1
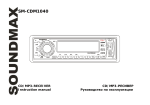
V-CD500
CD/MP3CD/MP3 RECEIVER
Instruction manual
V-CD500
Dear customer!
Thank you for purchasing our product. For safety, it is strongly recommended to read this manual carefully
before connecting, operating and/or adjusting the product and keep the manual for reference in the future.
Table of contents
Table of contents ...............................................................................................................................................2
Important safeguards .........................................................................................................................................3
Accessories........................................................................................................................................................4
Installation/connection.......................................................................................................................................5
Panel controls ....................................................................................................................................................8
General operations...........................................................................................................................................10
Digital tuner operations ...................................................................................................................................14
CD/ MP3/ WMA/ USB/ SD card operations ....................................................................................................18
MP3/ WMA overview......................................................................................................................................21
File / Folder Search Function...........................................................................................................................23
Encoding (Recording) function........................................................................................................................24
Handling discs .................................................................................................................................................26
Cleaning ..........................................................................................................................................................26
Troubleshooting guide .....................................................................................................................................27
Specification....................................................................................................................................................28
2
V-CD500
Important safeguards
Using the device at temperature below -10º may cause the breakage of the device. Before using please
heat up the passenger compartment to the recommended temperature!
Disconnect the vehicle's negative battery terminal while mounting and connecting the unit.
When replacing the fuse, be sure to use one with an identical amperage rating. Using a fuse with a higher
amperage rating may cause serious damage to the unit.
Do not attempt to disassemble the unit. Laser beams from the optical pickup are dangerous to the eyes.
Do not use the unit in places where it can be exposed to water, moisture and dust.
Make sure that pins or other foreign objects do not get inside the unit; they may cause malfunctions, or
create safety hazards such as electrical shock or laser beam exposure.
If you have parked the car for a long time in hot or cold weather, wait until the temperature in the car
becomes normal before operating the unit.
Do not open covers and do not repair yourself. Consult the dealer or an experienced technician for help.
Make sure you disconnect the power supply and aerial if you will not be using the system for a long
period or during a thunderstorm.
Make sure you disconnect the power supply if the system appears to be working incorrectly, is making an
unusual sound, has a strange smell, has smoke emitting from it or liquids have got inside it. Have a
qualified technician check the system.
The unit is designed for negative terminal of the battery, which is connected to the vehicle metal. Please
confirm it before installation.
Do not allow the speaker wires to be shorted together when the unit is switched on. Otherwise it may
overload or burn out the power amplifier.
3
V-CD500
Accessories
Receiver
Panel protective case
set ISO cable
Release keys
Screw B5 x 20
Bolt M5 x 6
Nut
Spring Washer
Flat Washer
Mounting strap
Rubber
Instruction manual
Warranty card
Customer information
1pc
1 pc
1 pc
2 pcs
1 pc
4 pcs
1 pc
1 pc
1 pc
1 pc
1 pc
1 pc
1 pc
1 pc
4
V-CD500
Installation/connection
Note: Unit should be installed horizontally in an angle less than 30°.
Insert Half Sleeve into dash-board hole and bend mount tabs outwards to fix it.
If necessary, place the mount strap at the rear of the unit and fix it with provided washer.
Push the unit into the Half Sleeve until you hear a click sound.
Place Trim Ring over the unit and installation is completed.
(Some vehicle may not need Trim Ring)
5
V-CD500
Un-installation
Remove Trim Ring and insert Release Keys into left and right side-end holes and pull the unit out of the dashboard.
Detaching the front panel
1. Press OPEN button on the front panel. The panel will go down (pic. 1).
2. Push the panel to the right and then pull it towards you (pic. 2).
Pic. 1
Pic. 2
Attaching the control panel
1. Insert the right side of the control panel into the main
unit (pic. 3).
2. Press the control panel on to the left side of middle of it
until a “click” sound is heard (pic. 4).
Caution:
Pic. 3
Pic. 4
Do not insert the control panel from the left side. It can damage the control panel.
The control panel can easily be damaged by shocks. After removing it, place it in a protective case and be
careful not to drop it or subject it to strong shocks.
The rear connector that connects the main unit and the control panel is an extremely important part. Be
careful not to damage it by pressing on it with fingernails, pens, screwdrivers, etc.
Note: If the control panel is dirty, wipe off the dirt with soft, dry cloth only. And use a cotton swab soaked in
isopropyl alcohol to clean the socket on the back of the control panel.
6
V-CD500
Electrical connection
Caution: Do not interchange the connection of the wiring!
For some car models you may need to modify wiring of the supplied power cord. Contact your authorized car
dealer before installing this unit.
7
V-CD500
Panel controls
Front panel
1. MODE button
2. PWR button
3. DIS/REC button
4. PTY button
5. TA button
6. T-UP/NEXT button
7. OPEN button
8. USB jack
9. T-DN/PREVIOUS button
10. AUX jack
11. AF button
12. BAND button
13. 6/+ 10 button
14. 5/- 10 button
15. 4 / RANDOM button
16. 3 / INTRO button
17. 2 / REPEAT button
18. 1 / PLAY/PAUSE button
19. AS/PS button
20. VOL knob/ SEL button
21. MUTE button
8
V-CD500
22. SD/MMC slot
23. EJECT button
24. Light indicator
25. RESET button
26. DISC slot
Inner panel
9
V-CD500
General operations
Reset the unit
Operating the unit for the first time or after replacing the car battery, you must reset the unit.
Press OPEN button on the panel to open the panel and press RESET button to restore the unit to the original
factory settings.
Power button
Press any button (except OPEN) to turn on the unit. Press and hold PWR button to switch the unit off.
Note: After the unit is off, the volume level and radio current settings will be memorized, and when you turn
the unit on it will resume the stored status you set.
Volume control
Rotate VOL knob to adjust the volume level.
Setting the sound characteristics and contrast
Press shortly and repeatedly SEL button to select the audio and contrast setting: VOLUME => BASS =>
TREBLE => BALANCE => FADER =>CONTRAST. Rotate VOL/SEL knob to regulate each setting.
Note:
If turning off the power all the settings of each mode will be saved.
If turning off the Battery power or reset the unit all the settings will become as they were set on the plant.
If you don’t adjust VOL knob within 6 seconds after selecting the desired setting, the unit will
automatically return to the current mode being displayed.
10
V-CD500
Setting other characteristics
During TUNER mode press SEL button and hold for 2 seconds, shortly and repeatedly press SEL button to
select the setting: INVOL=> ADJ => TA VOL => EON ON => REC => DSP => LOUD OFF => LOC OFF =>
STEREO => NORMAL => Exit menu. Rotate the knob to adjust each setting.
INVOL
Define default volume level when the unit is turned on.
ADJ
Set the time by volume rotary knob.
TA VOLUME
Rotate the knob to choose the volume level of TA announcements.
EON
EON: Enhanced Other Networks. Broadcasting information on PI, AF, TP, TA, etc, relating to networks other
than the network used for current reception
Rotate the knob to select EON OFF or ON.
REC
Rotate the knob to select the recording mode MP3-> WMA
DSP
Rotate the knob to choose intended sound effect in the sequence: NONE => CLAS => ROCK => POP =>
FLAT.
11
V-CD500
LOUD OFF/ON
Choose LOUD ON or OFF.
LOC OFF/ON
Choose LOC On or OFF.
STEREO
Choose Stereo or mono audio output.
NORMAL/REVERSE
Rotate the knob to choose NORMAL display (black mask with white word) or REVERSE display (white mask
with black word).
12
V-CD500
Turning the sound off
Press MUTE button to turn the sound off. Press it again or rotate VOL knob to turn the sound on.
Mode setting
Press MODE button on the panel repeatedly to select: TUNER => CD (if inserted) => USB (if USB device is
inserted) => SD (if the flash card is inserted) => AUX.
AUX jack
Intended to receive audio signals by connecting to outside input device.
Display
Press DIS/REC button to see current tuning information and time. Sequence of the menu: Clock/Time =>
PTY=> Radio Frequency => PS (“Program Service”- program name or name of broadcasting station) => Exit
=>.
13
V-CD500
Digital tuner operations
Note: RDS (Radio Data System) service availability varies with areas. Please understand if RDS service is not
available in you area, the following service is not available, either.
RDS overview
PI: Program Identification Code – for identifying code.
PS: Program Service Name Broadcast – station name data expressed in alphanumerically character.
TP: Traffic Program Identification – for traffic information broadcasting station.
TA: Traffic Announcement Identification – showing traffic information is being transmitted or not.
AF: Alternative frequencies – frequency list of broadcasting station transmitting the same program.
Band selection
Press MODE button to select TUNER. Press BAND to select: FM1, FM2, FM3, MW1 (AM1), MW2 (AM2).
Manual/automatic tuning
Manual tuning: select a band. Press and hold T-DN/T-UP buttons, MANUAL appears on the display, then
press these buttons repeatedly to search a station step by step upward or downward.
Automatic tuning: select a band. Press T-DN/T-UP buttons, the automatic backward/forward search will
start. It will play when finds the station.
Programming tuner stations
You can store up to a total of 30 radio stations in the memory (18 FM, 12 AM), manually or automatically.
To store a station:
- Select a band (if needed)
- Select a station by pressing T-DN/T-UP buttons.
14
V-CD500
- Hold a Preset button (1-6), which you want store the station for at least 2 seconds.
To recall a station:
- Select a band (if needed)
- Press a Preset button (1-6) briefly to recall the stored station.
Auto memory store
Select a band. Press AS/PS button on the panel and hold for 2 seconds to enter auto store mode. The radio will
automatically store 6 stations to the 6 preset memories of the current band. To stop auto store, press AS/PS
button again.
Note: During auto searching and storing the stations, the device will not go to increase frequencies but go to
the strong signal stations first, and if it haven’t been full stored, it will then search and store the weaker signal
stations.
Preset scan
Select a band. Press AS/PS button to scan all preset stations in the memories of the current band. To stop preset
scan, press the button again.
TA (Traffic Announcement) function
1. Press TA button shortly to turn on or turn off the TA function.
2. When TA function is activated, it will search the station with TA information automatically. If there is no
TA information, it will search the station with TP information automatically, if there is no TP information
either, it will return to the previous station after searching.
3. When receiving the station with TP information but without TA information, TP icon is on and TA icon
keeps blinking; when receiving the station with TP and TA information, both TP and TA icons are on.
4. When playing in other mode and TA information is received, it will change to the radio mode
automatically. After playing over, it will return to the previous mode. Buttons AS/PS / Preset [1-6] / PTY /
15
V-CD500
MODE / T-UP/NEXT/T-DN/PREVIOUS and BAND are locked. Press TA button once to ignore the
received TA information, press TA button twice to turn off the function.
AF (Alternative Frequencies) function
Press AF button on the panel shortly to turn on or turn off the AF function. If the AF function is on the display
will show “AF”. When AF switching mode is selected, but RDS information is not received yet the “AF” will
be flashing.
The RDS program will be automatically searched and received. After turning on, if the RDS signal is weak or
even no signal, the unit will search another frequency with this RDS program.
REG (Regional) funtion
Press and hold AF button for 2 seconds to enable or disable REG mode. (Default is off for REG).
When REG is enabled (on), the receiver accepts regional variants of the tuned station with REG icon turned on.
When REG is disabled (off), the receiver ignores regional variants.
PTY (Program Type) function
1. Press PTY button, PTY search is on, then press T-DN/T-UP buttons to search last time selected PTY
program.
2. Press and hold PTY button and rotate the knob to select the program type group: MUSIC GROUP or
SPEECH GROUP.
PTY music group
PTY speech group
POP M, ROCK M
NEWS, AFFAIRS, INFO
EAST M, LIGHT M
SPORT, EDUCATE, DRAMA
CLASSICS, OTHER M
CULTURE, SCIENCE, VARIED
JAZZ M, COUNTRY M
WEATHER, FINANCE, CHILDREN
NATION M, OLDIES M
SOCIAL, RELIGION, PHONE IN
FOLK M
TRAVEL, LEISURE, DOCUMENT
16
V-CD500
TEST, ALARM
3.
Press PTY button until PTY icon disappears.
17
V-CD500
CD/ MP3/ WMA/ USB/ SD card operations
Discs for playback
This unit can play disc types: CD/CD-R/-RW. Compatible with formats: CDDA/MP3/WMA.
USB/ SD/ MMC notes
USB functions (flash memory type) MP3 music play.
SD/MMC card support, 2in1 (SD/MMC) support.
USB flash memory.
FAT 12/ FAT 16/ FAT 32 is possible
FAT 12/16 (dir: 200 support, file: 500 support),
FAT 32 (dir: 200 support, file: 500 support).
Filename: 32 byte/ Dir name: 32 byte.
Tag (id3tag ver2.0).
Title/ Artist/ Album: 32 byte support.
Multi card reader not support. USB 2.0 support.
USB format supports 2.0.
Note:
Capacity: up to 2 GB.
SD cards brands: Cannon, Fuji film, Palm, Motorola, Microsoft, IBM, HP, Compaq, Sharp, Samsung, etc.
Capacity: up to 2 GB.
MMC cards brands: Ericsson, Nokia, Motorola, HP, Palm, Sanyo, Microsystems, etc.
Capacity: up to 2 GB.
18
V-CD500
Loading/Ejecting a disc
Turn the power on. Press OPEN button on the panel. Insert the disc with the printed side facing upward into the
slot. Press EJECT button on the inner side to eject the disc.
Inserting the SD/MMC card/USB device
Insert the MMC/SD card or USB device into MMC/SD compartment or USB socket. Then the playing mode
will be changed into MMC/SD or USB mode automatically. The first card/USB device track playback will
start.
Note: When MMC/SD card and USB device are both inserted into their compartment or socket, the playing
mode will be changed into the mode of the later one.
Playing/pausing
When the disc/card/USB device has been already loaded the playback of the first track starts automatically. To
ensure good system performance, wait until the unit finishes reading the disc information before proceeding. Or
press PLAY/PAUSE button to start playback. Press it again to pause the playback. Press again to resume the
playback.
Playing the previous/next track
During playback press PREVIOUS button to play the previous track. Press NEXT button to play the next track.
Scanning forward and backward
Press and hold PREVIOUS/NEXT buttons to select the speed of fast backward/forward playing.
Note: During the disc playback when fast backward/forward playback gets to the beginning of the playing
another track, it resumes normal playback.
+10 /- 10
Press 5/- 10, 6/ + 10 buttons to jump 10 track backward or forward.
19
V-CD500
Repeat playback
Press RPT button to play track repeatedly, press again to cancel. (when RPT on, LCD display "RPT", when
RPT off, this word disappears).
Note: After finishing playing all tracks or all folders of CD/MP3/SD/MMC, the unit restarts playing all tracks
or all folders automatically.
Intro
Press 3/INT button to activate INTRO function (playing the beginning of every track for 10 seconds).
Random
In disc mode press 4/RDM button to activate random playing mode. Press one more time to return to normal
playing.
20
V-CD500
MP3/ WMA overview
Notes on MP3:
MP3 is short for MPEG Audio Layer 3 and refers to an audio compression technology standard.
This product allows playback of MP3 files on CD-ROM, CD-R or CD-RW discs.
The unit can read MP3 files written in the format compliant with ISO 9660. However it does not support
the MP3 data written by the method of packet write.
The unit can not read an MP3 file that has a file extension other than “.mp3”.
If you play a non- MP3 file that has the “.mp3” extension, you may hear some noise.
In this manual, we refer to what are called “MP3 file” and “folder” in PC terminology as “track” and
“album”, respectively.
Maximum number of directory level is 8, including the root directory. Maximum number of files and
folders per disc is 256.
The unit may not play tracks in the order of Track numbers.
The unit plays only the audio tracks if a disc contains both audio tracks and MP3 files.
When playing a disc of 8 kbps or “VBR”, the elapsed playing time in the display window will not be
correct and also the intro play may not function properly. “VBR”: Variable Bit Rate.
The unit supports the playback of WMA files. The playback of ID3 tags for WMA format is not
guaranteed, it depends on versions and availability of Cyrillic alphabet.
WMA (Windows Media Audio) – music data compression format, created by Microsoft Corporation. This
format uses coding algorithm for compression of initial audio-record, greatly decreasing the file size, but,
saving the good sound quality even when the bit rate is low (for example, 64 Kbit/s).
21
V-CD500
Notes on creating your own CD-R or CD-RW containing MP3 files:
To enjoy high quality sound, we recommend converting to MP3 files with a sampling frequency of 44.1
kHz and a fixed bit rate o f 128 kbps.
DO NOT store more than 256 MP3 files per disc.
For ISO 9660 - compliant format, the maximum allowable depth of nested folders is 8, including the root
directory (folder).
When CD-R disc is used, playback is possible only for discs, which have been finalized.
Make sure that when MP3 CD-R or CD-RW is burned that it is formatted as a data disc and NOT as an
audio disc.
You should not write non-MP3 files or unneeded folders along with MP3 files on the disc otherwise it
takes a long time until the unit starts to play MP3 files.
With some CD-R or CD-RW media, data may not be properly written depending on its manufacturing
quality. In this case, data may not be reproduced correctly. High quality CD-R or CD-RW disc is
recommended.
Up to 16 characters are displayed for the name of an Album or a Track. ID3TAG version 1.x is required.
Note that the unit may not play Tracks in the order that you wrote them to the disc.
22
V-CD500
File / Folder Search Function
In CD, USB, SD/MMC mode, press AS/PS button to enter search mode.
Below is toggle sequence of search mode.
File Number Search -> File Name Search -> Folder Search -> Exit search mode
Note: Audio-CD Disc only supports File number Search
File Number Search
Press AS/PS button first time, it locates file number search and there is 3 digit of number (“001”) on LCD
display and the right end digit is blinking which means the unit is ready to input file number for search. Press TUP/T-DN button or rotate the knob to input a number (from 0 to 9) of which you want to listen to. Press the
knob to move to next digit. After completing input, press BAND button to play.
File Name Search
Press AS/PS button until (“A**”) is shown on LCD display with blinking left end alphabet (“A”) .
Press T-UP/T-DN button or rotate the knob to input alphabet (from A to Z) & Number (from 0 to 9) of which
you want to listen to, press the knob to move to next digit for another input. Press BAND button to show you
searched files that contains input letters. Press T-UP/T-DN button or rotate the knob button to show next
searched file. Press BAND button after choosing the track.
If there is no file found, “NO MATCH” is displayed on LCD with returning to initial input ready mode
automatically.
Folder Search
Press AS/PS button until the name of folder is shown. Press T-UP/T-DN button or rotate the knob to choose the
needed folder. Press BAND button to play the 1st file of the folder.
Note:
1. When there is sub-folders in a root-folder, press T-UP/T-DN button or rotate the knob to choose between
Root-folder and Sub-folder directly. (Root-folder->Sub-folder->Next root-folder).
2. If there is no folder in the device, “ROOT” will be displayed on LCD.
23
V-CD500
Encoding (Recording) function
The Recording (Encoding) function is to record sound source from Tuner, Audio CD, AUX-in directly to a
storage device (either USB flash device or SD/MMC Card).
If the storage device does not have enough memory capacity left, the last music source fails to be recorded
completely.
Note: If there is no storage device inserted, the display shows “NO MEDIA” and recording is not possible.
Recoding from Tuner/AUX-IN
Press and hold DIS/REC button for more than 2 seconds, the unit asks the location to record firstly to SD/MMC
card or you can switch to USB device by pressing the button again. To cancel recording, press and hold
DIS/REC for more than 2 seconds. To start recording, press BAND button; press again to stop recording.
Note: If only one media storage device in the unit, it doesn’t ask the location but start recording directly.
Recording from Audio CD
Press and hold DIS/REC button for more than 2 seconds, the unit asks the location to record in the following
sequence:
MMC ALL (record all tracks in the disc to SD/MMC card) -> USB ALL (record all tracks in the disc to USB
device) -> MMC ONE (record current track to SD/MMC card) -> USB ONE (record current track to USB
device).
To cancel recording, press and hold DIS/REC button for more than 2 seconds. To start recording, press BAND
button; press it again to stop recording.
Recording from MP3 CD
24
V-CD500
Press and hold DIS/REC button for more than 2 seconds, the unit asks the location to copy firstly to MMC or
you can switch to USB by pressing the button again. To cancel recording, press and hold DIS/REC button for
more than 2 seconds. To start recording, press BAND button; press again to stop recording.
Note: There is no sound heard during copying an MP3 file from a CD to a storage device.
Note: If only one media storage device in the unit, it doesn’t ask the location but start recording directly.
File delete function
To delete a music file from a USB device or a SD/MMC card, press and hold DIS/REC button for more than 2
seconds, the display shows “DELETE”. Press BAND button to activate deleting or press and hold DIS/REC
button for more than 2 seconds to cancel deleting.
The below table shows available functions in each mode:
Mode
Function
Rec SD/MMC
Rec USB
Delete
Tuner
CD
SD/MMC
USB
AUX
+
+
-
+
+
-
+
+
+
+
-
Note: during encoding - the sound form speakers is heard.
25
V-CD500
Handling discs
Dirty, scratched or warped discs may cause skip ping or noise.
Handle the disc only by the edges. To keep clean do not touch its surface.
Discs should be stored in their cases after use to avoid scratches.
Do not expose discs to direct sunlight, high humidity, high temperature or dust.
Prolonged exposure to extreme temperature can wrap the disc (such as leaving the discs in your car during
summertime).
Do not stick or write anything on either side of disc. Sharp writing instruments, or the inks used in some
felt-tip pens, may damage its surface.
Do not touch the unlabeled side. Do not attach any seal, label or data protection sheet to either side of a
disc.
Cleaning
Cleaning the cabinet
Wipe with a soft cloth. If the cabinet is very dampen (not dropping wet) the cloth with a weak solution of soapy
water, and then wipe clean.
Cleaning discs
Fingerprints should be carefully wiped from the surface of disc with a soft cloth. Unlike conventional records,
compact discs have no grooves to collect dust and macroscopic dirt, so gently wiping them with a soft cloth
should remove must panicles. Wipe in a straight motion from the center to the edge.
Never use thinner benzine, record cleaner or anti static spray on a compact disc.
Such chemicals can damage its plastic surface.
26
V-CD500
Troubleshooting guide
Symptom
No power
Cause
The car ignition is not on.
Disc cannot be loaded.
The fuse is blown.
Presence of disc inside the player.
Disc cannot be read.
Inserting the disc in upside down.
No sound
The buttons do not work.
Sound skips.
The radio does not work,
the radio station
automatic selection does
not work.
Compact disc is extremely dirty or
defective.
Temperature inside the car is too
high.
Volume is in minimum.
Wiring is not properly connected.
The built-in microcomputer is not
operating properly due to noise.
Front panel is not properly fix into
its place.
The installation angle is more than
30 degrees.
The disc is extremely dirty or
defective.
The antenna cable is not connected
the signals are too weak.
27
Solution
If the power supply is properly connected
to the car accessory switch the ignition
key to “ACC”.
Replace the fuse.
Remove the disc in the player then put a
new upward.
Insert the compact disc with the label
facing upward.
Clean the disc or try to play a new one.
Cool off until the ambient temperature
returns to normal.
Adjust volume to a desired level.
Check wiring connection.
Press RESET button.
Reinstall the front panel.
Adjust the installation angle to less than
30 degrees.
Clean the compact disc/try to play a new
one.
Insert the antenna cable firmly select a
station manually.
V-CD500
Specification
General
Power supply:
Storage support:
Compatible with:
Current consumption:
Maximum power output:
Dimensions (L x W x H):
Working temperature range:
FM Stereo Radio
Frequency range:
Usable sensitivity:
Preset memory stations:
MW (AM) section
Frequency range:
Preset memory stations:
Frequency response:
S/N ratio (A-vtd):
DSP sound effect:
Line out
Output:
12 V DC
CD/CD-R/CD-RW/USB/SD/MMC
CDDA/MP3/WMA
max. 15 A
50 W x 4 channels
178 x 175 x 50 mm
-10º - +60º
87.5 - 108.0 MHz
15 dBuV
18
522 kHz - 1620 kHz
12
20 Hz - 20 KHz
60 dB
Classic, Rock, Pop, Flat
2 channel RCA line out (2V)
Specifications are subject to change without notice. Dimensions are approximate.
28
V-CD500
!
.
,
,
.
....................................................................................................................................................29
...............................................................................................................................30
........................................................................................................................................31
................................................................................................................................32
...................................................................................................................................35
.......................................................................................................................................37
...................................................................................................................40
CD
/ SD
/ USB
...............................................................44
3 WMA........................................................................................................................................47
........................................................................................................................................49
.............................................................................................................................................50
....................................................................................................................................52
.................................................................................................................................................52
...............................................................................................53
........................................................................................................................54
29
V-CD500
-10º
.
.
.
,
,
.
.
.
,
,
.
,
,
,
.
.
,
,
.
,
,
.
,
.
.
,
.
,
,
,
,
,
.
.
,
.
,
.
.
.
,
.
30
V-CD500
1
1
:
ISO
20
6
2
1
1
4
1
1
1
1
1
1
1
1
31
V-CD500
:
30°.
,
.
,
.
,
(
.
).
32
V-CD500
,
.
1.
2.
OPEN
.
(
(
. 1).
. 2).
.2
.1
1.
,
,
(
.3).
2.
,
(
. 4).
.3
:
.4
.
.
:
,
.
.
.
,
,
.
:
,
,
33
.
.
V-CD500
:
!
.
.
34
V-CD500
1.
2.
3.
4.
5.
6.
7.
8.
9.
10.
11.
12.
13.
14.
15.
16.
17.
18.
19.
20.
21.
MODE
PWR
DIS/REC
PTY
TA
T-UP/ NEXT
OPEN
USB
T-DN/PREVIOUS
AUX
AF
BAND
6/+ 10
5/- 10
4 / RANDOM
3 / INTRO
2 / REPEAT
1 / PLAY/PAUSE
AS/PS
VOL /
SEL
MUTE
35
V-CD500
22.
23.
24.
25.
26.
SD/MMC
EJECT
RESET
36
V-CD500
,
OPEN,
(
,
RESET
),
(
.
OPEN),
.
PWR.
:
,
.
VOL/SEL,
SEL,
) => BASS (
CONTRAST (
VOL/SEL.
:
.
: VOLUME
) => TRE LE (
) => FADER (
).
) => BALANCE (
) =>
.
.
6
,
.
37
V-CD500
2
.
SEL,
ADJ => TA VOL => EON ON => REC => DSP => LOUD OFF => LOC OFF (
STEREO (
)=> NORMAL =>
.
,
.
INVOL (
)
.
ADJ (
)
.
TA VOLUME (
)
.
EON
Enhanced Other Networks (
).
,
.
,
(ON)
EON.
REC
,
MP3-> WMA.
DSP (
)
: NONE => CLAS => ROCK => POP => FLAT.
LOUD OFF/ON (
)
(ON)
(OFF)
“Loud”,
.
38
SEL,
: INVOL=>
) =>
,
(OFF)
V-CD500
LOC OFF/ON (
)
,
),
LOC OFF (
STEREO (
LOC ON
).
)
:
NORMAL/REVERSE
,
REVERSE (
MU
.
)
NORMAL (
(
,
VOL/SEL,
)
(
).
)
.
.
MOD ,
: TUNER (
) => USB (
USB
) => AUX.
) => CD (
)
) => SD
AUX
.
DIS/REC,
) => PTY => Radio Frequency (
.
.
) => PS (
39
: Clock/Time
)=>
V-CD500
:
RDS
RDS (
)
.
.
,
PI:
PS:
,
.
–
.
TP:
–
,
.
TA:
AF:
–
.
–
,
.
MOD ,
- TUNER.
: FM1, FM2, FM3, MW1 (AM1), MW2 (AM2).
:
.
MANUAL (
B ND,
T-DN/T-UP;
,
).
.
:
.
.
T-DN/T-UP,
,
.
40
V-CD500
6
(18 FM
5
,
.
30
12 AM).
:
-
(
).
T-DN/T-UP.
2
(1-6),
.
:
(
-
).
(1-6).
.
S/PS
2
, 6
1-6.
,
S/PS.
:
,
,
,
,
.
S/PS,
.
TA (
1.
,
.
)
(ON)
41
(OFF).
V-CD500
2.
TA
,
.
,
,
,
.
3.
,
,
,
;
,
4.
.
TA
,
,
MODE/T-UP/NEXT/T-DN/PREVIOUS
,
,
AF (
BAND
.
TA,
.
)
(ON)
AF
.
AS/PS /[1-6]/PTY/
.
(OFF)
AF.
«AF».
AF
,
RDS
.
AF
,
.
.
AF
2
,
. (
).
(on),
.
REG.
PTY (
1.
2.
)
PTY,
PTY.
PTY
PTY
T-DN/T-UP,
.
2
,
.
42
,
V-CD500
1
2
3
4
5
6
3.
POP M, ROCK M
EAST M, LIGHT M
CLASSICS, OTHER M
JAZZ M, COUNTRY M
NATION M, OLDIES M
FOLK M
PTY,
1
2
3
4
5
6
PTY
NEWS, AFFAIRS, INFO
SPORT, EDUCATE, DRAMA
CULTURE, SCIENCE, VARIED
WEATHER, FINANCE, CHILDREN
SOCIAL, RELIGION, PHONE IN
TRAVEL, LEISURE, DOCUMENT,
TEST, ALARM
,
43
.
V-CD500
CD
/ SD
/ USB
: CD/CD-R/-RW.
: CDDA/MP3/WMA.
USB/ SD/ MMC
MP3
USB
(
).
SD/ MMC, 2 1 (SD/MMC).
USB
.
FAT 12/ FAT 16/ FAT 32
FAT 12/ 16 (
200
, 500
),
FAT 32 (
200
, 500
).
: 32
/
: 32
.
(id3tag ver 2.0)
/
/
:
32
.
.
USB 2.0.
:
USB:
SD:
Sharp, Samsung
MMC:
.
:
USB 2.0.
SD
:
2
MMC
.
2
:
2 .
: Cannon, Fuji film, Palm, Motorola, Microsoft, IBM, HP, Compaq,
.
: Ericsson, Nokia, Motorola, HP, Palm, Sanyo, Microsystems
.
44
V-CD500
.
OPEN,
EJECT,
.
.
.
SD/MMC/USB
SD/MMC
USB
.
.
.
:
,
,
.
,
USB
.
,
,
,
.
,
PLAY/PAUSE.
.
PLAY/PAUSE,
PLAY/PAUSE
.
PREVIOUS,
.
NEXT,
.
PREVIOUS/NEXT
.
45
,
V-CD500
:
,
.
+10/-10
5/- 10, 6/ + 10
“RPT”),
10
.
RPT,
,
(
:
“RPT”
).
,
.
Intro
3/INT
Intro (
10
).
4/RDM
.
.
46
V-CD500
3
WMA
3
WMA:
3
MPEG 3
.
3
CD-ROM, CD-R
3,
,
3,
CD-RW.
ISO 9660.
.
3,
,
“.mp3”.
3
,
“.mp3”,
.
,
PC “
”
“
“
”
MP3”
“
”,
.
8,
.
256.
.
,
8
,
3.
VBR,
,
. VBR:
.
WMA
WMA
,
WMA (Windows Media Audio) –
Corporation.
.
ID3
.
,
47
Microsoft
,
V-CD500
,
, 64
,
)
(
).
,
,
.
CD-R
CD-RW,
MP3:
3
44,1
128
256
,
3
ISO 9660,
8,
.
.
(
).
CD-R
.
,
,
MP3 CD-R
CD-RW
,
.
3
3
,
CD-R
,
3.
CD-RW
.
.
CD-R
CD-RW
16
.
.
WMA (Windows Media Audio) –
Corporation.
,
,
, 64
,
)
(
,
).
,
.
48
1. ID3TAG.
Microsoft
,
V-CD500
CD, USB, SD/MMC,
AS/PS
=>
:
=>
=>
:
.
.
AS/PS,
(
)
(
0
(“001”),
T-UP/T-DN
.
9),
1
,
,
SEL),
(
,
,
.
)
BAND,
(
).
.
.
AS/PS,
(“A**”),
(
)
0
9)
,
.
T-UP/T-DN
(
A
,
.
(
,
.
BAND,
.
,
A
(
Z)
)
,
T-UP/T-DN
.
,
BAND,
.
:
: “NO MATCH”.
,
49
V-CD500
AS/PS,
,
T-UP/T-DN
.
,
.
BAND,
.
,
(
“ROOT”,
).
,
:
AUX-in
(USB,
CD,
SD/MMC).
.
:
(«
,
,
»);
/AUX-IN (
“NO MEDIA”
.
)
2
DIS/REC,
USB
2
SD/MMC;
,
DIS/REC,
.
:
,
,
.
2
DIS/REC,
:
50
.
BAND
V-CD500
MMC ALL (
) -> MMC ONE (
USB
SD/MMC) -> USB ALL (
USB
SD/MMC) -> USB ONE (
).
2
DIS/REC.
BAND;
,
.
MP3
2
SD/MMC (
.
BAND
:
.
:
,
DIS/REC,
);
USB
,
DIS/REC.
2
.
MP3
,
.
USB
DIS/REC;
2
BAND
SD/MMC,
“DELETE” («
.
DIS/REC
:
»).
2
.
.
:
SD/MMC
USB
+
+
-
CD
SD/MMC
USB
AUX
+
+
-
+
+
+
+
-
51
V-CD500
,
(
).
,
.
,
.
,
,
.
(
,
).
.
,
,
.
.
.
.
(
),
.
.
,
,
.
.
,
.
.
52
,
V-CD500
.
,
“
”.
.
.
.
,
.
.
.
.
.
,
.
.
.
.
.
.
RESET.
.
.
.
30
.
,
30
.
.
.
.
.
.
.
.
53
V-CD500
:
:
:
:
:
(
):
:
12
CD/CD-R/CD-RW/USB/SD/MMC
CDDA/MP3/WMA
15
50
4
178 175 50
-10º - +60º
FM
MW (
:
87.5 - 108.0
15
18
:
522-1620
12
20
– 20
60
Classic, Rock, Pop, Flat
RCA(2 )
)
:
(A-vtd):
DSP
.
.
54