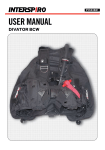
Download Zeagle Buoyancy Compensator Owner`s manual
Transcript
Rapid Diver™ BC
Owner’s Manual
Introduction
Thanks for Choosing Zeagle!
We value your decision to invest in a Zeagle Buoyancy Control
System. Please have your authorized Zeagle Dealer familiarize you with
the operation and care of your new Zeagle Rapid Diver™ Buoyancy
Compensator* (BC) and go over your Owner’s Manual with you. Have
your Dealer sign the appropriate line on the service record at the end of
this manual, after he has performed this service. Before you use your
BC for the first time, be sure your Dealer has performed the Dealer prep
check list. Please save and refer to this Owner’s Manual from time to
time to enable you to fully understand and benefit from this fine product.
SCUBA Diving is an extremely enjoyable pastime when done
with proper training, good equipment, and knowledge of both your equipment and your diving environment. This Zeagle Buoyancy Control
System is intended for use only by individuals practicing safe diving principles.
*Buoyancy Compensator (BC) and Buoyancy Control Device (BCD)
are synonymous for the same piece of SCUBA diving equipment.
1
Contents
Introduction .................................................................. 1
Warranty Information .................................................... 3
General Information and Specifications ...................... 4
Function of the Rapid Diver™ System .......................... 7
Assembling the Rapid Diver™ System ......................... 9
Fitting and Donning the Rapid Diver™ System ........... 12
Pre-dive Assembly and Inspection ............................... 15
Diving with the Rapid Diver™ System ......................... 16
Emergency Procedures ................................................17
Maintenance .................................................................18
Available BCD Accessories ..........................................19
Service Record ............................................................20
2
Warranty Information
Owner’s Responsibilities
• Zeagle Systems, Inc. requires that the end user of this system be
certified by a nationally or internationally recognized SCUBA certification agency and adequately trained in its use by a certified SCUBA
instructor with thorough knowledge and experience in the use of
Zeagle Systems, Inc. equipment.
• An annual inspection performed by an authorized Zeagle Dealer is
required for the safe operation of this system.
• Your Zeagle BC is NOT a personal flotation device and should
not be used as a life jacket. The BC does NOT guarantee a
heads up position of the wearer at the surface.
• All emergency procedures should be practiced periodically in shallow water (10 feet or 3 m) to maintain preparedness in the event an
actual emergency should occur.
• The owner is ultimately responsible for completing the Warranty
Registration by filling out the form included with the BCD and mailing
it to Zeagle Systems, Inc., or by going to the Product Registration
page at www.zeagle.com. One of these methods must be completed
within 30 days of purchase.
• For assistance with preparation, questions or service, contact your
local authorized Zeagle Dealer or Zeagle Systems, Inc.
LIMITED LIFETIME GUARANTEE TO THE
ORIGINAL OWNER
Your BC is guaranteed against defects in materials and workmanship. This guarantee does not cover damages from accident,
abuse, neglect, alterations, improper usage, normal wear & tear or
failure to provide reasonable care. To validate your warranty you
must fill out and return your warranty registration by regular mail
or e-mail, within 30 days of purchase. All warranty claims will be
handled through Zeagle, or an authorized Zeagle Dealer.
3
General Information and Specifications
This Buoyancy Compensator's Owner's Manual contains
important safety, maintenance, and operation information.
Read this manual thoroughly before diving.
Important information on the assembly, operation, and maintenance of your BC is designated throughout this manual with the
"IMPORTANT" graphic and the symbol shown above.
This owner's manual also uses the following "WARNING" graphic and symbol shown below to designate that special attention
needs to be given to the manual, otherwise, a potentially hazardous situation which, if not avoided, may result in injury or death.
SCUBA diving is an adventuresome activity and some risks
are involved. Please be sure that you and your dive partner
have current certifications and follow all of the recommendations of your certifying agency and that all equipment
is used and maintained according to the manufacturer’s
recommendations. Failure to follow these guidelines can
result in serious injury or death.
4
General Information & Specifications
SCUBA Cylinder Selection and Configuration
Your over-all buoyancy depends on a combination of the buoyancy of all
your diving equipment added to your own body's buoyancy. The Zeagle
System is designed to work with a variety of tank sizes and configurations.
Failure to comply with the following information may result in an improper buoyancy configuration. You must maintain neutral buoyancy
while diving to prevent injury or death.
The maximum single and double cylinder size specifications (in liters) for
the BC is found on a tank pictogram on the warning label. This label is
found on the BC, inside the vest. If the double cylinder pictogram has a
"XX" in it, then the BC has been designed for single cylinder use only. If
the single and double cylinder pictograms have numbers in them, then
the BC has been designed for either single or double cylinder use. The
number in the pictogram indicates the largest cylinder size recommended, in liters.
Cylinder dimensions and capacity are two quantities
which are important to understand when configuring
your equipment. Cylinder dimensions are the actual,
outside dimensions of a SCUBA cylinder (also called
the tank). Zeagle Rapid Diver™ BC's are designed
XX
3.9
specifically for SCUBA cylinders which have a maximum diameter of 5.25 in (13.3 cm). Consult your
MAX liters
local authorized Zeagle Dealer if you have any quesTank Pictogram tions regarding cylinder dimensions.
Cylinder capacity is the volume of the SCUBA cylinder. When expressed in cubic feet, the volume is given for compressed gas. When
expressed in liters, the volume is given for the actual volume of the
cylinder based on the interior dimensions of the cylinder (water capacity).
The Zeagle Rapid Diver's maximum recommended cylinder capacity is
30 ft3 (3.9 liters). Once again, if you have a question, consult your local
authorized Zeagle Dealer.
5
General Information and Specifications
Surface Buoyancy of BC's
Total
prEN1809
BUOYANCY
Your BC's buoyancy, has been rated by Zeagle Systems, Inc. Buoyancy
figures were measured in fresh water at sea level, and were rounded
down to the nearest pound. For buoyancies listed in the metric system,
buoyancy is measured in multiples of 10 Newtons, then rounded down to
the next lowest multiple.
The buoyancy of your BC is printed on a label, located on the bladder
assembly, as shown on page 8. A typical label for a BC will look like the
example below. This particular label indicates that the bladder assembly
is rated at 25 lbs ( 11.3 kg) buoyancy.
25 lbs / 11.3 kg
100 N
(rounded down to nearest 10 N)
Operating Temperature Range
Table 1.0
Air
-4o to +122o F
-20o to +50o C
Water
+28o to +104o F
- 2o to +40o C
Special Instruction in cold water diving methods, and the specific
use of this product is required prior to cold water diving (temperatures below 10o C / 50o F). This instruction is beyond the scope of
this Owner's Manual. Diving without this instruction could result in
injury or death. Consult your SCUBA instructor for this instruction
prior to using this product in cold water.
Shelf Life
The shelf life for a new, unused BC when deflated and stored in a dry
place at room temperature, with no exposure to ultraviolet (UV), light is
seven years. Refer to page 18 for Storage and Post Dive BC Cleaning
information.
6
Function of the Rapid-Diver System
The Zeagle Buoyancy Control System
The function of the Zeagle buoyancy control system is to add to your diving
enjoyment. It is designed to provide you with a comfortable way of “wearing” your SCUBA system, a resting platform while on the surface, and an
easy means of controlling your buoyancy while diving.
Tactical Swimmer's Vest
The Rapid-Diver can be worn without a tank or regulator as a Swimmer's
Vest. The vest portion of the system should fit so that it wraps partially
around the front of the diver. The vest should lay comfortably on the
shoulders without the neck opening pressing on the back of the neck. See
Figure 1. You will be able to tighten the waist strap(s) so the vest fits quite
snuggly around the upper body. In order to prevent the BC from shifting
while swimming, you can adjust the two waist straps independently. If the
vest is uncomfortably tight when the strap is fastened, you will need to
adjust the strap.
Fig. 1
7
Function of the Zeagle System
Your Rapid Diver™ includes a Power Inflator that allows
you to inflate the BCD by pushing on the white button "A"
to use air from the cylinder, or by putting your lips to the
mouthpiece and pressing the button "B". Both of these
techniques should be demonstrated by your instructor
and practiced in a safe shallow pool until they are mastered. See Figure 2 below.
Fig. 2
NEVER breathe from the bladder assembly. The bladder assembly was not designed as an auxiliary air source and may
contain harmful contaminants, which if inhaled, may cause
injury or death.
8
Assembling the Life-Support System onto the Rapid Diver
When you first receive the Rapid Diver™ System, it is unassembled in
its box or bag (See Fig 3). This chapter describes how to assemble the
components of the Rapid Diver System. Before you can use the Rapid
Diver system you have to install the Life-Support components of either the
Razor Tank/Valve combination or a standard valve and regulator such as
the ReZort.
Fig. 3
Note: When the Rapid Diver system arrives new at the dive store it is completely unassembled without the valve or RaZor in the tank and no gauge
installed on the first stage. It is beyond the scope of this manual to cover
the assembly from that point. Information needed to assemble a brand
new Rapid Diver regulator to its tank is covered in the Service Manuals
available only to authorized Zeagle Dealers.
9
Note: Tank bands expand and lengthen when wet. See Figure 5 below
with black arrows pointing to the tanks
bands. For this reason, you will get a
tighter fit if you make your initial adjustments with tank bands that have been
Fig. 4
wet for at least 20 minutes. To thread
the buckles for the first time;
• If the Tank Straps were completely removed from the Rapid Diver to
make it as light as possible for Swim-Vest use, the straps will have to be
re-threaded into the BC. First thread the flat end of the cylinder bands
through the tank attachment strap slots located on the Rapid Diver (behind the area where the tank will be located. Thread the straps through
the slots from the top to the bottom.
• Next bring the flat end of the straps up and thread them through the
buckle. See Figure 4. Threading instructions are also embossed on the
side of the plastic buckle.
Fig. 5
• Open the cylinder band buckles and loosen the bands.
• Slide the tank into the bands from the diver's left side. Position the
tank so that the valve's handle is pointing down towards the diver's
feet. See Figure 5.
• After Looping the webbing through final slot in buckle, check to be
sure that the Valve is lined vertically with the diver's left edge of the
BC. “Cam” the buckle over for extra tension.
•. Lock the buckle by engaging the Velcro material on the tank band.
10
Fig. 6
•
Add the first stage to the valve making sure that the yoke knob is facing away from the diver. See "D" in Figure 6.
•
Fasten the 2nd stage regulator hose over the neck using the three
Velcro attachments. See "B" & "C" in Figure 6. (Note: The Velcro Fastener behind the neck is hidden in this view.)
•
Fasten the pressure gauge hose vertically using the Velcro attachment. See "C" in Figure 6
•
Fasten the hose to the Power Inflator using the Quick Disconnect fitting. Once the QD fitting is fastened, use the Velcro Fastener to hold it in
place. See "A" in Figure 6
•
Turn the tank valve on carefully listening for leaks. If any leaks are
heard, do not dive with the unit until the cause of the leakage is corrected.
11
Fitting and Assembly
Initial Adjustments for Proper Fit
The Rapid Diver™ System allows the diver a universal fit feature. For
proper performance, please be sure that your system fits as described
below. For initial adjustments, loosen the waist and back strap and then
put the BC on (before attaching it to a SCUBA cylinder) and adjust the
shoulders and waist as follows.
1. Loosen all of the straps and
make sure all clips are secured
before donning. Make sure you
have at least a few inches of
strap loose to ensure an easy
adjustment. Place your elbows
through the arm-straps as shown
Fig. 7
2. Raise the Rapid Diver over
your head. Put your head
through the opening in the Rapid
Diver™ and lower the system
onto your shoulders.
Fig. 8
12
3. The system should be
worn with the tank even
with your sternum. Hold the
tank with one hand. With
the other hand, reach behind to grab the loose strap
and tighten it snuggly. Do
the same for the opposite
side. See Figure 9.
Fig. 9
4. Pull both adjustment
straps forward and down at
the same time to properly
position the Rapid Diver™.
Adjust the BC so that it does not restrict your breathing. Restriction of normal breathing while wearing your BC could result in injury or death. Before
each dive, check all bands, straps, clips, and/or waist straps for proper
adjustment.
13
5. To control the
excess strap, stow it
between the bladder
and your chest.
4. With assistance,
make sure the shoulder straps are adjusted
properly. There should
be about three inches
between your neck and
the collar of the BC.
14
Pre-dive Assembly and Inspection
Over Pressure Valve (OPV)
The over pressure / dump valve is typically located on the top left shoulder area of the bladder assembly. As its name implies, the OP Valve
prevents over inflation of the bladder. The valve automatically releases
air when the internal bladder pressure exceeds the valve's spring pressure. The valve will automatically close when the internal bladder
pressure becomes less than the valve's spring pressure. The OP Valve
should be inspected before every dive for proper operation.
Manual Dump Valve (MD Valve)
Your OP Valve is equipped with a manual dump system to allow you to
easily dump air from the BC as you adjust your buoyancy. To manually
dump air using this system, pull the red "T" Handle down until proper
buoyancy is achieved.
Remote Exhaust Valve (RE Valve)
Your BC may be equipped with a remote exhaust valve. If it is, it is located on the upper left, just over the shoulder, on the bladder assembly.
The RE Valve is another way to "dump" or exhaust air manually as you
adjust for neutral buoyancy. The RE Valve operates by simply pulling on
the power inflator mechanism and corrugated rubber hose.
The RE Valve should be inspected before every dive for proper operation. Also, inspect that both threaded caps on the RE Valve, are
tightened securely. The exhaust cap must be tightened a minimum
1/12 turn (3/8 inch) after it first contacts the body. The RE Valve was
designed to be serviced. Without proper tightening of these caps,
they may loosen over time and be lost.
Power Inflator/ Oral Inflator Mechanism
Your Rapid-Diver BC is equipped with a power inflator/oral inflator mechanism. This unit consists of an Oral Valve Mouthpiece, Oral Valve Button,
and Pneumatic Inflation Valve (PIV). The PIV can operate over a pressure range of 95-200 psi (6.5-13.8 bar). To inflate the BC using the PIV,
attach the low pressure hose using the quick disconnect (QD) fitting and
depress the PIV button. To inflate the BC using the oral inflator, depress
the Oral Valve Dump Button and breathe into the Oral Valve Mouthpiece.
CHECK ALL MECHANISMS BEFORE EVERY DIVE FOR
PROPER OPERATION AND LEAKS.
15
Diving with the Rapid-Diver System
Pre-Dive Check:
Prior to each dive, always check to make certain your Rapid Diver™
BC has no obvious leaks, by inflating the bladder until the over pressure
relief valve vents. Listen for air leaks. If any are found, then service is
necessary by an authorized Zeagle technician. Never dive with a leaking
or malfunctioning BC.
Diving
16
•
Your final buoyancy is primarily affected by your body, your thermal suit, your
diving cylinder, and your lead weights. It is adjusted with your BCD. Both
too little and too much lead ballast on your weight belt can be dangerous. To
determine the proper amount of lead ballast weight needed for your system,
go (with another diver) to a shallow safe location with the type (fresh or
salt) of water you will be diving in later. During the test, wear a near empty
cylinder of the same size and material you will be using. With a safety
diver present, carefully add or remove weights from your system until you
float vertically at the surface at eye level with a full breath of air (and a near
empty cylinder). The near empty cylinder is important. Many divers weight
themselves for a full cylinder, and then have trouble staying down later in the
dive as the cylinder gains buoyancy.
•
Start your descent by releasing air slowly by pulling gently on the red dump
handle which sits in front of the diver's left shoulder. DO NOT USE EXCESSIVE FORCE AS THIS COULD SERIOUSLY DAMAGE THE SYSTEM.
Let out just enough air to start your descent. As you descend and when
you reach your desired depth you will need to add air to your Zeagle BC by
pressing on the air inlet button of your low pressure inflator to attain “neutral”
buoyancy.
•
It may be necessary to adjust the waist during the dive due to the compression and expansion of your diving suit.
•
You will need to add air to the BC as you descend and exhaust air from the
BC as you ascend, to maintain neutral buoyancy throughout your dive.
•
When you begin your ascent at the termination of your dive, you must release air from your BC by pulling gently on the red dump handle which sits
in front of the diver's left shoulder. Be sure you are vertical with your left
side slightly higher than your right side to vent the BC. You should release
air so as to maintain rate of ascent of one foot per second or less. To maintain a safe ascent rate, you must swim to the surface. Do not use your BCD
to pull you to the surface, as this may result in fast ascents. Control your
Ascent Rate!
•
Inflate your Rapid Diver™ BC when you reach the surface to attain a
comfortable degree of buoyancy. Do not Overinflate the BCD.
Emergency Procedures
Problem Management
Inflator problem
Inflators may fail due to foreign material in the mechanism, damage from impact
by tanks or weights, or other causes. Practice the procedures below (in a safe
location with your buddy) for your safety.
Inflator fails to operate
Check to see that the low pressure hose is properly connected. Orally inflate the
bladder if necessary to establish proper buoyancy.
Inflator valve sticks open
Should the inflator valve stick open, causing an uncontrolled filling of the bladder
and/or excessive leakage of air at the inflator, hold exhaust valve open and over
your head to vent excess air as you disconnect the low pressure hose from the
inflator. Abort the dive.
Exhaust valve or over pressure valve sticks open
If the exhaust valve on the inflator sticks open, hold the inflator in the lowest
position possible, to allow the bladder to hold air from that level up. Abort the
dive and attempt to swim slowly, 1 ft per 2 sec (0.3 m per 2 seconds), or less, to
the surface. Should excessive negative buoyancy be created, your weights may
need to be released. Weight release at depth should only be done according to
the standards set by your certification agency.
Failure to hold air
If for any reason the system should fail to hold an adequate amount of air to provide necessary buoyancy, abort the dive and attempt to swim slowly, 1 ft per 2
seconds ( .3 m per 2 seconds) or less, to the surface. Should excessive negative
buoyancy be created, your weights may need to be released. Weight release at
depth should only be done according to the standards set by your certification
agency.
The above is based on recreational no decompression diving. Decompression
divers must have complete redundant systems to handle all problems underwater.
If at any time abnormal performance or malfunction is experienced, the
system must be serviced by an authorized Zeagle Dealer prior to any
further use.
17
Maintenance
The reliability and correct functioning of your equipment
depends on the care it receives.
Post Dive BC Cleaning:
•
•
•
•
Rinse the Rapid Diver™ BCD thoroughly with fresh water after each
use.
Rinse the inside of the bladder by holding the exhaust button on
the inflator system open and allowing fresh water to partially fill the
bladder. “Slosh” the water around to dissolve any salt crystals (salt
crystals can damage the bladder over time). Drain the bladder completely and repeat.
Hang the BCD upside down and allow it to dry while partially inflated.
Drain any residual water through the exhaust hose while the BCD is
hanging upside down.
Store the BCD partially inflated in a cool, dark, dry place.
Inspection and Service Interval
Your Rapid Diver™ BCD (including the Inflator) should be inspected and
maintained by an Authorized Zeagle Dealer at least once a year, and
more often if you dive frequently. This is a required action to keep your
warranty in effect. There is a Service Record in the back of this manual
for the Dealer to record the service performed.
Installation of New Parts/ Alterations
Use of non-factory parts or accessories, or any change to the product
not specifically authorized by Zeagle Systems, Inc., or performed by an
unauthorized repair facility, may cause improper operation, damage, or
leakage of the BC resulting in a loss of buoyancy control or air holding
capability. This could result in injury or death, plus will void your warranty. Replace worn or damaged items with approved, factory supplied
or specified parts ONLY.
18
Buoyancy System Accessories
Tank Band Mount
p/n 8029R
The same Band Assembly that mounts
the tank in front of
the Rapid-Diver, can
be installed in the
backplate to hold a
fully redundant rearmounted tank and
regulator.
20 cu ft Aluminum Tank
Sanded finish 331-1001
Black finish 331-1002
Shown with the optional
Valve 331-2001
A Zeagle Exclusive. The
perfect size and fit for the
Rapid Diver.
Utility Belt p/n
8099
Shown with
optional 8051R
10 lb Weight /
Utility Pockets
with Zipper and
Velcro openEnvoy - ReZort p/n 350-5210
ings.
Envoy 2nd stage and ReZort
(8050S 4 lb
1st Stage. A simple, rugged
Pockets are
and serviceable, yet high perAvailable but
formance design.
not shown.)
Zeagle BC Knife
5402
EMT Shears
8134
19
BC Pocket
(Clip Closure)
8033CC
Strobe/Flashlight
8036
Envoy - RaZor p/n 350-6240
Envoy 2nd stage and RaZor
1st stage. The RaZor is a
compact combination of a
Valve and Regulator.
Diver Tool Kits
8135 without slate
8135S with slate
Tech Utility Pocket
2 zip compartments
8033
SERVICE RECORD
DATE
SERVICE PERFORMED
SERVICE CENTER
TECHNICIAN #
Owner Orientation:
Dealer Preparation:
Attach the original or a copy of your purchase receipt
to this booklet and store it in a safe place. Your receipt
may be needed for warranty validation if you take your
BCD to a different Zeagle Dealer for service.
Locating Service and Support
The Dealer that sold you your Buoyancy Compensator will be able
to assist you with additional questions regarding product operation, warranty, and service. Go to www.zeagle.com for dealer
locations near you.
Your Local Zeagle Dealer:
(Dealer to affix stamp here)
20
Zeagle Systems,
Inc.
37150 Chancey Road
Zephyrhills, FL. 33541
Phone: (813) 782-5568
Fax: (813) 782-5569
www.zeagle.com
p/n 175-1648
10/2005


