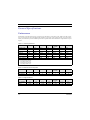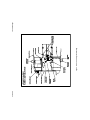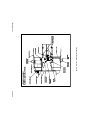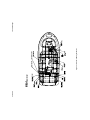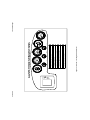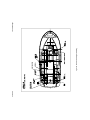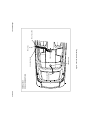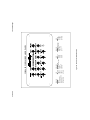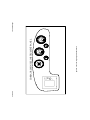
1
Cover page
Table of Contents
CHAPTER 1 Introduction. . . . . . . . . . . . . . . . . . . . . . . . . . . . . . . . . . . . . . . . . . . . . . . . . . . . 1–1
The Owner’s Manual . . . . . . . . . . . . . . . . . . . . . . . . . . . . . . . . . . . . . . . . . . . . . . . . . . . . . . . . . . . . . . 1–2
What This Manual Covers. . . . . . . . . . . . . . . . . . . . . . . . . . . . . . . . . . . . . . . . . . . . . . . . . . . . . . . . . 1–3
General Specifications . . . . . . . . . . . . . . . . . . . . . . . . . . . . . . . . . . . . . . . . . . . . . . . . . . . . . . . . . . . . .
Performance . . . . . . . . . . . . . . . . . . . . . . . . . . . . . . . . . . . . . . . . . . . . . . . . . . . . . . . . . . . . . . . . . . .
Engine Performance . . . . . . . . . . . . . . . . . . . . . . . . . . . . . . . . . . . . . . . . . . . . . . . . . . . . . . . . . . . . .
Weight Conversions . . . . . . . . . . . . . . . . . . . . . . . . . . . . . . . . . . . . . . . . . . . . . . . . . . . . . . . . . . . . .
1–4
1–4
1–5
1–5
Design Category. . . . . . . . . . . . . . . . . . . . . . . . . . . . . . . . . . . . . . . . . . . . . . . . . . . . . . . . . . . . . . . . . . 1–6
Component Manufacturers. . . . . . . . . . . . . . . . . . . . . . . . . . . . . . . . . . . . . . . . . . . . . . . . . . . . . . . . . . 1–7
CHAPTER 2 Safety and Operations . . . . . . . . . . . . . . . . . . . . . . . . . . . . . . . . . . . . . . . . . . . 2–1
Warning Placards and Labels . . . . . . . . . . . . . . . . . . . . . . . . . . . . . . . . . . . . . . . . . . . . . . . . . . . . . . . 2–4
Boating Safety . . . . . . . . . . . . . . . . . . . . . . . . . . . . . . . . . . . . . . . . . . . . . . . . . . . . . . . . . . . . . . . . . .
General Safety Precautions . . . . . . . . . . . . . . . . . . . . . . . . . . . . . . . . . . . . . . . . . . . . . . . . . . . . . .
Boating Courses . . . . . . . . . . . . . . . . . . . . . . . . . . . . . . . . . . . . . . . . . . . . . . . . . . . . . . . . . . . . .
Basic Seamanship . . . . . . . . . . . . . . . . . . . . . . . . . . . . . . . . . . . . . . . . . . . . . . . . . . . . . . . . . . . .
Meeting Situations . . . . . . . . . . . . . . . . . . . . . . . . . . . . . . . . . . . . . . . . . . . . . . . . . . . . . . . . . .
Visual Obstructions . . . . . . . . . . . . . . . . . . . . . . . . . . . . . . . . . . . . . . . . . . . . . . . . . . . . . . . . . . .
Propeller Safety . . . . . . . . . . . . . . . . . . . . . . . . . . . . . . . . . . . . . . . . . . . . . . . . . . . . . . . . . . . . . .
2–14
2–15
2–16
2–16
2–16
2–18
2–19
Boating Regulations and Requirements. . . . . . . . . . . . . . . . . . . . . . . . . . . . . . . . . . . . . . . . . . . . . . .
U.S. Coast Guard Boating Safety Hotline . . . . . . . . . . . . . . . . . . . . . . . . . . . . . . . . . . . . . . . . . . . .
Supplemental Federal, State or Local Regulations . . . . . . . . . . . . . . . . . . . . . . . . . . . . . . . . . . .
Alcohol and Drugs . . . . . . . . . . . . . . . . . . . . . . . . . . . . . . . . . . . . . . . . . . . . . . . . . . . . . . . . . . . .
Accident Reporting . . . . . . . . . . . . . . . . . . . . . . . . . . . . . . . . . . . . . . . . . . . . . . . . . . . . . . . . . . .
Rendering Assistance . . . . . . . . . . . . . . . . . . . . . . . . . . . . . . . . . . . . . . . . . . . . . . . . . . . . . . . . .
Vessel Maintenance . . . . . . . . . . . . . . . . . . . . . . . . . . . . . . . . . . . . . . . . . . . . . . . . . . . . . . . . . . . .
Load Capacity . . . . . . . . . . . . . . . . . . . . . . . . . . . . . . . . . . . . . . . . . . . . . . . . . . . . . . . . . . . . . . . . .
2–20
2–20
2–20
2–21
2–21
2–22
2–22
2–22
Chris-Craft
i
Table of Contents
Safety Equipment . . . . . . . . . . . . . . . . . . . . . . . . . . . . . . . . . . . . . . . . . . . . . . . . . . . . . . . . . . . . . . .
Personal Flotation Devices (PFDs) . . . . . . . . . . . . . . . . . . . . . . . . . . . . . . . . . . . . . . . . . . . . . . . . .
Types of PFDs . . . . . . . . . . . . . . . . . . . . . . . . . . . . . . . . . . . . . . . . . . . . . . . . . . . . . . . . . . . . . . .
Foam Class PFDs . . . . . . . . . . . . . . . . . . . . . . . . . . . . . . . . . . . . . . . . . . . . . . . . . . . . . . . . . . . .
Inflatable Class PFDs . . . . . . . . . . . . . . . . . . . . . . . . . . . . . . . . . . . . . . . . . . . . . . . . . . . . . . . . .
Hybrid Class PFDs . . . . . . . . . . . . . . . . . . . . . . . . . . . . . . . . . . . . . . . . . . . . . . . . . . . . . . . . . . .
PFD Considerations. . . . . . . . . . . . . . . . . . . . . . . . . . . . . . . . . . . . . . . . . . . . . . . . . . . . . . . . . . .
Additional Equipment . . . . . . . . . . . . . . . . . . . . . . . . . . . . . . . . . . . . . . . . . . . . . . . . . . . . . . . . . . .
Visual Distress Signals . . . . . . . . . . . . . . . . . . . . . . . . . . . . . . . . . . . . . . . . . . . . . . . . . . . . . . . . . .
Storage . . . . . . . . . . . . . . . . . . . . . . . . . . . . . . . . . . . . . . . . . . . . . . . . . . . . . . . . . . . . . . . . . . . .
Disposal . . . . . . . . . . . . . . . . . . . . . . . . . . . . . . . . . . . . . . . . . . . . . . . . . . . . . . . . . . . . . . . . . . . .
2–23
2–24
2–25
2–26
2–26
2–26
2–27
2–28
2–29
2–29
2–29
Emergencies . . . . . . . . . . . . . . . . . . . . . . . . . . . . . . . . . . . . . . . . . . . . . . . . . . . . . . . . . . . . . . . . . . . 2–30
Medical . . . . . . . . . . . . . . . . . . . . . . . . . . . . . . . . . . . . . . . . . . . . . . . . . . . . . . . . . . . . . . . . . . . . . . 2–30
Getting Help . . . . . . . . . . . . . . . . . . . . . . . . . . . . . . . . . . . . . . . . . . . . . . . . . . . . . . . . . . . . . . . . . . 2–30
Carbon Monoxide . . . . . . . . . . . . . . . . . . . . . . . . . . . . . . . . . . . . . . . . . . . . . . . . . . . . . . . . . . . . . . . . 2–31
Man Overboard . . . . . . . . . . . . . . . . . . . . . . . . . . . . . . . . . . . . . . . . . . . . . . . . . . . . . . . . . . . . . . . . . 2–33
Fire . . . . . . . . . . . . . . . . . . . . . . . . . . . . . . . . . . . . . . . . . . . . . . . . . . . . . . . . . . . . . . . . . . . . . . . . . . .
Classes of Fires . . . . . . . . . . . . . . . . . . . . . . . . . . . . . . . . . . . . . . . . . . . . . . . . . . . . . . . . . . . . . . .
Compliant Fire Extinguishers . . . . . . . . . . . . . . . . . . . . . . . . . . . . . . . . . . . . . . . . . . . . . . . . . . . .
Required Number of Portable Fire Extinguishers . . . . . . . . . . . . . . . . . . . . . . . . . . . . . . . . . . . .
Fire Extinguisher Maintenance and Service . . . . . . . . . . . . . . . . . . . . . . . . . . . . . . . . . . . . . . . .
2–35
2–35
2–35
2–36
2–36
Safety at Sea . . . . . . . . . . . . . . . . . . . . . . . . . . . . . . . . . . . . . . . . . . . . . . . . . . . . . . . . . . . . . . . . . . .
Mechanical Failures . . . . . . . . . . . . . . . . . . . . . . . . . . . . . . . . . . . . . . . . . . . . . . . . . . . . . . . . . . . .
Shallow Water Dangers . . . . . . . . . . . . . . . . . . . . . . . . . . . . . . . . . . . . . . . . . . . . . . . . . . . . . . . . .
Running Aground . . . . . . . . . . . . . . . . . . . . . . . . . . . . . . . . . . . . . . . . . . . . . . . . . . . . . . . . . . . . .
Flooding, Sinking, and Capsizing . . . . . . . . . . . . . . . . . . . . . . . . . . . . . . . . . . . . . . . . . . . . . . . .
Collisions . . . . . . . . . . . . . . . . . . . . . . . . . . . . . . . . . . . . . . . . . . . . . . . . . . . . . . . . . . . . . . . . . . .
Lightning Precautions . . . . . . . . . . . . . . . . . . . . . . . . . . . . . . . . . . . . . . . . . . . . . . . . . . . . . . . . . . .
2–37
2–37
2–38
2–38
2–39
2–39
2–40
Fueling . . . . . . . . . . . . . . . . . . . . . . . . . . . . . . . . . . . . . . . . . . . . . . . . . . . . . . . . . . . . . . . . . . . . . . . . 2–41
CHAPTER 3 Systems. . . . . . . . . . . . . . . . . . . . . . . . . . . . . . . . . . . . . . . . . . . . . . . . . . . . . . . 3–1
Switch Identification . . . . . . . . . . . . . . . . . . . . . . . . . . . . . . . . . . . . . . . . . . . . . . . . . . . . . . . . . . . . . . . 3–2
Engine Compartment . . . . . . . . . . . . . . . . . . . . . . . . . . . . . . . . . . . . . . . . . . . . . . . . . . . . . . . . . . . . . . 3–4
Lancer 22 Rumble . . . . . . . . . . . . . . . . . . . . . . . . . . . . . . . . . . . . . . . . . . . . . . . . . . . . . . . . . . . . . . . . 3–5
Boat Systems . . . . . . . . . . . . . . . . . . . . . . . . . . . . . . . . . . . . . . . . . . . . . . . . . . . . . . . . . . . . . . . . . . . . 3–7
Safety Package . . . . . . . . . . . . . . . . . . . . . . . . . . . . . . . . . . . . . . . . . . . . . . . . . . . . . . . . . . . . . . . . . 3–7
Seacocks and Thru-Hulls . . . . . . . . . . . . . . . . . . . . . . . . . . . . . . . . . . . . . . . . . . . . . . . . . . . . . . . . . 3–9
Drain Plugs . . . . . . . . . . . . . . . . . . . . . . . . . . . . . . . . . . . . . . . . . . . . . . . . . . . . . . . . . . . . . . . . . . 3–9
Bilge Pumps . . . . . . . . . . . . . . . . . . . . . . . . . . . . . . . . . . . . . . . . . . . . . . . . . . . . . . . . . . . . . . . . . . 3–10
General Maintenance . . . . . . . . . . . . . . . . . . . . . . . . . . . . . . . . . . . . . . . . . . . . . . . . . . . . . . . . . 3–10
Electric Bilge Pumps . . . . . . . . . . . . . . . . . . . . . . . . . . . . . . . . . . . . . . . . . . . . . . . . . . . . . . . . . . 3–10
Fuel Systems . . . . . . . . . . . . . . . . . . . . . . . . . . . . . . . . . . . . . . . . . . . . . . . . . . . . . . . . . . . . . . . . . 3–12
Fuel Tank . . . . . . . . . . . . . . . . . . . . . . . . . . . . . . . . . . . . . . . . . . . . . . . . . . . . . . . . . . . . . . . . . . . 3–13
Fuel Gauge . . . . . . . . . . . . . . . . . . . . . . . . . . . . . . . . . . . . . . . . . . . . . . . . . . . . . . . . . . . . . . . . . 3–16
Steering Systems . . . . . . . . . . . . . . . . . . . . . . . . . . . . . . . . . . . . . . . . . . . . . . . . . . . . . . . . . . . . . . 3–16
ii
Chris-Craft
Table of Contents
Engines . . . . . . . . . . . . . . . . . . . . . . . . . . . . . . . . . . . . . . . . . . . . . . . . . . . . . . . . . . . . . . . . . . . . . .
Emergency Engine Stop Switches. . . . . . . . . . . . . . . . . . . . . . . . . . . . . . . . . . . . . . . . . . . . . . . .
Ignition Switches . . . . . . . . . . . . . . . . . . . . . . . . . . . . . . . . . . . . . . . . . . . . . . . . . . . . . . . . . . . . .
Engine Throttles. . . . . . . . . . . . . . . . . . . . . . . . . . . . . . . . . . . . . . . . . . . . . . . . . . . . . . . . . . . . . .
Engine (Power) Trim . . . . . . . . . . . . . . . . . . . . . . . . . . . . . . . . . . . . . . . . . . . . . . . . . . . . . . . . . .
Engine Instruments . . . . . . . . . . . . . . . . . . . . . . . . . . . . . . . . . . . . . . . . . . . . . . . . . . . . . . . . . . .
Selectable Exhaust . . . . . . . . . . . . . . . . . . . . . . . . . . . . . . . . . . . . . . . . . . . . . . . . . . . . . . . . . . .
Engine Compartment Blower . . . . . . . . . . . . . . . . . . . . . . . . . . . . . . . . . . . . . . . . . . . . . . . . . . . .
Trim Tabs . . . . . . . . . . . . . . . . . . . . . . . . . . . . . . . . . . . . . . . . . . . . . . . . . . . . . . . . . . . . . . . . . . . .
Theory of Operation . . . . . . . . . . . . . . . . . . . . . . . . . . . . . . . . . . . . . . . . . . . . . . . . . . . . . . . . . . .
Trim Tab Hydraulic System . . . . . . . . . . . . . . . . . . . . . . . . . . . . . . . . . . . . . . . . . . . . . . . . . . . . .
Trim Tab Hydraulic Pump . . . . . . . . . . . . . . . . . . . . . . . . . . . . . . . . . . . . . . . . . . . . . . . . . . . . . .
Trim Tab Reservoir . . . . . . . . . . . . . . . . . . . . . . . . . . . . . . . . . . . . . . . . . . . . . . . . . . . . . . . . . . .
Trim Tab Zinc Plate . . . . . . . . . . . . . . . . . . . . . . . . . . . . . . . . . . . . . . . . . . . . . . . . . . . . . . . . . . .
Trim Tab Control Switches . . . . . . . . . . . . . . . . . . . . . . . . . . . . . . . . . . . . . . . . . . . . . . . . . . . . .
Fresh Water System . . . . . . . . . . . . . . . . . . . . . . . . . . . . . . . . . . . . . . . . . . . . . . . . . . . . . . . . . . . .
Sanitizing the Fresh Water System . . . . . . . . . . . . . . . . . . . . . . . . . . . . . . . . . . . . . . . . . . . . . . .
Using the Fresh Water System . . . . . . . . . . . . . . . . . . . . . . . . . . . . . . . . . . . . . . . . . . . . . . . . . .
Troubleshooting Water Systems . . . . . . . . . . . . . . . . . . . . . . . . . . . . . . . . . . . . . . . . . . . . . . . . .
Marine Sanitation System . . . . . . . . . . . . . . . . . . . . . . . . . . . . . . . . . . . . . . . . . . . . . . . . . . . . . . . .
Electrical System. . . . . . . . . . . . . . . . . . . . . . . . . . . . . . . . . . . . . . . . . . . . . . . . . . . . . . . . . . . . . . .
Electrical Safety . . . . . . . . . . . . . . . . . . . . . . . . . . . . . . . . . . . . . . . . . . . . . . . . . . . . . . . . . . . . . .
DC Electrical System . . . . . . . . . . . . . . . . . . . . . . . . . . . . . . . . . . . . . . . . . . . . . . . . . . . . . . . . . .
Circuit Breakers . . . . . . . . . . . . . . . . . . . . . . . . . . . . . . . . . . . . . . . . . . . . . . . . . . . . . . . . . . . .
Battery System . . . . . . . . . . . . . . . . . . . . . . . . . . . . . . . . . . . . . . . . . . . . . . . . . . . . . . . . . . . . .
Battery Charging. . . . . . . . . . . . . . . . . . . . . . . . . . . . . . . . . . . . . . . . . . . . . . . . . . . . . . . . . . . .
Battery Powered Systems . . . . . . . . . . . . . . . . . . . . . . . . . . . . . . . . . . . . . . . . . . . . . . . . . . . .
Wiring Color Codes . . . . . . . . . . . . . . . . . . . . . . . . . . . . . . . . . . . . . . . . . . . . . . . . . . . . . . . . .
DC System Troubleshooting. . . . . . . . . . . . . . . . . . . . . . . . . . . . . . . . . . . . . . . . . . . . . . . . . . .
AC Electrical System . . . . . . . . . . . . . . . . . . . . . . . . . . . . . . . . . . . . . . . . . . . . . . . . . . . . . . . . . .
Reverse Polarity . . . . . . . . . . . . . . . . . . . . . . . . . . . . . . . . . . . . . . . . . . . . . . . . . . . . . . . . . . . .
Connecting and Disconnecting Shore Power . . . . . . . . . . . . . . . . . . . . . . . . . . . . . . . . . . . . . .
AC Wiring Codes . . . . . . . . . . . . . . . . . . . . . . . . . . . . . . . . . . . . . . . . . . . . . . . . . . . . . . . . . . .
Troubleshooting the AC System . . . . . . . . . . . . . . . . . . . . . . . . . . . . . . . . . . . . . . . . . . . . . . . .
Compass . . . . . . . . . . . . . . . . . . . . . . . . . . . . . . . . . . . . . . . . . . . . . . . . . . . . . . . . . . . . . . . . . . . . .
Entertainment and Convenience Equipment. . . . . . . . . . . . . . . . . . . . . . . . . . . . . . . . . . . . . . . . . .
3–17
3–17
3–18
3–19
3–21
3–22
3–25
3–25
3–27
3–28
3–28
3–28
3–28
3–29
3–29
3–31
3–34
3–35
3–36
3–37
3–38
3–38
3–39
3–39
3–41
3–43
3–44
3–46
3–48
3–49
3–49
3–49
3–50
3–51
3–52
3–53
CHAPTER 4 Storage and Commissioning. . . . . . . . . . . . . . . . . . . . . . . . . . . . . . . . . . . . . . 4–1
Winter Storage . . . . . . . . . . . . . . . . . . . . . . . . . . . . . . . . . . . . . . . . . . . . . . . . . . . . . . . . . . . . . . . . . . . 4–2
Spring Commissioning . . . . . . . . . . . . . . . . . . . . . . . . . . . . . . . . . . . . . . . . . . . . . . . . . . . . . . . . . . . . . 4–4
Chris-Craft
iii
Table of Contents
APPENDIX A Warranty Information . . . . . . . . . . . . . . . . . . . . . . . . . . . . . . . . . . . . . . . . . . . A–1
APPENDIX B Checklist . . . . . . . . . . . . . . . . . . . . . . . . . . . . . . . . . . . . . . . . . . . . . . . . . . . . . B–1
APPENDIX C Coast Guard Accident Report . . . . . . . . . . . . . . . . . . . . . . . . . . . . . . . . . . . . C–1
APPENDIX D Float Plan. . . . . . . . . . . . . . . . . . . . . . . . . . . . . . . . . . . . . . . . . . . . . . . . . . . . . D–1
APPENDIX E Trailering . . . . . . . . . . . . . . . . . . . . . . . . . . . . . . . . . . . . . . . . . . . . . . . . . . . . . E–1
APPENDIX F Water Skiing. . . . . . . . . . . . . . . . . . . . . . . . . . . . . . . . . . . . . . . . . . . . . . . . . . . F–1
APPENDIX G Maintenance Log Forms . . . . . . . . . . . . . . . . . . . . . . . . . . . . . . . . . . . . . . . . G–1
APPENDIX H Technical Drawings . . . . . . . . . . . . . . . . . . . . . . . . . . . . . . . . . . . . . . . . . . . . H–1
iv
Chris-Craft
List of Figures
Figure 2-1. Placard – Discharge of Oil . . . . . . . . . . . . . . . . . . . . . . . . . . . . . . . . . . . . . . . . . . . . . . . . . . 2–4
Figure 2-2. Label – Unleaded Fuel Only . . . . . . . . . . . . . . . . . . . . . . . . . . . . . . . . . . . . . . . . . . . . . . . . . 2–4
Figure 2-3. Label – Rumble Seat Hatch Cover . . . . . . . . . . . . . . . . . . . . . . . . . . . . . . . . . . . . . . . . . . . . 2–4
Figure 2-4. Label – Shock Hazards . . . . . . . . . . . . . . . . . . . . . . . . . . . . . . . . . . . . . . . . . . . . . . . . . . . . . 2–5
Figure 2-5. Label – Electric Hatch . . . . . . . . . . . . . . . . . . . . . . . . . . . . . . . . . . . . . . . . . . . . . . . . . . . . . . 2–5
Figure 2-6. Label – Fire . . . . . . . . . . . . . . . . . . . . . . . . . . . . . . . . . . . . . . . . . . . . . . . . . . . . . . . . . . . . . . 2–5
Figure 2-7. Label – Trim Tab . . . . . . . . . . . . . . . . . . . . . . . . . . . . . . . . . . . . . . . . . . . . . . . . . . . . . . . . . . 2–5
Figure 2-8. Label – Fuel Vapors . . . . . . . . . . . . . . . . . . . . . . . . . . . . . . . . . . . . . . . . . . . . . . . . . . . . . . . 2–5
Figure 2-9. Label – Leaking Fuel. . . . . . . . . . . . . . . . . . . . . . . . . . . . . . . . . . . . . . . . . . . . . . . . . . . . . . . 2–6
Figure 2-10. Label – Ski Tow Fitting . . . . . . . . . . . . . . . . . . . . . . . . . . . . . . . . . . . . . . . . . . . . . . . . . . . . 2–6
Figure 2-11. Label – Gasoline Vapors. . . . . . . . . . . . . . . . . . . . . . . . . . . . . . . . . . . . . . . . . . . . . . . . . . . 2–6
Figure 2-12. Label – Before Engine Start . . . . . . . . . . . . . . . . . . . . . . . . . . . . . . . . . . . . . . . . . . . . . . . . 2–6
Figure 2-13. Label – Propeller Danger . . . . . . . . . . . . . . . . . . . . . . . . . . . . . . . . . . . . . . . . . . . . . . . . . . 2–6
Figure 2-14. Warning Labels – Lancer 20 . . . . . . . . . . . . . . . . . . . . . . . . . . . . . . . . . . . . . . . . . . . . . . . . 2–7
Figure 2-15. Warning Labels – Lancer 22 Rumble . . . . . . . . . . . . . . . . . . . . . . . . . . . . . . . . . . . . . . . . . 2–8
Figure 2-16. Warning Labels – Launch 22 . . . . . . . . . . . . . . . . . . . . . . . . . . . . . . . . . . . . . . . . . . . . . . . 2–9
Figure 2-17. Warning Labels – Launch 25 . . . . . . . . . . . . . . . . . . . . . . . . . . . . . . . . . . . . . . . . . . . . . . 2–10
Figure 2-18. Warning Labels – Corsair 25. . . . . . . . . . . . . . . . . . . . . . . . . . . . . . . . . . . . . . . . . . . . . . . 2–11
Figure 2-19. Warning Labels – Launch 28 . . . . . . . . . . . . . . . . . . . . . . . . . . . . . . . . . . . . . . . . . . . . . . 2–12
Figure 2-20. Warning Labels – Corsair 28. . . . . . . . . . . . . . . . . . . . . . . . . . . . . . . . . . . . . . . . . . . . . . . 2–13
Figure 2-21. Passing Port-to-Port . . . . . . . . . . . . . . . . . . . . . . . . . . . . . . . . . . . . . . . . . . . . . . . . . . . . . 2–17
Figure 2-22. Passing Starboard-to-Starboard . . . . . . . . . . . . . . . . . . . . . . . . . . . . . . . . . . . . . . . . . . . . 2–17
Figure 2-23. Overtaking. . . . . . . . . . . . . . . . . . . . . . . . . . . . . . . . . . . . . . . . . . . . . . . . . . . . . . . . . . . . . 2–17
Figure 3-1. Helm Switch Panel . . . . . . . . . . . . . . . . . . . . . . . . . . . . . . . . . . . . . . . . . . . . . . . . . . . . . . . . 3–3
Figure 3-2. Engine Hatch Activation Switch . . . . . . . . . . . . . . . . . . . . . . . . . . . . . . . . . . . . . . . . . . . . . . 3–4
Figure 3-3. Lancer 22 Rumble Seat . . . . . . . . . . . . . . . . . . . . . . . . . . . . . . . . . . . . . . . . . . . . . . . . . . . . 3–5
Chris-Craft
v
List of Figures
Figure 3-4. Lancer 22 Rumble Key Ring . . . . . . . . . . . . . . . . . . . . . . . . . . . . . . . . . . . . . . . . . . . . . . . . . 3–6
Figure 3-5. Fire Alarm Indicator. . . . . . . . . . . . . . . . . . . . . . . . . . . . . . . . . . . . . . . . . . . . . . . . . . . . . . . . 3–8
Figure 3-6. Optional Engine Fire Extinguisher. . . . . . . . . . . . . . . . . . . . . . . . . . . . . . . . . . . . . . . . . . . . . 3–8
Figure 3-7. Garboard Drain . . . . . . . . . . . . . . . . . . . . . . . . . . . . . . . . . . . . . . . . . . . . . . . . . . . . . . . . . . . 3–9
Figure 3-8. Bilge Pumps . . . . . . . . . . . . . . . . . . . . . . . . . . . . . . . . . . . . . . . . . . . . . . . . . . . . . . . . . . . . 3–11
Figure 3-9. Fuel Tank Fill Deck Plate . . . . . . . . . . . . . . . . . . . . . . . . . . . . . . . . . . . . . . . . . . . . . . . . . . 3–13
Figure 3-10. Fuel Tank Connections with Manual Shut-Off Valve. . . . . . . . . . . . . . . . . . . . . . . . . . . . . 3–14
Figure 3-11. Fuel Tank Connections Without Manual Shut-Off Valve. . . . . . . . . . . . . . . . . . . . . . . . . . 3–15
Figure 3-12. Fuel Shut-Off Valve Access Cover (Typical) . . . . . . . . . . . . . . . . . . . . . . . . . . . . . . . . . . . 3–15
Figure 3-13. Fuel Gauge . . . . . . . . . . . . . . . . . . . . . . . . . . . . . . . . . . . . . . . . . . . . . . . . . . . . . . . . . . . . 3–16
Figure 3-14. Engine Emergency Shut-off Switch. . . . . . . . . . . . . . . . . . . . . . . . . . . . . . . . . . . . . . . . . . 3–18
Figure 3-15. Ignition/Start Switches. . . . . . . . . . . . . . . . . . . . . . . . . . . . . . . . . . . . . . . . . . . . . . . . . . . . 3–18
Figure 3-16. Dual Engine Throttles . . . . . . . . . . . . . . . . . . . . . . . . . . . . . . . . . . . . . . . . . . . . . . . . . . . . 3–20
Figure 3-17. Single Engine Throttle. . . . . . . . . . . . . . . . . . . . . . . . . . . . . . . . . . . . . . . . . . . . . . . . . . . . 3–20
Figure 3-18. Single Engine Trim Switch . . . . . . . . . . . . . . . . . . . . . . . . . . . . . . . . . . . . . . . . . . . . . . . . 3–21
Figure 3-19. Dual Engine Trim Switches . . . . . . . . . . . . . . . . . . . . . . . . . . . . . . . . . . . . . . . . . . . . . . . . 3–22
Figure 3-20. Single Engine Instrument Configuration . . . . . . . . . . . . . . . . . . . . . . . . . . . . . . . . . . . . . . 3–24
Figure 3-21. Dual Engine Instrument Configuration . . . . . . . . . . . . . . . . . . . . . . . . . . . . . . . . . . . . . . . 3–24
Figure 3-22. Engine Compartment Blower Switch. . . . . . . . . . . . . . . . . . . . . . . . . . . . . . . . . . . . . . . . . 3–26
Figure 3-23. Trim Tab . . . . . . . . . . . . . . . . . . . . . . . . . . . . . . . . . . . . . . . . . . . . . . . . . . . . . . . . . . . . . . 3–27
Figure 3-24. Sacrificial Zinc Plate . . . . . . . . . . . . . . . . . . . . . . . . . . . . . . . . . . . . . . . . . . . . . . . . . . . . . 3–29
Figure 3-25. Trim Tab Control Switches . . . . . . . . . . . . . . . . . . . . . . . . . . . . . . . . . . . . . . . . . . . . . . . . 3–30
Figure 3-26. Fresh Water Pump and Filter . . . . . . . . . . . . . . . . . . . . . . . . . . . . . . . . . . . . . . . . . . . . . . 3–32
Figure 3-27. Fresh Water Pressure Pump Switch . . . . . . . . . . . . . . . . . . . . . . . . . . . . . . . . . . . . . . . . . 3–32
Figure 3-28. Transom Shower Head . . . . . . . . . . . . . . . . . . . . . . . . . . . . . . . . . . . . . . . . . . . . . . . . . . . 3–33
Figure 3-29. Wet Bar/Sink . . . . . . . . . . . . . . . . . . . . . . . . . . . . . . . . . . . . . . . . . . . . . . . . . . . . . . . . . . . 3–33
Figure 3-30. Windlass and Accessory System Circuit Breakers . . . . . . . . . . . . . . . . . . . . . . . . . . . . . . 3–40
Figure 3-31. Stereo/Bilge Pump Circuit Breakers . . . . . . . . . . . . . . . . . . . . . . . . . . . . . . . . . . . . . . . . . 3–40
Figure 3-32. Two Battery Switch Cluster . . . . . . . . . . . . . . . . . . . . . . . . . . . . . . . . . . . . . . . . . . . . . . . . 3–42
Figure 3-33. Optional Battery Charger . . . . . . . . . . . . . . . . . . . . . . . . . . . . . . . . . . . . . . . . . . . . . . . . . 3–43
Figure 3-34. Compass . . . . . . . . . . . . . . . . . . . . . . . . . . . . . . . . . . . . . . . . . . . . . . . . . . . . . . . . . . . . . . 3–52
vi
Chris-Craft
List of Figures
Technical Drawings
TD Figure 1. Lancer 20 – Plumbing and Fuel Routing
TD Figure 2. Lancer 20 – Helm Breaker Panel
TD Figure 3. Lancer 20 – Helm Switch Panel
TD Figure 4. Lancer 20 – Thru-Hull Locations
TD Figure 5. Lancer 20 – Instrument Panel
TD Figure 6. Lancer 22 – Plumbing and Fuel Routing
TD Figure 7. Lancer 22 – Helm Breaker Panel
TD Figure 8. Lancer 22 – Port Switch Panel
TD Figure 9. Lancer 22 – Starboard Switch Panel
TD Figure 10. Lancer 22 – Battery Switch Panel
TD Figure 11. Lancer 22 – Instrument Panel
TD Figure 12. Launch 22 – Plumbing and Fuel Routing
TD Figure 13. Launch 22 – Helm Breaker Panel
TD Figure 14. Launch 22 – Port Switch Panel
TD Figure 15. Launch 22 – Starboard Switch Panel
TD Figure 16. Launch 22 – Battery Switch Panel
TD Figure 17. Launch 22 – Thru-Hull Locations
TD Figure 18. Launch 22 – Instrument Panel
TD Figure 19. Launch 25 – Plumbing and Fuel Routing
TD Figure 20. Launch 25 – Helm Breaker Panel
TD Figure 21. Launch 25 – Port Switch Panel
TD Figure 22. Launch 25 – Starboard Switch Panel
TD Figure 23. Launch 25 – Battery Switch Panel
TD Figure 24. Launch 25 – Thru-Hull Locations
TD Figure 25. Launch 25 – Instrument Panel
TD Figure 26. Launch 28 – Plumbing Hose Route
TD Figure 27. Launch 28 – Battery Switch Panel
TD Figure 28. Launch 28 – Port Switch Panel
TD Figure 29. Launch 28 – Single Drive Trim Panel
TD Figure 30. Launch 28 – Single Switch Panel
TD Figure 31. Launch 28 – Twin Drive Trim Panel
TD Figure 32. Launch 28 – Twin Switch Panel
TD Figure 33. Launch 28 – Thru-Hull Locations
TD Figure 34. Launch 28 – Single Instrument Panel
TD Figure 35. Launch 28 – Twin Engine Instrument Panel
TD Figure 36. Corsair 25 – Plumbing Hose Routing
TD Figure 37. Corsair 25 – Fuel Hose Routing
TD Figure 38. Corsair 25 – Helm Breaker Panel
TD Figure 39. Corsair 25 – Helm Switch Panel
TD Figure 40. Corsair 25 – Battery Switch Panel
TD Figure 41. Corsair 25 – Thru-Hull Locations
TD Figure 42. Corsair 25 – Instrument Panel
Chris-Craft
vii
List of Figures
TD Figure 43. Corsair 28 – Plumbing Hose Routing (Sheet 1 of 2)
TD Figure 44. Corsair 28 – Plumbing Hose Routing (Sheet 2 of 2)
TD Figure 45. Corsair 28 – Battery Switch Panel
TD Figure 46. Corsair 28 – Port Switch Panel
TD Figure 47. Corsair 28 – Single Engine Drive Trim Panel
TD Figure 48. Corsair 28 – Single Engine Switch Panel
TD Figure 49. Corsair 28 – Twin Engine Drive Trim Panel
TD Figure 50. Corsair 28 – Twin Engine Switch Panel
TD Figure 51. Corsair 28 – Thru-Hull Locations
TD Figure 52. Corsair 28 – Single Engine Instrument Panel
TD Figure 53. Corsair 28 – Twin Engine Instrument Panel
TD Figure 54. Lancer 20 Electrical Schematic (Sheet 1 of 2)
TD Figure 55. Lancer 20 Electrical Schematic (Sheet 2 of 2)
TD Figure 56. Lancer 22 Electrical Schematic (Sheet 1 of 2)
TD Figure 57. Lancer 22 Electrical Schematic (Sheet 2 of 2)
TD Figure 58. Launch 22 Electrical Schematic (Sheet 1 of 2)
TD Figure 59. Launch 22 Electrical Schematic (Sheet 2 of 2)
TD Figure 60. Launch 25 Electrical Schematic (Sheet 1 of2)
TD Figure 61. Launch 25 Electrical Schematic (Sheet 2 of2)
TD Figure 62. Corsair 25 Electrical Schematic (Sheet 1 of 3)
TD Figure 63. Corsair 25 Electrical Schematic (Sheet 2 of 3)
TD Figure 64. Corsair 25 Electrical Schematic (Sheet 3 of 3)
TD Figure 65. Launch 28/Corsair 28 Single Engine Electrical Schematic (Sheet 1 of 3)
TD Figure 66. Launch 28/Corsair 28 Single Engine Electrical Schematic (Sheet 2 of 3)
TD Figure 67. Launch 28/Corsair 28 Single Engine Electrical Schematic (Sheet 3 of 3)
TD Figure 68. Launch 28/Corsair 28 Twin Engine Electrical Schematic (Sheet 1 of 3)
TD Figure 69. Launch 28/Corsair 28 Twin Engine Electrical Schematic (Sheet 2 of 3)
TD Figure 70. Launch 28/Corsair 28 Twin Engine Electrical Schematic (Sheet 3 of 3)
viii
Chris-Craft
List of Tables
Table 1-1. General Specifications . . . . . . . . . . . . . . . . . . . . . . . . . . . . . . . . . . . . . . . . . . . . . . . . . . . . . . 1–4
Table 1-2. Maximum Persons Capacities . . . . . . . . . . . . . . . . . . . . . . . . . . . . . . . . . . . . . . . . . . . . . . . . 1–4
Table 1-3. Bridge Clearances . . . . . . . . . . . . . . . . . . . . . . . . . . . . . . . . . . . . . . . . . . . . . . . . . . . . . . . . . 1–4
Table 1-4. Weight Conversions . . . . . . . . . . . . . . . . . . . . . . . . . . . . . . . . . . . . . . . . . . . . . . . . . . . . . . . . 1–5
Table 1-5. Vendor Directory . . . . . . . . . . . . . . . . . . . . . . . . . . . . . . . . . . . . . . . . . . . . . . . . . . . . . . . . . . 1–7
Table 2-1. Minimum Required Safety Equipment . . . . . . . . . . . . . . . . . . . . . . . . . . . . . . . . . . . . . . . . . 2–23
Table 2-2. Types of PFDs . . . . . . . . . . . . . . . . . . . . . . . . . . . . . . . . . . . . . . . . . . . . . . . . . . . . . . . . . . . 2–25
Table 2-3. PFD Minimum Buoyancy Requirements – Foam . . . . . . . . . . . . . . . . . . . . . . . . . . . . . . . . . 2–26
Table 2-4. PFD Minimum Buoyancy Requirements – Inflatable . . . . . . . . . . . . . . . . . . . . . . . . . . . . . . 2–26
Table 2-5. PFD Minimum Buoyancy Requirements – Hybrid . . . . . . . . . . . . . . . . . . . . . . . . . . . . . . . . 2–26
Table 2-6. Visual Distress Signals. . . . . . . . . . . . . . . . . . . . . . . . . . . . . . . . . . . . . . . . . . . . . . . . . . . . . 2–29
Table 2-7. Class of Fire and Extinguisher Types. . . . . . . . . . . . . . . . . . . . . . . . . . . . . . . . . . . . . . . . . . 2–36
Table 2-8. Minimum Portable Fire Extinguishers Required . . . . . . . . . . . . . . . . . . . . . . . . . . . . . . . . . . 2–36
Table 3-1. Switch Identification Icons . . . . . . . . . . . . . . . . . . . . . . . . . . . . . . . . . . . . . . . . . . . . . . . . . . . 3–2
Table 3-2. Water Troubleshooting Chart . . . . . . . . . . . . . . . . . . . . . . . . . . . . . . . . . . . . . . . . . . . . . . . . 3–36
Table 3-3. Battery Powered Systems Matrix . . . . . . . . . . . . . . . . . . . . . . . . . . . . . . . . . . . . . . . . . . . . . 3–44
Table 3-4. Engine/Battery Wire Codes . . . . . . . . . . . . . . . . . . . . . . . . . . . . . . . . . . . . . . . . . . . . . . . . . 3–46
Table 3-5. DC Electrical Troubleshooting Chart . . . . . . . . . . . . . . . . . . . . . . . . . . . . . . . . . . . . . . . . . . 3–48
Table 3-6. AC Electrical Troubleshooting Chart . . . . . . . . . . . . . . . . . . . . . . . . . . . . . . . . . . . . . . . . . . 3–51
Chris-Craft
ix
List of Tables
x
Chris-Craft
CHAPTER 1
Introduction
A Chris-Craft is a blend of the best of classic design, distinctive styling and superb naval engineering
focused on producing truly seaworthy boats. Chris-Craft's dedication to craftsmanship and quality totally
differentiates its boats from others and represents the company's enduring devotion to its proud past.
America's best naval architects, designers, boat builders and furniture makers are committed to continuous
new product development and technology and maintaining Chris-Craft as America's only premium boat
brand, thus setting standards beyond perfection.
Chris-Craft
1–1
Introduction
The Owner’s Manual
This manual is written to meet the recommendations of Technical Information Report T-24, Owner’s
Manuals, published by the American Boat and Yacht Council (ABYC) and the International Standard ISO
10240: Small Craft – Owner’s Manual.
In the United States, the American Boat and Yacht Council is a marine industry-based standards organization that publishes Standards and Recommended Practices for Small Craft. The book is an extensive collection of construction and design standards for small craft that is used as a guide by boat builders
throughout the world. For more information contact:
American Boat & Yacht Council
3069 Solomon's Island Rd.
Edgewater, MD 21037-1416
Ph (410) 956-1050 Fax (410) 956-2737
This manual is compiled to aid in the operation of the Chris-Craft line of boats in a safe and enjoyable
manner. It contains information on the systems, equipment operation, and general maintenance on each
model of boat. Many of the systems in the Chris-Craft line are similar among the various models, where
differences do occur, they will be pointed out and explained.
This manual provides up-to-date information on various systems at the time this vessel was manufactured.
Specifications of engines and other components are all subject to change without notice. The data contained herein is subservient to the manufacturers’ manuals of the numerous components, installed in this
vessel. If a discrepancy exists between this manual and the component manual, the component manual
takes precedence.
This owner’s manual is not a course on boating safety or seamanship. If this is your first craft, or if you are
changing to a type of craft you are not familiar with, for your own comfort and safety, please ensure that
you obtain handling and operating experience before assuming command of the craft.
Always use trained and competent people for maintenance, repair, or modifications. The boat builder cannot be held responsible for modifications he has not approved.
Any craft, no matter how strong it may be, can be severely damaged if not used properly. This is not compatible with safe boating. Always adjust the speed and direction of the craft to the sea conditions. Ensure
that the anticipated wind and sea conditions corresponds to the design category of your craft, and that you
and your crew are able to handle the craft in these conditions.
All persons should wear suitable buoyancy aid (life jacket/personal flotation device) when operating your
boat.
It is incumbent upon the owner/operator to stay informed of any changes and/or modifications that affect any component of this vessel and/or the safety of the vessel.
KEEP THIS MANUAL IN A SECURE PLACE, AND HAND IT OVER TO THE NEW
OWNER WHEN YOU SELL THE CRAFT.
1–2
Chris-Craft
Introduction
Chris-Craft boats are proudly manufactured in the United States of America by the Chris-Craft Corporation.
Chris-Craft Corporation
8161 15th Street East
Sarasota, FL 34243
Phone: (941) 351-4900
Fax: (941) 358-3776
What This Manual Covers
The features and specifications discussed in this manual are subject to change without notice. Chris-Craft reserves the right to discontinue any model and make changes, at any time, in colors,
equipment, specifications, materials, and prices. Chris-Craft is not
obligated to make, or provide, similar changes to any model previously sold.
This manual covers the following Chris-Craft models:
•
•
•
•
Lancer 20
Launch 22, 25, and 28
Lancer 22 Rumble
Corsair 25 and 28
Each of these models share common components which are discussed in this manual. If significant differences occur between models these differences are discussed.
Each model offers various upgrades and options. When you take possession of your Chris-Craft you
receive the appropriate manuals associated with options you may have chosen, consequently options and
upgrades are not discussed in this manual.
As the owner/operator it is your responsibility to familiarize yourself with the specific
characteristics of your boat.
Chris-Craft
1–3
Introduction
General Specifications
Performance
Performance is based upon the type of options you selected for your Chris-Craft. When you take possession of your boat you receive the appropriate books for your boat. As the owner/operator it is your responsibility to familiarize yourself with the performance specifications and maintenance requirements of your
engine.
Table 1-1. General Specifications
Model
Lancer 20
Launch 22
Launch 25
Launch 28
Lancer 22
Rumble
Corsair 25
Corsair 28
Overall Length
20’ 2”
23’ 5”
27’ 2”
28’ 0”
23” 5”
25’ 4”
28’ 0”
Beam
7’ 11”
8’ 3”
8’ 6”
10’ 0”
8’ 3”
8’ 6”
10’ 0”
Dry Weight
2,850 lbs
4,019 lbs
5,105 lbs
7,500 lbs
4,019 lbs
4,600 lbs
7,500 lbs
Deadrise
20 deg
20 deg
20 deg
20 deg
20 deg
20 deg
20 deg
Draft
34/17.5”
35.75/19”
36.5/20”
See Note 1
35.75/19”
35/17”
See Note 2
Fuel Capacity
34 gal
58 gal
85 gal
150 gal
58 gal
82 gal
150 gal
Water Capacity
N/A
9 gal
9 gal
35 gal
9 gal
9 gal
35 gal
Notes:
1. Twin Engine Draft: 33.5/20”
Singe Engine Draft: 35/17”
2. Twin Engine Draft: 33.5/20”
Singe Engine Draft: 35/17”
Table 1-2. Maximum Persons Capacities
Lancer 20
Launch 22
Launch 25
Launch 28
Lancer 22
Rumble
Corsair 25
Corsair 28
U.S. Standard
5
8
10
N/A
8
10
N/A
CE Standard
5
7
9
10
7
9
10
Lancer 20
Launch 22
Launch 25
Launch 28
Lancer 22
Rumble
Corsair 25
Corsair 28
3’ 7”
3’ 9”
4’ 5”
4’ 6”
3’ 9”
4’ 1½”
4’ 6”
1.092m
1.124m
1.340m
1.390m
1.124m
1.26m
1.390m
Model
Table 1-3. Bridge Clearances
Model
U.S. Standard
Metric
1–4
Chris-Craft
Introduction
Engine Performance
Engine performance is based upon the type of engine option you selected for your Chris-Craft. When you
take possession of your boat you receive the appropriate engine books for your boat. As the owner/operator
it is your responsibility to familiarize yourself with the performance specifications and maintenance
requirements of your engine.
Weight Conversions
Weight and loading attributes are important for safe boating. Use the following table to approximate the
weights of liquids carried aboard the boat.
Table 1-4. Weight Conversions
For Pounds per Gallon Multiply
Number of Gallons by:
For Kilograms Multiply Pounds by:
Gasoline
6.1
0.4536
#2 Diesel Fuel
7.05
0.4536
Potable Water
8.33
0.4536
Item
1 gallon of gasoline = 6.1 pounds
1 gallon of #2 Diesel Fuel = 7.05 pounds
1 gallon Potable Water = 8.33 pounds
1 pound = 0.4536 kilograms
Chris-Craft
1–5
Introduction
Design Category
Every boat built, regardless of manufacturer, falls within a specific design category applicable to that
model. Currently there are four (4) categories designated by the ISO 10240 Standard. They are:
•
•
•
•
Category A – Ocean: Craft designed to operate in winds that may exceed wind force 8* (34-40 knots/39-46
mph) and in significant wave heights of 4 meters (13 feet) and above. These vessels are largely self-sufficient.
Abnormal conditions such as hurricanes are excluded. Such conditions may be encountered on extended voyages, such as ocean crossings or inshore when unsheltered from the wind and waves for several hundred nautical miles.
Category B – Offshore: Craft designed to operate in winds up to, and including, wind force 8* (34-40 knots/3946 mph) and in significant wave heights up to, and including, 4 meters (13 feet). Such conditions may be
encountered on offshore voyages of sufficient length or on coastal waters when unsheltered from the wind and
waves for several dozens of nautical miles. These conditions may also be experienced on inland seas of sufficient size for the wave height to be generated.
Category C: Craft designed to operate in winds up to, and including, wind force 6* (22-27 knots/25-31 mph) and
in wave heights up to, and including, 2 meters (7 feet). Such conditions may be encountered in exposed inland
waters, in estuaries, and in coastal waters in moderate weather conditions.
Category D: Craft designed to operate in winds up to, and including, wind force 4* (11-16 knots/13-18 mph) and
in wave heights up to, and including, 0.3 meters (1 foot) with occasional waves of 0.5 meters (2 feet) maximum
height. Such conditions may be encountered in sheltered inland waters and in coastal waters in fine weather.
* Wind force is based upon the Beaufort Scale.
For categories A, B, and C, the significant wave height is the average height of the highest one-third of the
waves, which approximately corresponds to the wave height estimated by an experienced observer. Some
waves will double this height.
The boats addressed in this manual are certified as follows:
BOAT
Lancer 20/Launch 22/Launch 25/Lancer Rumble
1–6
CATAGORY
C
Launch 28
B
Corsair 25 and 28
B
Chris-Craft
Introduction
Component Manufacturers
Chris-Craft uses numerous vendors in the manufacturer of their boats. Each major component comes with
an owner’s or operation manual which provides information on component operation, troubleshooting and
warnings.
Table 1-5 contains a list of vendors that provide components for Chris-Craft.
Table 1-5. Vendor Directory
Mercury Marine
Professional Mariner, LLC
W6250 W. Pioneer Road
PO Box 968
P.O. Box 1939
Rye, NH 03870
Battery Charger
Fond du Lac, WI 54936-1939
Phone: (603) 433-4440
Fax: (603) 433-4442
Phone: (Phone: (920) 929-5040
Fax: (Fax: (920) 929-5893
www.pmariner.com
Engines
Volvo Penta of the Americas,
Inc.
Rule Industries
Cape Ann Industrial Park
1300 Volvo Penta Drive
Gloucester, MA 01930
Bilge Pumps
Chesapeake, VA 23320-9860
Phone: (978) 281-0440
Fax: (978) 283-2619
Phone: (Phone: (757) 436-2800
Fax: (Fax: (757) 436-5150
www.rule-industries.com
www.volvo.com
SHURflo, LLC
Ameritex Technologies
5900 Katella Ave.
2111 58th Avenue East
Cypress, CA 90630
Bradenton, FL 34203
Canvas
Phone: (941) 751-6131
Fax: (941) 751-0791
Engine Blowers
www.shurflo.com
Uflex USA Inc.
Faria Marine Instruments
6442 Parkland Drive
P.O. Box 983
Electric/Hydraulic Hatch Sarasota, FL 34243
Ram
Phone: (941) 351-2628
Fax: (941) 360-9171
Chris-Craft
Phone: (562) 795-5200
Phone: (800) 854-3218
Fax: (562) 795-7564
www.ameritex-tech.com
Electronic Equipment
www.mercurymarine.com
Uncasville, CT 06382-0983
Gauges
Phone: (860) 848-9271
Fax: (860) 848-2704
www.uflexusa.com
www.faria-instruments.com
Raymarine
HK Research Corp.
Contact information is based
upon dealer and region. Visit
website for contact information.
P.O. Box 1809
Hickory, NC 28603
Gelcoat
Phone: (603) 881-5200
Fax: (603) 864-4756
Phone: (800) 334-5975
Fax: (828) 328-1721
www.raymarine.com
www.hkresearch.com
1–7
Introduction
Table 1-5. Vendor Directory (Continued)
Marine Products
International
Uflex USA Inc.
29603 Hall St.
6422 Parkland Drive
Solon, OH 44139
Hoses
Phone: (440) 519-1750
Toll Free: (800) 845-5255
Fax: (440) 519-1754
Sarasota, FL 34243
Throttle/Shift
Control and Cables Phone: (941) 351-2628
Fax: (941) 360-9171
www.uflexusa.com
www.marinehose.com
Refrigerator/Cooling
Unit
Indel Marine USA Inc.
Bennett Marine
3400 Gateway Drive, Unit #107
550 Jim Moran Blvd.
Pompano Beach, FL 33069
Phone: (945) 984-8448
Fax: (954) 979-2533
Deerfield Beach, FL 33442
Trim Tabs
www.indelmarine.com
Phone: (954) 427-1400
Fax: (954) 480-2897
www.bennetttrimtabs.com
SHURflo, LLC
Teleflex Marine
5900 Katella Ave.
1 Sierra Place
Cypress, CA 90630
Steering Helm Assembly Litchfield, IL 62056-3029
Water Pump
Phone: (562) 795-5200
Phone: (800) 854-3218
Fax: (562) 795-7564
www.teleflexmarine.com
www.shurflo.com
Ameritex Technologies
2111 58th Avenue East
Bradenton, FL 34203
Tristar Distributing
Phone: (941) 751-6131
Fax: (941) 751-0791
58263 Charlotte Ave
Stereo Components
Elkhart, IN 46515
www.ameritex-tech.com
Phone: (574)294-2684
(For additional contact numbers,
see the Ameritex website.)
www.tristardistributing.com
For: Lancer 20, LAUNCH 22,
and LANCER 22 RUMBLE)
Windshield
Taylor Made Systems New
York
93 South Boulevard
Teak Decking Systems
Gloversville, NY 12078
7061 15th Street East
Phone: (518) 773-0636
Fax: (518) 773-2919
Teak
Sarasota, FL 34243
(Cockpits, Swim
Phone: (941) 756-0600
Platforms, and Deck Rails)
Fax: (941) 756-0406
www.teakdecking.com
www.taylormarine.com
(For additional contact numbers
and plant addresses, see the
Taylormarine website.)
(For: LAUNCH 25, LAUNCH 28,
and CORSAIR 28)
1–8
Chris-Craft
CHAPTER 2
Safety and Operations
As the owner/operator of your Chris-Craft, it is your responsibility to be safety conscious at all times.
This includes, but is not limited to:
•
Know and understand the limitations of both yourself and your vessel.
•
Understand and follow the “rules
•
•
•
•
Understand the potential hazards of boating.
Deliberately stay out of weather conditions that exceed the operator’s capability.
Keeping your passenger’s safety in mind at all times.
Operate the vessel in a proper manner when encountering limited visibility, rough water, and other weather or
people induced factors.
Understanding how to administer first aid, including CPR.
Know how to treat hypothermia.
Be ready for emergencies.
•
•
•
of the road.”
This chapter addresses numerous safety and responsibility topics which you need to be familiar with. It is
not all-inclusive, but rather provides a starting point for your boating knowledge.
There are numerous WARNINGS, CAUTIONS, and NOTICES presented in this manual and the manufacturers’ supplied literature.
As the owner/operator, it is your responsibility to replace any label that becomes illegible. Replacement
labels may be obtained from Chris-Craft.
Chris-Craft
2–1
Safety and Operations
The safety signs and warnings in this manual conform to American Boat & Yacht Council Standard T-5,
Safety Signs and Labels. Each of the labels are illustrated below with an explanation of the hazard level.
This manual is not all inclusive, and does not constitute all of the
Warnings, Cautions, and Notices that should be recognized and
practiced. This manual does not incorporate all the safety practices
you should use in boating.
Immediate hazards that WILL result in severe personal injury or death if
the warning is ignored.
Hazards or unsafe practices that COULD result in severe personal injury
or death if the warning is ignored.
Hazards or unsafe practices that could result in injury, product, or property
damage if the warning is ignored.
Notice is used to notify people of installation, operation, or maintenance
information, which is important, but not hazard related.
2–2
Chris-Craft
Safety and Operations
The following symbols are used in conjunction with the Warning statements to indicate a hazardous condition exists and that precautions must be followed to prevent injury or death.
Explosion
The rapidly expanding symbol shows that the material may explode if subjected to high
temperature, sources of ignition, or high pressure.
Chemical or Hot Water Hazard
The symbol represents a hazard to skin. The appropriate type of gloves shall be worn to
protect skin.
Eye Protection
The symbol of a person wearing goggles indicates that the material will injure the eyes.
Fire
The fire symbol indicates that the material may ignite and cause burns.
Poison
The skull and crossbones symbol indicates the material is poisonous or a danger to life.
Vapor
The symbol of a human figure in a cloud shows that material vapors present a danger to
life or health.
Chris-Craft
2–3
Safety and Operations
Warning Placards and Labels
Each model of boat has warning placards and labels that you must become familiar with. These warnings
indicate a condition that, if not followed, may result in injury and/or damage to the boat.
If a warning placard/label becomes unreadable, Federal Law dictates that it must be replaced with a new
one. To obtain a replacement warning placard, contact Chris-Craft directly.
Figure 2-1. Placard – Discharge of Oil
Figure 2-2. Label – Unleaded Fuel Only
Figure 2-3. Label – Rumble Seat Hatch Cover
2–4
Chris-Craft
Safety and Operations
Figure 2-4. Label – Shock Hazards
Figure 2-5. Label – Electric Hatch
Figure 2-6. Label – Fire
Figure 2-7. Label – Trim Tab
Figure 2-8. Label – Fuel Vapors
Chris-Craft
2–5
Safety and Operations
Figure 2-9. Label – Leaking Fuel
Figure 2-10. Label – Ski Tow Fitting
Figure 2-11. Label – Gasoline Vapors
Figure 2-12. Label – Before Engine Start
Figure 2-13. Label – Propeller Danger
2–6
Chris-Craft
Safety and Operations
Figure 2-14. Warning Labels – Lancer 20
Chris-Craft
2–7
Safety and Operations
Figure 2-15. Warning Labels – Lancer 22 Rumble
2–8
Chris-Craft
Safety and Operations
Figure 2-16. Warning Labels – Launch 22
Chris-Craft
2–9
Safety and Operations
Figure 2-17. Warning Labels – Launch 25
2–10
Chris-Craft
Safety and Operations
Figure 2-18. Warning Labels – Corsair 25
Chris-Craft
2–11
Safety and Operations
Figure 2-19. Warning Labels – Launch 28
2–12
Chris-Craft
Safety and Operations
Figure 2-20. Warning Labels – Corsair 28
Chris-Craft
2–13
Safety and Operations
Boating Safety
Operating your Chris-Craft without proper experience and/or without
full understanding of the boat and its systems can cause serious
injury. The owner/operator must read and understand this manual
and the manufacturers’ manuals supplied with it before operating
the vessel. Do not operate the boat if existing or anticipated conditions are beyond your level of experience.
Boating safety cannot be overemphasized. Understand the rules of the road and operate your vessel in a
safe manner. Understand the potential hazards of boating. Be prepared for emergencies.
For additional information contact the United States Power Squadron and the United States Coast Guard
Auxiliary at:
United States Coast Guard Auxiliary Flotilla
800-336-BOAT(2628)
As the owner/operator, it is your responsibility to become completely familiar with the Chris-Craft before
operating the vessel. Read and understand this manual and various manufacturers’ manuals accompanying
this manual.
If you have any questions regarding your Chris-Craft or the factory installed equipment, contact your
dealer or Chris-Craft at (941) 351-4900.
2–14
Chris-Craft
Safety and Operations
General Safety Precautions
Boating is a great recreation activity. However, emergencies on the water do happen and as the owner/
operator it is your responsibility to be prepared for them.
This safety list is general in nature and not all-inclusive. Common sense is always the best route to follow
when boating.
•
•
•
•
•
•
•
Mechanical safety.
– When working around operating machinery, such as the engines, always wear hearing protection. Eye
protection is always a good idea.
–
Understand operating machinery becomes hot. Wear proper protection such as gloves.
–
Take all proper precautions when working around moving parts. Wear tight fitting clothes as loose
clothing may get caught in moving parts.
–
Beware of toxic gases. What you don’t see and/or smell can kill you.
–
Understand all the safety precautions associated with mechanical maintenance.
Know the limits.
– Understand your own limits.
–
Understand the limits of your boat. Don’t overload the vessel. Distribute weight evenly.
–
Follow your checklists to ensure you don’t miss an important item.
If you don’t know how, learn to swim. Many Red Cross chapters offer swim courses that you can take advantage
of.
Keep the boat free of oil and grease. A fall on a slippery deck or ladder can have very serious consequences.
When cruising, monitor the weather. Weather at sea can change rapidly. Be prepared.
Be ready for emergencies. This chapter is a good starting point for understanding how to handle common emergencies.
Carry the proper safety equipment. Carry a set of tools for emergency repairs. Keep extra batteries for flashlights and other battery-operated equipment.
Best Defense – Common Sense.
Chris-Craft
2–15
Safety and Operations
Boating Courses
Operating a boat requires a greater skill than operating a car or truck. To enjoy a pleasurable and safe boating experience you must acquire these skills. Some recommendations are:
•
•
•
Take a Coast Guard, United States Power Squadron boating safety course. For information call: 800-336-BOAT
(2628), or
Take a boating safety course offered by local colleges or boating clubs.
Obtain “hands-on” training from qualified personnel on how to operate your vessel.
Boating courses help you to gain knowledge and experience in such areas as, but is not limited to: navigation, seamanship, rules of the road, weather, safety at sea, survival, first aid, communications, and pollution control.
Basic Seamanship
As the owner/operator it is your responsibility to learn the “rules-of-the-road” and understand basic seamanship rules and standards, as only rudimentary information is repeated
here.
In practical terms boats that are less maneuverable have the right-of-way over more agile vessels. In general a power-driven vessel must give way to the following:
•
A sailing vessel under sail only (engine(s) not running).
– When the sailboat is under engine power, it is considered a power-driven vessel.
•
•
Vessels propelled by oars or paddles.
A commercial fishing vessel engaged in fishing.
– This does not apply to sportfishers or party boats.
•
Vessels with restricted maneuverability, such as:
– Tow boats.
•
–
A vessel engaged in dredging activities or work that restricts it to a specific area.
–
A vessel engaged in the transfer of supplies from one vessel to another.
A vessel not under command, broken down.
Meeting Situations
When meeting in various situations the give-way vessel must take action to avoid a collision and maintain
a safe distance. The stand-on vessel should maintain course and speed.
If it becomes apparent that a collision is possible and the give-way vessel is not taking corrective action, it is your responsibility to take action and avoid a collision.
Meeting Head-On
When two boats meet head-on neither boat has the right-of-way. Both boats should reduce speed and pass
port-to-port (Figure 2-21).
2–16
Chris-Craft
Safety and Operations
Figure 2-21. Passing Port-to-Port
If it is not possible to pass port-to-port due to some obstruction or other boat traffic, you should sound two
short blasts to indicate that you are intending to pass starboard-to-starboard (Figure 2-22). Ensure the other
boat understands your intentions before proceeding.
Figure 2-22. Passing Starboard-to-Starboard
Crossing
When engaged in a crossing situation, where two vessels are approaching at right angles (or close to) and a
risk of collision exists, the vessel on the right is the stand-on vessel and must hold course and speed. The
give-way vessel must maneuver in such a way as to keep clear of the stand-on vessel. The give-way vessel
must pass to the stern of the stand-on vessel. The give-way vessel shall slow, stop, or reverse to allow the
stand-on vessel to pass.
Overtaking
If one boat wishes to overtake (pass) another boat, the vessel astern must initiate the signal indicating his
desire to pass. The vessel being passed (overtaken) is the stand-on vessel. The boat doing the passing
(overtaking) is the give-way vessel (Figure 2-23).
Figure 2-23. Overtaking
To pass on the port side you should signal two (2) short blasts. To pass on the starboard side you should
signal one (1) short blast.
Chris-Craft
2–17
Safety and Operations
Visual Obstructions
When piloting the boat, the operators vision may be obstructed by high trim angles and the sea state. Other
factors that can affect operator vision include, but may not be limited to:
2–18
•
Acceleration
•
Obstruction in Field of Vision
•
Darkness
•
Propulsion-Engine Trim Angles
•
Fog
•
Rain and Weather
•
Interior Lights
•
Speed
•
Load Distribution
•
Obstruction in Field of Vision
Chris-Craft
Safety and Operations
Propeller Safety
The propeller is the mechanical component that drives your boat through the water and as a moving piece
of equipment is dangerous. As the owner/operator, you are required to understand propeller safety and the
steps necessary to prevent injuries to you and your passengers.
At a minimum:
•
•
•
•
•
•
RECOGNIZE that propellers are dangerous and can cause injury and/or death.
ALWAYS stop the engine(s) before entering or exiting the water. Ensure the propeller(s) has come to a complete stop.
NEVER start the engine(s) when someone is near and/or around the propeller(s). Injury to the individual may
result.
ALWAYS supervise individuals who are swimming near and/or around the propeller(s). Ensure they understand
the dangers of propellers.
NEVER work on propeller while the engine(s) is running.
NEVER attempt to clear debris from the engine(s) water intake while the motor is running.
The above is the minimum steps you should take to prevent propeller strikes and injury. For additional
information contact a qualified safety boating program and/or the U.S. Coast Guard.
As the owner/operator, you are responsible for disseminating propeller safety to your passengers and ensuring they understand and follow all propeller safety procedures.
Chris-Craft
2–19
Safety and Operations
Boating Regulations and Requirements
In the United States, Federal law mandates that as the owner/operator you have a responsibility to yourself
and your passengers to always operate your vessel in a safe manner. As the owner/operator, you should
always check the regulatory procedures and/or requirements for the country of registration as regulations
and responsibilities may changed from country to country.
As the owner/operator, you are responsible for any documentation or registration required. All undocumented vessels equipped with propulsion machinery must be registered in the State or country of principal
use. A certificate of number is issued upon registering the vessel. These numbers must be displayed on
your vessel. The owner/operator of a vessel must carry a valid certificate whenever the vessel is in use. In
the United States if the vessel is moved to a new State of principal use, the certificate is valid for 60 days.
Some states require all vessels to be numbered. Requirements in other countries may vary.
Some vessels may be documented. The certificate of documentation MUST be on board a documented
vessel at all times.
In the United States further questions may be directed to the United States Coast Guard Boating Safety
Hotline.
U.S. Coast Guard Boating Safety Hotline
The U.S. Coast Guard Boating Safety Hotline is 800-368-5647.
Call Toll-Free for information regarding:
•
•
•
•
Information on boating safety recalls.
To comment on U.S.C.G. boarding procedures.
For answers to boating safety questions.
For boating safety literature.
Supplemental Federal, State or Local Regulations
It is the owner/operator’s responsibility to be aware of any other Federal, State or local regulations that
may be in effect. Examples include, but are not limited to:
Discharge of Oil
The Federal Water Pollution Control Act prohibits the discharge of oil or oily waste into or
upon the navigable waters of the United States or the waters of the contiguous zone if
such discharge causes a film or sheen upon or discoloration of the surface of the water or
causes a sludge or emulsion beneath the surface of the water. Violators are subject to a
penalty of $5000.
Solid Waste Disposal
(Marpol Treaty)
The Act to Prevent Pollution from Ships places limitations on the discharge of garbage
from vessels. It is illegal to dump plastic trash anywhere in the ocean or navigable waters
of the United States, including the Great Lakes. The discharge of other types of garbage is
permitted outside of specific distance offshore as determined by the nature of that
garbage. See Federal Requirements and Safety Tips for Recreational Boats for more
detail.
2–20
Chris-Craft
Safety and Operations
Other Waste
The Refuse Act of 1899 prohibits throwing discharging or depositing any refuse matter of
any kind (including trash, garbage, oil and other liquid pollutants) into the waters of the
United States.
Marine Sanitation
All recreational boats with installed toilet facilities must have an operable marine sanitation
device (MSD) aboard. Vessels 65 feet and under may use a Type I, II, or III MSD. All
installed MSD's must be Coast Guard certified. The Holding Tank installed in the ChrisCraft is certified by definition under the regulations and is not specifically labeled.
Speed
Local speed laws are often posted to prevent wake damage to shore side facilities, to slow
boaters in crowded or confined situations, and to preserve wildlife and wildlife habitats.
Penalties for violations are often very high.
Wake
No wake zones are usually posted to prevent damage to shore side facilities. It is the
operator's responsibility to operate the boat at a speed that does not produce a damaging
wake, even if the speed is below a posted speed limit.
Alcohol and Drugs
Operating your Chris-Craft under the influence of alcohol and/or
drugs may cause serious injury. Do not drink alcohol and/or take
drugs and operate the vessel.
It is the responsibility of the owner/operator to ensure that the vessel operator is not under the influence of
drugs and/or alcohol. In the United States, boating while intoxicated (BWI) became a Federal offense January 13, 1988. If the Blood Alcohol Content (BAC) is 0.10% (0.08% in some States) or higher for operators of recreational vessels being used only for pleasure, violators are subject to a civil penalty not to
exceed $1000 or criminal penalty not to exceed $5000 or both. Other State or local penalties may apply.
Accident Reporting
In the United States, all boating accidents must be reported by the operator or owner of the vessel to the
proper marine law enforcement authority for the State in which the accident occurred.
Accidents involving more then $500 damage or complete loss of the vessel must have a formal report filed
within 10 days. Accidents involving death or disappearance must be reported immediately. Accidents
involving injury requiring more than first aid must have a report filed within 48 hours.
Chris-Craft
2–21
Safety and Operations
If you need further information regarding accident reporting, please call:
United States Coast Guard Boating Safety Hotline
800-368-5647
It is the owner/operator’s responsibility to determine the regulations in effect in areas outside the United
States.
Rendering Assistance
The master or person in charge of a vessel is obligated by law to provide assistance that can be safely provided to any individual or vessel in distress, as long as his vessel is not endangered in the process. The
master or person in charge is subject to a fine and/or imprisonment for failure to do so (CFR Title 46).
Vessel Maintenance
As the owner/operator, you are responsible for keeping your vessel in a safe operating condition. Regularly
scheduled maintenance is mandatory for this to occur.
Load Capacity
Loading and capacity refers to the weight of:
•
•
•
•
People
Fuel
Gear
Any item carried aboard the boat.
When loading the boat keep the following in mind:
•
•
Overloading violates existing regulations. NEVER carry more weight than authorized for the class of boat.
Improper loading and/or distribution of weight is a significant cause of accidents.
Capacity limits and weight distribution apply to moderate weather conditions. If the weather changes and
seas become rough, the load distribution of the boat will affect its handling characteristics.
For additional information on load capacities and weight distribution, refer to a good boating course and/or
the U.S. Coast Guard.
As the owner/operator, you are responsible for the safe loading and weight distribution of
your boat.
2–22
Chris-Craft
Safety and Operations
Safety Equipment
In the United States the operator of a vessel is responsible for the minimum safety equipment required by
the U.S. Coast Guard. Safety equipment should be maintained on a regular basis and must be stowed where
it is accessible in a reasonable amount of time in an emergency. Some safety equipment must be Coast
Guard approved. “Coast Guard Approved Equipment” has been determined to be in compliance with
USCG specifications and regulations relating to performance, construction or materials.
As the owner/operator, you should always check the safety procedures and/or requirements for the country
of registration as regulations and responsibilities may changed from country to country.
A complete list of required equipment, Federal rules and regulations and other valuable links can be found
on the United States Coast Guard Boating Safety web page: www.uscgboating.org
A Quick Reference Chart of the Federal Requirements for recreational boats can be found at:
http://www.uscgboating.org/safety/fedreqs/equ_refchart.htm
Read and understand all pamphlets and brochures supplied with safety equipment. Become familiar with
how the equipment operates and stow all safety equipment properly.
At a minimum you should have the following safety equipment available (Table 2-1):
Table 2-1. Minimum Required Safety Equipment
Vessel Length (in Feet)
Equipment
16–25
26–39
Requirement
(a) One Type I, II, III, or V wearable PFD for each
person on board. (USCG approved)
Life Jackets (PFDs)
(b) In addition to paragraph (a), must carry One
Type IV (throwable) PFD.
(a) One electric distress light or Three combination
(day/night) red flares. (Note: only required to be
carried on board when operating between sunset and sunrise.)
Visual Distress Signal (VDS)
(b) One orange distress flag and One electric distress light - or -Three hand-held or floating
orange smoke signals and One electric distress
light - or - Three combination (day/night) red
flares: hand-held, meteor or parachute type.
(a) One B-I (when enclosed compartment)
Fire Extinguishers
(b) One B-II or Two B-I. (Note: Fixed system equals
One B-I.)
(c) One B-II and One B-I or Three B-I. (Note: Fixed
system equals One B-I or Two B-II.)
Backfire Flame Arrestor
Required on all gasoline engines except
outboard motors.
Navigation Lights
Required to be displayed from sunset to
sunrise and in or near areas of reduced
visibility.
Table courtesy of the U.S. Coast Guard.
Chris-Craft
2–23
Safety and Operations
Personal Flotation Devices (PFDs)
Federal regulations require that you have at least one Coast Guard-approved Personal Flotation Device
(PFD) for each occupant in a recreational boat. All PFDs must be in serviceable condition, readily accessible, and legibly marked with the Coast Guard approval number. Each PFD must be of the appropriate type
and size for each individual occupying the boat.
The Coast Guard recommends, and many states require, wearing the appropriate PFD when:
•
•
•
•
Water-skiing and other towed activities.
While operating personal watercraft (PWC).
During white water boating activities.
While sailboarding (under Federal law sailboards are not boats).
Laws governing the use of a particular type of PFD for a particular activity varies from state-to-state. Some
states require that children wear a PFD at all times. For clarification on any state requirement, check with
the state boating safety officials.
There are three kinds of PFDs: Foam, Inflatable, and Hybrid.
Within these three kinds there are five classes, known as Types, of PFDs, four wearable and one throwable.
Only Type I is designed to turn an unconscious person’s face upward, out of the water.
The best PFD is the one that you wear. When boating always wear your PFD.
2–24
Chris-Craft
Safety and Operations
Types of PFDs
There are five types of PFDs:
Table 2-2. Types of PFDs
Type
Description
Illustration
Offshore:
I
Provides most buoyancy. Designed for remote or rough waters where
rescue may take awhile. Keeps head out of water in face-up position.
Comes in two sizes: adult and child.
Near-Shore:
II
Intended for calm and inland waters where rescue may be quick. May
turn unconscious wearer face-up. Not as efficient as Type I.
Flotation Aids:
III
Vest or full-sleeved jacket style. Intended for calm waters. Not recommended for rough waters as they may not keep individual face-up. Generally used for water sports. Most comfortable for continuous wear. Some
Type III’s are designed to inflate when you enter the water.
Throwable Devices:
IV
Cushion, horseshoe, or ring buoy style. Designed to be thrown to someone in the water. Not designed as a personal flotation device that can be
constantly worn. Should be attached to a polypropylene rope. For emergency use only.
Special Use Device:
V
Designed for specific activities such as kayaking or water skiing. Varieties include deck suits, work vests, board sailing vests, and hybrid types.
If counted as a minimum PFD requirement, it must be worn and used in
accordance with their label.
Hybrid Inflatable:
Least bulky of all PFD types. Has both foam and an inflatable chamber.
Performance equal to Type I, II, or III PFDs when inflated. To be acceptable, hybrid PFDs must be worn when underway.
Chris-Craft
2–25
Safety and Operations
Foam Class PFDs
Foam type PFDs are inherently buoyant and are used for:
•
•
Adult, Youth, Child, and Infants
Swimmers, poor swimmers, and non-swimmers
Table 2-3. PFD Minimum Buoyancy Requirements – Foam
Wearable Size
Type
Inherent Buoyancy (Foam)
Adult
I
II & III
V
22 pounds
15.5 pounds
15.5 to 22 pounds
Youth
II & III
V
11 pounds
11 to 15.5 pounds
Child and Infant
II
7 pounds
IV
20 pounds
16.5 & 32 pounds
Throwable:
Cushion
Ring Buoy
The throwable PFD is only available in the Foam class.
Inflatable Class PFDs
The inflatable PFD may be more comfortable to wear but may not be used by children under 16 years of
age. Each inflatable PFD must have an operational gas cylinder and the individual must be knowledgeable
in its use and the condition of the PFD. Inflatable PFDs may not satisfy the requirement to carry PFDs, as
established by Federal Regulations.
Table 2-4. PFD Minimum Buoyancy Requirements – Inflatable
Wearable Size
Type
Inherent Buoyancy
Adult
I & II
III
V
34 pounds
22.5 pounds
22.5 to 34 pounds
Hybrid Class PFDs
Hybrid PFDs are both foam filled and are inflatable.
Table 2-5. PFD Minimum Buoyancy Requirements – Hybrid
Wearable Size
Type
Inherent Buoyancy
Inflated Total Buoyancy
Adult
II & III
V
10 pounds
7.5 pounds
22 pounds
22 pounds
Youth
II & III
V
9 pounds
7.5 pounds
15 pounds
15 pounds
Child
II
7 pounds
12 pounds
2–26
Chris-Craft
Safety and Operations
PFD Considerations
To obtain the best benefit from a PFD:
•
•
•
•
•
Children, non and poor swimmers should wear a PFD at all times.
Keep all PFDs in an accessible location.
Ensure the PFD comfortably fits the individual, both in and out of the water.
Practice using the PFD in the water. This will provide insight and confidence in its use.
Teach all children how to put on and wear the PFD.
PFD Care:
•
•
•
•
•
Do not store in plastic bags, locked in a compartment, or stowed beneath other gear.
Do not store when wet. Allow to dry thoroughly. Do not use a radiator or heater to dry.
Store in a well-ventilated area.
Keep PFDs away from sharp objects. Do not puncture.
Inspect on a regular basis. Replace any damaged PFD. Ensure inflatable PFDs have no leaks.
Chris-Craft
2–27
Safety and Operations
Additional Equipment
Safety equipment recommended by the Coast Guard should be considered the absolute minimum requirements. Your inventory of safety related devices depends on where you operate your boat and your personal
desired degree of self-sufficiency. Other equipment to consider includes, but is not limited to:
Anchor and Sea Anchor
Hand Pump
Binoculars
Spare Fuel
Boat hook
Sunglasses
Emergency Position Indicating Radio beacon (EPIRB)
Throwable device
Extra clothing
Tool kit
First Aid Kit
VHF Radio
Flashlights
Visual Distress Signals
Food and water
Whistle or bell (sound device)
Tools:
Adjustable wrench
Lubricating oil
Duct tape
Pliers (various types)
Electricians’ tape
Prop wrench
Hammer
Screwdrivers (various sizes)
Jackknife/Pocket knife
Spark plug wrench
Spare Parts:
Extra bulbs
Spare propeller
Extra drain plug
Spare wire
Extra fuses
Spark plugs
Extra prop nut/washer
2–28
Chris-Craft
Safety and Operations
Visual Distress Signals
As the owner/operator, you are responsible for any visual distress requirements (signals) that you may be
required to carry. It is the owner/operator’s responsibility to provide proper storage, understand how to
handle, and know how to dispose of these devices. These requirements can be found at:
http://www.uscgboating.org/safety/fedreqs/equ_vds.htm
There are two types of Visual Distress Signals in use:
•
•
Pyrotechnic type
Non-Pyrotechnic type
Table 2-6 lists the types of Visual Distress Signals available which are Coast Guard approved.
Table 2-6. Visual Distress Signals
Pyrotechnic Visual Distress Signals
Description
Use
CG Approval Number
Hand-Held Flare
Day/Night
160.021
Floating Orange Smoke
Day Only
160.022
Pistol Parachute Red Flare
Day/Night
160.024
Hand-Held Parachute Red Flare
Day/Night
160.036
Hand-Held Orange Smoke
Day Only
160.037
Floating Orange Smoke
Day Only
160.057
Red Aerial Pyrotechnic Flare
Day/Night
160.066
Non-Pyrotechnic Visual Distress Signals
Distress Flag
Day Only
160.072
Electric SOS Distress Light
Night Only
161.013
Storage
Store all VDS devices in a cool, dry place. Ensure they are protected from children, rain, sea spray, and
high humidity. By law these devices must be readily accessible, where they can be reach quickly regardless
of the operating conditions.
Disposal
Pyrotechnics are valid for 42 months from date of manufacture. Each pyrotechnic has a date stamp indicating its expiration date. Any VDS that is damaged or wet may not perform in the intended manner, posing a
hazard to the user and must be disposed of. To dispose of expired or damaged pyrotechnics, contact the
nearest law enforcement agency or fire department.
Chris-Craft
2–29
Safety and Operations
Emergencies
As the owner/operator of your vessel, you are responsible to know how to react to various emergencies.
This section lists a few of the emergencies you may come across, but is not all-inclusive of the type of incidents you may encounter.
Medical
Medical emergencies, both major and minor, are rare among boaters but they do occur, and help is not
always immediately available. Depending upon your situation and circumstances, at least two people
should be CPR certified and have taken a first aid course. Your vessel should also be equipped with a quality first aid kit.
Some of the major medical emergencies you could encounter consist of, but are not limited to:
•
•
•
•
•
Drowning
Near drowning
Hypothermia
Carbon Monoxide poisoning
Trauma from falling
Some of the minor emergencies you could encounter consist of, but are not limited to:
•
•
•
•
•
Seasickness
Heat illness
Sunburns
Skin burns (touching hot machinery)
Minor fall (bruises, tissue injury)
Use caution when swimming where jellyfish are in concentration. Never swim where sewage contamination exists.
Getting Help
When at sea do not expect to receive help immediately if you have a medical emergency. You must rely
upon yourself and your ability. Be prepared. Obtain and keep aboard, a good, quality book on first aid.
Obtain basic first aid skills. Learning CPR is always a good idea for both sea and shore activities. CPR
courses are available at your local school, hospital or Red Cross.
Being prepared for medical emergencies is always the best course of action to take.
2–30
Chris-Craft
Safety and Operations
Carbon Monoxide
Carbon Monoxide is an odorless, colorless, tasteless gas. Carbon
Monoxide can kill you. Ensure there is adequate ventilation when
running engines, generators, and other fuel burning equipment.
When the vessel is docked, anchored, or moored, open all doors,
windows, and hatches to distribute fresh air and provide adequate
air circulation. If Carbon Monoxide poisoning is suspected, obtain
medical attention immediately.
Carbon Monoxide (CO) is produced when a carbon-based fuel – gasoline, diesel, propane, charcoal, oil,
etc. – burns. On a boat, sources of CO may include, but is not limited to:
•
Engines
•
Generators
•
Barbecues
•
Portable space heaters
It is the owner/operator’s responsibility to recognize CO poisoning. Symptoms include, but may not be
limited to:
•
Dizziness
•
Weakness
•
Irritated eyes
•
Ears ringing
•
Headaches
•
Nausea
• Unconsciousness
Chris-Craft
2–31
Safety and Operations
Early symptoms of CO poisoning are often confused with seasickness or intoxication, thus those individuals affected may not receive adequate medical attention. As the owner/operator, you must be aware of Carbon Monoxide concentrations and its effects on passengers and crew. Dangerous concentrations of Carbon
Monoxide may be present if:
•
•
•
•
•
•
•
•
•
There is leakage in the engine exhaust system.
There is leakage in a generator exhaust system.
There is insufficient fresh air circulation.
Fumes move from the aft section of the vessel into the cabin and cockpit area.
Exhaust gas becomes trapped in enclosed places.
Exhaust outlets become blocked.
A back draft or “station wagon effect” occurs.
Your vessel is situated next to, and receives exhaust from, the neighboring vessel.
Your vessel is slow, idling, or stopped.
Carbon Monoxide is colorless, odorless, and tasteless.
To protect yourself and passengers from CO poisoning:
•
•
•
•
•
•
•
Maintain sufficient ventilation at all times.
Operate all fuel-burning appliances in a location where fresh air can circulate.
Keep all passengers away from exhaust outlets.
If fumes are detected, CO is present. Take steps to ventilate the area.
Symptoms of seasickness could be CO poisoning. Get the affected person to fresh air. Seek medical attention,
unless you are positive it is NOT Carbon Monoxide poisoning.
Review the Coast Guard pamphlet included with this documentation.
Get a vessel safety check.
Current and archived carbon monoxide alerts may be found at:
http://www.uscgboating.org/alerts/alertsview.aspx?id=8
2–32
Chris-Craft
Safety and Operations
Man Overboard
If a person falls overboard, you may have only minutes to perform a successful rescue.
This manual cannot address every man overboard situation, therefore it is incumbent upon the owner/operator to learn man overboard rescue techniques. Practicing man overboard techniques is an excellent way to
prepare for an actual emergency.
Water temperature is a major component in a rescue attempt due to the danger of hypothermia. If the water
temperature is below 21° C (70° F), hypothermia can quickly set in, incapacitate, and kill an individual.
Cold water removes body heat 25 times faster than air, therefore it is imperative to rescue the victim as
quickly as possible.
Water rescue consists of three phases:
•
•
•
Returning to the victim
Making contact with the victim
Getting the victim back aboard the vessel
If an individual falls overboard it is imperative to locate and return to the victim. If at night, use all available light sources to locate the individual. Locating and returning to the individual include, but may not be
limited to:
1.
Make everyone aware of the incident.
2.
Visually locate and keep the victim in sight.
3.
Slow the vessel when heading towards the victim.
4.
When in range, throw a life preserver, even if the victim is wearing a flotation device. This provides and serves
as another marker.
Employ the following steps when making contact with the victim:
1.
Use a circling procedure and attempt the approach by heading into the wind or into the waves. This allows the
victim to drift towards the boat.
2.
Maintain a constant visual of the victim.
3.
When close to the victim, alongside, stop the engine to prevent the propeller from windmilling.
Chris-Craft
2–33
Safety and Operations
Do not enter the water except as a last resort. If you must enter the
water, ensure you wear a personal flotation device (PFD) and a
safety line attached to the vessel. Use extra protection/precautions if
the water temperature is cold.
When retrieving the victim:
•
•
Attempt to reach the victim with a pole, rope, or life preserver.
Help the individual back into the vessel.
– It is very difficult to pull a victim back into the boat via the sides. The most effective recovery is at the
swim platform located at the stern.
•
If the person is injured, going into the water may be the only recourse. Wear a personal flotation device (PFD)
and attach yourself to the vessel with a rope.
Handle the victim with care. Be aware of spinal injuries.
If required, treat the victim for hypothermia.
If required, obtain medical attention as rapidly as possible.
•
•
•
2–34
Chris-Craft
Safety and Operations
Fire
When fighting fires:
•
•
•
•
•
If possible, throw burning materials over the side.
Never use water, or water-type extinguishers on gasoline, oil, grease, or electrical fire. Water spreads the
flames and acts as a conductor for electricity.
Pull the safety pin and aim the fire extinguisher at the base of the flames. Squeeze the handle and use a left-toright sweeping motion to extinguish the flames.
Signal for help using an appropriate signaling device.
If required, abandon ship, but only as a last resort.
To help reduce the possibility of fire, store flammable materials in an approved shipboard
storage container.
Classes of Fires
In the United States there are four classes of fire of which you should be familiar with. They are:
•
•
•
•
Class A – Wood, paper, textiles, trash, and other ordinary combustibles
Class B – Flammable liquids, oils, solvents, paints, grease, fuels, etc.
Class C – Electrical, energized electrical equipment
Class D – Combustible metals (magnesium, titanium, potassium, etc.)
Dry Powder type extinguishers are used on Class D (combustible
metals) type fires. This type of fire is rare on a boat of this type and
therefore not discussed.
Compliant Fire Extinguishers
Fire fighting extinguishers have been developed to combat the various classes of fires. These are:
•
•
•
•
Water
Carbon Dioxide
Multipurpose Dry Chemical
Foam
Some extinguishers are classified as multipurpose, meaning they can be used on more than one type of fire.
For this reason you should equip the vessel with at least two different types of fire extinguishers, one for
general purpose (such as Carbon Dioxide) and another for fuel (such as Multipurpose Dry Chemical or
Foam). Table 2-7 indicates which type of extinguisher works best for which class of fire.
Chris-Craft
2–35
Safety and Operations
Table 2-7. Class of Fire and Extinguisher Types
Extinguisher Type
Class of Fire
Water
Carbon Dioxide
Multipurpose Dry
Chemical
Foam
Best
Good
Good
Good
B
Good
Best
Best
C
Best
A
It is essential that you have, maintain, and regularly inspect fire extinguishers. As the owner/operator, it is
imperative that you learn the differences between the different types of fires that can occur aboard your
boat. With this knowledge you can quickly extinguish fires with the proper type of fire extinguisher.
Required Number of Portable Fire Extinguishers
The overall length of the boat determines the minimum number of portable fire extinguishers required.
Also, vessels with an approved fixed fire fighting system require fewer extinguishers, as explained in Table
2-8.
Table 2-8. Minimum Portable Fire Extinguishers Required
Vessel Length
Less than 7.9m (26 ft)
7.9m (26 ft) to less than 12.2m (40
ft)
No Fixed System
((Qty) and Type)
With Approved Fixed System
((Qty) and Type)
(1) B-I
0
(2) B-I or (1) B-II
(1) B-I
Fire Extinguisher Maintenance and Service
The boat owner/operator shall:
•
•
•
Have fire-fighting equipment checked at the intervals indicated on the equipment.
Replace portable fire extinguishers, if expired or discharged, by devices of identical fire fighting capacity.
Have fixed system systems refilled or replaced when expired or discharged.
Any fire extinguisher that does not satisfy the maintenance requirements must be replaced, or recharged. If
recharging a fire extinguisher, be sure to use a qualified fire extinguisher servicing company.
2–36
Chris-Craft
Safety and Operations
Safety at Sea
Hitting underwater objects, or boating in dangerous conditions can
cause serious injury or death. Always know where you are going,
where the hazards are, and avoid them. If you find yourself in
uncharted waters, boat very slowly and post a lookout.
As the owner/operator, it is your responsibility to know where obstructions are, recognize shallow water,
and avoid unnavigable conditions such as dangerous currents. To achieve this you must be familiar with,
and know how to read, nautical charts. Nautical charts, and navigation data, are available from the National
Oceanic and Atmospheric Administration (NOAA – web address: www.noaa.gov).
As the owner/operator, you must observe and understand all navigational aids, be aware of tide times
(where appropriate), and acquaint yourself with new technologies that can help you navigate your vessel
safely.
If you find yourself in unfamiliar waters, and without knowledge of the hazards, proceed slowly and post a
lookout – someone to watch for hazards.
Mechanical Failures
If your vessel breaks down due to mechanical failure, perform the following procedures:
1.
If necessary, set the anchor or sea anchor to avoid drifting.
2.
Investigate and troubleshoot the cause of the breakdown.
3.
If available, refer to the specific systems manual for additional information.
4.
If possible, correct the problem.
5.
If necessary, seek assistance from any nearby vessels and/or signal for help using an appropriate signaling
device.
If you experience propulsion failure some items you may initially investigate are (not all inclusive):
1.
Check fuel level.
2.
Check for clogged fuel filters.
3.
Check for a plugged tank vent.
4.
Check for obstructions in the fuel lines.
Chris-Craft
2–37
Safety and Operations
Shallow Water Dangers
The minimum depth of water you are able to run your boat is determined by several factors. The draft is
affected by the loading of the boat including the fore and aft trim, the propeller size and even by the salinity of the water. When your boat is fully loaded, measure the maximum depth from the waterline to the
deepest point and note the number. It is the owner/operator’s responsibility to maintain a comfortable margin over the bottom.
Should you run aground, visually check for water intrusion. If serious damage has occurred, it may be prudent to stay aground until the damage can be assessed and controlled. After re-floating, check the running
gear for damage and feel for any unusual vibration. Perform a thorough inspection after trailering the boat.
Running Aground
Engine cooling intakes are located under the boat. Ensure intakes
are free and clear of debris. Do not start the engines if intakes are
plugged.
If you encounter shallow water and run aground:
1.
Immediately place the transmissions in neutral.
2.
Ensure everyone has, and is wearing, a PFD.
3.
Perform a head count. Confirm everyone is present and accounted for.
4.
If possible, inspect the hull, propulsion, and steering systems for damage.
5.
Inspect for flooding and/or leaks.
6.
If the vessel is undamaged, decide on an appropriate course of action:
– Determine the water depth and the type of obstruction you are lodged on: sand, mud, rock, etc.
– Is it possible to dislodge the vessel?
– Do you need to lighten the load by removing passengers or equipment?
– Is it possible to push the vessel off the obstruction?
– Is it possible to use reverse thrust to free the craft?
– Determine tide, current, and wind velocity. Will they help or hurt your situation?
7.
If necessary, seek assistance from any nearby vessels and/or signal for help using an appropriate signaling
device.
8.
If damaged it may be safer to leave the vessel aground and seek professional help.
2–38
Chris-Craft
Safety and Operations
Flooding, Sinking, and Capsizing
If the vessel encounters flooding, swamping, or is in danger of capsizing you should, as a general measure:
1.
Ensure everyone has, and is wearing, a PFD.
2.
Perform a head count. Confirm everyone is present and accounted for.
3.
Seek assistance from any nearby vessels.
If your vessel encounters flooding and/or hull leaks, in addition to the general measures:
1.
Bring the boat to a complete stop.
2.
Identify the source of the leak/flooding.
3.
If possible stop or reduce leaking by using plugs, a hull patch kit, towels, rags, or any other available material.
4.
Engage the bilge pump(s).
5.
Assist the bilge pump(s) by removing the water with buckets or some other suitable device.
6.
Abandon the vessel only as a last resort.
If the boat is in danger of capsizing, or has capsized, in addition to the general measures:
1.
If you are far from shore and the vessel is not fully submerged, stay with it.
2.
Climb onto the overturned hull to remove you and your passengers from the water. This helps you retain body
heat and reduces the possibility of hypothermia.
3.
Signal for help with an appropriate signaling device.
Collisions
If your vessel is involved in a collision and depending upon the severity of the collision, perform the following tasks:
•
•
•
•
•
•
Ensure everyone has, and is wearing, a PFD.
Perform a head count. Confirm everyone is present and accounted for.
If injuries have occurred render appropriate first aid.
Inspect the boat for damage, flooding, and/or leakage. If necessary engage the bilge pump(s).
Attempt to stop any leaks by using plugs, a hull patch kit, towels, rags, or other available material.
If necessary, seek assistance from any nearby vessels and/or signal for help using an appropriate signaling
device.
If you are involved in a collision, you are required to file an accident report. Contact the nearest state
enforcement agency or Coast Guard office. If boating outside territorial waters, consult the nation you are
visiting for accident reporting requirements.
Chris-Craft
2–39
Safety and Operations
Lightning Precautions
A vessel at sea may be susceptible to lightning strikes. If the vessel is struck by lightning check for injuries
and apply any first aid as may be required. Also:
•
•
Check all electrical components, including compasses to determine if damage or a change in calibration has
occurred.
Check the vessel for physical damage, system integrity, and continuity to ground.
If caught in a lightning storm, the minimum precautions that shall be applied are:
•
•
•
•
All occupants shall remain inside the boat.
Occupants shall not enter the water. Arms and legs shall not dangle in the water.
Occupants shall refrain from making contact with components in such a way as to become an electrical bridge
between such items.
Avoid contact with any metal components that could conduct electrical current.
It is the owner/operator’s responsibility to become familiar with the dangers of lightning and learn all the
precautions necessary to protect the crew, passengers, and vessel in the event of a lightning storm.
2–40
Chris-Craft
Safety and Operations
Fueling
Gasoline is very flammable and explosive. The precautions and procedures in this section are the minimum steps that should be carefully and fully observed each time the boat is fueled.
Always follow the manufacturer’s recommendations for grades of
fuel and oil used in your engine. Using improper products may
cause damage to the engine and void your warranty.
General Procedures:
•
•
•
•
•
•
•
NEVER smoke or use any flame or ignition device when fueling or around fuel.
If possible, always fuel during daylight hours.
Always use fresh fuel. Old fuel can form gum and varnish which may affect engine performance.
Keep a fire extinguisher nearby.
All persons not directly involved with the fuel operation should stand clear.
Ensure engines are stopped and all electrical equipment turned OFF.
If appropriate, close all hatches, ports, doors, and windows to prevent fumes from entering the cabin.
Think! Have an escape route planned before fueling.
Fueling the boat:
1.
Remove the deck plate.
2.
Keep the nozzle in contact with the grounded deck plate while filling. This helps prevent static electricity from
creating sparks.
3.
Do not over fill. Fuel flowing from the fuel tank vent may spill overboard. Fuel spills violate government regulations and may result in citations. Allow for fuel expansion.
4.
NEVER leave the boat during the fueling process.
Chris-Craft
2–41
Safety and Operations
After fueling:
1.
Replace the fuel deck plate. Make sure the cap is tight to prevent water from leaking into the fuel tank.
2.
Wipe up any spilled fuel on the deck and surrounding area. Dispose of rags properly.
3.
If appropriate, open any hatches, ports, doors, and windows to ventilate the cabin.
4.
Investigate for leaks and drips. Make any corrections necessary.
The fuel deck plate cap is fitted with an O-ring that over time may
become worn and/or damaged. Inspect the cap on a regular basis
and replace as necessary.
2–42
Chris-Craft
CHAPTER 3
Systems
There are several systems and components associated with your Chris-Craft. This chapter provides an
overview and functional description of these systems. However, it is not, nor intended to be, a replacement
or substitute for the component manuals that accompany your boat.
At the time of this writing, the information contained in this chapter is current and up to date. However,
specifications are subject to change without notice. If there is a discrepancy between the information in this
chapter and a component manual, the component manual takes precedence.
It is the owner/operator’s responsibility to remain current on any changes that may affect
the operation and safety of the boat.
Chris-Craft
3–1
Systems
Switch Identification
There are numerous switches you should be aware of when operating your boat. This section identifies
these switches by their icon.
Table 3-1. Switch Identification Icons
Activate Accessory
Outlet
Turn Bilge Pump
ON/OFF
Engine Compartment
Blower
Cockpit Lights
Adjust Engine Drive
Trim
Open/Close Engine
Hatch
Turn Selectable Exhaust
ON/OFF
Horn
Turn Nav Lights
ON/OFF
Activate Battery
Parallel Circuit
Rumble Seat
Open/Close
Activate Trim Tab (one
switch for each trim tab)
Turn ON/OFF Water
Pressure Pump
Extend or Retrieve
Anchor
Slide Helm Seat
FWD and AFT
Dim/Brighten
Dash Lights
3–2
Chris-Craft
Systems
Figure 3-1. Helm Switch Panel
Chris-Craft
3–3
Systems
Engine Compartment
The engine compartment normally contains the following components:
•
•
•
•
•
Engine(s)
Batteries
Trim Tab Pump (if installed)
Engine Trim Pump
Bilge Pump
Other components may be included within the engine compartment depending upon the model of boat and
options chosen.
The engine compartment is accessed via the engine hatch located at the stern of the boat. All models except
the Lancer 20, Lancer 22 Rumble, and Launch 22 utilize either a single or dual electric power lift which is
activated from the helm (Figure 3-2). Actual location of this switch may vary from model to model.
The Lancer 20, Lancer 22 Rumble, and Launch 22 employs a manual latch release mechanism which utilizes a gas assisted piston to lift the engine hatch.
Figure 3-2. Engine Hatch Activation Switch
3–4
Chris-Craft
Systems
Lancer 22 Rumble
The Rumble seat hatch cover must be installed when the vessel is
not in use.
To avoid injury, keep away from the hatch during operation.
This 22-foot boat features a 2-person seat in the middle of the foredeck similar to classic “rumble seat”
boats from the past.
When the foredeck is closed, the Lancer has the same beautiful lines as the Lancer 20 and Corsairs. When
opened, the Lancer 22 Rumble reveals seating for two (Figure 3-3).
A pair of hydraulic actuators opens and closes the hatch to reveal the seat. The system has its own hydraulic pump and reservoir. A rocker switch on the control panel activates the hatch.
Always keep the rumble seat cover closed when not in use. This helps prevents water
intrusion and keeps the rumble seat dry when operating the boat.
Figure 3-3. Lancer 22 Rumble Seat
Chris-Craft
3–5
Systems
The hatch seal should be maintained on a regular basis by applying a thin layer of silicone sealant to the
seal.
A remote key ring (Figure 3-4) is available to open/close the rumble seat and turn the cockpit lights on and
off. To program the key ring:
1.
Access the control unit inside the rumble seat area behind the port closeout and open the cover.
2.
Locate the button located next to the LED and press once.
3.
Press the upper left button on the key ring twice.
4.
Replace the cover on the control unit.
5.
Test for proper operation.
Rumble Seat:
OPEN
Rumble Seat:
CLOSE
Cockpit Lights:
ON
Cockpit Lights:
OFF
Figure 3-4. Lancer 22 Rumble Key Ring
3–6
Chris-Craft
Systems
Boat Systems
Most of the systems discussed are common to all the boats covered
in this manual. Where major differences occur between models
those differences are highlighted.
The systems/components discussed in this chapter are:
•
•
•
•
•
•
•
•
•
•
•
Safety Package
Seacocks and Thru-Hulls
Bilge Pumps
Fuel Systems
Steering Systems
Engines
Trim Tabs
Fresh Water System
Electrical System
Compass
Entertainment and Convenience Equipment
Safety Package
Never restart the engine should a fire occur. Correct the malfunction
that caused the fire and replace the fire bottle before you use the
boat again.
The optional safety package includes the Automatic Fire Extinguisher Indicator (Figure 3-5) and an engine
compartment fire extinguisher (Figure 3-6). If your boat has this option, work with your dealer to become
familiar with the operation of the system.
The engine alarm monitors the engine compartment for fire. The location of the engine compartment fire
indicator may vary from model to model but is generally located near the helm instrument panel.
Should an engine fire occur, the fire bottle automatically discharges.
Chris-Craft
3–7
Systems
Figure 3-5. Fire Alarm Indicator
The fire extinguishing agent used is as follows:
•
•
For domestic use: FE241
For international use: FM200
You should frequently check the fire extinguisher for the correct pressure. If the pressure is below specification, have the unit serviced.
You should also weigh the cylinder (less the bracket) for proper weight. If the gross weight has deviated
from the specification label, service or replace the fire bottle. Weigh the cylinder at least twice a year.
Figure 3-6. Optional Engine Fire Extinguisher
3–8
Chris-Craft
Systems
Seacocks and Thru-Hulls
Each model has thru-hulls associated with it. Depending upon the model and engine configuration of your
boat, it may also include one or more seacocks which allows for raw water engine cooling.
APPENDIX H provides CAD drawings for each boat model, including seacock and thru-hull locations. It
is your responsibility to become familiar with those drawings appropriate for your boat.
Most seacocks are equipped with a shut-off feature, normally in the form of a ball-valve. Each seacock
should be exercised periodically to ensure proper function and to prevent corrosion accumulation.
A seawater strainer, attached to the seacock, protects the system from foreign objects that may enter the
seacock. The strainer should be periodically cleaned and inspected for effective operation.
Drain Plugs
Ensure you re-install the drain plug BEFORE putting the boat back
into the water. Failure to do so will result in flooding of the engine
compartment.
Garboard Drain plugs (Figure 3-7) allows water to drain from the boat when trailered. After the boat is
pulled from the water, open the drain plug so as to allow accumulated water to drain. When feasible, and if
applicable, rinse the area with fresh water to prevent salt buildup and corrosion.
If the boat will not be operated for more than a month, the engine should be prepared for extended storage
as outlined in the Owner’s Manual, Maintenance, and Warranty manual.
Figure 3-7. Garboard Drain
Chris-Craft
3–9
Systems
Bilge Pumps
The additional weight of water in the boat can adversely affect handling characteristics creating an unsafe
condition. In addition the sloshing water may be corrosive to the boat’s systems.
Since water is heavy (over 8 pounds per gallon) it must not be allowed to accumulate within the vessel.
It is highly recommended there be at least one hand operated pump on the vessel in the
event of a bilge pump failure.
General Maintenance
On a regular basis you should:
1.
Inspect the bilge pump intake and keep it free of dirt or material which may impede the flow of water through the
pump.
– To remove the pump strainer, depress the lock tabs on both sides of the pump and lift the pump motor.
2.
Check the bilge pump float switch by moving it manually.
– The float switch should move freely without sticking or binding. If it doesn’t, service or replace the switch
before using the boat.
3.
The bilge pump should start when the float switch is raised and should stop when lowered.
– If the pump does not start, reset the circuit breaker(s). If the pump still fails to start, replace the float switch
before using the boat.
– If you have to remove the float switch, verify proper operation of the new switch.
4.
After inspection reinstall the unit.
Electric Bilge Pumps
It is illegal to discharge oily bilge water into the waters of the United
States. Bilge oil spills must be mopped up and the oil and rags properly disposed of.
There is one bilge pump in each boat, located on the centerline in the engine compartment. All models
except the Lancer 20 use the Rule 1000 GPH model. The Lancer 20 uses the 800 GPH model.
The pump may be operated in the “manual” mode by placing the bilge pump switch, located on the helm
control panel, to the ON position. The indicator light on the switch illuminates indicating the pump is energized.
Do not run a bilge pump for more than a few seconds in a dry environment. Damage to
the pump may result.
The bilge pump is normally wired directly to the HOUSE battery for operation in the automatic mode. In
automatic mode, the bilge pump starts pumping as the water level reaches the bilge pump float switch. The
HOUSE battery switch must be in the ON position for the system to work.
3–10
Chris-Craft
Systems
The bilge pump is normally held in place with clips for easy removal and cleaning. Use care when removing and/or reinstalling the bilge pump. If you remove the pump for cleaning, after reinstalling perform a
systems test to ensure proper operation.
The bilge pump is protected by a circuit breaker located at the Helm Breaker Panel.
800 GPH Bilge Pump
1000 GPH Bilge Pump
Figure 3-8. Bilge Pumps
Should a bilge pump fail to operate, check the fuse and wiring connections. If the pump operates but fails
to discharge water, inspect for clogs or kinks in the discharge line.
If oil is present in the bilge, do not use the bilge pump to discharge the waste. Mop up the
waste and dispose of properly.
Chris-Craft
3–11
Systems
Fuel Systems
Leaking fuel is a fire and explosion hazard. Inspect the system on a
regular basis. Inspect all fittings, valves, filters, hoses, and connections for leaks. Do not operate the engine(s) if any fuel leak is
present.
Do not store fuel or flammable liquids in a closed area. Explosive
vapors may accumulate.
The fuel system is installed and tested in accordance with American
Boat and Yacht Council (ABYC) Standard H-33. Only qualified persons familiar with the practices established in this standard should
make repairs or modifications to the fuel system.
The fuel system is comprised of the following components:
•
•
•
•
•
•
•
•
•
•
3–12
Fuel Tank and Routing Lines
Fuel Gauges/Sending Units
Fuel Shut-off Valve(s)
Fill Deck Plate
Fuel Tank Vent(s)
Fuel Filter(s)
Fuel Fill Hose
Fuel Tank Vent Hose
Engine Fuel Feed Hose
Sending Unit
Chris-Craft
Systems
Fuel Tank
Fuel capacities are approximate measures. Always allow for adequate reserve of fuel when operating the boat.
All Chris-Craft boats have either aluminum or crosslink polyethylene fuel tanks with varying capacities.
Usable fuel will be less than capacity rating and depends upon trim conditions. Good seamanship calls for
an adequate fuel reserve in all boating activities.
The fuel tank fill deck plate is located on the opposite side of the
water fill deck plate. DO NOT put fuel in the water tank or water in the
fuel tank.
The fuel fill deck plate (Figure 3-9) is located on either the starboard or port gunnel of the boat. Actual
location, and physical appearance may vary from model to model, but the cap is clearly labeled.
Figure 3-9. Fuel Tank Fill Deck Plate
Chris-Craft
3–13
Systems
The fuel tank connects to the following items (Figure 3-10):
•
•
•
•
•
Fuel Fill Hose
Fuel Tank Vent Hose
Engine Fuel Feed Hose
Sending Unit
Manual Shut-off Valve
Fuel tank connections may vary slightly from model to model and depends upon the type of fuel tank
installed.
On some models a manually operated fuel shut-off valve is located on the fuel tank (Figure 3-10). On other
models there is no manual fuel shut-off valve (Figure 3-11).
The shut-off valve is normally accessed via an access cover (Figure 3-12), generally located in the cockpit
deck. Actual location and physical appearance of the access cover may vary from model to model due to
fuel tank location and options chosen.
Figure 3-10. Fuel Tank Connections with Manual Shut-Off Valve
3–14
Chris-Craft
Systems
Figure 3-11. Fuel Tank Connections Without Manual Shut-Off Valve
Figure 3-12. Fuel Shut-Off Valve Access Cover (Typical)
Chris-Craft
3–15
Systems
Fuel Gauge
A sending unit is installed in each fuel tank which senses the fuel level in the tank and displays the quantity
on the fuel gauge located, on the instrument panel. The gauge may vary in appearance and be clustered
with other indicators, such as oil and battery readings. However it is clearly labeled. Figure 3-13 illustrates
a typical cluster configuration.
The fuel indication is not 100% accurate so fuel planning is highly recommended. Maintain a reserve fuel
supply when planning a trip.
Figure 3-13. Fuel Gauge
Steering Systems
Steering is provided by the propeller/sterndrive assembly itself eliminating the need of a rudder. A power
steering system is used to make operating the boat easier.
A steering system owner’s manual is delivered as part of the documentation package you receive when you
take possession of your boat. It is your responsibility to become familiar with the contents of the manual
and how the system operates, as only rudimentary information is repeated here.
A hydraulic pump, with built-in reservoir, is mounted on the engine and provides power steering for the
boat. Turning the wheel pumps hydraulic fluid to the steering cylinder, which is attached to the sterndrive
assembly. This fluid moves a hydraulic cylinder, which in turn moves the sterndrive in the desired direction.
As part of the regular maintenance cycle, ensure the power steering reservoir contains the proper amount
of fluid. Verify with your dealer the type of steering/hydraulic fluid your boat uses. Use only the recommended brand and type of fluid recommended for your boat.
3–16
Chris-Craft
Systems
Engines
There are a variety of engine options you can select from for your boat. When you take possession of your
boat, you receive the appropriate engine books for your craft. As the owner/operator, it is your responsibility to familiarize yourself with the performance specifications and maintenance requirements of your
engine.
Because of the various engine options available, this manual does not discuss any one particular engine.
However, there are common components associated with each engine which are discussed in this section.
Emergency Engine Stop Switches
DO NOT remove the safety clip from the end of the lanyard. The
safety clip allows the engine(s) to shut down in the event the operator becomes incapacitated or falls overboard.
When driving the boat, attach the lanyard(s) to your person and keep
attached at all times. Failure to do so will not allow the engine(s) to
stop should the driver fall overboard.
Do not use the emergency stop switch(es) to shut down the engines
during normal operation. Damage to the engine(s) may result.
Many of the boats are available in either a single or dual engine configuration, therefore the boat will be
equipped with either a single or dual emergency engine shut-off switch.
Figure 3-14 illustrates dual engine emergency shut-off switches. The switches are spring-loaded to the
closed position and requires a safety clip, attached to the end of a lanyard, to keep open. The other end of
the lanyard should be attached to the driver at all times. The engine will not start unless the safety clips are
properly installed, keeping the shut-off switches in an open position.
To keep the switches in an open position, simply pull the switch out and insert the clip in such a position as
to keep the switch from closing.
Each lanyard should:
•
•
Be attached to the driver at all times when operating the boat. Do not allow it to become entangled at any time,
in any way.
Be long enough to prevent inadvertent engine deactivation and still allow driver free movement.
Chris-Craft
3–17
Systems
Figure 3-14. Engine Emergency Shut-off Switch
Ignition Switches
There is one ignition switch for each engine. The switch(es) are generally located on, or near the control
panel (Figure 3-15) at the helm. In order for the engines to start the emergency shut-off switch(es) must be
set to OPEN. This is accomplished by installing the safety clip as illustrated in Figure 3-14.
Figure 3-15. Ignition/Start Switches
3–18
Chris-Craft
Systems
Do not start the engines without some type of cooling water circulating through the engine(s). Damage to the engine(s) will result.
To start the engines:
1.
Ensure the fuel shut-off valve on the fuel tank is in the open position.
2.
If necessary turn on the master battery circuit breaker and/or engage any other circuit breaker(s) that may be
required for engine start.
3.
Ensure you have an adequate supply of cooling water circulating through the engine.
4.
Ensure no one is around the propeller(s), and that they are free of obstacles.
5.
Drop the sterndrive(s) into the water (if launching the boat).
6.
Insert the clip(s) into the emergency shut-off switch(es) and attach the lanyard(s) to your person.
7.
Place the throttles in NEUTRAL.
8.
Activate the engine compartment blower and allow approximately four (4) minutes for the compartment to ventilate.
9.
Start the engine(s).
10. Gauge readings – Normal
Ensure someone is at the controls at all times. DO NOT leave the helm unattended with
the engine(s) running.
To stop the engine(s):
1.
Turn the ignition switch(es) to OFF.
2.
Turn off any circuit breakers necessary to prevent a restart.
3.
If required, turn off the fuel shut-off valve on the fuel tank.
Do not approach the propeller(s) until the engine(s) have come to a complete stop and
there is no chance that the engine will restart.
Engine Throttles
There is one throttle for each engine (Figure 3-17). The throttle(s) controls the engine(s) speed which dictates the speed of the boat through the water. The throttle combines direction and power in one unit. Moving the throttle forward increases the engine speed until full forward power is reached. Moving the throttle
aft puts the boat in reverse. Continued aft movement of the throttle increases engine speed until full power
is reached. The middle detent is the NEUTRAL position. The engines will not start unless the throttles are
in the NEUTRAL position.
Work with your dealer for instructions on the best way of handling throttle control.
Chris-Craft
3–19
Systems
Figure 3-16. Dual Engine Throttles
The single engine throttle is located on the driver’s starboard side and like the dual throttles serves two purposes:
•
•
It regulates the engine speed, and
It acts as a gear shift level to control the rotation of the propeller.
As you move the handle forward and backward you should feel it drop into a detent when moved into
NEUTRAL position. Note that the engine will not start unless the control is in NEUTRAL.
Moving the control forward or backward increases engine speed in the direction the control is moved. This
also increases the boat speed. You must squeeze the shift interlock to move the control out of NEUTRAL.
Figure 3-17. Single Engine Throttle
3–20
Chris-Craft
Systems
Engine (Power) Trim
Each engine uses a trim switch (Figure 3-18) which works in conjunction with the trim tabs and performs
the following functions:
•
•
•
Moves the sterndrive(s) angle up or down to provide optimum running conditions.
Allows the boat to come up on plane more quickly and efficiently.
The power trim also allows the sterndrive(s) to be fully raised so that the boat may be trailered or un-trailered
without damaging the sterndrive/propeller.
The single engine trim may be located either on the throttle or on or near the helm switch panel (Figure 318). The dual engine trim switches are located near the dual engine throttles (Figure 3-19).
When using the engine trim, keep the following in mind:
•
•
•
Avoid a bow-down condition. This is known as “plowing” which can result in unintentional consequences. Readjust trim to correct this condition.
Avoid a bow-up condition. This is known as “porpoising” or “propeller ventilation.” This condition creates an
unsafe propeller speed which may damage the engine(s). Reduce engine RPM and readjust trim to correct this
situation.
When attempting to come up on plane, always start with the sterndrive(s) down.
Figure 3-18. Single Engine Trim Switch
Chris-Craft
3–21
Systems
Figure 3-19. Dual Engine Trim Switches
Engine Instruments
You should become familiar with “normal” gauge readings for your engines and become accustomed to
scanning the instruments when running. Unusual instrument readings require immediate attention. Do not
ignore unusually high or low instrument readings. Shut down the engine and have the problem diagnosed
before operating the engine.
The tachometer (tach) indicates the revolutions per minute (RPM) of the engine. Important
RPM’s to note from the manufacturer’s engine manual include idle RPM, normal cruise RPM
and maximum RPM. The maximum RPM should not be exceeded.
Tachometer
Although tachometers do not indicate boat speed, a careful helmsmen will chart boat speed vs.
RPM so that, in the event of other electronics problems, he will have a very good idea of boat
speed from his tachometers.
A sudden change of RPM may indicate a problem within the engine or a problem with the drive
train or running gear. Do not ignore “unexplainable” changes in RPM. A simple check of the
engine and running gear may prevent costly repairs.
Speedometer
Read in miles and kilometers per hour. Indicates speed of the boat.
Oil Pressure
Gauge
The oil pressure gauge measures the pressure of the lubricating oil circulating through the
engine. Adequate oil pressure is required to pump oil into the many highly-loaded bearings that
require lubrication. Inadequate oil pressure can lead to excess wear and possibly catastrophic
failure of the engine.
Check the manufacturer’s engine manual to determine normal oil pressure for the engines in
your boat. Shut down and do not operate an engine that has had a loss of oil pressure.
3–22
Chris-Craft
Systems
Water
Temperature
Gauge
The water temperature gauge indicates the temperature of the coolant mixture circulating inside
the engines cooling circuit. The engine is equipped with a thermostat that controls flow of
coolant within the engine thus maintaining correct operating temperature. Engine coolant
temperature is not affected by seawater temperature.
Correct operating coolant temperature indications for your engine may be found in the engine
manufacturer’s manual. An unusual change in temperature may indicate problems with the raw
water circuit or internal engine problems causing excess heat. Shut down and do not operate an
engine that is indicating coolant temperature in excess of the manufacturer’s maximum
allowable temperature.
Voltmeter
The voltmeter monitors the voltage of the battery and the charging circuit of the engine. Normal
voltage for a fully charged battery with the engines shut down is about 12.8 volts. With the
engines running a charging voltage of 13 to 15 volts should be indicated. Low voltage with the
engines running (less than 12 volts) indicates a possible problem with the charging circuit. The
engines are unlikely to start with less than 12 volts indicated on the volt meters.
Fuel Gauge
The fuel gauge indicates the fuel level in the tanks. Due to the irregular shape of the fuel tanks
and the angle of the tanks when running, indicated fuel level does not correspond directly with
the ratio of remaining fuel to total fuel capacity (i.e. an indicated fuel level of 1/2 does not
indicate 1/2 the capacity of the tank is remaining, but indicates the level of the fuel is 1/2 the
height of the tank at the sender). Remember, not all fuel capacity is usable capacity. Careful
planning of long trips using a safety reserve is advised. It is always prudent to fill the tanks
completely after each use to prevent condensation within the tanks.
Engine Hour
Meter
The engine hour meter is actually located on the engine itself and indicates the total cumulative
time in hours of operation. The engine hours should be noted on the engine log for all oil
changes, filter changes, scheduled and unscheduled maintenance. An accurate and carefully
maintained engine log is a valuable tool when diagnosing problems, when seeking warranty
compensation from the engine manufacturer and when your boat is re-sold.
Chris-Craft
3–23
Systems
The instrument panel layout may vary from model to model and also if the boat is single or dual engine.
Figure 3-20 illustrates a typical single engine instrument panel layout.
Figure 3-20. Single Engine Instrument Configuration
Figure 3-21 illustrates a typical dual engine instrument panel layout. The actual layout may vary from
model to model.
Figure 3-21. Dual Engine Instrument Configuration
3–24
Chris-Craft
Systems
Selectable Exhaust
Check your state and local noise laws prior to using the Corsa
Selectable Exhaust system.
Chris-Craft boats offer the option of a “selectable exhaust” which provides a “throaty” sound when operating away from shore and a “muffled” exhaust when operating within basin sound limitation boundaries.
The mode is selected by a switch located on the helm control panel. Actual location of the switch may vary
from model to model.
Prior to every use of the boat, examine the exhaust system to ensure tightness of the fittings.
Engine Compartment Blower
Ventilate the engine compartment before starting the engine(s). The
compartment should be ventilated a minimum of four (4) minutes.
The engine compartment may accumulate fumes when the engines are not running. Before starting the
engine(s) ventilate the engine compartment to remove any vapors that may have accumulated. The best
course of action is to open the engine hatch and allow the vapors to escape. However, if that is not possible,
or is inconvenient, then each boat is equipped with an engine compartment exhaust blower which can be
used to ventilate the compartment. Run the blower for at least four (4) minutes to ventilate the compartment before you start the engine.
If the boat is moving slowly, gasoline fumes can accumulate because not enough air is moving through the
engine compartment to keep it clear of vapors.
Anytime the boat is moving slow, engage the blower to remove any gasoline vapors that
may be accumulating in the engine compartment.
Inspect the blower system prior to every use. The blower makes a distinctive sound when operating properly. If the blower is not operating, repair or replace prior to using the boat again.
The exhaust blower is activated by a switch (Figure 3-22) located on, or near, the helm control panel.
Actual location of the switch may vary from model to model.
A warning label reminds you of the dangers of gasoline vapors and when to run the blower.
Chris-Craft
3–25
Systems
Figure 3-22. Engine Compartment Blower Switch
3–26
Chris-Craft
Systems
Trim Tabs
Trim tabs are standard on the Launch 25, Corsair 25, Launch 28, and
Corsair 28. If your model includes trim tabs, it is your responsibility
to learn how trim tabs affect the handling characteristics of the boat.
Ensure trim tabs are completely retracted when backing the boat.
Damage to the trim tabs may result otherwise.
Hydraulic Trim tabs (Figure 3-23) help adjust the vessel trim for weather, cross-winds, and water current
conditions. In addition they are used to adjust for listing due to uneven loading and propeller torque.
The trim tab system consists of:
•
•
•
Hydraulic Pump and Reservoir
Trim Tabs
Control Switches
Figure 3-23. Trim Tab
Chris-Craft
3–27
Systems
Theory of Operation
Trim tabs are used to modify the running angle of the boat. The Chris-Craft is designed to plane at a particular speed and weight distribution. As weight increases and/or speed decreases, the stern settles creating an
inefficient, untrimmed condition. In this bow-high position, visibility is limited, fuel economy is poor and
wake is large. Additionally the hull bottom may be pounded by waves. Trim tabs allows the vessel to plane
at heavier loads and slower speeds than the designed planing speed.
Increased trim may improve the ride in a head sea by allowing the bow to cleave the waves, rather than
pound over them. In a following sea, the tabs should be fully retracted for maximum steering response. A
listing condition may be corrected by applying more trim on one side. Too much trim will increase the drag
and cause the bow to “dig in” allowing wave action to veer the boat.
As the owner/operator, it is you responsibility to understand how trim tabs affect the characteristics of the
boat. The Trim Tab Owner’s Manual that accompanies this vessel provides additional operating and safety
instructions, which is not repeated here. However at a minimum:
•
•
•
•
•
•
•
Use trim tabs only at cruising speeds.
Do not use more tab than is actually needed for good performance.
Do not reduce the running angle less than 2°.
Do not use the trim tabs when backing or running an inlet. Damage to the cylinders and tabs my result.
Fully retract the trim tabs when trailering the boat or if leaving the boat to sit in the water for any extended length
of time.
Spend time getting familiar with how the trim tabs affect the vessel.
Improper use of the trim tabs can cause an accident and/or injury.
Trim Tab Hydraulic System
The trim tab hydraulic system is comprised of the following components:
•
•
•
Hydraulic Pump
Reservoir
Hydraulic Cylinders
Trim Tab Hydraulic Pump
The trim tab hydraulic pump is a 12VDC electric-driven pump. When activated, the electric motor pumps
hydraulic fluid to the hydraulic cylinder located on each tab. The high-pressure oil drives the piston downwards and pivots the aft section of the trim tab down below the bottom of the boat.
Trim Tab Reservoir
A hydraulic reservoir is built into the base of the pump. Fluid is drawn from the reservoir when the tabs are
driven downward and returned to the reservoir when the tabs retract.
Verify fluid level in the hydraulic pump reservoir on a regular basis. With the trim tabs completely
retracted the fluid level should be about two (2) inches from the bottom of the reservoir. To refill, remove
lexan cover and filler plug located at the front left hand corner of the reservoir. Fill with any type of Automatic Transmission Fluid (ATF) only. Brands of ATF can be mixed.
3–28
Chris-Craft
Systems
Trim Tab Zinc Plate
Each trim tab contains a sacrificial zinc plate (Figure 3-24) which prevents the development of corrosion
on the tab. This plate should be inspected and replaced when necessary.
Figure 3-24. Sacrificial Zinc Plate
Trim Tab Control Switches
There is a trim tab switch for each trim tab. The trim tab switches (Figure 3-25) are generally located on
the ignition control panel. When pressed, the switch activates the pressure pump that moves the trim tab in
the desired direction. Actual location of the switches may vary from model to model.
To correct for a listing condition you must lower the trim tab on the listed (lower) side by pushing the top
half of the rocker switch in a half second burst until the boat is righted.
If the stern of the boat is highly loaded, use both switches to operate both tabs, which lowers the bow when
the boat is on plane.
Chris-Craft
3–29
Systems
Figure 3-25. Trim Tab Control Switches
3–30
Chris-Craft
Systems
Fresh Water System
The water tank fill deck plate is located on the opposite side of the
fuel fill deck plate. DO NOT put fuel in the water tank or water in the
fuel tank.
The following models have a fresh water tank:
•
•
•
•
•
•
Launch 22 – Optional Transom Fresh Water Shower
Lancer 22 – Optional Transom Fresh Water Shower
Launch 25 – Standard
Launch 28 – Standard
Corsair 25 – Standard
Corsair 28 – Standard
The components of the water system consists of:
•
•
•
•
•
Water Tank
Pressure Pump
Water Fill Plate
Transom Shower
Piping
A fresh water deck fill is located on the side of the boat and clearly marked WATER. Actual location and
physical appearance of the fill plate may vary from model to model, but it is clearly labeled.
The water pressure pump (Figure 3-26) is a pressure-demand type pump. When energized the pump immediately pressurizes the water system. When the operating pressure is reached the pump shuts off until it
senses a loss of pressure, such as a faucet being opened, at which time it is automatically re-energized.
If the pump cycles on and off without a faucet being opened it may indicate a pressure leak in the system or
excessive air in the system. Bleed the system of air by opening all faucets until only water is flowing from
each. If a leak is present, or suspected, find and repair the leak.
A fresh water filter is attached to the pump and should be replaced seasonally (every 6 to 12 months) or
when taste and/or odor problems return. The pump and filter is located in the engine compartment. Actual
orientation of the pump and filter may vary from model to model.
When air enters the system it becomes necessary to purge it for proper operation. To bleed the system of
air, follow the steps outlined in “Using the Fresh Water System” on page 35.
Chris-Craft
3–31
Systems
Figure 3-26. Fresh Water Pump and Filter
A switch (Figure 3-27) on the helm switch panel energizes the pump.
Figure 3-27. Fresh Water Pressure Pump Switch
3–32
Chris-Craft
Systems
The transom shower (Figure 3-28) is a convenience option for a quick rinse-off after a swim. This feature
is not available on the Lancer 20.
Figure 3-28. Transom Shower Head
Some models offer a wet bar option for entertaining purposes (Figure 3-29). When closing the lid on the
sink, ensure the faucet is OFF to prevent draining the water tank.
Figure 3-29. Wet Bar/Sink
Chris-Craft
3–33
Systems
Sanitizing the Fresh Water System
Sanitizing solution contains bleach. Do not drink. Tag all faucets to
notify that the system is being sanitized.
You should always sanitize the fresh water system under the following conditions:
•
•
•
Before using it the first time.
After winter storage.
When the system has not been used for an extended period.
To sanitize the water system:
1.
Ensure the water tank is empty before beginning this process.
2.
You will need approximately one (1) gallon of weak bleach solution for each fifteen (15) gallons of tank water.
3.
In an appropriate size bucket, make a solution bleach and water using ¼ cup of household, unscented bleach
per gallon of fresh water.
4.
Dump water into water tank. Fill the remainder of the tank with fresh water.
5.
Activate the water pump and allow air to bleed from the system. Ensure the sanitizing solution is in all parts of
the water system.
6.
Allow treated water solution to remain in the system for three to four hours.
7.
Drain treated water solution from lines and empty tank.
8.
Flush entire system with fresh water, ensuring that all air bled from the system.
9.
Empty the system completely, refill, and bleed of air. The system is now ready to use.
If fresh water has an excessive chlorine taste after sanitizing the system:
1.
Pour a solution of 1 quart (0.95 liter) of vinegar and 5 gallons (19 liters) of fresh water into the water tank.
2.
Allow the solution to stand for three days.
3.
Drain the entire system and thoroughly flush with fresh water.
3–34
Chris-Craft
Systems
Using the Fresh Water System
On some models the water tank fill deck plate may be located in the
general vicinity of the fuel fill deck plate. DO NOT put fuel in the
water tank or water in the fuel tank.
Always keep the fresh water tank full. A full water tank helps keep the water potable. To fill the water tank:
1.
Ensure the water supply is suitable for drinking. If filling from the dock check with the dockmaster to verify the
water is potable.
2.
Remove the filler cap and fill the tank until water flows from the vent.
3.
Secure the filler cap.
You will need to start the system whenever the tank is empty and air is in the supply lines. To start/use the
fresh water system:
1.
Sanitize the system as previously described.
2.
Fill the water tank with potable water.
3.
Energize the pressure pump.
– The boat must have electrical power to energize the pressure pump. This can be the batteries, or if so
equipped, an external power source.
– Turn on the water pressure switch on the helm switch panel.
4.
If a hot water system is installed on your boat, open a hot water faucet to fill the water heater and allow air to
escape from the line. Close the faucet when free of air.
5.
Starting with the cold water faucet furthest from the pump, open each faucet until you see a steady stream of
water from each faucet. Close the faucets.
6.
If the boat is equipped with a water heater, open the faucet furthest from the water heater first then open all
other faucets. Run until you see a steady stream of water from each faucet. Close the faucets.
7.
Refill the water tank and turn off the pressure pump.
Chris-Craft
3–35
Systems
Troubleshooting Water Systems
Use the following procedure to help troubleshoot any water problem.
Table 3-2. Water Troubleshooting Chart
Problem
Solution
Probable Cause
Seacock valve partially closed
Open valve
Seacock strainer clogged
Clean strainer
Water tank empty
Fill water tank
Air in system
Open faucet to exhaust air, close
faucet when steady stream of water
flows
Leak in the water system
Find and repair leak
Pump breaker off
Switch breaker to ON
Water tank empty
Fill water tank
Blocked water lines
Find and clear obstruction
Defective pump pressure switch
Replace switch
Pump breaker OFF
Switch breaker to ON
Loose electrical connections
Check connections, tighten as needed
Defective pump pressure switch
Replace switch
Defective pump
Refer to dealer for service
Sea water pressure low
Water sputters from faucet
Fresh water pump cycles on
and off
No water when faucet is
opened
Pump does not run
3–36
Chris-Craft
Systems
Marine Sanitation System
Waste in the holding tank can form methane, an explosive gas. Keep
vent open and clear of obstructions. Keep fire and flame away when
maintaining the system.
It is illegal to dump plastic trash anywhere in the ocean or navigable
waters of the United States, including the Great Lakes. The discharge of other types of garbage is permitted outside of specific distance offshore as determined by the nature of that garbage.
All recreational boats with installed toilet facilities must have an
operable Marine Sanitation Device (MSD) aboard. Vessels 65 feet
and under may use a Type I, II, or III MSD. All installed MSD's must
be Coast Guard certified. The Holding Tank installed in the ChrisCraft is certified by definition under the regulations and is not specifically labeled. Do not flush foreign objects down the MSD. Damage to the system may result.
The Marine Toilet Owner’s Manual that comes in your documentation package addresses the use, maintenance, and troubleshooting of the system. It is your responsibility to become familiar with its contents as
only rudimentary information is presented here. Chris-Craft uses a porta potti for most standard installation, however on the Launch 28 and Corsair models a Tecma toilet is available as an option.
A portable toilet (MSD) is available as either standard or optional equipment, depending upon the boat
model. A self-contained toilet system is simple to use and maintain. Disposal of waste consists of removing the holding tank and transporting it off the boat. Dispose of the waste properly at a dump station or
other approved location. Do not dump the contents over the side.
The Tecma units utilizes a grinding system that grinds all waste before it enters the pump. This system virtually eliminates clogging while consuming very little water. The cycle is completely automatic and works
on a 12/24 VDC electrical system.
The Tecma system can be configured with one of two types of control switches: a one switch unit, or a two
switch unit. With the one switch unit, a specific quantity of water remains in the water closet. Pressing the
button begins the automatic flushing cycle.
With the two switch system, the water closet remains completely dry. Press the “Before Use” button to
send a specific quantity of water into the bowl. Press the “After Use” button to begin the automatic flushing cycle. This leaves the water closet clean and dry.
Chris-Craft
3–37
Systems
Electrical System
All the models discussed in this manual have a DC electrical system, with some having an AC system.
Both systems are complex entities hence it is critical that you understand how the electrical system affects
the boat and its components.
Electrical Safety
NEVER:
•
Work on the electrical system while the system is energized.
•
Modify the craft’s electrical system or relevant drawings: installation, alterations,
and maintenance should be performed by a competent marine electrical technician.
•
Alter or modify the rated current amperage of over-current protective devices.
•
Install or replace electrical appliances or devices with components exceeding the
rated current amperage of the circuit.
•
Leave the craft unattended with the electrical system energized, except automatic
bilge pumps, fire protection, and alarm circuits.
•
Allow the shore power cable to hang in the water. An electrical field may be caused
which can cause injury or death to nearby swimmers.
Electricity can be very dangerous and hazardous. It is incumbent upon the owner/operator to understand
basic electrical safety before working on any electrical system associated with the vessel. Other safety considerations are:
•
•
•
Disconnect shore power connections when the system is not in use.
Use double insulated or grounded electrical appliances.
Do not alter shore power cable connectors. Use only compatible connections.
The Electrical system is installed and tested in accordance with American Boat & Yacht
Council Standard E-9 and/or ISO 10133. Only persons familiar with the practices established in this standard should make repairs or modifications to the system.
3–38
Chris-Craft
Systems
DC Electrical System
Explosive hydrogen gas is given off by charging batteries. Batteries
will explode if an open flame or spark ignites the hydrogen gas.
Never use an open flame in the battery area. Do not strike sparks
near the batteries.
Working on engine starting circuits or alternators with battery
cables connected can cause severe injury or death. Battery cables
should be disconnected from the batteries before working on the
engine starting circuits or the alternator.
If any circuit breaker should trip, do not activate the system until the
cause of the malfunction has been determined and corrected.
The DC electrical system is a 12VDC system and is composed of the following components:
•
•
•
•
Batteries (one or more depending upon model)
Battery Charging System
Circuit Breakers
Battery Distribution Panel
The batteries are normally charged through an engine-driven alternator. A volt meter on the helm shows
the charge level of each battery.
Circuit Breakers
There are numerous circuit breakers in the system to prevent an electrical overload and protect the equipment from damage.
The main breaker panel is located at the helm. The actual location of the panel will vary from model to
model but the function remains the same – to protect the systems from an electrical overload or short circuit.
Other circuit breakers protect other components in the system and are located at various locations in the
boat. Since these locations vary from model to model, work with your dealer to familiarize yourself with
their location.
Common circuit breakers for additional systems are the windlass and accessory circuit breakers (Figure 330), and the stereo/bilge pump circuit breaker (Figure 3-31).
Chris-Craft
3–39
Systems
Figure 3-30. Windlass and Accessory System Circuit Breakers
Figure 3-31. Stereo/Bilge Pump Circuit Breakers
3–40
Chris-Craft
Systems
Battery System
Never disconnect battery cables when the engine is running. Damage to the electrical system may result.
Depending upon the model, your boat can have one, two, or three batteries associated with it. The battery is
used to supply DC power to the boat. All marine batteries provide a high capacity plus cold cranking performance. The batteries are not maintenance free and require periodic maintenance.
•
•
•
•
Maintain the water level in the battery cells.
Keep the terminals clean.
Keep the case clean.
Keep the battery charged.
Many variables affect the life of a battery. Some of these are, but not limited to:
•
•
•
•
Usage
Temperature
Charging
Age
Always inspect the condition of the battery. When inspecting ALWAYS utilize proper safety precautions.
A low water level may cause the batteries to fail or possibly explode. Therefore take corrective action immediately. If you must replace one battery, replace them all.
If there is more than one battery on your boat they can be broken down in the following manner:
For two batteries:
•
•
Port start battery
Starboard start battery
For three batteries:
•
•
•
Port start battery
Starboard start battery
House
Chris-Craft
3–41
Systems
The batteries are connect to a battery distribution cluster which support the master battery switches. The
number of switches in the cluster will vary depending upon the number of batteries in the boat. Figure 3-32
illustrates a typical two battery switch cluster.
The battery distribution cluster may also contain the Emergency Parallel switch. Activating this switch
links all the batteries together to provide extra current should one battery become depleted.
Figure 3-32. Two Battery Switch Cluster
3–42
Chris-Craft
Systems
Battery Charging
Each engine has an alternator which charges the battery, or batteries and also provides electrical power to
the boat. Some models may also use an external power source (shore power) to keep the battery charged.
A fully automatic AC battery charger (Figure 3-33) is optional on the Launch 22, Launch 25, Launch 28,
Corsair 25, and Corsair 28. Depending upon the model and options chosen, your boat may have as many as
three chargers installed. The batteries are charged according to battery switch position and power demand
(refer to “Battery Powered Systems” on page 44).
The charger(s) is protected by a circuit breaker on the main circuit breaker panel.
A manufacturer’s operation booklet is supplied with the vessel that has this option installed. This booklet
contains additional information which you should become familiar with.
Figure 3-33. Optional Battery Charger
Chris-Craft
3–43
Systems
Battery Powered Systems
For all models, the bilge pump and stereo memory is wired directly to the battery. Even with all battery
switches off, these two items continue to be energized. If the battery is disconnected, then all stereo memory will be lost and you will have to reset your presets.
Table 3-3 will help you identify common components which are energized on each model of boat (battery
power engaged, without refrigerator option).
Table 3-3. Battery Powered Systems Matrix
Item
Lancer 20
Launch 22
Lancer 22
Launch 25
Corsair 25
Launch 28
Corsair 28
(Single Engine)
Launch 28
Corsair 28
(Twin Engine)
X
X
X
X
X
X
X
X
X
X
X
X
X
Bilge Pump
(Battery Power ON
or OFF)
Stereo Memory
(Battery Power ON
or OFF)
Battery Charger
(Battery Power ON
or OFF)
CO Monitor
(Battery Power ON
or OFF)
X
X
(Corsair Only)
(Corsair Only)
All Helm
Components
X
X
X
X
X
Engine Starter
X
X
X
X
X
X
X
X
X
Amplifier
Sump Pump
X
The refrigerator option adds the HOUSE battery which changes the way the systems are energized. These
changes are discussed for each appropriate boat.
Launch 25
Refrigerator option installed:
•
•
•
•
•
The battery switch indicates positions 1, 2, BOTH, or OFF.
Position 1 draws and charges battery 1 from the engine alternator.
Position 2 draws and charges battery 2 from the engine alternator.
Position BOTH draws and charges both batteries from the engine alternator.
Position OFF only the non-switched items are active and only the battery charger will charge the batteries.
Refrigerator option not installed:
•
3–44
The battery switch is an ON-OFF type switch with one battery switching all switched items.
Chris-Craft
Systems
Launch 28/Corsair 28 Single Engine Configuration
Refrigerator option installed:
•
•
•
Adds voltage sensing relay for battery charging purposes.
House battery is used to switch on the following components:
– Helm components
–
Refrigerator
–
Amplifier
–
Stereo
Voltage-sensing relay allows House battery to be charged by batteries 1 and/or 2 as long as they are charged to
13.7 volts.
Refrigerator option not installed:
•
The battery switch is an ON-OFF type switch with one battery switching all switched items.
Launch 28/Corsair 28 Twin Engine Configuration
Refrigerator option not installed:
•
•
•
•
•
•
Two batteries installed: Port Start, Starboard Start.
The battery switch indicates positions 1, 2, BOTH, or OFF.
Position 1 draws and charges battery 1 from both engine alternators.
Position 2 draws and charges battery 2 from both engine alternators.
Position BOTH draws and charges both batteries from both engine alternators.
Position OFF only the non-switched items are active and only the battery charger will charge the batteries.
Refrigerator option installed:
•
•
•
•
Adds House battery to system.
Adds voltage sensing relay for battery charging purposes.
House battery is used to switch on the following components:
– Helm components
–
Amplifier
–
Stereo
Voltage-sensing relay allows House battery to be charged by batteries 1 and/or 2 as long as they are charged to
13.7 volts.
Chris-Craft
3–45
Systems
Wiring Color Codes
Color codes identify wiring throughout the boat. The color codes for the DC system is as follows:
•
Red – Source Conductors
– Positive 12VDC. All current carrying conductors between the batteries and first switch or load device in
a circuit. Bus bars, circuit breakers, terminals, and fuses in the source conductor are not considered
switches or load devices.
•
Yellow – Negative Conductors
– All current carrying DC negatives that terminate at the batteries or their terminals.
•
White – Load Conductors
– Positive 12VDC. Any and all current carrying conductors between the first switch or load device, and
the last load device before the negative conductor.
•
Green – All Ground Conductors
– Non-current carrying grounding and bonding conductors.
There are several additional basic colors and color combinations for different circuits used beyond the ignition switch. Some of these colors can serve more than one type of circuit. Table 3-4 illustrates the color
codes for the engine compartment and battery wiring.
Table 3-4. Engine/Battery Wire Codes
Function
3–46
Wire Color
PORT STARTER
RED
PORT BATTERY
RED
STBD STARTER
RED
HOUR METER
RED
PORT ALTERNATOR
WHITE
STBD BATTERY
RED
STBD ALTERNATOR
WHITE
PORT ENGINE
RED/VIOLET
PORT ENGINE TEMPERATURE
TAN
PORT ENGINE ALARM
TAN/BLUE
PORT ENGINE TACHOMETER
GRAY
PORT ENGINE OIL PRESSURE
LIGHT BLUE
PORT ENGINE TRIM LEVEL
BROWN/WHITE
PORT ENGINE IGNITION
VIOLET
PORT ENGINE STARTER
YELLOW/RED
GEN BATTERY ISOLATED
RED
STBD BATTERY ISOLATED
RED
PORT BATTERY ISOLETED
RED
PORT BATTERY CHARGER
RED (RED)
GEN BATTERY CHARGER
RED (BLUE)
STBD BATTERY CHARGER
RED (GREEN)
THRUSTER BATTERY CHARGER
RED
CABIN 12V OUTLET
RED
PORT SHUTDOWN
WHITE/RED
Chris-Craft
Systems
Table 3-4. Engine/Battery Wire Codes (Continued)
Function
Chris-Craft
Wire Color
STBD SHUTDOWN
WHITE/GREEN
STBD ENGINE
RED/VIOLET
STBD ENGINE TEMPERATURE
TAN
STBD ENGINE ALARM
TAN/BLUE
STBD ENGINE TACHOMETER
GRAY
STBD ENGINE OIL PRESSURE
LIGHT BLUE
STBD ENGINE TRIM LEVEL
BROWN/WHITE
STBD ENGINE IGNITION
VIOLET
STBD ENGINE STARTER
YELLOW/RED
GENERATOR STOP POWER
RED/WHITE
GENERATOR STOP
WHITE/RED
GENERATOR POWER
RED/VIOLET
GENERATOR PRE-HEAT
WHITE
GENERATOR START
YELLOW/RED
PORT PARALLEL START
RED
STBD PARALLEL START
RED
BOW THRUSTER POWER
RED
BOW THRUSTER BATTERY
RED
BOW THRUSTER LEFT
WHITE/RED
BOW THRUSTER RIGHT
WHITE/GREEN
PORT SHUTDOWN PWR
RED/WHITE
PORT SHUTDOWN
WHITE/RED
STBD SHUTDOWN PWR
GREEN
STBD SHUTDOWN
WHITE/GREEN
HELM POWER
RED
MAN BILGE SWITCH POWER
RED
HELM SWITCH POWER
RED
GENERATOR STARTER
RED
GENERATOR BATTERY
RED
ELECTRONICS POWER
RED
SHIP’S SERVICE
RED
HATCH SOLENOID
RED
WINDLASS
RED
WINDLASS CONTROL UP
RED/BLUE
WINDLASS CONTROL DOWN
RED/GREEN
3–47
Systems
DC System Troubleshooting
Disconnect battery cables before performing all inspections,
checks, troubleshooting, and repairs to avoid possible personal
injury and damage to equipment.
Table 3-5. DC Electrical Troubleshooting Chart
Problem
Solution
Cause
Battery disconnect switch to OFF
Turn switch ON
Battery selector switch turned to OFF
Switch selector switch ON for port (1)
or starboard (2) battery.
Weak or dead battery
Recharge battery. Replace if
necessary.
Engine running, battery not
charging
Engine alternator belt loose
Tighten belt.
Battery not holding a charge
Bad battery
Replace battery
Circuit breaker for device is OFF
Switch breaker to ON.
Weak or dead battery
Change battery selection switch
position (if available); charge battery.
Faulty electrical connection
Check 12V connections. Tighten or
repair as needed.
No power to 12V equipment
12V device not working
3–48
Chris-Craft
Systems
AC Electrical System
The AC electrical system is an option and not available on all models. It is your responsibility to familiarize yourself with the operation of the AC system.
The AC system operates on a standard 30 amp 120 volt, 60 hertz shore power system. Dockside power service is available in 110 volt (North America) or 220 volt (European).
A receptacle at the stern of the boat allows for connection of the shore power cord. Shore power allows the
battery chargers to operate and charge the batteries. A circuit breaker protects the shore power circuit from
overload.
Reverse Polarity
Reverse polarity refers to the reversal of the ungrounded current carrying conductor and the grounded current carrying conductor. The shore breaker automatically senses a reverse polarity shore power connection
and trips the breaker. Never ignore a reverse polarity indication. Ensure polarity is correct when connecting to shore power.
If a reverse polarity occurs:
1.
Turn OFF the dock main shore power.
2.
Verify the shore power cord is correctly seated and locked in place. Perform this step both on the vessel and at
the dock connection.
3.
After verifying shore power cord is firmly seated, turn the dock main breaker back on.
4.
If the reverse polarity situation still exist, disconnect the power cord and have the dock master check the wiring
at the shore power receptacle.
5.
If the wiring at the shore power receptacle is correct, and a reverse polarity situation still exists, contact a qualified marine technician.
Connecting and Disconnecting Shore Power
To minimize shock and fire hazards:
Chris-Craft
•
Turn off the boat’s shore connection switch before connecting or disconnecting
shore cable.
•
Connect shore power cable at the boat first.
•
If a reverse polarity warning indicator is activated, secure dock power and remove
power cable.
•
Disconnect shore power cable at shore outlet first.
•
Close shore power inlet cover tightly.
•
Do not alter shore power cable connectors.
3–49
Systems
Exceeding 30 amps on one power cord will cause the main
breaker(s) to trip. Reduce power load before resetting any breakers.
Never operate the shore power system at less than 105 volts.
This procedure connects shore power to a marina dock system. To connect shore power:
1.
Turn off all breakers at the dock station.
2.
Attach the power cord to the boat receptacle and lock in place. For safety reasons do not attach the power cord
to the dock first.
3.
Plug in the cord at the dock station. Turn on dock station breakers.
4.
Check for a reverse polarity indication. If a reverse polarity light illuminates, turn off dock power immediately.
Refer to the Reverse Polarity section for corrective action.
5.
Turn on the boats main AC breaker.
6.
Turn on any boat systems desired, do not exceed 30 amps.
To disconnect from shore power:
1.
Turn off all breakers at the dock station.
2.
Turn off the boats AC main circuit breaker.
3.
Disconnect the power cord from the dock station.
4.
Disconnect the power cord from the boat.
5.
Retrieve and store the power cord.
6.
Secure the power receptacle on the boat with the waterproof cap(s).
AC Wiring Codes
Color codes identify wiring throughout the boat. The color codes for the AC system is as follows:
•
Red – Source Conductors
– Positive. All current carrying conductors between the batteries and first switch or load device in a
circuit. Bus bars, circuit breakers, terminals, and fuses in the source conductor are not considered
switches or load devices.
•
Yellow – Negative Conductors
– All current carrying AC negatives that terminate at their terminals.
•
White – Load Conductors
– Positive. Any and all current carrying conductors between the first switch or load device, and the last
load device before the negative conductor.
•
Green – All Ground Conductors
– Non-current carrying grounding and bonding conductors.
There are several additional basic colors and color combinations for different circuits used beyond the ignition switch. Some of these colors can serve more than one type of circuit.
3–50
Chris-Craft
Systems
Troubleshooting the AC System
Table 3-6. AC Electrical Troubleshooting Chart
Problem
No AC power
Cause
Solution
Main breaker(s) tripped of OFF
Turn breakers ON or reset.
Breaker(s) at main AC panel tripped or
OFF
Turn breakers ON or reset.
Shore power cord not securely
connected
Check cord; plug in if necessary.
Loose or disconnected wire(s)
Tighten connections, or refer to
qualified marine electrician.
Breaker(s) at main AC panel tripped or
OFF
Turn breakers ON or reset.
Shore power cord not connected
Check cord; plug in if necessary.
Loose or disconnected wire(s)
Tighten connections, or refer to
qualified marine electrician.
Ground fault interrupter tripped
Reset button on outlet and test.
No power to AC devices
Chris-Craft
3–51
Systems
Compass
The compass is installed on each boat to aid in navigation. A magnetic compass is often deflected by iron,
magnets, or electrical current from nearby wiring. The compass must adjusted to compensate for these
influences.
Only a qualified technician should perform compass adjusting/compensation. Since it is seldom possible to
correct compass deviation to zero, a deviation card is created to indicate the correct heading that must be
utilized when navigating by compass. Keep this card near the helm and refer to it as necessary.
The actual size and location of the compass varies from model to model.
Figure 3-34. Compass
3–52
Chris-Craft
Systems
Entertainment and Convenience Equipment
Entertainment equipment consists of a standard in-dash AM/FM stereo CD with speakers and an in-dash
remote control. All models have four speakers except the Lancer 20 which has only two. An optional
sound package includes additional speakers, amplifier, and transom remote controls. The entire system is
designed to be waterproof to endure the harsh elements of boating. Included with the boat is an instruction
manual that details the proper use and care of the system.
The refrigeration system consists of a 12VDC cold plate with adjustable thermostat. When working on DC
power the engine must be running to prevent the batteries from being depleted. An instruction manual
details the proper use and care of the system.
Convenience equipment varies from model to model and includes storage coolers, drink holders, wet bar,
sink, and refrigerator.
Chris-Craft
3–53
Systems
3–54
Chris-Craft
CHAPTER 4
Storage and Commissioning
In climates where freezing occurs, it is important to prepare the boat for storage. This procedure is called
winterizing.
Winterizing is the procedure of removing all water from the boat that might otherwise freeze and damage
plumbing and components. In those areas where water cannot be removed, anti-freeze is added to prevent
freezing and damage.
The procedures in this chapter are general in nature and not all inclusive. Additionally
you must consult individual component manuals for instructions on how to winterize any
specific component.
Chris-Craft
4–1
Storage and Commissioning
Winter Storage
When you prepare your boat for winter storage, you should also prepare the trailer.
General
_______
Completely wash and wax the boat, both inside and out. Remove all marine growth and scum.
_______
Inspect all sections of the boat for damage and paint wear.
_______
Inspect all underwater gear, including propellers for wear and/or damage.
_______
Remove cushions and other fabric-type items and store in a clean, dry area. For those items that
cannot be removed leave a chemical dehumidifier or mildew inhibitor under the cover.
_______
Clean and store all PFDs in a clean, dry environment.
_______
Clean all cupboards, cabinets, and drawers with mild soap and water. Dry completely. Remove
any item that may cause mildew.
_______
Lubricate all hatch and locker hinges. Leave open if possible.
_______
Remove all electronics and store in a dry, secure area.
_______
Store the boat in a bow high attitude.
_______
Drain and dry all sections of the bilge. Remove all drain plugs and store in a plastic bag. Secure
plug(s) to the throttle level.
_______
Position the cover to prevent the pooling of water.
_______
Ventilate to prevent mildew and allow air flow.
_______
Slacken tiedowns to reduce strain on the hull.
_______
Inspect the boat regularly during storage.
Fresh Water Systems
_______
Turn on the pressure water pump, open all faucets and drain the system completely. Leave all
faucets open. Ensure the storage tank is completely empty.
It is not recommended that you leave water in the fresh water system. If you choose to leave water in the fresh
water system during winter storage you must add non-toxic antifreeze. Winterize in accordance with the following
steps.
_______
Fill the water tank with a solution of fresh water and non-toxic antifreeze.
_______
Open the faucet furthest away from the water pump. Energize the water pump and run until
antifreeze solution flows from the faucet.
_______
Open other faucets and run until antifreeze solution appears. Close all faucets.
_______
Disengage water pump breaker.
4–2
Chris-Craft
Storage and Commissioning
Engines and Fuel Tank
_______
Refer to the engine owner’s manual for detailed winterization instructions.
_______
Gasoline Engines – Fill tank and add a gas stabilizer and conditioner.
_______
Diesel Engines – Fill tank and add biocide and/or petroleum distillate additive.
Batteries
_______
Remove the batteries from the boat and clean both batteries and battery terminals.
_______
Properly store batteries in a cool, dry place. Do not store on concrete.
_______
Place on a regulated trickle charge.
Marine Sanitation Device
_______
Prepare in accordance with manufacturer’s directions.
Trailer
_______
Repack all wheel bearings.
_______
Inspect tires for wear. Replace as required.
_______
Inspect and lubricate hitch coupler, rollers, tongue jack, and winch.
_______
Inspect lights and electrical system. Inspect for corrosion, loose bulbs, and frayed wires.
_______
Inspect all tiedowns for frays and wear.
_______
Inspect for metal fatigue, corrosion, and cracks. Repair as necessary.
_______
Inspect for and replace any worn rollers and bunks.
Chris-Craft
4–3
Storage and Commissioning
Spring Commissioning
General
_______
Clean all sections of the boat as necessary.
_______
Inspect all thru-hull openings. Ensure they are clean and open.
_______
Check running gear. Replace propellers if removed.
_______
Check all life saving gear. Replace as necessary.
_______
Cycle all seacocks and valves to ensure proper and free movement. Leave open appropriate
valves. Check hoses and clamps. Re-install all drain plugs.
_______
Inspect the electrical system completely.
_______
Inspect navigation lights and check for proper operation.
_______
Check all switches for proper operation.
_______
Ensure engine compartment blower is operating properly. Make sure exhaust vent(s) are not
obstructed.
_______
Inspect, and if necessary replace, anchor lines and gear.
Fuel System
_______
Thoroughly check each fitting and hose in the fuel system. Ensure it is fuel and vapor tight.
_______
Open any valves closed for winterization.
Engines
_______
Refer to the engine owner’s manual for detailed recommissioning instructions.
_______
Ensure fluids are at proper levels.
Batteries
_______
Ensure batteries are clean and corrosion-free before installing.
_______
Ensure batteries are properly secured in their mounts.
Fresh Water Systems
_______
Connect any water lines that may have been removed or disconnected.
_______
Energize pressure pump and check for leaks.
_______
Sanitize the system. Flush the system completely. If necessary drain and re-flush. Ensure all
contaminants are removed from the system.
4–4
Chris-Craft
Storage and Commissioning
Fresh Water Systems (Continued)
_______
Bleed all air from the system.
_______
Close all faucets as required.
Bilge Pumps
_______
Chris-Craft
Check bilge pump operation in both automatic and manual mode.
4–5
Storage and Commissioning
4–6
Chris-Craft
APPENDIX A
Warranty Information
CHRIS-CRAFT LIMITED WARRANTY
This document is your Warranty Registration Certificate and Statement of Warranty.
WHAT IS COVERED: This Limited Warranty applies to Chris-Craft boats and yachts beginning with
model year 2007.
TEN YEAR LIMITED STRUCTURAL HULL AND DECK WARRANTY: Chris-Craft warrants to the
original retail purchaser of this boat if purchased from an authorized Chris-Craft dealer that the selling
dealer or Chris-Craft will repair or replace the fiberglass hull and deck, including stringers, floor, motor
mounts, and transom for a period of ten (10) years from the date of in-service delivery if it is found to be
structurally defective in material or workmanship. This limited warranty is subject to all limitations and
conditions explained below.
TWO YEAR LIMITED WARRANTY: Chris-Craft warrants to the original retail purchaser of this boat if
purchased from an authorized Chris-Craft dealer that the selling dealer or Chris-Craft will repair or replace
any:
•
Upholstery defects in factory materials or workmanship within two (2) years of the date of delivery. This limited
warranty is subject to all limitations and conditions explained below.
ONE YEAR LIMITED WARRANTY: Chris-Craft warrants to the original purchaser of this boat if purchased from an authorized Chris-Craft dealer that the selling dealer or Chris-Craft will repair or replace
any:
•
•
Gelcoat surface of the hull or deck that has laminate blisters, crazing, air voids or stress cracks which occurred
as a result of defects in factory material and workmanship within two (2) years of the date of delivery, provided
that the original factory gel coat surface has not been altered in any way such as accident repair, application of
a coating other than marine bottom paint or from improper surface preparation for paint, (i.e., excessive sanding
or sandblasting, etc.), any of which will void this warranty. This limited warranty is subject to all limitations and
conditions explained below.
any parts not already covered by other warranties that are found to be defective in factory materials or workmanship for a period of one (1) year from the date of delivery, subject to all exceptions, limitations and conditions contained herein.
Chris-Craft
A–1
Warranty Information
All warranty work is to be performed at a Chris-Craft dealership or other location authorized by a ChrisCraft Customer Service Manager after it is established to Chris-Craft’s satisfaction that there is a defect in
material or workmanship.
CUSTOMER OBLIGATIONS: The following are conditions precedent to the availability of any benefits
under these limited warranties:
(a) The purchaser must sign and submit to Chris-Craft the “OWNER REGISTRATION AND SYSTEMS
CHECKLIST FORM within ten (10) days of the date of delivery.
(b) The purchaser must first notify the dealer from whom the boat was purchased of any claim under this
warranty within the applicable warranty period and within a reasonable period of time (not to exceed
thirty (30) days) after the defect is or should have been discovered.
(c) Chris-Craft will not be responsible to repair any condition or replace any part, (1) if the use of the boat
is continued after the defect is or should have been discovered; and (2) if such continued use causes
other or additional damage to the boat or component parts of the boat.
(d) Based on the dealer’s knowledge of the Chris-Craft warranty policy and/or consultations with ChrisCraft, the dealer will accept the claim and arrange for appropriate repairs to be performed, or deny the
claim if it is not within the warranty.
(e) The dealer will contact the Chris-Craft boat owner regarding instructions for delivery of boat or part
for warranty repair if it is covered by the limited warranty. All costs to transport the boat for repairs are
the responsibility of the owner.
(f) If the Chris-Craft boat owner believes a claim has been denied in error or the dealer has performed the
warranty work in an unsatisfactory manner, the owner must notify the Chris-Craft Customer Service
Department in writing within thirty (30) days of the repair attempt at the address listed for further consideration. Chris-Craft will then review the claim and take appropriate follow-up action.
WARRANTY EXCEPTIONS: THIS LIMITED WARRANTY does not cover the following:
(a) Engines and power train, which come with their own warranty, metal plating or finishes, windshield
breakage, and leakage due to seal shrinkage or wear and tear; fading and deterioration of paints, timber, canvas, vinyl, upholstery and fabrics;
(b) Gelcoat surfaces including, but not limited to, fading, chalking, osmotic blistering as a result of environmental conditions, or discoloration except as noted above;
(c) Accessories and items which were not part of the boat when shipped from the Chris-Craft factory, and/
or any damage caused thereby;
(d) Damage caused by misuse, accident, galvanic corrosion, negligence, lack of proper maintenance, or
improper trailering;
(e) Any boat used for racing, or used for rental or commercial purposes;
(f) Any boat operated contrary to any instructions furnished by Chris-Craft, or operated in violation of any
federal, state, Coast Guard or other governmental agency laws, rules, or regulations;
(g) The limited warranty is void if unauthorized alterations have been made to the boat;
A–2
Chris-Craft
Warranty Information
(h) Transportation of boat or parts to and/or from the CHRIS-CRAFT factory or service location;
(i) Travel time or haul outs, loss of time or inconvenience;
(j) Any published or announced performance characteristics of speed, fuel and oil consumption, and static
or dynamic transportation in the water;
(k) Any boat that has been repowered beyond Chris-Craft power recommendations;
(l) Water damage to, dry rot to, condensation to, or absorption by interior surfaces, wood structures or
polyurethane foam; interior wood including, but not limited to, bleeding and/or discoloration as a
result of condensation or moisture or water continually contacting the plywood causing staining to
upholstery, carpet or other interior surfaces;
TRANSFERABILITY
The unexpired term of this limited warranty may be transferred once to a subsequent new owner, provided
that the transfer occurs during the first two (2) years after the date of in-service delivery. The new owner
must register the transfer of limited warranty within 60 days of purchase, by sending a written request to
CHRIS-CRAFT, 8161 Fifteenth Street, East. Sarasota, FL 34243 USA and accompanied by the payment to
CHRIS-CRAFT of two hundred dollars ($200.00).
ADDITIONAL TERMS, CONDITIONS, DISCLAIMERS AND ARBITRATION CLAUSE
NO WAIVER OF THESE TERMS: The terms, conditions, limitations and disclaimers contained herein
cannot be waived except by the Customer Service Manager of Chris-Craft. Any such waiver shall be in
writing. Neither the dealer, nor the customer, nor any service, sales and/or warranty representative of
Chris-Craft is authorized to waive and/or modify these conditions, limitations and/or disclaimers.
DISCLAIMER OF IMPLIED WARRANTIES AND EXCLUSIONS OF CONSEQUENTIAL AND INCIDENTAL DAMAGES
GENERAL PROVISIONS: ALL GENERAL, SPECIAL, INDIRECT, INCIDENTAL AND/OR CONSEQUENTIAL DAMAGES ARE EXCLUDED FROM THIS WARRANTY AND ARE TOTALLY DISCLAIMED BY CHRIS-CRAFT. IT IS THE INTEREST OF THE PARTIES THAT THE OWNER’S
SOLE AND EXCLUSIVE REMEDY IS THE REPAIR OR REPLACEMENT OF THE VESSEL OR ITS
ALLEGEDLY DEFECTIVE COMPONENT PARTS AND THAT NO OTHER LEGAL OR EQUITABLE
REMEDIES SHALL BE AVAILABLE TO SAID OWNER. SOME STATES DO NOT ALLOW THE
EXCLUSION OF INCIDENTAL OR CONSEQUENTIAL DAMAGES SO THE EXCLUSION OF INCIDENTAL OR CONSEQUENTIAL DAMAGES MAY NOT APPLY TO YOU. THIS IS A LIMITED
WARRANTY; CHRIS-CRAFT MAKES NO WARRANTY, OTHER THAN CONTAINED HEREIN; TO
THE EXTENT ALLOWED BY LAW ANY WARRANTIES OF MERCHANTABILITY OR FITNESS
FOR A PARTICULAR PURPOSE ARISING IN STATE LAW ARE EXPRESSLY EXCLUDED TO THE
EXTENT ALLOWED BY LAW, ANY IMPLIED WARRANTY OF MERCHANTABILITY IS LIMITED
TO THE DURATION OF THIS LIMITED WARRANTY. ALL OBLIGATIONS OF CHRIS-CRAFT ARE
SPECIFICALLY SET FORTH HEREIN. CHRIS-CRAFT DOES NOT AUTHORIZE ANY PERSON OR
DEALER TO ASSUME ANY LIABILITY IN CONNECTION WITH CHRIS-CRAFT BOATS. Some
states do not allow limitations on how long an implied warranty lasts, so the above limitation may not
apply to you. Chris-Craft’s obligation with respect to this warranty is limited to making repairs to or
replacing the defective parts and no claim for breach of warranty shall be cause for cancellation or rescission of the contract or sale for any boat manufactured by Chris-Craft.
Chris-Craft
A–3
Warranty Information
Chris-Craft will discharge its obligations under this warranty as rapidly as possible, but cannot guarantee
any specific completion date due to the different nature of claims which may be made and services which
may be required. Chris-Craft reserves the right to change or improve the design of its boats without obligation to modify any boat previously manufactured. This limited warranty gives you specific legal rights, and
you may also have other rights which may vary from state to state. Chris-Craft shall in no way be responsible for any repairs not PRE-AUTHORIZED by a Chris-Craft Customer Service Manager or repairs performed by a repair shop not PRE-AUTHORIZED by a Chris-Craft Customer Service Manager.
ARBITRATION OF DISPUTES AND WAIVER OF JURY TRIAL
EXCEPT AS SPECIFICALLY EXCLUDED IN THIS LIMITED WARRANTY, PURCHASER, CHRISCRAFT AND DEALER AGREE TO SUBMIT ANY AND ALL CONTROVERSIES, CLAIMS OR DISPUTES ARISING OUT OF OR RELATING TO THE BOAT AND THIS LIMITED WARRANTY AND ALL
OTHER AGREEMENTS EXECUTED BY PURCHASER RELATED TO THE BOAT TO BINDING ARBITRATION. IT IS THE EXPRESS INTENT OF PURCHASER, CHRIS-CRAFT AND DEALER THAT THIS
ARBITRATION PROVISION APPLIES TO ALL DISPUTES, INCLUDING CONTRACT DISPUTES, TORT
CLAIMS, FRAUD CLAIMS AND FRAUD-IN THE-INDUCEMENT CLAIMS, STATUTORY CLAIMS
AND REGULATORY CLAIMS RELATING IN ANY MANNER TO THE BOAT AND THIS LIMITED
WARRANTY. IF ANY CONTROVERSY OR CLAIM DESCRIBED IN THIS ARBITRATION PROVISION
IS DETERMINED FOR ANY REASON TO BE INELIGIBLE FOR ARBITRATION, AND FOR ANY CONTROVERSIES, CLAIMS, OR DISPUTES SPECIFICALLY EXEMPTED FROM ARBITRATION, THEN
THOSE CONTROVERSIES, CLAIMS OR DISPUTES SHALL INSTEAD BE DECIDED BY A JUDGE OF
A COURT OF COMPETENT JURISDICTION, WITHOUT A JURY. PURCHASER, CHRIS-CRAFT AND
DEALER KNOWINGLY AND VOLUNTARILY WAIVE THE RIGHT TO A TRIAL BY JURY FOR ALL
SUCH CONTROVERSIES, CLAIMS AND DISPUTES. PURCHASER, CHRIS-CRAFT AND DEALER
UNDERSTAND THAT THERE SHALL BE NO JURY TRIAL, WHETHER THE CONTROVERSY OR
CLAIM IS DECIDED BY ARBITRATION OR BY TRIAL BEFORE A JUDGE. NOTWITHSTANDING
THE PROVISIONS OF THIS ARBITRATION AGREEMENT, WITH REGARD TO CONTROVERSIES
AND/OR ENTITLEMENT TO POSSESSION OF EITHER THE BOAT OR ANY TRADE-IN, ANY PARTY
HERETO MAY RESORT TO A JUDICIAL DETERMINATION (BY A JUDGE AND NOT A JURY), OF
SUCH CONTROVERSIES, DISPUTES OR CLAIMS WITHOUT WAIVING ANY RIGHT TO DEMAND
ARBITRATION WITH RESPECT TO ALL OTHER CONTROVERSIES, DISPUTES OR CLAIMS
BETWEEN THE PARTIES AS MORE SPECIFICALLY SET FORTH IN THIS ARBITRATION PROVISION.
ALL ARBITRATIONS SHALL PROCEED THROUGH THE AMERICAN ARBITRATION ASSOCIATION
AND BE SUBJECT TO ITS COMMERCIAL ARBITRATION RULES, EXCEPT AS SET FORTH HEREIN.
THE ARBITRATORS SHALL HAVE THE AUTHORITY TO AWARD ANY FORM OF RELIEF THAT
COULD BE PROPERLY AWARDED IN A CIVIL ACTION IN THE STATE OF FLORIDA FOR THE TYPE
OF CLAIMS PRESENTED, SUBJECT HOWEVER, TO ALL LIMITATIONS, PREDICATES, AND CONDITION COVERING SUCH REMEDIES OR RELIEF UNDER FLORIDA LAW. THE PURCHASER, CHRISCRAFT OR DEALER MAY DEMAND ARBITRATION OF A CLAIM BY FILING A WRITTEN DEMAND
FOR ARBITRATION, ALONG WITH A STATEMENT OF THE MATTER IN CONTROVERSY WITH THE
AMERICAN ARBITRATION ASSOCIATION, AND SIMULTANEOUSLY SERVING A COPY UPON THE
OTHER PARTY. PURCHASER, CHRIS-CRAFT AND DEALER AGREE THAT THE ARBITRATION PROCEEDING SHALL BE CONDUCTED IN MANATEE COUNTY, FLORIDA UNLESS OTHERWISE
AGREED BY THE PARTIES. EACH PARTY AGREES TO BEAR THEIR OWN ATTORNEY FEES AND
COSTS. THE FILING FEES FOR THE ARBITRATION SHALL BE PAID BY THE FILING PARTY INITIATING THE ARBITRATION. THE ARBITRATOR’S FEE AND ANY OTHER “COSTS” NORMALLY
TAXABLE IN A CIVIL ACTION SHALL BE TAXED BY THE ARBITRATOR IN FAVOR OF THE PREVAILING PARTY.
A–4
Chris-Craft
Warranty Information
CHRIS-CRAFT CUSTOMER PROBLEM RESOLUTION
If a customer experiences a problem with a Chris-Craft Product:
They should maintain written record of events (the problem, related conversations/with whom, important
dates, etc.), as well as any supporting documents (invoices, work orders, etc.), and take the following steps:
1.
Discuss the matter with the appropriate department manager at the dealership (e.g. Service Manager, Parts
Manager, etc.). Explain exactly what the problem/cause is and ask what action will be taken to resolve it. The
Department Manager may find it necessary to contact Chris-Craft on behalf of the customer in order to find a
resolution.
If the matter remains unresolved after a reasonable amount of time:
2.
Discuss the matter with the Dealer Principal (usually the owner or co-owner of the dealership). Explain what has
occurred including the problem and the subsequent discussion with the Department Manager.
If the matter remains unresolved:
3.
Contact the Chris-Craft Customer Service Department at:
Chris-Craft Corporation
Customer Service Department
8161 15th Street East
Sarasota, FL 34243
(941) 351-4900
(941) 358-3782 Fax
TEN YEAR TRANSFERABLE PROTECTION
Hull and Deck Structure: Repair of any structural fiberglass deck or fiberglass hull defect
Please refer to the actual Chris-Craft Limited Warranty for details.
FIVE YEAR TRANSFERABLE PROTECTION
(FOR U.S. RESIDENT CUSTOMERS ONLY, ON UNITS ORDERED BY DEALERS AFTER JULY 1,
2004)
•
•
•
•
Engine: All Internally lubricated parts Including: pistons, rings and pins, crankshaft and main bearings, connecting rods and rod bearings, oil pump, camshaft and bearings, timing chain, gears and or belt, rocker arms, valve
push rods, lifters, valve cover (s), cylinder head and engine block (only if damaged as a result of the failure of an
internally lubricated engine component), intake manifold, exhaust manifold (Risers, riser gaskets and pipes are
excluded), flywheel, harmonic balancer, oil pan, engine mounts, distributor housing shaft and bearings only, diesel engine turbocharger housing and all internal parts, turbocharger waste gate actuator.
Intermediate Housing Components (Stern Drive Only): Intermediate or adapter housing (if damaged as a
result of the failure of a covered component), transom plate, upper gearcase (if damaged as a result of the failure of a covered component), upper gearcase housing (if damaged as a result of the failure of a covered component), U-Joints, U-Joint shaft and bearing, upper steering bearing and gimbal, tilt bearing and lower steering
bearings, shift bellcrank, bushing and plug, center yoke; drive yoke.
Transmission: All internally lubricated parts, transmission mounts, oil pan transmission case (if damaged as a
result of the failure of a covered component).
Gearcase Components (Stern Drive Only): Bearing and oil retainer (except prop shaft seal) driveshaft and
upper bearing, shift rod and/or cover assembly, lower pinion bearing, forward and / or pinion gear, reverse gear,
propeller shaft or shift fork, gearcase and gearcase head (if damaged as a result of the failure of a covered component)
Chris-Craft
A–5
Warranty Information
•
•
•
•
•
•
•
•
•
V-Drive Components: All internally lubricated parts within the V-drive case. V-drive case (if damaged as a
result of the failure of a covered component).
Electrical: Starter, starter solenoid, starter drive voltage regulator, ignition coil, switch box, ignition module, ignition trigger/sensor, windshield wiper motor, wiring and wiring harness.
Closed Cooling System: Engine water coolant circulating pump, oil cooler, heat exchangers.
Power Trim and Tilt: Spring sending unit, oil pump, pump relief valve spring, O-ring, trim cylinder, tilt cylinder,
manual release valve, hydraulic pump, reverse lock valve, power tilt motor and power trim motor
Controls: Neutral start switch, starter/choke primer switch, starter /stop button, throttle control handle, throttle
cam lever, throttle and shift cable, shift interrupter switch, tilt/trim switch ignition switch (Keys and tumblers
excluded)
Steering: Control helm assembly, steering bracket and bushing swivel bracket bearing, control rack and yoke
assembly, power steering pump, power steering cylinder, steering wheel coupling, steering cable, steering
rams.
Fuel System: Fuel /and/or air injector(s), fuel injection pump, EFI electric control module, fuel delivery pump,
diaphragm and flame arrester (Carburetors are excluded)
Seals and Gaskets: Seals and Gaskets are covered for those components covered by the plan.
Additional Benefits:
– $150 Towing Allowance
–
$100 Hoist / Haul-Out Allowance
–
$50 Service Call Reimbursement
–
$25 Repair Deductible
Please refer to the actual Pinnacle Plan Provision for full provisions and coverage.
FIVE YEAR TRANSFERABLE PROTECTION
(FOR U.S. RESIDENT CUSTOMERS ONLY, ON UNITS ORDERED BY DEALERS AFTER JULY 1,
2004)
Chris-Craft Packages
Cruiser Package (40 Roamer / 33 & 36 Corsair Only):
•
Auxiliary Powerplant/Generator Components:
– All internally lubricated parts of the powerplant engine plus the starter, switches and generator
assembly, seals and gaskets.
•
•
Power Inverter/Converter
Air Conditioning/Heat Exchange System Components:
– Compressor, evaporator, capacitors, relays, thermostats, fans, control panel, expansion valve,
temperature control programmer, receiver dryer, blower motor, and heating element.
•
Fresh Water System Components:
– Water Pump, compressor; water tank; waterlines traps, fittings, faucets.
•
Hot Water System Components:
– Thermostat, relays, and water heater unit.
•
Waste System Components:
– Shower, toilet, and sink(s), fixtures and traps, holding tanks, gate valves and connections.
•
Appliances:
– Range/ cook top, oven, microwave, refrigerator, ice maker, trash compactor, and central vacuum
system.
•
12 Volt/ 24 Volt/ 110 Volt Shore Power Components:
– Battery charger/ converter, onboard receptacle, shore power main switch, circuit panel, and circuit
breakers. (Shore power cables are excluded.)
A–6
Chris-Craft
Warranty Information
•
Electrical Components:
– Battery main switch, battery isolator, battery selector switch, remote spotlight (control panel, horizontal/
vertical control motors, light housing), bow and marker lights, and switches. (Light bulbs are excluded.)
•
•
•
Dual Station/ Tower Control Set Components:
Helm control, throttle/ shift control box.
Speedometer & Tachometer Components:
– Speedometer head, tachometer head, speed log and speed sensor.
•
•
Compass Head.
Stereo Systems Components:
– Factory or dealer installed audio system, (excluding speakers).
•
Planing/ Trim Tabs. Bilge Components:
– Pump, manual control panel, blower and switches.
•
Gauges:
– Voltmeter, fuel gauge, trim position gauge, oil pressure gauge, water pressure gauge, engine water
temperature gauge.
Sport Package (Lancer 20, 22, 25, 28 Launch & Corsair Only):
•
Digital Depth Finder / Fish Finder:
– Unit, depth warning alarm, transducer, control cable, unit wiring harness and mounting bracket.
•
Stereo:
– Manufacturer installed, in dash CD player, cassette player and AM / FM radio.
•
Electrical / Instrument panel:
– Tachometer head, voltage gauge, speedometer head, speedometer pilot tube, mounting bracket and
control cable, battery main switch, battery isolator, battery selector switch, battery box, fuse block, and
holders, manual compass, horn, chart light, transom light, bow light, interior courtesy lights, and
docking lights (excludes light bulbs); and windshield wiper motor.
•
Appliances:
– Galley sink and faucet, refrigerator/ icebox.
•
Bilge Components:
– Bilge, Control panel switch, blower motor and wiring harness.
Please refer to the actual Pinnacle Plan Provision for the full provisions and coverage.
TWO YEAR TRANSFERABLE PROTECTION
Gelcoat Finish: Repair any gel coat surface that has laminate blisters, air voids, crazing, or stress cracks.
•
Upholstery:
– Repair any upholstery defects in materials or workmanship.
Please refer to the actual Chris-Craft Limited Warranty for details.
ONE YEAR TRANSFERABLE PROTECTION
Chris-Craft Manufactured Parts: Parts to be found defective in factory material or workmanship
Please refer to the actual Chris-Craft Limited Warranty for details.
Chris-Craft
A–7
Warranty Information
POWERTRAIN WARRANTY
Any matter involving the powertrain is the responsibility of the powertrain manufacturer or its authorized
representative. The powertrain warranty consists of that offered by the manufacturer of the product, or its
authorized representative in the specific county, and should be addressed by them.
Powertrain Manufacturers used by Chris-Craft are:
Gasoline (Petrol) Engines:
Volvo Penta
Volvo Penta of the America, Inc.
1300 Volvo Penta Drive
Chesapeake, VA 23320
Telephone: (757) 436-2800
Mercruiser
3003 North Perkins Road
Stillwater, OK 74075
Telephone: (405) 743-6555
Diesel Engines
Volvo Penta
Volvo Penta of the Americas, Inc.
1300 Volvo Penta Drive
Chesapeake, VA 23320
Telephone: (757) 436-2800
Yanmar
Yanmar Diesel America Corp.
951 Corporate Grove Drive
Buffalo Grove, IL 60089-4508
Telephone: (847) 541-1900
Cummins Marine
4500 Leeds Ave. Suite 301
Charleston, SC 29405-8521
Telephone: (843) 745-1170
A–8
Chris-Craft
APPENDIX B
Checklist
To obtain the most pleasure and safety from your boating experience, certain criteria should be followed.
A checklist provides a standard which can be used to ensure critical items are accounted for. This appendix
provides a set of checklists which you can reproduce and use, as needed, for the task at hand.
Chris-Craft
B–1
Checklist
B–2
Chris-Craft
SAFETY BOATING CHECKLIST
Boating safety and the safety of your passengers is your responsibility.
_________
Observe the instructions on all safety labels. Failure to heed their warning may result in injury.
_________
Never operate a boat while under the influence of drugs or alcohol. It is a Federal offense. Allow only qualified drivers to
operate your boat.
_________
At least one passenger aboard should be able to operate the boat in case the operator/driver is unexpectedly unable to
do so.
_________
Do not overload the boat. Heavy seas reduce capacity. A weight capacity plate is not an excuse for failure to use common sense or rational judgement.
_________
Always use the lanyard stop switch when operating the boat and ensure that all passengers are familiar with its use.
_________
Regularly inspect the boat, the hull, engine, safety equipment, and all other boating gear. Keep them in a safe operating
condition.
_________
Be sure you have the minimum required safety equipment on board. Add any additional gear needed for your outing.
_________
Ensure that all lifesaving equipment, including fire extinguisher, is in a safe operating condition and easily accessible.
Show all passengers where the equipment is located and make sure they know how to use it.
_________
Be very careful when fueling the boat. Know the capacity of the fuel tank. Avoid fueling at night except under well-lit
conditions. Gas spills are unnoticeable in the dark. Extinguish all open flames when fueling.
_________
When fueling, ensure the engine compartment is free of gasoline vapors. Inspect all fuel lines for leaks and hose deterioration.
_________
Keep enough fuel on board for the planned cruise. Allow for changes due to adverse weather or other delays. Use 1/3
of the fuel to reach your destination, use 1/3 to return, and keep 1/3 in reserve.
_________
Check local weather conditions before departure. Be alert to changing conditions.
_________
Ensure all charts are up-to-date in your boating area. Before getting underway, check water conditions in the planned
cruising area.
_________
Before departure file a Float Plan with a responsible person ashore.
_________
Always operate your boat with consideration, courtesy, and common sense.
VISUAL INSPECTION
Before Launching
Vessel Condition and Equipment – General
_________
Decking – Free of hazards
_________
Safety Equipment – Stowed
_________
Optional/Additional Equipment – As required/desired (properly stowed)
_________
Fire Extinguisher(s) – Accessible, current, and ready to use
_________
Visual Distress Signals – Current, accessible, and properly stowed
_________
PFDs – Accessible and ready to use
_________
Hull – Free of damage, excessive dirt, and marine growth
_________
Propeller(s) – Free of damage, excessive dirt, and marine growth
_________
Drain Plugs – Installed
_________
Outdrive – In correct travel position
_________
Water Tank – Full
_________
Holding Tank (if appropriate) – Empty
Engine Compartment and Fuel System
_________
Engine Compartment Blower – Proper operation
_________
Engine – Oil, power steering, and coolant levels (refer to engine manual)
_________
Engine Cooling Seacocks – Open or as required
_________
Fuel Filters – Clean and clear
_________
Seacocks – As required
_________
Bilge Pumps – Clean/Water-free/Operational
_________
Fuel Fumes – None
_________
Fuel Hoses – Inspect for deterioration, kinks, damage
_________
Fuel Tanks – Full
_________
Extra Fuel – As required/desired (in proper containers and properly stowed)
_________
Batteries – Fully charged and connections tight
_________
Overall Condition – Clean and free of loose objects
PRE-DEPARTURE
_________
Float Plan – Leave with responsible person
_________
Weather Conditions – Safe, within your experience level and capabilities
_________
Weather Report – As needed
_________
Required Documents – On board
_________
Navigation Equipment – On board/as needed, including charts, electronics, etc.
_________
Main Circuit Breakers – Meters and switches as required
_________
Steering System – Operational
_________
Horn – Operational
_________
Electrical System – Operational
_________
Navigation Lights – Operational
_________
Bilge Blower and Bilge Pumps – Operational
_________
Safety Passenger Brief – Complete
_________
Food and Potable Water – As desired/required
TOWING, LAUNCHING, AND RETRIEVAL CHECKLIST
PRE-TOW CHECKLIST
_________
Check trailer tire pressures
_________
Trailer wheel bearings greased
_________
Trailer and tow vehicle lights and brakes – operating
_________
Boat steering mechanism – lubricated
_________
Tiedowns – secured
_________
Winch line – taut
_________
Winch anti-reverse gear – engaged
_________
Motor(s) – in traveling position
_________
Coupler – tight
_________
Hitch ball – lightly greased to reduce friction
_________
Safety chains – properly installed and secured
_________
Tongue jack – raised
_________
Spring bars – adjusted
_________
Boat canvas – down and secured
_________
Boat cover – secured
_________
Boating gear – secured
_________
Registration, proof of insurance, other documentation – present
PRE-LAUNCH CHECKLIST
_________
Drain plugs – installed (first visual check)
_________
Boat cover – removed
_________
Wheel chocks – available
_________
Equipment – loaded for proper trim
_________
Bow and stern lines – fastened
_________
Tiedowns – removed
_________
Fuel tanks – full
_________
Outboard or stern drive – tilted up and engine support removed (if applicable)
_________
Check boat systems (engine room blower, bilge pumps, lights, etc.) – operational
_________
Electrical connection to tow vehicle – unplugged
_________
Trailer wheel bearings – cool
_________
Ramp conditions, water depth, current – checked
_________
Drain plugs – installed (second visual check)
LAUNCHING CHECKLIST
_________
Station someone to help direct.
_________
Back straight down the ramp.
_________
Stop with trailer wheels at waters edge.
_________
Secure tow vehicle with parking brake and wheel chocks.
_________
Station helper to hold bow and stern lines from the ramp.
_________
Tighten winch brake and release anti-reverse lock. Do not disconnect winch cable.
_________
If equipped release tilt latch.
_________
Allow boat to slide off trailer.
_________
Unhook winch cable from bow and rewind or secure trailer.
_________
Pull boat to appropriate location and secure.
_________
Return trailer tilt to horizontal and lock.
_________
Remove chocks and drive tow vehicle and trailer from ramp.
BOAT RETRIEVAL
_________
Tilt the outboard or stern drive(s) up.
_________
Back trailer down ramp and into the water. Do not submerge the trailer too deep.
_________
Secure the tow vehicle with the parking brake and chocks.
_________
Guide the boat onto the trailer. Use bow and stern lines to help.
_________
Hook winch cable to boat bow eye.
_________
Pull boat onto the trailer and temporarily secure the boat.
_________
Remove tow vehicle from ramp and drive to the securing area.
_________
Remove drain plug and drain the bilge.
_________
If in salt water, wash hull and trailer with fresh water as soon as possible.
_________
Inspect the propeller for nicks or damage.
_________
Inspect the hull for damage.
_________
Wipe hull to prevent water spots and to keep the hull clean.
_________
If desired at this time clean the boat and prepare for next outing.
_________
Properly secure the boat for road travel.
_________
Reconnect trailer lights and ensure they are operational.
APPENDIX C
Coast Guard Accident Report
This appendix contains a copy of the Coast Guard Accident Report currently in use. If you are involved
in an accident, ensure you verify that you are using the latest form available.
Chris-Craft
C–1
Coast Guard Accident Report
C–2
Chris-Craft
APPENDIX D
Float Plan
Float plans detail your intentions. It describes your course, itinerary, vessel description, expected date of
arrival at your destination, and your expected return time. Leave the plan with a friend or relative, who in
turn can notify the Coast Guard in the event you fail to return.
This appendix contains an example of a float plan, currently in use, that you can copy and utilize.
Chris-Craft
D–1
Float Plan
D–2
Chris-Craft
APPENDIX E
Trailering
A properly selected trailer supports the boat, makes towing safer, and loading and unloading easier.
Improper trailering can cause serious traffic accidents and is a major cause of boat damage. It is your
responsibility to familiarize yourself with proper towing procedures before towing your boat on the road.
When selecting a trailer keep the following in mind:
•
•
•
•
Trailer must match the boat and load.
Check the requirements for brakes, lights, emergency breakaway system, and registration in your area.
The towing vehicle must have adequate power, cooling, transmission, tires, brakes, wheelbase, and suspension
to tow the boat.
The boat and trailer must not exceed the gross vehicle weight rating and towing capacity of the towing vehicle.
Chris-Craft
E–1
Trailering
HITCH
Overloading can cause hitch failure leading to injury-causing accidents. Total weight of the loaded trailer must not exceed the capacity
marker on the hitch of the tow vehicle.
Hitches are divided into classes that specify the gross trailer weight and maximum tongue weight for each
class. Always use a hitch with the same class number as the trailer.
There are two basic hitch types:
•
•
Weight-Carrying – This simple relatively inexpensive bumper hitch supports the entire trailer tongue weight at
the hitch. It is adequate for some light boats and trailers but may be banned in some areas.
Weight-Distributing – This hitch distributes the load to all wheels of both the tow vehicle and the trailer. It can
handle heavier loads with less wear on the tow vehicle. Some hitches have anti-sway bars to improve control by
minimizing trailer fishtailing.
Ensure that the hitch ball matches the trailer coupler. When latched the coupler should fit snugly on the
ball.
SAFETY CHAINS
Safety chains ensure that the trailer will not become completely separated from the towing vehicle while
being towed. Crisscross the chains under the trailer tongue to prevent the tongue from dropping to the road
if the trailer separates from the hitch ball.
BRAKES
The boat trailer should be equipped with a braking system to help relieve stress on the tow vehicle when
braking. Ensure the trailer brakes are operational and in good condition.
TOWING A TRAILER
When towing a trailer be aware that the trailer will track in a wider turn than the tow vehicle. When turning
be careful that the trailer does not strike another vehicle or object. Turns should be made at an appropriate
speed.
You should always practice backing a trailer before you get into a confined launch site. Get accustomed to
working with a trailer. Understand how backing a trailer is different than backing a car. The more you practice the more confident you become with your trailer.
E–2
Chris-Craft
Trailering
LAUNCHING YOUR BOAT
For common courtesy prepare your boat for launch away from the ramp. This includes removing tiedowns, securing loose gear, loading personal gear, and making sure the drain plugs are installed.
When handling cable to launch or retrieve a boat, always wear gloves.
CHECKLIST
When preparing your outing you should always use a checklist to ensure you address those items that will
ensure a pleasant outing.
PRE-TOW CHECKLIST
_________
Check trailer tire pressures
_________
Trailer wheel bearings greased
_________
Trailer and tow vehicle lights and brakes – operating
_________
Boat steering mechanism – lubricated
_________
Tiedowns – secured
_________
Winch line – taut
_________
Winch anti-reverse gear – engaged
_________
Motor(s) – in traveling position
_________
Coupler – tight
_________
Hitch ball – lightly greased to reduce friction
_________
Safety chains – properly installed and secured
_________
Tongue jack – raised
_________
Spring bars – adjusted
_________
Boat canvas – down and secured
_________
Boat cover – secured
_________
Boating gear – secured
_________
Registration, proof of insurance, other documentation – present
Chris-Craft
E–3
Trailering
PRE-LAUNCH CHECKLIST
_________
Drain plugs – installed (first visual check)
_________
Boat cover – removed
_________
Wheel chocks – available
_________
Equipment – loaded for proper trim
_________
Bow and stern lines – fastened
_________
Tiedowns – removed
_________
Fuel tanks – full
_________
Outboard or stern drive – tilted up and engine support removed (if applicable)
_________
Check boat systems (engine room blower, bilge pumps, lights, etc.) – operational
_________
Electrical connection to tow vehicle – unplugged
_________
Trailer wheel bearings – cool
_________
Ramp conditions, water depth, current – checked
_________
Drain plugs – installed (second visual check)
LAUNCHING CHECKLIST
_________
Station someone to help direct.
_________
Back straight down the ramp.
_________
Stop with trailer wheels at waters edge.
_________
Secure tow vehicle with parking brake and wheel chocks.
_________
Station helper to hold bow and stern lines from the ramp.
_________
Tighten winch brake and release anti-reverse lock. Do not disconnect winch cable.
_________
If equipped release tilt latch.
_________
Allow boat to slide off trailer.
_________
Unhook winch cable from bow and rewind or secure trailer.
_________
Pull boat to appropriate location and secure.
_________
Return trailer tilt to horizontal and lock.
_________
Remove chocks and drive tow vehicle and trailer from ramp.
When you are on the boat lower the engine(s) into the water. If necessary turn on engine room blower for a
few minutes to clear the engine compartment of fumes. Start the engine and allow to warm up. Depart the
area slowly.
When returning to the loading ramp prepare the boat before approaching the ramp.
E–4
Chris-Craft
Trailering
BOAT RETRIEVAL
_________
Tilt the outboard or stern drive(s) up.
_________
Back trailer down ramp and into the water. Do not submerge the trailer too deep.
_________
Secure the tow vehicle with the parking brake and chocks.
_________
Guide the boat onto the trailer. Use bow and stern lines to help.
_________
Hook winch cable to boat stem eye.
_________
Pull boat onto the trailer and temporarily secure the boat.
_________
Remove tow vehicle from ramp and drive to the securing area.
_________
Remove drain plug and drain the bilge.
_________
If in salt water wash hull and trailer with fresh water as soon as possible.
_________
Inspect the propeller for nicks or damage.
_________
Inspect the hull for damage.
_________
Wipe hull to prevent water spots and to keep the hull clean.
_________
If desired at this time clean the boat and prepare for next outing.
_________
Properly secure the boat for road travel.
_________
Reconnect trailer lights and ensure they are operational.
Chris-Craft
E–5
Trailering
E–6
Chris-Craft
APPENDIX F
Water Skiing
Water skiing has brought a special set of safety precautions to observe while boating.
1.
Water ski only in safe and/or designated areas. Stay away from areas designated for swimmers and skin divers.
2.
NEVER ski while under the influence of alcohol or drugs.
3.
Ski only in water free of underwater obstructions. Avoid shallow waters, other boats, navigational aids, and
other obstructions.
4.
Ski only during daylight when visibility is good. Never ski after dark. Not only is it dangerous, but it is illegal.
5.
Do not ski with 300 feet of another vessel, 100 feet of the shore, or dock.
6.
Do not ski in rough waters.
7.
Do not ski when it is raining.
8.
If skiing in cooler weather understand the effects of hypothermia and take the proper precautions.
9.
All skiers must wear a USCG approved personal flotation device (PFD).
10. Ensure everyone understands the hand signals.
11. A competent observer must watch the skier at all times and keep the driver informed of the skiers hand signals
or if the skier is in trouble.
12. The boat driver must always give full attention to driving and operating the boat.
13. Give immediate attention to a downed skier. Other boats may not see him or her.
14. Turn off the engine(s) when approaching the skier. Drive the boat carefully in the vicinity of the downed skier.
Approach the skier from the lee side (opposite the direction of the wind).
15. Do not swamp the boat when retrieving a skier.
16. Never back up to anyone in the water.
17. Never drive a boat behind a water skier. Should the skier fall you may hit him or her.
18. Always observe local restrictions on length of tow line.
19. Understand and use water skiing hand signals.
20. Always be considerate of others.
21. Non-swimmers should never ski.
Chris-Craft
F–1
Water Skiing
Understanding hand signals is critical to safe skiing. All parties should agree to what each signal means to
prevent confusion. The more common signals are illustrated below.
Left Turn
Arm outstretched pointing left
Right Turn
Arm outstretched point right
Skier OK
Hands clenched together overhead
Speed OK
Raised arm with thumb and finger
joined to form circle
Back to Dock
Pat top of head
Stop
Hand up, palm forward
Slower
Palm or thumb pointing down
Faster
Palm or thumb pointing up
Retrieval
One ski extended out of the water
F–2
Chris-Craft
APPENDIX G
Maintenance Log Forms
This appendix contains a maintenance log which you can copy and use to document maintenance actions
performed on this vessel.
It is not mandatory that you use this specific log to document maintenance actions, as you may have a preference for a certain style of maintenance log available on the open market. It is, however, important that
you keep some type of maintenance log which documents every maintenance action taken on the vessel.
The log may serve as an excellent indicator of potential problems as well as a record of service required by
warranties and service agreements.
Chris-Craft
G–1
Maintenance Log Forms
G–2
Chris-Craft
3
DATE
ENGINE
HOURS
MAINTENANCE ACTION
MAINTENANCE LOG
COMPANY/
TECHNICIAN
COST
4
DATE
ENGINE
HOURS
MAINTENANCE ACTION
MAINTENANCE LOG
COMPANY/
TECHNICIAN
COST
APPENDIX H
Technical Drawings
This appendix contains technical drawings for the models discussed in this manual. You should become
acquainted with those drawings applicable to your boat.
Chris-Craft
H–1
Technical Drawings
H–2
Chris-Craft
Chris-Craft
THRU- HULL
TRANSDUCER
(DEPTH)
BILGE PUMP
ENGINE FUEL FEED
BILGE PUMP
VENT HOSE
FUEL VENT HOSE
FUEL FILL LINE
SENDING UNIT
BATTERY
Figure 1. Lancer 20 – Plumbing and Fuel Routing
BILGE PUMP
FLOAT SWITCH
BLOWER
LANCER 20
PLUMBING AND FUEL ROUTING
Technical Drawings
white text
Chris-Craft
BREAKER
12V OUTLET
COURTESY LTS
BLOWR
STEREO
SIZE
15 AMPS
5 AMPS
7 AMPS
3 AMPS
SIZE
5 AMPS
3 AMPS
5 AMPS
15 AMPS
BREAKER
ACCESSORY SW
BILGE PUMP
IGNITION
SPARE
Figure 2. Lancer 20 – Helm Breaker Panel
BREAKER
NAV/ANCHOR LT
EXHAUST
HORN
AMPLIFIER
SIZE
NOT USED
5 AMPS
10 AMPS
NOT USED
Technical Drawings
white text
Chris-Craft
12V
AR I NC
0
M
MANUAL BILGE PUMP
ENGINE ROOM BLOWER
HORN
NAVIGATION/ANCHOR LT
DIMMER
COCKPIT LTS
Figure 3. Lancer 20 – Helm Switch Panel
IGNITION KEY SWITCH
SELECTABLE EXHAUST (OPTION)
ICON DESCRIPTION
12V OUTLET
ICON DESCRIPTION
LANCER 20 HELM SWITCH PANEL
Technical Drawings
white text
Chris-Craft
BILGE PUMP
DISCHARGE
LANCER 20
THRU HULL LOCATIONS
GARBOARD DRAIN
PLUG
Figure 4. Lancer 20 – Thru-Hull Locations
TRANSOM VIEW
DECK VENT DRAINS (TYPICAL
PORT AND STARBOARD)
STARBOARD VIEW
FUEL TANK VENT
ANCHOR LOCKER
DRAIN
Technical Drawings
white text
Chris-Craft
Volt
R
Oil Engine
Fuel
mph
R
45
60
55
50
UP
DN
TRIM
1
0
2
Figure 5. Lancer 20 – Instrument Panel
4" 4-IN-1 GAUGE (FUEL, VOLT, OIL, TEMP)
2" DEPTH SOUNDER
4" SPEEDOMETER (0-60 MPH)
2" DRIVE TRIM INDICATOR
4" TACHOMETER (0-6000 RPM)
PART DESCRIPTION
10
20
30
40
rpm
3
R
6
4
5
Technical Drawings
white text
Chris-Craft
Figure 6. Lancer 22 – Plumbing and Fuel Routing
Technical Drawings
white text
Chris-Craft
BREAKER
IGNITION
BLOWER
EXHAUST (OPTION)
WATER PUMP (OPT)
SIZE
10 AMPS
10 AMPS
5 AMPS
10 AMPS
SIZE
5 AMPS
10 AMPS
25 AMPS
20 AMPS
BREAKER
NAVIGATION LT
COCKPIT LTS
HORN
12V OUTLET
Figure 7. Lancer 22 – Helm Breaker Panel
BREAKER
BILGE PUMP
ACC SWITCH (RUMBLE)
ACCESSOR (RUMBLE)
TRIM TABS
LANCER 22 HELM BREAKER PANEL
SIZE
5 AMPS
5 AMPS
5 AMPS
15 AMPS
Technical Drawings
white text
Chris-Craft
MANUAL BILGE PUMP
ACCESSORY (NOT USED)
ENGINE ROOM BLOWER
SELECTABLE EXHAUST (OPTION)
Figure 8. Lancer 22 – Port Switch Panel
WATER PUMP (OPTION)
ICON DESCRIPTION
IGNITION KEY SWITCH
ICON DESCRIPTION
LANCER 22 PORT SWITCH PANEL
Technical Drawings
white text
Chris-Craft
ICON
HORN
COCKPIT LT
Figure 9. Lancer 22 – Starboard Switch Panel
NAVIGATION/ANCHOR LT
TRIM TAB
DESCRIPTION
DIMMER
ICON
TRIM TAB
DESCRIPTION
LANCER 22 STBD SWITCH PANEL
Technical Drawings
white text
Chris-Craft
SIZE
40 AMPS
AMPLIFIER
BREAKER
Figure 10. Lancer 22 – Battery Switch Panel
BREAKER
MAIN
BATTERY SWITCH
SIZE
5 AMPS
10 AMPS
15 AMPS
LANCER 22 BATTERY SWITCH PANEL
Technical Drawings
white text
Chris-Craft
Figure 11. Lancer 22 – Instrument Panel
4 " TACHOMETER (0-6000 RPM)
2" DRIVE TRIM INDICATOR
4" SPEEDOMETER (0-60 MPH)
2" DEPTH SOUNDER
4" 4-IN-1 GAUGE (FUEL, VOLT, OIL, TEMP)
PART DESCRIPTION
LANCER 22 INSTRUMENT PANEL
Technical Drawings
white text
Chris-Craft
Figure 12. Launch 22 – Plumbing and Fuel Routing
Technical Drawings
white text
Chris-Craft
BREAKER
IGNITION
BLOWER
EXHAUST (OPTION)
WATER PUMP (OPT)
SIZE
10 AMPS
10 AMPS
5 AMPS
10 AMPS
SIZE
5 AMPS
NOT USED
NOT USED
20 AMPS
BREAKER
NAVIGATION LT
COCKPIT LTS
HORN
12V OUTLET
Figure 13. Launch 22 – Helm Breaker Panel
BREAKER
BILGE PUMP
ACC SWITCH
ACCESSORY
TRIM TABS
LAUNCH 22 HELM BREAKER PANEL
SIZE
5 AMPS
5 AMPS
5 AMPS
15 AMPS
Technical Drawings
white text
Chris-Craft
ACCESSORY (NOT USED)
SELECTABLE EXHAUST (OPTION)
Figure 14. Launch 22 – Port Switch Panel
MANUAL BILGE PUMP
ICON DESCRIPTION
WATER PUMP (OPTION)
ENGINE ROOM BLOWER
ICON DESCRIPTION
IGNITION KEY SWITCH
LAUNCH 22 PORT SWITCH PANEL
Technical Drawings
white text
Chris-Craft
ICON
HORN
COCKPIT
Figure 15. Launch 22 – Starboard Switch Panel
NAVIGATION/ANCHOR LT
TRIM TAB
DESCRIPTION
DIMMER
ICON
TRIM TAB
DESCRIPTION
LAUNCH 22 STBD SWITCH PANEL
Technical Drawings
white text
Chris-Craft
SIZE
40 AMPS
AMPLIFIER
BREAKER
Figure 16. Launch 22 – Battery Switch Panel
BREAKER
MAIN
BATTERY SWITCH
SIZE
5 AMPS
10 AMPS
15 AMPS
LAUNCH 22 BATTERY SWITCH PANEL
Technical Drawings
white text
SELECTABLE EXHAUST (OPTION)
(TYPICAL PORT AND STARBOARD)
FUEL TANK VENT
RUMBLE HATCH DRAIN
BILGE PUMP
LAUNCH/LANCER (RUMBLE) 22
Chris-Craft
WATER TANK VENT
DECK VENT DRAINS
(TYPICAL PORT AND STARBOARD)
TRANSOM VIEW ( LOOKING FORWARD)
GARBOARD DRAIN PLUG
Figure 17. Launch 22 – Thru-Hull Locations
PORT SIDE PROFILE
STARBOARD PROFILE
ANCHOR LOCKER
DRAIN
RUMBLE HATCH DRAIN
(TYPICAL PORT & STARBOARD,
LANCER (RUMBLE) ONLY)
Technical Drawings
white text
Chris-Craft
Figure 18. Launch 22 – Instrument Panel
4 " TACHOMETER (0-6000 RPM)
2" DRIVE TRIM INDICATOR
4" SPEEDOMETER (0-60 MPH)
2" DEPTH SOUNDER
4" 4-IN-1 GAUGE (FUEL, VOLT, OIL, TEMP)
PART DESCRIPTION
LAUNCH 22 INSTRUMENT PANEL
Technical Drawings
white text
Chris-Craft
BLOWER
HOSE
ENGINE FUEL
FEED
RAW WATER
PICKUP (OPTIONAL)
BILGE PUMP FLOAT
SWITCH
TRANSDUCER (TO
DEPTH GAUGE)
TRIM TAB
LINES
FRESH WATER
PUMP
FRESH WATER
SUPPLY TO HEAD
SINK
BILGE HOSE
FRESH WATER
SUPPLY TO PUMP
BILGE HOSE FROM
SUMP PUMP TO
THRU-HULL
FUEL FILL LINE
TRIM TAB PUMP
(OPTION)
WATER HOSE
WATER FILL HOSE
OPTIONAL SANITATION HOSE FROM
TOILET TO DOCKSIDE PUMPOUT
DRAIN HOSE
Figure 19. Launch 25 – Plumbing and Fuel Routing
FUEL VENT HOSE
SANITATION HOSE
(OPTIONAL)
LAUNCH 25
PLUMBING AND FUEL LINE ROUTING
Technical Drawings
white text
Chris-Craft
BREAKER
IGNITION
BLOWER
EXHAUST (OPTION)
SIZE
10 AMPS
10 AMPS
5 AMPS
10 AMPS
SIZE
5 AMPS
20 AMPS
NOT USED
20 AMPS
BREAKER
NAVIGATION LT
COCKPIT LTS
HORN
12V OUTLET
Figure 20. Launch 25 – Helm Breaker Panel
ACCESSORY
TRIM TABS
BREAKER
LAUNCH 25 HELM BREAKER PANEL
SIZE
5 AMPS
5 AMPS
10 AMPS
15 AMPS
Technical Drawings
white text
Chris-Craft
ENGINE HATCH
SELECTABLE EXHAUST (OPTION)
Figure 21. Launch 25 – Port Switch Panel
MANUAL BILGE PUMP
ICON DESCRIPTION
WATER PUMP (OPTION)
ENGINE ROOM BLOWER
ICON DESCRIPTION
IGNITION KEY SWITCH
LAUNCH 25 PORT SWITCH PANEL
Technical Drawings
white text
Chris-Craft
ICON
HORN
COCKPIT LT
Figure 22. Launch 25 – Starboard Switch Panel
NAVIGATION/ANCHOR LT
TRIM TAB
DESCRIPTION
DIMMER
ICON
TRIM TAB
DESCRIPTION
LAUNCH 25 STBD SWITCH PANEL
Technical Drawings
white text
Chris-Craft
BREAKER
AUTO BILGE PUMP
STEREO MEMORY
MAIN
BREAKER
40 AMPS
SIZE
SUMP PUMP
SPARE
BREAKER
AMPLIFIER
Figure 23. Launch 25 – Battery Switch Panel
SIZE
5 AMPS
10 AMPS
20 AMPS
20 AMPS
LAUNCH 25 BATTERY SWITCH PANEL
SIZE
15 AMPS
5 AMPS
5 AMPS
NOT USED
Technical Drawings
white text
Chris-Craft
Figure 24. Launch 25 – Thru-Hull Locations
Technical Drawings
white text
Chris-Craft
Figure 25. Launch 25 – Instrument Panel
4 " TACHOMETER (0-6000 RPM)
2" DRIVE TRIM INDICATOR
4" SPEEDOMETER (0-60 MPH)
2" DEPTH SOUNDER
4" 4-IN-1 GAUGE (FUEL, VOLT, OIL, TEMP)
PART DESCRIPTION
LAUNCH 25 INSTRUMENT PANEL
Technical Drawings
white text
Chris-Craft
Figure 26. Launch 28 – Plumbing Hose Route
Technical Drawings
white text
Chris-Craft
5 AMPS
5 AMPS
3 AMPS
3 AMPS
20 AMPS
20 AMPS
20 AMPS
HIGH WATER BILGE
AUTO BILGE PUMP
STEREO MEMORY
CO MONITOR
BATTERY CHARGER 1 (OPT)
BATTERY CHARGER 2 (OPT)
BATTERY CHARGER 3 (OPT)
MAIN
HOUSE BATTERY SWITCH
VOLTAGE SENSITIVE RELAY
ENGINE BATTERY SWITCH
BREAKER
50 AMPS
SIZE
HEAD (OPTION)
CABIN LIGHTS
REFRIGERATOR (OPTION)
ELECT CONTROLS (TWIN)
AMPLIFIER
STEREO
SPARE
BREAKER
Figure 27. Launch 28 – Battery Switch Panel
SIZE
BREAKER
LAUNCH 28 BATTERY SWITCH PANEL
30 AMPS
5 AMPS
5 AMPS
20 AMPS
15 AMPS
10 AMPS
NOT USED
SIZE
Technical Drawings
white text
Chris-Craft
ICON
ICON
12V OUTLET
HELM SEAT (OPTION)
COCKPIT LTS
DIMMER
NAVIGATION/ANCHOR LT
DESCRIPTION
Figure 28. Launch 28 – Port Switch Panel
5 AMPS
SELECTABLE EXHAUST (OPTION)
20 AMPS
ENGING HATCH
3 AMPS
10 AMPS
WATER PUMP
25 AMPS
5 AMPS
MANUAL BILGE PUMP
WINDLASS MOTOR (OPTION)
10 AMPS
HORN
WINDLASS SWITCH (OPTION)
SIZE
DESCRIPTION
LAUNCH 28 PORT SWITCH PANEL
15 AMPS
15 AMPS
5 AMPS
3 AMPS
5 AMPS
SIZE
Technical Drawings
white text
Chris-Craft
Figure 29. Launch 28 – Single Drive Trim Panel
ICON DESCRIPTION
DRIVE TRIM SWITCH
LAUNCH 28 SINGLE DRIVE TRIM PANEL
Technical Drawings
white text
Chris-Craft
10 AMPS
Figure 30. Launch 28 – Single Switch Panel
TRIM TAB (STBD BOW DOWN)
IGNITION KEY SWITCH
20AMPS
10 AMPS
STBD ENGINE ROOM BLOWER
TRIM TAB (PORT BOW DOWN)
SIZE
10 AMPS
ICON DESCRIPTION
PORT ENGINE ROOM BLOWER
LAUNCH 28 SINGLE SWITCH PANEL
Technical Drawings
white text
Chris-Craft
Figure 31. Launch 28 – Twin Drive Trim Panel
STBD DRIVE TRIM SWITCH
ICON DESCRIPTION
PORT DRIVE TRIM SWITCH
LAUNCH 28 TWIN DRIVE TRIM PANEL
Technical Drawings
white text
Chris-Craft
STBD IGNITION KEY SWITCH
Figure 32. Launch 28 – Twin Switch Panel
10 AMPS
10 AMPS
PORT IGNITION KEY SWITCH
TRIM TAB (STBD BOW DOWN)
20AMPS
10 AMPS
STBD ENGINE ROOM BLOWER
TRIM TAB (PORT BOW DOWN)
SIZE
10 AMPS
ICON DESCRIPTION
PORT ENGINE ROOM BLOWER
LAUNCH 28 TWIN SWITCH PANEL
Technical Drawings
white text
Chris-Craft
SINK DRAIN
WETBAR - REFRIGERATOR
DRAIN
WATER TANK
VENT
WASTE TANK
VENT - OPTIONAL
Figure 33. Launch 28 – Thru-Hull Locations
FUEL TANK VENT
PORTA POTTI DOCKSIDE
PUMPOUT VENT - OPTIONAL
BILGE PUMP
SELECTABLE EXHAUST
(OPTION) (TYPICAL PORT &
STARBOARD)
LAUNCH 28
THRU HULL LOCATIONS
ANCHOR
LOCKER DRAIN
HIGHWATER
BILGE PUMP
Technical Drawings
white text
Chris-Craft
R
Volt
10
20
30
40
R
45
70
Figure 34. Launch 28 – Single Instrument Panel
5 " TACHOMETER (0-6000 RPM)
2" DRIVE TRIM INDICATOR
5" SPEEDOMETER (0-60 MPH)
60
50
5" 4-IN-1 GAUGE (FUEL, VOLT, OIL, TEMP)
2" DEPTH SOUNDER
CHART PLOTTER (OPTION)
PART DESCRIPTION
Oil Engine
Fuel
DN
TRIM
UP
1
0
2
rpm
3
LAUNCH 28 SINGLE INSTRUMENT PANEL
R
6
4
5
Technical Drawings
white text
Chris-Craft
Figure 35. Launch 28 – Twin Engine Instrument Panel
5" SPEEDOMETER (0-60 MPH)
5" STBD 3-IN-1 GAUGE ( VOLT, OIL, TEMP)
2" STBD DRIVE TRIM INDICATOR
5" STBD TACHOMETER (0-6000 RPM)
2" PORT DRIVE TRIM INDICATOR
5" PORT TACHOMETER (0-6000 RPM)
2" DEPTH SOUNDER
5" PORT 4-IN-1 GAUGE (FUEL, VOLT, OIL, TEMP)
CHART PLOTTER (OPTION)
PART DESCRIPTION
Technical Drawings
white text
Chris-Craft
Figure 36. Corsair 25 – Plumbing Hose Routing
Technical Drawings
white text
Chris-Craft
FUEL SUPPLY
TO ENGINE
CORSAIR 25
FUEL LINE ROUTING
Figure 37. Corsair 25 – Fuel Hose Routing
SENDING UNIT
FUEL TANK
FUEL VENT HOSE
FUEL FILL
FUEL FILL LINE
Technical Drawings
white text
Chris-Craft
BREAKER
IGNITION
HORN
NAVIGATION LT
EXHAUST (OPTION)
COCKPIT LTS
ENGINE HATCH
SIZE
10 AMPS
7 AMPS
5 AMPS
3 AMPS
5 AMPS
20 AMPS
SIZE
10 AMPS
5 AMPS
3 AMPS
5 AMPS
7 AMPS
BREAKER
WINDLASS SW (OPT)
WINDLASS (OPTION)
TRIM TABS
12V OUTLET
ACCY
Figure 38. Corsair 25 – Helm Breaker Panel
BREAKER
WATER PUMP
MANUAL BILGE PUMP
STEREO
CABIN LTS
BLOWER
CORSAIR 25 HELM BREAKER PANEL
SIZE
3 AMPS
25 AMPS
20 AMPS
15 AMPS
NOT USED
Technical Drawings
white text
Chris-Craft
ICON
DESCRIPTION
ENGINE HATCH
SELECTABLE EXHAUST (OPTION)
STEREO REMOTE
IGNITION KEY SWITCH
ENGINE ROOM BLOWERS
TRIM TAB (PORT BOW CONTROL)
TRIM TAB (STBD BOW CONTROL)
Figure 39. Corsair 25 – Helm Switch Panel
ICON DESCRIPTION
HORN
MANUAL BILGE PUMP
WATER PUMP
WINDLASS (OPTION)
NAVIGATION/ANCHOR LIGHT
DIMMER
COCKPIT LIGHT
CORSAIR 25 HELM SWITCH PANEL
Technical Drawings
white text
Chris-Craft
5 AMPS
10 AMPS
20 AMPS
20 AMPS
AUTO BILGE PUMP
STEREO MEMORY
BATTERY CHARGER 1 (OPT)
BATTERY CHARGER 2 (OPT)
MAIN
BATTERY SWITCH
BREAKER
40 AMPS
SIZE
15 AMPS
SIZE
SPARE
SUMP PUMP
NOT USED
NOT USED
REFRIGERATOR (OPTION) 5 AMPS
AMPLIFIER
BREAKER
Figure 40. Corsair 25 – Battery Switch Panel
SIZE
BREAKER
CORSAIR 25 BATTERY SWITCH PANEL
Technical Drawings
white text
Chris-Craft
WATER TANK VENT
WETBAR SINK DRAIN
DOCKSIDE PUMPOUT
VENT (OPTION)
Figure 41. Corsair 25 – Thru-Hull Locations
SELECTABLE EXHAUST (OPTION)
FUEL TANK VENT
SELECTABLE EXHAUST (OPTION)
BILGE PUMP
CORSAIR 25
HULL THRU HULL LOCATIONS
ANCHOR
LOCKER DRAIN
Technical Drawings
white text
Chris-Craft
Figure 42. Corsair 25 – Instrument Panel
Technical Drawings
white text
Chris-Craft
Figure 43. Corsair 28 – Plumbing Hose Routing (Sheet 1 of 2)
Technical Drawings
white text
Chris-Craft
Figure 44. Corsair 28 – Plumbing Hose Routing (Sheet 2 of 2)
Technical Drawings
white text
Chris-Craft
HIGH WATER BILGE
AUTO BILGE PUMP
STEREO MEMORY
CO MONITOR
BATTERY CHARGER 1 (OPT)
BATTERY CHARGER 2 (OPT)
BATTERY CHARGER 3 (OPT)
BREAKER
MAIN
HOUSE BATTERY SWITCH
VOLTAGE SENSITIVE RELAY
ENGINE BATTERY SWITCH
SIZE
50 AMPS
BREAKER
HEAD (OPTION)
CABIN LIGHTS
REFRIGERATOR (OPTION)
ELECT CONTROLS (TWIN)
AMPLIFIER
STEREO
SPARE
Figure 45. Corsair 28 – Battery Switch Panel
SIZE
5 AMPS
5 AMPS
3 AMPS
3 AMPS
20 AMPS
20 AMPS
20 AMPS
BREAKER
CORSAIR 28 BATTERY SWITCH PANEL
SIZE
30 AMPS
5 AMPS
5 AMPS
20 AMPS
15 AMPS
10 AMPS
NOT USED
Technical Drawings
white text
Chris-Craft
ICON
10 AMPS
20 AMPS
3 AMPS
25 AMPS
5 AMPS
MANUAL BILGE PUMP
WATER PUMP
ENGINE HATCH
WINDLASS SWITCH (OPTION)
WINDLASS MOTOR (OPTION)
SELECTABLE EXHAUST (OPTION)
ICON
12V OUTLET
HELM SEAT (OPTION)
COCKPIT LTS
DIMMER
NAVIGATION/ANCHOR LT
DESCRIPTION
Figure 46. Corsair 28 – Port Switch Panel
10 AMPS
5 AMPS
HORN
SIZE
DESCRIPTION
CORSAIR 28 PORT SWITCH PANEL
15 AMPS
15 AMPS
5 AMPS
3 AMPS
5 AMPS
SIZE
Technical Drawings
white text
Chris-Craft
Figure 47. Corsair 28 – Single Engine Drive Trim Panel
ICON DESCRIPTION
DRIVE TRIM SWITCH
CORSAIR 28 SINGLE DRIVE TRIM PANEL
Technical Drawings
white text
Chris-Craft
10 AMPS
Figure 48. Corsair 28 – Single Engine Switch Panel
IGNITION KEY SWITCH
TRIM TAB (STBD BOW DOWN)
20AMPS
10 AMPS
STBD ENGINE ROOM BLOWER
TRIM TAB (PORT BOW DOWN)
SIZE
10 AMPS
ICON DESCRIPTION
PORT ENGINE ROOM BLOWER
CORSAIR 28 SINGLE SWITCH PANEL
Technical Drawings
white text
Chris-Craft
Figure 49. Corsair 28 – Twin Engine Drive Trim Panel
STBD DRIVE TRIM SWITCH
ICON DESCRIPTION
PORT DRIVE TRIM SWITCH
CORSAIR 28 TWIN DRIVE TRIM PANEL
Technical Drawings
white text
Chris-Craft
10 AMPS
STBD IGNITION KEY SWITCH
Figure 50. Corsair 28 – Twin Engine Switch Panel
10 AMPS
PORT IGNITION KEY SWITCH
TRIM TAB (STBD BOW DOWN)
20AMPS
10 AMPS
STBD ENGINE ROOM BLOWER
TRIM TAB (PORT BOW DOWN)
SIZE
10 AMPS
PORT ENGINE ROOM BLOWER
ICON DESCRIPTION
CORSAIR 28 TWIN SWITCH PANEL
Technical Drawings
white text
Chris-Craft
WETBAR - REFRIGERATOR
DRAIN
WATER TANK
VENT
WASTE TANK
VENT - OPTIONAL
Figure 51. Corsair 28 – Thru-Hull Locations
FUEL TANK VENT
PORTA POTTI DOCKSIDE
PUMPOUT VENT - OPTIONAL
BILGE PUMP
SELECTABLE EXHAUST
(OPTION) (TYPICAL PORT &
STARBOARD)
CORSAIR 28
THRU HULL LOCATIONS
ANCHOR
LOCKER DRAIN
HIGHWATER
BILGE PUMP
Technical Drawings
white text
Chris-Craft
Volt
R
10
20
30
40
R
45
70
60
50
Figure 52. Corsair 28 – Single Engine Instrument Panel
Oil Engine
Fuel
DN
TRIM
UP
1
0
2
rpm
3
CORSAIR 28 SINGLE INSTRUMENT PANEL
R
6
4
5
Technical Drawings
white text
Chris-Craft
Figure 53. Corsair 28 – Twin Engine Instrument Panel
Technical Drawings
white text
FUEL
VOLT
WATER TEMPERATURE
OIL PRESSURE
116-2D
1
2
3
4
5
6
116-2A
460-1
520
114
1
2
3
4
5
6
116-2B
460-1A
460G
116-2
460-1
520
115
111
113
114
460GE
1
2
3 CONNECTOR "IP"
4
TO PRIMARY HARNESS
5
6 P/N: WIRE-1900
7
8
460GA
111
460GB
460-1A
460-1B
SPEEDOMETER
460GB
460GC
TACHOMETER
DRIVE
TRIM
1
2
3
4
5
6
116-2B
460-1B
113
1
2
3
4
5
6
116-2C
460-1C
1
2
3
4
116-2C
460-1C
115
460GD
460GC
460GD
COCKPIT
LIGHT
INSTRUMENT PANEL
P/N: PNL-1907
475-1
475G-1
1
2
112
ENGINE ALARM
116B
117A
305
305A
220
220A
235
235A
ON
IGNITION
IN
START
7
HORN
8
2
3
2
3
2
3
2
3
2
3
2
3
475A
1
2
3
4
5 CONNECTOR "SP1"
6
TO PRIMARY HARNESS
7
8 P/N: WIRE-1900
9
10
11
12
7
BLOWER
8
110
201
201A
7
BILGE PUMP
8
7
EXHAUST
8
460
450
450A
455
171G
171
7
COCKPIT LT
8
7
DIMMER
8
1
1 CONNECTOR "SP3"
2
TO PRIMARY HARNESS
3
4 P/N: WIRE-1900
1
2
3 CONNECTOR "SP2"
4
TO PRIMARY HARNESS
5
6 P/N: WIRE-1900
7
8
DIGITAL
DIMMER
7
4
5
6
8
1
2
3
NAVIGATION LTS
12V OUTLET
COCKPIT
LIGHT
HELM SWITCH PANEL
P/N: PNL-1902
475-2
475G-2
1
2
POSITIVE BUS
ACC SWITCH
NAV/ANC LT
5A
BILGE PUMP
5A
IGNITION
10A
SPARE
EXHAUST
116C
3A
HORN
5A
AMPLIFIER
15A
12V OUTLET
15A
CTSY LTS
5A
BLOWER
7A
STEREO
3A
374
220A
450A
201A
116B
171
116A
475A
376
235A
GROUND BUS
171G
460G
374G
460G-3
376G
450G
305G
305A
Chris-Craft
HELM BREAKER PANEL
P/N: PNL-1906
A
B
C
D
E
F
G
H
J
K CONNECTOR "BP"
L TO PRIMARY HARNESS
M P/N: WIRE-1900
N
P
R
S
T
U
V
W
X
Figure 54. Lancer 20 Electrical Schematic (Sheet 1 of 2)
Lancer 20
Electrical Diagram
Page 1 of 2
Electrical Technical Drawings
DEPTH
SOUNDER
1
2
3
4
5
6
this is text
Chris-Craft
100AG
-
+
100A
5A
150
AUTO BILGE
10A
STEREO MEM
24 HOUR
BREAKERS
BATTERY
SWITCH
170A
100
30A
MAIN BREAKER
STEREO
MEM
PWR
GND
AMP
FL+
FLFR+
FRRL+
RLRR+
RR-
100G
1
2
3
4
5
6
7
8
9
10
11
12
200G
200
BLOWER
FUEL FILL
1
2
3
4
1
2
EXTINGUISHER
(OPTION)
220G
220G-1
500G
1
2
455G
LOOP
1
2
Note:
If the boat is not equiped with an
extinguisher (or extinguisher has
discharged), the use of the loop is
needed in order for the engine
blower to function.
1
2
ANCHOR
LIGHT
DRIVE
TRIM SW
286
285
287
NEUTRAL
SAFETY
Figure 55. Lancer 20 Electrical Schematic (Sheet 2 of 2)
651
BLK
BRN
BLK
PORT
TWEETER
STBD
TWEETER
PORT
SPEAKER
STBD
SPEAKER
MAIN GROUND BUS
372
374
374G
373
384
385
386
387
388
389
390
391
SAFETY
LANYARD
SELECTABLE
EXHAUST
FUEL SENDER
520G
FIRE
MONITOR
220G-2
460-3
COMPASS
N
W E
S
AMPLIFIER/
SUBWOOFER
1
2
3 CONNECTOR "SP2"
4
TO HELM SWITCH PANEL
5
6 P/N: PNL-1902
7
8
450-1
450G-1
A
TO HELM BREAKER PANEL
B
C
+/- BUS BARS
D
E
F
G
H
J
K CONNECTOR "BP"
L TO HELM BREAKER PANEL
M P/N: PNL-1906
N
P
R
S
T
U
V
W
NAVIGATION
X
LIGHTS
170G
170
TRUMPET
HORN
171G
460G
374G
460G-3
376G
450G
305G
305A
116A
475A
376
235A
374
220A
450A
201A
116B
171
460
450
450A
455
171G
171
110
201
201A
475A
1 CONNECTOR "SP3"
2
TO HELM SWITCH PANEL
3
4 P/N: PNL-1902
1
2
3
4
5 CONNECTOR "SP1"
6
TO HELM SWITCH PANEL
7
8 P/N: PNL-1902
9
10
11
12
116B
117A
305
305A
220
220A
235
235A
112
1
2
3 CONNECTOR "IP"
4
TO INSTRUMENT PANEL
5
6 P/N: PNL-1907
7
8
460G
116-2
460-1
520
115
111
113
114
Lancer 20
Electrical Diagram
Page 2 of 2
Electrical Technical Drawings
this is text
Electrical Technical Drawings
Lancer 22
Electrical Diagram
Page 1 of 2
1
2
3
4
5
6
DEPTH
SOUNDER
FUEL
VOLT
WATER TEMPERATURE
OIL PRESSURE
460G-1
116-2
460-1
520
115
111
113
114
116-2D
460G-1D
1
2
3
4
5
6
116-2A
460-1
520
114
1
2
3
4
5
6
116-2B
460-1A
1
2
3 CONNECTOR "IP"
4
TO PRIMARY HARNESS
5
6 P/N: WIRE-2301
7
8
460G-1
111
460G-1A
460-1A
460-1B
SPEEDOMETER
460G-1D
460G-1A
460G-1B
DRIVE
TRIM
116-2B
460-1B
113
1
2
3
4
5
6
116-2C
460-1C
1
2
3
4
116-2C
460-1C
115
460G-1C
460G-1B
460G-1C
INSTRUMENT PANEL
P/N: PNL-2201
1
2V
15A
T
LE
UT
O
H
O
T
PI
CK
CO
RN
5A
S
LT
IG
V
A
N
5A
5A
A
ON
TI
S
LT
IM
TR
TA
BS
E
CC
A
RY
O
SS
CC
A
SW
CH
IT
20A
LG
BI
5A
E
M
PU
P
A
W
T
ER
PU
P
M
EX
10A
A
H
T
US
O
BL
5A
ER
W
10A
N
IO
IT
N
IG
10A
171
170-1
305A
170-2
170-3
475A
220A
450A
295
374
400A
201A
280A
235A
116B
116A
HELM BREAKER PANEL
P/N: PNL-2301
ENGINE ALARM
IGNITION
ON
IN
START
7
BLOWER
8
2
3
2
3
2
3
7
EXHAUST
8
201A
201
280A
280
235A
235
220A
220
110
116B
117A
460G-2
112
460-2
A
B
C
D
E
F
G
H
J
K CONNECTOR "BP"
L TO PRIMARY HARNESS
M P/N: WIRE-2301
N
P
R
S
T
U
V
W
X
1
2
3
4
5 CONNECTOR "PS1"
6
TO PRIMARY HARNESS
7
8 P/N: WIRE-2301
9
10
11
12
1 CONNECTOR "PS2"
2
TO PRIMARY HARNESS
3
4 P/N: WIRE-2301
7
460G
WATER PUMP
8
7
305A
305
475A
475
450A
450
460
455
7
BILGE PUMP
HORN
8
2
3
ACCESSORY
8
2
3
7
4
5
6
8
1
2
3
1
2
3
NAVIGATION LTS
7
DIMMER
8
PORT SWITCH PANEL
P/N: PNL-2206
DIGITAL
DIMMER
7
COCKPIT LTS
8
2
3
7
4
5
6
8
1
2
3
7
4
5
6
8
1
2
3
TRIM TAB
TRIM TAB
Chris-Craft
STBD SWITCH PANEL
P/N: PNL-2306
296
299
298
297
295
1
2
3
4
5 CONNECTOR "SS1"
6
TO PRIMARY HARNESS
7
8 P/N: WIRE-2301
9
10
11
12
1
2 CONNECTOR "SS2"
3
TO PRIMARY HARNESS
4
5 P/N: WIRE-2301
6
Figure 56. Lancer 22 Electrical Schematic (Sheet 1 of 2)
TACHOMETER
1
2
3
4
5
6
this is text
Chris-Craft
372
200
376
1
2
3
4
100AG
372
200
376
-
+
100A
BATTERY SWITCH PANEL
P/N: PNL-2207
15A
AMPLIFIER
10A
STEREO MEM
5A
AUTO BILGE
BATTERY
SWITCH
100
40A
MAIN
170
100G
1
2
EXTINGUISHER
(OPTION)
BLOWER
SAFETY
LANYARD
1
2
3
4
BLK
BRN
BLK
FIRE
MONITOR
385-1
384-1
280G
ANCHOR
LIGHT
1
2
FWD
455G
WATER PUMP
385-2
384-2
387-2
386-2
SELECTABLE
EXHAUST
PORT
TWEETER
STBD
TWEETER
AFT PORT
SPEAKER
AFT STBD
SPEAKER
AFT
AFT
NEUTRAL
SAFETY
200G
200
372
374
374G
373
384
385
386
387
388
389
390
391
FWD PORT
SPEAKER
386-1
387-1
COCKPIT
LT 2
COCKPIT
LT 1
AFT
TRUMPET
HORN
AFT
171-2G
1
2
1
2
AFT
475-2
475G-2
FWD
475-1
475G-1
450-1
450G-1
1
2
3
4
FWD
305G
AFT
AFT
FWD
450G
NAVIGATION
LIGHTS
AFT
295G
FUEL SENDER
520G
RED
GREEN
YELLOW
BLUE
BLACK
12 VOLT
OUTLET
TRIM TAB PUMP
FWD STBD
SPEAKER
Figure 57. Lancer 22 Electrical Schematic (Sheet 2 of 2)
LOOP
AFT
1
2
Note:
If the boat is not equiped with an
extinguisher (or extinguisher has
discharged), the use of the loop is
needed in order for the engine
blower to function.
1
2
220G-1
500G
FUEL FILL
220G
651
170G
MAIN GROUND BUS
DRIVE
TRIM SW
286
285
287
STEREO
1
2
3
4
5
6
7
8
9
10
11
12
MEM
PWR
GND
AMP
FL+
FLFR+
FRRL+
RLRR+
RR-
220G-2
AMPLIFIER/
SUBWOOFER
COMPASS
N
E W
S
1
2
3
4
5 CONNECTOR "SS1"
6
TO STBD SWITCH PANEL
7
8 P/N: PNL-2306
9
10
11
12
460G
296
299
298
297
295
1
2 CONNECTOR "SS2"
3
TO STBD SWITCH PANEL
4
5 P/N: PNL-2306
6
1 CONNECTOR "PS2"
2
TO PORT SWITCH PANEL
3
4 P/N: PNL-2206
460G-2
112
460-2
305A
305
475A
475
450A
450
460
455
1
2
3
4
5 CONNECTOR "PS1"
6
TO PORT SWITCH PANEL
7
8 P/N: PNL-2206
9
10
11
12
A
B
C
D
E
F
G
H
J
K CONNECTOR "BP"
L TO HELM BREAKER PANEL
M P/N: PNL-2301
N
P
R
S
T
U
V
W
X
1 FWD
2
3 CONNECTOR "IP"
4
TO INSTRUMENT PANEL
5
6 P/N: PNL-2201
7
8
1
2
400A
201A
201
280A
280
235A
235
220A
220
110
116B
117A
171
170-1
305A
170-2
170-3
475A
220A
450A
295
374
400A
201A
280A
235A
116B
116A
460G-1
116-2
460-1
520
115
111
113
114
460-3
460G-3
Lancer 22
Electrical Diagram
Page 2 of 2
Electrical Technical Drawings
this is text
Launch 22
Electrical Diagram
Page 1 of 2
Electrical Technical Drawings
DEPTH
SOUNDER
FUEL
VOLT
WATER TEMPERATURE
OIL PRESSURE
1
2
3
4
5
6
460G-1
116-2
460-1
520
115
111
113
114
116-2D
460G-1D
1
2
3
4
5
6
116-2A
460-1
520
114
1
2
3
4
5
6
116-2B
460-1A
1
2
3 CONNECTOR "IP"
4
TO PRIMARY HARNESS
5
6 P/N: WIRE-2301
7
8
460G-1
111
460G-1A
460-1A
460-1B
SPEEDOMETER
460G-1D
460G-1A
460G-1B
DRIVE
TRIM
116-2B
460-1B
113
1
2
3
4
5
6
116-2C
460-1C
1
2
3
4
116-2C
460-1C
115
460G-1C
460G-1B
460G-1C
INSTRUMENT PANEL
P/N: PNL-2201
1
2V
15A
ET
TL
U
O
H
T
PI
CK
O
C
RN
O
5A
S
LT
A
N
5A
5A
IG
V
N
O
TI
A
S
LT
IM
TR
BS
TA
CC
A
RY
SO
ES
CC
A
CH
IT
SW
20A
LG
BI
5A
E
P
M
PU
W
T
A
ER
M
PU
P
10A
A
H
EX
T
US
W
O
BL
5A
ER
N
IG
10A
N
IO
IT
10A
171
170-1
305A
170-2
170-3
475A
220A
450A
295
374
400A
201A
280A
235A
116B
116A
HELM BREAKER PANEL
P/N: PNL-2301
ENGINE ALARM
IGNITION
ON
IN
START
7
BLOWER
8
2
3
2
3
2
3
7
EXHAUST
8
201A
201
280A
280
235A
235
220A
220
110
116B
117A
460G-2
112
460-2
A
B
C
D
E
F
G
H
J
K CONNECTOR "BP"
L TO PRIMARY HARNESS
M P/N: WIRE-2301
N
P
R
S
T
U
V
W
X
1
2
3
4
5 CONNECTOR "PS1"
6
TO PRIMARY HARNESS
7
8 P/N: WIRE-2301
9
10
11
12
1 CONNECTOR "PS2"
2
TO PRIMARY HARNESS
3
4 P/N: WIRE-2301
7
460G
WATER PUMP
8
7
305A
305
475A
475
450A
450
460
455
7
BILGE PUMP
HORN
8
2
3
ACCESSORY
8
2
3
7
4
5
6
8
1
2
3
1
2
3
NAVIGATION LTS
7
DIMMER
8
PORT SWITCH PANEL
P/N: PNL-2206
DIGITAL
DIMMER
7
COCKPIT LTS
8
2
3
5
6
7
4
8
1
2
3
7
4
5
6
8
1
2
3
TRIM TAB
TRIM TAB
Chris-Craft
STBD SWITCH PANEL
P/N: PNL-2306
296
299
298
297
295
1
2
3
4
5 CONNECTOR "SS1"
6
TO PRIMARY HARNESS
7
8 P/N: WIRE-2301
9
10
11
12
1
2 CONNECTOR "SS2"
3
TO PRIMARY HARNESS
4
5 P/N: WIRE-2301
6
Figure 58. Launch 22 Electrical Schematic (Sheet 1 of 2)
TACHOMETER
1
2
3
4
5
6
this is text
Chris-Craft
372
200
376
1
2
3
4
100AG
372
200
376
-
+
100A
BATTERY SWITCH PANEL
P/N: PNL-2207
15A
AMPLIFIER
10A
STEREO MEM
5A
AUTO BILGE
BATTERY
SWITCH
100
40A
MAIN
170
100G
1
2
EXTINGUISHER
(OPTION)
BLOWER
SAFETY
LANYARD
1
2
3
4
BLK
BRN
BLK
FIRE
MONITOR
385-1
384-1
280G
ANCHOR
LIGHT
1
2
FWD
455G
WATER PUMP
385-2
384-2
387-2
386-2
SELECTABLE
EXHAUST
PORT
TWEETER
STBD
TWEETER
AFT PORT
SPEAKER
AFT STBD
SPEAKER
AFT
AFT
NEUTRAL
SAFETY
200G
200
372
374
374G
373
384
385
386
387
388
389
390
391
FWD PORT
SPEAKER
386-1
387-1
COCKPIT
LT 2
COCKPIT
LT 1
AFT
TRUMPET
HORN
AFT
171-2G
1
2
1
2
AFT
475-2
475G-2
FWD
475-1
475G-1
450-1
450G-1
1
2
3
4
FWD
305G
AFT
AFT
FWD
450G
NAVIGATION
LIGHTS
AFT
295G
FUEL SENDER
520G
RED
GREEN
YELLOW
BLUE
BLACK
12 VOLT
OUTLET
TRIM TAB PUMP
FWD STBD
SPEAKER
Figure 59. Launch 22 Electrical Schematic (Sheet 2 of 2)
LOOP
AFT
1
2
Note:
If the boat is not equiped with an
extinguisher (or extinguisher has
discharged), the use of the loop is
needed in order for the engine
blower to function.
1
2
220G-1
500G
FUEL FILL
220G
651
170G
MAIN GROUND BUS
DRIVE
TRIM SW
286
285
287
STEREO
1
2
3
4
5
6
7
8
9
10
11
12
MEM
PWR
GND
AMP
FL+
FLFR+
FRRL+
RLRR+
RR-
220G-2
AMPLIFIER/
SUBWOOFER
COMPASS
N
E W
S
1
2
3
4
5 CONNECTOR "SS1"
6
TO STBD SWITCH PANEL
7
8 P/N: PNL-2306
9
10
11
12
460G
296
299
298
297
295
1
2 CONNECTOR "SS2"
3
TO STBD SWITCH PANEL
4
5 P/N: PNL-2306
6
1 CONNECTOR "PS2"
2
TO PORT SWITCH PANEL
3
4 P/N: PNL-2206
460G-2
112
460-2
305A
305
475A
475
450A
450
460
455
1
2
3
4
5 CONNECTOR "PS1"
6
TO PORT SWITCH PANEL
7
8 P/N: PNL-2206
9
10
11
12
A
B
C
D
E
F
G
H
J
K CONNECTOR "BP"
L TO HELM BREAKER PANEL
M P/N: PNL-2301
N
P
R
S
T
U
V
W
X
1 FWD
2
3 CONNECTOR "IP"
4
TO INSTRUMENT PANEL
5
6 P/N: PNL-2201
7
8
1
2
400A
201A
201
280A
280
235A
235
220A
220
110
116B
117A
171
170-1
305A
170-2
170-3
475A
220A
450A
295
374
400A
201A
280A
235A
116B
116A
460G-1
116-2
460-1
520
115
111
113
114
460-3
460G-3
Launch 22
Electrical Diagram
Page 2 of 2
Electrical Technical Drawings
this is text
Launch 25
Electrical Diagram
Page 1 of 2
Electrical Technical Drawings
1
2
3
4
5
6
DEPTH
SOUNDER
FUEL
VOLT
WATER TEMPERATURE
OIL PRESSURE
460G-1
116-2
460-1
520
115
111
113
114
116-2D
460G-1D
1
2
3
4
5
6
116-2A
460-1
520
114
1
2
3
4
5
6
116-2B
460-1A
1
2
3 CONNECTOR "IP"
4
TO PRIMARY HARNESS
5
6 P/N: WIRE-2501
7
8
460G-1
111
460G-1A
460-1A
460-1B
SPEEDOMETER
460G-1D
460G-1A
460G-1B
DRIVE
TRIM
116-2B
460-1B
113
1
2
3
4
5
6
116-2C
460-1C
1
2
3
4
116-2C
460-1C
115
460G-1C
460G-1B
460G-1C
INSTRUMENT PANEL
P/N: PNL-2201
V
12
15A
O
U
ET
TL
H
RN
O
CO
10A
T
PI
CK
S
LT
N
5A
A
V
IG
A
O
TI
5A
N
S
LT
IM
TR
20A
TA
BS
A
RY
SO
ES
C
C
A
CC
CH
IT
SW
20A
E
LG
BI
5A
PU
M
P
A
W
10A
R
TE
M
PU
P
EX
5A
H
A
U
ST
O
BL
10A
ER
W
IO
IT
N
IG
N
10A
171
170-1
305A
170-2
170-3
475A
240A
450A
295
374
201A
280A
235A
116B
116A
425
220A
HELM BREAKER PANEL
P/N: PNL-2506
460G-2
460-2
117A
112
201
201A
241
280
240A
280A
240
235A
240G
235
220A
220
116B
110
ENGINE ALARM
IGNITION
ON
IN
START
7
BLOWER
8
2
3
2
3
2
3
7
EXHAUST
8
1
2
3
4
5
6
7
8
9 CONNECTOR "PS"
10 TO PRIMARY HARNESS
11 P/N: WIRE-2501
12
13
14
15
16
17
18
19
7
WATER PUMP
8
7
BILGE PUMP
8
HATCH
2
3
7
4
5
6
8
1
2
3
PORT SWITCH PANEL
P/N: PNL-2504
460G
305A
305
475A
475
450A
450
460
455
7
HORN
8
2
3
7
4
5
6
8
1
2
3
1
2
3
NAVIGATION LTS
7
DIMMER
8
DIGITAL
DIMMER
7
COCKPIT LTS
8
2
3
6
7
4
5
8
1
2
3
7
4
5
6
8
1
2
3
TRIM TAB
TRIM TAB
Chris-Craft
STBD SWITCH PANEL
P/N: PNL-2306
296
299
298
297
295
1
2
3
4
5 CONNECTOR "SS1"
6
TO PRIMARY HARNESS
7
8 P/N: WIRE-2501
9
10
11
12
1
2 CONNECTOR "SS2"
3
TO PRIMARY HARNESS
4
5 P/N: WIRE-2501
6
A
B
C
D
E
F
G
H
J
K CONNECTOR "BK"
L TO PRIMARY HARNESS
M P/N: WIRE-2501
N
P
R
S
T
U
V
W
X
Figure 60. Launch 25 Electrical Schematic (Sheet 1 of2)
TACHOMETER
1
2
3
4
5
6
this is text
Chris-Craft
175A
SUMP
5A
AFT
120G
121
122
815
BATTERY CHARGER
SHORE
INLET
BATTERY SWITCH PANEL
P/N: PNL-2604
20A
+
-
AFT
1
2
1
2
651
170G
560
560G
SUMP PUMP
372
200
230
376
COCKPIT
LT 4
COCKPIT
LT 3
AFT GROUND BUS
175AG
100G
HOUSE BATTERY
5A
170
FRIDGE
15A
AMPLIFIER
-
SPARE
B2
40A
MAIN
+
ENGINE BATTERY
CHARGER 2
COM
BATTERY
SWITCH B1
100A
100AG
1
20A
CHARGER 1
10A
STEREO MEM
100
5A
AUTO BILGE
SELECTABLE
EXHAUST
230G
AFT
1
2
1
2
FUEL FILL
1
2
1
2
3
4
350G
500G
SAFETY
LANYARD
BLK
BRN
BLK
MEM
PWR
GND
AMP
FL+
FLFR+
FRRL+
RLRR+
RR-
FWD
372
374
374G
373
384
385
386
387
388
389
390
391
1
2
1
2
AFT PORT
SPEAKER
385-1
384-1
387-1
386-1
AFT
171-2G
AFT
171-3G
BLACK
WHITE
386-2
387-2
171-2
171-3
AFT
STBD
TWEETER
12 VOLT
OUTLET 2
12 VOLT
OUTLET 3
BLACK
WHITE
Figure 61. Launch 25 Electrical Schematic (Sheet 2 of2)
385-1A
384-1A
387-1A
386-1A
385-2
384-2
AFT
455G
AFT STBD
SPEAKER
PORT
TWEETER
1
2
ENGINE
HATCH RAM
ENGINE
HATCH RAM
ANCHOR
LIGHT
FWD STBD
SPEAKER
1
2
3
4
5
6
7
8
9
10
11
12
FWD PORT
SPEAKER
BILGE PUMP
& FLOAT SW
STEREO
450-1
450G-1
450G
NAVIGATION
LIGHTS
LOOP
AFT
1
2
Note:
If the boat is not equiped with an
extinguisher (or extinguisher has
FIRE
discharged), the use of the loop is MONITOR
needed in order for the engine
blower to function.
1
2
350G-2
POWER AND GROUND
TO FWD +/- BUS
AFT
200G
200
AFT
475-2
475G-2
FWD
475-1
475G-1
EXTINGUISHER
(OPTION)
REFRIGERATOR
1
2
372
200
230
376
RED
BLACK
BRN
BLK
1
2
3
4
COCKPIT
LT 2
COCKPIT
LT 1
AFT
475-4
475G-4
AFT
475-3
475G-3
DRIVE
TRIM SW
286
285
287
BLOWER
NEUTRAL
SAFETY
116-3
350G-1
AFT
376G
TRIM TAB PUMP
TRUMPET
HORN
HATCH JUMPER
20A
HEAD
LIGHT
AMPLIFIER/
SUBWOOFER
RED
GREEN
YELLOW
BLUE
BLACK
FWD
305G
WATER PUMP
AFT
520G
1
2
1
2
3
4
1
2
425G
AFT
AFT
295G
AFT
1
2
FWD
+/- BUS
COMPASS
N
W E
S
280G
FUEL SENDER
460-3
460G-3
201A
280A
235A
116B
116A
425
220A
A
B
C
D
E
F
G
H
J
K CONNECTOR "BK"
L TO HELM BREAKER PANEL
M P/N: PNL-2506
N
P
R
S
T
U
V
W
X
1
2 CONNECTOR "SS2"
3
TO STBD SWITCH PANEL
4
5 P/N: PNL-2205
6
296
299
298
297
295
171
170-1
305A
170-2
170-3
475A
240A
450A
295
374
1
2
3
4
5 CONNECTOR "SS1"
6
TO STBD SWITCH PANEL
7
8 P/N: PNL-2205
9
10
11
12
1
2
3
4
5
6
7
8
9 CONNECTOR "PS"
10 TO PORT SWITCH PANEL
11 P/N: PNL-2504
12
13
14
15
16
17
18
19
460G-2
460-2
117A
112
201
201A
241
280
240A
280A
240
235A
240G
235
220A
220
116B
110
171G-1
171-1
305A
305
475A
475
450A
450
460
455
1
2
3 CONNECTOR "IP"
4
TO INSTRUMENT PANEL
5
6 P/N: PNL-2201
7
8
460G-1
116-2
460-1
520
115
111
113
114
Launch 25
Electrical Diagram
Page 2 of 2
Electrical Technical Drawings
this is text
Corsair 25
Electrical Diagram
Page 1 of 3
Electrical Technical Drawings
DEPTH
SOUNDER
FUEL
VOLT
WATER TEMPERATURE
OIL PRESSURE
1
2
3
4
5
6
116-2D
1
2
3
4
5
6
116-2A
460-2
520
1
2
3
4
5
6
116-2B
460-2A
114
111
111
113
114
115
116-2
520
460-2
460G-2
460G-2D
1
2
3 CONNECTOR "IP"
4
TO HULL HARNESS
5
6 P/N: WIRE-2502
7
8
460G-2
CO MONITOR
460G-2A
1
2
310G
1
2
425-1
425G-1
1
2
425-2
425G-2
425
425GA
310
A CONNECTOR "CC"
B TO HULL HARNESS
C P/N: WIRE-2502
CABIN LT
460-2A
460-2B
SPEEDOMETER
460G-2D
460G-2A
460G-2B
DRIVE
TRIM
116-2B
460-2B
113
1
2
3
4
5
6
116-2C
460-2C
1
2
3
4
116-2C
460-2C
115
460G-2C
CABIN HARNESS
P/N: WIRE-2528CBN
460G-2B
460G-2C
INSTRUMENT PANEL
P/N: PNL-2501
460-1
460G-1
1
2
3
4
5 CONNECTOR "SS1"
6
TO HULL HARNESS
7
8 P/N: WIRE-2502
9
10
11
12
110
112
116B
117A
1 CONNECTOR "SS2"
2
TO HULL HARNESS
3
4 P/N: WIRE-2502
220
220A
295
296
297
298
299
235
235A
ENGINE ALARM
IGNITION
ON
IN
START
7
BLOWER
8
2
3
7
4
5
6
8
1
2
3
7
4
5
6
8
1
2
3
2
3
TRIM TAB
TRIM TAB
7
EXHAUST
8
240G
460
240
241
460G
240A
305
305A
475
475A
7
WINDLASS
8
1
2
3
2
3
2
3
455
450
450A
280
280A
201
201A
198A
7
WATER PUMP
8
7
BILGE PUMP
8
7
HORN
8
2
3
7
4
5
6
8
1
2
3
2
3
2
3
HATCH
7
COCKPIT LTS
8
7
DIMMER
8
1
DIGITAL
DIMMER
7
4
5
6
8
1
2
3
NAVIGATION LTS
Chris-Craft
HELM SWITCH PANEL
P/N: PNL-2509
A
B
C
D
E
F
G
H
J
K CONNECTOR "PS"
L TO HULL HARNESS
M P/N: WIRE-2502
N
P
R
S
T
U
V
W
X
Figure 62. Corsair 25 Electrical Schematic (Sheet 1 of 3)
TACHOMETER
1
2
3
4
5
6
CABIN LT
this is text
Chris-Craft
425GA
AFT
1
2
3
4
5
6
372
200
310
376
560
372
374
374G
373
384
385
386
387
388
389
390
391
385-1
384-1
15A
COM
B2
FRIDGE
5A
MAIN
40A
BATTERY SWITCH PANEL
P/N: PNL-2511
CHARGER 2
15A
CHARGER 1
10A
STEREO MEM
15A
-
AMPLIFIER
BATTERY
SWITCH B1
+
ENGINE BATTERY
AFT
FWD STBD
SPEAKER
AFT
475-3
475G-3
AFT
475-2
475G-2
175A
100AG
AFT
175AG
FUEL FILL
170
1
2
3
4
AFT
AFT
AFT
POWER AND GROUND
TO HELM BREAKER PANEL
P/N: PNL-2510
200G
200
280G
450G
450-1
450G-1
AFT
1
2
1
2
3
4
1
2
350G
500G
350G-2
AFT
295G
LOOP
AFT
1
2
Note:
If the boat is not equiped with an
extinguisher (or extinguisher has
discharged), the use of the loop is
needed in order for the engine
blower to function.
BLOWER
RED
GREEN
YELLOW
BLUE
BLACK
EXTINGUISHER
(OPTION)
DRIVE
TRIM SW
286
285
287
NEUTRAL SAFETY
TRIM TAB PUMP
FUEL SENDER
520G
Figure 63. Corsair 25 Electrical Schematic (Sheet 2 of 3)
-
651
170G
BLK
BRN
BLK
1
2
NAVIGATION
LIGHTS
WATER PUMP
AFT
455G
AFT GROUND BUS
SELECTABLE
EXHAUST
HOUSE BATTERY
+
1
2
AFT
20A
HATCH JUMPER
BILGE PUMP &
FLOAT SWITCH
305G
ANCHOR
LIGHT
240-1
241-1
AMPLIFIER/
SUBWOOFER
TRUMPET
HORN
BLACK
WHITE
BLACK
WHITE
AFT
475-1
475G-1
5A
100A
385-2
384-2
387-2
386-2
386-1
387-1
1
2
1
2
1
2
AUTO BILGE
PORT
TWEETER
STBD
TWEETER
AFT PORT
SPEAKER
AFT STBD
SPEAKER
FWD PORT
SPEAKER
COCKPIT
LT 3
COCKPIT
LT 2
COCKPIT
LT 1
ENGINE
HATCH RAM
ENGINE
HATCH RAM
100G
310
376
560
560G
1
2
3
4
5
6
7
8
9
10
11
12
AFT
REFRIGERATOR
MEM
PWR
GND
AMP
FL+
FLFR+
FRRL+
RLRR+
RR-
SHORE
INLET
RED
BLACK
STEREO
815
120G
121
122
AFT
120AG
BATTERY CHARGER
CONNECTOR "CC" A
TO CABIN HARNESS B
P/N: WIRE-2528CBN C
SAFETY
LANYARD
1
2
460-3
12V OUTLET
COMPASS
N
W E
S
FIRE
MONITOR
116-3
350G-1
460G
240A
460G-1
201A
280A
460G-2
240G
460G-3
198A
374
425
235A
475A
116A
305A
171G
295
171
450A
116B
220A
455
450
450A
280
280A
201
201A
198A
240G
460
240
241
460G
240A
305
305A
475
475A
CONNECTOR "SS2"
TO HELM SWITCH PANEL
P/N: PNL-2509
CONNECTOR "SS1"
TO HELM SWITCH PANEL
P/N: PNL-2509
A
B
C
D
E
F
G
H
J
K CONNECTOR "BK"
L TO HELM BREAKER PANEL
M P/N: PNL-2510
N
P
R
S
T
U
V
W
X
A
B
C
D
E
F
G
H
J
K CONNECTOR "PS"
L TO HELM SWITCH PANEL
M P/N: PNL-2509
N
P
R
S
T
U
V
W
X
1
2
3
4
110
112
116B
117A
460-1
460G-1
1
2
3
4
5
6
7
8
9
10
11
12
1
2
3 CONNECTOR "IP"
4
TO INSTRUMENT PANEL
5
6 P/N: PNL-2501
7
8
220
220A
295
296
297
298
299
235
235A
111
113
114
115
116-2
520
460-2
460G-2
Corsair 25
Electrical Diagram
Page 2 of 3
Electrical Technical Drawings
this is text
Chris-Craft
5A
NAV LTS
1
2
3
5A
CABIN LTS
3A
STEREO
25A
WINDLASS HARNESS
P/N: WIRE-LEW07
195A
195G
WINDLASS BKR
195-1
196-1
HELM BREAKER PANEL
P/N: PNL-2510
5A
BILGE PMP
10A
WATER PMP
ACCY
5A
12V OUTLET
TRIM TABS
20A
REVERSING SOLENOID
25A
WINDLASS
3A
WINDLASS SW
BLOWER
7A
Figure 64. Corsair 25 Electrical Schematic (Sheet 3 of 3)
POWER AND GROUND
FROM HELM BREAKER PANEL
P/N: PNL-2510
8
7
WINDLASS SW
20A
HATCH
5A
COCKPIT LTS
HORN
7A
EXHAUST
3A
IGNITION
10A
FROM HELM SWITCH PANEL
P/N: PNL-2509
GROUND BUS
POSITIVE BUS
195
196
460G
240A
460G-1
201A
280A
460G-2
240G
460G-3
198A
374
425
235A
475A
116A
305A
171G
295
171
450A
116B
220A
RED
BLACK
M
WINDLASS
MOTOR
A
B
C
D
E
F
G
H
J
K CONNECTOR "BK"
L TO HULL HARNESS
M P/N: WIRE-2502
N
P
R
S
T
U
V
W
X
Corsair 25
Electrical Diagram
Page 3 of 3
Electrical Technical Drawings
this is text
FUEL
VOLT
WATER TEMPERATURE
OIL PRESSURE
116-2D
1
2
3
4
5
6
116-2A
460-2
520
1
2
3
4
5
6
116-2B
460-2A
114
111
111
113
114
115
116-2
520
460-2
460G-2
460G-2D
1
2
3 CONNECTOR "IP"
4
TO PRIMARY HARNESS
5
6 WIRE-2804
7
8
460G-2
7
DRIVE TRIM
8
3
285
286
287
460G-2D
460G-2A
460G-2B
1
2
3
4
5
6
116-2B
460-2B
113
1
2
3
4
5
6
116-2C
460-2C
ENGINE ALARM
460G-2C
IGNITION
START
5
7
116-2C
460-2C
115
460G-2C
10A
ON
IN
6
10A
BLOWERS
8
2
3
5
6
7
4
8
1
2
3
7
4
5
6
8
1
2
3
10A
TRIM TAB
SINGLE INSTRUMENT PANEL
P/N: PNL-2801
TRIM TAB
20A
SINGLE STBD SWITCH PANEL
P/N: PNL-28SSWTCH
240
241
170-6
195
196
280
201
211
305
251
252
450
460
235
116B
475
455
460G-1
460G-2
460G-3
HIGH WATER ALARM
7
HORN
8
2
3
2
3
2
3
7
A
B
C CONNECTOR "PS1"
D TO PRIMARY HARNESS
E WIRE-2804
F
G
H
1
2
3
4
5
6
7
8
9
10
11
12
CONNECTOR "PS2"
TO PRIMARY HARNESS
WIRE-2804
10A
BILGE PUMP
8
7
5A
WATER PUMP
8
7
4
5
6
8
1
2
3
1
2
3
10A
HATCH
7
8
20A
25A
WINDLASS
3A
7
EXHAUST
8
2
3
7
4
5
6
8
1
2
3
5A
NAVIGATION LTS
5A
7
DIMMER
8
1
2
3
3A
DIGITAL
DIMMER
7
COCKPIT LTS
8
2
3
7
4
5
6
8
1
2
3
5A
HELM SEAT
15A
WINDLASS
REVERSING SOLENOID
195G
195
195-1
196-1
195A
196
FWD +/- BUS
PORT SWITCH PANEL
P/N: PNL-2840
Chris-Craft
CONNECTOR "DT"
TO PRIMARY HARNESS
WIRE-2804
460-1
460G-1
296
297
220
170-6
225
298
299
110
112
116A
117A
460G-2B
1
2
3
4
1
2
3
4
5
6
7
8
SINGLE DRIVE TRIM PANEL
P/N: PNL-28STRM
SPEEDOMETER
DRIVE
TRIM
2
460
460G
460-2A
460-2B
TACHOMETER
1
460G-2A
1
2
3
4
5
6
7
8 CONNECTOR "SS"
9
TO PRIMARY HARNESS
10
11 WIRE-2804
12
13
14
15
16
17
18
Figure 65. Launch 28/Corsair 28 Single Engine Electrical Schematic (Sheet 1 of 3)
Electrical Technical Drawings
Launch 28/Corsair 28 - Single Engine
Electrical Diagram
Page 1 of 3
DEPTH
SOUNDER
1
2
3
4
5
6
this is text
Electrical Technical Drawings
Launch 28/Corsair 28 - Single Engine
Electrical Diagram
Page 2 of 3
CO MONITOR
1
2
310G
1
2
425-1
425G-1
1
2
425-2
425G-2
425
425GA
310
A CONNECTOR "CC"
B TO PRIMARY HARNESS
C P/N: WIRE-2804
425-2
425G-2
A CONNECTOR "CC"
B TO PRIMARY HARNESS
C P/N: WIRE-2804
550
550G
475-2
475G-2
390
391
1
2 CONNECTOR "SSC"
3 TO PRIMARY HARNESS
4 P/N: WIRE-2804
5
6
CABIN LT
CABIN LT
CABIN HARNESS
P/N: WIRE-2528CBN
(CORSAIR ONLY)
DECK HARNESS
P/N: WIRE-28DP
(LAUNCH ONLY)
REFRIGERATOR
RED
BLACK
COCKPIT
LT 2
1
2
AFT STBD
SPEAKER
STBD SEATING HARNESS
P/N: WIRE-28SEAT
HIGH WATER
5A
AUTO BILGE
CHARGER 1
HEAD
20A
30A
20A
CABIN LTS
AMP
CHARGER 2
MAIN
50A
5A
STEREO MEM
3A
CONTROLS
5A
CHARGER 3
20A
1
2
3
4
5
6
7
8
9
10
11
12
CONNECTOR "BS"
TO PRIMARY HARNESS
P/N: WIRE-2804
15A
FRIDGE
STEREO
5A
CO MONITOR
210
200
374
310
170AG
550
372
425
376
10A
SPARE
3A
HOUSE BAT SW
VSR
ENGINE BAT SW
PORT
ENGINE BATTERY
TWIN BATTERY SWITCH PANEL
P/N: PNL-2808
100A
+
-
100AG
100
TO PORT STARTER
170
TO HELM DISTRIBUTION
TO PORT ENGINE
AFT GROUND BUS
170G
650
651
SHORE INLET
815
HOUSE
BATTERY
175A
BATTERY CHARGER
121
122
120G
Chris-Craft
AFT
+
-
175G
TO HELM DISTRIBUTION
TO FUEL TANK
TO FUEL FILL
Figure 66. Launch 28/Corsair 28 Single Engine Electrical Schematic (Sheet 2 of 3)
HEAD LT
this is text
Chris-Craft
COCKPIT
LT 3
COCKPIT
LT 1
1
2
1
2
350G
500G
372
374
374G
373
384
385
386
387
388
389
390
391
PORT ENGINE
AFT
SELECTABLE
EXHAUST
475-3
475G-3
AFT
475-1
475G-1
1
2
3
4
5
6
1
235-2
ANCHOR
LIGHT
550
550G
475-2
475G-2
390
391
LOOP
AFT
1
2
Note:
If the boat is not equiped with an
extinguisher (or extinguisher has
discharged), the use of the loop is
needed in order for the engine
blower to function.
1
2
1
2
3
4
5
6
7
8
9
10
11
12
CONNECTOR "SSC"
TO STBD SEATING HARNESS
WIRE-28SEAT
EXTINGUISHER
(OPTION)
STEREO
MEM
PWR
GND
AMP
FL+
FLFR+
FRRL+
RLRR+
RR-
FWD PORT
SPEAKER
385-1
384-1
1
2
AFT
455G
FIRE
MONITOR
136-3
350G-1
450-1
450G-1
AFT
AFT
450G
NAVIGATION
LIGHTS
ELECTRIC
HELM SEAT
AFT PORT
SPEAKER
386-1
387-1
FWD STBD
SPEAKER
AFT
AFT
1
2
3
4
1
2
3
4
280G
305G
BLK
BRN
BLK
BLK
BRN
BLK
1
2
STBD
TWEETER
PORT
TWEETER
200G
200G
AFT
AFT
M
RED
BLACK
ENGINE
HATCH RAM
WINDLASS
MOTOR
350G-3
1
2
RED
GREEN
YELLOW
BLUE
BLACK
350G-2
BLACK
WHITE
BLACK
WHITE
TRIM TAB PUMP
1
2
ENGINE
HATCH RAM
STBD BLOWER
PORT BLOWER
1
2
3
4
240-1
241-1
AFT
295G
STORAGE
LIGHT
20A
AFT
425-2
425G-2
HATCH JUMPER
1
2
AFT
425-1
425AG
AFT
A
B
C
1
2
3
4
5
6
7
8
9
10
11
12
Figure 67. Launch 28/Corsair 28 Single Engine Electrical Schematic (Sheet 3 of 3)
TRUMPET
HORN
HIGH WATER
BILGE PUMP
& FLOAT SW
BILGE PUMP
& FLOAT SW
WATER PUMP
386-2
387-2
384-2
385-2
AFT
376G
AMPLIFIER/
SUBWOOFER
210
200
374
310
170AG
550
372
425
376
SAFETY
LANYARD
CONNECTOR "BS"
TO BATTERY SWITCH PANEL
PNL-2808
AFT
460-3
460-4
460G-4
285
286
287
CONNECTOR "PS2"
TO PRIMARY HARNESS
WIRE-2804
1
2
COMPASS
N
E W
S
1
2
3 CONNECTOR "DT"
4 TO TWIN DRIVE TRIM PNL
5 P/N: PNL-2833-TTRM
6
7
8
1
2
3
4
5
6
7
8
9
10
11
12
A
B
C CONNECTOR "PS1"
D TO PRIMARY HARNESS
E WIRE-2804
F
G
H
240
241
170-6
195
196
280
201
211
305
251
252
450
460
235
116B
475
455
460G-1
460G-2
460G-3
1
2
3
4
5
6
7
8 CONNECTOR "SS"
9
TO PRIMARY HARNESS
10
11 WIRE-2800
12
13
14
15
16
17
18
AFT
1
2
3 CONNECTOR "PI"
4
TO PRIMARY HARNESS
5
6 WIRE-2800
7
8
460-1
460G-1
296
297
220
170-6
225
298
299
110
112
116A
117A
130
132
136A
137A
111
113
114
115
116-2
520
460-2
460G-2
Launch 28/Corsair 28 - Single Engine
FUEL SENDER
Electrical Diagram
520G
Page 3 of 3
Electrical Technical Drawings
this is text
PORT
FUEL
VOLT
WATER TEMPERATURE
OIL PRESSURE
PORT
DRIVE
TRIM
STBD
TACHOMETER
STBD
VOLT
WATER TEMPERATURE
OIL PRESSURE
116-2
460-2A
113
1
2
3
4
5
6
116-2A
460-2B
1
2
3
4
5
6
116-2A
460-2B
520
1
2
3
4
5
6
116-2B
460-2C
114
111
1
2
3 CONNECTOR "PI"
4
TO PRIMARY HARNESS
5
6 WIRE-2805
7
8
131
133
134
135
136-2
1
2 CONNECTOR "SI"
3
TO PRIMARY HARNESS
4
5 WIRE-2805
6
460G-2A
460G-2B
460G-2B
460G-2C
1
2
3
4
116-2B
460-2C
115
460G-2C
1
2
3
4
5
6
136-2A
460-2D
133
1
2
3
4
5
6
136-2B
460-2E
1
2
3
4
5
6
136-2B
460-2E
1
2
3
4
5
6
136-2C
460-2F
134
131
425
425GA
310
CO MONITOR
1
2
310G
1
2
425-1
425G-1
1
2
425-2
425G-2
A CONNECTOR "CC"
B TO PRIMARY HARNESS
C P/N: WIRE-2805
CABIN LT
CABIN LT
460G-2D
CABIN HARNESS
P/N: WIRE-2528CBN
(CORSAIR ONLY)
REFRIGERATOR
460G-2E
RED
BLACK
460G-2E
550
550G
475-2
475G-2
390
391
COCKPIT
LT 2
1
2
460G-2F
1
2 CONNECTOR "SSC"
3 TO PRIMARY HARNESS
4 P/N: WIRE-2805
5
6
AFT STBD
SPEAKER
460-2F
460-2H
STBD SEATING HARNESS
P/N: WIRE-28SEAT
SPEEDOMETER
460G-2F
460G-2H
460G-2J
HEAD LT
425-2
425G-2
STBD
DRIVE
TRIM
1
2
3
4
136-2C
460-2H
135
460G-2H
1
2
3
4
5
6
136-2D
DEPTH
SOUNDER
DECK HARNESS
P/N: WIRE-28DP
(LAUNCH ONLY)
460G-2J
TWIN INSTRUMENT PANEL
P/N: PNL-2802
HIGH WATER
5A
AUTO BILGE
5A
STEREO MEM
CHARGER 1
HEAD
20A
30A
20A
CABIN LTS
AMP
CHARGER 2
MAIN
20A
50A
3A
CONTROLS
5A
CHARGER 3
CONNECTOR "BS"
TO PRIMARY HARNESS
P/N: WIRE-2805
STEREO
5A
20A
1
2
3
4
5
6
7
8
9
10
11
12
15A
FRIDGE
CO MONITOR
210
200
374
310
170AG
550
372
425
376
10A
SPARE
3A
HOUSE BAT SW
VSR
ENGINE BAT SW
B2
100
TO PORT STARTER
105
TO STBD STARTER
170
TO HELM DISTRIBUTION
COM
B1
PORT
ENGINE BATTERY
TWIN BATTERY SWITCH PANEL
P/N: PNL-2808
100A
+
-
100AG
TO PORT ENGINE
AFT GROUND BUS
STBD
ENGINE BATTERY
105A
SHORE INLET
815
121
123
122
120G
Chris-Craft
AFT
-
HOUSE
BATTERY
175A
BATTERY CHARGER
+
105AG
+
-
175G
TO STBD ENGINE
170G
650
651
TO HELM DISTRIBUTION
TO FUEL TANK
TO FUEL FILL
A CONNECTOR "CC"
B TO PRIMARY HARNESS
C P/N: WIRE-2805
Figure 68. Launch 28/Corsair 28 Twin Engine Electrical Schematic (Sheet 1 of 3)
Electrical Technical Drawings
Launch 28/Corsair 28 - Twin Engines
Electrical Diagram
Page 1 of 3
PORT
TACHOMETER
1
2
3
4
5
6
111
113
114
115
116-2
520
460-2
460G-2
this is text
8
1
2
3
1
2
3
7
PORT DRIVE TRIM
8
1
2
3
4
5
6
7
8
CONNECTOR "DT"
TO PRIMARY HARNESS
WIRE-2805
TWIN DRIVE TRIM PANEL
P/N: PNL-2833-TTRM
460-1
460G-1
296
297
220
170-6
225
298
299
110
112
116A
117A
130
132
136A
137A
PORT
ENGINE ALARM
PORT IGNITION
10A
ON
IN
START
STBD IGNITION
10A
ON
IN
START
1
2
3
4
5
6
7
8 CONNECTOR "SS"
9
TO PRIMARY HARNESS
10
11 WIRE-2805
12
13
14
15
16
17
18
STBD
ENGINE ALARM
7
5
6
10A
BLOWERS
8
2
3
7
4
5
6
8
1
2
3
7
4
5
6
8
1
2
3
10A
TRIM TAB
TRIM TAB
20A
TWIN STBD SWITCH PANEL
P/N: PNL-TSWTCH
240
241
170-6
195
196
280
201
211
305
251
252
450
460
235
116B
475
455
460G-1
460G-2
460G-3
HIGH WATER ALARM
7
HORN
8
2
3
2
3
7
A
B
C CONNECTOR "PS1"
D TO PRIMARY HARNESS
E WIRE-2805
F
G
H
1
2
3
4
5
6
7
8
9
10
11
12
CONNECTOR "PS2"
TO PRIMARY HARNESS
WIRE-2805
10A
BILGE PUMP
8
7
5A
WATER PUMP
8
2
3
7
4
5
6
8
1
2
3
10A
HATCH
7
8
20A
25A
WINDLASS
1
2
3
2
3
7
4
5
6
8
1
2
3
1
2
3
3A
7
EXHAUST
8
5A
NAVIGATION LTS
5A
7
DIMMER
8
3A
DIGITAL
DIMMER
7
COCKPIT LTS
8
2
3
7
4
5
6
8
1
2
3
5A
HELM SEAT
15A
WINDLASS
REVERSING SOLENOID
195G
195
195-1
196-1
195A
196
FWD +/- BUS
Chris-Craft
PORT SWITCH PANEL
P/N: PNL-2840
Figure 69. Launch 28/Corsair 28 Twin Engine Electrical Schematic (Sheet 2 of 3)
Launch 28/Corsair 28 - Twin Engines
Electrical Diagram
Page 2 of 3
Electrical Technical Drawings
285
286
287
290
291
292
460
460G
7
PORT DRIVE TRIM
this is text
Chris-Craft
350G
500G
COCKPIT
LT 3
COCKPIT
LT 1
1
2
1
2
372
374
374G
373
384
385
386
387
388
389
390
391
PORT ENGINE
AFT
SELECTABLE
EXHAUST
475-3
475G-3
AFT
475-1
475G-1
1
235-2
ANCHOR
LIGHT
550
550G
475-2
475G-2
390
391
LOOP
AFT
1
2
Note:
If the boat is not equiped with an
extinguisher (or extinguisher has
discharged), the use of the loop is
needed in order for the engine
blower to function.
1
2
1
2
3
4
5
6
7
8
9
10
11
12
1
CONNECTOR "SSC" 2
3
TO STBD SEATING HARNESS
4
WIRE-28SEAT 5
6
EXTINGUISHER
(OPTION)
STEREO
MEM
PWR
GND
AMP
FL+
FLFR+
FRRL+
RLRR+
RR-
FWD PORT
SPEAKER
385-1
384-1
1
2
AFT
455G
FIRE
MONITOR
136-3
350G-1
450-1
450G-1
AFT
AFT
450G
NAVIGATION
LIGHTS
ELECTRIC
HELM SEAT
AFT PORT
SPEAKER
386-1
387-1
FWD STBD
SPEAKER
AFT
AFT
1
2
3
4
1
2
3
4
280G
305G
BLK
BRN
BLK
BLK
BRN
BLK
1
2
STBD
TWEETER
PORT
TWEETER
AFT
AFT
STBD ENGINE
SELECTABLE
EXHAUST
200G
200G
1
235-1
M
RED
BLACK
ENGINE
HATCH RAM
WINDLASS
MOTOR
350G-3
1
2
RED
GREEN
YELLOW
BLUE
BLACK
350G-2
BLACK
WHITE
BLACK
WHITE
TRIM TAB PUMP
1
2
ENGINE
HATCH RAM
STBD BLOWER
PORT BLOWER
1
2
3
4
240-1
241-1
AFT
295G
STORAGE
LIGHT
20A
AFT
425-2
425G-2
SAFETY
LANYARD
HATCH JUMPER
1
2
AFT
425-1
425AG
AFT
A
B
C
Figure 70. Launch 28/Corsair 28 Twin Engine Electrical Schematic (Sheet 3 of 3)
TRUMPET
HORN
HIGH WATER
BILGE PUMP
& FLOAT SW
BILGE PUMP
& FLOAT SW
WATER PUMP
386-2
387-2
384-2
385-2
AFT
376G
AMPLIFIER/
SUBWOOFER
210
200
374
310
170AG
550
372
425
376
1
2
3
4
5
6
7
8
9
10
11
12
SAFETY
LANYARD
CONNECTOR "BS"
TO BATTERY SWITCH PANEL
PNL-2808
AFT
460-3
285
286
287
290
291
292
460-4
460G-4
CONNECTOR "PS2"
TO PRIMARY HARNESS
WIRE-2804
1
2
COMPASS
N
E W
S
1
2
3 CONNECTOR "DT"
4 TO TWIN DRIVE TRIM PNL
5 P/N: PNL-2833-TTRM
6
7
8
1
2
3
4
5
6
7
8
9
10
11
12
A
B
C CONNECTOR "PS1"
D TO PRIMARY HARNESS
E WIRE-2804
F
G
H
240
241
170-6
195
196
280
201
211
305
251
252
450
460
235
116B
475
455
460G-1
460G-2
460G-3
1
2
3
4
5
6
7
8 CONNECTOR "SS"
9
TO PRIMARY HARNESS
10
11 WIRE-2800
12
13
14
15
16
17
18
1
2 CONNECTOR "SI"
3
TO PRIMARY HARNESS
4
5 WIRE-2800
6
AFT
1
2
3 CONNECTOR "PI"
4
TO PRIMARY HARNESS
5
6 WIRE-2800
7
8
460-1
460G-1
296
297
220
170-6
225
298
299
110
112
116A
117A
130
132
136A
137A
131
133
134
135
136-2
111
113
114
115
116-2
520
460-2
460G-2
Launch 28/Corsair 28 - Twin Engines
Electrical Diagram
FUEL SENDER
Page 3 of 3
520G
Electrical Technical Drawings
this is text