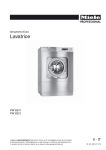
1
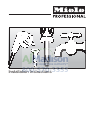
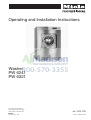
Operating and Installation Instructions
Washer
PW 6241
PW 6321
To prevent accidents
and appliance damage
read these instructions
before
installing or use.
en - US, CA
M.-Nr. 06 572 435
2
Contents
IMPORTANT SAFETY INSTRUCTIONS
Guide to the washer
Operating panel . . . . . . . . . . . . . . . . . . . . . . . . . . . . . . . . . . . . . . . . . . . . . . . . . . . . . . . . . . . . . . . . . . . . . . . . . . . . . 8
Use
1. Turn on the washer . . . . . . . . . . . . . . . . . . . . . . . . . . . . . . . . . . . . . . . . . . . . . . . . . . . . . . . . . . . . . . . . . . . . . . . . 10
2. Sort and load the laundry . . . . . . . . . . . . . . . . . . . . . . . . . . . . . . . . . . . . . . . . . . . . . . . . . . . . . . . . . . . . . . . . . . . 10
Maximum dry laundry weights . . . . . . . . . . . . . . . . . . . . . . . . . . . . . . . . . . . . . . . . . . . . . . . . . . . . . . . . . . . . . . . . . 11
3. Add detergent. . . . . . . . . . . . . . . . . . . . . . . . . . . . . . . . . . . . . . . . . . . . . . . . . . . . . . . . . . . . . . . . . . . . . . . . . . . . 11
4. Select a program . . . . . . . . . . . . . . . . . . . . . . . . . . . . . . . . . . . . . . . . . . . . . . . . . . . . . . . . . . . . . . . . . . . . . . . . . 14
5. Select wash options (if needed) . . . . . . . . . . . . . . . . . . . . . . . . . . . . . . . . . . . . . . . . . . . . . . . . . . . . . . . . . . . . . . 14
6. Adjust the program (if needed) . . . . . . . . . . . . . . . . . . . . . . . . . . . . . . . . . . . . . . . . . . . . . . . . . . . . . . . . . . . . . . 15
7. Select Delay Start (if needed) . . . . . . . . . . . . . . . . . . . . . . . . . . . . . . . . . . . . . . . . . . . . . . . . . . . . . . . . . . . . . . . . 16
8. Start the program . . . . . . . . . . . . . . . . . . . . . . . . . . . . . . . . . . . . . . . . . . . . . . . . . . . . . . . . . . . . . . . . . . . . . . . . . 16
9. End of program. . . . . . . . . . . . . . . . . . . . . . . . . . . . . . . . . . . . . . . . . . . . . . . . . . . . . . . . . . . . . . . . . . . . . . . . . . . 17
Skipping program cycles . . . . . . . . . . . . . . . . . . . . . . . . . . . . . . . . . . . . . . . . . . . . . . . . . . . . . . . . . . . . . . . . . . . . . 18
Program stop . . . . . . . . . . . . . . . . . . . . . . . . . . . . . . . . . . . . . . . . . . . . . . . . . . . . . . . . . . . . . . . . . . . . . . . . . . . . . . 18
Program end with water in the drum. . . . . . . . . . . . . . . . . . . . . . . . . . . . . . . . . . . . . . . . . . . . . . . . . . . . . . . . . . . . . 18
Canceling a program . . . . . . . . . . . . . . . . . . . . . . . . . . . . . . . . . . . . . . . . . . . . . . . . . . . . . . . . . . . . . . . . . . . . . . . . 19
Program sequence . . . . . . . . . . . . . . . . . . . . . . . . . . . . . . . . . . . . . . . . . . . . . . . . . . . . . . . . . . . . . . . . . . . . . . . . . . 20
K Information . . . . . . . . . . . . . . . . . . . . . . . . . . . . . . . . . . . . . . . . . . . . . . . . . . . . . . . . . . . . . . . . . . . . . . . . . . . . . . . 20
Language selection . . . . . . . . . . . . . . . . . . . . . . . . . . . . . . . . . . . . . . . . . . . . . . . . . . . . . . . . . . . . . . . . . . . . . . . . . 21
Chip card use
Card operation . . . . . . . . . . . . . . . . . . . . . . . . . . . . . . . . . . . . . . . . . . . . . . . . . . . . . . . . . . . . . . . . . . . . . . . . . . . . . 22
Optional modules
Liquid dispensing system . . . . . . . . . . . . . . . . . . . . . . . . . . . . . . . . . . . . . . . . . . . . . . . . . . . . . . . . . . . . . . . . . . . . . 23
Peak load cutoff . . . . . . . . . . . . . . . . . . . . . . . . . . . . . . . . . . . . . . . . . . . . . . . . . . . . . . . . . . . . . . . . . . . . . . . . . . . . 25
Communication module . . . . . . . . . . . . . . . . . . . . . . . . . . . . . . . . . . . . . . . . . . . . . . . . . . . . . . . . . . . . . . . . . . . . . . 25
Load module. . . . . . . . . . . . . . . . . . . . . . . . . . . . . . . . . . . . . . . . . . . . . . . . . . . . . . . . . . . . . . . . . . . . . . . . . . . . . . . 25
Cleaning and Care
After each use. . . . . . . . . . . . . . . . . . . . . . . . . . . . . . . . . . . . . . . . . . . . . . . . . . . . . . . . . . . . . . . . . . . . . . . . . . . . . . 26
Cleaning the exterior. . . . . . . . . . . . . . . . . . . . . . . . . . . . . . . . . . . . . . . . . . . . . . . . . . . . . . . . . . . . . . . . . . . . . . . . . 26
Frequently asked questions
Power failure - Emergency door release . . . . . . . . . . . . . . . . . . . . . . . . . . . . . . . . . . . . . . . . . . . . . . . . . . . . . . . . . 30
Fault messages. . . . . . . . . . . . . . . . . . . . . . . . . . . . . . . . . . . . . . . . . . . . . . . . . . . . . . . . . . . . . . . . . . . . . . . . . . . . . 31
After sales service
Guide to the data plate symbols
Help to protect the environment
Installation Instructions
Installation site . . . . . . . . . . . . . . . . . . . . . . . . . . . . . . . . . . . . . . . . . . . . . . . . . . . . . . . . . . . . . . . . . . . . . . . . . . . . . 37
Removing the shipping struts . . . . . . . . . . . . . . . . . . . . . . . . . . . . . . . . . . . . . . . . . . . . . . . . . . . . . . . . . . . . . . . . . . 37
Plumbing. . . . . . . . . . . . . . . . . . . . . . . . . . . . . . . . . . . . . . . . . . . . . . . . . . . . . . . . . . . . . . . . . . . . . . . . . . . . . . . . . . 38
Connecting the water intake / water drain hoses . . . . . . . . . . . . . . . . . . . . . . . . . . . . . . . . . . . . . . . . . . . . . . . . . . . 38
Electrical connection . . . . . . . . . . . . . . . . . . . . . . . . . . . . . . . . . . . . . . . . . . . . . . . . . . . . . . . . . . . . . . . . . . . . . . . . 39
Quick Guide
3
IMPORTANT SAFETY INSTRUCTIONS
Correct usage of the washer
Explanation of safety instructions and
warnings on the washer
Read the operating instructions.
~ Only use the washing machine to wash items which are
specified by the manufacturer to be machine washable on
the fabric care label. Any other applications may be dangerous.
~ Persons who lack physical, sensory or mental abilities,
Read all the instructions, e.g. the
installation instructions.
or experience with the appliance should not use it without
supervision or instruction by a responsible person.
~ This washer-extractor is only intended for laundry which
has not come in contact with flammable substances.
Caution, hot surfaces.
~ Dry cleaning solvents must not be used in this machine.
Such solvents could cause a fire or explosion.
~ Do not wash articles that have been previously cleaned,
Caution, voltage up to 1000 V
Grounding
washed, soaked or spotted with gasoline, dry-cleaning solvents, organic oils or other flammable substances. These
articles give off vapors that could ignite or explode. Do not
add these items to the wash load.
~ CAUTION: Fire hazard!
Do not store or use gasoline, gasoline-based substances
or any easily flammable materials near the machine. Do not
use the top of the washer as a storage area.
~ Do not store any chemicals (liquid detergents, wash
,READ AND SAVE THESE INSTRUCTIONS
Keep these operating instructions in a safe place
and pass them on to any future user.
Read all instructions before installation or use of the
washer to prevent injury and machine damage.
Installation, repair and maintenance work should be
performed by a Miele authorized service technician.
Work by unqualified persons could be dangerous.
This appliance complies with current safety requirements. Improper use of the appliance can lead to
personal injury and material damage.
All personnel working with this machine must be fully trained in all aspects of its use and safety.
aids) on the top of the washer. The chemicals could damage the surface. Spilled chemicals must be immediately
washed off with a wet sponge.
~ Under certain conditions, hydrogen gas may be produ-
ced in a hot water system that has not been used for 2
weeks or more. HYDROGEN GAS IS EXPLOSIVE. If the hot
water system has not been used for such a period, turn on
all hot water faucets and let the water flow from each for several minutes before using the washing machine. This will
release any built-up hydrogen gas. Do not smoke or use an
open flame during this time, the gas is flammable.
~ Check the wash results when the laundry was soiled
with biological oils or grease. If the laundry is not sufficiently cleaned, a spontaneous combustion might occur when
the laundry is dried in a dryer.
Use special detergents or wash programs.
~ If the washer is operated in a publicly accessible area,
the operator must ensure the safe use of the appliance.
~ Ensure that any one operating this machine is familiar
with these important safety instructions.
4
IMPORTANT SAFETY INSTRUCTIONS
Electrical Safety
Use
~ Be certain this appliance is properly installed and
grounded by an authorized technician. For electrical safety
this machine must be grounded. It is imperative that this
basic safety requirement be tested by a qualified electrician. Consult a qualified electrician if in doubt.
~ Do not let children play in, on or near the washer. Do not
~ Repairs to electrical or steam appliances should only be
washer, to prevent:
carried out by a Miele authorized technician in accordance
with local and national safety regulations. Unauthorized repairs could cause injury or machine damage.
~ Do not repair of replace any part of the appliance or at-
tempt any servicing unless specifically recommended in
these operating instructions. Contact Miele’s Technical Service Department for assistance.
let them play with the controls or operate the unit. Close supervision of children is necessary when the appliance is
used near children.
~ Always close the door after loading or unloading the
– children from climbing into the washer, or hiding small
items in the washer.
– small animals from climbing into the washer.
~ The drum door glass will be hot when washing at very
high temperatures. Do not touch the glass.
features and controls of the washer.
~ Do not reach into the appliance if the drum is moving.
~ Take care not to pinch or cut your fingers on the hinges
~ Do not operate the appliance if the control panel, wires
or cables are damaged.
~ The area necessary to open the drum door completely
~ Do not operate the washer when housing parts have
~ Do not drink washer water! Harmful residues could be
~ Do not damage, remove, or bypass any of the safety
been removed and the moving or electrical parts are exposed and accessible.
~ The washer is only completely isolated from the electri-
cal supply when the circuit breaker has been tripped or the
power main shut off.
~ Do not use force to open the washer drum door. The
door handle is equipped with an extra safety mechanism to
guarantee that the door remains locked.
~ Faulty components must only be replaced with genuine
Miele spare parts to guarantee the safe operation of this
machine.
of the drum door or lint flap. Use the handles.
must not be obstructed by doors or other structures.
present.
~ Always follow the instructions of the chemical manufacturer when using cleaning agents and special application
chemicals. Only use such chemicals for the purpose and in
the situation specified by the manufacturer. This will prevent the danger of adverse chemical reactions and material
damage.
If in doubt, check with the manufacturer to be sure that the
product is suitable for use in this machine.
~ Dyes, dye removers and descaling agents may only be
used in this machine if the manufacturer states they are
suitable for use in a washing machine. Always observe the
manufacturer’s instructions carefully.
~ Fabric softeners may be used with this machine. Follow
the manufacturers instructions.
~ Do not use high pressure cleaners to hose down the
washer.
~ Check the hoses regularly for leaks to prevent water damage.
~ Do not tamper with
the controls.
5
IMPORTANT SAFETY INSTRUCTIONS
Additional information
~ Disinfecting and cleaning agents often contain chlorides
(salts) which can cause steel surfaces to rust. To protect
the machine from rust damage, only use chloride free disinfecting and cleaning agents for washing/disinfecting and
for cleaning the machine. If you are not sure about an
agent contact Miele’s Professional Department. If you accidentally spill an agent containing chloride on the machine it
should be rinsed off with water and dried with a soft cloth.
~ The manufacturer of the washer does not take responsibility for the effect of the chemical on the laundry or the machine when a chemical cleaning agent is recommended on
technical application grounds.
~ Keep the area around the machine clean and free of debris.
~ Before the appliance is removed for service or discarded, remove the door.
~ The interior of the machine should be cleaned periodically by a qualified service agent.
Using accessories
~ Only use genuine Miele accessories. If other parts are
used, guarantee, performance and product liability claims
may become void.
Chlorine damage to components
How to handle chlorine bleach and perchloroethylene
(PCE)
~ Heavy use of chlorine products increases the risk of damage to appliance components.
Depending on the chlorine concentration, the exposure
time, and the temperature, the use of liquid and powdered
chlorine-based bleaches can erode the stainless steel
protective layer and lead to corrosion of the appliance
components. Therefore, it is recommended that these
products not be used. Instead you can use oxygen-based
bleaches.
If you still need to use chlorine-based bleaches in special
cases, you will need to perform a neutralizing step each
time. Failure to do so can result in permanent and
irreversible damage to the washing machine and the
laundered items.
Chlorine neutralization
Chlorine neutralization must be done immediately following
the use of a chlorine-based bleach. For best results, use
hydrogen peroxide or an oxygen-based laundry soap or
bleach, without draining the tub.
If thiosulfate is used (especially with hard water), lime
deposits can form, leading to residue on the laundered
items or a build-up in the washing machine. The preferable
alternative is to use hydrogen peroxide, because it helps
promote the neutralization of chlorine.
The exact amounts to be used, and at what temperature(s),
should be selected based on the recommendations of the
neutralizer manufacturer, then checked for efficacy. The
laundry will need to be tested to ensure that no active
chlorine remains behind after neutralization.
SAVE THESE
INSTRUCTIONS
6
Guide to the washer
a
b
c
d
e
f
g
a Emergency Stop button
e Door handle
Pressing the red button turns the machine off.
The door handle is equipped with an extra safety
mechanism to guarantee that the door remains
locked.
b Control panel
c Detergent compartments
Pull the handle to open the flap.
d Drum door
f Service panel
g Plinth
Pull the door handle to open the drum door. Do not
use force.
7
Guide to the washer
Operating panel
d Optical interface PC
a Display*
1
Hot Wash
194 °F
2
Cottons
140 °F
3
Cottons Intensive
140 °F
i
FC
The optical interface on the machine’s control panel
provides the connection point for data transfer
between the machine’s controls and a PC.
A
After turning the machine on, the display shows
briefly a welcome screen and switches to the
program list. The last started program is highlighted.
b Control keys
The control keys have different functions depending
on the machine status. The functions are shown in the
display above each button.
e Jog shuttle
Turn the jog shuttle to display selections and input
fields.
Press the jog shuttle to confirm display selections or
changes.
f Card reader
For card operation. Washing programs can be
uploaded and downloaded on the program card. The
programs on the card can be used to operate the
washer.
If programmed to "Button allocation direct", the first 6
programs from the program list can be selected
directly with the control keys 1 to 6.
g I On button
c Start button
h 0 Off button
The circle illumination flashes if a selected program
can be started. To start a program press the "Start"
button. Once a program has started the Start button
can be pressed to show the original display.
Turns the machine off.
* Contents in the display will vary with
program offering.
8
Turns the machine on.
i Emergency Stop button
Only use in case of an emergency.
^ Press the red button to turn the machine off. After
clearing the danger turn the button clockwise to unlock it.
^ Press "Start" to continue the interrupted program.
Guide to the washer
Control keys
e/- Following or previous line
^ Press once to activate the function, press again to
deactivate the function.
S Save
See Programming Manual
i Manual operation
(Used by Miele Service Technicians)
See Programming Manual.
$ Program locked
If a program is locked it cannot be stopped or ended
with the 0 "Off" button after 1 minute.
FC Functions
Press this key to temporarily select another language
and/or access the Supervisor level.
)
A Back to the previous display
+ i Block plus
The respective program block (e.g. prewash) will be
added to the program.
m Starch Stop
Press this button to stop the program and allow
starch to be added to the laundry.
k Spin Stop
Press this button if a final spin is not required after the
final rinse.
Program unlocked
ß Dispensing
ä Dispensing not available
\ Operating data
-> l <- Reset to 0 (zero)
To reset the load sensor to "00.0" when the drum is
empty and the display shows a load size.
D Data transfer
Operator Card
m Delay start
Press this key to select a start time in the display.
K
Information
To show program information
f Stop/Finish
Press to stop a selected program or end an already
stopped program.
q
Drain
ü Skip
Cycles of a program in progress can be skipped or
repeated.
No programs are saved on this card. To transfer the
data from the control to the card and vice versa see
Programming Manual.
30 programs containing 6 blocks each can be saved
on the card.
The rear side of the card can be labeled.
9
Use
1. Turn on the washer
2. Sort and load the laundry
^ Open the on-site water faucet (and the supply faucet for steam, if relevant).
^ Turn on the electrical supply at the mains (on site).
^ Press l "On" to turn the washer on.
The welcome screen shows.
PROFESSIONAL
PW 6xx1
Welcome
Then the program list is shown. The last started
program is highlighted.
1
Hot Wash
194 °F
2
Cottons
140 °F
3
Cottons Intensive
140 °F
i
ä
FC
^ Empty all pockets.
Foreign objects left in pockets (e.g. nails, coins,
paper clips, etc.) can cause damage to clothes
and the machine.
A
^ Sort the laundry.
^ Only wash fabrics according to this wash care label.
^ Open the drum door by pulling the handle.
^ Load the laundry loosely into the drum.
10
Use
3. Add detergent
^ Open the detergent compartment flap,
pull out the respective containers and add detergent.
To prevent fabric damage, check that laundry will
not be caught in the closed door.
^ Close the drum door with the handle.
Do not swing the door shut.
Maximum dry laundry weights
PW 6241
54 lbs / 24 kg laundry
35 lbs / 16 kg wet cleaning
PW 6321
72 lbs / 32 kg laundry
42 lbs / 19 kg wet cleaning
^ For standard programs add detergent to compartment:
2 = for the main wash
1 = for the Prewash (if required)
3 = fabric softener
4 = liquid bleach
5 = liquid detergent
^ Do not exceed the maximum fill level, the excess
will flow directly into the drum.
^ Close the detergent compartment.
11
Use
Detergent
Fabric softener
Only use the correct amount of high efficiency low
sudsing detergent. Too much detergent will cause
oversudsing.
^ Close the compartment lid and push in the dispenser drawer.
Dosage
Follow the instructions on the detergent packaging to
ensure the correct usage and dosage amount for
your water hardness.
Adjust the amount of detergent if the load is smaller
and more or less soiled than normal.
Water hardness
Water
hardness
levels
Water qua- Hardness lelity
vel in mmol/l
German
hardness
°d
I
soft
0 - 1.3
0-7
II
moderate
1.3 - 2.5
7 - 14
III
hard
2.5 - 3.8
14 - 21
IV
very hard
over 3.8
over 21
If you do not know the water hardness in your area
contact your local water authority.
12
^ Pour liquid fabric softener into the compartment according to the manufacturer’s instructions. Do not
exceed the maximum fill level, the excess will
prematurely activate the siphon and be wasted.
The fabric softener will automatically be dispensed
during the final rinse cycle.
A small amount of water will remain in the
compartment at the end of the program.
Never mix fabric softener and starch in the fabric
softener compartment, 3. This will clog the
dispenser.
Use
Starch
Bleach
In the detergent container
1
Hot Wash
m
Program stop - Starch stop
Door can be opened.
i
ü
f
"Program stop - Starch Stop" flashes in the display
when it is time to add starch to the laundry.
^ Add starch prepared according to manufacturer’s
instructions into compartment 3, 4 or 5. The wash
time is automatically extended by 4 minutes.
^ Press "Start" to continue the program.
Only bleach items with the x symbol on the fabric
care label.
Liquid bleach can only be used in a program
designed for bleach. Add bleach to compartment, 4,
only. It will be automatically added to the second
rinse.
A third rinse is necessary when using bleach (see
the Programming Manual).
,With increased use of chlorine the possibility of
machine damage rises.
In the drum
^ Once the program stops in "Starch Stop", open the
drum door and add starch to the laundry load prepared according to the manufacturer’s instructions.
^ Close the drum door.
The display shows:
1
Hot Wash
Fabric dye
Fabric dye and color aids must be suitable for use in
a washer. Always follow the instructions of the
manufacturer.
m
Program stop - Starch stop
Door can be opened.
i
ü
f
^ Press the"Start" button to continue the program.
13
Use
4. Select a program
5. Select wash options (if needed)
^ Select a program by turning the jog shuttle (e.g.
Program 1 Hot Wash).
^ Press one of the wash option buttons.
To deselect the option, press it again.
The following will appear in the display:
+ i Block Plus
18
Extra Drain
1
Hot Wash
2
Cottons
A pre-wash can be selected for heavily soiled laundry
in certain programs. If a pre-wash is an option the
"+i" field is highlighted. If a pre-wash is not
available, the "+i" will not be shown.
i
194 °F
140 °F
ä
FC
A
^ See the Programming Manual for more information.
^ Confirm the selected program by pressing the inner button of the jog shuttle.
The display shows:
1
Main wash
+i
m
54.0 /54.0 lb
Rinse
14
1100 rpm
k
Starch can be selected with all standard programs
(excluding Extra Spin and Extra Drain). The m field
is highlighted in the display.
k Spin Stop
Hot Wash
194 °F
m Starch Stop
m
A
Spin Stop can be selected with all standard programs
(excluding Extra Spin). The k field is highlighted in
the display.
Use
6. Adjust the program (if needed)
Spin speed
Laundry weight
The laundry weight can be manually selected.
1
Hot Wash
104 °F
Pre-wash
194 °F
Main wash
+i
m
k
54.0
m
/54.0 lb
e
A
^ Turn the jog shuttle to "Laundry weight" and press
to confirm the selection.
The weight shown on the right side indicates the max.
weight.
^ Turn the jog shuttle to the desired laundry weight
and press to confirm the selection.
The spin speed can be adjusted from 0 - 300 in 25
rpm increments. Depending on the machine model
and the program selected the max. spin speed
ranges from 600 - 1100 rpms.
^ Turn the jog shuttle to "Spin speed"
and press to confirm the selection.
1
+i
Hot Wash
54.0 /
54.0 lb
Rinse
1100 rpm
-
m
k
m
A
^ Turn the jog shuttle to the desired spin speed and
press it to confirm the selection.
Temperature
In 1°F steps from cold to the maximum program
temperature.
^ Turn the jog shuttle to "Temperature" (104 °F for
Pre-wash) and press to confirm the selection.
1
Hot Wash
104 °F
Pre-wash
194 °F
Main wash
+i
m
k
54.0 / 54.0 lb
m
e
A
^ Turn the jog shuttle to the desired temperature and
press it to confirm the selection.
15
Use
7. Select Delay Start (if needed)
8. Start the program
Use the m "Delay start" button to program the washer
to start automatically at a later time.
^ Press the "Start" button to start the program.
Setting the delay start
When using the "Spin Stop" wash option, "Without
spin" will flash in the display when the spin cycle is
reached.
^ Press m "Delay Start".
The following will appear in the display:
1
1
Hot Wash
Start time:
16
54.0 / 54.0 lb
: 10
Start date: 2.4.2003
After setting the delay start press Start.
m
A
The display shows the current time of day and date.
The entry field is highlighted for hours.
^ Press, then turn the jog shuttle to select the hour.
Press it to confirm the selection.
^ Repeat with the minutes, day, month and year.
^ Press the "Start" button to start the program at the
selected start time.
1
194 °F
Hot Wash
Main wash
16:15 -2.4.2003
+i
54.0 / 54.0 lb
m
Start: 6:00 -3.4.2003
k
m
A
The display shows the current time of day, date and
the start time.
^ If the door is opened before the delay start time
has elapsed, press the "Start" button again.
Canceling the Delay Start
^ Press m "Delay Start" again or the
A "Back" button to cancel the delay start function.
16
Hot Wash
k
Program stop - W/o spin
Door can be opened.
i
ü
f
^ To continue the program with spinning, press the
"Start" button.
^ Press the f "End" button to end the program without spinning.
Use
9. End of program
At the end of the program, once the drum is
stationary and no water is in the machine the display
shows (for example):
1
Hot Wash
Program end
Door can be opened.
m
FC
A
At the same time a tone will sound for a short time to
signal the program end.
^ Pull the door handle to open the drum door.
Important: If the door cannot be opened, press
against the door handle then pull again. Do not
use force!
^ Remove the laundry.
^ Leave the drum door open to air dry the interior.
^ Turn the machine off with the 0 "Off" button.
^ Turn the mains off (on-site).
^ Close the steam valve (on-site).
17
Use
Skipping program cycles
Program end with water in the drum
Cycles of a program in progress can be skipped or
repeated.
If the program is interrupted during a cycle, the
display shows either:
^ Press the f "End" button to stop the program.
1
1
Hot Wash
Program end - Water in the drum
Hot Wash
Program stop
m
i
ü
f
^ Press the ü "Skip/Repeat" button. The display
shows the current area, block or step.
See also "Program structure" in the Programming
Manual.
Skip/Repeat
Program stop
Area 2: Main wash
S
e
A
Area 2: Main wash
Step Wash time 2
S
A
^ Turn the jog shuttle to "Area" and press it to confirm
the selection.
Area: Select either 1 Prewash, 2 Main wash or 3
Rinse and confirm by pressing the jog shuttle.
^ Turn the jog shuttle to "Block" and press it to confirm the selection.
Block: Select either Prewash 1-10, Main wash 1-10
or Rinse 1-10 and confirm by pressing the jog
shuttle.
^ Turn the jog shuttle to "Block" and press it to confirm the selection. Select the desired program step
and confirm.
^ To start the new program step press S "Save" and
"Start".
To go back without skipping a program cycle
^ Press the A "Back" button to go back to the program stop.
Program stop
^ To stop the program, press f "End".
The program stops.
1
Hot Wash
Program stop
i
ü
f
^ Press f "End" again to continue the program.
18
1
Hot Wash
Program end - Drum rotates
FC
A
,The drum door is locked.
Do not use force!
^ Press the q "Drain" button or select the Drain Extra
program and press "Start".
^ At the end of the program open the door.
Block 1: Main wash
A
or
m
-> 1 Hot Wash
FC
Use
Canceling a program
Canceling a locked program
^ To cancel a program, press the f "End" button twice.
Locked programs cannot be stopped or canceled.
If the program was canceled with water in the
machine or during spinning, the display shows:
1
194 °F
Hot Wash
Main wash
Locked!
1
Hot Wash
End at 12:35
)
A
Program stop - Water in the drum
i
ü
f
The display shows that the program is locked if the f
"End" button is pressed.
^ To unlock the program press the ) "Unlock" button.
or
1
^ Enter the password, by turning the jog shuttle to the
desired character in the alpha numeric list and then
pressing the shuttle to confirm each selection.
Hot Wash
Program stop - Rotating drum
i
ü
f
^ Press the q "Water drain" button or select the program Extra Spin, and press the "Start" button.
After entering the password the display shows:
Unlock program?
S
A
^ Press the S "Save" button to confirm. The normal
display shows and the program can be canceled.
1
194 °F
Hot Wash
Main wash
140 °F
Rinse 1
End at 12:35
m
K
f
19
Use
K Information
Program sequence
The program sequence is shown in the display after
the start of the program.
1
104 °F
68 °F
194 °F
k
m
K
f
m
Main wash
m
k
Cold
k
End at 12:35
m
K
f
Press the K "Information" button during the program to
show information in the display.
1
Hot Wash
Delay start: 10.7.2003
Hot Wash
Rinse 1
+i
+i
140 °F
End at 12:35
The second display line, here Pre-wash, shows the
wash water temperature.
1
Main wash
Rinse 1
Pre-wash
m
Hot Wash
194 °F
Hot Wash
Main wash
+i
1
140 °F
Cold
End at 12:35
m
K
f
If the program block Pre-wash has ended, the 2nd
line in the display shows the program block Main
wash with the current wash water temperature. The
3rd line shows the following program block, here
Rinse 1.
The program end display, above 12:35, shows the
time of day when the program will be finished.
Start time: 9:47
e
A
For more information press e.
Time after start: 0 h 23 min
Time left: 0 h 11min
Time after start: 0 h 23 min
e
Time left: 0 h 11 min
Repetition: no
Area 3: Rinse
e
Block 2: Rinse 2
Block step Wash time 1
Actual water level: 22 mm
e
Programmed value: 60 mm
Actual temperature: 95°F
Programmed temperature: 140 °F
1
e
Hot Wash
Revolution: 40 rpm
Rhythm: 12 / 3
A
^ Press the A "Back" button to return to the program sequence.
20
Use
Language selection
The language can be selected with the F flag
symbol. The language is set back to its original
setting 5 minutes after the program ends or when the
door is opened.
1
Hot Wash
194 °F
2
Cottons
140 °F
3
Cottons Intensive
140°F
i
FC
A
Press the function button FC. The display shows:
Settings
Back A
Main menu
Language
Supervisor level
FC
A
^ Turn then press the jog shuttle to select "Language".
Settings
Dansk
Language
Deutsch
English
FC
A
^ Turn the jog shuttle to select the desired language
and press to confirm the selection.
21
Chip card use
Chip cards are programmed to a machine type.
Empty cards can be used with any machine.
^ Press l "On" to turn the washer on.
If the card was inserted the wrong way, the display
shows:
§
The Welcome screen shows.
Card fault
Reinsert card correctly in card reader.
i
ü
f
^ Reinsert the card properly into the card reader.
If the card is not suitable for this type of machine, the
display shows:
Card operation
Programs on the card are only
suitable for machine type PW 6167
A
^ Insert a card suitable for this machine type.
Card operation
^ Insert the card, arrow first, into the card reader.
The display shows the list of programs on the card,
example:
Card operation
17
Fire department clothing 113 °F
18
Wrinkle-free
i
ß
140 °F
FC
A
^ Turn the jog shuttle to select a program. Press the
jog shuttle to confirm the selection.
^ Press the "START" button to begin the program.
^ Remove the card from the card reader.
Once the program is finished it will be deleted from
the machines memory.
,Do not insert any items other than the card into
the card reader.
22
For laundry loads which need special wash
procedures, a single special program is written on a
card which is then used to run the program.
This function blocks all machine programs. The
washer runs only the program saved on the card.
The function "Load" can be activated in the supervisor
level. The machine will only accept cards in this
function.
Optional modules
Liquid dispensing system
Deselecting the dispensing
(Dispensing systems vary)
1
Hot Wash
194 °F
2
Cottons
140 °F
3
Cottons Intensive
i
ä
FC
140 °F
A
The liquid dispensing can be manually deselected
before a program start.
The dispensing pump is turned off. The display
shows:
1
194 °F
Hot Wash
56.0/56.0 lb t
Main wash
Rinse
+i
a c b
m
1000 rpm
k
m
A
Dispensing amount
,Always follow the instructions of the chemical
manufacturer when using cleaning agents and
special application chemicals.
e
d
Priming the dispensing pumps
a Hose connection socket (in)
Only use such chemicals for the purpose and in
the situation specified by the manufacturer to prevent the danger of adverse chemical reactions
and material damage.
If in doubt, check with the manufacturer that the
product is suitable for use in this machine.
b Leakage outlet
c Hose connection socket (out)
Liquid detergent should stand at room temperature
before being used to ensure proper dispensing.
d Suction inlet opening
e Level indicator
When the dispenser container is empty the pump and
the machine will shut off.
The display will indicate that the detergent dispenser
is empty.
ö
Dispensing system fault
Fill dispensing container 1
Press Start.
i
f
^ Refill the dispensing containers.
^ Press "Start" to continue the program.
23
Optional modules
Priming the dispensing pumps
Use the calibration to get liquid detergent to the
pumphead. Once calibration is complete run an
empty program to get detergent to the machine
before actually washing a load of laundry in the
machine.
^ The dispensing can be manually stopped by pressing the 0/1 button or it will stop automatically after
60 seconds.
^ Measure the pumped amount in the measuring
cup.
Dispensing calibration ~ Dispensing pump 1
Dispensing calibration
V: 100ml
t: 30s
The dispensing calibration is used to calculate the
flow rate of each dispensing pump.
For direct access to the dispensing calibration when
the machine is turned off:
^ Press and hold the 2
nd
control key from the left.
^ Turn the machine on at the mains and release the
control key.
P: 200.0 ml/min
0/1
S
A
^ Enter the measured amount in the "V:" field. The
flow rate P: in milliliter per minute is calculated by
the control.
^ Press S "Save" to allocate the measured values to
the dispensing pump.
^ Reconnect the hose.
Dispensing calibration ~ Main menu
Dispensing pump 1
e
A
Dispensing pump 2
Selections: Dispensing pump 1 to 13
Maintenance of the dispensing system
Rinse the dispensing system with hot water every 2
weeks, or before shutting down the dispenser pumps
for any length of time, to prevent the system from
clogging.
After selecting a dispensing pump the display shows:
^ Rinse out the suction pipes with water.
Dispensing calibration ~ Dispensing pump 1
^ Place the suction pipes in a container with warm
water, 104 - 122°F (40 - 50°C).
V: 100ml
t: 0s
No
0/1
S
A
The dispensing amount can be adjusted in 1 ml
increments from 0 to 999 ml.
^ Press the 0/1 control key, the dispensing hose fills.
Press the 0/1 button again to stop.
^ Point the hose of the dispensing pump to be determined, in a measuring cup. Hold the cup high
enough so the liquid has to be pumped rather than
flowing out.
,Avoid skin and eye contact, wear protective
clothing.
^ Press A to get back to the main menu.
Dispensing calibration ~ Main menu
Dispensing pump 1
Dispensing pump 2
e
A
^ Select the dispensing pump.
Dispensing calibration ~ Dispensing pump 1
V: 100ml
t: 0s
No
0/1
24
S
A
^ Select each pump by using the dispensing calibration.
^ Turn on each pump until the dispensing system is
rinsed.
^ Check the connection points, hoses and washers
for leaks.
Optional modules
Peak load cutoff
Load module
When activating the peak load cutoff the heat is
turned off and the program is stopped. The display
shows:
If the machine is equipped with a load module, the
load weight will be displayed, in 0.5 lb increments,
while loading the laundry. The maximum laundry
weight is displayed next to the selected program.
1
Hot Wash
^ Reset with the -> I <- "zero - setting" if the weight
display does not show "00.0" when the drum is
empty.
Program stop - Peak load function
Program will continue.
i
ü
f
When the peak load function ends the program will
continue automatically.
1
140 °F
The communication module makes it possible to
connect the machine to a PC (Personal Computer).
The outlet for the module is on the back of the
machine.
This requires a special Editor Program which is
available from the Miele Professional Department.
00.0 /
56 lb
-> I <-
e
A
Main wash
Rinse
+i
Communication module
Hot Wash
m
k
m
If there was still laundry in the drum when the weight
display was reset, the display shows:
1
140 °F
Hot Wash
/
- -.-
Main wash
Rinse
+i
56 lb
m
k
m
-> I <-
e
A
^ Reset again with the -> I <- button.
If the machine is overloaded (wet laundry) the
machine calculates after the programs start with the
nominal value. This value is saved in the operating
data module.
At the end of a program, with the drum stationary, the
residual moisture of the laundry is displayed.
1
Hot Wash
Program end
Residual moisture 60 %
Door can be opened.
m
FC
A
See "Use - Adjust the program" for more information.
25
Cleaning and Care
After each use
Never use high pressure cleaners to hose down
the machine.
Detergent containers and siphon tube
^ Regularly clean detergent residues from the detergent dispensers, drawers and siphons with warm
water.
The machine should be cleaned immediately after
use.
^ After use do not shut the drum door, allow the interior to air dry.
Cleaning the exterior
,Never use abrasive cleaners, scouring pads,
steel wool or caustic cleaners on the machine.
They will damage the surface.
All surfaces can be cleaned with a solution of warm
water and liquid dish soap applied with a soft
sponge.
Door gasket
^ Clean any residues on the door gasket with a damp
cloth.
Stainless steel
Stainless steel surfaces can be cleaned using a
non-abrasive stainless steel cleaner.
To help prevent resoiling, a conditioner for stainless
steel can also be used.
^ Apply sparingly with even pressure.
26
^ Pull the siphon tube out, clean it with warm water
and reinsert it.
Cleaning and Care
Vent grille
Water inlet filters
^ Check and clean regularly the wash water vent grille at the rear of the machine.
Rust
The drum and the wash water drum are made of
stainless steel. Water with a high iron content or items
like paper clips or iron buttons which are in the
laundry, can lead to rust in the drums.
^ To help prevent rust, a conditioner for stainless
steel can be used.
^ Check the door gasket for iron residue and clean
with stainless steel conditioner.
^ Clean regularly.
Leave the drum door open after use for the interior
to air dry.
^ Check and clean regularly the filters in the water intake faucets, and the water intake hoses.
Maintenance during downtime
^ When the machine is not used for an extended time
(4 weeks or more), the drum needs to be rotated
manually a couple of times to prevent bearing damage. Repeat every month.
27
Cleaning and Care
Drum bearing lubrication
Maintenance during downtime
If the machine needs to be serviced the following
message shows:
When the machine is not in use for an extended time
(4 weeks or more), the drum bearings must be
lubricated (before the downtime).
§
Drum bearing lubrication
^ Lubricate the drum bearing according to the warning message and turn the drum by hand a few times.
Call Technical Service.
A
^ Press A "back" to delete the message.
?
?
The message will show each time the machine is
turned on, until the Service Technician has serviced
the machine.
^ After about 1000 operating hours, lubricate the
drum journal bearing by the lubricating nipple with
Arcanol L 100 grease.
28
^ Repeat every month to prevent bearing damage.
Frequently asked questions
Reasons for oversudsing
The drum door cannot be opened
Detergent type
^ Press against the door handle, turn the machine on
then off and pull on the door handle once more.
^ Only use detergent formulated for use in commercial washers. Detergents for domestic machines are
not suitable.
The safety mechanism of the door handle
is disengaged
Too much detergent
^ Follow the detergent manufacturer’s instructions
and adjust the amount to the local water hardness.
Oversudsing detergent
^ Use a low sudsing detergent or contact Miele’s detergent application specialists.
Very soft water
^ In areas with soft water, use less detergent.
Soiling level of laundry
^ For lightly soiled laundry use less detergent.
Residue, e.g. undissolved detergent on laundry
^ Run a prewash without detergent and without selecting a temperature.
The door handle has lost its function. The door cannot
be opened or closed.
The safety mechanism is designed to protect the
handle from damage, i.e. if too much force is
being used in an attempt to open the door.
^ Laundry which has been pre-treated in detergent
before washing must be thoroughly rinsed before
running a wash program.
Small loads
^ Reduce the amount of detergent accordingly.
Drum speed too high during a wash (Profitronic-controls)
^ Reduce the drum speed and wash rhythm.
^ Firmly press against the door handle until you hear
the safety mechanism click.
The door can now be opened or closed provided
there is no water in the machine.
29
Frequently asked questions
Power failure - Emergency door release
Open the door manually
During a short power failure
The program remains in the last position. When
power is restored the following message appears in
the display:
y
Power failure
Program stop
Press Start
f
^ Press "Start" to continue the program.
Extended power failure
^ Turn the machine off.
^ Turn the electrical supply off at the mains.
^ Close the steam valve (on-site).
The machine must be drained and the drum door
opened manually to unload the machine.
Draining the wash water
^ Place a container under the manual drain at the
rear of the machine.
^ Open the drain by loosening the venting screw. Do
not take it completely out.
^ A small amount of water will drain from the machine.
^ Tighten the venting screw again and test for leaks
by opening the water supply.
30
^ Insert and hold a small screwdriver in the opening
next to the door lock.
^ Press against the door handle, then pull it towards
you to open the door.
Do not use force!
^ Remove the laundry.
Frequently asked questions
Display Maintenance notice
Fault messages
^ Call Technical Service for maintenance if the display shows the following message after turning the
machine on.
§
Maintenance notice
Call Technical Service.
A
,Repairs to electrical or steam appliances
should only be carried out by a Miele authorized
technician in accordance with local and national
safety regulations. Unauthorized repairs could
cause injury or machine damage.
Faults that occur before or after the start of a program
flash in the display.
The display goes out after 5 seconds.
If the display remains off, the washer has no power.
^ Check the plug, main switch and fuses on-site.
y
Power failure
Program stop
Press Start.
f
^ Press "Start".
This fault message can also indicate that the overload
cut-out of the drive motors has over heated.
^ Allow the motor to cool.
31
Frequently asked questions
M
Water intake fault
m
Call Technical Service
Program stop. Press Start.
if restart w/o success.
Motor temperature too high.
i
f
^ Check the water supply and press "Start".
/
i
Door lock fault
§
if restart w/o success.
f
^ Press the door handle so that it closes with a click,
press "Start".
i
A
Large imbalance, the imbalance switch has
activated.
^ Turn the machine off and on again
Heating system fault
^ Press "Start".
Program stop.
Press Start.
i
Imbalance fault
Call Technical Service
if restart w/o success.
i
f
^ Allow the motor to cool.
Contact Technical Service
§
Drive motor fault
f
q
Drain valve fault
Call Technical Service
if restart is w/o success.
^ Press "Start" to continue the program without heating.
i
If the program has a "Thermostop" the program will
time out.
^ Check and clean the drain system and press h
"Start".
^ Call Miele Technical Service.
^ Some programs may be canceled if this messages
shows.
Call Technical Service.
f
A defective drain valve should only be replaced by
an authorized service technician.
ö
Dispensing system fault
Fill dispensing container 1
Press Start.
i
f
^ Change/fill the dispensing container.
§
Card fault
Reinsert card correctly in card reader.
i
f
^ Insert the card properly into the card reader.
32
After sales service
^ In the event of a fault which you cannot correct
yourself, please contact Technical Service.
^ When contacting Technical Service please quote
the model, serial number (SN) and part number
(M.-Nr.) of the machine.
They can be found on the data plate located at the
top of the door opening (when drum door is open) or
on the back of the machine at the top.
^ When contacting Technical Service report the fault
in the display.
Only use original Miele spare parts when
performing maintenance or repairs on this
machine. When ordering please quote the model,
serial number (SN) and part number (M.-Nr.) of the
machine.
33
Guide to the data plate symbols
a
b
c
d
o
r
p
q
s
e
f
g
t
i
j
h
n
u
v
k
l
m
1 Model
2 Serial number
3 Item number
4 Material number
5 Voltage / Frequency
6 Control breaker
7 Motor
8 Drum data
9 Drum diameter / Drum depth
10 Spin speed
11 Drum volume / Dry laundry weight
12 Kinetic energy
13 Acceleration time
14 Deceleration time
15 Heating
16 Name / Year of manufacture
17 Commissioning date
18 Electrical heating
19 Breaker at the building's electrical service panel
20 Steam heat indirect
21 Steam heat diret
22 Gas heating
23 Certificates
34
w
Noise level
Wash cycle
PW 6241
PW 6321
60 dB
60 dB
Spin cycle
82 dB
80 dB
Installation Instructions
Help to protect the environment
Disposal of the packing materials
Disposal of an old appliance
The packing materials protect the appliance during
shipping. They have been designed to be
biodegradable and recyclable.
Old appliances may contain materials that can be
recycled. Please contact your local recycling center
about the possibility of recycling these materials.
To prevent suffocation, ensure that any plastic
wrappings, bags, etc. are disposed of safely and
kept out of the reach of children.
Ensure that the appliance presents no danger to
children while being stored for disposal. Before
discarding an old appliance, unplug it from the outlet,
cut off its power cord and remove any doors to
prevent hazards.
36
Installation Instructions
Removing the shipping struts
The washer must only be installed by a Miele
authorized service technician.
^ The fixing angles "A" on the diagram, 2 on each
side panel are fixed with 3 M 10 (SW 17) hex
screws. Remove these.
Before installation or service disconnect the power
supply to the work area.
The shipping struts "B" on the diagram, 2 at the front
and 2 at the rear are each fixed with 3 M 10 (SW 17)
hex screws.
The minimum dimensions and distance required
from the wall, as shown in the installation diagram,
must be observed to allow service to be
performed and the data plate to be viewed.
^ To remove them detach the front service panel and
the rear panel. Unscrew the 3 M6 hex screws (SW
8) at the bottom edge of the front service panel,
and take it off.
Unscrew 8 hex screws in the rear panel and remove.
Installation site
A concrete or reinforced floor is the most suitable
surface for the washer. These types of floors are less
prone to vibration during the spin cycle.
The washer must be leveled for proper operation. The
machine does not need to be installed on a base,
however, any unevenness in the floor must be
compensated for.
The cover for the bottom front and the rear panels are
secured to the side panels, and should be fitted when
the machine has been installed. Use the supplied
screws.
The shipping struts should be stored in a safe
place for future use. They must be refitted if the
machine is moved.
Do not install or store this machine in a room
where temperatures below freezing may occur or
where the machine may be exposed to the
weather.
Do not install the washer on carpeting. Carpeting
will block the washers air vents.
37
Installation Instructions
Plumbing
The machine should be connected to two water
supply faucets, which conform with local and national
regulations. Installation must be carried out by an
authorized service technician.
To ensure the machine is correctly connected please
follow the installation plan and the installation
instructions supplied with the machine.
Connecting the water intake / water drain
hoses
See the enclosed installation plan.
A water pressure flow rate of at least 14.5 psi, maximum
145 psi is required.
The inlet pressure hoses supplied with the machine
must be used for connection to the water supply.
The hoses should only be replaced with genuine
Miele spare parts which fulfill the pressure
requirements.
The hot water intake must not exceed a temperature
of 158°F (70°C).
Cold water connection only
See the enclosed installation diagram.
38
Installation Instructions
Electrical connection
,All electrical work must be performed by a
qualified service technician in accordance with
applicable codes and standards.
When installaing a residual current device (RCD) a
Type B GFCI circuit breaker must be installed.
The connecting terminal is located behind a cover.
Steam connection
The steam connection must only be connected by a
certified installer. For more information see the
enclosed installation plan and the installation manual.
Connecting the dispensing pumps
The connecting terminal for 4 time controlled
dispensing pumps is located behind the cover next to
the electrical connection. See the supplied wiring
diagram.
The dispensing pumps can be operated without the
multifunction module.
The machine must only be connected to the voltage
and frequency shown on the data plate.
The machine is equipped with a multi-tap
transformer.
Steam heated washers are factory set to
3 phase, 208 V, 60 Hz
They can be converted to
3 phase, 240 V, 60 Hz by a Miele Service Technician.
Electrically heated washers are factory set to 3
phase, 230 V, 50/60 Hz
They can be converted to
3 phase, 208 V, 60 Hz by a Miele Service Technician.
Equalizer
Secure the potential equalizer, if necessary.
To activate the heating the water level in the drum
must be 4 5/16" (110 mm) high.
A motor overload protection is located in the motor
winding.
See the enclosed wiring and installation diagrams.
39
Quick Guide
1. Sort the laundry
Only use this machine for items that are machine washable, see the fabric care label.
^ Empty all pockets.
2. Turn the machine on and load the laundry
^ Press the I "On" button to turn the machine on.
^ Open the drum door and load the laundry.
^ Close the drum door.
3. Add detergent
^ Add detergent to compartment:
1 = for the Prewash (if required)
2 = for the main wash
3 = fabric softener
4 = liquid bleach
5 = liquid detergent
4. Select a program by turning the jog shuttle
Programs may vary depending on the offerings of your machine.
5. Press "Start".
The selected program begins.
^ If "Door lock fault" appears in the display
press the door handle so that it closes with
a click. Press "Start".
/
Door lock fault
Contact Technical Service
if restart w/o success.
i
f
6. At the end of a program
The program end is displayed.
^ Open the door by pulling the handle.
Remove the laundry.
^ Leave the drum door open.
^ Turn the machine off with the 0 "Off" button.
40
1
Hot Wash
Program end
Door can be opened.
m
FC
A
41
42
43
Alteration rights reserved / 3112
M.-Nr. 06 572 435 / 00
INFORMATION IS SUBJECT TO CHANGE. PLEASE REFER TO OUR WEBSITE TO OBTAIN THE MOST CURRENT PRODUCT
SPECIFICATIONS, TECHNICAL & WARRANTY INFORMATION.