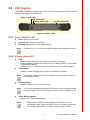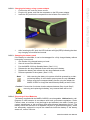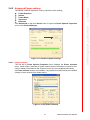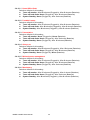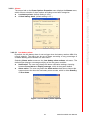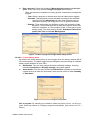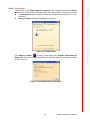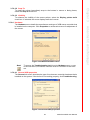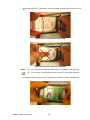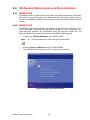
1
User Manual
MARS-3100R/S
Industrial Tablet PC
Copyright
The documentation and the software included with this product are copyrighted 2007
by Advantech Co., Ltd. All rights are reserved. Advantech Co., Ltd. reserves the right
to make improvements in the products described in this manual at any time without
notice. No part of this manual may be reproduced, copied, translated or transmitted
in any form or by any means without the prior written permission of Advantech Co.,
Ltd. Information provided in this manual is intended to be accurate and reliable. However, Advantech Co., Ltd. assumes no responsibility for its use, nor for any infringements of the rights of third parties, which may result from its use.
Acknowledgements
Intel and Pentium are trademarks of Intel Corporation.
Microsoft Windows and MS-DOS are registered trademarks of Microsoft Corp.
All other product names or trademarks are properties of their respective owners.
Product Warranty (2 years)
Advantech warrants to you, the original purchaser, that each of its products will be
free from defects in materials and workmanship for two years from the date of purchase.
This warranty does not apply to any products which have been repaired or altered by
persons other than repair personnel authorized by Advantech, or which have been
subject to misuse, abuse, accident or improper installation. Advantech assumes no
liability under the terms of this warranty as a consequence of such events.
Because of Advantech’s high quality-control standards and rigorous testing, most of
our customers never need to use our repair service. If an Advantech product is defective, it will be repaired or replaced at no charge during the warranty period. For outof-warranty repairs, you will be billed according to the cost of replacement materials,
service time and freight. Please consult your dealer for more details.
If you think you have a defective product, follow these steps:
1. Collect all the information about the problem encountered. (For example, CPU
speed, Advantech products used, other hardware and software used, etc.) Note
anything abnormal and list any onscreen messages you get when the problem
occurs.
2. Call your dealer and describe the problem. Please have your manual, product,
and any helpful information readily available.
3. If your product is diagnosed as defective, obtain an RMA (return merchandise
authorization) number from your dealer. This allows us to process your return
more quickly.
4. Carefully pack the defective product, a fully-completed Repair and Replacement
Order Card and a photocopy proof of purchase date (such as your sales receipt)
in a shippable container. A product returned without proof of the purchase date
is not eligible for warranty service.
5. Write the RMA number visibly on the outside of the package and ship it prepaid
to your dealer.
MARS-3100R/S User Manual
Part No. 2006310002
Edition 3
Printed in Taiwan
April 2008
ii
Declaration of Conformity
CE
This product has passed the CE test for environmental specifications when shielded
cables are used for external wiring. We recommend the use of shielded cables. This
kind of cable is available from Advantech. Please contact your local supplier for
ordering information.
CE
This product has passed the CE test for environmental specifications. Test conditions
for passing included the equipment being operated within an industrial enclosure. In
order to protect the product from being damaged by ESD (Electrostatic Discharge)
and EMI leakage, we strongly recommend the use of CE-compliant industrial enclosure products.
FCC Class B
Note: This equipment has been tested and found to comply with the limits for a Class
B digital device, pursuant to part 15 of the FCC Rules. These limits are designed to
provide reasonable protection against harmful interference in a residential installation. This equipment generates, uses and can radiate radio frequency energy and, if
not installed and used in accordance with the instructions, may cause harmful interference to radio communications. However, there is no guarantee that interference
will not occur in a particular installation. If this equipment does cause harmful interference to radio or television reception, which can be determined by turning the equipment off and on, the user is encouraged to try to correct the interference by one or
more of the following measures:
! Reorient or relocate the receiving antenna.
! Increase the separation between the equipment and receiver.
! Connect the equipment into an outlet on a circuit different from that to which the
receiver is connected.
! Consult the dealer or an experienced radio/TV technician for help.
FM
This equipment has passed the FM certification. According to the National Fire Protection Association, work sites are classified into different classes, divisions and
groups, based on hazard considerations. This equipment is compliant with the specifications of Class I, Division 2, Groups A, B, C and D indoor hazards.
iii
MARS-3100R/S User Manual
Europe – EU Declaration of Conformity
This device complies with the essential requirements of the R&TTE Directive
1999/5/EC. The following test methods have been applied in order to prove
presumption of conformity with the essential requirements of the R&TTE
Directive 1999/5/EC:
EN 60950-1: 2001
Safety of information technology equipment
IEEE Std. 1528: 2003
Recommended practice for determining the peak spatial-average specific
absorption rate (SAR) in the human head from wireless communications
devices: Measurement Techniques.
ANSI/IEEE C95.3: 2002
IEEE recommended practice for the measurement and computations of radio
frequency electromagnetic fields with respect to human exposure to such
fields, 100kHz-300GHz.
EN 300 328 V1.7.1 (2006-10)
Electromagnetic compatibility and Radio spectrum Matters (ERM); Wideband
transmission systems; Data transmission equipment operating in the 2,4 GHz
ISM band and using wide band modulation techniques; Harmonized EN covering
essential requirements under article 3.2 of the R&TTE Directive
EN 301 893 V1.2.3 (2003-08)
Broadband Radio Access Networks (BRAN); 5 GHz high performance RLAN;
Harmonized EN covering essential requirements of article 3.2 of the R&TTE
Directive
2005/513/EC, Commission Decision of 11 July 2005 on the harmonised use
of radio spectrum in the
5 GHz frequency band for the implementation of wireless access systems
including radio local area networks (WAS/RLANs)
EN 301 489-17 V1.2.1 (2002-08) and EN 301 489-1 V1.4.1 (2002-08)
Electromagnetic compatibility and Radio spectrum Matters (ERM);
ElectroMagnetic Compatibility (EMC) standard for radio equipment and
services; Part 17: Specific conditions for 2,4 GHz wideband transmission
systems and 5 GHz high performance RLAN equipment
MARS-3100R/S User Manual
iv
This device is a 2.4 GHz wideband transmission system (transceiver),
intended for use in all EU member states and EFTA countries under the
following conditions and/or with the following restrictions:
In Italy the end-user should apply for a license at the national spectrum
authorities in order to obtain authorization to use the device for setting
up outdoor radio links and/or for supplying public access to
telecommunications and/or network services.
This device may not be used for setting up outdoor radio links in France
and in some areas the RF output power may be limited to 10 mW EIRP in the
frequency range of 2454 – 2483.5 MHz. For detailed information the end-user
should contact the national spectrum authority in France.
This device is a 5 GHz wideband transmission system (transceiver), intended
for use in all EU member states and EFTA countries under the following
conditions and/or with the following restrictions:
This device may only be used indoors in the frequency bands 5150 – 5250
MHz and 5250 – 5350 MHz.
In France and Luxembourg a limited implementation of the frequency bands
5150 – 5250 MHz and 5250 – 5350 MHz. In Luxermbourg it is not allowed to make
use of the frequency band 5470 – 5725 MHz. End-users are encouraged to contact
the national spectrum authorities in France and Luxembourg in order to obtain the
latest information about any restrictions in the 5 GHz frequency band(s).
0560
v
MARS-3100R/S User Manual
Cesky [Czech]
[Advantech] tímto prohlašuje, _e tento [MARS-3100S] je ve shodì se základními po_adavky a dalšími pøíslušnými ustanoveními smìrnice 1999/5/ES.
Dansk [Danish]
Undertegnede [Advantech] erklærer herved, at følgende udstyr [MARS-3100S]
overholder de væsentlige krav og øvrige relevante krav i direktiv 1999/5/EF.
Deutsch [German]
Hiermit erklärt [Advantech], dass sich das Gerät [MARS-3100S] in Übereinstimmung mit den grundlegenden Anforderungen und den übrigen einschlägigen Bestimmungen der Richtlinie 1999/5/EG befindet.
Eesti [Estonian]
Käesolevaga kinnitab [Advantech] seadme [MARS-3100S] vastavust direktiivi
1999/5/EÜ põhinõuetele ja nimetatud direktiivist tulenevatele teistele asjakohastele sätetele.
English
Hereby, [Advantech], declares that this [MARS-3100S] is in compliance with
the essential requirements and other relevant provisions of Directive 1999/5/
EC.
Español [Spanish]
Por medio de la presente [Advantech] declara que el [MARS-3100S] cumple
con los requisitos esenciales y cualesquiera otras disposiciones aplicables o
exigibles de la Directiva 1999/5/CE.
Ελληνική [Greek]
ΜΕ ΤΗΝ ΠΑΡΟΥΣΑ [Advantech] ?ΗΛ?ΝΕΙ ΟΤΙ [MARS-3100S]
ΣΥΜΜΟΡΦ?ΝΕΤΑΙ ΠΡΟΣ ΤΙΣ ΟΥΣΙ??ΕΙΣ ΑΠΑΙΤΗΣΕΙΣ ΚΑΙ ΤΙΣ
ΛΟΙΠΕΣ ΣΧΕΤΙΚΕΣ ?ΙΑΤΑΞΕΙΣ ΤΗΣ Ο?ΗΓΙΑΣ 1999/5/ΕΚ.
Français [French]
Par la présente [Advantech] déclare que l'appareil [MARS-3100S] est conforme aux exigences essentielles et aux autres dispositions pertinentes de la
directive 1999/5/CE.
Italiano [Italian]
Con la presente [Advantech] dichiara che questo [MARS-3100S] è conforme ai
requisiti essenziali ed alle altre disposizioni pertinenti stabilite dalla direttiva
1999/5/CE.
Latviski
Ar ðo [Advantech] deklarç, ka [MARS-3100S] atbilst Direktîvas 1999/5/EK
bûtiskajâm prasîbâm
[Latvian]
un citiem ar to saistîtajiem noteikumiem.
Lietuvių [Lithuanian]
Šiuo [Advantech] deklaruoja, kad šis [MARS-3100S] atitinka esminius reikalavimus ir kitas 1999/5/EB Direktyvos nuostatas.
Nederlands [Dutch]
Hierbij verklaart [Advantech] dat het toestel [MARS-3100S] in overeenstemming is met de essentiële eisen en de andere relevante bepalingen van richtlijn
1999/5/EG.
Malti [Maltese]
Hawnhekk, [Advantech], jiddikjara li dan [MARS-3100S] jikkonforma malhtigijiet essenzjali u ma provvedimenti ohrajn relevanti li hemm fid-Dirrettiva
1999/5/EC.
Magyar [Hungarian]
Alulírott, [Advantech] nyilatkozom, hogy a [MARS-3100S] megfelel a vonatkozó alapvetõ követelményeknek és az 1999/5/EC irányelv egyéb elõírásainak.
Polski [Polish]
Niniejszym [Advantech] oœwiadcza, ¿e [MARS-3100S] jest zgodny z zasadniczymi wymogami oraz pozosta³ymi stosownymi postanowieniami Dyrektywy 1999/5/EC.
Português [Portuguese] [Advantech] declara que este [MARS-3100S] está conforme com os requisitos
essenciais e outras disposições da Directiva 1999/5/CE.
Slovensko [Slovenian] [Advantech] izjavlja, da je ta [tip opreme] v skladu z bistvenimi zahtevami in
ostalimi relevantnimi doloèili direktive 1999/5/ES.
Slovensky [Slovak]
[Advantech] týmto vyhlasuje, _e [tip opreme] spåòa základné po_iadavky a
všetky príslušné ustanovenia Smernice 1999/5/ES.
Suomi [Finnish]
[Advantech] vakuuttaa täten että [tip opreme] tyyppinen laite on direktiivin
1999/5/EY oleellisten vaatimusten ja sitä koskevien direktiivin muiden ehtojen
mukainen.
Svenska [Swedish]
Härmed intygar [Advantech] att denna [tip opreme] står I överensstämmelse
med de väsentliga egenskapskrav och övriga relevanta bestämmelser som
framgår av direktiv 1999/5/EG.
MARS-3100R/S User Manual
vi
Technical Support and Assistance
1.
2.
Visit the Advantech web site at www.advantech.com/support where you can
find the latest information about the product.
Contact your distributor, sales representative, or Advantech's customer service
center for technical support if you need additional assistance. Please have the
following information ready before you call:
– Product name and serial number
– Description of your peripheral attachments
– Description of your software (operating system, version, application software,
etc.)
– A complete description of the problem
– The exact wording of any error messages
Warnings, Cautions and Notes
Warning! Warnings indicate conditions, which if not observed, can cause personal
injury!
Caution! Cautions are included to help you avoid damaging hardware or losing
data. e.g.
There is a danger of a new battery exploding if it is incorrectly installed.
Do not attempt to recharge, force open, or heat the battery. Replace the
battery only with the same or equivalent type recommended by the manufacturer. Discard used batteries according to the manufacturer's
instructions.
Note!
Notes provide optional additional information.
Document Feedback
To assist us in making improvements to this manual, we would welcome comments
and constructive criticism.
Please send all such - in writing to: [email protected]
vii
MARS-3100R/S User Manual
Safety Instructions
1.
2.
3.
Read these safety instructions carefully.
Keep this User Manual for later reference.
Disconnect this equipment from any AC outlet before cleaning. Use a damp
cloth. Do not use liquid or spray detergents for cleaning.
4. For plug-in equipment, the power outlet socket must be located near the equipment and must be easily accessible.
5. Keep this equipment away from humidity.
6. Put this equipment on a reliable surface during installation. Dropping it or letting
it fall may cause damage.
7. The openings on the enclosure are for air convection. Protect the equipment
from overheating. DO NOT COVER THE OPENINGS.
8. Make sure the voltage of the power source is correct before connecting the
equipment to the power outlet.
9. Position the power cord so that people cannot step on it. Do not place anything
over the power cord.
10. All cautions and warnings on the equipment should be noted.
11. If the equipment is not used for a long time, disconnect it from the power source
to avoid damage by transient over-voltage.
12. Never pour any liquid into an opening. This may cause fire or electrical shock.
13. Never open the equipment. For safety reasons, the equipment should be
opened only by qualified service personnel.
14. If one of the following situations arises, get the equipment checked by service
personnel:
15. The power cord or plug is damaged.
16. Liquid has penetrated into the equipment.
17. The equipment has been exposed to moisture.
18. The equipment does not work well, or you cannot get it to work according to the
user's manual.
19. The equipment has been dropped and damaged.
20. The equipment has obvious signs of breakage.
21. DO NOT LEAVE THIS EQUIPMENT IN AN ENVIRONMENT WHERE THE
STORAGE TEMPERATURE MAY GO BELOW -10° C (-4° F) OR ABOVE 55° C
(140° F). THIS COULD DAMAGE THE EQUIPMENT. THE EQUIPMENT
SHOULD BE IN A CONTROLLED ENVIRONMENT.
22. CAUTION: DANGER OF EXPLOSION IF BATTERY IS INCORRECTLY
REPLACED. REPLACE ONLY WITH THE SAME OR EQUIVALENT TYPE
RECOMMENDED BY THE MANUFACTURER, DISCARD USED BATTERIES
ACCORDING TO THE MANUFACTURER'S INSTRUCTIONS.
23. The sound pressure level at the operator's position according to IEC 704-1:1982
is no more than 70 dB (A).
DISCLAIMER: This set of instructions is given according to IEC 704-1. Advantech
disclaims all responsibility for the accuracy of any statements contained herein.
Wichtige Sicherheishinweise
1.
2.
3.
Bitte lesen sie Sich diese Hinweise sorgfältig durch.
Heben Sie diese Anleitung für den späteren Gebrauch auf.
Vor jedem Reinigen ist das Gerät vom Stromnetz zu trennen. Verwenden Sie
Keine Flüssig-oder Aerosolreiniger. Am besten dient ein angefeuchtetes Tuch
zur Reinigung.
4. Die NetzanschluBsteckdose soll nahe dem Gerät angebracht und leicht
zugänglich sein.
5. Das Gerät ist vor Feuchtigkeit zu schützen.
6. Bei der Aufstellung des Gerätes ist auf sicheren Stand zu achten. Ein Kippen
oder Fallen könnte Verletzungen hervorrufen.
7. Die Belüftungsöffnungen dienen zur Luftzirkulation die das Gerät vor überhitzung schützt. Sorgen Sie dafür, daB diese Öffnungen nicht abgedeckt werden.
8. Beachten Sie beim. AnschluB an das Stromnetz die AnschluBwerte.
9. Verlegen Sie die NetzanschluBleitung so, daB niemand darüber fallen kann. Es
sollte auch nichts auf der Leitung abgestellt werden.
10. Alle Hinweise und Warnungen die sich am Geräten befinden sind zu beachten.
11. Wird das Gerät über einen längeren Zeitraum nicht benutzt, sollten Sie es vom
Stromnetz trennen. Somit wird im Falle einer Überspannung eine Beschädigung
vermieden.
12. Durch die Lüftungsöffnungen dürfen niemals Gegenstände oder Flüssigkeiten
in das Gerät gelangen. Dies könnte einen Brand bzw. elektrischen Schlag auslösen.
13. Öffnen Sie niemals das Gerät. Das Gerät darf aus Gründen der elektrischen
Sicherheit nur von authorisiertem Servicepersonal geöffnet werden.
14. Wenn folgende Situationen auftreten ist das Gerät vom Stromnetz zu trennen
und von einer qualifizierten Servicestelle zu überprüfen:
15. Netzkabel oder Netzstecker sind beschädigt.
16. Flüssigkeit ist in das Gerät eingedrungen.
17. Das Gerät war Feuchtigkeit ausgesetzt.
18. Wenn das Gerät nicht der Bedienungsanleitung entsprechend funktioniert oder
Sie mit Hilfe dieser Anleitung keine Verbesserung erzielen.
19. Das Gerät ist gefallen und/oder das Gehäuse ist beschädigt.
20. Wenn das Gerät deutliche Anzeichen eines Defektes aufweist.
21. VOSICHT: Explisionsgefahr bei unsachgemaben Austausch der Batterie.Ersatz
nur durch densellben order einem vom Hersteller empfohlene-mahnlichen Typ.
Entsorgung gebrauchter Batterien navh Angaben des Herstellers.
22. ACHTUNG: Es besteht die Explosionsgefahr, falls die Batterie auf nicht fachmännische Weise gewechselt wird. Verfangen Sie die Batterie nur gleicher oder
entsprechender Type, wie vom Hersteller empfohlen. Entsorgen Sie Batterien
nach Anweisung des Herstellers.
23. Der arbeitsplatzbezogene Schalldruckpegel nach DIN 45 635 Teil 1000 beträgt
70dB(A) oder weiger.
Haftungsausschluss: Die Bedienungsanleitungen wurden entsprechend der IEC704-1 erstellt. Advantech lehnt jegliche Verantwortung für die Richtigkeit der in
diesem Zusammenhang getätigten Aussagen ab.
Safety Precaution - Static Electricity
Follow these simple precautions to protect yourself from harm and the products from
damage.
! To avoid electrical shock, always disconnect the power from your PC chassis
before you work on it. Don't touch any components on the CPU card or other
cards while the PC is on.
! Disconnect power before making any configuration changes. The sudden rush
of power as you connect a jumper or install a card may damage sensitive electronic components.
Product Labelling
Contents
Chapter
1
Introduction..........................................1
1.1
1.2
1.3
Welcome ................................................................................................... 2
About this Manual ..................................................................................... 2
System Specifications ............................................................................... 3
Table 1.1: System Specifications ................................................ 3
Environmental Standards.......................................................................... 4
Table 1.2: Environmental Standards ........................................... 4
1.4
Chapter
2
Getting Started.....................................5
2.1
Check the Package ................................................................................... 6
Figure 2.1 Mars 3100R/S and Accessories .............................. 6
General Views of the Tablet PC................................................................ 7
2.2.1 Tablet front view............................................................................ 7
Figure 2.2 Front view ................................................................ 7
2.2.2 Tablet back view ........................................................................... 7
Figure 2.3 Back view ................................................................ 7
2.2.3 Tablet front edge view................................................................... 8
Figure 2.4 Front edge view ....................................................... 8
2.2.4 Tablet back edge view .................................................................. 8
Figure 2.5 Rear edge view........................................................ 8
2.2.5 Tablet right edge view................................................................... 8
Figure 2.6 Right edge view ....................................................... 8
2.2.6 Tablet left edge view ..................................................................... 8
Figure 2.7 Left edge view ......................................................... 8
LED Signals .............................................................................................. 9
Figure 2.8 Status LEDs............................................................. 9
2.3.1 Power ON/OFF LED ..................................................................... 9
2.3.2 Battery status LED: ....................................................................... 9
2.3.3 HDD status LED:......................................................................... 10
2.3.4 Wireless LAN ON/OFF LED:....................................................... 10
Buttons .................................................................................................... 11
Figure 2.9 Buttons on the front bezel...................................... 11
2.4.1 Key button................................................................................... 11
2.4.2 Display rotation button ................................................................ 11
2.4.3 5-way navigation button .............................................................. 11
2.4.4 Hotkey buttons ............................................................................ 11
Powering the tablet PC ........................................................................... 12
2.5.1 Battery Power ............................................................................. 12
Figure 2.10 Inserting the battery pack ...................................... 12
Figure 2.11 Replacing the screws ............................................ 12
Figure 2.12 Inserting the DC jack ............................................. 13
2.5.2 AC Power.................................................................................... 14
Starting the tablet PC .............................................................................. 14
Figure 2.13 Auto touchscreen calibration ................................. 14
Manual Touchscreen Calibration ............................................................ 15
Figure 2.14 Accessing the Configuration Utility ........................ 15
Figure 2.15 Calibrating the touchscreen................................... 15
Figure 2.16 4 points calibration................................................. 15
Figure 2.17 Draw test ............................................................... 16
Using the Pen.......................................................................................... 17
Figure 2.18 Using the pen ........................................................ 17
Connecting Peripherals........................................................................... 18
2.9.1 USB ports.................................................................................... 18
2.2
2.3
2.4
2.5
2.6
2.7
2.8
2.9
xi
MARS-3100R/S User Manual
Figure 2.19 USB port................................................................ 18
COM ports .................................................................................. 18
Figure 2.20 COM port............................................................... 18
2.9.3 Audio jacks ................................................................................. 19
Figure 2.21 Audio Jacks (Red: input and Green: output) ......... 19
2.9.4 VGA port ..................................................................................... 19
Figure 2.22 VGA port................................................................ 19
2.9.5 LAN port...................................................................................... 20
Figure 2.23 LAN port ................................................................ 20
Setting the Time and Date ...................................................................... 20
Power Management................................................................................ 20
2.11.1 Suspend...................................................................................... 20
2.11.2 Resuming.................................................................................... 21
2.9.2
2.10
2.11
Chapter
3
Advantech Central Manager ............ 23
3.1
Overview ................................................................................................. 24
Figure 3.1 Central manager icons .......................................... 24
Figure 3.2 Copyright page ...................................................... 24
Display .................................................................................................... 25
3.2.1 Rotation ...................................................................................... 25
Figure 3.3 Display menu......................................................... 25
Figure 3.4 Vertical display mode ............................................ 25
Figure 3.5 Horizontal display mode ........................................ 26
3.2.2 Rotation button ........................................................................... 26
3.2.3 Properties ................................................................................... 26
Figure 3.6 Display properties menu........................................ 26
3.2.4 Brightness adjustments (MARS-3100R only) ............................. 27
Figure 3.7 Brightness adjustment........................................... 27
Using Hotkey Buttons ............................................................................. 28
Figure 3.8 Three hotkey buttons............................................. 28
Figure 3.9 Hotkey menu ......................................................... 28
Power...................................................................................................... 29
Figure 3.10 Power menu .......................................................... 29
3.4.1 Power button settings ................................................................. 29
3.4.2 Advanced Power settings ........................................................... 31
Figure 3.11 Advanced power settings ...................................... 31
Figure 3.12 Six power schemes ............................................... 31
Figure 3.13 Power alarm options.............................................. 33
Figure 3.14 Low battery alarm options ..................................... 33
Figure 3.15 Run a program configuration dialog boxes............ 34
Figure 3.16 Critical battery alarm options................................. 34
Figure 3.17 Power meter .......................................................... 35
Figure 3.18 Detailed battery information .................................. 35
Figure 3.19 Advanced power-saving ........................................ 36
Figure 3.20 Hibernate............................................................... 37
Image Version......................................................................................... 38
Figure 3.21 Image version........................................................ 38
Audio....................................................................................................... 39
Figure 3.22 Main audio menu................................................... 39
3.6.1 Sounds and Audio Devices Properties ....................................... 39
Figure 3.23 Audio menu ........................................................... 40
Figure 3.24 Volume and advanced buttons.............................. 40
Figure 3.25 Playback volume control ....................................... 40
Figure 3.26 Speaker properties ................................................ 41
Figure 3.27 Performance properties......................................... 41
Figure 3.28 Sound recording menu .......................................... 42
Figure 3.29 Recording controls ................................................ 42
Figure 3.30 Advanced controls for microphone........................ 42
3.2
3.3
3.4
3.5
3.6
MARS-3100R/S User Manual
xii
3.7
3.8
3.9
Chapter
Figure 3.31 MIDI music playback ............................................. 42
Figure 3.32 Volume menu ........................................................ 43
Figure 3.33 Speaker volume..................................................... 43
Figure 3.34 Sounds menu ........................................................ 44
Figure 3.35 Voice menu............................................................ 45
Figure 3.36 Hardware test for microphone level....................... 45
Figure 3.37 Hardware menu ..................................................... 46
Figure 3.38 General menu........................................................ 46
Figure 3.39 Properties menu .................................................... 47
Figure 3.40 Driver menu ........................................................... 47
Figure 3.41 Driver details.......................................................... 47
Touch ...................................................................................................... 48
Figure 3.42 Touch menu........................................................... 48
3.7.1 Touchscreen ............................................................................... 48
Figure 3.43 Touchscreen calibration ........................................ 48
Figure 3.44 Digitizer Calibration Step 1 .................................... 49
Figure 3.45 Digitizer Calibration Step 2 .................................... 49
Figure 3.46 Digitizer Calibration Step 3 .................................... 49
Figure 3.47 Digitizer Calibration Step 4 .................................... 49
Figure 3.48 Touchkit USB controller......................................... 50
Figure 3.49 Pen tablet properties menu ................................... 50
3.7.2 Mouse ......................................................................................... 51
Figure 3.50 Buttons menu ........................................................ 51
Figure 3.51 Pointers menu ....................................................... 52
Figure 3.52 Pointer options menu............................................. 52
Figure 3.53 Mouse hardware menu.......................................... 53
Figure 3.54 General USB properties ........................................ 53
Figure 3.55 USB driver properties ............................................ 54
Figure 3.56 USB power management ...................................... 54
LAN ......................................................................................................... 55
3.8.1 Properties.................................................................................... 55
Figure 3.57 Network connections ............................................. 55
Security ................................................................................................... 56
Figure 3.58 Security menu........................................................ 56
Figure 3.59 Security center....................................................... 56
4
Maintenance and Troubleshooting ..57
4.1
Care, Storage and Cleaning.................................................................... 58
4.1.1 Protect the computer from damage ............................................ 58
4.1.2 Maintain good connections ......................................................... 58
4.1.3 Prevent thermal stress ................................................................ 58
4.1.4 Storing the computer................................................................... 58
4.1.5 Caring for the touchscreen display ............................................. 58
4.1.6 Cleaning the computer................................................................ 59
Replacing Components........................................................................... 60
4.2.1 Battery......................................................................................... 60
Figure 4.1 Removing the battery pack.................................... 60
4.2.2 HDD (or CF card)........................................................................ 61
Figure 4.2 HD / CF Card Port ................................................. 61
Figure 4.3 Hard Disk Drive ..................................................... 61
Figure 4.4 CF card.................................................................. 61
Figure 4.5 Correct Removal of the HDD................................. 62
Figure 4.6 Incorrect removal of the HDD ................................ 62
Figure 4.7 Unplugging the cable connector ............................ 62
Figure 4.8 Removing the CF card........................................... 63
Troubleshooting ...................................................................................... 64
4.3.1 Computer will not start ................................................................ 64
4.3.2 Computer does not resume operation after suspension ............. 64
4.2
4.3
xiii
MARS-3100R/S User Manual
4.5
4.3.3 Computer will not enter into suspension mode........................... 64
4.3.4 Computer will not shut down....................................................... 64
4.3.5 Display remains off, or is not bright ............................................ 64
4.3.6 Computer touchscreen does not respond to the pen.................. 64
4.3.7 Headphones do not emit, or volume is too low........................... 64
4.3.8 Peripherals do not respond......................................................... 64
4.3.9 The amber battery status LED is always on ............................... 65
4.3.10 The amber battery status LED is blinking ................................... 65
4.3.11 The amber battery status LED is blinking quickly ....................... 65
OS System Maintenance and Re-Installation ......................................... 66
4.4.1 MARS-3100S.............................................................................. 66
4.4.2 MARS-3100R.............................................................................. 66
Figure 4.9 Welcome to Windows XP ...................................... 66
Figure 4.10 XP setup icon ........................................................ 67
Figure 4.11 Install Windows XP................................................ 67
How to using Digitizer Touch? ................................................................ 67
Appendix A
GPRS Setting..................................... 69
A.1
A.2
A.3
Setting Up the Modem ............................................................................ 70
Setting Up an Internet Connection.......................................................... 74
Connect to the Internet by GPRS ........................................................... 78
4.4
INDEX
1
MARS-3100R/S User Manual
xiv
Chapter
1
1
Introduction
This chapter gives basic data
about the specifications and use
of the MARS-3100R/S Tablet PC.
Sections include:
! Welcome
! About this Manual
! System Specifications
! Environmental Standards
1.1 Welcome
Congratulations on selecting the MARS-3100R/S Rugged Tablet PC, supported by
Microsoft Windows® XP Embedded. This unique tablet PC offers a special combination of features that make it an ideal partner for a wide range of applications.
The main features of the MARS-3100R/S are:
! AMD® LX800, 500MHz, or Intel® Pentium Duo® Core Ultra Low Voltage U2500
1.2Ghz
!
!
!
!
!
!
!
Graphical performance: AMD LX800 built-in, or Intel 945GME
10.4” SVGA / XGA TFT monitor built-in
2.5” shock mounted HDD or Industrial CF card for storage
Internal mini-PCI and SmartBay (optional GSM/GPRS)
5-way navigation key and 3 programmable function keys
Multiple I/O ports: 2x USB2.0, (1x USB 2.0 for MARS-3100S), 1x COM, 1x LAN
and 1x VGA
Full-featured Hi-resolution audio support with audio jacks and an integrated
speaker
1.2 About this Manual
The following chapters contained in this manual are:
! Chapter 1: Introduction - General information about the tablet PC.
! Chapter 2: Getting Started - Basic functions of the tablet PC.
! Chapter 3: The Central Manager - Using the system management software
included with the tablet PC.
! Chapter 4: Maintenance and Troubleshooting - How to maintain, calibrate
and replace components; a troubleshooting FAQ details how to diagnose and
correct typical problems.
! Appendix A: GPRS Setting - How to set up the GPRS software connection for
the MARS-3100R/S.
MARS-3100R/S User Manual
2
The MARS-3100R/S meets the following specifications. Unless otherwise noted, all
the specifications listed below are subject to change without prior notification.
Table 1.1: System Specifications
Features
MARS-3100S
MARS-3100R
OS
MS XP Embedded
MS XP Professional
293 x 210 x 38mm
Dimension W × D × H
Panel
10.4” SVGA TFT
Touchscreen
Resistant touchscreen
10.4” XGA TFT
(Sunlight readable option)
Digitizer / Resistant touchscreen
CPU
L2 cache
AMD LX800
500MHz
256/512MB DDR400 (One
memory module support)
128 K
Intel Pentium Duo Core Ultra
Low Voltage U2500 1.2Ghz
1GB DDRII533 (One memory
module support)
1 MB
Chipset
AMD CS5536
Intel 945GME
Graphic
AMD LX800 with shared
Intel 945GME with shared
memory
memory
4G CF (2.5" shock mounted 2.5” shock mounted HDD (CF storHDD option)
age option)
5-way navigation key; 3x function key (programmable)
Storage
Keypad
Communication and Navigation
802.11 a/b/g
Wireless
SmartBay option GSM/GPRS/EDGE
WAN
PAN
Bluetooth V2.0/EDR (optional)
Bluetooth V2.0/EDR (default)
I/O
Microphone Jack
Yes
Headset Jack
Yes
Yes (COM 3)
RS232
USB
USB2.0 x 1
USB2.0 x 2
RJ-45
10/100 Base-T
DC-in
Yes
VGA D_sub connector
Yes
Docking / Port Replicator
Yes
Audio
AC97 Audio I/F
AC97 Audio I/F
HD Audio I/F
One integrated speaker
Speaker
Power
Battery
Battery Life
Removable 11.1V@3600mAh Li-ion battery pack; warm swappable
3 hour battery life
Charging Time
2.5 hours to 90%
Backup Battery
7.2V, 120mAh
Adapter
Auto-switching 100-240V, 50 ~60 Hz; supplies 19VDC at 3.42A
3
MARS-3100R/S User Manual
Introduction
2.1 kg
Weight
DRAM
Chapter 1
1.3 System Specifications
1.4 Environmental Standards
Table 1.2: Environmental Standards
Environmental Operational Parameters
Operation
Temperature
0° C to 50° C
-10° C to 55° C*
* Battery mode:
0°C @ 50% Battery capacity.
* Adapter mode: Any
( MIL-STD 810F Methods 501.4 and 502.4 )
Storage Temperature -20° C to 60° C
-40° C to 75° C
( MIL-STD 810F Methods 501.4 and 502.4 )
Thermal Shock
1.5° C < 5° C / minute over 0° C
to 50° C verified during
MILSTD810F testing
1.5°C < 5° C / minute over -10° C
to 55° C verified during
MILSTD810F testing
Operational Humidity 0% to 95% non-condensing MIL-STD810F Method 507.4
Storage Humidity
0% to 95% non-condensing MIL-STD810F Method 507.4
IP Rating
IP-54
Drop
3 foot high free drop survival limit, (test surface: concrete, base unit
only). According to MIL-STD-810F, Method 516.5
Shock and Pressure
Mechanical Shock
20g, 11ms, Terminal sawtooth, operating.
40g, 11ms, Terminal sawtooth, non-operating
MIL-STD-810F method 516.5
Vibration
- Operation
By CF: MIL-STD 810F Methods 514.5C-3
By HDD: MIL-STD 810F Methods 514.5C-1
- Non-operation
0.04g^2/Hz, 20Hz - 1000Hz, -6dB/octave 1000Hz - 2000Hz,
MIL- STD-810F method 514.5C-17
Low Pressure
-15,000 ft.: in accordance with MIL-STD810F; Method 500.4, Procedure I
Agency Approvals
EMC
- EN55022 Class B
- EN55011 Class A
- FCC Part15 Class B
- DOC Class B
EMS
- Contact: 4Kv/ Air: 8Kv, EN55024
Safety
- UL / cUL, UL60950-1
- CB, IEC/EN60950-1
MARS-3100R/S User Manual
4
Chapter
2
2
Getting Started
This chapter details basic
functions of the tablet PC and how
to use it for the first time.
Sections include:
! Check the Package
! General Views of the Tablet PC
! LED Indicator Signal Table
! Powering the tablet PC
! Starting the tablet PC
! Manual Touchscreen
Calibration
! Using the Pen
! Connecting Peripherals
! Setting the Time and Date
! Power Management
! Resetting System Defaults
! Disposing of Used Batteries
2.1 Check the Package
Each new MARS-3100R/S comes equipped with a range of product accessories and
materials.
Figure 2.1 Mars 3100R/S and Accessories
A summary of the package contents:
! MARS-3100R/S
! Battery pack
! Adapter
! Pen (for MARS-3100S) or Digitizer Pen (for MARS-3100R)
! Windows XP Professional Recovery Media CD (for MARS-3100R)
! Quick start guide
MARS-3100R/S User Manual
6
Chapter 2
2.2 General Views of the Tablet PC
2.2.1 Tablet front view
Figure 2.2 Front view
2.2.2 Tablet back view
HDD Cover
Pen & Holder
Heatsink Cover
Battery Pack
Figure 2.3 Back view
7
MARS-3100R/S User Manual
Getting Started
Front bezel buttons
2.2.3 Tablet front edge view
Speaker
Docking Port
Figure 2.4 Front edge view
2.2.4 Tablet back edge view
Power On/Off Switch
WLAN On/Off Switch
Figure 2.5 Rear edge view
2.2.5 Tablet right edge view
COM Port (COM3)
USB Port
(for MARS-3100R only)
SIM Slot
(for GSM/GPR/EDGE
models only)
Figure 2.6 Right edge view
2.2.6 Tablet left edge view
Audio In
DC Power Jack
Audio Out
RJ45 Port
VGA Port
USB Port
Figure 2.7 Left edge view
MARS-3100R/S User Manual
8
The MARS-3100R/S is equipped with a set of Light Emitting Diodes (LEDs) located
along the top edge of the front bezel.
Power On/Off LED
HDD Status LED
Battery Status LED
WLAN On/Off LED
Getting Started
Figure 2.8 Status LEDs
2.3.1 Power ON/OFF LED
!
!
!
Dark: System is turned OFF
Static Green: System is turned ON.
Blinking Green: System is in standby mode.
Note!
See section 2.11.1 for more information about using Suspend Function.
2.3.2 Battery status LED:
!
!
Dark:
– Battery is fully charged (if the system is powered by adapter).
– Battery capacity is sufficient and above the “Low Battery Alarm” (if the system
is powered by battery).
(Default for the “Low Battery Alarm” is less than 10% of normal capacity.)
Static Amber:
– Battery is under-charging (if the system is powered by adapter).
Note!
!
!
The Battery status LED will go off and become dark when the battery is
fully charged (100%).
Blinking Amber:
– Battery is under 10% of normal capacity.
Note!
10% of total available battery power is the default value for triggering the
low battery alarm. Users can change this value; refer to Chapter 3.4.2.2.
Quick Blinking Amber:
– Battery error. Replace the battery.
Note!
1.
2.
Battery errors indicate the temperature of the battery is out of
acceptable range. Place the MARS-3100 in a normal environment.
The battery may defective. Contact technical support office.
9
Chapter 2
2.3 LED Signals
MARS-3100R/S User Manual
2.3.3 HDD status LED:
!
!
Dark: HDD is idle.
Blinking: HDD is active.
Note!
Prevent any shocks or vibrations whenever the HDD status LED is blinking. Violent shocks may cause damage to the HDD, and data loss.
2.3.4 Wireless LAN ON/OFF LED:
!
!
Dark: Wireless LAN is disabled
Static Green: Wireless LAN is enabled
MARS-3100R/S User Manual
10
Key button
R
Display rotation button
F1
F2
Hotkey buttons
F3
Figure 2.9 Buttons on the front bezel
2.4.1 Key button
The Key button functions as equivalent to the “Ctrl + Alt + Del” key combination under
the MARS-3100S/R default OS environment, Windows XP Embedded or Windows
XP Professional.
2.4.2 Display rotation button
The rotation button is the hotkey for rotating the display on the screen.
2.4.3 5-way navigation button
The 5-way navigation button function as directional arrow keys: “Up,” “Down,”
“Right,” and “Left.” The navigation button is useful for navigating controls in various
applications. Pressing the center part of the button is equivalent to hitting the “Enter”
key.
2.4.4 Hotkey buttons
The F1 to F3 buttons are programmable hotkeys.
Note!
See Chapter 3.2.2, 3.3 for more information about setting up hotkeys
and using buttons.
11
MARS-3100R/S User Manual
Getting Started
5-way navigation button
Chapter 2
2.4 Buttons
2.5 Powering the tablet PC
2.5.1 Battery Power
The MARS-3100R/S tablet PC is supplied with a powerful rechargeable battery. To
install and maintain the battery, or if it needs to be replaced, follow the instructions in
this section.
Caution! Do not attempt to replace the battery with any others than the models
recommended and manufactured specifically for this tablet PC.
Note!
Before using MARS-3100 Tablet PC, please connect the adapter into
MARS-3100R/S to charge the battery and backup battery at least
24Hrs.
2.5.1.1 Installing a Battery
The battery is designed specifically for installation with the MARS-3100R/S tablet PC. It
fits exactly into the back of the PC and delivers precisely the exact voltage required to
power the unit. Under normal conditions, a fully charged battery will power the PC for up
to 3 hours. Normally, it requires 2.5 hours to fully charge a new battery.
! To install or replace the battery:
1. Turn off the MARS-3100R/S
2. Disconnect any peripheral devices from the MARS-3100R/S.
3. Unfasten the two large flathead screws and remove the battery.
4. Insert the new battery pack.
5.
Figure 2.10 Inserting the battery pack
Fasten the two flathead battery cover screws.
Figure 2.11 Replacing the screws
MARS-3100R/S User Manual
12
Chapter 2
2.5.1.2 Charging the battery using a power adapter
1. Connect the AC cord to a power source.
2. Plug the AC power cord into the receptacle on the DC power adapter.
3. Insert the DC jack into the receptacle on the left side of the tablet PC.
Getting Started
4.
Figure 2.12 Inserting the DC jack
After inserting the DC jack, the LED indicator will light (RED) indicating that battery charging is functional and normal.
2.5.1.3 Swapping the battery pack
If the battery is exhausted, it can be hot-swapped for a fully charged battery without
interrupting current work.
1. Get another fully charged battery on hand.
2. Save all current files and data.
3. Put the MARS-3100 into Standby Mode. (See 2.11.1)
4. Release the two large flathead screws and remove the battery.
5. Replace the battery and refasten the two large flathead screws.
6. Resume operation of the system. (See 2.11.2)
Note!
1.
2.
After removing the battery, the system will still be powered by an internal backup battery. It can maintain system power for only 3 minutes.
Before using the hot-swapped battery function, plug the adapter into
MARS-3100R/S to charge the internal backup battery at least 24 hrs.
Caution! If more than 3 minutes duration elapses between Step 4 and Step 5,
removing and replacing the battery, any unsaved data will be lost.
2.5.1.4 Disposing of Used Batteries
The battery supplied with the MARS-3100RS is a rechargeable, Lithium Ion dry cell.
Dispose of used batteries in accordance with local government regulations. Under
Federal, state, or local law, it may be illegal to put batteries in the trash. Contact your
system administrator or the municipal solid waste disposal department for info. The
battery should be delivered to a reputable recycler or governmental agency, which
are adequately equipped to recycle the chemicals inside the battery. If the battery
wears out, order a new one.
13
MARS-3100R/S User Manual
2.5.2 AC Power
The MARS-3100R/S can be powered exclusively with the supplied AC 19V adapter.
It is not recommended to use any other adapter than the one supplied with the tablet
PC.
2.6 Starting the tablet PC
1.
2.
3.
Press the power button once to turn on the tablet PC.
After powering up for the first time, the system prompts the user to engage the
touchscreen calibration.
Follow the onscreen instructions to calibrate the touchscreen.
Note!
The user may need to press the power button longer than 1 second for
battery only mode.
Caution! 1.
2.
Don't press the button longer than 4 seconds; it will cause the
MARS-3100R/S to shutdown immediately and crash data on the
HDD.
The Power LED will illuminate (Green) if the system is powered.
Figure 2.13 Auto touchscreen calibration
MARS-3100R/S User Manual
14
1.
To initiate touchscreen calibration manually, navigate via the start command
and click on the icon, Configuration Utility.
2.
In the Tools dialog, click on 4 Points Calibration to align the touchscreen.
Figure 2.15 Calibrating the touchscreen
3.
Follow the onscreen instructions to calibrate the touchscreen.
Figure 2.16 4 points calibration
15
MARS-3100R/S User Manual
Getting Started
Figure 2.14 Accessing the Configuration Utility
Chapter 2
2.7 Manual Touchscreen Calibration
4.
Return to the Tools dialog; select Linearization for 9 points linearization, and follow the onscreen instructions; then, return to the Tools dialog again and try the
Draw Test.
Figure 2.17 Draw test
MARS-3100R/S User Manual
16
Figure 2.18 Using the pen
17
MARS-3100R/S User Manual
Getting Started
The touchscreen pen is a tool supplied with the MARS-3100R/S. It is used exclusively as a control device for the touchscreen. It resembles a regular ballpoint pen.
Instead of a regular onscreen cursor, the pen contacts the surface of the screen.
Onscreen objects may be activated or moved with the pen. Whenever using the pen,
do not press too hard on the touchscreen. Only moderate pressure is required to activate touchscreen sensors. The pen is configured to function much like an ordinary
PC mouse.
! Touch, hold and drag: To move an object from one part of the screen to
another, or to copy an object from the desktop to another memory device, place
the tip of the pen onto the object and hold it while dragging the object across the
screen to the desired location.
! Double-click: Tap the pen twice on an onscreen object to activate a program,
or to open a selected folder.
Chapter 2
2.8 Using the Pen
2.9 Connecting Peripherals
The MARS-3100R/S supports several peripheral connections.
2.9.1 USB ports
Figure 2.19 USB port
2.9.2 COM ports
The COM port of MARS-3100R/S is “COM3.”
Figure 2.20 COM port
MARS-3100R/S User Manual
18
Chapter 2
2.9.3 Audio jacks
2.9.4 VGA port
Figure 2.22 VGA port
19
MARS-3100R/S User Manual
Getting Started
Figure 2.21 Audio Jacks (Red: input and Green: output)
2.9.5 LAN port
Figure 2.23 LAN port
2.10 Setting the Time and Date
Whenever the system timer is not matched with your location or time zone, please
reset the time and date by following step:
1. Click START > Control Panel, or START > Settings > Control panel
2. Double click the Date and Time Properties.
3. Select the correct day, month and year.
4. Click OK to save and exit.
2.11 Power Management
2.11.1 Suspend
To save battery power, or when swapping battery packs, put the MARS-3100R/S into
Suspend Mode. There are two suspend modes: Suspend-to-RAM (Standby mode)
and Suspend to HDD (Hibernation mode).
1. Suspend-to-RAM (Standby mode)
Suspend-to-RAM occurs when a system enters a low-power state. Information on
system configuration, open applications and active files are stored in the main memory. Most other system components are shut-off.
In this mode, although power consumption is very low, the battery may drain and
cause data loss. If the MARS-3100R/S is stored for durations longer than a few hours
or overnight, it is best simply to turn off the computer instead of using Suspend-toRAM mode.
Note!
The Power LED blinks green. (See chapter 2.3.1)
MARS-3100R/S User Manual
20
Note!
!
!
2.11.2 Resuming
When the system is in suspend mode, press the power button once, and the system
will resume to normal operation again.
Note!
It may be necessary to log-on again after the system has resumed.
21
MARS-3100R/S User Manual
Getting Started
The Power LED will shut off.
Suspend to Disk mode will take much time to finish the data saving
than Suspend to RAM. System will auto shutdown after all data is
saved.
Chapter 2
2. Suspend-to-Disk (Hibernation mode)
Instead of saving data temporarily to RAM, Suspend-to-Disk mode saves data on the
hard disk. Also, power consumption is the same as the system is turn off. In this
mode, all data will store in hard disk, so there is no risk to loss data if the battery is
exhausted.
Chapter
3
3
Advantech Central
Manager
This chapter explains how to use
the Advantech Central Manager
program application.
Sections include:
! Overview
! Display
! Hotkeys
! Power
! Image Version
! Audio
! Touch
! LAN
! Security
3.1 Overview
The Advantech Central Manager utility is configures settings, operate devices and
adjust the MARS-3100R/S. The Central Manager provides user-friendly functions.
! Display settings
! Screen resolutions
! Hotkey assignments
! Power management
! Audio & touchscreen controls
! LANs
! Network security
The Central Manager utility is available from the taskbar in the bottom right corner
of the Windows desktop. Double click the white and blue A icon. Access is also
available from the Control Panel. (See figure 3.1)
System tray: double click
Figure 3.1 Central manager icons
The Advantech Central Manager displays a menu with several tabs, including the
software Copyright page.
Figure 3.2 Copyright page
MARS-3100R/S User Manual
24
3.2.1 Rotation
Users may change the orientation of the desktop display on MARS-3100R/S. In the
Display menu, the Rotation control toggles horizontal (“landscape”) or vertical (“portrait”) display modes. The orientation of the display switches relative to the horizontal
and vertical axis of the tablet PC.
Click Left Rotation
to switch the display to the vertical axis (portrait
display mode). If the left rotation button is clicked again, the orientation rotates again
in a counter-clockwise direction: vertical to horizontal to vertical to horizontal.
Figure 3.4 Vertical display mode
25
MARS-3100R/S User Manual
Advantech Central Manager
Figure 3.3 Display menu
Chapter 3
3.2 Display
Click Right Rotation
to switch the display to the horizontal axis (landscape display mode). If the right rotation button is clicked again, the orientation
rotates again in a clockwise direction: vertical to horizontal to vertical to horizontal.
Figure 3.5 Horizontal display mode
3.2.2 Rotation button
R
Users may quickly change the orientation of the display by clicking the R key, located on the upper right side of the bezel, second
from the top.
3.2.3 Properties
Click Properties
menu.
to open the Windows Display Properties
Figure 3.6 Display properties menu
MARS-3100R/S User Manual
26
MARS-3100R has a brightness
adjustment control feature. To
adjust the intensity of the display,
use the pen to click right for
brighter, or click left for darker.
27
MARS-3100R/S User Manual
Advantech Central Manager
Figure 3.7 Brightness adjustment
Chapter 3
3.2.4 Brightness adjustments (MARS-3100R only)
3.3 Using Hotkey Buttons
The MARS-3100R/S features a handy hotkey command control system. Three F hotkey buttons are available on the front bezel. These
keys may be set to open software applications instantly.
F1
F2
F3
Figure 3.8 Three hotkey buttons
Select the Hotkey menu to configure hotkey-activated software applications.
Figure 3.9 Hotkey menu
Click
to open a browser window. Search for, and select the required
executable file, for example: “osk.exe.” Then click OK.
Then press
to accept the change and load the hotkey assignments
and software.
Note!
!
!
The acceptable file format is .exe.
The default setting of F1 hotkey is OSK (On Screen Keyboard).
Users can reconfigure the F1 hotkey to other functions.
!
Pressing
restores the previous settings for the F1,
F2 and F3 hotkeys.
MARS-3100R/S User Manual
28
The Power menu sets up a variety of convenient power schemes, including precise
configuration of the power button and low battery alarms.
3.4.1 Power button settings
The main power button, located on the top right side of the MARS-3100R/S, may be
set to carry out four commands.
The Power Button command on the Power menu supports four options.
!
!
!
!
Do nothing
Ask me what to do
Standby
Shut down (the default setting)
3.4.1.1 Shut down
When Shut down is selected, pressing the main power button once results in an
automatic system shut down. All applications are closed automatically and the unit
powers off.
Note!
If Shut down is selected, all unsaved data will be lost when the system
powers off.
3.4.1.2 Do nothing
When Do nothing is selected, pressing the power button once has no effect on the
operation of the computer.
In order to power off, return to the Power menu and reset the Power Button field to
Shut down. Then, the MARS-3100R/S powers down using the power button.
Even if Do nothing is selected, it is always possible to shut down the computer by
clicking Shut Down from the Windows Start menu.
29
MARS-3100R/S User Manual
Advantech Central Manager
Figure 3.10 Power menu
Chapter 3
3.4 Power
3.4.1.3 Ask me what to do
When Ask me what to do is selected, the computer presents a Shut Down Windows menu and four command choices. Selecting the desired option and the command is carried out after <Enter> is pressed.
! Log-off Administrator
! Shut down
! Restart
! Stand by
3.4.1.4 Standby
When Standby is selected, pressing the power button places the computer into
temporary hibernation and power-saving mode. In Standby, the screen goes blank,
but all applications and current data are preserved in a steady-state. Pressing the
power button again reactivates all systems, and restores the display and applications to the same state as they were before Standby was selected. By default, the
user will be asked to re-enter log-on data to protect the security and integrity of the
system.
Pressing the Key button or the Ctl-Alt-Del key combo presents
the Sign-on menu and the user must key-in log-on data.
MARS-3100R/S User Manual
30
Figure 3.11 Advanced power settings
3.4.2.1 Power schemes
The first tab in Power Options Properties menu displays the Power schemes
menu, which offers a selection of power options that are intended to conserve electricity or battery life whenever the computer is idle, but not completely shut-down.
Six Power scheme options are available; it is possible to modify and save the default
settings of each scheme from these menus.
Figure 3.12 Six power schemes
31
MARS-3100R/S User Manual
Advantech Central Manager
The MARS-3100R/S supports a variety of precise power settings.
! Power Schemes
! Alarms
! Power Meter
! Advanced
! Hibernate
Click Advanced on the main Power menu to open the Power Options Properties
menu of the Central Manager.
Chapter 3
3.4.2 Advanced Power settings
3.4.2.1.1 Home/Office Desk
Selection defaults for this setting.
! Turns off monitor: After 20 minutes (Plugged in); After 5 minutes (Batteries)
! Turns off hard disks: Never (Plugged in); After 10 minutes (Batteries)
! System Standby: Never (Plugged in); After 5 minutes (Batteries)
3.4.2.1.2 Portable/Laptop
Selection defaults for this setting.
! Turns off monitor: After 15 minutes (Plugged in); After 5 minutes (Batteries)
! Turns off hard disks: After 30 minutes (Plugged in); After 5 minutes (Batteries)
! System Standby: After 20 minutes (Plugged in); After 5 minutes (Batteries)
3.4.2.1.3 Presentation
Selection defaults for this setting.
! Turns off monitor: Never (Plugged in); Never (Batteries)
! Turns off hard disks: Never (Plugged in); After 5 minutes (Batteries)
! System Standby: Never (Plugged in); After 15 minutes (Batteries)
3.4.2.1.4 Always on
Selection defaults for this setting.
! Turns off monitor: After 20 minutes (Plugged in); After 15 minutes (Batteries)
! Turns off hard disks: Never (Plugged in); After 30 minutes (Batteries)
! System Standby: Never (Plugged in); Never (Batteries)
3.4.2.1.5 Minimal power management
Selection defaults for this setting.
! Turns off monitor: After 15 minutes (Plugged in); After 5 minutes (Batteries)
! Turns off hard disks: Never (Plugged in); After 15 minutes (Batteries)
! System Standby: Never (Plugged in); After 5 minutes (Batteries)
3.4.2.1.6 Max battery
Selection defaults for this setting.
! Turns off monitor: After 15 minutes (Plugged in); After 1 minute (Batteries)
! Turns off hard disks: Never (Plugged in); After 3 minutes (Batteries)
! System Standby: After 20 minutes (Plugged in); After 2 minutes (Batteries)
MARS-3100R/S User Manual
32
3.4.2.2.1 Low battery alarm
By default, the low battery alarm is set to trigger when the battery reaches 10% of its
normal capacity. The alarm can be set to trigger according to any percentage of
available battery power between 0% and 100%.
Selecting Alarm action summons the Low battery alarm actions sub-menu. The
default action displays a message notifying of the low power condition.
! Notification: The user may change the alarm notification settings, choosing
between Sound alarm or Display message, which is the system default.
! Alarm action: The user may select the Alarm action check box to instruct the
system what to do when the low battery alarm sounds, which is either Standby
or Shut down.
Figure 3.14 Low battery alarm options
33
MARS-3100R/S User Manual
Advantech Central Manager
Figure 3.13 Power alarm options
Chapter 3
3.4.2.2 Alarms
The second tab on the Power Options Properties menu displays the Alarms menu,
which offers a selection of alarm options according to two basic categories.
! Low battery alarm; (default setting is 10%.)
! Critical battery alarm; (default setting is 3%.)
!
Run a program: Select the checkbox, When the alarm occurs, run this program. Then, users may choose Configure program automatically.
– Three sub-menus are available for setting precise commands to manage the
program.
• Task: Select a program to activate when the low battery alarm triggers.
• Schedule: Task programs may be activated according to the schedule
required; from the Advanced sub-menu task programs may be
reactivated instantly and configured to run for precise durations.
• Settings: Three commands are available to refine the operation of task
programs. These commands set-up what the computer will do after
tasks are completed, or if the computer is idle, or if the unit is under
battery power. The three settings include, Scheduled Tasks Completed, Idle Time, and Power Management.
Figure 3.15 Run a program configuration dialog boxes
3.4.2.2.2 Critical battery alarm
By default, the critical battery alarm is set to trigger when the battery reaches 3% of
its normal capacity. The alarm trigger may be changed to any percentage of available
battery power between 0% and 100%.
! Notification: The user may change the alarm notification settings, choosing
between Sound alarm or Display message, the system default.
! Alarm Action: The user may activate the Alarm action checkbox to instruct the
system what to do when the low battery alarm sounds, which is either Standby
or Shut down.
Figure 3.16 Critical battery alarm options
Run a program: By selecting the checkbox, When the alarm occurs, run this program, users may choose to Configure program automatically. (See section 3.4.2.2.1
above.)
MARS-3100R/S User Manual
34
Click Battery number,
to open a new dialog box: Detailed information for
Battery # 1 to access precise data about the type and status of the battery currently
active in the unit.
Figure 3.18 Detailed battery information
35
MARS-3100R/S User Manual
Advantech Central Manager
Figure 3.17 Power meter
Chapter 3
3.4.2.3 Power Meter
The third tab on the Power Options Properties menu displays the advanced Power
Meter menu, and provides information about the present status of the power system.
! Current power source: displays whether the computer is powered by AC or DC
electricity.
! Battery number: Normally battery #1 is displayed.
3.4.2.4 Advanced
The fourth tab on the Power Options Properties menu displays the Advanced
power configuration options, which offer two main power-saving settings.
! Options
! Power buttons
Figure 3.19 Advanced power-saving
3.4.2.4.1 Options
! Select the Always show icon on the taskbar check box to activate the Power
Meter icon on the taskbar.
!
– Double-clicking the icon opens the Power Meter menu box, (See section
3.4.2.3 above.)
By default, Prompt for password when computer resumes from standby is
selected. This command ensures that unauthorized users cannot access the
computer or its data.
3.4.2.4.2 Power buttons
To configure the Power and Sleep buttons, click on the drop-down box to select a
command option for the following two buttons.
! Power Button options: When I press the power button on my computer.
– Do nothing
– Ask me what to do
– Standby
– Shut down (default setting)
! Sleep Button options:
– No support "Sleep mode" (default setting)
Note!
Normally, the Power button setting is accessed through the main
Power menu. (See section: 3.4.1, Power Button Settings.)
MARS-3100R/S User Manual
36
3.4.2.5.1 Hibernate check box
Selecting the Enable hibernation check box activates the hibernation function. It is
intended to preserve data that is currently active in the SDRAM memory, by saving it
to the hard disk drive before placing the computer into hibernation. Whenever the
computer is brought out of hibernation, it restores the data to its previous locations,
and the whole computer resumes its previous state of activity.
3.4.2.5.2 Disk space for hibernation
This box displays the Free disk space presently available on the computer and the
amount of minimum disk space required to activate the Hibernate function.
37
MARS-3100R/S User Manual
Advantech Central Manager
Figure 3.20 Hibernate
Chapter 3
3.4.2.5 Hibernate
The fifth tab on the Power Options Properties menu displays the Hibernate menu,
which provides the option to Enable hibernation.
3.5 Image Version
The Image version menu displays information about the status of the OS that is currently installed on the MARS-3100R/S. Normally, the OS is Microsoft Windows XP
Embedded Service Pack 2. The data displayed here also details the current version
of BIOS installed in the system, and its build date.
Figure 3.21 Image version
MARS-3100R/S User Manual
38
The Audio menu displays two slider controls to adjust the volume of the speaker and
the microphone. To make basic adjustments, place the pen on the slider button and
move it up or down.
3.6.1 Sounds and Audio Devices Properties
The MARS-3100R/S supports a variety of precise audio settings.
! Audio devices
! Volume
! Sounds
! Voice
! Hardware
Click Properties
on the main Audio menu of the Central Manager to
open the Sounds and Audio Devices Properties menu.
39
MARS-3100R/S User Manual
Advantech Central Manager
Figure 3.22 Main audio menu
Chapter 3
3.6 Audio
3.6.1.1 Audio devices
The third tab on Sounds and Audio Device Properties displays the Audio menu,
Figure 3.23 Audio menu
Three Audio Device settings are displayed on the menu.
! Sound playback
! Sound recording
! MIDI music playback
3.6.1.1.1 Sound playback
The Sound playback control sets the hardware device that controls audio signal processing. By default, the system is set to use the Realtek AC97 Audio chipset built into
the motherboard. However, if any external audio device or card is added to drive
audio processing, then it is possible to select the device from this menu.
Sound playback displays two important controls for fine-tuning the hardware audio
device controller.
! Volume
! Advanced audio settings
Figure 3.24 Volume and advanced buttons
3.6.1.1.2 Volume
Click the Volume button to access the Volume Control sub-menu. Five settings may
be adjusted for the sound playback device. The volume and balance of software and
external devices is controlled with sliders using the pen.
Figure 3.25 Playback volume control
MARS-3100R/S User Manual
40
!
Performance
– The Performance menu displays Audio playback controls for adjusting the
Hardware acceleration and the Sample rate. By default, both are set to the
maximum possible allowance. This setting devotes more system resources
to the quality of audio playback. Normally, it will not be necessary to adjust
these features unless the system has trouble playing back audio. Click
Restore defaults to reset the system defaults to maximum.
Figure 3.27 Performance properties
41
MARS-3100R/S User Manual
Advantech Central Manager
Figure 3.26 Speaker properties
Chapter 3
3.6.1.1.3 Advanced audio properties
Two properties are controlled from the Advanced audio properties sub-menu.
! Speakers
– The Speakers menu permits quick configuration of speakers, according to
the number and type of speakers connected to the computer.
– The drop-down list for Speaker setup control displays a variety of options;
select the arrangement most suited to the type of speakers already installed.
3.6.1.1.4 Sound recording
The Sound recording control on the Audio menu control permits fine-tuning of the
recording device. By default, the system device is the onboard Realtek AC97 chipset.
Sound recording also displays an important control for fine-tuning hardware devices
that may be connected via the device controller.
! Volume
Figure 3.28 Sound recording menu
– Click the Volume button to access the Recording controls sub-menu. Four
types of volume settings may be adjusted for sound recording devices, TV
Tuner, CD Player, Line In and Microphone.
Figure 3.29 Recording controls
– Click Advanced on the Recording Control sub-menu to access the
Advanced Controls for Microphone sub-menu.
• Tone Controls: Adjust the bass and treble sensitivity of the microphones.
• Other Controls: The audio device supports 1 Mic Boost. Select the
check box to activate this effect.
Figure 3.30 Advanced controls for microphone
3.6.1.1.5 MIDI music playback
The MIDI music playback control permits selection of the hardware device that controls MIDI signal processing. By default, the system is set to
use the Microsoft GS Wavetable SW Synth.
Figure 3.31 MIDI music playback
MIDI music playback also displays a volume control sub-menu that is identical to
the Playback volume control; (See Figure 3.25) for fine-tuning MIDI devices.
MARS-3100R/S User Manual
42
3.6.1.2.1 Device volume
The Device volume adjusts audio outputs and associated optional features. Use the
pen and slider to set the device output volume of the AC97 controller. Click the Mute
check box to silence all audio outputs. By default, the Volume icon is displayed on
the taskbar.
Click Advanced to access the volume control sub-menu. (See figure 3.25).
3.6.1.2.2 Speaker settings
From the Volume menu, click Speaker Volume
to open the sub-menu. The Speaker settings
control makes precise adjustments to the
speaker volume. Slider buttons are available to
adjust the speakers individually; if the Move all
slide indicators check box is selected, the sliders move in unison.
Click Restore Default on the Speaker Volume
menu to reset the volume to normal setting.
Note!
Clicking Advanced in Speaker settings on the main Volume menu
opens the Advanced Audio Properties sub-menu, as described in
section 3.6.1.1.3, Advanced audio
properties. (See page 38 above.)
Figure 3.33 Speaker volume
43
MARS-3100R/S User Manual
Advantech Central Manager
Figure 3.32 Volume menu
Chapter 3
3.6.1.2 Volume
The first tab on Sounds and Audio Device Properties menu displays the Volume
menu for the current audio controller. By default, this device is a Realtek AC97 Audio
chipset.
Two Volume settings are displayed on the menu.
! Device volume
! Speaker settings
3.6.1.3 Sounds
The second tab on the Sounds and Audio Device Properties menu displays the
Sounds menu. The sound scheme is set to the Windows default. However, it is possible to customize the sounds produced by the computer during events; and custom
sound assignments may be saved as a new Sound scheme.
The Sounds menu also displays a scrolling list of all events to which sounds may be
assigned. Use the pen to select Program events and assign a sound (wav) file to
each event from selections on the Sounds drop-down list.
Figure 3.34 Sounds menu
MARS-3100R/S User Manual
44
Note!
The control settings on the Voice sub-menus, Volume and Advanced,
are identical to those found in the Audio devices, section 3.6.1.1. on
pages 37, 38 and 39.
3.6.1.4.1 Test hardware
Click Test hardware to initiate a microphone test that will calibrate the audio levels
from the microphone to the system, so that peak audio performance is attained.
Follow the onscreen instructions to calibrate the microphone.
Figure 3.36 Hardware test for microphone level
Note!
A microphone must be connected to the computer, or the internal microphone must be activated. (See Chapter 2.8, Connecting Peripherals.)
45
MARS-3100R/S User Manual
Advantech Central Manager
Figure 3.35 Voice menu
Chapter 3
3.6.1.4 Voice
The fourth tab on Sounds and Audio Device Properties displays the Voice menu
for adjusting audio inputs and outputs when a microphone is connected to the PC.
3.6.1.5 Hardware
The fifth tab on Sounds and Audio Device Properties displays the Hardware
menu. Several hardware devices and drivers are listed. It is possible to check the status of each device and driver from this menu. Click Troubleshoot if device drivers
are not functioning correctly.
Figure 3.37 Hardware menu
3.6.1.5.1 Properties
The properties of each device or driver may be displayed, checked and modified. To
display device or driver properties, double-click on an item in the list, or select an
item and then click Properties.
! The General menu displays details about the manufacturer, date and functional
status of the selected item.
Figure 3.38 General menu
Note!
To access the Troubleshooting help from the Hardware menu, or any
sub-menu, the MARS-3100R/S must be connected to the Internet.
MARS-3100R/S User Manual
46
The Properties menu displays a comprehensive list of all the hardware and
software devices on the system.
!
The Driver menu displays a description of the manufacturer, date, version and
signification of the selected device driver. The menu permits updates, rollbacks
and uninstalling of drivers.
Figure 3.40 Driver menu
– Click Driver Details to view a full list of all
active drivers.
Figure 3.41 Driver details
47
MARS-3100R/S User Manual
Advantech Central Manager
Figure 3.39 Properties menu
Chapter 3
!
3.7 Touch
The Touch menu displays two fields.
! Touchscreen: for Calibration of pen sensitivities and access to the Control
utility, (Touchkit).
! Mouse: for accessing, testing and modifying properties.
Figure 3.42 Touch menu
3.7.1 Touchscreen
The Touchscreen field accesses a Calibration tool for adjusting the sensitivity of
the screen to the position of the pen on the screen; a Digitizer Calibration for calibrating the sensitivity of the pen as it touches the surface of the screen; and the Control Utility, which opens a link to the Touchkit USB Controller.
3.7.1.1 Calibration
Click Calibration to activate the resistive touchscreen calibration tool.
! Follow the onscreen instructions to calibrate the touchscreen. Press the pen
onto the middle of each X until it stops flashing and another one appears.l
Figure 3.43 Touchscreen calibration
MARS-3100R/S User Manual
48
Figure 3.45 Digitizer Calibration Step 2
Figure 3.46 Digitizer Calibration Step 3
Figure 3.47 Digitizer Calibration Step 4
49
MARS-3100R/S User Manual
Advantech Central Manager
Figure 3.44 Digitizer Calibration Step 1
Chapter 3
3.7.1.2 Digitizer Calibration
Click Digitizer Calibration to active the pen / digitizer calibration tool. Use the Digitizer pen to click the cross on the screen step by step until the calibration process is
completed.
3.7.1.3 Control Utility for MARS-3100S
Click Control Utility to open the Touchkit USB Controller utility. (See Chapter 2,
Section 2.6 and the Help files available on the MARS-3100S; or, refer to the Support
CD-ROM for printable versions of Touchkit instructions.)
Figure 3.48 Touchkit USB controller
3.7.1.4 Control Utility for MARS-3100R
Click Control Utility to open the Pen Tablet Properties tool to modify the sensitivity
of the pen / digitizer settings, and to calibrate the pen for the MARS-3100R.
Figure 3.49 Pen tablet properties menu
MARS-3100R/S User Manual
50
The MARS-3100R/S supports a variety of precise Mouse settings.
! Buttons
! Pointers
! Pointer Options
! Hardware
Chapter 3
3.7.2 Mouse
Click Mouse Properties to access the sub-menus.
Advantech Central Manager
3.7.2.1 Buttons
The first tab on Mouse Properties is the Buttons menu.
Figure 3.50 Buttons menu
Three Button fields are displayed on the menu.
! Button configuration
! Double-click speed
! ClickLock
3.7.2.1.1 Button configuration
Select the check box to switch the priority of the right mouse button for functions like
selecting items and dragging them, instead of the left mouse button. The left mouse
button also performs the same actions normally assigned to the right button if the
check box is selected.
3.7.2.1.2 Double-click speed
To increase the responsiveness of the mouse button whenever it is double-clicked,
slide the button to the right. Then, test the response: double-click slowly and then
faster; in this way it is possible to set a double-click that opens the folder displayed on
the right side of the field. If the double-click speed required to open the folder is too
slow or too fast, repeat the slider button adjustments until a satisfactory double-click
speed is attained.
3.7.2.1.3 ClickLock
Select the checkbox to enable ClickLock. To set the mouse to drag and drop items
with a single click, and without having to hold down the mouse button while dragging,
click the mouse button once after enabling ClickLock from this menu.
51
MARS-3100R/S User Manual
3.7.2.2 Pointers
The pointers menu displays a selection of options, and offers an exceptionally wide
variety of customized cursors.
3.7.2.2.1 Scheme
The Scheme field displays a range of custom pointer styles. Select one scheme.
Then go to the Customize field and select one pointer. It is also possible to select
custom cursors from files by clicking the Browse button. Click Apply.
To enable a Pointer shadow, click the Enable pointer shadow check box.
Figure 3.51 Pointers menu
3.7.2.3 Pointer options
Further adjustments to the performance of the pointer may be made on the Pointer
Options menu. Three fields are available.
3.7.2.3.1 Motion
Move the slider to control the distance that the cursor travels relative to the amount of
mouse movement required. To enhance the sensitivity of the pointer for precise work,
select the Enhance pointer precision check box.
Figure 3.52 Pointer options menu
MARS-3100R/S User Manual
52
3.7.2.3.3 Visibility
To enhance the visibility of the mouse pointer, select the Display pointer trails
check box. If selected, the cursor displays trails as it moves.
Figure 3.53 Mouse hardware menu
Note!
To access the Troubleshooting help from the Hardware menu, or any
of the sub-menus, the MARS-3100R/S must be connected to the Internet.
3.7.2.4.1 General USB properties
The General sub-menu describes the type of touchscreen controller hardware that is
installed on the system. If the device is not working properly, click Troubleshooting.
Figure 3.54 General USB properties
53
MARS-3100R/S User Manual
Advantech Central Manager
3.7.2.4 Hardware
The Hardware menu details the manufacturer and type of USB mouse controller that
is installed on the computer. Click Properties to access sub-menus for adjustment of
the mouse.
Chapter 3
3.7.2.3.2 Snap To
To make the pointer immediately snap to the buttons in menus or dialog boxes,
select the Snap to check box.
3.7.2.4.2 USB driver properties
The Driver sub-menu describes the type of touchscreen control driver. Click Driver
Details to display the name and precise location of the driver on the C:\ drive. Click
Update Driver to engage the Welcome to the Hardware Update Wizard.
Figure 3.55 USB driver properties
Note!
Click Roll Back Driver only if the system does not function properly
after attempting to update the driver. Click Uninstall only if planning to
install a new USB controller device that requires a new driver.
3.7.2.4.3 USB power management
The Power Management sub-menu displays two options. Select the first check box
to turn off power to the mouse whenever it is idle. Select the second check box to use
the mouse to turn the computer on, and bring it out of standby mode.
Figure 3.56 USB power management
MARS-3100R/S User Manual
54
The LAN menu displays the status of the Ethernet hardware device installed on the
MARS-3100R/S, including its name and connection addresses. The status of the
Ethernet or Wireless will turn “ON” once the MARS-3100 is already connected. An
“OFF” message indicates that the computer is not connected.
Click Properties to open Network Connections in an Explorer window. To configure a new connection for the first time, click Create a new connection and follow the
onscreen instructions. Make sure that the addresses for network servers are handy,
otherwise, making a connection will be impossible.
Figure 3.57 Network connections
55
MARS-3100R/S User Manual
Advantech Central Manager
3.8.1 Properties
Chapter 3
3.8 LAN
3.9 Security
The Security menu displays access to the Windows Security center.
Figure 3.58 Security menu
Click Windows Security Center to set the degree of network security. The Center
offers precise control over firewalls and antivirus applications. If the computer is connected to a network, it may receive automatic updates and access antivirus software.
Figure 3.59 Security center
MARS-3100R/S User Manual
56
Chapter
4
4
Maintenance and
Troubleshooting
This chapter explains how to care
for and maintain the Tablet PC
along with a troubleshooting FAQ.
Sections include:
! Care, Storage and Cleaning
! Replacing Components
! Troubleshooting
! OS Maintenance and Re-Installation
4.1 Care, Storage and Cleaning
4.1.1 Protect the computer from damage
The MARS-3100R/S is built to withstand extreme conditions of high and low temperature and physical shock when dropped from any side. However, the utmost care
should be exercised to ensure that the computer is operated within its specific operational limits. (See section 1.4 for more information.)
Note!
!
!
Do not place heavy objects on the computer and do not subject it to
undo shock or vibrations. Severe shocks can render it inoperable.
Do not disassemble the computer; doing so may damage the unit
and void the warranty.
4.1.2 Maintain good connections
Periodic maintenance of all electrical connections is essential to maintain stable
operation of the computer and an adequate supply of electrical current to the battery.
Note!
!
!
!
Keep connectors away from sources of dust or wetness.
Check AC connections and make sure the adapter cord is firmly
inserted.
Replace any damaged power cords, broken connectors immediately if they are broken.
4.1.3 Prevent thermal stress
The computer is designed to operate within a wide temperature range. However, if
conditions exceed these limitations, it is advisable to stop using the computer or permanent damage may result.
Note!
!
The computer is not warranted for repair if it becomes inoperable
after being subjected to extreme thermal conditions.
4.1.4 Storing the computer
The computer may be stored in the “off” state with a fully charged battery for up to 30
days. It will continue to power up and be usable.
Note!
!
It is advisable to remove the battery and store it in a plastic bag if
the computer will remain unused for periods in excess of 30 days.
4.1.5 Caring for the touchscreen display
Use only a soft, clean cloth or lens cleaning paper to wipe the touchscreen. Wipe the
screen when the power is off.
MARS-3100R/S User Manual
58
Use a soft, clean cloth. Dampen the cloth with water and household dish detergent
then wipe the housing without applying too much pressure.
Note!
!
!
Do not use alcohol or abrasive cleansers to clean either the touchscreen or the computer.
Use only mild, detergent-based (household) degreasers to remove
oil or tar.
Chapter 4
4.1.6 Cleaning the computer
Maintenance and Troubleshooting
59
MARS-3100R/S User Manual
4.2 Replacing Components
After long periods of use certain components may wear out. It is always possible to
replace old components. Follow these instructions to make changes. To replace
other components besides the battery and the HDD, like the touchscreen, please
contact technical support.
4.2.1 Battery
1.
2.
3.
Turn off the MARS-3100R/S
Disconnect any peripheral devices from the MARS-3100R/S.
Unfasten the two large flathead screws and remove the old battery.
4.
5.
Figure 4.1 Removing the battery pack
Insert the new battery pack.
Fasten the two flathead battery cover screws.
MARS-3100R/S User Manual
60
The hard disk drive (or optional CF card) is accessed behind the port on the backside
of the computer.
1. Turn off the MARS-3100R/S.
2. Remove the DC adapter and Battery pack from MARS-3100R/S.
3. Disconnect any peripheral devices from the MARS-3100R/S.
4. Unfasten the four small screws and remove the cover.
5.
The HDD (or CF card) is visible after removing the cover.
Figure 4.3 Hard Disk Drive
Figure 4.4 CF card
61
MARS-3100R/S User Manual
Maintenance and Troubleshooting
Figure 4.2 HD / CF Card Port
Chapter 4
4.2.2 HDD (or CF card)
6.
Grasp the HDD or CF card firmly. Use two fingers on both sides on the end. Lift
up.
Figure 4.5 Correct Removal of the HDD
Figure 4.6 Incorrect removal of the HDD
Note!
7.
!
!
Do not grasp the HD with the thumb in the middle of the housing.
Do not twist or bend either the HD or the CF card during removal.
Grasp the cable connector firmly. Unplug the connector, pulling it straight out.
Figure 4.7 Unplugging the cable connector
MARS-3100R/S User Manual
62
Remove the CF card from the slot.
Chapter 4
8.
63
MARS-3100R/S User Manual
Maintenance and Troubleshooting
Figure 4.8 Removing the CF card
4.3 Troubleshooting
Follow the instructions below if any problems occur with basic operation of the
MARS-3100R/S. If problems cannot be resolved using these instructions, please
consult technical support.
4.3.1 Computer will not start
!
!
!
!
Connect the AC adapter and/or charge the battery.
Check to see a new battery is inserted and connected.
Remove the battery and the AC adapter and reinstall both.
Under conditions of extremely high or low temperature, it is possible that the
computer may not function. Use the MARS-3100R/S only within its recommended operational parameters.
4.3.2 Computer does not resume operation after suspension
!
Check to see if the AC adapter or any peripherals have been connected or disconnected prior to suspension. Reconnect the AC or remove the peripherals; it
may be necessary to restart the computer.
4.3.3 Computer will not enter into suspension mode
!
!
Check to see that the computer is not connected to an active network.
Shut off any applications that regularly access the hard drive.
4.3.4 Computer will not shut down
!
Remove any peripheral devices, and try again.
4.3.5 Display remains off, or is not bright
!
!
!
!
Make sure that the computer is turned on.
The brightness display setting may be too low. (See section 3.2.4)
The computer may be stuck in suspension mode.
– Check AC, restart or remove peripheral devices.
An external monitor may be installed. Disconnect it and restart.
4.3.6 Computer touchscreen does not respond to the pen
!
!
!
The touchscreen may not be calibrated. (See sections: 2.5 to 2.7)
Attach a USB device to the system, like a keyboard. If it also fails to respond,
then the system may need to be reconfigured or reinstalled.
Try restarting the computer and retest the pen before making major system
changes.
4.3.7 Headphones do not emit, or volume is too low
!
The volume control may be set to mute. (See section: 3.6)
4.3.8 Peripherals do not respond
!
!
!
Check to see if the device is enabled or turned on.
Check the device drivers are installed and selected in BIOS.
Shut down the computer. Unplug the devices. Restart the computer. Plug in the
devices to see if they are detected; if they are detected, they are “live.”
MARS-3100R/S User Manual
64
4.3.9 The amber battery status LED is always on
!
!
Battery capacity is below the "Low Battery Alarm."
Charge the battery; replace the battery if it is spent.
Chapter 4
– If the device still does not respond, the devices, or their drives may be out of
date or incorrectly installed; or, the OS/drivers/hardware may not support this
particular type of peripheral device.
4.3.10 The amber battery status LED is blinking
Battery is critically low.
Charge the battery; replace the battery if it is spent.
4.3.11 The amber battery status LED is blinking quickly
!
Battery error. Replace the battery.
65
MARS-3100R/S User Manual
Maintenance and Troubleshooting
!
!
4.4 OS System Maintenance and Re-Installation
4.4.1 MARS-3100S
The MARS-3100S is supplied with a pre-loaded OS: Microsoft Windows XP Embedded, which is specially configured for MARS-3100S by Advantech programmers. If
the OS on the MARS-3100S becomes damaged or crashes, please contact technical
support.
4.4.2 MARS-3100R
The MARS-3100R is supplied with a pre-loaded OS: Windows XP Professional. If the
OS on the MARS-3100R becomes damaged or crashes, it may be necessary to reinstall Microsoft Windows XP Professional using the Recovery Media CD. The
Recovery Media CD is contained in the standard MARS-3100R package.
1.
Connect one CD/DVD-ROM drive to the MARS-3100R.
Note!
2.
3.
!
Recommended drive: USB external CD/DVD-ROM.
Insert the Recovery Media CD into the CD/DVD-ROM.
The CD/DVD-ROM autoplays the CD and pops up this window:
Figure 4.9 Welcome to Windows XP
MARS-3100R/S User Manual
66
!
If this window fails to pop up automatically, execute “Setup.exe”
manually.
4.
Click Install Windows XP and follow the instructions to perform a full Windows
XP Professional OS installation.
Figure 4.11 Install Windows XP
4.5 How to using Digitizer Touch?
!
!
Digitizer Touch is a very sensitive input device which will be influenced by environments and any high voltage / high magnetic devices.
The chassis of MARS-3100R is made of “Magnalium”, a metal material which
can enlarge the “noise” from the inside of the unit. Because of this limitation, it
may cause poor sensitivity in the corners, especially in the upper-right corner,
when you want to close the “Window”. So, if you come across any similar problems in using the Digitizer Touch, please follow the instructions below.
67
MARS-3100R/S User Manual
Maintenance and Troubleshooting
Figure 4.10 XP setup icon
Chapter 4
Note!
1.
Approaching the “X” symbol is the same as usual.
2.
Keep the pointer completely inside the “X” symbol.
3.
Press the icon a little harder until the icon becomes darker. Then you can close
the window.
Appendix
A
A
GPRS Setting
This chapter details instructions
about how to set up the GPRS software connection for the MARS3100R/S.
A.1 Setting Up the Modem
1.
Select and enter Phone and Modem Options in Control Panel.
2.
Select the country/region.
MARS-3100R/S User Manual
70
Enter the local Area Code and click OK. It is sufficient to leave the other column
blank.
4.
The system adds a new location named My Location.
5.
Select the Modem page and click Properties.
71
MARS-3100R/S User Manual
Appendix A GPRS Setting
3.
6.
Click the Diagnostics page.
7.
Click Query to check the communication with the modem device.
8.
Information from the device is displayed if communication is successful.
MARS-3100R/S User Manual
72
Click the Advanced page.
10. On this page, the user may need to key in some commands at Extra initialization commands to set up the modem to work correctly.
Note!
1.
2.
3.
4.
In different countries and regions, the user may need to enter
uniquely particular settings in these fields. Please check the local
ISP / administrator for correct information. The information below
assumes the user is located in Taiwan.
Before entering the settings, obtain the following details from the
local ISP/ administrator:
– CID (Context Identity)
– PDP (Packet Data Protocol)
– APN (name of an Access Point that connects the mobile network to the Internet)
Key in: at+cgdcont=1,“IP”,“internet”
In the example above, the settings predefine a PDP context in which CID = “1”,
PDP type = “IP” and the “internet” represents the Access-point Name (APN)
for GPRS service in Taiwan. Since these data vary from one region and country
to the next, it is important to verify the local APN with the local ISP supplier.
73
MARS-3100R/S User Manual
Appendix A GPRS Setting
9.
A.2 Setting Up an Internet Connection
1.
Select and enter Network Connections in Control Panel.
2.
Select the link, Create a new connection.
MARS-3100R/S User Manual
74
Click Next to continue.
4.
Select Connect to the internet when the table below appears. Click Next to
continue.
5.
Select Set up my connection manually and click Next to continue.
75
MARS-3100R/S User Manual
Appendix A GPRS Setting
3.
6.
Select Connect using a dial-up modem and click Next to continue.
7.
Enter the local network ISP name; for example, “TEST.”
8.
Enter the phone number: *99***<CID># and click Next to continue.
Note!
If the CID is “1” in your region, then enter: *99***1#
MARS-3100R/S User Manual
76
Ignore the user name request and click Next to continue.
10. Finish the set up process.
77
MARS-3100R/S User Manual
Appendix A GPRS Setting
9.
A.3 Connect to the Internet by GPRS
1.
Select and enter Network Connections in Control Panel.
2.
The ISP name created before appears (for example: TEST), right click and
select Properties.
MARS-3100R/S User Manual
78
Click Configure.
4.
Select 115200 for maximum speed, click OK twice and return to the desktop.
5.
Double click the connection (for example: TEST)
79
MARS-3100R/S User Manual
Appendix A GPRS Setting
3.
6.
Click Dial to access the internet via GPRS.
7.
Connection successful.
MARS-3100R/S User Manual
80
1
INDEX
Numerics
5-way navigation button 11
A
About this Manual 2
AC adapter 14
Accessories 6
Alarms 33
Ask me what to do 30
Audio
Advanced audio properties sub-menu 41
Performance 41
Speakers 41
Devices 40
Hardware menu 46
Properties 46
Jacks 19
Menu 39
MIDI music playback 42
Sound playback 40
Sound recording 42
Sounds 44
Sounds and Audio Devices Properties
menu 39
Speaker settings 43
Test hardware 45
Voice 45
Volume 40, 43
B
Battery 12
Charging 13
Critical battery alarm 34
Disposal 13
Installing 12
Low battery alarm 33
Swapping 13
Brightness 27
Buttons 11
Hotkey 28
Key 30
Power 29
C
Calibration 14, 15, 48
4 points 15
Caring for
Computer 58
CE iii
Central Manager 24
CF card
Installation and removal 61
COM ports 18
Components
Replacing 60
Configuration utility 15
Copyright ii
D
Disk space 37
Display 25
Menu 25
Properties 26
Properties menu 26
Rotation 25
Button 26
Display rotation button 11
Do nothing 29
Draw test 16
E
Environmental Standards 4
F
Features 2
G
GPRS 69, 78
Internet connection 78
H
HDD
Installation and removal 61
Hotkey
Buttons 11, 28
Hotkeys
Menu 28
I
Image version
Menu 38
Internet Connection
Setting Up 74
K
Key button 11, 30
L
LAN
Menu 55
Properties 55
LAN port 20
LED Signals 9
Battery status 9
HDD status 10
Power ON/OFF 9
Wireless LAN ON/OFF 10
LEDs 9
M
Maintenance
Cleaning 59
Connections 58
Storage 58
Thermal stress 58
Touchscreen 58
MIDI music playback 42
Modem
Setting up GPRS 70
Mouse
Buttons 51
General USB properties 53
Hardware 53
Pointer Options 52
Pointers 52
Scheme 52
USB driver properties 54
USB power management 54
Mouse settings 51
O
OS
MARS-3100R 66
MARS-3100S 66
P
Package 6
Package contents 6
Packing List viii
Pen 17
Peripherals
Connecting 18
Power
Advanced menu 36
Advanced settings 31
Alarms 33
Button 14, 29
Configuration 36
Hibernate menu 37
Menu 29
Options Properties menu 31, 33, 35, 36,
37
Power Meter menu 35
Schemes menu 31
Power Management
Suspend-to-Disk 21
Suspend-to-RAM 20
Product Labelling x
R
Replacing
Battery 60
Resuming 21
S
Safety Instructions viii
Security
Menu 56
Shut down 29
Sound recording 42
Specifications 3
Standby 30
Static Electricity x
System defaults
Resetting 66
T
Technical Support vii
Time and date 20
Touch
Menu 48
Mouse settings 51
Touchkit USB Controller utility 50
Touchscreen
Calibration 15, 48
Troubleshooting 64
Forgotten password 65
No audio 64
No display 64
No peripheral response 64
No resumption 64
No shutdown 64
No start up 64
No suspension mode 64
Status LEDS 65
U
USB ports 18
Using Hotkey Buttons 28
V
VGA port 19
Views 7
Back 7
Back edge 8
Front 7
Front edge 8
Left edge 8
Right edge 8
W
Warranty ii
Welcome 2
www.advantech.com
Please verify specifications before quoting. This guide is intended for reference
purposes only.
All product specifications are subject to change without notice.
No part of this publication may be reproduced in any form or by any means,
electronic, photocopying, recording or otherwise, without prior written permission of the publisher.
All brand and product names are trademarks or registered trademarks of their
respective companies.
© Advantech Co., Ltd. 2007