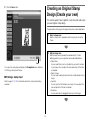
1
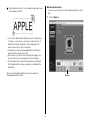
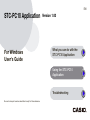
EN STC-PC10 Application For Windows User's Guide Version 1.00 What you can do with the STC-PC10 Application Using the STC-PC10 Application Troubleshooting Be sure to keep all user documentation handy for future reference. Important! The copyright of this manual and rights related to the software all revert to CASIO COMPUTER CO., LTD. • Microsoft, Windows, and Windows Vista are registered trademarks or trademarks of Microsoft Corporation of the United States in the United States and other countries. Precautions Concerning This Manual ■ Note that CASIO COMPUTER CO., LTD. shall not be held in any way responsible for any losses or lost profits, or for any claims by third parties arising out of the use of the examples presented in this manual. ■ Any reproduction of this manual, either in part or its entirety, is forbidden. Note that any use of this manual other than personal use without the permission of CASIO COMPUTER CO., LTD. violates copyright laws. ■ The specifications and other contents contained in this manual are subject to change without notice. • Other company names and product names used herein are trademarks or registered trademarks of others. Note that TM and ® marks are not used within the text of this manual. • Contract Company Umemura Taka Software Design, Inc. © 2014 CASIO COMPUTER CO., LTD. Except as required for proper use or for creating backup copy, any reproduction of this manual and/or the program, either in part or in their entirety, is strictly forbidden without the express written permission of CASIO COMPUTER CO., LTD. • Refer to the Printer (Stamp Maker) user documentation for information about how to install this software and the required operating environment. • The STC-PC10 Application is software that runs on Windows 8, Windows 7, Windows Vista, and Windows XP SP3. • Certain equipment configurations may not support proper operation. Creating an Original Stamp Design (Create your own) · · · · · · · · · · · · · · · · · · · · · · · · · · · Creating a stamp by editing a stamp face · · · · · · · Recalling a Saved Stamp (Saved stamps folder) · · Recalling a previously saved stamp face and using it to create a stamp · · · · · · · · · · · · · · · · · · · Configuring STC-PC10 Application Properties · · · Using Help · · · · · · · · · · · · · · · · · · · · · · · · · · · · · · · · · Index STC-PC10 Application Overview and Preparation Using This Manual · · · · · · · · · · · · · · · · · · · · · · · · · · · · What you should read first · · · · · · · · · · · · · · · · · · · · How information is presented · · · · · · · · · · · · · · · · · Printer Models Supported bythe STC-PC10 Application · · · · · · · · · · · · · · · · · · · · · · · · · · · · · · · · · · STC-PC10 Application Introduction· · · · · · · · · · · · · · STC-PC10 Application Introduction · · · · · · · · · · · · · 3 3 3 30 31 42 42 46 48 STC-PC10 Application Appendix 5 5 5 Software Troubleshooting · · · · · · · · · · · · · · · · · · · · 50 Stamp Printing Troubleshooting · · · · · · · · · · · · · · · 50 Error Messages · · · · · · · · · · · · · · · · · · · · · · · · · · · · · 52 STC-PC10 Application Using the STC-PC10 Application · · · · · · · · · · · · · · · · 8 What you can do with the STC-PC10 Application · · 8 Starting Up and Exiting the STC-PC10 Application · · 8 Basic Operations · · · · · · · · · · · · · · · · · · · · · · · · · · · · · 9 Home screen · · · · · · · · · · · · · · · · · · · · · · · · · · · · · · 9 Editing Screen · · · · · · · · · · · · · · · · · · · · · · · · · · · · 10 Preview screen · · · · · · · · · · · · · · · · · · · · · · · · · · · 12 Using an Existing Stamp Face · · · · · · · · · · · · · · · · · 13 Using an existing stamp face to create a stamp· · · 14 Using an Image Stored on Your Computer to Create a Stamp (Create from image) · · · · · · · · · · · · 19 Using an image to create a stamp · · · · · · · · · · · · · 20 1 STC-PC10 Application Overview and Preparation • Mouse operations: Click, double-click rightclick, drag, drag and drop, etc. • Menu operations with the mouse • Text input with the keyboard • Standard Windows operations Refer to the user documentation that came with your computer or Windows package for details about standard Windows operations. Using This Manual What you should read first First, carefully read the section titled “Overview and Preparation” (pages 3 through 6) for a general overview of the product and information about the required operating environment. When printing a stamp sheet refer to “Using the STC-PC10 Application” (page 8). ■ On-screen button operations All of the operations in this manual are shown as being performed with your computer’s mouse. • Command operations are represented as described below. Text settings(T) How information is presented ■ Terms used in this manual This term: Means this in this manual: print Outputting a stamp sheet on a stamp sheet printer (STC-W10 or STC-U10) printer CASIO STC-W10 or STC-U10 Stamp Maker printer Click Text settings(T). • Dialog box buttons are represented as shown below. STC-PC10 Application This computer application for laying out stamp face contents for output on a Stamp Maker printer. layout Arranging text and/or graphics with the STC-PC10 application for output on a Stamp Maker printer. stamp face The surface of a stamp that meets the paper (or other medium) and prints the stamp image. OK ■ This manual does not explain how to perform Windows operations. Click OK. This manual is the STC-PC10 Application User’s Guide for Windows. This software can run under Windows 8, Windows 7, Windows Vista, and Windows XP SP3 (hereinafter referred to as “Windows”). This manual does not explain how to use Windows itself. This manual was written for users who are at least familiar with the basic Windows operations below. 3 ■ Display screens • Note that the appearances of sample screen shots used in this manual may differ somewhat from the screens that are actually displayed on your computer. However, the essential contents of the two screens should be the same. • Screen shots shown in this manual are based on the English version of Windows 7, and examples assume that “English” was selected as the display language during installation. Screens produced by other operating systems or when another display language is selected may be different from the screen shots shown here. 4 Printer Models Supported by the STC-PC10 Application STC-PC10 Application Introduction The STC-PC10 Application can be used with the Printer models below. The STC-PC10 Application is software for laying out stamp face contents on a computer. STC-U10, STC-W10 • Actual stamp sheet printing requires installation of a USB driver for your specific printer model. For information about installing a USB driver, refer to the user documentation that comes with your printer. STC-PC10 Application Introduction The STC-PC10 Application can be used for easy layout of original stamp faces on a computer for printing. 5 ● Incorporate an image in computer memory into a stamp design. ● Use built-in stamp faces or quick and easy stamp layout. Family members Pets ● Optionally available Stamp Kits provide a choice of stamp sizes. A choice of ink colors (red, blue, etc.) is also available. Christmas stamps Business stamps ● Incorporate your name or other text into a stamp design. Large-size stamps can also be created. 6 STC-PC10 Application Using the STC-PC10 Application Starting Up and Exiting the STC-PC10 Application ■ To start up the STC-PC10 Application What you can do with the STC-PC10 Application ● Select a previously saved stamp face for quick and easy layout of a new stamp (“Using an Existing Stamp Face”, page 13). ● Use images stored on a computer to create original stamps (“Using an Image Stored on Your Computer to Create a Stamp (Create from image)”, page 19). • Modify images (photos) using a selection of effects (“Applying an effect”, page 26). ● Combine items and frames to create your own stamp face design (“Creating an Original Stamp Design (Create your own)”, page 30). ● Save your stamps on your computer for later recall and re-use (“Recalling a Saved Stamp (Saved stamp folder)”, page 42). ● Preview an image of your stamp before printing it (“Preview screen”, page 12). 1 On your computer desktop, double click the STC-PC10 icon. This starts up the STC-PC10 Application and displays its home screen. • If, during installation, you chose not to display a shortcut on your desktop, navigate the location where you have the STC-PC10 Application installed and double-click the STC-PC10 icon. • On the Windows Start menu, perform the following operation to start up: Programs (P)➔CASIO➔Stamp Maker➔STC-PC10. The actual folder where the STC-PC10 Application is located depends on the settings you used when installing it. Windows 8: You can start up by clicking the STC-PC10 icon on the start screen. Double-click 8 ■ Exiting the STC-PC10 Application Basic Operations 1 Click the close button ( This section explains the home screen that is displayed immediately following startup, the editing screen used for stamp face layout, and the preview screen used for previewing an image of your stamp before printing it. ) in the upper right corner of the screen. Close button Home screen This is the screen that appears first when you start up the STC-PC10 Application. It has a number of buttons that provide access to a variety of different function. This exits the STC-PC10 Application. • You can also exit with a menu bar operation. On the menu bar, click File (F). Click Exit (X). This exits the STC-PC10 Application. Basic stamp button Displays a screen for laying out a stamp using a built-in stamp face. ➜ “Using an Existing Stamp Face” (page 13) 9 Editing Screen Create from image button Displays a screen for laying out a stamp using an image (photo) stored on a computer. ➜ “Using an Image Stored on Your Computer to Create a Stamp (Create from image)” (page 19) The content of the editing screen depends on the type of stamp you are laying out, and the current state of your stamp layout. This section covers a number of common representative display items that normally appear on this screen. Create your own button Important! For information of the buttons and setting items that appear in the editing area and control panel for each type of screen, refer to the sections below, which describe the operation of each function. ➜ “Using an Existing Stamp Face” (page 13) ➜ “Using an Image Stored on Your Computer to Create a Stamp (Create from image)” (page 19) ➜ “Creating an Original Stamp Design (Create your own)” (page 30) ➜ “Recalling a Saved Stamp (Saved stamps folder)” (page 42) Displays a screen for laying out an original stamp face. ➜ “Creating an Original Stamp Design (Create your own)” (page 30) Saved stamps folder button Displays a screen for recalling a previously saved stamp face. ➜ Page 42 “Recalling a Saved Stamp (Saved stamps folder)” ● Example Basic tab data selection screen You can return to the home screen at any time by clicking the pomrie STAMP MAKER logo. 10 ■ Menu bar Menu bar These are menus of editing functions. Almost all of the functions displayed on menus can also be accessed using the buttons in the editing area and control panel. For details about each of the menu items, refer to the next section (“Menu bar”). This section explains functions on each of the menus included on the menu bar. Important! • Functions that can be executed from the menu bar depends on the task being performed and its current status. The names of functions that cannot be executed for some reason are dimmed on the menu. • Almost all of the functions that can be selected with the menu bar can also be accessed using the buttons in the editing area and control panel. Guidance Displays text that explains what you can do on the currently displayed screen. Editing area Shows lists for selecting stamps, images, or items, a preview image of the stamp face, etc. Display contents depend on the selected function and current conditions. ● File (F) menu Home (H) Cancels the current task and returns to the home screen. Exit (X) Exits the STC-PC10 Application. A confirmation message will appear if there are unsaved edits to a stamp face on the screen. Control panel Shows buttons and setting items for stamp face editing. Display contents depend on the selected function and current conditions. ● Edit (E) menu Undo (U) Undoes the last operation that you performed. Note that some operation cannot be undone. Redo (R) Redoes the last operation that was undone with the Undo command. Some operations cannot be redone. Copy (C) Copy the currently selected object (text, item). Delete (D) Deletes the currently selected object (text, item, or frame). When performing freehand drawing, deletes all lines that have been drawn. Navigation controls Shows a list of buttons that represent operations that need to be performed. The currently selected button (operation) is highlighted. Clicking a button for a previous operation will return to the operation that was performed using that button. ● Settings (S) menu Text settings (T) Displays a window for changing text properties. ➜ “To configure text properties” (page 46) 11 Item settings (I) Displays a window for changing item properties. ➜ “To configure item properties” (page 46) Frame settings (F) Displays a window for changing frame properties. “To configure frame properties” (page 47) Preview screen Displays an image of a stamp, which can be used for previewing before printing. You can even change the color of the preview image. ● Layout (P) menu Position (P) Aligns the currently selected object (text, item) with the Top, Bottom, Left, or Right of the stamp face. Centered (C) Centers the currently selected object (text, item) Horizontally or Vertically in the stamp face. ● View (V) menu Magnification (Z) Zooms the home page view in accordance with a specified zoom ratio. ● Help (H) menu CASIO Home Page (C) Starts up your web browser and accesses the CASIO website. ➜ “Accessing the CASIO website” (page 48) Version info. (A) Displays STC-PC10 Application version and copyright information. ➜ “To view version information” (page 48) Stamp preview image Shows a preview image of the stamp using black ink. 12 Using an Existing Stamp Face Inked image button Displays the window shown below, which can be used to change the color of the preview image. This section explains how to use an existing stamp face to create a stamp. The general flow for laying out a stamp using an existing stamp face is described below 1 Select a stamp. Decide on the type of stamp you want to create and its size, and then select the appropriate stamp face. The STC-PC10 Application has a variety of different built-in stamp faces that you can use. 2 Check the preview image of the stamp. Check the appearance of the stamp before printing it. You can view the preview image in a variety of different colors. 3 Print the stamp. Printing a stamp creates the face of the stamp. Prepare a sheet holder that contains a stamp sheet that is the same size as the stamp face you laid out. 13 2 Select the desired stamp type. Using an existing stamp face to create a stamp Click the folder for the type of stamp you want to create. Click Next. ■ Selecting a stamp Use the procedure below to select the existing stamp face you want to use to create a stamp. 1 On the home screen, click the Basic stamp button. Next Clicking Next displays a screen for selecting the stamp size and stamp face. Basic stamp This will display a screen for selecting a stamp type (category). 14 3 Click the stamp size. 4 Click the stamp face you want to use and then click Next. Next higher folder Next This will display the stamp faces available for the size you selected. • Clicking the icon returns to the next higher folder in the hierarchy. • If there are multiple tabs displayed, click a tab to switch to another folder. A preview image of the stamp will appear on the screen. You can change the color of the preview image, if you want. Advance to “Previewing the stamp image” (page 16). 15 ■ Previewing the stamp image Previewing a stamp image using different colored ink Click the Inked image button. This displays the window shown below, which can be used to change the ink color of the preview image. 1 Check the appearance of the stamp on the screen. Zoom out Zoom in Close Check the inked image and then click the Close button. Inked image Click the zoom [+] button to zoom in (enlarge the image) or the zoom [–] button to zoom out (reduce the size of the image). 16 ■ Printing a stamp 2 Click Next. This section explains how to print a stamp for the stamp face you laid out. Important! • Check to confirm that the Printer is connected to your computer, and that its power is turned on. • For information about Printer operations, see the user documentation that comes with it. 1 Click the Print button. Next This displays the screen for stamp printing. Advance to “Printing a stamp” below. Print This displays a message to confirm that you really want to print a stamp. 17 2 Click OK. 3 Insert the sheet holder into the Printer. Important! For information about how to insert the sheet holder, refer to the Printer User’s Guide. Stamp printing will start automatically. A message will appear on your computer prompting you to insert the sheet holder into the Printer. Wait until the sheet holder is completely ejected from the front of the Printer. The message Printing completed will appear when printing is complete. 18 4 Click OK. Using an Image Stored on Your Computer to Create a Stamp (Create from image) This section explains how to use an image (photograph) stored on your computer to create a stamp. The general flow for laying out a stamp using an image on your computer is described below. This completes the stamp printing process. Now you can assemble the stamp using the steps explained in the Printer User’s Guide. 1 Select the image. Select an image (photograph) that is stored on your computer. 2 Specify the size of the stamp and adjust the size and positioning of the image. Decide on the size of the stamp you want to create, zoom the image to fit, and then adjust its position. 3 Trim what you want from the image. You can trim a specific part of the image. Next, use the steps below to make fine adjustments. 4 Adjust the extracted image. Make fine adjustments to the image you trimmed above. You can restore parts of the image that are no longer visible, and further trim the image. 19 Using an image to create a stamp ■ Selecting an image 5 Apply an effect to the image. Select the image (photograph) you want to use from among images stored on your computer. You can apply a number of different effects to the image. 1 On the home screen, click the Create from image button. 6 Adjust the applied effect. Adjust the effect you applied to the image. The items that can be adjusted depend on the type of affect that is applied. 7 Check the appearance of the stamp. Check the appearance of the stamp before printing it. You can view the preview image in a variety of different colors. 8 Print the stamp. Printing a stamp creates the face of the stamp. Prepare a holder that contains a stamp sheet that is the same size as the stamp face you laid out. Create from image This displays an image selection screen. 20 2 Click the tab for the folder that contains the image you want to use. 3 Click the image you want to use and then click Next. Desktop tab My pictures tab [+] tab Next This displays a screen for adjusting the stamp size, image size, and image position. Advance to “Specifying the stamp size and adjusting the image position” below. • If you selected a monochrome image that satisfies the conditions below, clicking Next will cause a confirmation dialog box to appear. Clicking OK on the confirmation dialog box will create the stamp without out applying any effects. – File format: BMP – Color depth: Duotone (1 bit) – Image size (pixels): 120×120, 120×240, 120×480, 240×120, 240×240, 240×480, 480×120, 480×240, 360×360, 360×720, 720×360 Next higher folder • Initially, the My pictures and Desktop tab will be displayed. • Up to two more folders can be displayed as tabs by clicking the [+] tab. • Tabs show folders and image (JPG, JPEG, BMP, PNG) files. • You can open a folder displayed on a tab and select any image files contained inside it. Clicking the icon returns to the next higher folder in the hierarchy. 21 ■ Specifying the stamp size and adjusting the image position 2 Adjust the image size and position. Drag the image to reposition it. Use the [–] and [+] buttons to adjust the size of the image. To change the orientation of the image, click the rotate button. Clicking the rotate button rotates the image 90 degrees counterclockwise. First decide on the size of your stamp. On the screen below, decide which parts of the image and the size of the image you want to use, and make adjustments as you view the results on the screen. 1 Click the Size down (▼) button. On the menu that appears, click the Rotate stamp size you want to select. Zoom Size Next • Adjust the image so the part you want to appear in the stamp is enclosed within the boundary that indicates that stamp size. • The boundary in the center of the image indicates the stamp size. 22 ■ Trimming the image 3 Click the Next button. Use the procedure here to trim the part of the image you want to use in your stamp. You also will be able to make fine adjustments in the image in the next section (Adjusting the image). 1 Use a mouse drag operation to draw an enclosed boundary line around the area of the image you want to use in your stamp. • The area on the inside of the lines will be used as the stamp face image. Zoom out Zoom in Redo Undo This displays an image trimming screen. Advance to “Trimming the image” below. Delete Important! Make sure that your line forms a closed boundary, without any breaks. • Click the delete button to delete all drawn lines. • Click the zoom [+] button to zoom in (enlarge the image) or the zoom [–] button to zoom out (reduce the size of the image). 23 2 • Click the undo button to undo the last operation you performed. Click the redo button to restore an operation you undid with the undo button. Acceptable boundary drawing styles are shown below. Click the Next button. • If the selection boundary line has a break in it, and error will occur at this time and the image trimming screen will reappear. Multiple boundaries Boundary that runs off the edge of the displayed image In the example below, the bottom part of the image is the bottom boundary. A side or the top of the image can also be used as a boundary. Next This displays an image adjustment screen. You can use this screen to restore or delete finer parts of the image, and to make fine adjustments to the image trimming area. Advance to “Adjusting the extracted image” below. Donut shape boundary With this configuration, the center (hole) of the donut will be deleted. 24 ■ Adjusting the extracted image 2 Delete the parts of the image you want. Click the eraser button. Drag the mouse across the area you want to delete. You can use the procedure below to restore or delete parts of an image. 1 Restore or delete the parts of the image you want. Zoom out Zoom in Zoom in Zoom out Click . Drag the mouse across the area you want to restore. Redo Undo Eraser Restore Redo Undo Thickness The area of the image where you dragged is deleted. • You can click the thickness button and select the thickness of area to be deleted by the drag operation. Thickness The area of the image where you dragged is restored. • You can click the thickness button and select the thickness of area to be restored by the drag operation. • Click the zoom [+] button to zoom in (enlarge the image) or the zoom [–] button to zoom out (reduce the size of the image). • Click the undo button to undo the last operation you performed. Click the redo button to restore an operation you undid with the undo button. Repeat steps 1 and 2 as required to fine adjust the area to be trimmed. • Click the zoom [+] button to zoom in (enlarge the image) or the zoom [–] button to zoom out (reduce the size of the image). • Click the undo button to undo the last operation you performed. Click the redo button to restore an operation you undid with the undo button. 25 ■ Applying an effect 3 Click the Next button. You can use the procedure in this section to choose from among a number of different effects to apply to an image. You can also use your computer’s mouse to draw freehand lines. 1 Select an effect. Click the effect you want to apply to the image. Click the Next button. Next This displays a screen for applying an effect to an image. Advance to “Applying an effect” below. Effect Next • You can also double-click an effect to select it without clicking the Next button. 26 • You can select from among the 15 types of effects described below. Effect Type Description Standard Uses thresholding to convert the image to binary format (black and white). Line drawing Converts the image to line drawing illustration. Comic Converts a facial photograph to an image that resembles a hand-drawn likeness. Realistic Processes a facial or scenery photographic image so the stamp image looks similar to the original. Silhouette Works best with a distinctive pose or unique shape. Can be used as a base when overlaying multiple stamps. Scan of sketch Processes a photograph of a sketch so it is suitable for use as a stamp image. Hand-carved (3 types) Deforms and blurs the image to create a handdrawn effect. Pop (3 types) Adds stars and dots to create a pop image. Zoom out Adjust 1 tab Decorative border Adds a bold border to the trimmed area. Suitable (3 types) for text, logos, etc. Adjust 2 tab Zoom in Draw tab Border tab The items that can be adjusted on each tab are described below. Clicking Next displays a screen for adjusting the effect. 2 Adjust the effect. Adjust 1 tab For adjustment of contrast and configuration of the black/white reversal setting. Adjust 2 tab For adjustment of distress and smudge due to stamping effects. Border tab For adjustment of the border around the trimmed image. Draw tab For freehand drawing of black or white lines using the mouse. See step 3 below for information about the operations that can be performed on this tab. The items that can be adjusted depend on the type of affect that you selected. Click a tab to display other effect setting items. Drag the slider and/or click the buttons on the displayed tab to adjust the effect. 27 • To erase a line, click the eraser button and then drag on the line you want to delete. This will erase the section of the line where you drag. To delete all drawn lines, click the delete button. • To toggle the lines you draw on the Draw tab between transparent and opaque, click the View button. • Click the zoom [+] button to zoom in (enlarge the image) or the zoom [–] button to zoom out (reduce the size of the image). • Click the undo button to undo the last operation you performed. Click the redo button to restore an operation you undid with the undo button. • Click the zoom [+] button to zoom in (enlarge the image) or the zoom [–] button to zoom out (reduce the size of the image). 3 Use your mouse for freehand drawing of lines. You can use your mouse to for freehand drawing of black or white lines. Click the Draw tab. Click black pen to draw black lines or white pen to draw white lines. Drag the mouse on the image to draw. View Zoom in Zoom out 4 Click the Next button. Redo Undo Next Black pen White pen Eraser Delete Thickness A preview image of the stamp will appear on the screen. You can change the color of the preview image, if you want. Advance to “Previewing the stamp image”. Next • You can click the thickness button and select the thickness of line drawn by the pen. Important! Fine lines and fine text may not work well when stamping. 28 ■ Previewing the stamp image Previewing a stamp image using different colored ink Click the Inked image button. This displays the window shown below, which can be used to change the ink color of the preview image. 1 Check the appearance of the stamp on the screen. Zoom out Zoom in Close Check the inked image and then click the Close button. Inked image Edit stamp • Click the zoom [+] button to zoom in (enlarge the image) or the zoom [–] button to zoom out (reduce the size of the image). • Clicking Edit stamp will save the image and then display a screen for adding a frame or text to the image (page 44). 29 2 Click the Save button. Creating an Original Stamp Design (Create your own) This section explains how to perform stamp face edits and create your own original stamp design. The general flow for laying out an original stamp face is described below. 1 Select a stamp size. Select a stamp size in accordance with how you plan to use the stamp. 2 Edit the stamp face. Edit the stamp face to produce the desired results. The four editing operations you can perform here are described below. • Select items You can select items (such as illustrations) you want to include in your stamp. You can adjust the size and position of the items as required. • Select a frame You can select a decorative frame for the outside border of your stamp. • Input text You can input text to include in your stamp. You can adjust the size and position of the text as desired. • Draw lines You can draw lines by dragging the mouse on the image. Save This saves the stamp face and displays the Completed screen. Advance to “Printing a stamp sheet” below. ■ Printing a stamp sheet Refer to pages 17 to 19 for information about the stamp sheet printing operation. 30 Creating a stamp by editing a stamp face 3 Check the appearance of the stamp. ■ Selecting the stamp size Check the appearance of the stamp before printing a stamp sheet. You can view the preview image in a variety of different colors. 1 On the home screen, click the Create your own button. 4 Print the stamp sheet. Printing a stamp sheet creates the face of the stamp. Prepare a sheet holder that contains a stamp sheet that is the same size as the stamp face you laid out. Create your own This displays a screen for selecting the stamp size. 31 ■ Editing the stamp face 2 Select the stamp size you want. Click the size of the stamp you want to create. Click OK. The four editing operations you can perform are listed below. • Select items • Select a frame • Input text • Draw lines This section describes each function in the sequence they are listed above. When laying out a stamp, you can switch between tabs and perform operations in any sequence you like. ● Selecting items Use the procedure below to select items and arrange them on the stamp face. A stamp face can have more than one item. 1 Click the Item tab. OK This displays a stamp face editing screen. Advance to “Editing the stamp face” below. Item tab 32 2 Click the + (Add) button. 3 Select the desired item type. Click the folder for the type of item you want to use in the stamp. Click Next. Add This will display a screen for selecting an item type (category). Next This displays a list of available items. • Clicking the icon returns to the next higher folder in the hierarchy. • If there are multiple tabs displayed, click a tab to switch to another folder. 33 4 Click the item you want to use in the stamp and then click Next. 5 Adjust the item size and position. Drag the item to reposition it. Zoom out Next higher folder Redo Zoom in Undo Next This puts the item inside the stamp face boundary. Copy 34 Delete ● Selecting a frame Use the procedure below to select the frame you want for your stamp. After clicking an item to select it, you can drag the lower left corner of its boundary to resize it. 1 Click the Frames tab. After clicking an item to select it, you can drag the upper right corner of its boundary to rotate it. • To delete an item, click to select it and then click the delete button. • If you want to add or adjust multiple items, repeat steps 2 through 5 as many times as necessary to adjust each one. To deselect the currently selected item, click somewhere on the screen where an item or text is not located. • To add another instance of an already added item, click the item to select it and then click the copy button. • Click the zoom [+] button to zoom in (enlarge the image) or the zoom [–] button to zoom out (reduce the size of the image). • Click the undo button to undo the last operation you performed. Click the redo button to restore an operation you undid with the undo button. Frames tab After all of the items are positioned and sized the way you want, advance to “Select a frame” below. 35 2 Click the + (Add) button. Zoom out 3 Select the frame you want for your stamp. Click a frame to select it. Click Next. Redo Zoom in Undo Add Next Delete This puts the frame inside the stamp face boundary. • To delete the frame, click the delete button. • Click the zoom [+] button to zoom in (enlarge the image) or the zoom [–] button to zoom out (reduce the size of the image). • Click the undo button to undo the last operation you performed. Click the redo button to restore an operation you undid with the undo button. This displays a frame selection screen. After selecting the frame you want, advance to “Inputting text” below. 36 2 Enter text. ● Inputting text Use the procedure below input text and position it in the stamp. A stamp face can have more than one text strings. Click the text box. Enter text into the text box. Click the + (Add) button. 1 Click the Text tab. Zoom in Zoom out Redo Undo Text tab Add Color Font Text box Align Delete Copy • Click the zoom [+] button to zoom in (enlarge the image) or the zoom [–] button to zoom out (reduce the size of the image). • Click the undo button to undo the last operation you performed. Click the redo button to restore an operation you undid with the undo button. The text you input is placed on the stamp face. 37 3 Adjust the text size and position. You can also use the operations below to change the appearance of the text. • To change the appearance of text that is already input, click the text to select it before performing the operations below. Drag the text to reposition it. Changing the font Click the Font down (▼) button. On the menu that appears, click the font you want to select. Changing the text color Click the black button to select black text, or the white button to select white text. Changing the text alignment You can specify the alignment of text within its input boundary. Click the alignment button and then select align right, centered, or align left. Important! • The font setting is applied to all selected text. You cannot specify a font for individual characters. • Depending on the number of characters, selecting a large font may cause the text to be adjusted automatically. After clicking text to select it, you can drag the lower left corner of its boundary to resize it. 38 ● Drawing freehand lines You can use your mouse to for freehand drawing of black or white lines. After clicking text to select it, you can drag the upper right corner of its boundary to rotate it. 1 Click the Draw tab. • If you want to add or adjust multiple strings of text, repeat steps 2 through 3 as many times as necessary to adjust each one. To deselect the currently selected item, click somewhere on the screen where an item or text is not located. • To add another instance of already added text, click the text to select it and then click the copy button. • Click the zoom [+] button to zoom in (enlarge the image) or the zoom [–] button to zoom out (reduce the size of the image). • Click the undo button to undo the last operation you performed. Click the redo button to restore an operation you undid with the undo button. After you are finished inputting the text you want, advance to “Drawing freehand lines” below. Draw tab 39 2 Use your mouse for freehand drawing of lines. • Click the zoom [+] button to zoom in (enlarge the image) or the zoom [–] button to zoom out (reduce the size of the image). • Click the undo button to undo the last operation you performed. Click the redo button to restore an operation you undid with the undo button. After you are finished drawing lines, check the other tabs to make sure there is nothing else left to be redone or adjusted. Click black pen to draw black lines or white pen to draw white lines. Drag the mouse on the image to draw. View Zoom in Zoom out Redo Undo After everything is the way you want, advance to the next step below. 3 Click Next. Black pen White pen Erase Next Thickness Delete • You can click the thickness button and select the thickness of line drawn by the pen. • To erase a line, click the eraser button and then drag on the line you want to delete. This will erase the section of the line where you drag. To delete all drawn lines, click the delete button. • To toggle the lines you draw on the Draw tab between transparent and opaque, click the View button. Next A preview image of the stamp will appear on the screen. You can change the color of the preview image, if you want. Advance to “Previewing the stamp image”. Important! Depending on the text and the font you use, very thin lines and very small illustrations may not work well when stamping. The best font selection for stamp text is something like Sans-serif, which uses mostly thick lines. 40 ■ Previewing the stamp image Previewing a stamp image using different colored ink Click the Inked image button. This displays the window shown below, which can be used to change the ink color of the preview image. 1 Check the appearance of the stamp on the screen. Zoom out Zoom in Close Check the inked image and then click the Close button. Inked image Click the zoom [+] button to zoom in (enlarge the image) or the zoom [–] button to zoom out (reduce the size of the image). 41 2 Click the Save button. Recalling a Saved Stamp (Saved stamps folder) This section explains how to recall a stamp face you saved previously and use it to create a new stamp. Recalling a previously saved stamp face and using it to create a stamp ■ Selecting a previously stored stamp 1 On the home screen, click the Saved stamps folder button. Save This saves the stamp face and displays the screen for stamp sheet printing. Advance to “Printing a stamp sheet” below. ■ Printing a stamp sheet Refer to pages 17 to 19 for information about the stamp sheet printing operation. Saved stamps folder This displays a screen for recalling a previously saved stamp face. 42 2 Click the tab for the folder that contains the stamp you want to use. 3 Select the stamp face you want to use and then click Next. Stamp folder Photo folder Delete Next If a stamp face is selected on the screen Clicking Next above displays a confirmation screen. Click the Edit stamp button and advance to “Editing a stamp face” below. Select the folder you want. Stamp folder Contains stamp designs created and saved with Create your own. Photo folder Contains stamp designs created and saved with Create from image. • You can select a stamp face on this screen and then click the delete button to delete it. 43 ■ Editing the stamp face ■ Previewing the stamp image The screen below is used for editing a stamp face. • To print a stamp sheet without editing the stamp face, click the Next button and advance to “Previewing the stamp image” below. 1 Check the appearance of the stamp on the screen. Zoom out Next Zoom in Inked image If you want to edit the stamp face, refer to “Editing the stamp face” under “Creating an Original Stamp Design (Create your own)” (page 32). After you are finished editing, advance to “Previewing the stamp image” below. Click the zoom [+] button to zoom in (enlarge the image) or the zoom [–] button to zoom out (reduce the size of the image). 44 2 Click the Save button. Previewing an stamp image using different colored ink Click the Inked image button. This displays the window shown below, which can be used to change the ink color of the preview image. Close Check the inked image and then click the Close button. Save This saves the stamp face and displays the screen for stamp sheet printing. Advance to “Printing a stamp sheet” below. ■ Printing a stamp sheet Refer to pages 17 to 19 for information about the stamp printing operation. 45 Resizing a text string The Width and Height of a text input box frame can be specified in pixel units. Configuring STC-PC10 Application Properties Changing the angle of a text string For Rotation, input an angle value to change the angle of a text input box frame. The initial default setting is 0 degrees (no tilt). This section explains how to configure text, item, and frame settings using menu commands. These settings can also be configured using the control panel. 3 Click OK. ■ To configure text properties ■ To configure item properties 1 On the menu bar’s Settings (S) menu, click Text settings (T). Displays a window for changing text properties. 1 On the menu bar’s Settings (S) menu, click Item settings (I). This displays a window for changing item properties. 2 Configure properties for text positioning. Click the Position tab. Configure the settings of the items. 2 Configure properties for the item style. Click the General tab. Select the check box if you want the white parts of the item to be transparent. The settings that can be configured here are described below. • To change the appearance of text that is already input, click the text to select it before performing the operations below. • To change the style of an item that is already input, click the item to select it before performing the operations below. Repositioning a text string The Left edge and Top edge positions of a text input box frame can be specified in pixel units. 46 ■ To configure frame properties 3 Configure properties for the item position. Click the Position tab. Configure the settings of the items. 1 On the menu bar’s Settings (S) menu, click Frame settings (F). This displays a window for changing frame properties. 2 Select the check box if you want the white parts of the frame to be transparent. The settings that can be configured here are described below. • To change the style of an item that is already input, click the item to select it before performing the operations below. 3 Click OK. Repositioning an item The Left edge and Top edge positions of an item can be specified in pixel units. Resizing an item The Width and Height of an item can be specified in pixel units. Changing the angle an item For Rotation, input an angle value to change the angle of the item. The initial default setting is 0 degrees (no tilt). 4 Click OK. 47 Using Help ■ To view version information 1 On the menu bar’s Help (H) menu, click Version info. (A). This displays version information. 2 After checking the information, click OK. ■ Accessing the CASIO website If your computer is connected to the Internet, you can access the CASIO website for the latest information about your Printer. 1 On the menu bar’s Help (H) menu, click CASIO Home Page (C). • This will access the CASIO website where you can find out more about your Printer. 48 STC-PC10 Application Appendix Software Troubleshooting Symptom Possible Cause Stamp Printing Troubleshooting Required Action Symptom ● Some parts of Parts of certain Try using a different font. text characters fonts may extent are cut off. past the stamp printing area. Cause and Required Action ● Stamp printing • The computer’s USB port may not be enabled. ➜ Make sure USB cable is connected correctly. won’t start. Also, perform one of the procedures below (depending on your operating system) to check your computer’s USB port status. Windows 8: Log in to the computer with an admin account and then perform the steps below. 1. On your computer desktop, display the charm bar and then click Setting. 2. On the Setting charm that appears, click Control Panel. 3. On the Control Panel screen that appears, click Hardware and Sound and then Device Manager. 4. Expand the Universal Serial bus Controllers list. Windows 7, Windows Vista: Log in to the computer with an admin account and then perform the steps below. 1. Click Start and then Control Panel. 2. Click Hardware and Sound and then Device Manager. 3. Click the plus (+) icon next to Universal Serial bus Controllers. 50 Symptom ● Stamp printing won’t start. Cause and Required Action Windows XP: Log in to the computer with an admin account and then perform the steps below. 1. Click Start and then Control Panel. 2. Double-click the System icon. 3. Click the Hardware tab and then click the Device Manager button. 4. Click the plus (+) icon next to USB Controllers (Universal Serial bus Controllers). USB is enabled when the USB controller and USB route hub are displayed. If there is hub with multiple USB chains, either connect the Printer’s USB cable to another hub or try connecting a different device. Check to make sure the cable is plugged into securely and completely. If the USB host controller and USB route hub are not displayed, refer to your computer’s user documentation or contact the manufacturer of your computer for information about how to set up and enable USB. ● The stamp layout operation completes normally, but nothing prints on the stamp sheet. • No image or text in the stamp face layout. ➜ Insert an image or text into the layout. ● Printed stamps are unclear. ● I can’t print clear stamps. • Dirt, dust, or other foreign matter on the stamp sheet print head and/or the rubber roller. ➜ Perform cleaning. ● I can’t print stamps. ● Power turns off during stamp printing. • You are using the wrong type of AC adaptor. ➜ Use the specified AC adaptor. • The stamp print head is very hot. ➜ Wait for a while and then try performing the operation again. Symptom Cause and Required Action ● I can’t establish a USB connection with a computer. • The USB cable is not connected securely. ➜ Make sure that the USB cable is connected correctly. If you still can’t establish a connection, try disconnecting and re-connecting the cable. • The USB driver is not installed on the computer. ➜ Install the USB driver on the computer. If the above steps don’t solve the problem, try connecting the USB cable to a different USB port on the computer. Use the USB cable that comes with the STC-W10 Printer. ● A sheet holder Shift the release lever on the bottom of the Printer to the is jammed and RELEASE side and then pull out the sheet holder. won’t come out. RELEASE PRINT Next, return the release lever to the PRINT side and perform printing again. If you experience problems using the same sheet holder, use a new one. Important! Note the following while stamp printing is in progress. • Do not allow the sheet holder outlet slot to become covered. • Do not touch the sheet holder. • Do not change the release lever position. • Do not disconnect or unplug the AC adaptor. 51 Error Messages Error Message Required Action Printing timed out. Try again. The sheet holder was not inserted into the inlet slot within the required time. Perform the print operation again. Printer not found. Check to make sure that Printer power is turned on. Printing failed. A printer error occurred. The stamp face could not be encoded (converted) correctly. Try again. Printing failed. Return the release lever to its original position. Check to make sure that the release lever in not in the released position. Printing failed. Check the sheet holder. This can be due to any of the causes below. • The inserted sheet holder size is different from stamp face size. • The orientation (front-back, top-bottom) of the inserted sheet holder is not correct. • The sheet holder was not inserted far enough to engage the transport mechanism. • Trying to insert a sheet holder before creating a stamp sheet. Use the following steps to correct the problem. 1. Pull out the sheet holder. • If the sheet holder is jammed, shift the release lever on the bottom of the Printer to the RELEASE side and then pull out the sheet holder. After removing the sheet holder, return the release lever to the PRINT side. 2. Referring to "Printing a stamp" (page 17), create the stamp sheet again. Error Message Required Action Cannot open this file. The files cannot be used for some reason. Select The file is damaged or in a different file. the wrong file format. Cannot save stamp data. Insufficient free space to write the data. Increase the available space and then save the data. There’s not enough storage capacity available on your computer’s hard disk. Delete files you no longer need from your computer’s hard disk or take other steps to increase the amount of available storage capacity. Returns to home. Proceed? This message appears when you click the pomrie STAMP MAKER logo while working on a stamp. To return to the home screen, click OK. Trimming failed. Try again. The boundary around the portion of the image being trimmed is not a continuous unbroken line. Re-draw the boundary line, make sure it is continuous and unbroken. Image conversion failed. The image could not be converted correctly. Try Try again. again. 52 CASIO COMPUTER CO., LTD. 6-2, Hon-machi 1-chome Shibuya-ku, Tokyo 151-8543, Japan MO1405-A © 2014 CASIO COMPUTER CO., LTD.