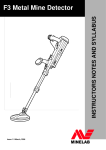
1
OPERATOR INSTRUCTORS
NOTES AND SYLLABUS
F1A4 Metal Mine Detector
st
Issue: 1 June, 2005
1
SLIDE
F1A4 Operator Instructor Notes and Syllabus
DESCRIPTION
INSTRUCTORS NOTES
These Instructor Notes are produced to assist instructors in preparing for the F1A4
Operator Training Course. They are provided as a guide and are not intended to be
prescriptive. They should be used in combination with the information contained in the
F1A4 Operations Manual and Field Guide.
Personnel attending the course will be required to pass an Evaluation to qualify as a
proficient operator on the equipment.
One
INTRODUCTION
The instructor will provide a short welcome and brief the students on the course. This
can include some background information on the Minelab F1A4.
Students will complete course registration administration as required.
If applicable, students will be asked to stand and introduce themselves to include a
short description of any experience in demining.
Students will be organized into pairs and issued an F1A4 per pair (or one per student if
numbers permit).
Two
COURSE OUTLINE
The Minelab F1A4 Operator Training Course includes lectures and practical sessions.
The course is conducted over two to three days (depending on student numbers and
language translation requirements) and consists of the following lessons:
• Introduction
• LESSON 1 – Description of the F1A4
• LESSON 2 – Assembly of the F1A4
• LESSON 3 – Principle of Operation
• LESSON 4 – Operation of the F1A4
• LESSON 5 – Operator Maintenance and Care
• Operator Evaluation
Minelab Countermine Division
Safety through Excellence
2
SLIDE
Three
F1A4 Operator Instructor Notes and Syllabus
DESCRIPTION
LESSON 1 – DESCRIPTION OF THE F1A4
Aim. Correctly describe and identify the F1A4.
Classroom Instruction. The training aids required are:
Chalk board or white board.
F1A4 Training PowerPoint Presentation.
One F1A4 in its Compact Bag inside the Hard Case.
F1A4 detectors - one per two students.
The major teaching points of this lesson are as follows:
Safety.
Equipment specifications.
Description of all F1A4 components.
TEACHING POINTS
Three
Four
Safety.
Emphasize the need to become very familiar with the equipment and the need to be
able to identify all parts. Relate this to safety issues during the demining process. All
components should be checked for correct operation before using the equipment. If a
fault develops, an operator must be able to correctly name the faulty part of the
detector. Explain the importance of the Test Piece.
Equipment Specifications.
List the basic specifications for the F1A4. Explain that the Control Box is not
waterproof, but water resistant. All other parts of the detector are waterproof including
the Coil. Explain the need to use good quality alkaline batteries and not carbon
batteries.
Five
Description of the Compact Bag and Hard Case.
Using the Compact Bag and Hard Case cover the following points:
• Rugged zippered Compact Bag, protected when closed
• Tear resistant cordura material in Compact Bag
• Reinforcement to protect Coil when packed
• Ease of adjusting the shoulder strap
• Ability to stack transport cases
• Ability to lock latches
• Avoid sitting on transport cases
• Hard Transport Case is designed to protect the F1A4 during transit
• It is recommended to keep the F1A4 secured in the Hard Case when not in use.
Minelab Countermine Division
Safety through Excellence
3
Six
F1A4 Operator Instructor Notes and Syllabus
Main Components
Using the assembled detector identify the following components. Avoid giving detailed
descriptions of the function of each component, as this will be covered in Lesson 4.
Arm Rest.
Designed to ensure a comfortable fit for the operator’s arm and adjustable when fitted to
the detector. Note the strength of the material.
Upper shaft.
Identify Upper shaft pointing out:
• Made of aluminium for ruggedness.
• Upper and Lower Camlocks (both different internal components).
• Ability to slide and lock Handle up and down.
Handle.
Designed for comfort. Note Hand Strap to add further ease of use when operating the
detector. Foam Handgrip is easily replaced and absorbs sweat in hot climates.
Includes a Camlock for locking onto the Upper shaft and is adjustable to various arm
lengths. Made of glass filled nylon and is very tough. Identify the Locking Pin for
connection of Control Box to the students.
Lower Shaft.
Explain that Lower Shaft cannot contain any metal components and is made of glass
filled nylon. Identify:
• Yoke.
• Nut, Bolt and Friction Washers.
• Cable groove to protect cable when in use.
Seven
Coil and Cable.
Referring to the slide showing a photo of a training monoloop Coil. It is important to
mention that part of the F1A4’s superior capability is due to its Coil design. Give a brief
description on the monoloop coil design explaining that no separate transmission and
reception windings exist, just one winding performing both roles. Emphasize that the
closed Coil stops vegetation from sticking up between any potential gaps and adds to
the toughness of the design. Other points:
• Waterproof design.
• Strain relief.
• Design permits edge detection (explained in Lesson 4).
• Extremely tough.
• Cable connector – explain, as with any electrical piece of equipment, the
connector is the weakest link.
Minelab Countermine Division
Safety through Excellence
4
Eight
F1A4 Operator Instructor Notes and Syllabus
Skid Plate.
The Skid Plate provides protection for the Coil. It has no effect on the sensitivity of the
Coil even when wet and is easy to replace.
Earsets.
Identify where the Earsets are stowed in the Compact Bag. Demonstrate attachment to
ear. Emphasize:
• Comfort and durability.
• Ease of fit underneath helmet.
• Military connector for connection to Control Box.
• Strength of Earset cable.
• Ease of clipping earphone back into moulding if required.
• Various earsets are available:
o Earset Speaker On which (when connected) allows the F1A4’s Loudspeaker
to continue to operate (for humanitarian demining).
o Earset Speaker Off, identifiable by a short length of green heatshrink on the
cable, shuts the detector Loudspeaker off when connected.
o Both Earset above are also available with an in-built volume control.
Batteries.
The F1A4 comes with four ‘D’ cell batteries as standard, either Alkaline or
Rechargeable.
Test Piece.
The Test Piece is used to simulate the sound of a Type 72A minimum metal mine
buried to a depth of 15 cm. The Test Piece is a vital piece of equipment to ascertain
whether the F1A4 is working to its optimum performance. Make sure the Test Piece is
carried by each deminer on their person.
Nine
Control Box.
Key points:
• Houses all electronics, batteries and controls.
• Is IP65 water-resistant.
• Includes Battery Lid and Battery Carrier.
• Identify all buttons, switches and ID Plate.
• Identify Battery Lid locking pins.
• Identify RS232 port.
• Internal Loudspeaker.
• Should always be handled with care.
Minelab Countermine Division
Safety through Excellence
5
Ten
F1A4 Operator Instructor Notes and Syllabus
Stowing the detector.
Use the packed Compact (carry) Bag to indicate the locations of the stowed F1A4
components. Mention the following:
• Check for damage/cleanliness.
• Have students be able to name each item.
• Stow away correctly.
Other Components.
•
•
•
Eleven
Operations Manual – waterproof paper.
Field guide – abbreviated and pictorial instructions, waterproof.
Control Box Bag – shoulder straps and belt clips.
QUESTIONS
Students shall be able to correctly identify all components of the F1A4.
Minelab Countermine Division
Safety through Excellence
6
SLIDE
Twelve
F1A4 Operator Instructor Notes and Syllabus
DESCRIPTION
LESSON 2 – ASSEMBLY OF THE F1A4
Aim. Correctly assemble and disassemble the F1A4.
Classroom instruction. The training aids required are:
Chalk or white board.
F1A4 Training PowerPoint Presentation.
F1A4 detectors - one per pair of students (minimum).
One set (four size “D” cells) of fresh batteries per F1A4.
The major teaching points of this lesson are as follows:
Review.
Assembly and disassembly of the F1A4.
TEACHING POINTS
Review. Review the description and identification of components of the F1A4.
Thirteen
Shaft Assembly.
Using a packed F1A4 demonstrate the Shaft assembly procedure in the following
manner:
• Secure the Handle. As you take the F1A4 out of the Compact Bag secure the
Handle in one place by locking the Handle Camlock. This will prevent it from
sliding up and down the Upper shaft while you are presenting.
• Orient Shafts. Ensure that the cable is completely embedded in the Lower Shaft
cable guide (demonstrate this by using all four fingers of your right hand feeling
the cable as they run up the length of the Lower Shaft) and that excess cable is
not protruding between the Lower and Upper shafts. Place the Coil on the
ground and gently hold in position using a foot. When orienting the shafts
ensure the Coil is facing forward on the Lower Shaft and the Handle is facing
forward on the Upper shaft.
• Unlock Lower Camlock.
• Prior to connecting the shafts once again ensure that the Cable is securely in the
guide.
• Connect Shafts.
• Lock Lower Camlock.
Minelab Countermine Division
Safety through Excellence
7
•
Fourteen
•
•
•
F1A4 Operator Instructor Notes and Syllabus
Secure Grommet. Show both Grommets and explain the reason for their
existence (reduces stress on cable) and ability to shaft or hip mount the Control
Box. Stress the importance of the selected Grommet being properly locked into
the Keyway opening located at the top of the Upper shaft.
Unlock Upper Camlock.
Insert Armrest. Explain the correct orientation needed to ensure the cable does
not interfere with the insertion of the Armrest. Demonstrate how the Armrest can
be adjusted.
Lock Upper Camlock. Conduct final check to ensure Grommet is correctly
located.
Fifteen
Present to the students the difference in ‘hip mounting’ the Control Box by using the
Lower Grommet on the Coil cable. Follow the same procedure for ‘shaft mounting’ the
Control Box as discussed above.
Sixteen
Battery Installation.
Using the 4 ‘D’ Cell Batteries demonstrate the correct procedure for inserting batteries.
Note the following:
• Control Box should be placed in the Compact bag when fitting/removing
batteries (stops dirt and debris from getting on Control Box).
• The batteries should be inserted from the centre outwards in accordance with
the Battery Map.
• The batteries should be gently placed inside the Battery Carrier and not forced.
• The negative end (flat end) of the battery should be inserted first.
• There is no need to remove the Battery Carrier from the Control Box when
inserting batteries.
• Demonstrate the ease with which to lock the Battery Lid Clips into place (they
should not be forced).
Seventeen
Connection of the Control Box to the Upper shaft.
Demonstrate the correct attachment of the Control Box to the Upper shaft ensuring that
the Locking Pin is turned all the way to the stop.
Eighteen
Connection of the Coil Cable and Earset to Control Box.
Connect the Cable Connector and Earset to the Control Box ensuring:
• Both connectors ‘click’ into the locked position.
• Ensure both Cable Connectors are held by their base when connecting and
disconnecting.
Once assembled, adjustments can be made to the handle to ensure the weight of
the detector is balanced evenly as the detector is swept from side to side.
Minelab Countermine Division
Safety through Excellence
8
Nineteen
F1A4 Operator Instructor Notes and Syllabus
Disassembly.
Reverse the procedure to demonstrate disassembly. While disassembling place each
component back into the Compact Bag paying particular attention to the:
• Correct location of each component as shown on the reverse side of the field
guide.
• Yellow alignment line in the base of the Compact Bag to illustrate the correct
orientation of the handle.
• Correct folding of the Upper and Lower Shaft to fit properly into the Compact Bag
(this may take several demonstrations) – Upper and Lower Shaft Camlocks are
to be locked but the Handle Camlock unlocked.
• Need to remove the batteries from the Control Box.
• Replacement of Dust Caps as required.
• Test Piece being correctly stowed into the Control Box Bag.
Have the students take turns assembling and disassembling and watch for incorrect
procedures. Alternatively, select one student to assemble the detector with the rest of
the class reporting faults as they occur. The same method can be used for
disassembly.
Twenty
QUESTIONS
Students shall be able to correctly assemble and disassemble the detector with no
faults.
Faults to check for include:
• Incorrect alignment of Shafts.
• Failure to unlock a Camlock when trying to insert or remove the Shaft or
Armrest.
• Incorrect positioning of Grommet.
• Incorrect method of inserting batteries into the Battery Carrier.
• Failure to turn the Handle Locking Pin to the locked position.
• Failure to “click” Coil Connector into the locked position.
• Incorrect folding of Shafts before placement inside the Compact Bag.
• Failure to place the Test Piece back into the Control Box Bag.
Minelab Countermine Division
Safety through Excellence
9
SLIDE
Twenty one
F1A4 Operator Instructor Notes and Syllabus
DESCRIPTION
LESSON 3 – PRINCIPLE OF OPERATION
Aim. To understand the principle of metal detection and how Multi-Period Sensing
(MPS) eliminates false alarms generated from mineralized ground.
Classroom instruction. The instructor must decide whether the content of this lesson is
applicable for the student group. The training aids required are:
Chalk board or white board.
F1A4 detectors - one per pair of students (minimum).
One set (four “D” cells) of fresh batteries.
Two different types of mineralized rock (laterite if available).
F1A4 Training PowerPoint Presentation.
The major teaching points of this lesson are as follows:
Revision.
Principle of Operation.
Multi Period Sensing.
Demonstration of Ground Balancing.
TEACHING POINTS
Revision. Nominate selected students to assemble and disassemble the F1A4 in front
of the class.
Twenty two
Twenty three
Principle of Operation.
Using the slides, explain the principle of metal detection. Emphasize:
• All detectors use the same magnetic principle to detect metal.
• The smaller the target the more difficult to obtain a response.
• Where the ground is mineralized, the false alarm can hide a minimum metal
mine.
• Conventional detectors must reduce sensitivity to combat the effects of ground.
• Reducing the sensitivity of a detector increases the risk of not detecting a
minimum metal mine.
• The F1A4 has no sensitivity adjustment as it can maintain maximum sensitivity
even when working in heavily mineralized soil.
Minelab Countermine Division
Safety through Excellence
10
Twenty four
F1A4 Operator Instructor Notes and Syllabus
Multi Period Sensing.
The F1A4 uses three channels in its electronics comprising two target channels and one
ground channel. MPS successfully and easily detects the presence of mineralized
ground and ignores its effects. MPS can be a difficult concept to explain. It is
recommended that instructors make best use of PowerPoint presentation.
MPS produces a series of wide and narrow pulses that are transmitted into the ground
from the Monoloop. Note: it is a physics law that the electromagnetic radiation will also
transmit upwards in the opposite direction. That is why there can be no metal in the
Lower Shaft assembly.
Twenty five
After each pulse, both wide and narrow, a piece of metal in the ground will be “excited”
and will return its own radiation as a decay pattern as shown.
Minelab Countermine Division
Safety through Excellence
11
F1A4 Operator Instructor Notes and Syllabus
Twenty six
Twenty
seven
If the ground is mineralized, the ground will also provide a response after each pulse
that will also decay over time. In conventional detectors, the interference from the
ground cannot be removed unless the sensitivity of the detector is decreased.
Twenty eight
Demonstration of Ground Balance.
The best method is to use a “mineralized rock” to demonstrate the false alarm as
follows (Note: a mineralized rock that the detector has not been balanced to is
required):
• Without the mineralized rock, use the Test Piece (or some minimum metal mine
fuse/firing pin) to demonstrate the soft response from the detector.
• Holding the metal target under the mineralized rock, pass both under the Coil.
The response from the mineralized rock should mask the target (this will not
happen if the target is a large piece of metal as the response to that will be
louder).
• Remove the target and pass only the mineralized rock under the Coil to show
that the response remains the same as before.
• Carry out the ground balancing procedure (do not go into detail as this is
explained in Lesson 4) – note the response from the mineralized rock
disappears.
• Pass the mineralized rock under the Coil to show there is now no response.
• Place the target under the mineralized rock and pass it under the Coil – only a
response from the target will be audible.
Note: If this demonstration is conducted inside a classroom, electrical interference from
lights, air conditioners etc may cause a warbling noise from the detector. If this
happens complete the Noise Cancel procedure to reduce/eliminate the interference. If
this does not work, the demonstration may have to be conducted outside in a location
away from electrical power sources.
Twenty nine
QUESTIONS
Students shall be able to explain the principles of metal detection and MPS technology.
Minelab Countermine Division
Safety through Excellence
12
SLIDE
Thirty
F1A4 Operator Instructor Notes and Syllabus
DESCRIPTION
LESSON 4 – OPERATION OF THE F1A4
Aim. To understand how to operate the F1A4.
Classroom instruction followed by an outdoors practical exercise with students working
in pairs locating previously buried targets in a designated area. The training aids are:
Classroom:
Chalk board or white board.
F1A4 detectors - one per pair of students (minimum).
One set (four “D” cells) of fresh batteries.
Mineralized rock (laterite if available).
F1A4 Training PowerPoint Presentation.
Outdoor Area (See layout at the end of these notes):
An outdoor area suitable for the burial of targets, confirm that the area is free of metallic
contamination, and large enough to accommodate the size of the class.
F1A4 detectors - one per pair of students.
One set (four size “D” cells) of fresh F1A4 detector.
Variety of targets (inert AP and AT mines) buried in a previously cleared area (typically
2m x 3m area).
Location disks/flags to mark detected targets.
One set (4 x ‘D’ cells) of weak batteries (to demonstrate ‘Battery Low’).
The major teaching points of this lesson are:
Revision.
Control Box Operation.
All procedures.
F1A4 Field Guide.
Pinpointing Targets –Edge Detection.
Operating Multiple Detectors.
TEACHING POINTS
Revision:
•
•
•
Select a student to explain the principle of metal detection (if applicable).
Select a student to explain MPS (if applicable).
Select a student to assemble the detector from the Compact Bag.
Minelab Countermine Division
Safety through Excellence
13
Thirty one
F1A4 Operator Instructor Notes and Syllabus
Control Box Operation.
Have the students unpack the Control Box from the bag and follow the demonstration
while looking at the Control Box.
Explain the function of each Control Box switch and button. Key points to note are:
•
•
•
•
•
•
Thirty two
The Ground Balance Switch must be held in Balance position throughout the
Ground Balance procedure.
There must be no metal under the Coil when conducting Ground Balance.
The detector must be held perfectly still when conducting Noise Cancel.
There must be no metallic objects near the Coil during Noise Cancel.
When the Battery Low alarm sounds, batteries should be immediately changed
(demonstrate ‘Battery Low’ alarm with a set of weak batteries).
The F1A4 uses a Threshold Tone that provides a very soft tone to provide a
positive indication to the operator that the detector is working correctly – the
Threshold Tone also assists the operator in distinguishing tone changes caused
by a small target.
Normal Procedures.
Using the Field Guide, demonstrate the Normal Procedures (switch on and Ground
Balance).
Key points:
• During the six seconds start up, internal diagnostic checks occur, previous
Ground Balance and Noise Cancel settings are loaded and no detection is
possible.
• When conducting Ground Balance:
o The Coil needs to be raised 10 cm from the ground.
o Each complete up and down movement should occur over 3-4 seconds.
o The Coil should be kept horizontal to the ground during the up and down
movement.
o Continue with the up and down movement until all ground interference is
removed.
o If the alleged ground interference does not reduce, it is likely that the Coil
is trying to Ground Balance a piece of metal – select another area to
Ground Balance.
o Once a Ground Balance procedure has been completed, the detector will
remember those Ground Balance settings even after it is switched off
and on again.
Thirty three
Optional Procedures.
Using the Field guide demonstrate the Optional Noise Cancel and Audio Reset
procedures:
Key points:
• Noise Cancel
o During Noise Cancel it is important to keep the detector still – during this
procedure the F1A4 electronics scans the environment over 4000
frequencies to search for and record all sources of interference – once
Minelab Countermine Division
Safety through Excellence
14
•
Thirty four
F1A4 Operator Instructor Notes and Syllabus
completed the F1A4 will select the frequency band with the least
interference.
o There must be no metallic objects near the Coil during Noise Cancel.
Audio Reset
o Field experience shows that Audio Reset is rarely required, although this
procedure can be used to “re-acquaint” an operator’s ear to the threshold
tone, especially during training.
Critical Safety Procedure.
Using the Field guide, demonstrate use of the Test Piece and Sweeping procedure.
Key Points:
•
Using the Test Piece is a critical procedure that MUST be done before any
demining is conducted and every time the detector is switched on.
•
The soft sound of the Test Piece demonstrates what the sound of a
minimum metal mine at depth will sound like.
•
When sweeping, the Coil must remain horizontal to the ground at all times.
•
When the ‘Battery Low’ alarm is heard, the detector must be switched off
immediately and fresh batteries fitted. The red LED on the Control Box front
panel flashes and the detector emits a loud oscillating tone when the charge
in the batteries drops to a predefined, low level. There is no loss of
sensitivity or capability before the LED flashes or the audible tone is heard.
Use the Field Guide, and through question and answer, review the preceding
procedures.
Thirty five
Pinpointing Targets – Sweeping
Key points:
• While sweeping the Coil it is important to keep it parallel to and at a constant
height from the ground at all times.
• Be aware to any tendency amongst the students to raise the Coil at the ends of
each sweep, this will reduce detection depth.
• Each sweep of the Coil should overlap the area covered by the previous sweep
to ensure full coverage of the area being searched.
Thirty six
Pinpointing Targets - Edge Detection.
Pinpointing with the F1A4 is very accurate due to the geometry of the Monoloop Coil.
Because detection occurs over the entire Coil surface, “edge detection” can be used.
Explain the F1A4 Coil geometry.
Key points:
• The cylindrical shaped F1A4 detection pattern remains constant at depth
therefore an operator is clearing the same amount of area at depth as he sees
on the surface (note: conventional detectors have a conical shape).
• Edge detection makes the detection of targets up against walls and fences
possible.
Minelab Countermine Division
Safety through Excellence
15
Thirty seven
F1A4 Operator Instructor Notes and Syllabus
Pinpointing Targets - Edge Detection – Pinpointing Small Targets
Key points:
• Explain to the students that when a possible target has been located continue to
sweep the Coil over the location, but reduce the size of the sweeps to more
accurately determine the position of the target.
• To further pinpoint the location, sweep the Coil across the ground and advance
forward towards the target with a half Coil diameter overlap on each sweep.
Notice when the target signal is first heard – this determines the edge of the
target area.
• Advance another sweep distance and approach the Coil from each side. Notice
when the target signal is first heard – this will indicate the side boundaries of the
target area.
Thirty eight
Pinpointing Targets - Edge Detection – Large or Multiple Targets Step 1
Note
Use the PowerPoint Presentation to explain the technique of edge detection and
mapping against multiple and large targets. Note that this will be demonstrated
in the outdoor area but should first be explained in the classroom.
When large or multiple targets are found it may be difficult to define the target by using
the crossing method as discussed in the previous slide. It is therefore recommended
that the following procedure be used to define large or multiple targets:
• Start high and pass the Coil over the target at ever decreasing heights until you
get an indication of the main centre (or centres) of the metallic mass.
Thirty nine
Pinpointing Targets - Edge Detection – Large or Multiple Targets
Step 2
•
Forty
At normal search height, move the Coil from outside the detection zone directly
towards the centre of the mass, and note where a clear detection signal is heard.
Pinpointing Targets - Edge Detection – Large or Multiple Targets
Step 3
•
Forty one
Repeat the process in Step 2 at small intervals around the whole target to
provide an outline of the shape of the target.
Pinpointing Targets - Edge Detection – Large or Multiple Targets
Step 4
•
Listen for indications of tone pitch. This may indicate multiple targets or booby
traps.
Minelab Countermine Division
Safety through Excellence
16
Forty two
Detector Tones
•
•
Forty three
F1A4 Operator Instructor Notes and Syllabus
Threshold Tone. A low volume continuous tone indicating correct operation of
the detector.
Target Tone. Abrupt variation to the volume and pitch.
Operating Multiple Detectors
Key points:
• When two or more F1A4 detectors are operating in close proximity it is
necessary to automatically tune each unit via the Noise Cancel procedure to set
the operating frequencies so that signals do not interfere with each other.
• To set up multiple detectors it is necessary to adhere to the following procedure:
o Turn ‘Detector 1’ On, and switch to Search. Wait for the end of the Startup tone.
o With ‘Detector 1’ operational, position ‘Detector 2’ two metres away and turn
it On. Wait for the end of the start-up tones and then perform a Noise
Cancel procedure. Wait 70 seconds for the Noise Cancel to end with the
four ‘beeps’.
o With ‘Detector 1’ and ‘Detector 2’ both operational, position ‘Detector 3’ two
metres away and turn it On. Wait for the end of the start-up tones and then
perform the Noise Cancel procedure. Wait 70 seconds for the Noise
Cancel to end with the four ‘beeps’.
o Continue the above procedure if more that three detectors are to be used in
close proximity.
• The recommended minimum operating distance between units is three metres,
but if interference does result it will be necessary to limit the number of detectors
in use or increase the distance between units. SOP Safety distances rather than
interference distance normally dictate the distance between operational
detectors.
Forty four
QUESTIONS
Outdoor Area. At the completion of the classroom lessons move to the outdoor
training area previously prepared. Provide practical demonstrations of all of the
procedures contained in the lesson. Also demonstrate edge detection. Note: by
selecting different targets, demonstrate how a different tone is produced for each target.
Often, different coins (containing different metals) are the best way to demonstrate this.
Students shall be able to explain all operating procedures.
Students shall be able to locate and identify the approximate size and depth of buried
targets. Students shall use correct sweeping methods to pinpoint the targets.
Minelab Countermine Division
Safety through Excellence
17
SLIDE
Forty five
F1A4 Operator Instructor Notes and Syllabus
DESCRIPTION
LESSON 5 – OPERATOR MAINTENANCE AND CARE
Aim. To understand how to care for and maintain the F1A4 detector.
Classroom instruction. The training aids are as follows:
F1A4 Training PowerPoint Presentation.
F1A4 detectors - one per pair of students, and one per instructor.
Clean wipe cloth, one per instructor and student.
The major teaching points of this lesson are:
Revision.
Care of the F1A4 Detector.
Replacing the Skid Plate.
TEACHING POINTS
Revision. Revise student on:
• Specifications of the equipment.
• Functions of Control Box controls.
• Description of operating procedures.
Forty six
Care of the F1A4 Detector
Discuss the points covered in the relevant PowerPoint slide. Disassembly of the
detector and its stowage in the Compact Bag is also part of this lesson.
Key Points:
• Inspect for damage before cleaning and disassembly and report faults if
required.
• Use a clean cloth and no solvents (mild soap or detergent only).
• Ensure disassembly and stowage is correct as given in Lesson 2.
• Dust Caps should be clean and placed over exposed connectors.
Forty seven
Fitting the Skid Plate
Demonstrate how to replace the Skid Plate.
Key Points:
• Place Skid Plate on ground.
• Place Coil onto Skid Plate.
• Using light foot pressure press Coil into Skid Plate (avoid excessive pressure).
• Water inside the Skid Plate will not affect sensitivity.
• The Skid Plate need not be removed for cleaning at the end of each day’s
operation unless the Coil became wet.
Minelab Countermine Division
Safety through Excellence
18
Forty eight
F1A4 Operator Instructor Notes and Syllabus
QUESTIONS
At the end of this period of instruction the student shall be able to carry out operator
care and maintenance and correctly stow the equipment in the Compact Bag and the
Transport Case.
Minelab Countermine Division
Safety through Excellence
19
F1A4 Operator Instructor Notes and Syllabus
OUTDOOR TRAINING
At the completion of the classroom instruction it is important that all students have a sufficient amount
of time to demonstrate proficiency in an outdoor environment with the F1A4. It is recommended that
this be done over two full days however depending on time available the least amount of time to be
allocated should be no less than one full day.
It is recommended that the outdoor training be conducted in purposely prepared training lanes and
that there be enough lanes for two students per lane. Each lane should be one metre wide and ten
metres long and the lanes should have a separation of at least ten metres. It is also very important
that the lanes be free from metal contamination prior to laying any training targets. Although the F1A4
is capable of cancelling the electronic influence created by another detector as close as three metres
away and still operate to its full capability, a ten metre separation between detectors is suggested and
a metal-free area to provide the best training environment. This will ensure that those students with no
experience will understand how to operate the detector and recognize its responses before needing to
deal with a complicated environment.
Training lanes should be different from each other offering a range of challenging targets. Differing
the targets in each lane allows the paired students to move between lanes during the training.
Simulated targets should represent the widest range of targets presently found in minefields around
the world and not necessarily those you anticipate will be found in your next area of operations.
While the students are practicing in their lanes you and your training staff should be moving between
each group providing feedback from your experience in the use of the F1A4.
No doubt during your training day you will stop every hour or so to allow your students to take a break.
Each time the students return from their break gather the class together and provide group instruction
on one of the following topics:
•
Ground Balance. This is always impressive. If the soil in the training area is benign, prepare
ahead of time and seek some mineralized soil from the local area or a local brick manufacturer or
distributor. Fired clay roof tiles work very well. Show the class the reaction from the F1A4 when
passed over this then conduct the Ground Balance (GROUND BALANCE) function. Repeat this
process with a target laid under the mineralized rock. It is likely that you will be asked if it is
possible to GROUND BALANCE out a metal target. The fact is that it is possible to GROUND
BALANCE a very small target in very heavily mineralized soil. Try it yourself with your mineralized
rock and an inert M14 or equivalent inert mine. It is most unlikely that bigger targets in benign soil
can be balanced out. Minelab does not advocate the drill that an operator can try to balance out a
potential target in a mine lane as proof it is actual metal. However, if a small target was Ground
Balanced then it should be obvious to an operator when the Coil is moved away from the target.
There should be an alarm from the surrounding soil because it is no longer balanced on the soil
rather on the small concealed target. Make sure there are no misunderstandings about this.
•
Test Piece Procedure. Exactly as shown in the Field Guide and the Operations Manual.
•
Pinpointing. Minelab detectors pinpoint their targets in a different way to all other detectors and if
your students have used another detector then it is important that the correct procedure for
pinpointing is taught and adopted by the students. Get used to the pinpointing procedure taught in
Lesson Four of this Training Program. When teaching the application of ‘Mapping the Target’
ensure that you and your students stop Coil movement toward the target as soon as the slightest
change is heard in the tone. Move the Coil backwards and forwards to confirm that you have
actually noted the point of tonal change. Note that point on the ground and carry out this
procedure for each of the 12 radius of a clock until you have a sound impression of the shape of
the target. If it is a circle then ask the student to pick the actual centre of the circle and dig for your
target. The more experience you and your students gain in this process the better you will become
Minelab Countermine Division
Safety through Excellence
20
F1A4 Operator Instructor Notes and Syllabus
at picking the exact centre of your target. If you have an odd shaped target it may have two
centres or be a pipe. You should still be able to pick the centre of the mass.
•
Two targets resolution. Your aim here is to show how to map two targets laid within close
proximity to each other showing the actual shape on the ground of the dual targets. Use the
pinpointing procedure mentioned above.
•
Similar looking targets but opposite tones. Use two coins that look similar but react differently
to each other. This is to demonstrate how the tones can provide some information about target
conductivity. For example the coins, although they look the same, are different in composition. In
Rwanda they use this feature to identify specific mines. A VS50 sounds much different than a
Type 72. Again it is not fool proof, but when combined with local experience it is a useful capability
for the operator.
•
Large Target. When you have a large metal target such as a metal anti-tank mine the extreme
edge of detection will appear to be very large and in fact it is a long way from the outer edge of the
target let alone the centre of it. To help you find the centre of large targets you can use the
following technique. Hold the detector by the handle at 90° to the ground and at chest height.
Lower the Coil towards the ground directly above the area you believe to be the centre of the
target. Slowly reduce the height of the Coil towards the ground until you hear the first sign of a
response in the Earset. After receiving this initial response you can then move the Coil around this
general area, keeping it at the same height, to ascertain the centre by listening for slight
fluctuations in the pitch of the tone. From these changes in pitch you will quickly ascertain where
you believe the centre of the target mass is.
•
Water. Dig a hole and fill it with water (or use a plastic bucket without a metal handle) and show
the F1A4 is not affected by operating in a wet environment. Place a target in the bottom of the
hole or under the bucket and show your students that there is no loss of sensitivity.
•
Soil sifting. The Monoloop Coil offers an excellent benefit when searching an area for a target,
which you anticipate to be fragmentation. Rest the Coil on a known clean piece of ground close to
the area to be excavated. As you remove soil from the area place that soil onto the Coil and wait
for a response. If no response occurs, brush the soil off and do it again with another sample.
When presenting this instruction make sure you have put a small piece of metal in the area to be
excavated. Initially, show the students the detector alarming on a target in the ground then
proceed to find it using this process.
Piece of wire. Have available a piece of wire that can show the students the conductivity of a
target. The wire needs to be about 60cm long and quite thin. Firstly ask the class if they believe
that a metal piece of wire will make the detector alarm, some will say yes. Holding the wire out
straight, pass it over the Coil. It will not make a sound. Join the wire together into a figure of eight
and pass it across the Coil again. It will now alarm with a moderate volume level. Unwind it from
the figure of eight and turn it into one circle and pass that across the Coil. This will provide you
with the strongest response. Now turn the circular piece of wire at 90 degrees to the Coil and note
that the response is weaker. This demonstration shows that a given mass of metal will have
differing levels of detection depending on its shape. Damaged or corroded mines may detect
differently depending on the extent of damage or corrosion, or the way they lie in the ground.
Minelab Countermine Division
Safety through Excellence
21
F1A4 Operator Instructor Notes and Syllabus
OPERATOR CONFIRMATION EXERCISE
The Operator Confirmation Exercise is used to confirm all training objectives for the course.
Instructors can decide to what degree the exercise can take. For example, it can include a theory
evaluation with oral questions being given to the student. However, as a minimum each operator must
demonstrate proficiency in the use of the detector by entering a previously prepared test area.
For an operator to be deemed proficient, all targets within the test area must be detected. If a student
fails to detect all targets, he should be permitted to attempt the Confirmation Exercise as many times
as necessary in order to pass.
An example of an Operator Confirmation Exercise Sheet is included at the end of these Instructor Notes.
Equipment
•
•
Cleared evaluation area – constructed as one mine lane (1m wide and 5m long).
Targets to bury in the test area as described below – if inert mines are not available, F1A4 Test
Pieces buried at varying depths will suffice.
Training
As each student comes to be evaluated, make then go through the normal start-up procedures and
also Ground Balance on your mineralized rock, brick or roof tile. They should then Ground Balance
the detector as close as possible to the evaluation area. Earsets must be worn.
•
Sweeping drill. Ensure the students sweep with the Coil parallel to the ground, and as close as
possible to the ground (observe local procedures) and that they overlap the front, rear and sides of
the area by one half Coil width (100mm/4ins). In addition as they progress up the mine lane, they
should advance the Coil one-half Coil width (100mm/4ins). When a target is initially detected,
always sweep beyond the sound of the target to cleared ground before commencing pinpointing
procedures.
Minelab Countermine Division
Safety through Excellence
22
F1A4 Operator Instructor Notes and Syllabus
As a minimum, set up the lane as follows:
E
D
C
B
A
START POINT
•
A - Medium Size Target (PMA-2 det). A good strong tone so that they can demonstrate solid
pinpointing technique.
•
B - Large and Small Target (PMA-2 and M14). Here they must demonstrate that they can
actually detect two targets. Be careful to ensure that the students do not miss the smaller
target by only recognizing a response from the larger target. The targets must be laid so that
the small target can be heard. It is also a teaching point that the obvious target normally draws
attention and an operator suddenly focuses on it forgetting it could be booby-trapped with a
second mine. They must continue with their sweeping drill before investigating the target.
Minelab Countermine Division
Safety through Excellence
23
F1A4 Operator Instructor Notes and Syllabus
•
C - Three similar targets in star shape (three Test Pieces). This brings out the lesson that
they must sweep forward to clear ground. Some will note the first two targets and forget the
upper third one. The good operators will actually be able to state that there are three targets.
That is an excellent response but all you should seek from this exercise is that the student can
accurately map the “suspicious area” that they will investigate by prodding.
•
D - One large target right on the edge of the lane.
conveniently located in the middle of lanes.
•
E - one small target (single Test Piece). Make as difficult as you want, but achievable.
To prove that not all mines are
The following is a suggested evaluation standard using inert mines – targets should be pinpointed to
within 10 cm of centre:
• T72a at 15cm (or similar minimum metal mine buried at maximum detection depth).
• PMN or equivalent at 20cm.
• Small different targets 10-15 cm apart.
• Large metal anti-tank mine at 30 cm.
• 2 small identical targets 7-10 cm apart.
• Small anti-personnel mine near metal anti-tank.
F1A4 OPERATOR PRACTICAL EVALUATION
Name
1
Minelab Countermine Division
2
3
4
5
6
7
8
9
10
Remarks
Safety through Excellence
24
F1A4 Operator Instructor Notes and Syllabus
This is to certify that
MINELAB F1A4 METAL MINE
DETECTOR
MINELAB ELECTRONICS PTY LTD
Signed …………………
Minelab Countermine Division
Dated: …………………
Safety through Excellence