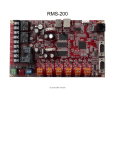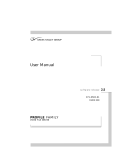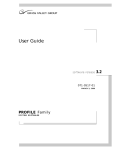
1
PRC1000 – User Manual SimpleComTools, LLC User Manual & Command Reference Guide prc1000 Programmable Relay Controller Updated: April 2011 SimpleComTools, LLC 1 PRC1000 – User Manual SimpleComTools, LLC Copyright © 2006-2011 SimpleComTools, LLC All rights reserved The information in this document is subject to change without notice. The statements, configurations, technical data, and recommendations in this document are believed to be accurate and reliable, but are presented without express or implied warranty. Users must take full responsibility for their applications of any products specified in this document. The information in this document is proprietary to SimpleComTools, LLC. Trademarks SimpleComTools, the SimpleComTools logo, PRC1000, and PRC1000 logos are all trademarks of Simple Com Tools, LLC. Statement of conditions In the interest of improving internal design, operational function, and/or reliability, SimpleComTools, LLC reserves the right to make changes to the products described in this document without notice. SimpleComTools, LLC does not assume any liability that may occur due to the use or application of the product(s) or circuit layout(s) described herein. USA requirements only Federal Communications Commission (FCC) Compliance Notice: Radio Frequency Notice This device complies with Part 15 of the FCC Rules. Operation is subject to the following two conditions: This device may not cause harmful interference. This device must accept any interference received, including interference that may cause undesired operation. Note: This equipment has been tested and found to comply with the limits for a Class B digital device, pursuant to Part 15 of the FCC Rules. These limits are designed to provide reasonable protection against harmful interference in a residential installation. This equipment generates, uses and can radiate radio frequency energy and, if not installed and used in accordance with the instructions, may cause harmful interference to radio communications. However, there is no guarantee that interference will not occur in a particular installation. If this equipment does cause harmful interference to radio or television reception, which can be determined by turning the equipment off and on, the user is encouraged to try to correct the interference by one or more of the following measures: Reorient or relocate the receiving antenna. Increase the separation between the equipment and receiver. Connect the equipment into an outlet on a circuit different from that to which the receiver is connected. Consult the dealer or an experienced radio/TV technician for help. European requirements only EN 55 022 statement This is to certify that the SimpleComTools PRC1000 is shielded against the generation of radio interference in accordance with the application of Council Directive 89/336/EEC, Article 4a. Conformity is declared by the application of EN 55 022 Class B (CISPR 22). Canada requirements only Canadian Department of Communications Radio Interference Regulations This digital apparatus does not exceed the Class B limits for radio-noise emissions from digital apparatus as set out in the Radio Interference Regulations of the Canadian Department of Communications. Règlement sur le brouillage radioélectrique du ministère des Communications Cet appareil numérique respecte les limites de bruits radioélectriques visant les appareils numériques de classe B prescrites dans le Règlement sur le brouillage radioélectrique du ministère des Communications du Canada. SimpleComTools, LLC 2 PRC1000 – User Manual SimpleComTools, LLC Table of Contents Page INTRODUCTION . . . . . . . . . . . . . . . . . . . . . . . . . . . . . . . . . . . . . . . . . . . . . . . . . . . . . 4 BASICS OF OPERATION . . . . . . . . . . . . . . . . . . . . . . . . . . . . . . . . . . . . . . . . . . . . . . . . 6 GETTING STARTED . . . . . . . . . . . . . . . . . . . . . . . . . . . . . . . . . . . . . . . . . . . . . . . . . . . 7 USING AT COMMANDS . . . . . . . . . . . . . . . . . . . . . . . . . . . . . . . . . . . . . . . . . . . . . . . . 12 WIRING AND SETUP EXAMPLES. . . . . . . . . . . . . . . . . . . . . . . . . . . . . . . . . . . . . . . . . 15 APPLICATION EXAMPLES. . . . . . . . . . . . . . . . . . . . . . . . . . . . . . . . . . . . . . . . . . . . . . . 17 SimpleComTools, LLC 3 PRC1000 – User Manual SimpleComTools, LLC 1 Introduction Preface The PRC1000 Programmable Relay Controller is an extremely low-power, user programmable dual mode/dual relay controller providing complete power control for two individual electronic devices. Equipped with two separate SPDT (Single Pole Double Throw) relays, individually configurable schedule timers and serial data stream triggers, the PRC1000 provides for either manual or automatic operation of any electronic equipment. Rugged Design While there are many types of relay controllers on the market, the PRC1000 is truly unique in both its design and function. Housed in a safe, rugged enclosure of 18 gauge cold-rolled steel, the PRC1000 is tough enough to tolerate the most rugged installation requirements. Its low profile housing and integrated mounting solution make it easy to install into any telecom closet, remote cabinet, or solar battery enclosure. Low Power Applications Designed specifically for reducing the power consumption of remote power systems, the PRC1000 uses less power than any other programmable relay controller available on the market. By utilizing latching relays and specially designed micro-power logic, the PRC1000 helps reduce the average power consumption of any remote power or charging system. With a typical draw of less than 625uA (microAmps), and a sleeping power draw of less than 25uA, the PRC1000 can both reduce the size photovoltaic panel requirements and lengthen the battery life of any solar installation. Flexible Applications Each of the PRC1000 relays is rated at 1 Amp at 120 VAC and 4 Amps at 30VDC. That makes the PRC1000 a perfect fit for a wide variety of remote power control applications, including: Airport and heliport lighting systems Street lighting Access control systems Railway signaling Alarm Systems Remote data collection systems Cathodic protection systems Remote sensors Environmental Monitoring Equipment Telecommunications and radio equipment Lighted advertising signs Telemetry/SCADA systems Marine lighting systems Traffic management systems Meteorological stations Tower Lighting and Control Systems Seismic measurement equipment TV and satellite transmitters Solar powered artistic projects Video recording equipment SimpleComTools, LLC 4 PRC1000 – User Manual SimpleComTools, LLC Hardware Dimensions The PRC1000 is approximately 4.5” x 2.35” x 1” in size. Exact dimensions are as follows: Serial Side View Top View Interfaces The PRC1000 provides the following hardware interfaces: (2) Relay Outputs - Rated at 1 Amp at 120 VAC and 4 Amps at 30VDC (1) Power interface - 5-20VDC Terminal Block View SimpleComTools, LLC 5 PRC1000 – User Manual SimpleComTools, LLC 2 Basics of Operation The PRC1000 Programmable Relay Controller is a low-power, user programmable dual mode/dual relay controller providing complete power control for two individual electronic devices. Equipped with two isolated SPDT (Single Pole Double Throw) relays, individually configurable schedule timers and serial data stream triggers, the PRC1000 provides for either manual or automatic operation of any electronic equipment. Scheduled Events The PRC1000 allows for scheduled control of power to (2) individual electronic devices. With an on-board Real-Time Clock (RTC) and advanced configuration logic, the PRC1000 lets you schedule connected electronic equipment to be turned ON or OFF on a multitude of schedule patterns. Each relay also has its own schedule logic, so you may choose to have completely different rules for each interfaces. Examples of schedule patterns are shown below. The exact commands for configuring the device are in Sections 3 & 4. Scheduled Event Type Daily Events Description Enable activation of a device at any hour of the day Keep the device activated for any length of time (hours or minutes) Repeat the event any number of times during the day Weekly Events Enable activation of a device any one day or multiple days of the week Enable activation on weekdays, weekends, or any selection of days Select alternate weeks by use the Monthly pattern option Monthly Events Enable activation of a device on any day or days of the month Enable activation on regular intervals or sporadic days st th th th th, Examples include the 1 , 7 , 14 , or 15 and 30 or any variation Command Line Control With support for ON and OFF „alias‟ commands, it is possible to manually control the operation of the relays using plain English commands. This allows for control of the operation of the relays by either a user or a connected machine. By connecting the PRC1000 to a serial-to-Ethernet device server or terminal server, the PRC1000 now becomes an IP or Internet controllable relay. By connecting the PRC1000 to a machine, the PRC1000 becomes capable of controlling any device via the receipt of any serial data string from a machine. Lower Power Consumption The most impressive feature of the PRC1000 has to be its low power consumption. While relays are often used to eliminate unnecessary power consumption or reduce the burden on battery powered systems, the PRC1000 takes that application to new levels. With its advanced power logic and controllable sleep function, the PRC1000 is virtually indiscernible in terms of power usage. With relay trigger events rated at 66 mA for approximately 5mS, latching relays to eliminate continuous power draw, and a sleeping power draw of less than 25uA, the PRC1000 can both reduce the size photovoltaic panel requirements and lengthen the battery life of any solar installation SimpleComTools, LLC 6 PRC1000 – User Manual SimpleComTools, LLC 3 Getting Started Before you begin This guide is intended for qualified service personnel who are installing the PRC1000 for the first time or who need to install a switch, gauge, modem, or other device to an existing PRC1000. However, before you install anything related to the PRC1000, make sure that the proper cables have been selected and/or the required network cabling has been installed using standard cable system practices. Installation Requirements and Instructions Mounting: The PRC1000 has (4) slotted mounting holes and (2) oval mounting holes for easy mounting and installation. You can use either wood or sheet metal screens, hooks, or other common fasteners to mount or hang the device. Power: The PRC1000 requires either a 110-12VDC-power adapter or 9-30VDC power source. The power interface is a standard 2-wire (+ and -) terminal strip. Disconnect the 2-lead terminal strip insert plug from the PRC1000 power interface. With a power adapter or wire that is not yet connected to a power supply, insert the positive wire into the left (+) side access hole of the insert plug and tighten the retaining screw. Next, insert the ground wire into the right (-) side access hole of the terminal strip and tighten the second retaining screw. Plug the terminal strip plug into the PRC1000 power interface. Finally, connect the other end of the wire or the power supply to your power source. Do NOT insert live power leads directly into either of the Relay inputs, as this may severely damage the PRC1000. Failure to comply with this warning will void any and all existing product warranties or service agreements. Environment: SimpleComTools, LLC The PRC1000 is NOT waterproof or weatherproof. Installation should include an enclosure to protect electronics. Preferably a NMEA-4 type enclosure to ensure protection from water and humidity. 7 PRC1000 – User Manual SimpleComTools, LLC PRC1000 Setup and Configuration Setup and configuration of the PRC can be done in either two ways: - using a conventional terminal program and AT Commands - using the MS Windows based PRC1000 Configuration Utility Communicating to the PRC1000 Communicating with the PRC1000 is done thru a DB9 male connector (RS232). The port is configured as a DCE (terminal) port, therefore, in order to connect to the PRCL1000 from a PC, you use a standard serial cable. The serial port is set by default at a baud rate of 9600,8N1. No flow control is used as this is a 3 wire device (TX, RX and GND). (All flow control signals are “looped-back” for your convenience). Connection Steps Step 1: Connect your PC to the PRC1000 using any standard RS232 serial cable. The PRC1000 serial port is configured as a DCE, so there is no need for a null adapter. Any standard serial cable will work just fine. RS-232 Step 2: Launch the PRC1000 Configuration Utility. Select the correct COM Port on your PC from the Connection Type drop down menu. You will be able to view the status of the connection in the Status window. Step 3: ® ® Once successfully connected, you can begin to configure the device using either the Microsoft Windows Configuration Utility or the AT Command interface. ® ® PRC1000 Microsoft Windows Configuration Utility: This interface lets you configure the device date and time, as well as the operation schedule for the relays. start/stop time; length of operation; and daily, weekly and monthly events. Events are programmed using simple drop-down menus and text input boxes. The advanced interface is accessed via the VIEW menu. This interface lets you configure the date and time and schedule settings manually. It also allows you to configure the sleep timer settings, as well as userdefinable alias commands to control both ON and OFF operations. The alias commands allow for control of the operation of the relays by either a user or a connected machine. By connecting the PRC1000 to a serial-to-Ethernet device server, the PRC1000 becomes an IP or Internet controllable relay. By connecting the PRC1000 to a machine, the PRC1000 becomes capable of controlling the power to any device via the receipt of any serial data string. AT Commands: Finally, the configuration utility provides a simple terminal interface that allows for manual configuration of the PRC1000 using conventional AT Commands. SimpleComTools, LLC 8 PRC1000 – User Manual SimpleComTools, LLC Configuration Utility This section will assist you in using the PRC1000 Configuration Utility to do the following: Setting the Time and Date Setting the Start Time and Duration Setting the Schedule Setting the Sleep timer Setting commands to change relay state Setting the duration for forced events Utility Layout The utility is broken down into (3) sections; Parameters, Notes, and Command buttons. Here are the basic button functions: PARAMETERS Shows the available values, the current setting, and new values to be changed NOTES Provides explanation of the parameter and what setting options exist CLEAR ALL Clears the New Value area. CURRENT > NEW Copies current settings to the New Value area. WRITE Sends all changes shown in yellow to the PRC1000. REFRESH Updates the Current Value display. Reading and making changes to the device Reading the values in the attached device is done under the Current Value side. To refresh the reading simply select the REFRESH button. Making changes to the device is done by entering the change in the New Value side. Changes can be entered use text or by selecting items from the drop-down menu. After entering a new value you must hit ENTER. The unwritten changes will be shown in yellow. Write changes using the Write button. Clearing existing values In the case of numeric values, clearing is simply done by entering a zero. In the case of text values, enter the word „CLR‟. Writing zeros or CLR to the device will clear the existing value from the device. Saving the settings as a template The PRC1000 configuration utility provides the ability to save a device‟s settings for future use or application to another device. That topic is covered in the next section. SimpleComTools, LLC 9 PRC1000 – User Manual SimpleComTools, LLC Using Templates In order to save a device configuration for future use or to make copies of a working device, the configuration utility provides a TEMPLATE function. Here are the basic options: Saving a configuration 1. Select the Current >> New button to copy the current configuration to the New Value side. 2. Select the File/Template/Save and give the file a name and save it with a .tpl extension. Opening a configuration 1. Select File/Template/Open and select the configuration file you want to use. When opened, the settings will populate the New Value side. 2. Edit values if appropriate. 3. Select WRITE to send changes to the device. Configuration Utility (AT Commands) This section will assist you in using the AT Command interface to configure any and all device settings. (Refer to Section 4 for more information on using AT Commands) SimpleComTools, LLC 10 PRC1000 – User Manual SimpleComTools, LLC Configuration Utility Register Descriptions Parameter Name Description General Settings Time Sets the clock time for the device. Format is HH:MM. Date Sets the calendar date for the device. Format is DOW/MM/DD/YYYY. Sleep Mode Timer Sets the number of minutes before going into Sleep mode. Relay Settings Relay „x‟ – Status Displays the current state of RELAY 1. (Value = ON or OFF) Relay „x‟ – Schedule On Time The time of day that RELAY „x‟ will be activated. Relay „x‟ – On Duration The length of time that RELAY „x‟ will remain activated. Relay „x‟ – Repeat Schedule The length of time between RELAY „x‟ activation events within a 24 hour period. Type of recurrence pattern for the start and duration of RELAY „x‟. Options are as follows: (Daily) - Enter D (Weekly) - Enter W,ddd (Monthly) - Enter M,xxx Relay „x‟ – Pattern ddd = A comma separated list of days of the week Valid values are SUN, MON, TUE, WED, THU, FRI, SAT Example: D,MON,WED,FRI xxx = A comma separated list of days of the month. Valid values are 1-31 Example: M,1,5,10,15 Relay „x‟ – Forced On Duration The length of time that RELAY „x‟ will remain active when forced on by command. Relay „x‟ – Forced On „Alias‟ The „plain English‟ command to be used to activate RELAY „x‟. Accepts any alpha-numeric value up to 20 characters. Relay „x‟ – Forced Off „Alias‟ The „plain English‟ command to be used to de-activate RELAY „x‟. Accepts any alpha-numeric value up to 20 characters. SimpleComTools, LLC 11 PRC1000 – User Manual SimpleComTools, LLC 4 Using ‘AT’ Commands The PRC1000 AT Commands are a format similar to traditional Hayes-Compatible AT Commands, but because the device is not a modem, the similarities are modest. In order to configure the device using AT Commands, follow these directions: Step 1: Connect your PC to the PRC1000 RS232 interface using a standard RS232 cable. The PRC1000 interface is a DCE port, so a standard serial cable is all you need.. Step 2: Open a connection using any Terminal program, such as HyperTerminal or TeraTerm. The default setup for the port is 9600, 8, None, and 1. Step 3: Once connected, your should hit the RETURN or ENTER key. That will bring up the device command prompt. Step 4: Once you have successfully gained access to the command prompt, you can view or edit any of the PRC1000 application registers. To view ALL the current register settings, use the AT command AT&V. SimpleComTools, LLC 12 RS-232 PRC1000 – User Manual SimpleComTools, LLC Screenshot of AT Command interface within the PRC100 Configuration Utility Screenshot of AT Command interface using HyperTerminal SimpleComTools, LLC 13 PRC1000 – User Manual SimpleComTools, LLC Configuration Using AT Commands All of the listed device registers being with a * character. When sending an AT Command you must include the * character after the letters AT. Example: setting the time would be AT*TIME=HH:MM. AT Command Description and Example Commands General Settings *TIME Sets the clock time for the device. Example: AT*TIME=HH:MM *DATE Sets the calendar date for the device. Format is DOW/MM/DD/YYYY. Example: AT*DATE=DOW/MM/DD/YY *SLEEPMODE Sets the number of minutes before going into Sleep mode. Valid values are 0-255. Example: AT*SLEEPMODE=5 Relay Settings *RxONTIME *RxDURATION *RxREPEAT The time of day that RELAY „x‟ will be activated. Example: AT*R1ONTIME=HH:MM The length of time that RELAY „x‟ will remain activated. Example: AT*R1DURATION=HH:MM:SS The length of time between RELAY „x‟ activation events within a 24 hour period. Example: AT*R1REPEAT=HH:MM Type of recurrence pattern for the start and duration of RELAY „x‟. Options are as follows: (Daily) Enter D (Weekly) Enter W,ddd (Monthly) Enter M,xxx *RxPATTERN ddd = A comma separated list of days of the week Valid values are SUN, MON, TUE, WED, THU, FRI, SAT Example: D,MON,WED,FRI xxx = A comma separated list of days of the month. Valid values are 1-31 Example: M,1,5,10,15 *RxON The length of time that RELAY „x‟ will remain activated when forced ON by command. Example: AT*R1ON=HH:MM *RxOFF The length of time that RELAY „x‟ will remain inactive when forced OFF by command. Example: AT*R1OFF=HH:MM *RxONALIAS The „plain English‟ command to be used to activate RELAY „x‟. Example: AT*R1ONALIAS=relay1on *RxOFFALIAS The „plain English‟ command to be used to de-activate RELAY „x‟. Example: AT*R2OFFALIAS=relay2off NOTE: Where there is an ‘x’ in the command shown above, enter the value of the relay you want to configure. Example: AT*R1ONTIME=08:00; AT*R2OFFALIAS=relay2off SimpleComTools, LLC 14 PRC1000 – User Manual SimpleComTools, LLC 5 Wiring and setup examples Wiring your equipment to the PRC1000 is easy. Connect the lead from the power source to the COMMON terminal on either of the two relays. Then connect the power lead to your equipment to either the Normally Open or Normally Closed terminal side of that same relay. Which to choose depends on your application. Here’s how that works…. The PRC1000 has two isolated SPDT (Single Pole Double Throw) relays. That means that when one side of the relay is engaged (closed), the other side will be disengaged (open). The PRC1000 operating system refers to the state where the Normally Open side is engaged as being in the „ON‟ state. (ON is referring to your equipment being powered ON.) Choosing sides…. When choosing between the Normally Open (NO) and Normally Closed (NC) side of the relay, you have to consider whether the equipment you are controlling will be regularly OFF and you want to power it ON for a brief period of time, or regularly ON and needs to be powered OFF for a specific period of time. If you want to have equipment that is regularly OFF and you power it ON at a specific time for a specific duration, you would connect the source power lead to the relay COMMON and power lead wire to the device to the Normally Open side of the relay. Being normally OPEN, the power circuit to the device would be broken and thus the device would be OFF. When the clock reaches the time set in the ON Time register, the relay will engage (close), the circuit will complete, and the power to the device will be supplied. The device will then turn on and stay on for the length of time set in the ON Duration register. When that period expires, the relay will disengage, the circuit will open, and the power to the device will be cut off. The device will then power OFF, and stay off until the clock reaches the On Time again – or some other „ON‟ event specified in the Repeat Schedule and Repeat Pattern registers takes place. Diagram showing how to connect equipment that is normally OFF to be power ON for a period of time Battery PRC1000 PRC1000 POS (+) NEG (-) Relay 1 NO C NC Relay 2 NO C + - Equipment SimpleComTools, LLC 15 NC PWR + NO PRC1000 – User Manual SimpleComTools, LLC Using the PRC1000 for power-cycling equipment As previously mentioned, the PRC1000 can be used to control equipment that is regularly OFF that you want to power it ON for a brief period of time, or regularly ON and needs to be powered OFF for a specific period of time. In this second scenario, the duration for the OFF period of time can be short enough to simply act as a power-cycle for the equipment if you like. Here’s how that works…. When the PRC1000 relay is in the ON state, the Normally Open side of the relay is engaged and your equipment is powered ON. In order to have the power drop (cycle) for a brief period of time (say for example one minute), you have two choices: 1) Connect your equipment to the Normally Open contact and set the On Duration for 23 hrs and 59 minutes …or… 2) Connect your equipment to the Normally Closed contact and set the On Duration for one minute Here’s an example using method #2 to power-cycle equipment for 1-minute at a specific time of day. Step 1: Connect the GROUND (negative) lead from the power source to the equipment ground. Step 2: Connect the POWER (positive) lead from the power source to the COMMON interfaces on Relays 1 and 2. Step 3: Connect the Normally Open (NC) side of the Relays to the positive lead of the electronic equipment. Step 4: Set the PRC1000 for the time you want the power-cycle event to take place. (In this case, 0100 or 1:00 AM) AT*RnONTIME=01:00 (1:00 AM) (Value is in military time in the form HH:MM) Step 5: Set the PRC1000 for the length of time you want the equipment to be powered off: (In this case, 1 minute) AT*RnONDURATION=00:01:00 (1 minute) (Value is in military time in the form HH:MM:SS) Diagram showing how to connect equipment that is normally ON to be power OFF for a period of time Battery PRC1000 PRC1000 POS (+) NEG (-) Relay 1 NO C Relay 2 NC + Data Logger SimpleComTools, LLC 16 NO - C PWR NC + + - NO Radio PRC1000 – User Manual SimpleComTools, LLC 6 Application examples Sample Applications The PRC1000 can be used to control a variety of electronic equipment. The following are some examples of how to use the PRC1000 in real world applications. Control power to lighting system Control electronic door locks Control power consumption by a data logger and wireless/cellular radio modem Manually power-cycle equipment via wireless/cellular radio modem Here is a practical example of how the PRC1000 can be used to control power on solar system 1 Solar panel converts sunlight into DC electricity to charge the battery. 2 DC electricity is fed to the battery via a solar regulator which ensures the battery is charged properly and not damaged. 3 Unlike conventional car batteries which are designed to provide a large amount of current for a short amount of time, deep cycle batteries are designed to be discharged over a long period of time and recharged thousands of times. 4 PRC1000 controls the power being supplied to the connected radio modem and data logger. Draw from PRC1000 on battery is ~25uA when in sleep mode. SimpleComTools, LLC 17 PRC1000 – User Manual SimpleComTools, LLC Here is a practical example of how the PRC1000 can be used to control power to remote equipment SimpleComTools, LLC 18