1
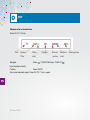
DE – Betriebsanleitung
FR – Mode d‘emploi
IT – Istruzioni per l’uso
EN – Instruction manual
Fusion Z-7799
DE
FR
IT
EN
EN
2 Fusion Z-7799
Dear customer
Finally arrived at YA! Take a seat and enjoy the world of YA! You will see: It is a wonderfull place
to be.
The appliance must only be used for the intended purpose according to these instructions.
Keep the instructions carefully and pass them on to further users.
The manufacturer reserves the right to change design, accessories or equipment without prior
notice.
EN
3 Fusion Z-7799
Safety instructions
Carefully read the instructions before use. Keep the instructions, if you need to read it again
or if you want to pass on the appliance.
■ The appliance must only be connected to a voltage supply in accordance with the rating label on
the supplied adapter. Voltage supply information to be found on the label of the adapter.
■ This appliance is not intended for use by persons (including children) with reduced physical,
sensory or mental capabilities, or lack of experience and knowledge, unless they have been
given supervision or instruction concerning use of the appliance by a person responsible for
their safety. Children should be supervised to ensure that they do not play with the appliance.
■ Do not allow power cable to hang down within easy reach.
■ Keep children away from packing material (e.g. plastic bags).
■ Disconnect the mains plug in case of faults during use, before cleaning or moving the appliance
from place to place, after use.
■ Never pull the plug out of the socket by the cable or with wet hands. Don’t pull the cable
EN
over sharp edges. Don’t jam it. Don’t bend it.
■ If the supply cable is damaged, it must be replaced by the manufacturer or its service agent or
similarly qualified person in order to avoid hazard.
■ Regularly check if the mains cable / appliance / extension lead is defective.
■ Only trained personnel should repair electrical appliances. Unskilled repairs can cause
considerable danger to the user.
■ Do not use attachments not recommended by the manufacturer.
■ Never put the appliance / cable on hot surfaces or near open flames.
4 Fusion Z-7799
Safety instructions
■ Never subject the appliance, power cable or plug to moisture, water or any other liquid.
■ Never attempt to open the casing of the appliance.
■ Position the appliance so that it has sufficient ventilation. Never block the ventilation openings.
Ensure that no objects or liquids enter the ventilation openings.
■ The equipment contains a laser radiating laser rays according to the limit of laser
product of class 1.
■ Batteries must not be exposed to excessive heat such a direct sunlight, fire and the like.
■ If the battery leaks, remove it, clean the contacts of the appliance and wash your hands.
■ If you do not use the appliance for a long time, remove the battery.
■ Where the mains plug is used as the disconnect device, it shall remain readily operable.
■ Listening with headphones for long periods at full volume may cause damage to the hearing.
■ Switch the appliance off and pull the plug out of the mains when it is not in use. Don’t pull the cable
around the appliance. The appliance is only cut from the mains if the plug is pulled out!
WARNING: Do not use this appliance near bathtubs, showers, basins or
EN
other vessels containing water.
5 Fusion Z-7799
Safety instructions
Electrostatic precautions:
An electrostatic discharge at any point of the device can lead to a functional failure, or to turn off
the device. This is an intentional response and serves to protect the equipment. If this happens,
please unplug, wait several seconds and then plug the device back on line. Thus, the device is
reset to its normal state.
WARNING
There is a danger of explosion if batteries are exchanged improperly. Only replace
batteries with ones of the same type.
■ Do not put any container (f. ex. vases, etc.) containing liquids on or in the surroundings
of the appliance.
■ Subject to technical modifications. No liability for typographical errors.
EN
6 Fusion Z-7799
Key to symbols
WARNING
This symbol and WARNING heading is used when failure to follow or non compliancy with the
operating and work instructions as well as with prescribed work procedures and the like, may
cause injuries or fatal accidents.
CAUTION
This symbol and CAUTION heading is used when failure to follow or non compliancy with the
operating and work instructions as well as with prescribed work procedures and the like, may
cause damage to the appliance.
NOTE
This symbol and the heading NOTE apply to technical requirements that the user must pay
attention to during the activities.
EN
7 Fusion Z-7799
Proper use of the appliance
The appliance is designed for household use and not for industrial operation. Any other use is
improper and could endanger persons.
EN
Improper use of the appliance
No warranty for any possible damage can be accepted if the appliance is improperly used,
incorrectly operated or repaired unprofessionally. In such a case, any warranty claim is void.
8 Fusion Z-7799
Disposal of old electrical appliances
This product shall not be disposed off in the EC/Switzerland with the household waste.
Before disposal, remove the battery. Make worn out appliances unusable. Pull out the
mains plug and sever the cable. Return electrical appliances to a shop of sale or dispose
of product and battery separately in accordance with local regulations. The crossed out
“wheeled bin” symbol on the product reminds you of your obligation, that when you
dispose of the appliance, it must be separately collected. Consumers should contact
their local authority or retailer for information concerning the correct disposal of their old
appliance.
EN
9 Fusion Z-7799
Scope of delivery
1 x Fusion Z-7799 Home Cinema System
2 x Speaker
2 x Stand (for loudspeakers)
1 x Stand (for Home Cinema System)
1 x Subwoover
1 x Docking station
8 x Screws and dowels
EN
1 x Mains plug/mains cable
1 x Remote control (incl. battery)
7 x Different adaptors
1 x Instruction manual
10 Fusion Z-7799
Technical data
Power supply Power consumption
AC 100 V-240 V ~ 50/60 Hz
Standby:
1W
In operation:
52 W
Dimension Appliance:
410 x 178 x 175 mm without stand
Speaker:
270 x 178 x 175 mm without stand
Subwoofer:
220 x 240 x 240 mm
Docking station:
86 x 192 x 110 mm
WeightAppliance:
2.3 kg
Speaker:2.3 kg
Subwoofer:
5.5 kg Docking station:
0.34 kg
Speaker
28 W x 2+18 W x 2 + 35 W
Amplifier
10 W x 2 + 20 W = 40 W (RMS)
Protection Class EN
2
11 Fusion Z-7799
Position the appliance
Attach stand (base and loudspeaker)
Place the stand under the unit and slide it forward
Stop when the indicator arrow mark is aligned with the mark at the unit.
(To release the stand press the clip and and slide the stand downwards)
Indicator mark
EN
LOCK
12 Fusion Z-7799
Operation
Insert backup batteries
The backup batteries save the wake-up function in the event that the power supply is interrupted.
Insert two 1.5 V batteries (AA/UM-4/LR03) (not included).
The remote control can only be used with batteries.
Insert 2 x 3 V, CR 2032 battery (included in the scope of delivery).
-+
+-
EN
Technical data
13 Fusion Z-7799
Operation
Operation of the appliance
The appliance is equipped with an AC adaptor, rating DC = 15 V, 3 A and a plug:
■
Only connect the appliance with the supplied adaptor and mains supply.
Use of other adaptors may damage the unit or cause it to malfunction.
■
1. Plug the tail end of the AC-adaptor into the DC-jack (socket)
2. Connect the mains plus to the mains
1
■
2
ON / STANDBY to switch on the appliance
Appliance
Remote control
ON / STANDBY
EN
■
The appliance cannot be completely switched off. It is either in operation or in Standby mode.
■
The display is dimmed in standby mode, time is displayed.
■
Power consumption is reduced in standby mode.
Remote control
■
Carefully remove the transparent plastic foil from the battery compartment and
test if the appliance reacts on the remote control with ON / STANDBY
14 Fusion Z-7799
Operation
Wall installation
■
This unit can be fastened to the wall.
■
Screws: 3.5 x 34 mm (8 screws supplied)
WARNING
The unit may only be mounted on vertical walls. Check before installation whether the wall can bear three times the weight of the unit. Bring in a qualified craftsman if in doubt, and in any case to drill the holes.
EN
15 Fusion Z-7799
Connections
■ The Fusion-Z 7799 Home Cinema System can be connected to normal household mains power
sockets.
■ Check that the power supply rating is adequate for the unit.
■ Connect the mains plug of the unit and of the subwoofer to the mains power supply
■ Switch on the unit and the subwoofer with ON / OFF.
Connect the loudspeaker to the subwoofer
■ Release the connecting cable of both loudspeakers from the binding.
■ Two cables per loudspeaker: 1 x WHITE (clear) and 1 x BLACK
■ WHITE cable left-hand loudspeaker, connect with RED L+ to the subwoofer
■ BLACK cable left-hand loudspeaker, connect with BLACK L- to the subwoofer
■ Do the same with the right-hand loudspeaker: Connection to R + and R■ To connect the cables; press the RED and BLACK knobs respectively against the subwoofer, connect the cable, release the knob
■ Locate the loudspeakers in the room to give the best sound quality
EN
Bass control subwoofer
■ The bass can be set at any time at the back of the subwoofer with the Bass Level Control knob.
16 Fusion Z-7799
Connections
LIGHTCURRENT WIRELES AUDIO TECHNOLOGIE
The LIGHTCURRENT technology uses safe infrared light to connect without cables. The technology also functions over greater distances and eliminates errors in transmission at radio frequencies.
The dock distributes uncompressed signals in all directions. These are reflected by walls,. ceilings
and even the device itself and thus always reach the 2.1 loudspeakers, regardless of where they are
placed. They thus attain an incomparable quality of sound.
EN
17 Fusion Z-7799
Overview Fusion Z-7799
20
21
5
11a
4
10 11b
43
6
7
8
9
44
47
45
3
37
35
1
EN
1
12
16
13
17
14
18
15
19
34 33 31
30
32
29
2
36
39
38
28
40
46
41
42
18 Fusion Z-7799
22
23
24
25
26
27
1 Speaker
2 Stand (for loudspeakers)
3Stand
4Display
5 CD tray
6FUNCTION
7 TUNER
8 EQ (Equalizer)
9 OPEN / CLOSE
10 ON / STANDBY
11 a Sensor remote control
b Lightcurrent© transmitter
12 TUNE DOWN
13 PLAY / PAUSE
14 TUNE U P
15 VOLUME +
16 MEM 17STOP
18 MEM +
19 VOLUME 20 USB IN
22HDMI OUT
23 AUDIO OUT
24 COAXIAL OUT
25 VIDEO OUT
26 S-VIDEO OUT
27 OPTICAL OUT
28 VIDEO COMPONENTS OUT
29 DOCK VIDEO OUT
30 AUX INPUT
31 Subwoofer OUTPUT
32 Connection for iPod
33 DC Jack (socket) (15 V)
34 Headphone socket
Subwoofer:
35Lightcurrent© receiver
36 Bass ventilation
37 Lighting
38Speaker
39 Bass Level Control
40 Connection for loudspeakers
41 ON / OFF
42 Mains plug / mains cable
iPod docking station
43 Display mains current and audio source
44 Dock for adaptor
45Stand
46 Dock for iPod
47 iPod Docking Station connecting cable
19 Fusion Z-7799
EN
Overview remote control Fusion Z-7799
1
2
3
4
6
7
9
10
12
13
15
16
5
8
11
14
17
18
19
23
20
21
22
EN
20 Fusion Z-7799
24
25
26
27
28
29
31
32
34
35
37
38
40
30
33
36
39
1 OPEN / CLOSE
21RANDOM
2 ON / OFF
22+IO
3 DVD / USB / SD
23 Numbers button
4 AUX / DOCK
24 PLAY / PAUSE
5 TUNER
25STOP
6SLEEP
26 VOLUME –
7TIMER
27 VOLUME +
8 ALARM
28MUTE
9CLOCK
29UP
10 SLOW / INTRO
30 EQ (Equlizer)
11 AUDIO / STEREO
31 TUNE DOWN
12 TITLE / PLAYLIST +
32ENTER
13 STEP ALBUM +
33 TUNE UP
14 GOTO / TRACK +
34 MEM -
15 ANGLE / PLAYLIST -
35DOWN
16 ZOOM / ALBUM -
36 MEM +
17 SUBTITLE / TRACK -
37MENU
18 OSD / INFO
38SETUP
19 A-B / RDS
39 PROG. / MEM
20REPEAT
40 Battery
EN
21 Fusion Z-7799
Set clock
The appliance is supplied with a digital clock. Time is displayed in two modes:
1. Standby mode Display shows actual time
2. ON mode
The display does not show the current time.
Display: Press CLOCK on the remote control.
Choose display (12H/24H) UP
resp. DOWN
Confirm Press CLOCK
Set hour UP
Confirm Press CLOCK
Set minutes
UP
Confirm Press CLOCK
resp. DOWN
resp. DOWN
NOTE If no key is pressed for 10 seconds, the appliance automatically returns to its initial
EN
function. The programming is not saved.
22 Fusion Z-7799
Set alarm
This appliance is supplied with a Timer function. It is used for programming to enable the appliance
to schut off or on automatically. This function can be use as an alarm clock.
CAUTION The timer only works if the clock and the playback function
( Disc / USB / CARD iPod / tuner FM ) have been set.
Press TIMER for 2 seconds
Set function UP resp. DOWN
( Disc / USB / CARD iPod / tuner FM )
Confirm Press TIMER
Set hourUP
resp. DOWN
Confirm
Press TIMER
Set minutes UP
Confirm
Press TIMER
Adjust volume VOLUME + resp. VOLUME -
Confirm
Press TIMER
NOTE
resp. DOWN
EN
symbol on the display shows when the timer function is active. Press TIMER at Symbol disappears. If TUNER FM had been the remote control to switch off the timer.
selected as a wake-up function, playback of the radio frequency that
had last been selected starts.
23 Fusion Z-7799
z
z
z
SLEEP
This appliance is supplied with a SLEEP function. You can use it to have the appliance automatically shut off. This function can be used for example to sleep in with music.
Set minutes
Press SLEEP repeatedly
(10 / 20 / 30 / 40 / 50 / 60 / 70 / 80 / 90 / OFF)
OFF = SLEEP function is off.
Musik Equalizer
This appliance has four pre-programmed soundadjustments.
Set EQ sound effects
Press EQ repeatedly
(EQ OFF / CLASSIC / ROCK / POP / JAZZ / Bass)
Setting the alarm (beep beep)
EN
Switch off appliance
ON / STANDBY Press ALARM
resp. DOWN
Set hour
UP
Confirm
Press ALARM
Set minutes UP
Confirm
Press ALARM
24 Fusion Z-7799
resp. DOWN
MUTE
The volume of the appliance can be switched of temporarely.
Press MUTE
Press MUTE again Volume off
Volume on
VOLUME
The volume can be adjusted either at the appliance or on the remote control. VOLUME + and
VOLUME - it is possible to hear a CLICK during the adjustment. The clicking stops once the desired
loudness is achieved.
Playback
EN
Start playback
Interrupt playback
Stop playback Select track
STOP
TUNE- resp. TUNE+
Fast forward or
reverse within
the actual track Press and hold
PREV resp. NEXT
25 Fusion Z-7799
Radio
Switch on appliance
Press ON / STANDBY
Choose TUNER
on the appliance or the remote control
NOTE Improve FM radio reception: Adjust the antenna wire (on the back of the appliance).
RDS information, if available, such as programme name, title name or contact details. To get more information on the broadcaster
Press INFO on the remote control
Adjust frequency
TUNE DOWN resp. TUNE UP
Scan manual Press
The scanning is being done in steps. Frequeny is displayed.
Scan automatic Press
Scans automaticaly, stops when the next station is found.
TUNE DOWN resp. TUNE UP
for 2 seconds
Save frequency
There are 20 memory positions.
EN
TUNE DOWN resp. TUNE UP
Choose frequency
Press
Confirm Press PROG / MEM
Select memory slot number Press MEM - resp. MEM +
Confirm
Press PROG / MEM on the remote control
Find a
saved frequency
MEM - resp. MEM +
Overwrite saved positions: save the new frequency on the desired position.
26 Fusion Z-7799
CD
■ Check the the CD is not rotating any more before opening the CD tray.
Always press STOP
to stop the CD.
■ Hold the CD by its edge and insert it with the printed facing the front.
■ Once the CD has been inserted then close the CD tray (OPEN / CLOSE
).
■ The CD is now ready to play back.
■ To remove the CD, repeat the steps described above and again hold the CD by the edge,
and take it out.
Switch on appliance
Press ON / STANDBY
Choose CD
DVD / USB / SD on the remote control
Inserting the CD
OPEN / CLOSE
The CD automatically starts playback and shows the current title number in the display.
Start playback
Interrupt playback
Stop playback EN
STOP
Back to title 1
Press STOP
Select track
Press
TUNE DOWN resp. TUNE UP
within the actual track: Press
TUNE DOWN resp. TUNE UP
Speed 2x
2x
Fast forward or reverse
4x
8x
repeatedly
20x
Set the normal playback speed again: press
27 Fusion Z-7799
CD-MP3
■ Check the the MP3 CD is not rotating any more before opening the CD tray.
Always press STOP
to stop the CD.
■ Hold the MP3 CD by its edge and insert it with the printed facing the front.
■ Once the MP3 CD has been inserted then close the CD tray (OPEN / CLOSE
).
■ The MP3 CD is now ready to play back.
■ To remove the MP3 CD, repeat the steps described above and again hold the CD by the edge,
and take it out.
Switch on appliance
Press ON / STANDBY
Choose CD
Press DVD / USB / SD on the remote control repeatedly
Inserting the MP3 CD
OPEN / CLOSE
The MP3 CD automatically starts playback and shows the current title number in the display.
Select folder and title
Start playback
EN
TUNE DOWN resp. TUNE UP
or UP
resp. DOWN
Press ENTER
Interrupt playback
Stop playback STOP
Back to title 1
Press STOP
Select track
Press
then press
MEM - resp. MEM +
Fast forward or reverse
within the actual track: Press
Speed 2x
TUNE DOWN resp. TUNE UP
4x
Set the normal playback speed again: press
28 Fusion Z-7799
8x
20x
repeatedly
Programmierung Abspielliste MP3 CD
Switch on appliance
Press ON / STANDBY
Choose CD
DVD / USB / SD on the remote control
STOP
PROG / MEM
2x
The external screen immediately shows that it is connected:
Press the Numbers Button to input the title and section at the current item. Go to the next item with
TUNE DOWN resp. TUNE UP
Confirm list
EN
Press ENTER
Playback then starts automatically.
29 Fusion Z-7799
USB and SD CARD
The appliance is equipped with USB and SD Card slots, this allows the playbck of MP3 files. Connect
USB or SD CARD (access top left).
Switch on appliance
Press ON / STANDBY
Choose USB / SD CARD Press DVD / USB / SD on the remote control or FUNCTION
Select folder and title
Start playback
on the applance repeatedly
TUNE DOWN resp. TUNE UP
or UP
resp. DOWN
Press ENTER
Interrupt playback
Select track
Press
MEM - resp. MEM +
Fast forward or
reverse within
EN
the actual track: Press and hold
Speed 2x
4x
Set the normal playback speed again: press
30 Fusion Z-7799
TUNE DOWN resp. TUNE UP
8x
20x
USB and SD CARD
File playback options
File type can be selected:
Music files
Image files
Video files
Note Display shows number of tracks and directories for a short time and then starts
automatically the playback.The appliance is compatible with USB 1.1 and 2.0 standards. It is
possible that some USB sticks cannot be read, as they might not comply with these standards.
The appliance supports max. 4 GB USB Sticks / SD Cards. The time of reading varies depending
on the quantity of data. It can take up to 60 seconds.
CAUTION Switch off the appliance before removeing the USB Sticks/ SD Card. Do not use an USB FLASH DRIVE with this appliance. Always connect the USB without cable.
31 Fusion Z-7799
EN
iPod
Insert appropriate iPod adaptor (accessory) to the dock and connect with the appliance.
The number on the dock adaptor shows which iPod will fit.
iPod touch 1+2. Generation 14 or 16
iPod classic
80/120/160 GB 9 or 10
iPod
5. Generation 30/60/80 GB 9 or 10
iPod nano
5. Generation 8/16 GB 18
iPod nano
4. Generation 8/16 GB 17
Switch on appliance and iPod docking station and conect iPod with docking station.
ipod Press FUNCTION repeatedly
Start playback
Interrupt playback
Select track
TUNE DOWN resp. TUNE UP
Fast forward or
EN
reverse within the actual track: 32 Fusion Z-7799
Press and hold
TUNE DOWN resp. TUNE UP
iPod
■
Never disconnect the iPod from the appliance during playback. First press FUNCTION
and change source to avoid damage to your files.
■
iPod can be used with the remote control on the iPod or on the appliance.
■
When connected to the appliance the iPod automatically charges.
Note If an iPod Video is connected, this error message appears on the display:
The currently attached accessory is not supported by this iPod.
The audio functions can be used despite this message.
EN
33 Fusion Z-7799
AUX
Connect external appliance (f. ex. mp3 Player) at the back and switch on both appliances.
Choose AUX Press FUNCTION repeatedly on the appliance
Press AUX / DOCK on the remote control
Playback
Press
Stop playback Press STOP
Playback
EN
Press REPEAT repeatedly to select between the following options:
REPEAT 1
Repeat actual track
REPEAT DIRECTORY
repeat current folder
REPEAT ALL
repeat all titles (entire CD)
34 Fusion Z-7799
DVD
Switch on appliance
Press ON / STANDBY
Choose CD
Press DVD / USB / SD on the remote control or FUNCTION on the
appliance repeatedly
Insert DVD. The display shows the current section number, scene and running time.
If the DVD has a Front Menu and has been inserted for the first time, it is possible to navigate in the
menu with
TUNE DOWN resp. TUNE UP
or UP
resp. DOWN
respectively.
Interrupt playback
Stop playback
without saving
Press STOP
2x
Stop playback
with saving
Press STOP
Section and scene are saved and start again at the next playback
Change scene / section
Press
MEM - resp. MEM +
TUNE DOWN bzw. TUNE UP
EN
Fast forward or
–reverse Press
Speed 2x
Slow-motion playback Press SLOW repeatedly
Speed 1/2
4x
1/3
8x
1/4
repeatedly
20x
1/5
1/6
1/7
35 Fusion Z-7799
DVD
Freeze-frame
Frames can be played back individually: Press STEP / ALMUM+ repeatedly.
Setting the normal playback speed again: press
A-B repetition
This function allows sequences to be recorded from A to B and played back again.
Frames can be played back individually: Press STEP / ALMUM+ repeatedly.
Start recording
Press A-B / RDS
Stop recording
Press A-B / RDS again
Note If A-B / RDS is pressed while playing back the recorded sequence, normal playback starts again.
Audio Sprache
Audio language
EN
Press AUDIO / STEREO repeatedly
The audio language is shown on the display. The languages available depend on the DVD.
Sub-titles
Select sub-titles
Press SUBTITLE / TRACK- repeatedly
The sub-title language is shown on the display. The languages available depend on the DVD.
36 Fusion Z-7799
DVD
Zoom
Select zoom
Press ZOOM / ALBUM- repeatedly
Zoom selection
Zoom 2
If the DVD does not have a zoom option, the display shows
invalid key
Zoom 3
Zoom 4
Zoom 1/2
Zoom 1/3
Zoom 1/4
Camera angle
Select angle
Press ANGLE / PLAYLIST- repeatedly
If the DVD does not have an angle option, the display showsy
invalid key
Display display (OSD)
Display information
Press OSD
Hide information
Press OSD again
EN
Menu
Display menu
Press MENU or TITLE / PLAYLIST+
Navigate in the menu
Confirm selection
TUNE DOWN resp. TUNE UP
or UP
resp. DOWN
Press ENTER
37 Fusion Z-7799
DVD
Playback after a desired time
Press GO TO / Track+
Title
Current
Titles
Title
total
Navigate
Press
Chapter
Press ENTER
Set normal playback again: Press GO TO / Track+ again.
EN
38 Fusion Z-7799
Sections
section
total
TUNE DOWN resp. TUNE UP
Input numbers directly
Confirm
Current
Running time
DVD
Programming playback
Press PROG / MEM
Select title (T) and
chapter(C) TUNE DOWN resp. TUNE UP
or UP
resp. DOWN
Input numbers directly
Confirm
Choose PLAY Confirm
Press ENTER
TUNE DOWN resp. TUNE UP
or UP
resp. DOWN
Press ENTER
Set normal playback again: Press PROG / MEM again
EN
Repeat
Repeat sections /
scenes / titles
Press REPEAT
Selection
REP OFF
REP CHAPTER
REP TITLE
REP ALL
39 Fusion Z-7799
DVD system settings
Basic
In DISC, USB or SD CARD mode with SETUP at the remote control
go into the menu.
With
TUNE DOWN resp. TUNE UP
and call up the menu option with DOWN
With DOWN
respectively select the symbol
. E.g. Audio.
call up the menu option and with TUNE UP
navigate in the sub-menu.
EN
To quit the menu, press SETUP at the remote control.
40 Fusion Z-7799
DVD system settings
TV SYSTEM
Set the colour system of the TV
NTSC
PAL
AUTO (for Multi System TV sets)
SCREEN SAVER
Set ON or OFF. The screen saver comes on when playback is stopped,
no DVD has been inserted or if Pause has been set.
VIDEO
Setting video options
INTERLACE-YUV DVD player connected to the TV set with a video cable.
P-SCAN
DVD player connected to a Progressive Scan TV set
with Y, PB or PR video cable.
S-VIDEO DVD player connected to the TV set with an S-video cable.
EN
Note Select INTERLACE-YUV if Composite Video is connected at the TV set. Select P-SCAN if a video cable is connected to the TV set or an Interlace or Progressive Scan TV set is being used.
CAUTION Do not connect a video cable and an S-video cable at the same time.
41 Fusion Z-7799
DVD system settings
HD OUTPUT
make the settings if a DVD player is connected with an HDMI cable.
TV TYPE
Setting the picture format.
NOTE The picture format depends on the DVD and the TV set.
PASSWORD
EN
The password option is blocked. Input 0000 to unblock it and confirm
with ENTER. To input a password, first input the old password and then
input a new 4-digit password.
42 Fusion Z-7799
DVD system settings
Setting age limiting
1G
2
All age groups
3 PG
Level 2
Only under parental supervision
4PG 13
Not under 13, from 13-18 only under parental supervision
5
Level 5
6R
Under 18 only under parental supervision
7 NC-17 For adults, not under 17
8
Only for adults
NOTE The option cannot be used if the password has not been unblocked.
RESTORE
Reset all settings.
EN
OSD LANGUAGE
Set the display language and confirm with ENTER.
43 Fusion Z-7799
DVD system settings
OP MODE
Setting the audio:
LINE OUT
quieter
RF REMOD
louder
DYNAMIC RANGE
The function can be set if music with a high dynamic range is being
played back in a noisy environment. Quiet music becomes louder and
loud music becomes quieter.
DUAL MONO (left & right)
Tone setting.
EN
NOTE Mix Mono is used for karaoke.
44 Fusion Z-7799
DVD system settings
BRIGHTNESS
Set brightness.
CONTRAST
Set contrast.
SATURATION
Set saturation.
EN
ANGLE SWITCH
Set angle.
45 Fusion Z-7799
DVD system settings
DOWNMIX
Adjust speaker:
LT / RT
Dolby Digital
STEREO
2 channel tone
VSS
5.1 channel format
AUDIO OUT
Spdif / off No audio signal from the coaxial output.
Spdif / Raw DVD player is connected to an amplifier with a coaxial cable.
Spdif / PCM
EN
46 Fusion Z-7799
DVD player is connected to 2 channel stereo amplifier.
Imported by:
CECONET AG
Hintermättlistrasse 1
CH-5506 Mägenwil