1
P74279ea-F8E841eaBLK 24-03-2003 14:11 Page 1
En
User Manual
Fr
Manuel de l'utilisateur
Benutzerhandbuch
De
Handleiding
Manuale utente
Nl
Manual de usuario
Es
It
P74279ea
Belkin Series:
F8E841eaBLK and F8E882eaOPT
P74279ea-F8E841eaBLK 24-03-2003 14:11 Page 2
P74279ea-F8E841eaBLK 24-03-2003 14:11 Page 3
Table of Contents
En
English . . . . . . . . . . . . . . . . . . . . . . . . . . . 4
Fr
Français (Europe) . . . . . . . . . . . . . . . . . . 18
Deutsch . . . . . . . . . . . . . . . . . . . . . . . . . . 30
De
Nl
Nederlands . . . . . . . . . . . . . . . . . . . . . . . 42
Es
Español . . . . . . . . . . . . . . . . . . . . . . . . . . 54
It
Italiano . . . . . . . . . . . . . . . . . . . . . . . . . . . 66
P74279ea-F8E841eaBLK 24-03-2003 14:11 Page 4
Important Information
USB Connector
The USB connector is compatible with Windows® 98,
Windows® 2000, Windows® ME, Windows® XP
PS/2 Connector
The PS/2 connector is compatible with Windows® 98, NT,
and 2000.
4
P74279ea-F8E841eaBLK 24-03-2003 14:11 Page 5
Introduction
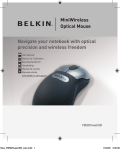
1.1 An Introduction to your new Belkin Mouse
Congratulations on your purchase of the Belkin MiniScroller Mouse, a revolutionary
mouse designed for today’s sophisticated computer user. You will find this mouse
not only resoundingly easy to use but also incredibly versatile.
Mouse features include a scroll wheel, which eliminates the need for a scroll bar as
you move fluidly through websites and documents. Using the MiniScroller Mouse
scroll wheel also reduces movement, for less strain on your wrist and easier
navigation through computer programs. Four-directional scrolling increases viewing
options. Scroll horizontally or vertically with one click of the wheel. You can even
browse at multiple speeds. Browse quickly or slowly—you decide!
One-Touch Zoom Control gives you control of the zoom feature provided by your
Windows system. Now you can instantly enlarge or reduce your viewing screen.
Once the software has been loaded onto your computer, the center button of your
mouse (the scroll wheel) can be programmed to perform the same tasks as:
"Left Button Double-Click"
"F1" through "F12"
"Enter" Key
"Page Up" Key
"Page Down" Key
"Home" Key
"End" Key
These can be used in place of your scrolling options.
5
En
P74279ea-F8E841eaBLK 24-03-2003 14:11 Page 6
Introduction
Miniscroller Optical Mouse
Try it on the floor, try it on a lampshade, try it on your leg…try it just about
anywhere. You’ll be amazed by the precision of the MiniScroller Optical Mouse,
moving more smoothly than other mice on conventional mouse pads. No longer will
you need a mouse pad to get optimal performance—which is perfect for computer
users who don’t have a lot of space.
And without a rubber ball that picks up dirt and debris from everyday use, you
won’t have to continuously clean your MiniScroller Optical Mouse. This nomaintenance-required device stays smooth and precise.
So enjoy—and thank you for choosing Belkin!
6
P74279ea-F8E841eaBLK 24-03-2003 14:11 Page 7
Hardware Installation
2.1 Hardware Installation
Your mouse connects to either a PS/2 mouse port
or a Universal Serial Bus
(USB) port
. To check, look at the back of your computer for the port that is
designated for your mouse. Some PCs will have the word MOUSE marked next to
the PS/2 connector. If you are still unsure, please refer to your hardware manual. For
USB mouse port installation, simply remove the PS/2-USB adapter from the end of
the connector before plugging the mouse into the computer.
PS/2 Installation
a.
Make sure that the computer is turned off.
b. Locate the PS/2 mouse port on the back of your computer.
c.
Plug your mouse into the appropriate port suggested above. Check the box in
which your mouse was shipped to verify the ports supported.
d. Turn your computer on. At this point, your mouse will work with the built-in
Microsoft® Operating System.
Note: To use the extra features of your middle button, you must install the included
software.
7
En
P74279ea-F8E841eaBLK 24-03-2003 14:11 Page 8
Hardware Installation (continued)
USB Installation
a.
Locate the Universal Serial Bus (USB) port on the back of your computer.
b. Plug your mouse into the port. Check the box in which your mouse was shipped to
verify the ports supported.
c.
Sometimes, when connecting the mouse into a USB port, Windows will detect
the mouse and start the Add New Hardware Wizard. If it does not, then go to
d, below. If the Wizard does come up, follow the on-screen instructions.
1.
You may be prompted to insert the Windows®
software disk.
2.
Insert the disk into the diskette driver.
3.
The drive and CD will come up automatically. Confirm that it is the current
drive (for example: A:\).
4.
Then click “OK”.
5.
The file needed to support the USB mouse will be copied to your computer.
d. At this point, your mouse will work with the built-in Microsoft® Operating System.
Note: To use the extra features of your middle button, you must install the included
software.
8
P74279ea-F8E841eaBLK 24-03-2003 14:11 Page 9
Software Installation
A step-by-step guide to getting your mouse set up.
Important: Before installing the MiniScroller™ software, it is strongly recommended that you
remove all other third party mouse drivers. DO NOT REMOVE THE WINDOWS® DEFAULT
MOUSE DRIVERS.
WARNING:
To avoid damage, turn your computer off before plugging or unplugging any
pointing devices.
Windows® 95, Windows® 98 and Windows NT® Installation
a.
Insert the MiniScroller™ diskette in the A: or B: drive
b.
Click "Start" in the lower left corner of your screen
c.
Then click "Run"
d.
Type "A\:setup" (or "B\:setup") and then click "OK"
e.
Follow the on-screen instructions to complete the installation of the MiniScroller™
f.
To make the process run smoothly:
1.
Click "Next" two times
2.
Type in your name and the company's name,
then click "Next"
3.
Click "Next" two more times
4.
Specify if you are using a USB or PS/2 connection
(refer to section 2.1) then click "OK"
5.
Select "Yes, I want to restart my computer now" then click "Finish"
9
En
P74279ea-F8E841eaBLK 24-03-2003 14:11 Page 10
Troubleshooting
Problem #1:
Q:
A:
I can get into Windows® or into "Safe Mode"
but I cannot use the mouse.
If you have more than one driver, this could be causing your computer to boot
in safe mode or not allow your mouse to work at all. To solve this problem, you
must remove the excess drivers. If you are using a PS/2 mouse, then the driver
must state that it is using a PS/2 driver. If you are using a USB mouse, then
the driver must state that it is using a USB driver. Go to "Mouse Properties"
(Start, Settings, Control Panel, Mouse) and look under the “General” tab. This
will show you which driver is currently recognized by Windows. If this is not the
same as the mouse you currently have plugged in, then you must remove this
driver and install the correct one.
Problem #2:
Q:
A:
If I have more than one mouse driver how do I remove the driver without
the mouse control? How do I boot into normal Windows® mode?
Use your "Windows®"Key at the bottom left hand corner of your keyboard.
Then use your [Up Arrow] to select "Settings", then use your [Right Arrow] to
select "Control Panel", and then press [Enter]. These steps have taken you to
the "Control Panel" where you can gain access to your "Device Manager". The
"Device Manager" shows your driver status and information and it will allow
you to modify their settings.
After entering the "Control Panel" use your [Up and Down Arrows] to select
"System" and then press [Enter]. After entering "System Properties" use your
[Right Arrow] to select "Device Manager". Then press [Tab] until you have
selected "Computer" and then use the [Down Arrow] until your "Mouse" is
highlighted. Then use your [Right Arrow] to expand and select your mouse
driver or drivers.
After you have chosen your mouse driver you can now modify it by removing
the driver or changing the driver.
To remove the driver you have selected, use your [Tab] key until the "Remove"
tab is selected. Then press [Enter]. This will remove the driver. Use your [Arrow
Keys] to select any other drivers and repeat the process until all but one driver
remains. Even if it is the wrong driver you can use it and change it to the
mouse driver you want.
10
P74279ea-F8E841eaBLK 24-03-2003 14:11 Page 11
Troubleshooting (continued)
After removing or changing the mouse driver, use your [Tab] key until "Close"
is selected and then press [Enter]. Then you will have to reboot your
computer. Use your [Windows®] Key at the bottom left hand corner of your
keyboard if you have one; if not, press {[Alt] + [S]}. Then use the [Up Arrow] to
select "Shut Down" and use your [Enter] key. Use your [Arrow Key] to select
"Restart" and press [Enter]".
Problem #3:
Q:
A:
After installing the mouse driver and rebooting, my mouse will not work.
How do I change the mouse driver without mouse control?
see Problem #2
Problem #4:
Q:
A:
Why does my external mouse not work with my laptop computer?
You may have to disable the onboard mouse in order to use an external
mouse. Try looking in your CMOS or BIOS in order to disable the onboard
mouse. If you do not have this option or do not know how to get into your
BIOS or CMOS, please follow the instructions in your computer manual or call
the computer dealer/ technical support for your computer.
11
En
P74279ea-F8E841eaBLK 24-03-2003 14:11 Page 12
How To Use Your Mouse
Care for Your Mouse
Maintenance of your Belkin (ball-style) Mouse is important. It is designed to provide
years of trouble-free service. A self-cleaning ball cage helps prevent dust and lint from
building up around the ball. However, if the pointer should skip or move abnormally
on-screen, we recommend you clean your mouse manually.
a. First, turn the retainer ring counter clockwise to remove the ball
b. Wipe the ball with a clean lint-free cloth
c.
d.
Blow into the ball cage to dislodge any dust and lint. If there is build-up on the
rubber rollers inside the ball cage, clean them using a cotton swab, lightly soaked
with isopropyl alcohol to remove any debris.
User maintenance is not required on optical model mice.
Get to know your options!
Programming your scroll wheel couldn't get any easier. On the bottom right-hand
corner of your screen, you will find a yellow box with an orange triangle in it. Click on
it, then click "Open".
Starting with the Universal Scroll section, you will be allowed to choose and restrict
the direction your mouse can scroll. "X-Scroll" and "Y-Scroll" are already selected for
you. This allows you to scroll left/right and up/down, respectively. Clicking off the
"X-Scroll" restricts scrolling to up and down only, while clicking off the "Y-Scroll" sets
scrolling for left and right only. Clicking off both disables the scrolling features of the
wheel.
The "Direction Reverse" field will reverse your scroll direction. Clicking it, depressing
the wheel, and moving your mouse to the left lets you scroll to the right (and vice
versa).
Your MiniScroller Optical Mouse will let you scroll by lines or by pages. Choosing to
scroll by page is recommended for larger documents that you need to browse
quickly. Clicking the scroll wheel once starts the "Auto Browse" mode, in which the
appearance of the arrow changes to a dot with four arrows directed away from it.
Moving the mouse in the direction that you wish to browse scrolls the page in that
direction. Scrolling speed is also adjustable in this mode: the further the pointer gets
from your original point, the faster the scrolling occurs.
12
P74279ea-F8E841eaBLK 24-03-2003 14:11 Page 13
Software Uninstall
Removing the mouse software from your computer.
WARNING:
To avoid damage, turn your computer off before plugging or
unplugging any pointing devices.
Windows® 98 and higher
Miniscroller Optical Mouse:
a. Click on “Start”, then click on “Programs”
b. Click on “Browser Mouse”
c. Click on “Uninstall”
Miniscroller Ball Mouse:
First, it will be necessary to close the "Mouse Control Panel". Click the “X” button in
the upper right hand corner of the "Mouse Control Panel" window. When asked if
you are sure if you want to quit the "Mouse Control", click "Yes". Now you are ready
to begin the uninstall process.
a.
Select "Start".
b. Select "Settings".
c.
Select "Control Panel".
d. Select "Add/Remove Programs".
e. Select "Belkin Mouse Driver", then click "Add/Remove".
f.
You will be asked if you are sure if you want to remove "Browser Mouse" and all
of its components. Click "Yes".
g. The uninstall process will begin. Follow the on-screen instructions to complete
the process.
13
En
P74279ea-F8E841eaBLK 24-03-2003 14:11 Page 14
Information
FCC Statement
DECLARATION OF CONFORMITY WITH FCC RULES FOR
ELECTROMAGNETIC COMPATIBILITY
We, Belkin Components, of 501 West Walnut Street, Compton CA 90220,
declare under our sole responsibility that the product series:
F8E841-BLK and F8E882-OPT
to which this declaration relates:
Complies with Part 15 of the FCC Rules. Operation is subject to the following
two conditions: (1) this device may not cause harmful interference, and (2) this
device must accept any interference received, including interference that may
cause undesired operation.
CE Declaration of Conformity
We, Belkin Components, declare under our sole responsibility that the F8E812, F8E841-BLK
and F8E882-OPT, to which this declaration relates, is in conformity with Generic Emissions
Standard EN50081-1 and with Generic Immunity Standard EN50082-1 1992.
Belkin Components Limited Lifetime Product Warranty
Belkin Components warrants this product against defects in materials and workmanship for
its lifetime. If a defect is discovered, Belkin will, at its option, repair or replace the product at
no charge provided it is returned during the warranty period, with transportation charges
prepaid, to the authorized Belkin dealer from whom you purchased the product. Proof of
purchase may be required.
This warranty does not apply if the product has been damaged by accident, abuse, misuse,
or misapplication; if the product has been modified without the written permission of Belkin;
or if any Belkin serial number has been removed or defaced.
THE WARRANTY AND REMEDIES SET FORTH ABOVE ARE EXCLUSIVE IN LIEU OF ALL OTHERS,
WHETHER ORAL OR WRITTEN, EXPRESSED OR IMPLIED. BELKIN SPECIFICALLY DISCLAIMS
ANY AND ALL IMPLIED WARRANTIES, INCLUDING, WITHOUT LIMITATION, WARRANTIES OF
MERCHANTABILITY AND FITNESS FOR A PARTICULAR PURPOSE.
No Belkin dealer, agent, or employee is authorized to make any modification, extension, or
addition to this warranty.
BELKIN IS NOT RESPONSIBLE FOR SPECIAL, INCIDENTAL, OR CONSEQUENTIAL
DAMAGES RESULTING FROM ANY BREACH OF WARRANTY, OR UNDER ANY OTHER
LEGAL THEORY, INCLUDING BUT NOT LIMITED TO LOST PROFITS, DOWNTIME,
GOODWILL, DAMAGE TO OR REPROGRAMMING, OR REPRODUCING ANY PROGRAM
OR DATA STORED IN OR USED WITH BELKIN PRODUCTS.
Some states do not allow the exclusion or limitation of incidental or consequential damages
or exclusions of implied warranties, so the above limitations of exclusions may not apply to
you. This warranty gives you specific legal rights, and you may also have other rights that
vary from state to state.
14
P74279ea-F8E841eaBLK 24-03-2003 14:11 Page 15
En
P74279ea-F8E841eaBLK 24-03-2003 14:11 Page 16
Belkin Corporation
501 West Walnut Street • Compton • CA •
90220-5221 • USA
Tel +1 310 898 1100
Fax +1 310 898 1111
Belkin Components, Ltd.
Express Business Park •
Shipton Way • Rushden •
NN10 6GL • United Kingdom
Tel +44 (0) 1933 35 2000
Fax +44 (0) 1933 31 2000
Belkin Components B.V.
Starparc Building • Boeing Avenue 333 •
1119 PH Schiphol-Rijk • The Netherlands
Tel +31 (0) 20 654 7300
Fax +31 (0) 20 654 7349
Belkin GmbH
Hanebergstrasse 2
80637 München, Germany
Tel +49 (0) 89 / 1434 05-0
Fax +49 (0) 89 / 143405-100
Belkin Components, Ltd.
7 Bowen Cresent •
West Gosford • NSW 2250 • Australia
Tel +61 (2) 4372 8600
Fax +61 (2) 4325 4277
Free Technical support
Tel: 00800 22355460
e-mail: [email protected]
© 2003 Belkin Components. All rights reserved.
All trade names are registered trademarks of respective manufacturers listed.
P74279ea-F8E841eaBLK 24-03-2003 14:11 Page 17
En
P74279ea-F8E841eaBLK 24-03-2003 14:11 Page 18
Information Importante
Connecteur USB Le connecteur USB est compatible
avec Windows® 98, Windows®2000, Windows® ME e
Windows®XP
Connecteur PS/2 Le connecteur ®PS/2 est compatible
avec Windows 98, NT et 2000.
18
P74279ea-F8E841eaBLK 24-03-2003 14:11 Page 19
Introduction
1.1 LA SOURIS MINISCROLLER DE BELKIN
Merci d'avoir choisi la souris MiniScroller de Belkin, une souris révolutionnaire
conçue pour les utilisateurs des ordinateurs complexes d'aujourd'hui. Vous trouverez
non seulement que cette souris est facile à utiliser, mais qu'elle est également
incroyablement polyvalente.
La souris est équipée d'une molette de défilement qui vous permet de vous
déplacer avec fluidité sur les sites web que vous visitez ou dans vos documents et
ceci sans utiliser la barre de défilement. La molette de la souris optique MiniScroller
réduit également les mouvements, ce qui provoque moins de tension au niveau du
poignet et facilite la navigation dans vos programmes. Le défilement dans quatre
directions vous donne des options d'affichage supplémentaires. Vous pouvez faire
défiler horizontalement ou verticalement d'un seul clic de la molette. Vous disposez
même de plusieurs vitesses de défilement. Naviguer rapidement ou lentement : c'est
vous qui décidez ! La commande de zoom d'un seul clic vous permet de contrôler la
fonction de zoom du système Windows que vous utilisez. Vous pouvez désormais
agrandir ou réduire la partie de l'écran que vous affichez.
Dès que le logiciel est installé sur votre ordinateur, vous pouvez programmer le
bouton du milieu (roulette de défilement) pour exécuter les fonctions suivantes :
"Double-clic du bouton gauche"
"Touches F1 à F12"
“Touche « Enter » (Entrée)”
"Touche « Page Up » (Page Préc)”
"Touche « Page Down » (Page Suiv)”
"Touche « Home » (Début)
"Touche « End » (Fin)”
Ces touches peuvent être utilisées au lieu de vos options de défilement.
La souris Miniscroller Optique
Par terre, sur votre jambe… essayez-la où vous voulez. Vous serez étonné par la
précision de la souris optique MiniScroller. Elle se déplace avec moins d'à-coups que
les autres souris sur leurs tapis traditionnels. Plus besoin désormais de tapis pour
obtenir des performances optimales, ce qui est parfait pour les utilisateurs qui
manquent d'espace.
Vous n'aurez plus besoin de nettoyer sans arrêt la souris optique MiniScroller
puisqu'elle n'a pas de boule en caoutchouc qui ramasse la poussière et les débris à
chaque utilisation. Ce périphérique sans entretien continue à se déplacer avec
précision et sans à-coup.
Amusez-vous et merci d'avoir choisi Belkin !
19
Fr
P74279ea-F8E841eaBLK 24-03-2003 14:11 Page 20
Installation matériel
2.1 Installation du logiciel
Vous pouvez brancher votre souris soit dans un port souris PS/2 ou un port USB (Bus
série universel). Pour vérifier, regardez à l'arrière de votre ordinateur pour le port qui
est destiné à votre souris. Dans la plupart des cas, le mot MOUSE est marqué à côté
du connecteur PS/2. Si vous n’êtes toujours pas certain, consultez le guide
d’utilisation de votre ordinateur. Si votre ordinateur est doté d’un port pour souris
PS/2, retirez simplement l’adaptateur PS/2-USB de l'extrémité du connecteur avant
de brancher la souris dans l'ordinateur.
Installation PS/2
a.
Assurez-vous que l'ordinateur est hors tension.
b. Localisez le port de la souris PS/2 à l'arrière de
votre ordinateur.
c.
Branchez la souris dans le port approprié suggéré ci-dessus. Vérifiez sur la boîte
d'emballage les ports supportés.
d. Mettez votre ordinateur sous tension. À ce niveau, votre souris fonctionne avec
le système d'exploitation intégré Microsoft®.
Remarque : Pour vous servir des fonctions supplémentaires de votre bouton du
milieu, vous devez installer le
logiciel inclus.
20
P74279ea-F8E841eaBLK 24-03-2003 14:11 Page 21
Installation matériel (suite)
Installation USB
a.
Repérez le port du bus série universel (USB) situé à l’arrière de votre ordinateur.
b. Branchez la souris dans le port. Vérifiez sur la boîte d’emballage les types de ports qui
peuvent être utilisés.
c.
Parfois, lors de la connexion de la souris dans un port USB, Windows détectera
la souris et lancera l'Assistance d'ajout de nouveau matériel. S'il ne le fait pas,
passez à, ci-dessous. Si l'Assistant apparaît, suivre les instructions à l'écran.
1.
Il peut vous être demandé d'insérer le disque du
logiciel Windows®.
2.
Insérez le disque dans le lecteur de disquette.
3.
Le lecteur et le CD démarreront automatiquement. Confirmez qu'il s'agit du
lecteur en cours (par exemple: A:\).
4.
Puis cliquez sur « OK ».
5.
Le fichier destiné à supporter la souris USB sera
copié sur votre ordinateur.
d. À ce niveau, votre souris fonctionne avec le système d'exploitation intégré Microsoft®.
Remarque: Pour utiliser les fonctions supplémentaires du bouton du milieu, vous devez
installer le logiciel inclus.
21
Fr
P74279ea-F8E841eaBLK 24-03-2003 14:11 Page 22
Installation du logiciel
Marche à suivre pour paramétrer votre souris
Important : Avant d'installer le logiciel MiniScroller™ , il est fortement
recommandé que vous ôtiez tous les pilotes de souris.
NE PAS ÔTER LES PILOTES DE SOURIS WINDOWS® PAR DÉFAUT.
AVERTISSEMENT :
Pour éviter tout dégât, mettez votre ordinateur hors
tension avant de
brancher ou de débrancher tout
dispositif de pointage.
Installation Windows® 95, Windows® 98 et Windows NT®.
a.
Insérez la disquette MiniScroller™ dans le lecteur A: ou B:.
b. Cliquez sur « Start » (Démarrer) dans le coin inférieur gauche
de votre écran.
c.
Ensuite, cliquez sur « Run » (Exécuter).
d. Tapez « A\:setup » (ou « B\:setup») puis cliquez sur « OK ».
e. Suivez les instructions à l’écran pour terminer l’installation du MiniScroller™.
f.
Pour que tout fonctionne correctement :
1.
Cliquez deux fois sur « Next » (Suivant)
2.
Tapez votre nom et le nom de la société, puis cliquez sur « Next » (Suivant).
3.
Cliquez deux fois encore sur « Next » (Suivant)
4.
Précisez si vous utilisez une connexion USB ou PS/2 (reportez-vous à la
section 2.1), puis cliquez sur « OK ».
5.
Sélectionnez « Yes » (Oui) lorsqu’on vous demande si vous voulez redémarrer
votre ordinateur maintenant puis cliquez sur Finish (Terminer).
22
P74279ea-F8E841eaBLK 24-03-2003 14:11 Page 23
Dépannage
Problème n° 1
Q:
R:
J’ai accès à Windows® ou au mode sans échec (Safe Mode) mais je suis
incapable d’utiliser la souris.
Si vous disposez de plusieurs pilotes, il se peut que l'ordinateur soit amorcé en
mode sans échec ou que la souris ne fonctionne pas du tout. Pour résoudre ce
problème, vous devez supprimer les pilotes en trop. Si vous utilisez une souris
PS/2, le pilote doit indiquer qu'elle utilise un pilote PS/2. Si vous utilisez une
souris USB, le pilote doit indiquer qu'elle utilise un pilote USB. Ouvrez la fenêtre
« Mouse Properties » (Propriétés de la souris) en cliquant sur « Start »
(Démarrer), « Settings » (Paramètres), « Control Panel » (Panneau de
configuration), « Mouse » (Souris), puis cliquez sur l'onglet « General »
(Général). Il vous indique le pilote actuellement reconnu par Windows. S'il est
différent de celui de la souris qui est branchée, vous devez supprimer ce pilote
et installer celui qui convient.
Problème n° 2
Q:
R:
Si j’ai plus d’un pilote de souris, comment puis-je supprimer ceux qui sont de
trop si je n’ai pas accès à la souris? Comment démarrer en mode Windows®
normal ?
Appuyez sur la touche Windows® située à gauche au bas de votre clavier si vous
en avez une.
Ensuite, utilisez la flèche vers le haut pour sélectionner « Settings » (Paramètres)
puis la flèche vers la droite pour sélectionner « Control Panel » (Panneau de
configuration) et appuyez sur « Enter » (Entrée).
Ces étapes vous amènent au « Control Panel » (Panneau de configuration) à
partir duquel vous avez accès au « Device Manager » (Gestionnaire de
périphériques). Ce gestionnaire affiche des informations sur le type de matériel
et l’état des pilotes et permet de modifier les paramètres.
Une fois rendu au panneau de configuration, utilisez la flèche vers le haut ou
vers le bas pour sélectionner « System » (Système) puis appuyez sur « Enter »
(Entrée). Dans la fenêtre « System Properties » (Propriétés Système), utilisez la
flèche pointant vers la droite pour sélectionner « Device Manager » (Gestionnaire
de périphériques). Ensuite, appuyez sur la touche de tabulation pour passer à la
rubrique « Computer » (Ordinateur) puis descendez jusqu’à ce que « Mouse »
(Souris) apparaisse en surbrillance. Utilisez la flèche droite pour afficher les
éléments qui s’y rattachent puis sélectionnez le pilote voulu.
23
Fr
P74279ea-F8E841eaBLK 24-03-2003 14:11 Page 24
Dépannage (Suite)
Après avoir choisi le pilote de votre souris, vous pouvez le supprimer ou le
modifier.
Pour supprimer le pilote que vous avez sélectionné, appuyez sur la touche de
tabulation jusqu’à ce que vous arriviez à l’onglet « Remove » (Supprimer) puis
appuyez sur « Enter » (Entrée). Cela supprimera le pilote. Utilisez les touches avec
flèche pour sélectionner tout autre pilote et répétez le processus jusqu’à ce qu’il
ne reste plus qu’un seul pilote. Même si ce n’est pas le bon pilote, vous pouvez
l’utiliser et le remplacer par un autre.
Après avoir supprimé ou remplacé le pilote de souris, utilisez la touche de
tabulation pour sélectionner « Close » (Fermer) puis appuyez sur « Enter »
(Entrée). Vous devrez ensuite redémarrer votre ordinateur. Appuyez sur la touche
Windows® à gauche au bas de votre clavier si vous en avez une. Sinon, appuyez
sur « Alt + S » puis à l’aide de la flèche vers le haut, sélectionnez « Shut Down »
(Arrêter) et appuyez sur « Enter » (Entrée). Utilisez la touche avec flèche pour
sélectionner « Restart » (Redémarrer) et appuyez sur « Enter » (Entrée).
Problème n° 3
Q:
Après avoir installé le pilote de souris et redémarré mon ordinateur, la souris
ne fonctionne toujours pas. Comment puis-je changer de pilote de souris si je
n’ai pas accès à la souris ?
R:
Reportez-vous au problème n° 2
Problème n° 4
Q:
Pourquoi ma souris externe ne fonctionne-t-elle pas avec mon ordinateur
portatif ?
R:
Vous devrez peut-être désactiver la souris intégrée pour pouvoir utiliser la souris
externe. Essayez de vérifier les paramètres CMOS ou BIOS pour désactiver la
souris intégrée. Si vous n’avez pas cette option ou si vous ne savez pas
comment accéder à ces paramètres, suivez les instructions de votre manuel ou
communiquez avec votre vendeur d’ordinateur ou le service de soutien
technique.
24
P74279ea-F8E841eaBLK 24-03-2003 14:11 Page 25
Comment vous servir de votre souris
Entretien de votre souris
L’entretien de votre souris Belkin™ est important (modèle avec boule uniquement). Elle a
été conçue pour fonctionner sans problème pendant des années.
Une cage de retenue de boule autonettoyante empêche l’accumulation de poussières
et de charpies autour de la boule. Cependant, si le pointeur saute ou se déplace
anormalement à l’écran, nous vous recommandons de nettoyer manuellement votre
souris.
a. Tournez d’abord l’anneau de retenue dans le sens inverse des aiguilles d’une
montre pour enlever la boule.
b. Ensuite, essuyez la boule à l’aide d’un chiffon sans charpie.
c. Puis, soufflez dans la cage pour éliminer toute poussière ou charpie. S’il y a
accumulation sur les billes de caoutchouc à l’intérieur de la cage, enlevez-la à l’aide
d’un bâtonnet ouaté légèrement imbibé d’alcool isopropylique.
d. L'entretien utilisateur n'est pas requis pour le modèle de
souris optique.
Faites connaissances avec vos options !
La programmation de la molette de défilement ne saurait être plus simple. Dans
l'angle inférieur droit de l'écran se trouve une case jaune avec un triangle orange.
Cliquez dessus, puis sur « Open » (Ouvrir). En commençant par la section « Universal
Scroll » (Défilement universel), vous pourrez choisir et limiter la direction du
défilement de la souris. Les options « X-Scroll » (Défilement X) et « Y-Scroll »
(Défilement Y) sont déjà sélectionnées. Ceci vous permet de faire défiler
respectivement vers la gauche/la droite et vers le haut/le bas. Si vous désélectionnez
« X-Scroll » (Défilement X), vous limitez le défilement au haut et au bas uniquement. Si
vous désélectionnez « Y-Scroll » (Défilement Y) seul le défilement vers la gauche et
vers la droite est autorisé.
Si vous désélectionnez les deux, les fonctions de défilement de la molette sont
désactivées. Le champ « Direction Reverse » (Direction inverse) inverse la direction du
défilement. Lorsque vous cliquez dessus, en appuyant sur la molette et en déplaçant
la souris vers la gauche, vous faites défiler vers la droite (et inversement).
La souris optique MiniScroller vous permet de faire défiler les documents ligne par
ligne ou page par page. Nous vous conseillons le défilement par page pour les
documents volumineux que vous devez parcourir rapidement. Cliquez une fois sur la
molette de défilement pour lancer le mode « Auto Browse » (Parcours automatique).
La flèche se transforme en point avec quatre flèches qui en partent. Déplacez la souris
dans la direction que vous souhaitez pour faire défile la page dans cette direction.
Dans ce mode, vous pouvez également ajuster la vitesse de défilement : plus le
pointeur s'éloigne du point d'origine, plus le défilement est rapide.
25
Fr
P74279ea-F8E841eaBLK 24-03-2003 14:11 Page 26
Désinstallation
Suppression du logiciel de la souris de votre ordinateur
AVERTISSEMENT
Pour éviter tout dégât, mettez votre ordinateur hors tension avant de brancher ou de
débrancher tout dispositif de pointage.
Windows® 98 et versions ultérieures
Souris à boule MiniScroller:
Fermez d’abord le « Mouse Control Panel » (Panneau de configuration de la souris).
Pour ce faire, cliquez sur le bouton « X » situé dans le coin supérieur droit de la
fenêtre. Lorsqu’on vous demande si vous êtes certain de vouloir quitter cette
fenêtre, cliquez sur « Yes » (Oui). Vous êtes maintenant prêt à commencer le
processus de désinstallation.
a.
Sélectionnez « Start » (Démarrer).
b. Sélectionnez « Settings » (Paramètres).
c.
Cliquez sur « Control Panel » (Panneau de configuration).
d. Sélectionnez « Add/Remove Programs » (Ajout/Suppression de programmes).
e. Sélectionnez « Belkin Mouse Driver » (Pilote souris Belkin) puis cliquez sur «
Add/Remove » (Ajouter/Supprimer).
f.
On vous demandera si vous êtes certain de vouloir supprimer la souris du
navigateur «Browser Mouse» et tous ses composants. Cliquez sur « Yes » (Oui).
g. Le processus de désinstallation commencera. Suivez les instructions à l’écran
jusqu’à la fin du processus.
Souris optique MiniScroller:
a. Cliquez sur « Start » (Démarrer), puis sur « Programs » (Programmes).
b. Cliquez sur « Browser Mouse » (Souris de navigateur).
c. Cliquez sur « Uninstall » (Désinstaller).
26
P74279ea-F8E841eaBLK 24-03-2003 14:11 Page 27
Information
Réglementation FCC
DECLARATION DE CONFORMITE AVEC LES REGLES FCC
POUR LA COMPATIBILITE ELECTROMAGNETIQUE
Nous, Belkin Components, sis au 501 West Walnut Street, Compton CA 90220,
déclarons sous notre seule responsabilité que le produit
F8E841-BLK / F8E882-OPT
auquel se réfère la présente déclaration, est conforme à la partie XV des règles
FCC. Le fonctionnement doit remplir les deux conditions suivantes : (1) ce
périphérique ne doit pas causer d’interférences nuisibles et (2) ce périphérique
doit accepter toute interférence reçue, y compris les interférences pouvant
entraîner un fonctionnement non désiré.
Déclaration de conformité CE
Nous, Belkin Components, déclarons sous notre seule responsabilité que le F8E812 /
F8E841-BLK / F8E882-OPT auquel se réfère la présente déclaration est conforme à la norme
sur les émissions génériques EN55022: +A1: +A2 et à la norme sur l’immunité générique EN
50082-1 1997.
Garantie produit limitée à vie de Belkin Components
Belkin garantit ce produit à vie contre tout défaut de matériau et de fabrication. Si l’appareil
s’avère défectueux, Belkin Components le réparera ou le remplacera gratuitement, à sa
convenance, à condition que le produit soit retourné, port payé, pendant la durée de la
garantie, au distributeur Belkin agréé auquel le produit a été acheté. Une preuve d’achat
peut être exigée.
La présente garantie est caduque si le produit a été endommagé par accident, abus, usage
impropre ou mauvaise application, si le produit a été modifié sans autorisation écrite de
Belkin, ou si un numéro de série Belkin a été supprimé ou rendu illisible.
LA GARANTIE ET LES VOIES DE RECOURS MENTIONNÉES FONT FOI EXCLUSIVEMENT ET
REMPLACENT TOUTES LES AUTRES, ORALES OU ÉCRITES, EXPLICITES OU IMPLICITES.
BELKIN REJETTE EXPRESSÉMENT TOUTES LES GARANTIES IMPLICITES, Y COMPRIS MAIS
SANS RESTRICTION, LES GARANTIES AFFÉRENTES À LA QUALITÉ LOYALE ET
MARCHANDE ET À LA POSSIBILITÉ D’UTILISATION À UNE FIN DONNÉE.
Aucun revendeur, représentant ou employé de Belkin n’est habilité à apporter des
modifications ou adjonctions à la présente garantie, ni à la proroger.
BELKIN N’EST PAS RESPONSABLE DES DOMMAGES SPÉCIAUX, DIRECTS OU INDIRECTS,
DÉCOULANT D’UNE RUPTURE DE GARANTIE, OU EN VERTU DE TOUTE AUTRE THÉORIE
JURIDIQUE, Y COMPRIS MAIS SANS RESTRICTION LES PERTES DE BÉNÉFICES, TEMPS
D’ARRÊT, FONDS DE COMMERCE, REPROGRAMMATION OU REPRODUCTION DE
PROGRAMMES OU DE DONNÉES MÉMORISÉS OU UTILISÉS AVEC DES PRODUITS BELKIN
OU DOMMAGES CAUSÉS À CES PROGRAMMES OU À CES DONNÉES.
27
Fr
P74279ea-F8E841eaBLK 24-03-2003 14:11 Page 28
Belkin Corporation
501 West Walnut Street • Compton • CA •
90220-5221 • Etats-Unis
Tel +1 310 898 1100
Fax +1 310 898 1111
Belkin Components, Ltd.
Express Business Park •
Shipton Way • Rushden •
NN10 6GL • • Royaume-Uni
Tel +44 (0) 1933 35 2000
Fax +44 (0) 1933 31 2000
Belkin Components B.V.
Starparc Building • Boeing Avenue 333 •
1119 PH Schiphol-Rijk • Pays-Bas
Tel +31 (0) 20 654 7300
Fax +31 (0) 20 654 7349
Belkin GmbH
Hanebergstrasse 2
80637 München, Allemagne
Tel +49 (0) 89 / 1434 05-0
Fax +49 (0) 89 / 143405-100
Belkin Components, Ltd.
7 Bowen Cresent •
West Gosford • NSW 2250 • Australie
Tel +61 (2) 4372 8600
Fax +61 (2) 4325 4277
Free Technical support
Tel: 00800 22355460
e-mail: [email protected]
© 2003 Belkin Components. Tous droits réservés.
Toutes les raisons commerciales sont des marques déposées de leurs fabricants respectifs. P73429ea
P74279ea-F8E841eaBLK 24-03-2003 14:11 Page 29
Fr
P74279ea-F8E841eaBLK 24-03-2003 14:11 Page 30
Wichtige Hinweise
USB-Stecker
PS/2-Anschluß
Der USB-Stecker ist mit Windows® 98, Windows® 2000,
Windows ME® und Windows XP® kompatibel.
Der PS/2-Stecker ist mit Windows® 98, NT und 2000
kompatibel.
30
P74279ea-F8E841eaBLK 24-03-2003 14:11 Page 31
Einführung
1.1 INFOS ZU IHRER NEUEN MAUS
Herzlichen Glückwunsch zum Kauf Ihrer neuen Belkin MiniScroller-Maus, der
bahnbrechenden Maus für den anspruchsvollen Anwender.
Ihre neue Maus ist besonders leichtgängig und bietet vielseitige Funktionen.
Probieren Sie sie auf dem Boden, dem Lampenschirm oder auf dem Bein aus, oder
wo immer Sie möchten: Die Präzision der optischen MiniScroller-Maus wird Sie
begeistern.
In der Handhabung ist sie jeder herkömmlichen Mausmatten-Maus überlegen.
Überhaupt können Sie für eine optimale Leistung auf die Mausmatte verzichten:
optimal für Schreibtische mit kleiner Arbeitsfläche.Auch eine regelmäßige Reinigung
ist bei der optischen MiniScroller-Maus nicht erforderlich, da sie ohne die
Gummikugel auskommt, die permanent Schmutz aufliest. Das wartungsfreie Gerät
steht für dauerhafte Präzision und Leichtgängigkeit.
Die Maus ist mit einem Mausrad ausgestattet, mit dem Sie ohne Bildlaufleiste
schnell durch Websites und Dokumente navigieren. Mit dem Mausrad entlasten Sie
Ihr Handgelenk und navigieren leichter und bequemer durch Ihre Anwendungen.
Der Bildlauf in vier Richtungen bietet Ihnen zusätzliche Anzeigemöglichkeiten.
Mit einem Radklick durchlaufen Sie Ihr Dokument vertikal oder horizontal. Selbst die
Ablaufgeschwindigkeit ist variabel. Sie legen selbst fest, wie schnell Sie sich
bewegen. Mit dem Eintasten-Zoom kontrollieren Sie die Zoom-Funktion Ihres
Windows-Systems und verstellen die Bildgröße im Handumdrehen.
Nach der Installation der Software kann die mittlere Taste der Maus (das Mausrad)
so programmiert werden, daß sie die gleiche Funktion erfüllt wie eine der folgenden
Tasten:
Doppelklicken mit der linken Maustaste
F1 bis F12
Eingabetaste
BILD AUF-Taste
BILD AB-Taste
Pos1-Taste
Ende-Taste
Sie können eine dieser Aufgaben anstelle der Bildlaufoptionen einstellen.
Wir wünschen Ihnen viel Freude mit Ihrem neuen Belkin-Produkt!
31
De
P74279ea-F8E841eaBLK 24-03-2003 14:11 Page 32
Hardware-Installation
2.1 Hardware-Installation
Sie können die Maus wahlweise an einen PS/2-Mausanschluß oder an einen USBAnschluß anschließen. Suchen Sie an der Rückseite des Computers nach dem
Anschluß für die Maus. Bei einigen PCs ist die PS/2-Buchse mit "MOUSE" bzw.
"MAUS" gekennzeichnet. Wenn Sie nicht genau wissen, welchen Anschluß Sie
verwenden können, bietet Ihr Computerhandbuch entsprechende Informationen.
Für den Anschluß der Maus an die USB-Schnittstelle ziehen Sie einfach den PS/2-aufUSB-Adapter vom Stecker ab und stecken dann das Mauskabel in den Computer.
PS/2-Installation
a)
Stellen Sie sicher, daß der Computer heruntergefahren und abgeschaltet ist.
b) Suchen Sie an der Rückseite des Computers nach dem PS/2-Mausanschluß.
c)
Schließen Sie die Maus am entsprechenden Anschluß, wie oben beschrieben, an.
Sehen Sie auf der Mausverpackung nach, welchen Anschluß die Maus unterstützt.
d) Schalten Sie den Computer ein. Jetzt wird die Maus durch das Microsoft®
Betriebssystem gesteuert.
Hinweis: Um die Zusatzfunktionen der mittleren Maustaste zu nutzen, müssen Sie die
enthaltene Software installieren.
32
P74279ea-F8E841eaBLK 24-03-2003 14:11 Page 33
Hardware-Installation (Fortsetzung)
USB-Installation
a)
Suchen Sie den USB-Anschluß an der Computerrückseite.
b) Schließen Sie die Maus an. Sehen Sie auf der Mausverpackung nach, welche
Anschlüsse die Maus unterstützt.
c)
Manchmal erkennt Windows, daß Sie die Maus an eine USB-Schnittstelle
angeschlossen haben, und startet den "Add New Hardware Wizard" (HardwareAssistenten). Geschieht dies nicht, fahren Sie mit Schritt d.) fort. Wird der
Assistent geöffnet, folgen Sie den Anweisungen auf dem Bildschirm.
1.
Sie werden eventuell aufgefordert, die Treiberdiskette mit der Windows®Software einzulegen.
2.
Legen Sie die Treiberdiskette in das Laufwerk ein.
3.
Laufwerk und Treiberdiskette werden automatisch angezeigt. Bestätigen Sie
das aktuelle Laufwerk (z. B. A:\).
4.
Klicken Sie dann auf "OK".
5.
Die Datei zur Unterstützung der USB-Maus wird auf die Festplatte kopiert.
d.) Jetzt wird die Maus durch das Microsoft® Betriebssystem gesteuert.
Hinweis: Um die Zusatzfunktionen der mittleren Maustaste zu nutzen, müssen Sie die
enthaltene Software installieren.
33
De
P74279ea-F8E841eaBLK 24-03-2003 14:11 Page 34
Software-Installation
Schritt-für-Schritt-Anleitung zur Konfiguration Ihrer Maus
Wichtig: Vor der Installation der MiniScroller™-Software sollten Sie unbedingt alle
Maustreiber von anderen Herstellern entfernen. Entfernen Sie jedoch nicht den
Standardmaustreiber von Windows®.
WARNUNG:
Um Schäden an Ihrer Hardware zu vermeiden, schalten Sie den
Computer unbedingt ab, bevor Sie Zeigegeräte (z.B. eine Maus)
anschließen oder wieder entfernen.
Installation für Windows® 95, Windows® 98 und Windows NT®
a)
Legen Sie die MiniScroller™-Diskette in das Laufwerk A: bzw. B: ein.
b) Klicken Sie auf die Schaltfläche "Start" links unten auf dem Bildschirm.
c)
Klicken Sie dann auf "Run" (Ausführen).
d) Geben Sie folgendes ein: "A\: setup (bzw. "B\: setup), und klicken Sie auf "OK".
e) Folgen Sie den Anweisungen auf dem Bildschirm, um die MiniScroller™-Software zu
installieren.
f)
Führen Sie folgende Schritte zur Konfiguration der Maus durch:
1.
Klicken Sie die nächsten beiden Male auf "Next" (Weiter).
2.
Geben Sie Ihren Namen und Ihre Firma ein, und klicken Sie dann auf "Next"
(Weiter).
3.
Klicken Sie die nächsten beiden Male wieder auf "Next" (Weiter).
4.
Geben Sie an, ob Sie eine USB- oder PS/2-Verbindung verwenden (vgl. Abschnitt
2.1). Klicken Sie auf "OK".
5.
Wählen Sie "Yes, I want to restart my computer" (“Den Computer jetzt neu
starten? Ja.”). Klicken Sie dann auf "Finish" (“Beenden”).
34
P74279ea-F8E841eaBLK 24-03-2003 14:11 Page 35
Fehlersuche
Problem # 1
F:
Ich kann Windows® laden oder zumindest im geschützten Modus arbeiten, aber
die Maus funktioniert nicht.
A:
Wenn Sie mehrere Treiber verwenden, kann dies dazu führen, dass der Computer
nur im geschützten Modus startet oder dass die Maus nicht funktioniert. Daher
müssen Sie die überzähligen Treiber deinstallieren. Wenn Sie mit einer PS/2-Maus
arbeiten, beachten Sie, dass der PS/2-Treiber installiert werden muss. Wenn Sie mit
einer USB-Maus arbeiten, muss der USB-Treiber installiert werden. Wählen Sie
"Start" > "Einstellungen" > "Systemsteuerung" > "Maus", und klicken Sie im
Fenster "Eigenschaften von Maus" auf die Registerkarte "Allgemein". Hier wird
angezeigt, welchen Treiber Windows derzeit nutzt. Wenn dies nicht der Treiber für
die angeschlossene Maus ist, müssen Sie ihn deinstallieren und den richtigen
Treiber installieren.
Problem # 2
F:
Frage: Wenn mehrere Maustreiber installiert sind, wie entferne ich den Treiber
ohne die Maus? Wie kann ich Windows® wieder im normalen Modus starten?
A:
Drücken Sie die Windows®-Taste unten links auf der Tastatur, soweit vorhanden,
andernfalls Alt + S. Dies entspricht dem Wählen der START-Schaltfläche unter
Windows® 95. Wählen Sie dann mit der oberen Pfeiltaste "Settings" (Einstellungen)
aus, dann mit der rechten Pfeiltaste "Control Panel" (Systemsteuerung), und
drücken Sie die Eingabetaste.
Mit diesen Schritten gelangen Sie in die "Control Panel" (Systemsteuerung). Dort
haben Sie Zugriff auf den "Device-Manager" (Geräte-Manager). Der GeräteManager zeigt den Treiberstatus und Treiberinformationen an. Dort können Sie
auch die Einstellungen des Treibers ändern.
Im Fenster "Control Panel" (Systemsteuerung) wählen Sie mit der Nach-Obenbzw. der Nach-Unten-Taste die Option "System" aus. Drücken Sie dann die
Eingabetaste. Wählen Sie in den "System Properties" (Systemeigenschaften) mit
der rechten Pfeiltaste den "Device Manager" (Geräte-Manager) aus. Drücken Sie
dann die Tabulatortaste, bis "Computer" aktiviert ist, und drücken Sie die untere
Pfeiltaste, bis die Option "Maus" markiert ist.
Drücken Sie die rechte Pfeiltaste, bis der oder die Maustreiber ausgewählt sind.
Jetzt können Sie den Maustreiber entfernen oder bearbeiten.
35
De
P74279ea-F8E841eaBLK 24-03-2003 14:11 Page 36
Fehlersuche (Fortsetzung)
Um den ausgewählten Maustreiber zu entfernen, drücken Sie die Tabulatortaste,
bis die Schaltfläche "Remove" (Entfernen) markiert ist. Drücken Sie dann die
Eingabetaste. Dadurch wird der Treiber entfernt. Wählen Sie mit den Pfeiltasten die
anderen Treiber aus, und wiederholen Sie den Vorgang, bis nur ein Treiber
übrigbleibt. Selbst wenn dies der falsche Treiber ist, können Sie mit ihm Ihre Maus
bedienen und so den gewünschten Maustreiber konfigurieren.
Nach dem Entfernen oder Ändern des Maustreibers drücken Sie die
Tabulatortaste, bis "Close" (Schließen) markiert ist, und drücken Sie dann die
Eingabetaste. Danach müssen Sie Ihren Computer neu starten.
Drücken Sie hierzu die Windows®-Taste unten links auf der Tastatur, soweit
vorhanden, andernfalls “Alt + S”. Drücken Sie dann die obere Pfeiltaste, bis
"Shut Down" (Beenden) ausgewählt ist, und drücken Sie die Eingabetaste. Wählen
Sie mit den Pfeiltasten "Restart" (Neu starten), und drücken Sie die Eingabetaste.
Problem # 3
F:
Frage: Ich habe den Maustreiber installiert und den Computer neu gestartet,
aber meine Maus funktioniert nicht. Wie kann ich den Maustreiber ohne Hilfe
der Maus wechseln?
A:
siehe Problem # 2
Problem # 4
F:
Warum funktioniert die externe Maus nicht, die an meinem Laptop
angeschlossen ist?
A:
Möglicherweise müssen Sie zuerst die integrierte Maus deaktivieren, damit Sie eine
externe Maus verwenden können. Meistens kann die integrierte Maus im CMOS
oder BIOS des Laptops deaktiviert werden. Wenn Sie diese Möglichkeit nicht
haben oder nicht wissen, wie man das BIOS oder CMOS aufruft, befolgen Sie die
Anweisungen im Computerhandbuch, oder fragen Sie Ihren Computerhändler oder
Computerkundendienst um Rat.
36
P74279ea-F8E841eaBLK 24-03-2003 14:11 Page 37
Verwenden der Maus
Pflege der Maus
Achten Sie auf die richtige Pflege der Belkin™ Scroll-Maus (nur mit Mauskugel). Die
Maus ist durch die solide und sorgfältige Verarbeitung auf langjährige Verwendung
ausgelegt.
Die selbstreinigende Kugel verhindert das Festsetzen von Staub und Fasern. Springt
der Mauszeiger oder bewegt er sich unnormal, sollten Sie die Maus manuell reinigen.
a)
Drehen Sie den Fassungsring im Uhrzeigersinn, und entnehmen Sie die Kugel.
b) Wischen Sie die Kugel mit einem sauberen, fusselfreien Tuch ab.
c)
Blasen Sie in das Kugelgehäuse, um Staub und Faserrückstände zu entfernen.
Befinden sich Ablagerungen auf den Gummirollen im Gehäuse, entfernen Sie den
Schmutz mit einem Wattestäbchen und etwas Isopropylalkohol.
d) Bei optischen Mäusen sind keine benutzerseitigen Pflegemaßnahmen erforderlich.
Lernen Sie Ihre Möglichkeiten kennen!
Einfacher kann man sich die Mausrad-Programmierung nicht vorstellen: Unten rechts
auf dem Bildschirm befindet sich ein gelbes Feld mit einem orangefarbenen Dreieck.
Klicken Sie darauf und dann auf "Öffnen". Im ersten Abschnitt, "Universal Scroll",
können Sie die Richtung für den Mausbildlauf festlegen und eingrenzen.
Standardmäßig sind die Optionen "X-Scroll" und "Y-Scroll" bereits markiert. Dadurch
können Sie den Bildlauf nach rechts bzw. links und nach oben bzw. unten durchführen.
Wenn Sie die Option "X-Scroll" deaktivieren, ist der Bildlauf auf die Vertikale
beschränkt; wenn Sie "Y-Scroll" deaktivieren, auf die Horizontale. Wenn Sie beide
Optionen deaktivieren, ist der Bildlauf mit dem Mausrad abgestellt. Wenn Sie die
Option "Direction Reverse" markieren, wird der Bildlauf in umgekehrter Richtung
durchgeführt. Wenn Sie danach das Rad drücken und die Maus nach links ziehen, wird
das Bild nach rechts abgerollt (und umgekehrt). Sie können einstellen, ob der Bildlauf
mit der optischen MiniScroller-Maus zeilen- oder seitenweise durchgeführt wird. Der
seitenweise Bildlauf bietet sich für größere Dokumente an, die schnell abgerollt
werden sollen. Wenn Sie das Mausrad einmal drücken, aktivieren Sie die
"Automatische Navigation". Der Pfeil auf dem Bildschirm wird durch einen Punkt mit
vier Pfeilspitzen ersetzt. Bewegen Sie die Maus in die Richtung, in die Sie navigieren
möchten. Die Seite wird entsprechend abgerollt. In diesem Modus können Sie auch
die Bildlaufgeschwindigkeit einstellen: Je weiter Sie den Mauszeiger von seinem
Ausgangspunkt wegziehen, desto höher ist die Geschwindigkeit des Bildlaufs.
37
De
P74279ea-F8E841eaBLK 24-03-2003 14:11 Page 38
Deinstallieren der Software
Entfernen der Maus-Software aus dem Computer
WARNUNG:
Um Schäden an Ihrer Hardware zu vermeiden, schalten Sie den
Computer unbedingt ab, bevor Sie Zeigegeräte (z.B. eine Maus)
anschließen oder wieder entfernen.
Windows® 98 (oder höher):
Mechanische MiniScroller-Maus:
Zunächst muß das "Mouse Control Panel" (Maussteuerfeld in der Systemsteuerung)
geschlossen werden. Klicken Sie auf das "X" (Fenster schließen) in der oberen
rechten Ecke des Fensters. Wenn Sie gefragt werden, ob Sie das "Mouse Control
Panel" (Maussteuerung) wirklich schließen möchten, klicken Sie auf "Yes" (Ja). Jetzt
können Sie mit der Deinstallation beginnen.
a)
Wählen Sie "Start".
b) Wählen Sie "Settings" (Einstellungen).
c)
Wählen Sie die Option "Control Panel" (Systemsteuerung).
d) Wählen Sie "Add/Remove Programs" (Software).
e) Wählen Sie "Belkin Mouse Driver" (Belkin-Maustreiber), und klicken Sie dann auf
"Add/Remove" (Hinzufügen/Entfernen).
f)
Sie werden aufgefordert, die Deinstallation für "Browser Mouse" und die
zugehörigen Komponenten zu bestätigen. Klicken Sie auf "Yes" (Ja).
g) Die Deinstallation wird gestartet. Befolgen Sie die Anweisungen auf dem
Bildschirm, um den Vorgang abzuschließen.
Optische MiniScroller-Maus:
a)
Klicken Sie auf "Start" > "Programme".
b) Klicken Sie auf "Browser Mouse" (Browser-Maus)
c)
Klicken Sie auf "Uninstall" (Deinstallieren).
38
P74279ea-F8E841eaBLK 24-03-2003 14:11 Page 39
Information
FCC Erklärung
ERKLÄRUNG DER KONFORMITÄT MIT DEN FCC-VORSCHRIFTEN
ZUR ELEKTROMAGNETISCHEN VERTRÄGLICHKEIT
Wir, Belkin Components, 501 West Walnut Street, Compton CA 90220, USA, erklären
hiermit in alleiniger Verantwortung, daß der Artikel
F8E841-BLK / F8E882-OPT
auf den sich diese Erklärung bezieht, in Einklang mit Teil 15 der FCC-Vorschriften steht.
Der Betrieb unterliegt den folgenden beiden Bedingungen: 1.) Dieses Gerät darf keine
Störbeeinflussung verursachen. 2.) Dieses Gerät muß empfangene Störbeeinflussung
akzeptieren, auch Störbeeinflussung, die unerwünschten Betrieb verursachen kann.
CE-Konformitätserklärung
We, Belkin Components, declare under our sole responsibility that the F8E812 / F8E841-BLK
/ F8E882-OPT to which this declaration relates, is in conformity with Generic Emissions
Standard EN 55022: +A1: +A2 and with Generic Immunity Standard EN 50082-1 1997.
Begrenzte Belkin-Produktgarantie auf Lebenszeit
Belkin Components gewährleistet hiermit, daß dieses Produkt während seiner gesamten
Lebensdauer keine Material- und Verarbeitungsfehler aufweisen wird. Bei Feststellung eines
Fehlers wird Belkin das Produkt nach eigenem Ermessen entweder kostenlos reparieren oder
austauschen, sofern es während des Garantiezeitraums an den autorisierten Belkin-Händler
zurückgegeben wurde, bei dem es gekauft wurde. Die Kosten für den Rücktransport zum
Belkin-Händler sind vom Kunden zu tragen. Ein Kaufnachweis kann verlangt werden.
Diese Gewährleistung erstreckt sich nicht auf die Beschädigung des Produkts durch Unfall,
mißbräuchliche, unsachgemäße oder fehlerhafte Verwendung oder Anwendung. Ebenso ist
die Gewährleistung unwirksam, wenn das Produkt ohne schriftliche Genehmigung durch
Belkin verändert wurde oder wenn eine Belkin-Seriennummer entfernt oder unkenntlich
gemacht wurde.
DIE VORSTEHENDEN GEWÄHRLEISTUNGEN UND RECHTSBEHELFE SCHLIEßEN ALLE
ANDEREN GEWÄHRLEISTUNGEN UND RECHTSBEHELFE - OB MÜNDLICH ODER
SCHRIFTLICH, AUSDRÜCKLICH ODER KONKLUDENT - AUS UND TRETEN AN DEREN
STELLE. BELKIN ÜBERNIMMT INSBESONDERE KEINERLEI KONKLUDENTE
GEWÄHRLEISTUNGEN, U.A. AUCH KEINE GEWÄHRLEISTUNG DER EIGNUNG FÜR EINEN
BESTIMMTEN ZWECK UND DER HANDELSÜBLICHEN QUALITÄT.
Kein Händler, Bevollmächtigter bzw. Vertreter oder Mitarbeiter von Belkin ist befugt, diese
Gewährleistungsregelung in irgendeiner Weise abzuändern oder zu ergänzen.
BELKIN HAFTET NICHT FÜR BESONDERE, DURCH ZUFALL EINGETRETENE ODER
FOLGESCHÄDEN AUFGRUND DER VERLETZUNG EINER GEWÄHRLEISTUNG ODER NACH
MAßGABE EINER ANDEREN RECHTSLEHRE (U.A. FÜR ENTGANGENE GEWINNE,
AUSFALLZEITEN, GESCHÄFTS- ODER FIRMENWERTEINBUßEN BZW. DIE BESCHÄDIGUNG,
NEUPROGRAMMIERUNG ODER WIEDERHERSTELLUNG VON PROGRAMMEN ODER DATEN
NACH SPEICHERUNG IN ODER NUTZUNG IN VERBINDUNG MIT BELKIN-PRODUKTEN).
De
P74279ea-F8E841eaBLK 24-03-2003 14:11 Page 40
Belkin Corporation
501 West Walnut Street • Compton • CA •
90220-5221 • USA
Tel +1 310 898 1100
Fax +1 310 898 1111
Belkin Components, Ltd.
Express Business Park •
Shipton Way • Rushden •
NN10 6GL • Großbritannien
Tel +44 (0) 1933 35 2000
Fax +44 (0) 1933 31 2000
Belkin Components B.V.
Starparc Building • Boeing Avenue 333 •
1119 PH Schiphol-Rijk • Niederlande
Tel +31 (0) 20 654 7300
Fax +31 (0) 20 654 7349
Belkin GmbH
Hanebergstrasse 2
80637 München, Deutschland
Tel +49 (0) 89 / 1434 05-0
Fax +49 (0) 89 / 143405-100
Belkin Components, Ltd.
7 Bowen Cresent •
West Gosford • NSW 2250 • Australien
Tel +61 (2) 4372 8600
Fax +61 (2) 4325 4277
Free Technical support
Tel: 00800 22355460
e-mail: [email protected]
© 2003 Belkin Components. Alle Rechte vorbehalten.
Alle Markennamen sind eingetragene Warenzeichen der angegebenen Hersteller. P73429ea
P74279ea-F8E841eaBLK 24-03-2003 14:11 Page 41
De
P74279ea-F8E841eaBLK 24-03-2003 14:11 Page 42
Belangrijke informatie
USB-aansluiting
De USB-aansluiting is compatibel met Windows® 98,
Windows 2000, Windows® ME en Windows® XP
PS/2-aansluiting
De PS/2-aansluiting is compatibel met Windows® 98,
NT en 2000.
42
P74279ea-F8E841eaBLK 24-03-2003 14:11 Page 43
Inleiding
1.1 ALLES OVER UW MUIS
Hartelijk gefeliciteerd met uw aankoop van de Belkin MiniScroller™ muis, een
revolutionaire muis die ontworpen is voor de veeleisende computergebruiker van
vandaag. U ziet wel dat deze muis niet alleen bijzonder gebruiksvriendelijk is maar
ook ongelooflijk veelzijdig.
Zo heeft de muis een schuifwieltje waardoor u zich zonder schuifbalk flexibel door
websites en documenten kunt verplaatsen. Dankzij dit schuifwieltje hoeft u ook
minder met uw hand te bewegen waardoor de spanning op uw pols vermindert en u
gemakkelijker door computerprogramma’s navigeert. Door het verschuiven in vier
richtingen ziet u meer. Met één klik op het wieltje kunt u horizontaal of verticaal
doorschuiven. U kunt zelfs met verschillende snelheden bladeren. Snel bladeren of
langzaam — u kiest maar!
De Windows zoomfunctie kunt u met de rechtstreekse zoomregelknop bedienen. Zo
kunt u de afmetingen van uw beeldscherm in een handomdraai vergroten of
verkleinen.
Nadat de software in de computer geladen is, kunt u de middenknop van de muis
(het scrollwieltje) programmeren om de volgende opties uit te voeren:
‘Dubbelklikken linker muisknop’
‘F1’ tot en met ‘F12’
Toets ‘Enter’
Toets ‘Page Up’ (Pagina omhoog)
Toets ‘Page Down’ (Pagina omlaag)
Toets ‘Home’ (Begin document)
Toets ‘End’ (Einde document)
U kunt deze gebruiken in plaats van de scroll-opties.
Extra voor Miniscroller™ Optische Muis
Deze muis doet het op de vloer, op een lampenkap, op uw been… letterlijk op alles.
De optische MiniScroller muis werkt verbazend nauwkeurig en beweegt veel
soepeler over een muismat dan gewone muizen. U hebt zelfs geen muismat nodig
om efficiënt te werken — ideaal voor de computergebruiker die maar weinig ruimte
heeft.
U hoeft uw optische MiniScroller muis ook niet telkens schoon te maken; hij heeft
dan ook geen rubber kogel die stof en vuil aantrekt. Deze onderhoudsvrije muis
werkt altijd soepel en nauwkeurig.
Veel plezier met uw nieuwe muis — en hartelijk dank voor uw keus van Belkin!
43
Nl
P74279ea-F8E841eaBLK 24-03-2003 14:11 Page 44
Hardware installeren
2.1 Hardware installeren
U kunt deze muis aansluiten op een PS/2-muispoort of op een USB-poort. Kijk achter
op de computer welke poort voor de muis bestemd is. Op sommige PC’s staat bij
de PS/2-aansluiting het woord ‘MOUSE’ (Muis). Raadpleeg de handleiding van de
computer als u twijfelt. Voor het installeren van een USB-muispoort verwijdert u de
PS/2 USB-adapter van de connector voordat u de muis op de computer aansluit.
PS/2 installeren
a.
Zorg dat de computer uitgeschakeld is.
b. Zoek achter op de computer de PS/2-muispoort poort op.
c.
Sluit de muis aan op deze poort. Kijk op de verpakking van de muis welke
poorten ondersteund worden.
d. Zet de computer aan. Vanaf nu werkt de muis met het ingebouwde Microsoft®
besturingssysteem.
Let op: Als u de extra eigenschappen van de middenknop wilt gebruiken, installeert
u de meegeleverde software.
44
P74279ea-F8E841eaBLK 24-03-2003 14:11 Page 45
Hardware installeren (vervolg)
USB installeren
a.
Zoek achter op de computer de USB-poort op.
b. Sluit de muis op de poort aan. Kijk op de verpakking van de muis welke poorten
ondersteund worden.
c.
Soms detecteert Windows de muis wanneer u deze op een USB-poort aansluit
en start dan de wizard ‘Add New Hardware’ (Nieuwe hardware toevoegen). Is
dat niet het geval, ga dan naar ‘d’ hier onder. Volg de aanwijzingen op het
beeldscherm als de wizard verschijnt.
1.
Misschien vraagt de computer u naar de diskette met Windows® software.
2.
Plaats de diskette met stuurprogramma’s in het A\:-drive.
3.
Het station en de diskette worden automatisch aangegeven. Controleer of
de naam van het station correct is (bijvoorbeeld: A:\).
4.
Klik vervolgens op ‘OK’.
5.
Het bestand dat de USB-muis ondersteunt, wordt naar de computer
gekopieerd.
d. Vanaf nu werkt de muis met het ingebouwde Microsoft® besturingssysteem.
Let op: Wilt u de extra eigenschappen van de middenknop gebruiken, installeer dan de
meegeleverde software.
45
Nl
P74279ea-F8E841eaBLK 24-03-2003 14:11 Page 46
Software installeren
Stap-voor-stap handleiding voor het installeren van de muis.
Belangrijk: Wij adviseren u nadrukkelijk alle muisstuurprogramma’s van derden te
verwijderen voordat u de software van de MiniScroller installeert. DE STANDAARD
MUISSTUURPROGRAMMA’S VAN WINDOWS® MAG U NIET VERWIJDEREN.
WAARSCHUWING:
Om beschadiging te voorkomen, moet u de computer
uitschakelen voordat u aanwijsapparaten aansluit of
loskoppelt.
Installeren onder Windows® 95, Windows® 98 en Windows NT®
a.
Plaats de MiniScroller diskette in station A: of B:
b. Klik in de linker benedenhoek van het beeldscherm op ‘Start’.
c.
Klik vervolgens op ‘Run’ (Uitvoeren).
d. Typ ‘A\: setup’ (of ‘B\: setup’) en klik vervolgens op ‘OK’
e. Volg de aanwijzingen op het scherm om de installatie van de MiniScroller te voltooien
f.
Een soepel verloop van de procedure bereikt u als volgt:
1.
Klik twee maal op ‘Next’ (Volgende).
2.
Typ uw naam en die van het bedrijf en klik vervolgens op ‘Next’ (Volgende).
3.
Klik nogmaals twee maal op ‘Next’ (Volgende)
4.
Geef aan of u een USB- of PS/2-aansluiting gebruikt (zie hoofdstuk 2.1) en klik
vervolgens op ‘OK’.
5.
Selecteer ‘Yes, I want to restart my computer now’ (Ja, ik wil mijn computer nu
herstarten) en klik op ‘Finish’ (Voltooien).
46
P74279ea-F8E841eaBLK 24-03-2003 14:11 Page 47
Problemen oplossen
Probleem nr. 1:
Q:
Ik kan naar Windows® of ‘Safe Mode’ (Veilige modus) gaan maar ik kan de muis
niet gebruiken.
A:
Als u meer dan één stuurprogramma hebt, kan dit de oorzaak zijn dat uw
computer in de veilige modus start of verhinderen dat uw muis werkt. U lost dit
probleem op door de overbodige stuurprogramma’s te verwijderen. Als u een
PS/2-muis gebruikt, moet het stuurprogramma aangeven dat het een PS/2stuurprogramma gebruikt. Als u een USB-muis gebruikt, moet het stuurprogramma
aangeven dat het een USB-stuurprogramma gebruikt. Via Start, Settings, Control
Panel, Mouse (Start, Instellingen, Configuratiescherm, Muis) gaat u naar ‘Mouse
Properties’ (Muiseigenschappen). Hier kunt u zien welk stuurprogramma Windows
momenteel herkent. Als dit niet klopt met de muis die u momenteel hebt
aangesloten, verwijder dan dit stuurprogramma en installeer het juiste..
Nl
Probleem nr. 2:
Q:
Als ik meer dan één muisstuurprogramma heb, hoe kan ik dan zonder
muisbesturing de overbodige stuurprogramma’s verwijderen? Hoe start ik in
normale Windows® modus op?
A:
Gebruik de ‘Windows®’ toets links onder op het toetsenbord. Ga met de pijlomhoog toets naar ‘Settings’ (Instellingen) en met de pijl-rechts toets naar ‘Control
Panel’ (Configuratiescherm). Druk op ‘Enter’.
U bent nu in het ‘Control Panel’ (Configuratiescherm) waar u toegang kunt krijgen
tot de ‘Device Manager’ (Apparaatbeheer). Daarin kunt u de status van en
informatie over de stuurprogramma(’s) zien en de instellingen wijzigen.
Ga nu in het ‘Control Panel’ (Configuratiescherm) met de pijl-omhoog en pijlomlaag toetsen naar ‘System’ (Systeem) en druk op ‘Enter’. In ‘System Properties’
(Systeemeigenschappen) selecteert u met de pijl-rechts toets ‘Device Manager’
(Apparaatbeheer). Vervolgens drukt u op de tabtoets totdat u ‘Computer’ hebt
geselecteerd. Ga met de pijl-omlaag toets naar uw ‘Mouse’ (Muis).
U kunt nu met de pijl-rechts toets de inhoud uitbreiden en uw
muisstuurprogramma of stuurprogramma’s kiezen.
Nadat u een muisstuurprogramma geselecteerd hebt, kunt u dit bewerken door
het te verwijderen of te wijzigen.
Om het door u geselecteerde stuurprogramma te verwijderen, drukt u op de
tabtoets totdat het tabblad ‘Remove’ (Verwijderen) geselecteerd is. Druk
47
P74279ea-F8E841eaBLK 24-03-2003 14:11 Page 48
Problemen oplossen (vervolg)
vervolgens op ‘Enter’. Hierdoor wordt het stuurprogramma verwijderd. Gebruik de
pijltoetsen om andere stuurprogramma’s te selecteren en herhaal de procedure
totdat slechts één stuurprogramma overblijft. Ook al is dit het verkeerde
stuurprogramma, dan kunt u dit toch gebruiken en wijzigen in het
muisstuurprogramma dat u nodig hebt.
Nadat u het muisstuurprogramma verwijderd of aangepast hebt, selecteert u met
de tabtoets ‘Close’ (Afsluiten). Druk vervolgens op ‘Enter’. Start de computer
opnieuw. Gebruik indien aanwezig de ‘Windows®’ toets links onder op het
toetsenbord. Ontbreekt deze, druk dan op Alt+S. Ga met de pijl-omhoog toets
naar ‘Shut Down’ (Uitschakelen) en druk op ‘Enter’. Kies met de pijltoets ‘Restart’
(Opnieuw starten) en druk op ‘Enter’.
Probleem nr. 3:
Q:
Na installeren van het muisstuurprogramma en opnieuw starten, werkt mijn
muis niet. Hoe kan ik het muisstuurprogramma wijzigen zonder de muis te
gebruiken?
A:
Zie probleem nr. 2
Probleem nr. 4:
Q:
Waarom werkt mijn externe muis niet op mijn laptop computer?
A:
Het is mogelijk dat u de ingebouwde muis moet uitschakelen om een externe muis
te gebruiken. Probeer in uw CMOS of BIOS te kijken om de ingebouwde muis uit
te schakelen. Als u deze mogelijkheid niet hebt of niet weet hoe u in uw BIOS of
CMOS moet komen, volg dan de aanwijzingen in de handleiding van de computer,
bel de computerdealer of vraag de helpdesk om technische ondersteuning voor de
computer.
48
P74279ea-F8E841eaBLK 24-03-2003 14:11 Page 49
Gebruik van de muis (vervolg)
Verzorging van de muis
Onderhoud van de Belkin muis (alleen met kogel) is belangrijk. Hij is ontworpen om u
jarenlang probleemloos van dienst te zijn.
Een zelfreinigende kogelkooi helpt het aankoeken van stof en pluizen rond de kogel
voorkomen. Als de pijlaanwijzer echter weigert of abnormaal over het beeldscherm
beweegt, maak de muis dan met de hand schoon.
a.
Draai eerst de borgring tegen de klok in los om de kogel te verwijderen.
b. Reinig de kogel met een schone pluisvrije doek.
c.
Blaas in de kogelkooi om alle stof en pluizen te verwijderen. Als u aanslag op de
rubber rollers in de kogelkooi constateert, maak dan alles voorzichtig schoon met
een pluisvrij katoenen doekje dat u even in isopropylalcohol hebt gedrenkt.
d. Dit onderhoud is niet nodig bij optisch werkende muizen.
Volop mogelijkheden!
Het programmeren van uw schuifwieltje is de eenvoud zelf. Rechts onder in uw
beeldscherm ziet u een geel vakje met daarin een oranje driehoek. Klik eerst hierop en
dan op ‘Open’ (Openen). In ‘Universal Scroll’(Universeel schuiven) kunt u de richting
waarin uw muis kan scrollen zelf bepalen of beperken. ‘X-scroll’ en ‘Y-scroll’ zijn al voor u
geselecteerd. Hierdoor kunt u zowel links/rechts ofwel op/neer scrollen. Door ‘X-Scroll’
weg te klikken, maakt u omhoog en omlaag verschuiven onmogelijk terwijl u door ‘Yscroll’ weg te klikken het naar links en rechts verschuiven belet. Door allebei weg te
klikken, schakelt u de schuiffuncties van het wieltje uit. Het veld ‘Direction Reverse’
(Richting omkeren) draait de schuifrichting om. Als u hieop klikt, het wieltje indrukt en
uw muis naar links beweegt, schuift u naar rechts (en omgekeerd). Met uw optische
MiniScroller muis kunt u per regel of per pagina doorschuiven. Per pagina doorschuiven
komt van pas bij grotere documenten die u snel wilt doorbladeren. Door één keer op
het schuifwieltje te klikken, start u de modus ‘Autobrowse’ (Automatisch bladeren)
waarin de pijl verandert in een punt met vier naar buiten wijzende pijlen. Als u de muis
beweegt in de richting waarin u wilt bladeren, verschuift de pagina ook in die richting. In
deze stand kunt u ook de schuifsnelheid aanpassen: hoe groter de afstand tussen het
oorspronkelijke aanklikpunt en uw aanwijzer, des te sneller bewegen de pagina’s over
het scherm.
49
Nl
P74279ea-F8E841eaBLK 24-03-2003 14:11 Page 50
Software verwijderen
Muissoftware uit de computer verwijderen.
WAARSCHUWING : Om beschadiging te voorkomen, moet u de computer
uitschakelen voordat u aanwijsapparaten aansluit of loskoppelt.
Windows® 98 en hoger:
MiniScroller muis met kogel:
Eerst moet het ‘Mouse Control Panel’ (Muisconfiguratievenster) gesloten worden.
Klik op het kruisje rechts boven in het muisconfiguratievenster. Als de computer
vraagt of u zeker weet dat u de ‘Mouse Control’ (Muisbesturing) wilt afsluiten, klik
dan op ‘Yes’ ( Ja). U bent nu klaar om het verwijderen van de muissoftware te
starten.
a.
Selecteer ‘Start’.
b. Selecteer ‘Settings’ (Instellingen).
c.
Selecteer ‘Control Panel’ (Configuratiescherm).
d. Selecteer ‘Add/Remove Programs’ (Programma’s toevoegen/verwijderen).
e. Selecteer ‘Belkin Mouse Driver’ (Belkin muisstuurprogramma). Klik vervolgens op
‘Add/Remove’ (Toevoegen/Verwijderen).
f.
De computer vraagt nu of u zeker weet dat u ‘Browser Mouse’ (Browser muis) en
alle bijbehorende componenten wilt verwijderen. Klik op ‘Yes’ (Ja).
g. De computer start nu met het verwijderen van de betreffende software. Volg de
aanwijzingen op het beeldscherm om de procedure te voltooien.
Optische MiniScroller muis:
a.
Klik op ‘Start’ en vervolgens op ‘Programs’ (Programma’s)
b. Klik op ‘Browser Mouse’
c.
Klik op ‘Uninstall’ (Verwijderen)
50
P74279ea-F8E841eaBLK 24-03-2003 14:11 Page 51
Informatie
FCC* Verklaring
*Federal Communications Commission
VERKLARING VAN CONFORMITEIT MET DE FCC VOORSCHRIFTEN
INZAKE ELEKTROMAGNETISCHE COMPATIBILITEIT
Belkin Components, gevestigd 501 West Walnut Street, Compton CA 90220
(USA), verklaart onder haar uitsluitende verantwoordelijkheid dat het product:
F8E841-BLK / F8E882-OPT
waarop deze verklaring betrekking heeft:
Voldoet aan paragraaf 15 van de FCC Voorschriften. De werking is onderworpen
aan de volgende twee voorwaarden: (1) dit apparaat mag geen schadelijke
storing veroorzaken en (2) dit apparaat moet elke hierop inwerkende storing
accepteren inclusief storing die de werking mogelijk kan belemmeren.
CE Conformiteitsverklaring
Belkin Components verklaart onder haar uitsluitende verantwoordelijkheid dat het product
waarop deze verklaring betrekking heeft, type F8E812 / F8E841-BLK / F8E882-OPT, voldoet
aan de Generieke Emissiestandaard EN 55022: +A1: +A2 en aan de Generieke
Immuniteitsstandaard EN 50082-1 1997.
BEPERKTE
LEVENSLANGE GARANTIE VAN
BELKIN COMPONENTS
Belkin Components garandeert dit product gedurende zijn gehele gebruiksduur op materiaalen fabricagefouten. In geval van een defect zal Belkin Components het product naar eigen
inzicht repareren of gratis vervangen mits het binnen de garantieperiode en met vooruitbetaling
van verzendkosten wordt geretourneerd aan de geautoriseerde Belkin leverancier waarvan u het
product gekocht hebt. Deze kan u vragen het aankoopbewijs te tonen.
Deze garantie geldt niet indien de schade aan het product is ontstaan door een ongeval,
door opzettelijk of onopzettelijk onjuist gebruik, door foutieve toepassing of door wijziging
van het product zonder de nadrukkelijke toestemming van Belkin dan wel door verwijdering
of verminking van enig Belkin serienummer.
DE BOVENVERMELDE GARANTIE EN MAATREGELEN SLUITEN ALLE ANDERE UIT,
MONDELING DAN WEL SCHRIFTELIJK, NADRUKKELIJK OF IMPLICIET. BELKIN VERWERPT
MET NAME ALLE EN ALLE IMPLICIETE GARANTIES, ONVERKORT MEEGEREKEND
GARANTIES INZAKE COMMERCIËLE TOEPASSINGEN EN/OF GESCHIKTHEID VOOR EEN
INDIVIDUEEL DOEL.
Geen door Belkin aangestelde wederverkoper, tussenpersoon of werknemer is gemachtigd
deze garantie op welke wijze dan ook te wijzigen, uit te breiden of aan te vullen.
BELKIN IS NIET AANSPRAKELIJK VOOR BIJZONDERE, BIJKOMENDE OF VERVOLGSCHADE
DOOR GARANTIEVERBREKING OF VOORTSPRUITEND UIT ENIG ANDER JURIDISCH
BEGINSEL, MET INBEGRIP VAN, DOCH NIET BEPERKT TOT, VERLIES VAN BATEN EN/OF
GOODWILL, BEDRIJFSSTILSTAND, BESCHADIGING RESPECTIEVELIJK
HERPROGRAMMERING OF REPRODUCTIE VAN ENIG PROGRAMMA OF ENIGE GEGEVENS
OPGESLAGEN IN OF GEBRUIKT MET BELKIN PRODUCTEN.
Nl
P74279ea-F8E841eaBLK 24-03-2003 14:11 Page 52
Belkin Corporation
501 West Walnut Street • Compton • CA •
90220-5221 • USA
Tel +1 310 898 1100
Fax +1 310 898 1111
Belkin Components, Ltd.
Express Business Park •
Shipton Way • Rushden •
NN10 6GL • Verenigd Koninkrijk
Tel +44 (0) 1933 35 2000
Fax +44 (0) 1933 31 2000
Belkin Components B.V.
Starparc Building • Boeing Avenue 333 •
1119 PH Schiphol-Rijk • Nederland
Tel +31 (0) 20 654 7300
Fax +31 (0) 20 654 7349
Belkin GmbH
Hanebergstrasse 2
80637 München, Duitsland
Tel +49 (0) 89 / 1434 05-0
Fax +49 (0) 89 / 143405-100
Belkin Components, Ltd.
7 Bowen Cresent •
West Gosford • NSW 2250 • Australië
Tel +61 (2) 4372 8600
Fax +61 (2) 4325 4277
Free Technical support
Tel: 00800 22355460
e-mail: [email protected]
© 2003 Belkin Components. Alle rechten voorbehouden.
Alle handelsnamen zijn geregistreerde handelsmerken van de betreffende rechthebbenden. P73429ea
P74279ea-F8E841eaBLK 24-03-2003 14:11 Page 53
Nl
P74279ea-F8E841eaBLK 24-03-2003 14:11 Page 54
Información importante
Conector USB
Conector PS / 2
El conector USB es compatible con Windows® 98, Windows
2000, Windows® ME y Windows® XP
El conector PS/ 2 es compatible con Windows® 98, NT, y
2000.
54
P74279ea-F8E841eaBLK 24-03-2003 14:11 Page 55
Introducción
1.1 ACERCA DE SU RATÓN
Felicidades por la compra del Ratón MiniScroller de Belkin, un dispositivo
revolucionario diseñado para los más sofisticados usuarios de ordenador de la
actualidad. No sólo le parecerá increíblemente fácil de utilizar, sino que también le
apasionará su extremada versatilidad.
Pruébelo sobre el suelo, sobre la pantalla de una lámpara, sobre su propia
pierna…pruébelo prácticamente en cualquier parte. Le fascinará la precisión del
Ratón Óptico MiniScroller, con un desplazamiento aún más suave que cualquier otro
ratón sobre las almohadillas convencionales. Ya no necesitará una almohadilla para
ratón para poder disfrutar de un rendimiento óptimo: una opción perfecta para los
usuarios de ordenador que no cuentan con demasiado espacio.
Y sin la habitual bola de goma a la que se adhieren la suciedad y los restos del uso
diario, no tendrá que limpiar continuamente su Ratón Óptico MiniScroller. Este
dispositivo sin necesidad de mantenimiento permanece en perfecto estado y
preciso.
Las características del ratón incluyen una rueda de desplazamiento que elimina la
necesidad de disponer de barra de desplazamiento, ya que le permite moverse
libremente por páginas web y documentos. El empleo de la rueda de
desplazamiento del Ratón Óptico MiniScroller reduce asimismo el movimiento,
evitando acumular tensiones en las muñecas y facilitando la navegación por los
programas de ordenador. La posibilidad de desplazamiento en cuatro direcciones
aumenta las opciones de visualización. Desplácese en sentido horizontal o vertical
con un solo clic de la rueda. Incluso podrá navegar a múltiples velocidades. Navegue
con mayor o menor velocidad: ¡usted decide!
El control de enfoque “One-Touch” le proporciona el control sobre la característica
de enfoque incluida en su sistema Windows. Ahora podrá aumentar o reducir al
instante su pantalla de visualización.
"Left Button Double Click" (Doble clic con el botón izquierdo)
"F1" a través de "F12"
Tecla "Enter" (Intro)
Tecla de "Page Up" (Re Pag)
Tecla de "Page Down" (Av Pag)
Tecla "Home" (Inicio)
Tecla "End" (Fin)
Estas opciones pueden ser empleadas en lugar de sus opciones de desplazamiento.
Por lo tanto, ¡a disfrutar! Y gracias por elegir a Belkin.
55
Es
P74279ea-F8E841eaBLK 24-03-2003 14:11 Page 56
Instalación del hardware
2.1 Instalación del hardware
Su ratón se puede conectar tanto a un puerto de ratón PS/2 como a un puerto USB
(Universal Serial Bus, Bus serie universal). Para comprobarlo, localice el puerto
designado para el ratón en la parte posterior de su ordenador. Algunos ordenadores
tendrán la palabra MOUSE (RATÓN) indicada junto al conector PS/2. Si no está
seguro, por favor consulte su manual de hardware.
Para instalación del puerto de ratón USB, simplemente retire el adaptador PS/2 - USB
del extremo del conector antes de enchufar el ratón al ordenador.
Instalación PS/2
a.
Asegúrese que el ordenador esté apagado.
a.
Localice el puerto de ratón PS / 2 en la parte posterior de su ordenador.
c.
Conecte el ratón al puerto apropiado sugerido anteriormente. Compruebe, en la
caja en la que se suministró el ratón, para qué puertos es válido
d. Encienda el ordenador. En este momento, su ratón trabajará con el sistema
operativo instalado de Microsoft.
Atención: Para usar las funciones adicionales del botón central, debe instalar el
software que viene incluido.
56
P74279ea-F8E841eaBLK 24-03-2003 14:11 Page 57
Instalación del hardware
(continuación)
Instalación USB
a.
Localice el puerto USB (Universal Serial Bus) en la parte posterior de su
ordenador.
b. Conecte su ratón al puerto. Compruebe, en la caja en la que se suministró el
ratón, para qué puertos es válido.
c.
En algunas ocasiones, cuando se conecta un ratón a un puerto USB, Windows
detecta el ratón e inicia el programa de Asistente para Agregar Nuevo
Hardware. Si no lo inicia, vaya al paso d, explicado más abajo. Si aparece el
asistente, siga las instrucciones en la pantalla.
1.
Es posible que se solicite la inserción del disco de software de Windows.
2.
Introduzca el disco en la unidad de disquete.
3.
La unidad de disco y el CD aparecerán automáticamente en pantalla.
Confirme que se trata de la unidad de disco correcta (por ejemplo: A:\).
4.
Luego haga clic en "OK" (Aceptar).
5.
El archivo necesario para el funcionamiento de su ratón USB será copiado
en su ordenador.
d. En este momento, su ratón trabajará con el sistema operativo instalado de Microsoft.
Atención: Para usar las funciones adicionales del botón central, deberá instalar el software
que viene incluido.
57
Es
P74279ea-F8E841eaBLK 24-03-2003 14:11 Page 58
Instalación del software
Instrucciones paso a paso para instalar su ratón
Importante: antes de instalar el software para el MiniScroller™, se le recomienda
especialmente que elimine todos los controladores de ratón de terceros.
NO ELIMINE LOS CONTROLADORES DE RATÓN POR DEFECTO DE WINDOWS.
WARNING:
Para evitar daños, apague su ordenador antes de enchufar o
desenchufar cualquier dispositivo de señalización.
Instalación para Windows 95, Windows 98 y Windows NT
a.
Inserte el disquete del MiniScroller™ en la unidad A: o B:
b. Haga clic en "Start" (Inicio) en la esquina inferior izquierda de su pantalla.
c.
Haga clic en "Run" (Ejecutar)
d. Escriba "A\:setup" (o "B\:setup") y haga clic en "OK" (Aceptar).
e. Siga las instrucciones que aparecen en pantalla para completar la instalación del
MiniScroller ™
f.
Para que el proceso se ejecute sin problemas:
1.
Haga clic en "Next" (Siguiente) dos veces
2.
Escriba su nombre y el nombre de la compañía, luego haga clic en "Next"
(Siguiente)
3.
Haga clic en "Next" (Siguiente) dos veces más
4.
Especifique si está utilizando una conexión PS/2 o USB (consulte la sección 2.1) y
haga clic en "OK" (Aceptar)
5.
Seleccione "Yes, I want to restart my computer now" (Sí, quiero reiniciar mi
ordenador ahora) y después haga clic en "Finish" (Finalizar).
58
P74279ea-F8E841eaBLK 24-03-2003 14:11 Page 59
Resolución de problemas
Problema #1:
P:
Puedo entrar en Windows o en "Safe Mode" (Modalidad segura) pero no
puedo usar el ratón.
R:
Si dispone de más de un controlador, podría suceder que su ordenador arranque
en modo de seguridad o que no permita el funcionamiento del ratón. Para
resolver este problema, deberá eliminar los controladores sobrantes. Si está
haciendo uso de un ratón PS/2, el controlador deberá indicar que está haciendo
uso de un controlador PS/2. Si está haciendo uso de un ratón USB, el controlador
deberá indicar que está haciendo uso de un controlador USB. Vaya a “Mouse
Properties” (Propiedades del ratón) (Start, Settings, Control Panel, Mouse [Inicio,
Configuración, Panel de control, Ratón]) y consulte la pestaña “General”. Aquí se
mostrará qué controlador es reconocido actualmente por Windows. Si no coincide
con el del ratón que acaba de conectar, deberá eliminar este controlador e instalar
el correcto.
Problema #2:
P:
Si tengo más de un controlador de ratón, ¿cómo puedo eliminar el controlador
sin tener el control del ratón? ¿Cómo reinicio en la modalidad normal de
Windows?
R:
Use su Tecla "Windows" en la esquina inferior izquierda de su teclado si cuenta
con una; si no, pulse "Alt + S" para ir al botón "Start" (Inicio) en Windows 95.
Después use la flecha "Arriba" para seleccionar "Settings"(Configuración), emplee
la flecha "Derecha" para seleccionar el "Control Panel" (Panel de Control) y
después pulse "Enter" (Intro).
Estos pasos le llevan al "Control Panel" (Panel de control) desde donde puede
tener acceso a su "Device Manager" (Administrador de dispositivos). El "Device
Manager" (Administrador de dispositivos) muestra el estado y la información de su
controlador y le permitirá modificar sus configuraciones.
Después de entrar en el "Control Panel" (Panel de control) use sus flechas de
"Arriba" y "Abajo" para seleccionar "System" (Sistema) y después pulse "Enter"
(Intro). Después de entrar en "System Properties" (Propiedades del sistema) use su
flecha "Derecha" para seleccionar el "Device Manager" (Administrador de
dispositivos). Pulse la tecla Tab (tabulador) hasta que haya seleccionado
"Computer" (Ordenador) y después use la flecha "Abajo" hasta que esté resaltado
"Mouse" (Ratón).
59
Es
P74279ea-F8E841eaBLK 24-03-2003 14:11 Page 60
Resolución de problemas (continuación)
Luego use la flecha "Derecha" para expandir y seleccione el controlador o los
controladores de su ratón
Una vez que haya seleccionado el controlador de su ratón puede modificarlo
eliminando o cambiando el controlador.
Para eliminar el controlador que ha seleccionado, use la tecla "Tab" (tabulador)
hasta que aparezca seleccionado el botón de "Remove" (Quitar). De esta forma se
eliminará el controlador. Use las teclas de "Flecha" para seleccionar cualquier otro
controlador y repita el proceso hasta que solamente quede un controlador.
Aunque se trate del controlador equivocado, usted lo puede utilizar y convertirlo
en el controlador de ratón que desee.
Después de eliminar o cambiar el controlador del ratón, use su tecla "Tab"
(tabulador) hasta que el botón "Close"(Cerrar) se encuentre seleccionado y pulse
"Enter" (Intro). Después tendrá que reiniciar su ordenador. Use la Tecla "Windows"
en la esquina inferior izquierda de su teclado si cuenta con una. Si no, pulse "Alt +
S". Después emplee la flecha hacia "Arriba" para seleccionar "Shut Down"
(Apagar el sistema) y pulse la tecla "Enter" (Intro). Use la tecla de "Flecha" hasta
seleccionar "Restart"(Reiniciar) y pulse "Enter" (Intro).
Problema #3:
P:
Después de instalar el controlador del ratón y reiniciar el ordenador, mi ratón
no funciona. ¿Cómo puedo cambiar el controlador del ratón sin tener el control
del ratón?
R:
véase problema #2
Problema #4:
P:
Porqué no funciona el ratón externo con mi ordenador portátil?
R:
Es posible que tenga que desactivar el ratón integrado para poder utilizar el ratón
externo. Pruebe buscando en su CMOS o BIOS para desactivar el ratón instalado.
Si no cuenta con esta opción o no sabe cómo llegar a su BIOS o CMOS, por favor
siga las instrucciones en el manual de su ordenador o llame al apoyo técnico / al
distribuidor de su ordenador.
60
P74279ea-F8E841eaBLK 24-03-2003 14:11 Page 61
Cómo usar su ratón
Cuidado de su ratón
El mantenimiento de su ratón Belkin™ (solamente los ratones con esfera) es importante.
Está diseñado para proporcionarle años de funcionamiento sin problemas.
El cubículo para la esfera es autolimpiable ayuda a evitar que el polvo y la pelusa se
acumulen alrededor de la esfera. Sin embargo, si el puntero del ratón vibra o se mueve
anormalmente en la pantalla, le recomendamos que limpie su ratón manualmente.
a.
En primer lugar, gire el anillo de sujeción en el sentido de las agujas del reloj para
retirar la esfera
b. Limpie la esfera con un paño libre de pelusa
c. Sople en el cubículo de la esfera para extraer el polvo y la pelusa. Si hay alguna
acumulación en los rodillos de goma dentro del cubículo de la esfera, limpie
utilizando un algodón humedecido ligeramente con alcohol isopropílico para
eliminar cualquier suciedad.
d. No es preciso el mantenimiento por parte del usuario en el caso de los ratones de
modelo óptico.
¡Conozca sus posibilidades!
La programación de su rueda de desplazamiento no podría ser más sencilla. En la
esquina inferior derecha de su pantalla encontrará un recuadro amarillo con un triángulo
naranja en su interior. Haga clic sobre él y después haga clic en “Open” (Abrir). Al iniciar
la sección de Desplazamiento Universal (“Universal Scroll”), le estará permitido
seleccionar y restringir la dirección en la que puede desplazarse su ratón. “X-Scroll”
(Desplazamiento X) y “Y-Scroll” (Desplazamiento Y) se encuentran ya seleccionados para
usted. Esto le permite desplazarse a izquierda/derecha y arriba/abajo respectivamente.
Al hacer clic para desactivar la opción “X-Scroll” se restringirá el desplazamiento a arriba
y abajo exclusivamente y al hacer clic para desactivar la opción “Y-Scroll” se restringirá
el desplazamiento a izquierda y derecha exclusivamente. Al hacer clic para desactivar
ambas opciones, se desactivarán las propiedades de desplazamiento de la rueda. El
campo de “Direction Reverse” (Inversión de la dirección) invertirá el sentido de
desplazamiento. Haciendo clic sobre el mismo, pulsando la rueda y desplazando el
ratón a la izquierda se logrará desplazar el ratón hacia la derecha (y viceversa). Su Ratón
Óptico MiniScroller le permitirá desplazarse por líneas o por páginas. Se recomienda
seleccionar el desplazamiento por páginas para los documentos de mayor tamaño por
los que necesite navegar con rapidez. Al hacer clic una vez sobre la rueda de
desplazamiento se iniciará el modo “Auto Browse” (Navegación automática), en el que
la imagen de la flecha se convertirá en un punto con cuatro flechas partiendo desde el
mismo en todas las direcciones. Al desplazar el ratón en la dirección en la que desee
navegar, la página se desplazará en dicha dirección. La velocidad de desplazamiento
también es regulable en este modo: cuanto más lejos se sitúe el puntero de su punto de
partida, tanto más rápido se producirá el desplazamiento.
61
Es
P74279ea-F8E841eaBLK 24-03-2003 14:11 Page 62
Desinstalar el software
Cómo eliminar de su ordenador el software del ratón.
ADVERTENCIA: para prevenir daños, apague su ordenador antes de conectar o
desconectar cualquier dispositivo de señalización.
Windows® 98 y superior
Ratón de bola Miniscroller:
En primer lugar será necesario cerrar el "Mouse Control Panel" (Panel de control del
ratón). Haga clic en el botón "X" en la esquina superior derecha de la ventana del
"Mouse Control Panel" (Panel de control del ratón). Cuando se le pida confirmar si
está seguro de querer salir del "Mouse Control" (Control del ratón), haga clic en
"Yes" (Sí). Ahora está listo para empezar el proceso de desinstalar.
a.
Seleccione "Start" (Inicio)
b. Seleccione "Settings" (Configuración)
c.
Seleccione "Control Panel" (Panel de control)
d. Seleccione "Add/Remove Programs" (Agregar/quitar programas)
e. Seleccione "Belkin Mouse Driver"; después haga clic en "Add/Remove"
(Agregar/quitar).
f.
Se le preguntará si está seguro de querer eliminar el "Browser Mouse" y todos
sus componentes. Haga clic en "Yes" (Sí).
g. Comienza el proceso de desinstalación. Siga las instrucciones que aparecen en
pantalla para completar el proceso.
Ratón óptico Miniscroller:
a. Haga clic en “Start” (Inicio) y después en “Programs” (Programas)
b. Haga clic en “Browser Mouse” (Ratón navegador)
c. Haga clic sobre “Uninstall” (Desinstalar).
62
P74279ea-F8E841eaBLK 24-03-2003 14:11 Page 63
Información
Declaración de la FCC
DECLARACION DE CONFORMIDAD CON REGLAMENTOS
DEL FCC PARA COMPATIBILIDAD ELECTROMAGNETICA
Nosotros, Belkin Components, de 501 West Walnut Street, Compton, California
90220, declaramos bajo nuestra responsabilidad única que el producto:
F8E841-BLK / F8E882-OPT
a la cual está declaración se relaciona:
Cumple con el Inciso 15 de los Reglamentos del FCC. La operación está sujeta a
las dos siguientes condiciones: (1) este dispositivo no puede causar interferencia
dañina, y (2) este dispositivo deberá aceptar cualquier interferencia recibida,
incluyendo interferencia que pueda causar una operación no deseada.
Declaración de Conformidad CE
Nosotros, Belkin Components, declaramos bajo nuestra única responsabilidad que el F8E812 /
F8E841-BLK / F8E882-OPT, al cual está relacionada está declaración, está en conformidad con
los Estándares de Emisiones Genéricos EN 55022: +A1: +A2 y con los Estándares de
Inmunidad Genéricos EN 50082-1 1997.
Garantía de por vida de Belkin Components Limited
Belkin Components garantiza este producto contra defectos de materiales y calidad a lo largo
de su vida. Si se descubre un defecto, Belkin podrá, a su opción, reparar o reemplazar el
producto sin cargos, siempre y cuando sea devuelto durante el período de garantía, con los
cargos por transporte ya pagos, al agente Belkin autorizado de quien este producto fue
comprado. Puede que se requiera constancia de la compra.
Esta garantía no aplicará si el producto ha sido damnificado por accidente, mal trato, uso
indebido, o falta en la aplicación, si el producto ha sido modificado sin permiso por escrito de
Belkin, o si uno de los números de serie de Belkin ha sido removido o cambiado.
LA GARANTIA Y RECURSOS SEÑALADOS ANTERIORMENTE SON EXCLUSIVOS DE
CUALQUIER OTRO, YA SEAN ORALES O POR ESCRITO, EXPRESADOS O INSINUADOS.
BELKIN ESPECIFICAMENTE RECHAZA CUALQUIER Y TODAS LAS GARANTIAS INSINUADAS,
INCLUYENDO, SIN LIMITES, GARANTIAS DE MERCANTABILIDAD Y CAPACIDAD PARA
ALGUN PROPOSITO.
Ningún representante, agente o empleado de Belkin está autorizado a modificar, extender o
añadir a esta garantía.
BELKIN NO ES RESPONSABLE POR DAÑOS ESPECIALES, INCIDENTALES O POR
CONSECUENCIA QUE RESULTEN DE ALGUN INCUMPLIMIENTO DE LA GARANTIA, O POR
CUALQUIER TEORIA LEGAL, INCLUYENDO PERO NO LIMITATIVA A PERDIDA DE
UTILIDADES, TIEMPO PERDIDO, BUENA VOLUNTAD, DAÑOS A O DE VOLVER A
PROGRAMAR, O REPRODUCIENDO CUALQUIER PROGRAMA O DATOS ALMACENADOS
EN O USADOS CON LOS PRODUCTOS BELKIN.
Es
P74279ea-F8E841eaBLK 24-03-2003 14:11 Page 64
Belkin Corporation
501 West Walnut Street • Compton • CA •
90220-5221 • EEUU
Tel +1 310 898 1100
Fax +1 310 898 1111
Belkin Components, Ltd.
Express Business Park •
Shipton Way • Rushden •
NN10 6GL • Reino Unido
Tel +44 (0) 1933 35 2000
Fax +44 (0) 1933 31 2000
Belkin Components B.V.
Starparc Building • Boeing Avenue 333 •
1119 PH Schiphol-Rijk • Países Bajos
Tel +31 (0) 20 654 7300
Fax +31 (0) 20 654 7349
Belkin GmbH
Hanebergstrasse 2
80637 München, Alemania
Tel +49 (0) 89 / 1434 05-0
Fax +49 (0) 89 / 143405-100
Belkin Components, Ltd.
7 Bowen Cresent •
West Gosford • NSW 2250 • Australia
Tel +61 (2) 4372 8600
Fax +61 (2) 4325 4277
Free Technical support
Tel: 00800 22355460
e-mail: [email protected]
© 2003 Belkin Components. Todos los derechos reservados.
Todos los nombres de marcas son marcas registradas de los respectivos fabricantes listados. P73429ea
P74279ea-F8E841eaBLK 24-03-2003 14:11 Page 65
Es
P74279ea-F8E841eaBLK 24-03-2003 14:11 Page 66
Informazioni importanti
Connettore USB
Il connettore USB è compatibile con Windows® 98,
Windows 2000, Windows® ME e Windows® XP
Connettore PS/2
Il connettore PS/2 è compatibile con Windows® 98,
NT, e 2000
66
P74279ea-F8E841eaBLK 24-03-2003 14:11 Page 67
Introduzione
1.1 IL VOSTRO MOUSE
Complimenti per aver scelto il mouse MiniScroller di Belkin, un mouse rivoluzionario,
progettato per i più sofisticati e moderni utilizzatori di computer. Questo mouse non
è soltanto incredibilmente facile da usare, ma anche estremamente versatile.
Provatelo sul pavimento, su un paralume, su una gamba … provatelo ovunque. La
precisione del mouse ottico MiniScroller vi sorprenderà, lo potrete spostare con una
facilità superiore rispetto a qualsiasi mouse tradizionale sul suo tappetino. Il
tappetino non sarà più necessario neanche per ottenere le migliori prestazioni:
aspetto importante per chi usa il computer su uno spazio ristretto.
Inoltre, data l'assenza di una sfera in gomma che raccoglie lo sporco e le impurità
nel corso dell'utilizzo quotidiano, il mouse ottico MiniScroller non dovrà neanche
essere continuamente pulito. Questa periferica, che non richiede alcun tipo di
manutenzione, potrà quindi essere usata con facilità e precisione in qualsiasi
momento.
Tra le caratteristiche del mouse è compresa la presenza di una rotella di scorrimento
che rende superflua la barra di scorrimento per spostarsi fluidamente nei siti web e
nei documenti. Con il mouse ottico MiniScroller, la rotella di scorrimento riduce
inoltre la necessità di muovere il polso, consentendo di navigare con maggiore
facilità nei programmi. La possibilità di scorrimento in quattro direzioni migliora le
possibilità di visualizzazione: questo mouse consente infatti di scorrere i documenti
sia orizzontalmente, sia verticalmente, con un semplice clic della rotella, potendo
addirittura navigare a velocità diverse: rapidamente o lentamente, come preferite.
L'opzione di controllo One-Touch Zoom consente di gestire la funzione di zoom
prevista in Windows: la schermata di visualizzazione potrà essere ingrandita o ridotta
istantaneamente.
Una volta caricato il software nel vostro computer, il pulsante centrale del mouse (la
rotella di scorrimento) può essere programmato per eseguire le stesse funzioni di:
"Doppio click del pulsante sinistro"
Da "F1" a "F12"
Tasto "Enter" (Invio)
Tasto "Page Up" (Pagina su)
Tasto "Page Down" (Pagina giù)
Tasto "Home" (Inizio documento)
Tasto "End" (Fine documento)
Queste soluzioni possono essere adottate in sostituzione delle vostre opzioni di
scorrimento.
Quindi, non possiamo che augurarvi buon divertimento e ringraziarvi per aver scelto
Belkin.
67
It
P74279ea-F8E841eaBLK 24-03-2003 14:11 Page 68
Installazione hardware
2.1 Installazione hardware
Il vostro mouse può essere collegato o ad una porta per mouse PS/2 o ad una porta
Universal Serial Bus (USB). Per verificare quale faccia al caso vostro, controllate sul
retro del computer quale sia la vostra porta destinata al mouse. In alcuni PC la
parola MOUSE è marcata vicino al connettore PS/2. Se non siete ancora
completamente sicuri, guardate nel manuale.
Per l’installazione alla porta mouse USB è sufficiente togliere l’adattatore PS/2-USB
dall’estremità del connettore prima di inserire il mouse nel computer.
Installazione PS/2
a.
Accertatevi che il computer sia spento
b. Trovate la porta mouse PS/2 sul retro del computer.
c.
Inserite il mouse nella porta adatta indicata in precedenza. Controllate sulla
scatola che conteneva il mouse quali siano le porte supportate.
d. Accendete il computer. A questo punto il vostro mouse funziona con il sistema
operativo Microsoft® presente.
Nota: Per sfruttare le altre funzioni del tasto centrale, è necessario installare il
software fornito.
68
P74279ea-F8E841eaBLK 24-03-2003 14:11 Page 69
Installazione hardware
(continua)
Installazione USB
a.
Trovate la porta Universal Serial Bus (USB) sul retro del computer.
b. Collegate il mouse alla porta. Controllate sulla scatola che conteneva il mouse
quali siano le porte supportate.
c.
Talvolta può accadere che collegando il mouse ad una porta USB, Windows rilevi
il mouse ed avvii la "Add New Hardware Wizard" (Installazione guidata nuovo
hardware). Se questo non accade, passate al punto d. di seguito. Al contrario,
se l’Installazione guidata compare, seguite le istruzioni a video.
1.
Vi può venire richiesto di inserire il dischetto del software Windows®
2.
Inserite il disco nell’apposito dischetto driver.
3.
Il drive ed il dischetto compaiono automaticamente. Confermate che si
tratta del vostro drive attuale (ad esempio: A:\)
4.
Quindi cliccate su "OK".
5.
Il file necessario per supportare il mouse USB verrà copiato nel computer.
d. A questo punto il vostro mouse funziona con il sistema operativo Microsoft® presente.
Nota: Per sfruttare le altre funzioni del tasto centrale, è necessario installare il software
fornito.
It
69
P74279ea-F8E841eaBLK 24-03-2003 14:11 Page 70
Installazione software
Una guida passo per passo per l’impostazione del mouse
Importante: prima di installare il software MiniScroller™ si consiglia vivamente di
eliminare tutti gli altri driver mouse presenti.
AD ECCEZIONE DEI DRIVER MOUSE DI DEFAULT DI WINDOWS®
ATTENZIONE:
Per evitare eventuali danni, spegnete il computer prima di
collegare o scollegare qualsiasi periferica di puntamento.
Installazione con Windows® 95, Windows® 98 e Windows NT®
a.
Inserite il dischetto MiniScroller™ nel drive A: o B: .
b. Cliccate "Start" (Avvio) nell’angolo in basso a sinistra del vostro schermo
c.
Quindi cliccate su "Run" (Esegui)
d. Digitate ("A\: o B\: setup") e cliccate su "OK".
e. Seguite le istruzioni a video per completare l’installazione del MiniScroller™
f.
Perché la procedura si svolga senza difficoltà:
1.
Cliccate "Next" (Avanti) due volte
2.
Digitate il vostro nome ed il nome della vostra azienda, quindi cliccate su "Next"
(Avanti)
3.
Cliccate "Next" (Avanti) altre due volte
4.
Specificate se state utilizzando una connessione USB o PS/2 (si veda sezione 2.1),
quindi cliccate su "OK".
5.
Selezionate "Yes, I want to restart my computer now" (Sì, desidero riavviare il
mio computer adesso) e cliccate su "Finish" (Fine)
70
P74279ea-F8E841eaBLK 24-03-2003 14:11 Page 71
Rilevazione ed eliminazione anomalie
Problema n.1:
D:
Riesco ad accedere a Windows® o a "Safe Mode" (Modalità di protezione) ma
non riesco ad utilizzare il mouse.
R:
In presenza di più di un driver installato, il computer potrebbe avviarsi in modalità
di protezione o non consentire per niente al mouse di funzionare. Per ovviare a
questo inconveniente è necessario rimuovere tutti i driver in eccesso. Se si utilizza
un mouse PS/2, il driver deve indicare l'utilizzo di un driver PS/2. Se si utilizza un
mouse USB, il driver deve indicare l'utilizzo di un driver USB. Andare in “Mouse
Properties” (Proprietà Mouse) (Start, Settings (Impostazioni), Control Panel
(Pannello di controllo), Mouse) e guardare nella cartella “General” (Informazioni
generali), dove viene indicato il tipo di driver attualmente riconosciuto da
Windows. Se l'impostazione non dovesse corrispondere al mouse attualmente
collegato, eliminarlo ed installare il driver corretto.
Problema n.2:
D:
Se ho più di un driver mouse, come posso eliminare i driver senza il controllo
del mouse? Come posso eseguire l’avvio nella modalità normale di Windows®?
R:
Utilizzate il vostro tasto "Windows®" nell’angolo in basso a sinistra della tastiera, se
previsto, o altrimenti premete "Alt + S" per accedere al pulsante "Start" (Avvio) in
Windows® 95. Quindi utilizzate il tasto "Up" (Freccia su) per selezionare "Settings"
(Impostazioni) ed il tasto "Right" (Freccia destra) per selezionare "Control Panel"
(Pannello di controllo) e premete "Enter" (Invio).
Questi passaggi vi hanno portato al "Control Panel" (Pannello di controllo) da dove
potete accedere al vostro "Device Manager" (Gestione periferiche). Il "Device
Manager" (Gestione periferiche) riporta lo stato dei vostri driver e le informazioni
relative e vi consente di modificare le impostazioni.
Dopo l’accesso al "Control Panel" (Pannello di controllo), con i tasti "Up" e
"Down" (Freccia su e Freccia giù) selezionate "System" (Sistema) e premete
"Enter" (Invio). Dopo essere entrati in "System Properties" (Proprietà di sistema)
con il tasto "Right" (Freccia destra) selezionate "Device Manager" (Gestione
periferiche). Quindi premete Tab (Tabulazioni) fino a selezionare "Computer" e con
il tasto "Down" (Freccia giù) evidenziate il vostro "Mouse".
Con il tasto "Right" (Freccia destra) espandete la casella e selezionate il o i vostri
driver mouse.
Una volta scelto il driver mouse, questo può essere modificato, eliminato o
cambiato.
71
It
P74279ea-F8E841eaBLK 24-03-2003 14:11 Page 72
Rilevazione ed eliminazione anomalie
(continua)
Per eliminare il driver selezionato, utilizzate il tasto "Tab" (Tabulazioni) fino a
selezionare "Remove" (Elimina). Quindi premete "Enter" (Invio). In questo modo il
driver viene eliminato. Con il tasto "Arrow" (Freccia) selezionate qualsiasi altro
driver e ripetete la procedura fino a quando rimangono tutti i driver tranne uno.
Anche se si tratta del driver sbagliato, esso può essere utilizzato e cambiato nel
driver desiderato.
Una volta rimosso o cambiato il driver del mouse, con il tasto "Tab" scegliete
"Close" (Chiudi) e premete "Enter" (Invio). A questo punto dovete riavviare il
computer. Utilizzate il tasto Windows® nell’angolo in basso a sinistra della tastiera
se previsto, altrimenti premete "Alt+S". Quindi con il tasto "Up" (Freccia su)
selezionate "Shut Down" (Chiudi) e premete "Enter" (Invio). Con il tasto "Arrow"
(Freccia) selezionate "Restart" (Riavvia) e premete "Enter" (Invio).
Problema n.3:
D:
Dopo aver installato il driver del mouse e riavviato il computer, il mouse non
funziona. Come posso cambiare il driver del mouse senza controllo del mouse?
R:
vedi problema n.2
Problema n.4:
D:
Perché il mio mouse esterno non funziona sul mio computer portatile?
R:
Potrebbe essere necessario disattivare il mouse interno per poter utilizzare un
mouse esterno. Provate a guardare in CMOS o BIOS per disattivare il mouse
interno. Se non avete questa opzione, o non sapete come accedere a BIOS o a
CMOS, seguite le istruzioni nel manuale del vostro computer o contattate il
rivenditore / l’assistenza tecnica del vostro computer.
72
P74279ea-F8E841eaBLK 24-03-2003 14:11 Page 73
Come utilizzare il mouse
Cura del mouse
La manutenzione del mouse Belkin™ (solo nella versione con sfera) è importante. Esso è
stato progettato per offrire anni di utilizzo senza problemi.
Una gabbia autopulente per la sfera fa in modo che attorno alla sfera non si formino
polvere e impurità . Tuttavia, se il puntatore dovesse saltare o muoversi in modo
anomalo sullo schermo, è consigliabile pulire il mouse a mano
a. Innanzitutto, fate ruotare l’anello di tenuta in senso antiorario per estrarre la sfera
b. Pulite la sfera con un panno liscio e pulito
c. Soffiate nella gabbia della sfera per eliminare qualsiasi traccia di polvere o impurità.
Qualora si dovesse formare dello sporco sui rulli gommati all’interno della gabbia
della sfera, eliminate qualsiasi residuo con un batuffolo di cotone leggermente
imbevuto di alcool .
d. La manutenzione da parte dell'utente non è necessaria nei mouse ottici.
Per conoscere le opzioni disponibili…
La programmazione della rotella di scorrimento non potrebbe essere più semplice.
Nell'angolo in basso a destra dello schermo è prevista una casella gialla con un triangolo
arancione al suo interno. Fare clic sulla casella e poi su “Open” (Apri). Partendo dalla
sezione “Universal Scroll” (Scorrimento universale), si ha modo di scegliere e limitare la
direzione di scorrimento del mouse. “X-Scroll” (Scorrimento X) e “Y-Scroll” (Scorrimento
Y) sono già preimpostate. Questa opzione consente di scorrere i documenti
rispettivamente verso sinistra/destra e l'alto / basso. Disattivando l'opzione “X-Scroll”
(scorrimento X), lo scorrimento viene limitato soltanto alle direzioni su e giù, mentre
disattivando l'opzione “Y-Scroll”, si imposta la possibilità di scorrere il documento
soltanto verso sinistra e destra. Disattivando entrambe le opzioni, tutte le opzioni di
scorrimento della rotella vengono disattivate. Il campo “Direction riverse” (Direzione
inversa) fa invertire la direzione di scorrimento. Facendo clic su di essa, premendo la
rotella e spostando il mouse a sinistra è possibile scorrere verso destra (e viceversa). Con
il mouse ottico MiniScroller i documenti possono essere scorsi per righe o per pagine. Lo
scorrimento per pagine è consigliato per i documenti più consistenti, che si desidera
sfogliare rapidamente. Con un clic della rotella di scorrimento, si avvia la modalità “Auto
Browse” (Sfoglia in automatico), nella quale la freccia si trasforma in un punto con quattro
frecce orientate in direzioni diverse. Spostando il mouse nella direzione desiderata, la
pagina viene scorsa nella stessa direzione. In questa modalità è possibile impostare anche
la velocità di scorrimento: più il puntatore si allontana dal punto originale e più veloce è
lo scorrimento.
73
It
P74279ea-F8E841eaBLK 24-03-2003 14:11 Page 74
Disinstallazione del software
Per eliminare il software mouse dal computer
ATTENZIONE:
Per evitare eventuali danni, spegnete il computer prima di collegare o
scollegare qualsiasi periferica di puntamento.
Windows® 98 e superiore:
Mouse Miniscroller a sfera:
Innanzitutto è necessario chiudere il "Mouse Control Panel" (Pannello di controllo
mouse). Cliccate sul pulsante "X" nell’angolo in alto a destra della finestra "Mouse
Control Panel" (Pannello di controllo mouse). Quando vi viene chiesto se siete sicuri
di voler uscire dal "Mouse Control" (Controllo Mouse), cliccate su "Yes" (Sì) Ora siete
pronti per iniziare la procedura di disinstallazione.
a.
Selezionate "Start" (Avvio).
b. Selezionate "Settings" (Impostazioni)
c.
Selezionate "Control Panel) (Panello di controllo)
d. Selezionate "Add/Remove Programs" (Aggiungi/Elimina programmi).
e. Selezionate "Belkin Mouse Driver" (Driver Mouse Belkin) e cliccate su
"Add/Remove" (Aggiungi/Elimina).
f.
Vi viene chiesto se siete certi di voler eliminare "Browser Mouse" e tutti i suoi
componenti. Cliccate su "Yes" (Sì).
g. Inizia il procedura di disinstallazione. Seguite le istruzioni sul video per
completare la procedura.
Mouse ottico MiniScroller:
a.
Fare clic su “Start” e quindi su “Programs” (Programmi)
b. Fare clic su “Browser Mouse” (Mouse di scorrimento)
c.
Fare clic su “Uninstall” (Disinstalla)
74
P74279ea-F8E841eaBLK 24-03-2003 14:11 Page 75
Informazioni
Dichiarazione FCC
DICHIARAZIONE DI CONFORMITÀ CON LE LEGGI FCC
PER LA COMPATIBILITÀ ELETTROMAGNETICA
Noi sottoscritti, Belkin Components, di 501 West Walnut Street, Compton CA
90220, dichiariamo sotto la nostra piena responsabilità che il prodotto
F8E841-BLK / F8E882-OPT
a cui questa dichiarazione si riferisce è conforme all’art.15 delle Norme FCC. Il
funzionamento è soggetto alle seguenti due condizioni: (1) questo dispositivo non
deve causare interferenze dannose, e (2) questo dispositivo deve accettare
qualsiasi interferenza ricevuta, comprese eventuali interferenze che possano
causare un funzionamento anomalo.
Dichiarazione di Conformità CE
Noi sottoscritti, Belkin Components, dichiariamo sotto la nostra piena responsabilità che il
prodotto F8E812 / F8E841-BLK / F8E882-OPT a cui questa dichiarazione fa riferimento, è
in conformità con la Norma sulle Emissioni Generiche EN 55022: +A1: +A2 e con la Norma
di Immunità Generica EN 50082-1 1997.
Garanzia di durata della Belkin Components Limited
La Belkin Components garantisce questo prodotto contro ogni difetto di materiale e
costruzione per tutta la sua durata. Nel caso di un’eventuale anomalia la Belkin
provvederà, a propria discrezione, a riparare o sostituire il prodotto senza alcuna spesa, a
condizione che questo sia presentato entro il termine di garanzia, con le spese di trasporto
già pagate, presso il rivenditore autorizzato Belkin da cui avete acquistato il prodotto.
Potrebbe essere necessario presentare la prova d’acquisto.
Questa garanzia non viene applicata se il prodotto è stato danneggiato involontariamente
o in seguito ad un utilizzo eccessivo, scorretto o errato; se il prodotto è stato modificato
senza l’autorizzazione scritta della Belkin; o se un qualsiasi numero di serie Belkin sia stato
rimosso o cancellato.
LA GARANZIA ED I RIMEDI DI CUI SOPRA VERRANNO APPLICATI ESCLUSIVAMENTE
NEL CASO DI CONFERMA ORALE O SCRITTA, ESPRESSA O IMPLICITA. LA BELKIN IN
PARTICOLARE DECLINA L’OBBLIGO DI QUALSIASI GARANZIA IMPLICITA, COMPRESE,
SENZA ALCUN LIMITE, LE GARANZIE DI COMMERCIABILITÀ ED IDONEITÀ AD UNO
SCOPO SPECIFICO.
I rivenditori, gli agenti o i dipendenti della Belkin non sono autorizzati a modificare,
prolungare o ampliare la presente garanzia.
LA BELKIN DECLINA QUALSIASI RESPONSABILITÀ PER DANNI PARTICOLARI,
ACCIDENTALI O CONSEGUENTI CAUSATI DA QUALSIASI VIOLAZIONE DELLA
GARANZIA O DETERMINATI DA QUALSIASI TEORIA LEGALE COMPRESI, MA NON
SOLO, I CASI DI LUCRO CESSANTE, TEMPI DI ATTESA ED AVVIAMENTO, NONCHÉ PER
EVENTUALI DANNEGGIAMENTI O RIPROGRAMMAZIONI O RIPRODUZIONI DI
QUALSIASI DATO O PROGRAMMA SALVATO O UTILIZZATO CON I PRODOTTI BELKIN.
It
P74279ea-F8E841eaBLK 24-03-2003 14:11 Page 76
Belkin Corporation
501 West Walnut Street • Compton • CA •
90220-5221 • USA
Tel +1 310 898 1100
Fax +1 310 898 1111
Belkin Components, Ltd.
Express Business Park •
Shipton Way • Rushden •
NN10 6GL • Regno Unito
Tel +44 (0) 1933 35 2000
Fax +44 (0) 1933 31 2000
Belkin Components B.V.
Starparc Building • Boeing Avenue 333 •
1119 PH Schiphol-Rijk • Paesi Bassi
Tel +31 (0) 20 654 7300
Fax +31 (0) 20 654 7349
Belkin GmbH
Hanebergstrasse 2
80637 München, Germania
Tel +49 (0) 89 / 1434 05-0
Fax +49 (0) 89 / 143405-100
Belkin Components, Ltd.
7 Bowen Cresent •
West Gosford • NSW 2250 • Australia
Tel +61 (2) 4372 8600
Fax +61 (2) 4325 4277
Free Technical support
Tel: 00800 22355460
e-mail: [email protected]
© 2003 Belkin Components. Tutti i diritti riservati.
Tutti i nomi commerciali sono marchi registrati dei rispettivi produttori elencati. P73429ea