1
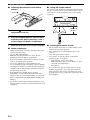
UATLK
RECEIVER/CD PLAYER
AMPLI-TUNER/LECTEUR CD
OWNER'S MANUAL
MODE D'EMPLOI
MANUAL DE INSTRUCCIONES
IMPORTANT SAFETY INSTRUCTIONS
CAUTION
RISK OF ELECTRIC SHOCK
DO NOT OPEN
CAUTION: TO REDUCE THE RISK OF
ELECTRIC SHOCK, DO NOT REMOVE
COVER (OR BACK). NO USER-SERVICEABLE
PARTS INSIDE. REFER SERVICING TO
QUALIFIED SERVICE PERSONNEL.
1
2
3
4
5
6
7
8
9
• Explanation of Graphical Symbols
The lightning flash with arrowhead symbol, within an
equilateral triangle, is intended to alert you to the
presence of uninsulated “dangerous voltage” within the
product’s enclosure that may be of sufficient magnitude
to constitute a risk of electric shock to persons.
The exclamation point within an equilateral triangle is
intended to alert you to the presence of important
operating and maintenance (servicing) instructions in
the literature accompanying the appliance.
Note to CATV system installer:
This reminder is provided to call the CATV system
installer’s attention to Article 820-40 of the NEC that
provides guidelines for proper grounding and, in
particular, specifies that the cable ground shall be
connected to the grounding system of the building, as
close to the point of cable entry as practical.
IMPORTANT
Please record the serial number of this unit in the space
below.
MODEL:
Serial No.:
The serial number is located on the rear of the unit.
Retain this Owner’s Manual in a safe place for future
reference.
10
11
12
13
14
Read these instructions.
Keep these instructions.
Heed all warnings.
Follow all instructions.
Do not use this apparatus near water.
Clean only with dry cloth.
Do not block any ventilation openings. Install in accordance with
the manufacturer’s instructions.
Do not install near any heat sources such as radiators, heat
registers, stoves, or other apparatus (including amplifiers) that
produce heat.
Do not defeat the safety purpose of the polarized or groundingtype plug. A polarized plug has two blades with one wider than
the other. A grounding type plug has two blades and a third
grounding prong. The wide blade or the third prong are provided
for your safety. If the provided plug does not fit into your outlet,
consult an electrician for replacement of the obsolete outlet.
Protect the power cord from being walked on or pinched
particularly at plugs, convenience receptacles, and the point
where they exit from the apparatus.
Only use attachments/accessories specified by the manufacturer.
Use only with the cart, stand, tripod, bracket, or
table specified by the manufacturer, or sold with
the apparatus. When a cart is used, use caution
when moving the cart/apparatus combination to
avoid injury from tip-over.
Unplug this apparatus during lightning storms or
when unused for long periods of time.
Refer all servicing to qualified service personnel. Servicing is
required when the apparatus has been damaged in any way, such
as power-supply cord or plug is damaged, liquid has been spilled
or objects have fallen into the apparatus, the apparatus has been
exposed to rain or moisture, does not operate normally, or has
been dropped.
We Want You Listening For A Lifetime
Yamaha and the Electronic Industries Association’s Consumer Electronics Group want you to get the most out of your
equipment by playing it at a safe level. One that lets the sound come through loud and clear without annoying blaring or
distortion – and, most importantly, without affecting your sensitive hearing. Since hearing damage from loud sounds is
often undetectable until it is too late, Yamaha and the Electronic Industries Association’s Consumer Electronics Group
recommend you to avoid prolonged exposure from excessive volume levels.
i En
FCC INFORMATION (for US customers)
1 IMPORTANT NOTICE: DO NOT MODIFY THIS
UNIT!
This product, when installed as indicated in the
instructions contained in this manual, meets FCC
requirements. Modifications not expressly approved by
Yamaha may void your authority, granted by the FCC,
to use the product.
2 IMPORTANT: When connecting this product to
accessories and/or another product use only high quality
shielded cables. Cable/s supplied with this product MUST
be used. Follow all installation instructions. Failure to
follow instructions could void your FCC authorization to
use this product in the USA.
3 NOTE: This product has been tested and found to comply
with the requirements listed in FCC Regulations, Part 15
for Class “B” digital devices. Compliance with these
requirements provides a reasonable level of assurance that
your use of this product in a residential environment will
not result in harmful interference with other electronic
devices.
This equipment generates/uses radio frequencies and, if
not installed and used according to the instructions found
in the users manual, may cause interference harmful to the
operation of other electronic devices.
R-1330
Compliance with FCC regulations does not guarantee
that interference will not occur in all installations. If
this product is found to be the source of interference,
which can be determined by turning the unit “OFF”
and “ON”, please try to eliminate the problem by using
one of the following measures:
Relocate either this product or the device that is being
affected by the interference.
Utilize power outlets that are on different branch
(circuit breaker or fuse) circuits or install AC line
filter/s.
In the case of radio or TV interference, relocate/
reorient the antenna. If the antenna lead-in is 300 ohm
ribbon lead, change the lead-in to coaxial type cable.
If these corrective measures do not produce
satisfactory results, please contact the local retailer
authorized to distribute this type of product. If you can
not locate the appropriate retailer, please contact
Yamaha Electronics Corp., U.S.A. 6660 Orangethorpe
Ave, Buena Park, CA 90620.
The above statements apply ONLY to those products
distributed by Yamaha Corporation of America or its
subsidiaries.
CD-1330
● The label is located on the bottom of the unit. (U.S.A and Canada models only)
ii En
CAUTION: READ THIS BEFORE OPERATING YOUR UNIT.
1
2
3
4
5
6
7
8
9
10
11
12
13
14
15
16
17
To assure the finest performance, please read this manual
carefully. Keep it in a safe place for future reference.
Install this unit (R-1330 and CD-1330) in a well ventilated, cool,
dry, clean place with at least 10 cm on the top (except for CD1330), 10 cm on the left and right, and 10 cm at the back of this
unit — away from direct sunlight, heat sources, vibration, dust,
moisture, and/or cold.
Locate this unit away from other electrical appliances, motors, or
transformers to avoid humming sounds.
Do not expose this unit to sudden temperature changes from cold
to hot, and do not locate this unit in an environment with high
humidity (i.e. a room with a humidifier) to prevent condensation
inside this unit, which may cause an electrical shock, fire,
damage to this unit, and/or personal injury.
Avoid installing this unit where foreign object may fall onto this
unit and/or this unit may be exposed to liquid dripping or
splashing. On the top of this unit, do not place:
– Other components, as they may cause damage and/or
discoloration on the surface of this unit.
– Burning objects (i.e. candles), as they may cause fire, damage
to this unit, and/or personal injury.
– Containers with liquid in them, as they may fall and liquid
may cause electrical shock to the user and/or damage to this
unit.
Do not cover this unit with a newspaper, tablecloth, curtain, etc.
in order not to obstruct heat radiation. If the temperature inside
this unit rises, it may cause fire, damage to this unit, and/or
personal injury.
Do not plug in this unit to a wall outlet until all connections are
complete.
Do not operate this unit upside-down. It may overheat, possibly
causing damage.
Do not use force on switches, knobs and/or cords.
When disconnecting the power cable from the wall outlet, grasp
the plug; do not pull the cable.
Do not clean this unit with chemical solvents; this might damage
the finish. Use a clean, dry cloth.
Only voltage specified on this unit must be used. Using this unit
with a higher voltage than specified is dangerous and may cause
fire, damage to this unit, and/or personal injury. Yamaha will not
be held responsible for any damage resulting from use of this unit
with a voltage other than specified.
To prevent damage by lightning, keep the power cord and
outdoor antennas disconnected from a wall outlet or this unit
during a lightning storm.
Do not attempt to modify or fix this unit. Contact qualified
Yamaha service personnel when any service is needed.
The cabinet should never be opened for any reasons.
When not planning to use this unit for long periods of time (i.e.
vacation), disconnect the AC power plug from the wall outlet.
Be sure to read the “TROUBLESHOOTING” section on
common operating errors before concluding that this unit is
faulty.
Before moving this unit, press ON/STANDBY, OFF to turn off
the system, and disconnect the AC power plug from the wall
outlet.
iii En
18 Condensation will form when the surrounding temperature
changes suddenly. Disconnect the power cable from the outlet,
then leave this unit alone.
19 When using this unit for a long time, this unit may become warm.
Turn the power off, then leave this unit alone for cooling.
20 Install this unit near the AC outlet and where the AC power plug
can be reached easily.
21 The batteries shall not be exposed to excessive heat such as
sunshine, fire or the like.
22 Excessive sound pressure from earphones and headphones can
cause hearing loss.
This unit is not disconnected from the AC power source as
long as it is connected to the wall outlet, even if this unit itself
is turned off by
. This state is called the standby mode. In
this state, this unit is designed to consume a very small
quantity of power.
LASER SAFETY
This unit employs a laser. Due to possible eye injury, only a
qualified service person should remove the cover or attempt to
service this device.
DANGER
This unit emits visible laser radiation when open. Avoid direct
eye exposure to beam.
When this unit is plugged into the wall outlet, do not place your
eyes close to the opening of the disc tray and other openings to
look into inside.
The laser component in this product is capable of emitting
radiation exceeding the limit for Class 1.
WARNING
TO REDUCE THE RISK OF FIRE OR ELECTRIC
SHOCK, DO NOT EXPOSE THIS UNIT TO RAIN
OR MOISTURE.
FOR CANADIAN CUSTOMERS
To prevent electric shock, match wide blade of plug to
wide slot and fully insert.
This Class B digital apparatus complies with Canadian
ICES-003.
CONTENTS
FEATURES............................................................. 2
SUPPLIED ACCESSORIES ................................. 2
CONTROLS AND FUNCTIONS ......................... 3
Receiver (R-1330) ..................................................... 3
CD player (CD-1330) ................................................ 4
Remote control........................................................... 5
OTHER OPERATIONS
CONTROLLING iPod™......................................19
Using iPod™ ........................................................... 19
ADDITIONAL INFORMATION
INTRODUCTION
INTRODUCTION
TROUBLESHOOTING .......................................20
CONNECTING THE EXTERNAL
COMPONENTS WITH THE SYSTEM .......... 9
CONNECTING ANTENNAS.............................. 10
CONNECTING THE POWER CABLES .......... 10
CONNECTING THE iPod™ AND THE USB
DEVICE............................................................. 11
Receiver (R-1330) ................................................... 20
CD player (CD-1330) .............................................. 21
Remote control ........................................................ 22
NOTES ABOUT DISCS/MP3, WMA FILES.....23
GLOSSARY...........................................................25
Audio information ................................................... 25
Copyright and logo marks ....................................... 25
SPECIFICATIONS...............................................25
BASIC
OPERATIONS
Connecting an iPod™.............................................. 11
Connecting USB devices ......................................... 11
PREPARATION
PREPARATION
BASIC OPERATIONS
SYSTEM OPERATIONS .................................... 12
Basic system operations........................................... 12
Changing the brightness of the front panel display ..... 13
Setting the sleep timer ............................................. 13
To use headphones................................................... 13
TUNER
OPERATIONS
DISC AND USB DEVICE OPERATIONS ........ 14
Playback operations ................................................. 14
Switching the playback information display ........... 15
Repeating playback (Repeat Play)........................... 16
Playing back randomly (Random Play)................... 16
TUNER OPERATIONS
OTHER
OPERATIONS
FM/AM TUNING ................................................. 17
Automatic tuning ..................................................... 17
Manual tuning.......................................................... 17
Automatic preset tuning (FM only) ......................... 17
Manual preset tuning ............................................... 18
Selecting preset stations........................................... 18
ADDITIONAL
INFORMATION
■ About this manual
1 En
English
• In this manual, “R-1330” is described as “receiver” and “CD-1330” is described as “CD player”.
• This manual describes how to operate the system using a remote control except when it is not available. Some of these operations are
also available using the front panel buttons.
• y indicates a tip for your operation.
• Notes contain important information about safety and operating instructions.
• This manual is printed prior to production. Design and specifications are subject to change in part as a result of improvements, etc. In
case of differences between the manual and the product, the product has priority.
FEATURES
FEATURES
Receiver (R-1330)
• Minimum RMS output power per channel
60 W + 60 W (6 Ω, 1 kHz, 0.5% THD)
• 30-station FM/AM preset tuning
• iPod playability (with rechargeable function)
• Pure Direct mode
• Adjustable Display Brightness
CD player (CD-1330)
• Plays Audio CDs, MP3/WMA discs
• CD-R, CD-RW Disc Playability
• MP3/WMA file playability stored on USB
device
• Linked operation with the receiver such as
Pure Direct mode, Adjustable Display
Brightness and INPUT mode
SUPPLIED ACCESSORIES
This product includes the following accessories. Before connecting this system, make sure you received all of the following parts.
Remote
control
iPod
CD
USB
FM/AM
PHONO
AUX
Batteries (x2)
(AA, R6, UM-3)
System control
cable (0.6 m)
Indoor FM antenna
RCA stereo
cable (1.0 m)
AM loop antenna
PRESET
TUNING
MEMORY
REPEAT
RANDOM
iPod MENU SEL
(Australia and
Korea models)
MENU
(Other models)
ENTER
Dock cover
Clamp filter (x2)
VOL
VOL
(U.S.A and Canada
models only)
TONE BALANCE
DISPLAY DIMMER
SLEEP
PURE DIRECT
MUTE
Latch
iPod
VOLUME
ON/STANDBY
OFF
PHONES
INPUT
PURE
DIRECT
TUNER PRESET
MIN
Coil the speaker cable around
the clamp filter and close it
until the latch is locked.
2 En
When the Dock cover is covered.
MAX
CONTROLS AND FUNCTIONS
INTRODUCTION
Receiver (R-1330)
■ Front panel
iPod
E
D
1
3
2
4
5
PRESET
ON/STANDBY
OFF
TUNED STEREO
kHz SLEEP MHz
INPUT
PHONES
Top view
7
6
VOLUME
PURE
DIRECT
TUNER PRESET
MIN
8
9
0
A
B
MAX
C
Front view
1 ON/STANDBY, OFF
Turns the receiver to ON/STANDBY or OFF.
8 PHONES
Outputs audio signals for private listening with headphones.
2 ON/STANDBY indicator
Lights up in green when the receiver is turned on. Lights
up in amber when the receiver is in standby mode.
The indicator goes off when the receiver is turned off.
9 Remote control sensor
Receives signals from the remote control.
3 Front panel display
Shows the various information such as the tuning
frequency.
A PURE DIRECT
Turns on or off the Pure Direct mode (see page 12).
When PURE DIRECT mode is on, the indicator above
lights up.
4 PRESET indicator
Lights up when you select preset radio stations (see
page 18).
5 TUNED indicator
Lights up when the receiver is tuned into a station.
6 STEREO indicator
Lights up when the receiver is receiving a strong signal
from an FM stereo broadcast.
B TUNER PRESET
/
The input source is changed to FM/AM. Selects a preset
station. Operable even when the receiver is in standby mode.
C VOLUME
Adjusts the volume level.
D h/e
The input source is changed to iPod. Starts and pauses the
playback of iPod. Operable even when the receiver is in
standby mode.
E iPod terminal
Connect your iPod (see page 11).
3 En
English
7 SLEEP indicator
Lights up when the sleep timer is on (see page 13).
0 INPUT
Selects an input source.
CONTROLS AND FUNCTIONS
CD player (CD-1330)
■ Front panel
1
2
ON/STANDBY
OFF
4
3
5
USB
6
7
8
9
0
A
B
C
D
1 ON/STANDBY, OFF
Turns the CD player to ON/STANDBY or OFF.
8 Front panel display
Shows the current status of the CD player.
2 ON/STANDBY indicator
Lights up in green when the CD player is turned on. Lights
up in amber when the CD player is in standby mode.
The indicator goes off when the CD player is turned off.
9 RANDOM indicator
Lights up the icon for the selected Random Play mode.
3 USB indicator
Lights on when the CD player is in USB mode and goes
off when the CD player is in CD mode. Blinks when the
CD player is reading the USB device.
4 Disc tray
Holds a disc to be played back.
5
Opens and closes the disc tray.
When this button is pressed during standby mode, the
receiver automatically turns on and the input changes to
CD.
6 USB Port
Connect your USB device.
7 Remote control sensor
Receives signals from the remote control.
4 En
0 REP OFF S ALL indicator
Lights up the icon for the selected Repeat Play mode.
A
Starts or pauses playback (see page 14).
When this button is pressed during standby mode, the
receiver automatically turns on and the input changes to
either CD or USB whichever was the last selected.
B
Stops playback (see page 14).
C
Skips to the beginning of the current track. Press and hold
to fast reverse. Press twice to skip to the previous track
(see page 14).
D
Skips to the next track. Press and hold to fast forward (see
page 14).
CONTROLS AND FUNCTIONS
Remote control
iPod
CD
USB
FM/AM
PHONO
AUX
PRESET
To switch the input mode of the receiver
Input
selection
keys
TUNING
MEMORY
INTRODUCTION
This remote control can operate the system components
(including tuner functions) and an iPod stationed in a
terminal on the top of the receiver.
To operate the CD player, tuner functions, or an iPod
using the remote control, you need to set the receiver to
the corresponding input mode.
Press the corresponding input selection key on the remote
control (or rotate INPUT on the front panel).
The name of the corresponding input source appears in the
front panel display of the receiver.
y
When CD or USB is selected as an input source, the CD
player turns on automatically and when other input source
is selected, the CD player sets to standby mode.
■ Common functions
Operations common to all modes
1
The following operations are available for the receiver
when it is set to any input mode.
2
1 Infrared signal transmitter
Sends signals to the system you want to control.
3
iPod
CD
USB
FM/AM
PHONO
AUX
2
(standby/on)
Turns the system on or sets it to the standby mode.
PRESET
Note
TUNING
MEMORY
REPEAT
Even when the system is in standby mode, it consumes a small
amount of power in order to receive infrared-signals from the
remote control.
RANDOM
iPod MENU SEL
3 Input selection keys
Select the input source on the receiver.
MENU
ENTER
4 PURE DIRECT
Turns on or off the Pure Direct mode (see page 12).
VOL
5 VOL +/–
Adjusts the overall volume level on the receiver.
5
VOL
TONE BALANCE
4
DISPLAY DIMMER
SLEEP
PURE DIRECT
MUTE
6
7
8
9
6 TONE/BALANCE
/
Adjusts the audio quality (see page 12).
7 SLEEP
Sets the sleep timer on the system (see page 13).
8 MUTE
Turn off the volume (see page 12).
5 En
English
9 DIMMER
Changes the brightness of the front panel display (see
page 13).
CONTROLS AND FUNCTIONS
■ CD/USB mode
iPod
CD
USB
FM/AM
PHONO
AUX
Operations available in CD/USB mode
The following operations are available for the CD player
if the CD player is connected to the receiver with the
system control connection (see page 9).
PRESET
TUNING
MEMORY
1
REPEAT
RANDOM
iPod MENU SEL
2
4
5
MENU
ENTER
6
VOL
VOL
DISPLAY DIMMER
SLEEP
PURE DIRECT
MUTE
1 REPEAT
Selects the Repeat Play mode (see page 16).
2
,
Skips to the beginning of the current track or next track.
Press and hold to fast reverse or fast forward (see
page 14). Press
twice to skip back to the previous
track.
3 DISPLAY
Switches the information shown in the front panel display
of the CD player (see page 15).
TONE BALANCE
3
y
Press CD or USB to set the receiver to the CD or USB
mode before carrying out the following operations.
4 RANDOM
Turns on/off the Random Play feature (see page 16).
5
Stops playback (see page 14).
6
Starts or pauses playback (see page 14).
■ FM/AM mode
iPod
CD
USB
FM/AM
PHONO
AUX
Operations available in FM/AM mode
The following operations are available for the receiver.
1
2
y
PRESET
TUNING
MEMORY
REPEAT
RANDOM
3
Press FM/AM to set the receiver to the FM or AM mode before
carrying out the following operations.
1 PRESET
/
Select a preset station (see page 18).
iPod MENU SEL
2 MEMORY
Stores a preset station in the memory (see page 18). Starts
Automatic preset tuning (see page 17).
MENU
ENTER
3 TUNING
/
Press TUNING
/
and hold TUNING
VOL
VOL
TONE BALANCE
6 En
DISPLAY DIMMER
SLEEP
PURE DIRECT
MUTE
/
to Manual tuning and press
to Automatic tuning.
CONTROLS AND FUNCTIONS
■ iPod mode
Operations available in iPod mode
iPod
CD
USB
FM/AM
PHONO
AUX
y
Press iPod to set the receiver to the iPod mode before carrying out
the following operations.
PRESET
TUNING
MEMORY
1
iPod MENU SEL
5
6
MENU
7
REPEAT
RANDOM
2
3
4
8
9
ENTER
VOL
VOL
1 REPEAT
Selects the Repeat Play mode (see page 19).
INTRODUCTION
The following operations are available for the iPod. For
details on iPod operations, see “Using iPod™” on
page 19.
2 iPod MENU SEL
Press
or
to switch an item in the selected group.
3 ENTER
Press ENTER to enter the selected group. (Pressing
ENTER starts playback when a song is selected.)
4
Skips to the beginning of the current track. Press twice to
skip back to the previous track. Press and hold to fast
reverse.
TONE BALANCE
DISPLAY DIMMER
SLEEP
PURE DIRECT
MUTE
5
Stops playback.
* The playback resumes from the first song in the iPod.
6 RANDOM
Turns on/off the Random Play feature (see page 19).
7 MENU
Returns to the upper level in the iPod menu.
8
Skips to the next song. Press and hold to fast forward.
9
Starts or pauses playback.
English
7 En
CONTROLS AND FUNCTIONS
■ Installing the batteries in the remote
control
Press
■ Using the remote control
The remote control transmits a directional infrared beam.
Be sure to aim the remote control directly at the remote
control sensor on the front panel of the system during
operation.
VOLUME
ON/STANDBY
OFF
INPUT
PHONES
PURE
DIRECT
TUNER PRESET
MIN
ON/STANDBY
OFF
1
Press the
part and slide the battery
compartment cover off.
2
Insert two supplied batteries (AA, R6, UM-3)
according to the polarity markings (+ and –)
on the inside of the battery compartment.
MAX
USB
30˚
30˚
iPod
CD
FM/AM
Within 6 m
(20 feet)
USB
PHONO
AUX
PRESET
3
Slide the cover back until it snaps into place.
■ Notes on batteries
• Change both batteries when the operation range of the
remote control decreases.
• Use AA, R6, UM-3 batteries.
• Make sure that the polarities are correct. See the
illustration inside the battery compartment.
• Remove the batteries if the remote control is not to be
used for an extended period of time.
• Do not use old batteries together with new ones.
• Do not use different types of batteries (such as alkaline
and manganese batteries) together. Read the packaging
carefully as these different types of batteries may have
the same shape and color.
• If the batteries have leaked, dispose of them
immediately. Avoid touching the leaked material or
letting it come into contact with clothing, etc. Clean the
battery compartment thoroughly before installing new
batteries.
• Do not throw away batteries with general house waste;
dispose of them correctly in accordance with your local
regulations.
8 En
TUNING
MEMORY
REPEAT
RANDOM
iPod MENU SEL
MENU
ENTER
VOL
VOL
TONE BALANCE
DISPLAY DIMMER
SLEEP
PURE DIRECT
MUTE
■ Handling the remote control
• The area between the remote control and the system
must be clear of large obstacles.
• Do not spill water or other liquids on the remote
control.
• Do not drop the remote control.
• Do not leave or store the remote control in the
following types of conditions:
– high humidity, such as near a bath
– high temperature, such as near a heater or a stove
– extremely low temperatures
– dusty places.
• Do not expose the remote control sensor to strong
lighting, in particular, an inverter type fluorescent
lamp; otherwise, the remote control may not work
properly. If necessary, position the system away from
direct lighting.
CONNECTING THE EXTERNAL COMPONENTS WITH THE SYSTEM
CONNECTING THE EXTERNAL COMPONENTS WITH THE SYSTEM
Make sure you read the following procedure and notes carefully before connecting the system. For information on the
speakers (NS-BP400), refer to the owner’s manual supplied with it.
CAUTION
Turntable
DVD player etc.
Subwoofer
INPUT
INPUT
GND
Audio out
Left speaker
(NS-BP400)
L
R
Right speaker
(NS-BP400)
GND
Audio out
RCA
stereo
cable
L
UNBAL. FM
GND
OUTPUT
L
SUB
WOOFER
L
SYSTEM
CONNECTOR
System control
cable (supplied)
R
5
PHONO
CD
TO:CD PLAYER
OUTPUT
R
L
AUX
RCA stereo cable
(supplied)
4
3
RCA
stereo
cable
Receiver (R-1330)
AM
INPUT
SPEAKERS:6 MIN.
R
ANTENNA
75
R
PREPARATION
• Do not connect this unit or other components to the main power until all connections between components are complete.
• Do not let the bare speaker wires touch each other or do not them touch any metal part of the receiver. This could damage the receiver
and/or the speakers.
• All connections must be correct: L (left) to L, R (right) to R, “+” to “+” and “–” to “–”. If the connections are faulty, no sound will be
heard from the speakers, and if the polarity of the speaker connections is incorrect, the sound will be unnatural and lack bass. Also,
refer to the owner’s manual for each of your components.
L
TO:RECEIVER
SYSTEM
CONNECTOR
1
2
CD player (CD-1330)
Connecting the system
Connect the CD (L/R) jacks of the receiver to the OUTPUT (L/R) jacks of the CD player using the supplied audio
RCA stereo cable.
Connect the SYSTEM CONNECTOR (TO:CD PLAYER) jack of the receiver to the SYSTEM CONNECTOR
(TO:RECEIVER) jack of the CD player using the supplied system control cable.
Connect the speaker terminals (L) of the receiver to the speaker terminals of the left speaker and the speaker terminals (R)
of the receiver to the speaker terminals of the right speaker using the speaker cables supplied with the speaker set (NSBP400). Also, attach the clamp filter to the speaker cables within 10 cm of the left and right speaker terminals (see page 2).
Notes
9 En
English
• The NS-BP400 speakers are not magnetically shielded, so place the speakers away from the monitor. When connecting speakers other
than NS-BP400, use the speakers having more than 6 Ω impedance.
• The PHONO jacks are only compatible with a turntable with MM cartridge.
• Connect your turntable to the GND terminal to reduce noise in the signal. However, you may hear less noise without the connection to
the GND terminal for some turntable(s).
When using banana plugs (commercially available), tighten the speaker terminals strongly then connect the banana plugs (for U.S.A,
Canada, Australia and China models).
CONNECTING ANTENNAS
CONNECTING ANTENNAS
To enjoy radio on this system, you need to connect FM/AM antennas to this unit. This product includes an indoor FM
antenna and AM loop antenna. If the radio wave reception is weak in your area or you want to improve the radio wave
reception, we recommend that you use outdoor antennas. For details, consult the nearest authorized Yamaha dealer or
service center.
Indoor FM antenna
(supplied)
Indoor FM antenna
AM loop antenna
(supplied)
AM loop antenna
2
1
4
ANTENNA
GND
75
UNBAL. FM
GND
OUTPUT
SUB
WOOFER
L
AM
3
SYSTEM
CONNECTOR
INPUT
R
PHONO
CD
AUX
TO:CD PLAYER
Ground
(GND terminal*)
* For the maximum safety and minimum interference, connect the antenna GND terminal to a good earth ground.
A good earth ground is a metal stake driven into the moist earth.
Connect the supplied indoor FM antenna to the FM jack and AM loop antenna's GND terminal of the receiver. Place
the antenna away from the receiver and speaker cables. Find the best reception position, expand the antenna, then fix it.
Attach the antenna stand to the antenna. When attaching the antenna on the wall, you do not need to use the antenna
stand.
Connect the AM loop antenna lead wires to the AM and GND terminals of the receiver. There is no distinction
between the two lead wires for connecting. Twist the lead wires of the AM loop antenna and the indoor FM antenna
together before connecting to the GND terminal.
Place the AM loop antenna away from the system and speaker cables. While listening to the radio, rotate the antenna
head to find the best angle for reception.
CONNECTING THE POWER CABLES
■ Switching the voltage (Asia and Central/
South America models only)
Asia and Central/
South America
models only
To AC wall outlet
ANTENNA
75
UNBAL. FM
GND
OUTPUT
SUB
WOOFER
HONO
CD
AUX
AM
SYSTEM
CONNECTOR
MAINS
TO:CD PLAYER
To AC wall outlet
TO:RECEIVER
SYSTEM
CONNECTOR
MAINS
CAUTION
The VOLTAGE SELECTOR on the rear panel of this system
must be set for your local voltage BEFORE plugging the power
cable into the AC wall outlet. Improper setting of the VOLTAGE
SELECTOR may cause damage to this system and create a
potential fire hazard.
Select the switch position (left or right)
according to your local voltage using a straight
slot screwdriver. Voltages are 220/230-240 V AC,
50/60 Hz.
■ Connecting the system to the wall outlet
After you made all connections, connect the power cables
of the system and other components.
10 En
CONNECTING THE iPod™ AND THE USB DEVICE
CONNECTING THE iPod™ AND THE USB DEVICE
You can connect various audio components, USB device or iPod to the receiver. For information on your external
component, refer to the owner’s manual supplied with each component.
Connecting an iPod™
Connecting USB devices
y
This CD player has a USB port and can access MP3 or
WMA files saved on your USB device. Connect your USB
device to the USB port on the front panel of the CD
player.
CAUTION
Do not disconnect your USB device while the USB indicator is
blinking.
PREPARATION
The receiver is equipped with a terminal on the top panel
where you can station your iPod and control playback of
your iPod using the supplied remote control.
Use this receiver with iPod dock adapter (supplied with
your iPod or commercially available) appropriate for your
iPod. If you use this receiver without using an appropriate
iPod dock adapter, loose connection may result.
When the receiver is turned on or in standby mode, connect the
iPod during the playback, the receiver automatically starts
playback of iPod .
ON/STANDBY
OFF
USB
iPod
CD player
iPod
VOLUME
ON/STANDBY
OFF
PHONES
INPUT
PURE
DIRECT
USB device
TUNER PRESET
MIN
MAX
Receiver
Notes
• Only iPod (Click and Wheel), iPod nano, and iPod mini, and
iPod touch are supported.
• Do not connect any iPod accessories (such as headphones, a
wired remote control, or an FM transmitter) to your iPod when
it is stationed in a terminal.
• Unless your iPod is firmly stationed in a terminal, audio signals
may not be output properly.
• Once the connection between your iPod and the receiver is
complete and the receiver is set to iPod mode (see page 5),
“CONNECTED” appears in the front panel display. If the
connection between your iPod and the receiver fails, a status
message appears in the front panel display. For a complete list
of connection status message, see the iPod section in
“TROUBLESHOOTING” on page 20.
• When your iPod is stationed in a terminal of the receiver, your
iPod can be charged automatically even when the receiver is in
standby mode.
• You can disconnect the iPod during the playback.
■ Supported USB devices
This CD player supports USB mass storage class devices
(e.g., flash memories, card readers or portable audio
players) using FAT16 or FAT32 format.
Notes
11 En
English
• Some devices may not work properly even if they meet the
requirements.
• Do not connect devices other than the USB mass storage class
devices.
• When you insert two or more memory cards at the same time
using card readers, etc., only one of the memory cards is
recognized.
• Yamaha and suppliers accepts no liability for the loss of data
saved on the USB devices connected to the receiver. As a
precaution, it is recommended that the files are made backup
copies.
• Playability of and power supply to all kind of USB devices are
not guaranteed.
• When your USB device is connected to the USB port, your
USB device can be charged automatically even when the CD
player is in standby mode and ECO mode is OFF
(see page 13).
• You can disconnect the USB device during the playback.
SYSTEM OPERATIONS
SYSTEM OPERATIONS
Follow the procedure below to select an input source and adjust the sound settings on the system.
ON/STANDBY, OFF
PURE DIRECT
3
Press one of the input selection keys (or
rotate INPUT on the front panel) to select the
desired input source.
4
Start playback on the selected source
component or select a radio station.
For information on the disc/USB device playback,
see page 14, and for information on tuning, see
page 17.
5
Press VOL +/– (or rotate VOLUME on the
front panel) to adjust the volume to the
desired output level.
VOLUME
ON/STANDBY
OFF
INPUT
PHONES
PURE
DIRECT
TUNER PRESET
MIN
ON/STANDBY
OFF
MAX
USB
INPUT
VOLUME
■ To adjust the audio quality
(standby/on)
Input selection
keys
iPod
CD
USB
FM/AM
PHONO
AUX
PRESET
1
Press TONE/BALANCE to select BASS,
TREBLE, or BALANCE.
2
To adjust the setting, press
or
.
BASS:
Adjusts the low frequency response.
TREBLE: Adjusts the high frequency response.
BALANCE: Adjusts the volume level of each left
and right speaker channel.
TUNING
VOL
VOL +/–
VOL
■ Pure Direct mode
TONE BALANCE
TONE/BALANCE
DISPLAY DIMMER
SLEEP
PURE DIRECT
MUTE
PURE DIRECT
/
The Pure Direct mode shuts down the tone control
circuitry and front panel display, allowing you to enjoy
pure high-fidelity sounds.
MUTE
Press PURE DIRECT (or PURE DIRECT on the
front panel) to turn on the Pure Direct mode.
The PURE DIRECT indicator lights up, and the front
panel display goes off.
Notes
Basic system operations
1
Press ON/STANDBY, OFF on the front panel
of the receiver and the CD player.
2
Press
(standby/on) to turn on the
receiver.
Depending on the input mode of the receiver, the CD
player also turns on by the system control connection
(see page 9). The front panel display lights up.
12 En
• If you carry out operations while the Pure Direct mode is turned
on, the front panel display lights up briefly to acknowledge the
command.
• While the Pure Direct mode is turned on, neither BASS,
TREBLE, nor BALANCE is available.
To turn off the Pure Direct mode
Press PURE DIRECT again so that PURE DIRECT
indicator turns off and the front panel display lights up.
■ Muting the sound (MUTE)
Press MUTE to turn off the sound.
MUTE ON appears on the front panel display.
To restore the sound, press MUTE again or press VOL +/–.
SYSTEM OPERATIONS
■ To use the ECO mode of the CD player
This mode reduces the power consumption during the
standby mode. Even if the USB device is connected to the
USB port of the CD player, the USB device cannot be
charged when the CD player is in standby mode and ECO
mode is ON.
Press SLEEP repeatedly to select the desired
duration.
Each time you press the key, the duration changes as
follows.
The SLEEP indicator lights up in the front panel display.
120min.
Press ON/STANDBY, OFF while pressing and
holding
of the CD player to turn on the CD
player.
Each time you turn on the CD player by press
ON/STANDBY, OFF while pressing and holding
of
the CD player, ECO ON or ECO OFF appears on the front
panel display alternately.
90min.
60min.
30min.
OFF
Changing the brightness of the
front panel display
VOL
• The sleep timer is canceled if you set the receiver to the standby
mode.
• If you press SLEEP while the sleep timer is set, the remaining
time appears in the front panel display.
To cancel the sleep timer
Press SLEEP repeatedly to select “OFF”.
TONE BALANCE
DISPLAY DIMMER
SLEEP
PURE DIRECT
MUTE
BASIC
OPERATIONS
Follow the procedure below to change the brightness of
the receiver’s and CD player’s front panel display.
y
To use headphones
DIMMER
You can connect your headphones to the PHONES jack
on the front panel of the receiver.
The sound from the speakers and the subwoofer stops.
Press DIMMER.
You can choose your desired brightness of the front panel
display between normal (bright), mid dim, and dim.
ON/STANDBY
OFF
PHONES
Setting the sleep timer
The sleep timer sets the system to the standby mode after
the specified time elapses.
VOL
TONE BALANCE
DISPLAY DIMMER
SLEEP
PURE DIRECT
MUTE
SLEEP
English
13 En
DISC AND USB DEVICE OPERATIONS
DISC AND USB DEVICE OPERATIONS
You can enjoy playing back your audio CDs, USB devices, and MP3 or WMA files recorded on a disc/USB device.
Some operations may be different or restricted depending on the disc/USB device. Before playing back, check the
compatibility of your disc/USB device with this system (see page 23).
3
Note
Depending on the disc, some operations may be different or
restricted.
iPod
CD
USB
FM/AM
PHONO
AUX
CD
USB
Notes
• Total time does not appear for USB device playback.
• If the USB device is partitioned, only the first partition is
displayed.
• Some files may not work properly depending on the USB
device specification.
• Copyright-protected files cannot be played back.
• This system can play back files of 4 GB in size or less.
PRESET
TUNING
MEMORY
REPEAT
RANDOM
iPod MENU SEL
MENU
/
To stop playback
ENTER
Press
.
For audio CD, the total track number and total time of the
disc are displayed and for MP3/WMA disc or USB device,
the total file number is displayed on the front panel.
VOL
Playback operations
To pause playback
■ To start disc playback
1
Select CD as an input source (see page 12).
2
Press
CD.
3
to open the disc tray and load a
Press
.
Playback starts automatically.
For an audio CD, playback starts from the first track,
and for MP3 or WMA files, playback starts in
alphanumeric order by the filename.
y
You can also close the disc tray by pressing
panel of the CD player.
on the front
■ To start USB device playback
1
Select USB as an input source (see page 12).
2
Connect your USB device to the USB port on
the CD player.
The total number of files is displayed.
The reading time may exceed 30 seconds depending
on the number of files/folders.
14 En
Press
to start playback.
For a USB device, playback in order by the date and
time of creation if playable files are in the USB
device.
Press
.
To return to normal playback, press
.
To skip tracks
• To skip to the start of the current track, press
• To skip to the next track, press
.
• To skip to the previous track, quickly press
.
twice.
To fast reverse or fast forward
• To fast reverse, press and hold
• To fast forward, press and hold
.
.
y
The sound can be heard (although slightly garbled) during these
operation in either direction. This is convenient for locating a
precise position within a track, or for reviewing the contents
quickly. Sound may not be heard depending on the MP3/WMA
file.
DISC AND USB DEVICE OPERATIONS
Switching the playback information display
You can switch the disc playback information shown in the CD player’s front panel display. Available information
differs depending on the type of the disc/USB device.
Press DISPLAY repeatedly while playing back a
disc/USB device.
Each time you press the key, the information display
changes as described in “Playback information for audio
CDs” and “Playback information for MP3 or WMA files
DISPLAY
recorded on discs/USB devices”.
VOL
TONE BALANCE
DISPLAY DIMMER
SLEEP
PURE DIRECT
MUTE
Note
Some special characters may not be shown properly.
■ Playback information for audio CDs
The following information is available during playback of an audio CD.
1 Elapsed time of the current track
BASIC
OPERATIONS
2 Remaining time of the disc
■ Playback information for MP3 or WMA files recorded on discs/USB devices
1 Elapsed time of the current file
Returns to the normal display after displaying a file name.
2 File name
English
15 En
DISC AND USB DEVICE OPERATIONS
Repeating playback
(Repeat Play)
Playing back randomly
(Random Play)
You can repeat the playback of the selected item in a disc/
USB.
You can play back tracks in the disc/USB in random
order.
Note
When playing back with Random Play, the remaining time of the
disc cannot be displayed.
iPod
CD
USB
FM/AM
PHONO
AUX
PRESET
TUNING
MEMORY
RANDOM
REPEAT
iPod
CD
USB
FM/AM
PHONO
AUX
REPEAT
iPod MENU SEL
PRESET
TUNING
MEMORY
1
Play back the disc/USB you want to repeat.
RANDOM
REPEAT
RANDOM
iPod MENU SEL
2
During the playback of the disc/USB, press
REPEAT to select the desired Repeat Play
mode.
Each time you press the key, the Repeat Play mode
indicator in the CD player’s front panel display
changes as follows.
Press RANDOM while playback is stopped.
The RANDOM indicator lights up in the CD player’s
front panel display and Random Play starts.
To cancel Random Play
Press
Off (Normal playback)
REP S (Repeat Play by the current track)
REP ALL (Repeat Play by disc/USB)
To cancel Repeat Play
Press REPEAT repeatedly so that the Repeat Play mode
indicator disappears from the front panel display.
Note
The Repeat Play mode is canceled when the disc/USB device is
removed.
y
REP OFF appears when the system is set to the Pure Direct
mode.
16 En
.
FM/AM TUNING
There are 2 tuning methods: automatic and manual. Automatic tuning is effective when station signals are strong and
there is no interference. If the signal from the station you want to select is weak, tune into it manually. You can also use
the automatic and manual preset tuning features to store up to 30 stations.
For Asia and Central/South America models only
You may need to set the tuner frequency step according to the frequency spacing in your area. Press ON/STANDBY, OFF on the front
panel of the receiver while pressing and holding TUNER PRESET d on the front panel of the receiver to turn on the receiver. Each
time you set the tuner frequency spacing, the following setting switches.
• AM10/FM100: for Central and South America
• AM9/FM50: for all other areas (default)
Automatic tuning
Automatic preset tuning (FM only)
Automatic tuning is effective when station signals are
strong and there is no interference.
iPod
CD
USB
FM/AM
PHONO
AUX
Follow the procedure below to preset radio stations
automatically.
FM/AM
iPod
CD
USB
FM/AM
PHONO
AUX
FM/AM
PRESET
PRESET
REPEAT
TUNER
OPERATIONS
TUNING
MEMORY
TUNING
MEMORY
RANDOM
TUNING
MEMORY
/
REPEAT
RANDOM
iPod MENU SEL
iPod MENU SEL
1
Press FM/AM (or rotate INPUT on the front
panel) to set the receiver to the FM or AM mode.
1
Press FM/AM (or rotate INPUT on the front
panel) to set the receiver to the FM mode.
2
Press and hold TUNING
/
for more
than 2 seconds to begin automatic tuning.
When the receiver is tuned into a station, the TUNED
indicator lights up and the frequency of the received
station is shown in the front panel display.
• Press d to tune into a lower frequency.
• Press u to tune into a higher frequency.
2
Press and hold MEMORY for more than two
seconds.
The PRESET indicator flashes in the front panel
display and starts presetting stations automatically.
After searching all the frequencies, stops
automatically.
• Auto Preset starts at the lowest frequency toward
the highest frequency.
• The receiver automatically applies a preset number
to each detected station.
• To cancel, press MEMORY.
Manual tuning
If the signal received from the station you want to select is
weak, tune into it manually.
Press FM/AM (or rotate INPUT on the front
panel) to set the receiver to the FM or AM mode.
2
Press TUNING
/
to tune into the
desired station manually.
17 En
English
1
Notes
• You can preset up to 30 stations.
• Any stored station data existing under a preset station number is
cleared when you store a new station under the same preset
station number.
FM/AM TUNING
Manual preset tuning
Selecting preset stations
You can tune into any desired station simply by selecting
the preset station under which it was stored (see page 17).
You can store up to 30 stations.
iPod
CD
USB
FM/AM
PHONO
AUX
FM/AM
CD
USB
FM/AM
PHONO
AUX
FM/AM
PRESET
PRESET
iPod
/
PRESET
TUNING
MEMORY
TUNING
MEMORY
MEMORY
REPEAT
PRESET
RANDOM
/
RANDOM
REPEAT
iPod MENU SEL
iPod MENU SEL
1
2
Tune into a radio station you want to preset.
See page 17 for tuning instructions.
Press MEMORY.
The PRESET indicator flashes in the front panel
display for about 5 seconds.
3
Press PRESET
/
repeatedly to select
a preset station number while the MEMORY
indicator is flashing.
4
Press MEMORY to store while the MEMORY
indicator is flashing.
The PRESET indicator lights up in the front panel
display.
5
Repeat steps 1 to 4 until all desired stations
are preset.
18 En
1
Press PRESET
preset station.
/
repeatedly to select a
y
You can also use the front panel to select preset stations. Press
TUNER PRESET d / u repeatedly to select a preset station.
CONTROLLING iPod™
In addition to controlling the receiver (R-1330) and CD player (CD-1330), you can operate your iPod stationed in a
terminal using the supplied remote control.
Using iPod™
Once you have stationed your iPod to a terminal, you can enjoy playback of your iPod using the supplied remote control.
When connecting the iPod during the playback, this system automatically changes to the iPod mode.
Notes
• Only iPod (Click and Wheel), iPod nano, iPod mini, and iPod touch are supported.
• Some features may not be compatible depending on the model or the software version of your iPod.
y
For a complete list of status messages that appear in the front panel display of the receiver, refer to the “iPod” section in
“TROUBLESHOOTING” (see page 21).
iPod
CD
USB
FM/AM
PHONO
AUX
3
iPod
PRESET
TUNING
MEMORY
REPEAT
RANDOM
REPEAT
RANDOM
iPod MENU SEL
■ Repeating playback (Repeat Play)
iPod MENU SEL
You can repeat the playback of the selected item in your iPod.
MENU
Press REPEAT to select the desired Repeat Play
mode.
Each time you press the key, the Repeat Play mode
changes as example below. To use properly, please check
it with your iPod.
ENTER
ENTER
iPod
Press
/
to operate the iPod menu, and
then press ENTER to start playback of the
selected song (or group).
• View the screen of the iPod to control the menu.
• Operate the iPod using the iPod controls or the
supplied remote control.
Remote control
MENU
One (Repeat play by song)
All (Repeat play by selected group)
Off
iPod MENU SEL
■ Playing back randomly (Shuffle Play)
OTHER
OPERATIONS
ENTER
You can play back songs or albums in your iPod randomly.
Press RANDOM.
Each time you press the key, the Shuffle Play mode
changes as example below. To use properly, please check
it with your iPod.
The supplied remote control has the same function
keys with your iPod. So, these keys are corresponding
with each other.
Songs (Shuffle play by song)
Albums (Shuffle play by albums)
Press iPod to select the iPod as the input
source.
2
Station your iPod to the terminal.
Off
English
1
19 En
TROUBLESHOOTING
TROUBLESHOOTING
Refer to the table below when this system does not function properly. If the problem you are experiencing is not listed
below or if the instruction below does not help, turn off this system, disconnect the power cable, and contact the nearest
authorized Yamaha dealer or service center.
Receiver (R-1330)
■ General
Problem
The receiver fails to
turn on or enters the
standby mode soon
after the power is
turned on.
Cause
Remedy
See
page
The power cable is not connected or the
plug is not completely inserted.
Connect the power cable firmly.
10
The receiver has been exposed to a strong
external electric shock (such as lightning
or strong static electricity).
Set the receiver to the OFF mode, disconnect the
power cable, plug it back in after 30 seconds and
then use it normally.
—
The cable is short-circuited and the
protection circuity has been activated.
Make sure that all speaker wire connections on the
receiver and on all speakers are secure and that the
wire for each connection does not touch anything
other than its respective connection.
9
The internal temperature is too high, the
protection circuity has been activated.
Wait about 1 hour for the receiver to cool down and
then turn it back on.
9
Incorrect input or output cable
connections.
Connect the cables properly. If the problem persists,
the cables may be defective.
9
No appropriate input source has been
selected.
Select an appropriate input source with the INPUT
selector on the front panel (or the input selection
keys on the remote control).
—
Speaker connections are not secure.
Secure the connections.
9
The volume is turned down.
Turn up the volume.
—
The sound is muted.
Press MUTE or VOL +/- to resume audio output and
then adjust the volume.
5
Signals the receiver cannot reproduce are
being input from a source component,
such as a CD-ROM.
Play a source whose signals can be reproduced by
the receiver.
—
The sleep timer has turned off the
receiver.
Turn on the receiver, and play the source again.
—
Sound is heard from
the speaker on one
side only.
Incorrect cable connections.
Connect the cables properly. If the problem persists,
the cables may be defective.
9
There is noise
interference from
digital or radio
frequency
equipment.
The receiver is too close to the digital or
high-frequency equipment.
Move the receiver further away from such
equipment.
—
The sound is
distorted.
The volume level is too high.
Adjust the volume level.
12
The component other than turntable is
connected to the PHONO jacks.
Connect to the CD or AUX jacks.
9
Speaker cables are short-circuited.
Make sure speaker cables are connected correctly.
9
No sound
“CHK SP WIRE”
appears in the
display.
20 En
TROUBLESHOOTING
■ Tuner
Problem
Cause
FM stereo reception is
noisy.
FM
AM
Remedy
The characteristics of FM stereo
broadcasts may cause this problem
when the transmitter is too far away
or the antenna input is poor.
See
page
Check the antenna connections.
10
Try using a high-quality directional FM
antenna.
—
There is distortion, and
clear reception cannot be
obtained even with a good
FM antenna.
There is multi-path interference.
Adjust the antenna position to eliminate
multi-path interference.
—
The desired station cannot
be tuned into with the
automatic tuning method.
The signal is too weak.
Use a high-quality directional FM antenna.
—
Use the manual tuning method.
17
The desired station cannot
be tuned into with the
automatic tuning method.
The signal is weak or the antenna
connections are loose.
Orient the AM loop antenna for the best
reception.
10
Use the manual tuning method.
17
There are continuous
crackling and hissing
noises.
Noises can result from lightning,
fluorescent lamps, motors, thermostats
and other electrical equipment.
Use an outdoor antenna and a ground wire.
This will help somewhat, but it is difficult
to eliminate all noise.
—
There are buzzing and
whining noises.
A TV set is being used nearby.
Move this unit away from the TV set.
—
■ iPod
Note
In case of a transmission error without a status message appearing in the front panel of the receiver, check the connection to your iPod
(see page 11).
Status message
Cause
Remedy
See
page
There is a problem with the signal path
from your iPod to the receiver.
Turn off the receiver and try resetting your iPod.
11
UNKNOWN TYP
The iPod being used is not supported by
the receiver.
Only iPod (Click and Wheel), iPod nano, iPod mini,
and iPod touch are supported.
—
CONNECTED
Your iPod is properly stationed in a
terminal, and the connection between
your iPod and the receiver is complete.
NOT CONNECT
Your iPod was removed from an iPod
terminal of the receiver.
Station your iPod back to the terminal of the
receiver.
11
CAN'T PLAY
The receiver cannot play back the songs
currently stored on your iPod.
Check that the songs currently stored on your iPod
are playable.
—
Store some other playable music files on your iPod.
—
Remedy
See
page
CD player (CD-1330)
■ General
Problem
The plug is not completely inserted.
Connect the power cable firmly.
9
The receiver and the CD player are
connected incorrectly.
Check the connection with the receiver.
9
The receiver is set incorrectly.
Check the setting (INPUT/Volume/MUTE/
Headphone) of the receiver.
—
21 En
English
Power does not turn
on
Cause
ADDITIONAL
INFORMATION
CONNECT ERR
TROUBLESHOOTING
■ General (continuous from previous page)
Problem
Cause
Remedy
See
page
No sound or
distorted sound
The sampling rate of a MP3 or WMA file
may not be compatible with the CD player.
Check the sampling rate and bit rate of an MP3 or
WMA file are compatible with the CD player.
23
Not linked with the
receiver
The system control cable is disconnected
from the system connector jack of the
receiver and/or the CD player.
Connect the receiver and the CD player with the
system control cable firmly.
9
■ Disc
Problem
Disc playback does
not start.
Cause
Remedy
See
page
You may use a CD-R/RW that is not
finalized.
Finalize the CD-R/RW.
—
The disc label may not be facing up.
Check that the disc label is facing up.
—
The disc may be defective.
Try to play back another disc. If the same problem
does not happen, the disc you want to play back is
defective.
—
MP3/WMA disc may not contain
sufficient music tracks to be played back.
Check that your MP3/WMA disc contains at least 5
MP3/WMA music files.
—
The sampling rate of a MP3 or WMA file
may not be compatible with the CD
player.
Check the sampling rate and bit rate of an MP3 or
WMA file are compatible with the CD player.
23
■ USB
Problem
Cause
Remedy
See
page
"NO USB" appears in
the display.
The USB device is not connected.
Connect playable USB device.
11
"OVER CURENT"
appears in the
display.
The connected USB device not playable
on this system.
The connected USB device diagonally.
Disconnect the USB device. Change input source
other than USB and select USB an input source
again. Then connect playable USB device again.
—
The USB device
cannot be
recognized.
Check that the USB device is connected
correctly.
Connect the USB device firmly.
11
"NOT SUPPORT"
appears in the
display.
The connected the USB device is not
supported on this system.
Connect a supported USB device.
11
Remote control
Problem
The remote control
does not work nor
function properly.
22 En
Cause
Remedy
See
page
The remote control may be operated
outside its operation range.
For information on the remote control operation
range, refer to “Using the remote control”.
8
The remote control sensor on this system
may be exposed to direct sunlight or
lightening (invented fluorescent lamps).
Change the lighting or orientation of this system.
8
The battery may be worn out.
Replace the battery with new one.
8
There are obstacles between the sensor of
this system and the remote control.
Remove the obstacles.
8
NOTES ABOUT DISCS/MP3, WMA FILES
■ Discs (audio CDs) playable with this CD
player
This player is designed for playing back compact discs
bearing the marks shown below. Never attempt to load
any other type of disc into the unit. The unit can also play
back 8-cm (3-inch) compact discs.
....
Compact discs (digital audio)
The most popular discs for commercially
available audio CDs.
....
CD-R,CD-RW digital audio discs
Music CDs made by copying onto a CD-R
or CD-RW (including MP3 or WMA
format files).
Notes
• Be sure to use a CD-R or CD-RW disc made
by a reliable manufacture.
• Be sure to use a CD-R or CD-RW disc which
has at least one of the following phrases on
the disc or disc case.
FOR CONSUMER
FOR CONSUMER USE
FOR MUSIC USE ONLY
• Be sure to use a finalized CD-R or CD-RW
disc.
....
CD-TEXT discs
The discs recorded with text data such as
album titles, track titles and artist names.
Though these discs can be played back
with ordinary CD players, the text data is
not displayed.
MP3
MP3 is a standard technology and format for compressing
an audio sequence into a small-sized file. However, the
original level of sound quality is preserved during
playback.
The playable formats are:
• MPEG-1 Audio Layer-3
Bitrate*: 32-320 kbps
Sampling frequency: 44.1/48/32 kHz
• MPEG-2 Audio Layer-3, 2
Bitrate*: 8-160 kbps
Sampling frequency: 24/22.05/16 kHz
• MPEG-2.5 Audio Layer-2
Bitrate*: 8-160 kbps
Sampling frequency: 12/11.025/8 kHz
* Variable bitrate is supported.
WMA
“WMA (Windows Media Audio)” is a Microsoft file
format for encoding digital audio files similar to MP3
though can compress files at a higher rate than MP3.
The playable formats are:
• Version 8
• Version 9 (Standard and variable bitrates are
supported. Professional and Lossless are not
supported.)
• High Profile
Bitrate*: 32-320 kbps
Sampling frequency: 48/44.1/32 kHz
• Mid Profile
Bitrate: 16-32 kbps
Sampling frequency: 22.05/16 kHz
* Both constant and variable bitrates are supported.
Notes
• Depending on the conditions of recording such as software
recording setting, this system may not be able to play a disc or
USB device in the order the tracks were recorded.
• Playback for Data Disc starts in alphanumeric order.
• Playback for USB starts in order by date and time of creation.
• Copyright-protected WMA (DRM) files cannot be played back
by the CD player.
• The disc must be ISO9660 compatible.
• The maximum file and folder numbers are as follows.
To prevent a malfunction of the CD player:
• Do not use any nonstandard
shaped disc (heart, etc.) available
on the market because it might
damage the unit.
• Do not use a disc with tape, stickers, or paste on it. If
you use such a disc, the disc may get stuck in the
unit, or damage to the unit may result.
You can play back MP3 and WMA files recorded on a
CD-R/CD-RW and those stored on a USB device.
USB
Maximum total number of file
and folder*
512
999
Maximum folder number*
255
255
Maximum file number per
folder
511
255
English
■ About MP3 and WMA files
Data Disc
ADDITIONAL
INFORMATION
Note
This compact disc player may not be able to play back some
CD-RW discs or discs on which recording was not made
correctly.
* The root is counted as one of the folders.
23 En
NOTES ABOUT DISCS/MP3, WMA FILES
■ Notes about handling compact discs
To play back an 8-cm (3-inch) CD
• Always handle a disc with care so that its surface is not
scratched.
Place it in the inner recessed area of the disc tray. Do not
put a normal (12-cm) CD on top of an 8-cm (3-inch) CD.
Note: Do not use any lens cleaners as they may be a
cause of malfunction.
• Compact discs are not subjected to wear during
playback, but damage to the disc surface when the disc
is being handled can adversely affect the disc playback.
• Be sure to use a felt-tip pen or similar writing tool
when writing on the label side of the disc. Do not use a
ballpoint pen, pencil, or other hard-tipped writing tool,
as these may damage the disc and may adversely affect
the disc playback.
• Do not warp discs.
• When a disc is not being used, remove it from the unit
and store in an appropriate case.
• When removing or storing a disc, be careful not to
scratch the playing surface.
• Compact discs are not affected by small particles of
dust or fingerprints on their playing surface, but even
so they should be kept clean. Wipe by using a clean,
dry cloth.
Do not wipe with a circular motion; wipe straight
outward from the center.
• Do not try to clean the disc’s surface by using any type
of disc cleaner, record spray, anti-static spray or liquid,
or any other chemical-based liquid because such
substances might irreparably damage the disc’s
surface.
• Do not expose discs to direct sunlight, high
temperature or high humidity for a long period of time,
as these might warp or otherwise damage the disc.
No!
24 En
GLOSSARY
Each division is called a track number.
Audio information
■ WMA (Windows Media Audio)
■ MP3 (MPEG Audio Layer-3)
One of the audio compression methods used by MPEG. It
employs the irreversible compression method, which
achieves a high compression rate by thinning out the data of
hardly audible part to the human ears. It is said to be capable
of compressing the data quantity by about 1/11 (128 kbps)
while maintaining a similar audio quality to music CD.
An audio compression method developed by Microsoft
Corporation. It employs the irreversible compression
method, which achieves a high compression rate by
thinning out the data of hardly audible part to the human
ears. It is said to be capable of compressing the data
quantity by about 1/22 (64 kbps) while maintaining a
similar audio quality to music CD.
■ PCM (Pulse Code Modulation)
Copyright and logo marks
A signal that is changed to digital format without
compression. A CD is recorded with 16-bit sound at
44.1 kHz. This signal also has a type called Packed PCM
(PPCM) that can be compressed without any loss of data.
■ Sampling frequency
The number of sampling (process for digitalizing analog
signals) per second. In principle, the higher the sampling
rate, the wider the frequency range that can be played
back, and the higher the quantized bit rate, the finer the
sound that can be reproduced.
MPEG Layer-3 audio decoding technology licensed from
Fraunhofer IIS and Thomson Multimedia.
iPod™
“iPod” is a trademark of Apple Inc., registered in the U.S. and
other countries.
“Made for iPod” means that an electronic accessory has been
designed to connect specifically to iPod and has been certified by
the developer to meet Apple performance standards.
Apple is not responsible for the operation of this device or its
compliance with safety and regulatory standards.
■ Track
A CD can be divided into a number of segments (tracks).
SPECIFICATIONS
■ R-1330
AMPLIFIER SECTION
• Minimum RMS output power per channel
(6 Ω , 1 kHz, 0.5% THD) ..........................................60 W + 60 W
• Maximum useful output power (JEITA)
[Asia, China and Korea models]
(6 Ω, 1 kHz, 10% THD) ............................................70 W + 70 W
• Input sensitivity/Impedance
CD/AUX ................................................................. 200 mV/47 kΩ
PHONO.................................................................... 3.5 mV/47 kΩ
• Frequency Response
CD.......................................................... 20 Hz to 20 kHz ± 0.5 dB
• Total Harmonic Distortion
CD (10 W/6 Ω) .......................................................... 0.01% or less
• Signal to Noise ratio (IHF-A network)
CD (200 mV, Input shorted).................................. 100 dB or more
• Power consumption................................................................... 80 W
• Dimensions (W x H x D) .................................... 300 x 67 x 336 mm
(11 13/16 x 2 5/8 x 13 1/4 in)
• Weight ...................................................................... 5.8 kg (12.7 lbs)
■ CD-1330
PLAYBACK SYSTEM
• CD, CD-R/RW
LASER
•
•
•
•
Type....................................................................................... GaAlAs
Wave length ........................................................................... 795 nm
Emission Duration.............................................................continuous
Laser Output............................................................... max. 160 μW*
* This output is the value measured at a distance of about 200 mm
from the objective lens surface on the Optical Pick-up Block.
AUDIO PERFORMANCE
• Tuning Range
• Signal-Noise (1 kHz)................................................. 105 dB or more
• Dynamic range (1 kHz) ............................................. 100 dB or more
• Harmonic distortion + noise (1 kHz) .........................0.003 % or less
FM
[U.S.A and Canada models] ............................. 87.5 to 107.9 MHz
[Asia model] ............................... 87.5/87.50 to 108.0/108.00 MHz
[Other models] .............................................. 87.50 to 108.00 MHz
AM
[U.S.A and Canada models] .................................530 to 1710 kHz
[Asia model] .........................................530/531 to 1710/1611 kHz
[Other models] ......................................................531 to 1611 kHz
GENERAL
• Power supply
[U.S.A and Canada models]................................ AC 120 V, 60 Hz
[Asia model].....................................AC 220/230-240 V, 50/60 Hz
[China model]...................................................... AC 220 V, 50 Hz
[Korea model] ..................................................... AC 220 V, 60 Hz
[Australia models]............................................... AC 240 V, 50 Hz
• Power consumption..................................................... Approx. 15 W
• Dimensions (W x H x D) .................................... 300 x 67 x 310 mm
(11 13/16 x 2 5/8 x 12 3/16 in)
• Weight ........................................................................ 3.8 kg (8.3 lbs)
Specifications are subject to change without notice.
25 En
English
• Power Supply
[U.S.A and Canada models] ................................AC 120 V, 60 Hz
[Asia model] .................................... AC 220/230-240 V, 50/60 Hz
[China model] ......................................................AC 220 V, 50 Hz
[Korea model]......................................................AC 220 V, 60 Hz
[Australia models] ...............................................AC 240 V, 50 Hz
GENERAL
ADDITIONAL
INFORMATION
TUNER SECTION
CAUTION
Use of controls or adjustments or performance of procedures
other than those specified herein may result in hazardous
radiation exposure.
AVERTISSEMENT
L’utilisation de commandes et l’emploi de réglages ou de
méthodes autres que ceux décrits ci-dessous, peuvent
entraîner une exposition à un rayonnement dangereux.
CD-1330
PRECAUCIÓN
El uso de los controles, los ajustes o los procedimientos que
no se especifican enste manual pueden causar una exposición
peligrosa a la radiación.
© 2008 Yamaha Corporation All rights reserved.
Printed in Malaysia
WQ57000