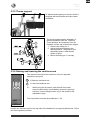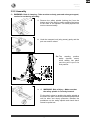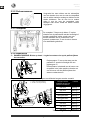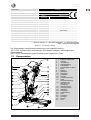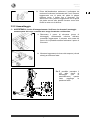
1
VERMEIREN
Albatros II
INSTRUCTION MANUAL
M O D E
D ’ E M P L O I
GEBRUIKSAANWIJZING
GEBRAUCHSANWEISUNG
ISTRUZIONI PER L'USO
MANUAL DE INSTRUCCIONES
INSTRUKCJA OBSŁUGI
Instructions to the specialist dealer
This instruction manual is part and parcel of the product and must accompany every product sold.
Version: A, September 2012
All rights reserved, including translation.
No part of this manual may be reproduced in any form what so ever (print, photocopy, microfilm or any other process) without
written permission of the publisher, or processed, duplicated or distributed by using electronic systems.
© N.V. Vermeiren N.V. 2012
Instructions pour les distributeurs
Ce manuel d'instructions fait partie du produit et doit accompagner chaque produit vendu.
Version : A, Septembre 2012
Tous droits réservés, y compris la traduction.
Aucune partie de ce manuel ne peut être reproduite, sous quelque forme que ce soit (imprimée, photocopie, microfilm ou tout autre
procédé) sans l'autorisation écrite du publicateur, ni traitée, dupliquée ou distribuée à l'aide de systèmes électroniques.
© N.V. Vermeiren N.V. 2012
Instructies voor de vakhandelaar
Deze handleiding is deel van het product en dient bij iedere product te worden geleverd.
Versie: A, september 2012
Alle rechten, inclusief vertaling, voorbehouden.
Niets uit deze handleiding mag geheel of gedeeltelijk in enige vorm (druk, fotokopie, microfilm of ieder ander procedé) zonder de
schriftelijke toelating van de uitgever worden gereproduceerd of met behulp van elektronische systemen worden verwerkt,
gekopieerd of verspreid.
© N.V. Vermeiren N.V. 2012
Hinweise für den Fachhändler
Diese Gebrauchsanweisung ist Bestandteil des Produkts und ist bei jeder Produkts auszuhändigen.
Version: A, September 2012
Alle Rechte, auch an der Übersetzung, vorbehalten.
Kein Teil der Gebrauchsanweisung darf in irgendeiner Form (Druck, Fotokopie, Mikrofilm oder einem anderen Verfahren) ohne
schriftliche Genehmigung des Herausgebers reproduziert oder unter Verwendung elektronischer Systeme verarbeitet, vervielfältigt
oder verbreitet werden.
© N.V. Vermeiren N.V. 2012
Istruzioni per il rivenditore
Il presente Manuale di istruzioni è parte integrante del prodotto e deve essere fornito assieme alla prodotto.
Versione: A, Settembre 2012
Tutti i diritti riservati (anche sulla traduzione).
Il presente manuale non può essere riprodotto, neppure parzialmente, con alcun mezzo (stampa, fotocopia, microfilm o altro
procedimento) senza l’autorizzazione scritta della casa produttrice, né elaborato, duplicato o distribuito con l’ausilio di sistemi
elettronici.
© N.V. Vermeiren N.V. 2012
Instrucciones destinadas a los distribuidores especializados
El presente manual de instrucciones es parte integrante del producto y se debe adjuntar a todas las producto que se vendan.
Versión: A, Septiembre 2012
Todos los derechos reservados, incluidos los de la traducción.
Se prohíbe la reproducción total o parcial del presente manual de cualquier forma (impresión, fotocopia, microfilm o cualquier otro
procedimiento), así como la edición, copia o distribución empleando sistemas electrónicos, sin el permiso escrito del editor.
© N.V. Vermeiren N.V. 2012
Instrukcje dla wyspecjalizowanego sprzedawcy
Niniejsza instrukcja obsługi jest nieodłączną częścią produktu i musi być dołączona do każdego sprzedawanego produktu.
Wersja: A, Września 2012
Wszelkie prawa zastrzeżone, łącznie z tłumaczeniem.
Żadna część niniejszej instrukcji nie może być powielana w jakiejkolwiek formie (drukowanej, fotokopii, mikrofilmu ani innej) bez
pisemnej zgody wydawcy, nie może być również przetwarzana, kopiowana ani rozprowadzana za pomocą systemów
elektronicznych.
© N.V. Vermeiren N.V. 2012
Albatros II
2012-09
Contents
Preface ................................................................................................. 2
1
Product description ................................................................. 3
1.1
1.2
1.3
1.4
1.5
2
Use ............................................................................................. 7
2.1
2.2
2.3
2.4
2.5
2.6
3
General notes ............................................................................................................... 7
Use of the JUMBO system (battery, control box + included battery charger) ......... 10
Operating the lift ....................................................................................................... 11
Slings ......................................................................................................................... 14
Safety rules ................................................................................................................ 14
Emergency ................................................................................................................. 15
Installation and adjustment .................................................. 16
3.1
3.2
4
5
Intended Use ................................................................................................................ 3
Technical specifications .............................................................................................. 4
Drawing ....................................................................................................................... 6
Explanation of the symbols ......................................................................................... 7
Delivery ....................................................................................................................... 7
Swapping the battery ................................................................................................. 16
Assembly or dismantling........................................................................................... 16
Maintenance ........................................................................... 23
Ordernumbers ....................................................................... 23
Page 1
Albatros II
2012-09
Preface
First of all we want to thank you for putting your trust in us by selecting one of our products.
The Vermeiren patient hoists are the result of many years of research and experience.
During the development, special attention was given to the ease of use and the serviceability
of the patient hoist.
The expected lifetime of your patient hoist is strongly influenced by the care and
maintenance of the patient hoist.
This manual will help you get acquainted with the operation of your product.
Following the user instructions and the maintenance instructions are an essential part of the
guarantee.
This manual reflects the latest product developments. Vermeiren has the right to introduce
changes without the obligation to adapt or replace previously delivered models.
For any further questions, please consult your specialist dealer.
Page 2
Albatros II
2012-09
1
Product description
1.1
Intended Use
The patient hoist is intended for people with walking difficulties or no walking abilities.
The patient hoist is designed to transport 1 person.
The patient hoist is suited for indoor use.
The user must lifted in the patient hoist by an attendant.
The different possibilities/positions allow the application of the patient lift in case of unability
or impossibility to walk based on:
• paresis
• limb deformations
• cachexia
• atrophy
• and also for aged persons.
When providing for individual requirements:
• body size and weight (max. 150 kg)
• physical and psychological condition
• residential circumstances
• environment
should be taken into consideration.
Your patient hoist should only be used on flat surfaces and with all four casters in contact
with the ground.
The patient hoist can be used for transferring in and out of the shower or the bath, but not
during showering or bathing.
Riding over obstacles while transferring the patient is completely forbidden.
The patient hoist should not be used as a ladder, nor is it a transport for heavy or hot
objects.
When used on mats, carpeted floors or loose floor coverings, the floor covering can get
damaged.
Use only Vermeiren approved accessories.
Make sure that the end of the adjustment motor has a safety measurement. Therefore, use
the patient hoist only in the middle of the adjustment range and not at the end of the hoist
motor.
Compliance with the user and maintenance instructions are an essential part of the
guarantee conditions.
Visually impaired people can contact the dealer for the instructions for use.
The patient hoist is suitable for re-use.
Page 3
Albatros II
2012-09
1.2
Technical specifications
Forward
direction
Page 4
Albatros II
2012-09
Brand
Address
Type
Model
Vermeiren
Vermeirenplein 1/15, B-2920 Kalmthout
Patient hoist
Albatros II
Measurement in
Dimensions
drawing
Lowest CAP position*
l
1060 mm
Highest CAP position*
k
1687 mm
Lifting range (range of heights)
m
637 mm
Leg length
1000 mm
Total length
1115 mm
Total width
Folded / Dismantled length
685 mm
1380 mm (actuator lowest position)
1687 mm (actuator highest position)
1115 mm (not foldable)
Folded / Dismantled width
685 mm (not foldable)
Folded / Dismantled height
500 mm
Total height
Minimum leg separation
r
467 mm
Maximum leg separation
q
769 mm
Leg height / Frame height
n
117 mm
Overall width (closed), external dimension
Overall width (opened), castors forwards
Min. distance between wall / CSP*
(minimum height)
Min. distance between wall / CSP*
(maximum reach)
Min. distance between wall / CSP*
(maximum height)
Turning circle
584 mm
P
945 mm
w3 (=w2)
285 mm
w2 (=w3)
285 mm
w1
870 mm
1160 mm
Total weight
50,60 kg
Weight of chassis + motor + control box
34,50 kg
Weight of battery
2,90 kg
Weight of footplate
5,10 kg
Weight of thorax support
1,40 kg
Weight of legsupport
Weight attachment of legsupport and lifting
column
Maximum load
3,00 kg
3,60 kg
150 kg
Free height, minimum
Maximum reach at 600 mm with legsupport
Maximum reach at 600 mm without
legsupport
Maximum reach from support
Reach from support at separation 700 mm
57 mm
a1
300 mm
a2
360 mm
b
c
495 mm
375 mm
Power outlet
24V
Supply voltage
max. 250 VA
100-240V ~ max. 37-53 VA
Maximum current drawn
max. 400 mA
Operating temperature
+5 to +40°C
Relative humidity
20% to 90% at 30°C, non-condensing
Noise level
< 50 dB(A)
Air pressure
700 to 1060 hPa
Control box
Linak CBJ2
Battery
Linak BAJ1
Manual control
Linak HB5X (< 5N force required to operate)
Motor
Linak LA34 (7500N)
Control box protection class
IPX4
Page 5
Albatros II
2012-09
Brand
Address
Type
Model
Vermeiren
Vermeirenplein 1/15, B-2920 Kalmthout
Patient hoist
Albatros II
Measurement in
Dimensions
drawing
Battery protection class
IPX5
Manual control protection class
IPX5
Motor protection class
IP54
Insulation class
II - Type B
Operational performance
Battery capacity
approx. 40 lifts per charge
max. 10%, or 2 min. continuous
operation/18 min. pauses
2.9 Ah
Emergency stop
Yes
Manual lowering in emergency
Yes
Periodic operation
Electrical lowering in emergency
No
We reserve the right to introduce technical changes. Measurement tolerance ± 15 mm / 1,5 kg
1 = Highest position, 2 = Maximum reach, 3 = Lowest position
* CSP = Central suspension point
Table 1: Technical specifications
The patient hoist complies to the requirements set up in:
ISO 7176-8: Requirements and test methods for static, impact and fatigue strengths.
ISO 7176-16: Resistance to ignition of upholstered parts.
1.3
Drawing
1
2
3
4
5
6
7
8
9
10
11
12
13
14
15
16
17
18
19
20
21
22
23
24
25
Page 6
= Buttons for mounting
straps
= Cantilever arm
= Thorax cushion
= Slide holder
= Slide column
= Transport holder for motor
= Motor
= Leg belt
= Leg support
= Chassis
= Footplate
= Caster
= Caster with brake
= Chassis expansion pedal
= Footrests with velcro
fastening
= Safety spindle
= Foldaway lock
= Power cable
= Handle for pushing
= Manual control
= Pole
= Control box
= Emergency stop
= Battery
= Table
Albatros II
2012-09
1.4
Explanation of the symbols
Observe the safety instructions!
Read the instruction manual before use!
Separate recovery and recycling of electric and electronic devices.
CE declaration of conformity
1.5
Delivery
The Vermeiren Albatros II patient hoist shall be delivered with:
• chassis including 4 casters (2 with brakes)
• pole, including handles for pushing
• cantilever arm with attachment for sling
• control box (+ included battery charger)
• battery
• manual control
• motor
• instruction manual
• foot plate + footrests with velcro fastening
• leg support
• thorax support
Before use check if everything is included and that no products are damaged (example by
transport, ...).
Please note that the basic configuration may vary from one European country to another.
Please contact the specialist dealer in your country for more information.
2
Use
This chapter describes the everyday use. These instructions are for the user and the
specialist dealer.
The patient hoist is delivered fully assembled by your specialist dealer. The instructions
intended for the specialist dealer on how to set up the patient hoist are given in § 3.
2.1
General notes
The patient hoist must only be operated by qualified staff who have been instructed or
trained in its specific application.
The use of the patient hoist is restricted to indoors only. Please ensure that it is only used on
flat surfaces. It must be used strictly indoors only.
We would like to point out that sources of electromagnetic radiation (e.g. mobile phones,
etc.) can cause interference and that the lift's electronics can also affect other electrical
appliances.
Even if you have been instructed by your dealer about the operational elements of your lift
and their use, we recommend that you read the following pages carefully.
Page 7
Albatros II
2012-09
2.1.1 Instructions for lifting patient
Phase I – Preparation. In this phase, the patient should stay on the footplate and put his feet
in the special footrests with the velcro fastening. Then stabilize your feet and legs under your
knees by using the velcro belt on the foot- and leg support. Make sure that the feet and legs
are firmly touching the pillow from the foot- and leg support. Fasten the thorax belt with the
four straps to the patient hoist.
Buttons for attachment
of the thorax belt.
Phase II- Lifting. Use the manual control slowly to lift the patient up. The patient must hold
the handgrips during lifting.
Phase III – Stabilization. In the last step after lifting to the vertical position, the patient is
stabilized by thorax belts. Thorax belts are mounted on both sides of the thorax support.
Afterwards you can remove the vest. To complete stabilization you should use the waist belt
which stabilizes the hip and trunk of the cross section. In this way, the patient is fully
protected in four support points: feet, knees, hips and thorax.
Page 8
Albatros II
2012-09
Buttons for waist belt attachment
View properly how the patient is stabilized.
Page 9
Albatros II
2012-09
2.2
Use of the JUMBO system (battery, control box + included
battery charger)
JUMBO is a modular system combining an actuator, a control box and a battery in a flexible
solution, specially developed for patient hoists.
2.2.1 Battery
The battery is above the control box and is replaceable with an
integrated clip system.
Primary voltage
Ambient temperature
Ambient storage temperature
Relative storage humidity
Conformity
24 VDC
+5°C to +40°C
-10° to +50°C
max. 90% (non-condensing)
tested in accordance with IEC 60601-1
2.2.2 Control box + included battery charger
The control box is designed with a red
emergency stop and an internal battery charger.
Primary voltage
Secondary voltage
(charging voltage)
Secondary current
(charging current)
Safeguards
100 - 240 VAC / 50/60 Hz
24 VDC, max. 250 VA
Ambient temperature
Ambient storage
temperature
Relative storage
humidity
Conformity
+5°C to +40°C
-10° to +50°C
max. 10 A
Protected against reverse
polarisation, electrical surges
and extreme temperature
max. 90% (non-condensing)
tested in accordance with
IEC 60601-1
We reserve the right to introduce technical changes.
2.2.3 External charger (OPTIONAL)
The external charger shall be mounted on the
wall. It is possible to charge the spare battery
(optional) with this external charger and you
have no waiting time to use the patient hoist
when charging the batteries.
Primary voltage
Charging current
Ambient temperature
Ambient storage
temperature
Relative storage
humidity
Page 10
100 - 240 VAC / 50/60 Hz
max. 650 mA
+5°C to +40°C
-10° to +50°C
max. 90% (non-condensing)
Albatros II
2012-09
2.2.4 Charging the batteries
Use only the control box with included battery charger on the Albatros II or the external
charger meant to be mounted on the wall.
We recommend that you should regularly recharge the batteries in order to ensure that the
hoist remains usable and to extend the lifespan of the batteries. The control box will give a
warning sound to tell you when the battery charge is on 50% capacity.
•
FIRST USE
First, insert the supply cable with the connector side into the appropriate connector on the
control box. The plug side of the supply cable must be insert in the socket outlet. The loading
time is about 24 hours.
•
RECHARGING
L WARNING: Risk of injury – Do not use the lift when the supply cable is
connected to the socket outlet.
When the batteries are recharging there will burn a yellow light (above
on) and an orange light (above charge).
After the recharging process is completed, you should always remove the mains plug from
the socket first and then remove the connector plug from the control box.
Do not use the lift while it is being recharged!
If the batteries are not used for a significant period, they discharge slowly by themselves
(deep discharge). It then becomes impossible to recharge them with the battery charger
supplied. You should therefore recharge the batteries at least once a month even if they are
not being used.
2.3
Operating the lift
Please observe the technical information according to which the patient hoists (Albatros II)
may be operated. The patient hoist must only be operated by authorised staff who have
been trained in its use and operation.
L WARNING: Risk of burns – Be careful when driving in hot or cold environments
(sunshine, extreme cold, saunas, etc.) for a sufficient amount of time and when
touching - Surfaces can assume environment temperatures.
2.3.1 Altering the chassis width
To get the lift around a wheelchair or other
seating furniture, or to increase the stability of
the lift in the standing position, the separation of
the chassis legs can be increased.
Stand behind the assembled lift and take hold of
the handles for pushing the patient hoist (on the
left and right, next to the control box). Press the
lever at the bottom of the chassis (left or right)
down with your foot, and the separation of the
legs of the chassis can be increased or
decreased.
Page 11
Albatros II
2012-09
2.3.2 Parking brakes
Secure the two casters at the back of the
chassis by pressing the caster brake plates
down gently to their end stops with the tip of
your foot. To release the brake, push the brake
plate gently back up again with the front of your
foot until the casters are free.
2.3.3 Foot plate
The footplate can be mounted or removed
with the hooks to/from the chassis of the
patient hoist. If it is required for a greater
stabilization of your feet you can use the special
footrests with velcro straps for stabilization.
2.3.4 Leg support
L WARNING: Risk of injury – Do not drop the leg support on the patient when
adjusting.
The leg support can be mounted on the
bar of the patient hoist with the safety pin
.
The leg support is meant to keep the legs
of the patient in the correct position and to
support the legs of the patient during stand
up.
The leg supports can be adjusted in depth and 9 different heights.
1 = Bar for height adjustment
2 = Lever for depth adjustment
Height from footplate
to top of leg support
Position
690 mm
Hole 1
665 mm
Hole 2
640 mm
Hole 3
Do not use
Hole 4
Do not use
Hole 5
495 mm
Hole 6
470 mm
Hole 7
445 mm
Hole 8
420 mm
Hole 9
Table 2: Height adjustment leg support
Page 12
Albatros II
2012-09
2.3.5 Thorax support
To stabilize and support your thorax, the lift is
equipped with thorax pillow and velcro belts
to stabilize.
The thorax support can be adjusted in 2
different positions 1045 mm, 1200 mm.
These positions are measured from the
footplate until the top of the thorax support.
1. Remove the safety pin .
2. Adjust the thorax support in the
desired position. The position from
attachment plate shall be like
shown in figure.
3. Mount the safety pin securely.
2.3.6 Raising and lowering the cantilever arm
The manual control allow the cantilever arm to be adjusted
smoothly to any point.
1
2
1
= Raise the cantilever arm
2
= Lower the cantilever arm
L
When using the lift function until the end of the hoist
motor the limit switch is activated by electronics (security
function). Use the lifting function only in the middle of the
adjustment range.
Force required to activate the pushbutton: < 5N
Position the manual control to the top tube of the handles for moving the patient hoist. This is
the most ergonomic position.
Page 13
Albatros II
2012-09
2.3.7 Moving the patient hoist
L WARNING: Risk of clamping – Be careful passing through restricted passages
(e.g. doors).
1.
Stand behind the patient hoist and grasp the handles (left and right, next to the battery
and control box) with both hands.
2.
Make sure that both back caster brakes have been released.
3.
Push the patient hoist slowly into the desired position.
When it is not loaded, we advise you to pull the patient hoist backwards, which makes it
easier to get round any obstacles (door frames, corners of rooms or furniture).
To move the patient hoist use only the handles for pushing and no other components
(actuator, manual control, ...) .
2.4 Slings
L WARNING: Risk of injury – Only use appropriate slings for the patients.
L WARNING: Risk of injury – Do not use damaged slings.
The Albatros II patient hoist must only be used with slings designed for the Vermeiren
Albatros II patient hoists.
The applicability and instructions for use for the specific slings should be followed.
2.5
Safety rules
Some safety tips are given below for your security:
L
Only authorised staff who have been trained in using the lift must use and operate the
patient lift.
L
Make sure when using the lift that there is sufficient room around and above it, as the
adjustment movements could otherwise lead to damage or injury.
L
Always be aware of the lifting arm to avoid injury.
L
The patient lift must only be used on level surfaces, with all 4 casters contacting the
ground evenly.
L
It must not be used in humid environments.
L
Only slings that have been designed and approved for the patients must be used
(see usage instructions for the various slings). Use of any other slings is at your own
risk.
L
Please follow the instructions of the nursing staff or suitably trained persons, so that
no injuries are caused during use of the lift.
L
Check the medical condition of the patient and be sure that it is possible to lift the
patient with this patient hoist. (Refer to intended use)
L
Be careful with sources of ignition such as lit cigarettes as they may set the sling
alight.
L
Never exceed the maximum load (150 kg). The control box is disabled if the lift is
overloaded.
L
When using slings with a maximum load, the lowest load is used between the
patients hoist and sling.
L
The manufacturer accepts no liability for damages and injury caused by inappropriate
actions or by not observing the instructions given in this manual.
L
Use only the handles for pushing to move the patient hoist and no other components
(actuator, manual control, ...).
L
Pull the lifting arm before use manually upwards and check that the lifting arm falls
down by himself. If not, contact your specialist dealer.
Page 14
Albatros II
2012-09
2.6
Emergency
In cases for emergency the emergency stop and the function for lowering in an emergency
must be used.
2.6.1 Emergency stop
In emergencies, and during assembly and disassembly,
the emergency stop is activated by pressing the red
button on the control box.
Push on the button and turn in the direction of the arrows.
If the button is fully pressed to the back turn back in the
opposite direction of the arrows.
The emergency stop is deactivated by
turning the red button in the direction
of the arrows.
2.6.2 Manual emergency lowering
L WARNING: Risk of injury – Adjust the manual emergency lowering for the weight
of the patient.
Emergency lowering if the power fails or the batteries are
empty can be done using the red pull button (1) at the
lower end of the motor. This emergency lowering is
factory-set for a patient weight of 50 kg.
Standard calibration: 2500N, 15 mm/s to lower the
patiënt.
1
Please note that the manual emergency lowering is only possible when the patient is sitting
in the patient lift.
Pull force: 10 mm for force from 80 à 100N.
Page 15
Albatros II
2012-09
3
Installation and adjustment
The instructions in this chapter are for the specialist dealer.
To find a service facility or specialist dealer near you, contact the nearest Vermeiren facility.
A list of Vermeiren facilities can be found on the last page.
L WARNING: Risk of unsafe limitations - Use only the limitations described in this
manual.
3.1
•
•
•
Swapping the battery
We shall decline all liability for damage caused by the use of improper battery.
Do not use the battery at temperatures below +5°C o r above +50°C (the ideal is
+20°C).
If the battery is opened, all liability of the manufacturer shall be voided as well as any
claim.
The battery can be swapped by an integrated clip system.
To swap the battery pull on the integrated clip
system. The plate will be lifted and the battery
can take off the holder (control box).
3.2
Assembly or dismantling
3.2.1 Unpacking
L WARNING: Risk of injury - After unpacking and before further assembly, always
first confirm that the emergency stop (the red pushbutton on the control box) is
pressed in.
The patient hoist packaging has been selected to provide the best possible protection during
transport.
1.
Take the patient hoist out of the box and check that
all the items have been delivered and that the
individual parts do not have any visible defects. If
there is any damage, please contact your sales
office.
2.
Before assembly, put on the caster brakes to make
sure that the lift cannot be moved unintentionally.
Push the caster brake plate down gently to its end
stop with the front of your foot. To release the brake,
push the brake plate gently back up again with the
front of your foot until the caster is free.
Page 16
Albatros II
2012-09
3.2.2 Assembly
L WARNING: Risk of clamping - Take care that no body parts and wires get trapped,
crushed or cut during assembly.
1. Remove the safety spindle (locking pin) from the
bottom end of the pole by gently pressing the button
at the head of the spindle. The safety spindle can
now be removed easily.
2. Undo the transport lock (wing screw) gently and the
pole can now be raised.
2.a The
standing
position
safety (traction screw)
clicks audibly into place
once the pole is put in its
final position.
klick
3.
L WARNING: Risk of injury - Make sure that
the safety spindle is correctly inserted.
Fix the pole in place by pushing the safety spindle at
the end of the pole in with the pushbutton depressed
until its other end clearly protrudes. Release the
pushbutton on the safety spindle and check that it
cannot be pulled out.
Page 17
Albatros II
2012-09
4. Remove the cantilever arm
from the top end of the
pole . This is possible by
pulling on the pen .
5. Mount the slide
column with the foot
support attachment
in the tube of the
patient hoist frame.
Retighten the lever .
6. Attach the slide and
slide holder to the
cantilever arm with
the locking pin .
Page 18
Albatros II
2012-09
7. Pull the actuator gently out
the black clip
8.
.
Attach the actuator on the
cantilever arm by the
locking pin . Take care
that
the
actuator
is
positioned
very
well
between the cantilever
arm.
9. Attach the footplate with the hooks to the chassis of
the patient hoist.
10. Attach the leg support
Position the leg support
depth.
with the locking pin .
to the desired height and
11. Mount the thorax
support to the slide
column with the
locking pin in a
comfortable height for
every patient.
Page 19
Albatros II
2012-09
3.2.3 Dismantling
L WARNING: Risk of clamping - Take care that no body parts and wires get trapped,
L
crushed or cut during dismantling.
WARNING: Risk of injury - Check the emergency stop (red pushbutton on the
control box) is activated, to avoid unintentional adjustment movements.
1. Secure the two casters at the back of the chassis by
pressing the caster brake plates down gently to their
end stops with the tip of your foot. To release the
brake, push the brake plate gently back up again with
the front of your foot until the casters are free.
2. Remove the thorax support
from the slide column
with the locking pin .
3. Remove the leg support
by the locking pin
.
4. Remove the footplate from the chassis of the patient
hoist.
Page 20
Albatros II
2012-09
5. Dismantle
the
actuator
(motor) from the cantilever
arm by removing the locking
pin .
6. Move the actuator to the
bottom position and place
the actuator in the black clip
.
7. Remove the slide and slide
holder
from the cantilver
arm
with the locking pin
.
8. Loosen
the
lever
.
Remove the slide column
and foot support attachment
out the tube of the patient
hoist frame.
Page 21
Albatros II
2012-09
9. Move the cantilever arm to
the bottom position
.
Fasten the pen on the top
end of the pole in the hole of
the cantilever arm .
10. Remove the safety spindle (locking pin) from the
bottom end of the pole by gently pressing the
button at the head of the spindle. The safety
spindle can now be removed easily.
11.
L WARNING: Risk of injury - Once the pole
is unlocked, its own weight can cause
considerable downward forces to be
exerted.
Pull out the standing position safety (traction screw)
until the pole is released and can be tilted. The pole
can now be tilted forwards.
Tip the pole as far as possible forward.
12.
L WARNING: Risk of injury - Make sure
that the safety spindle is correctly
inserted.
Fix the pole in place by pushing the safety spindle at
the end of the pole in with the pushbutton depressed
until its other end clearly protrudes. Release the
pushbutton on the safety spindle and check that it
cannot be pulled out again.
Page 22
Albatros II
2012-09
4
Maintenance
For the maintenance manual of the patient hoists refer to the Vermeiren website:
www.vermeiren.be.
5
Ordernumbers
Casters (ø 100 mm)
Braked casters (ø 100 mm)
E Control box Albatros
E Motor 7,5KN Albatros
E Handcontrol Albatros
E Battery Albatros
E Construction plate Albatros
E Grey plug controlbox Albatros
E Cable Albatros
E External charger CHJ2 for Albatros
E Construction plate external charger Albatros
1903403
1903402
1906137
1906229
1906138
1906139
1906230
1906232
1906233
1906423 (OPTIONAL)
1906424 (OPTIONAL)
Slings
Sling
Sling SU
Right thorax belt
Left thorax belt
Mousse thorax support
2991605
2991627
2991603
2991604
2991600
Page 23
Albatros II
2012-09
Table des matières
Préface ................................................................................................. 2
1
Description du produit ............................................................ 3
1.1
1.2
1.3
1.4
1.5
2
Utilisation ................................................................................. 7
2.1
2.2
2.3
2.4
2.5
2.6
3
Généralités................................................................................................................... 7
Équipement JUMBO (batterie, boîtier de commande + chargeur de batterie inclus) ..
................................................................................................................................... 10
Utilisation du lève-personne...................................................................................... 11
Sangles ...................................................................................................................... 14
Règles de sécurité ...................................................................................................... 14
Urgence ..................................................................................................................... 15
Installation et réglage ............................................................ 16
3.1
3.2
4
5
Utilisation prévue ........................................................................................................ 3
Spécifications techniques ............................................................................................ 4
Composants ................................................................................................................. 6
Explication des symboles ............................................................................................ 7
Livraison...................................................................................................................... 7
Remplacement de la batterie ..................................................................................... 16
Montage ou démontage ............................................................................................. 16
Maintenance ........................................................................... 23
Références............................................................................... 23
Page 1
Albatros II
2012-09
Préface
Nous tenons tout d'abord à vous remercier de nous avoir fait confiance en choisissant l'un
de nos lève-personnes.
Les lève-personnes Vermeiren sont le résultat de nombreuses années de recherche et
d'expérience. Au cours du développement, une attention spéciale a été portée sur la facilité
d'utilisation et les possibilités d'entretien du lève-personne.
La durée de vie attendue de votre lève-personnes dépend essentiellement de l'entretien et
la maintenance que vous lui procurez.
Ce manuel vous aidera à connaître le fonctionnement de votre produit.
Le respect des instructions d'utilisation et des instructions de maintenance est une condition
essentielle de la garantie.
Ce manuel reflète les derniers développements du produit. Vermeiren est autorisé à
apporter des modifications sans devoir pour autant adapter ou remplacer les modèles
fournis précédemment.
Pour toute question, consultez votre distributeur.
Page 2
Albatros II
2012-09
1
Description du produit
1.1
Utilisation prévue
Le lève-personne est destiné aux personnes qui ont des difficultés à marcher ou sont dans
l'impossibilité de marcher.
Le lève-personne est destiné au transport d'une seule personne.
Le lève-personne est destiné à une utilisation en intérieur.
Le lève-personne doit être utilisé avec l'aide d'une tierce personne.
Les différentes possibilités/positions permettent l'utilisation du lève-personne pour les
patients dans l'incapacité de se lever ou marcher suite à :
•
•
•
•
•
paralysie,
malformation de membres,
cachexie,
atrophie,
et les personnes gériatriques
En cas de fourniture pour des besoins individuels :
•
•
•
•
de la taille et du poids corporel (maximum 150 kg),
de l’état physique et psychologique,
de l'environnement de vie,
de l'environnement
Il doit être exclusivement utilisé sur une surface plane, en veillant à ce que les quatre
roulettes soient en appui sur le sol.
Le lève-personne peut être utilisé pour le transfert vers une douche ou une baignoire, mais
pas pendant la toilette.
Il est strictement déconseillé de franchir des obstacles lors du transfert du patient.
Le lève-personne ne doit pas être utilisé comme échelle, ni pour le transport d'objets lourds
ou chauds.
En cas d'utilisation sur des paillassons, moquettes ou revêtements de sols non fixés, le
revêtement de sol peut être endommagé.
Utilisez uniquement des accessoires approuvés par Vermeiren.
Assurez-vous que le réglage du moteur de levage demeure dans les limites de la plage de
sécurité. Utilisez le lève-personne uniquement au centre de la plage de réglage et non à la
limite extrême du moteur de levage.
Le respect des instructions d'utilisation et des instructions de maintenance est une condition
essentielle de la garantie.
Les personnes souffrant de problèmes visuels peuvent prendre contact avec le revendeur
pour les instructions d'utilisation.
Le lève-personne est permettant sa réutilisation.
Page 3
Albatros II
2012-09
1.2
Spécifications techniques
Avant
direction
Page 4
Albatros II
2012-09
Marque
Adresse
Type
Modèle
Cote sur le
schéma
Vermeiren
Vermeirenplein 1/15, B-2920 Kalmthout
Lève-personne
Albatros II
Dimensions
Position la plus profonde du PAC*
l
1060 mm
Hauteur maximale du PAC*
k
1687 mm
Plage de levage (portée en hauteur)
m
637 mm
Côté
1000 mm
Longueur totale
1115 mm
Largeur totale
685 mm
1380 mm (moteur dans la position la plus basse)
1687 mm (moteur dans la position la plus haute)
1115 mm (ne peut pas être replié)
Hauteur totale
Plié / longueur déplié
Plié / largeur déplié
685 mm (ne peut pas être replié)
Plié / hauteur déplié
500 mm
Écart minimal du bras
r
467 mm
Écart maximal du bras
q
769 mm
Hauteur du bras / hauteur de châssis
n
117 mm
Largeur totale (fermé), cote extérieure
Largeur totale (ouvert), roues en avant
Distance minimale entre paroi et PAC*
(hauteur minimale)
Distance minimale entre paroi et PAC*
(portée maximale)
Distance minimale entre paroi et PAC*
(hauteur maximale)
Rayon de braquage
584 mm
P
945 mm
w3 (=w2)
285 mm
w2 (=w3)
285 mm
w1
870 mm
1160 mm
Masse totale
Poids du châssis + moteur + boîte de
contrôle
Poids de la batterie
50,60 kg
Poids de la palette
5,10 kg
Poids du soutien pour le thorax
1,40 kg
Poids du repose-jambe
Poids de la fixation du repose-jambe et de
la colonne d'ascenseur
Charge maximale
3,00 kg
Hauteur libre, minimum
Portée maximale à 600 mm avec reposejambe
Portée maximale à 600 mm sans reposejambe
Portée maximale à partir du pied
Portée à partir du pied avec écart de 700
mm
57 mm
34,50 kg
2,90 kg
3,60 kg
150 kg
a1
300 mm
a2
360 mm
b
c
495 mm
375 mm
Sortie de tension
24V
Tension d'alimentation
max. 250 VA
100-240V ~ max. 37-53 VA
Consommation de courant maximale
Max. 400 mA
Température de fonctionnement
+5°C à +40°C
Humidité de l'air
20 à 90 % à 30°C – sans condensation
Niveau acoustique
< 50 dB (A)
Pression atmosphérique
700 à 1060 hPa
Boîtier de contrôle
Linak CBJ2
Batterie
Linak BAJ1
Commande manuelle
Linak HB5X (force d’actionnement< 5N)
Page 5
Albatros II
2012-09
Marque
Adresse
Type
Modèle
Cote sur le
schéma
Vermeiren
Vermeirenplein 1/15, B-2920 Kalmthout
Lève-personne
Albatros II
Dimensions
Moteur
Classe de protection du boîtier de
commande
Classe de protection de la batterie
Classe de protection de la commande
manuelle
Classe de protection du moteur
Linak LA34 (7500N)
IPX4
IPX5
IPX5
IP54
Classe d'isolation
II - Type B
Rendement
env. 40 levages par chargement
Max. 10%, ou 2 minutes d’utilisation pour 18
minutes de pause
2.9 Ah
Utilisation périodique
Capacité des batteries
Arrêt d'urgence
Oui
Abaissement manuel d'urgence
Oui
Abaissement manuel électrique
Non
Nous nous réservons le droit d’apporter des modifications techniques. Tolérance de mesure +/- 15 mm / 1,5kg
1 = Position la plus haute, 2 = Portée maximale, 3 = Position la plus basse
* PAC = Point d’ancrage central
Tableau 1 : Spécifications techniques
Le lève-personne est conforme aux normes suivantes :
ISO 7176-8: Exigences et méthodes de test pour les forces statiques, d'impact et de fatigue.
ISO 7176-16: Résistance à l'inflammation des pièces rembourrées
1.3
Composants
1
2
3
4
5
6
7
8
9
10
11
12
13
14
15
16
17
18
19
20
21
22
23
24
25
Page 6
= Boutons pour les ceintures
de fixation
= Bras de levage
= Coussins pour le thorax
= Support de guidage
= Colonne de guidage
= Support de transport pour le
moteur
= Moteur
= Ceinture pour les jambes
= Repose-jambe
= Châssis
= Palette
= Roulette directrice
= Roue avec frein
= Pédale d'écartement du
châssis
= Repose-pied avec une
fixation en velcro
= Axe de fixation
= Verrouillage escamotable
= Câble d'alimentation
= Barres du poussoir
= Commande manuelle
= Mât
= Boîte de contrôle
= Arrêt d'urgence
= Batterie
= Tablette
Albatros II
2012-09
1.4
Explication des symboles
Respecter les instructions de sécurité !
Lire le mode d'emploi avant l'utilisation.
Collecte et recyclage séparés des appareils électriques et électroniques.
Conformité CE
1.5
Livraison
Le lève-personne Vermeiren Albatros II est livré avec :
• Un châssis incluant 4 roulettes (dont 2 avec frein)
• Mât avec étrier coulissant
• Bras de levage avec dispositif de fixation pour la sangle
• Un boîtier de commande (+ chargeur de batterie incorporé)
• Batterie
• Commande manuelle
• Moteur
• Mode d’emploi
• Palette + Repose-pied avec une fixation en velcro
• Repose-jambe
• Support pour le thorax
Vérifiez que vous êtes en possession de tous ces éléments et qu'aucun n'a été endommagé
(en particulier durant le transport).
Veuillez noter que la configuration de base pour l'Europe peut varier d'un pays à l'autre. Pour
de plus amples informations, contactez votre spécialiste dans votre pays.
2
Utilisation
Ce chapitre décrit l'utilisation quotidienne. Ces instructions sont destinées à l'utilisateur
et au distributeur.
Le lève-personne est livré entièrement assemblé par votre distributeur. Les instructions
destinées au distributeur pour le réglage du lève-personne sont indiquées au § 3.
2.1
Généralités
Seul un personnel qualifié, formé à cette application spéciale, peut utiliser le lève-personne.
L'utilisation du lève-personne est limitée à l'intérieur. Assurez-vous que l'utilisation se limite à
des surfaces planes. L’utilisation de ce produit à l’extérieur est exclue.
Nous tenons à vous signaler que des pannes peuvent être provoquées par des sources
électromagnétiques (ex. : téléphone portable, etc.) et que l’électronique du lève-personne
peut elle-même causer des perturbations sur d’autres appareils électriques.
Même si votre revendeur vous a renseigné sur les organes de commande de votre lèvepersonne et sur leur manipulation, vous devez lire attentivement les pages qui suivent.
Page 7
Albatros II
2012-09
2.1.1 Instructions pour soulever le patient
Phase I – Préparation. Dans cette phase, le patient doit se placer sur la palette et placer
ses pieds dans les repose-pieds spéciaux avec une fixation en velcro. Stabilisez vos pieds et
vos jambes en dessous de vos genoux en utilisant les ceintures en velcro du repose-pied et
pour les jambes. Assurez-vous que vos pieds et vos jambes reposent bien contre le coussin
du repose-pied et les jambes. Fixez la ceinture pour le thorax au lève-personnes à l'aide des
quatre sangles de fixation.
Boutons pour fixer la
ceinture pour le thorax
Phase II- Soulever. Utilisez prudemment la commande manuelle pour soulever le patient.
Demandez au patient de saisir les poignées pendant le soulèvement.
Phase III – Stabilisation. Au cours de la dernière étape après le soulèvement en position
verticale, le patient est stabilisé grâce aux ceintures pour le thorax. Les ceintures pour le
thorax sont montées des deux côtés du support pour le thorax. Lorsque le patient est
soulevé, vous pouvez enlever la veste. Pour compléter la stabilisation, vous utilisez la
ceinture à la taille afin de stabiliser la coupe transversale de la hanche et du tronc. De cette
manière, le patient est entièrement protégé au niveau de quatre points : les pieds, les
genoux, les hanches et le thorax.
Page 8
Albatros II
2012-09
Boutons pour fixer la ceinture à la taille
Regardez de quelle manière le patient est stabilisé.
Page 9
Albatros II
2012-09
2.2
Équipement JUMBO (batterie, boîtier de commande +
chargeur de batterie inclus)
Spécialement conçu pour un usage tout en souplesse du lève-personne, l'équipement
JUMBO est un dispositif modulaire réunissant un moteur, un boîtier de commande et une
batterie.
2.2.1 Batterie
La batterie est située au-dessus du boîtier de commande et son
remplacement s'effectue au moyen d'un dispositif de clip intégré.
Tension primaire
Température environnante
Température environnante pour le
stockage
Humidité relative pour le stockage
Conformité
24 V CC
+5°C à +40°C
-10° à +50°C
Max. 90% (sans condensation)
contrôlé d'après IEC 606011
2.2.2 Un boîtier de commande (+ chargeur de batterie)
Le boîtier de commande est équipé d'un arrêt
d'urgence rouge et d'un chargeur de batterie
intégré.
Tension primaire
Tension secondaire
(tension de charge)
Courant secondaire
(courant de charge)
Systèmes de sécurité
100 - 240V CA / 50/60 Hz
24 V CC, max. 250 VA
Température
environnante
Température
environnante pour le
stockage
Humidité de l'air
de stockage
Conformité
+5°C à +40°C
Max. 10 A
protection contre les
inversions de polarité, les
surtensions et la température
-10° à +50°C
Max. 90% (sans
condensation)
contrôlé d'après
IEC 606011
Nous nous réservons le droit d’apporter des modifications techniques.
2.2.3 Chargeur externe (EN OPTION)
Le chargeur externe est conçu pour un montage
mural. Il vous permet de disposer à l'avance
d'une batterie de rechange (en option) chargée
et d'éviter ainsi des temps d'attente lorsque vous
souhaitez utiliser le lève-personne.
Tension primaire
Courant de charge
Température environnante
Température environnante
pour le stockage
Humidité de l'air
de stockage
Page 10
100 - 240V CA / 50/60 Hz
Max. 650 mA
+5°C à +40°C
-10° à +50°C
Max. 90% (sans
condensation)
Albatros II
2012-09
2.2.4 Chargement des batteries
N'utilisez que le boîtier de commande Albatros II à chargeur de batterie intégré ou le
chargeur externe mural.
Nous vous invitons à recharger régulièrement les batteries afin de maintenir le lèvepersonne en état de fonctionnement et de bénéficier de la durée de vie optimale des
batteries. Le boîtier de commande émet un signal sonore dès que la batterie est rechargée à
50 % de sa capacité.
•
MISE EN SERVICE
Raccordez tout d'abord le connecteur du cordon d'alimentation au connecteur correspondant
sur le boîtier de commande. Branchez ensuite la prise du cordon d'alimentation sur la prise
de courant. La durée de chargement est d'environ 24 heures.
•
RECHARGE
L AVERTISSEMENT : Risque de blessures – N'utilisez pas le lève-personne
lorsque le cordon d'alimentation est branché sur la prise de courant.
Lors de la charge des batteries, un voyant jaune (charge en cours) puis
orange (charge terminée) est allumé.
Une fois la batterie rechargée, débranchez toujours le cordon de la prise de courant avant
de le détacher du boîtier de commande.
Aucune utilisation du lève-personne pendant le chargement !
Toute batterie inutilisée pendant une période prolongée se décharge progressivement
(décharge complète). Une charge à l’aide du chargeur fourni n’est plus possible. Nous vous
invitons donc à recharger les batteries au moins une fois par mois, même si vous ne devez
pas vous en servir.
2.3
Utilisation du lève-personne
Respectez les caractéristiques techniques liées à l'utilisation du lève-personnes (Albatros II).
Seules des personnes autorisées, formées à l'utilisation et au fonctionnement du lèvepersonne, peuvent le manipuler.
L AVERTISSEMENT : Risque de brûlures - Soyez prudent lorsque vous roulez dans
des environnements extrêmement chauds ou froids (soleil, froid extrême, sauna,
etc.) pour une durée déterminée et lorsqu'il y a des contacts - Les surfaces
peuvent absorber la température ambiante.
2.3.1 Ecartement du chassis
Il est possible d'augmenter l'écartement du
châssis pour entourer un fauteuil roulant ou un
autre siège avec le lève-personne, mais aussi
pour améliorer la stabilité du lève-personne.
En vous tenant derrière le lève-personne une
fois celui-ci monté et saisissez les barres du
poussoir du lève-personne (à gauche et à droite
à côté du boîtier de commande). Appuyez avec
le pied légèrement vers le bas sur la bascule sur
le châssis inférieur (droite ou gauche) pour
pouvoir augmenter ou réduire l'écartement des
bras du châssis.
Page 11
Albatros II
2012-09
2.3.2 Freins de stationnement
Bloquez les deux roues à l'arrière du châssis en
appuyant légèrement de la pointe du pied sur la
patte du frein des roues en l’abaissement
jusqu’à ce qu’elles soient bloquées. Pour
desserrer les freins, soulever de la pointe du
pied sur la pédale de frein vers le haut jusqu’à
ce que les roues soient libérées.
2.3.3 Palette
La palette
peut être fixée avec les crochets
sur le châssis du lève-personne ou peut être
enlevées. Si c'est nécessaire pour une meilleure
stabilité des pieds, vous pouvez utiliser les
repose-pieds spéciaux
avec les sangles en
velcro pour la stabilisation.
2.3.4 Repose-jambe
L AVERTISSEMENT : Risque de lésion - Ne placer pas le repose-jambe sur le
patient pendant le réglage.
Le repose-jambe
peut être fixé sur la
barre du lève-personne
à l'aide d'une
goupille d'arrêt .
Le repose-jambe sert à maintenir les
jambes du patient dans la bonne position et
à soutenir les jambes du patient lorsqu'il est
debout.
Les repose-jambes peuvent être réglés en profondeur et dans neuf hauteurs différentes.
1 = Barre pour le réglage en hauteur
2 = Levier pour le réglage en
profondeur
Hauteur de la palette
jusqu'au sommet du
repose-jambe
Position
690 mm
Trou 1
665 mm
Trou 2
640 mm
Trou 3
Ne pas utiliser
Trou 4
Ne pas utiliser
Trou 5
495 mm
Trou 6
470 mm
Trou 7
445 mm
Trou 8
420 mm
Trou 9
Tableau 2 : Réglage en hauteur du
repose-jambe
Page 12
Albatros II
2012-09
2.3.5 Support pour le thorax
Afin de stabiliser et de soutenir votre thorax,
le lève-personne est équipé d'un coussin
pour le thorax et de sangles en velcro pour
assurer la stabilisation.
Le soutien pour le thorax peut être placé
dans deux positions différentes : 1045 mm
et 1200 mm. Ces positions sont mesurées
de la palette jusqu'à la partie supérieure du
soutien pour le thorax.
1. Enlevez les goupilles d'arrêt .
2. Réglez le soutien pour le thorax dans
la position souhaitée. La position de la
est celle indiquée
plaque de fixation
dans l'illustration.
3. Remontez les goupilles d'arrêt .
2.3.6 Soulevement / abaissement du bras de levage
Le bras de levage permet un réglage manuel en douceur en n'importe
quelle position.
1
2
1
= Soulever le bras de levage
2
= Abaisser le bras de levage
L
Lorsque la fonction de levage est utilisée jusqu'à l'extrémité du
moteur du palan, l'interrupteur de fin de course est activé par
le système électronique (fonction de sécurité). N'utilisez la
fonction de levage qu'au centre de la plage de réglage.
Force d’actionnement du bouton: < 5N
Pour déplacer le lève-personne, réglez la commande manuelle sur le tube supérieur des
poignées. Il s'agit là de la position la plus ergonomique.
Page 13
Albatros II
2012-09
2.3.7 Déplacement du lève-personne
L AVERTISSEMENT : risque de pincement - Soyez prudent lorsque vous
franchissez des passages étroits (portes, par exemple).
1.
Placez-vous derrière le lève-personne, en tenant à deux mains les barres du poussoir
(gauche et droite, à côté du boîtier de commande).
2.
Vérifiez que les deux freins des roues arrière soient desserrés.
3.
Poussez lentement le leve-personne dans la position souhaitée.
Lorsque le lève-personne n'est pas chargé, nous recommandons de le tirer en marche
arrière afin de pouvoir plus facilement éviter des obstacles (tels que des chambranles de
portes, angles de pièces ou meubles).
Pour déplacer le lève-personne, servez-vous exclusivement des barres du poussoir et
d'aucun autre élément (actionneur, commande manuelle...) .
2.4 Sangles
L AVERTISSEMENT : Risque de blessures – Veillez à utiliser les sangles adaptée
au patient.
L AVERTISSEMENT : Risque de blessures – N'utilisez pas de sangles
endommagée.
Le lève-personne Albatros II doit être strictement utilisé avec les sangles conçues pour les
équipements Vermeiren Albatros II.
Vous trouverez les instructions d'utilisation dans les modes d'emploi des différents sangles.
2.5
Règles de sécurité
Nous vous donnons ci-après quelques conseils de sécurité qui vous seront utiles pour votre
propre sécurité :
L
Seules des personnes autorisées, formées à l'utilisation et au fonctionnement du
lève-personne, peuvent le manipuler.
L
Veillez lors de l'utilisation du lève-personne à disposer d'un espace suffisant à côté et
au-dessus du lève-personne pour éviter tout dommage ou blessure lors de
l'utilisation des fonctions de réglage.
L
Faites toujours attention à la position du bras de levage afin de ne pas blesser le
patient.
L
Le lève-personne ne doit être utilisé que sur des surfaces planes sur lesquelles les 4
roues touchent le sol.
L
Toute utilisation dans un environnement humide est exclue.
L
N'utilisez que des sangles prévus et homologués pour le lève-personne (voir le mode
d'emploi des différents sangles). L'utilisation d'autres sangles se fait à vos risques et
périls.
L
Suivez les indications du personnel soignant ou des personnes formées afin d'éviter
toute blessure pendant l'utilisation du lève-personne.
L
Prenez connaissance du profil médical du patient afin de vous assurer que son état
est compatible avec l'utilisation du lève-personne (voir les applications du dispositif).
L
Soyez prudent avec le feu, en particulier avec les cigarettes incandescentes ; en
effet, les sangles risquent de s'enflammer.
L
Ne dépassez jamais la charge maximale de 150 kg. En cas de surcharge, le boîtier
de commande est désactivé.
L
Lors de l'utilisation d'élingues avec une charge maximale, la charge la plus basse est
utilisée entre le lève-personne et l'élingue.
L
Le fabricant décline toute responsabilité pour les dégâts et blessures dus à une
manipulation incorrecte ou au non-respect de ces instructions.
Page 14
Albatros II
2012-09
L
L
Pour déplacer le lève-personne, n'utilisez que les barres du poussoir à l'exclusion de
tout autre élément (moteur, commande manuelle...).
Tirez le bras de levage vers le haut avant de l'utiliser manuellement et vérifiez que le
bras de levage tombe de lui-même. Sinon, contactez votre revendeur.
2.6
Urgence
En cas d'urgence, utilisez le bouton d'urgence ainsi que la fonction d'abaissement
d'urgence.
2.6.1 Arrêt d'urgence
En cas d'urgence ainsi que lors du montage et du
démontage, vous pouvez activer l'arrêt d'urgence en
actionnant le bouton rouge du boîtier de commande.
Enfoncez pour cela le bouton et faites-le tourner dans la
direction des flèches. Si le bouton est entièrement
enfoncé et tourné vers l'arrière, faites-le tourner dans la
direction opposée aux flèches.
Pour désactiver l'arrêt d'urgence,
faites tourner le bouton rouge dans la
direction des flèches.
2.6.2 Abaissement manuel d'urgence
L AVERTISSEMENT : Risque de blessures – Le dispositif d'abaissement manuel
d'urgence doit être réglé selon le poids du patient.
L'abaissement d'urgence, par exemple en cas de
coupure d'alimentation ou de batterie déchargée,
s'effectue au moyen du bouton rouge (1) en bas du
moteur. Le dispositif d'abaissement d'urgence est réglé
en usine pour un patient de 50 kg.
Calibrage type : 2500N, 15 mm/s pour faire descendre le
patient.
1
Veuillez noter que l'abaissement manuel d'urgence n'est possible que si le patient est assis
dans le lève-personne.
Force de tirée : 10 mm pour une force de 80 à 100N.
Page 15
Albatros II
2012-09
3
Installation et réglage
Les instructions de ce chapitre sont destinées au distributeur.
Pour trouver un service d'entretien ou un revendeur spécialisé près de chez vous, contactez
l'établissement Vermeiren le plus proche. Vous trouverez une liste des établissements sur la
dernière page.
L AVERTISSEMENT : risque de réglages dangereux - N'utilisez que les réglages
décrits dans ce manuel.
3.1
•
•
•
Remplacement de la batterie
Nous déclinons toute responsabilité en cas de dommage résultant d'une mauvaise
utilisation de la batterie.
N'utilisez pas la batterie à des températures inférieures à +5 °C ou supérieures à
+50°C (la température idéale étant de +20°C).
Le constructeur décline toute responsabilité et réclamation en cas d'ouverture de la
batterie.
Le remplacement de batterie s'effectue au moyen d'un dispositif de clip intégré.
Pour remplacer la batterie, tirez sur ce dispositif
afin de soulever la plaque et de retirer la batterie
de son logement (boîtier de commande).
3.2
Montage ou démontage
3.2.1 Deballage
L AVERTISSEMENT : Risque de blessures - Une fois l'équipement déballé et avant
de procéder à son assemblage, vérifiez que le bouton d'arrêt d'urgence (bouton
rouge du boîtier de commande) est enfoncé.
L'emballage du lève-personne a été choisi pour garantir une protection optimale pendant le
transport.
1.
Retirez le lève-personne du carton et contrôlez que
tous les éléments soient présents et si des pièces
présentent un défaut visible. En cas de dommage,
veuillez vous adresser à votre revendeur.
2.
Avant l'installation, empêchez tout déplacement
involontaire du lève-personne en actionnant les
roues avec freins. Appuyez légèrement de la pointe
du pied sur la patte du frein des roues en l’abaissant
vers le bas jusqu’à ce qu’elles soient bloquées. Pour
desserrer les freins, soulevez de la pointe du pied la
patte du frein vers le haut jusqu’à ce que les roues
soient libérées.
Page 16
Albatros II
2012-09
3.2.2 Assemblage
L AVERTISSEMENT : Risque de pincement - Veillez à ne pas vous pincer ou
couper, ni pincer, écraser ou couper des fils lors du montage.
1. Retirez l'axe de fixation (arbre de transmission) en
bas du mât en appuyant légèrement sur le bouton
sur la tête de l'axe. Vous pouvez alors retirer
facilement l'axe de fixation.
2. Libérez délicatement la sécurité de transport (vis à
croisillon) pour pouvoir orienter le mât.
2.a La sécurité (vis de traction)
s’enclenche de manière
audible lorsque le mât est
placé dans sa position
finale.
Click
3.
L AVERTISSEMENT : Risque de blessure Veillez à ce que l’axe de fixation soit bien en
place.
Fixez le mât en insérant l’axe de fixation en bas du
mât (en appuyant sur le bouton) suffisamment loin
pour qu’il dépasse visiblement de l’autre côté.
Relâchez le bouton de l’axe de fixation et vérifiez
que l’axe ne puisse pas être retiré.
Page 17
Albatros II
2012-09
4. Enlevez le levier de la
partie supérieure du mât
. Vous le faites en tirant
prudemment sur la broche
.
5. Montez la colonne de
direction
avec la
fixation du reposedans la
pieds
conduite du châssis
du lève-personne.
Fixez à nouveau le
levier .
6. Fixez le conducteur et
le support de
conduction
au bras
de levage
avec les
goupilles d'arrêt .
Page 18
Albatros II
2012-09
7. Tirez légèrement le moteur
de la pince noire
8.
.
Fixez le moteur au bras de
levage
à
l'aide
des
goupilles
d'arrêt
.
Assurez-vous
que
le
moteur est bien placé
entre le bras de levage.
9. Fixez la palette avec les crochets sur le châssis du
léve-personne.
10. Fixez le repose-jambe
à l'aide de la goupille
d'arrêt . Placez le repose-jambe
à la hauteur et
dans la profondeur souhaitées.
11. Montez le support pour
le thorax
sur la
colonne de direction
avec la goupille d'arrêt
dans une hauteur
confortable pour
chaque patient.
Page 19
Albatros II
2012-09
3.2.3 Démontage
L AVERTISSEMENT : Risque de pincement - Veillez à ne pas vous pincer ou
L
couper, ni pincer, écraser ou couper des fils lors du démontage.
AVERTISSEMENT : Risque de blessures - Vérifiez que l'arrêt d'urgence (bouton
rouge du boîtier de commande) est activé afin d'éviter tout réglage intempestif.
1. Bloquez les deux roues à l'arrière du châssis en
appuyant légèrement de la pointe du pied sur la patte
du frein des roues en l’abaissement jusqu’à ce
qu’elles soient bloquées. Pour desserrer les freins,
soulever de la pointe du pied sur la pédale de frein
vers le haut jusqu’à ce que les roues soient libérées.
2. Enlevez le support pour le
de la colonne de
thorax
direction
avec la goupille
d'arrêt .
3. Enlevez le repose-jambe
d'arrêt .
à l'aide de la goupille
4. Enlevez la palette du châssis du lève-personne.
Page 20
Albatros II
2012-09
5. Enlevez le moteur du bras
de levage en enlevant la
goupille d'arrêt .
6. Déplacez le moteur de la
position inférieure et fixez le
moteur dans la pince noire
.
7. Enlevez le conducteur et le
support de conduction
du
avec la
bras de levage
goupille d'arrêt .
8. Détachez le levier
.
Enlevez la colonne de
et la fixation du
direction
repose-jambe
, dans la
conduite du châssis du lèvepersonne.
Page 21
Albatros II
2012-09
9. Mettez le bras de levage
dans la position inférieure
. Fixez la broche sur la
partie supérieure du mât
dans le trou du bras de
levage .
10. Retirez l'axe de fixation (arbre de transmission)
en bas du mât en appuyant légèrement sur le
bouton sur la tête de l'axe. Vous pouvez alors
retirer facilement l'axe de fixation.
L
AVERTISSEMENT : risque de lésion Si le mât est déverrouillé, des forces
descendantes considérables peuvent
faire leur apparition en raison de son
propre poids.
Tirez la sécurité (vis de traction) jusqu’à ce que le
mât puisse être incliné. Vous pouvez alors incliner le
mât vers l’avant.
11.
Faites basculer le mât le plus loin possible vers
l'avant.
12.
L
AVERTISSEMENT : risque de lésion Veillez à ce que l’axe de fixation soit
bien en place.
Fixez le mât en insérant l’axe de fixation en bas du
mât (en appuyant sur le bouton) suffisamment loin
pour qu’il dépasse visiblement de l’autre côté.
Relâchez le bouton de l’axe de fixation et vérifiez que
l’axe ne puisse pas être retiré.
Page 22
Albatros II
2012-09
4
Maintenance
Le mode d'emploi des lève-personnes se trouve sur le site Internet de Vermeiren,
www.vermeiren.be.
5
Références
Roulettes (ø 100 mm)
Roulettes avec frein (ø 100 mm)
E Boîtier de commande Albatros
E Moteur 7,5KN Albatros
E Commande manuelle Albatros
E Batterie Albatros
E Plaque de construction Albatros
E Gris fiche du boîtier de commande Albatros
E Câble Albatros
E Chargeur externe CHJ2 pour Albatros
E Chargeur externe plaque de construction Albatros
1903403
1903402
1906137
1906229
1906138
1906139
1906230
1906232
1906233
1906423 (EN OPTION)
1906424 (EN OPTION)
Sangles
Sangle 2991605
Sangle SU
Ceinture droite pour le thorax
Ceinture gauche pour le thorax
Mousse pour le soutien du thorax
2991627
2991603
2991604
2991600
Page 23
Albatros II
2012-09
INHOUDSOPGAVE
Voorwoord........................................................................................... 2
1
Productomschrijving ............................................................... 3
1.1
1.2
1.3
1.4
1.5
2
Gebruik ..................................................................................... 7
2.1
2.2
2.3
2.4
2.5
2.6
3
Algemene instructies ................................................................................................... 7
Gebruik van het JUMBO-systeem (batterij, controlebox + interne batterijlader).... 10
Bediening van de lift ................................................................................................. 11
Tilbanden ................................................................................................................... 14
Voor Uw veiligheid ................................................................................................... 14
Noodgeval ................................................................................................................. 15
Montage en instellingen......................................................... 16
3.1
3.2
4
5
Toepassingsgebied ....................................................................................................... 3
Technische specificaties .............................................................................................. 4
Componenten .............................................................................................................. 6
Verklaring van de symbolen ........................................................................................ 7
Levering ...................................................................................................................... 7
De batterij verwisselen .............................................................................................. 16
Montage of demontage .............................................................................................. 16
Onderhoud ............................................................................. 23
Ordernummers ...................................................................... 23
Pagina 1
Albatros II
2012-09
Voorwoord
We willen U danken voor het vertrouwen dat U in onze producten stelt.
De patiëntenliften van Vermeiren zijn het resultaat van jarenlange studies en ervaringen. Bij
de ontwikkeling werd veel aandacht besteed aan een eenvoudige bediening en een
gemakkelijk onderhoud.
De verwachte levensduur van Uw patiëntenlift hangt in sterke mate af van de zorg waarmee
U de patiëntenlift behandelt.
Deze handleiding maakt U vertrouwd met de bediening van Uw product.
Het naleven van de gebruiks- en onderhoudsinstructies vormen een essentieel onderdeel
van de garantiebepalingen.
Deze handleiding houdt rekening met de recentste productontwikkelingen. De Firma
Vermeiren behoudt zich echter het recht voor om wijzigingen door te voeren zonder verplicht
te zijn voordien geleverde modellen aan te passen of te vervangen.
Als U nog vragen hebt, neemt U best contact op met Uw vakhandelaar.
Pagina 2
Albatros II
2012-09
1
Productomschrijving
1.1
Toepassingsgebied
De patiëntenlift is bedoeld voor mensen die moeilijk of niet kunnen lopen.
De patiëntenlift is ontworpen voor het transport van 1 persoon.
De patiëntenlift is geschikt om binnenshuis te gebruiken.
De gebruiker moet door een begeleider in de patiëntenlift worden getild.
De verschillende mogelijkheden / posities zorgen ervoor dat de patiëntenlift kan worden
gebruikt door mensen die invalide of ongeschikt zijn omwille van:
•
•
•
•
•
gedeeltelijke verlamming
aandoeningen van ledematen
cachexie
atrofie
en geriatrische personen
Houd bij de individuele verzorging rekening met:
•
•
•
•
grootte en lichaamsgewicht (max. 150 kg)
fysieke en psychologische gesteldheid
woonomgeving
milieu
Gebruik uw patiëntenlift alleen op een vlakke ondergrond en met alle vier de zwenkwielen op
de grond.
De patiëntenlift kan gebruikt worden voor de transfer in en uit de douche of bad, maar
gebruik deze niet tijdens het douchen of baden zelf.
Gebruik de lift niet in natte ruimtes/badkamers of vochtige omgevingen.
Het is strikt verboden om over obstakels te rijden tijdens het vervoer van de patiënt.
De patiëntenlift dient niet als klimtoestel of om hete of zware voorwerpen te transporteren.
Het gebruik op tapijten, tapijtvloeren of andere losse vloerbedekkingen kan slijtage van de
vloerbedekking tot gevolg hebben.
Gebruik enkel door Vermeiren goedgekeurde accessoires.
Zorg ervoor dat de instelling van de lift motor binnen een veilig bereik blijft. Gebruik de
patiëntenlift alleen in het midden van het instelbereik en niet aan het uiterste uiteinde van de
lift motor.
Het naleven van de gebruiks- en onderhoudsinstructies vormen een essentieel onderdeel
van de garantiebepalingen.
Mensen met een visuele beperking kunnen contact opnemen met de vakhandelaar voor de
gebruikersinstructies.
De patiëntenlift is geschikt voor hergebruik.
Pagina 3
Albatros II
2012-09
1.2
Technische specificaties
Voorwaartse
richting
Pagina 4
Albatros II
2012-09
Merk
Adres
Type
Model
Vermeiren
Vermeirenplein 1/15, B-2920 Kalmthout
Patiëntenlift
Albatros II
Afmetingen in
Afmetingen
tekening
Laagste positie COP*
l
1060 mm
Maximale hoogte COP*
k
1687 mm
Tilbereik (hoogtebereik)
m
637 mm
Pootlengte
1000 mm
Totale lengte
1115 mm
Totale breedte
Opgevouwen / Gedemonteerde lengte
685 mm
1380 mm (motor in laagste positie)
1687 mm (motor in hoogste positie)
1115 mm (kan niet worden opgevouwen)
Opgevouwen / Gedemonteerde breedte
685 mm (kan niet worden opgevouwen)
Opgevouwen / Gedemonteerde hoogte
500 mm
Totale hoogte
Minimale afstand poten
r
467 mm
Maximale afstand poten
q
769 mm
Poothoogte / Chassishoogte
n
117 mm
Totale breedte (gesloten), buitenafmeting
Totale breedte (geopend), wielen voorwaarts
Min. Afstand tussen muur / COP* (minimum
hoogte)
Min. Afstand tussen muur / COP* (maximaal
bereik)
Min. Afstand tussen muur / COP* (grootste
hoogte)
Draaicirkel
584 mm
P
945 mm
w3 (=w2)
285 mm
w2 (=w3)
285 mm
w1
870 mm
1160 mm
Totaal gewicht
50,60 kg
Gewicht van chassis + motor + controlebox
34,50 kg
Gewicht van de batterij
2,90 kg
Gewicht van de voetplaat
5,10 kg
Gewicht van de thorax ondersteuning
1,40 kg
Gewicht van de beensteun
Gewicht bevestiging beensteun en de
liftkolom
Maximale belasting
3,00 kg
3,60 kg
150 kg
Vrije hoogte, ten minste
Maximaal bereik bij 600 mm met beensteun
Maximaal bereik bij 600 mm zonder
beensteun
Maximaal bereik vanaf drager
Bereik vanaf drager met afstand van 700
mm
57 mm
a1
300 mm
a2
360 mm
b
c
495 mm
375 mm
Spanningsuitgang
24V
Voedingsspanning
max. 250 VA
100-240V ~ max. 37-53 VA
Maximale stroomopname
max. 400 mA
Bedrijfstemperatuur
+5°C tot +40°C
Relatieve luchtvochtigheid
20% tot 90% bij 30°C, niet condenserend
Geluidsdruk
< 50 dB(A)
Luchtdruk
700 tot 1060 hPa
Controlebox
Linak CBJ2
Batterij
Linak BAJ1
Handbediening
Linak HB5X (< 5N bedieningskracht)
Motor
Linak LA34 (7500N)
Beschermingsklasse controlebox
IPX4
Pagina 5
Albatros II
2012-09
Merk
Adres
Type
Model
Vermeiren
Vermeirenplein 1/15, B-2920 Kalmthout
Patiëntenlift
Albatros II
Afmetingen in
Afmetingen
tekening
Beschermingsklasse Batterij
IPX5
Beschermingsklasse handbediening
IPX5
Beschermingsklasse motor
IP54
Isolatieklasse
II - Type B
Arbeidsvermogen
ca. 40 tilacties per lading
max. 10%, of 2 min. continu bedrijf /18 min.
pauze
2,9 Ah
Periodiek bedrijf
Batterijcapaciteit
Noodstopknop
Ja
Handmatige noodneerlating
Ja
Elektrische noodneerlating
Nee
We behouden ons het recht voor om technische wijzigingen te introduceren. Meettolerantie, +/- 15 mm / 1,5kg
1 = Hoogste positie, 2 = Maximaal bereik, 3 = Laagste positie
* COP = Centraal ophangingspunt
Tabel 1: Technische specificaties
De patiëntenlift voldoet aan de vereisten die zijn vastgelegd in:
ISO 7176-8: Eisen en beproevingsmethoden voor statische, bots en vermoeiingsproeven.
ISO 7176-16: Weerstand tegen ontbranding van gestoffeerde onderdelen.
1.3
Componenten
1
= Knoppen voor
bevestigingsriemen
2 = Hefarm
3 = Thorax kussen
4 = Geleidingshouder
5 = Geleidingskolom
6 = Transporthouder voor motor
7 = Motor
8 = Riem voor de benen
9 = Beensteun
10 = Chassis
11 = Voetplaat
12 = Zwenkwiel
13 = Zwenkwiel met rem
14 = Pedaal voor spreiding
chassis
15 = Voetsteun met bevestiging in
velcro
16 = Vergrendelas
17 = Opklapbare vergrendeling
18 = Voedingskabel
19 = Duwbeugels
20 = Handbediening
21 = Mast
22 = Controlebox
23 = Noodstopknop
24 = batterij
25 = Tafel
Pagina 6
Albatros II
2012-09
1.4
Verklaring van de symbolen
Veiligheidsinstructies respecteren!
Voor gebruik de handleiding lezen.
Gescheiden inzameling en recycleren van elektrische en elektronische apparaten.
CE conformiteit
1.5
Levering
De Vermeiren Albatros II-patiëntenlift wordt geleverd met:
• Chassis inclusief 4 zwenkwielen (2 met remmen)
• Mast, inclusief duwbeugel
• Hefarm met verstelling voor draagband
• Controlebox (+ meegeleverde batterijoplader)
• Batterij
• Handbediening
• Motor
• Handleiding
• Voetplaat + voetsteunen met bevestiging in velcro
• Beensteun
• Thorax ondersteuning
Controleer vóór gebruik of alles is meegeleverd en er geen producten zijn beschadigd
(tijdens het transport bijvoorbeeld...).
Denk eraan dat de basis configuratie kan variëren in de verschillende Europese landen.
Neem voor meer informatie contact op met de vakhandelaar in Uw land.
2
Gebruik
Dit hoofdstuk beschrijft het normaal gebruik. Deze instructies zijn van toepassing voor de
gebruiker en de vakhandelaar.
De patiëntenlift wordt gemonteerd en ingesteld door Uw vakhandelaar. De instructies voor
de montage en instellingen van de patiëntenlift staan in § 3.
2.1
Algemene instructies
De patiëntenlift mag alleen door gekwalificeerd personeel worden bediend dat voor het
speciale gebruik is geïnstrueerd of opgeleid.
De patiëntenlift mag alleen binnenshuis worden gebruikt. Zorg ervoor dat de lift alleen op
een vlakke ondergrond wordt gebruikt. Dit product mag niet buitenshuis worden gebruikt.
We willen er Uw aandacht op vestigen dat storingen door elektromagnetische bronnen (b.v.
door GSM, enz.) kunnen worden veroorzaakt en dat de elektronica van de lift zelf storingen
bij andere elektrische apparaten kan veroorzaken.
Ook wanneer de vakhandelaar U de bedieningselementen van Uw lift en de wijze waarop U
ermee dient om te gaan heeft uitgelegd, moet U de volgende pagina’s toch aandachtig
lezen.
Pagina 7
Albatros II
2012-09
2.1.1 Instructies voor het tillen van de patiënt
Fase I – Voorbereiding. In deze fase, moet de patiënt op de voetplaat gaan staan en zijn
voeten plaatsen in de speciale voetsteunen met bevestiging in velcro. Stabiliseer Uw voeten
en benen onder Uw knieën door de velcro riemen van de voet- en beensteun te gebruiken.
Zorg ervoor dat Uw voeten en benen goed tegen het kussen van de voet- en beensteun
zitten. Maak de thorax gordel vast aan de patiëntenlift met behulp van de vier
bevestigingsriemen.
Knoppen om de thorax
gordel te bevestigen
Fase II- Tillen. Gebruik voorzichtig de handbediening om de patiënt naar boven te tillen.
Laat de patënt de handgrepen vastnemen tijdens het tillen.
Fase III – Stabilisatie. In de laatste stap na het tillen in de verticale positie, is de patiënt
gestabiliseerd door de thorax gordels. De Thorax gordels zijn langs beide kanten van de
steun voor de thorax gemonteerd. Eenmaal naar boven getild kan U de vest uitdoen. Om de
stabilisatie te vervolledigen gebruikt U de taillegordel om de dwarsdoorsnede van de heup
en de romp te stabiliseren. Op deze manier, is de patiënt volledig beschermd in vier
punten: voeten, knieën, heupen en thorax.
Pagina 8
Albatros II
2012-09
Knoppen om de taillegordel te bevestigen
Kijk goed hoe de patiënt is gestabiliseerd.
Pagina 9
Albatros II
2012-09
2.2
Gebruik van het JUMBO-systeem (batterij, controlebox +
interne batterijlader)
JUMBO is een modulair systeem waarbij een motor, een controlebox en een batterij in één
enkele oplossing worden gecombineerd; speciaal ontworpen voor patiëntenliften.
2.2.1 Batterij
De batterij bevindt zich boven de controlebox en kan worden
vervangen met een ingebouwd klemsysteem.
Primaire spanning
Omgevingstemperatuur
Omgevingstemperatuur bij opslag
Relatieve luchtvochtigheid bij
opslag
Conformiteit
24 V DC
+5°C tot +40°C
-10° tot +50°C
max. 90% (niet condenseren)
getest volgens IEC 606011
2.2.2 Controlebox + interne batterijlader
De controlebox is ontworpen met een rode
noodstopknop en een interne batterijlader.
Primaire spanning
Secundaire spanning
(laadspanning)
Secundaire stroom
(laadstroom)
Beveiligingen
Omgevingstemperatuur
Omgevingstemperatuur
bij opslag
Relatieve
luchtvochtigheid
bij opslag
Conformiteit
100 - 240 V AC / 50/60
Hz
24 V DC, max. 250 VA
max. 10 A
Beschermd tegen ompoling,
overspanning en te hoge
temperatuur
+5°C tot +40°C
-10° tot +50°C
max. 90% (niet
condenseren)
getest volgens
IEC 606011
We behouden ons het recht voor om technische wijzigingen te introduceren.
2.2.3 Externe oplader (OPTIONEEL)
De externe oplader moet aan de muur worden
bevestigd. U kunt de reservebatterij (optioneel)
met deze externe oplader opladen. U hoeft dan
niet te wachten om de patiëntenlift te gebruiken
als U de batterijen aan het opladen bent.
Primaire spanning
Oplaadstroom
Omgevingstemperatuur
Omgevingstemperatuur
bij opslag
Relatieve
luchtvochtigheid
bij opslag
Pagina 10
100 - 240 V AC / 50/60
Hz
max. 650 mA
+5°C tot +40°C
-10° tot +50°C
max. 90% (niet
condenseren)
Albatros II
2012-09
2.2.4 Laden van de batterijen
Gebruik enkel de controlebox met de interne batterijlader op de Albatros II of de externe
oplader die aan de muur moet worden bevestigd.
We raden U aan om de batterijen regelmatig opnieuw op te laden om ervoor te zorgen dat
de lift bruikbaar blijft en om de levensduur van de batterijen te verlengen. De controlebox
geeft een waarschuwingssignaal om U te laten weten dat de batterij nog 50% capaciteit
heeft.
•
INBEDRIJFSTELLING
Steek eerst de stroomkabel met de plug in de juiste aansluiting van de controlebox. De
stekker van de voedingskabel moet in het stopcontact worden gestoken. De oplaadtijd
bedraagt ongeveer 24 uur.
•
OPNIEUW OPLADEN
L WAARSCHUWING: Risico op letsel – Gebruik de lift niet als de stroomkabel in
het stopcontact zit.
Als de batterijen opnieuw worden opgeladen, brandt er een geel lampje
(boven on) en een oranje lampje (boven charge).
Nadat het oplaadproces is voltooid, moet U altijd eerst de stekker uit het stopcontact halen
en dan de plug uit de controlebox.
Gebruik de lift niet terwijl deze wordt opgeladen!
Als de batterijen voor een lange periode niet worden gebruikt, ontladen ze langzaam zichzelf
(volledige ontlading). Zo wordt het onmogelijk om ze opnieuw te laden met de meegeleverde
batterijlader. U moet de batterijen daarom minstens 1 keer per maand opnieuw opladen, ook
al worden ze niet gebruikt.
2.3
Bediening van de lift
Neem de technische gegevens in acht waaronder de patiëntenliften (Albatros II) mag
worden gebruikt. De patiëntenlift mag alleen worden bediend door geautoriseerde personen
die zijn opgeleid voor het gebruik van de lift.
L WAARSCHUWING: Gevaar voor brandwonden– Wees voorzichtig bij het rijden in
extreem warme of koude omgevingen (zon, extreme koude, sauna's, enz.) voor
een bepaalde tijd en bij het aanraken - de oppervlakken kunnen de
omgevingstemperatuur aannemen.
2.3.1 Spreiding chassis
Om met de lift een rolstoel of andere zit
mogelijkheden te omsluiten maar ook om de
stabiliteit van de lift te verhogen, kunt U de
afstand tussen de chassispoten vergroten.
Ga achter de gemonteerde lift staan en houdt
de duwbeugels van de patiëntenlift vast (aan de
linker- en rechterkant, naast de controlebox).
Druk met een voet de pedaal van het chassis
(links of rechts) zachtjes naar beneden; de
afstand tussen de chassispoten wordt hiermee
groter of kleiner.
Pagina 11
Albatros II
2012-09
2.3.2 Parkeerremmen
Vergrendel de twee wielen aan de achterzijde
van het chassis door met de voet de rempedaal
van de wielen zachtjes omlaag te drukken tot de
wielen blokkeren. Om de rem los te maken
drukt U met de voet de rempedaal weer
zachtjes naar boven totdat de wielen worden
vrijgegeven.
2.3.3 Voetplaat
De voetplaat
kan met de haken
op het
chassis van de patiëntenlift worden bevestigd of
worden verwijderd. Indien vereist voor een
betere stabiliteit van de voeten kan U de
speciale voetsteunen
met de velcro riemen
voor stabilisatie gebruiken.
2.3.4 Beensteun
L WAARSCHUWING: Risico op letsel - Leg de beensteun niet op de patiënt tijdens
het verstellen.
De beensteun
kan op de stang van de
worden bevestigd met een
patiëntlift
pijpborgpen .
De beensteun is bedoeld om de benen van
de patiënt in de juiste positie te houden en
om de benen van de patiënt tijdens het
staan te ondersteunen.
De beensteunen kunnen in diepte en in negen verschillende hoogtes worden versteld.
1 = Stang voor hoogteafstelling
2 = Hendel voor diepteafstelling
Hoogte van de
voetplaat tot de top
van de beensteun
Positie
690 mm
Boring 1
665 mm
Boring 2
640 mm
Boring 3
Niet gebruiken
Boring 4
Niet gebruiken
Boring 5
495 mm
Boring 6
470 mm
Boring 7
445 mm
Boring 8
420 mm
Boring 9
Tabel 2: Hoogteafstelling beensteun
Pagina 12
Albatros II
2012-09
2.3.5 Thorax ondersteuning
Om Uw thorax te stabiliseren en te
ondersteunen, is de lift voorzien van een
thorax kussen en velcro riemen om te
stabiliseren.
De thorax ondersteuning kan in 2
verschillende posities 1045 mm, 1200 mm
worden gezet. Deze posities zijn gemeten
van de voetplaat tot aan de bovenzijde van
de thorax ondersteuning.
1. Verwijder de pijpborgpen .
2. Verstel de thorax ondersteuning in de
gewenste positie. De positie van de
is zoals aangeduid
bevestiginsplaat
in de figuur.
3. Monteer de pijpborgpen
terug.
2.3.6 Hefarm omhoog brengen / neerlaten
Met de handbediening kan de hefarm eenvoudig naar elk punt
(traploos) worden ingesteld.
1
2
1
= Hefarm omhoog brengen
2
= Hefarm neerlaten
L
Bij het gebruik van de liftfunctie tot aan het uiteinde van de
liftmotor wordt de limietschakelaar via elektronica geactiveerd
(beveiligingsfunctie). Benut de liftfunctie alleen in het midden
van het verstelbereik.
Bedieningskracht van de drukschakelaar: < 5N
Plaats de handbediening aan de bovenste buis van de duwbeugels om de patiëntenlift te
verplaatsen. Dit is de meest ergonomische positie.
Pagina 13
Albatros II
2012-09
2.3.7 Verplaatsen van de patiëntenlift
L WAARSCHUWING: Kans op knellen – Let op wanneer U door nauwe doorgangen,
zoals deuren, rijdt.
1.
Ga achter de patiëntenlift staan en grijp de duwbeugels (links en rechts, naast de batterij
en de controlebox) met beide handen vast.
2.
Controleer of beide remmen van de achterste wielen los zijn.
3.
Schuif de patiëntenlift langzaam in de gewenste stand.
In onbelaste toestand kunt U de patiëntenlift het beste achterwaarts rijden zodat
hindernissen (bijvoorbeeld deurkozijnen, kamerhoeken of meubilair) gemakkelijker kunnen
worden omzeild.
Gebruik alleen de duwbeugels en geen andere onderdelen (motor, handbediening, ...)
als U de patiëntenlift verplaatst .
2.4 Tilbanden
L WAARSCHUWING: Risico op letsel - Gebruik alleen geschikte tilbanden voor de
patiënten.
L WAARSCHUWING: Risico op letsel – Gebruik geen beschadigde tilbanden.
De Albatros II patiëntenlift mag alleen worden gebruikt met tilbanden die zijn ontworpen voor
de Vermeiren Albatros II patiëntenlift.
Raadpleeg de handleidingen van de desbetreffende tilbanden voor gebruiksaanwijzingen.
2.5
Voor Uw veiligheid
Hieronder vindt U enkele veiligheidstips:
L
De patiëntenlift mag alleen worden gebruikt en bediend door geautoriseerde
personen die zijn opgeleid voor het gebruik van de lift.
L
Let erop dat bij gebruik van de lift voldoende ruimte aan de zijkanten en boven de lift
is omdat anders bij bewegen van de verstelfuncties schade of letsel kan optreden.
L
Let altijd op de hijsarm om letsel te voorkomen.
L
De patiëntenlift mag alleen op een vlakke ondergrond worden gebruikt waarbij alle
vier de wielen gelijkmatig de grond raken.
L
Er mogen alleen tilbanden worden gebruikt die vrijgegeven en geschikt zijn voor
patiëntenliften (zie handleiding van desbetreffende tilbanden). Het gebruik van
andere tilbanden gebeurt op eigen risico.
L
Volg de instructies van het verplegend personeel of van geschoolde personen zodat
tijdens het gebruik van de lift geen letsel optreedt.
L
Controleer de medische toestand van de patiënt en of het mogelijk is om de patiënt
met deze patiëntenlift op te tillen. (Zie bedoeld gebruik)
L
Let op met brandende voorwerpen, zoals sigaretten. De tilbanden kunnen vlam
vatten.
L
Let erop dat de maximale belasting (150 kg) niet wordt overschreden. Bij
overbelasting wordt de controlebox uitgeschakeld.
L
Bij het gebruik van tilbanden met een maximale belasting, moet de laagste belasting
gebruikt worden tussen de patiëntenlift en de tilband.
L
Voor schade of letsel ontstaan door ondeskundig onderhoud of niet-naleving van de
instructies in deze handleiding is de fabrikant niet aansprakelijk.
L
Gebruik alleen de duwbeugels om de patiëntenlift te verplaatsen en geen andere
onderdelen (motor, handbediening, ...).
L
Til de liftarm manueel naar boven voor gebruik en controleer dat de liftarm uit zichzelf
naar beneden valt. Contacteer de vakhandelaar als dit niet zo is.
Pagina 14
Albatros II
2012-09
2.6
Noodgeval
In noodgevallen moeten de noodstopknop en de functie voor het omlaag brengen van de
patiënt worden gebruikt.
2.6.1 Noodstopknop
In noodgevallen, en tijdens montage en demontage,
wordt de noodrem geactiveerd door op de rode knop op
de controlebox te drukken.
Druk op de knop en draai deze in de richting van de
pijltjes. Als de knop volledig is ingedrukt, draait U de knop
weer terug in de tegengestelde richting van de pijltjes.
De noodstopknop wordt uitgeschakeld
door de rode knop in de richting van
de pijltjes te draaien.
2.6.2 Handmatig omlaag brengen bij noodgevallen
L WAARSCHUWING: Risico op letsel - Stel het handmatig verlagen bij
noodgevallen af op het gewicht.
Het omlaag brengen bij noodgevallen kan, als de stroom
uitvalt of de batterijen leeg zijn, worden uitgevoerd met
behulp van de rode trekknop (1) aan het lage uiteinde
van de motor. Deze functie voor het omlaag brengen bij
noodgevallen is in de fabriek afgesteld op een
patiëntengewicht van 50 kg.
Standaardkalibratie: 2500N, 15 mm/s om de patiënt
omlaag te brengen.
1
Let op dat de handmatige functie voor omlaag brengen bij noodgevallen alleen mogelijk is
als de patiënt in de patiëntenlift zit.
Trekkracht: 10 mm voor kracht van 80 à 100N.
Pagina 15
Albatros II
2012-09
3
Montage en instellingen
De in dit hoofdstuk beschreven instructies zijn bestemd voor de vakhandelaar.
Om een servicepunt of vakhandelaar in Uw buurt te vinden, neemt U contact op met de
dichtstbijzijnde Vermeiren faciliteit. Een lijst van de Vermeiren faciliteiten zijn terug te vinden
op de laatste bladzijde.
L WAARSCHUWING: Risico bij onveilige instellingen - Gebruik enkel de
instellingen beschreven in deze handleiding.
3.1
•
•
•
De batterij verwisselen
We wijzen alle aansprakelijkheid voor beschadiging af die is veroorzaakt door het
gebruik van een onjuiste batterij.
Gebruik de batterij niet bij temperaturen onder +5°C of boven +50°C (de ideale
temperatuur is +20°C).
Zowel de aansprakelijkheid van de fabrikant als welke claim dan ook vervalt, als de
batterijen worden geopend.
De batterij kan worden verwisseld via een ingebouwd klemsysteem.
Als U de batterij wilt verwisselen, drukt U op het
ingebouwde klemsysteem. De plaat komt
omhoog en de batterij kan uit de houder worden
gehaald (controlebox).
3.2
Montage of demontage
3.2.1 Uitpakken
L WAARSCHUWING: Risico op letsel - Na het uitpakken voordat U verder monteert,
controleert U altijd eerst of de noodstopknop (de rode drukknop op de
controlebox) is ingedrukt.
De verpakking van de patiëntenlift is zo gekozen dat optimale bescherming tijdens transport
is gegarandeerd.
1.
Haal de patiëntenlift uit de verpakking en controleer
of de levering compleet is en of afzonderlijke delen
zichtbare schade vertonen. Bij beschadigingen
neemt U contact op met de vakhandelaar.
2.
Vergrendel voor de montage de lift tegen
ongewenste bewegingen door alle remwielen vast te
zetten. Druk met de voet de remplaat van de wielen
zachtjes omlaag totdat het wiel blokkeert. Om de rem
los te maken drukt U met de voet de remplaat weer
zachtjes naar boven totdat het wiel wordt
vrijgegeven.
Pagina 16
Albatros II
2012-09
3.2.2 Montage
L WAARSCHUWING: Risico op klemmen - Let erop dat er geen lichaamsdelen of
bedrading vast komen te zitten, of worden platgedrukt tijdens de montage.
1. Verwijder de vergrendelas (steekas) aan het
ondereinde van de mast door de drukknop op de
kop van de as licht in te drukken. De vergrendelas
kan er nu gemakkelijk worden uitgetrokken.
2. Maak de transportbeveiliging (knevelschroef)
enigszins los en de mast kan nu rechtop worden
gezet.
2.a De
standvergrendeling
(trekschroef) klikt hoorbaar
als de mast in zijn
eindpositie
wordt
opgesteld.
Klik
3.
L WAARSCHUWING: Kans op letsel – Let
erop dat de vergrendelas op de juiste wijze
is geplaatst.
Vergrendel de mast door de vergrendelas aan het
einde van de mast met ingedrukte drukknop zover
door te schuiven totdat deze aan het andere einde
weer zichtbaar is. Laat de drukknop van de
vergrendelas weer los en controleer of U deze er
weer kunt uittrekken.
Pagina 17
Albatros II
2012-09
4. Verwijder de hefarm van
de bovenkant van de mast
. U doet dit door
voorzichtig aan de pin
te trekken.
5. Monteer de
geleidingskolom
met de bevestiging
van de voetsteun
in de buis van het
frame van de
patiëntenlift.
Zet de hendel
terug
vast.
6. Bevestig de geleider
en geleidingshouder
aan de hefarm
met de pijpborgpen .
Pagina 18
Albatros II
2012-09
7. Trek de motor zachtjes uit
de zwarte klem
8.
.
Bevestig de motor aan de
hefarm met behulp van de
pijpborgpen
.
Zorg
ervoor dat de motor goed
tussen de hefarm wordt
geplaatst.
9. Bevestig de voetplaat met de haken op het chassis
van de patiëntenlift.
met behulp van de
10. Bevestig de beensteun
pijpborgpen
. Plaats de beensteun
op de
gewenste hoogte en diepte.
11. Monteer de thorax
ondersteuning
aan
de geleidingskolom
met de pijpborgpen
in een comfortabele
hoogte voor elke
patiënt.
Pagina 19
Albatros II
2012-09
3.2.3 Demontage
L WAARSCHUWING: Risico op klemmen - Let erop dat geen lichaamsdelen of
L
bedrading vast komen te zitten, of worden platgedrukt tijdens de demontage.
WAARSCHUWING: Risico op letsel - Controleer of de noodstopknop (rode
drukknop op de controlebox) is ingeschakeld, om onbedoelde bewegingen tijdens
het afstellen te voorkomen.
1. Vergrendel de twee wielen aan de achterzijde van
het chassis door met de voet de rempedaal van de
wielen zachtjes omlaag te drukken tot de wielen
blokkeren. Om de rem los te maken drukt U met de
voet de rempedaal weer zachtjes naar boven totdat
de wielen worden vrijgegeven.
2. Verwijder
de
ondersteuning
geleidingskolom
pijpborgpen .
3. Verwijder de beensteun
pijpborgpen .
thorax
van de
met de
met behulp van de
4. Verwijder de voetplaat van het chassis van de
patiëntenlift.
Pagina 20
Albatros II
2012-09
5. Verwijder de motor van de
hefarm door de pijpborgpen
te verwijderen.
6. Verplaats de motor naar de
onderste positie en bevestig
de motor in de zwarte klem
.
7. Verwijder de geleider en
geleidingshouder
van de
met behulp van
hefarm
de pijpborgpen .
8. Maak de hendel
Verwijder
geleidingskolom
bevestiging
voor
beenteun , uit de buis
het
frame
van
patiëntenlift.
Pagina 21
los.
de
en
de
van
de
Albatros II
2012-09
9. Breng de hefarm naar de
onderste positie
. Maak
de pen aan de bovenzijde
van de mast in de boring
van de hefarm
vast.
10. Verwijder de vergrendelas (steekas) aan het
ondereinde van de mast door de drukknop op de
kop van de as licht in te drukken. De
vergrendelas kan er nu gemakkelijk worden
uitgetrokken.
L
WAARSCHUWING: Kans op letsel –
Als de mast is ontgrendeld, kan door
zijn eigen gewicht aanzienlijke
neerwaartse krachten ontstaan.
Trek aan de standvergrendeling (trekschoef) totdat
de mast voor kantelen wordt vrijgegeven. De mast
kan nu naar voren worden gekanteld.
11.
Kantel de mast zo ver mogelijk naar voren.
12.
L
WAARSCHUWING: Kans op letsel –
Let erop dat de vergrendelas op de
juiste wijze is geplaatst.
Vergrendel de mast door de vergrendelas aan het
einde van de mast met ingedrukte drukknop zover
door te schuiven totdat deze aan het andere einde
weer zichtbaar is. Laat de drukknop van de
vergrendelas weer los en controleer of U deze er
weer kunt uittrekken.
Pagina 22
Albatros II
2012-09
4
Onderhoud
Voor de onderhoudshandleiding van de patiëntenliften kan U de website van Vermeiren
raadplegen: www.vermeiren.be.
5
Ordernummers
Zwenkwielen (ø 100 mm)
Zwenkwielen met rem (ø 100 mm)
E Controlebox Albatros
E Motor 7,5KN Albatros
E Handbediening Albatros
E Batterij Albatros
E Constructie plaat Albatros
E Grijze stekker controlebox Albatros
E Kabel Albatros
E Externe oplader CHJ2 voor Albatros
E Constructie plaat externe oplader Albatros
1903403
1903402
1906137
1906229
1906138
1906139
1906230
1906232
1906233
1906423 (OPTIONEEL)
1906424 (OPTIONEEL)
Tilbanden
Tilband
Tilband SU
Rechtse thorax gordel
Linkse thorax gordel
Mousse voor thorax ondersteuning
2991605
2991627
2991603
2991604
2991600
Pagina 23
Albatros II
2012-09
Inhalt
Vorwort ............................................................................................... 2
1
Produkt beschreibung ............................................................. 3
1.1
1.2
1.3
1.4
1.5
2
Verwendung ............................................................................. 7
2.1
2.2
2.3
2.4
2.5
2.6
3
Allgemeine Hinweise .................................................................................................. 7
Verwendung des JUMBO-Systems (Batterie, Kontrollbox inkl. Batterieladegerät) 10
Bedienung des Lifters................................................................................................ 11
Sitzsystem.................................................................................................................. 14
Für Ihre Sicherheit ..................................................................................................... 14
Notfall........................................................................................................................ 15
Zusammenbau und Einstellung ............................................ 16
3.1
3.2
4
5
Verwendungszweck ..................................................................................................... 3
Technische Daten ........................................................................................................ 4
Komponenten .............................................................................................................. 6
ZEICHENERKLÄRUNG ........................................................................................... 7
Lieferumfang ............................................................................................................... 7
Austauschen der Batterie ........................................................................................... 16
Montage und Demontage .......................................................................................... 16
Wartung .................................................................................. 23
Bestellnummern ..................................................................... 23
Seite 1
Albatros II
2012-09
Vorwort
Zuerst möchten wir uns für das Vertrauen bedanken, das Sie in uns gesetzt haben, indem
Sie sich für eines unserer Produkte entschieden haben.
Die Vermeiren-Patientenlifter sind das Ergebnis langjähriger Forschung und Erfahrung. In
der Entwicklungsphase wurde besonderer Wert auf Bedienerfreundlichkeit und leichte
Wartung des Patientenlifters gelegt.
Die zu erwartende Lebensdauer Ihres Patientenlifters hängt stark von der Wartung und
Pflege ab, die für den Patientenlifter aufgewendet wird.
Diese Bedienungsanleitung soll Ihnen helfen, sich mit der Benutzung Ihres Patientenlifters
vertraut zu machen.
Das Befolgen der Bedienungsanleitung und der Wartungshinweise bildet einen wesentlichen
Teil der Garantiebedingungen.
Diese Bedienungsanleitung spiegelt die neuesten Produktentwicklungen wider. Das
Unternehmen Vermeiren behält sich jedoch das Recht vor, Änderungen vorzunehmen.
Dabei besteht keine Verpflichtung, die früher ausgelieferten Modelle anzupassen oder zu
ersetzen.
Sollten Sie weitere Fragen haben, so wenden Sie sich bitte an Ihren Fachhändler.
Seite 2
Albatros II
2012-09
1
Produkt beschreibung
1.1
Verwendungszweck
Der Patientenlifter ist ausschließlich für den Transport von gehbehinderten oder
gehunfähigen Menschen vorgesehen.
In dem Patientenlifter kann eine Person transportiert werden.
Der Patientenlifter kann im Innenbereich eingesetzt werden.
Die Nutzung des Patientenlifters ist nur mittels einer helfenden Personen vorgesehen.
Die Ausstattungsvarianten erlauben den Einsatz des Patientenlifters bei
Gehbehinderung/Gehunfähigkeit aufgrund von:
•
•
•
•
•
Parese
Gliedmaßendeformation
Kachexie
Atrophie
und für ältere Menschen.
Bei der individuellen Versorgung sind außerdem:
• Körpergröße und -gewicht (max. 150 kg)
• Körperlicher und geistiger Zustand
• Wohnverhältnisse
• Umgebung
zu beachten.
Der Patientenlifter darf nur auf ebenen Flächen genutzt werden, auf denen alle 4 Laufrollen
gleichmäßig den Boden erreichen.
Der Patientenlifter kann für den Transfer ins Bad oder in die Dusche genutzt werden, jedoch
nicht während des Duschens oder innerhalb der Badewanne oder Duschwanne unter
fließendem oder in stehendem Wasser.
Während eines Patiententransports ist es absolut unzulässig, über Hindernisse zu fahren.
Der Patientenlifter darf nicht als Leiter oder als Transportmittel für schwere oder heiße
Objekte verwendet werden.
Wird der Lifter auf Matten, Auslegeware oder Teppichböden verwendet, könnten diese
Bodenbeläge beschädigt werden.
Verwenden Sie ausschließlich von Vermeiren genehmigtes Zubehör.
Stellen Sie sicher, dass das Ende des Verstellmotors über einen Sicherheitsabstand verfügt.
Verwenden Sie den Patientenlifter daher nur im mittleren Verstellbereich und nicht am Ende
des Bereichs des Liftermotors.
Das Befolgen der Bedienungsanleitung und der Wartungshinweise bildet einen wesentlichen
Teil der Garantiebedingungen.
Sehbehinderte können sich zur Erläuterung der Bedienungsanleitung an den Händler
wenden.
Der Patientenlifter ist für den Wiedereinsatz geeignet.
Seite 3
Albatros II
2012-09
1.2
Technische Daten
Vorwärtsrichtung
Seite 4
Albatros II
2012-09
Produktname
Adresse
Typ
Modell
Vermeiren
Vermeirenplein 1/15, B-2920 Kalmthout
Patientenlifter
Albatros II
Maße in
Abmessungen
Zeichnung
Tiefste Position ZAP*
l
1060 mm
Maximale Höhe ZAP*
k
1687 mm
Hebebereich (Höhenreichweite)
m
637 mm
Schenkellänge
1000 mm
Gesamtlänge
1115 mm
Gesamtbreite
Länge, zusammengeklappt/zerlegt
685 mm
1380 mm (Verstellmotor niedrigste Position)
1687 mm (Verstellmotor höchste Position)
1115 mm (nicht klappbar)
Breite, zusammengeklappt/zerlegt
685 mm (nicht klappbar)
Höhe, zusammengeklappt/zerlegt
500 mm
Gesamthöhe
Mindestabstand Schenkel
r
467 mm
Maximaler Abstand Schenkel
q
769 mm
Schenkelhöhe / Höhe des Fahrgestells
n
117 mm
Gesamtbreite (geschlossen), Außenmaß
Gesamtbreite (geöffnet), Laufrollen vorne
Min. Abstand Wand/ZAP* (geringste Höhe)
Min. Abstand Wand/ZAP*
(Höchstreichweite)
Min. Abstand Wand/ZAP* (größte Höhe)
584 mm
P
945 mm
w3 (=w2)
285 mm
w2 (=w3)
285 mm
870 mm
w1
Wendekreis
1160 mm
Gesamtgewicht
Gewicht von Fahrgestell, Motor und
Kontrollbox
Gewicht der Batterie
50,60 kg
Gewicht der Fußauflage
5,10 kg
Gewicht der Thoraxstütze
1,40 kg
Gewicht der Beinstütze
Gewicht der Beinstützenbefestigung und
Hubsäule
Höchslast
3,00 kg
Freie Höhe, mindestens
Maximale Reichweite bei 600 mm mit
Beinstütze
Maximale Reichweite bei 600 mm ohne
Beinstütze
Maximale Reichweite ab Träger
Reichweite ab Träger mit Abstand von 700
mm
57 mm
34,50 kg
2,90 kg
3,60 kg
150 kg
a1
300 mm
a2
360 mm
b
c
495 mm
375 mm
Spannungsausgang
24V
Versorgungsspannung
max. 250 VA
100-240V ~ max. 37-53 VA
Maximale Stromaufnahme
max. 400 mA
Betriebstemperatur
+5 bis +40°C
Relative Luftfeuchtigkeit
20% bis 90% bei 30°C, nicht kondensierend
Schalldruck
< 50 dB(A)
Luftdruck
700 bis 1060 hPa
Kontrollbox
Linak CBJ2
Batterie
Linak BAJ1
Handsteuerung
Linak HB5X (< 5N Betätigungskraft)
Motor
Linak LA34 (7500N)
Schutzklasse Kontrollbox
IPX4
Seite 5
Albatros II
2012-09
Produktname
Adresse
Typ
Modell
Vermeiren
Vermeirenplein 1/15, B-2920 Kalmthout
Patientenlifter
Albatros II
Maße in
Abmessungen
Zeichnung
Schutzart Batterie
IPX5
Schutzart Handsteuerung
IPX5
Schutzart Motor
IP54
Schutzklasse
II - Type B
Arbeitsleistung
ca. 40 Anhebungen pro Ladung
max. 10%, oder 2 Min. Dauerbetrieb / 18
min. Pause
2.9 Ah
Periodischer Betrieb
Batteriekapazität
Not-Stopp
Ja
Manuelle Notabsenkung
Ja
Elektrische Notabsenkung
Nein
Technische Änderungen vorbehalten. Maßtoleranz +/- 15 mm / 1,5 kg
1 = Höchste Position, 2 = Maximale Reichweite, 3 = Niedrigste Position
* ZAP = Zentraler Anschlagpunkt
Tabelle 1: Technische Daten
Der Patientenlifter entspricht den Anforderungen der folgenden Normen:
ISO 7176-8: Anforderungen und Prüfungen für statische Festigkeit, Stoßfestigkeit und
Dauerfestigkeit.
ISO 7176-16: Beständigkeit gegen Entzündung von gepolsterten Teilen.
1.3
Komponenten
1
2
3
4
5
6
7
8
9
10
11
12
13
14
=
=
=
=
=
=
=
=
=
=
=
=
=
=
15 =
16
17
18
19
20
21
22
23
24
25
Seite 6
=
=
=
=
=
=
=
=
=
=
Knöpfe für Gurtbänder
Ausleger
Thoraxkissen
Schiebehalterung
Schiebesäule
Transporthalter für Motor
Motor
Beingurt
Beinstütze
Fahrgestell
Fußauflage
Laufrolle
Laufrolle mit Bremse
Pedal
Fahrgestellspreizung
Fußstützen mit
Klettverschlussbefestigung
Sicherungsachse
Sicherung Faltung
Netzkabel
Schiebegriff
Handbedienung
Mast
Kontrollbox
Not-Stopp
Batterie
Tisch
Albatros II
2012-09
1.4
ZEICHENERKLÄRUNG
Sicherheitshinweise beachten!
Vor Gebrauch Gebrauchsanweisung lesen!
Getrennte Sammlung und Recycling von Elektro- und Elektronikgeräten
CE Konformität
1.5
Lieferumfang
Der Lieferumfang des Vermeiren Albatros II Patientenlifters umfasst:
• Fahrgestell mit vier Laufrollen (davon zwei bremsbar)
• Mast mit Schiebegriffen
• Ausleger mit Befestigung für Gurt
• Kontrollbox (inkl. Batterieladegerät)
• Batterie
• Handbedienung
• Verstellmotor
• Gebrauchsanweisung
• Fußauflage + Fußstützen mit Klettverschluss
• Beinstütze
• Thoraxstütze
Prüfen Sie vor der Verwendung, ob alle aufgeführten Artikel in der Lieferung enthalten und
nicht beschädigt sind (beispielsweise durch den Transport).
Bitte beachten Sie, dass die Basiskonfigurationen in den verschiedenen europäischen
Ländern unterschiedlich sein können. Wenden Sie sich bitte an den Fachhändler in Ihrem
Land, um weitere Informationen zu erhalten.
2
Verwendung
In diesem Kapitel wird die tägliche Verwendung beschrieben. Diese Anweisungen richten
sich an den Benutzer und den Fachhändler.
Der Patientenlifter wird Ihnen vollständig aufgebaut von Ihrem Fachhändler geliefert.
Anweisungen für den Fachhändler, wie der Patientenlifter zusammengebaut und eingerichtet
wird, finden Sie in § 3.
2.1
Allgemeine Hinweise
Die Bedienung des Patientenlifters darf nur durch qualifiziertes Personal durchgeführt
werden, das auf die spezielle Anwendung eingewiesen oder geschult wurde.
Die Nutzung des Patientenlifters ist auf den Innenbereich beschränkt. Stellen Sie sicher,
dass die Nutzung nur auf ebenen Flächen durchgeführt wird. Eine Nutzung im Außenbereich
ist grundsätzlich ausgeschlossen.
Wir möchten Sie darauf hinweisen, dass Störungen durch elektromagnetische Quellen (z.B.
Handy etc.) verursacht werden können und dass die Elektronik des Lifters selber Störungen
bei anderen elektrischen Geräten verursachen kann.
Auch wenn Sie von Ihrem Fachhändler über die Bedienelemente Ihres Lifters und den
Umgang mit ihm unterrichtet worden sind, sollten Sie sich dennoch die folgenden Seiten in
Ruhe durchlesen.
Seite 7
Albatros II
2012-09
2.1.1 Anweisungen zum Heben von Patienten
Phase I – Vorbereitung. In dieser Phase sollten sich die Beine des Patienten auf der
Fußplatte in den speziellen Fußstützen mit den Klettverschlüssen befinden. Stabilisieren Sie
dann Ihre Beine und Füße unter Ihren Knien. Verwenden Sie hierzu den Klettverschlussgurt
an der Fuß- und Beinstütze. Achten Sie darauf, dass Ihre Füße und Beine fest am Kissen
der Fuß- und Beinstütze anliegen. Befestigen Sie nun den Thoraxgurt mit den vier
Gurtbändern am Patientenlift.
Knöpfe zum Anbringen
des Thoraxgurts.
Phase II- Heben. Heben Sie den Patienten ganz langsam mithilfe der Handbedienung hoch.
Der Patient muss sich während des Hebevorgangs an den Handgriffen festhalten.
Phase III – Stabilisierung. Nach dem Hochheben in die vertikale Position wird der Patient in
einem letzten Schritt mit den Thoraxgurten stabilisiert. Die Thoraxgurte sind beidseits an der
Thoraxstütze befestigt. Danach können Sie die Weste ablegen. Für die vollständige
Stabilisierung empfehlen wir die Verwendung des Hüftgurts, der die Hüfte und den Rumpf
stabilisiert. So ist der Patient durch vier Stützpunkte vollständig geschützt: Füße, Knie, Hüfte
und Thorax.
Seite 8
Albatros II
2012-09
Knöpfe zum Anbringen des Hüftgurts.
Sehen Sie sich genau an, wie der Patient stabilisiert wurde.
Seite 9
Albatros II
2012-09
2.2
Verwendung des JUMBO-Systems (Batterie, Kontrollbox inkl.
Batterieladegerät)
JUMBO ist ein modulares System, das einen Verstellmotor, eine Kontrollbox und eine
Batterie in einer flexiblen Lösung kombiniert, die speziell für Patientenlifter entwickelt wurde.
2.2.1 Batterie
Die Batterie befindet sich oberhalb der Kontrollbox und kann mit
einem integrierten Clipsystem ausgestauscht werden.
Primäre Spannung
Umgebungstemperatur
Umgebungstemperatur Lagerung
Relative Luftfeuchtigkeit
Lagerung
Konformität
24 V DC
+5°C bis +40°C
-10°C bis +50°C
max. 90 % (nicht kondensierend)
geprüft gemäß IEC 606011
2.2.2 Kontrollbox inkl. Batterieladegerät
Die Kontrollbox ist mit einem roten NotstoppKnopf und einem internen Batterieladegerät
ausgestattet.
Primäre Spannung
Sekundäre Spannung
(Ladespannung)
Sekundärer Strom
(Ladestrom)
Schutzvorrichtungen
100 - 240 V AC / 50/60 Hz
24 V DC, max. 250 VA
Umgebungstemperatur
Umgebungstemperatur
Lagerung
Relative Luftfeuchtigkeit
für Lagerung
Konformität
+5°C bis +40°C
-10°C bis +50°C
max. 10 A
verpolsicher, überspannungsund temperaturgesichert
max. 90 % (nicht
kondensierend)
geprüft gemäß IEC 606011
Technische Änderungen vorbehalten.
2.2.3 Externes Ladegerät (OPTIONAL)
Das externe Ladegerät sollte an der Wand
befestigt werden. Die Ersatzbatterie (optional)
kann mit diesem externen Ladegerät aufgeladen
werden, sodass beim Wechseln der Batterien
keine Wartezeiten für die Verwendung des
Patientenlifters auftreten.
Primäre Spannung
Ladestrom
Umgebungstemperatur
Umgebungstemperatur
Lagerung
Relative Luftfeuchtigkeit
für Lagerung
Seite 10
100 - 240 V AC / 50/60 Hz
max. 650 mA
+5°C bis +40°C
-10°C bis +50°C
max. 90 % (nicht
kondensierend)
Albatros II
2012-09
2.2.4 Laden der Batterien
Verwenden Sie für den Albatros II nur die Kontrollbox mit integriertem Batterieladegerät oder
das an der Wand zu befestigende externen Ladegerät.
Wir empfehlen Ihnen, die eingebauten Batterien der Kontrollbox regelmäßig zu beladen, um
die Einsatzfähigkeit des Lifters zu gewährleisten und die Lebensdauer der Batterien lange
aufrecht zu halten. Die Kontrollbox weist mit einem Warnton darauf hin, sobald die
Batterieladung bei nur noch 50 % liegt.
•
INBETRIEBNAHME
Stecken Sie zuerst das Ladekabel in den dafür vorgesehenen Anschluss der Kontrollbox.
Danach stecken Sie das Netzteil in die Steckdose. Die Ladezeit beträgt ca. 24 Stunden.
•
ERNEUTES AUFLADEN
L WARNUNG: Verletzungsgefahr – Der Lifter darf nicht verwendet werden,
wenn das Ladekabel mit der Steckdose verbunden ist.
Wenn die Batterien aufgeladen werden, leuchtet eine gelbe Anzeige
(Eingeschaltet) und eine orangefarbene Anzeige (Laden).
Ziehen Sie nach Beendigung des Ladevorgangs immer zuerst den Netzstecker aus der
Steckdose und erst dann denn Anschlussstecker aus der Kontrollbox.
Keine Nutzung des Lifters während des Ladebetriebs.
Wenn die Batterien längere Zeit nicht genutzt werden, entladen sich diese langsam
selbstständig (Tiefentladung). Ein Aufladen mit dem mitgelieferten Ladegerät ist dann nicht
mehr möglich. Laden Sie auch bei Nichtbenutzung der Batterien diese mindestens einmal im
Monat auf.
2.3
Bedienung des Lifters
Beachten Sie die technischen Angaben unter denen der Patientenlifter (Albatros II) betrieben
werden darf. Die Bedienung des Patientenlifters darf nur von autorisierten Personen
durchgeführt werden, die auf die Nutzung und den Betrieb geschult worden sind.
L WARNUNG: Verletzungsgefahr – Achten Sie darauf, dass Sie das Gerät keinen
extremen Temperaturen aussetzen (Sonnenschein, extreme Kälte, Sauna etc.), da
sich die verwendeten Materialien den Umgebungstemperaturen angleichen,
was bei Berührung zu Verletzungen führen kann.
2.3.1 Spreizung Fahrgestell
Um mit dem Lifter einen Rollstuhl oder andere
Sitzmöglichkeiten zu umfahren, aber auch um
die Standsicherheit des Lifters zu erhöhen, lässt
sich der Abstand der Fahrgestellschenkel
vergrößern.
Stellen Sie sich hinter den aufgebauten Lifter
und ergreifen Sie die Schiebegriffe des
Patientenlifters (links und rechts neben der
Kontrollbox). Drücken Sie mit einem Fuß leicht
die Wippe am unteren Fahrgestell (links oder
rechts) leicht nach unten und der Abstand der
Schenkel des Fahrgestells lässt sich vergrößern
oder verkleinern.
Seite 11
Albatros II
2012-09
2.3.2 Feststellbremsen
Sichern Sie die zwei Laufrollen am hinteren Ende des
Fahrgestells, indem Sie mit der Fußspitze leicht die
Bremspedale der Laufrollen nach unten drücken, bis
diese arretieren. Um die Bremse zu lösen, drücken Sie
mit der Fußspitze die Bremspedale wieder leicht nach
oben, bis die Laufrollen freigegeben werden.
2.3.3 Fußauflage
Die Fußauflage
kann mithilfe der Haken
am
Fahrgestell des Patientenlifters befestigt bzw. von
diesem entfernt werden. Für noch mehr Stabilität Ihrer
Füße können Sie die speziellen Fußstützen
verwenden, die mit Klettverschlüssen versehen sind.
2.3.4 Beinstütze
L WARNUNG: Verletzungsgefahr – Lassen Sie die Beinstütze nicht auf den
Patienten fallen, wenn Sie sie verstellen.
Die Beinstütze
kann an der Stange des
Patientenlifters
mit einem Sicherungsstift
befestigt werden.
Die Beinstütze soll die Beine der Patienten
in der korrekten Position halten und die
Beine des Patienten beim Aufstehen
abstützen.
Die Beinstütze kann in der Tiefe geändert und es können 9 verschiedene
Höheneinstellungen vorgenommen werden.
1 = Stange für Höheneinstellung
2 = Hebel für Tiefeneinstellung
Höhe von der
Fußauflage zur
Oberseite der
Beinstütze
Position
690 mm
Bohrung 1
665 mm
Bohrung 2
640 mm
Bohrung 3
Nicht verwenden
Bohrung 4
Nicht verwenden
Bohrung 5
495 mm
Bohrung 6
470 mm
Bohrung 7
445 mm
Bohrung 8
420 mm
Bohrung 9
Tabelle 2: Höheneinstellung der
Beinstütze
Seite 12
Albatros II
2012-09
2.3.5 Thoraxstütze
Zur Stabilisierung und Unterstützung Ihres
Thorax ist der Lifter mit einem Thoraxkissen
und Klettverschlüssen ausgestattet.
Die Thoraxstütze kann auf 2 verschiedene
Positionen (1045 mm und 1200 mm)
eingestellt werden. Diese Positionen
werden von der Fußplatte bis zur
Oberkante der Thoraxstütze gemessen.
1. Entfernen Sie den Sicherungsstift .
2. Bringen Sie die Thoraxstütze in die
gewünschte Position. Die Position ab
der Befestigungsplatte
sollte der in
der Abbildung dargestellten
entsprechen.
3. Bringen Sie den Sicherungsstift
wieder an.
2.3.6 Ausleger anheben / absenken
Mithilfe der Handbedienung kann der Ausleger stufenlos in jede
gewünschte Position gebracht werden.
1
2
1
= Ausleger anheben
2
= Ausleger absenken
L
Bei Nutzung der Hubfunktion bis an den Endanschlag des
Hubmotors, wird die Endabschaltung der Elektronik aktiviert
(Sicherheitsfunktion). Nutzen Sie daher die Hubfunktion nur im
mittleren Vertsellbereich.
Betätigungskraft der Drucktaster: < 5N
Positionieren Sie die Handbedienung am oberen
Patientenlifters. Dies ist die ergonomischste Position.
Seite 13
Bügel
der
Schiebegriffe
des
Albatros II
2012-09
2.3.7 Bewegen des Patientenlifters
L WARNUNG: Klemmgefahr: Seien Sie in engen Durchfahren (z. B. Türen)
vorsichtig.
1.
Stellen Sie sich hinter den Patientenlifter und ergreifen Sie die Griffe (links und rechts
neben der Batterie und der Kontrollbox) mit beiden Händen.
2.
Stellen Sie sicher, dass beide Bremsen der hinteren Laufrollen gelöst sind.
3.
Schieben Sie den Patientenlifter langsam in die gewünschte Position.
In unbelastetem Zustand empfehlen wir, dass Sie den Patientenlifter rückwärts fahren, damit
Hindernisse (wie z.B. Türzargen, Zimmerecken oder Möbelstücke) leichter umfahren werden
können.
Verwenden Sie zum Bewegen des Patientenlifters ausschließlich die Schiebegriffe
(und keine anderen Komponenten wie Verstellmotor, Handbedienung usw.). .
2.4 Sitzsystem
L WARNUNG: Verletzungsgefahr – Verwenden Sie nur geeignete Sitzsystem für die
Patienten.
L WARNUNG: Verletzungsgefahr – Verwenden Sie keine beschädigten Sitzsysteme.
Der Albatros II Patientenlifter darf nur mit Sitzsystemen verwendet werden, die für die
Vermeiren Albatros II Patientenlifter konzipiert wurden.
Verwendungshinweise sind den Gebrauchsanweisungen der jeweiligen Sitzsysteme zu
entnehmen.
2.5
Für Ihre Sicherheit
Nachfolgend führen wir einige Sicherheitstipps auf, die Ihrer eigenen Sicherheit dienen:
L
Die Nutzung und der Betrieb des Patientenlifters ist nu durch autorisierte Personen
durchzuführen, die auf die Nutzung des Lifters geschult worden sind.
L
Achten Sie darauf, dass bei Nutzung des Lifters ausreichend Platz seitlich und
oberhalb des Lifters vorhanden ist, da sonst bei Bewegen der Verstellfunktionen
Schäden oder Verletzungen auftreten können.
L
Achten Sie stets auf den Ausleger, um Verletzungen zu vermeiden.
L
Der Patientenlifter darf nur auf ebenen Flächen genutzt werden, auf denen alle 4
Laufrollen gleichmäßig den Boden erreichen.
L
Es sind nur Sitzsysteme zu verwenden, die für den Patientenlifter freigegeben und
vorgesehen sind (siehe Gebrauchsanweisung der jeweiligen Sitzsysteme). Die
Nutzung anderer Sitzsysteme geschieht auf eigene Gefahr.
L
Folgen Sie den Anweisungen des Pflegepersonals oder der eingewiesenen
Personen, damit während der Nutzung des Lifters keine Verletzungen entstehen.
L
Berücksichtigen Sie den Gesundheitszustand des Patienten, um sicherzustellen,
dass es möglich ist, den Patienten mit diesem Patientenlifter anzuheben.
(Berücksichtigen Sie die Informationen zum Verwendungszweck.)
L
Vorsicht beim Umgang mit Feuer, insbesondere brennenden Zigaretten; die
Sitzsysteme könnten sich entzünden.
L
Achten sie darauf, dass die maximale Zuladung (150 kg) nicht überschritten wird. Bei
Überlast schaltet die Kontrollbox ab.
L
Bei Verwendung von Sitzsystemen ist deren maximale Zuladung zu beachten. In der
Kombination mit dem Patientenlifter ist immer die niedrigste Lastangabe des
kombinierten Systems anzuwenden (Patientenlifter oder Sitzsystem).
Seite 14
Albatros II
2012-09
L
L
L
2.6
Bei Schäden und Verletzungen, die durch unsachgemäße Handhabung oder
Nichteinhaltung der Angaben dieser Gebrauchsanweisung entstehen, haftet der
Hersteller nicht.
Verwenden Sie zum Bewegen des Patientenlifters ausschließlich die Schiebegriffe
(und keine anderen Komponenten wie Verstellmotor, Handbedienung usw.).
Ziehen Sie am Ausleger, bevor Sie diesen manuell nach oben ziehen und prüfen Sie,
dass der Ausleger alleine nach unten fällt. Ist dies nicht so, kontaktieren Sie Ihren
Fachhändler.
Notfall
In Notfallsituationen müssen der Notstopp und die Notabsenkungsfunktion verwendet
werden.
2.6.1 Not-Stopp
Bei Notfällen und während der Montage und Demontage
muss der Notstopp durch Drücken des roten Knopfs an
der Kontrollbox aktiviert werden.
Drücken Sie auf den Knopf und drehen Sie ihn in
Pfeilrichtung. Wenn der Knopf vollständig eingedrückt ist,
drehen Sie ihn in entgegengesetzter Pfeilrichtung zurück.
Der Notstopp wird deaktiviert, indem
der rote Knopf in Pfeilrichtung gedreht
wird.
2.6.2 Manuelle Notabsenkung
L WARNUNG: Verletzungsgefahr - Passen Sie die manuelle Notabsenkung an das
Körpergewicht des Patienten an.
Die Notabsenkung kann bei Stromausfall oder entleerter
Batterie über den roten Drucktaster (1) am unteren Ende
des Motors betätigt werden. Werkseitig ist diese
Notabsenkung auf ein Patientengewicht von 50 kg
eingestellt.
Standardkalibrierung: 2500 N, 15 mm/s zum Absenken
des Patienten.
1
Beachten Sie, dass die manuelle Notabsenkung nur möglich ist, wenn der Patient im
Patientenlifter sitzt.
Zugkraft: 10 mm ür Kraft von 80 bis 100 N.
Seite 15
Albatros II
2012-09
3
Zusammenbau und Einstellung
Die Anweisungen in diesem Kapitel richten sich an den Fachhändler.
Um einen Fachhändler in Ihrer Nähe zu finden, stehen Ihnen unsere Niederlassungen gerne
zur Verfügung. Eine Auflistung aller Vermeiren Niederlassungen finden Sie auf der letzten
Seite dieser Gebrauchsanweisung.
L WARNUNG: Gefahr nicht sicherer Einstellungen – Verwenden Sie nur die in
dieser Anleitung beschriebenen Einstellungen.
3.1
•
•
•
Austauschen der Batterie
Für Schäden durch Verwendung von Fremdbatterien übernehmen wir keine Haftung.
Verwenden Sie die Batterie nicht bei Temperaturen unter +5 °C oder über +50 °C
(ideal: +20 °C).
Wird die Batterie geöffnet, entfallen jegliche Haftung des Herstellers und der
Gewährleistungsanspruch.
Die Batterie kann mithilfe eines integrierten Clipsystems ausgetauscht werden.
Ziehen Sie zum Austauschen der Batterie am
integrierten Clipsystem. Dadurch wird die
Abdeckung angehoben, und die Batterie kann
aus der Halterung (Kontrollbox) entnommen
werden.
3.2
Montage und Demontage
3.2.1 Auspacken
L WARNUNG: Verletzungsgefahr - Kontrollieren Sie vor dem Auspacken und der
Montage immer zuerst, dass der Not-Stopp (roter Druckknopf an der Kontrollbox)
eingedrückt ist.
Die Verpackung der Patientenlifter wurde daraufhin gewählt, um einen optimalen Schutz
während des Transportes zu gewährleisten.
1.
Ziehen Sie den Patientenlifter aus dem Karton und
überprüfen Sie die Vollständigkeit der Lieferung und
ob einzelne Teile sichtbare Mängel aufweisen. Bei
Beschädigungen wenden Sie sich bitte an Ihre
Vertriebsniederlassung.
2.
Sichern Sie vor dem Aufbau den Lifter vor
ungewollten
Bewegungen,
indem
Sie
alle
Bremsrollen betätigen. Drücken Sie mit der
Fußspitze leicht die Bremsplatte der Laufrollen nach
unten, bis diese arretieren. Um die Bremse zu lösen,
drücken Sie mit der Fußspitze die Bremspedale
wieder leicht nach oben, bis die Laufrollen
freigegeben sind.
Seite 16
Albatros II
2012-09
3.2.2 Zusammenbauen
L WARNUNG: Klemmgefahr - Achten Sie bei der Montage darauf, dass Sie sich
nicht verletzen und keine Drähte eingeklemmt, gequetscht oder durchtrennt
werden.
1. Entfernen Sie die Sicherungsachse (Steckachse)
am unteren Ende des Mastes, indem Sie leicht den
Druckknopf am Kopf der Achse eindrücken. Die
Sicherungsachse lässt sich nun leicht herausziehen.
2. Lösen Sie die Transportsicherung (Knebelschraube)
leicht und der Mast kann nun aufgerichtet werden.
2.a Die Standsicherung (Zugschraube) rastet hörbar
ein, wenn der Mast in
seiner
Endposition
aufgestellt wurde.
klick
3.
L WARNUNG: Verletzungsgefahr– Achten Sie
darauf, dass die Sicherungsachse korrekt
eingesteckt ist.
Sichern Sie den Mast, indem Sie die
Sicherungsachse am Ende des Mastes mit
eingedrücktem Druckknopf soweit durchschieben,
dass diese am anderen Ende sichtbar herauszeigt.
Lassen Sie den Druckknopf der Sicherungsachse
los und prüfen Sie, ob sich diese wieder
herausziehen lässt.
Seite 17
Albatros II
2012-09
4. Entfernen
Sie
den
Ausleger
vom
oberen
Ende der Stange . Dazu
ziehen Sie an dem Stift .
5. Bringen Sie die
Schiebesäule
mit
der Fußstützenam
befestigung
Rohr des
Patientenlifterrahmens an.
Ziehen Sie den Hebel
wieder fest.
6. Bringen Sie den
Schlitten und die
Schiebehalterung
am Auslegerarm
mit dem
Sicherungsstift
an.
Seite 18
Albatros II
2012-09
7. Ziehen
Sie
den
Verstellmotor
vorsichtig
aus dem schwarzen Clip
.
8.
Befestigen
Sie
den
Verstellmotor am Ausleger
mit dem Sicherungsstift .
Achten Sie darauf, dass
der Verstellmotor optimal
zwischen dem Ausleger
positioniert ist.
9. Befestigen Sie die Fußauflage mit den Haken am
Fahrgestell des Patientenlifters.
mit dem
10. Befestigen Sie die Beinstütze
Sicherungsstift . Positionieren Sie die Beinstütze
in der gewünschten Höhe und Tiefe.
11. Befestigen Sie die
Thoraxstütze
mit
dem Sicherungsstift
an der Schiebesäule
in einer für den
Patienten komfortablen
Höhe.
Seite 19
Albatros II
2012-09
3.2.3 Demontage
L WARNUNG: Klemmgefahr - Achten Sie bei der Demontage darauf, dass Sie sich
L
nicht verletzen und keine Drähte eingeklemmt, gequetscht oder durchtrennt
werden.
WARNUNG: Verletzungsgefahr - Stellen Sie sicher, dass der Not-Stopp (roter
Druckknopf an der Kontrollbox) aktiviert ist, um unbeabsichtigte
Verstellbewegungen zu vermeiden.
1. Sichern Sie die zwei Laufrollen am hinteren Ende
des Fahrgestells, indem Sie mit der Fußspitze leicht
die Bremspedale der Laufrollen nach unten drücken,
bis diese arretieren. Um die Bremse zu lösen,
drücken Sie mit der Fußspitze die Bremspedale
wieder leicht nach oben, bis die Laufrollen
freigegeben werden.
2. Entfernen
Sie
die
Thoraxstütze
mithilfe des
von der
Sicherungsstifts
Schiebesäule .
3. Entfernen Sie die
Sicherungsstift .
Beinstütze
mit
dem
4. Entfernen Sie die Fußauflage vom Fahrgestell des
Patientenlifters.
Seite 20
Albatros II
2012-09
5. Bauen Sie den Verstellmotor
aus dem Ausleger aus,
indem
Sie
den
Sicherungsstift
entfernen.
6. Bewegen
Sie
den
Verstellmotor in die untere
Position, und platzieren Sie
den
Verstellmotor
im
schwarzen Clip .
7. Entfernen Sie den Schlitten
und den Schiebehalter
vom Ausleger
mit dem
Sicherungsstift .
8. Lösen Sie den Hebel
.
Ziehen Sie die Schiebesäule
und
die
Fußstützenbefestigung
aus dem Vierkantrohr des
Lifterrahmens.
Seite 21
Albatros II
2012-09
9. Fahren Sie den Ausleger in
die unterste Position
.
Sichern Sie den Stift an der
Oberseite des Masts in der
Bohrung des Auslegers .
10. Entfernen Sie die Sicherungsachse (Steckachse)
am unteren Ende des Mastes, indem Sie leicht
den Druckknopf am Kopf der Achse eindrücken.
Die Sicherungsachse lässt sich nun leicht
herausziehen.
11.
L WARNUNG: Verletzungsgefahr – Bei
entriegeltem Mast können aufgrund
des Eigengewichtes des Mastes
starke Fallkräfte auftreten.
Ziehen Sie die Standsicherung (Zugschraube) bis der
Mast für das Abkippen freigegeben wird. Der Mast
lässt sich nun nach vorne abkippen.
Kippen Sie den Mast so weit wie möglich nach vorne.
12.
L WARNUNG: Verletzungsgefahr–
Achten Sie darauf, dass die
Sicherungsachse korrekt eingesteckt
ist.
Sichern
Sie
den
Mast,
indem
Sie
die
Sicherungsachse am Ende des Mastes mit
eingedrücktem Druckknopf soweit durchschieben,
dass diese am anderen Ende sichtbar herauszeigt.
Lassen Sie den Druckknopf der Sicherungsachse los
und prüfen Sie, ob sich diese wieder herausziehen
lässt.
Seite 22
Albatros II
2012-09
4
Wartung
Hinweise zur Wartung des Patientenlifters entnehmen Sie bitte der Website von
Vermeiren: www.vermeiren.be.
5
Bestellnummern
Laufrollen (ø 100 mm)
Laufrollen mit Bremsen (ø 100 mm)
E Kontrollbox Albatros
E Motor 7,5KN Albatros
E Handbedienung Albatros
E Batterie Albatros
E Bauplatte Albatros
E Grauer Stecker Kontrollbox Albatros
E Kabel Albatros
E Externes Ladegerät CHJ2 für Albatros
E Bauplatte externes Ladegerät Albatros
1903403
1903402
1906137
1906229
1906138
1906139
1906230
1906232
1906233
1906423 (OPTIONAL)
1906424 (OPTIONAL)
Sitzsystem
Sitzsystem
Sitzsystem SU
Rechter Thoraxgurt
Linker Thoraxgurt
Thorax-Schaumstoffstütze
2991605
2991627
2991603
2991604
2991600
Seite 23
Albatros II
2012-09
Indice
Premessa.............................................................................................. 2
1
Descrizione del prodotto.......................................................... 3
1.1
1.2
1.3
1.4
1.5
2
Utilizzo ...................................................................................... 7
2.1
2.2
2.3
2.4
2.5
2.6
3
Generalità .................................................................................................................... 7
Utilizzo del sistema JUMBO (batteria, scatola di controllo + caricabatterie incluso) .
................................................................................................................................... 10
Uso del sollevatore .................................................................................................... 11
Sistema di seduta ....................................................................................................... 14
Regole per la sicurezza .............................................................................................. 14
Emergenza ................................................................................................................. 15
Installazione e regolazione ................................................... 16
3.1
3.2
4
5
Destinazione d'uso ....................................................................................................... 3
Specifiche tecniche...................................................................................................... 4
Schema ........................................................................................................................ 6
Significato dei simboli ................................................................................................ 7
Consegna ..................................................................................................................... 7
Sostituzione della batteria ......................................................................................... 16
Montaggio o smontaggio ........................................................................................... 16
Manutenzione ......................................................................... 23
Codici parti di ricambio ........................................................ 23
Pagina 1
Albatros II
2012-09
Premessa
Ringraziamo per la fiducia accordataci con l’acquisto di uno dei nostri prodotti.
I sollevatori Vermeiren sono il risultato di molti anni di ricerca ed esperienza. Durante lo
sviluppo, è stata dedicata attenzione speciale alla facilità d'uso e alla praticità del solleva
ammalati.
La durata del sollevatore dipende fortemente dalla cura e manutenzione che vi si dedicano.
Il presente manuale ha lo scopo di aiutare ad acquisire familiarità con il funzionamento del
sollevatore.
Attenersi alle istruzioni operative e di manutenzione costituisce parte integrante della
garanzia.
Il manuale riflette gli sviluppi più recenti dei prodotti. Vermeiren si riserva il diritto di
apportare modifiche senza preavviso, senza essere tenuta a sostituire o adattare modelli
forniti in precedenza.
Per qualsiasi chiarimento, rivolgersi al rivenditore specializzato.
Pagina 2
Albatros II
2012-09
1
Descrizione del prodotto
1.1
Destinazione d'uso
Il sollevatore è destinato a persone con difficoltà motorie o incapacità di deambulazione.
Il sollevatore può trasportare una sola persona e può essere utilizzato sia all'interno che in
spazi esterni.
Il paziente deve essere posizionato sul sollevatore da personale qualificato.
Le caratteristiche del sollevatore ne permettono l’utilizzo in caso di difficoltà di
deambulazione dovute a:
•
•
•
•
•
paresi
deformazioni degli arti inferiori
cachessia
atropia
e per usi geriatrici.
Nella valutazione delle esigenze personali, si consiglia di tenere in considerazione i seguenti
fattori:
•
•
•
•
corporatura e peso corporeo (150 kg max)
condizioni psico-fisiche
abitazione
ambiente
Il sollevatore deve essere utilizzato solo su superfici piane e con tutte le quattro ruote a
contatto con il suolo.
Il sollevatore può essere utilizzato per il trasferimento in doccia o vasca da bagno, ma non
mentre ci si lava.
È assolutamente vietato passare sopra ad ostacoli di qualsiasi tipo durante il trasferimento
del paziente.
Non utilizzare il sollevatore come scala, né per trasportare oggetti pesanti o caldi.
Se utilizzata su pavimenti con tappeti, moquette o rivestimenti, questi potrebbero venire
danneggiati.
Utilizzare solo gli accessori approvati da Vermeiren.
Accertarsi che l'estremità del motoposizionatore sia dotato di una misura di sicurezza.
Utilizzare pertanto il sollevatore solo al centro dell'intervallo di regolazione non all'estremità
del motore dello stesso.
La conformità con le istruzioni operative e di manutenzione è parte integrante della garanzia.
I pazienti con problemi di vista possono contattare il rivenditore per le istruzioni d'uso.
Il sollevatore è adatto per il riutilizzo.
Pagina 3
Albatros II
2012-09
1.2
Specifiche tecniche
Direzione
avanti
Pagina 4
Albatros II
2012-09
Marchio
Indirizzo
Tipo
Modello
Vermeiren
Vermeirenplein 1/15, B-2920 Kalmthout
Sollevatore di pazienti
Albatros II
Misurazione nel
Dimensioni
disegno
Altezza minima ZAP*
l
1060 mm
Altezza massima ZAP*
k
1687 mm
Area di sollevamento (portata in altezza)
m
637 mm
Lunghezza gamba
1000 mm
Lunghezza totale
1115 mm
Larghezza totale
Lunghezza da ripiegato o smontato
685 mm
1380 mm (motore di azionamento in
posizione più bassa)
1687 mm (motore di azionamento in
posizione più alta)
1115 mm (non ripiegabile)
Larghezza da ripiegato o smontato
685 mm (non ripiegabile)
Altezza totale
Altezza da ripiegato o smontato
500 mm
Distanza minima gambe
r
467 mm
Distanza massima gambe
q
769 mm
Altezza gamba / altezza telaio
n
117 mm
Larghezza totale (chiuso), ingombro
Larghezza totale (aperto), ruote anteriori
Distanza minima tra parete / CSP* (altezza
minima)
Distanza minima tra parete / CSP* (portata
massima)
Distanza minima tra parete / ZAP* (altezza
massima)
Raggio di curva
584 mm
P
945 mm
w3 (=w2)
285 mm
w2 (=w3)
285 mm
w1
870 mm
1160 mm
Peso complessivo
50,60 kg
Peso telaio + motore + unità di comando
34,50 kg
Peso batteria
2,90 kg
Peso della pedana
5,10 kg
Peso appoggio torace
1,40 kg
Peso del poggiagambe
Peso sostegno poggiagambe e colonna di
sollevamento
Carico massimo
3,00 kg
Altezza libera, minima
Portata massima a 600 mm con
poggiagambe
Portata massima a 600 mm senza
poggiagambe
Portata massima dalla trave
Portata dalla traversa con distanza di 700
mm
57 mm
3,60 kg
150 kg
a1
300 mm
a2
360 mm
b
c
495 mm
375 mm
Tensione in uscita
24V
Tensione di alimentazione
max. 250 VA
100-240V ~ max. 37-53 VA
Assorbimento elettrico massimo
max. 400 mA
Temperatura d'esercizio
Pressione acustica
+5 °C fino a +40°C
da 20% a 90% a 30°C, senza produzione di
condensa
< 50 dB (A)
Pressione dell'aria
da 700 a 1060 hPa
Umidità relativa
Centralina
Linak CBJ2
Batteria
Linak BAJ1
Pagina 5
Albatros II
2012-09
Marchio
Indirizzo
Tipo
Modello
Vermeiren
Vermeirenplein 1/15, B-2920 Kalmthout
Sollevatore di pazienti
Albatros II
Misurazione nel
Dimensioni
disegno
Linak HB5X (< 5N meccanica di
azionamento)
Linak LA34 (7500N)
Telecomando
Motore
Classe di protezione centralina
IPX4
Classe di protezione batteria
IPX5
Classe di protezione comando manuale
IPX5
Classe di protezione motore
IP54
Classe di isolamento
II - Tipo B
Rendimento di lavoro
Capacità delle batteria
circa 40 sollevamenti a carico
max. 10% o 2 min. funzionamento
continuo/18 min. pausa
2.9 Ah
Arresto di emergenza
Sì
Funzionamento periodico
Abbassamento di emergenza manuale
Sì
Abbassamento elettrico di emergenza
No
La casa produttrice si riserva il diritto di apportare modifiche tecniche. Tolleranza +/- 15 mm / 1,5 kg
1 = Posizione più alta, 2 = Portata massima, 3 = Posizione più bassa
* ZAP = punto di sollevamento centrale
Tabella 1: Specifiche tecniche
Il sollevatore è conforme ai requisiti stabiliti in:
ISO 7176-8: Requisiti e test per prove di stabilità, d'urto e di fatica.
ISO 7176-16: resistenza ignifuga delle parti imbottite
1.3
Schema
1
2
3
4
5
6
7
8
9
10
11
12
13
14
15
16
17
18
19
20
21
22
23
24
25
Pagina 6
= Pulsanti per le cinghie di
fissaggio
= Braccio
= Appoggio torace
= Staffa di scorrimento
= Colonna di scorrimento
= Staffa di trasporto per il
motore
= Motore
= Cintura per le gambe
= Poggiagambe
= Telaio
= Pedana
= Ruota
= Ruota con freno
= Pedale spaziatura telaio
= Poggiapiedi con velcro
di fissaggio
= Perno di sicurezza
= Raccordo di sicurezza
= Cavo di alimentazione
= Impugnatura di
spostamento
= Comando manuale
= Asta
= Unità di comando
= Arresto di emergenza
= Batteria
= Tavolino
Albatros II
2012-09
1.4
Significato dei simboli
Fare attenzione alle indicazioni di sicurezza!
Prima dell'uso leggere le relative istruzioni!
Raccolta differenziata e riciclaggio delle parti elettriche ed elettroniche
CE conformità
1.5
Consegna
Il sollevatore Albatros II Vermeiren è dotato di:
• telaio comprensivo di 4 ruote (di cui due con freni)
• asta con impugnatura per la spinta
• traversa con attacco per l'imbragatura
• centralina (+ caricabatterie incluso)
• batteria
• telecomando
• motore
• manuale di istruzioni
• pedana + poggiapiedi con fissaggio in velcro
• poggiagambe
• appoggio per il torace
Prima dell'uso, controllare che tutti i componenti siano inclusi e che non siano stati
danneggiati, ad esempio durante il trasporto.
Si noti che nei vari paesi europei la dotazione di base potrebbe essere diversa. Per ulteriori
informazioni, rivolgersi al rivenditore nel proprio paese.
2
Utilizzo
Nel capitolo viene descritto l'utilizzo quotidiano. Le presenti istruzioni sono destinate
all'utente e al rivenditore specializzato.
Il sollevatore viene fornito completamente assemblato dal rivenditore specializzato. Le
istruzioni destinate al rivenditore, relative alla configurazione del sollevatore sono descritte
nel § 3.
2.1
Generalità
Il sollevamalati deve essere utilizzato solo da personale qualificato che ha ricevuto
un'adeguata formazione sull'uso speciale del dispositivo.
L'uso del sollevatore è limitato agli ambienti chiusi. Accertarsi che il dispositivo venga
utilizzato solo su superfici piane. Non è consentito l’uso della sedia all’esterno.
Si segnala che le fonti elettromagnetiche (cellulari etc.) possono provocare interferenze
sull’elettronica del sollevatore, che a sua volta può provocarne su altri apparecchi elettrici.
Anche se l’utente ha fatto pratica nell’utilizzo del sollevatore con l'ausilio del rivenditore, si
consiglia di leggere con attenzione le pagine che seguono.
Pagina 7
Albatros II
2012-09
2.1.1 Istruzioni per il sollevamento del paziente
Fase I – Preparazione. In questa fase, il paziente deve collocarsi sulla pedana e appoggiare
i piedi sullo speciale poggiapiedi con il fissaggio in velcro. Stabilizzare i piedi e la parte
inferiore delle gambe utilizzando le cinture in velcro disponibili su poggiapiedi e
poggiagambe. Accertarsi che i piedi e le gambe siano saldamente a contatto con l'imbottitura
degli appositi supporti di appoggio. Agganciare la cintura per il torace con quattro cinghie al
sollevatore.
Pulsanti per l'aggancio
della cintura per il torace.
Fase II - Sollevamento. Azionare il telecomando per sollevare il paziente. Durante la fase di
sollevamento, il paziente deve impugnare le apposite maniglie.
Fase III – Stabilizzazione. L'ultimo passaggio al termine del sollevamento in posizione
verticale consiste nella stabilizzazione mediante le cinture per il torace. Le cinture per il
torace sono montate su entrambi i lati dell'appoggio per il torace. Al termine è possibile
rimuovere il corpetto. Per una stabilizzazione completa, utilizzare la cintura attorno alla vita
che consente di stabilizzare il bacino e il tronco. In questo modo, il paziente viene
completamente protetto in quattro punti: piedi, ginocchia, bacino e torace.
Pagina 8
Albatros II
2012-09
Pulsanti per l'aggancio della cintura
alla vita.
Verificare il corretto posizionamento del paziente.
Pagina 9
Albatros II
2012-09
2.2
Utilizzo del sistema JUMBO (batteria, scatola di controllo +
caricabatterie incluso)
JUMBO è un sistema modulare che combina un motore di azionamento, una centralina e
una batteria in una soluzione flessibile sviluppata specificatamente per i sollevatori.
2.2.1 Batteria
La batteria si trova sopra la centralina ed è sostituibile grazie a un
sistema di morsetti integrato.
Tensione primaria
Temperatura ambiente
Temperatura ambientale per la
conservazione
Umidità relativa per la
conservazione
Dichiarazione di conformità
24 VDC
+5°C fino a +40°C
da -10° C a +50° C
max. 90% (senza condensazione)
verificato ai sensi della direttiva
IEC 606011
2.2.2 Centralina + caricabatterie incluso
La centralina è comprensiva di un arresto di
emergenza e di un caricabatterie interno.
Tensione primaria
Tensione secondaria
(tensione di carica)
Corrente secondaria
(corrente di carica)
Dispositivi di
protezione
100 - 240 VAC / 50/60 Hz
24 VDC, max. 250 VA
Temperatura
ambiente
Temperatura
ambientale per la
conservazione
Umidità relativa per
la conservazione
Dichiarazione di
conformità
+5°C fino a +40°C
max. 10 A
protetto da errori di polarità,
sovratensione e
surriscaldamento
da -10° C a +50° C
max. 90% (senza
condensazione)
verificato ai sensi della
direttiva IEC 606011
La casa produttrice si riserva il diritto di apportare modifiche tecniche.
2.2.3 Caricabatterie esterno (FACOLTATIVO)
Il caricabatterie esterno deve essere installato su
una parete. Il caricabatterie esterno consente di
caricare una batteria di ricambio (facoltativa) e di
continuare pertanto a utilizzare il sollevatore
senza interruzioni dovute alla necessità di
ricaricare le batterie.
Tensione primaria
Corrente di carica
Temperatura ambiente
Temperatura ambientale
per la conservazione
Umidità relativa per
la conservazione
Pagina 10
100 - 240 VAC / 50/60 Hz
max. 650 mA
+5°C fino a +40°C
da -10° C a +50° C
max. 90% (senza
condensazione)
Albatros II
2012-09
2.2.4 Carica della batteria
Utilizzare solo la scatola di controllo del dispositivo Albatros II con il caricabatterie incluso
oppure il caricabatterie esterno da installare sulla parete.
È consigliabile ricaricare regolarmente le batterie, per garantire la continuità di utilizzo del
sollevatore ed estendere la vita utile delle batterie. La centralina indicherà con un segnale
acustico quando il livello di carica delle batteria è al 50% della capacità.
•
PRIMO UTILIZZO
Inserire il connettore del cavo di alimentazione nell'apposito connettore della centralina. La
spina del cavo di alimentazione deve essere inserita nella presa di corrente. Il tempo di
ricarica è di circa 24 ore.
•
RICARICA
L AVVERTENZA: rischio di lesioni. Non utilizzare il sollevatore quando il cavo di
alimentazione è collegato alla presa di corrente.
Quando le batterie sono sotto carica saranno accese una luce gialla
(sopra l'indicatore di accensione) e una luce arancione (sopra
l'indicatore di carica).
Al termine della carica è sempre consigliabile rimuovere prima la spina di alimentazione
dalla presa di corrente e successivamente il connettore dalla centralina.
Non utilizzare il sollevatore durante la carica!
Se le batterie non vengono utilizzate per un lungo periodo di tempo, si scaricano lentamente
(completamente) e non possono più essere ricaricate con il caricabatterie in dotazione. È
pertanto consigliabile ricaricare le batterie almeno una volta al mese, anche se non vengono
utilizzate.
2.3
Uso del sollevatore
Osservare i dati tecnici secondo cui è possibile utilizzare il sollevatore (Albatros II). Il
sollevatore deve essere utilizzato solo da persone autorizzate che hanno ricevuto una
formazione sull'uso dello stesso.
L AVVERTENZA: Pericolo di ustioni – Prestare attenzione durante l'uso in ambienti
caldi o freddi (esposizione al sole, freddo estremo, sauna, ecc.) per un
determinato periodo di tempo e quando si tocca il dispositivo.
2.3.1 Spaziatura telaio
Per poter utilizzare una sedia a rotelle o altri
dispositivi simili con il sollevatore, ma anche per
aumentare la sicurezza d'uso del sollevatore, è
possibile aumentare la distanza tra le gambe del
telaio.
Posizionarsi dietro il sollevatore assemblato,
afferrare le impugnature per la spinta del
sollevatore (a destra e a sinistra della
centralina). Premere leggermente con un piede
la leva sul telaio inferiore (a destra o a sinistra)
verso il basso per aumentare o ridurre la
distanza delle gambe del telaio.
Pagina 11
Albatros II
2012-09
2.3.2 Freno di stazionamento
Fissare le due ruote sull'estremità posteriore del
telaio premendo leggermente con la punta del
piede il pedale del freno della ruota verso il
basso finché non si blocca. Per sbloccare il
freno, premere leggermente con la punta del
piede ancora sul pedale del freno verso l'alto
finché le ruote non si sbloccano.
2.3.3 Pedana
La pedana
può essere montata o rimossa
tramite i ganci
presenti nel telaio del
sollevatore. Se necessario, per una maggiore
stabilità dei piedi è possibile utilizzare lo
speciale poggiapiedi
con strisce in velcro.
2.3.4 Poggiagambe
L AVVERTENZA: rischio di lesioni. Non lasciar cadere il poggiagambe sul paziente
durante la regolazione.
Il poggiagambe
può essere montato
sulla barra dell'argano paziente
con il
perno di sicurezza .
Lo scopo del poggiagambe è quello di
mantenere le gambe del paziente nella
posizione corretta e di supportare le gambe
quando il paziente quando si solleva in
piedi.
È possibile regolare la profondità del poggiagambe e impostarlo su 9 altezze diverse.
1 = Leva per la regolazione dell'altezza
2 = Leva per la regolazione della
profondità
Altezza dalla pedana
alla parte superiore
del poggiagambe
Posizione
690 mm
Foro 1
665 mm
Foro 2
640 mm
Foro 3
Non utilizzare
Foro 4
Non utilizzare
Foro 5
495 mm
Foro 6
470 mm
Foro 7
445 mm
Foro 8
420 mm
Foro 9
Tabella 2: regolazione dell'altezza del
poggiagambe
Pagina 12
Albatros II
2012-09
2.3.5 Appoggio per il torace
Per stabilizzare e sostenere il torace, il
sollevatore è dotato di un supporto imbottito
per il torace e delle relative cinture in velcro
per la stabilizzazione.
L'appoggio per il torace può essere
regolato in 2 diverse posizioni: 1045 mm e
1200 mm. Le misure vengono calcolate a
partire dalla pedana fino al bordo superiore
dell'appoggio per il torace.
1. Rimuovere il perno di sicurezza .
2. Regolare l'appoggio per il torace nella
posizione desiderata. La posizione
rispetto al supporto di aggancio
deve essere come mostrato
nell'immagine.
3. Fissare saldamente il perno di
sicurezza
.
2.3.6 Sollevare e abbassare il braccio del sollevatore
Con il comando manuale è possibile regolare il braccio del sollevatore
in qualsiasi posizione.
1
2
1
= Sollevare il braccio
2
= Abbassare il braccio
L
Durante l'uso della funzione di sollevamento fino all'estremità
del motore del sollevatore, l'interruttore di limite è attivato
(funzione di sicurezza). Utilizzare la funzione di sollevamento
solo al centro dell'intervallo di regolazione.
meccanica di azionamento dei pulsanti: < 5N
Posizionare il controllo manuale sul tubo superiore dell'impugnatura per lo spostamento del
sollevatore. Questa è la posizione più ergonomica.
Pagina 13
Albatros II
2012-09
2.3.7 Spostamento del sollevamalati
L AVVERTENZA: Rischio di intrappolamento – Prestare attenzione durante il
passaggio in spazi ristretti, ad esempio attraverso le porte.
1.
Posizionarsi dietro il sollevatore e afferrare le impugnature (a destra e a sinistra,
accanto alla batteria e alla scatola di controllo) con entrambe le mani.
2.
Accertarsi che entrambi i freni delle ruote posteriori siano sbloccati.
3.
Spostare lentamente il sollevatore nella posizione desiderata.
A sollevatore scarico, consigliamo di spostarlo indietro affinché sia possibile superare più
facilmente gli ostacoli.
Per spostare il sollevatore, utilizzare solo le impugnature per la spinta e nessun altro
componente (motore di azionamento, controllo manuale...) .
2.4 Sistema di seduta
L AVVERTENZA: pericolo di lesioni. Utilizzare solo le imbragature appropriate per i
pazienti.
L AVVERTENZA: pericolo di lesioni. Non utilizzare imbragature danneggiate.
Il sollevatore Albatros II deve essere utilizzato solo con le apposite imbragature.
Le indicazioni d'uso sono presenti nelle istruzioni d'uso delle imbragature.
2.5
Regole per la sicurezza
Di seguito sono riportati alcuni consigli in materia di sicurezza:
L
L'uso ed il funzionamento del sollevatore è pensato solo per le persone autorizzate
che sono state istruite sull'uso del dispositivo stesso.
L
Verificare che durante l'uso del sollevatore ci sia sufficiente spazio ai lati e al di sopra
dello stesso, poiché in caso contrario si potrebbero verificare danni o lesioni delle
funzioni d'impostazione durante il movimento.
L
Per evitare lesioni, tenere sempre sotto controllo il braccio del sollevatore.
L
Il sollevatore deve essere utilizzato solo su superfici piane in cui tutte le quattro ruote
sono a contatto con il pavimento in modo equilibrato.
L
Si devono utilizzare solo sistemi di seduta pensati ed approvati per il sollevatore
(vedere istruzioni per l'uso delle relative imbragature). L'uso di altri sistemi di seduta
è a proprio rischio e pericolo.
L
Seguire le istruzioni del personale di assistenza o del personale istruito al fine di
evitare lesioni durante l'uso del sollevatore.
L
Verificare le condizioni mediche del paziente e accertarsi che sia possibile sollevare il
paziente con il sollevatore. (Vedere la destinazione d'uso)
L
Prestare attenzione al fuoco, soprattutto alle sigarette accese, perché i sistemi di
seduta sono infiammabili.
L
Non superare mai il carico massimo di 150 kg. In caso di sovraccarico la centralina si
disattiva.
L
Quando si utilizzano cinghie con un carico massimo, il carico più basso viene
utilizzato tra l'alzasedile e la cinghia del paziente.
L
Il produttore non è responsabile in caso di danni e lesioni generati da un uso non
conforme o dall'inosservanza delle istruzioni d'uso.
L
Per spostare il sollevamalati, utilizzare solo le impugnature per la spinta e nessun
altro componente (motore di azionamento, controllo manuale...).
L
Tirare il braccio di sollevamento prima di usare manualmente il sollevatore e
verificare che il braccio scenda da solo. Altrimenti rivolgersi al rivenditore.
Pagina 14
Albatros II
2012-09
2.6
Emergenza
In casi di emergenza, è necessario utilizzare l'arresto di emergenza e la funzionalità di
abbassamento di emergenza.
2.6.1 Arresto di emergenza
In caso di emergenza e durante il montaggio e lo
smontaggio, è possibile attivare l'arresto di emergenza
premendo il pulsante rosso a destra presente sulla
centralina.
Premere il pulsante e ruotare nella direzione indicata
dalle frecce. Se il pulsante è premuto, ruotare nella
direzione opposta a quella delle frecce.
L'arresto
di
emergenza
viene
disattivato ruotando il pulsante rosso
nella direzione delle frecce.
2.6.2 Abbassamento di emergenza manuale
L AVVERTENZA: rischio di lesioni. L'abbassamento di emergenza manuale deve
essere adeguato al peso del paziente.
In caso di assenza di alimentazione o di batterie scariche,
l'abbassamento di emergenza può essere effettuato
premendo il pulsante rosso (1) disponibile all'estremità
inferiore del motore. L'abbassamento di emergenza
predefinito è impostato per un paziente del peso di 50 Kg.
Calibrazione standard: 2500N, 15 mm/s per abbassare il
paziente.
1
Si noti che l'abbassamento di emergenza manuale è possibile solo se il paziente è seduto
sul sollevatore.
Forza di aggancio: 10 mm per una forza da 80 a 100N.
Pagina 15
Albatros II
2012-09
3
Installazione e regolazione
Le istruzioni contenute nel presente capitolo sono destinate al rivenditore.
Per individuare il centro assistenza o il rivenditore specializzato più vicino, contattare il
centro Vermeiren. Nell'ultima pagina del manuale, è disponibile un elenco di centri
Vermeiren autorizzati.
L AVVERTENZA: pericolo di limiti non sicuri. Utilizzare solo i limiti descritti nel
presente manuale.
3.1
•
•
•
Sostituzione della batteria
La casa produttrice declina qualsiasi responsabilità per danni derivanti dall’uso di
batterie non appropriate.
Non utilizzare la batteria a temperature inferiori a +5° C o superiori a +50° C, la
temperatura ottimale è +20° C.
In caso di apertura della batteria, la casa costruttrice declina ogni responsabilità e la
garanzia decade.
La batteria può essere sostituita tramite un sistema di morsetti integrato.
Per sostituire la batteria, tirare in corrispondenza
del sistema di morsetti integrato. Si solleverà la
piastra e sarà possibile rimuovere il coperchio
della batteria (centralina).
3.2
Montaggio o smontaggio
3.2.1 Disimballaggio
L AVVERTENZA: rischio di lesioni. Dopo il disimballaggio e prima del montaggio,
verificare sempre che l'arresto di emergenza (il pulsante rosso sulla centrlina) sia
premuto.
L'imballaggio del sollevatore è stato scelto per garantire una sicurezza ottimale durante il
trasporto.
1.
Estrarre il sollevatore dal cartone e verificare che la
spedizione sia completa e i singoli componenti non
presentino difetti visibili. In caso di danni, rivolgersi al
proprio rivenditore.
Pagina 16
Albatros II
2012-09
2.
Prima dell'installazione assicurare il sollevatore da
movimenti involontari, azionando tutti i freni. Premere
leggermente con la punta del piede la piastra
frenante verso il basso fino a bloccarla. Per
sbloccare il freno, premere leggermente con la punta
del piede ancora sulla piastra frenante verso l'alto
finché la ruota non si sblocca.
3.2.2 Assemblaggio
L AVVERTENZA: rischio di intrappolamento. Verificare che durante il montaggio
nessuna parte del corpo o nessun cavo venga incastrato o schiacciato.
1. Rimuovere il perno di sicurezza (perno di
bloccaggio)
sull'estremità
inferiore
dell'asta,
premendo leggermente il pulsante sulla testa del
perno. Ora è possibile estrarre facilmente il perno di
sicurezza.
2. Allentare leggermente la sicura del trasporto (vite ad
alette) per sollevare l'asta.
2.a È possibile percepire il
‘clic’
della
sicura
di
bloccaggio
(vite
di
tensionamento)
quando
l'asta
raggiunge
la
posizione finale.
klick
Pagina 17
Albatros II
2012-09
3.
L AVVERTENZA: Rischio di lesioni –
Accertarsi che il perno di sicurezza sia
inserito correttamente.
Fissare l'asta inserendo il perno di sicurezza
all'estremità dell'asta con il pulsante premuto, in
modo che la stessa sporga visibilmente sull'altra
estremità. Rilasciare il pulsante del perno di
sicurezza e verificare se l'asta può ancora essere
estratta.
4. Rimuovere
il
braccio
dall'estremità dell'asta
.
A tale scopo, è necessario
tirare la leva .
5.
Pagina 18
Montare la colonna del
sollevatore
con
l'aggancio
per
il
poggiapiedi
nel telaio
tubolare dell'argano per il
paziente.
Serrare l'impugnatura .
Albatros II
2012-09
6.
Fissare la colonna di
scorrimento e la relativa
staffa
alla traversa
con il perno di bloccaggio
.
7. Rimuovere delicatamente il
motore di azionamento
tirando verso l'esterno il
morsetto nero .
8.
Fissare il motore di
azionamento alla traversa
tramite
il
perno
di
bloccaggio
. Verificare
che
il
motore
di
azionamento
sia
accuratamente posizionato
accanto alla traversa.
9. Fissare la pedana al telaio dell'argano paziente
tramite i ganci.
Pagina 19
Albatros II
2012-09
10. Fissare il poggiagambe tramite
il perno di
alla
bloccaggio . Posizionare il poggiagambe
profondità e all'altezza desiderate.
11. Montare l'appoggio per il
torace
alla colonna del
sollevatore
con il perno
di
bloccaggio
a
un'altezza confortevole per
i pazienti.
3.2.3 Smontaggio
L AVVERTENZA: rischio di intrappolamento. Verificare che durante lo smontaggio
nessuna parte del corpo o nessun cavo venga incastrato o schiacciato.
L AVVERTENZA: rischio di lesioni. Verificare che l'arresto di emergenza (pulsante
rosso sulla centralina) sia attivato, per evitare spostamenti involontari.
1. Fissare le due ruote sull'estremità posteriore del
telaio premendo leggermente con la punta del piede
il pedale del freno della ruota verso il basso finché
non si blocca. Per sbloccare il freno, premere
leggermente con la punta del piede ancora sul
pedale del freno verso l'alto finché le ruote non si
sbloccano.
2. Rimuovere l'appoggio per il
torace
dalla colonna di
sollevamento
tramite il
perno di bloccaggio .
Pagina 20
Albatros II
2012-09
3. Rimuovere il poggiagambe tramite
bloccaggio .
il perno di
4. Rimuovere la pedana dal sollevatore.
5. Smontare il motore di
azionamento dalla traversa
rimuovendo il perno di
bloccaggio .
6. Spostare il motore di
azionamento nella posizione
più bassa e collocarlo nel
morsetto posteriore .
Pagina 21
Albatros II
2012-09
7. Rimuovere
l'asta
di
scorrimento e la relativa
staffa
dalla traversa
con il perno di bloccaggio
.
8. Allentare
la
leva
.
Rimuovere la colonna di
e l'aggancio
scorrimento
del poggiapiedi
dal
profilato tubolare del telaio.
9. Spostare la traversa nella
posizione più bassa
.
Assicurare
la
punta
all'estremità
superiore
dell'asta nel foro della
traversa .
Pagina 22
Albatros II
2012-09
10. Rimuovere il perno di sicurezza (perno di
bloccaggio) sull'estremità inferiore dell'asta,
premendo leggermente il pulsante sulla testa del
perno. Ora è possibile estrarre facilmente il
perno di sicurezza.
L
AVVERTENZA: Rischio di lesioni –
Sbloccando l'asta, questa può
ribaltarsi repentinamente a causa del
proprio peso.
Tirare la sicura di bloccaggio (vite di tensionamento)
finché l'asta non è sbloccata e può essere ribaltata.
Ora è possibile ribaltare in avanti l'asta.
11.
Inclinare l'asta in avanti il più possibile.
12.
L
AVVERTENZA: Rischio di lesioni –
Accertarsi che il perno di sicurezza
sia inserito correttamente.
Fissare l'asta inserendo il perno di sicurezza
all'estremità dell'asta con il pulsante premuto, in
modo che la stessa sporga visibilmente sull'altra
estremità. Rilasciare il pulsante del perno di
sicurezza e verificare se l'asta possa essere ancora
estratta.
4
Manutenzione
Per il manuale di manutenzione delle dell'argano paziente consultate il sito web Vermeiren:
www.vermeiren.be.
5
Codici parti di ricambio
Ruote (ø 100 mm)
Ruote con freno (ø 100 mm)
E - Scatola di controllo Albatros
E - Motore 7,5KN Albatros
E - Controllo manuale
E - Batteria Albatros
E - Piastra portante Albatros
E - Scatola di controllo Albatros, connettore grigio
E Cavo Albatros
E Caricabatterie esterno CHJ2 per Albatros
E Piastra portante caricabatterie esterno Albatros
1903403
1903402
1906137
1906229
1906138
1906139
1906230
1906232
1906233
1906423 (FACOLTATIVO)
1906424 (FACOLTATIVO)
Sistema di seduta
Sistema di seduta
Sistema di seduta SU
Cintura torace destra
Cintura torace sinistra
Appoggio torace imbottito
2991605
2991627
2991603
2991604
2991600
Pagina 23
Albatros II
2012-09
Índice
Introducción........................................................................................ 2
1
Descripción del producto ........................................................ 3
1.1
1.2
1.3
1.4
1.5
2
Uso............................................................................................. 7
2.1
2.2
2.3
2.4
2.5
2.6
3
Indicaciones generales................................................................................................. 7
Uso del sistema JUMBO (batería, caja de control + cargador de batería incluido) . 10
Manejo del elevador .................................................................................................. 11
Sistema de asiento ..................................................................................................... 14
Normas de seguridad ................................................................................................. 14
Emergencia ................................................................................................................ 15
Instalación y ajuste ................................................................ 16
3.1
3.2
4
5
Uso previsto................................................................................................................. 3
Especificaciones técnicas ............................................................................................ 4
Esquema ...................................................................................................................... 6
Explicación de los símbolos ........................................................................................ 7
Entrega ........................................................................................................................ 7
Intercambio de baterías ............................................................................................. 16
Montaje o desmontaje ............................................................................................... 16
Mantenimiento ....................................................................... 23
Números de pedido ................................................................ 23
Página 1
Albatros II
2012-09
Introducción
En primer lugar, nos gustaría agradecerle que haya confiado en nosotros y haya escogido
uno de nuestros productos.
Los elevadores de pacientes Vermeiren son el resultado de muchos años de experiencia e
investigación. Durante su desarrollo, hemos puesto especial atención en crear un elevador
de pacientes práctico y fácil de usar.
La vida de su elevador de pacientes dependerá en gran medida de los cuidados y el
mantenimiento que le dedique.
Este manual le permitirá familiarizarse con el funcionamiento de su producto.
El seguimiento de las instrucciones para el usuario y de las instrucciones de mantenimiento
son parte indispensable de la garantía.
Este manual incluye las mejoras de producto más recientes. Vermeiren se reserva el
derecho de introducir cambios sin tener ninguna obligación de adaptar o sustituir los
modelos entregados previamente.
Si tiene más preguntas, le rogamos que consulte a su distribuidor especializado.
Página 2
Albatros II
2012-09
1
Descripción del producto
1.1
Uso previsto
El elevador de pacientes está diseñado para personas con movilidad reducida o nula.
El elevador de pacientes está diseñado para transportar a 1 persona.
El elevador de pacientes debe ser usado en interiores.
El usuario debe ser levantado en el elevador de pacientes por un acompañante.
Las diferentes posibilidades / posiciones permiten el uso de la grúa en caso de incapacidad
o la imposibilidad de caminar como:
•
•
•
•
•
parálisis
deformaciones en los miembros
caquexia
atrofia
así como para ancianos
En cada caso particular, también se debe tener en cuenta lo siguiente:
•
•
•
•
envergadura y peso (máx. 150 kg)
estado físico y psicológico
características de la vivienda
entorno
El elevador de pacientes solo se debe usar en superficies planas y con las cuatro ruedas en
contacto con el suelo.
La grúa se puede utilizar para hacer transferencias para entrar o salir de la ducha o bañera,
pero no durante la ducha o el baño.
Está totalmente prohibido pasar por encima de obstáculos mientras se transporta al
paciente.
El elevador de pacientes no debe usarse como escalera, ni tampoco como medio de
transporte para objetos pesados o calientes.
Si lo utiliza encima de alfombras, suelos enmoquetados o suelos con recubrimientos que no
estén fijados, podría dañar dichos recubrimientos.
Utilice solo los accesorios aprobados de Vermeiren.
Asegúrese de que el extremo del motor de ajuste cuenta con una medida de seguridad. Por
lo tanto, emplee el elevador del paciente únicamente en el medio del rango de ajuste y no
en el extremo del motor del elevador.
El cumplimiento de las instrucciones del usuario y de mantenimiento es parte indispensable
de la garantía.
Las personas con deficiencias visuales pueden ponerse en contacto con el distribuidor para
obtener las instrucciones de uso.
El elevador de pacientes es conveniente para su reutilización.
Página 3
Albatros II
2012-09
1.2
Especificaciones técnicas
Dirección de
avance
Página 4
Albatros II
2012-09
Marca
Dirección
Tipo
Modelo
Vermeiren
Vermeirenplein 1/15, B-2920 Kalmthout
Elevador de pacientes
Albatros II
Dimensiones en
Dimensiones
el plano
Posición más baja ZAP*
l
1060 mm
Altura máxima ZAP*
k
1687 mm
Rango de elevación (altura alcanzada)
m
637 mm
Longitud del brazo
1000 mm
Longitud total
1115 mm
Ancho total
Longitud plegada/desmontada
685 mm
1380 mm (posición más baja del
accionador)
1687 mm (posición más alta del accionador)
1115 mm (no plegable)
Anchura plegada/desmontada
685 mm (no plegable)
Altura total
Altura plegada/desmontada
500 mm
Distancia mínima brazo
r
467 mm
Distancia máxima brazo
q
769 mm
Altura de las patas / altura del chasis
Anchura total (cerrado), dimensiones
exteriores
Anchura total (abierto), ruedas delanteras
Distancia mín. entre la pared / CSP* (altura
mínima)
Distancia mín. entre la pared / CSP*
(alcance máximo)
Distancia mín. entre la pared / ZAP* (altura
máxima)
Radio de giro
n
117 mm
584 mm
P
945 mm
w3 (=w2)
285 mm
w2 (=w3)
285 mm
w1
870 mm
1160 mm
Peso total
50,60 kg
Peso del chasis + motor + caja de control
34,50 kg
Peso de la batería
2,90 kg
Peso de los estribos
5,10 kg
Peso del apoyo para el tórax
1,40 kg
Peso del apoyo para piernas
Peso del accesorio del apoyo para las
piernas y la columna del elevador
Carga máxima
3,00 kg
Altura libre, mínima
Alcance máximo a 600 mm con apoyo para
piernas
Alcance máximo a 600 mm sin apoyo para
piernas
Anchura máxima desde el soporte
Anchura máxima desde el soporte con una
distancia de 700 mm
57 mm
3,60 kg
150 kg
a1
300 mm
a2
360 mm
b
c
495 mm
375 mm
Salida de tensión
24V
Tensión de alimentación
máx. 250 VA
100-240V ~ máx. 37-53 VA
Potencia máxima consumida
máx. 400 mA
Temperatura de servicio
de +5°C a +40°C
Humedad relativa
del 20% al 90% a 30 °C – sin condensación
Nivel de ruido
< 50 dB (A)
Presión del aire
de 700 a 1060 hPa
Panel de control
Linak CBJ2
Batería
Linak BAJ1
Página 5
Albatros II
2012-09
Marca
Dirección
Tipo
Modelo
Vermeiren
Vermeirenplein 1/15, B-2920 Kalmthout
Elevador de pacientes
Albatros II
Dimensiones en
Dimensiones
el plano
Control manual
Linak HB5X (< 5N fuerza de activación)
Motor
Linak LA34 (7500N)
Clase de protección del panel de control
IPX4
Clase de protección de la batería
IPX5
Clase de protección del control manual
IPX5
Clase de protección del motor
IP54
Clase de aislamiento
II - Tipo B
Rendimiento
Capacidad de la batería
aprox. 40 elevaciones por carga
máx. 10% o 2 min. de servicio
ininterrumpido/18 min. pausa
2.9 Ah
Parada de emergencia
Sí
Bajada manual de emergencia
Sí
Modo periódico
Bajada eléctrica de emergencia
No
Derechos de modificación reservados. Tolerancia de la medida +/- 15 mm/ 1,5 kg
1 = posición superior, 2 = alcance máximo, 3 = posición inferior
* ZAP = Tope central
Tabla 1: Especificaciones técnicas
El elevador de pacientes cumple las especificaciones siguientes:
ISO 7176-8: Especificaciones y métodos de prueba de resistencia estática, a impactos y a la
fatiga.
ISO 7176-16: Resistencia a la ignición de los componentes tapizados.
1.3
Esquema
1
= Botones para correas de
montaje
2 = Brazo basculante
3 = Cojín para el tórax
4 = Soporte deslizante
5 = Columna deslizante
6 = Soporte de transporte
para motor
7 = Motor
8 = Correa para las piernas
9 = Apoyo para las piernas
10 = Chasis
11 = Estribos
12 = Rueda
13 = Rueda con freno
14 = Pedal apertura del chasis
15 = Reposapiés con cierre
de velcro
16 = Eje de sujeción
17 = Bloqueo abatible
18 = Cable de alimentación
19 = Asidero de empuje
20 = Control manual
21 = Mástil
22 = Caja de control
23 = Parada de emergencia
24 = Batería
25 = Mesa
Página 6
Albatros II
2012-09
1.4
Explicación de los símbolos
Siga las instrucciones de seguridad
Lea el manual de instrucciones antes de utilizarlo
Reciclaje de aparatos eléctricos y electrónicos.
Conformidad con la normativa CE
1.5
Entrega
El elevador de pacientes Vermeiren Albatros II se entrega con:
• chasis y 4 ruedas (2 con frenos)
• poste con asideros de empuje
• brazo basculante con accesorio para arnés
• caja de control (+ cargador de batería incluido)
• batería
• control manual
• motor
• manual de instrucciones
• estribos + reposapiés con cierre de velcro
• apoyo para piernas
• apoyo para el tórax
Antes de utilizarlo, compruebe que ha recibido todo el material y que no ha sufrido ningún
daño (por culpa del transporte u otro motivo).
Tenga en cuenta que la configuración básica puede variar de un país de Europa a otro.
Póngase en contacto con el distribuidor especializado de su país para obtener más
información.
2
Uso
Este capítulo describe el uso diario. Estas instrucciones están destinadas al usuario y a
los distribuidores especializados.
El elevador de pacientes se entrega completamente montado por su distribuidor
especializado. Las instrucciones dirigidas al distribuidor especializado con respecto al
montaje del elevador de pacientes se encuentran en el capítulo 3.
2.1
Indicaciones generales
El manejo del elevador de pacientes sólo se puede encomendar a personal cualificado
instruido o formado en esta aplicación especial.
El uso del elevador de pacientes está limitado a interiores. Asegúrese de que se use
únicamente sobre superficies llanas. En principio, este producto no es adecuado para su
utilización en exteriores.
Cabe señalar que pueden producirse interferencias debido a otras fuentes
electromagnéticas (teléfonos móviles, etc.) y que el mismo sistema electrónico del elevador
de pacientes puede provocarlas en otros dispositivos eléctricos.
Aunque su distribuidor especializado le haya explicado exhaustivamente los elementos de
mando y el manejo del elevador de pacientes, no está de más que lea detenidamente las
páginas siguientes.
Página 7
Albatros II
2012-09
2.1.1 Instrucciones para elevar al paciente
Fase I – Preparación. En esta fase, el paciente deberá permanecer en los estribos y
colocar sus pies en los reposapiés especiales con cierre de velcro. A continuación, tendrá
que estabilizar los pies y las piernas bajo las rodillas con la correa de velcro del apoyo para
las piernas y los pies. Asegúrese de que las piernas y los pies toquen con firmeza el cojín
del apoyo para las piernas y los pies. Abroche la correa del tórax al elevador del paciente
con las cuatro correas.
Botones para el accesorio de
la correa del tórax
Fase II- Elevación. Levante lentamente al paciente con el control manual. Mientras lo
levante, el paciente deberá sujetarse a las empuñaduras.
Fase III – Estabilización. Tras elevar al paciente a la posición vertical, las correas del tórax
lo mantendrán estabilizado. Las correas del tórax están instaladas a ambos lados del apoyo
para el tórax. Ahora puede sacar las correas. Para terminar la estabilización, deberá utilizar
el cinturón que estabiliza las caderas y el tronco de la sección transversal. De esta forma, el
paciente quedará protegido en los cuatro puntos de apoyo: pies, rodillas, caderas y tórax.
Página 8
Albatros II
2012-09
Botones para el accesorio del cinturón
Observe cómo se estabiliza a un paciente de forma apropiada.
Página 9
Albatros II
2012-09
2.2
Uso del sistema JUMBO (batería, caja de control + cargador
de batería incluido)
JUMBO es un sistema modular que combina un accionador, una caja de control y una
batería en una solución flexible desarrollada especialmente para elevadores de pacientes.
2.2.1 Batería
La batería está encima de la caja de control y se puede sustituir con
un sistema de clip integrado.
Voltaje primario
Temperatura ambiente
Temperatura ambiente de
almacenamiento
Humedad relativa de
almacenamiento
Conformidad
24 V CC
+5°C a +40 °C
-10 °C a +50°C
máx. 90% (sin condensación)
probado según IEC 606011
2.2.2 Caja de control + cargador de batería incluido
La caja de control está diseñada con una parada
de emergencia roja y un cargador de batería
interno.
Voltaje primario
Voltaje secundario
(voltaje de carga)
Corriente secundaria
(corriente de carga)
Protecciones
100 - 240 V CA / 50/60 Hz
24 V CC, máx. 250 V A
Temperatura
ambiente
Temperatura
ambiente de
almacenamiento
Humedad relativa
de almacenamiento
Conformidad
+5°C a +40 °C
máx. 10 A
Protegido contra polarización
inversa, sobrecargas eléctricas
y temperatura extrema
-10 °C a +50°C
máx. 90% (sin
condensación)
probado según IEC 606011
Nos reservamos el derecho a aplicar modificaciones técnicas.
2.2.3 Cargador externo (OPCIONAL)
El cargador externo se debe montar en la pared.
El cargador permite cargar la batería de
repuesto (opcional) para no tener que esperar a
que se carguen las baterías para poder utilizar el
elevador de pacientes.
Voltaje primario
Corriente de carga
Temperatura
ambiente
Temperatura
ambiente de
almacenamiento
Humedad relativa
de almacenamiento
Página 10
100 - 240 V CA / 50/60 Hz
máx. 650 mA
+5°C a +40 °C
-10 °C a +50°C
máx. 90% (sin
condensación)
Albatros II
2012-09
2.2.4 Carga de las baterías
Use solo la caja de control con el cargador de batería incluido en el Albatros o el cargador
externo pensado para montarse en la pared.
Se recomienda recargar las baterías regularmente para asegurarse de que el elevador siga
operativo y para ampliar la vida útil de las baterías. La caja de control emitirá un sonido de
advertencia para indicarle que la batería está a un 50% de su capacidad.
•
PRIMER USO
Inserte primero el cable de alimentación por el lado del conector en el conector adecuado de
la caja de control. El lado del enchufe del cable de alimentación se debe insertar en la toma
de pared. La carga dura unas 24 horas.
•
RECARGA
L ADVERTENCIA: Riesgo de lesiones: no utilice el elevador con el cable de
alimentación conectado a la toma de pared.
Cuando las baterías se están cargando, se ilumina un indicador
amarillo (sobre On) y un indicador naranja (sobre Charge).
Una vez finalizado el proceso de recarga, debe desconectar siempre en primer lugar el
cable de alimentación de la toma de pared y luego el enchufe del conector de la caja de
control.
No utilice el elevador mientras se está recargando.
Si las baterías no se usan durante un período considerable de tiempo, se descargan solas
lentamente (descarga profunda). En estos casos, es imposible recargarlas con el cargador
de baterías suministrado. Por tanto, es necesario recargarlas como mínimo una vez al mes
aunque no se utilicen.
2.3
Manejo del elevador
Tenga en cuenta las especificaciones técnicas por las que se debe regir el elevador de
pacientes (Albatros II). El manejo del elevador de pacientes se debe encomendar
exclusivamente a personas autorizadas formadas en su uso y manejo.
L ADVERTENCIA: Riesgo de quemaduras – tenga cuidado cuando circule por
entornos calientes o fríos (luz solar, frío extremo, sauna, etc.) durante un periodo
de tiempo suficiente y al tocarlo.
2.3.1 Extensión del chasis
Para conectar al elevador una silla de ruedas u
otro elemento de asiento, así como para elevar
la estabilidad del elevador, se puede
incrementar la distancia del brazo del chasis.
Sitúese detrás del elevador montado y sujete
los asideros de empuje del elevador de
pacientes (a izquierda y derecha, junto a la caja
de control). Con un pie, presione ligeramente el
pulsador basculante situado en la parte inferior
del chasis (izquierda o derecha) y podrá
aumentar o reducir la distancia del brazo del
chasis.
Página 11
Albatros II
2012-09
2.3.2 Frenos de estacionamiento
Fije las dos ruedas posteriores del chasis
presionando ligeramente hacia abajo los
pedales de freno con la punta del pie hasta que
queden encastrados. Para soltar los frenos,
vuelva a presionar ligeramente los pedales con
la punta del pie hacia arriba hasta que las
ruedas queden libres.
2.3.3 Estribos
Los estribos
se pueden montar o desmontar
con los ganchos
al/del chasis del elevador
de pacientes. Si necesita que sus pies
permanezcan estables, puede utilizar los
reposapiés especiales
con correas de
velcro para obtener estabilización.
2.3.4 Apoyo para piernas
L ADVERTENCIA: Riesgo de lesiones: no deje caer el apoyo para piernas sobre el
paciente cuando realice los ajustes.
El apoyo para piernas
se puede montar
en la barra del elevador de pacientes
con el perno de seguridad .
El apoyo para piernas está destinado a
mantener las piernas del paciente en la
posición correcta y utilizarse como apoyo
para las piernas del paciente cuando este
se ponga de pie.
Los apoyos para piernas se pueden ajustar en profundidad y a 9 alturas diferentes.
1 = Barra para ajuste de altura
2 = Palanca para ajuste de profundidad
Altura del estribo a
la parte superior
del apoyo para
piernas
Posición
690 mm
Orificio 1
665 mm
Orificio 2
640 mm
Orificio 3
No utilizar
Orificio 4
No utilizar
Orificio 5
495 mm
Orificio 6
470 mm
Orificio 7
445 mm
Orificio 8
420 mm
Orificio 9
Tabla 2: Ajuste de altura del apoyo
para piernas
Página 12
Albatros II
2012-09
2.3.5 Apoyo para el tórax
A fin de estabilizar y apoyar el tórax, el
elevador dispone de un cojín para el tórax y
de correas de velcro.
El apoyo para el tórax puede ajustarse en
dos posiciones distintas: 1045 y 1200 mm.
Dichas posiciones se miden desde los
estribos hasta la parte superior del apoyo
para el tórax.
1. Saque el perno de seguridad .
2. Ajuste el apoyo para el tórax en la
posición deseada. La posición de la
placa de ajuste
debe ser la misma
que la mostrada en la ilustración.
3. Coloque el perno de seguridad
con
firmeza.
2.3.6 Subir y bajar el brazo basculante
El control manual permite ajustar gradualmente el brazo basculante
en cualquier punto.
1
2
1
= Levantar el brazo basculante
2
= Bajar el brazo basculante
L
Al usar la función de elevación hasta el extremo del motor
elevador, el sistema electrónico activa el interruptor limitador
(función de seguridad). Emplee la función de elevación
únicamente en el centro del rango de ajuste.
Fuerza de activación de los pulsadores: < 5N
Coloque el control manual en el tubo superior de los asideros para mover el elevador de
pacientes. Esta es la posición más ergonómica.
Página 13
Albatros II
2012-09
2.3.7 Mover el elevador de pacientes
L ADVERTENCIA: Riesgo de que los dedos queden atrapados: tenga cuidado al
pasar por lugares estrechos (p. ej. puertas).
1.
Sitúese detrás del elevador de pacientes y sujete los asideros (a izquierda y derecha,
junto a la batería y la caja de control) con las dos manos.
2.
Asegúrese de que los dos frenos de las ruedas traseras estén sueltos.
3.
Desplace lentamente el elevador de pacientes hasta la posición deseada.
Si no lleva carga, recomendamos que mueva el elevador de pacientes hacia atrás, para
superar los obstáculos (como umbrales, esquinas o muebles) con mayor facilidad.
Para mover el elevador de pacientes, use sólo los asideros de empuje; no utilice
ningún otro componente (accionador, control manual...) para hacerlo.
2.4 Sistema de asiento
L ADVERTENCIA: Riesgo de lesiones: use solo arneses adecuados para los
pacientes.
L ADVERTENCIA: Riesgo de lesiones: no utilice arneses dañados.
El elevador de pacientes Albatros II solo se debe usar con arneses diseñados para los
elevadores de pacientes Vermeiren Albatros II.
Consulte las instrucciones de uso en el manual del usuario de los sistemas de asiento
correspondientes.
2.5
Normas de seguridad
A continuación le ofrecemos algunos consejos para su propia seguridad:
L
El uso y manejo del elevador de pacientes está reservado a personas autorizadas
formadas en el uso del elevador.
L
Tenga en cuenta que, para usar el elevador, debe tener suficiente espacio a los lados
del elevador y sobre éste, ya que de lo contrario, al moverse las funciones de ajuste
pueden causar daños o lesiones.
L
Vigile siempre el brazo de elevación para evitar lesiones.
L
El elevador de pacientes sólo se puede usar sobre superficies lisas sobre las cuales
las 4 ruedas toquen el suelo por igual.
L
Sólo se pueden emplear sistemas de asiento aprobados y previstos para el elevador
de pacientes (véanse las instrucciones de uso de los sistemas de asiento
correspondientes). Si usa otros sistemas de asiento, será por su propio riesgo.
L
Siga las indicaciones del personal de asistencia o de personas instruidas para que
nadie sufra lesiones mientras usa el elevador.
L
Compruebe el estado de salud del paciente y asegúrese de que es posible levantarlo
con este elevador de pacientes. (Consulte el uso previsto del elevador).
L
Tenga cuidado al manipular fuego, sobre todo con los cigarrillos encendidos, puesto
que los sistemas de asiento son inflamables.
L
No supere nunca la carga máxima (150 kg). En caso de sobrecarga, el panel de
control se desconecta.
L
Al usar sistema de asiento con una carga máxima, se emplea la carga más baja
entre el elevador del paciente y el sistema de asiento.
L
El fabricante no se responsabiliza por los daños y las lesiones provocados por un
manejo inadecuado o por la no observancia de las indicaciones de estas
instrucciones de uso.
Página 14
Albatros II
2012-09
L
L
Use sólo los asideros de empuje para mover el elevador de pacientes; no utilice
ningún otro componente (accionador, control manual...) para hacerlo.
Tire del brazo de elevación hacia arriba antes de usarlo manualmente y compruebe
que el brazo de elevación se cae por sí mismo. Si no es así, póngase en contacto
con su distribuidor especializado.
2.6
Emergencia
En casos de emergencia, se debe usar la parada de emergencia y la función de bajada de
emergencia.
2.6.1 Parada de emergencia
En caso de emergencia y durante el montaje y
desmontaje, la parada de emergencia se activa
presionando el botón rojo de la caja de control.
Presione el botón y gírelo en la dirección de las flechas.
Si se presiona el botón hasta el final, girar en la dirección
opuesta a la indicada por las flechas.
La parada de emergencia se
desactiva girando el botón rojo en la
dirección de las flechas.
2.6.2 Bajada de emergencia manual
L ADVERTENCIA: Riesgo de lesiones: ajuste la bajada de emergencia manual para
el peso del paciente.
En caso de corte del suministro eléctrico o cuando las
baterías estén vacías, la bajada de emergencia se puede
realizar por medio del tirador rojo (1) del extremo inferior
del motor. Esta bajada de emergencia está configurada
de fábrica para un peso del paciente de 50 kg.
Calibración estándar: 2500 N, 15 mm/s para bajar el
paciente.
1
Tenga en cuenta que la bajada de emergencia manual solo es posible cuando el paciente
está sentado en el elevador de pacientes.
Fuerza de tiro: 10 mm para una fuerza de 80 a 100 N.
Página 15
Albatros II
2012-09
3
Instalación y ajuste
Este capítulo contiene instrucciones destinadas a los distribuidores especializados.
Para encontrar un centro de servicio o un distribuidor especializado cerca de usted,
póngase en contacto con el centro Vermeiren más próximo. Puede encontrar una lista con
los centros Vermeiren en la última página.
L ADVERTENCIA: Riesgo por limitaciones peligrosos; utilice únicamente las
limitaciones indicadas en este manual.
3.1
•
•
•
Intercambio de baterías
No asumimos responsabilidad alguna por los daños causados por el uso de una
batería incorrecta.
No use la batería a temperaturas inferiores a +5 °C o superiores a +50 °C (la
temperatura ideal es de +20 °C).
Al abrir las baterías se anula cualquier responsabilidad del fabricante, así como
cualquier reclamación.
La batería se puede sustituir mediante un sistema de clip integrado.
Para sustituir la batería, tire del sistema de clip
integrado. La placa se levantará y se podrá
extraer la batería del soporte (caja de control).
3.2
Montaje o desmontaje
3.2.1 Desembalaje
L ADVERTENCIA: Riesgo de lesiones: después de desembalar y antes de
continuar con el montaje, compruebe siempre que el botón de parada de
emergencia (pulsador rojo de la caja de control) esté presionado.
El embalaje del elevador de pacientes se ha seleccionado para garantizar una protección
óptima durante el transporte.
1.
Saque el elevador de pacientes de la caja y
compruebe que están todos los elementos y que
ninguna pieza presente defectos visibles. Si detecta
daños, diríjase a su sucursal distribuidora.
Página 16
Albatros II
2012-09
2.
Antes de montar el elevador, active los frenos de las
ruedas para que no se mueva inesperadamente.
Presione ligeramente con la punta del pie sobre la
placa de freno de las ruedas hacia abajo, hasta que
se bloqueen. Para soltar el freno, vuelva a presionar
ligeramente con la punta del pie hacia arriba hasta
que las ruedas queden libres.
3.2.2 Montaje
L ADVERTENCIA: Riesgo de aplastamiento: tenga cuidado de no atrapar, aplastar
ni cortar ninguna parte del cuerpo o cable durante el montaje.
1. Retire el eje de sujeción (eje insertado) en la parte
inferior del mástil, presionando ligeramente el
pulsador en el extremo del eje. El eje de sujeción
sólo se puede sacar un poco.
2. Suelte ligeramente el seguro de transporte (tornillo
de muletilla); ahora puede levantar el mástil.
2.a Al colocar el mástil en su
posición, puede oír como
encaja el seguro de
soporte
(tornillo
de
tracción).
klick
Página 17
Albatros II
2012-09
3.
L ADVERTENCIA: Riesgo de lesiones –
Asegúrese de que el eje de sujeción esté
correctamente insertado.
Asegure el mástil desplazando el eje de sujeción en
el extremo del mástil con el pulsador presionado
hasta que se asome por el otro extremo. Suelte el
pulsador del eje de sujeción y compruebe si se
puede sacar de nuevo.
4. Retire el brazo basculante
del extremo superior del
poste . Para ello, deberá
tirar del pasador .
5.
Página 18
Coloque
la
columna
deslizante
con el apoyo
para los pies
en
el tubo del bastidor del
elevador de pacientes.
Vuelva
a
apretar
la
empuñadura .
Albatros II
2012-09
6.
Fije el pasador y el soporte
deslizante
en el brazo
basculante
con el perno
de bloqueo .
7. Saque el accionador con
suavidad tras extraer el
clip negro .
8.
Monte el accionador en el
brazo
basculante
bloqueando el perno
.
Tenga cuidado de colocar
muy bien el accionador
entre el brazo basculante.
9. Monte el estribo en el chasis del elevador de
pacientes con los ganchos.
Página 19
Albatros II
2012-09
10. Monte el apoyo para piernas
mediante el perno
en
de bloqueo . Coloque el apoyo para piernas
la altura y profundidad deseadas.
1. Monte el apoyo para el tórax
en la columna deslizante
con el perno de bloqueo
a una altura cómoda para
cada paciente.
3.2.3 Desmontaje
L ADVERTENCIA: Riesgo de aplastamiento: tenga cuidado de no atrapar, aplastar
ni cortar ninguna parte del cuerpo o cable durante el desmontaje.
L ADVERTENCIA: Riesgo de lesiones: compruebe que el botón de parada de
emergencia (pulsador rojo de la caja de control) esté activado para evitar
movimientos de ajuste accidentales.
2. Fije las dos ruedas posteriores del chasis
presionando ligeramente hacia abajo los pedales de
freno con la punta del pie hasta que queden
bloqueados. Para soltar los frenos, vuelva a
presionar ligeramente los pedales con la punta del
pie hacia arriba hasta que las ruedas queden libres.
3. Saque el apoyo para el
tórax
de la columna
deslizante
con el perno
de bloqueo .
Página 20
Albatros II
2012-09
4. Extraiga el apoyo para piernas
de bloqueo .
mediante el perno
5. Extraiga el estribo del chasis del elevador de
pacientes.
6. Desmonte el accionador
(motor)
del
brazo
basculante
retirando
el
perno de bloqueo .
7. Mueva el accionador hasta
la posición inferior y coloque
el accionador en el clip
negro .
Página 21
Albatros II
2012-09
8. Saque el pasador y el
soporte deslizante
del
con el
brazo basculante
perno de bloqueo .
9. Afloje la palanca . Saque
y
la columna deslizante
el apoyo para los pies
del
tubo
del
bastidor
del
elevador de pacientes.
10. Mueva el brazo basculante
a la posición inferior
.
Apriete el pasador en el
extremo superior del poste,
en el orificio del brazo
basculante .
Página 22
Albatros II
2012-09
11. Retire el eje de sujeción (eje insertado) en la
parte inferior del mástil, presionando ligeramente
el pulsador en el extremo del eje. El eje de
sujeción sólo se puede sacar un poco.
12.
L ADVERTENCIA: Riesgo de lesiones –
Con el mástil desbloqueado, debido a su
peso, puede originarse una intensa
fuerza de caída.
Tire del seguro de soporte (tornillo de tracción) hasta
que el mástil se pueda abatir. Ahora puede abatir el
mástil hacia delante.
Empuje el poste lo más adelante que pueda.
13.
L ADVERTENCIA: Riesgo de lesiones Asegúrese de que el eje de sujeción esté
correctamente insertado.
Asegure el mástil desplazando el eje de sujeción en
el extremo del mástil con el pulsador presionado
hasta que se asome por el otro extremo. Suelte el
pulsador del eje de sujeción y compruebe si se
puede sacar de nuevo.
4
Mantenimiento
Para consultar el manual de mantenimiento de los elevadores de pacientes, visite el sitio
web de Vermeiren.
5
Números de pedido
Ruedas (ø 100 mm)
Ruedas con freno (ø 100 mm)
E Caja de control Albatros
E Motor 7,5KN Albatros
E Control manual Albatros
E Batería Albatros
E Placa de construcción Albatros
E Caja de control de conector gris Albatros
E Cable Albatros
E Cargador externo CHJ2 para Albatros
E Placa de construcción cargador externo Albatros
1903403
1903402
1906137
1906229
1906138
1906139
1906230
1906232
1906233
1906423 (OPCIONAL)
1906424 (OPCIONAL)
Sistema de asiento
Sistema de asiento
Sistema de asiento SU
Correa derecha para el tórax
Correa izquierda para el tórax
Apoyo para el tórax de espuma
2991605
2991627
2991603
2991604
2991600
Página 23
Albatros II
2012-09
Spis treści
Wstęp ................................................................................................... 2
1
Opis produktu .......................................................................... 3
1.1
1.2
1.3
1.4
1.5
2
Sposób użycia ........................................................................... 7
2.1
2.2
2.3
2.4
2.5
2.6
3
Informacje ogólne ....................................................................................................... 7
Korzystanie z systemu JUMBO (akumulator, skrzynka sterująca wraz z ładowarką
akumulatora).............................................................................................................. 10
Obsługa podnośnika pacjenta .................................................................................... 12
Siedzisko ................................................................................................................... 15
Zasady bezpieczeństwa ............................................................................................. 15
Nagłe przypadki ........................................................................................................ 16
Montaż i regulacja ................................................................. 17
3.1
3.2
4
5
Przeznaczenie .............................................................................................................. 3
Parametry techniczne .................................................................................................. 4
Rysunek ....................................................................................................................... 6
Objaśnienie symboli .................................................................................................... 7
Dostawa ....................................................................................................................... 7
Wymiana akumulatora............................................................................................... 17
Montaż lub demontaż ................................................................................................ 17
Konserwacja ........................................................................... 24
Numery części podawane w zamówieniu ............................. 24
Strona 1
Albatros II
2012-09
Wstęp
Przede wszystkim pragniemy Państwu podziękować za zaufanie, jakim nas Państwo
obdarzyli, dokonując wyboru jednego z naszych produktów.
Podnośniki pacjenta Vermeiren są konstruowane na podstawie wieloletnich badań i
doświadczenia. W procesie projektowania szczególną uwagę poświęcono łatwości użycia i
solidności wyrobu.
Na szacowaną żywotność podnośnika pacjenta olbrzymi wpływ ma konserwacja oraz
pielęgnacja podnośnika.
Niniejsza instrukcja pomoże Państwu zapoznać się z obsługą podnośnika.
Postępowanie zgodnie z instrukcją użytkownika oraz instrukcją konserwacji stanowi
zasadniczy warunek gwarancji.
Niniejsza instrukcja obsługi odzwierciedla aktualny stan produktu. Firma Vermeiren
zastrzega sobie jednak prawo do wprowadzenia zmian bez obowiązku dostosowania lub
wymiany wcześniej dostarczonych modeli.
W razie jakichkolwiek pytań prosimy kontaktować się ze sprzedawcą.
Strona 2
Albatros II
2012-09
1
Opis produktu
1.1
Przeznaczenie
Podnośnik pacjenta jest przeznaczony dla osób o ograniczonej zdolności lub braku
zdolności chodzenia.
Podnośnik pacjenta jest zaprojektowany do transportu jednej osoby.
Podnośnik pacjenta dostosowany do użytku wewnątrz pomieszczeń.
Pacjenta na podnośniku powinien podnosić opiekun.
Budowa podnośnika pozwala na wykorzystanie w sytuacji gdy pacjent nie jest zdolny do
samodzielnego chodzenia, między innymi z powodu:
•
•
•
•
•
pareza;
deformacji kończyn;
kacheksji;
atrofii;
oraz przez osoby starsze.
W celu dostosowania produktu do indywidualnych wymagań, należy uwzględnić następujące
warunki:
•
•
•
•
rozmiary i masa ciała (maks. 150 kg);
stan fizyczny i psychiczny;
warunki mieszkaniowe;
otoczenie
Podnośnika należy używać wyłącznie na płaskich powierzchniach, a wszystkie cztery kółka
powinny być w kontakcie z podłożem.
Podnośnik może być wykorzystany do przeniesienia pacjenta do/z wanny czy brodzika, ale
nie podczas kąpieli czy brania prysznica.
Przejeżdżanie przez przeszkody podczas przenoszenia pacjenta jest surowo zabronione.
Podnośnik pacjenta nie należy wykorzystywać w roli drabiny, nie służy on również do
transportu ciężkich lub gorących przedmiotów.
Podczas użytkowania na matach, dywanach lub luźnych przykryciach podłogowych może
dojść do uszkodzenia powierzchni wykładzinowej.
Należy korzystać wyłącznie z akcesoriów zatwierdzonych przez firmę Vermeiren.
Należy sprawdzić, czy końcowa część silnika regulacyjnego ma pomiar bezpieczeństwa.
Podnośnika należy używać wyłącznie na środkowych parametrach zakresu regulacji, a nie
od strony silnika podnośnika.
Postępowanie zgodnie z instrukcją użytkownika oraz instrukcją konserwacji stanowi
zasadniczy warunek gwarancji.
Osoby niedowidzące mogą skontaktować się ze sprzedawcą w celu uzyskania instrukcji
użytkowania.
Podnośnik pacjenta jest przeznaczony do ponownego wykorzystania.
Strona 3
Albatros II
2012-09
1.2
Parametry techniczne
Do przodu
Strona 4
Albatros II
2012-09
Marka
Adres
Typ
Model
Vermeiren
Vermeirenplein 1/15, B-2920 Kalmthout
Podnośnik pacjenta
Albatros II
Wymiary na
Wymiary
rysunku
Najniższa pozycja centralnego punktu ograniczenia
ruchu*
Maksymalna pozycja centralnego punktu
ograniczenia ruchu*
Zakres podnoszenia (zakres wysokości)
l
1060 mm
k
1687 mm
m
637 mm
Długość ramienia
1000 mm
Długość całkowita
1115 mm
Szerokość całkowita
685 mm
1380 mm (najniższa pozycja siłownika)
1687 mm (najwyżasza pozycja siłownika)
1115 mm (brak możliwości składania)
Wysokość całkowita
Długość po złożeniu / demontażu
Szerokość po złożeniu / demontażu
685 mm (brak możliwości składania)
Wysokość po złożeniu / demontażu
500 mm
Minimalny rozstaw ramion
r
467 mm
Maksymalny rozstaw ramion
q
769 mm
Wysokość kolumny / Wysokość ramy
Szerokość całkowita (pozycja złożona), wymiar
zewnętrzny
Szerokość całkowita (pozycja rozłożona), kółka
jezdne z przodu
Min. odległość pomiędzy ścianą / CSP* (wysokość
minimalna)
Min. odległość pomiędzy ścianą / CSP* (zasięg
maksymalny)
Min. odległość pomiędzy ścianą / CPOR* (wysokość
maksymalna)
Koło skrętu
n
117 mm
584 mm
P
945 mm
w3 (=w2)
285 mm
w2 (=w3)
285 mm
w1
870 mm
1160 mm
Waga całkowita
Waga podwozia wraz z silnikiem + skrzynka
sterująca
Waga akumulatora
50,60 kg
Waga podnóżka
5,10 kg
Waga poduszka klatki piersiowej
1,40 kg
Waga podpórki pod nogi
Waga uchwytu poduszki na nogi oraz kolumny
ślizgacza
Maksymalne obciążenie
3,00 kg
Dowolna wysokość, co najmniej
Zasięg maksymalny przy 600 mm wraz z podpórką
pod nogi
Zasięg maksymalny przy 600 mm bez podpórki pod
nogi
Maksymalny zakres od słupa nośnego
Zakres od słupa nośnego z odstępem 700 mm
57 mm
34,50 kg
2,90 kg
3,60 kg
150 kg
a1
300 mm
a2
360 mm
b
c
495 mm
375 mm
Wyjście napięcia
24V
Napięcie zasilające
maks. 250 VA
100-240V ~ maks. 37-53 VA
Maksymalny pobór prądu
maks. 400 mA
Temperatura użytkowa
od +5 °C do +40°C
od 20% do 90% przy 30°C – brak
kondensacji
< 50 dB (A)
Wilgotność powietrza
Poziom hałasu
Ciśnienie powietrza
od 700 do 1060 hPa
Strona 5
Albatros II
2012-09
Marka
Adres
Typ
Model
Vermeiren
Vermeirenplein 1/15, B-2920 Kalmthout
Podnośnik pacjenta
Albatros II
Wymiary na
Wymiary
rysunku
Skrzynka kontrolna
Linak CBJ2
Akumulator
Linak BAJ1
Sterowanie ręczne
Linak HB5X (< 5N siła uruchamiania )
silnik
Linak LA34 (7500N)
Klasa ochronności skrzynki kontrolnej
IPX4
Klasa zabezpieczeń akumulatora
IPX5
Klasa ochronności panelu sterowania ręcznego
IPX5
Klasa ochronności silnika
IP54
Klasa izolacji
II – typ B
Wydajność pracy
ok. 40 podniesień na jedno załadowanie
maks. 10% lub 2 minuty pracy ciągłej/18
min. przerwy
2.9 Ah
Praca okresowa
Pojemność akumulatora
Przycisk awaryjny
Tak
Ręczne obniżenie awaryjne
Tak
Elektryczne obniżenie awaryjne
Nie
Producent zastrzega sobie prawo do wprowadzania zmian parametrów technicznych. Tolerancja pomiaru +/– 15 mm / 1,5 kg
1 = maksymalna pozycja, 2 = maksymalny zakres, 3 = najniższa pozycja
* CPOR = centralny punkt ograniczenia ruchu
Tabela 1: Parametry techniczne
Podnośnik pacjenta spełnia wymogi następujących norm:
ISO 7176-8: Wymogi i metody testowania sił działających w bezruchu, przy uderzeniu oraz
zmęczeniu materiału.
ISO 7176-16: Odporność części pokrytych tapicerką na zapłon.
1.3
Rysunek
1
2
3
4
5
6
7
8
9
10
11
12
13
14
15
16
17
18
19
20
21
22
23
24
25
Strona 6
=
=
=
=
=
=
Zaczepy pasków mocujących
Ramię wspornika
Poduszka klatki piersiowej
Uchwyt slizgacza
Kolumna slizgacza
Uchwyt transportowy do
silnika
= Silnik
= Pas nozny
= Poduszka na nogi
= Podwozie
= Podnozek
= Kolo
= Kolo z hamulcem
= Pedał rozsuwania podwozia
= Podstopnik zapinany
na rzepy
= Blokada zabezpieczajaca
= Składana blokada
= Kabel zasilajacy
= Uchwyt do prowadzenia
podnośnika
= Sterowanie ręczne
= Slupek
= Skrzynka sterująca
= Przycisk awaryjny
= Akumulator
= Stolik
Albatros II
2012-09
1.4
Objaśnienie symboli
Należy stosować się do instrukcji bezpieczeństwa!
Przed użyciem należy przeczytać instrukcję obsługi!
Wydzielone punkty zbiórki i recyklingu urządzeń elektrycznych i elektronicznych
CE deklaracja
1.5
Dostawa
Dostarczany podnośnik Albatros II firmy Vermeiren będzie zawierał:
• podwozie wyposażone w 4 kółka (w tym 2 z hamulcami)
• słupek z uchwytami do prowadzenia podnośnika
• ramię wspornika wraz z nasadką na pas nośny
• skrzynkę sterującą (wraz z ładowarką akumulatora)
• akumulator
• sterowanie ręczne
• silnik
• instrukcję obsługi
• podnóżek + korytka na stopy
• podpórkę pod nogi
• podpórka klatki piersiowej
Przed użyciem należy się upewnić, że produkt zawiera wszystkie elementy oraz że żaden z
elementów nie uległ uszkodzeniu (np. podczas transportu).
Należy pamiętać, że podstawowa konfiguracja może się różnić w zależności od danego
kraju europejskiego. Aby uzyskać więcej informacji, należy skontaktować się z
wyspecjalizowanym sprzedawcą w swoim kraju.
2
Sposób użycia
W niniejszym rozdziale opisano normalne użytkowanie wózka. Instrukcje te są
przeznaczone dla użytkownika oraz wyspecjalizowanego sprzedawcy.
Podnośnik pacjenta jest dostarczany klientowi po złożeniu przez wyspecjalizowanego
sprzedawcę. IInstrukcje montażu wózka przeznaczone dla wyspecjalizowanego sprzedawcy
zawiera § 3.
2.1
Informacje ogólne
Podnośnik pacjenta może obsługiwać jedynie wykwalifikowany personel, który został
odpowiednio poinstruowany lub wyszkolony w zakresie specjalnego zastosowania.
Z podnośnika pacjenta można korzystać tylko wewnątrz budynków i na płaskich
powierzchniach. Użytkowanie na zewnątrz jest w zasadzie wykluczone. Do ładowania
akumulatorów należy używać wyłącznie dołączonej ładowarki.
Źródła fal elektromagnetycznych (np. telefony komórkowe) mogą wywoływać zakłócenia,
natomiast podzespoły elektroniczne podnośnika pacjenta mogą same zakłócać pracę innych
urządzeń elektrycznych.
Nawet jeśli sprzedawca udzielił informacji na temat sposobu obsługi podnośnika pacjenta,
zalecamy zapoznanie się ze wskazówkami znajdującymi w dalszej części instrukcji obsługi.
Strona 7
Albatros II
2012-09
2.1.1 Sposób podoszenia pacjenta
FAZA I – Przygotowanie. W tej fazie dojeżdżamy do pacjenta tak, aby stopy mozna włożyć
do specjalnych korytek a nastepnie stopy nalezy zapiąc paskmi. W następnej kolejności
stabilizujemy nogi poniżek kolan za pomoca pasa. Nalezy tak zapiąc pasek aby nogi byłu
dosc mocno stykały się z poduszką. Kolejnym krokiem jest założenie kamizelki a jej cztery
paski zamocowac na zaczepach.
Uchwyt do
zamocowania kamizelki
FAZA II- Unoszenie. Za pomoca pilota należy powoli unosic pacjenta do góry. Pacjent
powinien trzymać sie uchwytów w trakcie unoszenia.
FAZA III – Stabilizacja. Po spionizowaniu użytkownik stabilizowany jest pasem piersiowym
który jest zamocowany po obydwu stronach podparcia klatki piersiowej. Po jego zapieciu
można zdjąc kamizelkę. W celu cakowitej stabilizacji należy uzyc pas biodrowy który
stabilizuje biodra i części krzyżową tułowia. W ten sposób pacjent jest wpełni
zabezpieczony w cztery punkty podparcia : stopy, kolana, biodra, klatka piersiowa.
Strona 8
Albatros II
2012-09
Uchwyt do moccowania pasu
blodrowego
Widok prawidłowo ustabilizowanego pacjenta.
Strona 9
Albatros II
2012-09
2.2
Korzystanie z systemu JUMBO (akumulator, skrzynka
sterująca wraz z ładowarką akumulatora)
JUMBO to system modułowy obejmujący siłownik, skrzynkę sterującą i akumulator,
stanowiący elastyczne rozwiązanie stworzone specjalnie do podnośników osobowych.
2.2.1 Akumulator
Akumulator umieszczony jest nad skrzynką sterującą i istnieje
możliwość wymienienia go za pomocą zintegrowanego systemu
zacisków.
Napięcie pierwotne
Dopuszczalna temperatura
otoczenia
Dopuszczalna temperatura
przechowywania
Dopuszczalna wilgotność
względna przechowywania
Zgodność
24 VDC
+5°C do +40°C
od -10°C do +50°C
maks. 90% (bez efektu kondensacji)
przetestowano zgodnie z normą IEC 606011
2.2.2 Skrzynka sterująca wraz z ładowarką akumulatora
Skrzynka sterująca została wyposażona w
czerwony przycisk awaryjny i wewnętrzną
ładowarkę akumulatora.
Napięcie pierwotne
Napięcie wtórne
(napięcie ładowania)
Prąd wtórny (prąd
ładowania)
Zabezpieczenia
100 - 240 VAC / 50/60 Hz
24 VDC, maks. 250 VA
Dopuszczalna
temperatura
otoczenia
Dopuszczalna
temperatura
przechowywania
Dopuszczalna
wilgotność względna
przechowywania
Zgodność
+5°C do +40°C
maks. 10 A
Zabezpieczono przed
polaryzacją zaporową,
wyładowaniami elektrycznymi i
skrajnymi temperaturami
od -10°C do +50°C
maks. 90% (bez efektu
kondensacji)
przetestowano zgodnie z
normą IEC 606011
Producent zastrzega sobie prawo do wprowadzania zmian parametrów technicznych.
Strona 10
Albatros II
2012-09
2.2.3 Ładowarka zewnętrzna (OPCJONALNIE)
Ładowarkę zewnętrzną należy zamontować na
ścianie. Istnieje możliwość naładowania
akumulatora zapasowego (opcjonalny) za
pomocą ładowarki zewnętrznej, co pozwala
uniknąć przerw w korzystaniu z podnośnika
spowodowanych ładowaniem akumulatora.
Napięcie pierwotne
Prąd ładowania
Dopuszczalna
temperatura
otoczenia
Dopuszczalna
temperatura
przechowywania
Dopuszczalna
wilgotność względna
przechowywania
100 - 240 VAC / 50/60 Hz
maks. 650 mA
+5°C do +40°C
od -10°C do +50°C
maks. 90% (bez efektu
kondensacji)
2.2.4 Ładowanie akumulatorów
Należy korzystać wyłącznie ze skrzynki sterującej podnośnika Albatros II z dołączoną
ładowarką lub ładowarki zewnętrznej, która powinna być zamontowana na ścianie.
Zalecamy regularne ładowanie akumulatorów, aby zapewnić ciągłość użytkowania
podnośnika oraz wydłużyć żywotność akumulatorów. Skrzynka sterująca wyda informacyjny
dźwięk ostrzegawczy, kiedy poziom naładowania akumulatora spadnie do 50%.
•
PIERWSZE UŻYCIE
W pierwszej kolejności należy podłączyć kabel zasilający od strony złącza do
odpowiedniego złącza skrzynki sterującej. Od strony wtyczki kabel zasilający należy
podłączyć do gniazdka. Czas ładowania wynosi ok. 24 godziny.
•
PONOWNE ŁADOWANIE
L OSTRZEŻENIE: Ryzyko urazu – nie należy korzystać z podnośnika, kiedy
kabel zasilający jest podłączony do gniazdka.
W trakcie ładowania akumulatorów świecić się będzie dioda żółta (nad
włącznikiem) i pomarańczowa (ładowanie).
Kiedy proces ładowania się zakończy, należy zawsze najpierw wyłączyć główną wtyczkę z
gniazdka, a następnie odłączyć złącze od skrzynki sterującej.
Nie należy korzystać z podnośnika w trakcie ładowania!
Jeżeli akumulatory nie są używane przez dłuższy okres, ulegają powolnemu samoczynnemu
rozładowaniu
(nadmierne rozładowanie). Doładowanie ich za pomocą dołączonej do podnośnika ładowarki
akumulatorów staje się wtedy niemożliwe. Należy zatem ładować akumulatory przynajmniej
raz na miesiąc, nawet jeśli nie są używane.
Strona 11
Albatros II
2012-09
2.3
Obsługa podnośnika pacjenta
Podczas obsługi podnośnika pacjenta (Albatros II) należy uwzględnić dane techniczne.
Podnośnik może być obsługiwany wyłącznie przez upoważniony do tego personel, który
został przeszkolony w zakresie jego użytkowania i obsługi.
L OSTRZEŻENIE: Istnieje ryzyko poparzenia – Należy zachować ostrożność
podczas przewożenia przy bardzo wysokich i niskich temperaturach (na ostrym
słońcu, mrozie, w saunie itp.) przez dłuższy czas i przy kontakcie ze skórą.
2.3.1 Poszerzanie podstawy jezdnej
Istnieje możliwość zwiększenia rozstawu ramion
jezdnych, dzięki czemu pacjent może siedzieć
na wózku lub na innym sprzęcie, a podnośnik
jest bardziej stabilny.
Należy stanąć za zmontowanym w pełni
podnośnikiem i złapać za uchwyty do
prowadzenia podnośnika (po lewej i prawej
stronie, obok skrzynki sterującej). Naciśnij lekko
w dół stopą wspornik znajdujący się w dolnej
części podstawy jezdnej (z lewej lub z prawej
strony). Rozstaw ramion podstawy jezdnej
można teraz w łatwy sposób zmniejszyć lub
zwiększyć.
2.3.2 Blokady kół
Zabezpiecz dwa kółka jezdne znajdujące się na
tylnym końcu podstawy jezdnej, naciskając
lekko w dół stopą pedał hamulca kółek jezdnych
aż do momentu ich zablokowania. Aby zwolnić
hamulec, naciskaj stopą pedał hamulca lekko w
górę, aż do momentu odblokowania kółek
jezdnych.
2.3.3 Podnóżek
Podnóżek
można zamontować lub usunąć z
podwozia podnośnika za pomocą haków
.
Jeżeli jest wymagana większa stabilizacja stóp
można zastosować specjalne korytka
na
stopy z paskami stabilizacyjnymy.
Strona 12
Albatros II
2012-09
2.3.4 Podpórka pod nogi
L OSTRZEŻENIE: Ryzyko urazu – należy uważać, aby nie upuścić podpórki pod
nogi na pacjenta podczas ustawiania.
Podpórkę pod nogi
można zamontować
na poprzeczce podnośnika
za pomocą
zawleczki zabezpieczającej .
Podpórka pod nogi ma utrzymywać nogi
pacjenta w odpowiedniej pozycji i podpierać
je w trakcie wstawania.
Podpórkę pod nogi można regulować w głąb i ustawić 9 różnych wysokości.
1 = Słupek do regulacji wysokości
2 = Dźwignia do regulacji głębokości
Wysokość od
podnóżka do górnej
części podpórki
Pozycja
690 mm
Otwór 1
665 mm
Otwór 2
640 mm
Otwór 3
Nie używać
Otwór 4
Nie używać
Otwór 5
495 mm
Otwór 6
470 mm
Otwór 7
445 mm
Otwór 8
420 mm
Otwór 9
Tabela 2: Regulacja wysokości podpórki
pod nogi
2.3.5 Podparcie klatki piersiowej
W celu stabilizacji oraz podparcie klatki
piersowej podnośnik wyposazony jest w
podpórke wraz z pasami do stabilizacji.
Strona 13
Albatros II
2012-09
Poduszka klatki piersiowej może być
ustawiona w dwóch różnych pozycjach
1045 mm, 1200 mm. Pozycje te mierzone
są od podstawy na nogi (podnóżka) do
górnej części poduszki klatki piersiowej.
1. Usuń sworzeń blokujący
(szybkozłączkę) .
2. Ustaw poduszkę klatki piersiowej w
odpowiedniej pozycji. Pozycja uchwytu
powinna być taka , jak pokazana na
rys.
3. Zamontować sworzeń blokujący
(szybkozłączkę).
2.3.6 Podnoszenie i obniżanie ramienia wspornika
Możliwość ustawiania ręcznego pozwala łatwo ustawić ramię
wspornika w dowolnym miejscu.
1.
2
1
= Podnoszenie wysięgnika
2
= Obniżanie wysięgnika
L
W przypadku użycia podnośnika aż do końca przy silniku
podnośnika, zostanie elektronicznie aktywowany wyłącznik
krańcowy (funkcja zabezpieczająca). Podnoszenie należy
wykonywać tylko na środkowych parametrach zakresu regulacji.
Siła uruchamiania przycisków sterowniczych: < 5N
Należy ustawić regulator przy najwyższej rurce uchwytów do prowadzenia podnośnika. Jest
to najbardziej ergonomiczna pozycja.
2.3.7 Przesuwanie podnośnika
L OSTRZEŻENIE: Ryzyko przytrzaśnięcia — zachowaj ostrożność podczas
przejazdu przez ograniczone przestrzenie (np. drzwi).
1.
Należy stanąć za podnośnikiem i złapać obiema rękami za uchwyty (lewy i prawy, obok
akumulatora i skrzynki sterującej).
2.
Upewnij się, że oba hamulce tylnych kół jezdnych są zwolnione.
3.
Przesuwaj podnośnik pacjenta powoli do żądanej pozycji.
Jeśli na podnośniku nie jest przewożony pacjent, można prowadzić podnośnik do tyłu.
Pozwoli to na łatwe omijanie przeszkód (np. ościeżnic drzwiowych, rogów w pokojach lub
mebli).
Strona 14
Albatros II
2012-09
Podnośnik należy przesuwać wyłącznie przy pomocy uchwytów do prowadzenia, nie
dotykając żadnych innych elementów (siłownika, sterowania ręcznego itp.) .
2.4 Siedzisko
L OSTRZEŻENIE: Ryzyko urazu – należy używać wyłącznie odpowiednich dla
pacjentów pasów nośnych.
L OSTRZEŻENIE: Ryzyko urazu – nie należy używać uszkodzonych pasów
nośnych.
Z podnośnikiem osobowym Albatros II należy używać wyłącznie pasów nośnych
zaprojektowanych specjalnie do podnośników Albatros II firmy Vermeiren.
Wskazówki dotyczące zastosowania znajdują się w instrukcjach obsługi siedzisk.
2.5
Zasady bezpieczeństwa
Poniżej przedstawiono kilka wskazówek dotyczących bezpieczeństwa:
L
Podnośnik pacjenta może być użytkowany i obsługiwany wyłącznie przez
upoważniony personel przeszkolony w tym zakresie.
L
Należy pamiętać o tym, aby podczas użytkowania podnośnika z boku i powyżej niego
było wystarczająco dużo miejsca. Pozwoli to uniknąć uszkodzeń i obrażeń podczas
przesuwania.
L
Należy zawsze pamiętać o ramieniu podnośnika, aby zapobiec urazom.
L
Podnośnik pacjenta można użytkować tylko na płaskich powierzchniach, na których
wszystkie 4 kółka jezdne w tym samym stopniu dotykają podłoża.
L
Należy korzystać jedynie z siedzisk, które zatwierdzono i przewidziano do
zastosowania w podnośnikach pacjenta (por. Instrukcja obsługi siedziska). Jeśli
użytkownik korzysta z innych siedzisk, czyni to wyłącznie na własne ryzyko.
L
Aby podczas korzystania z podnośnika nie doszło do obrażeń, należy stosować się
do instrukcji personelu pielęgniarskiego lub innych odpowiednio poinstruowanych
osób.
L
Należy sprawdzić stan zdrowia pacjenta i upewnić się, że podniesienie pacjenta za
pomocą niniejszego podnośnika jest możliwe. (Patrz: Przeznaczenie)
L
Należy ostrożnie obchodzić się z ogniem, zwłaszcza z papierosami, gdyż siedzisko
może się zapalić.
L
Nigdy nie należy przekraczać maksymalnego obciążenia (150 kg). W przypadku
przeciążenia skrzynka kontrolna wyłącza się.
L
Przy używaniu pasów nośnych z maksymalnym obciążeniem, najniższe obciążenie
stosowane jest pomiędzy podnośnikiem a pasem nośnym.
L
Producent nie odpowiada za uszkodzenia i obrażenia ciała powstałe w wyniku
nienależytej obsługi lub niestosowania się do informacji zawartych w niniejszej
instrukcji obsługi.
L
Podnośnik należy przesuwać wyłącznie przy pomocy uchwytów do prowadzenia, nie
dotykając żadnych innych elementów (siłownika, sterowania ręcznego itp.).
L
Przed użyciem podnośnika, unieś jego ramię w górę i upewnij się, że opadnie ono
swobodnie. Jeśli tak się nie stanie, skontaktuj się ze sprzedawcą produktu.
Strona 15
Albatros II
2012-09
2.6
Nagłe przypadki
W razie nagłego przypadku należy użyć przycisku awaryjnego oraz funkcji obniżania w razie
wypadku.
2.6.1 Przycisk awaryjny
W razie nagłych wypadków oraz w trakcie montażu i
demontażu, należy aktywować przycisk awaryjny,
przyciskając czerwony przycisk na skrzynce sterującej.
Należy nacisnąć przycisk i przekręcić go zgodnie z
kierunkiem jaki pokazują strzałki. Jeśli przycisk jest
wciśnięty do końca, należy go przekręcić w kierunku
przeciwnym do tego, który pokazują strzałki.
Przycisk awaryjny dezaktywuje się
przekręcając
czerwony
przycisk
zgodnie z kierunkiem jaki wskazują
strzałki.
2.6.2 Ręczne obniżanie awaryjne
L OSTRZEŻENIE: Ryzyko urazu – należy dostosować funkcję obniżania
awaryjnego do wagi pacjenta.
Obniżania awaryjnego w przypadku braku zasilania lub
rozładowania się akumulatora można dokonać za
pomocą czerwonego przycisku pociągnięcia (1) w dolnej
części
silnika.
Obniżanie
awaryjnie
fabrycznie
dostosowane jest do pacjenta o wadze 50 kg.
Standardowa kalibracja: 2500N, 15 mm/s, aby obniżyć
pacjenta.
1
Należy pamiętać, że ręczne obniżanie awaryjne jest możliwe wyłącznie jeśli pacjent siedzi
na podnośniku.
Siła pociągnięcia: 10 mm dla siły od 80 do 100N.
Strona 16
Albatros II
2012-09
3
Montaż i regulacja
Instrukcje zawarte w niniejszym rozdziale są przeznaczone dla wyspecjalizowanego
sprzedawcy.
Aby uzyskać informację o odpowiednim punkcie serwisowym lub wyspecjalizowanym
sprzedawcy, należy skontaktować się z najbliższym przedstawicielem firmy Vermeiren.
Wykaz przedstawicieli firmy Vermeiren podano na ostatniej stronie.
L OSTRZEŻENIE: Istnieje ryzyko stosowania groźnych dla bezpieczeństwa
zakresów - Należy używać wyłącznie zakresów opisanych w niniejszej instrukcji.
3.1
•
•
•
Wymiana akumulatora
Producent nie ponosi odpowiedzialności za uszkodzenia spowodowane
korzystaniem z nieodpowiedniego akumulatora.
Nie należy używać akumulatora w temperaturach poniżej +5°C lub powy żej +50°C
(idealna temperatura to +20°C).
W przypadku otwarcia akumulatora odpowiedzialność producenta wygasa, a
wszelkie roszczenia zostają anulowane.
Akumulator można wymienić za pomocą zintegrowanego systemu zacisków.
Aby wymienić akumulator, należy pociągnąć
zintegrowany system zacisków. Pokrywa
podniesie się i będzie można wyciągnąć
akumulator z obudowy (skrzynki sterującej).
3.2
Montaż lub demontaż
3.2.1 Rozpakowywanie
L OSTRZEŻENIE: Ryzyko urazu – po rozpakowaniu i przed dalszym montażem,
zawsze należy w pierwszej kolejności upewnić się, że przycisk awaryjny
(czerwony przycisk na skrzynce sterującej) został wciśnięty.
Opakowanie podnośnika pacjenta wybrano pod kątem zapewnienia optymalnej ochrony
podczas transportu.
1.
Wyciągnij podnośnik pacjenta z kartonu i sprawdź
kompletność dostawy oraz to, czy poszczególne
części nie posiadają widocznych usterek. W
przypadku uszkodzeń zwróć się do lokalnej filii
dystrybucyjnej.
Strona 17
Albatros II
2012-09
2.
Przed montażem zabezpiecz podnośnik pacjenta
przed niezamierzonym ruchem za pomocą
wszystkich rolek hamujących. W tym celu naciskaj
stopą płytkę hamulcową kółek jezdnych lekko w dół,
do momentu ich zablokowania. Aby zwolnić hamulec,
naciskaj stopą płytkę hamulcową lekko w górę, do
momentu odblokowania kółka jezdnego.
3.2.2 Montaż
L OSTRZEŻENIE: Ryzyko przytrzaśnięcia – należy uważać, aby żadna część ciała
ani przewód nie zostały przytrzaśnięte, zmiażdżone lub przecięte w trakcie
montażu.
1. Usuń oś zabezpieczającą (oś wtykową) znajdującą
się na dolnym końcu słupa, wciskając lekko przycisk
znajdujący się na jej głowicy. Teraz oś
zabezpieczającą można w prosty sposób wyjąć.
2. Lekko poluzuj zabezpieczenie transportowe (śrubę
dociskową z przetyczką). Teraz słup można
podnieść.
2.a Po umieszczeniu słupa w
pozycji
końcowej
następuje
słyszalne
zatrzaśnięcie
zabezpieczenia
pozycji
stojącej
(śruba
rozciągana).
Strona 18
Albatros II
2012-09
3.
L OSTRZEŻENIE: Ryzyko urazu – Należy
sprawdzić, czy blokada zabezpieczająca jest
włożona prawidłowo.
Zabezpiecz słup, przesuwając oś zabezpieczającą
znajdującą się na końcu słupa, trzymając wciśnięty
przycisk tak długo, aż znajdzie się ona na drugim
końcu. Zwolnij przycisk osi zabezpieczającej i
sprawdź, czy można tę oś ponownie wyciągnąć.
4. Należy
usunąć
ramię
wspornika z górnej części
słupka . Można to zrobić
pociągając za końcówkę
.
5. Zmontować uchwyt na
poduszkę na nogi
wraz z kolumną
ślizgacza
do
uchwytu w ramie
podnośnika.
Dokręcić dźwignię .
Strona 19
Albatros II
2012-09
6. Uchwyt ślizgacza
wraz z przykręconym
ślizgaczem
należy
przymocować
za
pomocą szybkozłączki
do
ramienia
podnośnika .
7. Należy delikatnie usunąć
siłownik, wyciągając go z
czarnego zacisku .
8.
Następnie siłownik należy
przymocować do ramienia
wspornika przy pomocy
sworznia blokującego
.
Ważne jest, aby siłownik
był
odpowiednio
umieszczony w ramieniu
wspornika.
9. Podnóżek należy przymocować
podnośnika za pomocą haków.
do
podwozia
10. Podpórkę pod nogi
należy zamocować przy
pomocy sworznia blokującego
. Podpórkę
można ustawić na wybranej wysokości i głębokości.
Strona 20
Albatros II
2012-09
11. Za pomocą sworznia
blokującego
(szybkozłączki)
przymocować poduszkę
do
klaki piersiowej
kolumny ślizgacza
na
odpowiedniej i wygodnej
wysokości dla danego
pacjęta.
3.2.3 Demontaż
L OSTRZEŻENIE: Ryzyko przytrzaśnięcia – należy uważać, aby żadna część ciała
L
ani przewód nie zostały przytrzaśnięte, zmiażdżone lub przecięte w trakcie
demontażu.
OSTRZEŻENIE: Ryzyko urazu – należy upewnić się, że przycisk awaryjny
(czerwony przycisk na skrzynce sterującej) jest aktywny, aby zapobiec
nieprzewidzianym ruchom.
1. Zabezpiecz dwa kółka jezdne znajdujące się na
tylnym końcu podstawy jezdnej, naciskając lekko w
dół stopą pedał hamulca kółek jezdnych aż do
momentu ich zablokowania. Aby zwolnić hamulec,
naciskaj stopą pedał hamulca lekko w górę, aż do
momentu odblokowania kółek jezdnych.
2. W celu usunięcia poduszki
z
na klatkę piersiową
kolumny
ślizgacza
odepnij sworzeń blokujący
(szybkozłączkę) .
3. Podpórkę pod nogi
sworznia blokującego
Strona 21
należy usunąć przy pomocy
.
Albatros II
2012-09
4. Podnóżek należy usunąć z podwozia podnośnika.
5. Siłownik
(silnik)
należy
zdemontować z ramienia
wspornika,
usuwając
sworzeń blokujący .
6. Należy przesunąć siłownik
w dół i umieścić go w
czarnym zacisku .
7. W celu usunięcia ślizgacza
oraz uchwyt ślizgacza
z
ramienia podnośnika
posłuż się sworzniem
blokującym .
Strona 22
Albatros II
2012-09
8. Poluzuj dźwignię
. Usuń
oraz
kolumnę ślizgacza
uchwyt na poduszkę na nogi
z ramy podnośnika.
9. Ramię wspornika należy
.
przesunąć
w
dół
Końcówka powinna zostać
przymocowana do górnego
końca słupka, w otworze
ramienia wspornika .
10. Usuń oś zabezpieczającą (oś wtykową)
znajdującą się na dolnym końcu słupa, wciskając
lekko przycisk znajdujący się na jej głowicy.
Teraz oś zabezpieczającą można w prosty
sposób wyjąć.
L
OSTRZEŻENIE: Ryzyko urazu – W
przypadku odryglowania słupa
istnieje niebezpieczeństwo jego
upadku z dużą siłą ze względu na
jego ciężar.
Ciągnij zabezpieczenie pozycji stojącej (śrubę
rozciąganą) do momentu, aż możliwe będzie
przechylenie słupa. Teraz słup można przechylić do
przodu.
11.
Słupek należy przechylić do przodu, najdalej jak to
możliwe.
Strona 23
Albatros II
2012-09
12.
L
OSTRZEŻENIE: Ryzyko urazu –
Należy sprawdzić, czy blokada
zabezpieczająca jest włożona
prawidłowo.
Zabezpiecz słup, przesuwając oś zabezpieczającą
znajdującą się na końcu słupa, trzymając wciśnięty
przycisk tak długo, aż znajdzie się ona na drugim
końcu. Zwolnij przycisk osi zabezpieczającej i
sprawdź, czy można tę oś ponownie wyciągnąć.
4
Konserwacja
Instrukcje dotyczące konserwacji podnośnika znajdziesz na stronie
Vermeiren: www.vermeiren.pl.
5
internetowej firmy
Numery części podawane w zamówieniu
Kółka (ø 100 mm)
Kółka z hamulcami (ø 100 mm)
E Skrzynka sterująca Albatros
E Silnik 7,5KN Albatros
E Regulator sterowania ręcznego Albatros
E Akumulator Albatros
E Konstrukcja Albatros
E Szara wtyczka skrzynki sterującej Albatros
E Kabel Albatros
E Ładowarka zewnętrzna CHJ2 dla modelu Albatros
E Ładowarka zewnętrzna konstrukcji Albatros
1903403
1903402
1906137
1906229
1906138
1906139
1906230
1906232
1906233
1906423 (OPCJONALNIE)
1906424 (OPCJONALNIE)
Siedzisko
Siedzisko
Siedzisko SU
Prawy pas poduszki klatki piersiowej
Lewy pas klatki poduszki piersiowej
Pianka wspornika poduszki klatki piersiowej
2991605
2991627
2991603
2991604
2991600
Strona 24
Adres/Adresse/Address
Adresse/Indrizzo
Woonplaats/Domicile/Home
Wohnort/Citta
E-mail
Artikel/Article/Article
Artikel/Articolo
Reeks nr./N° de série/Serie nr.
Serien-Nr./No. di serie
Aankoopdatum/Date d’achat/Date of purchase
Kaufdatum/Data di acquisto
Stempel verkoper/Timbre du vendeur
Dealer stamp/Händlerstempel
Timbro del rivenditore
Tel.: 00 32 (0)3 620 20 20
Fax: 00 32 (0)3 666 48 94
www.vermeiren.com
Naam/Nom/Name
Name/Nome
B
N.V. VERMEIREN N.V.
VERMEIRENPLEIN 1-15
B-2920 Kalmthout
WAARBORG
GARANTIE
WARRANTY
GARANTIE
GARANZIA
VERMEIREN
Naam/Nom/Name
Name/Nome
✂
- danno dovuto al cattivo ed improprio utilizzo della
carrozzina,
- danno subito durante il trasporto,
- incidente o caduta,
- smontaggio, modifica, o riparazione effettuate in proprio,
- usura abituale della carrozzina,
- invio del tagliando di garanzia con la data di acquisto.
Questa garanzia non potra’ essere applicata nei seguenti
casi:
RISERVE
Per far valere la garanzia, e’ necessario indirizzarla al vostro
distributore di fiducia che presentera’ al produttore il
tagliando.
CONDIZIONI
La carrozzine manuali sono garantite 5 anni, la carrozzine
ultra leggera 4 anni. Le carrozzine elettroniche, tricicli, letti e
altri prodotti: 2 anno contro tutti i difetti di costruzione o di
materiale (batterie 6 mesi). Multiposizioni 3 anni. Questa
garanzia e’ limitata alle sostituzione di parti riconosciute difettose.
GARANZIA CONTRATTUALE
ITALIANO
A
Om aanspraak te kunnen maken op de waarbord, bezorgt u
het garantiecertificaat dat u heeft bewaard, aan uw Vermeiren dealer. De waarborg is enkel geldig in de zetel van de
onderneming.
TOEPASSINGSVOORWAARDEN
Op de manuele rolstoelen geven wij 5 jaar, lichtgewicht rolstoelen 4 jaar. Op de elektronische rolstoelen, driewielers,
bedden en andere producten : 2 jaar waarborg op constructie - of materiaalfouten (batterijen 6 maanden). Op multipositie rolstoelen geven we 3 jaar waarborg. Deze garantie
is uitdrukkelijk beperkt tot de vervanging van defecte stukken
of onderdelen.
CONTRACTUELE GARANTIE
Cette garantie ne pourra être appliquée en cas de:
RESERVES
Pour prétendre à cette garantie, il faut présenter le certificat
de garantie que vous avez conservé à votre distributeur Vermeiren. La garantie est uniquement valable au siège de la
société.
CONDITIONS D’APPLICATION
Les fauteuils manuels standard sont garantis 5 ans, les fauteuils ultra légers 4 ans. Les fauteuils électroniques, tricycles, lits et d’autres produits: 2 ans contre tous vices de
construction ou de matériaux (batteries 6 mois). Fauteuils
multiposition 3 ans. Cette garantie est expressément limitée
au remplacement des éléments ou pièces détachées reconnues défectueuses.
GARANTIE CONTRACTUELLE
GARANTIEERKLÄRUNG
DEUTSCH
CONTRACTUAL WARRANTY
Wir garantieren, dass für unsere Rollstühle hochwertige Produkte verwendet werden, die in sorgfältiger Verarbeitung
nach dem neuesten Stand der Technik montiert werden.
Bevor Ihr Rollstuhl unser Werk verlassen hat, wurde er einer
eingehenden Endkontrolle unterzogen, um auch letzte,
eventuell vorhandene Mängel aufzuspüren.
ENGLISH
We offer 5 years of warranty on standard wheelchairs, lightweight wheelchairs 4 years. Electronic wheelchairs, tricycles,
beds and other products: 2 years (batteries 6 months) and
multiposition wheelchairs 3 years. This warranty is limited to
the replacement of defective or spare parts.
APPLICATION CONDITIONS
In order to claim tis warranty, part “B” of this card has to be
given to your official Vermerien dealer. The warranty is only
valid when parts are replaced by Vermeiren in Belgium.
EXCEPTIONS
This warranty is not valid in case of:
Auf Standardrollstühle gewähren wir eine Garantie von 5
Jahren, auf Leichtgewichtrollstühle 4 Jahre, auf elektronische Rollstühle, Dreiräder, Betten und andere Produkte: 2
Jahre (Batterien 6 Monate), auf Multifunktionsrollstühle 3
Jahre.
In dieser Garantie eingeschlossen sind alle Mängel, die auf
einen Produkt- oder Verarbeitungsfehler zurückzuführen
sind, Dieser Garantie unterliegen keine Schäden aus unsachgemäßer Benutzung. Ebenfalls sind Verschleißteile von
der Garantie ausgenommen.
Sollte einmal der Fall eingetreten sein, dass Sie aus
berechtigtem Grunde mit Ihrem Rollstuhl unzufrieden sind,
so wenden Sie sich bitte unverzüglich an Ihren Fachhändler.
Er wird sich in enger Zusammenarbeit mit uns darum bemühen, eine für Sie zufriedenstellende Lösung zu finden.
prodotto al nostro web site, http://www.vermeiren.be/registration
- terugsturen binnen de 8 dagen na aankoop of registreer uw product via
onze website, http://www.vermeiren.be/registration
- à renvoyer dans les 8 jours après achat ou régistrer votre produit sur
notre site, http://www.vermeiren.be/registration
- please return within 8 days of date of purchase or register your product at
our website, http://www.vermeiren.be/registration
- zurückschicken innerhalb von 8 Tagen nach kauf oder registrieren Sie
Ihr Produkt auf unserer website, http://www.vermeiren.be/registration
- da restituire entro 8 giorni dalla data di acquisto o registri il vostro
- damage due to incorrect usage of the wheelchair,
- damage during transport,
- involvement in an accident,
- a dismount, modification or repair carried outside
of our company and/or official Vermeiren
dealership,
- normal wear of the wheelchair,
- non-return of the warranty card
A
B
- in geval van herstelling, kaart “B” bijvoegen.
- en cas de réparation, veuillez ajouter la carete “B”.
- in case of repair, please add part “B”.
- im Falle einer Reparatur, Karte “B” beifügen
- in case di riparazione, rispediteci la carta “B”.
✂
UITZONDERINGEN
FRANCAIS
Deze garantie is niet van toepassing in geval van:
- dommage dû à la mauvaise utilisation du fauteuil,
- endommagement pendant le transport,
- accident ou chute,
- démontage, modification ou réparation fait en
dehors de notre société,
- usure normale du fauteuil,
- non retour du coupon de garantie.
NEDERLANDS
- schade te wijten aan het verkeerd gebruik
van de rolstoel,
- beschadiging tijdens het transport,
- een val of een ongeval
- een demontage, wijziging of herstelling uitgevoerd
buiten onze firma,
- normale slijtage van de rolstoel,
- niet inzenden van de garantiestrook.
N.V. VERMEIREN N.V.
Vermeirenplein 1/15
B-2920 Kalmthout
BELGIUM
✂
Albatros II
2012-09
SERVICE
The patient hoist was serviced:
Le lève-personnes a été contrôlé:
De patient lift is gecontroleerd:
Das patientenlifter wurde überprüft:
Il sollevatore do soffito è stat ispezionata:
La elevador de techo ha sido revisada por:
Z podnośnika pacjenta był serwisowany:
Dealer´s stamp • Cachet du revendeur • Stempel van de handelaar
Händlerstempel • Timbro del rivenditore • Sello del distribuidor •
Dealerzy pieczęć:
Dealer´s stamp • Cachet du revendeur • Stempel van de handelaar
Händlerstempel • Timbro del rivenditore • Sello del distribuidor •
Dealerzy pieczęć:
Date • Datum • Data • Fecha:
Date • Datum • Data • Fecha:
Dealer´s stamp • Cachet du revendeur • Stempel van de handelaar
Händlerstempel • Timbro del rivenditore • Sello del distribuidor •
Dealerzy pieczęć:
Dealer´s stamp • Cachet du revendeur • Stempel van de handelaar
Händlerstempel • Timbro del rivenditore • Sello del distribuidor •
Dealerzy pieczęć:
Date • Datum • Data • Fecha:
Date • Datum • Data • Fecha:
Dealer´s stamp • Cachet du revendeur • Stempel van de handelaar
Händlerstempel • Timbro del rivenditore • Sello del distribuidor •
Dealerzy pieczęć:
Dealer´s stamp • Cachet du revendeur • Stempel van de handelaar
Händlerstempel • Timbro del rivenditore • Sello del distribuidor •
Dealerzy pieczęć:
Date • Datum • Data • Fecha:
Date • Datum • Data • Fecha:
Dealer´s stamp • Cachet du revendeur • Stempel van de handelaar
Händlerstempel • Timbro del rivenditore • Sello del distribuidor •
Dealerzy pieczęć:
Dealer´s stamp • Cachet du revendeur • Stempel van de handelaar
Händlerstempel • Timbro del rivenditore • Sello del distribuidor •
Dealerzy pieczęć:
Date • Datum • Data • Fecha:
Date • Datum • Data • Fecha:
Dealer´s stamp • Cachet du revendeur • Stempel van de handelaar
Händlerstempel • Timbro del rivenditore • Sello del distribuidor •
Dealerzy pieczęć:
Dealer´s stamp • Cachet du revendeur • Stempel van de handelaar
Händlerstempel • Timbro del rivenditore • Sello del distribuidor •
Dealerzy pieczęć:
Date • Datum • Data • Fecha:
Date • Datum • Data • Fecha:
•
•
•
•
•
•
•
For service checklists an additional technical information, please see our specialist dealers nearest to you.
More information on our website at: www.vermeiren.com.
Les listes des contrôles à effectuer lors des entretiens de même que toute autre information technique sont
disponibles auprès de nos filiales. Pour de plus amples informations, consultez le site: www.vermeiren.fr.
Servicelijsten en andere technische informatie kunt u aanvragen bij onze vestigingen. Meer informatie vindt
u ook op: www.vermeiren.be.
Servicechecklisten und weitere technische Informationen erhalten Sie über unsere Niederlassungen.
Informationen unter: www.vermeiren.de, www.vermeiren.at, www.vermeiren.ch.
Gli elenchi di controllo di manutenzione e ulteriori informazioni tecniche sono disponibili presso le nostre
filiali. Per informazioni consultare il sito: www.vermeiren.com.
Para un servicio de revisión o información técnica adicional, por favor, consulte a nuestros distribuidores
especialistas más cercanos. Más información en nuestra página web: www.vermeiren.com.
Po dodatkowe informacje techniczne oraz listę części zamiennych proszę się kontaktować z
naszym wyspecjalizowanymi dystrybutorami w pobliżu miejsca zamieszkania. Więcej informacji
na naszej stronie www.vermeiren.pl.
Germany
N.V. Vermeiren N.V.
Vermeirenplein 1 / 15
B-2920 Kalmthout
Tel: +32(0)3 620 20 20
Fax: +32(0)3 666 48 94
website: www.vermeiren.be
e-mail: [email protected]
Vermeiren Deutschland GmbH
Wahlerstraße 12 a
D-40472 Düsseldorf
Tel: +49(0)211 94 27 90
Fax: +49(0)211 65 36 00
website: www.vermeiren.de
e-mail: [email protected]
France
Austria
Vermeiren France S.A.
Z. I., 5, Rue d´Ennevelin
F-59710 Avelin
Tel: +33(0)3 28 55 07 98
Fax: +33(0)3 20 90 28 89
website: www.vermeiren.fr
e-mail: [email protected]
L. Vermeiren Ges. mbH
Winetzhammerstraße 10
A-4030 Linz
Tel: +43(0)732 37 13 66
Fax: +43(0)732 37 13 69
website: www.vermeiren.at
e-mail: [email protected]
Italy
Switzerland
Reatime S.R.L.
Vermeiren Suisse S.A.
Viale delle Industrie 5
I-20020 Arese MI
Tel: +39 02 99 77 07
Fax: +39 02 93 58 56 17
website: www.reatime.it
e-mail: [email protected]
Hühnerhubelstraße 59
CH-3123 Belp
Tel: +41(0)31 818 40 95
Fax: +41(0)31 818 40 98
website: www.vermeiren.ch
e-mail: [email protected]
Poland
The Netherlands
Vermeiren Polska Sp. z o.o
ul. Łączna 1
PL-55-100 Trzebnica
Tel: +48(0)71 387 42 00
Fax: +48(0)71 387 05 74
website: www.vermeiren.pl
e-mail: [email protected]
Vermeiren Nederland B.V.
Domstraat 50
NL-3864 PR Nijkerkerveen
Tel: +31(0)33 2536424
Fax: +31(0)33 2536517
website: www.vermeiren.com
e-mail: [email protected]
Spain
Czech Republic
Vermeiren Iberica, S.L.
Trens Petits, 6. - Pol. Ind. Mas Xirgu.
17005 Girona
Tel: +34 902 48 72 72
Fax: +34 972 40 50 54
website: www.vermeiren.es
e-mail: [email protected]
Vermeiren ČR S.R.O.
Sezemická 2757/2 - VGP Park
193 00 Praha 9 - Horní Počernice
Tel: +420 731 653 639
Fax: +420 596 121 976
website: www.vermeiren.cz
e-mail: [email protected]
R.E.: N.V. Vermeiren N.V., Vermeirenplein 1/15 - 2920 Kalmthout - Belgium – 2012-09- Instruction Manual Albatros II- vA
Belgium