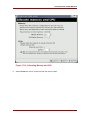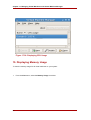
1
Virtualization Guide
5.1
Red Hat Enterprise Linux
Virtualization_Guide
ISBN: N/A
Publication date: January 2008
Virtualization Guide
This Guide contains information on configuring, creating and monitoring guest operating
systems on Red Hat Enterprise Linux 5.1, using virsh, vmm, and xend.If you find an error in the
Red Hat Enterprise Linux Virtualization Guide, or if you have thought of a way to make this
manual better, we would like to hear from you! Submit a report in Bugzilla
(http://bugzilla.redhat.com/bugzilla/) against the product Red Hat Enterprise Linux and the
component Virtualization_Guide.
Virtualization Guide: Red Hat Enterprise Linux
Copyright © 2008 Red Hat, Inc.
Copyright © 2008 Red Hat, Inc. This material may only be distributed subject to the terms and conditions set forth in the
Open Publication License, V1.0 or later with the restrictions noted below (the latest version of the OPL is presently
available at http://www.opencontent.org/openpub/).
Distribution of substantively modified versions of this document is prohibited without the explicit permission of the
copyright holder.
Distribution of the work or derivative of the work in any standard (paper) book form for commercial purposes is
prohibited unless prior permission is obtained from the copyright holder.
Red Hat and the Red Hat "Shadow Man" logo are registered trademarks of Red Hat, Inc. in the United States and other
countries.
All other trademarks referenced herein are the property of their respective owners.
The GPG fingerprint of the [email protected] key is:
CA 20 86 86 2B D6 9D FC 65 F6 EC C4 21 91 80 CD DB 42 A6 0E
1801 Varsity Drive
Raleigh, NC 27606-2072
USA
Phone: +1 919 754 3700
Phone: 888 733 4281
Fax: +1 919 754 3701
PO Box 13588
Research Triangle Park, NC 27709
USA
Virtualization Guide
1. Red Hat Virtualization System Architecture .............................................................. 1
2. Operating System Support ...................................................................................... 3
3. Hardware Support .................................................................................................. 5
4. Red Hat Virtualization System Requirements ........................................................... 7
5. Booting the System ................................................................................................ 9
6. Configuring GRUB ................................................................................................11
7. Booting a Guest Domain ........................................................................................13
8. Starting/Stopping a Domain at Boot Time ...............................................................15
9. Configuration Files ................................................................................................17
10. Managing CPUs ..................................................................................................19
11. Migrating a Domain .............................................................................................21
12. Configuring for Use on a Network .........................................................................23
13. Securing Domain0 ...............................................................................................25
14. Storage ..............................................................................................................27
15. Managing Virtual Machines with virsh ...................................................................29
1. Connecting to a Hypervisor ............................................................................29
2. Creating a Virtual Machine .............................................................................29
3. Configuring an XML Dump .............................................................................29
4. Suspending a Virtual Machine ........................................................................29
5. Resuming a Virtual Machine ..........................................................................30
6. Saving a Virtual Machine ...............................................................................30
7. Restoring a Virtual Machine ...........................................................................30
8. Shutting Down a Virtual Machine ....................................................................30
9. Rebooting a Virtual Machine ..........................................................................31
10. Terminating a Domain .................................................................................31
11. Converting a Domain Name to a Domain ID ..................................................31
12. Converting a Domain ID to a Domain Name ..................................................31
13. Converting a Domain Name to a UUID .........................................................31
14. Displaying Virtual Machine Information .........................................................32
15. Displaying Node Information ........................................................................32
16. Displaying the Virtual Machines ....................................................................32
17. Displaying Virtual CPU Information ...............................................................33
18. Configuring Virtual CPU Affinity ....................................................................33
19. Configuring Virtual CPU Count .....................................................................33
20. Configuring Memory Allocation .....................................................................34
21. Configuring Maximum Memory .....................................................................34
22. Managing Virtual Networks ..........................................................................34
16. Managing Virtual Machines Using xend ................................................................37
17. Managing Virtual Machines with Virtual Machine Manager .....................................41
1. Virtual Machine Manager Architecture ............................................................41
2. The Open Connection Window ......................................................................41
3. Virtual Machine Manager Window ..................................................................42
4. Virtual Machine Details Window .....................................................................43
5. Virtual Machine Graphical Console .................................................................43
6. Starting the Virtual Machine Manager .............................................................44
7. Creating a New Virtual Machine .....................................................................45
v
Virtualization Guide
8. Restoring A Saved Machine ...........................................................................54
9. Displaying Virtual Machine Details .................................................................56
10. Configuring Status Monitoring ......................................................................61
11. Displaying Domain ID ..................................................................................62
12. Displaying Virtual Machine Status ................................................................64
13. Displaying Virtual CPUs ...............................................................................65
14. Displaying CPU Usage ................................................................................67
15. Displaying Memory Usage ...........................................................................68
16. Managing a Virtual Network .........................................................................70
17. Creating a Virtual Network ...........................................................................71
18. Red Hat Virtualization Troubleshooting .................................................................81
1. Logfile Overview and Locations ......................................................................81
2. Logfile Descriptions .......................................................................................81
3. Important Directory Locations ........................................................................82
4. Troubleshooting Tools ...................................................................................82
5. Troubleshooting with the Logs .......................................................................84
6. Troubleshooting with the Serial Console .........................................................85
7. Paravirtualized Guest Console Access ...........................................................85
8. Full Virtualization Guest Console Access ........................................................86
9. Implementing Lun Persistence .......................................................................86
10. SELinux Considerations ..............................................................................88
11. Accessing Data on Guest Disk Image ...........................................................88
12. Common Troubleshooting Situations ............................................................89
13. Loop Device Errors .....................................................................................90
14. Guest Creation Errors ..................................................................................90
15. Serial Console Errors ..................................................................................90
16. Network Bridge Errors .................................................................................91
17. Laptop Configurations .................................................................................92
18. Starting Domains Automatically During System Boot .....................................94
19. Modifying Domain0 .....................................................................................95
20. Guest Configuration Files ............................................................................96
21. Cloning the Guest Configuration Files ...........................................................97
22. Creating a Script to Generate MAC Addresses ..............................................97
23. Configuring Virtual Machine Live Migration ...................................................97
24. Interpreting Error Messages .........................................................................98
25. Online Troubleshooting Resources .............................................................101
19. Additional Resources .........................................................................................103
1. Useful Websites ..........................................................................................103
2. Installed Documentation ..............................................................................103
A. Lab 1 .................................................................................................................105
B. Lab 2 .................................................................................................................111
vi
Chapter 1.
Red Hat Virtualization System
Architecture
A functional Red Hat Virtualization system is multi-layered and is driven by the privileged Red
Hat Virtualization component. Red Hat Virtualization can host multiple guest operating systems.
Each guest operating system runs in its own domain, Red Hat Virtualization schedules virtual
CPUs within the virtual machines to make the best use of the available physical CPUs. Each
guest operating systems handles its own applications. These guest operating systems schedule
each application accordingly.
You can deploy Red Hat Virtualization in one of two choices: full virtualization or
paravirtualization. Full virtualization provides total abstraction of the underlying physical
system and creates a new virtual system in which the guest operating systems can run. No
modifications are needed in the guest OS or application (the guest OS or application is not
aware of the virtualized environment and runs normally). Paravirualization requires user
modification of the guest operating systems that run on the virtual machines (these guest
operating systems are aware that they are running on a virtual machine) and provide
near-native performance. You can deploy both paravirtualization and full virtualization across
your virtualization infrastructure.
The first domain, known as domain0 (dom0), is automatically created when you boot the
system. Domain0 is the privileged guest and it possesses management capabilities which can
create new domains and manage their virtual devices. Domain0 handles the physical hardware,
such as network cards and hard disk controllers. Domain0 also handles administrative tasks
such as suspending, resuming, or migrating guest domains to other virtual machines.
The hypervisor (Red Hat's Virtual Machine Monitor) is a virtualization platform that allows
multiple operating systems to run on a single host simultaneously within a full virtualization
environment. A guest is an operating system (OS) that runs on a virtual machine in addition to
the host or main OS.
With Red Hat Virtualization, each guests memory comes from a slice of the host's physical
memory. For paravirtual guests, you can set both the initial memory and the maximum size of
the virtual machine. You can add (or remove) physical memory to the virtual machine at runtime
without exceeding the maximum size you specify. This process is called ballooning.
You can configure each guest with a number of virtual cpus (called vcpus). The Virtual Machine
Manager schedules the vcpus according to the workload on the physical CPUs.
You can grant a guest any number of virtual disks. The guest sees these as either hard disks
or (for full virtual guests) as CD-ROM drives. Each virtual disk is served to the guest from a
block device or from a regular file on the host. The device on the host contains the entire full
disk image for the guest, and usually includes partition tables, multiple partitions, and potentially
LVM physical volumes.
Virtual networking interfaces runs on the guest. Other interfaces can run on the guest like
1
Chapter 1. Red Hat Virtualization System Architecture
virtual ethernet internet cards (VNICs). These network interfaces are configured with a
persistent virtual media access control (MAC) address. The default installation of a new guest
installs the VNIC with a MAC address selected at random from a reserved pool of over 16
million addresses, so it is unlikely that any two guests will receive the same MAC address.
Complex sites with a large number of guests can allocate MAC addresses manually to ensure
that they remain unique on the network.
Each guest has a virtual text console that connects to the host. You can redirect guest logins
and console output to the text console.
You can configure any guest to use a virtual graphical console that corresponds to the normal
video console on the physical host. You can do this for full virtual and paravirtual guests. It
employs the features of the standard graphic adapter like boot messaging, graphical booting,
multiple virtual terminals, and can launch the x window system. You can also use the graphical
keyboard to configure the virtual keyboard and mouse.
Guests can be identified in any of three identities: domain name (domain-name), identity
(domain-id), or UUID. The domain-name is a text string that corresponds to a guest
configuration file. The domain-name is used to launch the guests, and when the guest runs the
same name is used to identify and control it. The domain-id is a unique, non-persistent number
that gets assigned to an active domain and is used to identify and control it. The UUID is a
persistent, unique identifier that is controlled from the guest's configuration file and ensures that
the guest is identified over time by system management tools. It is visible to the guest when it
runs. A new UUID is automatically assigned to each guest by the system tools when the guest
first installs.
2
Chapter 2.
Operating System Support
Red Hat Virtualization's paravirtualization mode allows you to utilize high performance
virtualization on architectures that are potentially difficult to virtualize such as x86 based
systems. To deploy para-virtualization across your operating system(s), you need access to the
paravirtual guest kernels that are available from a respective Red Hat distro (for example, RHEL
4.0, RHEL 5.0, etc.). Whilst your operating system kernels must support Red Hat Virtualization,
it is not necessary to modify user applications or libraries.
Red Hat Virtualization allows you to run an unmodified guest kernel if you have Intel VT and
AMD SVM CPU hardware. You do not have to port your operating system to deploy this
architecture on your Intel VT or AMD SVM systems. Red Hat Virtualization supports:
• Intel VT-x or AMD-V Pacifica and Vanderpool technology for full and paravirtualization.
• Intel VT-i for ia64
• Linux and UNIX operating systems, including NetBSD, FreeBSD, and Solaris.
• Microsoft Windows as an unmodified guest operating system with Intel Vanderpool or AMD's
Pacifica technology.
To run full virtualization guests on systems with Hardware-assisted Virtual Machine (HVM),
Intel, or AMD platforms, you must check to ensure your CPUs have the capabilities needed to
do so.
To check if you have the CPU flags for Intel support, enter the following:
grep vmx /proc/cpuinfo
The output displays:
flags
: fpu tsc msr pae mce cx8 apic mtrr mca cmov pat pse36 clflush dts
acpi mmx fxsr sse sse2 ss ht tm syscall nx lm constant_tsc pni monitor
ds_cpl vmx est tm2 cx16 xtpr lahf_lm
If a vmx flag appears then you have Intel support.
To check if you have the CPU flags for AMD support, enter the following:
grep svm /proc/cpuinfo
cat /proc/cpuinfo | grep svm
3
Chapter 2. Operating System Support
The output displays:
flags
: fpu tsc msr pae mce cx8 apic mtrr mca cmov pat pse36 clflush dt
acpi mmx fxsr sse sse2 ss ht tm syscall nx mmtext fxsr_opt rdtscp lm
3dnowext pni cx16 lahf_lm cmp_legacy svm cr8_legacy
If an svm flag appears then you have AMD support.
note
In addition to checking the CPU flags, you should enable full virtualization within
your system BIOS.
4
Chapter 3.
Hardware Support
Red Hat Virtualization supports multiprocessor systems and allows you to run Red Hat
Virtualization on x86 architectured systems with a P6 class (or earlier) processors like:
• Celeron
• Pentium II
• Pentium III
• Pentium IV
• Xeon
• AMD Athlon
• AMD Duron
With Red Hat Virtualization, 32-bit hosts runs only 32-bit paravirtual guests. 64-bit hosts runs
only 64-bit paravirtual guests. And a 64-bit full virtualization host runs 32-bit, 32-bit PAE, or
64-bit guests. A 32-bit full virtualization host runs both PAE and non-PAE full virtualization
guests.
The Red Hat Enterprise Linux Virtualization kernel does not support more than 32GB of memory
for x86_64 systems. If you need to boot the virtualization kernel on systems with more than
32GB of physical memory installed, you must append the kernel command line with mem=32G.
This example shows how to enable the proper parameters in the grub.conf file:
title Red Hat Enterprise Linux Server (2.6.18-4.elxen)
root (hd0, 0)
kernel
/xen.gz-2.6.18-4-el5 mem=32G
module
/vmlinuz -2.6.18-4.el5xen ro root=LABEL=/
module
/initrd-2.6.18-4.el5xen.img
PAE (Physical Address Extension) is a technology that increases the amount of physical or
virtual memory available to user applications. Red Hat Virtualization requires that PAE is active
on your systems. Red Hat Virtualization 32 bit architecture with PAE supports up to 16 GB of
physical memory. It is recommended that you have at least 256 megabytes of RAM for every
guest you have running on the system. Red Hat Virtualization enables x86/64 machines to
address up to physical 64 GB. The Red Hat Virtualization kernels will not run on a non-PAE
system. To determine if a system supports PAE, type the following commands:
grep pae /proc/cpuinfo
5
Chapter 3. Hardware Support
The following output displays:
flags : fpu tsc msr pae mce cx8 apic mtrr mca cmov pat pse36 mmx fxsr sse
syscall mmtext 3dnowext 3dnow up ts
If your output matches (or is similar to) the above, then your CPU supports PAE. If the
command prompt displays nothing, then your CPU does not support PAE.
6
Chapter 4.
Red Hat Virtualization System
Requirements
The items listed below are required by the Red Hat Virtualization system:
• A working Red Hat RHEL 5 Linux distribution
• A working GRUB bootloader
• Root access
• A P6 class (or earlier) processor
• The Linux bridge-utils
• The Linux hotplug systems
• zlib development installation
• Python 2.2 runtime
• initscripts
The dependencies are configured automatically during the installation process.
Note
If your system CPU architecture is ia64, you need to manually install the
xen-ia64-guest-firmware package to run a fully virtualized guest. This
package is provided in the Supplementary CD and is not installed by default.
7
8
Chapter 5.
Booting the System
After installing the Red Hat Virtualization components, you must reboot the system. When the
boot completes, you must log into your system as usual. Then before you start Red Hat
Virtualization you must log in a root. The xend control daemon should already be initiated by
initscripts, but to start the xend manually, enter:
service xend start
You can also use chkconfig xend when installing to enable xend at boot time.
The xend node control daemon performs system management functions that relate to virtual
machines. This daemon controls the virtualized resources, and xend must be running to interact
with virtual machines. Before you start xend, you must specify the operating parameters by
editing the xend configuration file xend-config.sxp which is located in the etc/xen directory.
9
10
Chapter 6.
Configuring GRUB
GNU Grand Unified Boot Loader (or GRUB) is a program which enables the user to select
which installed operating system or kernel to load at system boot time. It also allows the user to
pass arguments to the kernel. The GRUB configuration file (located in /boot/grub/grub.conf)
is used to create a list of operating systems to boot in GRUB's menu interface. When you install
the kernel-xen RPM, a post script adds kernel-xen entries to the GRUB configuration file. You
can edit the grub.conf file and enable the following GRUB parameter:
title Red Hat Enterprise Linux Server (2.6.18-3.el5xen)
root
(hd0; 0)
kernel /xen.gz.-2.6.18-3.el5
module /vmlinuz-2.6..18-3.el5xen ro root=/dev/VolGroup00/LogVol00
quiet
module /initrd-2.6.18-3. el5xenxen.img
rhgb
If you set your Linux grub entries to reflect this example, the boot loader loads the hypervisor,
initrd image, and Linux kernel. Since the kernel entry is on top of the other entries, the kernel
loads into memory first. The boot loader sends (and recieves) command line arguments to and
from the hypervisor and Linux kernel. This example entry shows how you would restrict the
Domain0 linux kernel memory to 800 MB:
title Red Hat Enterprise Linux Server (2.6.18-3.el5xen)
root
(hd0; 0)
kernel /xen.gz.-2.6.18-3.el5 dom0_mem=800M
module /vmlinuz-2.6..18-3.el5xen ro root=/dev/VolGroup00/LogVol00
quiet
module /initrd-2.6.18-3. el5xenxen.img
rhgb
You can use these GRUB parameters to configure the Virtualization hypervisor:
mem
This limits the amount of memory that is available for domain0.
com1=115200, 8n1
This enables the first serial port in the system to act as serial console (com2 is assigned for the
next port, and so on...).
11
Chapter 6. Configuring GRUB
dom0_mem
This limits the amount of memory that is available for domain0.
dom0_max_vcpus
This limits the amount of CPUs visible to domain0.
acpi
This switches the ACPI hypervisor to the hypervisor and domain0. The ACPI parameter options
include:
/*
/*
/*
/*
/*
/*
**** Linux config options: propagated to domain0 ****/
"acpi=off":
Disables both ACPI table parsing and interpreter.
"acpi=force":
Overrides the disable blacklist.
"acpi=strict":
Disables out-of-spec workarounds.
"acpi=ht":
Limits ACPI from boot-time to enable HT.
"acpi=noirq":
Disables ACPI interrupt routing.
noacpi
This disables ACPI for interrupt delivery.
12
*/
*/
*/
*/
*/
Chapter 7.
Booting a Guest Domain
You can boot guest domains by using the xm application. You can also use virsh and the
Virtual Machine Manager to boot the guests. A prerequisite for booting a guest domain is to
install a guest host first. This example uses the xm create subcommand:
# xm create -c guestdomain1
The guestdomain1 is the configuration file for the domain you are booting. The -c option
connects to the actual console after booting.
13
14
Chapter 8.
Starting/Stopping a Domain at Boot
Time
You can start or stop running domains at any time. Domain0 waits for all running domains to
shutdown before restarting. You must place the configuration files of the domains you wish to
shut down in the /etc/xen/ directory. All the domains that you want to start at boot time must
be symlinked to /etc/xen/auto.
chkconfig xendomains on
The chkconfig xendomains on command does not automatically start domains; instead it will
start the domains on the next boot.
chkconfig xendomains off
Terminates all running Red Hat Virtualization domains. The chkconfig xendomains off
command shuts down the domains on the next boot.
15
16
Chapter 9.
Configuration Files
Red Hat Virtualization configuration files contain the following standard variables. Configuration
items within these files must be enclosed in quotes ("). These configuration files reside in the
/etc/xen directory.
Item
Description
pae
Specifies the physical address extention
configuration data.
apic
Specifies the advanced programmable
interrupt controller configuration data.
memory
Specifies the memory size in megabytes.
vcpus
Specifies the numbers of virtual CPUs.
console
Specifies the port numbers to export the
domain consoles to.
nic
Specifies the number of virtual network
interfaces.
vif
Lists the randomly-assigned MAC addresses
and bridges assigned to use for the domain's
network addresses.
disk
Lists the block devices to export to the
domain and exports physical devices to
domain with read only access.
dhcp
Enables networking using DHCP.
netmask
Specifies the configured IP netmasks.
gateway
Specifies the configured IP gateways.
acpi
Specifies the advanced configuration power
interface configuration data.
Table 9.1. Red Hat Virtualization Configuration Files
17
18
Chapter 10.
Managing CPUs
Red Hat Virtualization allows a domain's virtual CPUs to associate with one or more host CPUs.
This can be used to allocate real resources among one or more guests. This approach allows
Red Hat Virtualization to make optimal use of processor resources when employing dual-core,
hyperthreading, or other advanced CPU technologies. If you are running I/O intensive tasks, its
typically better to dedicate either a hyperthread or entire core to run domain0. The Red Hat
Virtualization credit scheduler automatically rebalances virtual cpus between physical ones, to
maximize system use. The Red Hat Virtualization system allows the credit scheduler to move
CPUs around as necessary, as long as the virtual CPU is pinned to a physical CPU.
19
20
Chapter 11.
Migrating a Domain
Migration is the transferal of a running virtual domain from one physical host to another. Red
Hat Virtualization supports two varieties of migration — offline and live. Offline migration moves
a virtual machine from one host to another by pausing it, transferring its memory, and then
resuming it on the host destination. Live migration does the same thing, but does not directly
affect the domain. When performing a live migration, the domain continues its usual activities,
and from the user perspective is unnoticeable. To initiate a live migration, both hosts must be
running Red Hat Virtualization and the xend daemon. The destinations host must have sufficient
resources (such as memory capacity) to accommodate the domain bandwidth after the
migration. Both the source and destination machines must have the same architecture and
virtualization extensions (such as i386-VT, x86-64-VT, x86-64-SVM, etc.) and must be on the
same L2 subnet.
When a domain migrates its MAC and IP addresses move with it. Only virtual machines with the
same layer-2 network and subnets will successfully migrate. If the destination node is on a
different subnet, the administrator must manually configure a suitable EtherIP or IP tunnel in the
remote node of domain0. The xend daemon stops the domain and copies the job over to the
new node and restarts it. The Red Hat Virtualization RPM does not enable migration from any
other host except the localhost (see the /etc/xend-config.sxp file for information). To allow the
migration target to accept incoming migration requests from remote hosts, you must modify the
target's xen-relocation-hosts-allow parameter. Be sure to carefully restrict which hosts are
allowed to migrate, since there is no authentication.
Since these domains have such large file allocations, this process can be time consuming. If
you migrate a domain with open network connections, they will be preserved on the host
destination, and SSH connections should still function. The default Red Hat Virtualization
iptables rules will not permit incoming migration connections. To allow this, you must create
explicit iptables rules.
You can use the xm migrate command to perform an offline migration :
xm migrate domain-id [destination domain]
You can use the xm migrate command to perform a live migration:
xm
migrate domain-id -l [destination domain]
You may need to reconnect to the domain's console on the new machine. You can use the xm
console command to reconnect.
21
22
Chapter 12.
Configuring for Use on a Network
Integrating Red Hat Virtualization into your network architecture is a complicated process and
depending upon your infrastructure, may require custom configuration to deploy multiple
ethernet interfaces and setup bridging.
Each domain network interface is connected to a virtual network interface in dom0 by a point to
point link. These devices are vif<domid> and <vifid>. vif1.0 for the first interface in domain
1; vif3.1 for the second interface in domain 3.
Domain0 handles traffic on these virtual interfaces by using standard Linux conventions for
bridging, routing, rate limiting, etc. The xend daemon employs two shell scripts to perform initial
configuration of your network and new virtual interfaces. These scripts configure a single bridge
for all virtual interfaces. You can configure additional routing and bridging by customizing these
scripts.
Red Hat Virtualization's virtual networking is controlled by the two shell scripts, network-bridge
and vif-bridge. xend calls these scripts when certain events occur. Arguments can be passed
to the scripts to provide additional contextual information. These scripts are located in the
/etc/xen/scripts directory. You can change script properties by modifying the
xend-config.sxp configuration file located in the /etc/xen directory.
network-bridge — When xend is started or stopped, this script initializes or shuts down the
virtual network. Then the configuration initialization creates the bridge xen—br0 and moves eth0
onto that bridge, modifying the routing accordingly. When xend finally exits, it deletes the bridge
and removes eth0, thereby restoring the original IP and routing configuration.
vif-bridge is a script that is invoked for every virtual interface on the domain. It configures
firewall rules and can add the vif to the appropriate bridge.
There are other scripts that you can use to help in setting up Red Hat Virtualization to run on
your network, such as network-route, network-nat, vif-route, and vif-nat. Or these
scripts can be replaced with customized variants.
23
24
Chapter 13.
Securing Domain0
When deploying Red Hat Virtualization on your corporate infrastructure, you must ensure that
domain0 cannot be compromised. Domain0 is the privileged domain that handles system
management. If domain0 is insecure, all other domains in the system are vulnerable. There are
several ways to implement security you should know about when integrating Red Hat
Virtualization into your systems. Together with other people in your organization,you should
create a 'deployment plan' that contains the operating specifications and services that will run
on Red Hat Virtualization, and what is needed to support these services. Here are some
security issues to consider when putting together a deployment plan:
• Run the lowest number of necessary services. You do not want to include too many jobs and
services in domain0. The less things running on domain0, the higher the level of security.
• Enable SeLINUX to help secure domain0.
• Use a firewall to restrict traffic to domain0. You can setup a firewall with default-reject rules
that will help secure attacks on domain0. It is also important to limit network facing services.
• Do not allow normal users to access domain0. If you do permit normal users domain0 access,
you run the risk of rendering domain0 vulnerable. Remember, domain0 is privileged, and
granting unprivilged accounts may compromise the level of security.
25
26
Chapter 14.
Storage
There are several ways to manage virtual machine storage. You can export a domain0 physical
block device (hard drive or partition) to a guest domain as a virtual block device (VBD). You can
also export directly from a partitioned image as a file-backed VBD. Red Hat Virtualization
enables LVM and blktap by default during installation. You can also employ standard network
protocols such as NFS, CLVM, or iSCSI to provide storage for virtual machines.
27
28
Chapter 15.
Managing Virtual Machines with
virsh
You can use the virsh application to manage virtual machines. This utility is built around the
libvirt management API and operates as an alternative to the xm tool or the graphical Virtual
Machine Manager. Unprivileged users can employ this utility for read-only operations. If you
plan on running xend/qemu, you should enable xend/qemu to run as a service. After modifying
the respective configuration file, reboot the system, and xend/qemu will run as a service. You
can use virsh to script vm work. Like the xm tool, you run virsh from the command line.
1. Connecting to a Hypervisor
You can use virsh to initiate a hypervisor session:
virsh connect <name>
Where <name> is the machine name of the hypervisor. If you want to initiate a read—only
connection, append the above command with —readonly.
2. Creating a Virtual Machine
You can make a new virtual machine session from an XML machine definition. If you have a
pre-existing guest that you created previously with the xm tool, you can also create a virtual
machine for it:
virsh create <path to XML configuration file>
3. Configuring an XML Dump
You can use virsh to perform a data dump for an existing virtual machine.
virsh dumpxml [domain-id | domain-name | domain-uuid]
This command outputs the domain information (in XML) to stdout . If you save the data to a
file, you can use the create option to recreate the virtual machine.
4. Suspending a Virtual Machine
You can use virsh to suspend a domain:
29
Chapter 15. Managing Virtual Machines with virsh
virsh suspend [domain-id | domain-name |domain-uuid]
When a domain is in a suspended state, it still consumes system RAM. There will also be no
disk or network I/O when suspended. This operation is immediate and the virtual machine must
be restarted with the resume option .
5. Resuming a Virtual Machine
You can use virsh to restore a suspended virtual machine:
virsh resume [domain-id | domain-name | domain-uuid]
This operation is immediate and the virtual machine parameters are preserved in a suspend
and resume cycle.
6. Saving a Virtual Machine
You can use virsh to save the current state of a virtual machine to a file:
virsh save [domain-name][domain-id | domain-uuid][filename]
This stops the virtual machine you specify and saves the data to a file, which may take some
time given the amount of memory in use by your virtual machine. You can restore the state of
the virtual machine with the restore option .
7. Restoring a Virtual Machine
You can use virsh to restore a virtual machine that you previously saved with the virsh save
option :
virsh restore [filename]
This restarts the saved virtual machine, which may take some time. The virtual machine's name
and UUID are preserved but are allocated for a new id.
8. Shutting Down a Virtual Machine
You can use virsh to shut down a virtual machine:
virsh shutdown [domain-id | domain-name | domain-uuid]
30
Rebooting a Virtual Machine
You can control the behavior of the rebooting virtual machine by modifying the on_shutdown
parameter of the xmdomain.cfg file.
9. Rebooting a Virtual Machine
You can use virsh to reboot a virtual machine:
virsh reboot [domain-id | domain-name | domain-uuid]
You can control the behavior of the rebooting virtual machine by modifying the on_reboot
parameter of the xmdomain.cfg file.
10. Terminating a Domain
You can use virsh to terminate a virtual machine:
virsh destroy [domain-name | domain-id | domain-uuid]
This command does an immediate ungraceful shutdown and stops any guest domain sessions
(which could potentially lead to file corruptted filesystems still in use by the virtual machine). You
should use the destroy option only when the virtual machine's operating system is
non-responsive. For a paravirtualized virtual machine, you should use the shutdown option .
11. Converting a Domain Name to a Domain ID
You can use virsh to convert a domain name or UUID to a domain id:
virsh domid [domain-name | domain-uuid]
12. Converting a Domain ID to a Domain Name
You can use virsh to convert a domain id or UUID to a domain name:
virsh domname [domain-name | domain-uuid]
13. Converting a Domain Name to a UUID
31
Chapter 15. Managing Virtual Machines with virsh
You can use virsh to convert a domain name to a UUID:
virsh domuuid [domain-id | domain-uuid]
14. Displaying Virtual Machine Information
You can use virsh to display information for a given virtual machine identified by its domain ID,
domain name, or UUID:
virsh dominfo [domain-id | domain-name | domain-uuid]
15. Displaying Node Information
You can use virsh to display node information:
virsh nodeinfo
The outputs displays something similar to:
CPU model
CPU (s)
CPU frequency
CPU socket(s)
Core(s) per socket
Threads per core:
Numa cell(s)
Memory size:
x86_64
8
2895 Mhz
2
2
2
1
1046528 kb
This displays the node information and the machines that support the virtualization process.
16. Displaying the Virtual Machines
You can use virsh to display the virtual machine list and the current state:
virsh list domain-name [ ——inactive
|
—— -all]
The ——inactive option lists inactive domains (domains that have been defined but are not
currently active). The — -all domain lists all domains, whether active or not. Your output
should resemble the this example:
32
Displaying Virtual CPU Information
ID
————————————————
0
1
2
3
Name
Domain0
Domain202
Domain010
Domain9600
State
running
paused
inactive
crashed
Here are the six domain states:
running
lists domains currently active on the CPU
blocked
lists domains that are blocked
paused
lists domains that are suspended
shutdown lists domains that are in process of shutting down
shutoff
lists domains that are completely down.
crashed
lists domains that are crashed
17. Displaying Virtual CPU Information
You can use virsh to display virtual CPU information from a virtual machine:
virsh vcpuinfo [domain-id | domain-name | domain-uuid]
18. Configuring Virtual CPU Affinity
You can use virsh to configure the affinity of virtuals CPUs with physical CPUs:
virsh vcpupin [domain-id | domain-name | domain-uuid] [vcpu] , [cpulist]
Where [vcpu] is the virtual VCPU number and [cpulist] lists the physical number of CPUs.
19. Configuring Virtual CPU Count
You can use virsh to modify a Virtual Machine's number of CPUs:
virsh setvcpus [domain-name | domain-id | domain-uuid] [count]
33
Chapter 15. Managing Virtual Machines with virsh
Note that the new count cannot exceed the amount you specified when you created the Virtual
Machine.
20. Configuring Memory Allocation
You can use virsh to modify a domain's memory allocation:
virsh setmem [domain-id | domain-name]
[count]
You must specify the [count] in kilobytes. Note that the new count cannot exceed the amount
you specified when you created the Virtual Machine. Values lower than 64 MB probably won't
work. You can adjust the Virtual Machine memory as necessary.
21. Configuring Maximum Memory
You can use virsh to modify a Virtual Machine's maximum memory:
virsh setmaxmem
[domain-name | domain-id | domain-uuid] [count]
You must specify the [count] in kilobytes. Note that the new count cannot exceed the amount
you specified when you created the Virtual Machine. Values lower than 64 MB probably won't
work. The maximum memory doesn't affect the current use of the Virtual Machine (unless the
new value is lower which should shrink memory usage).
22. Managing Virtual Networks
You can use virsh to manage virtual networks. To list virtual networks:
virsh net-list
This command generates output similar to:
[root@domain ~]# virsh net-list
Name
State
Autostart
----------------------------------------default
active
yes
vnet1
active
yes
vnet2
active
yes
To view network information for a specific virtual network:
34
Managing Virtual Networks
virsh net-dumpxml [vnet name]
This displays information about a specified virtual network in XML format:
[root@domain ~]# virsh net-dumpxml vnet1
<network>
<name>vnet1</name>
<uuid>98361b46-1581-acb7-1643-85a412626e70</uuid>
<forward dev='eth0'/>
<bridge name='vnet0' stp='on' forwardDelay='0' />
<ip address='192.168.100.1' netmask='255.255.255.0'>
<dhcp>
<range start='192.168.100.128' end='192.168.100.254' />
</dhcp>
</ip>
</network>
Other virsh commands used in managing virtual networks are:
• virsh net-autostart [network name] — Autostart a network specified as [network name]
• virsh net-create [XML file] — Generates and starts a new network using a preexisting
XML file
• virsh net-define [XML file] — Generates a new network from a preexisting XML file
without starting it
• virsh net-destroy [network name] — Destroy a network specified as [network name]
• virsh net-name [network UUID] — Convert a specified [network UUID] to a network name
• virsh net-uuid [network name — Convert a specified [network name] to a network UUID
• virsh net-start [name of an inactive network] — Starts a previously undefined
inactive network
• virsh net-undefine [name of an inactive network] — Undefine an inactive network
35
36
Chapter 16.
Managing Virtual Machines Using
xend
The xend node control daemon performs certain system management functions that relate to
virtual machines. This daemon controls the virtualized resources, and xend must be running to
interact with virtual machines. Before you start xend, you must specify the operating parameters
by editing the xend configuration file xend-config.sxp which is located in the etc/xen
directory. Here are the parameters you can enable or disable in the xend-config.sxp
configuration file:
Item
Description
console-limit
Determines the console server's memory
buffer limit and assigns values on a
per-domain basis
min-mem
Determines the minimum number of
megabytes that is reserved for domain0 (if
you enter 0, the value does not change)
dom0 cpus
Determines the number of CPUs in use by
domain0 (at least 1 CPU is assigned by
default)
enable-dump
Determines that a crash occurs then enables
a dump (default is 0)
external-migration-tool
Determines the script or application that
handles external device migration (scripts
must reside in
etc/xen/scripts/external-device-migrate
logfile
Determines the location of the log file (default
is /var/log/xend.log)
loglevel
Filters out the log mode values: DEBUG,
INFO, WARNING, ERROR, or CRITICAL
(default is DEBUG)
network-script
Determines the script that enables the
networking environment (scripts must reside
in etc/xen/scripts directory)
xend-http-server
Enables the http stream packet management
37
Chapter 16. Managing Virtual Machines Using xend
Item
Description
server (default is no)
xend-unix-server
Enables the unix domain socket server (a
socket server is a communications endpoint
that handles low level network connections
and accepts or rejects incoming connections)
xend-relocation-server
Enables the relocation server for
cross-machine migrations (default is no)
xend-unix-path
Determines the location where the
xend-unix-server command outputs data
(default is var/lib/xend/xend-socket)
xend-port
Determines the port that the http management
server uses (default is 8000)
xend-relocation-port
Determines the port that the relocation server
uses (default is 8002)
xend-relocation-address
Determines the virtual machine addresses
that are allowed for system migration
xend-address
Determines the address that the domain
socket server binds to.
Table 16.1. Red Hat Virtualization xend Configuration Parameters
After setting these operating parameters, you should verify that xend is running and if not,
initilize the daemon. At the command prompt, you can start the xend daemon by entering the
following:
service xend start
You can use xend to stop the daemon:
service xend stop
This stops the daemon from running.
38
You can use xend to restart the daemon:
service xend restart
The daemon starts once again.
You check the status of the xend daemon.
service xend status
The output displays the daemon's status.
39
40
Chapter 17.
Managing Virtual Machines with
Virtual Machine Manager
This section describes the Red Hat Virtualization Virtual Machine Manager (VMM) windows,
dialog boxes, and various GUI controls.
1. Virtual Machine Manager Architecture
Red Hat Virtualization is a collection of software components that work together to host and
manage virtual machines. The Virtual Machine Manager (VMM) gives you a graphical view of
the virtual machines on your system. You can use VMM to define both para-virtual and full
virtual machines. Using Virtual Machine Manager, you can perform any number of virtualization
management tasks including assigning memory, assigning virtual CPUs, monitoring operational
performance, and save, restore, pause, resume, and shutdown virtual systems. It also allows
you to access the textual and graphical console. Red Hat Virtualization abstracts CPU and
memory resources from the underlying hardware and network configurations. This enables
processing resources to be pooled and dynamically assigned to applications and service
requests. Chip-level virtualization enables operating systems with Intel VT and AMD Pacifica
hardware to run on hypervisors.
2. The Open Connection Window
This window appears first and prompts the user to choose a hypervisor session. Non-privileged
users can initiate a read-only session. Root users can start a session with full blown read-write
status. For normal use, select the Local Xen host option. You start the Virtual Machine
Manager test mode by selecting the Other hypervisor and then type test:///default in the
URL field beneath. Once in test mode, you can connect to a libvirt dummy hypervisor. Note that
although the Remote Xen host screen is visible, the functionality to connect to such a host is
not implemented into Red Hat Enterprise Linux 5.1.
41
Chapter 17. Managing Virtual Machines with Virtual Machine Manager
Figure 17.1. Virtual Machine Manager Connection window
3. Virtual Machine Manager Window
This main window displays all the running virtual machines and resources currently allocated to
them (including domain0). You can decide which fields to display. Double-clicking on the
desired virtual machine brings up the respective console for that particular machine. Selecting a
virtual machine and double-click the Details button to display the Details window for that
machine. You can also access the File menu to create a new virtual machine.
Figure 17.2. Virtual Machine Manager main window
42
Virtual Machine Graphical Console
4. Virtual Machine Details Window
This window displays graphs and statistics of a guest's live resource utilization data available
from the Red Hat Virtualization Virtual Machine Manager. The UUID field displays the globally
unique identifier for the virtual machines(s).
Figure 17.3. Virtual Machine Manager Details window
5. Virtual Machine Graphical Console
This window displays a virtual machine's graphical console. Paravirtual and full virtual machines
use different techniques to export their local virtual framebuffers, but both technologies use
VNC to make them available to the Virtual Machine Manager's console window. If your virtual
machine is set to require authentication, the Virtual Machine Graphical console prompts you for
a password before the display appears.
43
Chapter 17. Managing Virtual Machines with Virtual Machine Manager
Figure 17.4. Graphical Console window
Your local desktop can intercept key combinations (for example, Ctrl+Alt+F11) to prevent them
from being sent to the guest machine. You can use the Virtual Machine Manager's 'sticky key'
capability to send these sequences. You must press any modifier key (like Ctrl or Alt) 3 times
and the key you specify gets treated as active until the next non-modifier key is pressed. Then
you can send Ctrl-Alt-F11 to the guest by entering the key sequence 'Ctrl Ctrl Ctrl Alt+F1'.
6. Starting the Virtual Machine Manager
To start the Virtual Machine Manager session, from the Applications menu, click System
Tools and select Virtual Machine Manager .
The Virtual Machine Manager main window appears.
44
Creating a New Virtual Machine
Figure 17.5. Starting the Virtual Machine Manager
7. Creating a New Virtual Machine
The Virtual Machine Manager (virt-manager) is the desktop application that manages virtual
machines.
You can use Red Hat's Virtual Machine Manager to:
• Create new domains.
• Configure or adjust a domain's resource allocation and virtual hardware.
• Summarize running domains with live performance and resource utilization statistics.
• Display graphs that show performance and resource utilization over time.
• Use the embedded VNC client viewer which presents a full graphical console to the guest
domain.
Note:
You must install Red Hat Enterprise Linux 5.1, virt-manager, and the kernel
packages on all systems that require virtualization. All systems then must be
booted and running the Red Hat Virtualization kernel.
These are the steps required to install a guest operating system on Red Hat Enterprise Linux 5
using the Virtual Machine Monitor:
45
Chapter 17. Managing Virtual Machines with Virtual Machine Manager
Procedure 17.1. Creating a Guest Operating System
1.
From the Applications menu, select System Tools and then Virtual Machine Manager.
The Virtual Machine Manager main window appears.
Figure 17.6. Virtual Machine Manager window
2.
46
From the File menu, select New machine.
Creating a New Virtual Machine
Figure 17.7. Selecting a New Machine
The Creating a new virtual system wizard appears.
3.
Click Forward.
Figure 17.8. Creating a New Virtual System Wizard
47
Chapter 17. Managing Virtual Machines with Virtual Machine Manager
4.
Enter the name of the new virtual system and then click Forward.
Figure 17.9. Naming the Virtual System
5.
48
Enter the location of your install media. Location of the kickstart file is optional. Then click
Forward .
Creating a New Virtual Machine
Figure 17.10. Locating the Installation Media
6.
Install either to a physical disk partition or install to a virtual file system within a file.
Note
This example installs a virtual system within a file.
SELinux policy only allows xen disk images to reside in /var/lib/xen/images.
Open a terminal and create the /xen directory and set the SELinux policy with the command
restorecon -v /xen. Specify your location and the size of the virtual disk, then click
Forward.
49
Chapter 17. Managing Virtual Machines with Virtual Machine Manager
Figure 17.11. Assigning the Storage Space
7.
50
Select memory to allocate the guest and the number of virtual CPUs then click Forward.
Creating a New Virtual Machine
Figure 17.12. Allocating Memory and CPU
8.
Select Forward to open a console and the files start to install.
51
Chapter 17. Managing Virtual Machines with Virtual Machine Manager
Figure 17.13. Allocating Memory and CPU
9.
52
Complete your installation in the window provided.
Creating a New Virtual Machine
Figure 17.14. Installation Begins...
Warning
When installing Red Hat Enterprise Linux 5.1 on a fully virtualized guest, do not
use the kernel-xen kernel. Using this kernel on fully virtualized guests can
cause your system to hang.
If you are using an Installation Number when installing Red Hat Enterprise Linux
5.1 on a fully virtualized guest, be sure to deselect the Virtualization package
group during the installation. The Virtualization package group option installs
the kernel-xen kernel.
Note that paravirtualized guests are not affected by this issue. Paravirtualized
guests always use the kernel-xen kernel.
10. Type xm create -c xen-guest to start the Red Hat Enterprise Linux 5.1 guest. Right click
53
Chapter 17. Managing Virtual Machines with Virtual Machine Manager
on the guest in the Virtual Machine Manager and choose Open to open a virtual console.
Figure 17.15. Red Hat Enterprise Linux 5.1 (guest)
11. Enter user name and password to continue using the Virtual Machine Manager.
8. Restoring A Saved Machine
After you start the Virtual Machine Manager, all virtual machines on your system are displayed
in the main window. Domain0 is your host system. If there are no machines present, this means
that currently there are no machines running on the system.
To restore a previously saved session:
1.
54
From the File menu, select Restore a saved machine.
Restoring A Saved Machine
Figure 17.16. Restoring a Virtual Machine
2.
The Restore Virtual Machine main window appears.
Figure 17.17. Selecting Saved Virtual Machine Session
55
Chapter 17. Managing Virtual Machines with Virtual Machine Manager
3.
Navigate to correct directory and select the saved session file.
4.
Click Open.
The saved virtual system appears in the Virtual Machine Manager main window.
Figure 17.18. The Restored Virtual Machine Manager Session
9. Displaying Virtual Machine Details
You can use the Virtual Machine Monitor to view activity data information for any virtual
machines on your system.
To view a virtual system's details:
1.
56
In the Virtual Machine Manager main window, highlight the virtual machine that you want to
view.
Displaying Virtual Machine Details
Figure 17.19. Selecting Virtual Machine to Display
2.
From the Virtual Machine Manager Edit menu, select Machine Details (or click the Details
button on the bottom of the Virtual Machine Manager main window).
Figure 17.20. Displaying Virtual Machine Details Menu
The Virtual Machine Details Overview window appears. This window summarizes CPU and
memory usage for the domain(s) you specified.
57
Chapter 17. Managing Virtual Machines with Virtual Machine Manager
Figure 17.21. Displaying Virtual Machine Details Overview
3.
On the Virtual Machine Details window, click the Hardware tab.
The Virtual Machine Details Hardware window appears.
58
Displaying Virtual Machine Details
Figure 17.22. Displaying Virtual Machine Details Hardware
4.
On the Hardware tab, click on Processor to view or change the current processor memory
allocation.
Figure 17.23. Displaying Processor Allocation
5.
On the Hardware tab, click on Memory to view or change the current RAM memory
allocation.
59
Chapter 17. Managing Virtual Machines with Virtual Machine Manager
Figure 17.24. Displaying Memory Allocation
6.
On the Hardware tab, click on Disk to view or change the current hard disk configuration.
Figure 17.25. Displaying Disk Configuration
7.
60
On the Hardware tab, click on Network to view or change the current network
configuration.
Configuring Status Monitoring
Figure 17.26. Displaying Network Configuration
10. Configuring Status Monitoring
You can use the Virtual Machine Manager to modify the virtual system Status monitoring.
To configure Status monitoring, and enable Consoles:
1.
From the Edit menu, select Preferences.
Figure 17.27. Modifying Virtual Machine Preferences
The Virtual Machine Manager Preferences window appears.
2.
From the Status monitoring area selection box, specify the time (in seconds) that you want
the system to update.
61
Chapter 17. Managing Virtual Machines with Virtual Machine Manager
Figure 17.28. Configuring Status Monitoring
3.
From the Consoles area, specify how to open a console and specify an input device.
11. Displaying Domain ID
To view the domain IDs for all virtual machines on your system:
1.
62
From the View menu, select the Domain ID check box.
Displaying Domain ID
Figure 17.29. Displaying Domain-IDs
2.
The Virtual Machine Manager lists the Domain ID's for all domains on your system.
63
Chapter 17. Managing Virtual Machines with Virtual Machine Manager
Figure 17.30. Displaying Domain-IDs
12. Displaying Virtual Machine Status
To view the status of all virtual machines on your system:
1.
From the View menu, select the Status check box.
Figure 17.31. Displaying Virtual Machine Status
2.
64
The Virtual Machine Manager lists the status of all virtual machines on your system.
Displaying Virtual CPUs
Figure 17.32. Displaying Virtual Machine Status
13. Displaying Virtual CPUs
To view the amount of virtual CPUs for all virtual machines on your system:
1.
From the View menu, select the Virtual CPUs check box.
65
Chapter 17. Managing Virtual Machines with Virtual Machine Manager
Figure 17.33. Displaying Virtual CPUs
2.
66
The Virtual Machine Manager lists the Virtual CPUs for all virtual machines on your system.
Displaying CPU Usage
Figure 17.34. Displaying Virtual CPUs
14. Displaying CPU Usage
To view the CPU usage for all virtual machines on your system:
1.
From the View menu, select the CPU Usage check box.
Figure 17.35. Displaying CPU Usage
2.
The Virtual Machine Manager lists the percentage of CPU in use for all virtual machines on
your system.
67
Chapter 17. Managing Virtual Machines with Virtual Machine Manager
Figure 17.36. Displaying CPU Usage
15. Displaying Memory Usage
To view the memory usage for all virtual machines on your system:
1.
68
From the View menu, select the Memory Usage check box.
Displaying Memory Usage
Figure 17.37. Displaying Memory Usage
2.
The Virtual Machine Manager lists the percentage of memory in use (in megabytes) for all
virtual machines on your system.
69
Chapter 17. Managing Virtual Machines with Virtual Machine Manager
Figure 17.38. Displaying Memory Usage
16. Managing a Virtual Network
To configure a virtual network on your system:
1.
From the Edit menu, select Host Details.
Figure 17.39. Selecting Host Details
2.
70
This will open the Host Details menu. Click the Virtual Networks tab.
Creating a Virtual Network
Figure 17.40. Virtual Network Configuration
3.
All available virtual networks are listed on the left-hand box of the menu. You can edit the
configuration of a virtual network by selecting it from this box and editing as you see fit.
17. Creating a Virtual Network
To create a virtual network on your system:
1.
Open the Host Details menu (refer to Section 16, “Managing a Virtual Network”) and click
the Add button.
71
Chapter 17. Managing Virtual Machines with Virtual Machine Manager
Figure 17.41. Virtual Network Configuration
This will open the Create a new virtual network menu. Click Forward to continue.
72
Creating a Virtual Network
Figure 17.42. Creating a new virtual network
2.
Enter an appropriate name for your virtual network and click Forward.
73
Chapter 17. Managing Virtual Machines with Virtual Machine Manager
Figure 17.43. Naming your virtual network
3.
74
Enter an IPv4 address space for your virtual network and click Forward.
Creating a Virtual Network
Figure 17.44. Choosing an IPv4 address space
4.
Define the DHCP range for your virtual network by specifying a Start and End range of IP
addresses. Click Forward to continue.
75
Chapter 17. Managing Virtual Machines with Virtual Machine Manager
Figure 17.45. Selecting the DHCP range
5.
76
Select how the virtual network should connect to the physical network.
Creating a Virtual Network
Figure 17.46. Connecting to physical network
If you select Forwarding to physical network, choose whether the Destination should be
NAT to any physical device or NAT to physical device eth0.
Click Forward to continue.
6.
You are now ready to create the network. Check the configuration of your network and click
Finish.
77
Chapter 17. Managing Virtual Machines with Virtual Machine Manager
Figure 17.47. Ready to create network
7.
78
The new virtual network is now available in the Virtual Network tab of the Host Details
menu.
Creating a Virtual Network
Figure 17.48. New virtual network is now available
79
80
Chapter 18.
Red Hat Virtualization
Troubleshooting
This section covers potential issues you may experience in the installation, management, and
general day-to-day operations of your Red Hat Virtualization system(s). This troubleshooting
section covers the error messages, log file locations, system tools, and general approaches to
research data and analyze problems.
1. Logfile Overview and Locations
When deploying Red Hat Enterprise Linux 5.1 with Virtualization into your network
infrastructure, the host's Virtualization software uses many specific directories for important
configuration, log files, and other utilities. All the Red Hat Virtualization logs files are standard
ASCII files, and easily accessable with any ASCII based editor:
• The Red Hat Virtualization main configuration directory is /etc/xen/. This directory contains
the xend daemon and other virtual machine configuration files. The networking script files
reside here as well (in the /scripts subdirectory).
• All of actual log files themselves that you will consult for troubleshooting purposes reside in
the /var/log/xen directory.
• You should also know that the default directory for all virtual machine file-based disk images
resides in the /var/lib/xen directory.
• Red Hat Virtualization information for the /proc file system reside in the /proc/xen/
directory.
2. Logfile Descriptions
Red Hat Virtualization features the xend daemon and qemu-dm process, two utilities that write
the multiple log files to the /var/log/xen/ directory:
• xend.log is the logfile that contains all the data collected by the xend daemon, whether it is a
normal system event, or an operator initiated action. All virtual machine operations (such as
create, shutdown, destroy, etc.) appears here. The xend.log is usually the first place to look
when you track down event or performance problems. It contains detailed entries and
conditions of the error messages.
• xend-debug.log is the logfile that contains records of event errors from xend and the
Virtualization subsystems (such as framebuffer, Python scripts, etc.).
81
Chapter 18. Red Hat Virtualization Troubleshooting
• xen-hotplug-log is the logfile that contains data from hotplug events. If a device or a
network script does not come online, the event appears here.
• qemu-dm.[PID].log is the logfile created by the qemu-dm process for each fully virtualized
guest. When using this logfile, you must retrieve the given qemu-dm process PID, by using
the ps command to examine process arguments to isolate the qemu-dm process on the virtual
machine. Note that you must replace the [PID] symbol with the actual PID qemu-dm process.
If you encounter any errors with the Virtual Machine Manager, you can review the generated
data in the virt-manager.log file that resides in the /.virt-manager directory. Note that
every time you start the Virtual Machine Manager, it overwrites the existing logfile contents.
Make sure to backup the virt-manager.log file, before you restart the Virtual Machine
manager after a system error.
3. Important Directory Locations
There are additional utilities and logfiles you should remember when you track errors and
troubleshoot problems within Red Hat Virtualization environments:
• Virtual machines images reside in the /var/lib/xen/images directory.
• When you restart the xend daemon, it updates the xend-database that resides in the
/var/lib/xen/xend-db directory.
• Virtual machine dumps (that you perform with xm dump-core command) resides in the
/var/lib/xen/dumps directory.
• The /etc/xen directory contains the configuration files that you use to manage system
resources. The xend daemon configuration file is called xend-config.sxp and you can use
this file to implement system-wide changes and configure the networking callouts.
• The proc commands are another resource that allows you to gather system information.
These proc entries reside in the /proc/xen directory:
/proc/xen/capabilities
/proc/xen/balloon
/proc/xen/xenbus/
4. Troubleshooting Tools
82
Troubleshooting Tools
This section summarizes the System Administrator applications, the networking utilities, and the
Advanced Debugging Tools (for more information on using these tools to configure the Red Hat
Virtualization services, see the respective configuration documentation). You can employ these
standard System Administrator Tools and logs to assist with troubleshooting:
• xentop
• xm dmesg
• xm log
• vmstat
• iostat
• lsof
You can employ these Advanced Debugging Tools and logs to assist with troubleshooting:
• XenOprofile
• systemTap
• crash
• sysrq
• sysrq t
• sysrq w
You can employ these Networking Tools to assist with troubleshooting:
• ifconfig
• tcpdump
• brctl
brctl is a networking tool that inspects and configures the ethernet bridge configuration in the
Virtualization linux kernel. You must have root access before performing these example
commands:
# brctl show
bridge-name
bridge-id
STP enabled interfaces
-----------------------------------------------------------------------------
83
Chapter 18. Red Hat Virtualization Troubleshooting
xenbr0
xenbr1
xenbr2
8000.feffffff
8000.ffffefff
8000.ffffffef
no
yes
no
vif13.0
pddummy0
vif0.0
# brctl showmacs xenbr0
port-no
mac-addr
local?
1
2
fe:ff:ff:ff:ff:
fe:ff:ff:fe:ff:
yes
yes
ageing timer
0.00
0.00
# brctl showstp xenbr0
xenbr0
bridge-id
8000.fefffffffff
designated-root
8000.fefffffffff
root-port
0
path-cost
0
max-age
20.00
bridge-max-age
20.00
hello-time
2.00
bridge-hello-time
2.00
forward-delay
0.00
bridge-forward-delay
0.00
ageing-time
300.01
hello-timer
1.43
tcn-timer
0.00
topology-change-timer
0.00
gc-timer
0.02
5. Troubleshooting with the Logs
When encountering issues with installing Red Hat Virtualization, you can refer to the host
system's two logs to assist with troubleshooting. The xend.log file contains the same basic
information as when you run the xm log command. It resides in the /var/log/ directory. Here
is an example log entry for when you create a domain running a kernel:
[2006-12-27 02:23:02 xend] ERROR (SrvBase: 163) op=create: Error creating
domain: (0, 'Error')
Traceback (most recent call list)
File "/usr/lib/python2.4/site-packages/xen/xend/server/SrvBase.py" line 107
in_perform val = op_method (op,req)
File
"/usr/lib/python2.4/site-packages/xen/xend/server/SrvDomainDir.py line 71 in
op_create
raise XendError ("Error creating domain: " + str(ex))
XendError: Error creating domain: (0, 'Error')
84
Troubleshooting with the Serial Console
The other log file, xend-debug.log , is very useful to system administrators since it contains
even more detailed information than xend.log . Here is the same error data for the same
kernel domain creation problem:
ERROR: Will only load images built for Xen v3.0
ERROR: Actually saw: GUEST_OS=netbsd, GUEST_VER=2.0, XEN_VER=2.0;
LOADER=generic, BSD_SYMTAB'
ERROR: Error constructing guest OS
When calling customer support, always include a copy of both these log files when contacting
the technical support staff.
6. Troubleshooting with the Serial Console
The serial console is helpful in troubleshooting difficult problems. If the Virtualization kernel
crashes and the hypervisor generates an error, there is no way to track the error on a local host.
However, the serial console allows you to capture it on a remote host. You must configure the
Xen host to output data to the serial console. Then you must configure the remote host to
capture the data. To do this, you must modify these options in the grub.conf file to enable a
38400-bps serial console on com1 /dev/ttyS0:
title Red Hat Enterprise Linix (2.6.18-8.2080_RHEL5xen0)
root (hd0,2)
kernel /xen.gz-2.6.18-8.el5 com1=38400,8n1
module /vmlinuz-2.618-8.el5xen ro root=LABEL=/rhgb quiet
console=xvc console=tty xencons=xvc
module /initrd-2.6.18-8.el5xen.img
The sync_console can help determine a problem that causes hangs with asynchronous
hypervisor console output, and the "pnpacpi=off" works around a problem that breaks input
on the serial console. The parameters "console=ttyS0" and "console=tty" means that
kernel errors get logged with on both the normal VGA console and on the serial console. Then
you can install and set up ttywatch to capture the data on a remote host connected by a
standard null-modem cable. For example, on the remote host you could type:
ttywatch --name myhost --port /dev/ttyS0
This pipes the output from /dev/ttyS0 into the file /var/log/ttywatch/myhost.log .
7. Paravirtualized Guest Console Access
Paravirtualized guest operating systems automatically has a virtual text console configured to
plumb data to the Domain0 operating system. You can do this from the command line by typing:
85
Chapter 18. Red Hat Virtualization Troubleshooting
xm console [domain name or number]
Where domain100 represents a running name or number. You can also use the Virtual Machine
Manager to display the virtual text console. On the Virtual Machine Details window, select Serial
Console from the View menu.
8. Full Virtualization Guest Console Access
Full Virtualized guest operating systems automatically has a text console configured for use, but
the difference is the kernel guest is not configured. To enable the guest virtual serial console to
work with the Full Virtualized guest, you must modify the guest's grub.conf file, and include the
'console =ttyS0 console=tty0' parameter. This ensures that the kernel messages are sent
to the virtual serial console (and the normal graphical console). If you plan to use the virtual
serial console in a full virtualized guest, you must edit the configuration file in the /etc/xen/
directory. On the host domain, you can then access the text console by typing:
xm console
You can also use the Virtual Machine Manager to display the serial console. On the Virtual
Machine Details window, select Serial Console from the View menu.
9. Implementing Lun Persistence
If your system is not using multipath, you can use udev to implement lun persistence. Before
implementing lun persistence in your system, ensure that you acquire the proper UUIDs. Once
you aquire these, you can configure lun persistence by editing the scsi_id file that resides in
the /etc directory. Once you have this file open in a text editor, you must comment out this
line:
# options=-b
Then replace it with this parameter:
# options=-g
This tells udev to monitor all system SCSI devices for returning UUIDs. To determine the
system UUIDs, type:
# scsi_id
86
-g
-s
/block/sdc
Implementing Lun Persistence
The output should resemble the following:
[root@devices] # scsi_id -g -s /block/sdc
*3600a0b80001327510000015427b625e*
This long string of characters is the UUID. To get the device names to key off the UUID, check
each device path to ensure that the UUID number is the same for each device. The UUIDs do
not change when you add a new device to your system. Once you have checked the device
paths, you must create rules for the device naming. To create these rules, you must edit the
20-names.rules file that resides in the /etc/udev/rules.d directory. The device naming
rules you create here should follow this format:
# KERNEL="sd*", BUS="scsi",
NAME="devicename"
PROGRAM="sbin/scsi_id", RESULT="UUID",
Replace your exisiting UUID and devicename with the above UUID retrieved entry. So the rule
should resemble the following:
KERNEL="sd*", BUS="scsi", PROGRAM="sbin/scsi_id",
RESULT="3600a0b80001327510000015427b625e
", NAME="mydevicename"
This causes the system to enable all devices that match /dev/sd* to inspect the given UUID.
When it finds a matching device, it creates a device node called /dev/devicename. For this
example, the device node is /dev/mydevice . Finally, you need to append the rc.local file
that resides in the /etc directory with this path:
/sbin/start_udev
IMPLEMENTING LUN PERSISTENCE WITH MULTIPATH
To implement lun persistence in a multipath environment, you must define the alias names for
the multipath devices. For this example, you must define four device aliases by editing the
multipath.conf file that resides in the /etc/ directory:
multipath
}
multipath
{
wwid
alias
3600a0b80001327510000015427b625e
oramp1
wwid
3600a0b80001327510000015427b6
{
87
Chapter 18. Red Hat Virtualization Troubleshooting
}
multipath
}
multipath
alias
oramp2
wwid
alias
3600a0b80001327510000015427b625e
oramp3
wwid
alias
3600a0b80001327510000015427b625e
oramp4
{
{
}
This defines 4 luns: /dev/mpath/oramp1, /dev/mpath/oramp2, /dev/mpath/oramp3, and
dev/mpath/oramp4. The devices will reside in the /dev/mpath directory. These lun names are
persistent over reboots as it creates the alias names on the wwid of the luns.
10. SELinux Considerations
This sections contains things to you must consider when you implement SELinux into your Red
Hat Virtualization environment. When you deploy system changes or add devices, you must
update your SELinux policy accordingly. To configure an LVM volume for a guest, you must
modify the SELinux context for the respective underlying block device and volume group.
# semanage fcontext -a -t xen_image _t -f -b /dev/sda2
# restorecon /dev/sda2
The boolean parameter xend_disable_trans put xend in unconfined mode after restarting the
daemon. It is better to disable protection for a single daemon than the whole system. It is
advisable that you should not re-label directories as xen_image_t that you will use elsewhere.
11. Accessing Data on Guest Disk Image
You can use two separate applications that assist you in accessing data from within a guest
disk image. Before using these tools, you must shut down the guests. Accessing the file system
from the guest and dom0 could potentially harm your system.
You can use the kpartx application to handle partitioned disks or LVM volume groups:
yum install kpartx
kpartx -av /dev/xen/guest1
add map guest1p1 : 0 208782 linear /dev/xen/guest1 63
add map guest1p2: 0 16563015 linear /dev/xen/guest1 208845
To access LVM volumes on a second partiton, you must rescan LVM with vgscan and activate
the volume group on the partition (called VolGroup00 by default) by using the vgchange -ay
command:
88
Common Troubleshooting Situations
# kpartx -a /dev/xen/guest1
#vgscan
Reading all physical volumes . This may take a while...
Found volume group "VolGroup00" using metadata type 1vm2
# vgchange -ay VolGroup00
2 logical volume(s) in volume group VolGroup00 now active.
# lvs
LV VG Attr Lsize Origin Snap% Move Log Copy%
LogVol00 VolGroup00 -wi-a- 5.06G
LogVol01 VolGroup00 -wi-a- 800.00M
# mount /dev/VolGroup00/LogVol00 /mnt/
....
#umount /mnt/
#vgchange -an VolGroup00
#kpartx -d /dev/xen/guest1
You must remember to deactivate the logical volumes with vgchange -an, remove the partitions
with kpartx-d , and delete the loop device with losetup -d when you finish.
12. Common Troubleshooting Situations
When you attempt to start the xend service nothing happens. You type xm list1 and receive
the following:
Error: Error connecting to xend: Connection refused. Is xend running?
You try to run xend start manually and receive more errors:
Error: Could not obtain handle on privileged command interfaces (2 = No such
file or directory)
Traceback (most recent call last:)
File "/usr/sbin/xend/", line 33 in ?
from xen.xend.server. import SrvDaemon
File "/usr/lib/python2.4/site-packages/xen/xend/server/SrvDaemon.py" , line
26 in ?
from xen.xend import XendDomain
File "/usr//lib/python2.4/site-packages/xen/xend/XendDomain.py" , line 33,
in ?
from xen.xend import XendDomainInfo
File "/usr/lib/python2.4/site-packages/xen/xend/image.py" , line37, in ?
import images
89
Chapter 18. Red Hat Virtualization Troubleshooting
File "/usr/lib/python2.4/site-packages/xen/xend/image.py" , line30, in ?
xc = xen.lowlevel.xc.xc ()
RuntimeError: (2, 'No such file or directory' )
What is most likely happened here is that you rebooted your host into a kernel that is not a
xen-hypervisor kernel. To correct this, you must select the xen-hypervisor kernel at boot
time (or set the xen-hypervisor kernel to default in your grub.conf file.
13. Loop Device Errors
If you use file-based guest images, one may have increased the number of configured loop
devices (the default allows up to 8 loop devices to become active). If you need more than 8
file-based guests/loop devices, you must modify the /etc/modprobe.conf file. When modifying
the modprobe.conf file, you must include this line:
options loop max_loop=64
This example uses 64 but you can specify another number to set the maximum loop value. You
may also have to implement loop device backed guests on your system. To employ loop device
backed guests for a paravirtual system, use the phy: block device or tap:aio commands.
To employ loop device backed guests for a full virtualized system, use the phy: device or
file: file commands.
14. Guest Creation Errors
When you attempt to create a guest, you receive an "Invalid argument" error message. This
usually means that the kernel image you are trying to boot is incompatible with the hypervisor.
An example of this would be if you were attempting to run a non-PAE FC5 kernel on a PAE only
FC6 hypervisor.
You do a yum update and receive a new kernel, the grub.conf default kernel switches right
back to a bare-metal kernel instead of the Virtualization kernel.
To correct this problem you must modify the default kernel RPM that resides in the
/etc/sysconfig/kernel/ directory. You must ensure that kernel-xen parameter is set as the
default option in your gb.conf file.
15. Serial Console Errors
You receive no output to the serial console. To correct this problem, you must modify the
grub.conf and change the com port parameters to:
90
Network Bridge Errors
serial
--unit=1
--speed=115200
title RHEL5 i386 Xen (2.6.18-1.2910.el5xen)
root (hd0, 8)
kernel /boot/xen.gz-2.6.18-1.2910.el5 com2=115200, 8n1
module /boot/vmlinuz-2.6.18-1.2910.el5xen to root=LABEL=RHEL5_i386
console=tty console=ttyS1115200
module /boot/initrd-2.8.6.18-12910.el5xen.img
title RHEL5 i386 xen (2.6.18.-1.2910.el5xen
root (hd0, 8)
kernel /boot/xen.gz-2.6.18-1.2910.el5 com2=115200 console=com2l
module /boot/vmlinuz2.6.18-1.2910.el5xen to root=LABEL=RHEL5_i386
console=xvc xencons=xvc
module /boot/ititrd-2.6.18-1.2910.el5xen.img
These changes to the grub.conf should enable your serial console to work correctly. You
should be able to use any number for the ttyS and it should work like ttyS0 .
16. Network Bridge Errors
Red Hat Virtualization can configure multiple Virtualization network bridges to use with multiple
ethernet cards. To successfully configure multiple network bridges for ethernet cards, you must
configure the second network interface by either using the system-config-network TUI/GUI, or
by creating a new configuration file in /etc/sysconfig/network-scripts . You should use a
process to setup multiple Xen bridges. This is an example config file for a second NIC called
'eth1' :
#/etc/sysconfig/network-scripts/fcfg-eth1
DEVICE=eth1
BOOTPROTO=static
ONBOOT=yes
USERCTL=no
IPV6INIT=no
PEERDNS=yes
TYPE=Ethernet
NETMASK=255.255.255.0
IPADDR=10.1.1.1
GATEWAY=10.1.1.254
ARP=yes
Copy the /etc/xen/scripts/network-bridge to /etc/xen/scripts/network-bridge.xen .
Edit /etc/xen/xend-config.sxp and add a line to your new network bridge script (this
example uses "network-virtualization-multi-bridge" ).
In the xend-config.sxp file, the new line should reflect your new script:
91
Chapter 18. Red Hat Virtualization Troubleshooting
network-script network-xen-multi-bridge
Make sure to uncomment the line that states:
network-script network-bridge
If you want to create multiple Xen bridges, you must create a custom script. This example below
creates two Xen bridges (called xenbr0 and xenbr1 ) and attaches them to eth1 and eth0 ,
respectively:
# !/bin/sh
# network-xen-multi-bridge
# Exit if anything goes wrong
set -e
# First arg is operation.
OP=$1
shift
script=/etc/xen/scripts/network-bridge.xen
case ${OP} in
start)
$script start vifnum=1 bridge=xenbr1 netdev=eth1
$script start vifnum=0 bridge=xenbr0 netdev=eth0
;;
stop)
$script stop vifnum=1 bridge=xenbr1 netdev=eth1
$script stop vifnum=0 bridge=xenbr0 netdev=eth0
;;
status)
$script status vifnum=1 bridge=xenbr1 netdev=eth1
$script status vifnum=0 bridge=xenbr0 netdev=eth0
;;
*)
echo 'Unknown command: ' ${OP}
echo 'Valid commands are: start, stop, status'
exit 1
esac
If you want to create additional bridges, just use the example script and copy/paste the file
accordingly.
17. Laptop Configurations
The task of configuring your RHEL 5.1 loaded laptop for use on a network environment,
presents a number of potential challenges. Most WiFi and wired connections switch constantly
during any given day, and Red Hat Virtualization assumes it has access to the same interface
consistently. This results in the system performing ifup/ifdown calls to the network interface in
92
Laptop Configurations
use by Red Hat Virtualization. WiFi cards are not the ideal network connection method since
Red Hat Virtualization uses the default network interface.
The idea here is to create a 'dummy' network interface for Red Hat Virtualization to use.
This technique allows you to use a hidden IP address space for your guests and Virtual
Machines. To do this operation successfully, you must use static IP addresses as DHCP does
not listen for IP addresses on the dummy network. You also must configure NAT/IP
masquerading to enable network access for your guests and Virtual Machines. You should
attach a static IP when you create the 'dummy' network interface.
For this example, the interface is called dummy0 and the IP used is 10.1.1.1 The script is called
ifcfg-dummy0 and resides in the /etc/sysconfig/network-scripts/ directory:
DEVICE =dummy0
BOOTPROTO=none
ONBOOT=yes
USERCTL=no
IPV6INIT=no
PEERDNS=yes
TYPE=Ethernet
NETMASK=255.255.255.0
IPADDR=10.1.1.1
ARP=yes
You should bind xenbr0 to dummy0 to allow network connection even when disconnected from
the physical network.
You will need to make additional modifications to the xend-config.sxp file. You must locate
the ( network-script 'network-bridge' bridge=xenbr0 ) section and add include this in
the end of the line:
netdev=dummy0
You must also make some modifications to your guest's domU networking configuration to
enable the default gateway to point to dummy0. You must edit the DomU 'network' file that
resides in the /etc/sysconfig/ directory to reflect the example below:
NETWORKING=yes
HOSTNAME=localhost.localdomain
GATEWAY=10.1.1.1
IPADDR=10.1.1.10
NETMASK=255.255.255.0
93
Chapter 18. Red Hat Virtualization Troubleshooting
It is a good idea to enable NAT in domain0 so that domU can access the public net. This way,
even wireless users can work around the Red Hat Virtualization wireless limitations. To do this,
you must modify the S99XenLaptopNAT file that resides in the /etc/rc3.d directory to reflect
the example below:
#!/bin/bash
#
# XenLaptopNAT Startup script for Xen on Laptops
#
# chkconfig: - 99 01
# description: Start NAT for Xen Laptops
#
# PATH=/usr/bin:/sbin:/bin:/usr/sbin
# export PATH
GATEWAYDEV=`ip route | grep default | awk {'print $5'}`
iptables -F
case "$1" in
start)
if test -z "$GATEWAYDEV"; then
echo "No gateway device found"
else
echo "Masquerading using $GATEWAYDEV"
/sbin/iptables -t nat -A POSTROUTING -o $GATEWAYDEV -j MASQUERADE
fi
echo "Enabling IP forwarding"
echo 1 > /proc/sys/net/ipv4/ip_forward
echo "IP forwarding set to `cat /proc/sys/net/ipv4/ip_forward`"
echo "done."
;;
*)
echo "Usage: $0 {start|restart|status}"
;;
esac
If you want to automatically have the network setup at boot time, you must create a softlink to
/etc/rc3.d/S99XenLaptopNAT
When modifying the modprobe.conf file, you must include these lines:
alias dummy0 dummy
options dummy numdummies=1
18. Starting Domains Automatically During System
Boot
Starting Domains Automatically During System Boot
You can configure your guests to start automatically when you boot the system. To do this, you
94
Modifying Domain0
must modify the symbolic links that resides in /etc/xen/auto . This file points to the guest
configuration files that you need to start automatically. The startup process is serialized,
meaning that the higher the number of guests, the longer the boot process will take. This
example shows you how to use symbolic links for the guest rhel5vm01 :
[root@python
[root@python
[root@python
[root@python
[root@python
xen]# cd /etc/xen
xen]# cd auto
auto]# ls
auto]# ln -s ../rhel5vm01 .
auto]# ls -l
lrwxrwxrwx 1 root root 14 Dec 14 10:02 rhel5vm01 -> ../rhel5vm01
[root@python auto]#
19. Modifying Domain0
To use Red Hat Virtualization to manage domain0, you will constantly making changes to the
grub.conf configuration file, that resides in the /etc directory. Because of the large number of
domains to manage, many system administrators prefer to use the 'cut and paste' method when
editing grub.conf . If you do this, make sure that you include all five lines in the Virtualization
entry (or this will create system errors). If you require Xen hypervisor specific values, you must
add them to the 'xen' line. This example represents a correct grub.conf Virtualization entry:
# boot=/dev/sda/
default=0
timeout=15
#splashimage=(hd0, 0)/grub/splash.xpm.gz
hiddenmenu
serial --unit=0 --speed=115200 --word=8 --parity=no --stop=1
terminal --timeout=10 serial console
title Red Hat Enterprise Linux Server (2.6.17-1.2519.4.21. el5xen)
root (hd0, 0)
kernel /xen.gz-2.6.17-1.2519.4.21.el5 com1=115200, 8n1
module /vmlinuz-2.6.17-1.2519.4.21el5xen ro
root=/dev/VolGroup00/LogVol00
module /initrd-2.6.17-1.2519.4.21.el5xen.img
For example, if you need to change your dom0 hypervisor's memory to 256MB at boot time, you
must edit the 'xen' line and append it with the correct entry, 'dom0_mem=256M' . This example
represents the respective grub.conf xen entry:
# boot=/dev/sda
default=0
timeout=15
#splashimage=(hd0,0)/grubs/splash.xpm.gz
hiddenmenu
95
Chapter 18. Red Hat Virtualization Troubleshooting
serial --unit=0 --speed =115200 --word=8 --parity=no --stop=1
terminal --timeout=10 serial console
title Red Hat Enterprise Linux Server (2.6.17-1.2519.4.21. el5xen)
root (hd0,0)
kernel /xen.gz-2.6.17-1.2519.4.21.el5 com1=115200, 8n1
dom0_mem=256MB
module /vmlinuz-2.6.17-1.2519.4.21.el5xen ro
root=/dev/VolGroup00/LogVol00
module /initrd-2.6.17-1.2519.4.21.el5xen.img
20. Guest Configuration Files
When you install new guests using virt-manager (or virt-install) tool(s) from Red Hat Enterprise
Linux 5.1 with Virtualization, the guests configuration files (located in the /etc/xen directory) get
modified and setup automatically. This configuration file example is for a para-virtualized guest:
name = "rhel5vm01"
memory = "2048"
disk = ['tap:aio:/xen/images/rhel5vm01.dsk,xvda,w',]
vif = ["type=ieomu, mac=00:16:3e:09:f0:12 bridge=xenbr0',
"type=ieomu, mac=00:16:3e:09:f0:13 ]
vnc = 1
vncunused = 1
uuid = "302bd9ce-4f60-fc67-9e40-7a77d9b4e1ed"
bootloader = "/usr/bin/pygrub"
vcpus=2
on_reboot = "restart"
on_crash = "restart"
Note that the serial="pty" is the default for the configuration file. This configuration file
example is for a fully-virtualized guest:
name = "rhel5u5-86_64"
builder = "hvm"
memory = 500
disk = ['file:/xen/images/rhel5u5-x86_64.dsk.hda,w
[../../../home/mhideo/.evolution//xen/images/rhel5u5-x86_64.dsk.hda,w]']
vif = [ 'type=ioemu, mac=00:16:3e:09:f0:12, bridge=xenbr0', 'type=ieomu,
mac=00:16:3e:09:f0:13, bridge=xenbr1']
uuid = "b10372f9-91d7-ao5f-12ff-372100c99af5'
device_model = "/usr/lib64/xen/bin/qemu-dm"
kernel = "/usr/lib/xen/boot/hvmloader/"
vnc = 1
vncunused = 1
apic = 1
acpi = 1
pae = 1
vcpus =1
serial ="pty" # enable serial console
on_boot = 'restart'
96
Cloning the Guest Configuration Files
21. Cloning the Guest Configuration Files
You can copy (or clone) an existing configuration file to create an all new guest. You must
modify the name parameter of the guests' configuration file. The new, unique name then
appears in the hypervisor and is viewable by the management utilities. You must generate an all
new UUID as well (using the uuidgen(1) command). Then for the vif entries you must define
a unique MAC address for each guest (if you are copying a guest configuration from an existing
guest, you can create a script to handle it). For the xen bridge information, if you move an
existing guest configuration file to a new host, you must update the xenbr entry to match your
local networking configuration. For the Device entries, you must modify the entries in the
'disk=' section to point to the correct guest image.
You must also modify these system configuration settings on your guest. You must modify the
HOSTNAME entry of the /etc/sysconfig/network file to match the new guest's hostname.
You must modify the HWADDR address of the
/etc/sysconfig/network-scripts/ifcfg-eth0 file to match the output from ifconfig eth0
file and if you use static IP addresses, you must modify the IPADDR entry.
22. Creating a Script to Generate MAC Addresses
Red Hat Virtualization can generate a MAC address for each virtual machine at the time of
creation. Since is a nearly unlimited amount of numbers on the same subnet, it is unlikely you
could get the same MAC address. To work around this, you can also write a script to generate a
MAC address. This example script contains the parameters to generate a MAC address:
#! /usr/bin/python
# macgen.py script generates a MAC address for Xen guests
#
import random
mac = [ 0x00, 0x16, 0x3e,
random.randint(0x00, 0x7f),
random.randint(0x00, 0xff),
random.randint(0x00, 0xff) ]
print ':'.join(map(lambda x: "%02x" % x, mac))
Generates e.g.:
00:16:3e:66:f5:77
to stdout
23. Configuring Virtual Machine Live Migration
Red Hat Virtualization can migrate virtual machines between other servers running Red Hat
Enterprise Linux 5.1 with Virtualization. Further, migration is performed in an offline method
(using the xm migrate command). Live migration can be done from the same command.
97
Chapter 18. Red Hat Virtualization Troubleshooting
However there are some additional modifications that you must do to the xend-config
configuration file. This example identifies the entries that you must modify to ensure a
successful migration:
(xend-relocation-server yes)
The default for this parameter is 'no', which keeps the relocation/migration server
deactivated (unless on a trusted network) and the domain virtual memory is exchanged in
raw form without encryption.
(xend-relocation-port 8002)
This parameter sets the port that xend uses for migration. This value is correct, just make
sure to remove the comment that comes before it.
(xend-relocation-address )
This parameter is the address that listens for relocation socket connections, after you
enable the xend-relocation-server . When listening, it restricts the migration to a
particular interface.
(xend-relocation-hosts-allow )
This parameter controls the host that communicates with the relocation port. If the value is
empty, then all incoming connections are allowed. You must change this to a
space-separated sequences of regular expressions (such as
xend-relocation-hosts-allow- '^localhost\\.localdomain$' ). A host with a fully
qualified domain name or IP address that matches these expressions are accepted.
After you configure these parameters, you must reboot the host for the Red Hat Virtualization to
accept your new parameters.
24. Interpreting Error Messages
You receive the following error:
failed domain creation due to memory shortage, unable to balloon domain0
A domain can fail if there is not enough RAM available. Domain0 does not balloon down enough
to provide space for the newly created guest. You can check the xend.log file for this error:
[2006-12-21] 20:33:31 xend 3198] DEBUG (balloon:133) Balloon: 558432 Kib
free; 0 to scrub; need 1048576; retries: 20
[2006-12-21] 20:33:31 xend. XendDomainInfo 3198] ERROR (XendDomainInfo: 202
Domain construction failed
You can check the amount of memory in use by domain0 by using the xm list Domain0
command. If domain0 is not ballooned down, you can use the command "xm mem-set
98
Interpreting Error Messages
Domain-0 NewMemSize" to check memory.
You receive the following error:
wrong kernel image: non-PAE kernel on a PAE
This message indicates that you are trying to run an unsupported guest kernel image on your
Hypervisor. This happens when you try to boot a non-PAE paravirtual guest kernel on a RHEL
5.1 hypervisor. Red Hat Virtualization only supports guest kernels with PAE and 64bit
architectures.
Type this command:
[root@smith]# xm create -c va base
Using config file "va-base"
Error: (22, 'invalid argument')
[2006-12-14 14:55:46 xend.XendDomainInfo 3874] ERRORs
(XendDomainInfo:202) Domain construction failed
Traceback (most recent call last)
File "/usr/lib/python2.4/site-packages/xen/xend/XendDomainInfo.py", line 195
in create vm.initDomain()
File " /usr/lib/python2.4/site-packages/xen/xend/XendDomainInfo.py", line
1363 in initDomain raise VmError(str(exn))
VmError: (22, 'Invalid argument')
[2006-12-14 14:55:46 xend.XendDomainInfo 3874] DEBUG (XenDomainInfo: 1449]
XendDlomainInfo.destroy: domin=1
[2006-12-14 14:55:46 xend.XendDomainInfo 3874] DEBUG (XenDomainInfo: 1457]
XendDlomainInfo.destroy:Domain(1)
If you need to run a 32bit/non-PAE kernel you will need to run your guest as a fully virtualized
virtual machine. For paravirtualized guests, if you need to run a 32bit PAE guest, then you must
have a 32bit PAE hypervisor. For paravirtualized guests, if you need to run a 64bit PAE guest,
then you must have a 64bit PAE hypervisor. For full virtulization guests you must run a 64bit
guest with a 64bit hypervisor. The 32bit PAE hypervisor that comes with RHEL 5 i686 only
supports running 32bit PAE paravirtualized and 32 bit fully virtualized guest OSes. The 64bit
hypervisor only supports 64bit paravirtualized guests.
This happens when you move the full virtualized HVM guest onto a RHEL 5.1 system. Your
guest may fail to boot and you will see an error in the console screen. Check the PAE entry in
your configuration file and ensure that pae=1.You should use a 32bit distibution.
You receive the following error:
Unable to open a connection to the Xen hypervisor or daemon
99
Chapter 18. Red Hat Virtualization Troubleshooting
This happens when the virt-manager application fails to launch. This error occurs when there is
no localhost entry in the /etc/hosts configuration file. Check the file and verify if the localhost
entry is enabled. Here is an example of an incorrect localhost entry:
# Do not remove the following line, or various programs
# that require network functionality will fail.
localhost.localdomain localhost
Here is an example of a correct localhost entry:
# Do not remove the following line, or various programs
# that require network functionality will fail.
127.0.0.1 localhost.localdomain localhost
localhost.localdomain. localhost
You receive the following error (in the xen-xend.log file ):
Bridge xenbr1 does not exist!
This happens when the guest's bridge is incorrectly configured and this forces the Xen hotplug
scipts to timeout. If you move configuration files between hosts, you must ensure that you
update the guest configuration files to reflect network topology and configuration modifications.
When you attempt to start a guest that has an incorrect or non-existent Xen bridge
configuration, you will receive the following errors:
[root@trumble virt]# xm create r5b2-mySQL01
Using config file " r5b2-mySQL01"
Going to boot Red Hat Enterprise Linux Server (2.6.18.-1.2747 .el5xen)
kernel: /vmlinuz-2.6.18-12747.el5xen
initrd: /initrd-2.6.18-1.2747.el5xen.img
Error: Device 0 (vif) could not be connected. Hotplug scripts not working.
In addition, the xend.log displays the following errors:
[2006-11-14 15:07:08 xend 3875] DEBUG (DevController:143) Waiting for
devices vif
[2006-11-14 15:07:08 xend 3875] DEBUG (DevController:149) Waiting for 0
[2006-11-14 15:07:08 xend 3875] DEBUG (DevController:464)
hotplugStatusCallback
/local/domain/0/backend/vif/2/0/hotplug-status
100
Online Troubleshooting Resources
[2006-11-14 15:08:09 xend.XendDomainInfo 3875] DEBUG (XendDomainInfo:1449)
XendDomainInfo.destroy: domid=2
[2006-11-14 15:08:09 xend.XendDomainInfo 3875] DEBUG (XendDomainInfo:1457)
XendDomainInfo.destroyDomain(2)
[2006-11-14 15:07:08 xend 3875] DEBUG (DevController:464)
hotplugStatusCallback
/local/domain/0/backend/vif/2/0/hotplug-status
To resolve this problem, you must edit your guest configuration file, and modify the vif entry.
When you locate the vif entry of the configuration file, assuming you are using xenbr0 as the
default bridge, ensure that the proper entry resembles the following:
# vif = ['mac=00:16:3e:49:1d:11, bridge=xenbr0',]
You receive these python depreciation errors:
[root@python xen]# xm shutdown win2k3xen12
[root@python xen]# xm create win2k3xen12
Using config file "win2k3xen12".
/usr/lib64/python2.4/site-packages/xenxm/opts.py:520: Deprecation Warning:
Non ASCII character '\xc0' in file win2k3xen12 on line 1, but no encoding
declared; see http://www.python.org/peps/pep-0263.html for details
execfile (defconfig, globs, locs,)
Error: invalid syntax 9win2k3xen12, line1)
Python generates these messages when an invalid (or incorrect) configuration file. To resolve
this problem, you must modify the incorrect configuration file, or you can generate a new one.
25. Online Troubleshooting Resources
• Red Hat Virtualization Center
http://www.openvirtualization.com [http://www.openvirtualization.com/]
• Red Hat Enterprise Linux 5 Beta 2 Documentation
http://www.redhat.com/docs/manuals/enterprise/RHEL-5-manual/index.html
• Libvirt API
101
Chapter 18. Red Hat Virtualization Troubleshooting
http://www.libvirt.org [http://www.libvirt.org/]
• virt-manager Project Home Page
http://virt-manager.et.redhat.com [http://virt-manager.et.redhat.com/]
• Xen Community Center
http://www.xensource.com/xen/xen/
• Virtualization Technologies Overview
http://virt.kernelnewbies.org [http://virt.kernelnewbies.org/]
• Emerging Technologies Projects
http://et.redhat.com [http://et.redhat.com/]
102
Chapter 19.
Additional Resources
To learn more about Red Hat Virtualization, refer to the following resources.
1. Useful Websites
• http://www.cl.cam.ac.uk/research/srg/netos/xen/ — The project website of the Xen™
para-virtualization machine manager from which Red Hat Virtualization is derived. The site
maintains the upstream Xen project binaries and sourcecode and also contains information,
architecture overviews, documentation, and related links regarding Xen and its associated
technologies.
• http://www.libvirt.org/ — The official website for the libvirt virtualization API that interacts
with the virtualization framework of a host OS.
• http://virt-manager.et.redhat.com/ — The project website for the Virtual Machine Manager
(virt-manager), the graphical application for managing virtual machines.
2. Installed Documentation
• /usr/share/doc/xen-<version-number>/ —. This directory contains a wealth of
information about the Xen para-virtualization hypervisor and associated management tools,
including a look at various example configurations, hardware-specific information, and the
current Xen upstream user documentation.
• man virsh and /usr/share/doc/libvirt-<version-number> — Contains subcommands
and options for the virsh virtual machine management utility as well as comprehensive
information about the libvirt virtualization library API.
• /usr/share/doc/gnome-applet-vm-<version-number> — Documentation for the GNOME
graphical panel applet that monitors and manages locally-running virtual machines.
• /usr/share/doc/libvirt-python-<version-number> — Provides details on the Python
bindings for the libvirt library. The libvirt-python package allows python developers to
create programs that interface with the libvirt virtualization management library.
• /usr/share/doc/python-virtinst-<version-number> — Provides documentation on the
virt-install command that helps in starting installations of Fedora and Red Hat Enterprise
Linux related distributions inside of virtual machines.
• /usr/share/doc/virt-manager-<version-number> — Provides documentation on the
Virtual Machine Manager, which provides a graphical tool for administering virtual machines.
103
104
Appendix A. Lab 1
Xen Guest Installation
Goal: To install RHEL 3, 4, or 5 and Windows XP Xen guests.
Prerequisites: A workstation installed with Red Hat Enterprise Linux 5.0 with Virtualization
component.
For this lab, you will configure and install RHEL 3, 4, or 5 and Win XP Xen guests using various
virtualization tools.
Lab Sequence 1: Checking for PAE support
You must determine whether your system has PAE support. Red Hat Virtualization supports
x86_64 or ia64 based CPU architectures to run para-virtualized guests. To run i386 guests the
system requires a CPU with PAE extensions. Many older laptops (particularly those based on
Pentium Mobile or Centrino) do not support PAE.
1. To determine if your CPU has PAE support, type:
grep pae /proc/cpuinfo
2. The following output shows a CPU that has PAE support. If the command returns nothing,
then the CPU does not have PAE support. All the lab exercises require a i386 CPU with PAE
extension or x86_64 or ia64 in order to proceed.
flags :
fpu vme de pse tsc msr pae mce cx8 apic mtrr pge mca cmov pat clflush
dts acpi
mmx fxsr sse sse2 ss tm pbe nx up est tm2
Lab Sequence 2: Installing RHEL5 Beta 2 Xen para-virtualized guest using virt-install.
For this lab, you must install a Red Hat Enterprise Linux 5 Beta 2 Xen guest using
virt-install.
1. To install your Red Hat Enterprise Linux 5 Beta 2 Xen guest, at the command prompt type:
virt-install.
2. When asked to install a fully virtualized guest, type: no.
105
Appendix A. Lab 1
3. Type rhel5b2-pv1 for your virtual machine name.
4. Type 500 for your RAM allocation.
5. Type /xen/rhel5b2-pv1.img for your disk (guest image).
6. Type 6 for the size of your disk (guest image).
7. Type yes to enable graphics support.
8. Type nfs:server:/path/to/rhel5b2 for your install location.
9. The installation begins. Proceed as normal with the installation.
10.After the installation completes, type /etc/xen/rhel5b2-pv1, and make the following
changes: #vnc=1#vncunused=1sdl=1
11.Use a text editor to modify /etc/inittab, and append this to the file: init
5.#id:3:initdefault:id:5:initdefault:
Lab Sequence 3: Installing RHEL5 Beta 2 Xen para-virtualized guest using virt-manager.
For this lab, you will install a Red Hat Enterprise Linux 5 Beta 2 Xen paravirtualized guest using
virt-manager.
1. To install your Red Hat Enterprise Linux 5 Beta 2 Xen guest, at the command prompt type:
virt-manager.
2. On the Open Connection window, select Local Xen host, and click on Connect.
3. Start Red Hat's Virtual Machine Manager application, and from the File menu, click on New.
4. Click on Forward.
5. Type rhel5b2-pv2 for your system name, and click on Forward.
6. Select Paravirtualized, and click Forward.
7. Type nfs:server:/path/to/rhel5b2 for your install media URL, and click Forward.
8. Select Simple File, type /xen/rhel5b2-pv2.img for your file location. Choose 6000 MB,
and click Forward.
9. Choose 500 for your VM Startup and Maximum Memory, and click Forward.
10.Click Finish.
The Virtual Machine Console window appears. Proceed as normal and finish up the installation.
Lab Sequence 4: Checking for Intel-VT or AMD-V support
106
For this lab, you must determine if your system supports Intel-VT or AMD-V hardware. Your
system must support Intel-VT or AMD-V enabled CPUs to successfully install the fully virtualized
guest operating systems. Red Hat Virtualization incorporates a generic HVM layer to support
these CPU vendors.
1. To determine if your CPU has Intel-VT or AMD-V support, type the following command:
egrep -e 'vmx|svm' /proc/cpuinfo
2. The following output shows a CPU that supports Intel-VT:
.flags :
fpu tsc msr pae mce cx8 apic mtrr mca cmov pat clflush dts acpi mmx fxsr
sse
sse2 ss ht tm pbe constant_tsc pni monitor vmx est tm2 xtpr
If the command returns nothing, then the CPU does not support Intel-VT or AMD-V.
3. To determine if your CPU has Intel-VT or AMD-V support, type the following command:
cat /sys/hypervisor/properties/capabilities
4. The following output shows that Intel-VT support has been enabled in the BIOS. If the
command returns nothing, then go into the BIOS Setup Utlility and look for a setting related to
'Virtualization', i.e. 'Intel(R) Virtualization Technology' under 'CPU' section on a IBM T60p.
Enable and save the setting and do a power off to take effect.
xen-3.0-x86_32p hvm-3.0-x86_32 hvm-3.0-x86_32p
Lab Sequence 5: Installing RHEL5 Beta 2 Xen fully virtualized guest using virt-install.
For this lab, you will install a Red Hat Enterprise Linux 5 Beta 2 Xen fully virtualized guest using
virt-install:
1. To install your Red Hat Enterprise Linux 5 Beta 2 Xen guest, at the command prompt type:
virt-install.
2. When prompted to install a fully virtualized guest, type yes.
3. Type rhel5b2-pv2 for your virtual machine name.
4. Type 500 for your memory allocation.
107
Appendix A. Lab 1
5. Type /xen/rhel5b2-fv1.img for your disk (guest image).
6. Type 6 for the size of your disk (guest image).
7. Type yes to enable graphics support.
8. Type /dev/cdrom for the virtual CD image.
9. The VNC viewer appears within the installation window. If there is an error message that
says “main: Unable to connect to host: Connection refused (111)”, then type the following
command to proceed: vncviewer localhost:5900. VNC port 5900 refers to the first Xen
guest that is running on VNC. If it doesn't work, you might need to use 5901, 5902, etc.
The installation begins. Proceed as normal with the installation.
Lab Sequence 6: Installing RHEL5 Beta 2 Xen fully virtualized guest using virt-manager.
For this lab, you will install a Red Hat Enterprise Linux 5 Beta 2 Xen fully virtualized guest using
virt-manager:
1. To install your Red Hat Enterprise Linux 5 Beta 2 Xen guest, at the command prompt type:
virt-manager.
2. On the Open Connection window, select Local Xen host, and click on Connect.
3. Start Red Hat's Virtual Machine Monitor application, and from the File menu, click on New.
4. Click on Forward.
5. Type rhel5b2-fv2 for your system name, and click on Forward.
6. Select Fully virtualized, and click Forward.
7. Specify either CD-ROM or DVD, and enter the path to install media. Specify ISO Image
location if you will install from an ISO image. Click Forward.
8. Select Simple File, type /xen/rhel5b2-fv2.img for your file location. Specify 6000 MB, and
click Forward.
9. Choose 500 for your VM Startup and Maximum Memory, and click Forward.
10.Click Finish .
11.The Virtual Machine Console window appears.
Proceed as normal and finish up the installation.
Lab Sequence 7: Installing RHEL3 Xen fully virtualized guest using virt-manager.
For this lab, you will install a Red Hat Enterprise Linux 3 Xen guest using virt-manager:
108
1. The same instructions for Lab Sequence 6 applies here.
Lab Sequence 8: Installing RHEL4 Xen fully virtualized guest using virt-manager
For this lab, you will install a Red Hat Enterprise Linux 4 Xen guest using virt-manager :
1. The same instructions for Lab Sequence 6 applies here.
Lab Sequence 9: Installing Windows XP Xen fully virtualized guest using virt-manager.
For this lab, you will install a Windows XP Xen fully virtualized guest using virt-manager:
1. To install your Red Hat Enterprise Linux 5 on your Windows XP host, at the command
prompt type: virt-manager.
2. On the Open Connection window, select Local Xen host, and click on Connect.
3. Start Red Hat's Virtual Machine Manager application, and from the File menu click on New.
4. Click on Forward.
5. Type winxp for your system name, and click on Forward.
6. Select Fully virtualized, and click Forward.
7. Specify either CD-ROM or DVD, and enter the path to install media. Specify ISO Image
location if you will install from an ISO image. Click Forward.
8. Select Simple File, type /xen/winxp.img for your file location. Specify 6000 MB, and click
Forward.
9. Select 1024 for your VM Startup and Maximum Memory, and select 2 for VCPUs. Click
Forward .
10.Click Finish.
11.The Virtual Machine Console window appears. Proceed as normal and finish up the
installation.
12.Choose to format the C:\ partition in FAT file system format. Red Hat Enterprise Linux 5
does not come with NTFS kernel modules. Mounting or writing files to the Xen guest image
may not be as straight-forward if you were to format the partition in NTFS file system format.
13.After you reboot the system for the first time, edit the winxp guest image: losetup
/dev/loop0 /xen/winxp.imgkpartx -av /dev/loop0mount /dev/mapper/loop0p1
/mntcp -prv $WINDOWS/i386 /mnt/. This fixes a problem that you may face in the later
part of the Windows installation.
14.Restart the Xen guest manually by typing: xm create -c winxp/.
109
Appendix A. Lab 1
15.In the Virtual Machine Manager window, select the winxp Xen guest and click Open.
16.The Virtual Machine Console window appears. Proceed as normal and finish up with the
installation.
17.Whenever a 'Files Needed' dialog box appears, change the path
GLOBALROOT\DEVICE\CDROM0\I386 to C:\I386. Depending on your installation, you may or
may not see this problem. You may be prompted for missing files during the installation.
Changing the path to C:\I386 should compensate for this problem.
18.If the Xen guest console freezes, click shutdown, make the following changes in
/etc/xen/winxp:#vnc=1#vncunused=1sdl=1#vcpus=2
19.Repeat step 14 and proceed as normal with the installation.
110
Appendix B. Lab 2
Live Migration
Goal: To configure and perform a live migration between two hosts.
Prerequisite: Two workstations installed with Red Hat Enterprise Linux 5.0 Beta 2 with
Virtualization Platform, and a Fedora Core 6 Xen guest on one of the two workstations.
For this lab, you will configure the migration and execute a live migration between two hosts.
Introduction: Before you begin
For this lab, you will need two Virtualization hosts: a Xen guest and a shared storage. You must
connect the two Virtualization hosts via a UTP cable. One of the Virtualization hosts exports a
shared storage via NFS. You must configure both of the Virtualization hosts so they migrate
successfully. The Xen guest resides on the shared storage. On the Xen guest, you should
install a streaming server. You must make sure that the streaming server still runs without any
interruptions on the Xen guest, so the live migration takes place between one Virtualization host
and the other. For Lab 2, you will refer the two Virtualization hosts as host1 and host2 .
Sequence 1: Configuring xend (both Xen hosts)
In this Lab procedure, you configure xend to start up as a HTTP server and a relocation server.
The xend daemon does not initiate the HTTP server by default. It starts the UNIX domain socket
management server (for xm) and communicates with xend. To enable cross-machine live
migration, you must configure it to support live migration:
1.
To make a backup of your xend-config.sxp file:
cp -pr /etc/xen/xend-config.sxp /etc/xen/xend-config.sxp.default
2.
Edit /etc/xen/xend-config.sxp and make the following changes:
#(xend-unix-server yes)(xend-relocation-server
yes)(xend-relocation-port 8002)(xend-relocation-address
'')(xend-relocation-hosts-allow '')#(xend-relocation-hosts-allow
'^localhost$
^localhost\\.localdomain$')
111
Appendix B. Lab 2
3.
Restart xend:service and xend restart.
Sequence 2: Exporting a shared storage via NFS
For this lab procedure, you will configure NFS and use it to export a shared storage.
1.
Edit /etc/exports and include the line: /xen *(rw,sync,no_root_squash)/
2.
Save /etc/exports and restart the NFS server. Make sure that the NFS server starts by
default:service nfs startchkconfig nfs on.
3.
After starting the NFS server on host1, we can then mount it on host2:mount host1:/xen
.
4.
Now start the Xen guest on host1 and select fc6-pv1 (or fc6-pv2 from Lab 1):
xm create -c fc6-pv1
Sequence 3: Installing the Xen guest streaming server
For this lab step, you will install a streaming server, gnump3d, for our demonstration purposes.
You will select gnump3d because it supports OGG vorbis files and is easy to install, configure,
and modify.
1.
Download gnump3d-2.9.9.9.tar.bz2 tarball from http://www.gnump3d.org/ . Unpack
the tarball and in the gnump3d-2.9.9.9/ directory, compile, and install the gnump3d
application:tar xvjf gnump3d-2.9.9.9.tar.bz2cd gnump3d-2.9.9.9/make install
2.
Create a /home/mp3 directory and copy TruthHappens.ogg from Red Hat's Truth Happens
page to mkdir /home/mp3wget -c http://www.redhat.com/v/ogg/TruthHappens.ogg
3.
Start the streaming server by typing
command:gnump3d
4.
112
On either one of the two Xen hosts, start running the Movie Player. If it is not installed, then
install the totem and iso-codecs rpms before running the Movie Player. Click Applications,
then Sound & Video, and finally Movie Player.
5.
Click Movie, then Open Location. Enter http://guest:8888/TruthHappens.ogg.
Sequence 4: Performing live migration
1.
Run the TruthHappens.ogg file on one of the two Xen hosts.
2.
Perform the live migration from host1 to host2:
xm migrate –live fc6-pv1 host2
3.
Open multiple window terminals on both Xen hosts with the following command:
watch -n1 xm list
4.
Observe as the live migration beginss. Note how long it takes for migration to complete.
Challenge Sequence: Configuring VNC server from within the Xen guest
If time permits, from within the Xen guest, configure the VNC server to initiate when gdm starts
up. Run VNC viewer and connect to the Xen guest. Play with the Xen guest when the live
migration occurs. Attempt to pause/resume, and save/restore the Xen guest and observe what
happens to the VNC viewer. If you connect to the VNC viewer via localhost:590x, and do a
live migration, you won't be able to connect to the VNC viewer again when it dies. This is a
known bug.
113
114