1
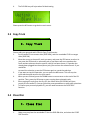
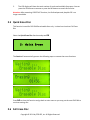
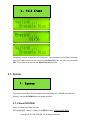
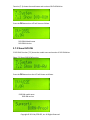
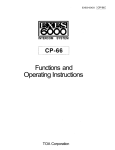
COACH
Single Target
1 to 1 DVD Duplicator
User’s Manual
Version: 2.0
WARNING!
The COACH Single Target DVD duplicator is to be used legally to duplicate discs for personal use.
We discourage owners of the COACH Single Target DVD duplicator from using this product to
duplicate copy-righted discs without the owner’s consent.
Note: The Coach Single Target DVD duplicator will not copy protected DVD or CD discs.
Copyright © 2011 by EZ DUPE, Inc. All Rights Reserved.
Important Safety Precautions
For U.S.A
TO THE USER
This equipment has been tested and found to comply with the limits for a Class A digital device,
pursuant to part 15 of the FCC Rules.
These limits are designed to provide reasonable protection against harmful interference when
the equipment generates, uses, and can radiate radio frequency energy and, if not installed and
use in accordance with the instruction manual, may cause harmful interference to radio
communications.
Operation of this equipment in a residential area is likely to cause harmful interference to radio
communications, in which case the user will be required to correct the interference at his own
expense.
CAUTION
Changes or modifications to this equipment, not expressly approved, could void the
equipment’s warranty.
Copyright © 2011 by EZ DUPE, Inc. All Rights Reserved.
Table Of Contents:
Table Of Contents: ......................................................................................................3
Chapter 1 Introduction...............................................................................................4
1.1 General Introduction ........................................................................................4
1.2 Overview of the Coach Single Target DVD Duplicator ........................................4
1.3 Main Features...................................................................................................4
1.3.1 Easy setup .................................................................................................4
1.3.2 Friendly interface ......................................................................................4
1.3.3 Disc format................................................................................................5
1.3.4 Power design .............................................................................................5
1.4 Package contents:.............................................................................................5
Chapter 2 Operating Instructions ...............................................................................6
2.0 Power ON and OFF ...........................................................................................7
2.1 Copy Disc .........................................................................................................7
2.2 Test Copy Disc..................................................................................................9
2.3 Copy Track ......................................................................................................10
2.4 Close Disc .......................................................................................................10
2.5 QuickEraseDisc ...............................................................................................11
2.6 Full EraseDisc..................................................................................................11
2.7 System ...........................................................................................................12
2.7.1 Show DVD-ROM......................................................................................12
2.7.2 Show DVD-RW........................................................................................13
2.7.3 Update BIOS...........................................................................................14
2.7.4 Machine Info..........................................................................................15
2.7.5 Burn In ...................................................................................................16
2.8 Music Player .................................................................................................16
Chapter 3 USB 2.0 Interface ....................................................................................19
A:
FAQ ..............................................................................................................20
B:
Specifications:...............................................................................................21
Copyright © 2011 by EZ DUPE, Inc. All Rights Reserved.
Chapter 1 Introduction
1.1 General Introduction
The Coach is a standalone duplicator and does not require connection to a computer. It
provides flawless duplications for any format of DVD/CD disc quickly and easily.
The Coach can read all kinds of DVD or CD discs. Its innovative design and multi- function LCD
panel makes the Coach very user-friendly. It is a cost-efficient CD/DVD- R/RW duplicator for
audio, data, multimedia and video applications.
1.2 Overview of the Coach Single Target DVD Duplicator
LCD Display
UP button
Heatsink Fan
DOWN button
YES button
NO button
Earphone Jack
USB Jack
Power Jack
Target (Blank Disc)
Master (Source Disc)
1.3 Main Features
1.3.1 Easy setup
Plug in household power supply and press YES start to turn on the Coach.
1.3.2 Friendly interface
The LCD display allows you to select functions from the menu by clicking the UP or
DOWN buttons.
Copyright © 2011 by EZ DUPE, Inc. All Rights Reserved.
1.3.3 Disc format
Supports all kinds of disc format, including DVD-ROM, DVD-Video, DVD-R, DVDRW, DVD+R, DVD+RW, DVD-RAM, CD-DA, CD-ROM Mode 1, CD-ROM XA Mode
2, Multi-session Photo CD, CD-I, Video CD and CD Extra (CD Plus).
1.3.4 Power design
AC 100V~220V.input range with single 5V DC output to maximum 3.8 AMP.
1.4 Package includes:
1.
2.
3.
4.
5.
1 Coach 1 to 1 DVD/CD Duplicator
1 USB Cable
1 Software Driver Disc
1 User’s Manual
1 Power Adapter
Copyright © 2011 by EZ DUPE, Inc. All Rights Reserved.
Chapter 2 Operating Instructions
LCD Control Panel Overview
UP
YES
1.Copy Disc
DOWN
NO
S/W Version: 6.54
LCD Display Panel: Displays main functions and messages
UP:
Press to move left or up in the system menu to select target function
DOWN: Press to move right or down in the system menu to select target menu
YES:
Executes the function that you select
NO:
Cancel the function that you have selected
Once the Coach is turned on, navigate through the menu by pressing the UP or DOWN
buttons and you will find the eight major functions listed sequentially on LCD as follows:
1. Copy Disc.
2. Test Copy Disc
3. Copy track.
4. Close Disc.
5. Quick Erase Disk.
6. Full Erase Disc.
7. System.
8. Music Player
Copyright © 2011 by EZ DUPE, Inc. All Rights Reserved.
Perform each function by pressing UP or DOWN to select a function and YES or NO
button to confirm or cancel the selection.
ALL MAIN FUNCTIONS ARE DESCRIBED AS FOLLOWS:
2.0 Power ON and OFF
You can turn on & turn off Coach duplicator.
1.
Press the YES button about 2 seconds and the unit will be turned ON.
2.
Press the YES button about 4 seconds and the unit will be turned OFF.
2.1 Copy Disc
To copy a disc, first place your disc in the DVD-ROM designated as the Master drive.
Afterwards, place your blank disc, either a CD+R disc or a DVD+R disc, into the target drive.
Select 1. Copy Disc, and press YES button
1. Copy Disc
The LCD prompts you to put the master disc in first.
Waiting...
Master Disc
Select the recording speed.
Move the cursor to select a proper recording speed. REMEMBER to select a speed that is
compatible with the type of blank disc you have. When finished, press YES.
Once you hit the YES button, the LCD prompts you to put your blank media in the target drive.
Copyright © 2011 by EZ DUPE, Inc. All Rights Reserved.
Start copying:
The duplicator will automatically set the drive speed and analyze the format of the master disc.
The machine will process the following steps to finish copying the disc.
You may wish to refer to the message shown on the LCD for duplication status. Afterwards, just
wait for duplication to finish.
Analyzing the format of master disc.
Type of master disc
Total disc length (MB)
Data length written (%)
Waiting for synchronize
The Coach will synchronize the disc you create and write the section
Finish copying. The DVD-RW tray will automatically eject the disc when the copying process is
complete. If you want more copies, all you have to do is place another blank disc into the
target drive.
Copyright © 2011 by EZ DUPE, Inc. All Rights Reserved.
You can put in another blank disc and press
YES to copy another disc or press
NO button to cancel the operation.
NOTE:
If you are not satisfied with the quality of your finished disc, you should use another type of
disc that matches the recorder or select a lower writing speed to improve the quality of the
recorded disc.
2.2 Test Copy Disc
2. Test Copy Disc
The Test Copy Disc function is used to check the feasibility of writing data to a blank disc. This
function is almost the same as the Copy Disc function. However, the difference is that data will
not be written to a blank disc. [You should execute this function when source disc has serious
scratches.]
Follow the steps similar to 2.1 Copy Disc:
1.
Place the master disc in DVD-ROM, and Blank disc in DVD-RW drive
2.
Move the cursor to the Test Copy Disc function and press OK
3.
The Coach will start to simulate the copying process and check the feasibility of data
writing
Test 4X (15:00)
Audio 4X
Total disc length
Total length elapse
Copyright © 2011 by EZ DUPE, Inc. All Rights Reserved.
4.
The DVD-RW tray will eject when finished testing.
Please press the NO button to go back to main menu.
2.3 Copy Track
3. Copy Track
You can edit your personal audio CD with Copy Track function.
1.
Put the audio CD into master drive (DVD ROM), and the recordable CD-R into target
drive (DVD RW).
2.
Move the cursor to the specific track you want, and press the YES button to select. As
you press the YES button on selected tracks, a few letters will come up above the
track number to denote that the specific track(s) has been chosen. If a speaker has
already been plugged into the earphone jack, you can hear the selected music. If you
would like
to cancel the selection, press the YES button again to cancel the selection.
3.
If you want to stop this operation, you can press the NO button. This will stop the
track selection and return to the main menu.
4.
When you are finished, press the DOWN button to move cursor to the end of the OK
position. Then, press the OK button to start copying these selected tracks.
5.
After copying all tracks from the first CD, the master drive (DVD-ROM) will eject
to wait for next audio CD. You can follow the same procedures to make other selections.
6.
To finalize your personal playable CD, you will need to execute the CLOSE DISC
function.
2.4 Close Disc
4. Close Disc
1.
Make sure you place the recordable CD into the DVD-RW drive, and select the CLOSE
DISC function.
Copyright © 2011 by EZ DUPE, Inc. All Rights Reserved.
2.
The LCD display will show the total number of tracks and available free space. You can
press the YES button to execute or press the NO button to cancel this function.
Attention: After executing CLOSE DISC function, the finalized personal playable CD is no
longer recordable.
2.5 Quick Erase Disc
This function is used for DVD-RW Re-writeable discs only. It takes less time than Full Erase
Disc
Select the Quick Erase Disc function and press OK
5. Quick Erase
The Coach will automatically process the following steps to execute the erase functions.
Press NO to close this function and go back to main menu or you may put the next DVD-RW to
continue erasing disc.
2.6 Full Erase Disc
Copyright © 2011 by EZ DUPE, Inc. All Rights Reserved.
6. Full Erase
Completely remove all data from a DVD-RW disc. The more data on a DVD-RW, the longer
time it will take to erase the disc. Select the Full Erase Disc from the main menu and press
OK. The process is the same as the Quick Erase Disc function.
2.7 System
7. System
This function provides information about the DVD-ROM drive, DVD-RW drive and DVD
Backup. Use the UP/DOWN button to select functions.
2.7.1 Show DVD-ROM
Select 7.1 Show DVD-ROM Function.
DVD-ROM DRIVE. Select 7. System, press OK and select 7.1 Shows DVD-ROM.
Copyright © 2011 by EZ DUPE, Inc. All Rights Reserved.
Function [7.1] shows the model name and version of DVD-ROM drive.
Press the OK button then LCD will show as follows
DVD-ROM Model name
DVD-ROM Version
2.7.2 Show DVD-RW
2.DVD-RW. Function [7.2] shows the model name and version of DVD-RW drive.
Select 7.2 Show DVD-ROW function
Press the OK button then the LCD will shown as follows.
DVD-RW model name
DVD-RW version
Copyright © 2011 by EZ DUPE, Inc. All Rights Reserved.
2.7.3 Update BIOS
Function [7.3] helps you Update BIOS:
(If you insert an old BIOS disc, the LCD shows as below warning message:)
***
No New BIOS BIOS
version is not newer than the system.
If the Coach detects the latest BIOS version in the BIOS disc, it will automatically update the old
Bios to a new one.
Note:
The Coach has the ability to receive firmware updates via DVD-ROM. Updating the system will
not be necessary under normal use. Do not proceed with this action unless you have received
a notice that a firmware update is needed.
Warning:
When updating BIOS, DO NOT press power button, otherwise the Coach will not boot up
again!
The BIOS updating processes are as follows:
Check current disc
Copyright © 2011 by EZ DUPE, Inc. All Rights Reserved.
Erase Flash ROM.
Updating BIOS
Process completed
New BIOS Update!
Restart System!
System reboots.
After updating new BIOS, the system will reboot. You can see the new version of DVD Backup
display.
2.7.4 Machine Info
Function [7.4] shows the machine information of the BIOS.
Select 7.4 Machine Info function.
Copyright © 2011 by EZ DUPE, Inc. All Rights Reserved.
S/W Version: 6.54
2.7.5 Burn In
2.8 Music Player
The Coach can be used as an audio CD player when you choose the Music Player
function.
Here is an image of the Music Player function screen
8. Music Player
This is the image you’ll see when the Coach is loading your audio CD
Copyright © 2011 by EZ DUPE, Inc. All Rights Reserved.
When you come to this screen, you decide which track you want to listen to.
When you come to this screen, you decide whether you want to listen to it once or have
the tracks repeat.
You can press YES button to pause player, hitting it again will play.
Hold UP/DOWN to increase/decrease volume.
Press UP/DOWN button to forward/backward music tracks.
Copyright © 2011 by EZ DUPE, Inc. All Rights Reserved.
Copyright © 2011 by EZ DUPE, Inc. All Rights Reserved.
Chapter 3 USB 2.0 Interface
The Coach can be hooked up directly to a PC. When you hook up the Coach to a PC, it will work
as two drives, one external USB 2.0 DVD-ROM drive and one DVD-RW drive. All you need to do
is connect the Coach up ANYTIME to a PC with the USB cable that is included.
The LCD will display the screen above. If your operating system supports USB devices, the
computer will detect TWO external USB devices!
You just have to unplug it if you don’t want to use the USB feature.
Copyright © 2011 by EZ DUPE, Inc. All Rights Reserved.
Appendix
A:
FAQ
Q:
If you place the wrong type of disc in the DVD-RW drive, the LCD will show the message:
Error……
No Blank Disc
Target is not blank disc
A:
If you decide to duplicate a DVD-R disc, you will need to use a blank DVD-R disc.
If you are using a DVD-RW disc, you will probably need to execute the [Quick Erase
Disc] function to remove data on the DVD-RW disc.
Q:
When you put a DVD-R disc in the DVD-RW drive and execute the [Quick Erase Disc]
function, the LCD will show the following error message:
Error…
No Erasable Disc
Target is not DVD-RW disc
A:
DVD-R discs are not erasable. Change to a DVD-RW disc.
Q:
When you execute the [Update BIOS] function, it shows the error message below.
* Wrong Disc * [08]
Put BIOS Disc
A:
Inserted disc is not an
updated BIOS disc.
Insert a BIOS disc in the CD-ROM drive.
Copyright © 2011 by EZ DUPE, Inc. All Rights Reserved.
B:
Specifications:
Supported Disc Format
Maximum Recording Speed
Supported Recording Discs
External PC Link
Analog Audio Output
Supported OS
Power Adapter
Gross Weight
Dimensions
DVD-ROM, DVD-R, DVD-Video, DVD-RW, DVD+R,
DVD+RW, DVD-RAM, CD-DA, CD-ROM Mode 1, CDROM XA Mode 2, Multi-session Photo CDTM,, CD-I,
Video CD, CD Extra (CD Plus).
DVD-R:
2 ~ 4X
DVD-RW:
2X
DVD-RAM:
2X
DVD+R:
2.4 ~ 4X
DVD+RW:
2.4 ~ 4X
CD-R:
8 ~ 16X
CD-RW:
8X
12 cm 4.7GB DVD-R/RW;DVD+R/RW;DVD-RAM
12 cm 80min/700MB CD-R
12 cm 74min/650MB CD-RW
8 cm 1.47GB mini DVD-R
8 cm 24min/210MB mini CD-R
8 cm 50MB Business CD-R
USB 2.0 (for external CD/DVD-ROM/RW drives)
Earphone jack (44.1KHz, 16bit Stereo)
Digital Volume Control
Windows 98SE/ME/2000/XP
Mac OS X (10.1.2 or later)
Input: AC 100~240V, 50/60Hz
Output: DC 5V, 3.8A
4 lbs
(2.2 kgs)
6" x 7" x 1.5" (bare drive only)
(152mm x 178mm x 38mm)
10.7" x 9" x 3.6" (giftbox)
(271mm x 230mm x 90mm)
* Specifications are subject to change without notice.
Copyright © 2011 by EZ DUPE, Inc. All Rights Reserved.