1
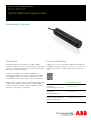
Operating instructions OI/ADS430–EN Rev. A
Aztec ADS430
Optical dissolved oxygen probe
Measurement made easy
Introduction
For more information
The ADS430 (RDO® PRO-X) probe is a rugged, reliable
instrument designed to deliver accurate dissolved oxygen (DO)
data across a wide measurement range using the latest optical
technology for DO measurement.
Publications for the associated Aztec AWT440 transmitter are
available for free download from www.abb.com/measurement
(see links and reference numbers below) or by scanning this
code:
The probe is designed for use with the ABB AWT440
multi-input transmitter that features 'hot-plugging' capability.
'Hot-plugging' enables new or replacement sensors to be
connected without the need to power down the transmitter.
When used in conjunction with the optional ADS430 EZCLEAN
compressed air supply unit (connected to an ABB adaptor
nozzle or flowcell), a schedule can be configured to provide
automatic in situ cleaning of the probe.
search for or click on:
Aztec AWT440 multi-input
transmitter
Commissioning instructions
CI/AWT440-EN
Aztec AWT440 multi-input
transmitter
Operating instructions
OI/AWT440-EN
Aztec ADS430 EZCLEAN
compressed air supply unit
Operating instructions
OI/ADS430/EZCLN-EN
Contents
1 Health & Safety ..........................................................3
1.1
1.2
1.3
1.4
1.5
1.6
1.7
Document symbols ...................................................... 3
Safety precautions ....................................................... 3
Potential safety hazards ............................................... 3
1.3.1 Aztec ADS430 probe – electrical ...................... 3
Safety standards .......................................................... 3
Product symbols .......................................................... 3
Product recycling and disposal (Europe only) ............... 3
Restriction of Hazardous Substances (RoHS) .............. 3
2 System overview .......................................................4
3 Installation ..................................................................5
3.1
3.2
3.3
3.4
3.5
Siting ........................................................................... 5
Probe dimensions ........................................................ 5
Storing the sensor cap ................................................. 5
Fitting the sensor cap .................................................. 5
Mounting / cleaning options ......................................... 6
4 Sensor setup – first-time installation ........................7
5 Sensor setup ..............................................................8
5.1
Sensor Setup ............................................................... 9
6 Calibration ................................................................11
6.1
6.2
6.3
6.4
6.5
6.6
Calibrate menu .......................................................... 11
1-Point calibration (water-saturated air) ...................... 12
2-Point calibration (100 % and 0 % saturation) ........... 14
Abort calibration ......................................................... 16
Calibration timings ..................................................... 16
6.5.1 Stability period ................................................ 16
6.5.2 Slow probe response ..................................... 16
Calibration troubleshooting –
slow sensor calibration or
no response to dissolved oxygen changes ................. 16
7 Maintenance ............................................................17
7.1
7.2
7.3
7.4
Cleaning the sensor cap ............................................ 17
Cleaning the optical lens ............................................ 17
Cleaning the probe body ............................................ 17
Diagnostic messages ................................................. 17
8 Specification ............................................................18
9 Spares and accessories ..........................................19
9.1
9.2
Spares ....................................................................... 19
Accessories ............................................................... 19
Acknowledgements ......................................................19
2
OI/ADS430–EN Rev. A | Aztec ADS430 | Optical dissolved oxygen probe
1 Health & Safety
1.1 Document symbols
Symbols that appear in this document are explained below:
WARNING – Bodily injury
This symbol in conjunction with the signal word
'WARNING' indicates a potentially dangerous situation.
Failure to observe this safety information may result in
death or severe injury.
IMPORTANT (NOTE)
This symbol indicates operator tips, particularly useful
information or important information about the product
or its further uses. The signal word 'IMPORTANT
(NOTE)' does not indicate a dangerous or harmful
situation.
1.2 Safety precautions
Be sure to read, understand and follow the instructions
contained within this manual before and during use of the
equipment. Failure to do so could result in bodily harm or
damage to the equipment.
WARNING – Bodily injury Installation, operation,
maintenance and servicing must be performed:
— by suitably trained personnel only
— in accordance with the information provided in this
manual
— in accordance with relevant local regulations
1.5 Product symbols
Symbols that may appear on this product are shown below:
Direct current supply only.
This symbol identifies a risk of chemical harm and
indicates that only individuals qualified and trained to
work with chemicals should handle chemicals or
perform maintenance on chemical delivery systems
associated with the equipment.
This symbol indicates the need for protective eye wear.
This symbol indicates the need for protective hand
wear.
Recycle separately from general waste under the
WEEE directive.
1.6 Product recycling and disposal (Europe only)
Electrical equipment marked with this symbol may not
be disposed of in European public disposal systems
after 12 August 2005. To conform to European local
and national regulations (EU Directive 2002/96/EC),
European electrical equipment users must now return
old or end-of-life equipment to the manufacturer for
disposal at no charge to the user.
ABB is committed to ensuring that the risk of any
environmental damage or pollution caused by any of its
products is minimized as far as possible.
1.3 Potential safety hazards
1.3.1 Aztec ADS430 probe – electrical
The probe operates on 24 V DC supplied from the transmitter.
There are no hazardous voltages present.
1.4 Safety standards
This product has been designed to satisfy the requirements of
IEC61010-1:2010 3rd edition 'Safety Requirements for
Electrical Equipment for Measurement, Control and Laboratory
Use' and complies with US NEC 500, NIST and OSHA.
IMPORTANT (NOTE) For return for recycling, please
contact the equipment manufacturer or supplier for
instructions on how to return end-of-life equipment for
proper disposal.
1.7 Restriction of Hazardous Substances (RoHS)
The European Union RoHS Directive and subsequent
regulations introduced in member states and other
countries limits the use of six hazardous substances
used in the manufacturing of electrical and electronic
equipment. Currently, monitoring and control monitors
do not fall within the scope of the RoHS Directive,
however ABB has taken the decision to adopt the
recommendations in the Directive as the target for all
future product design and component purchasing.
Aztec ADS430 | Optical dissolved oxygen probe | OI/ADS430–EN Rev. A
3
2 System overview
Item Feature
ADS430 probe components are shown in Fig. 2.1:
A
EZLink digital sensor connector
B
Shroud
C
Sensor cap (supplied unfitted in sealed factory-supplied
container)
Note. the sensor cap serial number is programmed
on the memory chip inside the cap.
D
Probe body (including temperature sensor)
E
10 m (39.3 ft.) fixed cable
Note. The probe serial number is printed on
a label at the plug end of the fixed cable.
For extension cables (including twist-lock connector) –
see Section 9.2, page 19.
F
Calibration chamber
G
Calibration chamber storage cap
H
Calibration chamber vented calibration cap
I
Sponge wafer
AD
S4
30
xx
xx
xx
Probe serial
number
Temperature
sensor
Table 2.1 Probe – component descriptions
Fig. 2.1 ADS430 probe components
4
OI/ADS430–EN Rev. A | Aztec ADS430 | Optical dissolved oxygen probe
3 Installation
4.
Align arrow G on sensor cap E with index mark H on
the probe.
3.1 Siting
IMPORTANT (NOTE) When fitting the sensor cap,
DO NOT touch the cap end.
Max.
210 m
(64 ft.)
5.
Slide sensor cap E over probe tip D firmly until it seals
over O-rings F – do not twist the cap.
6.
Refit shroud A by screwing it onto probe body B.
Ensure O-ring is fitted.
Fig. 3.1 Siting the sensor
3.2 Probe dimensions
Dimensions in mm (in.).
203
(8)
57
(2.27)
47 (1.85)
Fig. 3.2 Probe dimensions
3.3 Storing the sensor cap
IMPORTANT (NOTE) Prior to installation, the
sensor cap (see Fig. 2.1, page 4) must remain stored
in the sealed factory-supplied sleeve.
3.4 Fitting the sensor cap
1. Remove the probe assembly from the box.
Referring to Fig. 3.3:
2.
Unscrew shroud A from probe body B and remove dust
cover C from probe tip D.
Retain the dust cover for later use.
3.
Remove sensor cap E from it’s sealed storage sleeve.
IMPORTANT (NOTE)
— Do not allow moisture or atmospheric humidity
inside sensor cap E . Keep it in the sealed
sleeve until it is ready to be installed. Ensure the
2 O-ring grooves on the probe are dry and
O-rings F are not rolled or pinched when
the cap is fitted.
Fig. 3.3 Fitting the sensor cap
— The sensor cap lifetime is 2-years after the first
reading has been taken. Install by the date
printed on the package.
Aztec ADS430 | Optical dissolved oxygen probe | OI/ADS430–EN Rev. A
5
3.5 Mounting / cleaning options
Probe mounting / cleaning options are shown in Table. 3.1:
B
A
C
E
D
F
User-supplied
mounting
bracket
G
H
tion
Cau
Item
A
B
Mounting option
Floating ball assembly: ADS430110 (including boom) or
floating ball assembly kit: ADS430120 (excluding boom)
—
suitable for handrail mounting using swivel / tilt
bracket (item G ) or tilt bracket (Item H )
Air cleaning system: ADS430170
—
shown fitted to dip pole and floating ball assembly
Item
Mounting option
Flowcell pipeline mount: ADS430160
E
F
—
suitable for wall (surface) mounting
(includes wall mounting clip)
Open tank flanged dip mount: ADS430150
—
for mounting on user-supplied mounting bracket
Handrail mounting bracket – swivel / tilt action:
C
Open channel and open tank mounting kit: ADS430140
—
suitable for floor / wall (surface) mounting
G
—
—
ADS430130:
48 mm (1.89
ADS430135:
50 mm (1.97
for 42 (1.7 in.) handrail and
in.) diameter boom
for 50 mm (1.97 in.) handrail and
in.) diameter boom
Handrail mounting bracket – tilt (standard):
D
Dip / Pole assembly: ADS430100 (including dip pole) or
pole mounting adaptor kit: ADS430105 (excluding dip pole)
—
H
handrail-mounted using tit bracket (Item H )
—
—
ADS430125: for 42 mm (1.7 in.)
48 or 50 mm (1.89 in. or 2.0 in.)
ADS430128: for 50 mm (2.0 in.)
48 or 50 mm (1.89 in. or 2.0 in.)
EZClean compressor unit:
I
Table 3.1 Probe mounting / cleaning options
6
OI/ADS430–EN Rev. A | Aztec ADS430 | Optical dissolved oxygen probe
—
—
ADS430050: 230 V AC
ADS430051: 115 V AC
handrail and
diameter boom
handrail and
diameter boom
4 Sensor setup – first-time installation
The following Configuration parameters are set at Easy
Setup level:
—
—
—
—
—
—
—
—
—
—
IMPORTANT (NOTE)
Perform this procedure when a new / replacement
sensor cap is connected to the transmitter for the first
time only. For existing sensors, see Section 5, page 8.
To perform a first-time installation (Easy Setup menu):
1.
Connect a new or replacement probe to the transmitter’s
EZLink connector – see transmitter Operating instructions
OI/AWT440-EN.
The New Sensor S(1 – 4) Detected Start Easy Setup ?
prompt is displayed identifying the new / replacement
sensor (S1 to S4):
IMPORTANT (NOTE)
Refer to Section 5.1, page 9, for parameter details – not
all parameters in Section 5.1 are displayed at Easy
Setup level.
00-00-2014
15:21:24
AWT440
New Sensor S3
Detected
Start Easy
Setup ?
Tag
PV Type
Units
Range High
Range Low
Clean Interval
Salinity Units
Salinity Correction
Pressure Units
Barometric Pressure
6.
Continue with configuration of the required parameters.
On completion the Easy Setup start screen is displayed:
Menu
Easy Setup
2.
To enter Easy Setup level, press the
(below the
icon).
key
The Easy Setup start screen is displayed:
Exit
Menu
7.
Easy Setup
3.
To exit Easy Setup, press the
key (below the Exit
prompt) to display the Operator Page.
Pressing the
key (below the Select prompt) re-enters
the Easy Setup level where parameters can be reviewed or
modified after 1st time connection.
Exit
Select
Press the
key (below the Select prompt).
To enter Easy Setup level, press the
(below the Select icon).
Select
After completing the Easy Setup level, pressing the
or
key enters the Advanced Configuration level, where
all available sensor and transmitter parameters can be
reviewed or modified.
key
The Configuration parameter is displayed on the left of the
screen and the factory default value for it is displayed on
the right.
4.
Press the
key (below the Edit prompt) to change the
default value to the required value / selection.
5.
Press the
key (below the Next prompt) to accept the
value / selection displayed and advance to the next
configuration parameter.
IMPORTANT (NOTE)
To re-configure an existing probe (after first-time
installation), enter the Configuration level (see Section
5.1, page 9) via the Operator Page – refer to transmitter
Operating instructions OI/AWT440-EN for Operator
Page details and navigation.
8.
When the probe has been configured, perform a Calibrate
routine – see Section 6, page 11.
Aztec ADS430 | Optical dissolved oxygen probe | OI/ADS430–EN Rev. A
7
5 Sensor setup
3.
IMPORTANT (NOTE)
Perform this procedure on existing probe(s) only.
Probes are setup / configured individually. If installing a
new / replacement probe, see Section 4, page 7.
Ensure S1 :RDO is highlighted and press the
the Select prompt).
The S1 :RDO menu page is displayed:
S1 :RDO
Connect the ADS430 probe to the transmitter’s EZLink
connector – see transmitter Operating instructions
OI/AWT440-EN.
2.
At the AWT440 transmitter, press the
key to display the
Operator Page menu, then select Enter Configuration to
display the Access Level page.
Back
Use the
press the
key to select the Advanced menu item and
key (below the Select prompt).
If the Sensor Setup menu is not displayed use the
keys to scroll to it:
/
Menu
Sensor Setup
Exit
Press the
Select
key (below the Select prompt).
The Sensor Setup page is displayed:
Sensor Setup
1
2
3
S1 :RDO
Salinity Units
Pressure Units
Back
8
Select
OI/ADS430–EN Rev. A | Aztec ADS430 | Optical dissolved oxygen probe
1
2
3
Tag
PV Type
Units
Range High
Range Low
Filter Type
1.
key (below
4.
Select
Proceed with sensor setup – see Section 6.1, page 11
for parameter options.
5.1 Sensor Setup
Menu
Sensor Setup
Exit
Used to set the tag, measurement units, operational range and clean functions and to
compensate for salinity and barometric pressure.
Select
Menu
Comment
Default
S1 (to 4) :RDO
Select the optical dissolved oxygen probe to set up.
Tag
Enter an alphanumeric probe tag (16 characters maximum) to
identify the probe on the Operator Pages.
PV Type
Select measurement type.
Note. If a change is made the I/O sources are reset.
DO Concentration / % Saturation
DO Concentration
Units
Select the measurement units:
mg/l / ppm
ppm
Range High
Set the span value in Chart and Bargraph views.
50 ppm (200 %)
Range Low
Set the zero value in Chart and Bargraph views.
0
Filter Type
Select the filter type:
Off / Low / Medium / High
Off
Clean Interval
Set the interval between cleans:
Off / 15 Mins. / 30 Mins. / 45 Mins. / 1 to 24 Hours
Off
Clean Type *
Set the clean type:
Continuous / Pulsed
Continuous
Clean On Time *
Set the duration of the clean:
1 to 60 Secs
30 Secs
Clean Off Time * †
Set the duration between cleans:
1 to 60 Secs
30 Secs
Number of Pulses * †
Set the number of cleaning pulses:
1 to 10 Pulses
2 Pulses
Recovery Time *
Set the time delay between the completion of cleaning and the
display of a new reading on the operator page:
1 to 10 Min.
1 Min.
Clean Duration *
Displays the total duration of the clean:
Clean Type set to Continuous = Clean on Time + Recovery Time
Clean Type set to Pulsed = (Clean on Time + Clean Off Time)
x Number of Pulses + Recovery Time
Clean Output *
Displays the output signal the clean is assigned to.
This can be set to relay 1 to 6 or digital output 1 to 6 – refer to
OI/AWT440-EN.
No Assignment
* Displayed only if Clean Interval is NOT set to Off
† Displayed only if Clean Type is set to Pulsed
Continued on next page...
Aztec ADS430 | Optical dissolved oxygen probe | OI/ADS430–EN Rev. A
9
Menu
Comment
Default
Salinity Correction
Required when monitoring water containing high quantities of
dissolved salts. Enter the required value between 0 and 42 Practical
Salinity Units (PSU). Leave at the default value of 0 PSU if salinity
correction is not required.
0 PSU
Barometric Pressure
Barometric pressure compensation. Set the local barometric
pressure to 506 – 1114 mbar (380 – 835 mm/Hg). If the barometric
pressure is unknown, leave at the default sea-level value of 1013
mbar (760 mm/Hg).
1013 mbar
Restore Defaults
Select to reset all Sensor Setup parameters to their default values.
Salinity Units
Select the required salinity units:
PSU (Practical Salinity Units) or ppt (parts-per-thousand)
PSU
Pressure Units
Select the required barometric pressure units:
mBar / mmHg
mBar
10
OI/ADS430–EN Rev. A | Aztec ADS430 | Optical dissolved oxygen probe
6 Calibration
This section describes how to calibrate the probe and
involves measuring the probe's sensitivity to oxygen by
exposing the probe to water-saturated air.
Calibrations are initiated via the Cal prompt displayed on
Operator pages or via the Calibrate and Advanced menu
items on the Access Level page – refer to transmitter Operating
instructions OI/AWT440-EN for all transmitter menu options.
IMPORTANT (NOTE)
— Do not perform a calibration until the probe and
transmitter are installed and ready for operation.
— Before removing the probe for calibration purposes,
set the currents outputs and alarms to Hold
(enabled via the Operator Menu / Manual Hold
function).
— After calibration and probe replacement, reset the
currents outputs and alarms – see Section 6.1
below.
6.1 Calibrate menu
Menu
Calibrate
Used to calibrate the probe.
Access to the Calibrate menu is permitted via the Calibrate and Advanced levels only.
Note. During calibration, current outputs and alarms are set to Hold automatically if
Hold Outputs is enabled (see below).
Select
Exit
Menu
Comment
Default
S1(to 4) :RDO
Select the optical dissolved oxygen probe to calibrate.
Probe Calibration
Calibration Type
1-Point Cal
Select to perform a 1-point calibration in water-saturated air
(100% saturation).
2-Point Cal
Select to perform a 100% saturation calibration in water-saturated
air and a 0% saturation calibration in an oxygen-depleted solution,
e.g. sodium sulphite (Na 2SO 3).
Hold Outputs
Enable / disable the Hold Outputs function. If enabled, the current
outputs and alarm functions are held during calibrations.
Enabled
Aztec ADS430 | Optical dissolved oxygen probe | OI/ADS430–EN Rev. A
11
6.2 1-Point calibration (water-saturated air)
Referring to Fig. 6.1:
1.
2.
3.
Remove storage cap A from the top of calibration
chamber B .
7.
At the transmitter perform a 1-point calibration from
an Operator page as follows:
8.
Press the
key (below the Cal prompt).
AWT 440
Place sponge wafer C in the bottom of calibration
chamber B and saturate with approximately 10 ml
(0.34 fl oz [US]) of water.
2014–08–20
10:34:52
7.62
Fit vented calibration cap D to the top of calibration
chamber B .
25
ppm
°C
Dissolved Oxygen
CAL
4.
Ensure the probe and sensing element are completely dry.
If necessary use a paper towel to remove any water or
debris from the probe or sensing element.
5.
Slide probe E into calibration chamber B until the
sensing element is approximately 25 mm (1 in.) above
water-saturated sponge C.
6.
Allow 5 to 10 minutes for temperature stabilization prior to
continuing the calibration procedure from step 7 onwards.
The Calibrate page is displayed:
Menu
Calibrate
Exit
9.
IMPORTANT (NOTE)
— Do not leave the probe in the calibration chamber
for more than 30 minutes – this can allow
condensation to form on the surface of the sensing
element, producing false low readings after
calibration.
Select
Press the
key (below the Select prompt).
The Calibrate page is displayed with all available
sensors shown:
Calibrate
S1 :RDO
— If condensation occurs, remove the probe,
thoroughly dry the sensing element, probe and
thermistor before performing the calibration
procedure.
Back
Select
10. Use the
/
keys to select the probe to
be calibrated and press the
key
(below the Select prompt).
The Calibration Type page is displayed:
S1 :RDO
Calibration Type
1-Point Cal
25 mm
(1.0 in.)
Fig. 6.1 1-Point calibration
12
OI/ADS430–EN Rev. A | Aztec ADS430 | Optical dissolved oxygen probe
Next
Edit
15. When span calibration is complete, a results
page is displayed:
11. If 1-Point Cal is displayed, go to step 14.
If 1-Point Cal is not displayed, press the
(below the Edit prompt).
key
The Calibration Type selection page is displayed:
Calibration Type
2-Point Cal
99.98 %
24.90 °C
0.045
1.054
Exit
Cancel
OK
/
PV
Tmp
Offset
Slope
1-Point Cal
12. Use the
press the
Calibrate
keys to select 1-Point Cal and
key (below the OK prompt).
The Calibration Type page is displayed:
In the event of a calibration failure, the message
Calibration Failed is displayed with an indication
of the reason for failure, for example
'Result Out Of Bounds'.
16. Press the
key (below the Exit prompt).
The Calibrate page is displayed:
Calibrate
S1 :RDO
Calibration Type
S1 :RDO
1-Point Cal
Next
Edit
13. Press the
key below the Next prompt).
The Calibrate / Start Span Cal? page is displayed:
Calibrate
Back
17. Press the
Select
key (below the Back prompt).
The Calibrate page is displayed:
Menu
Calibrate
Start Span Cal?
Place in 100% Sat
Abort
Continue
14. Press the
key (below the Continue prompt).
Exit
Select
18. Press the
key (below the Exit prompt) to
return to the Operator page.
The Calibrate page is displayed:
Calibrate
PV
Tmp
98.26 %
25.22 °C
Settling-Please Wait
Abort
Aztec ADS430 | Optical dissolved oxygen probe | OI/ADS430–EN Rev. A
13
6.3 2-Point calibration (100 % and 0 % saturation)
IMPORTANT (NOTE)
— Do not leave the probe in the calibration chamber
for more than 30 minutes – this can allow
condensation to form on the surface of the sensing
element, producing false low readings after
calibration.
IMPORTANT (NOTE) This calibration procedure
requires 60 ml (2.0 fl oz [US])) of fresh sodium
sulphite solution.
1.
Perform a 1-point calibration.
— If condensation occurs, remove the probe,
thoroughly dry the sensing element, probe and
thermistor before performing the calibration
procedure.
Referring to Fig. 6.2:
2.
Remove storage cap A from the top of calibration
chamber B .
3.
Place sponge wafer C in the bottom of calibration
chamber B and saturate with approximately 10 ml
(0.34 fl oz [US])) of water.
4.
Fit vented calibration cap D to the top of calibration
chamber B .
5.
Ensure the probe and sensing element are completely dry.
If necessary use a paper towel to remove any water or
debris from the probe or sensing element.
6.
7.
Slide probe E into calibration chamber B until the
sensing element is approximately 25 mm (1 in.) above
water-saturated sponge C.
8.
At the transmitter perform a 2-point calibration from an
Operator page as follows:
9.
Press the
key (below the Cal prompt).
Aztec 400
2014–08–20
10:34:52
7.62
25
ppm
°C
Dissolved Oxygen
CAL
The Calibrate page is displayed:
Menu
Allow 5 to 10 minutes for temperature stabilization prior to
continuing the calibration procedure from step 8 onwards.
Calibrate
Exit
10. Press the
Select
key (below the Select prompt).
The Calibrate page is displayed with all available
sensors shown:
Calibrate
25 mm
(1.0 in.)
S1 :RDO
Fig. 6.2 1-Point calibration
Back
14
OI/ADS430–EN Rev. A | Aztec ADS430 | Optical dissolved oxygen probe
Select
11. Use the
/
keys to select the probe to
be calibrated and press the
key (below the
Select prompt).
15. Press the
key (below the Continue prompt).
The Calibrate page is displayed:
Calibrate
The Calibration Type page is displayed:
PV
Tmp
S1 :RDO
99.98 %
25.22 °C
Calibration Type
2-Point Cal
Settling-Please Wait
Abort
Next
16. When span calibration is complete, the
Calibrate / Start Zero Cal? page is displayed:
Edit
12. If 2-Point Cal is displayed, go to step 14.
If 2-Point Cal is not displayed, press the
(below the Edit prompt).
Calibrate
key
Start Zero Cal?
Place in 0% Sat
The Calibration Type selection page is displayed:
Calibration Type
Abort
1-Point Cal
2-Point Cal
Referring to Fig. 6.3:
Cancel
OK
13. Use the
press the
/
Continue
keys to select 2-Point Cal and
key (below the OK prompt).
17. Remove sponge wafer A from the bottom of calibration
chamber B (ensure vented calibration cap C is in place
at the top of the chamber).
18. Fill calibration chamber B to fill line D using 60 ml (2.0 fl
oz [US]) of fresh sodium sulphite solution.
The Calibration Type page is displayed:
S1 :RDO
Calibration Type
2-Point Cal
Next
14. Press the
Edit
19. Slide probe E into the chamber leaving at least 13 mm
(0.5 in.) between the surface of the sensing element and
the bottom of the chamber – ensure the temperature
sensor F is completely submerged in the solution.
20. Allow 5 to 10 minutes for temperature stabilization prior to
continuing the calibration procedure from step 21
onwards.
key below the Next prompt).
The Calibrate / Start Span Cal? page is displayed:
Calibrate
Start Span Cal?
Place in 100% Sat
Abort
Continue
13 mm
(0.5 in.)
Fig. 6.3 2-Point calibration
Aztec ADS430 | Optical dissolved oxygen probe | OI/ADS430–EN Rev. A
15
21. Press the
key (below the Continue prompt).
The Calibrate page is displayed:
Calibrate
PV
Tmp
2.31 %
25.31 °C
6.5 Calibration timings
Settling-Please Wait
Abort
22. When zero calibration is complete, a results
page is displayed:
2.31 %
25.40 °C
Offset
Slope
0.041
0.954
6.6 Calibration troubleshooting – slow sensor calibration or no
response to dissolved oxygen changes
1. Check probe configuration / recalibrate probe – refer to
Section 6, page 11.
Exit
23. Press the
6.5.1 Stability period
The temperature and concentration readings are monitored for
up to 10 minutes until a stable reading is achieved. When
stability is achieved, the calibration (slope and offset) values
are determined.
6.5.2 Slow probe response
If the output from the probe does not stabilize during the
Stability Period the calibration is not accepted and a Cal Failed
diagnostic is displayed, the Calibration Log is updated with a
Cal Failed message.
Calibrate
PV
Tmp
6.4 Abort calibration
A calibration is aborted by pressing the
key below the Abort
prompt displayed on the Calibrate pages (refer to transmitter
Operating instructions OI/AWT440-EN). The Calibration Log
displays the message Cal Aborted – refer to OI/AWT440-EN for
Calibration Log entries.
key (below the Exit prompt).
If the fault persists:
The Calibrate page is displayed:
2.
Calibrate
S1 :RDO
If the fault persists:
3.
Back
24. Press the
Select
key (below the Back prompt).
The Calibrate page is displayed:
Menu
Calibrate
Exit
Select
25. Press the
key (below the Exit prompt) to
return to the Operator page.
26. Once the calibration is complete, remove the sensor from
the chamber and rinse thoroughly to remove all of the
sodium sulphite.
16
Clean the sensor cap and lens – refer to Section 7,
page 17.
OI/ADS430–EN Rev. A | Aztec ADS430 | Optical dissolved oxygen probe
Replace the sensor cap – refer to Section 9, page 19.
If the fault persists:
4.
Replace the probe.
7 Maintenance
7.1 Cleaning the sensor cap
1. Isolate the transmitter and remove the probe from the
process.
Referring to Fig. 7.1:
2. Unscrew shroud A from probe body B.
3. Rinse sensor cap C with clean water from a spray bottle.
4. Gently wipe sensor cap C with a soft-bristled brush or, if
biofouling is present, a soft cloth.
If necessary, use a grease remover to remove grease.
5. Refit shroud A by screwing it onto probe body B.
7.3 Cleaning the probe body
1. Isolate the transmitter and remove the probe from
the process.
Referring to Fig. 7.3:
IMPORTANT (NOTE)
— Ensure shroud A is secured in place before
cleaning.
2.
Gently scrub shroud A and probe body B with a
soft-bristled brush or nylon dish scrubber.
If necessary, use a grease remover to remove grease or
other matter from the body, or soak in vinegar and
deionized water to remove mineral deposits or extensive
fouling.
Fig. 7.1 Cleaning the sensor cap
7.2 Cleaning the optical lens
1. Isolate the transmitter and remove the probe from the
process.
Referring to Fig. 7.2:
2. Unscrew shroud A from probe body B.
3. Grip sensor cap C between your thumb and forefinger
and carefully slide it off of probe sensor D .
IMPORTANT (NOTE)
— DO NOT touch the cap end of sensor cap C.
— Do not allow moisture or atmospheric humidity
inside sensor cap C .
— Do not wet lens area E with water or any
solution. Use only the supplied lens cloth
for cleaning.
4.
5.
Fig. 7.3 Cleaning the probe body
7.4 Diagnostic messages
The table below shows sensor-specific icon types, diagnostic
messages and possible causes / suggested remedial action.
IMPORTANT (NOTE)
— The diagnostic icons in the following tables
conform to NAMUR 107.
— For transmitter-specific diagnostics messages,
refer to AWT440-EN.
Diagnostic Icon
NAMUR Status
Out of specification
Gently wipe optical lens E with a lens cloth (not supplied).
Refit shroud A by screwing it securely onto probe
body B .
Maintenance required
Check function
Icon
Message
Possible cause / suggested action
Cap Expired
(S1, S2, S3, S4)
The optical DO sensor cap has reached
or exceeded its expiry date. The cap
may continue operating but its
accuracy will degrade and cannot be
guaranteed to meet specification.
Replace Cap
The optical DO sensor cap will reach
expiry date in 4 weeks or less.
Replace sensor cap.
Cap Removed
The sensor cap has been removed. The
reading will drop to zero. Ensure sensor
cap is fitted onto the probe tip.
Fig. 7.2 Cleaning the optical lens
Aztec ADS430 | Optical dissolved oxygen probe | OI/ADS430–EN Rev. A
17
8 Specification
Power
Sensor type
Consumption (maximum)
50 mA @ 12 V DC
Optical (luminescent) dissolved oxygen sensor
Probe
Measurement current
6 mA typical @ 24 V DC
IP rating
IP68
Idle current (no measurement or consumption)
160 μA typical @ 24 V DC
Range
0 to 50 mg/l concentration; 0 to 600 % saturation
Cable
Accuracy
±0.1 mg/l, 0 to 8 mg/l
±0.2 mg/l, 8 to 20 mg/l
±10 % of reading, 20 to 50 mg/l
Resolution
0.01 mg/l
Response time
T90 < 45 sec; T95 < 60 sec @ 25 °C (77 °F)
Storage conditions
–5 to 60 °C (23 to 140° F)
Dimensions
47 mm (1.85 in.) diameter
Fixed length
10 m (39.3 ft.)
EZLink digital sensor connector IP rating
IP67 (when connected)
Extension cable (options)
1, 5, 15, 25, 50 m (3.2, 16.4, 49.2, 82, 164 ft.)
Maximum length (including optional extension cable)
Up to 210 m (826 ft.)
Salinity compensation
0 to 42 PSU (ppt)
Barometric pressure
506 to 1114 mbar (380 to 835 mm/Hg)
203 mm (8 in.) length
Probe internal mounting thread
1 1/ 4 NPT
Environmental ratings
Sensor cap
Pressure
10.342 bar (150 psi) from 0 to 50 °C (32 to 122 °F),
20.468 bar (300 psi) @ 25 °C (77 °F)
Typical working life
2 years
Operating temperature range
0 to 50 °C (32 to 122 °F)
IP rating
IP68 (when fitted)
Compliance
Storage conditions
1 to 60 °C (33° to 140° F) in factory container
Heavy industrial, IEC:61000-6-2:2005
Methods
Temperature sensor
Standard methods 4S00-0
Operating temperature range
0 to 50 °C (32 to 122° F)
In-Situ methods 1002-8-2009,1003-8-2009,
1004-8-2009 (EPA approved)
Accuracy
±0.1 °C typical
Resolution
±0.01 °C
Materials of construction
Sensor cap
PC / PMMA
Probe body
ABS
Temperature sensor
Titanium
Cable
Polyurethane
DS/ADS430-EN
IMPORTANT (NOTE) There are some known interferents
such as: alcohols > 5 %; hydrogen peroxide > 3 %;
sodium hypochlorite (commercial bleach) > 3 %;
gaseous sulfur dioxide; gaseous chlorine. Organic
solvents and certain petroleum-based hydrocarbons
may swell the sensing element and destroy it. Examples
include, but are not limited to, acetone; chloroform;
methylene chloride and BTEX (benzene, toluene,
ethylbenzene, xylene) compounds.
18
OI/ADS430–EN Rev. A | Aztec ADS430 | Optical dissolved oxygen probe
9 Spares and accessories
Acknowledgements
9.1 Spares
RDO is a registered copyright of In-Situ Inc.
Part number
Description
ADS430203
ABB RDO probe O-ring replacement kit
ADS430204
ABB RDO probe sensor cap replacement kit
ADS430205
ABB RDO probe calibration kit
ADS430212
Nose replacement kit
AWT4009010
1 m (3.2 ft.) extension cable
AWT4009050
5 m (16.4 ft.) extension cable
AWT4009100
10 m (32 ft.) extension cable
AWT4009150
15 m (49.2 ft.) extension cable
AWT4009250
25 m (82 ft.) extension cable
AWT4009500
50 m (164 ft.) extension cable
Table 9.1 Spares
9.2 Accessories
Part number
Description
ADS430125*
Handrail mounting bracket for 42 mm (1.7 in.) dia handrail –
dip or floating ball systems
ADS430128*
Handrail mounting bracket for 50 mm (2.0 in.) dia handrail –
dip or floating ball systems
ADS430130*
Swivel and tilt action handrail mounting bracket for 42 mm
(1.7 in.) dia. handrail – floating ball systems only
ADS430135*
Swivel and tilt action handrail mounting bracket for 50 mm
(2.0 in.) dia. handrail – floating ball systems only
ADS430145
ADS430144
ADS430 chain mounting adaptor with 3 m (9.8 ft.) chain
Stainless steel chain (extension) – 10 m (32.8 ft.)
EZCLEAN compressor unit:
ADS430050*
– 230 V AC
ADS430051*
– 115 V AC
EZCLEAN upgrade kit; includes EZCLEAN compressor unit,
air-blast adaptor assembly, pneumatic tubing, spring clips
for dip pole and floating ball boom:
ADS430057
– 230 V AC
ADS430058
– 115 V AC
Table 9.2 Accessories
*See Section 3.5, page 6.
Aztec ADS430 | Optical dissolved oxygen probe | OI/ADS430–EN Rev. A
19
ABB Inc.
Process Automation
125 E. County Line Road
Warminster
PA 18974
USA
Tel:
+1 215 674 6000
www.abb.com
Note
We reserve the right to make technical changes or
modify the contents of this document without prior
notice. With regard to purchase orders, the agreed
particulars shall prevail. ABB does not accept any
responsibility whatsoever for potential errors or
possible lack of information in this document.
We reserve all rights in this document and in the
subject matter and illustrations contained therein.
Any reproduction, disclosure to third parties or
utilization of its contents in whole or in parts – is
forbidden without prior written consent of ABB.
Copyright© 2015 ABB
All rights reserved
3KXA494430R4201
Sales
Service
OI/ADS430–EN Rev. A
ABB Limited
Process Automation
Howard Road, St. Neots
Cambridgeshire, PE19 8EU
UK
Tel:
+44 (0)870 600 6122
Fax:
+44 (0)1480 213 339
Mail: [email protected]
04.2015
Contact us