1
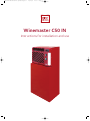
WC50IN installation guide:Layout 1
23/4/08
12:51
Page 1
Winemaster C50 IN
Instructions for installation and use
WC50IN installation guide:Layout 1
23/4/08
12:51
Page 2
Contents
Introduction: From the vine to the wine
3-5
1. Layout of premises
1.1. Hot air outlet
1.2. The cellar
1.2.1 Insulation
1.2.2 Insulation of walls and ceiling
1.2.3 Insulation of the floor
1.2.4 Insulation of the door
1.2.5 Insulation of other elements
2. Installing the Wine C50 IN
2.1. Drilling the wall
2.2. Dimensions
2.3. Installation examples
2.4 Installing the ducts
2.5 Installing the water flue
5-7
4. Servicing
4.1. Changing the filter
9
5. The guarantee
10
5.1. The legal guarantee
5.2. 2-year contractual guarantee
5.3. Conditions applicable to
the guarantee
5.4. Guarantee exclusions
and limits
3. Using the Wine C50 IN
8-9
3.1. Connecting the air-conditioner
3.2. Control panel
3.3. Automatic defrost
From the vine to the wine
In the past cellars were planned and built so that they could maintain a temperature not
exceeding 14 to 16°C for a whole season unattended. Nowadays not many cellars are
capable of this. Yet, a cellar that deserves this name, must be impervious against important
temperature changes, be as humid as necessary and at the same time, be ventilated, dark
and insensitive to vibrations.
That is why we have spent the last fifteen years, surrounded by specialists and passionate
and demanding amateurs, projecting, developing, testing and producing thousands of airconditioning systems for the conservation and ageing of wine.
If you follow our advice and adhere to our recommendations, your wines will be able to
fully develop. Before installing and using your WINEMASTER® FONDIS cellar airconditioning, you must read the following instructions carefully.
If you have any questions, please contact us!
And so... even if several long years may be necessary until the wine fully develops its
richness, the big and exciting day will come when you can uncork your wine. Carefully take
the bottle, do not cut at the top right next to the neck of the bottle, seize a beautiful
corkscrew, remove the cork without causing vibration and sit back and enjoy!
But that is a different story…
2
WC50IN installation guide:Layout 1
23/4/08
12:51
Page 3
Setting the temperature
Preset to 12°C, adjustable between 4 and 25°C*
Maximum outdoor temperature
35°C**
Cooling power
1 200 W at 15°C **
Electricity supply
230-240 V - 50 Hz - with earth connection
(supplied with 3 m cable)
Electrical power
950 W
Lighting
Fluorescent tube and switch built into the device
Heating power
500 W
The circuit breaker must be at least 16 Amps.
* The insulation quality and thickness has to be in accordance with the volume of the cellar and the set temperature.
** The cooling performance is dependant from the outside temperature. Therefore, the set temperature of 12°C for
the cellar cannot be maintained if the outside temperature of the cellar is maintained at 35°C. If the thermal safety
functions to often, there is a risk for the condensator and starter to be damaged. In all the cases, it must be avoided
that the outside temperature remains at 35°C. This high temperature should be limited to the summer period.
1. Layout of Premises
The air-conditioner is installed entirely in the wine cellar: it can be fitted on the floor or on
a suitable support which can bear the weight of the unit.
1.1 Hot air outlet
- If the WINEMASTER hot air outlet is indoors, the room must be well-ventilated to ensure
that the temperature does not exceed 35°C. The ideal temperature is arround 20°C. It is
preferable to discharge the hot air outside if possible, via ducts.
- The air intake and outlet ducts must not be connected to each other nor obstructed, to
avoid overheating the unit. The two openings (intake and outlet) must therefore be at
least 200mm apart. The maximum length of each duct must not exceed 10 metres. This
lengh is to be reduced according to number of bends (by 1 meter per bend). The radius of
the bends must be higher than 300 mm. The diameter of the ducts must not be reduced.
1.2 The cellar
1.2.1 INSULATION
Insulation of the 4 walls, the door, the ceiling and the floor is essential for the
Winemaster to work properly. Adequate insulation helps to obtain the stability of the
temperature and the humidity. The table on the next page (choice of insulation) can be
used to determine the type and the thickness of insulation needed according to the
internal volume of the cellar and a cellar temperature of 12°C.
Insulation continuity :
Insulating components must be assembled preferably by interlocking panels or gluing
the panels together, to ensure perfect continuity of insulation. This is very important as
it prevents heat and humidity entering from the outside which would counter the
effects of regulation.
3
WC50IN installation guide:Layout 1
23/4/08
12:51
Page 4
IMPORTANT
The validity of the WINEMASTER guarantee depends on the values in the "Choice of insulation"
table being strictly respected, for all the cellar walls, including floor and ceiling + door, as well
as perfect continuity of insulation and installation in accordance to the user guide.
C50 In insulation
MINIMUM THICKNESS OF INSULATION (mm)
for 12°C cellar temperature
CELLAR
VOLUME (m3)
MINIMUM
THERMAL
RESISTANCE
R : m² . °C/W
EXPANDED
POLYSTYRENE
λ = 0.044W/m°C
EXTRUDED
POLYSTYRENE
λ = 0.030W/m°C
POLYURETHANE
FOAM
λ = 0.025W/m°C
14
16
18
20
22
24
26
28
30
32
34
36
38
40
42
46
50
0.94
1.08
1.21
1.35
1.48
1.62
1.75
1.88
2.02
2.15
2.29
2.42
2.56
2.69
2.82
2.96
3.23
50
50
60
60
70
80
80
90
90
100
110
110
120
120
130
130
150
30
40
40
40
50
50
60
60
60
70
70
80
80
90
90
90
100
30
30
40
40
40
50
50
50
60
60
60
70
70
70
80
80
80
1.2.2 WALL AND CEILING INSULATION
The manufacturers propose their insulating panels in several forms:
- insulation alone
- complexes: the insulation is lined with a facing (plaster, mineral, etc...)
- sandwiches: the insulation is lined on each side with a wooden or plaster panel.
The panel facing is important: it protects the insulation from shocks and guarantees
long life.
Do not use mineral fibre insulation (glasswool, stonewool,etc...) because it stores
humidity and loose its insulation capacity.
Protection against rodents
Some insulating materials are damaged by rodents (mice, rats…). It is therefore
essential to make sure that the walls of the cellar do not contain holes which would
allow rodents access to the insulation. This insulation must be lined on the inner
surface of the cellar, with a protective facing. Polyurethane insulation, because of its
chemical composition, is not attacked by rodents.
4
WC50IN installation guide:Layout 1
23/4/08
12:51
Page 5
1.2.3 FLOOR INSULATION
The cellar floor must be able to support shelves and the wine stored on them.
You should therefore choose an insulating material with adequate compression
resistance for this part.
Manufacturers recommend appropriate insulation or materials designed specifically for
floor insulation, in their documentation.
Puncture resistance (feet of shelves in particular) is provided:
- by using "complex" insulation panels lined, on the upper surface, with a strong panel.
- by facing the insulation with a panel of chipboard (approx. 15 mm thick), or any other
suitable covering plaster and slab, for example).
1.2.4 THE DOOR
It is part of the continuity of insulation.
There are two possible solutions:
- to insulate the existing door using the same type as insulation as was used for the
cellar walls. Insert a seal such as foam, between the door panel and the frame, all
around the edge.
- use a FONDIS ISOTHERMAL DOOR, lined with polyurethane foam. It includes a seal
around its periphery, with a magnetic closure.
1.2.5 INSULATION OF OTHER ITEMS
A fridge or another appliance producing heat must not be placed inside the cellar.
For example, any hot water pipe going through the cellar must also be insulated.
2. Installing the Wine C50 IN in the wine cellar
Make sure you have chosen the best place for fitting the air-conditioner.
- chose the best place in order that the lengh of the flexible ducts are as short as possible,
- put the wine cellar on the ground or on his horizontal support,
- there should not be any obstacle in front of the ventilation grid, to facilitate air flow,
- the support or floor must be level and not transmit vibrations.
2.1 Drilling the wall
- Draw the grid’s site on the wall which divide the wine cellar to the reject indoor.
- Pierce 2 holes Ø 160 mm.
- Install the 2 grids in the wall.
- Connect the duct at the back of grids (§ 2.3).
- The seal between the ducts and the insulation must be filled (with polyurethane foam
for example).
5
WC50IN installation guide:Layout 1
23/4/08
12:51
Page 6
2.2. Dimensions
2.2. Installation examples
6
WC50IN installation guide:Layout 1
23/4/08
12:51
Page 7
2.4 Installing the ducts
The connections must be sealed to prevent condensation forming on the walls
of the air-conditioner.
1. Place the inside duct
on the flue collar
2. Stick the adhesive tape across
the flue collar and the duct.
3. Take it round several times
to ensure a good seal.
4. Position the insulation duct,
then the ring clamp
5. Close the head of the ring clamp
after tightening it manually.
6. Screw up the ring clamp and
repeat the operation on the
other flue collar.
2.4 Installing the water flue
The connections must be sealed to prevent condensation forming on the walls
of the air-conditioner.
1. Screw the bend, supplied with
the equipment, on the right side
of the device.
2. Slide on the PVC tubing.
3. Connect the free end of the PVC
tubing to a wastewater point or
retention tank.
Avoid ‘counter-slopes’ or ‘siphons’
IMPORTANT
Wait for 24 hours before switching the air-conditioner on.
7
WC50IN installation guide:Layout 1
23/4/08
12:51
Page 8
3. Using the Wine C50 IN
C50IN must be installed by complying with the national rules of electric installation.
3.1 Connecting the air-conditioner
Connect the male plug to a 230V / 16A power socket. Switch on the air-conditioner by
pressing button 1 on the diagram below. The fan on the cellar side comes on immediately.
The compressor may not come on until 2 minutes later if the temperature in the cellar is
higher than the set temperature. If the cellar temperature matches the thermostat setting,
the compressor will not come on.
If you want to reduce the setting quicker, you can press button 2 on position II. I this case,
the speed of air circulation increase and the wine cellar will reach nominal power.
For the cellars where the volume is higher than 20m3 (this volume could change according
the insulation condition). It is advisable, specialy during heat period, to always remain with
position II.
3.2 Control panel
The air-conditioner is equipped with an electronic
thermostat fitted to the front of the device so
that the operating status of the WINEMASTER can
be seen at any time from inside the cellar.
The thermostat permanently displays the
temperature of the air in the cellar which varies
in range of 2 °C. The variation of the air
temperature carries a smaller variation than the
wine’s one due to the thermal inertia of the
liquid.
The thermostat as been set by factory at 12°C.
When you start the cellar wine, you should verify
and, if need, modify the temperature following
instructions below.
The on/off button IOII (reference 1 in diagram)
allows you to start the air conditioner and select
the level of ventilation within the cellar.
The button IO (reference 2) when lit up in green
indicates the electricity connection of the unit and
allows you to illuminate the integrated flourescent lamp.
The setting of the targeted temperature of the cellar is made on the thermostat
Use the following process:
Press the button
Press then the button
for one second until the message o1 appears.
- the set temperature of the cellar will appear.
Use again the
button to increase the temperature or the
button to lower the
temperature. When the right temperature is set, press the
button to confirm it.
8
WC50IN installation guide:Layout 1
23/4/08
12:51
Page 9
3.3 Automatic defrost
The program of the thermostat will run an automatic defrost time several times a day.
During this time the compressor cannot sart. Only the fan in the cellar can function.
The condensate water produced during this period will be evacuated through the tube.
4. Servicing the Wine C50 IN air conditioner
THE DUST FILTER
It is essential to replace the dust filter in the air-conditioner as soon as necessary and at
least once a year. If it is clogged, the air-conditioner could be seriously damaged.
4.1 Changing the filter
1. Unscrew the four black plastic
screws on the front of the air
conditioner.
2. Remove the cover.
3. Pull the tab to release the filter.
Replace it with a FONDIS filter only! You can then replace the cover.
9
WC50IN installation guide:Layout 1
23/4/08
12:51
Page 10
5. The guarantee
5.1. The legal guarantee
The contractual guarantee is, to the advantage of the buyer, not exclusive of the legal
guarantee for hidden mistakes and defects, in accordance with the conditions of art.
1641 ff of the Civil Code.
5.2. 2-year contractual guarantee
The air conditioner has a 2-year guarantee for all defects of production. During the term of
the guarantee, FONDIS replaces all parts that are demonstra-bly defective. In case of a
power failure, FONDIS replaces all defective parts, which were dam-aged due to the
intervention of the dealer or his representative. Should the cooling fail, FONDIS is entitled
to demand that the appliance be re-turned to the factory for repair. The material has to be
packed and ready to be collected by a carrier of FONDIS. The repair works have to be
carried out in accordance with the written agreements of the FONDIS after-sales service.
5.3. Conditions applicable to the guarantee
The contractual guarantee applies to all appliances that were installed and used according
to the "Instructions for installation and use". Condition for the applica-bility of the
guarantee is the presentation of the invoice from the purchase or a copy thereof.
5.4. Guarantee exclusions and limits
The guarantee is NOT VALID in the following cases:
- Where the insulation of the cellar and the installation was not carried out in accordance
with the presented instructions.
- Where the failures are due to negligence, bad servicing, wrong or inappropriate use of the
air conditioner.
- The aim of the exchange of spare parts or their repair within the guarantee does not
prolong the guarantee.
- Where the service information was not supplied to the after sales service. FONDIS SA
cannot under any circumstances be held responsible for the direct or indirect
consequences of an incorrect function of the air conditioner. The guarantee applies
exclusively to the product supplied by FONDIS S.A.
The European Community attaching a great importance to the environment and
the waste processing, set up Directive 2002/96/CE relating to the Electric and
Electronic Component Waste. In accordance with this standard, the presence of the
logo "barred dustbin" is obligatory. This logo means that this product cannot be to in
no case thrown in the household refuse. It must be given to a suitable collection point
for the treatment, valorization, recycling of Electric and Electronic Components.
Acting like that you make a gesture for the environment and you contribute to the
safeguarding of the natural resources as well as to the protection of human health.
10