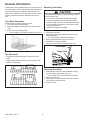
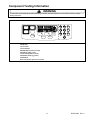
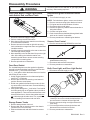
1
This manual covers general information on Freestanding Gas BIG OVEN. Refer to individual Technical Sheets for information on specific models. Service Gas Freestanding BIG OVEN™ Service Manual for Amana® This manual is to be used by qualified appliance technicians only. Amana does not assume any responsibility for property damage or personal injury for improper service procedures done by an unqualified person. RS2310005 Revision 0 April 2001 Important Information Pride and workmanship go into every product to provide our customers with quality products. It is possible, however, that during its lifetime a product may require service. Products should be serviced only by a qualified service technician who is familiar with the safety procedures required in the repair and who is equipped with the proper tools, parts, testing instruments and the appropriate service manual. REVIEW ALL SERVICE INFORMATION IN THE APPROPRIATE SERVICE MANUAL BEFORE BEGINNING REPAIRS. Important Notices for Consumers and Servicers ! WARNING To avoid risk of serious injury or death, repairs should not be attempted by an unauthorized personal, dangerous conditions (such as exposure to electrical shock) may result. ! CAUTION Amana will not be responsible for any injury or property damage from improper service procedures. If performing service on your own product, assume responsibility for any personal injury or property damage which may result. To locate an authorized servicer, consult your telephone book or the dealer from whom you purchased this product. For further assistance, contact: 1 (800) 628-5782 first, if no answer call number listed below. CONSUMER AFFAIRS DEPT. AMANA APPLIANCES AMANA, IOWA 52204 OR CALL 1 (800) 843-0304 If outside the United States contact: AMANA ATTN: CONSUMER AFFAIRS DEPT AMANA, IOWA 52204, USA Telephone: (319) 622-5511 Facsimile: (319) 622-2180 TELEX: 4330076 AMANA CABLE: "AMANA", AMANA, IOWA, USA Recognize Safety Symbols, Words, and Labels ! DANGER DANGER—Immediate hazards which WILL result in severe personal injury or death. ! WARNING WARNING—Hazards or unsafe practices which COULD result in severe personal injury or death. ! CAUTION CAUTION—Hazards or unsafe practices which COULD result in minor personal injury or product or property damage. RS2310005 Rev. 0 2 Table of Contents Disassembly Procedures Oven Door Handle, Outer/Inner Glass, and Door Hinges ......................................................... 17 Reverse Procedure to Reassemble Oven Door ... 18 Clock/Timer Mechanism, Spark Module, and High Limit Sensor ................................................ 18 Cooktop, Top Burner Gas Valves, Top Burner Bases, Top Burner Venturies, and Spark Electrodes ................................................. 18 Spark Switches .................................................... 18 Oven Bottom ........................................................ 18 Door Latch Motor, Plunger Light Switch, Latch Switch, Rod, and Door Catch ..................... 19 Oven Door Gasket ............................................... 19 Storage Drawer Tracks ........................................ 19 Bake Burner Ignitor and Broil Burner Ignitor ........ 19 Sensor, Oven Control .......................................... 19 Bulb, Oven Light, and Oven Light Socket ............ 19 Pressure Regulator and Low Voltage Oven/Broil Gas Valve........................................... 20 Broil Burner .......................................................... 20 Bake Burner ......................................................... 20 Flue ...................................................................... 21 Leveling Leg Bracket ........................................... 21 Front Frame and Oven Liner ............................... 21 Side Panel ........................................................... 21 Power Cord .......................................................... 21 Appendix A LP/Propane Conversion ..................................... A-2 Converting Back to Natural Gas ........................ A-4 Appendix B Quick Start Reference Guide ............................. B-2 Appendix C Owner's Manual ................................................. C-2 Important Information ................................................... 2 Important Safety Information ........................................4 ALL APPLIANCES .................................................5 SURFACE BURNERS ...........................................5 OVENS .................................................................. 5 SELF-CLEANING OVENS .....................................5 VENTILATION HOODS ......................................... 5 DELAYED IGNITION ............................................. 6 General Information Cooking Utensils ....................................................7 Pan Bottom Test ....................................................7 Oven Rack Placement ...........................................8 Pan Placement ...................................................... 8 Removing Oven Door ............................................ 8 Replacing Oven Door............................................. 8 Replacing Oven Light ............................................. 9 Removing Storage Drawer .....................................9 Cleaning ................................................................. 9 Cleaning Stainless Steel ...................................... 10 Component Testing Information ................................. 11 Troubleshooting Procedures Sealed Top Burners ............................................. 15 Bake and Broil Burners ........................................ 16 3 RS2310005 Rev. 0 Important Safety Information ! WARNING ! WARNING To reduce risk of the appliance tipping, it must be secured by a properly installed anti-tip bracket. To verify bracket has been installed properly, remove the storage drawer or panel and look under the range with a flashlight. Bracket must be engaged in the rear corner of the range. • ALL RANGES CAN TIP • INJURY TO PERSONS COULD RESULT • INSTALL ANTI-TIP BRACKET PACKED WITH RANGE • REFER TO INSTALLATION INSTRUCTIONS ! CAUTION DO NOT TOUCH SURFACE BURNERS OR AREAS NEAR BURNERS—Areas near surface burners may become hot enough to cause burns. During and after use do not touch, let clothing or other flammable materials touch or contact surface burners or areas near surface burners until they have had enough time to cool. These areas include the rangetop and backguard. ! CAUTION DO NOT TOUCH GAS BURNERS OR INTERIOR SURFACES OF OVEN—Interior surfaces of an oven become hot enough to cause burns. During and after use do not touch, let clothing or other flammable materials touch, or contact heated interior surfaces of the oven until they have had enough time to cool. Other range surfaces that may become hot enough to cause burns are the oven door and oven vent at the backguard. ! CAUTION To avoid fire or smoke damage, • remove any flammable materials from storage drawer. Items like plastic containers and paper manuals can melt or burn. • clean excess spills before starting a self-clean cycle. To avoid personal injury, do not sit, stand or lean on oven door or oven drawer. ! WARNING To avoid risk of electrical shock, personal injury, or death, verify your range has been properly grounded and always disconnect it from main power supply before servicing. ! WARNING If the information in this manual is not followed exactly, a fire or explosion may result causing property damage, personal injury or death. — Do not store or use gasoline or other flamable vapors and liquids in the vicinity of this or any other appliance. — What To Do If You Smell Gas • Do not try to light any appliance. • Do not touch any electrical switch. • Do not use any phone in your building. • Immediately call your gas supplier from a neighbor’s phone. Follow the gas supplier’s instructions. • If you cannot reach your gas supplier, call the fire department. — Installation and service must be performed by a qualified installer, service agency or the gas supplier. SAVE THESE INSTRUCTIONS RS2310005 Rev. 0 4 Important Safety Information ALL APPLIANCES OVENS 1. Proper Installation—Be sure your appliance is properly installed and grounded by a qualified technician. 2. Never Use Your Appliance for Warming or Heating the Room. 3. Do Not Leave Children Alone—Children should not be alone or unattended in the area where the appliance is in use. They should never be allowed to sit or stand on any part of the appliance. 4. Wear Proper Apparel—Loose fitting or hanging garments should never be worn while using appliance. 5. User Servicing—Do not repair or replace any part of the appliance unless specifically recommended in the manual. All other servicing should be referred to a qualified technician. 6. Storage in or on Appliance—Flammable materials should not be stored in an oven or near surface units. 7. Do Not Use Water On Grease Fires—Smother fire or flame, or use dry chemical or foam-type extinguisher. 8. Use Only Dry Potholders—Moist or damp potholders on hot surfaces may result in burns from steam. Do not let potholder touch elements. Do not use a towel or other bulky cloth. 1. Use Care When Opening Door—Let hot air or steam escape before removing or replacing food. 2. Do Not Heat Unopened Food Containers—Build-up of pressure may cause container to burst and result in injury. 3. Keep Oven Vent Ducts Unobstructed. 4. Placement of Oven Racks—Always place oven racks in desired location while oven is cool. If rack is removed while oven is hot, do not let potholder contact hot heating element in oven. 5. Protective Liners—Do not use aluminum foil to line drip bowls, oven racks or oven bottoms. Improper installation of these liners may result in a risk of electrical shock, or fire. SELF-CLEANING OVENS 1. Do Not Clean Door Gasket—The door gasket is essential for a good seal. Care should be taken not to rub, damage, or move the gasket. 2. Do Not Use Oven Cleaners—No commercial oven cleaner or oven liner protective coating of any kind should be used in or around any part of the liner. 3. Clean Only Parts Listed in Manual. 4. Before Self-Cleaning the Oven—Remove broiler pan, oven racks, and other utensils. 5. Remove All Items From Rangetop and Backguard. SURFACE BURNERS 1. Use Proper Pan Size—This appliance is equipped with one or more surface burners of different sizes. Select utensils having flat bottoms large enough to cover the surface burner. The use of undersized utensils will expose a portion of the burner to direct contact and may result in ignition of clothing. Use of oversized utensils concentrates heat on cooking surface and can cause damage to range. Proper relationship of utensil to burner improves efficiency. 2. Never Leave Surface Burners Unattended—Boilover causes smoking and greasy spillovers that may ignite. 3. Make Sure Reflector Pans or Drip Bowls Are in Place—Absence of these pans or bowls during cooking may subject wiring or components underneath to damage. 4. Protective Liners—Do not use aluminum foil to line surface burner drip bowls or oven bottom, except as suggested in the manual. Improper installation of these liners may result in a risk of electric shock, or fire. 5. Glazed Cooking Utensils—Only certain types of glass, ceramic, earthware, or other glazed utensils are suitable for rangetop service without breaking due to sudden change in temperature. 6. Utensil Handles Should Be Turned Inward and Not Extended Over Adjacent Surface Burners—To reduce the risk of burns, ignition of flammable materials, and spillage due to unintentional contact with the utensil, the handle of a utensil should be positioned so that it is turned inward, and does not extend over adjacent surface burners. VENTILATION HOODS 1. Clean Ventilating Hoods Frequently—Grease should not be allowed to accumulate on hood or filter. 2. When flaming foods under the hood, turn the fan on. In Case of Fire Fires can occur as a result of over cooking or excessive grease. Though a fire is unlikely, if one occurs, proceed as follows: Surface Burner Fire 1. Smother the fire with a nonflammable lid or baking soda, or use a Class ABC or BC extinguisher. Not water. Not salt. Not flour. 2. As soon as it is safe to do so, turn the surface controls to OFF. Turn off power at main circuit breaker or fuse box. Turn off gas supply. Oven Fires 1. If you see smoke from your oven, do not open oven door. 2. Turn off oven. 3. As an added precaution, turn off power at main circuit breaker or fuse box. Turn off gas supply. 4. Turn on vent to remove smoke. 5. Allow food or grease to burn itself out in oven. 6. If smoke and fire persist, call fire department. 7. If there is any damage to components, call an authorized servicer before using range. 5 RS2310005 Rev. 0 Important Safety Information Precautions DELAYED IGNITION • Do not cook food directly on rangetop surface, always use cookware. • Do not mix household cleaning products. Chemical mixtures may interact with objectionable or even hazardous results. • Do not put plastic items on warm cooking areas. They may melt and stick. • Oven door contains a glass window. While the window is built to be sturdy and strong, it is still glass and needs to be treated with care. • Do not lift or move range by grasping oven door handle. This can result in window glass breaking or shattering. • Do not slide rough metal objects across rangetop surface. Scratching or metal marking can result. • Do not leave fat heating unless you remain nearby. Fat can ignite if overheated by spilling onto hot surfaces. • Do not allow pots to boil dry as this can cause damage to cooking surface and pan. • Do not use rangetop surface as a cutting board. • Do not use range for storage or as a display counter. Surface burners Burner should ignite within 4 seconds. If burner does not ignite within 4 seconds, turn control knob to OFF and follow directions for installing burner caps in Adjusting Surface Burners. Try again. If burner still does not ignite within 4 seconds, contact an authorized servicer. RS2310005 Rev. 0 Bake and broil burner flame Allow no more than 40-60 seconds before burner ignites and heat is felt. To check for heat, open oven door to first stop and place hand over oven door. If heat is not felt, turn temperature control knob to OFF. If burner repeatedly fails to ignite, contact an authorized servicer. 6 General Information Cooking Utensils Utensil Material Charateristics • Use proper pan size. Do not use a pan that has a bottom smaller than element. Do not use utensils that overhang element by more than 1 inch. Type Temperature Response Uses Aluminum Heats and Cools Quickly Frying, Braising, Roasting Cast Iron Heats and Cools Slowly Low Heat Cooking, Frying Copper Tin Lined Heats and Cools Quickly Gourmet Cooking, Wine Sauces, Egg Dishes Enamelware Depends on Base Metal Low Heat Cooking Ceramic (Glass) Heats and Cools Slowly Low Heat Cooking Stainless Steel Heats and Cools at Moderate Rate Soups, Sauces, Vegetables, General Cooking 1" Less than 1" overhang 2" More than 1" overhang • Use care when using glazed cooking utensils. Some glass, earthenware, or other glazed utensils break due to sudden temperature changes. • Select utensils without broken or loose handles. Handles should not be heavy enough to tilt pan. • Select utensils with flat bottoms. • Do not use a wok with a ring stand. Pan Bottom Test Determine if pan has a flat bottom. For best cooking results, use a pan with a flat bottom. 1. Rotate a ruler along bottom of pan. If pan is not flat, gaps between bottom of pan and edge of ruler occur. 2. A small groove or mark on a pan does not effect cooking times. However, if a pan has a gap, formed rings, or an uneven bottom, it does not cook efficiently and in some cases may not boil water. Do not use a wok with a ring stand. Use a flat bottom wok. 7 RS2310005 Rev. 0 General Information Follow these recommendations only as a guide for times and temperature. Times, rack position, and temperatures may vary depending on conditions and food type. For best results, always check food at minimum time. When roasting, choose rack position based on size of food item. Removing Oven Door ! CAUTION To avoid personal injury or property damage, handle oven door with care. • Door is heavy and can be damaged if dropped. • Avoid placing hands in hinge area when door is removed. Hinge can snap closed and pinch hands. • Do not scratch or chip glass, or twist door. Glass may break suddenly. • Replace door glass if damaged. Oven Rack Placement Position oven rack before turning on oven. 1. Pull rack forward to stop position. 2. Raise front edge of rack and pull until rack is out of oven. 3. Place rack in new rack position. • Curved edge of rack must be toward rear of oven. 1. Fully open oven door. 2. Push hinge locks down toward door frame, to the unlocked position. • This may require a flatblade screwdriver. 3. Firmly grasp both sides of top of oven door. 4. Close door to first stop position. 5. Lift door up until hinge arm is clear of the slot. Oven Frame Hinge Lock Oven Door Pan Placement • Keep pans and baking sheets 2 inches from oven walls. • Stagger pans placed on different racks so one is not directly over the other. Replacing Oven Door 1. Grasping door top firmly, seat indentation of hinge arm into bottom edge of the hinge slot. • Door should be at the first stop position angle. 2. Fully open oven door. 3. Push hinge locks up against the front frame of the oven cavity to locked position. 4. Close oven door. RS2310005 Rev. 0 8 General Information Replacing Oven Light ! Removing Storage Drawer 1. Slide drawer out until it stops. 2. Grasp drawer sides near back of drawer. WARNING To avoid risk of burns or electrical shock, disconnect electrical supply to oven before changing light bulb. • Before replacing light bulb make sure bulb is cool. • Wear protective gloves. • Do not operate oven without bulb and cover in place. 1. Disconnect electrical supply. 2. Remove oven door if desired. 3. Unscrew light bulb cover and then light bulb counterclockwise. 4. Replace light bulb with 120 volt, 40 watt appliance bulb. • Do not overtighten bulb or it may be difficult to remove later. 5. Replace light bulb cover and oven door before use. 3. Lift up and out. • Reverse to reinstall. Cleaning PART Burner caps and grates GENERAL DIRECTIONS Cool before cleaning. Frequent cleaning with soap and water and a non abrasive pad prolongs time between deep cleanings. Be sure to dry thoroughly. For deep cleaning, place burner claps and grates in plastic bag with ½ cup ammonia. DO NOT pour ammonia into bag or allow ammonia to touch grates or caps. Close bag tightly and allow to sit overnight. Open bag pointed away from face to avoid fumes. Remove grates and caps and wash normally. Burner base Allow to cool. Clean with warm soapy water and a clean cloth. If ports are clogged, clean with a toothbrush or a straight pin. Do not use a toothpick. Replace burner caps and turn on burners to check for proper operation. Electrode Cool and remove burner grates and caps. Clean area around ceramic electrode with non-metallic utensil such as platic pick, plastic straw or old toothbrush. Be sure there is no debris, burned fragments, or grease that may divert the spark or cause poor ignition. Do not pry on ceramic electrode Broiler pan and grid Drain fat, cool pan and grid slightly. (Do not stand soiled pan and grid in oven to cool.) Sprinkle with soap. Fill the pan with warm water. Let pan and grid stand for a few minutes Control knobs O FF ME D < G AS ON LO HI Pull off knobs. Wash gently with mild soap and water but do not soak. Dry and return knobs to oven, making sure to match flat area on the knob to the flat area on the shaft. TE LI Outside finish Wash all glass with cloth dampened in soapy water. Rinse and polish with a dry cloth. If knobs are removed, do not allow water to run down inside surface while cleaning. Oven racks For heavy soil, place oven racks in large plastic bag with ammonia and water in cup. Seal tightly and allow to stand overnight. Wash and rinse, dry thoroughly. Storage drawer For heavy soil, clean by hand and rinse thoroughly. Remove drawer for ease in cleaning. Be sure drawer is dry before replacing. 9 RS2310005 Rev. 0 General Information Cleaning Stainless Steel Damage to stainless steel finish due to improper use of cleaning products, or using non-recommended cleaning products, is not covered under warranty. For Amana recommended products, call Consumer Affairs at 1(800) 843-0304 or online at www.amana.com. Our stainless steel appliances have been factory finished for high shine and luster. To maintain this quality appearance: • • • • • • • Abrasive powders or liquids Citrus based cleaners Ammonia Steel wool pads Abrasive cloths Oven cleansers Acidic or vinegar based cleaners • • • Warm soapy water for routine cleaning Soft clean cloths to dry or polish Stainless steel cleaner designed for appliances such as Amana Cleaning Polish and Conditioner for Stainless Steel (#31960801) For best cleaning results 1. Wash surfaces with warm soapy water and a soft, clean cloth or sponge. 2. Rinse surfaces with warm water. Dry surfaces with a soft, clean cloth. DO NOT use the following harsh cleaners: • abrasive or acidic cleaners (ammonia, chlorine bleach, vinegar-based product, etc.) • citrus-based cleaners • scouring pads (metal, textured plastic, etc.) These items can scratch, discolor, or permanently tarnish surfaces. 3. Follow up rinsing by immediately drying with a soft, clean cloth. This will avoid water spotting on stainless steel finish. Can I use liquid cleaners on my stainless steel? Just because a cleaner is a liquid does not mean it is non-abrasive. Many liquid cleansers designed to be gentle on tile and smooth surfaces still damage stainless steel. Cosmetic damage from using non-recommended products is not covered under warranty. Citric Acid Questions? Comments? Concerns? Contact us! www.amana.com or call Consumer Affairs at 1-800-843-0304 RS2310005 Rev. 0 10 Citric acid permanently discolors stainless steel. To prevent damage to the finish of your stainless steel appliance, do not allow these substances to remain on the steel finish: • • • • • mustard tomato juice marinara sauce citrus based sauces citrus based products Component Testing Information ! WARNING To avoid risk of electrical shock, personal injury, or death, disconnect power to oven before servicing, unless testing requires it. General Component 3-wire power cord Oven light socket Auto latch assembly Pressure regulator with shut-off valve Test Procedure Check for continuity Remove one wire from receptacle and test resistance of terminals........ Results Verify polarity and grounding. Measure voltage at oven light. ......... 120 VAC, see wiring diagram for terminal identification. If no voltage is present at oven light, check wiring or light switches. Motor switch Unlocked..................................... Locked ........................................ Door switch Door closed................................. Door open ................................... Verify gas pressure (WCP). Indicates continuity with bulb screwed in. COM − N.O. continuity COM − N.O. open COM − N.C. continuity COM − N.C. open 6" Natural 10" LP/propane If on LP service verify proper gas supply conversion. ! WARNING To avoid risk of fire, always test for leaks after a gas component repair. Gas valve Disconnect wiring to valve. Measure resistance on bake circuit. Measure resistance on broil circuit. Continuity. If not, replace. Continuity. If not, replace. ! WARNING Do not attempt to open valve with 120 VAC. Ignitor Test for voltage at terminals. ............ 270° valve Test for the amount of amperage in the circuit. ........................................ (Ignitor may glow but not have sufficient amperage to open valve). Verify gas is supplied. 120 VAC 3.2− 3.6 Amps. Orifice adjusted for Natural or LP. Spark 270° switch Spark ignition electrode Top surface burner Adjust set screw for simmer control. Test for voltage at terminals. ............ 120 VAC Disconnect wiring and check for continuity in LITE position. ............... Test for resistance of spark lead. ..... Continuity in LITE position. Continuity Test ignitor to chassis. ..................... No continuity from ignitor to chassis. Verify gas is supplied. Verify burner cap is positioned correctly, clean and free of debris. Check for obstructions in burner ports. Check for continuity to chassis......... 11 Continuity RS2310005 Rev. 0 Component Testing Information ! WARNING To avoid risk of electrical shock, personal injury, or death, disconnect power to oven before servicing, unless testing requires it. General Component Bake burner Test Procedure Verify gas is supplied. Results Orifice adjusted for Natural or LP. Broil burner assembly Check for obstructions or contamination in ports. Verify gas is supplied. Orifice adjusted for Natural or LP. Check for obstructions or contamination in ports. L A Venturi−surface burner Shutter settings: Nominal Tol. ± Spark module 4 + 0 Test for voltage at terminals L and N B Check spark leads. Check for arcing to chassis. N A1 120 VAC See wiring diagram. Continuity in lead, no continuity to chassis. B1 Temperature sensor Knob Control Electronic range control J2 PIN 1 Control will run a 30 second diagnostic scan on power up. Door lock will cycle and door lock light will blink. Measure resistance. Approximately 1090 O at room temperature 75ºF, 1650 O at 350ºF, 2600 O at 850ºF No Bake/Broil ................................... If sensor is open when range is powered up the F-3 code will not be displayed. Check sensor resistance and connections. Measure voltage at terminals J2−3 (L1) and E2 (NEU) .................. Relay drive requirements BakeJ2−1 to NEU......................... Broil J2−5 to NEU......................... Bake............................................... Broil................................................ Clean Stage 1........................................... Stage 2........................................... Time (Adjustable) ........................... E1 E2 E4 Failure codes: F1-Control malfunction ..................... PIN 1 F2-Oven over temperature ............... J1 .125" 1/8" .031" 1/32" F3-Oven temperature sensor Open or Shorted.......................... F9-Door latch circuit malfunction ...... RS2310005 Rev. 0 12 120 VAC should be indicated, verifying voltage to control. 120 VAC, if not replace control. 120 VAC, if not replace control. 100% bake element 100% broil element Time controlled 30 minutes 100% broil Same element control as bake mode 2 hours minimum to 4 hours maximum Verify voltage to control. If no voltage is present, check wiring. If voltage is present, replace control. Check sensor resistance and wiring. Replace control if sensor and wiring are good. Check sensor resistance and wiring. Replace sensor, if wiring is good. Check latch switch and associated wiring. Component Testing Information ! WARNING To avoid risk of electrical shock, personal injury, or death, disconnect power to oven before servicing, unless testing requires it. Touch Panel Control BAKE CLEAN BROIL CLOCK TIMER ON/OFF STOP COOK OVEN LIGHT OVEN CANCEL START 1 2 3 4 5 6 7 8 9 0 Features VFD Display 12 Hour Clock 12 Hour Shutoff Sabbath Mode (12 hour over ride) Hour/Minute Timer (11:59) Timed or Delay Bake to (11:59) Variable Self Clean (2−4 hours) Variable Broil Broil interrupt door open over 3 minutes 13 RS2310005 Rev. 0 Component Testing Information ! WARNING To avoid risk of electrical shock, personal injury, or death, disconnect power to oven before servicing, unless testing requires it. Illustration ERC Controlled ERC Controlled Component ERC - Sigma Touchmatic electronic range control Temperature adjustment (BAKE mode only) ERC Controlled Sabbath mode (BAKE mode only) ERC Controlled Twelve hour off ERC Controlled Child lock out RS2310005 Rev. 0 Test Procedure F0-0 - No error. Initial factory setting. F1-1 - Over temperature while cooking. F1-3 - Over temperature while cleaning. F1-5 - Cancel key input out of range. F1-7 - Keyboard disconnected. F1-8 - Shorted key. F1-9 - Slave micro not functioning. F1-A - VCC/GND lift off. F1-C - Control not calibrated. F1-E - EEPROM data corruption. F1-F - Incorrect project number in EEPROM. F1-H - Door Switch input circuit failure. F1-J - Latch switch input circuit failure. F3-1 - Sensor or sensor circuit failure. F9-1 - Auto latch will not lock. F9-2 - Auto latch will not unlock. Press BAKE pad. Press in oven temperature of 500°F. Immediately press and hold BAKE until current offset appears in display, approximately 3 seconds. To decrease or increase oven temperature. Press BAKE until negative or positive offset appears. Oven can be adjusted from 35° to 35°. To avoid over adjusting oven move temperature in 5° increments each time. Press START to accept offset setting or press CANCEL to restore to previous offset setting. Press BAKE, enter desired temperature and press START. Press the 8 key and hold for 3 seconds. The STAR symbol will flash and “Sab” is displayed in the temperature digits area. The STAR will flash for 5 seconds until Sabbath mode initiates and temperature displays. Pressing CANCEL will deactivate the Sabbath mode and cancel the bake operation. Sabbath mode can also be cancelled by pressing and holding the 8 key for 3 seconds, but bake operation will continue. BAKE and ON indicators will illuminate in display during bake operation. Control will automatically cancel any cooking operation and remove all relay drives 12 hours after the last pad touch. Press the 7 key and hold for 3 seconds. Control will return to normal operation by repeating the procedure. 14 Results Check sensor and wiring first, replace control if sensor is good. Check sensor and wiring first, replace control if sensor is good. Replace control. Verify wire connection is tight and replace control if failed. Replace control. Replace control. Replace control. Replace control. Replace control. Replace control. Check switch and wiring. Check switch and wiring. Check wire connections and sensor. Check wiring, motor, and latch switch. Check wiring, motor, and latch switch. While increasing or decreasing oven temperature, this does affect self-cleaning temperature. Temperature adjustment will be retained even through a power failure. Offset is a wrap-around function from 35° to -35° in 5° increments. Sabbath mode will disable the 12 hour shut-off to allow baking operation for a maximum of 37 hours. The state of the oven light must be set before entering Sabbath mode. If oven light was on when Sabbath mode was activated oven light will remain on. If oven light was off when Sabbath mode was activated oven light will remain off. All prompts, messages, timed cook modes, and alert tones are deactivated while in the Sabbath mode. All keys are disabled except CANCEL and the 8 key Control input features will be disabled and display will indicate the padlock symbol. Troubleshooting Procedures ! To avoid risk of electrical shock, personal injury or death, disconnect power and gas supply before servicing, unless testing requires it. WARNING Sealed Top Burners Spark Ignition Problem Burner will not light. “SPARK” at top burner ignitors. Burner will not light. No “SPARK’ at top burner ignitors. Burner knob pushed in and held in “LITE” position. No spark or only random spark at one ignitor. Interm ittent or occasional spark after unit is turned off. Unit continues to spark after it is turned off. Sooting from burner flam e. Possible C ause • Burner venturi, caps or ignition ports clogged. • Poor ground on burner cap. • Low gas pressure. • W eak spark m odule. • No 120 VAC to unit. • M icro switch contacts not closing. • Failed wiring or poor connection at burner cap electrode and electrode socket. • Failed spark m odule. • Electrode dirty, burner cap dirty. • Cracked or broken electrode, electrode wire or electrode socket. • Cracked ignitor or a pinched ignitor lead wire. • Poor connection of ground or lack of continuity to ground of ignitor. • Cracked or broken ignitor extension lead. • Reversed polarity. W hen polarity is correct, no voltage is present at neutral to ground and no voltage to spark m odule with switch in “O FF” position. • Failed valve switch. • Switch has been pulled up and off of fixed position on valve so that it is not turned to “O FF” position w ith valve stem . • Too little prim ary air. • Burner head not positioned correctly. • If using LP gas, range m ay not be properly converted. 15 Correction • Clean burner venturi, caps, and ignitor ports. • Clean burner cap. • Verify correct gas pressure. • Replace spark m odule. • Verify electricity at wall outlet. • Verify correct w iring and connection are tight. • Verify correct w iring and connection’s are tight. • Verify operation of spark m odule. Replace if failed. • Clean electrode and burner cap. • Replace electrode wire. • Replace ignitor lead or electrode. • Tighten ground connection and correct any breaks in ground path from ignitor to unit ground. • Replace ignitor. • W ith all switches in the “O FF” position, verify voltage at “N” term inal of the spark m odule to ground. If voltage is present, polarity is reversed. • Verify correct w iring and connection’s are tight. • Verify wiring is not pinched. • Replace switch. • Carefully reposition switch on valve stem and rotate valve from “O FF” to “HIG H” several tim es to verify switch is not broken. • O pen air shutter. • Level burner head. • Verify correct conversion procedures. Som e yellow tipping is norm al on LP. RS2310005 Rev. 0 Troubleshooting Procedures ! To avoid risk of electrical shock, personal injury or death, disconnect power and gas supply before servicing, unless testing requires it. WARNING Bake and Broil Burners Problem Flame blows away from burner. Flames flash back into mixer head. Floating flame. Gas smell. Gas valve opens but bake and broiler burners do not ignite. Delayed ignition. Oven light does not operate. Broil shuts off RS2310005 Rev. 0 • • • • Possible Cause Too much air. Gas pressure too high. Draft around cooktop area. Too much air. • Blocked flue or burner. • Not enough air. • Leak in pipe joints. • Valve leak. • Regulator plug loose. • Bake/Broil ignitor positioned too far from burner. • Range is not properly converted for LP gas. • Low gas pressure. • Misalignment of orifice and burner. • Partial blockage of orifice, burner or feed tube. • Failed oven lamp. • Failed light switch. • Failed wiring. • Failed light socket. • Normal 16 • • • • Correction Slightly close air shutter to burner. Verify correct gas pressure. Eliminate source of draft. Close air shutter slightly. • Check for possible blockage in burner. • Open air shutter. • Verify gas connections and tighten if necessary. • Check valves and replace if necessary. • Check and tighten regulator plug. • Reposition Bake/Broil ignitor closer to the burner. • Verify correct conversion procedures. • Verify correct gas pressure. • Check alignment of burner and orifice and align correctly. • Check for blockage or burr in orifice. • Clean burner. • Check lamp and replace if necessary. • Check switch contacts. • Check for broken wires and loose or dirty connections. • Check light socket for continuity. • Broil interrupted when door is open for more than 3 minutes. Disassembly Procedures ! Disconnect power source and shut off gas supply before servicing, unless testing requires it. WARNING Oven Door Handle, Outer/Inner Glass, and Door Hinges 7. Remove screws and neoprene washer from the bottom of OVEN DOOR HINGE and one screw securing oven door hinge to the door assembly. 1. Fully open the oven door, while open rotate both hinge locking tabs into the LOCK position. NOTE: Hinges are interchangeable. 8. Remove screws securing top of door trim. Lift up and twist trim towards bottom of door to disengage plastic finger tabs. 9. All outer perimeter door trim can now be removed. 10. After removing the OFFSET screws from left and right door glass trim, access is gained to the door glass heat shield. 11. Remove screws from each side and screws from top of door glass heat shield. Note position of plastic door handle supports remove same. 12. Lift out galvanized insulation retainer and fiberglass insulation. 13. Remove the tempered glass panes individually as well as the glass frame. Hinge Lock Oven Door 2. Close oven door about 3/4 of the way. The hinge locking tabs will prevent the door closing any further. 3. Lift up equally on both sides of oven door. Hinges will disengage from hinge receivers and oven door can be removed. 4. Place oven door, with outer door glass facing downward on a padded flat surface. 5. While supporting outer door glass, remove screws securing left and right side the OVEN DOOR HANDLE. 6. Again support outer door glass and turn door assembly so outer door glass is facing upward and remove outer oven door glass. NOTE: Tempered glass panes do not have an inner or outer side. Be careful of fingerprints before reassembly. NOTE: Position replacement hinges into “LOCK” position by using channel lock pliers PRIOR to installing oven door on range. Door Handle Screw NOTE: May need to loosen screws in bottom glass retainer. Side Door Trim Top Door Trim Window Glass Door Hinge Heat Shield Bushing Oven Door Window Oven Door Backer Window Frame Door Handle Door Hinge Side Door Trim Door Glass Heat Shield Glass Support 17 RS2310005 Rev. 0 Disassembly Procedures ! WARNING Reverse Procedure to Reassemble Oven Door • Position slot on oven door hinge arms into the hinge receivers. When slot is engaged into the hinge receivers, open the door just far enough to rotate both hinge locking tabs to the UNLOCK position. Clock/Timer Mechanism, Spark Module, and High Limit Sensor 1. Turn off electric supply to oven. 2. Using a “stubby” phillips screwdriver remove the offset screws from the bottom front of control panel. Spark module High limit sensor Clock Overlay Offset screws 3. Rotate bottom of control panel outward, then lift up to disengage top tabs. 4. Place control panel on a protective padded surface with the clock/timer down. Remove screws securing CLOCK/TIMER MECHANISM to mounting bracket. There is sufficient extra wire length to twist clock/ timer mechanism out of the way while installing new mechanism. Transfer electrical wires/connectors one at a time to new mechanism. 5. Depress double tab on top of SPARK MODULE and remove from rear cover. Reconnect wires one at a time to new spark module. 6. HIGH LIMIT switch is attached to bracket by screws. NOTE: When reinstalling control panel, be certain the fiberfax insulation and it’s galvanized retainer is above the flue cutout in control panel. Insulation and retainer are NOT visible when correctly positioned. Verify backguard heat shield (above flue) is below backguard panel and visible when installed. 7. Reverse procedure to reattach control panel to range. RS2310005 Rev. 0 Disconnect power source and shut off gas supply before servicing, unless testing requires it. Cooktop, Top Burner Gas Valves, Top Burner Bases, Top Burner Venturies, and Spark Electrodes 1. 2. 3. 4. 5. Turn off gas supply and disconnect gas supply line. Turn off electrical supply to range. Remove all four top burner control knobs. Remove screws securing manifold panel. Rotate bottom of manifold panel outward to disengage from tabs located on top. NOTE: When reinstalling manifold panel hooks. Place the top tabs first, then position manifold panel ABOVE flange on range front frame. 6. Remove top burner grates and cast burner caps. 7. Remove screws securing each BURNER BASE to cooktop/burner venturi. 8. Disconnect spark electrode wire from each burner base. Mark each burner base LF, RF, LR, and RR to avoid mix up later. 9. Remove screw securing BURNER SPARK ELECTRODES to burner base. 10. Lift up on front of COOKTOP and pull forward. 11. Move top burner venturi off TOP BURNER GAS VALVE being serviced. 12.Using a ¼–inch nut driver remove screw securing gas valve to gas manifold pipe. 13.Reverse procedure to install new top burner gas valve. NOTE: Verify gas connection fittings are tight using soapy water. Spark Switches 1. Disconnect electrical supply to range. 2. Remove manifold panel cover, see previous section. 3. Gently pull forward on switch wires on left side until the ¼–inch electrical disconnects can be disconnected. 4. The spark switches are supplied in sets of four. Remove switches from each top burner gas valve. Reconnect ¼–inch connectors. 5. Reverse procedure to reassemble and check operation. Oven Bottom 1. Remove thumb screws securing oven bottom to oven cavity brackets, located in the rear of the oven cavity. 2. Lift at the rear and slide oven bottom away from the front oven frame. 3. Remove oven bottom from oven cavity. 18 Disassembly Procedures ! WARNING Disconnect power source and shut off gas supply before servicing, unless testing requires it. Door Latch Motor, Plunger Light Switch, Latch Switch, Rod, and Door Catch Bake Burner Ignitor and Broiler Burner Ignitor 1. Turn off electrical supply to oven. NOTE: For bake burner ignitor, remove oven bottom. 2. 3. 4. 5. Remove screws securing ignitor bracket to burner. Pull ignitor and wires forward about 6 inches. Disconnect wires on old ignitor. Handle new ignitor by ceramic base and transfer to old ignitor bracket. 6. Connect new ignitor wires. 7. Push wires/connector backward through both holes as far to the “outside” as possible. 8. Reverse procedures to reattach ignitor bracket. 1. Disconnect electrical supply to range. 2. Perform cooktop removal instructions. 3. Move the two left top burner venturies out of the way to access latch mechanism. 4. Remove screws in front and on right side securing latch mechanism to range front frame and galvanized insulation retainer. 5. Carefully maneuver assembly to the rear to clear door catch and light switch plunger. 6. Move assembly to the left side then lift up on the right side. After clearing the insulation retainer turn assembly upside down to access screws securing components to mounting plate. 7. Reverse procedures to reassemble. Sensor, Oven Control 1. Remove screws securing SENSOR to oven liner. 2. Gently pull wires forward to access the two pin polarized disconnect plug. 3. Disconnect and reconnect new sensor. 4. Reverse procedure to reassemble. Oven Door Gasket The braided fiberglass oven door gasket is clipped at intervals in holes around the front of the oven liner then inserted into a 3/8–inch holes at the bottom. A 6 1/2 –inch gasket void at the bottom does not interfere with sealing of oven to door. 1. Unclip original gasket from front frame and pullout ends from 3/8–inch holes. 2. Remove two knurled nuts securing oven bottom in position. Remove oven bottom. 3. Divide oven gasket in half and insert center clip into top center hole in the front frame. Proceed inserting clips left and right. 4. Push gasket through the 3/8–inch holes. From behind the holes gently pull on the gasket ends to provide a neat appearance. Then tuck the ends between cross brace and front frame. Assure that gasket ends are not visible through air intake slots. If so, reposition prior to installing oven bottom and oven door. Bulb, Oven Light, and Oven Light Socket 1. Disconnect electrical supply to oven. 2. Wearing protective gloves unscrew the knurled “mason jar” lens cover counterclockwise about 3/4 turn and remove. Unscrew old oven light bulb. 3. Remove screws securing oven light socket to the oven cavity. 4. Pull oven light socket out through the front and disconnect wire terminals from socket. 5. Reverse procedures to reassemble. Storage Drawer Tracks 1. Remove storage drawer from unit. 2. Remove bolt and nut securing track to the chassis (located in the front of the unit). 3. Slide track backwards and then forward to remove track. 19 RS2310005 Rev. 0 Disassembly Procedures ! WARNING Pressure Regulator and Low Voltage Oven/ Broil Gas Valve NOTE: Due to location of Gas and Electrical connections on the components. Range will have to be moved forward for access. Disconnect power source and shut off gas supply before servicing, unless testing requires it. 17.Using a needle nose pliers transfer the PURPLE and WHITE wires to the new gas valve utilizing the 3 /16–inch connections. These two wires are for the BAKE circuit in the gas valve. 18.Using a needle nose pliers transfer the BROWN and WHITE wires to the new gas valve utilizing the 1 /4–inch connections. These two wires are for the BROIL circuit in the gas valve. 19.Reposition the bracket/gas valve assembly. NOTE: Verify oven burner venturi is over the oven burner orifice on the gas valve. 1. Disconnect electrical supply to range. 2. Turn off or disconnect gas supply to range. 3. Using a floor protection pad move range forward. On solid pipe connection the pipe must be first disconnected from pressure regulator inlet connection accessed through storage door area. 4. Remove bottom shield covering gas and electrical connections. 5. If replacing PRESSURE REGULATOR disconnect gas supply line at the pressure regulator. 6. Using a 9/16–inch wrench, disconnect both pieces of gas tubing from the PRESSURE REGULATOR. 7. Remove the screws securing the pressure regulator to the support bracket. 8. Transfer any adapters/fittings to new pressure regulator using the appropriate pipe sealant and double wrenching to assure gas tight connection. 9. Reattach pressure regulator to mounting bracket. Reconnect two pieces of tubing. Reconnect gas supply. NOTE: Verify shut-off valve lever on pressure regulator is in the “OPEN” position. 20.Reattach assembly to the range. 21.Using a 9/16–inch wrench, reconnect both pieces of tubing to gas valve. 22.Turn on gas supply to range and check gas connections using soapy water solution. The BROIL outlet fitting will have to be checked with gas turned on, electric turned on, and clock timer set for BROIL. NOTE: Verify oven door is closed to eliminate the three minute broil “CANCEL” feature. Broil Burner 1. Remove screws securing broil ignitor to broil burner. 2. Remove screws securing broil flame spreader to oven cavity. 3. Remove broil burner and replace broil burner by reversing procedures. Bake Burner 1. Remove oven bottom, see “Oven Bottom” procedure. 2. Remove screws securing bake ignitor to bake burner. 3. Remove screws securing bake burner bracket and the front of the bake burner to oven cavity. 4. Remove bake burner and replace bake burner by reversing procedures. 10.Turn gas on and check for gas leaks using soapy water on connections. 11. If replacing LOW VOLTAGE OVEN/BROIL GAS VALVE it is not necessary to disconnect gas supply to range. 12.Using a 9/16–inch wrench, disconnect both pieces of gas tubing. 13.Remove screws securing gas valve bracket to bottom rear of range. 14.Carefully twist bracket/gas valve assembly to disengage oven burner from burner orifice on gas valve. 15.Pull assembly outward far enough to access the bracket and gas valve. 16.Remove screws securing gas valve to bracket, then secure new gas valve in its place. RS2310005 Rev. 0 20 Disassembly Procedures ! WARNING Disconnect power source and shut off gas supply before servicing, unless testing requires it. Flue Front Frame and Oven Liner 1. Disconnect electrical supply to range. 2. Turn off or disconnect gas supply to range. 3. Using a floor protection pad slide range forward. On a solid pipe connection the pipe must be first disconnected from pressure regulator inlet connection, accessed through storage door area. 4. Remove screws securing top burners to maintop. 5. Raise maintop in front and slide maintop forward, leaving ignitor wires connected. 6. Remove first set of screws securing flue, located under maintop. Front Frame and Oven Liner are NOT field replaceable on these units. Side Panel 1. Remove cooktop, see Cooktop procedure steps 1– 6. 2. Remove lower access panel, located on the rear of unit. 3. Remove screws securing backguard bracket to side panel. 4. Remove oven door from unit and slide oven drawer outward to gain access to screws. 5. Remove screws securing side panel to oven chassis. Screws are located on top, front, and back of unit. 6. Remove side panel by pulling outward on the back of panel and sliding panel forward. 7. Reverse procedure to reassemble. 7. Remove broil burner, see Broil Burner procedure. 8. Remove second set of screws securing flue, located on the inside of the oven cavity. 9. Remove lower access panel on back of unit. 10.Remove backguard shield from backguard brackets. 11. Drill two holes 5/16–inch in the back of the rear insulation retainer to gain access to screws securing flue. Power Cord 1. 2. 3. 4. 5. Slide unit outward to gain access to power cord. Unplug power cord from receptacle. Remove screw securing power cord to unit chassis. Disconnect power cord. Reverse procedure to reassemble. 5/16" Holes 12.Remove third set of screws securing flue to exterior of the oven cavity. Leveling Leg Bracket • Remove screws securing bracket to chassis. 21 RS2310005 Rev. 0 Disassembly Procedures ! WARNING Disconnect power source and shut off gas supply before servicing, unless testing requires it. This page intentionally left blank. RS2310005 Rev. 0 22 Appendix A A–1 RS2310005 Rev. 0 LP/Propane Conversion Refer to Owners Manual and Installation Instructions for safety statements. Keep these instructions for future reference. Installation must conform to all local, municipal and state building codes and local utility regulations. Converting for Use with LP/Propane Gas ! WARNING Your range is factory set for use with natural gas. If LP/Propane gas use is desired, the range must be converted. Gas supply should be turned off prior to conversion. To avoid electric shock that can cause personal injury or death, disconnect main electrical supply to range before servicing. Converting Pressure Regulator for Use with LP/Propane plastic insert pressure regulator cap LP spring location 1. Remove storage drawer from front of range. Refer to Removing Storage Drawer section in Owner’s Manual. 2. Locate pressure regulator. 3. Remove the pressure regulator cap with a wrench. 4. Pull plastic insert from pressure regulator cap. • Plastic insert is placed tightly in cap. • Pliers or a wrench may be used to carefully remove the insert. 5. Reverse plastic insert and carefully push plastic insert firmly into hole in pressure regulator cap. • Insert stem must show LP rightside up. • Long end of insert should be inserted into cap as shown. 6. Place pressure regulator cap on pressure regulator and tighten. • Insert should not disturb spring in body of regulator. 7. Verify regulator shutoff valve is in OPEN position. 8. Replace storage drawer. Questions? oven shutoff valve Refer to Owners Manual OPEN position or call Amana Consumer Affairs Department 1-800-843-0304 RS2310005 Rev. 0 A–2 Converting Surface Burners for Use with LP/Propane 1. Remove 4 burner control knobs from range. • 2 screws are exposed on the burner control panel. burner knob 2. Remove 2 screws from burner control panel. • Panel drops slightly after screws are removed. 3. Grasp bottom of burner control panel, gently lift and pull out panel until clear of burner valve stems. • After burner control panel clears valve stems, continue to roll panel until free from range. Set aside. • Gas valve and orifice hood are visible after burner control panel is removed. 4. While facing range front, turn orifice hoods counterclockwise 1½ to 2 turns or until snug. • A mark may be placed on the orifice hood so turns can be easily counted. • Use ½ inch open end or 90° offset open end wrench. • Do not over tighten orifice hoods. If orifice hoods are over tightened, gas supply can be cutoff or orifice hoods can strip. 5. Open air shutter fully using a flat blade screwdriver and moving the shutter back to the orifice hood. 6. Reassemble burner control panel after adjusting air shutter. • Refer to Adjusting Surface Burner Flame section in Owner’s Manual. pivot point air shutter orifice hood close open Converting Oven Burner for Use with LP/Propane 1. Remove storage drawer. • Refer to Removing Storage Drawer section in Owner’s Manual. 2. Locate bake burner orifice hood. 3. Using a 1/2" open end wrench turn orifice hood clockwise 2 to 2 1/2 turns or until snug. • A mark may be placed on the orifice hood so turns can be easily counted. • Do not over tighten orifice hoods. If orifice hoods are over tightened, gas supply can be cutoff or orifice hoods can strip. 4. Verify fuel supply shut off valve is in OPEN position on pressure regulator. 5. Replace storage drawer. • Air flow may need to be adjusted to oven burner flame after conversion. Refer to Owner’s Manual for instructions. orifice hood Converting Broiler Burner for Use with LP/Propane orifice hood 1. Open oven door and locate broiler burner on oven ceiling. 2. Locate orifice spud on broiler fitting in the back of oven. 3. Using a 1/2" open end wrench turn orifice hood clockwise initially 1 turn and adjust as necessary, or until snug. • A mark may be placed on the orifice hood so turns can be easily counted. • Do not over tighten orifice hoods. If orifice hoods are over tightened, gas supply can be cutoff or orifice hoods can strip. 4. Close oven door. • Air flow may need to be adjusted to oven burner flame after conversion. Refer to Owner’s Manual for instructions. A–3 RS2310005 Rev. 0 Converting Back to Natural Gas Follow these steps only if the range has been converted for use with LP/Propane Refer to Owners Manual and Installation Instructions for safety statements. Reconverting for Use with Natural Gas This range is shipped from the factory for use with natural gas. Range needs to be converted for use to natural gas only if it has been converted for use with LP/Propane after leaving the factory. Gas supply should be turned off prior to conversion. ! WARNING To avoid electric shock that can cause personal injury or death, disconnect main electrical supply to range before servicing. Converting Pressure Regulator for Use with Natural Gas plastic insert pressure regulator cap N AT spring location 1. Remove storage drawer. • Refer to Removing Storage Drawer section in Owner’s Manual. 2. Locate pressure regulator. 3. Remove pressure regulator cap with a wrench. 4. Remove plastic insert from pressure regulator cap. • Plastic insert fits tightly in cap. 5. Reverse plastic insert and carefully push plastic insert firmly into hole in pressure regulator cap. • Insert must show NAT rightside up or be blank. 6. Place pressure regulator cap on pressure regulator and tighten. • Insert should not disturb spring in body of regulator. 7. Verify that pressure regulator supply valve is in OPEN position 8. Replace storage drawer. Questions? oven shutoff valve OPEN position Refer to Owners Manual or call Amana Consumer Affairs Department 1-800-843-0304 RS2310005 Rev. 0 A–4 Converting Surface Burners for Use with Natural Gas 1. Remove the 4 burner control knobs from range. • 2 screws are exposed on burner control panel. 2. Remove 2 screws from burner control panel. • Panel drops slightly after screws are removed. 3. Grasp bottom of burner control panel, gently lift and pull burner knob out panel until clear of burner valve stems. • After burner control panel clears valve stems, continue to roll panel until free from range. Set aside. • Gas valve and orifice hood are visible after burner control panel are removed. 4. While facing range front, turn orifice hoods clockwise 1½ to 2 turns. • A mark may be placed on the orifice hood so turns can be easily counted. • Use ½ inch open end or 90° offset open end wrench. 5. Adjust airflow to burner flame by adjusting air shutter to 1/4" opening. • Refer to Adjusting Surface Burner Flame section in Owner’s Manual. 6. Reassemble burner control panel after adjusting air flow to surface burner flame. pivot point air shutter orifice hood Converting Oven Burner for Use with Natural Gas 1. Remove storage drawer. • Refer to Removing Storage Drawer section in Owner’s Manual. 2. Locate the bake burner orifice hood. 3. Using a 1/2" open end wrench turn the orifice hood counterclockwise 2 turns. • A mark may be placed on the orifice hood so turns can be easily counted. • Do not over tighten orifice hoods. If orifice hoods are over tightened, gas supply can be cutoff or orifice hoods can strip. 4. Verify fuel supply shut off valve is in OPEN position. 5. Replace storage drawer. • Air flow may need to be adjusted to oven burner flame after conversion. Refer to Owner’s Manual for instructions. orifice hood Converting Broiler Burner for Use with Natural Gas 1. Open the oven door and locate the broiler burner on oven ceiling. 2. Locate the orifice spud on the broiler fitting in the back of the oven. 3. Using a 1/2" open end wrench turn the orifice hood counterclockwise 1 to 1 1/2 turns. • A mark may be placed on the orifice hood so turns can be easily counted. • Do not over tighten orifice hoods. If orifice hoods are over tightened, gas supply can be cutoff or orifice hoods can strip. 4. Close the oven door. • Air flow may need to be adjusted to oven burner flame after conversion. Refer to Owner’s Manual for instructions. air orifice shutterhood 2000 Amana Appliances Amana, Iowa 52204 Part No. 36-32025201-0 Printed in U.S.A. 11/00 A–5 RS2310005 Rev. 0 This page intentionally left blank. RS2310005 Rev. 0 A–6 Appendix B B–1 RS2310005 Rev. 0 Quick Start Reference Guide Covering Amana® Distinctions ACF3315A and The Big Oven ACF3335A Refer to Installation Instructions and Owners Manual for safety statements. Getting Ready 1. Remove storage drawer and verify that the anti tip bracket has been installed and is engaged. Refer to Installation Instructions for details. 2. Read important safety instructions in Owner’s Manual. 3. Burner caps and grates must be placed correctly. Burner caps should match the size of the burner base. Once caps are placed, grate needs to be placed over the burners. Refer to Adjusting Burner Flame section in the Owner’s Manual. 4. Remove all hanging tags and papers from the range. Check the inside oven cavity for paper. Remove any residue with non abrasive cleanser. Do not store paper in range, oven or storage drawer, or around range. For more information, refer to Care and Cleaning section in the Owner’s Manual. ¸ Setting the Clock To set the clock, press Recall Clock pad. The light above the button will glow, indicating the clock can be adjusted. Use the arrow keys to set the clock to the correct time of day. The clock is a twelve hour clock and does not display AM, PM, or military time. To set time, press RECALL CLOCK pad again open. Operating Your New Range It is normal for all four burner electrodes to spark when one burner is turned on. Burners should ignite within 4 seconds. If not, refer to Adjusting Burner Flame section in Owner’s Manual. Oven may make noise during a heating or cooling cycle, especially during a self-clean. This is normal. It is the sound of the oven cavity expanding and contracting. Do not allow flames to extend up the sides of the cooking utensil. This may cause burns or damage. Oven may generate smoke the first few times operated, especially during a self-clean cycle. This is normal. If possible, ventilate odors. Remove birds and animals from area when using the self-clean cycle. Refer to Self-cleaning section in the Owner’s Manual for more information. Surface burners should not be used during a self-clean cycle. A self-clean cycle can be set for times when the oven is not in use. Refer to Self-cleaning section in the Owner’s Manual for more information. : Timer The minute timer is a timer only, and does not control baking, broiling or cleaning functions of the oven. To set timer, press TIMER ON/OFF. The light above the button will glow, indicating the timer can be set. Use arrow keys to set the timer. Timer can be set up to 11 hours and 59 minutes. Timer begins after 5 seconds of no further time adjustment. To cancel the timer, press and hold the TIMER ON/OFF pad for five seconds. Timer signals once at the end of the countdown. Questions? Refer to Owners Manual or call Amana Consumer Affairs Department 1-800-843-0304 RS2310005 Rev. 0 B–2 Using the Minute Quick Start Reference Guide Bake To bake in your new oven: 1. 2. 3. 4. Arrange racks to desired position. Push and turn temperature knob. Temperature will be displayed in clock area. • Display reverts to time of day. Press RECALL OVEN TEMP/CLOCK pad to view cooking temperature. Preheat light will glow during preheat cycle. Once oven has reached selected temperature, a signal will sound and preheat light will shut off. To shut off oven, turn temperature knob to OFF position. B 1. 2. Timed Bake To set the oven to perform a timed bake: 1. 2. 3. 4. 5. 6. 3. Arrange racks to desired position. Press COOK/CLEAN TIME pad. Use arrow keys to enter the selected amount of time. Push and turn the oven temperature control knob to desired temperature. • Temperature will be displayed in clock area. Oven will begin to heat. When cooking time has elapsed, END displays and a signal will sound four times and then once approximately every 10 seconds until oven temperature knob is turned to OFF. 4. 5. 6. Delayed Bake NOTE: Do not use delayed bake with any dairy, meat, or egg products: 1. 2. 3. 4. 5. 6. 7. 8. Arrange racks to desired position. Press START COOK/CLEAN pad. Use arrow keys to select the time of day to begin cooking. Press COOK/CLEAN TIME pad. Use the arrow keys to enter the desired amount of time. Push and turn the oven temperature control knob to desired temperature. Temperature will be displayed in clock area. Oven will begin to heat at selected start time. When cooking time has elapsed, END displays and a signal will sound four times and then once approximately every 10 seconds until oven temperature knob is turned to OFF. Broil NOTE: Oven door MUST be closed during broiling. 1. 2. 3. 4. 5. 6. Arrange racks to desired position. Place food in oven. Preheating is not required. Close door. Push and turn temperature knob to BROIL. BRL will display in clock area. When finished cooking, turn temperature knob to OFF position. Part No.36-32033801-0 Printed in U.S.A.11/00 7. To set a self-clean cycle in your oven: Prepare the oven and surrounding area for self-clean (refer to Selfclean section in Owner’s Manual). Remove all animals from area and, if possible, open a window the first few self-clean cycles. Remove all pans, broiler pans, oven racks and accessories from inside oven, rangetop, backguard and storage drawer. Push and turn oven control knob to CLEAN. CLN will display. Default cycle time of 3 hours will display. Cycle can be set from 2 to 4 hours by adjusting time with arrow buttons. Self-clean will begin. Oven door will automatically lock during the cycle. • Surface burners SHOULD NOT be used during a selfclean cycle. When complete, oven will beep and LOCKED light will shut off. Oven may still be warm to touch. DO NOT force oven door open. Wait for the LOCKED light to turn off to open door. Your oven temperatures are factory set for the best performance. However, to provide the flexibility to change these settings, a temperature adjustment feature has been added for your convenience. Refer to your Owner’s Manual for instructions. Amana Appliances Online • http://www.amana.com B–3 Self-Clean 2000 Amana Appliances Amana, Iowa 52204 RS2310005 Rev. 0 This page intentionally left blank. RS2310005 Rev. 0 B–4 Appendix C C–1 RS2310005 Rev. 0 Owners Manual Covering ACF3315A and TM ACF3335A Contents Important Safety Information ......... 3 Adjusting Burner Flame ................. 6 Cookware Suggestions ................. 8 Using the Range............................ 9 Custom Features ......................... 12 Displays and Signals ................... 13 Using the Oven Control ............... 14 Cooking Baking ...................................... 19 Broiling ..................................... 22 Roasting ................................... 23 Braising .................................... 24 Care and Cleaning ....................... 25 Troubleshooting ........................... 28 Amana Warranty ......................... 30 Manuel du propriétaire ................. 31 TM Gas Range Keep instructions for future reference. Be sure manual stays with range. RS2310005 Rev. 0 C–2 36-32038801-0 Thank you for buying an Amana Range! Please take the time to complete the registration card and return promptly. If registration card is missing, call Amana Consumer Affairs Department. When contacting Amana, provide product information from serial plate found on right side of storage door opening: Rating Model Number __________________________________ Plate Manufacturing (P) Number _________________________ Serial Number (S/N) ______________________________ Purchase Date __________________________________ Dealer Name ___________________________________ Dealer Address _________________________________ Dealer Phone ___________________________________ Asure Extended Service Plan Keep this manual and your sales receipt together in a safe place for future reference or if warranty service is required. Purchase replacement parts and additional accessories such as cleaning supplies by phone. To order accessories for your Amana product, call 1-800-843-0304 inside USA or 319-622-5511 outside USA. For answers to questions or to locate an authorized servicer, call 1-800-NAT-LSVC (1-800-628-5782) inside USA or 319-622-5511 outside USA. Warranty service must be performed by an authorized servicer. Amana Appliances also recommends contacting an authorized servicer if service is required after warranty expires. Amana Appliances offers long-term service protection for this new range. Asure™ Extended Service Plan, covering functional parts, labor, and travel charges, is specially designed to supplement a strong warranty. Call 1-800-528-2682 for information. Parts and Accessories Save Time and Money To register your product electronically, get more information on your range or other Amana products, visit our Web site www.amana.com or call Consumer Affairs Department at 1-800-843-0304 If something seems unusual, please check “Troubleshooting” section, which is designed to help you solve problems before calling service. If you have a question, call us at (800) 843-0304 or write us at: Consumer Affairs Department Amana Appliances 2800 - 220th Trail Amana, Iowa 52204 Remember to include model number of your appliance and your phone number. What You Need to Know about Safety Instructions Warning and Important Safety Instructions appearing in this manual are not meant to cover all possible conditions and situations that may occur. Common sense, caution, and care must be exercised when installing, maintaining, or operating range. Always contact your dealer, distributor, service agent, or manufacturer about problems or conditions you do not understand. Recognize Safety Symbols, Words, Labels ! DANGER DANGER—Immediate hazards which WILL result in severe personal injury or death. ! WARNING WARNING—Hazards or unsafe practices which COULD result in severe personal injury or death. ! CAUTION CAUTION—Hazards or unsafe practices which COULD result in minor personal injury or product or property damage. C–3 RS2310005 Rev. 0 IMPORTANT SAFETY INFORMATION ! WARNING ! WARNING To reduce risk of the appliance tipping, it must be secured by a properly installed anti-tip bracket. To verify bracket has been installed properly, remove the storage drawer or panel and look under the range with a flashlight. Bracket must be engaged in the rear corner of the range. • ALL RANGES CAN TIP • INJURY TO PERSONS COULD RESULT • INSTALL ANTI-TIP BRACKET PACKED WITH RANGE • REFER TO INSTALLATION INSTRUCTIONS ! CAUTION DO NOT TOUCH SURFACE BURNERS OR AREAS NEAR BURNERS—Areas near surface burners may become hot enough to cause burns. During and after use do not touch, let clothing or other flammable materials touch or contact surface burners or areas near surface burners until they have had enough time to cool. These areas include the rangetop and backguard. ! CAUTION DO NOT TOUCH GAS BURNERS OR INTERIOR SURFACES OF OVEN—Interior surfaces of an oven become hot enough to cause burns. During and after use do not touch, let clothing or other flammable materials touch, or contact heated interior surfaces of the oven until they have had enough time to cool. Other range surfaces that may become hot enough to cause burns are the oven door and oven vent at the backguard. ! CAUTION To avoid fire or smoke damage, • remove any flammable materials from storage drawer. Items like plastic containers and paper manuals can melt or burn. • clean excess spills before starting a self-clean cycle. To avoid personal injury, do not sit, stand or lean on oven door or oven drawer. ! WARNING To avoid risk of electrical shock, personal injury, or death, verify your range has been properly grounded and always disconnect it from main power supply before servicing. ! WARNING If the information in this manual is not followed exactly, a fire or explosion may result causing property damage, personal injury or death. — Do not store or use gasoline or other flamable vapors and liquids in the vicinity of this or any other appliance. — What To Do If You Smell Gas • Do not try to light any appliance. • Do not touch any electrical switch. • Do not use any phone in your building. • Immediately call your gas supplier from a neighbor’s phone. Follow the gas supplier’s instructions. • If you cannot reach your gas supplier, call the fire department. — Installation and service must be performed by a qualified installer, service agency or the gas supplier. SAVE THESE INSTRUCTIONS RS2310005 Rev. 0 C–4 IMPORTANT SAFETY INFORMATION (contd) ALL APPLIANCES SURFACE BURNERS 1. Proper Installation—Be sure your appliance is properly installed and grounded by a qualified technician. 2. Never Use Your Appliance for Warming or Heating the Room. 3. Do Not Leave Children Alone— Children should not be alone or unattended in the area where the appliance is in use. They should never be allowed to sit or stand on any part of the appliance. 4. Wear Proper Apparel—Loose fitting or hanging garments should never be worn while using appliance. 5. User Servicing—Do not repair or replace any part of the appliance unless specifically recommended in the manual. All other servicing should be referred to a qualified technician. 6. Storage in or on Appliance—Flammable materials should not be stored in an oven or near surface units. 7. Do Not Use Water On Grease Fires—Smother fire or flame, or use dry chemical or foam-type extinguisher. 8. Use Only Dry Potholders—Moist or damp potholders on hot surfaces may result in burns from steam. Do not let potholder touch elements. Do not use a towel or other bulky cloth. 1. Use Proper Pan Size—This appliance is equipped with one or more surface burners of different sizes. Select utensils having flat bottoms large enough to cover the surface burner. The use of undersized utensils will expose a portion of the burner to direct contact and may result in ignition of clothing. Use of oversized utensils concentrates heat on cooking surface and can cause damage to range. Proper relationship of utensil to burner improves efficiency. 2. Never Leave Surface Burners Unattended—Boilover causes smoking and greasy spillovers that may ignite. 3. Make Sure Reflector Pans or Drip Bowls Are in Place—Absence of these pans or bowls during cooking may subject wiring or components underneath to damage. 4. Protective Liners—Do not use aluminum foil to line surface burner drip bowls or oven bottom, except as suggested in the manual. Improper installation of these liners may result in a risk of electric shock, or fire. 5. Glazed Cooking Utensils—Only certain types of glass, ceramic, earthware, or other glazed utensils are suitable for rangetop service without breaking due to sudden change in temperature. 6. Utensil Handles Should Be Turned Inward and Not Extended Over Adjacent Surface Burners—To reduce the risk of burns, ignition of flammable materials, and spillage due to unintentional contact with the utensil, the handle of a utensil should be positioned so that it is turned inward, and does not extend over adjacent surface burners. California Safe Drinking Water and Toxic Enforcement Act (Proposition 65) The Governor of California is required to publish a list of substances known to the state of California to cause cancer or reproductive harm and requires businesses to warn customers of potential exposures to such substances. ! CAUTION This appliance may contain or produce a chemical or chemicals which can cause death or serious illness and which are known to the State of California to cause cancer, birth defects, or other reproductive harm. To reduce the risk from substances in the fuel or from fuel combustion, make sure this appliance is installed, operated and maintained according to the instructions provided. To avoid delayed or improper ignition, do not obstruct the flow of combustion or ventilation air. ! CAUTION Do not store items of interest to children in cabinets above a range or on the backguard of a range—children climbing on the range to reach items could be seriously injured. SAVE THESE INSTRUCTIONS C–5 RS2310005 Rev. 0 IMPORTANT SAFETY INFORMATION (contd) OVENS In Case of Fire 1. Use Care When Opening Door—Let hot air or steam escape before removing or replacing food. 2. Do Not Heat Unopened Food Containers—Build-up of pressure may cause container to burst and result in injury. 3. Keep Oven Vent Ducts Unobstructed. 4. Placement of Oven Racks—Always place oven racks in desired location while oven is cool. If rack is removed while oven is hot, do not let potholder contact hot heating element in oven. 5. Protective Liners—Do not use aluminum foil to line drip bowls, oven racks or oven bottoms. Improper installation of these liners may result in a risk of electrical shock, or fire. Fires can occur as a result of over cooking or excessive grease. Though a fire is unlikely, if one occurs, proceed as follows: Surface Burner Fire 1. Smother the fire with a nonflammable lid or baking soda, or use a Class ABC or BC extinguisher. Not water. Not salt. Not flour. 2. As soon as it is safe to do so, turn the surface controls to OFF. Turn off power at main circuit breaker or fuse box. Turn off gas supply. SELF-CLEANING OVENS 1. Do Not Clean Door Gasket—The door gasket is essential for a good seal. Care should be taken not to rub, damage, or move the gasket. 2. Do Not Use Oven Cleaners—No commercial oven cleaner or oven liner protective coating of any kind should be used in or around any part of the liner. 3. Clean Only Parts Listed in Manual. 4. Before Self-Cleaning the Oven—Remove broiler pan, oven racks, and other utensils. 5. Remove All Items From Rangetop and Backguard. Oven Fires 1. If you see smoke from your oven, do not open oven door. 2. Turn off oven. 3. As an added precaution, turn off power at main circuit breaker or fuse box. Turn off gas supply. 4. Turn on vent to remove smoke. 5. Allow food or grease to burn itself out in oven. 6. If smoke and fire persist, call fire department. 7. If there is any damage to components, call an authorized servicer before using range. ! • VENTILATION HOODS 1. Clean Ventilating Hoods Frequently—Grease should not be allowed to accumulate on hood or filter. 2. When flaming foods under the hood, turn the fan on. • • DELAYED IGNITION • Surface burners Burner should ignite within 4 seconds. If burner does not ignite within 4 seconds, turn control knob to OFF and follow directions for installing burner caps in Adjusting Surface Burners. Try again. If burner still does not ignite within 4 seconds, contact an authorized servicer. Bake and broil burner flame Allow no more than 40-60 seconds before burner ignites and heat is felt. To check for heat, open oven door to first stop and place hand over oven door. If heat is not felt, turn temperature control knob to OFF. If burner repeatedly fails to ignite, contact an authorized servicer. • • • • • Precautions • Do not cook food directly on rangetop surface, always use cookware. Do not mix household cleaning products. Chemical mixtures may interact with objectionable or even hazardous results. Do not put plastic items on warm cooking areas. They may melt and stick. Oven door contains a glass window. While the window is built to be sturdy and strong, it is still glass and needs to be treated with care. Do not lift or move range by grasping oven door handle. This can result in window glass breaking or shattering. Do not slide rough metal objects across rangetop surface. Scratching or metal marking can result. Do not leave fat heating unless you remain nearby. Fat can ignite if overheated by spilling onto hot surfaces. Do not allow pots to boil dry as this can cause damage to cooking surface and pan. Do not use rangetop surface as a cutting board. Do not use range for storage or as a display counter. SAVE THESE INSTRUCTIONS RS2310005 Rev. 0 C–6 Adjusting Surface Burner Flame Adjustments must conform to all local, municipal and state building codes, and local utility regulations. grate Placing burner caps burner cap Burner cap must be correctly seated on the burner base for proper operation of the burner. Verify cap is properly aligned and leveled by moving the burner cap around on burner base while rangetop is cool. burner base • • • • • The cap should not be loose. The pegs in the burner base should fit into the recess on the underside of burner cap. Cap should be the correct size for each burner base. Cap must be clean and dry for proper ignition. Place grate over cap and burner base once cap is properly placed. Testing and adjusting surface burner flame A properly adjusted surface burner on a high setting has flames that are clean and blue with a distinct inner cone approximately 1/4" to 1/2" inch long. Some yellow flame is normal when burning LP/Propane. Burner /4 to 1/2 " 1 • • • • See Delayed Ignition section in Important Safety Information for safety warnings and procedures. Flames will not be a uniform size around the cap. This distribution around the cap and grate allows for optimal heating. If burner flame is blowing or noisy, airflow should be reduced to the burner (close air shutter). If burner flame is weak and does not hold its shape, airflow should be increased to the burner (open air shutter). Adjusting the surface burners air shutter 1. Disconnect electrical supply 2. Turn off all surface burners. 3. Remove burner control knobs from range. open • 2 screws are visible on the burner control panel. 4. Remove both screws from burner control panel. • Panel will drop slightly after screws are removed. 5. While grasping bottom of burner control panel, gently lift and pull out panel until it is clear of burner valve stems. • After burner control panel clears the valve stems, continue to roll the panel until free from the range. Set aside. • Both gas valve and orifice hood are visible after burner control panel is removed. 6. Slide air shutter open or closed depending on the appearance of burner flame. • Air shutter should be moved by 1/16" to 1/8" at a time. 7. Connect electrical supply. pivot point 8. Check flame adjustment. burner knob • Slide knob onto valve shaft and turn to lite surface burner. • Flame should be blue with a distinct inner cone 1 /4" to 1/2" long. • Shut off burner after flame is viewed. Remove knob. Disconnect electrical supply if further adjustments are needed. orifice hood • Repeat air shutter adjustments as necessary. 9. Reassemble burner control panel in reverse order. C–7 close air shutter RS2310005 Rev. 0 Adjusting Oven Burner Flame Adjustments must conform to all local, municipal and state building codes, and local utility regulations. Testing and adjusting the bake and broil burner flames 1/2" Properly adjusted oven burner flames are blue with a distinct blue inner cone approximately 1/2" long. When using natural gas, flame should not have any yellow flame when burning. Some yellow flame when burning LP/Propane gas is normal. Flame should not be visible in oven cavity when burning and should not extend into the oven cavity beyond the removable oven bottom. See Delayed Ignition section in Important Safety Information for safety warnings and procedures. Adjusting bake burners air shutter 1. 2. 3. 4. 5. 6. 7. 8. 9. 10. Disconnect electrical supply. Remove oven bottom while still cool. Remove storage drawer. From front of range, locate bake burner air shutter. Loosen air shutter lock screw and open or close air shutter. • Air shutter should be moved by 1/16" to 1/8" at a time. • If burner flame is blowing or noisy, reduce airflow to the burner (close air shutter) • If burner flame is yellow and does not hold its shape, increase airflow to the burner (open air shutter). Tighten air shutter screw. Connect electrical supply. Test oven bake burner flame for proper adjustment. If not adjusted properly, disconnect electrical supply and repeat steps 5, 6 and 7. Replace storage drawer. When oven is again cool, replace oven bottom. Flame 1 / 2" long Burner orifice hood open close air shutter lock screw air shutter Adjusting broil burners air shutter 1. Disconnect electrical supply. 2. Open oven door. 3. Loosen air shutter lock screw and open or close the air shutter. • Air shutter should be moved by 1/16" to 1/8" at a time. • If burner flame is blowing or noisy, reduce airflow to the burner. • If burner flame is yellow and does not hold its shape, increase airflow to the burner. 4. Tighten air shutter screw. 5. Reconnect electrical supply. 6. Test oven broil burner flame for proper adjustment. If not adjusted properly, disconnect electrical supply and repeat steps 3 and 4. 7. Close oven door. RS2310005 Rev. 0 C–8 air open shutter close Cookware Recommendations What Should You Consider in Cookware? Flat Pan Test For best cooking results, use a pan with a flat bottom. To determine if pan has a flat bottom: 1. Rotate a ruler along bottom of pan. If pan is not flat, gaps between bottom of pan and edge of ruler can be seen. 2. A small groove or mark on a pan does not affect cooking times. However, if a pan has a gap, formed rings, or an uneven bottom, it does not cook efficiently and in some cases may not boil liquid. SELECT AVOID Flat bottomed cookware. Cookware with rounded or warped bottoms. Heavy gauge metal cookware. Light gauge metal cookware. Handles that are secure, that are not heavy enough to tilt pan. Cookware with loose or broken handles or heavy handles that tip pan when empty. Proper pan size. Cookware that is smaller than or greater than burner grate by 1 inch. Flat bottomed wok Wok with a ringstand on bottom. Does not cover burner More than 1 inch overhang Can I can? Canning is not recommended with any of the Amana gas ranges or cooktops due to the intense heat and large cookware required to can. COOKWARE MATERIAL Aluminum Heats and cools quickly. Use for frying, braising, and roasting. The high, sustained heat generated by the canning cookware overheats both the burners and the surface of the range or cooktop. This may cause damage to burners, knobs, or finish, and may even cause overheating of surrounding walls. Stainless Steel Heats and cools at moderate rate. Use for soups, sauces, vegetables, general cooking. Copper Clad / Tin Lined Heats and cools quickly. Use for gourmet cooking, wine sauces, egg dishes. Cast Iron Heats and cools slowly. Use for low heat cooking, frying. Damage incurred by canning, or attempting to can, is not covered under warranty. Enamelware Ceramic (Glass) C–9 USES Heating speed depends on base metal in the cookware. Use for low heat cooking. Heats and cools slowly. Use for low heat cooking. RS2310005 Rev. 0 Using the Range Setting Surface Burner Controls ! WARNING Burner should ignite within 4 seconds. If burner does not ignite within 4 seconds, turn control knob to OFF position and follow directions in Placing Burner Caps section. MED <GAS ON 1. Push in and turn knob to LITE. • Burner should ignite within 4 seconds. OF F 2. After gas ignites, turn control to desired LO setting. • Knobs do not have distinct ‘clicks’. • Use HI to bring food to boiling temperatures. When food is boiling temperature setting should be reduced. • After lighting burner do not operate for long periods of time without cookware on grate. The finish on the grate can chip without cookware to absorb the heat. • Flame size should match the size of the pan. Do not allow the flame to extend up the sides of the pan. This can cause clothing to ignite, make the handle hot, or cause burns. 3. When finished cooking, turn control to OFF position. To avoid risk of serious personal injury, property damage, or fire, do not leave surface burners unattended while in operation. Grease and spillovers can ignite causing a fire. HI If These Controls Are Different From Yours TE LI SURFACE BURNER CONTROL SETTINGS WHEN TO USE SETTING LO Use to prepare food at less than boiling temperatures or to simmer. MED Use to maintain boiling of larger amounts of food, low temperature frying and to maintain correct pressure in a pressure cooker. HI Use to bring food to boiling temperatures. When food is boiling temperature setting should be reduced to LO through MED. Adjusting Burner Flame Size • • • While turning burner control knob, watch the burner flame. Flame size should match the size of the pan. Flames that extend up the sides of the pan can ignite clothing, making the handle hot, or cause burns. RS2310005 Rev. 0 C–10 The control descriptions are intended to show the variety of features that are available in the product line. If your range does not have all the features that are shown, it is not a mistake. The information provided applies to several of the available models. During a Power Outage Although the system that lights the burners is electric, surface burners can be ignited during a power outage. Never attempt to light bake or broil burners (oven burners) during a power failure. 1. 2. 3. Hold match at base of desired surface burner. Push in burner control knob and turn to LITE position. After gas ignites, remove match from burner and turn burner control knob to desired setting. Using the Range (contd) Aluminum Foil ! WARNING To avoid risk of personal injury, property damage or fire, do not line oven bottom, racks, or broiler pan and grid with aluminum foil or any other material. When placed on the oven bottom or racks, aluminum foil not only creates a hazard, but also affects cooking performance. To minimize spills in the oven, place a shallow pan or cookie sheet underneath food items that drip or spill. Broiling Hints • • • • • • • • • Broiling does not require preheating. Remove excess fat from meat before broiling. Cut edges of meat to prevent curling. Place food on a cold ungreased broiling pan. If pan is hot, food sticks. All food except fish should be turned at least one time. Begin broiling with skin side down. Season meat after it has browned. Begin cooking using suggested rack levels in Cooking:Broiling section in the back of this manual to test broiler results. If food is not brown enough, cook on a higher rack position. If food is too brown, cook on a lower rack position. Oven door must be closed. Oven Racks and Rack Positions Your range has 6 oven rack positions to accommodate all type of cooking and cookware. Oven Rack Placement Position oven rack before turning oven on. 1. Pull rack forward to stop position. 2. Raise front edge of rack and pull until rack is out of oven. 3. Place rack in new rack position. • Curved edge of rack must be toward rear of oven. 1 2 3 4 5 6 RACK POSITION GUIDELINES FOR BAKING, ROASTING, BRAISING Rack Position Food Type 2 Puff pastry products, streudles, casseroles, muffins, small pork poin, and Eye of Round roast. 3 Halved chickens, whole pork tenderloin, Cornish hens, pot pies, frozen pizzas, quick breads (corn bread, biscuits). 4 Roast tenderloin of beef, whole chicken, whole pork loin, roasted vegetables such as spaghetti or acorn squash. 5 Whole turkey, capons, tip roasts and dressings. 6 Large cuts of roasts meats such as top round, standing rib roast, crown roast of lamb and boston butts. Baked and sweet potatoes, flat breads and cobblers. RACK POSITION GUIDELINES FOR BROILING Rack Position Food Type 1 Boneless pork chops, boneless skinless chicken breast, fish fillets, tuna steaks. Use a flat or shallow edged tray. 2 1/2 to 3/4” thick beef or tuna steaks, or pork chops. London Broil. 3 1 to 1 1/2” thick steaks, 1 to 2” thick pork chops. Lobster tails. C–11 RS2310005 Rev. 0 Using the Range (contd) Placing the oven bottom The oven bottom in your range has been screwed in to prevent any shifting during moving or cooking. The oven bottom protects the recessed bake burner area during baking or broiling. It is necessary to remove the oven bottom for routine cleaning. The oven bottom, burner baffle, and bake burner recess will need to be cleaned of any excess grease or soil before a self-clean cycle is started. ! WARNING To avoid risk of personal injury, property damage, or fire, clean excess grease and soil from bake recess before beginning a selfclean cycle. To remove the oven bottom: 1. Verify all controls are in the OFF position. 2. Oven must be cool to the touch. 3. Open oven door and adjust any low oven racks to a higher rack position, or remove racks temporarily from oven. 4. Locate two thumb screws holding oven bottom in place in rear of oven cavity. • Remove thumb screws and retain for later use. 5. Carefully remove oven bottom from oven cavity. • Lift at rear sides and slide from front frame. • Oven bottom can be washed of excessive grease using a mild soap and water. 6. Wipe out bake burner recess with a cloth dampened with soapy water. 7. Dry thoroughly. 8. Replace oven bottom and secure with thumb screws. • Place front edge of oven bottoms under front frame. • Lower rear of oven bottom into position and install thumb screws. • Do not overtighten thumb screws. • Oven bottom must be in place for oven to be used or for a self-clean cycle to be run. 9. If oven racks were removed, replace oven racks. RS2310005 Rev. 0 C–12 ! WARNING To avoid risk of personal injury, property damage or fire, do not line oven bottom, racks, or broiler pan and grid with aluminum foil. ! CAUTION To avoid risk of personal injury wear gloves to protect hands from possible sharp edges. Features ¸ 12-hour automatic cancel This safety feature prevents oven from continuing to operate if it has been left on for over 12 hours. If a cooking function continues longer than 12 hours without any options on oven control being touched, this feature turns oven off. Any time an option is touched, 12-hour automatic cancel is reset. Oven temperature control adjustment Your range is calibrated at the factory for proper temperature. Due to individual variances and preferences, it may be necessary to adjust oven once it has been installed. When first using the oven, follow recipe times and temperatures. Before adjusting oven baking temperature, test a recipe by setting oven temperature higher or lower than the suggested temperature. The baking results should help you to decide how much of a temperature adjustment is required. An accurate digital thermometer is necessary to calibrate the oven. Store purchased oven thermometers do not accurately measure oven temperature. Oven temperature can be increased or decreased by 35°F. To avoid over adjusting the oven, only adjust the temperature by 5°F each time. NOTE: Remove aluminum foil from racks and oven bottom as this will alter oven performance. Check for blocked heat vents. If it still appears oven is not performing as expected, a calibration may be done. 1. 2. 3. 4. Turn oven temperature knob to OFF. Press and hold both arrow pads for approximately 5 seconds. A double digit will display ranging from -35°F to 35°F. Immediately, press either: • to increase oven temperature by 5°F • to decrease oven temperature by 5°F • When temperature is adjusted to a cooler setting, a minus sign (-) will display with the offset temperature. 5. When desired temperature change is displayed, release control and change will be automatically saved after a few seconds. Control will return to time of day display. • Offset temperature change will be retained through a power failure. Fcode Service codes and tones Possible Meaning F1 Control failure F2 Oven over temperature F3 Sensor open or shorted F9 Door latch circuit failure DOOR Electronic oven control is equipped with a self-diagnostic system. Self-diagnostic system alerts you if there is an error or problem with the unit. If electronic range control sounds a series of short, rapid beeps for over 16 seconds and the display shows an F-code, record F-code shown. Some F-codes can be cleared by disconnecting power to the range for approximately 3 minutes. If the code continues to reoccur disconnect electrical supply to range and contact an authorized servicer. Door has not latched. C–13 RS2310005 Rev. 0 Display and Signals 350 LIGHTS Clock also displays oven temperature. DESCRIPTION CLOCK Clock pad light remains on while time of day is set. TIMER ON/OFF Timer On/Off pad light remains on while the timer counts down. COOK/CLEAN TIME Cook/Clean Time light is turned on when entering cook or clean time. Light remains on during the cook or clean cycle. START COOK/CLEAN Start Cook/Clean light turns on when entering the time a cooking or cleaning cycle is to start. PREHEAT Preheat light turns on and remains on while oven is heating to selected temperature. Light shuts off when oven reaches and maintains temperature. LOCKED Locked light turns on and remains on when oven door is locked. Locked light flashes when door is automatically locking or unlocking. OVEN ON Oven On light turns on and remains on while oven is in use. Oven light does not monitor oven cavity temperature. OVEN LIGHT Turns on when OVEN LIGHT pad is pressed. DISPLAY DESCRIPTION BRL Displays when oven is broiling or set to broil. CLN Displays when oven is self cleaning or is set to self clean. END Displays when oven has reached the end of a baking or cleaning cycle. RS2310005 Rev. 0 C–14 Timer Signal When time elapses, timer beeps a single, three second tone. Preheat Signal After setting oven to bake and selecting a temperature, oven preheats. When oven reaches set temperature, oven signals a one second beep and the preheat light shuts off. End-of-Cycle Signal When a timed cooking cycle is complete, the oven will beep four tones approximately one second apart, followed by a continuous series of one second beeps every ten seconds until the oven knob is turned to OFF. Using the Oven Control Setting Electronic Clock Flashing Display When power is connected or interrupted, oven display flashes. Press CLOCK to reset display. Clock may need to be reset. Making the Numbers Increase at a Faster Rate The 12 hour clock does not display AM, PM or military time. When power is connected or restored, display flashes until RECALL OVEN TEMP/CLOCK pad is pressed or temperature knob is turned. 1. Press RECALL OVEN TEMP/CLOCK pad. 2. Press + or pads until correct time-of-day displays. 3. Time is set after 5 seconds of no adjustment. Time increases in larger increments the longer the + or pad is held. Setting Minute Timer Timer Signal When time elapses, beep will sound. Press TIMER ON/OFF pad to stop timer and return to clock display. Preheat Signal After setting oven to bake and selecting a temperature, oven preheats. When oven reaches set temperature, signal sounds. The preheat light will shut off and remain off after oven has reached the selected temperature. The timer is a timer only. Electronic timer does not control bake, broil or self-clean function. Timer can be set up to 11 hours and 59 minutes. 1. Press TIMER ON/OFF pad. 2. Press + or pad until desired amount of time displays. • Time increases in 1 minute and 10 minute increments. • Timer begins counting down automatically after time is entered. • To view clock while timer counts down, press RECALL OVEN TEMP/CLOCK pad. Timer will return after 3 seconds of no input. 3. Press and hold TIMER ON/OFF pad to cancel timer signal. • After time elapses, timer beeps a single, three second tone. Resetting and Canceling Timer To reset the time when remaining time is displayed, press TIMER ON/OFF pad, then + or pad until new time displays. To cancel timer when remaining time is displayed or when signal is beeping, press and hold TIMER ON/OFF pad. C–15 RS2310005 Rev. 0 Using the Oven Control (contd) ! WARNING Baking While oven is still cool, remove any stored items from the oven cavity. 1. Place racks in desired position and close oven door. 2. Push and turn oven temperature knob to desired temperature. • Oven indicator light will turn on and stay on. • Temperature is displayed in the clock area in 5 degree increments. • Temperature range is 170°F to 550°F. • Display will return to time of day after approximately 15 seconds. • To recall oven temperature, press RECALL OVEN TEMP/CLOCK pad. 3. PREHEAT light will turn on during the preheat cycle. PREHEAT light shuts off when oven has reached desired temperature and oven beeps. 4. Open door carefully and place food in oven. 5. After cooking time elapses, remove food and turn oven temperature knob to OFF. Broiling Broiling sears in natural juices and provides charbroiled flavor. To broil, center food on broiling grid and pan and place on proper rack in oven. Do not place aluminum foil over boiling pan, oven rack or oven bottom. Oven door must be fully closed. Broiling does not require preheating so you can place food in oven while it is still cool. 1. Adjust oven racks to desired position. 2. Turn oven temperature knob to BROIL. • Oven indicator light will turn on and remain on. • BRL will display. • Display will return to time of day approximately 15 seconds after broiling begins. • To recall oven temperature, press RECALL OVEN TEMP/CLOCK pad. 2. Close oven door. • If oven door is ajar for more than 3 minutes, broil cycle will stop. • If oven stops broiling due to an open door, close oven door and wait for the ignitor to lite broil burner. 3. After broiling, remove food and turn oven temperature knob to OFF. RS2310005 Rev. 0 C–16 To avoid risk of personal injury, property damage or fire, do not line oven bottom, racks, or broiler pan and grid with aluminum foil. ! WARNING To avoid risk of personal injury, property damage or fire, never leave oven unattended while broiling. Preheating In most cases, you should preheat the oven before baking. After the range control is set, the oven temperature will begin to rise until the desired cooking temperature is reached. When cooking temperature is reached oven signal beeps. For delicate baking, preheat approximately 15–20 minutes before placing food inside oven or wait 10 minutes after oven signal beeps before placing food in oven. The extra time creates a more stable oven temperature. How High or Low Can I Set the Temperature? Oven bake temperature can be set from 170°F to 550°F . Some minor smoking is normal when using oven for first time. Using the Oven Control (contd) What's the difference between TIMED and DELAYED cooking? When using TIMED cooking, the oven begins to heat immediately after the oven control is set. Then, the oven cooks for the desired length of time set. When using DELAYED cooking, the oven begins to cook later in the day. Set the time that you want to begin cooking and the how long you want to cook. The oven begins to heat when at the selected time and cooks for the specified length of time. How Far Ahead Can I Set the Time? Cook time and start time can be set up to 11 hours and 59 minutes ahead. To view cook time, press and hold COOK TIME pad. When cooking time has elapsed, an end of cycle signal sounds, oven automatically turns off and display returns to time of day. Oven signal sounds 4 times, then once every 10 seconds until knob is turned to OFF. Broil can not be set to Timed or Delayed. ! CAUTION To reduce risk of food poisoning due to bacterial growth and production of toxins, never hold meat, milk, fish, or eggs for more than 2 hours before cooking. How much time is left? For a delayed bake cycle, the cook time can be viewed by pressing the COOK pad. For a timed bake cycle, the stop time can be viewed by pressing the STOP pad. Timed Baking Set oven to cook for desired amount of time. Follow recipe directions for preheating the oven. 1. Place food in oven. 2. Press COOK/CLEAN TIME pad. 3. Press or pad until desired length of time is displayed. • Cook time can be set up to 11 hours and 59 minutes. 4. Push and turn the temperature control knob. • Temperature displays in 5° increments starting at 170°F. • Clock will return to time of day after approximately 15 seconds. • To recall oven temperature, press RECALL OVEN TEMP/CLOCK pad. 5. Oven will automatically begin to heat. • To adjust cook time, press COOK/CLEAN TIME pad while the remaining cook time is displayed. Cook time can then be adjusted. • When cooking time has elapsed an end of cycle signal sounds and END will be displayed. Oven signal sounds 4 times, then once every 10 seconds until oven control knob is turned to OFF. 6. Turn knob to OFF to cancel baking. Delayed Baking Set oven to begin baking at a later time. 1. Place food in oven. 2. Press START COOK/CLEAN button. • Default time displayed is current time of day. or pad until desired time displays. 3. Press • Start time can be set up to 11 hours and 59 minutes ahead of current time of day. 4. Press COOK/CLEAN TIME pad. 5. Press or pad until desired cooking time displays. • 1 minute minimum cooking time. • END will be displayed when cooking time has elapsed. 6. Push and turn oven temperature control knob to desired temperature. • Temperature displays in 5° increments starting at 170°F. • Display will return to time of day after 5 seconds of no input. • START TIME and COOK TIME lights will remain on, but OVEN ON light will not turn on until cooking begins. 7. Oven will automatically begin to heat at selected start time. • OVEN ON light will turn on when oven begins to heat. • To adjust cook time, press COOK/CLEAN TIME pad while the remaining cook time is displayed. Cook time can then be adjusted. • When cooking time has elapsed an end of cycle signal sounds and END will be displayed. Oven signal sounds 4 times, then once every 10 seconds until oven control knob is turned to OFF. 8. Turn knob to OFF to cancel baking. C–17 RS2310005 Rev. 0 Using the Oven Control (contd) ! CAUTION Self-cleaning Self-clean feature uses high oven temperature to clean oven interior. For the oven to operate through a complete self-clean cycle, the selfclean must be set when the oven is cool. 1. Prepare oven for self-cleaning (see below left). 2. Close door. 3. Push and turn oven temperature knob to CLEAN position. • The default self-clean cycle length of 3 hours will display. 4. Set cycle length for self-clean. • Use arrow keys to adjust time as necessary before oven indicator light turns on. • Clean cycle can be set from two to four hours in five minute increments. • Default setting for the cycle is three hours. 5. Self-clean begins. • OVEN ON indicator light will be on and will remain on until the end of the cycle. • At the end of the self-clean cycle, the OVEN ON indicator light will shut off. • The LOCKED indicator light will remain on until oven reaches a cooler temperature. LOCKED light will flash while door is unlocking, and then shut off when door has unlocked. Oven cavity will be hot to the touch. DO NOT attempt to open door prior to LOCKED indicator light shutting off. To avoid fire or smoke damage, • remove any flammable materials from storage drawer. Items like plastic containers and paper manuals can melt or burn. • clean excess spills before starting a self-clean cycle. ! WARNING To avoid risk of personal injury, do not touch oven vents, or area around vents, during selfcleaning. These areas can become hot enough to cause burns. Do I need to prepare? To get the best results from the self-clean cycle, follow these steps: • Interrupting the self-clean cycle To stop a self-clean cycle that has already started follow these steps. If the interruption occurs mid cycle, the oven will remain locked, even though the cycle has stopped, until the oven cavity has cooled to a lower temperature. • 1. Turn oven temperature knob to OFF position. 2. When oven has cooled to a lower temperature, LOCKED light turns off. Door can be unlocked. DO NOT force door. This can cause damage to the latch. • • • • Operating surface burners during a self-clean cycle. Your range is equipped with a safety feature to prevent it from overheating during a self-clean cycle. A special temperature sensor shuts off the selfclean cycle if the range becomes too hot. Depending on the range and the length of cooking time on the surface burners, the sensor may or may not shut off the self-clean cycle. To prevent any self-clean cycle disruption, it is best not to use the range surface burners during a self-clean cycle. RS2310005 Rev. 0 C–18 • Clean excess spills from oven interior and oven burner thoroughly. Remove birds or animals susceptible to smoke or other fumes from the room or adjoining room. Open window if possible. Make sure oven light cover is properly in place. Do not use cleaning cycle if it is not. Remove oven racks and all cooking utensils from oven. Remove items from range top, backguard and storage drawer. These areas can become hot during self-cleaning cycle. The range vents from the center bottom of the backguard. Make sure this area is unobstructed by removing all items from backguard and range top. Using the Oven Control (contd) ! WARNING To avoid risk of personal injury, do not touch oven vents, or area around vents, during self-cleaning. These areas can become hot enough to cause burns. ! CAUTION To avoid fire or smoke damage, • remove any flammable materials from storage drawer. Items like plastic containers and paper manuals can melt or burn. • clean excess spills before starting a self-clean cycle. Do I need to prepare? To get the best results from the self-clean cycle, follow these steps: • • • • • • • Clean excess spills from oven interior and oven burner well. Remove birds or animals susceptible to smoke or other fumes from the room or adjoining room. Open window if possible. Make sure oven light cover is properly in place. Do not use cleaning cycle if it is not. Remove oven racks and all cooking utensils from oven. Remove items from range top backguard and storage drawer. These areas can become hot during self-cleaning cycle. The range vents from the center bottom of the backguard. Make sure this area is unobstructed by removing all items from backguard and range top. Delayed Self-clean Cycle Self-clean feature uses high oven temperature to clean oven interior. Set oven to begin and end cleaning at later time. Range control begins the self-clean at your specified start time. 1. Prepare oven for self-cleaning (see below right). 2. Close door. 3. Press START COOK/CLEAN pad. 4. Set starting time for the cleaning cycle. • Default time is current time of day. • Start time can be set from current time to current time plus 11 hours and 59 minutes. 5. Turn oven temperature knob to CLEAN. • Default self-clean cycle length of 3 hours will display. 6. Set cycle length for self-clean. • Use arrow keys to adjust time as necessary. • Clean cycle can be set from two to four hours in five minute increments. • Default setting for the cycle is three hours. 7. Self-clean cycle is set. • Oven cannot be used until completion of the self-clean cycle. • Self-clean cycle will begin at selected start time. • To view start time, press the START COOK/CLEAN pad. • OVEN ON indicator light will turn on when the self-clean cycle begins and will remain on until the end of the cycle. • To view the clean cycle time, press the COOK/CLEAN TIME pad. • At the end of the self-clean cycle, OVEN ON indicator light shuts off. • The LOCKED indicator light will remain on until oven reaches a cooler temperature. LOCKED light will flash while door is unlocking, and then shut off when door has unlocked. Oven cavity will be hot to the touch. DO NOT attempt to open door prior to LOCKED indicator light shutting off. Interrupting the self-clean cycle To stop a self-clean cycle that has already started follow these steps. If the interruption occurs mid cycle, the oven will remain locked, even though the cycle has stopped, until the oven cavity has cooled to a safe temperature. 1. Turn oven temperature knob to OFF position. 2. When oven has cooled to a lower temperature, LOCKED light shuts off. Door can be unlocked. DO NOT force door. This can cause damage to the latch. C–19 RS2310005 Rev. 0 Cooking Baking Guidelines When baking with a new oven, keep in mind temperatures vary from oven to oven. Store-bought thermometers are generally not accurate and should not be used to calibrate oven temperatures. Hints for Cookies, • • Shiny, flat cookie sheets should be used. Avoid cookie pans with high sides - this will cause uneven browning on the top. Cookie sheet should not touch the sides of the oven or door. Cakes, • • Follow recipe’s directions for pan size. Shiny pans work best for cakes. Cake baked in too large a pan will be thin and dry. Too small a pan will be undercooked or unevenly cooked and may spill. Pies • • Pies should be baked in dark or dull pans to increase browning. Frozen pies should be heated on an aluminum cookie sheet. BAKING TIME GUIDELINES Cake Pan Type Cups of batter Oven Temp. Minutes 7 ¾” x 5 ¾” 2½ 350°F 25 to 30 13” x 9 ¾” 8 350°F 25 to 30 6” 2 350°F 25 to 30 8“ 3 350°F 30 to 35 14” 10 350°F 50 to 55 8” 5 325°F 60 to 65 12” 11 325°F 75 to 80 Half Round, 2” layer 18” 9 325°F 60 to 65 Half Round, 3” layer 18” 12 325°F 60 to 65 Square 6” 2 350°F 25 to 30 10” 6 350°F 35 to 40 16” 15 1/2 350°F 45 to 50 Oval Pan size Round, 2” layer Round, 3” layer BAKEWARE GUIDELINES Dark or dull pans Absorb more heat and result in darker browning. Recommended for pies and breads. Shiny pans (no sides) Recommended for cookies. Shiny pans (sides) Recommended for cakes Glass pans Lower recommended oven temperature by 25°F. RS2310005 Rev. 0 Bake Pan Placement • Keep pans and baking sheets 2 inches from oven walls. • Stagger pans placed on different racks so one is not directly over the other. Preheating In most cases, you should preheat the oven before baking. After the range control is set, the oven temperature will begin to rise until the desired cooking temperature is reached (approximately 8 to 10 minutes). When cooking temperature is reached oven signal beeps. For delicate baking (such as puff pastries or souffles), preheat approximately 15–20 minutes before placing food inside oven or wait 10 minutes after oven signal beeps before placing food in oven. The extra time creates a more stable oven temperature. C–20 Cooking (contd) Common Baking Problems If you begin to notice consistent problems refer to the chart below for possible solutions. If results are still poor, contact Amana Consumer Affairs at (800) 843-0304. Test your cakes for doneness While they are still in the oven. Because of variances across individual ovens, it is best to test for the proper consistency rather than solely relying on time and visual appearance as an indicator. It may not be the oven Cake problems may be in the mixing of the batter. Overbeating can cause cake structure to break down and excessive shrinkage of the cake. Underbeating can result in lumpy cakes that may not be cooked thoroughly. All ingredients should be at room temperature—not out of the refrigerator. Make sure to follow the recipes directions for how long the batter should be mixed. Problem Cause Lopsided cakes (bake unevenly) Pans touching each other or oven walls. Batter spread unevenly in pan. Uneven heat distribution in oven. Oven is not level. Cakes, cookies, biscuits too brown on bottom or top Oven not preheated. Pans touching each other or oven walls. Using glass, darkened, warped or dull finish metal pans. Rack position too high or low. Incorrect use of aluminum foil. Oven temperature too high. Pies don’t brown Incorrect rack position. Using shiny metal pans. Temperature set too low. Cakes not done in center Temperature too high. Pan too small. Baking time too short. Pan not centered in oven. Cakes fall Too much shortening or sugar. Too much or too little liquid. Temperature too low. Old or too little baking powder. Pan too small. Oven door opened frequently (peeking). Insufficient baking. Excessive shrinkage Too little leavening. Mixing batter too long. Pan too large. Oven temperature too high. Baking time too long. Cakes high in middle or cracked Temperature set too high. Overmixing. Too much flour. Pans touching each other or oven walls. Cake stuck? Allow cake to cool in cake pan on a rack for 10 minutes before removing. Larger cakes (over 14 inches in diameter) may take 15 minutes. If the cake has cooled too long, reheat in the oven at 250°F for a few minutes. Better with butter Make sure to follow recipe directions and use butter or margarine when it is listed. Using a low fat substitute will cause a recipe to fail. C–21 RS2310005 Rev. 0 Cooking (contd) Meat Basics While cooking has always been a talent, it is now becoming a science, also. Amana provides this information as a guide to aid in preparation. For specific questions regarding meat preparation, handling, or storage contact USDA (United States Department of Agriculture) Meat & Poultry Hotline at (800) 535-4555. Handling Hints Cooking Tips Storage Safety • • • • • • • • When shopping, put meat in its own separate plastic sack to keep drips off other foods. Defrost frozen meats in refrigerator, not at room temperature. Keep meat cool and covered until it is time to cook. Wash hands with warm soapy water before and after handling meat or raw egg. Thoroughly wash any surface or utensil raw meat or egg touched. Do not put cooked meat on the same plate that held raw meat. Tenderizing Braising is only one way to tenderize less tender cuts. Before cooking, you may pound, cube, marinate, or use commercially prepared meat tenderizers. You may then use a dry method to cook the meat. • • • • Marinades are acidic liquids such as wine, citrus, or vinegar. Marinades soften meat fibers but only penetrate about one-fourth of an inch into the interior of the meat. Do not marinate meat for longer than 24 hours. Pounding with a heavy meat mallet breaks down the connective tissue to tenderize meat. Cubing breaks down the structure more than pounding. Cubing is done at the meat counter. Commercial tenderizers are primarily enzymes that work on the outer fourth inch on a meat cut. Make sure to follow the manufacturer’s directions. RS2310005 Rev. 0 • • • • Marinate meat in the refrigerator. Throw out excess marinade that came into contact with meat. Use an oven-proof meat thermometer. Cook meat to internal temperature recommended by USDA. When reheating foods, heat to an internal temperature of at least 165 °F. While cooking meats, turn over at least once. • • • • Once carved, refrigerate unused portion immediately. Keep hot foods hot and cold foods cold when serving meals. Separate cooked foods into small portions for fast cooling. Do not store cooked ground meats or meals containing ground meats for longer than 3 to 4 days in the refrigerator. Do not allow cooked or uncooked meat juices to come into contact with ready-to-eat foods such as fruits or vegetables. Using a Meat Thermometer When using a meat thermometer, remember to insert it at a slight angle, in the thickest part of the meat, away from fat and bone. The meat should be removed when 5°F below the desired final temperature. While the meat sits before carving, it will continue to cook internally, raising the last 5°F by itself. A meat thermometer can • • Take the guesswork out of cooking to a desired ‘doneness’. Help reduce the risk of foodborne illness. Oven-safe Thermometer • Inserted before the meat is placed in the oven, this thermometer stays with the meat while it cooks. • The internal temperature will rise slowly as the meat cooks. Instant-read Thermometer • Not oven safe, these thermometers are placed in the meat when it is removed from the oven. • While times may vary, an accurate temperature is normally displayed within one to two minutes. • When using an instant-read, remember to clean the thermometer stem with warm, soapy water between readings. C–22 Cooking (contd) Broiling Guidelines Broiling is a dry heat cooking method that allows a restaurant quality charbroiled flavor. Meat is exposed directly to the heating element at high temperatures. 1. Place meat on rack in broiler pan, with the surface of cuts the specified distance from the heating element (specified below). 2. Broil for half the recommended time, or until the surface is browned. 3. Turn meat and continue broiling to desired internal temperature. 4. Season, if desired. Meat Cut Recommended Internal Temperature Thickness (inches) Weight (pounds) Distance From Heat (inches) Approximate Cooking Time (minutes) ¼ ¼ to 1 1 to 1 ¼ 2 to 3 3 to 4 12 to 14 8 to 12 ½ ½ to ¾ ¾ to 1 2 to 3 3 to 4 4 to 5 8 to 12 10 to 15 20 to 25 1 to 1 ¾ 1 ½ to 3 2 ¼ to 4 2 to 3 3 to 4 4 to 5 10 to 15 16 to 21 21 to 25 ¾ to 1 1 ½ to 2 2 to 3 2 to 3 3 to 4 4 to 5 8 to 12 10 to 15 20 to 25 BEEF Chuck Shoulder Steak 1 ¾ Rib Eye Steak Sirloin Steak Porterhouse Steak 1 Very Rare 130°F Rare 140°F Medium Rare 145°F ¾ Medium 160°F 1½ Well Done 170°F ¾ Very Well Done 180°F 1 1½ 1½ 1 Filet Mignon (Tenderloin) ¼ to ½ 2 to 4 10 to 15 Flank Steak 1 to 1 ½ 2 to 3 12 to 14 1 3 to 4 10 to 15 Ground Beef Patties ¾ to 1 160°F minimum PORK ¾ 4 6 to 8 ¾ 4 6 to 8 ½ to 1 4 15 to 25 1 inch cubes 4 10 to 20 ½ 4 8 to 10 Loin Chops 1 3 to 4 10 to 15 Rib Chops 1 3 to 4 10 to 15 1 3 to 4 12 to 15 1 3 to 4 12 to 15 Center Leg Steaks 1 3 to 4 15 to 20 Cubes for Kabobs 1 ¼ pieces 3 to 4 10 to 15 Chops, bone in Chops, boneless Tenderloin Kabobs Lean Ground Pork Patties All pork must be cooked to an internal temperature of at least 160°F to reduce the likelihood of Trichinosis. Failing to cook the meat to this temperature could result in personal injury or illness. LAMB Sirloin Steaks Top Round Steaks Medium Well Done 160°F 170°F 3 to 4 12 Lamb Patties ½ x 4 inches ¼ each All times and recommended temperatures are provided by the USDA, the Beef Industry Council, the National Pork Producer’s Council, and the American Sheep Industry Council. C–23 RS2310005 Rev. 0 Cooking (contd) Roasting Guidelines Tender cuts such as rib and loin cuts are best cooked by dry heat methods, such as roasting. To roast: 1. Heat oven to desired temperature. 2. Place roast directly from refrigerator fat side up in a shallow roasting pan. 3. Insert ovenproof meat thermometer so tip is centered in thickest part of roast. Make sure thermometer does not rest in fat or on bone. 4. Remove roast 5°F below desired degree of finished internal temperature. 5. Transfer roast to carving board and tent loosely with aluminum foil for approximately 15 minutes. Meat Cut Recommended Internal Temperature Approximate Cooking Time (minutes) Oven Temperature Weight (pounds) 325°F 4 to 6 25 to 30 325°F 3 ½ to 4 30 to 40 325°F 4 to 6 20 to 30 425°F 2 to 3 4 to 6 35 to 45 45 to 60 325°F 4 to 6 6 to 8 26 to 42 23 to 35 350°F 4 to 6 18 to 24 350°F 3 to 5 350°F 2 to 4 450°F ½ to 1 325°F 7 to 8 325°F 3 ½ to 6 35 to 40 375°F 1½–2½ 30 to 35 BEEF Boneless Rump Roast Tip Roast Eye Round Roast Tenderloin Roast Rib Roast Very Rare 130°F Rare 140°F Medium Rare 145°F Medium 160°F Well Done 170°F Very Well Done 180°F Rib Eye Roast PORK Loin Roast, bone-in Rib Roast, boneless Tenderloin All pork must be cooked to an internal temperature of at least 160°F to reduce the likelihood of Trichinosis and other food-borne illnesses. Ham bone-in, cook-before-eating 20 minutes per pound LAMB Shoulder Rib Roast Medium-Rare Medium Well Done 150°F 160°F 170°F 375°F 2 to 3 25 to 30 325°F 1 ¼ to 1 ¾ 45 to 55 325°F 5 to 7 7 to 9 15 to 20 20 to 25 Capon 325 to 350°F 4 to 8 Cornish Hens, whole 325 to 350°F 1 ¼ to 1 ½ 325 to 350°F 18-20 min/lb. 325 to 350°F 20 to 25 min/lb. Rib Crown Roast, not stuffed Loin Roast Leg, Frenched Style or Half Shank POULTRY (unstuffed) Duck, whole Goose, whole Pheasant, whole To reduce the risk of food-borne illnesses, poultry must be cooked to an internal temperature of 180°F. Quail, whole Turkey 20 to 30 min/lb. 50 to 60 total 325 to 350°F 2 30 min/lb. 325 to 350°F — 20 minutes total 325°F 8 to 16 3 ½ to 5 ½ hours All times and recommended temperatures are provided by the USDA, the Beef Industry Council, the National Pork Producer’s Council, and the American Sheep Industry Council. RS2310005 Rev. 0 C–24 Cooking (contd) Braising Guidelines Less tender cuts such as those from the round, chuck, brisket and shank require moist cooking. A longer cooking time at lower temperatures with moisture helps soften the meat. 1. Brown meat with a small amount of oil in heavy pan. 2. Pour off excessive drippings, season, if desired. 3. Add small amount of liquid (1/2 to 2 cups) and cover tightly. • Simmer gently over low heat on top of the range or in a 325°F oven, until meat is fork tender. Meat Cut Recommended Internal Temperature Oven Temperature Weight (pounds) OR Thickness Approximate Cooking Time (hours) BEEF Blade Pot Roast 325°F 3 to 5 1 ½ to 2 Arm Pot Roast 325°F 3 to 5 2 to 3 325°F 3 to 5 2 to 3 325°F 2 inches x 2 inches x 4 inches thick 1 ½ to 2 ½ Round Steak 325°F ¾ to 1 inch thick 1 to 1 ½ Flank Steak 325°F 1 ½ to 2 inches thick 1 ½ to 2 ½ 325°F 1 inch thick 1 to 1 ¼ 325°F 3 pounds 1 ½ to 2 325°F 3 pounds 1 to 1 ½ 325°F 1 inch pieces 1 ¼ lbs. 1 ¼ to 1 ½ Chuck Roast (boneless) Short Ribs Meat should be cooked to a temperature of at least 160°F to reduce the likelihood of foodborne illnesses. LAMB Shoulder Chops, Round Bone or Blade Riblets Shanks Meat should be cooked to a temperature of at least 160°F to reduce the likelihood of foodborne illnesses. Stew Cubes All times and recommended temperatures are provided by the USDA, the Beef Industry Council, the National Pork Producer’s Council, and the American Sheep Industry Council. C–25 RS2310005 Rev. 0 Care and Cleaning Removing Oven Door 1. Fully open oven door. 2. Push hinge locks down toward door frame, to the unlocked position. • This may require a flatblade screwdriver. 3. Firmly grasp both sides of top of oven door. 4. Close door to first stop position. 5. Lift door up until hinge arm is clear of the slot. Oven Frame Hinge Lock Oven Door Replacing Oven Door 1. Grasping door top firmly, seat indentation of hinge arm into bottom edge of the hinge slot. • Door should be at the first stop position angle. 2. Fully open oven door. 3. Push hinge locks up against the front frame of the oven cavity to locked position. 4. Close oven door. ! CAUTION To avoid personal injury or property damage, handle oven door with care. • Do not lift door by handle. • Door is heavy and can be damaged if dropped. • Screwdriver can scrape or chip range or oven finish. • Do not scratch or chip glass or twist door. Glass may break suddenly. Door Gasket Cleaning Oven Door Not all areas of the oven are cleaned by the self-clean cycle. The oven door, the gasket and area surrounding the gasket will not be cleaned effectively by the self-clean cycle. DO NOT use spray cleaners to clean the outside or inside of the oven door. DO NOT clean the gasket. Do not wet, rub, soak or use any type of cleaning material to clean the oven gasket. Any damage or defects occurring from attempting to clean or remove the gasket are not covered by warranty. To clean the area around the gasket make sure oven is cool to the touch. Using a cloth with a mild soap wipe area needing to be cleaned. Avoid gasket. Gasket should not be removed while cleaning. Do not allow water or cleaning solution to spill or drip onto gasket. Removing Storage Drawer 1. Slide drawer out until it stops. 2. Remove stored items. 3. Grasp drawer sides near back of drawer. 4. Lift up and out. Reverse to reinstall. RS2310005 Rev. 0 C–26 Care and Cleaning (contd) Replacing Oven Light ! WARNING To avoid risk of burns or electrical shock: • disconnect electrical supply to oven before changing light bulb. • before replacing light bulb make sure oven and bulb are cool. • do not operate oven without bulb and cover in place. ! CAUTION 1. Disconnect electrical supply. 2. Remove oven door if desired. 3. While wearing protective gloves, unscrew counterclockwise the light bulb cover located in rear of oven cavity. Then turn light bulb counterclockwise to remove. 4. Replace light bulb with 120-volt, 40-watt appliance bulb. Do not over tighten bulb or cover or they may be difficult to remove later. 5. Replace light bulb cover and oven door before use. 6. Reconnect power supply. Wear gloves to protect hands from accidental bulb breakage. PART Burner caps and grates GENERAL DIRECTIONS Cool before cleaning. Frequent cleaning with soap and water and a non abrasive pad prolongs time between deep cleanings. Be sure to dry thoroughly. For deep cleaning, place burner claps and grates in plastic bag with ½ cup ammonia. DO NOT pour ammonia into bag or allow ammonia to touch grates or caps. Close bag tightly and allow to sit overnight. Open bag pointed away from face to avoid fumes. Remove grates and caps and wash normally. Burner base Allow to cool. Clean with warm soapy water and a clean cloth. If ports are clogged, clean with a toothbrush or a straight pin. Do not use a toothpick. Replace burner caps and turn on burners to check for proper operation. Electrode Cool and remove burner grates and caps. Clean area around ceramic electrode with non-metallic utensil such as platic pick, plastic straw or old toothbrush. Be sure there is no debris, burned fragments, or grease that may divert the spark or cause poor ignition. Do not pry on ceramic electrode Broiler pan and grid Drain fat, cool pan and grid slightly. (Do not stand soiled pan and grid in oven to cool.) Sprinkle with soap. Fill the pan with warm water. Let pan and grid stand for a few minutes Control knobs OF F ME D <G AS ON LO HI Pull off knobs. Wash gently with mild soap and water but do not soak. Dry and return knobs to oven, making sure to match flat area on the knob to the flat area on the shaft. TE LI Outside finish Wash all glass with cloth dampened in soapy water. Rinse and polish with a dry cloth. If knobs are removed, do not allow water to run down inside surface while cleaning. Oven racks For heavy soil, place oven racks in large plastic bag with ammonia and water in cup. Seal tightly and allow to stand overnight. Wash and rinse, dry thoroughly. Storage drawer For heavy soil, clean by hand and rinse thoroughly. Remove drawer for ease in cleaning. Be sure drawer is dry before replacing. C–27 RS2310005 Rev. 0 Care and Cleaning (contd) Cleaning Stainless Steel Damage to stainless steel finish due to improper use of cleaning products, or using non-recommended cleaning products, is not covered under warranty. For Amana recommended products, call Consumer Affairs at 1(800) 843-0304 or online at www.amana.com. Our stainless steel appliances have been factory finished for high shine and luster. To maintain this quality appearance: • • • • • • • Abrasive powders or liquids Citrus based cleaners Ammonia Steel wool pads Abrasive cloths Oven cleansers Acidic or vinegar based cleaners • • • Warm soapy water for routine cleaning Soft clean cloths to dry or polish Stainless steel cleaner designed for appliances such as Amana Cleaning Polish and Conditioner for Stainless Steel (#31960801) For best cleaning results 1. Wash surfaces with warm soapy water and a soft, clean cloth or sponge. 2. Rinse surfaces with warm water. Dry surfaces with a soft, clean cloth. DO NOT use the following harsh cleaners: • abrasive or acidic cleaners (ammonia, chlorine bleach, vinegar-based product, etc.) • citrus-based cleaners • scouring pads (metal, textured plastic, etc.) These items can scratch, discolor, or permanently tarnish surfaces. 3. Follow up rinsing by immediately drying with a soft, clean cloth. This will avoid water spotting on stainless steel finish. Can I use liquid cleaners on my stainless steel? Just because a cleaner is a liquid does not mean it is non-abrasive. Many liquid cleansers designed to be gentle on tile and smooth surfaces still damage stainless steel. Cosmetic damage from using non-recommended products is not covered under warranty. Citric Acid Questions? Comments? Concerns? Contact us! www.amana.com or call Consumer Affairs at 1-800-843-0304 RS2310005 Rev. 0 C–28 Citric acid permanently discolors stainless steel. To prevent damage to the finish of your stainless steel appliance, do not allow these substances to remain on the steel finish: • • • • • mustard tomato juice marinara sauce citrus based sauces citrus based products Troubleshooting You may save time and money by checking items below before calling for service. List includes common concerns that are not the result of defective workmanship or materials. If your question is not explained below, contact Amana Consumer Affairs Department at 800-843-0304. Topic Possible Cause Solution Power outage Make sure appliance is plugged in. Verify that circuit breaker is not tripped. Replace household fuse but do not change fuse capacity. Oven door locked Allow oven to cool for automatic lock to disengage. Once oven has unlocked, set oven to desired temperature. Self clean shuts off during cycle Using surface burners during self clean cycle Surface burners should not be used during a self clean cycle. Set self clean cycle to delay when range does not need to be used. Surface burner does not ignite Poor cap placement Turn control to OFF and follow directions in Placing Burner Cap section. Dirt or debris on electrode Turn control to OFF and folow directions in Care and Cleaning section. Broil cycle stops Oven door open Oven door must be closed during a broil cycle. Close oven door and broil cycle should resume normally. Clock and timer not working Power outage Make sure appliance is plugged in. Verify that circuit breaker is not tripped. Replace fuse but do not change fuse capacity. Oven light not working Loose bulb Burnt out bulb Check for loose bulb. Tighten. Check for burnt out bulb. Replace if necessary with an appliance bulb. Oven door will not unlock Oven is self-cleaning Allow cycle to complete or cancel function. Oven still hot Will not unlatch until a certain cooler temperature has been reached. Do not force door open—will void warranty. May blow cooler air on latch with hair dryer at cool setting to quicken process. Too much soil, grime left in oven Wipe out and remove excess soil prior to running self-clean cycle. Soot remains in oven after cycle Normal. Wipe out with damp cloth. Pans rock on surface burner grates Warped pans See Utensil section to check pan for flat bottom. Locked light displayed Door locked If oven is hot, allow to cool rather than trying to force door latch open. Display flashing Power failure reset clock Press CLOCK. F-(numeric) display Service code Shut off power to oven for one to two minutes by switching off circuit breaker. Reset breaker. If continues, contact service department. Oven smokes the first few times used Normal Minor smoking is normal the first few times the oven is used. OPERATION Appliance not working Oven not clean after a self clean cycle C–29 RS2310005 Rev. 0 Troubleshooting (contd) COOKING Food not baking properly Various causes See Cooking, Common Baking Problems Food not roasting properly Various causes See Cooking, Roasting Food not broiling properly Various causes See Cooking, Broiling Oven temperature too hot or cold Calibrate oven temperature See Using the Oven Control, Oven Temperature Control Adjustment Oven has strong odor Normal Ovens will have a ‘new’ odor. Run a self-clean cycle to remove the odor. Not boiling or cooking fast enough Improperly sized cooking utensils Make sure pans fit heating elements. See Cookware Requirements. Frequent cycling off and on of oven. Normal To maintain a temperature for baking, the oven cycles on and off. Surface burners all click at once. Normal Ignitor sparks all burners when lighting a surface burner. Cracking or popping sound Normal Wet cooking utensils or possible spillage. NOISE Expansion or contraction of oven during heating cycle. May be louder when using LP/Propane. RS2310005 Rev. 0 C–30 Amana Warranty Full ONE Year Warranty Amana Appliances will repair or replace, including related labor and travel, any part (f.o.b. Amana Iowa) which proves defective as to workmanship or materials. Limited Warranty After one year from the date of original retail purchase, Amana will provide a free part, as listed below, to replace any part that fails due to a defect in materials or workmanship. The owner will be responsible for paying all other costs including labor, mileage, and transportation. Second Year Amana will provide replacement part, part only (f.o.b. Amana Iowa), which proves defective as to workmanship or materials. Third through Fifth Year Amana will provide replacement glass/ceramic cooktop, part only (f.o.b. Amana Iowa) which proves defective as to workmanship or materials. Amana will provide replacement electric surface elements or gas surface burners, part only (f.o.b. Amana Iowa) which prove defective as to workmanship or materials. What is not covered by these warranties • • • • • • • • To Receive Warranty Service Replacement of household fuses, resetting of circuit breakers, or correction to household wiring or plumbing. Normal product maintenance and cleaning, including light bulbs. Products with original serial numbers removed, altered, or not readily determined. Products purchased for commercial, industrial, rental, or leased use. Products located outside of the United States or Canada. Premium service charges, if the servicer is requested to perform service in addition to normal service or outside normal service hours or area. Adjustments after the first year. Repairs resulting from the following: • Improper installation, exhaust system, or maintenance. • Any modification, alteration, or adjustment not authorized by Amana. • Accident, misuse, abuse, fire, flood, or acts of nature. • Connections to improper electrical current, voltage supply, or gas supply. • Use of improper pans, containers, or accessories that cause damage to the product. Service must be performed by an authorized Amana service representative. To schedule service, contact the Amana dealer where you purchased your appliance or contact Amana Appliances Factory Service. Amana Appliances Factory Service 1-800-628-5782 inside USA For more information, Amana Appliances Consumer Services Amana Appliances 2800 220th Trail Amana, Iowa 52204 1-800-843-0304 inside USA (319) 622-5511 worldwide When contacting Amana Appliances please include the following information: • • • • • Your name, address, and telephone number. Model number and serial number of your appliance (found on right side of storage drawer opening). The name and address of your dealer and the date of purchase. A clear description of the problem. Proof of purchase (sales receipt). IN NO EVENT SHALL AMANA BE LIABLE FOR INCIDENTAL OR CONSEQUENTIAL DAMAGES. This warranty gives you specific legal rights, and you may have others which vary from state to state. For example, some states do not allow the exclusion or limitation of incidental or consequential damages, so this exclusion may not apply to you. Amana Appliances Online • http://www.amana.com Part No.36-32038801-0 Printed in U.S.A.01/01 2001 Amana Appliances Amana, Iowa 52204 C–31 RS2310005 Rev. 0