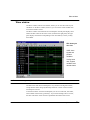
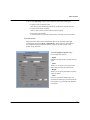
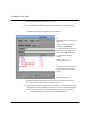
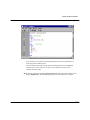
1
ModelSim EE/PLUS
Tutorial
The ModelSim Elite Edition for
VHDL, Verilog, and Mixed-HDL Simulation
ModelSim /VHDL, ModelSim /VLOG, ModelSim /LNL, and ModelSim /PLUS are produced by
Model Technology Incorporated. Unauthorized copying, duplication, or other reproduction is
prohibited without the written consent of Model Technology.
The information in this manual is subject to change without notice and does not represent a
commitment on the part of Model Technology. The program described in this manual is
furnished under a license agreement and may not be used or copied except in accordance with
the terms of the agreement. The online documentation provided with this product may be
printed by the end-user. The number or copies that may be printed is limited to the number of
licenses purchased.
ModelSim is a trademark of Model Technology Incorporated. PostScript is a registered
trademark of Adobe Systems Incorporated. UNIX is a registered trademark of AT&T in the USA
and other countries. FLEXlm is a trademark of Globetrotter Software, Inc. IBM, AT, and PC are
registered trademarks, AIX and RISC System/6000 are trademarks of International Business
Machines Corporation. Windows, Microsoft, and MS-DOS are registered trademarks of
Microsoft Corporation. OSF/Motif is a trademark of the Open Software Foundation, Inc. in the
USA and other countries. SPARC is a registered trademark and SPARCstation is a trademark
of SPARC International, Inc. Sun Microsystems is a registered trademark, and Sun, SunOS and
OpenWindows are trademarks of Sun Microsystems, Inc. All other trademarks and registered
trademarks are the properties of their respective holders.
Copyright (c) 1990-1998, Model Technology Incorporated.
All rights reserved. Confidential. Online documentation may be printed by licensed customers
of Model Technology Incorporated for internal business purposes only.
Software Version: 5.2
Published: November 1998
Model Technology Incorporated
10450 SW Nimbus Avenue / Building R
Portland, OR 97223-4347 USA
phone: 503-641-1340
fax: 503-526-5410
email: [email protected], [email protected]
home page: http://www.model.com
EE Tutorial - Part # M16540
US$50
ii
Software License Agreement
This is a legal agreement between you, the end user, and Model Technology Incorporated
(MTI). By opening the sealed package, or by signing this form, you are agreeing to be bound
by the terms of this agreement. If you do not agree to the terms of this agreement, promptly
return the unopened package and all accompanying items to the place you obtained them for
a full refund.
Model Technology Software License
1. LICENSE. MTI grants to you the nontransferable, nonexclusive right to use one copy of
the enclosed software program (the "SOFTWARE") for each license you have purchased. The
SOFTWARE must be used on the computer hardware server equipment that you identified in
writing by make, model, and workstation or host identification number and the equipment
served, in machine-readable form only, as allowed by the authorization code provided to you
by MTI or its agents. All authorized systems must be used within the country for which the
systems were sold. ModelSim EE licenses must be located at a single site, i.e. within a onekilometer radius identified in writing to MTI. This restriction does not apply to single ModelSim
PE licenses locked by a hardware security key, and such ModelSim PE products may be
relocated within the country for which sold.
2. COPYRIGHT. The SOFTWARE is owned by MTI (or its licensors) and is protected by United
States copyright laws and international treaty provisions. Therefore you must treat the
SOFTWARE like any other copyrighted material, except that you may either (a) make one copy
of the SOFTWARE solely for backup or archival purposes, or (b) transfer the SOFTWARE to a
single hard disk provided you keep the original solely for backup or archival purposes. You may
not copy the written materials accompanying the SOFTWARE.
3. USE OF SOFTWARE. The SOFTWARE is licensed to you for internal use only. You shall
not conduct benchmarks or other evaluations of the SOFTWARE without the advance written
consent of an authorized representative of MTI. You shall not sub-license, assign or otherwise
transfer the license granted or the rights under it without the prior written consent of MTI or its
applicable licensor. You shall keep the SOFTWARE in a restricted and secured area and shall
grant access only to authorized persons. You shall not make software available in any form to
any person other than your employees whose job performance requires access and who are
specified in writing to MTI. MTI may enter your business premises during normal business
hours to inspect the SOFTWARE, subject to your normal security.
4. PERMISSION TO COPY LICENSED SOFTWARE. You may copy the SOFTWARE only as
reasonably necessary to support an authorized use. Except as permitted by Section 2, you may
not make copies, in whole or in part, of the SOFTWARE or other material provided by MTI
without the prior written consent of MTI. For such permitted copies, you will include all notices
and legends embedded in the SOFTWARE and affixed to its medium and container as received
iii
from MTI. All copies of the SOFTWARE, whether provided by MTI or made by you, shall remain
the property of MTI or its licensors.
You will maintain a record of the number and location of all copies of the SOFTWARE made,
including copes that have been merged with other software, and will make those records
available to MTI or its applicable licensor upon request.
5. TRADE SECRET. The source code of the SOFTWARE is trade secret or confidential
information of MTI or its licensors. You shall take appropriate action to protect the confidentiality
of the SOFTWARE and to ensure that any user permitted access to the SOFTWARE does not
provide it to others. You shall take appropriate action to protect the confidentiality of the source
code of the SOFTWARE. You shall not reverse-assemble, reverse-compile or otherwise
reverse-engineer the SOFTWARE in whole or in part. The provisions of this section shall
survive the termination of this Agreement.
6. TITLE. Title to the SOFTWARE licensed to you or copies thereof are retained by MTI or third
parties from whom MTI has obtained a licensing right.
7. OTHER RESTRICTIONS. You may not rent or lease the SOFTWARE. You shall not
mortgage, pledge or encumber the SOFTWARE in any way. You shall ensure that all support
service is performed by MTI or its designated agents. You shall notify MTI of any loss of the
SOFTWARE.
8. TERMINATION. MTI may terminate this Agreement, or any license granted under it, in the
event of breach or default by you. In the event of such termination, all applicable SOFTWARE
shall be returned to MTI or destroyed.
9. EXPORT. You agree not to allow the MTI SOFTWARE to be sent or used in any other
country except in compliance with this license and applicable U.S. laws and regulations. If you
need advice on export laws and regulations, you should contact the U.S. Department of
Commerce, Export Division, Washington, DC 20230, USA for clarification.
Important Notice
Any provision of Model Technology Incorporated SOFTWARE to the U.S. Government is with
"Restricted Rights" as follows: Use, duplication, or disclosure by the Government is subject to
restrictions as set forth in subparagraphs (a) through (d) of the Commercial ComputerRestricted Rights clause at FAR 2.227-19 when applicable, or in subparagraph (c)(1)(ii) of the
Rights in Technical Data and Computer Software clauses in the NASA FAR Supplement. Any
provision of Model Technology documentation to the U.S. Government is with Limited Rights.
Contractor/manufacturer is Model Technology Incorporated, 10450 SW Nimbus Avenue
Building R, Portland, Oregon 97223-4347 USA.
iv
Limited Warranty
LIMITED WARRANTY. MTI warrants that the SOFTWARE will perform substantially in
accordance with the accompanying written materials for a period of 30 days from the date of
receipt. Any implied warranties on the SOFTWARE are limited to 30 days. Some states do not
allow limitations on duration of an implied warranty, so the above limitation may not apply to
you.
CUSTOMER REMEDIES. MTI’s entire liability and your exclusive remedy shall be, at MTI’s
option, either (a) return of the price paid or (b) repair or replacement of the SOFTWARE that
does not meet MTI’s Limited Warranty and which is returned to MTI. This Limited Warranty is
void if failure of the SOFTWARE has resulted from accident, abuse or misapplication. Any
replacement SOFTWARE will be warranted for the remainder of the original warranty period or
30 days, whichever is longer.
NO OTHER WARRANTIES. MTI disclaims all other warranties, either express or implied,
including but not limited to implied warranties of merchantability and fitness for a particular
purpose, with respect to the SOFTWARE and the accompanying written materials. This limited
warranty gives you specific legal rights. You may have others, which vary from state to state.
NO LIABILITY FOR CONSEQUENTIAL DAMAGES. In no event shall MTI or its suppliers be
liable for any damages whatsoever (including, without limitation, damages for loss of business
profits, business interruption, loss of business information, or other pecuniary loss) arising out
of the use of or inability to use these MTI products, even if MTI has been advised of the
possibility of such damages. Because some states do not allow the exclusion or limitation of
liability for consequential or incidental damages, the above limitation may not apply to you.
v
Table of Contents
Software License Agreement . . . .
Model Technology Software License .
Important Notice . . . . . . . . .
Limited Warranty . . . . . . . .
.
.
.
.
.
.
.
.
.
.
.
.
.
.
.
.
.
.
.
.
.
.
.
.
.
.
.
.
.
.
.
.
.
.
.
.
.
.
.
.
.
.
.
.
.
.
.
.
.
.
.
.
.
.
.
.
.
.
.
.
.
.
.
.
.
.
.
.
.
.
.
.
.
.
.
.
.
.
.
.
.
.
.
.
.
.
.
.
.
.
.
.
iii
iii
iv
v
1 - Introduction (p11)
Software versions . . . . . . . . . . . . . . . . . . . . . . . . . . . . . . . . . 11
ModelSim’s graphic interface
. . . . . . . . . . . . . . . . . . . . . . . . . . . . 12
Standards supported . . . . . . . . . . . . . . . . . . . . . . . . . . . . . . . . 12
Assumptions . . . . . . . . . . . . . . . . . . . . . . . . . . . . . . . . . . . 13
Sections in this document . . . . . . . . . . . . . . . . . . . . . . . . . . . . . . 13
Text conventions . . . . . . . . . . . . . . . . . . . . . . . . . . . . . . . . . 14
HDL and HDL item defined . . . . . . . . . . . . . . . . . . . . . . . . . . . 14
Syntax conventions
. . . . . . . . . . . . . . . . . . . . . . . . . . . . . . . . 14
Where to find our documentation . . . . . . . . . . . . . . . . . . . . . . . . . . . 15
Download a free PDF reader . . . . . . . . . . . . . . . . . . . . . . . . . . . 16
Comments . . . . . . . . . . . . . . . . . . . . . . . . . . . . . . . . . . . . 16
2 - ModelSim EE Graphic Interface (p17)
Window overview . . . . . . . . . . . . . . . . . . . . . . . . . . . . . . . . . 18
Window features . . . . . . . . . . .
Quick access toolbar . . . . . . . .
Drag and Drop . . . . . . . . . .
Automatic window updating . . . . .
Finding names, and searching for values
Sorting HDL items . . . . . . . . .
Multiple window copies . . . . . . .
Menu tear off . . . . . . . . . . .
Tree window hierarchical view . . . .
.
.
.
.
.
.
.
.
.
.
.
.
.
.
.
.
.
.
.
.
.
.
.
.
.
.
.
.
.
.
.
.
.
.
.
.
.
.
.
.
.
.
.
.
.
.
.
.
.
.
.
.
.
.
.
.
.
.
.
.
.
.
.
.
.
.
.
.
.
.
.
.
.
.
.
.
.
.
.
.
.
.
.
.
.
.
.
.
.
.
.
.
.
.
.
.
.
.
.
.
.
.
.
.
.
.
.
.
.
.
.
.
.
.
.
.
.
.
.
.
.
.
.
.
.
.
.
.
.
.
.
.
.
.
.
.
.
.
.
.
.
.
.
.
.
.
.
.
.
.
.
.
.
.
.
.
.
.
.
.
.
.
.
.
.
.
.
.
.
.
.
.
.
.
.
.
.
.
.
.
.
.
.
.
.
.
.
.
.
. 19
. 19
. 20
. 20
. 21
. 21
. 21
. 21
. 22
Main window . . . . . . . .
The Main window menu bar
The Main window tool bar .
The Main window status bar
.
.
.
.
.
.
.
.
.
.
.
.
.
.
.
.
.
.
.
.
.
.
.
.
.
.
.
.
.
.
.
.
.
.
.
.
.
.
.
.
.
.
.
.
.
.
.
.
.
.
.
.
.
.
.
.
.
.
.
.
.
.
.
.
.
.
.
.
.
.
.
.
.
.
.
.
.
.
.
.
.
.
.
.
. 24
. 25
. 30
. 32
6 - Table of Contents
.
.
.
.
.
.
.
.
.
.
.
.
.
.
.
.
.
.
.
.
ModelSim EE Tutorial
Editing the command line, the current source file, and notepads . . . . . . . . . . . . . 33
Dataflow window . . . . . . . . . . . . . . . . . . . . . . . . . . . . . . . . . 35
The Dataflow window menu bar . . . . . . . . . . . . . . . . . . . . . . . . . 36
Tracing HDL items with the Dataflow window . . . . . . . . . . . . . . . . . . . . 37
List window . . . . . . . . . . . . . . . . . .
List window action list . . . . . . . . . . . .
The List window menu bar . . . . . . . . . . .
Setting List window display properties . . . . . .
Adding HDL items to the List window . . . . . .
Editing and formatting HDL items in the List window
Examining simulation results with the List window .
Finding items by name in the List window . . . .
Searching for item values in the List window . . .
Setting time markers in the List window . . . . .
List window keyboard shortcuts . . . . . . . . .
Saving List window data to a file . . . . . . . .
.
.
.
.
.
.
.
.
.
.
.
.
.
.
.
.
.
.
.
.
.
.
.
.
.
.
.
.
.
.
.
.
.
.
.
.
.
.
.
.
.
.
.
.
.
.
.
.
.
.
.
.
.
.
.
.
.
.
.
.
.
.
.
.
.
.
.
.
.
.
.
.
.
.
.
.
.
.
.
.
.
.
.
.
.
.
.
.
.
.
.
.
.
.
.
.
.
.
.
.
.
.
.
.
.
.
.
.
.
.
.
.
.
.
.
.
.
.
.
.
.
.
.
.
.
.
.
.
.
.
.
.
.
.
.
.
.
.
.
.
.
.
.
.
.
.
.
.
.
.
.
.
.
.
.
.
.
.
.
.
.
.
.
.
.
.
.
.
.
.
.
.
.
.
.
.
.
.
.
.
.
.
.
.
.
.
.
.
.
.
.
.
. 38
. 38
. 40
. 42
. 44
. 45
. 47
. 48
. 48
. 50
. 50
. 51
Process window . . . . . . . . . . . . . . . . . . . . . . . . . . . . . . . . . . 52
The Process window menu bar . . . . . . . . . . . . . . . . . . . . . . . . . . 53
Signals window . . . . . . . . . . . . . . . . . . . . .
The Signals window menu bar . . . . . . . . . . . . .
Selecting HDL item types to view . . . . . . . . . . . .
Forcing signal and net values . . . . . . . . . . . . . .
Adding HDL items to the Wave and List windows or a log file
Finding HDL items in the Signals window . . . . . . . .
.
.
.
.
.
.
.
.
.
.
.
.
.
.
.
.
.
.
.
.
.
.
.
.
.
.
.
.
.
.
.
.
.
.
.
.
.
.
.
.
.
.
.
.
.
.
.
.
.
.
.
.
.
.
.
.
.
.
.
.
.
.
.
.
.
.
.
.
.
.
.
.
. 55
. 56
. 57
. 57
. 59
. 60
Source window . . . . . . . . . . . . . .
The Source window menu bar . . . . . .
The Source window tool bar . . . . . . .
Editing the source file in the Source window .
Checking HDL item values and descriptions .
Setting Source window options . . . . . .
.
.
.
.
.
.
.
.
.
.
.
.
.
.
.
.
.
.
.
.
.
.
.
.
.
.
.
.
.
.
.
.
.
.
.
.
.
.
.
.
.
.
.
.
.
.
.
.
.
.
.
.
.
.
.
.
.
.
.
.
.
.
.
.
.
.
.
.
.
.
.
.
. 61
. 62
. 64
. 65
. 65
. 66
.
.
.
.
.
.
.
.
.
.
.
.
.
.
.
.
.
.
.
.
.
.
.
.
.
.
.
.
.
.
.
.
.
.
.
.
.
.
.
.
.
.
Structure window . . . . . . . . . . . . . . . . . . . . . . . . . . . . . . . . . 67
The Structure window menu bar . . . . . . . . . . . . . . . . . . . . . . . . . 68
Variables window . . . . . . . . . . . . . . . . . . . . . . . . . . . . . . . . . 70
The Variables window menu bar . . . . . . . . . . . . . . . . . . . . . . . . . 71
Wave window . . . . . . . . . . . .
Wave window action list . . . . . .
The Wave window menu bar . . . . .
Wave window tool bar . . . . . . .
Setting Wave window display properties
ModelSim EE Tutorial
.
.
.
.
.
.
.
.
.
.
.
.
.
.
.
.
.
.
.
.
.
.
.
.
.
.
.
.
.
.
.
.
.
.
.
.
.
.
.
.
.
.
.
.
.
.
.
.
.
.
.
.
.
.
.
.
.
.
.
.
.
.
.
.
.
.
.
.
.
.
.
.
.
.
.
.
.
.
.
.
.
.
.
.
.
.
.
.
.
.
.
.
.
.
.
.
.
.
.
.
.
.
.
.
.
. 73
. 74
. 75
. 78
. 81
Table of Contents - 7
Adding HDL items in the Wave window . . . . . .
Editing and formatting HDL items in the Wave window
Sorting a group of HDL items . . . . . . . . . .
Finding items by name or value in the Wave window .
Searching for item values in the Wave window . . . .
Using time cursors in the Wave window . . . . . .
Zooming - changing the waveform display range . . .
Wave window keyboard shortcuts . . . . . . . . .
.
.
.
.
.
.
.
.
.
.
.
.
.
.
.
.
.
.
.
.
.
.
.
.
.
.
.
.
.
.
.
.
.
.
.
.
.
.
.
.
.
.
.
.
.
.
.
.
.
.
.
.
.
.
.
.
.
.
.
.
.
.
.
.
.
.
.
.
.
.
.
.
.
.
.
.
.
.
.
.
.
.
.
.
.
.
.
.
.
.
.
.
.
.
.
.
.
.
.
.
.
.
.
.
.
.
.
.
.
.
.
.
.
.
.
.
.
.
.
.
. 81
. 82
. 85
. 85
. 85
. 87
. 88
. 90
.
.
.
.
.
.
.
.
.
.
.
.
.
.
.
.
.
.
.
.
.
.
.
.
.
.
.
.
.
.
.
.
.
.
.
.
.
.
.
.
.
.
.
.
.
.
.
.
.
.
.
.
.
.
.
.
.
.
.
.
. 91
. 92
. 92
. 93
3 - ModelSim EE Lessons (p91)
Assumptions . . . . . . . . . . . . .
Command, button, and menu equivalents . .
Commands and their history . . . . . . .
Reusing commands from the Main transcript
Basic VHDL simulation
.
.
.
.
.
.
.
.
.
.
.
.
.
.
.
.
. . . . . . . . . . . . . . . . . . . . . . . . . . . . . . 94
Debugging a VHDL design . . . . . . . . . . . . . . . . . . . . . . . . . . . . 103
Running a batch-mode simulation . . . . . . . . . . . . . . . . . . . . . . . . . . 112
Executing commands at startup . . . . . . . . . . . . . . . . . . . . . . . . . . . 114
Tcl/Tk and ModelSim . . . . . . . . . . . . . . . . . .
Examples in this lesson . . . . . . . . . . . . . . . .
More information on Tcl/Tk . . . . . . . . . . . . . .
How Tcl/Tk works with ModelSim . . . . . . . . . . .
The custom-traffic-light interface . . . . . . . . . . . .
Copies of the original example files . . . . . . . . . . .
Solutions to the examples . . . . . . . . . . . . . . .
Viewing files . . . . . . . . . . . . . . . . . . . .
The Tcl source command . . . . . . . . . . . . . . .
Example shortcuts . . . . . . . . . . . . . . . . . .
Preparing for the Tcl/Tk examples . . . . . . . . . . . .
Example 1 - create a "hello world" button widget . . . . . .
Example 2 - add a procedure that gets called by a button push .
Example 3 - The traffic light simulation . . . . . . . . .
Example 4 - draw a state machine that represents the simulation
.
.
.
.
.
.
.
.
.
.
.
.
.
.
.
.
.
.
.
.
.
.
.
.
.
.
.
.
.
.
.
.
.
.
.
.
.
.
.
.
.
.
.
.
.
.
.
.
.
.
.
.
.
.
.
.
.
.
.
.
.
.
.
.
.
.
.
.
.
.
.
.
.
.
.
.
.
.
.
.
.
.
.
.
.
.
.
.
.
.
.
.
.
.
.
.
.
.
.
.
.
.
.
.
.
.
.
.
.
.
.
.
.
.
.
.
.
.
.
.
.
.
.
.
.
.
.
.
.
.
.
.
.
.
.
.
.
.
.
.
.
.
.
.
.
.
.
.
.
.
.
.
.
.
.
.
.
.
.
.
.
.
.
.
.
.
.
.
.
.
.
.
.
.
.
.
.
.
.
.
115
115
115
116
117
119
120
120
120
121
121
122
123
124
127
Basic Verilog simulation . . . . . . . . . . . . . . . . . . . . . . . . . . . . . 129
Mixed VHDL/Verilog simulation . . . . . . . . . . . . . . . . . . . . . . . . . . 143
Finding names, and searching for values . . . . . . . . . . . . . . . . . . . . . . . 150
Finding items by name in tree windows . . . . . . . . . . . . . . . . . . . . . . 150
8 - Table of Contents
ModelSim EE Tutorial
Searching for item values in the List and Wave windows . . . . . . . . . . . . . . . 150
Using the Wave window . . . . . . . . . . .
Using time cursors in the Wave window . . .
Zooming - changing the waveform display range
Wave window keyboard shortcuts . . . . . .
.
.
.
.
.
.
.
.
.
.
.
.
.
.
.
.
.
.
.
.
.
.
.
.
.
.
.
.
.
.
.
.
.
.
.
.
.
.
.
.
.
.
.
.
.
.
.
.
.
.
.
.
.
.
.
.
.
.
.
.
.
.
.
.
.
.
.
.
.
.
.
.
153
153
155
157
Continuing with ModelSim EE . . . . . . . . . . . . . . . . . . . . . . . . . . . 158
A - Technical Support, Updates, and Licensing (p159)
Technical support - by telephone . . . . . . . . . . . . . . . . . . . . . . . . . . 159
Technical support - electronic support services . . . . . . . . . . . . . . . . . . . . . 160
Technical support - other channels
. . . . . . . . . . . . . . . . . . . . . . . . . 161
Updates . . . . . . . . . . . . . . . . . . . . . . . . . . . . . . . . . . . . 162
Licenses - ModelSim EE . . . . . . . . . . . . . . . . . . . . . . . . . . . . . 162
Online References . . . .
Books and publications
Partners . . . . . .
Training partners . .
.
.
.
.
.
.
.
.
.
.
.
.
.
.
.
.
.
.
.
.
.
.
.
.
.
.
.
.
.
.
.
.
.
.
.
.
.
.
.
.
.
.
.
.
.
.
.
.
.
.
.
.
.
.
.
.
.
.
.
.
.
.
.
.
.
.
.
.
.
.
.
.
.
.
.
.
.
.
.
.
.
.
.
.
.
.
.
.
.
.
.
.
.
.
.
.
.
.
.
.
.
.
.
.
.
.
.
.
.
.
.
.
165
165
165
165
Index (p167)
ModelSim EE Tutorial
Table of Contents - 9
10 - Table of Contents
ModelSim EE Tutorial
1 - Introduction
Chapter contents
Software versions
.
.
.
.
.
.
.
.
.
.
.
.
.
.
.
.
.
.
. 11
Standards supported .
.
.
.
.
.
.
.
.
.
.
.
.
.
.
.
.
.
. 12
Assumptions .
.
.
.
.
.
.
.
.
.
.
.
.
.
.
.
.
.
. 13
Sections in this document
.
.
.
.
.
.
.
.
.
.
.
.
.
.
.
.
. 13
HDL and HDL item defined .
.
.
.
.
.
.
.
.
.
.
.
.
.
.
.
. 14
Where to find our documentation
.
.
.
.
.
.
.
.
.
.
.
.
.
.
. 15
.
.
The purpose of this tutorial is to help you become familiar with ModelSim EE,
Model Technology’s HDL-simulation software for UNIX, Microsoft Windows
NT 4.0, and Windows 95/98. Tutorials are included that apply to one or more of
the following ModelSim simulators:
• ModelSim EE/VHDL
for VHDL simulation only
• ModelSim EE/VLOG
for Verilog simulation only
• ModelSim EE/LNL
Language-Neutral Licensing - for either VHDL, or Verilog simulation
• ModelSim EE/PLUS
for single language, or mixed VDHL/Verilog simulation
Software versions
This documentation was written to support ModelSim EE/PLUS 5.2 for UNIX,
Microsoft Windows NT 4.0, and Windows 95/98. If the ModelSim software you
are using is a later release, check the README file that accompanied the
software. Any supplemental information will be there.
Although this document covers both VHDL and Verilog simulation, you will find
it a useful reference even if your design work is limited to a single HDL.
ModelSim EE Tutorial
Introduction - 11
ModelSim’s graphic interface
ModelSim’s graphic interface
While your operating system interface provides the window-management frame,
ModelSim controls all internal-window features including menus, buttons, and
scroll bars. The resulting simulator interface remains consistent within these
operating systems:
• SPARCstation with OpenWindows or OSF/Motif
• IBM RISC System/6000 with OSF/Motif
• Hewlett-Packard HP 9000 Series 700 with HP VUE or OSF/Motif
• Microsoft Windows NT and Windows 95/98
Because ModelSim’s graphic interface is based on Tcl/TK, you also have the tools
to build your own simulation environment. Easily accessible preference variables
and configuration commands give you control over the use and placement of
windows, menus, menu options and buttons.
For an in-depth look at ModelSim’s graphic interface see, "ModelSim EE Graphic
Interface" (p17).
Standards supported
ModelSim VHDL supports both the IEEE 1076-1987, 1076-1993 VHDL, 11641993 Standard Multivalue Logic System for VHDL Interoperability, and the
1076.2-1996 Standard VHDL Mathematical Packages standards. Any design
developed with ModelSim will be compatible with any other VHDL system that
is compliant with either IEEE Standard 1076-1987 or 1076-1993.
ModelSim Verilog is based on the IEEE Std 1364-1995 Standard Hardware
Description Language Based on the Verilog Hardware Description Language.
The Open Verilog International Verilog LRM version 2.0 is also applicable to a
large extent. The PLI is supported for PE and EE users, while VCD support is
available for EE users only.
In addition, all products support SDF 1.0, 2.0, and 2.1, VITAL 2.2b, and
VITAL’95 - IEEE 1076.4-1995.
12
- Introduction
ModelSim EE Tutorial
Assumptions
Assumptions
We assume that you are familiar with the use of your operating system. You
should be familiar with the window management functions of your graphic
interface: either OpenWindows, OSF/Motif, or Microsoft Windows NT/95/98.
We also assume that you have a working knowledge of VHDL and Verilog.
Although ModelSim is an excellent tool to use while learning HDL concepts and
practices, this document is not written to support that goal. If you need more
information about HDLs, check out our. "Online References" (p165).
Sections in this document
In addition to this introduction, you will find the following major sections in this
document:
2 - ModelSim EE Graphic Interface (p17)
This chapter describes the graphic interface available while operating VSIM, the ModelSim
simulator. ModelSim’s graphic interface is designed to provide consistency throughout all
operating system environments.
3 - ModelSim EE Lessons (p91)
This is a collection of lessons for ModelSim EE. Lessons are included for all versions of
EE: VHDL, VLOG, and PLUS. The Tcl lesson gives you a chance to create a custom
simulation environment.
A - Technical Support, Updates, and Licensing (p159)
How and where to get tech support, updates and licensing for ModelSim. Links to
the Model Technology web site; a collection of references to books, organizations,
and companies involved in EDA and simulation.
ModelSim EE Tutorial
Introduction -
13
Text conventions
Text conventions
Text conventions used in this manual include:
italic text
provides emphasis and sets off file and path names
bold text
indicates commands, command options, and menu choices, as well as package
and library logical names
monospaced type
monospace type is used for program and command examples
The right angle (>)
is used to connect menu choices when traversing menus as in: File > Save
path separators
examples will show either UNIX or Windows path separators - use separators
appropriate for you operating system when trying the examples
HDL and HDL item defined
“HDL” refers to either VHDL or Verilog when a specific language reference is not
needed. Depending on the context, “HDL item” can refer to any of the following:
• VHDL
block statement, component instantiation, constant, generate statement,
generic, package, signal, or variable
• Verilog
function, module instantiation, named fork, named begin, net, task, or register
variable
Syntax conventions
The syntax elements of ModelSim commands are signified as follows:
14
<
>
angled brackets surrounding a syntax item indicate a user-defined argument; do
not enter the brackets in commands
[
]
square brackets indicate an optional item; if the brackets surround several words,
all must be entered as a group; the brackets are not entered
...
an ellipsis indicates items that may appear more than once; the ellipsis itself does
not appear in commands.
|
the vertical bar indicates a choice between items on either side of it. Do not
include the bar in the command
#
comments are preceded by the number sign (#)
- Introduction
ModelSim EE Tutorial
Where to find our documentation
Where to find our documentation
Model Technology’s documentation is available in the following formats and
locations:
Document
Format
How to get it
Start Here for ModelSim
(installation & support
reference)
paper
shipped with the product
PDF online
find "ee_start_here.pdf" in the "<install_dir>/
<modelsim_dir>/docs" directory; also available from the
Support page of our web site: www.model.com
Documentation Index
PDF online
find "ee_doc_index.pdf" in the "<install_dir>/
<modelsim_dir>/docs" directory after installation; also see
Doc Index bookmark in PDF docs; provides links to all
installed PDF documentation
ModelSim EE Tutorial
PDF online
find "ee_tutorial_<version>.pdf" in the "<install_dir>/
<modelsim_dir>/docs" directory; current version available
from the Support page of our web site: www.model.com
paper
first two copies free with request cards in Start Here
document; additional copies at $50 each (for customers with
current maintenance)
PDF online
find "ee_manual_<version>.pdf" in "<install_dir>/
<modelsim_dir>/docs"; current version available for ftp from
the Support page of our web site: www.model.com (password
required)
paper
first two copies free with request cards in Start Here
document; additional copies at $50 each (for customers with
current maintenance)
Tcl man pages
HTML
find "contents.html" in "<install_dir>/<modelsim_dir>/docs/
html/", or use the Main window menu selection: Help > Tcl
Man Pages
tech notes
ASCII
located in the "<install_dir>/<modelsim_dir>/docs/
technotes"directory after installation
EE Reference Manual
ModelSim EE Tutorial
Introduction -
15
Comments
Download a free PDF reader
Model Technology’s PDF documentation requires an Adobe Acrobat Reader for
viewing. The Reader may be installed from the ModelSim CD. It is also available
without cost from Adobe at http://www.adobe.com. Be sure to download the
Acrobat Reader with Search to take advantage of the index file supplied with our
reference manuals; the index makes searching the documentation much faster.
Comments
Comments and questions about this manual and ModelSim software are welcome.
Call, write, or fax or email:
Model Technology Incorporated
10450 SW Nimbus Avenue / Building R
Portland OR 97223-4347 USA
phone: 503-641-1340
fax: 503-526-5410
email: [email protected]
home page: http://www.model.com
16
- Introduction
ModelSim EE Tutorial
2 - ModelSim EE Graphic Interface
Chapter contents
Window overview
.
Window features. .
Main window .
Dataflow window
List window . .
Process window .
Signals window .
Source window .
Structure window
Variables window
Wave window .
.
.
.
.
.
.
.
.
.
.
.
.
.
.
.
.
.
. 18
.
.
.
.
.
.
.
.
.
.
.
.
.
.
.
.
.
.
.
.
.
.
.
.
.
.
.
.
.
.
.
.
.
.
.
.
.
.
.
.
.
.
.
.
.
.
.
.
.
.
.
.
.
.
.
.
.
.
.
.
.
.
.
.
.
.
.
.
.
.
.
.
.
.
.
.
.
.
.
.
.
.
.
.
.
.
.
.
.
.
.
.
.
.
.
.
.
.
.
.
.
.
.
.
.
.
.
.
.
.
.
.
.
.
.
.
.
.
.
.
.
.
.
.
.
.
.
.
.
.
.
.
.
.
.
.
.
.
.
.
.
.
.
.
.
.
.
.
.
.
.
.
.
.
.
.
.
.
.
.
.
.
.
.
.
.
.
.
.
.
. 19
. 24
. 35
. 38
. 52
. 55
. 61
. 67
. 70
. 73
This chapter describes ModelSim’s graphic interface.
The example graphics in this chapter illustrate ModelSim’s graphic interface
within both Windows and UNIX. Since our interface is designed to provide
consistency in all system environments, your operating system’s job is to provide
the basic window-management frames, while ModelSim controls all internal
window features such as menus, buttons, and scroll bars.
Because ModelSim’s graphic interface is based on Tcl/Tk, you are able to
customize your simulation environment. Easily-accessible preference variables
and configuration commands give you control over the use and placement of
windows, menus, menu options, and buttons.
The "Tcl/Tk and ModelSim" (p115) section in the ModelSim EE Lessons (p91)
chapter will provide you with some hands-on experience using Tcl/Tk with
ModelSim.
ModelSim EE Tutorial
ModelSim EE Graphic Interface - 17
Window overview
Window overview
The ModelSim simulation environment consists of nine window types. Multiple
windows of each type may be used during simulation (with the exception of the
Main window) A brief description of each window follows:
• Main window (p24)
The main window from which all subsequent VSIM windows are available.
• Dataflow window (p35)
Lets you trace signals and nets through your design by showing related
processes.
• List window (p38)
Shows the simulation values of selected VHDL signals, and Verilog nets and
register variables in tabular format.
• Process window (p52)
Displays a list of processes that are scheduled to run during the current
simulation cycle.
• Signals window (p55)
Shows the names and current values of VHDL signals, and Verilog nets and
register variables in the region currently selected in the Structure window.
• Source window (p61)
Displays the HDL source code for the design.
• Structure window (p67)
Displays the hierarchy of structural elements such as VHDL component
instances, packages, blocks, generate statements, and Verilog model instances,
named blocks, tasks and functions.
• Variables window (p70)
Displays VHDL constants, generics, variables, and Verilog register variables in
the current process and their current values.
• Wave window (p73)
Displays waveforms, and current values for the VHDL signals, and Verilog nets
and register variables you have selected.
18
- ModelSim EE Graphic Interface
ModelSim EE Tutorial
Window features
Window features
ModelSim’s graphic interface provides many features that add to its usability;
features common to many of the windows are described below.
Feature
Feature applies to these windows
Quick access toolbar (p19)
Main, Source, and Wave
Drag and Drop (p20)
Dataflow, List, Signals, Source,
Structure, Variables, and Wave windows
Automatic window updating (p20)
Dataflow, Process, Signals, and
Structure
Finding names, and searching for values (p21)
various windows
Sorting HDL items (p21)
Process, Signals, Source, Structure,
Variables and Wave windows
Multiple window copies (p21)
all windows except the Main window
Menu tear off (p21)
all windows
Tree window hierarchical view (p22)
all windows
Tree window hierarchical view (p22)
Structure, Signals, Variables, and Wave
windows
Quick access toolbar
Buttons on the Main, Source, and Wave windows provide access to commonly
used commands and functions. See, "The Main window tool bar" (p30), "The
Source window tool bar" (p64), and "Wave window tool bar" (p78).
ModelSim EE Tutorial
ModelSim EE Graphic Interface -
19
Window features
Drag and Drop
Drag and drop of HDL items is possible between the following windows. Using
the left mouse button, click and release to select an item, then click and hold to
drag it.
• Drag items from these windows:
Dataflow, List, Signals, Source, Structure, Variables, and Wave windows
• Drop items in these windows:
List and Wave windows
Note:
Drag and drop works to move items within the List and Wave windows as well.
Automatic window updating
Selecting an item in the following windows automatically updates other related
ModelSim windows as indicated below:
Select an item in this window
To update these windows
Dataflow window (p35)
Process window (p52)
(with a process selected in the center of the window)
Signals window (p55)
Source window (p61)
Structure window (p67)
Variables window (p70)
Process window (p52)
Dataflow window (p35)
Signals window (p55)
Structure window (p67)
Variables window (p70)
Signals window (p55)
Dataflow window (p35)
Structure window (p67)
Signals window (p55)
Source window (p61)
20
- ModelSim EE Graphic Interface
ModelSim EE Tutorial
Window features
Finding names, and searching for values
• Find HDL item names with the Edit > Find menu selection in these windows:
List, Process, Signals, Source, Structure, Variables, and Wave windows.
• Search for HDL item values with the Edit > Search menu selection in these
windows: List, and Wave windows.
You can also:
• Locate time markers in the List window with the Markers > Goto menu
selection.
• Locate time cursors in the Wave window with the Cursor > Goto menu
selection.
In addition to the menu selections above, the virtual event <<Find>> is defined
for all windows. The default binding is to <Key-F19> in most windows (the Find
key on a Sun keyboard). You can bind <<Find>> to other events with the Tcl/Tk
command event add. For example,
event add <<Find>> <control-Key-F>
Sorting HDL items
Use the Edit > Sort menu selection in the windows below to sort HDL items in
ascending, descending or declaration order.
Process, Signals, Source, Structure, Variables and Wave windows
Names such as net_1, net_10, and net_2 will sort numerically in the Signals and
Wave windows.
Multiple window copies
Use the View > New menu selection from the Main window (p24) to create
multiple copies of the same window type. The new window will become the
default window for that type.
Menu tear off
All window menus may be "torn off " to create a separate menu window. To tear
off, click on the menu, then select the dotted-line button at the top of the menu.
ModelSim EE Tutorial
ModelSim EE Graphic Interface -
21
Window features
Tree window hierarchical view
ModelSim provides a hierarchical, or "tree view" of some aspect of your design in
the Structure, Signals, Variables, and Wave windows.
HDL items you can view
Depending on which window you are
viewing, one entry is created for each of the
following VHDL and Verilog HDL item
within the design:
VHDL items
(indicated by a "box" prefix)
signals, variables, component instantiation,
generate statement, block statement, and
package
Verilog items
(indicated by a "circle" prefix)
parameters, registers, nets, module
instantiation, named fork, named begin,
task, and function
Viewing the hierarchy
Whenever you see a tree view, as in the Structure window above, you can use the
mouse to collapse or expand the hierarchy. Select the symbols as shown below to
change the view of the structure.
22
Symbol
Description
[+]
click a plus box/circle to expand the item and view the structure
[-]
click a minus box/circle to hide a hierarchy that has been expanded
[ ]
an empty box/circle indicates a single-level item
- ModelSim EE Graphic Interface
ModelSim EE Tutorial
Window features
Tree window action list
Action
Use
Do
expand a level
left mouse button
click on a "+" box/circle
collapse a level
left mouse button
click on a "-" box/circle
select a single item
left mouse button
click on the HDL item name
(not the box/circle prefix)
select multiple contiguous
items (not in Structure window)
left mouse button
click on the HDL item name and
drag to complete selection
select a range of contiguous
items (not in Structure window)
shift + left mouse button
select first item, shift/click on
last item in range
select multiple random items
(not in Structure window)
control + left mouse button
click on the desired items in any
order
move an item
left mouse button
click on an item, then reselect,
hold, and drag it to reposition
Finding items within tree windows
You can open the find dialog box within all windows (except the Main, and
Source windows) by using this keyboard shortcut:
<control-f>
Options within the Find dialog box allow you to search unique text-string fields
within the specific window. See also,
• "Finding items by name in the List window" (p48),
• "Finding HDL items in the Signals window" (p60), and
• "Finding items by name or value in the Wave window" (p85).
ModelSim EE Tutorial
ModelSim EE Graphic Interface -
23
Main window
Main window
The Main window is pictured below as it appears when VSIM is first invoked.
Note that your operating system graphic interface provides the windowmanagement frame only; ModelSim handles all internal-window features
including menus, buttons, and scroll bars.
The menu bar at the top of the window provides access to a wide variety of
simulation commands and ModelSim preferences. The status bar at the bottom of
the window gives you information about the data in the active ModelSim window.
The tool bar provides buttons for quick access to the many common commands.
When a simulation is running, the Main window displays a VSIM prompt,
allowing you to enter command-line commands from within the graphic interface.
Messages output by VSIM during simulation are also displayed in this window.
You can scroll backward and forward through the current work history by using
the vertical scrollbar. You can also copy and paste using the mouse within the
window, see "Editing the command line, the current source file, and notepads"
(p33).
The Main window menu bar, tool bar, and status bar are detailed below.
24
- ModelSim EE Graphic Interface
ModelSim EE Tutorial
Main window
The Main window menu bar
The menu bar at the top of the Main window lets you access many ModelSim
commands and features. The menus are listed below with brief descriptions of the
command’s use.
File menu
Change Directory
change to a different working directory
Load New Design
start a new simulation via the Load Design dialog box
Restart
restart the current simulation from time zero; a dialog box provides options
to keep the List and Wave formats, breakpoints, and logged signals
End Simulation
Quit the current simulation and return to the ModelSim prompt, the GUI
remains open; same as the quit -sim command
Save Main
save the current contents of the transcript window to the previously defined
file, see "Saving the transcript file" (p29)
Save Main as...
save the current contents of the transcript window to a file, see "Reusing
commands from the Main transcript" (p93)
Clear Transcript
clear the Main window transcript display
Options
(all options are set for the
current session only)
Transcript File: sets a transcript file to save for this session only
Command History: file for saving command history only, no comments
Save File: sets filename for Save Main, and Save Main as
Saved Lines: limits the number of lines saved in the transcript (default is all)
Line Prefix: specify the comment prefix for the transcript
Update Rate: specify the update frequency for the Main status bar
ModelSim Prompt: change the title of the ModelSim prompt
VSIM Prompt: change the title of the VSIM prompt
Paused Prompt: change the title of the Paused prompt
Path list
Windows only - a list of the most recent working directory changes
Quit
quit ModelSim (returns to the command line if UNIX)
ModelSim EE Tutorial
ModelSim EE Graphic Interface -
25
Main window
Edit menu
Copy
copy the selected text
Paste
paste the previously cut or copied item to the left of the currently selected item
Select All
delete the selected item field
Unselect All
combine the selected fields into a user-defined bus; keep copies of the original items
rather than moving them
Find
search the transcript forward or backward for the specified text string
Library menu
Browse Libraries
browse all libraries within the scope of the design
Create a New Library
create a new library or map a library to a new name
View Library
Contents
view or delete the contents of a library
View menu
26
All
open all VSIM windows
Source
open and/or view the Source window (p61)
Structure
open and/or view the Structure window (p67)
Variables
open and/or view the Variables window (p70)
Signals
open and/or view the Signals window (p55)
List
open and/or view the List window (p38)
Process
open and/or view the Process window (p52)
Wave
open and/or view the Wave window (p73)
Dataflow
open and/or view the Dataflow window (p35)
New
create a new VSIM window of the specified type
- ModelSim EE Graphic Interface
ModelSim EE Tutorial
Main window
Run menu
Run <default>
run simulation for one default run length; change the run length with Options >
Simulation, or use the Run Length list on the tool bar
Run -All
run simulation until you stop it
Continue
continue the simulation
Run -Next
run to the next event time
Step
single-step the simulator
Step-Over
execute without single-stepping through a subprogram call
Macro menu
Execute Macro
allows you to browse for and execute a DO file (macro)
Macro Helper
Unix only - invokes the Macro Helper tool
Tcl Debugger
invokes the Tcl debugger, TDebug
Options menu
Compile
returns the Compile Options dialog box; options cover both VHDL and
Verilog compile options
Simulation
returns the Simulation Options dialog box; options include: default radix,
default force type, default run length, iteration limit, warning suppression,
and break on assertion specification
Edit Preferences...
returns the Preferences dialog box; color preferences can be set for
window background, text and graphic items (i.e., waves in the Wave
window)
Save Preferences
save current ModelSim settings to a Tcl preference file
ModelSim EE Tutorial
ModelSim EE Graphic Interface -
27
Main window
Window menu
Initial Layout
restore all windows to the size and placement of the initial full-screen layout
Cascade
cascade all open windows
Tile Horizontally
tile all open windows horizontally
Tile Vertically
tile all open windows vertically
Icon Children
icon all but the Main window
Icon All
icon all windows
Deicon All
deicon all windows
Customize
use the Button Adder to define and add a button to either the menu bar, tool bar,
or status bar of the specified window
<window_name>
lists the currently open windows; select a window name to switch to, or show that
window if it is hidden; when the source window is available, the source file name
is also indicated; open additional windows from the "View menu" (p26)
Help menu
28
About ModelSim
display ModelSim application information
Release Notes
view current release notes
Information about Help
view the readme file pertaining to ModelSim’s online documentation
ModelSim EE Tutorial
open and read the ModelSim EE Tutorial (.pdf) file; PDF files can be
read with a free Adode Acrobat reader available through
www.adobe.com
ModelSim EE/PLUS
Reference Manual
open and read the EE Reference Manual Acrobat (.pdf) file; PDF files
can be read with a free Adode Acrobat reader available through
www.adobe.com
Tcl Man Pages
open and read Tcl 7.6/Tk 4.2 manual in HTML format (uses a Tcl/Tk
HTML viewer)
Technotes
select a technical note to view from the drop-down list
- ModelSim EE Graphic Interface
ModelSim EE Tutorial
Main window
Saving the transcript file
Variable settings determine the filename used for saving the Main window
transcript. If either PrefMain(file) in modelsim.tcl, or TranscriptFile in
modelsim.ini file is set, then the transcript output is logged to the specified file. By
default the TranscriptFile variable in modelsim.ini is set to transcript. If either
variable is set, the transcript contents are always saved and no explicit saving is
necessary.
Note:
The log file specified above cannot be changed during the simulation session.
If you would like to save an additional copy of the transcript with a different
filename, you can use the File > Save Main As, or File > Save Main menu items.
The initial save must be made with the Save Main As selection, which stores the
filename in the Tcl variable PrefMain(saveFile). Subsequent saves can be made
with the Save Main selection. Since no automatic saves are performed for this file,
it is written only when a Save... menu selection is made. The file is written to the
current working directory and records the contents of the transcript at the time of
the save.
Using the saved transcript as a macro (DO file)
Saved transcript files can be used as macros (DO files), see "Reusing commands
from the Main transcript" (p93) for more information.
ModelSim EE Tutorial
ModelSim EE Graphic Interface -
29
Main window
The Main window tool bar
k
ea
er
br
st
e
p
ov
ll
st
ep
n
ru
nt
in
co
ru
n
ue
ng
le
n
ru
-a
th
n
ru
rt
st
a
re
py
st
e
pa
co
si
gn
de
d
lo
a
co
m
pi
le
Buttons on the Main window tool bar give you quick access to these ModelSim
commands and functions.
Main window tool bar buttons
Button
30
Menu equivalent
Command equivalents
Compile
open the Compile HDL
Source Files dialog box to
select files for compilation
none, however,
Options > Compile
opens the Compile
Options dialog box
vcom <arguments>, or
vlog <arguments>
Load Design
open the Load a Design
dialog box to initiate
simulation
File > Load New Design
vsim <arguments>
Copy
copy the selected text
within the Main window
transcript
Edit > Copy
see: "Editing the command line,
the current source file, and
notepads" (p33)
Paste
paste the copied text to the
cursor location
Edit > Paste
see: "Editing the command line,
the current source file, and
notepads" (p33)
- ModelSim EE Graphic Interface
ModelSim EE Tutorial
Main window
Main window tool bar buttons
Button
Menu equivalent
Command equivalents
Restart
restart the current
simulation with the option
of use current formatting,
breakpoints, and log file
File > Restart
restart <arguments>
Run
run the current simulation
for the default time length
Run > Run
<default_run_length>…
run (no arguments)
none
run <specific run length>
Continue Run
continue the current
simulation run
Run > Continue
run -continue
Run -All
run to current simulation
forever, or until it hits a
breakpoint or specified
break event *
Run > Run -All
run -all
Step
steps the current
simulation to the next
HDL statement
Run > Step….
step
Step Over
HDL statements are
executed but treated as
simple statements instead
of entered and traced line
by line
Run > Step Over….
step -over
Run Length
specify the run length
for the current
simulation
ModelSim EE Tutorial
ModelSim EE Graphic Interface -
31
Main window
Main window tool bar buttons
Button
Break
stop the current simulation
run
Menu equivalent
Command equivalents
none
execute a break when the Main
window is active with <control-c>
The Main window status bar
Fields at the bottom of the Main window provide the following information about
the current simulation:
32
Field
Description
Now
the current simulation time or a larger time unit if one can be used without a fractional
remainder
Delta
the current simulation iteration number
Env
name of the current environment (item selected in the Structure window (p67))
- ModelSim EE Graphic Interface
ModelSim EE Tutorial
Main window
Editing the command line, the current source file, and notepads
The following mouse actions and special keystrokes can be used to edit commands
in the entry region of the Main window. They can also be used in editing the file
displayed in the Source window (p61) and all notepad windows (enter the
notepad command at the VSIM prompt to open the notepad editor).
Mouse - UNIX
Mouse - Windows
Result
< left-button - click >
move the insertion cursor
< left-button - press > + drag
select
< shift - left-button - press >
extend selection
< left-button - double-click >
select word
< left-button - double-click > + drag
select word + word
< control - left-button - click >
move insertion cursor without
changing the selection
< left-button - click > on previous ModelSim or VSIM prompt
copy and paste previous command
string to current prompt
< middle-button - click >
none
paste clipboard
< middle-button - press > + drag
none
scroll the window
Keystrokes - UNIX
Keystrokes - Windows
Result
< left | right - arrow >
move the insertion cursor
< up | down - arrow >
scroll through command history
< control - p >
move insertion cursor to previous line
< control - n >
move insertion cursor to next line
< control - f >
move insertion cursor forward
< control - b >
move insertion cursor backward
< backspace >
delete character to the left
ModelSim EE Tutorial
ModelSim EE Graphic Interface -
33
Main window
Keystrokes - UNIX
Keystrokes - Windows
Result
< control - d >
delete character to the right
< control - k >
delete to the end of line
< control - a >
< control - a >, <Home>
move insertion cursor to beginning of line
< control - e >
< control - e >, <End>
move insertion cursor to end of line
< * meta - "<" >
none
move insertion cursor to beginning of file
< * meta - ">" >
none
move insertion cursor to end of file
< control - w >
< control - x >
cut selection
< *meta - w >
< control - c > **
copy selection
< control - y >
< control - v >
insert clipboard
The Main window allows insertions or pastes only after the prompt, therefore, you
don’t need to set the cursor when copying strings to the command line.
* Unix only
Which keyboard key functions as the meta key depends on how your X-windows KeySym
mapping is set up. You may need help from your system administrator to map a particular
key, such as the <alt> key, to the meta KeySym.
** Windows
<control - c> copies text in all but the Main window; in the Main window <control-c>
performs a Break.
34
- ModelSim EE Graphic Interface
ModelSim EE Tutorial
Dataflow window
Dataflow window
The Dataflow window allows you to trace VHDL signals or Verilog nets through
your design. Double-click an item with the left mouse button to move it to the
center of the Dataflow display.
VHDL signals or processes in the Dataflow window:
• A signal displays in the center of the window with all the processes that drive
the signal on the left, and all the processes that read the signal on the right, or
• a process is displayed with all the signals read by the process shown as inputs
on the left of the window, and all the signals driven by the process on the right.
Verilog nets or processes in the Dataflow window:
• A net displays in the center of the window with all the processes that drive the
net on the left, and all the processes triggered by the net on the right, or
• a process is displayed with all the nets that trigger the process shown as inputs
on the left of the window, and all the nets driven by the process on the right.
process "#ASSIGN#15"
signal or net "paddr"
ModelSim EE Tutorial
ModelSim EE Graphic Interface -
35
Dataflow window
The Dataflow window menu bar
The following menu commands and button options are available from the
Dataflow window menu bar.
File menu
Save Postscript
save the current dataflow view as a Postscript file
Selection
Selection > Follow Selection updates window when the Process window (p52) or
Signals window (p55) changes; Fix Selection freezes the view selected from
within the Dataflow window
Close
close this copy of the Dataflow window; you can create a new window with
View > New from the "The Main window menu bar" (p25)
Window menu
36
Initial Layout
restore all windows to the size and placement of the initial full-screen layout
Cascade
cascade all open windows
Tile Horizontally
tile all open windows horizontally
Tile Vertically
tile all open windows vertically
Icon Children
icon all but the Main window
Icon All
icon all windows
Deicon All
deicon all windows
Customize
use the Button Adder to define and add a button to either the menu bar, tool bar,
or status bar of the specified window
<window_name>
lists the currently open windows; select a window name to switch to, or show that
window if it is hidden; when the source window is available, the source file name
is also indicated; open additional windows from the "View menu" (p26)
- ModelSim EE Graphic Interface
ModelSim EE Tutorial
Dataflow window
Tracing HDL items with the Dataflow window
The Dataflow window is linked with the Signals window (p55) and the Process
window (p52). To examine a particular process in the Dataflow window, click on
the process name in the Process window. To examine a particular HDL item in the
Dataflow window, click on the item name in the Signals window.
with a signal in center of the Dataflow window, you can:
• click once on a process name in the Dataflow window to make the Source and
Variable windows update to show that process,
• click twice on a process name in the Dataflow window to move the process to
the center of the Dataflow window
with a process in center of the Dataflow window, you can:
• click once on an item name to make the Source and Signals windows update to
show that item,
• click twice on an item name to move that item to the center of the Dataflow
window.
The Dataflow window will display the current process when you single-step or
when VSIM hits a breakpoint.
ModelSim EE Tutorial
ModelSim EE Graphic Interface -
37
List window
List window
The List window displays the results of your simulation run in tabular format. The
window is divided into two adjustable panes, which allow you to scroll
horizontally through the listing on the right, while keeping time and delta visible
on the left.
HDL items you can view
One entry is created for each
of the following VHDL and
Verilog HDL items within the
design:
VHDL items
signals and process variables
Verilog items
nets and register variables
Note:
Constants, generics, parameters, and memories are not viewable in the List or Wave windows.
List window action list
This action list provides a quick reference to menu selections and mouse actions
in the List window. See the "Tree window action list" (p23) for additional
information.
Action
Menu or mouse
See also
place specific HDL items in
the List window
Signals window (p55) menu:
View > List (choose Selected Signals,
Signals in Region, or Signals in Design)
"Adding HDL items to
the List window" (p44)
drag and drop:
from the Process, Signals, or Signals
window
38
- ModelSim EE Graphic Interface
ModelSim EE Tutorial
List window
Action
Menu or mouse
See also
move or delete items already
in the List window
menu selection:
Edit > (select Cut, Copy, Paste, Delete,
Combine, Select All, or Unselect All)
"Adding HDL items to
the List window" (p44)
drag and drop:
within the List window
set display properties such as
name length, trigger on
options, delta views, and
strobe timing
menu selection:
Prop > Display Props
"Setting List window
display properties" (p42)
format an item’s radix, label,
width, and triggering
properties
menu selection:
Prop > Signal Props
"Editing and formatting
HDL items in the List
window" (p45)
save your listing to an ASCII
file
menu selection:
File > Write List (select tabular, events
or TSSI format)
"Saving List window data
to a file" (p51)
save your List window
configuration for future use
menu selection:
File > Save Format
"Adding HDL items to
the List window" (p44)
reuse a List window
configuration
menu selection:
File > Load Format
"Adding HDL items to
the List window" (p44)
finding an HDL item by
name
menu selection:
Edit > Find
"Finding items by name
in the List window" (p48)
finding the value of an HDL
item
menu selection:
Edit > Search
"Searching for item
values in the List
window" (p48)
set, delete or go to a time
marker in the listing
menu selection:
Markers > (choose Add Marker, Delete
Marker, or Goto)
"Setting time markers in
the List window" (p50)
ModelSim EE Tutorial
ModelSim EE Graphic Interface -
39
List window
The List window menu bar
The following menu commands and button options are available from the List
window menu bar.
File menu
Write List
(format)
save the listing as a text file in one of three formats: tabular, events, or TSSI
Load Format
run a List window format DO file previously saved with Save Format
Save Format
saves the current List window display and signal preferences to a do (macro) file;
running the DO file will reformat the List window to match the display as it
appeared when the DO file was created
Close
close this copy of the List window; you can create a new window with
View > New from the "The Main window menu bar" (p25)
Edit menu
40
Cut
cut the selected item field from the listing; see "Editing and formatting HDL items
in the List window" (p45)
Copy
copy the selected item field
Paste
paste the previously cut or copied item to the left of the currently selected item
Delete
delete the selected item field
Combine
combine the selected fields into a user-defined bus; keep copies of the original items
rather than moving them
Select All
select all signals in the List window
Unselect All
deselect all signals in the List window
Find...
find specified item label within the List window
Search...
search the List window for a specified value, or the next transition for the selected
signal
- ModelSim EE Graphic Interface
ModelSim EE Tutorial
List window
Markers menu
Add Marker
add a time marker at the top of the listing page
Delete Marker
delete the selected marker from the listing
Goto
choose the time marker to go to from a list of current markers
Prop menu
Display Props
set display properties for all items in the window: delta settings, trigger on
selection, strobe period, and label size
Signal Props
set label, radix, trigger on/off, and field width for the selected item
Window menu
Initial Layout
restore all windows to the size and placement of the initial full-screen layout
Cascade
cascade all open windows
Tile Horizontally
tile all open windows horizontally
Tile Vertically
tile all open windows vertically
Icon Children
icon all but the Main window
Icon All
icon all windows
Deicon All
deicon all windows
Customize
use the Button Adder to define and add a button to either the menu bar, tool bar,
or status bar of the specified window
<window_name>
lists the currently open windows; select a window name to switch to, or show that
window if it is hidden; when the source window is available, the source file name
is also indicated; open additional windows from the "View menu" (p26)
ModelSim EE Tutorial
ModelSim EE Graphic Interface -
41
List window
Setting List window display properties
Before you add items to the List window you can set the window’s display
properties. To change when and how a signal is displayed in the List window,
make this selection from the List window menu bar: Prop > Display Props. The
resulting Modify Display Properties dialog box has the following options.
Trigger settings page
The Triggers page controls the triggering for
the display of new lines in the List window.
You can specify whether an HDL item trigger
or a strobe trigger is used to determine when
the List window displays a new line. If you
choose Trigger on: Signals, then you can
choose between collapsed or expanded delta
displays. You can also choose a combination
of signal or strobe triggers. To use gating,
Signals or Strobe or both must be selected.
The Triggers page includes these options:
• Deltas:Expand Deltas
When selected with the Trigger on: Signals
check box, displays a new line for each time step
on which items change, including deltas within a
single unit of time resolution.
• Deltas:Collapse Deltas
Displays only the final value for each time unit in the List window.
• Deltas:No Deltas
No simulation cycle (delta) column is displayed in the List window.
• Trigger On: Signals
Triggers on signal changes. Defaults to all signals. Individual signals may be
excluded from triggering by using the Prop > Signals Props dialog box.
• Trigger On: Strobe
Triggers on the Strobe Period you specify; specify the first strobe with First
Strobe at:.
• Trigger Gating: Expression
Enables triggers to be gated on and off by an overriding expression, much like
a hardware signal analyzer might be set up to start recording data on a specified
42
- ModelSim EE Graphic Interface
ModelSim EE Tutorial
List window
setup of address bits and clock edges. Affects the display of data, not the
acquisition of the data.
• Use Expression Builder (button)
Opens the Expression Builder to help you write a gating expression.
• Expression
Enter the expression for trigger gating into this field, or use the Expression
Builder (select the Use Expression Builder button). The expression is evaluated
when the List window would normally have displayed a row of data (given the
trigger on signals and strobe settings above).
• On Duration
The duration for gating to remain open after the last list row in which the
expression evaluates to true; expressed in x number of default timescale units.
Gating is level-sensitive rather than edge-triggered.
List window gating information is saved as configuration statements when the list
format is saved. The gating portion of a configuration statement might look like
this:
.list.tbl config -usegating 1
.list.tbl config -gateduration 100
.list.tbl config -gateexpr {<expression>}
Window Properties page
The Window Properties page includes
these options:
• Label: Full Name
Display the full pathname of the item.
• Label: Short Name
Display the item name without the path.
• Name Limit
The maximum number of number of rows in
the name pane.
ModelSim EE Tutorial
ModelSim EE Graphic Interface -
43
List window
Adding HDL items to the List window
Before adding items to the List window you may want to set the window display
properties (see "Setting List window display properties" (p42)). You can add
items to the List window in several ways.
Adding items with drag and drop
You can drag and drop items into the List window from the Process, Signals, or
Structure window. Select the items in the first window, then drop them into the
List window. Depending on what you select, all items or any portion of the design
may be added. See the "Tree window action list" (p23) for information about
making item selections.
Adding items from the Main window command line
Invoke the add list command to add one or more individual items; separate the
names with a space:
add list <item_name> <item_name>
You can add all the items in the current region with this command:
add list *
Or add all the items in the design with:
add list -r /*
Adding items with a List window format file
To use a List window format file you must first save a format file for the design
you are simulating. The saved format file can then be used as a DO file to recreate
the List window formatting.
• add HDL items to your List window
• edit and format the items to create the view you want,
see "Editing and formatting HDL items in the List window" (p45)
• save the format to a file with the List window menu selection:
File > Save Format
To use the format (do) file, start with a blank List window, and run the DO file in
one of two ways:
• use the do command on the command line:
do <my_list_format>
• select File > Load Format from the List window menu bar
44
- ModelSim EE Graphic Interface
ModelSim EE Tutorial
List window
Use Edit > Select All and Edit > Delete to remove the items from the current List
window or create a new, blank List window with the View > New > List selection
from the "Main window" (p24). You may find it useful to have two differently
formatted windows open at the same time, see "Examining simulation results with
the List window" (p47).
Note: List window format files are design-specific; use them only with the design you were simulating
when they were created. If you try to the wrong format file, ModelSim will advise you of the HDL items it
expects to find.
Editing and formatting HDL items in the List window
Once you have the HDL items you want in the List window, you can edit and
format the list to create the view you find most useful. (See also, "Adding HDL
items to the List window" (p44))
To edit an item:
Select the item’s label at the top of the List window or one of its values from the
listing. Move, copy or remove the item by selecting commands from the List
window Edit menu (p40) menu.
You can also click+drag to move items within the window:
• to select several contiguous items:
click+drag to select additional items to the right or the left of the original
selection
• to select several items randomly:
Control+click to add or subtract from the selected group
• to move the selected items:
re-click on one of the selected items, hold and drag it to the new location
To format an item:
Select the item’s label at the top of the List window or one of its values from the
listing, then use the Prop > Signal Props menu selection. The resulting Modify
Signal Properties dialog box allows you to set the item’s label, label width,
triggering, and radix.
ModelSim EE Tutorial
ModelSim EE Graphic Interface -
45
List window
The Modify Signal Properties dialog
box includes these options:
• Signal
Shows the item you selected with the mouse.
• Label
Allows you to specify the label that is to
appear at the top of the List window column
for the specified item.
• Radix
Allows you to specify the radix (base) in
which the item value is expressed. The default
radix is symbolic, which means that for an
enumerated type, the List window lists the
actual values of the enumerated type of that
item.
For the other radixes - binary, octal, decimal,
unsigned, hexadecimal, or ASCII - the item
value is converted to an appropriate
representation in that radix. In the system initialization file, modelsim.tcl, you
can specify the list translation rules for arrays of enumerated types for binary,
octal, decimal, unsigned decimal, or hexadecimal item values in the design unit.
• Width
Allows you to specify the desired width of the column used to list the item
value. The default is an approximation of the width of the current value.
• Trigger: Triggers line
Specifies that a change in the value of the selected item causes a new line to be
displayed in the List window.
• Trigger: Does not trigger line
Selecting this option in the List Signals window specifies that a change in the
value of the selected item does not affect the List window.
The trigger specification affects the trigger property of the selected item. See also,
"Setting List window display properties" (p42).
46
- ModelSim EE Graphic Interface
ModelSim EE Tutorial
List window
Examining simulation results with the List window
Because you can use the Main window View menu (p26) to create a second List
window, you can reformat another List window after the simulation run if you
decide a different format would reveal the information you’re after. Compare the
two illustrations.
symbolic item format item change triggers a new line
- the divider bar separates resolution and delta from values
decimal and symbolic formats - 100ns strobe triggers a new line
In the first List window, the HDL items are formatted as symbolic and use an item
change to trigger a line; the field width was changed to accommodate the default
label width. The window divider maintains the time and delta in the left pane;
signals in the right pane may be viewed by scrolling. For the second listing, the
specification for triggering was changed to a 100-ns strobe, and the item radix for
a, b, cin, and sum is now decimal.
ModelSim EE Tutorial
ModelSim EE Graphic Interface -
47
List window
Finding items by name in the List window
The Find dialog box allows you to search for text strings in the List window. From
the List window select Edit > Find to bring up the Find dialog box.
Enter an item label and Find it by searching
Forward (right) or Reverse (left) through the
List window display. The column number of
the item found displays at the bottom of the
dialog box. Note that you can change an item’s
label, see "Setting List window display
properties" (p42).
Searching for item values in the List window
Select an item in the List window. From the List window menu bar select Edit >
Search to bring up the List Signal Search dialog box.
The List Signal Search
dialog box includes these
options:
• Signal Name <item_label>
This indicates the item
currently selected in the List
window; the subject of the
search.
• Search Options: Ignore
Glitches
Ignore zero width glitches in
VHDL signals and Verilog
nets.
• Search Options: Reverse
Direction
Select to search the list from
bottom to top. Deselect to
search from top to bottom.
48
- ModelSim EE Graphic Interface
ModelSim EE Tutorial
List window
• Search Options: Search for Signal
Value
Reveals the Search Value field; search for
the value specified in the Search Value field
(the value must be formatted in the same
radix as the display). If no value is specified
look for transitions.
List Signal Search dialog box with Search
for Signal Value selected
• Search Options: Search for Expression
Reveals the Search Expression field and the
Use Expression Builder button; searches for
the expression specified in the Search
Expression field evaluating to a boolean
true.
The expression may involve more than one
signal but is limited to signals logged in the
List window. Expressions may include
constants, variables and macros. If no
expression is specified, the search will give
an error.
To help build the expression, click the Use
Expression Builder button.
• Search Occurrences
You can search for the n-th transition or the
n-th match on value or expression; Search
Occurrences indicates the number of
transitions or matches for which to search.
List Signal Search dialog box with Search
for Expression selected
ModelSim EE Tutorial
ModelSim EE Graphic Interface -
49
List window
Setting time markers in the List window
From the List window select Markers > Add Marker to tag the selected list line
with a marker. The marker is indicated by a thin box surrounding the marked line.
The selected line uses the same indicator, but its values are highlighted. Delete
markers by first selecting the marked line, then making the Markers > Delete
Marker menu selection.
Finding a marker
Choose a specific
marked line to view
with Markers >
Goto menu
selection. The
marker name (on the
Goto list)
corresponds to the
simulation time of
the selected line.
List window keyboard shortcuts
Using the following keys when the mouse cursor is within the List
window will cause the indicated actions:
50
Key
Action
<arrow up>
scroll listing up
<arrow down>
scroll listing down
<arrow left>
scroll listing left
<arrow right>
scroll listing right
<page up>
scroll listing up by page
<page down>
scroll listing down by page
- ModelSim EE Graphic Interface
ModelSim EE Tutorial
List window
Key
Action
<tab>
searches forward (down) to the next transition on the selected signal
<shift-tab>
searches backward (up) to the previous transition on the selected signal (does not
function on HP workstations)
<control-f>
opens the find dialog box; find the specified item label within the list display
Saving List window data to a file
From the List window select Edit > Write List (format) to save the List window
data in one of these formats:
• tabular
writes a text file that looks like the window listing
ns
0
0
2
delta
+0
+1
+0
/a
X
0
0
/b
X
1
1
/cin
U
0
0
/sum
X
X
X
/cout
U
U
U
• event
writes a text file containing transitions during simulation
@0 +0
/a X
/b X
/cin U
/sum X
/cout U
@0 +1
/a 0
/b 1
/cin 0
• TSSI
writes a file in standard TSSI format.
0 00000000000000010?????????
2 00000000000000010???????1?
3 00000000000000010??????010
4 00000000000000010000000010
100 00000001000000010000000010
ModelSim EE Tutorial
ModelSim EE Graphic Interface -
51
Process window
Process window
The Process window displays a list of processes and indicates the pathname of the
instance in which the process is located.
Each HDL item in the scrollbox is preceded by one of the
following indicators:
• <Ready>
Indicates that the process is scheduled to be executed within the
current delta time.
• <Wait>
Indicates that the process is waiting for a VHDL signal or
Verilog net or variable to change or for a specified time-out
period.
• <Done>
Indicates that the process has executed a VHDL wait statement
without a time-out or a sensitivity list. The process will not
restart during the current simulation run.
If you select a "Ready" process, it will be executed next by the simulator.
When you click on a process in the Process window the following windows are
updated:
52
Window updated
Result
Structure window (p67)
shows the region in which the process is located
Variables window (p70)
shows the VHDL variables and Verilog register variables in
the process
Source window (p61)
shows the associated source code
Dataflow window (p35)
shows the process, the signals and nets the process reads, and
the signals and nets driven by the process.
- ModelSim EE Graphic Interface
ModelSim EE Tutorial
Process window
The Process window menu bar
The following menu commands and button options are available from the Process
window menu bar.
File menu
Save As
save the process tree to a text file viewable with the ModelSim notepad
Environment
Follow Environment: update the window based on the selection in the Structure
window (p67); Fix Environment: maintain the current view, do not update
Close
close this copy of the Process window; you can create a new window with
View > New from the "The Main window menu bar" (p25)
Edit menu
Copy
copy the selected process
Sort
sort the process list in either ascending, descending, or declaration order
Select All
select all signals in the Process window
Unselect All
deselect all signals in the Process window
Find...
find specified text string within the structure tree; choose the Status (ready, wait
or done) or Process label to search and the search direction: forward or reverse
Window menu
Initial Layout
restore all windows to the size and placement of the initial full-screen layout
Cascade
cascade all open windows
Tile Horizontally
tile all open windows horizontally
Tile Vertically
tile all open windows vertically
Icon Children
icon all but the Main window
Icon All
icon all windows
Deicon All
deicon all windows
ModelSim EE Tutorial
ModelSim EE Graphic Interface -
53
Process window
Customize
use the Button Adder to define and add a button to either the menu bar, tool bar,
or status bar of the specified window
<window_name>
lists the currently open windows; select a window name to switch to, or show that
window if it is hidden; when the source window is available, the source file name
is also indicated; open additional windows from the "View menu" (p26)
Active/In Region toggle button
54
Active
Displays all the processes that are scheduled to run during the current simulation cycle.
In Region
Displays any processes that exist in the region that is selected in the Structure window.
- ModelSim EE Graphic Interface
ModelSim EE Tutorial
Signals window
Signals window
The Signals window shows the names and values of HDL items in the current
region (which is selected in the Structure window). Items may be sorted in
ascending, descending, or declaration order.
HDL items you can view
One entry is created for each of the
following VHDL and Verilog HDL
items within the design:
VHDL items
signals
Verilog items
nets, register variables, and named
events
The names of any VHDL composite
types (arrays and record types) are
shown in a hierarchical fashion.
Hierarchy also applies to Verilog nets
and vector memories. (Verilog vector
registers do not have hierarchy
because they are not internally
represented as arrays.) Hierarchy is
indicated in typical ModelSim fashion
with plus (expandable), minus
(expanded), and blank (single level)
boxes.
See "Tree window hierarchical view" (p22) for more information.
ModelSim EE Tutorial
ModelSim EE Graphic Interface -
55
Signals window
The Signals window menu bar
The following menu commands are available from the Signals window menu bar.
File menu
Save As
save the signals tree to a text file viewable with the ModelSim notepad
Environment
Follow Environment: update the window based on the selection in the Structure
window (p67); Fix Environment: maintain the current view, do not update
Close
close this copy of the Signals window; you can create a new window with
View > New from the "The Main window menu bar" (p25)
Edit menu
Copy
copy the current selection in the Signals window
Sort
sort the signals tree in either ascending, descending, or declaration order
Select All
select all items in the Signals window
Unselect All
unselect all items in the Signals window
Force...
apply stimulus to the specified Signal Name; specify Value, Kind (Freeze/Drive/
Deposit), Delay, and Repeat
Noforce
removes the effect of any active force command on the selected HDL item
Find...
find specified text string within the Signals window; choose the Name or Value
field to search and the search direction: forward or reverse
View menu
Wave/List/Log
place the Selected Signals, Signals in Region, or Signals in Design in the Wave
window (p73), List window (p38), or Log file
Filter
choose the port and signal types to view (Input Ports, Output Ports, InOut Ports
and Internal Signals) in the Signals window
Window menu
56
Initial Layout
restore all windows to the size and placement of the initial full-screen layout
Cascade
cascade all open windows
- ModelSim EE Graphic Interface
ModelSim EE Tutorial
Signals window
Tile Horizontally
tile all open windows horizontally
Tile Vertically
tile all open windows vertically
Icon Children
icon all but the Main window
Icon All
icon all windows
Deicon All
deicon all windows
Customize
use the Button Adder to define and add a button to either the menu bar, tool bar,
or status bar of the specified window
<window_name>
lists the currently open windows; select a window name to switch to, or show that
window if it is hidden; when the source window is available, the source file name
is also indicated; open additional windows from the "View menu" (p26)
Selecting HDL item types to view
The View > Filter... menu selection allows you to specify which HDL
items are shown in the Signals window. Multiple options may be
selected.
Forcing signal and net values
The Edit > Force menu selection displays a dialog box that allows you to apply
stimulus to the selected signal or net. You can specify that the stimulus is to repeat
at a regular time interval, expressed in the time units set in the Startup window
when you invoked the simulator.
ModelSim EE Tutorial
ModelSim EE Graphic Interface -
57
Signals window
The Force dialog box includes these options:
• Signal Name
Specify the signal or net for the applied stimulus.
• Value
Initially displays the current value, which can be
changed by entering a new value into the field. A value
can be specified in radixes other than decimal by using
the form (for VHDL and Verilog, respectively):
base#value
-or-
b|o|d|h’value
16#EE or h’EE, for example, specifies the hexadecimal
value EE.
• Kind: Freeze
Freezes the signal or net at the specified value until it is forced again or until it
is unforced with a noforce command.
• Kind: Drive
Attaches a driver to the signal and drives the specified value until the signal or
net is forced again or until it is unforced with a noforce command. This value
is illegal for unresolved VHDL signals.
• Kind: Deposit
Sets the signal or net to the specified value. The value remains until there is a
subsequent driver transaction, or until the signal or net is forced again, or until
it is unforced with a noforce command.
Freeze is the default for Verilog nets and unresolved VHDL signals and Drive is
the default for resolved signals.
If you prefer Freeze as the default for resolved and unresolved signals, you can
change the default force kind in the modelsim.ini file.
• Delay
Allows you to specify how many time units from the current time the stimulus
is to be applied.
• Repeat
Allows you to specify the time interval after which the stimulus is to be
repeated. A value of 0 indicates that the stimulus is not to be repeated.
• Force
When you click the Force button, a force command is issued with the
parameters you have set and echoed in the Main window.
58
- ModelSim EE Graphic Interface
ModelSim EE Tutorial
Signals window
Adding HDL items to the Wave and List windows or a log file
Before adding items to the List or Wave window you may want to set the window
display properties (see "Setting List window display properties" (p42)). Once
display properties have been set, you can add items to the windows or log file in
several ways.
Adding items from the Main window command line
Use the View menu with either the Wave, List, or Log selection to add
HDL items to the Wave window (p73), List window (p38)or a log file,
respectively.
The log file is written as an archive file in binary format and is used to
drive the List and Wave window at a later time. Once signals are added
to the log file they cannot be removed. If you begin a simulation by
invoking VSIM with the -view <logfile_name> option, VSIM reads the
log file to drive the Wave and List windows.
Choose one of the following options (ModelSim opens the target window for you):
• Selected signal
Lists only the item(s) selected in the Signals window.
• Signals in region
Lists all items in the region that is selected in the Structure window.
• Signals in design
Lists all items in the design.
Adding items from the Main window command line
Another way to add items to the Wave or List window or the log file is to enter the
one of the following commands at the VSIM prompt:
add list | add wave | log <item_name> <item_name>
You can add all the items in the current region with this command:
add list | add wave | log *
Or add all the items in the design with:
add list | add wave | log -r /*
ModelSim EE Tutorial
ModelSim EE Graphic Interface -
59
Signals window
If the target window (Wave or List) is closed, ModelSim opens it when you when
you invoke the command.
Finding HDL items in the Signals window
Find the specified text string within the Signals
window; choose the Name or Value field to
search and the search direction: Forward or
Reverse.
60
- ModelSim EE Graphic Interface
ModelSim EE Tutorial
Source window
Source window
The Source window allows you to view and edit your HDL source code. Select an
item in the Structure window (p67) or use the File menu to add a source file to the
window, then select a process in the Process window (p52) to view that process;
an arrow next to the line numbers indicates the selected process.
If any breakpoints have been set, each is signified by a colored dot next to a line
number at the left side of the window pane. To set a breakpoint, click at or near
the line number in the numbered area at the left side of the window. The
breakpoints are toggles, so you can click again to delete an existing breakpoint.
There is no limit to the number of breakpoints you can set.
To look at a file that is not currently being displayed, use the Structure window
(p67) to select a different design unit or use the Source menu selection: File >
Open. The pathname of the source file is indicated in the header of the Source
window.
You can copy and paste text between the Source window and the Main window
(p24); select the text you want to copy, then paste it into the Main window with
the middle mouse button.
ModelSim EE Tutorial
ModelSim EE Graphic Interface -
61
Source window
The Source window menu bar
The following menu commands are available from the Source window menu bar.
File menu
New
edit a new source file
Open
select a source file to open
Use Source
specifies an alternative file to use for the current source file; this alternative source
mapping exists for the current simulation only
Source Directory
add to a list of directories (the SourceDir variable in modelsim.tcl) to search for
source files
Save
save the current source file
Save_As
save the current source file with a different name
Close
close this copy of the Source window; you can create a new window with
View > New from the "The Main window menu bar" (p25)
Edit menu
To edit a source file, make sure the Read Only option in the Source Options
dialog box is not selected (use the Source menu Options > Options selection).
<editing option>
basic editing options include: Cut, Copy, Paste, Select All, and Unselect All; see:
"Editing the command line, the current source file, and notepads" (p33)
Find...
find the specified text string within the source file; match case option
read only
toggles the read-only status of the current source file
Object menu
62
Describe
displays information about the selected HDL item; the item name is shown in the
title bar
Examine
displays the current value of the selected HDL item; the item name is shown in the
title bar
- ModelSim EE Graphic Interface
ModelSim EE Tutorial
Source window
Options menu
Options
open the Source Options dialog box, see "Setting Source window options" (p66)
Window menu
Initial Layout
restore all windows to the size and placement of the initial full-screen layout
Cascade
cascade all open windows
Tile Horizontally
tile all open windows horizontally
Tile Vertically
tile all open windows vertically
Icon Children
icon all but the Main window
Icon All
icon all windows
Deicon All
deicon all windows
Customize
use the Button Adder to define and add a button to either the menu bar, tool bar,
or status bar of the specified window
<window_name>
lists the currently open windows; select a window name to switch to, or show that
window if it is hidden; when the source window is available, the source file name
is also indicated; open additional windows from the "View menu" (p26)
ModelSim EE Tutorial
ModelSim EE Graphic Interface -
63
Source window
The Source window tool bar
er
ov
st
ep
st
ep
d
fin
t
py
pa
st
e
co
cu
fil
e
ce
ur
so
ve
sa
lo
ad
so
ur
ce
fil
e
Buttons on the Source window tool bar gives you quick access to these ModelSim
commands and functions.
Source window tool bar buttons
Button
64
Menu equivalent
Other equivalents
Load Source File
open the Open dialog box
(you can open any text file
for editing in the Source
window)
File > Open
select an HDL item in the
Structure window, the associated
source file is loaded into the
Source window
Save Source File
save the file in the Source
window
File > Save
none
Cut
cut the selected text within
the Source window
Edit > Cut
see: "Editing the command line,
the current source file, and
notepads" (p33)
Copy
copy the selected text
within the Source window
Edit > Copy
see: "Editing the command line,
the current source file, and
notepads" (p33)
- ModelSim EE Graphic Interface
ModelSim EE Tutorial
Source window
Source window tool bar buttons
Button
Menu equivalent
Other equivalents
Paste
paste the copied text to the
cursor location
Edit > Paste
see: "Editing the command line,
the current source file, and
notepads" (p33)
Find
find the specified text
string within the source
file; match case option
Edit > Find
none
Step
steps the current
simulation to the next
HDL statement
none
step
Step Over
HDL statements are
executed but treated as
simple statements instead
of entered and traced line
by line
none
step -over
Editing the source file in the Source window
Several tool bar buttons (shown above), mouse actions, and special keystrokes can
be used to edit the source file in the Source window. See "Editing the command
line, the current source file, and notepads" (p33) for a list of mouse and keyboard
editing options.
Checking HDL item values and descriptions
There are two quick methods to determine the value and description of an HDL
item displayed in the Source window:
• select an item, then chose Object > Examine or Object > Description from the
Source window menu
• select an item with the right mouse button to view examine pop-up (select "now"
to examine the current simulation time in VHDL code)
ModelSim EE Tutorial
ModelSim EE Graphic Interface -
65
Source window
Setting Source window options
Access the Source window options with this Source menu selection: Options >
Options.
The Source Options dialog box includes
these options:
• Language
select either VHDL or Verilog; sets language for
key word colorizing
• Source Update Mode
select freeze file to maintain the same source file
in the Source window (useful when you have two
Source windows open; one can be updated from
the Structure window (p67), the other frozen) or
freeze view to disable updating the source view
from the Process window (p52)
• Colorize Source
colorize key words, variables and comments
• Step Buttons Visible
select to add Step and Step Over buttons to the Source window menu bar
• Read-Only
sets the source file to read-only mode
• Highlight Executable Lines
highlights the line number of executable lines
66
- ModelSim EE Graphic Interface
ModelSim EE Tutorial
Structure window
Structure window
The Structure window provides a hierarchical view of the structure of your design.
An entry is created by each HDL item within the design.
HDL items you can view
The following HDL items for VHDL and
Verilog are represented by hierarchy within
Structure window.
VHDL items
component instantiation, generate statement,
block statement, and package
Verilog items
module instantiation, named fork, named
begin,
task and function
Within the Structure window, VHDL items
are indicated by a box and Verilog items are
indicated by a circle.You can expand and
contract the display to view the elements by
clicking on the boxes or circles at the left of
the Window. The first line of the Structure
window indicates the top-level design unit
being simulated.
Instance name components in the Structure window
An instance name displayed in the Structure window consists of the following
parts:
instantiation label
ModelSim EE Tutorial
(architecture)
entity or module
ModelSim EE Graphic Interface -
67
Structure window
where:
• instantiation label
Indicates the label assigned to the component or module instance in the
instantiation statement.
• entity or module
Indicates the name of the entity or module that has been instantiated.
• architecture
Indicates the name of the architecture associated with the entity (not present for
Verilog).
When you select a region in the Structure window, it becomes the current region
and is highlighted; the Source window (p61) and Signals window (p55) change
dynamically to reflect the information for that region. This feature provides a
useful method for finding the source code for a selected region because the system
keeps track of the pathname where the source is located and displays it
automatically, without the need for you to provide the pathname.
Also, when you select a region in the Structure window, the Process window (p52)
is updated if In Region is selected in that window; the Process window will in turn
update the Variables window (p70).
The Structure window menu bar
The following menu commands are available from the Structure window menu
bar.
File menu
Save_As
save the structure tree to a text file viewable with the ModelSim notepad
Close
close this copy of the Structure window; you can create a new window with
View > New from the "The Main window menu bar" (p25)
Edit menu
68
Copy
copy the current selection in the Structure window
Sort
sort the structure tree in either ascending, descending, or declaration order
Unselect All
unselect all items in the Structure window
- ModelSim EE Graphic Interface
ModelSim EE Tutorial
Structure window
Find...
find specified text string within the structure tree; choose the label for instance,
entity/module or architecture to search for and the search direction: forward or
reverse
Window menu
Initial Layout
restore all windows to the size and placement of the initial full-screen layout
Cascade
cascade all open windows
Tile Horizontally
tile all open windows horizontally
Tile Vertically
tile all open windows vertically
Icon Children
icon all but the Main window
Icon All
icon all windows
Deicon All
deicon all windows
Customize
use the Button Adder to define and add a button to either the menu bar, tool bar,
or status bar of the specified window
<window_name>
lists the currently open windows; select a window name to switch to, or show that
window if it is hidden; when the source window is available, the source file name
is also indicated; open additional windows from the "View menu" (p26)
ModelSim EE Tutorial
ModelSim EE Graphic Interface -
69
Variables window
Variables window
The Variables window lists the names of HDL items within the current process,
followed by the current value(s) associated with each name. The pathname of the
current process is displayed at the bottom of the window.
HDL items you can view
The following HDL items for VHDL and
Verilog are viewable within the Variables
window.
VHDL items
constants, generics, and variables
Verilog items
register variables
The names of any VHDL composite types
(arrays and record types) are shown in a
hierarchical fashion. Hierarchy also applies
to Verilog vector memories. (Verilog vector
registers do not have hierarchy because they
are not internally represented as arrays.) Hierarchy is indicated in typical
ModelSim fashion with plus (expandable), minus (expanded), and blank (single
level) boxes. See "Tree window hierarchical view" (p22) for more information.
To change the value of a VHDL variable, constant, generic or Verilog register
variable, move the pointer to the desired name and click to highlight the selection.
Then select Edit > Change from the Variables window menu. This brings up a
dialog box that lets you specify a new value. Note that "Variable Name" is a term
that is used loosely in this case to signify VHDL constants and generics as well as
VHDL and Verilog register variables. You can enter any value that is valid for the
variable. An array value must be specified as a string (without surrounding
quotation marks). To modify the values in a record, you need to change each field
separately.
70
- ModelSim EE Graphic Interface
ModelSim EE Tutorial
Variables window
The Variables window menu bar
The following menu commands are available from the Variables window menu
bar.
File menu
Save As
save the variables tree to a text file viewable with the ModelSim notepad
Environment
Follow Environment: update the window based on the selection in the Structure
window (p67); Fix Environment: maintain the current view, do not update
Close
close this copy of the Variables window; you can create a new window with
View > New from the "The Main window menu bar" (p25)
Edit menu
Copy
copy the selected items in the Variables window
Sort
sort the variables tree in either ascending, descending, or declaration order
Select All
select all items in the Variables window
Unselect All
deselect all items in the Variables window
Change
change the value of the selected HDL item
Find...
find specified text string within the variables tree; choose the Name or Value field
to search and the search direction: forward or reverse
View menu
Wave/List/Log
ModelSim EE Tutorial
place the Selected Variables, Variables in Region, or Variables in Design in the
Wave window (p73), List window (p38), or Log file
ModelSim EE Graphic Interface -
71
Variables window
Window menu
72
Initial Layout
restore all windows to the size and placement of the initial full-screen layout
Cascade
cascade all open windows
Tile Horizontally
tile all open windows horizontally
Tile Vertically
tile all open windows vertically
Icon Children
icon all but the Main window
Icon All
icon all windows
Deicon All
deicon all windows
Customize
use the Button Adder to define and add a button to either the menu bar, tool bar,
or status bar of the specified window
<window_name>
lists the currently open windows; select a window name to switch to, or show that
window if it is hidden; when the source window is available, the source file name
is also indicated; open additional windows from the "View menu" (p26)
- ModelSim EE Graphic Interface
ModelSim EE Tutorial
Wave window
Wave window
The Wave window, like the List window, allows you to view the results of your
simulation. In the Wave window, however, you can see the results as HDL item
waveforms and their values.
The Wave window is divided into two windowpanes: the left pane displays item
names and their values at the active cursor (located in the right pane); the right
pane displays waveforms corresponding to each item and any cursors you may
have added.
HDL items you
can view
VHDL items
signals and
process
variables
Verilog items
nets, register
variables, and
named events
Note:
Constants, generics, parameters, and memories are not viewable in the List or Wave windows.
The data in the item values windowpane is very similar to the Signals window,
except that the values change dynamically whenever a cursor in the waveform
windowpane is moved.
At the bottom of the waveform windowpane you can see a time line, tick marks,
and a readout of the cursor(s) position(s). As you click and drag to move a cursor,
the time value at the cursor location is updated at the bottom of the cursor.
ModelSim EE Tutorial
ModelSim EE Graphic Interface -
73
Wave window
You can resize the windowpanes by clicking and dragging the bar between the two
windowpanes.
Waveform and signal-name formatting are easily changed via the Prop menu
(p77). You can reuse any formatting changes you make by saving a Wave window
format file, see "Adding items with a Wave window format file" (p82).
Wave window action list
This action list provides a quick reference to menu selections and mouse actions
in the Wave window. See the "Tree window action list" (p23) for additional
information.
74
Action
Menu or mouse
See also
collapse and expand composites
left mouse button:
click on a "-" or "+" box/
circle
"Tree window action list"
(p23)
move items, make single and multiple
item selections
left mouse button and
control + left mouse button
"Tree window action list"
(p23)
search for transitions in the waveform
display and signal values
menu selection:
Edit > Find...
"Searching for item values in
the Wave window" (p85)
find an item name or value
menu selection:
Edit > Find
"Finding items by name or
value in the Wave window"
(p85)
find a specific cursor
menu selection:
Cursor > Goto
"Making cursor
measurements" (p87)
sort items: ascending, descending,
declaration order
menu selection:
Edit > Sort
"Sorting a group of HDL
items" (p85)
making cursor measurements
menu selection:
Cursor > Add Cursor
"Making cursor
measurements" (p87)
reformat items, change their display
colors, and position them within the
window
menu selection:
Prop > Display Props...
"Editing and formatting HDL
items in the Wave window"
(p82)
- ModelSim EE Graphic Interface
ModelSim EE Tutorial
Wave window
Action
Menu or mouse
See also
zoom in or out to change the amount of
simulation time shown in the window
menu selection:
Zoom > (select zoom
option)
"Zooming - changing the
waveform display range"
(p88)
center mouse button:
click and drag to zoom
rubberband section
change signal properties: radix, color,
height, format (analog/literal/logic/
event)
menu selection:
Prop > Signal Props
"Setting Wave window
display properties" (p81)
save the Wave window configuration;
load a new configuration
menu selection:
File > Save (or Load)
Format
adding and editing items in the name/
value pane
menu selection:
Edit > (select edit option)
"Adding HDL items in the
Wave window" (p81)
The Wave window menu bar
The following menu commands and button options are available from the Wave
window menu bar. If you see a dotted line at the top of a drop-down menu, click
and drag the dotted line to create a separate menu window.
File menu
Write Postscript
save the waveform display as a Postscript file
Load Format
run a Wave window format (do) file previously saved with Save Format
ModelSim EE Tutorial
ModelSim EE Graphic Interface -
75
Wave window
Save Format
saves the current Wave window display and signal preferences to a do (macro)
file; running the DO file will reformat the Wave window to match the display as
it appeared when the DO file was created
Close
close this copy of the Wave window; you can create a new window with
View > New from the "The Main window menu bar" (p25)
Edit menu
Cut
cut the selected item from the wave name pane; see "Editing and formatting HDL
items in the Wave window" (p82)
Copy
copy the selected item and waveform
Paste
paste the previously cut or copied item above the currently selected item
Combine
combine the selected fields into a user defined bus
Sort
sort the top-level items in the name pane; sort with full path name or viewed name;
use ascending, descending or declaration order
Delete
delete the selected item and its waveform
Select All
Unselect All
select, or unselect, all item names in name pane
Find...
find specified item label within the Wave name window
Search...
search the waveform display for a specified value, or the next transition for the
selected signal; see: "Searching for item values in the Wave window" (p85)
Cursors menu
Add Cursor
add a cursor to the center of the waveform window
Delete Cursor
delete the selected cursor from the window
Goto
choose a cursor to go to from a list of current cursors
Zoom menu
Zoom <selection>
76
selection: Full, In, Out, Last, or Range to change the waveform display range
- ModelSim EE Graphic Interface
ModelSim EE Tutorial
Wave window
Prop menu
Display Props
set display properties for all items in the window: delta settings, trigger on
selection, strobe period, and label size
Signal Props
set label, radix, trigger on/off, and field width for the selected item (use the menu
selections below to quickly change individual properties)
Radix
set the selected item’s radix
Format
set the waveform format for the selected item
Color
set the color for the selected item from a color palette
Height
set the waveform height in pixels for the selected item
Window menu
Initial Layout
restore all windows to the size and placement of the initial full-screen layout
Cascade
cascade all open windows
Tile Horizontally
tile all open windows horizontally
Tile Vertically
tile all open windows vertically
Icon Children
icon all but the Main window
Icon All
icon all windows
Deicon All
deicon all windows
Customize
use the Button Adder to define and add a button to either the menu bar, tool bar,
or status bar of the specified window
<window_name>
lists the currently open windows; select a window name to switch to, or show that
window if it is hidden; when the source window is available, the source file name
is also indicated; open additional windows from the "View menu" (p26)
ModelSim EE Tutorial
ModelSim EE Graphic Interface -
77
Wave window
Wave window tool bar
ea
br
-a
k
ll
n
n
ru
e
in
u
nt
co
zo
ru
ru
n
fu
ll
ea
om
ar
t2
m
zo
o
ou
in
om
zo
om
zo
x
2x
n
n
iti
o
iti
o
ns
ns
t ra
ne
d
fin
d
fin
pr
ev
de
io
u
le
s
te
t ra
cu
cu
r
d
ad
xt
so
r
rs
or
st
e
pa
t
py
co
cu
at
fo
rm
e
av
w
ve
sa
lo
ad
w
av
e
fo
rm
at
The Wave window tool bar gives you quick access to these ModelSim commands
and functions.
Wave window tool bar buttons
Button
78
Menu equivalent
Other options
Load Wave Format
run a Wave window
format (do) file
previously saved with
Save Format
File > Load Format
none
Save Wave Format
saves the current
Wave window display
and signal preferences
to a do (macro) file
File > Save Format
none
Cut
cut the selected text
within the Source
window
Edit > Cut
none
- ModelSim EE Graphic Interface
ModelSim EE Tutorial
Wave window
Wave window tool bar buttons
Button
Menu equivalent
Other options
Copy
copy the selected text
within the Main
window transcript
Edit > Copy
none
Paste
paste the copied text to
the cursor location
Edit > Paste
see: "Editing the command line,
the current source file, and
notepads" (p33)
Add Cursor
add a cursor to the
center of the
waveform window
Cursor > Add Cursor
none
Delete Cursor
delete the selected
cursor from the
window
Cursor > Delete Cursor
none
Find Previous
Transition
locate the previous
signal value change
for the selected signal
Edit > Find > Reverse
none
Find Next Transition
locate the next signal
value change for the
selected signal
Edit > Find > Forward
none
Zoom in 2x
zoom in by a factor of
two from the current
view
Zoom > Zoom In
see: "Zooming - changing the
waveform display range" (p88)
Zoom out 2x
zoom out by a factor of
two from current view
Zoom > Zoom Out
see: "Zooming - changing the
waveform display range" (p88)
ModelSim EE Tutorial
ModelSim EE Graphic Interface -
79
Wave window
Wave window tool bar buttons
Button
80
Menu equivalent
Other options
Zoom area
use the cursor to
outline a zoom area
Zoom > Zoom Range
see: "Zooming - changing the
waveform display range" (p88)
Zoom Full
zoom out to view the
full range of the
simulation from time 0
to the current time
Zoom > Zoom Full
see: "Zooming - changing the
waveform display range" (p88)
Run
run the current
simulation for the
default time length
none
use the run command at the VSIM
prompt
Continue Run
continue the current
simulation run
none
use the run -continue command
at the VSIM prompt
Run -All
run to current
simulation forever, or
until it hits a
breakpoint or specified
break event*
none
use the run -all command at the
VSIM prompt
Break
stop the current
simulation run
none
execute a break when the Main
window is active with <control-c>
- ModelSim EE Graphic Interface
ModelSim EE Tutorial
Wave window
Setting Wave window display properties
You can define the item name width and the cursor snap distance of all items in
the Wave window with the Prop > Display Props... menu selection.
The Wave Window Properties
dialog box includes these options:
• Max Signal Name Width
Sets the item name width. This is
especially useful for items that have a
long pathname. Choose a maximum
name width setting, say 10 characters,
and then item pathnames longer than 10
characters are truncated on the left. All truncations take place at the slash
boundary so you will never see a partial item name. The default value for this
field is 0, which means to display the full path. Negative numbers allow you to
specify the number of regions, instead of characters, to display.
• Snap Distance
Specifies the distance the cursor needs to be placed from an item edge to jump
to that edge (a 0 specification turns off the snap). The value displayed in the item
value windowpane is updated to reflect the snap.
Adding HDL items in the Wave window
Before adding items to the Wave window you may want to set the window display
properties (see "Setting Wave window display properties" (p81)). You can add
items to the Wave window in several ways.
Adding items from the Signals window with drag and drop
You can drag and drop items into the Wave window from the Process, Signals, or
Structure window. Select the items in the first window, then drop them into the
Wave window. Depending on what you select, all items or any portion of the
design may be added. See the "Tree window action list" (p23) for information
about making item selections.
Adding items from the Main window command line
To add specific HDL items to the window, enter (separate the item names with a
space):
add wave <item_name> <item_name>
ModelSim EE Tutorial
ModelSim EE Graphic Interface -
81
Wave window
You can add all the items in the current region with this command:
add wave *
Or add all the items in the design with:
add wave -r /*
Adding items with a Wave window format file
To use a Wave window format file you must first save a format file for the design
you are simulating.
• add the items you want in the Wave window with any other method shown
above
• edit and format the items, see "Editing and formatting HDL items in the Wave
window" (p82) to create the view you want
• save the format to a file with the Wave window menu selection: File > Save
Format
To use the format file, start with a blank Wave window and run the DO file in one
of two ways:
• use the do command on the command line:
do <my_wave_format>
• select File > Load Format from the Wave window menu bar
Use Edit > Select All and Edit > Delete to remove the items from the current
Wave window, use the delete command with the wave option, or create a new,
blank Wave window with the View > New > Wave selection from the Main
window (p24).
Note: Wave window format files are design-specific; use them only with the design you were simulating
when they were created.
Editing and formatting HDL items in the Wave window
Once you have the HDL items you want in the Wave window, you can edit and
format the list in the name/value pane to create the view you find most useful. (See
also, "Adding HDL items in the Wave window" (p81).)
To edit an item:
Select the item’s label in the left name/value windowpane or its waveform in the
right windowpane. Move, copy or remove the item by selecting commands from
the Wave window Edit menu (p76) menu.
82
- ModelSim EE Graphic Interface
ModelSim EE Tutorial
Wave window
You can also click+drag to move items within the name/value windowpane:
• to select several contiguous items:
click+drag to select additional items above or below the original selection
• to select several items randomly:
control+click to add or subtract from the selected group
• to move the selected items:
re-click and hold on one of the selected items, then drag to the new location
To format an item:
Select the item’s label in the left name/value pane or its waveform in the right
windowpane, then use the Prop > Signal Props... menu selection. The resulting
Wave Signal Properties dialog box allows you to set the item’s height, color,
format, range, and radix.
The Wave Signal Properties dialog
box includes these options:
• Signal
Indicates the name of the currently selected
signal.
• Label
Allows you to specify a new label (in the
name/value pane) for the selected item.
• Height
Allows you to specify the height (in pixels)
of the waveform.
• Color
Lets you override the default color of a
waveform by selecting a new color from the
color palette, or by entering an X-Windows
color name.
ModelSim EE Tutorial
ModelSim EE Graphic Interface -
83
Wave window
This illustration shows
the same item displayed
in each wave format
outlined below. Note
that the signal labels
were also changed.
HDL items of VHDL type
integer and floating point,
and Verilog type real can
be formatted as analog in
the Wave window.
• Format: Analog Step
Displays a waveform of an
integer, real or time type,
with the height and offset
determined by the
Pixels = specification and
the value of the item.
• Format: Analog Interpolated
Displays the waveform in interpolated style.
• Format: Analog Backstep
Displays the waveform in backstep style. Used for power calculations.
• Format: Literal
Displays the waveform as a box containing the item value (if the value fits the
space available). This is the only format that can be used to list a record.
• Format: Logic
Displays values as 0, 1, X, Z, H, L, U, or -.
• Format: Event
Marks each transition during the simulation run.
• Pixels = (value + <offset>) * <scale factor>
This choice works with analog items only and allows you to decide on the scale
of the item as it is seen on the display. Value is the value of the signal at a given
time, <offset> is the number of pixels offset from zero. The <scale factor> reduces
(if less than 1) or increases (if greater than 1) the number of pixels displayed.
• Radix
The explicit choices are Symbolic, Binary, Octal, Decimal, Unsigned,
Hexadecimal, and ASCII. If you select Default the signal’s radix changes
whenever the default is changed using the radix command. Item values are not
translated if you select Symbolic.
84
- ModelSim EE Graphic Interface
ModelSim EE Tutorial
Wave window
Sorting a group of HDL items
Use the Edit > Sort menu selection to sort the items in the name/value pane.
Finding items by name or value in the Wave window
The Find dialog box allows you to search for text strings in the Wave window.
From the Wave window select Edit > Find to bring up the Find dialog box.
Choose either the Name or Value field to search from
the drop-down menu, and enter the value to search for
in the Find field. Find the item by searching Forward
(down) or Reverse (up) through the Wave window
display.
Searching for item values in the Wave window
Select an item in the Wave window. From the Wave window menu bar select Edit
> Search to bring up the Wave Signal Search dialog box.
The Wave Signal Search dialog box
includes these options:
• Signal Name <item_label>
This indicates the item currently selected
in the Wave window; the subject of the
search.
• Search Options: Ignore Glitches
Ignore zero width glitches in VHDL
signals and Verilog nets.
• Search Options: Reverse Direction
Search the list from right to left. Deselect
to search from left to right.
• Search Options: Search for Signal Value
Reveals the Search Value field; search for the value specified in the Search
Value field (the value must be formatted in the same radix as the display). If no
value is specified the search will look for transitions.
ModelSim EE Tutorial
ModelSim EE Graphic Interface -
85
• Search Options: Search for
Expression
Reveals the Search Expression
field and the Use Expression
Builder button; searches for
the expression specified in the
Search Expression field
evaluating to a boolean true.
Wave Signal Search dialog box with Search
for Signal Value selected
The expression may involve
more than one signal but is
limited to signals logged in the
List window. Expressions may
include constants, variables,
and macros. If no expression is
specified, the search will give
an error. See the ModelSim
EE/PLUS Reference Manual
for more information on
expression syntax and the use
of the Expression Builder.
• Search Occurrences
You can search for the n-th
transition or the n-th match on
value or expression; Search
Occurrences indicates the
number of transitions or
matches for which to search.
Wave Signal Search dialog box with Search for Expression selected
86
- ModelSim EE Graphic Interface
ModelSim EE Tutorial
Wave window
Using time cursors in the Wave window
When the Wave window is first drawn, there is one cursor in it at time zero.
Clicking anywhere in the waveform display brings that cursor to the mouse
location.
You can add additional cursors to the waveform pane with the
Cursor > Add Cursor menu selection, or with the Add Cursor
button on the toolbar.
The selected cursor is drawn as a solid line; all other cursors are
drawn with dotted lines.
Remove a cursor by selecting it and choosing using the Cursor >
Delete Cursor menu selection, or use the Add Cursor button on
the toolbar.
Finding a cursor
Choose a specific
cursor view with
Cursor > Goto
menu selection. The
cursor value (on the
Goto list)
corresponds to the
simulation time of
that cursor.
Making cursor measurements
Each cursor is displayed with a time box showing the precise simulation time at
the bottom. When you have more than one cursor, each time box appears in a
separate track at the bottom of the display. VSIM also adds a delta measurement
showing the time difference between the two cursor positions.
If you click in the waveform display, the cursor closest to the mouse position is
selected and then moved to the mouse position. Another way to position multiple
cursors is to use the mouse in the time box tracks at the bottom of the display.
Clicking anywhere in a track selects that cursor and brings it to the mouse
position.
ModelSim EE Tutorial
ModelSim EE Graphic Interface -
87
Wave window
The cursors are designed to snap to the closest wave edge to the left on the
waveform that the mouse pointer is positioned over. You can control the snap
distance from "Wave category" in the dialog box available from the Properties >
Display menu selection; see "Setting Wave window display properties" (p81).
You can position a cursor without snapping by dragging in the area below the
waveforms.
Finding next and previous transitions
You can move the cursors to the next and previous transition of the selected item
with the Find Transition buttons on the toolbar:
Find Previous
Transition
locate the previous
signal value change
for the selected signal
Find Next Transition
locate the next signal
value change for the
selected signal
Zooming - changing the waveform display range
Zooming lets you change the simulation range in the windowpane display. You
can zoom with either the Zoom menu, the toolbar buttons, mouse, keyboard, or
VSIM commands.
Using the Zoom menu - three-button mouse only
You can use the Wave window menu bar, or call up a Zoom menu window with
the right mouse button in the right windowpane. The menu options include:
• Zoom Full
Redraws the display to show the entire simulation from time 0 to the current
simulation time.
• Zoom In
Zooms in by a factor of two, increasing the resolution and decreasing the visible
range horizontally, cropping the view on the right. The starting time is held
static.
• Zoom Out
Zooms out by a factor of two, decreasing the resolution and increasing the
88
- ModelSim EE Graphic Interface
ModelSim EE Tutorial
Wave window
visible range horizontally, extending the view on the right. The starting time is
held static.
• Zoom Last
Restores the display to where it was before the last zoom operation.
• Zoom Range
Brings up a dialog box that allows you to enter the beginning and ending times
for a range of time units to be displayed.
Zooming with the toolbar buttons
Use these buttons on the Wave window toolbar to zoom.
Zoom in 2x
zoom in by a factor of
two from the current
view
Zoom area
use the cursor to
outline a zoom area
Zoom out 2x
zoom out by a factor of
two from current view
Zoom Full
zoom out to view the
full range of the
simulation from time 0
to the current time
Zooming with the mouse
To zoom with the mouse,
position the mouse cursor to
the left side of the desired
zoom interval, press the
middle mouse button (3button mouse) or the right
button (2-button mouse),
continue to press, and drag to
the right, then release when
the box has expanded to the
right side of the desired zoom
interval.
drag from left to right with the mouse button to zoom
(3-button mouse - middle button, 2-button mouse - right button)
ModelSim EE Tutorial
ModelSim EE Graphic Interface -
89
Wave window
Zooming keyboard shortcuts
See the table below for list of Wave window keyboard shortcuts.
Wave window keyboard shortcuts
Using the following keys when the mouse cursor is within the Wave
window will cause the indicated actions:
90
Key
Action
i I or +
zoom in
o O or -
zoom out
f or F
zoom full
l or L
zoom last
r or R
zoom range
<arrow up>
scroll waveform display up
<arrow down>
scroll waveform display down
<arrow left>
scroll waveform display left
<arrow right>
scroll waveform display right
<page up>
scroll waveform display up by page
<page down>
scroll waveform display down by page
<tab>
searches forward (right) to the next transition on the selected signal - finds the
next edge
<shift-tab>
searches backward (left) to the previous transition on the selected signal - finds
the previous edge
<control-f>
opens the find dialog box; search within the specified field in the wave-name pane
for text strings
- ModelSim EE Graphic Interface
ModelSim EE Tutorial
3 - ModelSim EE Lessons
Chapter contents
Choose the lessons appropriate for your simulator version:
PLUS, and VHDL lessons
Basic VHDL simulation . .
Debugging a VHDL design . .
Running a batch-mode simulation
Executing commands at startup.
Tcl/Tk and ModelSim . . .
.
.
.
.
.
.
.
.
.
.
.
.
.
.
.
.
.
.
.
.
.
.
.
.
.
.
.
.
.
.
.
.
.
.
.
.
.
.
.
.
.
.
.
.
.
.
.
.
.
.
.
.
.
.
.
.
.
.
.
.
.
.
.
.
.
. 94
103
112
114
115
.
.
.
.
.
.
.
.
.
.
.
.
.
129
Mixed VHDL/Verilog simulation .
.
.
.
.
.
.
.
.
.
.
.
.
143
Finding names, and searching for values
Using the Wave window . . . .
.
.
.
.
.
.
.
.
.
.
.
.
.
.
.
.
.
.
.
.
.
.
150
153
PLUS, and VLOG lesson
Basic Verilog simulation
.
.
PLUS lesson
PLUS, VHDL, and VLOG practice
Assumptions
We assume that you are familiar with the your platform’s operating system and
graphical interface. Preparation for some of the examples leaves certain details up
to you - you will decide the best way to create directories, copy files and execute
programs within your operating system. (When you are operating the simulator
within ModelSim’s GUI, the interface is consistent for all platforms.)
We also assume that you have a working knowledge of HDL design. Although
ModelSim is an excellent tool to use while learning HDL concepts and practices,
this guide is not written to support that goal.
Additional details for VHDL, Verilog, and mixed VHDL/Verilog simulation can
be found in the ModelSim EE/PLUS Reference Manual. (See "Where to find our
documentation" (p15).)
Examples may show either UNIX or Windows path separators - use separators
appropriate for your operating system when trying the examples.
ModelSim EE Tutorial
ModelSim EE Lessons - 91
Command, button, and menu equivalents
Many of the lesson steps are accomplished by a button or menu selection. When
appropriate, VSIM command-line (PROMPT:) or menu (MENU:) equivalents for
these selections are shown in parentheses within the step. This example shows
three options to the run -all command, a button, prompt command, and a menu
selection.
(PROMPT: run -all) (MENU: Run > Run -All)
Drag and drop too
"Drag and Drop" (p20) allows you to copy and move signals among windows. If
drag and drop applies to a lesson step, it is noted in a fashion similar to MENUS and
PROMPTS with: DRAG&DROP.
Commands and their history
As you work on the lessons keep an eye on the Main transcript. The commands
invoked by buttons and menu selections are echoed there. You can scroll through
the command history with the up and down arrow keys, or the command history
may be reviewed with several shortcuts at the ModelSim/VSIM prompt.
92
Shortcut
Description
!!
repeats the last command
!n
repeats command number n; n is the VSIM prompt number, i.e., for this prompt:
VSIM 12>, n =12
!abc
repeats the most recent command starting with "abc"
^xyz^ab^
replaces "xyz" in the last command with "ab"
click on prompt
left-click once on a previous ModelSim or VSIM prompt in the transcript to copy
the command typed at that prompt to the active cursor
his or history
shows the last few commands (up to 50 are kept)
- ModelSim EE Lessons
ModelSim EE Tutorial
Reusing commands from the Main transcript
ModelSim’s Main transcript may be saved, and the resulting file used as a DO
(macro) file to replay the transcribed commands. You can save the transcript at
any time before or during simulation. You have the option of clearing the
transcript (File > Clear Transcript) if you don’t want to save the entire command
history.
To save the contents of the transcript select File > Save Main As from the Main
menu.
Replay the saved transcript with the do command:
do <do file name>
For example, if you saved a series of compiler commands as mycompile.do (the.do
extension is optional), you could recompile with one command:
do mycompile.do
Note:
Neither the prompt nor the Return that ends a command line are shown in the examples.
ModelSim EE Tutorial
ModelSim EE Lessons -
93
Basic VHDL simulation
Basic VHDL simulation
The goals for the first lesson are:
• create a library
• compile a VHDL file
• start the simulator
• understand the basic VSIM windows, mouse, and menu conventions
• run VSIM using the run command
• list some signals
• use the waveform display
• force the value of a signal
• single-step through a simulation run
• set a breakpoint
• use the Wave window
1
You’ll start out by creating a new directory for this exercise (in case other users will
be working these lesson). Create the directory, then copy all of the VHDL (.vhd) files
from the /<install_dir>/<modelsim_dir>/examples to the new directory.
Make sure the new directory is the current directory.
2
Start ModelSim with one of the following:
for UNIX at the shell prompt:
vsim -gui
for Windows - your option - DOS prompt, shortcut, or Start menu:
modelsim.exe
This opens the ModelSim Main window without loading a design.
94
- ModelSim EE Lessons
ModelSim EE Tutorial
Basic VHDL simulation
3
Before you compile any HDL code, you’ll need a design library to hold the
compilation results. To create a new design library, make this menu selection in the
Main window: Library > Create a New Library. (PROMPT: vlib work)
In the Create a New Library dialog
box select Create: a new library
and a logical mapping to it.
Make sure Library: indicates
work, then select OK. This
creates a subdirectory named work
- your design library - within the
current directory. This
subdirectory contains a special file
named _info. (Do not create these
using UNIX or Windows
commands—always use the
Library menu or the vlib
command from either the
ModelSim or UNIX/DOS
prompt.)
ModelSim EE Tutorial
ModelSim EE Lessons -
95
Basic VHDL simulation
4
Compile the file counter.vhd into the new library by selecting the Compile button on
the toolbar:
(PROMPT: vcom counter.vhd)
This opens the Compile HDL Source Files dialog box.
Complete the
compilation by
selecting
counter.vhd from
the file list and
clicking Compile.
Select Done when
you are finished.
You can compile
multiple files in one
session from the file
list. Individually
select and Compile
the files in the order
required by your
design.
5
Start the simulator by selecting the Load Design button from the toolbar:
(PROMPT: vsim counter)
96
- ModelSim EE Lessons
ModelSim EE Tutorial
Basic VHDL simulation
The Load Design dialog box comes up, as shown below (you won’t see this dialog
box if you invoked vsim with counter from the command line).
The Load Design dialog box allows you to select the library and the top-level
design unit to simulate. You can also select the resolution limit for this simulation.
By default, the following will appear for this simulation run:
•
•
•
•
Simulator Resolution: default (the default is 1 ns)
Library: work
Design Unit: counter
Description: entity
Note: If the Design Unit is an entity (like counter in this design) you can click on the plus-box prefix to
view any associated architectures; see the graphic below.
ModelSim EE Tutorial
ModelSim EE Lessons -
97
Basic VHDL simulation
Î
6
Select the entity counter and choose Load to accept these settings.
7
Now you can open all of the VSIM windows with this Main window menu selection:
View > All.
(PROMPT: view *)
8
To display the top-level signals in the List window, select the Signals window and
make this Signal menu selection: View > List > Signals in Region.
(PROMPT: add list /counter/*)
9
Next add top-level signals to the Wave window with a similar Signals menu selection:
View > Wave > Signals in Region.
(PROMPT: add wave /counter/*)
10 You can apply stimulus to the clock input by moving the pointer to the Main window
and entering the following command at the VSIM prompt:
force clk 1 50, 0 100 -repeat 100
98
- ModelSim EE Lessons
ModelSim EE Tutorial
Basic VHDL simulation
The force command you just invoked is interpreted by VSIM to mean:
• force clk to the value 1 at 50 ns after the current time
• then to 0 at 100 ns after the current time
• repeat this cycle every 100 ns
Note how the Run Length selector on the toolbar now indicates 100 (ns is the
current default resolution). You will see the effects of this force command as soon
as you tell the simulator to run.
11 Now you will exercise two different Run functions from buttons on the Main or Wave
window toolbar. Select the Run button first. When the run is complete, select Run All.
Run. This causes the simulation to run and then stop after 100 ns.
(PROMPT: run 100) (MENU: Run > Run 100ns)
Run -All. This causes the simulator to run forever. To stop the run, go
on to the next step.
(PROMPT: run -all) (MENU: Run > Run -All)
ModelSim EE Tutorial
ModelSim EE Lessons -
99
Basic VHDL simulation
12 Select the Break button on the Main toolbar to end the run.
(KEYBOARD: control+c)
The arrow points to the next HDL statement to be executed. Next, you will set a
breakpoint in the function on line 18.
13 Move the pointer to the VSIM Source window. Using the vertical scroll bar, scroll until
line 18 is visible. Click at or near line number 18 to set the breakpoint. You should see
a dot next to the line number where the breakpoint is set. This breakpoint can be
toggled on and off by clicking it.
(PROMPT: bp counter.vhd 18)
100
- ModelSim EE Lessons
ModelSim EE Tutorial
Basic VHDL simulation
14 Select the Continue Run button to resume the run that you interrupted. VSIM will hit
the breakpoint, as shown by an arrow in the VSIM Source window and by a message
in the Main window. Also note that the parameters and variables within the function
are displayed in the VSIM Variables window.
(PROMPT: run -continue) (MENU: Run > Continue)
15 Click the Step button to single-step through the simulation. Notice that the values
change in the VSIM Variables window. You can keep clicking Step if you wish.
(PROMPT: run -step) (PROMPT: step)
Now let’s take a look at the simulation in the Wave window.
In the Wave window, you
can use cursors to:
• probe for values - Signal
values update whenever you
move the cursor.
• find signal transition times Click a signal edge, the cursor
displays the time.
• measure time intervals - Time
is displayed between two cursors.
ModelSim EE Tutorial
ModelSim EE Lessons -
101
Basic VHDL simulation
n
iti
o
fu
ea
om
zo
om
zo
ll
x
ou
t2
2x
zo
om
in
om
xt
zo
ne
ar
ns
ns
t ra
io
u
s
tra
d)
d
fin
fin
d
pr
ev
el
ec
te
(s
or
e
rs
cu
le
t
de
d
ad
These Wave window
buttons give you quick
access to zooming and
cursor placement.
cu
rs
iti
o
n
or
16 Experiment with using the cursors, buttons, scrolling, and zooming (see page 157 for
Wave window shortcuts).
Click and drag with
the center button
(3-button mouse)
or right button
(2-button mouse)
to zoom the
display.
interval measurement
selected cursor is bold
17 When you’re done experimenting, quit the simulator by entering the command:
quit -force
This command exits VSIM without saving data. Your window positions will be
saved in the modelsim.ini file and the windows will close. (Refer to the ModelSim
Reference Manual for additional information on the modelsim.ini file.)
102
- ModelSim EE Lessons
ModelSim EE Tutorial
Debugging a VHDL design
Debugging a VHDL design
The goals for this lesson are:
• show an example of a VHDL testbench - a VHDL architecture that instantiates
the VHDL design units to be tested, provides simulation stimuli, and checks the
results
• map a logical library name to an actual library
• change the default run length
• recognize assertion messages in the command window
• change the assertion break level
• restart the simulation run using the restart command
• examine composite types displayed in the VSIM Variables window
• change the value of a variable
• use a strobe to trigger lines in the VSIM List window
• change the radix of signals displayed in the VSIM List window
1
Return to the directory you created in "Basic VHDL simulation" (p94), and invoke
ModelSim:
for UNIX at the shell prompt:
vsim -gui
for Windows - your option - from the DOS prompt, a shortcut, or the Start menu:
modelsim.exe
2
Enter the following command at the ModelSim prompt to create the a new library:
vlib library_2
3
Compile the source files into the new library by entering this command at the system
prompt:
vcom -work library_2 gates.vhd adder.vhd testadder.vhd
4
Now let’s map the new library to the work library. To create a mapping you can edit
the [Library] section of the modelsim.ini file, or you can create a logical library name
with the vmap command:
vmap work library_2
ModelSim EE Tutorial
ModelSim EE Lessons -
103
Debugging a VHDL design
ModelSim modifies the modelsim.ini file for you.
5
Start the simulator by entering the following command at the UNIX/DOS prompt:
vsim
The Load Design dialog box is displayed, as shown below.
6
Perform the following steps in this
dialog box:
• Make sure that the simulator
resolution is ns (default).
• Look in the Design Unit scroll
box and select the configuration
named test_adder_structural.
• Click Load to accept the
settings.
(PROMPT: vsim -t ns
work.test_adder_structural)
7
To open all of the VSIM windows,
enter the following command in
the Main window at the VSIM
prompt:
view *
(Main MENU: View > All)
ModelSim will open all the windows in the positions you left them in at the end of
the last exercise if no one has run the simulator since then.
8
Drag and drop the top-level signals to the List window in the following manner: make
sure the hierarchy is not expanded (no minus boxes), select all signals in the Signals
window with Edit > Select All, then drag the selected signals to the List window.
(Signals MENU: View > List > Signals in Region) (PROMPT: add list /*)
104
- ModelSim EE Lessons
ModelSim EE Tutorial
Debugging a VHDL design
9
To add top-level signals to the Wave window, enter the command:
add wave /*
(Signals MENU: View > Wave > Signals in Region) (DRAG&DROP)
10 Now change the default simulation run length to 1000 (ns) with the run length selector
on the Main toolbar. Click on the field to edit the number to 1000 (notice how the
arrows allow you to change the run length in increments).
(Main MENU: Options > Simulation > Defaults)
11 Next, you will run the simulator. Select the Run button on the Main toolbar.
(PROMPT: run)
A message in the Main window will notify you that there was an assertion error.
Let's find out what's wrong. Perform the following steps to track down the
assertion message.
ModelSim EE Tutorial
ModelSim EE Lessons -
105
Debugging a VHDL design
12 First, change the simulation assertion options. Make this Main menu selection:
Options > Simulation.
13
Select the
Assertions page.
Change the selection
for Break on
Assertion to Error
and click OK. This
will cause the
simulator to stop at
the HDL statement
after the assertion is
displayed.
14 To restart the simulation select the Restart button on the Main toolbar.
(Main MENU: File > Restart) (PROMPT: restart)
Make sure all items in the Restart dialog box are selected, then click Restart.
106
- ModelSim EE Lessons
ModelSim EE Tutorial
Debugging a VHDL design
15 From the Main toolbar select the Run button.
(Main MENU: Run > Run 1000 ns) (PROMPT: run)
Notice that the arrow in the Source window is pointing to the statement after the
assertion.
16 If you turn to the Variables window now, you can see that i = 6. This indicates that the
simulation stopped in the sixth iteration of the test pattern’s loop.
ModelSim EE Tutorial
ModelSim EE Lessons -
107
Debugging a VHDL design
17 Expand the variable named test_patterns by clicking the [+]. (You may need to resize
the window for a better view.)
18 Also expand the sixth record in the array, that is, test_patterns(6), by clicking the [+].
The Variables window should be similar to the one below.
The assertion shows that the signal sum does not equal the sum field in
test_patterns(6). Note that the sum of the inputs a, b, and cin should be equal to
the output sum. But there is an error in the test vectors. To correct this error, you
need to restart the simulation and modify the initial value of the test vectors.
19 In the Main window, type:
restart -f
The -f option causes VSIM to restart without popping up the confirmation dialog.
108
- ModelSim EE Lessons
ModelSim EE Tutorial
Debugging a VHDL design
20 Once the simulation has restarted, add variables to the Variables window by selecting
the test /testbench process in the Process window.
21 In the Variables window, expand test_patterns, and test_pattern(6) again. Then
highlight the sum record by clicking on the variable name (not the box before the
name) and then use the Edit > Change menu selection.
22 Select the last four bits in the value field 1000 by dragging the pointer across them.
Then replace them with 0111, and click Change. (Note that this is a temporary edit,
you must use your text editor to permanently change the source code.)
23 Select the Run button from the Main toolbar.
(Main MENU: Run > Run 1000 ns) (PROMPT: run)
At this point, the simulation will run without any errors.
Next you will learn how to change the new-line triggering for the List window.
ModelSim EE Tutorial
ModelSim EE Lessons -
109
Debugging a VHDL design
By default, a new line is displayed in the List window for each transition of a listed
signal. The following steps will change the triggering so the values are listed every
100 ns.
24 In the List window make this menu selection: Prop > Display Props.
25
Perform these steps on
Triggers page in the
Modify Display Properties
(list) dialog box:
• Deselect Trigger On:
Signals to disable
triggering on signals.
• Select Trigger On:
Strobe to enable the
strobe.
• Enter 100 in the Strobe
Period field.
• Enter 70 in the First
Strobe at field.
• Click OK to accept the
settings.
26 Your next action will be to change the radix for a, b, and sum to decimal.
Make this List window menu selection: Prop > Signal Props. This will open the
Modify Signal Properties (list) dialog box.
110
- ModelSim EE Lessons
ModelSim EE Tutorial
Debugging a VHDL design
27 In the List window select the signal you want to change, then make the property
changes in the dialog box. Make the following property changes:
• Select signal a, then click Decimal, then click Apply.
• Select signal b, then click Decimal, then Apply.
• Select signal sum, then click Decimal, then OK.
This brings you to the end of this lesson, but feel free to experiment further with
the menu system. When you are ready to end the simulation session, quit VSIM
without saving data by entering the following command at the VSIM prompt:
quit -force
ModelSim EE Tutorial
ModelSim EE Lessons -
111
Running a batch-mode simulation
Running a batch-mode simulation
The goals for this lesson are:
• run a batch-mode VHDL simulation
• execute a macro (DO) file
• view a saved simulation
You’ll work this lesson from a DOS or UNIX prompt.
1
To set up for this lesson you’ll need to create a new directory and make it the current
directory. Copy this file into your new directory:
/<install_dir>/<modelsim_dir>/examples/counter.vhd
2
Create a new design library:
vlib work
3
Map the library:
vmap work work
4
Then compile the source file:
vcom counter.vhd
5
You will use a macro file that provides stimulus for the counter. For your convenience,
a macro file has been provided with ModelSim EE. You need to copy this macro file
from the installation directory to the current directory:
<install_dir>/<modelsim_dir>/examples/stim.do
6
Create a batch file using an editor; name it yourfile. With the editor, put the following
on separate lines in the file:
add list -decimal *
do stim.do
write format list counter.lst
7
To run the batch-mode simulation, enter the following command:
vsim -wav saved.wav counter < yourfile
This is what you just did in Step 7:
• invoked the VSIM simulator on a design unit called "counter"
112
- ModelSim EE Lessons
ModelSim EE Tutorial
Running a batch-mode simulation
• the -wav switch instructed the simulator to save the simulation results in a log
file named saved.wav
• used the contents of yourfile to specify that values are to be listed in decimal, to
execute a stimulus file called stim.do, and to write the results to a file named
counter.lst, the default for a design named counter
8
Since you saved the simulation results in saved.wav, you can view the simulation
results by starting up VSIM with its -view switch:
vsim -view saved.wav
9
Open these windows with the VIEW button or the equivalent command:
view structure signals list wave
Note: If you open the Process or Variables windows they will be empty. You are looking at a saved
simulation, not examining one interactively; the logfile saved in saved.wav was used to reconstruct the current
windows.
10 Now that you have the windows open, put the signals in them:
add wave *
add list *
11 Use the available VSIM windows to experiment with the saved simulation results and
quit when you are ready:
quit -f
For additional information on the batch and command line modes, please refer to
the ModelSim EE/PLUS Reference Manual.
ModelSim EE Tutorial
ModelSim EE Lessons -
113
Executing commands at startup
Executing commands at startup
The goals for this lesson are:
• specify the design unit to be simulated on the command line
• edit the modelsim.ini file
• execute commands at startup with a DO file
Start this lesson from either the UNIX or DOS prompt.
1
For this lesson, you will use a macro (DO) file that provides startup information. For
convenience, a startup file has been provided with the ModelSim program. You need
to copy this DO file from the installation directory to your current directory:
/<install_dir>/<modelsim_dir>/examples/startup.do
2
Next, you will edit the system initialization file in the /<modelsim_dir> directory to
specify a command that is to be executed after the design is loaded. To do this, open
the modelsim.ini file using a text editor and uncomment the following line in the [vsim]
section of the file:
Startup = do startup.do
3
Take a look at the DO file. It uses the predefined variable $entity to do different things
at startup for different designs.
4
Start the simulator and specify the top-level design unit to be simulated by entering the
following command at the UNIX/DOS prompt:
vsim counter
Notice that the simulator loads the design unit without displaying the Load Design
dialog box. This is handy if you are simulating the same design unit over and over.
Also notice that all the windows are open. This is because the view * command is
included in the startup macro.
5
If you plan to continue with the following practice sessions, keep ModelSim running.
If you would like to quit the simulator, enter the following command at the VSIM
prompt:
quit -force
6
114
You won’t need the startup.do file for any other examples, so use your text editor to
comment out the "Startup" line in modelsim.ini.
- ModelSim EE Lessons
ModelSim EE Tutorial
Tcl/Tk and ModelSim
Tcl/Tk and ModelSim
This lesson is divided into several Tcl examples intended to give you a sense of
Tcl/Tk’s function within ModelSim. The examples include a custom simulation
interface created with Tcl/Tk. You must be using ModelSim EE/PLUS or
ModelSim EE/VHDL to complete these exercises.
Examples in this lesson
Example 1 - create a "hello world" button widget (p122)
Example 2 - add a procedure that gets called by a button push (p123)
Example 3 - The traffic light simulation (p124)
Example 4 - draw a state machine that represents the simulation (p127)
More information on Tcl/Tk
Tcl print references
Sources of information about Tcl include Tcl and the Tk Toolkit by John K.
Ousterhout, published by Addison-Wesley Publishing Company, Inc., and
Practical Programming in Tcl and Tk by Brent Welch published by Prentice Hall.
Tcl online references
The following are a few of the many Tcl references available:
• When using ModelSim make this VSIM Main menu selection: Help > Tcl Man
Pages.
• Tcl man pages are also available at: www.elf.org/tcltk-man-html/contents.htm
• Tcl/Tk general information is available from the Tcl/Tk Consortium:
www.tclconsortium.org
• The Scriptics Corporation, John Ousterhout’s company (the original Tcl
developer): www.scriptics.com.
ModelSim EE Tutorial
ModelSim EE Lessons -
115
Tcl/Tk and ModelSim
How Tcl/Tk works with ModelSim
ModelSim incorporates Tcl as an embedded library package. The Tcl library
consists of a parser for the Tcl language, routines to implement the Tcl built-in
commands, and procedures that allow Tcl to be extended with additional
commands specific to ModelSim.
ModelSim generates Tcl commands and passes them to the Tcl parser for
execution. Commands may be generated by reading characters from an input
source, or by associating command strings with ModelSim’s user interface
features, such as menu entries, buttons, or keystrokes.
When the Tcl library receives commands it parses them into component fields and
executes built-in commands directly. For commands implemented by ModelSim,
Tcl calls back to the application to execute the commands. In many cases
commands will invoke recursive invocations of the Tcl interpreter by passing in
additional strings to execute (procedures, looping commands, and conditional
commands all work in this way).
ModelSim gains a programming advantage by using Tcl for its command
language. ModelSim can focus on simulation-specific commands, while Tcl
provides many utility commands, graphic interface features, and a general
programming interface for building up complex command procedures.
By using Tcl, ModelSim need not re-implement these features, a benefit that
allows it’s graphic interface to remain consistent on all platforms. (The only
vestige of the host platform’s graphic interface is the window frame manager.)
116
- ModelSim EE Lessons
ModelSim EE Tutorial
Tcl/Tk and ModelSim
The custom-traffic-light interface
The subject of our main Tcl/Tk lesson is a simple traffic-light controller. The
system is comprised of three primary components: a state machine, a pair of traffic
lights, and a pair of traffic sensors. The components are described in three VHDL
files: traffic.vhd (the state machine), queue.vhd (the traffic arrival queue) and
tb_traffic.vhd (the testbench).
You could, of course, simulate this system with ModelSim’s familiar interface, but
Tcl/Tk provides us the option to try something different. Since we’re simulating
something most of us have seen and experienced before, we can create an intuitive
interface unique to the simulation.
Assumptions
The example assumes that source files were previously compiled. Here’s how it
works:
Î
VHDL source files
describe the system
Î
Tcl procedures create and
connect the interface, plus the
source files, to ModelSim
Î
ModelSim commands are run
via the new interface using the
Tcl procedures
draw_intersection
traffic.vhd
queue.vhd
tb_traffic.vhd
connect_lights
vsim -lib vhdl/work tb_traffic
examine -value <light_timing>
draw_queues
draw_controls
ModelSim EE Tutorial
force -freeze $var $val ns
ModelSim EE Lessons -
117
Tcl/Tk and ModelSim
The result is a traffic intersection interface similar to this illustration:
wm widget
Calls to the operating system
window manager to create
the
"traffic"
window.
frame and
scale widget
A scale widget
within a frame
widget creates
an analog entry
device for a minimum to a maximum value and
invokes
the
VSIM force command
entry widget
The entry widget
(contained within
a frame widget)
can facilitate entry, or in this case,
provides a display
for a VSIM examine command.
118
- ModelSim EE Lessons
canvas widget
The background,
lines and traffic
lights are created
with the canvas
widget.
button widgets
Each button invokes the indicated VSIM run
or break command.
label widget
A static label is added to the end of the
connect_lights procedure to indicate
connection to the
simulator.
ModelSim EE Tutorial
Tcl/Tk and ModelSim
Tk widgets
The intersection illustration points out several Tcl/Tk "widgets". A widget is
simply a user interface element, like a menu or scrolled list. Tk widgets are
referenced within Tcl procedures to create graphic interface objects. The Tk tool
box comes with several widgets, additional widgets can be created using these as
a base.
Controlling the simulation
The components of the intersection interface have the following effect within
ModelSim:
Intersection control used
Effect in ModelSim
Run 1000 button
invokes the run command for 1000 ns
Run Forever button
invokes the run -all command
Break button
invokes the break command
light timing control
invokes the force command with the arguments for the
indicated signal and time
arrival time control
invokes the force command with the arguments for the
indicated direction and time
waiting queue
any time you change a control the examine command is
invoked to display the value of the waiting queue
Saving time
Since several intersection controls invoke a VSIM command and arguments with
a single action (such as the movement of a slider), this custom interface saves time
compared to invoking the commands from the command line or ModelSim menus.
Copies of the original example files
Additional copies of the Tcl example files from these exercises are located in the../
examples/tcl_tutorial/originals directory.
ModelSim EE Tutorial
ModelSim EE Lessons -
119
Tcl/Tk and ModelSim
Solutions to the examples
Throughout the traffic intersection examples you will be modifying Tcl files to
complete the final intersection. You will find a completed set of intersection
examples ready-to-run in the tcl_tutorial/solutions directory. Invoke these
commands from the ModelSim prompt to run the intersection:
cd solutions
do traffic.do
Viewing files
If you would like to view the source for any of the Tcl files in our examples, use
the notepad command at either the ModelSim or VSIM prompt.
notepad <filename>
Most files are opened in read-only mode by default; you can edit the file by
deselecting read only from the notepad Edit menu.
The Tcl source command
The Tcl source command reads the Tcl file into the Tcl interpreter, which parses
the procedures for use within the current environment. Once sourced, a Tcl
procedure can be called from the ModelSim prompt as shown in the syntax below.
VSIM executes the instructions within the procedure.
Syntax
source <tcl filename>
<tcl procedure name>
Arguments
<tcl filename>
The Tcl file read into the VSIM Tcl interpreter with the source command.
<tcl procedure name>
The Tcl procedure defined within <tcl filename>, called from the ModelSim prompt, and
executed by VSIM.
The traffic.do file is a good example of the source command syntax (the file is a
macro that runs the traffic light simulation). Check it out with the notepad:
notepad traffic.do
120
- ModelSim EE Lessons
ModelSim EE Tutorial
Tcl/Tk and ModelSim
Example shortcuts
To save some typing, copy the commands from the PDF version of these
instructions and paste them at the ModelSim prompt. Paste with the right (2 button
mouse), or middle (3 button mouse). You can also select a ModelSim or VSIM
prompt from the Main transcript to paste a previous command to the current
command line.
Make a transcript DO file
You can rerun the commands executed during the current session with a Do file
created from the Main transcript. Make the DO file by saving the transcript with
the File > Save Main As menu selection at any time during the exercises. Run the
DO file to repeat the commands (do <do filename>).
Preparing for the Tcl/Tk examples
These steps must be completed before running the Tcl examples.
1
Create, and change to a new working directory for the Tcl/Tk exercises. Copy the
lesson files in the following directory (include all subdirectories and files) to your new
directory:
<install_dir>/<modelsim_dir>/examples/tcl_tutorial
2
Make the new directory the current directory, then invoke ModelSim:
for UNIX
vsim -gui
for Windows (from a shortcut or Start > Run, etc.)
modelsim.exe
3
At the ModelSim prompt, create a work library in the /vhdl directory:
vlib vhdl/work
4
Map the work library.
vmap work vhdl/work
5
Compile the VHDL example files with these commands (or the Compile dialog box):
vcom vhdl/traffic.vhd
vcom vhdl/queue.vhd
vcom vhdl/tb_traffic.vhd
Now you’re now ready to run the examples.
ModelSim EE Tutorial
ModelSim EE Lessons -
121
Tcl/Tk and ModelSim
Example 1 - create a "hello world" button widget
Before you begin the examples make sure you have completed "Preparing for the
Tcl/Tk examples" (p121).
In this example you will study a "hello world" button that prints a message when
pressed.
1
Source the Tcl file from the ModelSim prompt:
source hello.tcl
then run the procedure defined within hello.tcl:
hello_example
The file hello.tcl was read into the VSIM Tcl interpreter. The instructions in
hello_example procedure were then executed by VSIM, and "Hello World" was
printed to the Main transcript. Selecting the button will print the message again.
You’ve just created your first top-level widget!
2
Invoke the hello_example procedure again and notice how the new button replaces the
original button. The procedure destroyed the first button and created the new one. Get
a closer look at the source Tcl file with the notepad:
notepad hello.tcl
Close the hello_example window when you’re done.
122
- ModelSim EE Lessons
ModelSim EE Tutorial
Tcl/Tk and ModelSim
Example 2 - add a procedure that gets called by a button push
Before you begin this example make sure you have completed "Preparing for the
Tcl/Tk examples" (p121).
In this example you will study a larger Tcl example, and add a procedure that gets
called by a button push.
This example will display all of the gif images in the images directory. Each
button has a binding attached to it for "enter" events, and a binding for a mouse
button press. When the mouse enters the button graphic, the image file name is
printed to the Main window. When the mouse button is pushed its "widget" name
will be printed to the Main window.
1
Build an image viewer by invoking this command, and calling this procedure:
source images.tcl
image_example
2
Drag the mouse across the buttons and notice what happens in the Main transcript.
Push one of the buttons; you will see an error dialog box. You can solve this
problem by modifying the images.tcl file.
3
To view the source file press the See Source Code button at the bottom of the image
display or invoke notepad at the ModelSim prompt:
notepad images.tcl
You’ll find that the pushme procedure is missing; it’s commented out in
images.tcl.
4
Search for "proc push" using the Edit > Find menu selection in the notepad.
Remove the comments (the "#" symbols) to return the function to your source,
then close the image window with the Destroy button.
5
Once the pushme procedure is in place it will print its one parameter, the object name,
to the transcript.
After you have added the pushme procedure to your source, you need to resource
and rerun the Tcl procedure with these commands (use the up arrow to scroll
through the commands or type !source):
source images.tcl
image_example
ModelSim EE Tutorial
ModelSim EE Lessons -
123
Tcl/Tk and ModelSim
Press all the buttons and notice the object names in the Main transcript. Close the
image example window when you’re done.
Example 3 - The traffic light simulation
In this example you’ll simulate an intersection with traffic lights. The simulation
interface you will create allows you to run "what if" scenarios efficiently.
Introduction of the traffic intersection widget
This portion of our example introduces the traffic intersection widget. You’ll add
other widgets to the intersection to create a custom traffic simulation environment.
Once again, make sure you have completed "Preparing for the Tcl/Tk examples"
(p121) before working this example.
1
Draw the intersection by invoking this command and procedure at the ModelSim
prompt:
source intersection.tcl
draw_intersection
2
From the ModelSim prompt, use the procedure set_light_state to change the color of
the lights:
set_light_state green .traffic.i.ns_light
set_light_state green .traffic.i.ew_light
You can use the Copy and Paste buttons on the Main toolbar to help build
instructions from previous commands.
3
View the source code with this command at the ModelSim prompt:
notepad intersection.tcl
You can locate the set_light_state procedure with Edit > Find from the Main
menu (it’s located toward the middle of the file).
Connect traffic lights to the simulation
Using the intersection widget, you will add when statements to connect the lights
to the real simulation. Once the connection is made you will simulate the traffic
light controller and watch the lights change.
We'll use VSIM when statements to condition the simulation to call our Tcl
program when a desired simulation condition happens.
124
- ModelSim EE Lessons
ModelSim EE Tutorial
Tcl/Tk and ModelSim
For our example, the desired condition is the state of the lights. Whenever the state
of the light in the simulation changes, we want to change the color of the light on
the screen.
4
Load the VHDL libraries you compiled in preparation for these examples using this
command at the ModelSim prompt:
vsim tb_traffic
Be sure you invoke this command before the start of the connect_lights
procedure, if you don't load the libraries, you won't have a design to simulate.
5
Connect the lights to the simulation with this command and procedure:
source lights.tcl
connect_lights
Try running the simulation now; select either run button on the intersection (select
Break if you used the Run Forever button - notice how the Source window opens
and indicates the next line to be executed). Only the East/West lights are working.
You can make both lights work by editing the lights.tcl file.
6
Edit lights.tcl with the notepad to add a when statement for the North/South light.
notepad lights.tcl
You need to add this because the current statement is for the East/West light only.
You’ll find the solution commented. (Remember to change the read-only status of
the file so you can edit it.)
You’ll find the code commented-out toward the end of the file (try Edit >Find
again).
7
After you have made the changes, reload and run the simulation again.
source lights.tcl
connect_lights
Both lights are now working.
Note: Remember, if you need to return to the original Tcl files (maybe you’ve edited the file and it doesn’t
work right) you’ll find the files in the tcl_tutorial/originals directory.
ModelSim EE Tutorial
ModelSim EE Lessons -
125
Tcl/Tk and ModelSim
Add widgets to display simulation information
Running the lights may be interesting, but not very useful - let’s add some displays
that will tell us what’s happening to the cars at the intersection.
Now you will add queue widgets to display the sum of the length of each pair of
queues as we simulate.
8
The East/West widget for displaying the total East/West queue length is already
provided. Let's edit the source to add a display for the North/South direction. Use the
notepad:
notepad queues.tcl
The solution is commented out in queues.tcl.
The Queue Display widget consists of an enclosing frame with two label widgets.
The first label is a simple text string. The second label is the value of the queue
length. The text in the second label will be updated whenever the queue lengths
change.
The update is accomplished by using a when statement.
9
After you have added your North/South widget, run your program by invoking this
command:
source queues.tcl
draw_queues
According to the traffic indicators, the cars are leaving the intersection at the same
rate. That seems fair, but if you are designing an intersection that responds to the
traffic flow into the intersection you might want to change the light cycles.
Perhaps one of the directions has more incoming traffic than the other.
Adding controls, in the form of scale widgets, allows you to quickly change the
assumptions about traffic flow into the intersection.
Add "scale" widgets to control the simulation
Next you will add Tk "scale" widgets that will control the arrival rates and the
length of the lights.
10 The East/West widget for controlling the East/West queue inter-arrival time is
provided. You'll edit the source code to add controls for the North/South direction. Use
this command:
notepad controls.tcl
126
- ModelSim EE Lessons
ModelSim EE Tutorial
Tcl/Tk and ModelSim
You can remove the comments in the code to make this change.
Similarly, add the North/South widget for controlling the length of the lights. The
East/West widget for light control is provided. (You can remove the comments in
the code to make this change as well.)
These control widgets are implemented using the Tk "scale" widgets, enclosed in
a frame.
When the value of the scale widget changes, it calls the command specified with
the -command option on each scale.
11 After you have added your North/South widgets, run your program with this
command:
source controls.tcl
draw_controls
Now you have a complete intersection interface. Try the run buttons and the slider
scales. You can also view the simulation with ModelSim’s GUI. Check the Source
window to view the VHDL files, and add signals to a Wave window
(add wave *). You can also change the run length in the Main window. Try using
the Run buttons in the Main window and the intersection window.
Keep the intersection simulation running to complete the next example. If you
want to recreate the final intersection environment quickly, invoke these
commands from the ModelSim prompt (after "Preparing for the Tcl/Tk examples"
(p121)).
cd solutions
do traffic.do
Example 4 - draw a state machine that represents the simulation
In this final example you will draw a state machine representing the simulation,
and connect it to the state signal inside the traffic light controller. Each transition
that the controller makes is displayed as it happens.
The intersection environment from the previous example needs to be running for
this example. To get it running quickly, invoke these commands from the
ModelSim prompt (after "Preparing for the Tcl/Tk examples" (p121)).
cd solutions
do traffic.do
1
Run the state machine with these commands:
source state-machine.tcl
draw_state_machine
ModelSim EE Tutorial
ModelSim EE Lessons -
127
Tcl/Tk and ModelSim
Let’s make some changes to the light colors and transition arrows.
2
Open the source file with this command:
notepad state-machine.tcl
Note the "ModelSim EXAMPLE part 1" comments in the file. Change "both_red"
state coordinates as indicated in the file.
3
Note the "ModelSim EXAMPLE part 2" comments in the file. Change the transition
arrow coordinates as indicated in the file.
4
Note the "ModelSim EXAMPLE part 3" comments in the file. Change the active color
from "black" to "purple".
5
Reuse the original commands when you're ready to run the state machine (remember,
to copy a previous command to the current command line, select the previous
ModelSim prompt):
source state-machine.tcl
draw_state_machine
Notice the changes. Try some additional changes if you wish.
This is the end of the Tcl/Tk examples. Continue to modify and test the examples
if you wish; you can recover the original files at any time in the
tcl_tutorial/originals directory.
128
- ModelSim EE Lessons
ModelSim EE Tutorial
Basic Verilog simulation
Basic Verilog simulation
You must be using ModelSim EE/PLUS or ModelSim EE/VLOG for this lesson.
The goals for this lesson are:
• compile a Verilog design
• examine the hierarchy of the design
• list signals in the design
• change list attributes
• set a breakpoint
• add and remove cursors in the waveform display
If you’ve completed any previous VHDL lesson you’ll notice that the Verilog and
VHDL simulation processes are almost identical.
1
Create, and change to a new directory to make it the current directory.
2
Copy the Verilog files from the /<install_dir>/<modelsim_dir>/examples directory
into the current directory.
Before you can compile a Verilog design, you need to create a design library in
the new directory. If you are only familiar with interpreted Verilog simulators
such as Cadence Verilog XL this will be a new idea for you. Since ModelSim is a
compiled Verilog, it requires a target design library for the compilation. ModelSim
can compile both VHDL and Verilog code into the same library if desired.
3
Invoke ModelSim:
for UNIX at the shell prompt:
vsim -gui
for Windows - your option - DOS prompt, shortcut, or Start menu:
modelsim.exe
This opens the ModelSim Main window without loading a design.
ModelSim EE Tutorial
ModelSim EE Lessons -
129
Basic Verilog simulation
4
Before you compile a source file, you’ll need a design library to hold the compilation
results. To create a new design library, make this menu selection in the Main window:
Library > Create a New Library. (PROMPT: vlib work)
In the Create a New Library dialog
box, select Create: a new library
and a logical mapping to it.
Make sure Library: indicates
work, then select OK. This
creates a subdirectory named work
- your design library - within the
current directory. This
subdirectory contains a special file
named _info. (Do not create these
using UNIX or Windows
commands—always use the
Library menu or the vlib
command from either the
ModelSim or UNIX/DOS
prompt.)
130
- ModelSim EE Lessons
ModelSim EE Tutorial
Basic Verilog simulation
Note: Remember, a library directory should not be created using UNIX/DOS commands - always use the
Main Library menu or the vlib command.
Next, you’ll compile the Verilog design.
The example design consists of two Verilog source files, each containing a unique
module. The file counter.v contains a module called counter, which implements
a simple 8-bit binary up-counter. The other file, tcounter.v, is a testbench module
(test_counter) used to verify counter. Under simulation you will see that these
two files are configured hierarchically with a single instance (instance name dut)
of module counter instantiated by the testbench. You'll get a chance to look at the
structure of this code later. For now, you need to compile both files into the work
design library.
5
Compile the counter.v, and tcounter.v files into the work library by selecting the
Compile button on the toolbar:
(PROMPT: vlog counter.v)
This opens the Compile HDL Source Files dialog box.
Complete the
compilation by
selecting both files.
Control+click (left
mouse button) on
counter.v, then
tcounter.v from the
file list and choose
Compile, then
Done.
ModelSim EE Tutorial
ModelSim EE Lessons -
131
Basic Verilog simulation
Note: The order in which you compile the two Verilog modules is not important. This may again seem
strange to Verilog XL users who understand the possible problems of interface checking between design
units, or compiler directive inheritance. ModelSim defers such checks until the design is loaded by VSIM (the
HDL simulator). So it doesn't matter here if you choose to compile counter.v before or after tcounter.v.
6
Start the simulator by selecting the Load Design button from the toolbar:
(PROMPT: vsim test_counter)
The Load Design dialog box comes up, as shown below.
132
- ModelSim EE Lessons
ModelSim EE Tutorial
Basic Verilog simulation
The Load Design dialog box allows you to select a design unit to simulate from
the specified library. You can also select the resolution limit for the simulation.
The default library is work and the default resolution is 1 ns (default).
7
Select Design Unit: test_counter and click Load to accept these settings.
8
Bring up the Signals, List and Wave windows by entering the following line at the
VSIM prompt within the Main window:
view signals list wave
(Main MENU: View > <window name>)
9
To list the top-level signals, move the pointer to the Signals window and make this
View menu selection: View > List > Signals in Region.
(PROMPT: add list /counter/*)
10 Now let’s add signals to the Wave window with ModelSim’s drag and drop feature.
ModelSim EE Tutorial
ModelSim EE Lessons -
133
Basic Verilog simulation
In the Signals window, control-click on each of the clk, rst, and count signals to
make a group selection. Click and hold on the group one more time, then drag it
to either pane of the Wave window.
HDL items can also be copied from one window to another (or within the Wave
and List windows) with the Edit > Copy and Edit > Paste menu selections. You
can also delete selected items with the Edit > Delete selection.
11 Next open the Structure and Source windows. From the Main window make these
menu selections: View > Structure and View > Source.
(PROMPT: view structure source)
134
- ModelSim EE Lessons
ModelSim EE Tutorial
Basic Verilog simulation
12 Rearrange the windows to give yourself a clear view of all open windows (try the
Window > Initial Layout menu selection), then click inside the Structure window.
Notice how this window describes the
hierarchical structure of the design. In the
illustration the Structure window shows three
hierarchical levels: test_counter, counter and
the function called increment. (If test_counter
is not displayed you simulated counter instead
of test_counter.)
You can navigate within the hierarchy by
clicking on any line with a "+" (expand) or "-"
(contract) symbol. The same navigation
technique works anywhere you find these
symbols within ModelSim.
13 Click on Function increment and notice how other VSIM windows are automatically
updated as appropriate.
Specifically, the Source window displays the Verilog code at the hierarchical level
you selected in the Structure window. The source-file name is also displayed in
the Source window title bar.
Using the Structure window in this way is analogous to scoping commands in
interpreted Verilogs.
For now, make sure the test_counter module is showing in the Source window by
clicking on the top line in the Structure window.
14 Now you will exercise different Run functions from the toolbar.
15 Select Run button on the Main toolbar. This causes the simulation to run and then stop
after 100 ns (the default simulation length).
(PROMPT: run) (MENU: Run > Run 100 ns)
ModelSim EE Tutorial
ModelSim EE Lessons -
135
Basic Verilog simulation
16 Next change the run length to 500 on the Run Length selector and select the Run
button again.
Now the simulation has run for a total of 600ns (the default 100ns plus the 500 you
just asked for). A status bar reflects this information at the bottom of the Main
window.
17 The last command you executed (run 500) caused the simulation to advance for 500ns.
You can also advance simulation to a specific time. Type:
run @ 3000
This advances the simulation to time 3000ns. Note that the simulation actually ran
for 2400ns (3000 - 600).
18 Now select the Run All button from the Main toolbar. This causes the simulator to run
forever.
(PROMPT: run -all) (Main MENU: Run > Run -All)
19 Select the Break button to stop the run.
(control + c with the Main window active)
136
- ModelSim EE Lessons
ModelSim EE Tutorial
Basic Verilog simulation
Your window won’t look exactly like the illustration because your simulation very
likely stopped at a different point.
Next we'll take a brief look at some interactive debug features of the ModelSim
environment. To start with, let's see what we can do about the way the List
window presents its data.
20 In the List window select /test_counter/count. From the List window menu bar select
Prop > Signal Props. The Modify Signal Properties (list) dialog box is opened.
ModelSim EE Tutorial
ModelSim EE Lessons -
137
Basic Verilog simulation
Select a display radix of Decimal for the signal count. Click OK. This causes the
List window output to change; the count signal is now listed in decimal rather than
the default binary.
21 Let’s set a breakpoint at line 30 in the counter.v file (which contains a call to the
Verilog function increment). To do this, select dut: counter in the Structure window.
Move the cursor to the Source window and scroll the window to display line 30. Click
at or near line number 30 to set a breakpoint (the executable line number is displayed
in green).
138
- ModelSim EE Lessons
ModelSim EE Tutorial
Basic Verilog simulation
You will see a dot appear next to the line number. This indicates that a breakpoint
has been set for that line. Clicking line 30 once more would remove the breakpoint
but don’t do that now.
22 Select the Run button from the Main toolbar to resume execution of the simulation.
(PROMPT: run) (Main MENU: Run > Run 500 ns)
When the simulation hits the breakpoint, it stops running, highlights the Source
window with an arrow, and issues a message in the Main window.
23 Typically when a breakpoint is reached you will be interested in one or more signal
values. You have several options for checking values.
You can look at the values shown in the Signals window, you can move you
mouse pointer over the count variable in the Source window and press the right
mouse button, or you can use the examine command:
examine count
As a result of your command the count is output to the Main window.
ModelSim EE Tutorial
ModelSim EE Lessons -
139
Basic Verilog simulation
24 Let’s move through the Verilog source functions with ModelSim’s Step and Step Over
commands. Click Step Over on the toolbar.
This causes the debugger to step over the function call on line 30. The Step button
on the toolbar would have single-stepped the debugger, including each line of the
increment function.
25 Experiment by yourself for awhile; setting and clearing breakpoints as well as Step’ing
and Step Over’ing function calls until you feel comfortable with the operation of these
commands.
26 Now let’s get a Wave window view of the simulation.
When the Wave window is first drawn, there is one cursor in it at time zero.
Clicking anywhere in the waveform display brings that cursor to the mouse
location.
Up to ten cursors can be present at the same time. Cursors are displayed with a
time box showing the precise simulation time at the bottom. When you have more
than one cursor, each time box appears in a separate track at the bottom of the
display.
27 Try adding or removing cursors with the Add Cursor and Delete Cursor buttons.
140
- ModelSim EE Lessons
ModelSim EE Tutorial
us
t ra
xt
tra nsit
io
zo
ns
n
om
iti
on
in
zo
2x
om
ou
t2
zo
x
om
ar
e
zo
om a
fu
ll
ne
fin
d
fin
d
pr
ev
io
rs
or
cu
te
cu
le
de
d
ad
These Wave window
buttons give you quick
access to zooming and
cursor placement.
rs
or
Basic Verilog simulation
Click and drag with
the center button
(3-button mouse)
or right button
(2-button mouse)
to zoom the
display.
interval measurement
selected cursor is bold
When you add a cursor, it is drawn in the middle of the display. Once you have
more than one cursor, VSIM adds a delta measurement showing the time
difference between the two cursor positions. The selected cursor is drawn as a
solid line; all other cursors are drawn with dotted lines.
28 Click in the waveform display. Notice how the cursor closest to the mouse position is
selected and then moved to the mouse position.
ModelSim EE Tutorial
ModelSim EE Lessons -
141
Basic Verilog simulation
Another way to position multiple cursors is to use the mouse in the time box tracks
at the bottom of the display. Clicking anywhere in a track selects that cursor and
brings it to the mouse position.
The cursors are designed to snap to the closest wave edge to the left of the mouse
pointer. You can position a cursor without snapping by dragging in the area below
the waveforms.
29 Experiment with using the cursors, scrolling, and zooming (see page 157 for Wave
window shortcuts).
30 When you’re done experimenting, quit the simulator by entering the command:
quit -force
142
- ModelSim EE Lessons
ModelSim EE Tutorial
Mixed VHDL/Verilog simulation
Mixed VHDL/Verilog simulation
You must be using ModelSim EE/PLUS for this lesson.
The goals for this lesson are:
• compile multiple VHDL and Verilog files
• simulate a mixed VHDL and Verilog design
• list VHDL signals and Verilog nets and registers
• view the design in the Structure window
• view the HDL source code in the Source window
1
First, return to the directory you created in "Basic VHDL simulation" (p94).
cd <directory_name>
Next copy the VHDL and Verilog example files to the directory:
<install_dir>/<modelsim_dir>/examples/mixedHDL/*.vhd
<install_dir>/<modelsim_dir>/examples/mixedHDL/*.v
2
Start ModelSim with this command from the UNIX/DOS prompt (or modelsim.exe for
Windows):
vsim -gui
This opens the ModelSim Main window without loading a design.
ModelSim EE Tutorial
ModelSim EE Lessons -
143
Mixed VHDL/Verilog simulation
3
Let’s create a new library to hold the mixed design. Make this menu selection in the
Main window: Library > Create a New Library.
(PROMPT: vlib mixed)
In the Create a New Library dialog
box select Create: a new library
only. In the Library: field type
mixed, then select OK.
This creates a subdirectory named
mixed (your design library) within
the current directory. The library
contains a special file named _info
that is created with the library.
Do not create library
subdirectories using UNIX or
Windows commands—always use
the Library menu or the vlib
command from either the
ModelSim or UNIX/DOS prompt.
4
144
Now you can map the new library to the work library. From the Main menu select
Library > Browse Libraries. In the Library Browser select the work library, then
Edit. (PROMPT: vmap work mixed)
- ModelSim EE Lessons
ModelSim EE Tutorial
Mixed VHDL/Verilog simulation
This opens the Edit Library
dialog box; where you can
set the library mapping
between work and mixed.
Type mixed into the Path:
field, then click OK. Now
you’re ready to compile the
design.
5
Compile the HDL files by selecting the Compile button on the toolbar:
(PROMPT: vlog cache.v memory.v proc.v)
(PROMPT: vcom util.vhd set.vhd top.vhd)
This opens the Compile HDL Source Files dialog box.
A group of Verilog files
can be compiled in any
order. Note, however, in
a mixed VHDL/Verilog
design the Verilog files
must be compiled before
the VHDL files.
Compile the source, by
double-clicking each of
these Verilog files in the
file list (this invokes the
Verilog compiler, vlog):
• cache.v
• memory.v
• proc.v
ModelSim EE Tutorial
ModelSim EE Lessons -
145
Mixed VHDL/Verilog simulation
6
Depending on the design, the compile order of VHDL files can be very specific. In the
case of this lesson, the file top.vhd must be compiled last.
Stay in the Compile HDL Source Files dialog box and compile the VHDL files in
this order (this invokes the VHDL compiler, vcom):
• util.vhd
• set.vhd
• top.vhd
Compiling is now complete, click Done to dismiss the dialog box.
7
Now it’s time to simulate. Start the simulator by selecting the Load Design button
from the Main toolbar:
(PROMPT: vsim top)
This returns the Load Design dialog box.
On the Design tab select the top entity and click Load.
8
From the Main menu select View > All to open all ModelSim windows.
(PROMPT: view *)
146
- ModelSim EE Lessons
ModelSim EE Tutorial
Mixed VHDL/Verilog simulation
9
This time you will use the VSIM command line to add all of the HDL items in the
region to the List and Wave windows:
add list *
add wave *
(Signals MENU: View > List > Signals in Region)
(Signals MENU: View > Wave > Signals in Region)
10 Take a look at the Structure window.
Notice the hierarchical mixture of VHDL and Verilog in the design. VHDL levels
are indicated by a square “prefix”, while Verilog levels are indicated by a circle
“prefix.” Try expanding (+) and contracting (-) the structure layers. You’ll find
Verilog modules have been instantiated by VHDL architectures, and similar
instantiations of VHDL items by Verilog.
Let’s take another look at the design.
11
In the Structure window, click on the Verilog module
c: cache. The source code for the Verilog module is
now shown in the Source window.
ModelSim EE Tutorial
ModelSim EE Lessons -
147
Mixed VHDL/Verilog simulation
12 We’ll use ModelSim’s Find/Search function to find the declaration of cache_set within
cache.v. From the Source window menu select: Edit > Find; the Search dialog box is
displayed.
In the Search For: field type
cache_set and click
Forward. The cache_set
declaration is now displayed
in the Source window.
Note that the declaration of cache_set is a VHDL entity instantiated within the
Verilog file cache.v.
13 Now click on the line "s0: cache_set(only)" in the Structure window.
The Source window now shows the VHDL code for the cache_set entity.
148
- ModelSim EE Lessons
ModelSim EE Tutorial
Mixed VHDL/Verilog simulation
Before you quit, try experimenting with some of the commands you’ve learned
from Lesson 1. Note that in this design, “clk” is already driven, so you won’t need
to use the force command.
14 When you’re ready to quit simulating, enter the command:
quit -force
ModelSim EE Tutorial
ModelSim EE Lessons -
149
Finding names, and searching for values
Finding names, and searching for values
You can easily locate HDL item names and values within ModelSim’s windows.
Start any of the lesson simulations to try out the Find and Search functions
illustrated below.
Finding items by name in tree windows
You can find HDL item names with the Edit > Find menu selection in these
windows:
List, Process, Signals, Source, Structure, Variables, and Wave windows.
Select Edit > Find to bring up the Find dialog box (List window version shown).
Enter an item label and Find it by searching Forward (right) or Reverse (left)
through the window display.
Searching for item values in the List and Wave windows
You can search for HDL item values in the List, and Wave windows. Select Edit
> Search from the window’s menu to bring up the Signal Search dialog box (List
window version shown).
150
- ModelSim EE Lessons
ModelSim EE Tutorial
Finding names, and searching for values
The List Signal Search dialog box includes these options:
You can locate values for the Signal Name: <item_label> shown at the top of the
dialog box. The search is based on these options (multiple Search Options may
be selected):
• Search Options: Ignore Glitches
Ignore zero width glitches in VHDL signals and Verilog nets.
• Search Options: Reverse Direction
Search the list from bottom to top.
• Search Options: Search for Signal Value
Activates the Search Value field; search for the value specified in the Search
Value field, otherwise just look for transitions.
• Search Options: Search for Expression
Activates the Search Expression field and the Use Expression Builder button;
searches for the expression specified in the Search Expression field evaluating
to a boolean true.
The expression may involve more than one signal but is limited to signals
logged in the List window. Expressions may include constants, variables, and
DO files. If no expression is specified, the search will give an error.
See the ModelSim EE/PLUS Reference Manual for more information on
expression syntax and the use of the Expression Builder.
ModelSim EE Tutorial
ModelSim EE Lessons -
151
Finding names, and searching for values
• Search Occurrences
You can search for the n-th transition or the n-th match on value; Search
Occurrences indicates the number of transitions or matches for which to
search.
• Search Value
Valid only if Use signal value is selected; specifies the search value; must be
formatted in the same radix as displayed.
The result of your search is indicated at the bottom of the dialog box.
152
- ModelSim EE Lessons
ModelSim EE Tutorial
Using the Wave window
Using the Wave window
us
t ra
xt
tra nsit
io
zo
ns
n
om
iti
on
in
zo
2x
om
ou
t2
zo
x
om
ar
e
zo
om a
fu
ll
ne
fin
d
fin
d
pr
ev
io
rs
or
cu
te
cu
le
de
d
ad
These Wave window
buttons give you quick
access to zooming and
cursor placement.
rs
or
This practice involves the use of Wave window time cursors, zooming the
waveform display, and Wave window keyboard shortcuts. Any of the previous
lesson simulations may be used with this practice.
Click and drag with
the center button
(3-button mouse)
or right button (2button mouse) to
zoom the display.
interval measurement
selected cursor is bold
Using time cursors in the Wave window
When the Wave window is first drawn, there is one cursor located at time zero.
Clicking anywhere in the waveform display brings that cursor to the mouse
location.You can add additional cursors to the waveform pane with the Cursor >
ModelSim EE Tutorial
ModelSim EE Lessons -
153
Using the Wave window
Add Cursor menu selection (or the Add Cursor button shown below). The
selected cursor is drawn as a solid line; all other cursors are drawn with dotted
lines. Remove cursors by selecting them and choosing using the Cursor > Delete
Cursor menu selection (or the Delete Cursor button shown below).
Add Cursor
add a cursor to the
center of the
waveform window
Delete Cursor
delete the selected
cursor from the
window
Finding a cursor
The cursor value (on the Goto list) corresponds to the simulation time of that
cursor. Choose a specific cursor view with Cursor > Goto menu selection.
Making cursor measurements
Each cursor is displayed with a time box showing the precise simulation time at
the bottom. When you have more than one cursor, each time box appears in a
separate track at the bottom of the display. VSIM also adds a delta measurement
showing the time difference between the two cursor positions.
If you click in the waveform display, the cursor closest to the mouse position is
selected and then moved to the mouse position. Another way to position multiple
cursors is to use the mouse in the time box tracks at the bottom of the display.
Clicking anywhere in a track selects that cursor and brings it to the mouse
position.
The cursors are designed to snap to the closest wave edge to the left on the
waveform that the mouse pointer is positioned over. You can control the snap
distance from "Wave category" in the dialog box available from the Wave window
Prop > Display Props menu selection.
You can position a cursor without snapping by dragging in the area below the
waveforms.
You can also move cursors to the next transition of a signal with these toolbar
buttons:
Find Previous
Transition
locate the previous
signal value change
for the selected signal
154
- ModelSim EE Lessons
Find Next
Transition
locate the next signal
value change for the
selected signal
ModelSim EE Tutorial
Using the Wave window
Zooming - changing the waveform display range
Zooming lets you change the simulation range in the windowpane display. You
can zoom with either the Zoom menu, toolbar buttons, mouse, keyboard, or VSIM
commands.
Using the Zoom menu
You can use the Wave window menu bar, or call up a Zoom menu window with
the right mouse button in the right windowpane. The menu options include:
• Zoom Full
Redraws the display to show the entire simulation from time 0 to the current
simulation time.
• Zoom In
Zooms in by a factor of two, increasing the resolution and decreasing the visible
range horizontally, cropping the view on the right. The starting time is held
static.
• Zoom Out
Zooms out by a factor of two, decreasing the resolution and increasing the
visible range horizontally, extending the view on the right. The starting time is
held static.
• Zoom Last
Restores the display to where it was before the last zoom operation.
• Zoom Range
Brings up a dialog box that allows you to enter the beginning and ending times
for a range of time units to be displayed.
ModelSim EE Tutorial
ModelSim EE Lessons -
155
Using the Wave window
Zooming with the toolbar buttons
These zoom buttons are available on the toolbar:
Zoom in 2x
zoom in by a factor
of two from the
current view
Zoom area
use the cursor to
outline a zoom
area
Zoom out 2x
zoom out by a
factor of two from
current view
Zoom Full
zoom out to view
the full range of
the simulation
from time 0 to the
current time
Zooming with the mouse
To zoom with the mouse, position the mouse cursor to the left side of the desired
zoom interval, press the middle mouse button (3 button mouse), or right button (2
button mouse), and while continuing to press, drag to the right and then release at
the right side of the desired zoom interval.
Zooming keyboard shortcuts
See "Wave window keyboard shortcuts" (p157) for a complete list of Wave
window keyboard shortcuts.
Zooming with VSIM commands
The.wave.tree zoomfull provides the same function as the Zoom > Zoom Full
menu selection and the .wave.tree zoomrange provides the same function as the
Zoom > Zoom Range menu selection.
Use this syntax with the .wave.tree zoomrange command:
Syntax
.wave.tree zoomrange f1 f2
Arguments
f1 f2
Sets the waveform display to zoom from time f1 to f2, where f1 and f2 are floating
point numbers.
156
- ModelSim EE Lessons
ModelSim EE Tutorial
Using the Wave window
Wave window keyboard shortcuts
Using the following keys when the mouse cursor is within the Wave
window will cause the indicated actions:
Key
Action
i I or +
zoom in
o O or -
zoom out
f or F
zoom full
l or L
zoom last
r or R
zoom range
<arrow up>
scroll waveform display up
<arrow down>
scroll waveform display down
<arrow left>
scroll waveform display left
<arrow right>
scroll waveform display right
<page up>
scroll waveform display up by page
<page down>
scroll waveform display down by page
<tab>
searches forward (right) to the next transition on the
selected signal
<shift-tab>
searches backward (left) to the previous transition on the
selected signal
<Control-f>
opens the find dialog box; search within the specified
field in the wave-name pane for text strings
ModelSim EE Tutorial
ModelSim EE Lessons -
157
Continuing with ModelSim EE
Continuing with ModelSim EE
More information on ModelSim commands, functions and techniques for use can
be found in the following locations:
• ModelSim EE/PLUS Reference Manual
an Adobe Acrobat (.pdf) version of our reference manual is available in the
<install_dir>/<modelsim_dir>/docs directory after installation
• Tips and Techniques appendix of the ModelSim reference manual
• technote text files installed with ModelSim
located in the <install_dir>/<modelsim_dir>/docs/technotes directory,
or select Help > technotes from the Main window Help menu
• Tcl man pages (the basis of ModelSim’s GUI)
select Help > Tcl man pages from the Main window Help menu
158
- ModelSim EE Lessons
ModelSim EE Tutorial
A - Technical Support, Updates, and Licensing
Technical support - by telephone
Mentor Graphics customers In North America
For customers who purchased products from Mentor Graphics in North America,
and are under a current support contract, technical telephone support is available
from the central SupportCenter by calling toll-free 1-800-547-4303. The coverage
window is from 6:00am to 5:30pm Pacific Time. All coverage is provided
Monday through Friday, excluding Mentor Graphics holidays.
The more preliminary information customers can supply about a problem or issue
at the beginning of the reporting process, the sooner the Software Support
Engineer (SSE) can supply a solution or workaround. Information of most help to
the SSE includes accurate operating system and software version numbers, the
steps leading to the problem or crash, the first few lines of a traceback, and
problem sections of the Procedural Interface code.
Mentor Graphics customers outside North America
For customers who purchased products from Mentor Graphics outside of North
America, should contact their local support organization. A list of local Mentor
Graphics SupportCenters outside North America can be found at
supportnetweb.mentorg.com under "Connections", then "International
Directory".
Model Technology customers worldwide
For customers who purchased from Model Technology, please contact Model
Technology via the support line at 1-503-641-1340 from 8:00 AM to 5:00 PM
Pacific Time. Be sure to have your server hostID or hardware security key
authorization number handy.
ModelSim EE Tutorial
Technical Support, Updates, and Licensing - 159
Technical support - electronic support services
Technical support - electronic support services
Mentor Graphics customers
Mentor Graphics Customer Support offers a SupportNet-Email server for North
American and European companies that lets customers find product information
or submit service requests (call logs) to the SupportCenter 24 hours a day, 365
days a year. The server will return a call log number within minutes. SSEs follow
up on the call logs submitted through SupportNet-Email using the same process
as if a customer had phoned the SupportCenter. For more information about using
the SupportNet-Email server, send a blank e-mail message to the following
address: [email protected].
Additionally, customers can open call logs or search the Mentor TechNote
database of solutions to try to find the answers to their questions by logging onto
Mentor Graphics’ Customer Support web home page at http://
supportnetweb.mentorg.com.
To establish a SupportNet account for your site (both a site-based SupportNetWeb account and a user-based SupportNet Email account), please submit the
following information: name, phone number, fax number, email address,
company name, site ID. Within one business day, you will be provided with the
account information for new registrations.
While all customers worldwide are invited to obtain a SupportNet-Web site login,
the SupportNet-Email services are currently limited to customers who receive
support from Mentor support offices in North America or Europe. If you receive
support from Mentor offices outside of North America or Europe, please contact
your local field office to obtain assistance for a technical-support issue.
Model Technology customers
Support questions may be submitted through the Model Technology web site at:
www.model.com. Model Technology customers may also email test cases to
[email protected]; please provide the following information, in this format, in
the body of your email message:
• Your name:
Company:
Email address (if different from message address):
Telephone:
FAX (optional):
• ModelSim product (EE or PE, and VHDL, VLOG, or PLUS):
160
- Technical Support, Updates, and Licensing
ModelSim EE Tutorial
Technical support - other channels
• ModelSim Version:
(Use the Help About dialog box with Windows; type vcom for UNIX
workstations.)
• Host operating system version:
• PC hardware security key authorization number:
• Host ID of license server for workstations:
• Description of the problem (please include the exact wording of any error
messages):
Technical support - other channels
For customers who purchased ModelSim as part of a bundled product from an
OEM or VAR, support is available at the following:
• Annapolis Microsystems
email: [email protected]
telephone: 1-410-841-2514
web site: http://www.annapmicro.com
• Exemplar Logic
email: [email protected]
telephone: 1-510-789-3333
web site: http://www.exemplar.com
• Hewlett Packard EEsof
email: [email protected]
telephone: 1-800-HPEESOF (1-800-473-3763)
web site: http://www.hp.com/go/hpeesof
• Synplicity
email: [email protected]
telephone: 1-408-617-6000
web site: http://www.synplicity.com
ModelSim EE Tutorial
Technical Support, Updates, and Licensing -
161
Updates
Updates
Mentor customers: getting the latest version via FTP
You can ftp the latest EE or PE version of the software from the SupportNet site
at ftp://supportnet.mentorg.com/pub/mentortech/modeltech/. Instructions are
there as well. A valid license file from Mentor Graphics is needed to uncompress
the ModelSim EE files. A password from Model Technology is required to
uncompress the ModelSim PE files. Contact [email protected] if you are a
current PE customer and need a password.
Model Technology customers: getting the latest version via FTP
You can ftp the latest version of the software from the web site at ftp://
ftp.model.com. Instructions are there as well. A valid license file from Model
Technology is needed to uncompress the ModelSim EE files. A password from
Model Technology is needed to uncompress the ModelSim PE files. Contact
[email protected] if you are a current PE customer and need a password.
Licenses - ModelSim EE
Where to obtain your license
Mentor Graphics customers must contact Mentor Graphics for ModelSim EE
licensing. All other customers may obtain ModelSim EE licenses from Model
Technology. Please contact Model Technology at [email protected].
If you have trouble with licensing
Contact your normal technical support channel:
• Technical support - by telephone (p159)
• Technical support - electronic support services (p160)
• Technical support - other channels (p161)
162
- Technical Support, Updates, and Licensing
ModelSim EE Tutorial
Licenses - ModelSim EE
All customers: ModelSim EE licensing
ModelSim EE uses Globetrotter’s FLEXlm license manager and files.
Globetrotter FLEXlm license files contain lines that can be referred to by the word
that appears first on the line. Each kind of line has a specific purpose and there are
many more kinds of lines that MTI does not use.
A license.dat file example
SERVER hostname 11111111 1650
DAEMON modeltech ./modeltech ./options
FEATURE vcom modeltech 1998.080 31-aug-98 1 \
0C944D8F0C79B02EF5CF ck=117
FEATURE vsim modeltech 1998.080 31-aug-98 1 \
FCB4FD0F2A635C20E5CF ck=128
FEATURE vlog modeltech 1998.080 31-aug-98 1 \
0C944D9F176CA773E889 ck=10
FEATURE vsim-vlog modeltech 1998.080 31-aug-98 1 \
FCB41D9FC43C87567DBC ck=116
FEATURE hdlcom modeltech 1998.080 31-aug-98 1 \
4C94EDFF6A00858BC8F2 ck=93
FEATURE hdlsim modeltech 1998.080 31-aug-98 1 \
4CF48DDF6A6EA59BCEF2 ck=89
# NOTE: You can edit the hostname on the SERVER line (1st arg),
#
the port address on the SERVER line (3rd arg), the paths
#
to the daemon and options files on the DAEMON line
#
(2nd and 3rd args), or any right-half of a string (b)
#
of the form a=b where (a) is all lowercase. (For example,
#
xxx in vendor_info="xxx" can be changed).
#
Any other changes will invalidate this license.
A Globetrotter FLEXlm license file contains information about the license server,
the daemon required to authorize the feature, and a line for each product feature
you are authorized to execute.
The first line is a SERVER line; it spells out which computer on the network is the
license server. The license server is a network resource that will manage the
features for all users of ModelSim products. The SERVER line includes the
server's hostname, hostID (a unique serial number), and a socket number. The
hostname and socket number may be changed in a license file, but any change to
the hostID will invalidate the license. If the host is a Windows machine, the hostID
is the FLEXid security key number, and will take the alpha-numeric form:
7-xxxxxxxx.
If you need to find the unique server ID, use one of these UNIX commands: for
Sun, hostid; for HP, /etc/lanscan; for IBM RISC/6000: uname -m. On a
Windows machine, use the FLEXlm license manager control panel.
ModelSim EE Tutorial
Technical Support, Updates, and Licensing -
163
Licenses - ModelSim EE
A DAEMON line specifies the name of the license daemon and the locations of
the daemon and options files it will use. This is the full path to the modeltech
daemon. In the example file, the UNIX "./" means "look in the current directory".
This is the directory in which the server was started. If the server is to be started
from another directory, the full path to the modeltech and options files would need
to be added to this line. For example,
DAEMON modeltech /usr/mti5.2/sunos5/modeltech \
/usr/mti5.2/sunos5/options
A FEATURE line describes how many licenses ("tokens") are available; it
contains the feature name, daemon required, most current build date authorized to
run, token expiration date, number of tokens for the feature, license code, and a
checksum. The features are:
vcom is a VHDL compilation feature
vsim is a VHDL simulation feature
vlog is a Verilog compilation feature
vsim-vlog is a Verilog simulation feature
When a VHDL design is compiled, a vcom token is used. When a Verilog design
is compiled, a vlog token is used. When a VHDL design is simulated, a vsim token
is used. When a Verilog design is simulated,
vsim-vlog is used. This is why two people running different single-language
designs can work at the same time with one ModelSim PLUS product. When a
design with both languages is run, one of each token is checked out.
With ModelSim EE/LNL, hdl FEATURE lines are added. With LNL (languageneutral licensing), either VHDL or Verilog - but not both - can be used. The hdl
FEATURE lines are shown in the example:
hdlcom is a compilation feature used with either VHDL or Verilog
hdlsim is a simulation feature used with either language
Notice the FEATURE lines. If a line is too long for the email program, a backslash
("\") appears at the end of the line. A UNIX system reads that as "whatever you
read on the next line belongs on this line". So never edit out the "\" when you are
transcribing a license file. Never put another character after it either.
All the important lines end in checksums. FLEXlm will let you know if you
mistyped something when transcribing the license files because the checksum will
not match the line's contents.
(GLOBEtrotter has a utility that will report any checksum errors in a file. Use this
command: lmchksum <license.file>)
164
- Technical Support, Updates, and Licensing
ModelSim EE Tutorial
Online References
Lines that start with "#" are comments.
If you want to learn more about the tools that license ModelSim, read the license
manager appendix in the ModelSim reference manual, and visit GLOBEtrotter at
http://www.globetrotter.com/home.htm.
All customers: maintenance renewals and EE licenses
When maintenance is renewed, a new license file that incorporates the new
maintenance expiration date will be automatically sent to you. If maintenance is
not renewed, the current license file will still permit the use of any version of the
software built before the maintenance expired until the stop date is reached.
All customers: license transfers and server changes
Model Technology and Mentor Graphics both charge a fee for server changes or
license transfers. Contact [email protected] for more information from Model
Technology, or contact your local Mentor Graphics sales office for Mentor
Graphics purchases.
Online References
The Model Technology web site includes links to many EDA information sources.
Check the links below for the most current information.
Books and publications
model.com/support/tnbooksvhd.html
Partners
model.com/partners/index.html
Training partners
model.com/support/training.html
ModelSim EE Tutorial
Technical Support, Updates, and Licensing -
165
166
- Technical Support, Updates, and Licensing
ModelSim EE Tutorial
Index
A
Assertion errors 105
B
Breakpoints
continuing simulation after 101
deleting 61
setting 61
viewing 61
C
Compile
the order of Verilog modules 132
Verilog 129
VHDL 95
Conventions
text and command syntax 14
Cursors
adding and deleting in the Wave window 87
D
Dataflow window (see also, Windows) 35
Debugging a VHDL design 103
Delay
specifying stimulus delay 58
Delta
collapse deltas in the List window 42
Descriptions of HDL items 65
Design hierarchy
viewing in Structure window 67
Design library
ModelSim EE Tutorial
creating for Verilog 130
creating for VHDL 95
Design units
viewing hierarchy 22
DO files
executing a DO file in batch-mode 112
using a DO file at startup 114
using the transcript as a DO file
E
Editing
in notepad windows 33
in the Main window 33
in the Source window 33
Email
Model Technology’s email address 16
Errors
breaking on assertion 106
finding in VHDL design 105
viewing in Source window 107
examples
Tcl example solutions 120
F
Finding
a cursor in the Wave window 87, 154
a marker in the List window 50
Finding names, and searching for values in windows 21,
150
H
HDL items
defined 14
Hierarchy
of a mixed VHDL/Verilog design 147
Index - 167
of a Verilog design 135
Home page
Model Technology’s home-page URL 16
I
Wave window 75
N
Nets
Instantiation label 68
K
Keyboard shortcuts, List window 50
Keyboard shortcuts, Wave window 90, 157
adding to the Wave and List windows 59
displaying in Dataflow window 35
displaying values in Signals window 55
forcing signal and net values 57
saving values as binary log file 59
viewing waveforms 73
Next and previous edges, searching for in Wave window
90
Notepad windows, text editing 33
L
Library creation and mapping 103
Library mapping 103
Licensing
obtain your license 162
List window
change display radix 137
placing top level Verilog signals in 133
List window (see also, Windows) 38
M
Macros
see Do files
Main window (see also, Windows) 24
Menus
Dataflow window 36
List window 40
Main window 25
Process window 53
Signals window 56
Source window 62
Structure window 68
tearing off or pinning menus 21
Variables window 71
168 - Index
O
Operating systems supported 12
P
Process window (see also, Windows) 52
Processes
displayed in Dataflow window 35
values and pathnames in Variables window 70
R
Radix
specifying in List window 46
specifying in Signals window 58
Records
changing values of 70
displaying values of 108
Register variables
adding to the Wave and List windows 59
displaying values in Signals window 55
saving values as binary log file 59
viewing waveforms 73
ModelSim EE Tutorial
S
Searching
for HDL item names and transitions in the Wave
window 88, 155
for values and finding names in windows 21, 150
in tree windows 150
List window
signal values, transitions, and names 48
text strings in the List window 48
text strings in the Wave window 85
waveform
signal values, edges and names 85
Shortcuts
command history 92
List window 50
text editing 33
Wave window 90, 157
Signal transitions
searching for 88, 155
Signals
adding to a log file 59
adding to the Wave and List windows 59
applying stimulus to 57, 98
displaying in Dataflow window 35
displaying values in Signals window 55
forcing signal and net values 57
in the List and Wave windows 104
listing in region 98
placing top-level Verilog signals in the List and
Wave window 133
saving values as binary log file 59
selecting signal types to view 57
specifying radix of 110
triggering listings for 109
viewing waveforms 73
Signals window (see also, Windows) 55
Simulating
applying stimulus to signals and nets 57
viewing results in List window 38
Simulation
batch-mode 112
ModelSim EE Tutorial
executing commands at startup 114
Load Design dialog box 132
mixed VHDL/Verilog 143
saving results in log file 113
single-stepping 101
starting 104
Verilog 129
VHDL 94
Software updates 162
solutions to the examples 120
Sorting
sorting HDL items in VSIM windows 21
Source code
viewing 61
Source window (see also, Windows) 61
Status bar
Main window 32
Structure window (see also, Windows) 67
Syntax conventions 14
T
Tcl
Man Pages in Help menu 28
Technical support 159
Text editing, see Editing
Text strings
finding in the List window 48
finding in the Wave window 85
Tool bar
Main window 30
Wave window 78
Tracing HDL items with the Dataflow window 37
Tree windows
searching in 150
VHDL and Verilog items in 22
viewing the design hierarchy 22
Triggering
changing in List window 110
Index - 169
V
Values of HDL items 65
Variables window (see also, Windows) 70
Variables, HDL
changing value of with the GUI 70
Verilog
interface checking between design units 132
source code viewing 61
viewing design in Structure and Source windows
147
Verilog simulation 129
VHDL
source code viewing 61
VHDL simulation 94
Viewing design hierarchy 22
W
Wave window
cursors 140
placing top level Verilog signals in 133
Wave window (see also, Windows) 73
Windows
finding HDL item names 21, 150
opening multiple copies 21
opening with the GUI 26
searching for HDL item values 21, 150
Dataflow window 35
tracing signals and nets 37
List window 38
adding HDL items 44
adding signals with a log file 59
examining simulation results 47
formatting HDL items 45
locating time markers 21, 150
saving to a file 51
setting display properties 42
Main window 24
status bar 32
text editing 33
170 - Index
time and delta display 32
tool bar 30
Process window 52
displaying active processes 52
specifying next process to be executed 52
viewing processing in the region 52
Signals window 55
VHDL and Verilog items viewed in 55
Source window 61
text editing 33
viewing HDL source code 61
Structure window 67
HDL items viewed in 67
instance names 67
selecting items to view in Signals window 55
VHDL and Verilog items viewed in 67
viewing design hierarchy 67
Variables window 70
displaying values 70
VHDL and Verilog items viewed in 70
viewing all 104
Wave window 73
adding HDL items 81
adding signals with a log file 59
changing display range (zoom) 88, 155
cursor measurements 87, 154
locating time cursors 21, 150
searching for HDL item values 85
setting display properties 81
using time cursors 87, 153
zooming 88, 155
Work library mapping 103
Z
Zoom
from Wave toolbar buttons 156
from Zoom menu 155
with the mouse 156
Zooming in the Wave window 88, 155
ModelSim EE Tutorial
Thank you for purchasing ModelSim!
Model Technology
A
M E N T O R
G R A P H I C S
C O M P A N Y