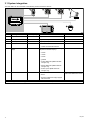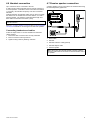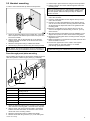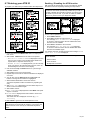
1
Ray260
000
Installation and operation
instructions
English
Date: 1 1-2013
Document number: 81343-3-EN
© 2013 Raymarine UK Limited
0
Trademark and patents notice
Autohelm, hsb2, RayTech Navigator, Sail Pilot, SeaTalk, SeaTalkNG, SeaTalkHS and Sportpilot are registered trademarks of
Raymarine UK Limited. RayTalk, Seahawk, Smartpilot, Pathfinder and Raymarine are registered trademarks of Raymarine
Holdings Limited.
FLIR is a registered trademark of FLIR Systems, Inc. and/or its subsidiaries.
All other trademarks, trade names, or company names referenced herein are used for identification only and are the property
of their respective owners.
This product is protected by patents, design patents, patents pending, or design patents pending.
Fair Use Statement
You may print no more than three copies of this manual for your own use. You may not make any further copies or distribute or use
the manual in any other way including without limitation exploiting the manual commercially or giving or selling copies to third parties.
Software updates
Check the website www.raymarine.com for the latest software releases for your product.
Product handbooks
The latest versions of all English and translated handbooks are available to download in PDF format from the website www.raymarine.com.
Please check the website to ensure you have the latest handbooks.
Copyright ©2013 Raymarine UK Ltd. All rights reserved.
ENGLISH
Document number: 81343-3
Date: 11-2013
Contents
Chapter 1 Important information........................ 7
Chapter 7 Digital selective calling (DSC)........... 41
Making a distress call................................................. 7
Making a Mayday call ................................................ 7
7.1 Digital Selective Calling (DSC) .............................. 42
7.2 Distress calls ....................................................... 43
Safety notices............................................................ 7
General Information ................................................... 8
7.3 Urgency calls ....................................................... 45
7.4 Safety calls .......................................................... 46
Chapter 2 Document and product
information........................................................... 11
2.1 Handbook information .......................................... 12
7.5 Routine calls ........................................................ 46
7.6 Group calls .......................................................... 47
7.7 Position requests ................................................. 48
2.2 Product information .............................................. 12
7.8 Position tracking .................................................. 48
7.9 Test calls ............................................................. 49
Chapter 3 Planning the installation ................... 13
7.10 Voice mail .......................................................... 49
3.1 System integration ............................................... 14
7.11 Received call logs .............................................. 50
7.12 Phonebook ........................................................ 50
3.2 Typical systems ................................................... 15
3.3 Installation checklist ............................................. 16
3.4 Schematic diagram .............................................. 16
3.5 System protocols ................................................. 17
3.6 Parts supplied...................................................... 17
7.13 Group list........................................................... 51
7.14 DSC options ...................................................... 51
Chapter 8 VHF operations .................................. 53
8.1 Scan mode .......................................................... 54
Chapter 4 Cables and connections.................... 19
4.1 General cabling guidance ..................................... 20
8.2 Watch modes....................................................... 54
8.3 Priority channels .................................................. 55
4.2 Connections overview .......................................... 20
8.4 Favorite channels................................................. 55
4.3 Power connection ................................................ 21
8.5 Sensitivity ............................................................ 56
4.4 NMEA 0183 connection ........................................ 22
4.5 Loud hailer connection ......................................... 22
8.6 Private channels .................................................. 56
4.6 Handset connection ............................................. 23
4.7 Passive speaker connection ................................. 23
4.8 Active speaker connection .................................... 24
8.7 Automatic Transmitter Identification System
(ATIS) and Marcom-C mode ....................................... 57
8.8 AIS...................................................................... 58
8.9 Voice recorder ..................................................... 58
4.9 SeaTalkng connection ........................................... 24
8.10 System configuration .......................................... 59
Chapter 5 Location and mounting ..................... 25
Chapter 9 Hailer, Fog horn, and Intercom........... 61
5.1 General location requirements .............................. 26
9.1 Hailer .................................................................. 62
5.2 Base station dimensions....................................... 27
9.2 Fog horn.............................................................. 62
9.3 Handset intercom................................................. 63
5.3 Base station mounting .......................................... 28
5.4 Speaker mounting ................................................ 28
5.5 Handset mounting ................................................ 29
Chapter 10 Maintenance ..................................... 65
10.1 Maintenance ...................................................... 66
Chapter 6 Getting started ................................... 31
10.2 Routine checks .................................................. 66
6.1 Controls............................................................... 32
10.3 Cleaning ............................................................ 67
6.2 Switching the radio on .......................................... 32
6.3 Switching the radio off .......................................... 33
10.4 Unit cleaning instructions .................................... 67
6.4 Voltage detection ................................................. 33
6.5 Handset display LCD overview.............................. 34
6.6 Entering your MMSI number ................................. 35
6.7 Entering your ATIS ID........................................... 36
6.8 Selecting NMEA 0183 or SeaTalkng
connection ................................................................ 37
Chapter 11 Troubleshooting ............................... 69
11.1 Troubleshooting.................................................. 70
11.2 VHF Radio troubleshooting ................................. 71
Chapter 12 Technical support ............................ 73
12.1 Raymarine customer support .............................. 74
6.9 Regional programming ......................................... 37
Chapter 13 Technical specification.................... 75
6.10 Adjusting the LCD backlight level ........................ 38
13.1 Technical specification ........................................ 76
6.11 Adjusting the LCD contrast.................................. 38
Chapter 14 Spares and accessories .................. 77
6.12 Changing the transmit power .............................. 39
6.13 GPS setup ......................................................... 39
14.1 Ray260 Spares & Accessories ............................ 78
14.2 SeaTalkng cables and accessories ....................... 78
6.14 Handset station priority ....................................... 40
Appendix A NMEA 0183 sentences ................... 81
5
Appendix B NMEA 2000 sentences ................... 82
Appendix C VHF Channels ................................. 83
Appendix D Phonetic alphabet........................... 90
Appendix E Prowords ......................................... 91
6
Ray260
Chapter 1: Important information
Certified Installation
Making a distress call
In an emergency you can use your product to make an automatic
DSC distress call.
55 60 5
10
50
15
45
20
40
35 30 25
0
0
0
0
0
0
0
0
0
RX HI
RX HI
DIS TRESS
UNDESI GNATED
...3
COUNTI NG DOWN
DIS TRESS
UNDESI GNATED
OK
RX HI
RX HI
DIS TRESS
UNDESI GNATED
...2
COUNTI NG DOWN
DIS TRESS
AWAITI NG ACK...
REMAINING TI ME
TO RESEND..04'20
RX HI
RX HI
DIS TRESS
UNDESI GNATED
...1
COUNTI NG DOWN
DIS TRESS
00'01
ACKNOWLEDGED
FROM:0012345 6 7
ORI G:mYSHIP
OK
OK
INTCM
PAUSE
CANCEL
PAUSE
Raymarine recommends certified installation by a Raymarine
approved installer. A certified installation qualifies for enhanced
product warranty benefits. Contact your Raymarine dealer for
further details, and refer to the separate warranty document
packed with your product.
Warning: Product installation and
operation
TRANSMITTING ...
OK
OK
Safety notices
This product must be installed and operated in
accordance with the instructions provided. Failure
to do so could result in personal injury, damage to
your vessel and/or poor product performance.
P 1/3
D12810-1
1. Open the spring loaded door on the rear of the handset.
2. Press and hold the DISTRESS button for 3 seconds.
Once the DISTRESS button is pressed a 3 second count
down will begin, when the count down reaches zero the
distress call is transmitted.
3. Wait for an acknowledgement of your distress call.
The distress call is repeated automatically until it is
acknowledged.
4. Press and hold the PTT button.
5. Slowly and clearly speak the details of the distress:
MAYDAY, MAYDAY, MAYDAY
This is <state name of vessel 3 times>
MAYDAY <state name of vessel 1 time>
My position is <state latitude and longitude, or true bearing
and distance from a known point.>
Warning: Potential ignition source
This product is NOT approved for use in
hazardous/flammable atmospheres. Do NOT install
in a hazardous/flammable atmosphere (such as in
an engine room or near fuel tanks).
Warning: Positive ground systems
Do not connect this unit to a system which has
positive grounding.
Warning: Switch off power supply
Ensure the vessel’s power supply is switched OFF
before starting to install this product. Do NOT
connect or disconnect equipment with the power
switched on, unless instructed in this document.
I am <state nature of distress e.g. sinking, on fire etc.>
Warning: Chassis grounding
I have <state number of persons on board and any other
information — drifting, flares fired etc.>
Do NOT ground this product using the chassis
ground terminal.
I REQUIRE IMMEDIATE ASSISTANCE
Grounding this product to a vessel’s RF ground
may cause galvanic corrosion.
OVER
6. Release the PTT button.
Making a Mayday call
In an emergency you can use your product to make a Mayday
call.
1. Press the 16/9 or 16 PLUS button.
2. Press and hold the PTT button.
3. Slowly and clearly speak the details of the distress:
MAYDAY, MAYDAY, MAYDAY
This is <state name of vessel 3 times>
MAYDAY <state name of vessel 1 time>
My position is <state latitude and longitude, or true bearing
and distance from a known point.>
I am <state nature of distress e.g. sinking, on fire etc.>
I have <state number of persons on board and any other
information — drifting, flares fired etc.>
I REQUIRE IMMEDIATE ASSISTANCE
OVER
4. Release the PTT button.
5. If an acknowledgement is not received then repeat steps
2 to 4 above.
Warning: Antenna isolation
To prevent galvanic corrosion your antenna must
be isolated from any vessel metalwork using a
suitable insulated e.g. plastic, mounting bracket.
Warning: FCC Warning (Part 15.21)
Changes or modifications to this equipment not
expressly approved in writing by Raymarine
Incorporated could violate compliance with FCC
rules and void the user’s authority to operate the
equipment.
Warning: Maximum Permissible
Exposure
Failure to observe these guidelines may expose
those within the maximum permissible exposure
(MPE) radius to RF radiation absorption that
exceeds the FCC MPE limit. It is the radio
operator’s responsibility to ensure that no one
comes within this radius.
For optimal radio performance and minimal human
exposure to radio frequency electromagnetic
energy, make sure the antenna is:
• connected to the radio before transmitting
• located where it will be away from people
• located at least 1.5 meters (5 feet) from the
radio’s main unit
Important information
7
Caution: Power supply protection
When installing this product ensure the power
source is adequately protected by means of a
suitably-rated fuse or automatic circuit breaker.
Caution: Perform regular radio
checks
Perform regular radio checks when using your
vessel, as recommended in radio training and
certification schemes and radio equipment rules
of use.
Caution: Ensure proper radio use
Under no circumstances should a DSC distress
alert be sent from your radio for test purposes.
Such action is a violation of rules of use for radio
equipment, and can result in heavy fines.
Caution: Cleaning
When cleaning this product:
the instructions, may cause harmful interference to radio
communications. However, there is no guarantee that
interference will not occur in a particular installation. If this
equipment does cause harmful interference to radio or television
reception, which can be determined by turning the equipment off
and on, the user is encouraged to try to correct the interference
by one of the following measures:
1. Reorient or relocate the receiving antenna.
2. Increase the separation between the equipment and
receiver.
3. Connect the equipment into an outlet on a circuit different
from that to which the receiver is connected.
4. Consult the dealer or an experienced radio / TV technician
for help.
Industry Canada
This device complies with Industry Canada License-exempt
RSS standard(s).
Operation is subject to the following two conditions:
1. This device may not cause interference; and
• Do NOT wipe the display screen with a dry cloth,
as this could scratch the screen coating.
2. This device must accept any interference, including
interference that may cause undesired operation of the
device.
• Do NOT use abrasive, or acid or ammonia based
products.
This Class B digital apparatus complies with Canadian
ICES-003.
• Do NOT use a jet wash.
Licensing
Prior to using this product please check your national
requirements for both operators and equipment licensing.
General Information
Water ingress
Water ingress disclaimer
Although the waterproof rating capacity of this product meets
the stated IPX standard (refer to the product’s Technical
Specification), water intrusion and subsequent equipment
failure may occur if the product is subjected to commercial
high-pressure washing. Raymarine will not warrant products
subjected to high-pressure washing.
Disclaimer
Raymarine does not warrant that this product is error-free or that
it is compatible with products manufactured by any person or
entity other than Raymarine.
Raymarine is not responsible for damages or injuries caused by
your use or inability to use the product, by the interaction of the
product with products manufactured by others, or by errors in
information utilized by the product supplied by third parties.
Station Licence
FCC station license requirement
An FCC Ship Radio Station License and Call Sign are not
required for most recreational vessels travelling in US waters.
However, you must obtain a license if your vessel travels to
foreign ports.
Ships that use MF/HF single side-band radio, satellite
communications, or telegraphy must be licensed by the FCC.
You can obtain a Station License by filing FCC Form 605, which
is available from the FCC website listed above.
Industry Canada
Industry Canada license requirement
You do not need a license to operate this product within
sovereign waters of Canada or the US. You will need a license
to operate this radio outside of Canada or the US. To obtain
Industry Canada licensing information, contact the nearest field
or regional office, or write:
Industry Canada Radio Regulatory Branch
Attention: DOSP
300 Slater Street
FCC
Compliance Statement (Part 15.19)
This device complies with Part 15 of the FCC Rules. Operation
is subject to the following two conditions:
1. This device may not cause harmful interference.
2. This device must accept any interference received, including
interference that may cause undesired operation.
FCC Interference Statement (Part 15.105 (b))
This equipment has been tested and found to comply with the
limits for a Class B digital device, pursuant to Part 15 of the FCC
Rules.
These limits are designed to provide reasonable protection
against harmful interference in a residential installation. This
equipment generates, uses, and can radiate radio frequency
energy and, if not installed and used in accordance with
8
Ottawa, Ontario
Canada, KIA OC8
European licensing requirements
Regulations in some areas require that an Operator’s license is
obtained before operating a VHF radio. It is your responsibility
to determine whether a license is required in your area before
operating this equipment.
Additional information
The following additional information is required for completing a
license application in Canada and the US.
Industry Canada
certification number
4069B-RAY260 D
FCC ID
PJ5–RAY260
FCC Type accepted
Parts 2, 15 and 80
Output power
1 watt (low) and 25 watt (high)
Ray260
Modulation
FM
Frequency range
155.000 MHz to 165.000 MHz
Maritime Mobile Service Identity (MMSI)
This product is a class “D” Digital Selective Calling (DSC) device.
A 9 digit MMSI number is required to operate DSC equipment.
In some areas, a radio operator license is required before an
MMSI number can be issued.
Note: You can request an MMSI number from the same
agency that issues radio or ship radio licenses in your area.
Once obtained, you can program the MMSI number into your
product by following the instruction supplied with the product.
Once obtained, you can program the MMSI number into your
product using the instructions provided in this handbook.
If regulations in your area do not permit you to program the
MMSI number yourself, your Raymarine dealer can program
the number for you.
Obtaining an MMSI number in the United States
You can request an MMSI number from the FCC when you
apply for a Station License. If your vessel does not require
a license, you may obtain an MMSI by contacting BoatUS
www.boatus.com.
Obtaining an MMSI number in Canada
You can obtain an MMSI number from your nearest Industry
Canada Office.
Obtaining an MMSI number in Europe and rest of world
Am MMSI number should be requested from the same agency
that issues radio operator licenses in your area.
Automatic Transmitter Identification System
(ATIS)
Your product includes ATIS functionality for use on the inland
waterways of contracting governments of the “Regional
Arrangement Concerning the Radiotelephone Service on Inland
Waterways” — also known as the “Basel Agreement” .
ATIS adds data at the end of radio transmissions that identifies
your station. ATIS operation can be turned on or off as needed
via the radio’s menu.
An ATIS number can be obtained from the same agency that
issues radio operator licenses in your area.
Your ATIS ID number is derived from your vessel’s call sign.
If your call sign is suitable, your authorized Raymarine dealer
can assist you in decoding your ATIS ID number, which you can
then program into your product using the instructions provided
in this handbook.
Note: The Basel Agreement includes: Germany, Austria,
Belgium, Bulgaria, Croatia, France, Hungary, Luxembourg,
Moldova, the Netherlands, Poland, Romania, Russian
Federation, the Slovak Republic, Switzerland, the Czech
Republic, Ukraine and the Federal Republic of Yugoslavia.
Note: When ATIS is enabled, certain programming steps
have been implemented to protect the integrity of the Basel
agreement, including the blocking of DSC functions when
ATIS is active.
EMC installation guidelines
Raymarine equipment and accessories conform to the
appropriate Electromagnetic Compatibility (EMC) regulations,
to minimize electromagnetic interference between equipment
and minimize the effect such interference could have on the
performance of your system
Correct installation is required to ensure that EMC performance
is not compromised.
For optimum EMC performance we recommend that wherever
possible:
Important information
• Raymarine equipment and cables connected to it are:
– At least 1 m (3 ft) from any equipment transmitting or
cables carrying radio signals e.g. VHF radios, cables and
antennas. In the case of SSB radios, the distance should
be increased to 7 ft (2 m).
– More than 2 m (7 ft) from the path of a radar beam. A
radar beam can normally be assumed to spread 20 degrees
above and below the radiating element.
• The product is supplied from a separate battery from that used
for engine start. This is important to prevent erratic behavior
and data loss which can occur if the engine start does not
have a separate battery.
• Raymarine specified cables are used.
• Cables are not cut or extended, unless doing so is detailed in
the installation manual.
Note: Where constraints on the installation prevent
any of the above recommendations, always ensure the
maximum possible separation between different items of
electrical equipment, to provide the best conditions for EMC
performance throughout the installation
Antenna mounting and EME exposure
Ensure that the antenna is connected to the radio before
transmission.
Raymarine declares a Maximum Permissible Exposure (MPE)
radius of 1.5 metres (4.9 ft) (per OET Bulletin 65) for this system,
assuming 25 watts output to an omnidirectional antenna of 3dBi
gain or less.
For watercraft with suitable structures, the antenna base must
be at least 3.5 metres (11.5 ft) above the main deck to meet
the MPE for persons up to 2 metres (6.6 ft) tall. For watercraft
without such structures, the antenna must be mounted so that
its base is a minimum of 1.5 metres (4.9 ft) vertically from heads
of all persons.
The antenna must be isolated from the vessel’s metalwork using
an insulated (e.g. plastic) mounting bracket.
Connections to other equipment
Requirement for ferrites on non-Raymarine cables
If your Raymarine equipment is to be connected to other
equipment using a cable not supplied by Raymarine, a
suppression ferrite MUST always be attached to the cable near
the Raymarine unit.
Declaration of conformity
Raymarine UK Ltd. declares that this product is compliant with
the essential requirements of R&TTE directive 1999/5/EC.
The original Declaration of Conformity certificate may be viewed
on the relevant product page at www.raymarine.com.
Product disposal
Dispose of this product in accordance with the WEEE Directive.
The Waste Electrical and Electronic Equipment (WEEE)
Directive requires the recycling of waste electrical and electronic
equipment. Whilst the WEEE Directive does not apply to some
Raymarine products, we support its policy and ask you to be
aware of how to dispose of this product.
Warranty registration
To register your Raymarine product ownership, please visit
www.raymarine.com and register online.
It is important that you register your product to receive full
warranty benefits. Your unit package includes a bar code label
indicating the serial number of the unit. You will need this serial
number when registering your product online. You should retain
the label for future reference.
9
IMO and SOLAS
The equipment described within this document is intended for
use on leisure marine boats and workboats not covered by
International Maritime Organization (IMO) and Safety of Life at
Sea (SOLAS) Carriage Regulations.
Technical accuracy
To the best of our knowledge, the information in this document
was correct at the time it was produced. However, Raymarine
cannot accept liability for any inaccuracies or omissions it
may contain. In addition, our policy of continuous product
improvement may change specifications without notice. As a
result, Raymarine cannot accept liability for any differences
between the product and this document. Please check the
Raymarine website (www.raymarine.com) to ensure you have
the most up-to-date version(s) of the documentation for your
product.
10
Ray260
Chapter 2: Document and product information
Chapter contents
•
2.1 Handbook information on page 12
•
2.2 Product information on page 12
Document and product information
11
2.1 Handbook information
2.2 Product information
This handbook contains important information regarding your
DSC VHF Radio.
The Ray260 is a Class D Digital Selective Calling (DSC) VHF
radio. DSC enables you to make a selective call to a specific
radio, and to transmit and receive position information to and
from the selected radio. DSC also allows transmission of
a distress alert to all radios within range at the touch of a
button. Once a DSC request is sent and acknowledged voice
communication is carried out on the channel chosen by the
caller. The radio can transmit and receive on all available US,
Canadian and international and private marine VHF channels.
Ray260 handbooks
The following handbooks are applicable to your Ray260:
All documents are available to download in pdf format from the
Raymarine website www.raymarine.com.
Your product includes the Ray260 base station, a handset and
either a passive or and active speaker (depending on variant).
Extra handsets, active and passive speakers can be added to
the standard Ray260 providing up to 3 fully functional stations.
Handbooks
Description
Part number
Mounting and getting started
88014
Installation and operation
instructions
81343
Ray260 mounting template
87167
Speaker mounting template
87168
With an optional loud hailer connected the radio can also be
used as a fog horn or loud public address (PA) system.
The Ray260 is available in the following variants:
SeaTalkng handbooks
Description
Part number
SeaTalkng reference manual
Planning and connection of systems based around the
SeaTalkng network.
81300
SeaTalk – SeaTalkng converter handbook
Installation and connection of the SeaTalk - SeaTalkng
converter.
87121
Variant
Description
Speaker
type
Part number
Ray260
US/Canadian variant
Passive
E70087
Ray260
AIS
US/Canadian variant
with built in AIS
receiver
Passive
E70088
Ray260E
European variant
Passive
E70089
Ray260E
European variant
Active
E70253
Ray260E
AIS
European variant with
built in AIS receiver
Passive
E70090
Passive and active speakers
User manuals Print Shop
Raymarine provides a Print Shop service, enabling you to
purchase a high-quality, professionally-printed manual for your
Raymarine product.
The product can be supplied with either a passive or an active
speaker.
1
Printed manuals are ideal for keeping onboard your vessel, as a
useful source of reference whenever you need assistance with
your Raymarine product.
Visit http://www.raymarine.co.uk/view/?id=5175 to order a
printed manual, delivered directly to your door.
0
1
0
For further information about the Print Shop, please visit the Print
Shop FAQ pages: http://www.raymarine.co.uk/view/?id=5751.
Note:
• Accepted methods of payment for printed manuals are
credit cards and PayPal.
• Printed manuals can be shipped worldwide.
• Further manuals will be added to the Print Shop over the
coming months for both new and legacy products.
• Raymarine user manuals are also available to download
free-of-charge from the Raymarine website, in the popular
PDF format. These PDF files can be viewed on a PC /
laptop, tablet, smartphone, or on the latest generation of
Raymarine multifunction displays.
Dxxxxx-1
1
Passive speaker (A80198)
2
Active speaker (A80199)
Active speakers
Active speakers connect in-line with your handset and include a
built-in amplifier and dedicated volume control.
Passive speakers
Passive speakers connect to the speaker pigtail on the handset
adaptor cable, speaker volume is controlled using the handset
volume controls. Passive speakers do not have a built-in
amplifier or volume control.
Note: You can only connect 1 active speaker or 1 passive
speaker per handset station.
12
Ray260
Chapter 3: Planning the installation
Chapter contents
•
3.1 System integration on page 14
•
3.2 Typical systems on page 15
•
3.3 Installation checklist on page 16
•
3.4 Schematic diagram on page 16
•
3.5 System protocols on page 17
•
3.6 Parts supplied on page 17
Planning the installation
13
3.1 System integration
Your VHF radio can be connected to the following marine electronics devices.
2
0
3
0
4
0
1
0
5
6
D12611-1
Item
Device type
Maximum quantity
Suitable devices
Connections
1
Ray260 handset
3
Ray260 handset
1 per base station handset connection
2
Active Speaker
3
Ray260 active speaker
1 per handset
3
Passive speaker
3
Ray260 passive speaker
1 per handset
4
Loud hailer
1
• 30 Watt Loud hailer
power/data cable
• 30 Watt Loud hailer with listen-back
5
Raymarine multifunction
display
6
The Ray260 is compatible with the following
Raymarine multifunction displays:
SeaTalkng or NMEA 0183
• a Series
• c Series
• e Series
• gS Series
• C-Series Widescreen (NMEA 0183 DSC
messages only)
• E-Series Widescreen (NMEA 0183 DSC
messages only)
• G-Series system (NMEA 0183 DSC
messages only)
6
GPS Receiver
1
• RS130
• RS125
SeaTalkng or NMEA 0183 with an
NMEA 0183 to NMEA 2000 converter.
• Raymarine multifunction display equipped
with internal GPS
Note: The Ray260 does not support connection to NMEA 0183 and SeaTalkng at the same time.
14
Ray260
3.2 Typical systems
The Ray260 can be installed as a standalone radio with
peripherals or as part of a marine electronics network.
Standalone DSC VHF radio system
1
2
4
3
0
5
D12614-3
1. Ray260 base station
2. Handset
3. Handset extension cable
4. Handset adaptor cable
5. Passive speaker
Planning the installation
15
Extended system
1
0
2
5
4
3
INTCM
6
0
7
SeaTalkng
8
INTCM
10
INTCM
0
9
D1281 1-1
1. Station 1 active speaker
2. Station 1 handset
3. Ray260 base station
4. Loud hailer
5. GPS receiver
6. Station 2 active speaker
7. Station 2 handset
8. Station 3 handset
9. Station 3 passive speaker
10. Multifunction display
Note: Each station can support connection of 1 passive OR 1 active speaker.
3.3 Installation checklist
3.4 Schematic diagram
Installation includes the following activities:
Installation Task
A schematic diagram is an essential part of planning any
installation. It is also useful for any future additions or
maintenance of the system. The diagram should include:
1
Plan your system.
• Location of all components.
2
Obtain all required equipment and tools.
• Connectors, cable types, routes and lengths.
3
Site all equipment.
4
Route all cables.
5
Drill cable and mounting holes.
6
Make all connections into equipment.
7
Secure all equipment in place.
8
Power on and test the system.
16
Ray260
3.5 System protocols
3.6 Parts supplied
Your product can send and receive position information, e.g.
latitude and longitude using any of the following protocols:
The parts supplied with your Ray260 are shown below.
1
• SeaTalkng
2
3
• NMEA 2000
0
• NMEA 0183
Using these protocols enables your radio to send position
information to other devices in your system whenever it receives:
4
5
• a response to a DSC position request.
6
7
8
• a DSC distress call
10
9
Note: You may find that your product or system does not use
all of the protocols described in this section.
11
12
Seatalkng
SeaTalkng (Next Generation) is an enhanced protocol for
connection of compatible marine instruments and equipment. It
replaces the older SeaTalk and SeaTalk2 protocols.
13
D12624-2
SeaTalkng utilizes a single backbone to which compatible
instruments connect using a spur. Data and power are carried
within the backbone. Devices that have a low draw can be
powered from the network, although high current equipment will
need to have a separate power connection.
SeaTalkng is a proprietary extension to NMEA 2000 and the
proven CAN bus technology. Compatible NMEA 2000 and
SeaTalk / SeaTalk2 devices can also be connected using the
appropriate interfaces or adaptor cables as required.
NMEA 2000
NMEA 2000 offers significant improvements over NMEA 0183,
most notably in speed and connectivity. Up to 50 units can
simultaneously transmit and receive on a single physical bus at
any one time, with each node being physically addressable. The
standard was specifically intended to allow for a whole network
of marine electronics from any manufacturer to communicate on
a common bus via standardized message types and formats.
NMEA 0183
The NMEA 0183 Data Interface Standard was developed by
the National Marine Electronics Association of America. It is an
international standard to enable equipment from many different
manufacturers to be connected together and share information.
The NMEA 0183 standard carries similar information to SeaTalk.
However it has the important difference that one cable will only
carry information in one direction. For this reason NMEA 0183
is generally used to connect a data receiver and a transmitter
together, e.g. a compass sensor transmitting heading to a radar
display. This information is passed in ‘sentences’, each of which
has a three letter sentence identifier. It is therefore important
when checking compatibility between items that the same
sentence identifiers are used some examples of which are:
1
Ray260 Base station
2
Ray260 Handset
3
Ray260 speaker including cable (depending on variant the
speaker may be passive or active.)
4
Speaker gasket
5
4 x screws for base station mounting
6
2 x Screws for handset mounting
7
SeaTalkng blanking plug
8
2 x handset station blanking plugs
9
Handset extension kit
10
4 x Thumb nut and studs for speaker mounting
11
Handset mounting clip
12
Documentation pack
13
Power / Data cable 1 m (3.3 ft.)
Handset extension kit contents
The handset extension kit includes the parts shown below.
• VTG - carries Course and Speed Over Ground data.
1
2
4
5
6
7
3
• GLL - carries latitude and longitude.
D12649-1
• DBT - carries water depth.
• MWV - carries relative wind angle and wind speed data.
NMEA Baud rates
The NMEA 0183 standard operates at a number of different
speeds, depending upon the particular requirement or equipment
capabilities. Typical examples are:
• 4800 baud rate. Used for general purpose communications,
including FastHeading data.
• 38400 baud rate. Used for AIS and other high speed
applications.
Planning the installation
1
Splash-proof cap
2
Nut
3
Handset adaptor cable 10 m (32.8 ft.)
4
Washer
5
3 x Mounting screws
6
Gasket
7
Mounting plate
17
18
Ray260
Chapter 4: Cables and connections
Chapter contents
•
4.1 General cabling guidance on page 20
•
4.2 Connections overview on page 20
•
4.3 Power connection on page 21
•
4.4 NMEA 0183 connection on page 22
•
4.5 Loud hailer connection on page 22
•
4.6 Handset connection on page 23
•
4.7 Passive speaker connection on page 23
•
4.8 Active speaker connection on page 24
•
4.9 SeaTalkng connection on page 24
Cables and connections
19
4.1 General cabling guidance
4.2 Connections overview
Cable types and length
The connections shown below are available on the Ray260
Base station.
It is important to use cables of the appropriate type and length
• Unless otherwise stated use only standard cables of the
correct type, supplied by Raymarine.
1
• Ensure that any non-Raymarine cables are of the correct
quality and gauge. For example, longer power cable runs may
require larger wire gauges to minimize voltage drop along the
run.
Routing cables
Cables must be routed correctly, to maximize performance and
prolong cable life.
• Do NOT bend cables excessively. Wherever possible, ensure
a minimum bend diameter of 200 mm (8 in) / minimum bend
radius of 100 mm (4 in).
2
3
4
5
6
200 mm (8 in)
D12812-1
1
Antenna connection
2
HS1 — Station 1 port
3
HS2 — Station 2 port
• Protect all cables from physical damage and exposure to heat.
Use trunking or conduit where possible. Do NOT run cables
through bilges or doorways, or close to moving or hot objects.
4
HS3 — Station 3 port
5
SeaTalkng connection
• Secure cables in place using tie-wraps or lacing twine. Coil
any extra cable and tie it out of the way.
6
Power / NMEA 0183 / Loud hailer connection
100 mm (4 in)
• Where a cable passes through an exposed bulkhead or
deckhead, use a suitable watertight feed-through.
• Do NOT run cables near to engines or fluorescent lights.
Always route data cables as far away as possible from:
• other equipment and cables,
• high current carrying ac and dc power lines,
• antennae.
Strain relief
Ensure adequate strain relief is provided. Protect connectors
from strain and ensure they will not pull out under extreme sea
conditions.
Circuit isolation
Appropriate circuit isolation is required for installations using
both AC and DC current:
• Always use isolating transformers or a separate power-inverter
to run PC’s, processors, displays and other sensitive electronic
instruments or devices.
• Always use an isolating transformer with Weather FAX audio
cables.
• Always use an isolated power supply when using a 3rd party
audio amplifier.
• Always use an RS232/NMEA converter with optical isolation
on the signal lines.
• Always make sure that PC’s or other sensitive electronic
devices have a dedicated power circuit.
Cable shielding
Ensure that all data cables are properly shielded that the
cable shielding is intact (e.g. hasn’t been scraped off by being
squeezed through a tight area).
Blanking plugs
Connectors not in use should be protected using blanking plugs.
Connectors on the product or accompanying cables, that are
not in use (not connected), should be covered using blanking
plugs if supplied.
20
Ray260
4.3 Power connection
Sharing a breaker
The power supply should be connected as shown below:
Where more than 1 piece of equipment shares a breaker you
must provide protection for the individual circuits. E.g. by
connecting an in-line fuse for each power circuit.
-
+
1
1
2
3
4
2
3
6
12 v dc +
7
12 v dc -
5
6
8
4
4
D12612-2
1. Ray260 base station
D11637-2
2. Power cable
1
Positive (+) bar
3. Vessel power supply
2
Negative (-) bar
4. Red positive wire
3
Circuit breaker
4
Fuse
5. Black negative wire.
6. In-line 10 A fuse.
Where possible, connect individual items of equipment to
individual circuit breakers. Where this is not possible, use
individual in-line fuses to provide the necessary protection.
7. NMEA 0183 wires.
8. Loud hailer wires
The unit should be powered from a dedicated circuit breaker,
that has appropriate circuit protection. If the unit is not powered
directly from a dedicated circuit breaker then a separate isolation
switch should be fitted to the units power supply.
The unit is powered on when the power cable is attached to the
vessel’s power supply.
Important: When the vessel is unattended the unit should
always be switched off by the circuit breaker or isolation
switch.
Warning: Chassis grounding
Do NOT ground this product using the chassis
ground terminal.
Grounding this product to a vessel’s RF ground
may cause galvanic corrosion.
Grounding
This product is grounded through the 0 V dc negative wire on
the power cable and does not require a drain (shield) to be
connected to the base station’s ground terminal.
Warning: Positive ground systems
Do not connect this unit to a system which has
positive grounding.
Breakers, fuses and circuit protection
The power cable includes an in-line fuse. It is recommended that
you fit an additional thermal breaker or fuse at the distribution
panel.
In-line fuse rating
Thermal breaker rating
10 A in-line slow-blow fuse fitted
within power cable
7 A (if only 1 device is connected)
Note: The suitable fuse rating for the thermal breaker is
dependent on the number of devices you are connecting. If in
doubt consult an authorized Raymarine dealer.
Cables and connections
21
4.4 NMEA 0183 connection
4.5 Loud hailer connection
The NMEA 0183 wires on the power/data cable can be used to
connect the radio to a GPS receiver or a Raymarine multifunction
display.
A single 30 watt loud hailer can be connected to the base station
via the loud hailer wires on the power / data cable.
Note: Connections cannot be made using SeaTalkng and
NMEA 0183 at the same time.
1
1
2
2
D12813-1
3
4
1
(+) Hailer wire (Purple)
2
(-) Hailer wire (Gray)
5
Connecting loud hailer wires
6
D12613-1
1. Ray260 base station.
Loud hailer wires should be connected securely and covered to
prevent corrosion.
2. Power/data cable.
3. Yellow – Receive positive (+) wire.
4. Green – Receive negative (-) wire.
5. White – Transmit positive (+) wire.
6. Brown – Transmit negative (-) wire.
The NMEA wires on the product’s power / data cable should
be connected to a compatible NMEA 0183 devices as shown
in the table below:
Ray260
NMEA 0183 device
Yellow – Receive positive (+)
to
Transmit positive (+)
Green – Receive negative (-)
to
Transmit negative (-)
White – Transmit positive (+)
to
Receive positive (+)
Brown – Transmit negative (-)
to
Receive negative (-)
Connecting NMEA 0183 wires
NMEA 0183 wires should be connected securely and covered to
prevent corrosion.
22
Ray260
4.6 Handset connection
4.7 Passive speaker connection
Up to 3 stations can be connected to the unit.
A passive speaker can be connected to the handset cable using
the external speaker pigtail wires.
A station must include a handset and can include a passive or
an active speaker. A handset must be connected to the station
1 port (HS1), this handset has priority over other connected
handsets.
1
Optional extension and adaptor cables can be used to increase
the distance of the handset from the base station, or to add a
passive speaker. The maximum extended cable length from
base station to handset is 50 metres (164 ft).
2
Note: You cannot connect an active and a passive speaker to
the same station.
Refer to 4.7 Passive speaker connection and 4.8 Active speaker
connection for details on connecting the handset and speakers.
Connecting handsets and cables
Follow the steps below to connect handsets and extension
cables together.
1. Ensure the cable connectors are correctly orientated.
2. Ensure connectors are fully inserted.
3. Tighten locking collars by Rotating clockwise.
4
3
0
5
D12614-3
1. Base station
2. Handset
3. Handset extension cable (optional)
4. Handset adaptor cable
5. Passive speaker
Note: When using the optional handset extension cable the
extension cable must be connected to the base station side of
the speaker.
Cables and connections
23
4.8 Active speaker connection
4.9 SeaTalkng connection
An active speaker can be connected using the handset cable or
handset extension cable.
The Ray260 can interface with Raymarine GPS receivers and
Raymarine multifunction displays using the SeaTalkng connector.
0
A Raymarine SeaTalkng GPS receiver cannot be connected
directly to the Base station as GPS receivers are powered via
the SeaTalkng backbone.
2
3
Note: If your unit has both SeaTalkng and NMEA 0183
connected then you must select which connection you want
to be active using the DSC Menu > Connection > Interface
menu options. Refer to 6.8 Selecting NMEA 0183 or SeaTalkng
connection for details.
1
Connecting SeaTalkng
The Ray260 can interface with Raymarine GPS receivers
and Raymarine multifunction displays through the SeaTalkng
connector.
4
D12647-2
Before connecting to SeaTalkng, refer to the SeaTalkng
Reference Manual, to ensure that the maximum permitted Load
Equivalence Number (LEN), for the SeaTalkng system is not
exceeded once this product is connected.
1. Base station
2. Active speaker
3. Handset
4. Handset extension cable (optional)
Note: When using the optional handset extension cable the
extension cable must be connected to the base station side
of the speaker
Connecting active speakers
Active speakers must be connected to the system as described
below.
0
1
2
D12648-1
1
2
Connector (1) must be connected either directly to the
handset or to the handset via an extension cable
Connector (2) must be connected either directly to the base
station or to the base station via an extension cable
1. Ensure the cable connectors are correctly orientated.
2. Ensure connectors are fully inserted.
3. Tighten locking collars by Rotating clockwise.
24
D12615-1
SeaTalkng
1. Rotate the
connector’s locking collar anti
clockwise, to the unlock position.
2. Ensure the spur cable connector is correctly orientated.
3. Fully insert the spur cable connector into the SeaTalkng
connector on the unit.
4. Rotate the locking collar clockwise 2 clicks, to the locked
position.
Ray260
Chapter 5: Location and mounting
Chapter contents
•
5.1 General location requirements on page 26
•
5.2 Base station dimensions on page 27
•
5.3 Base station mounting on page 28
•
5.4 Speaker mounting on page 28
•
5.5 Handset mounting on page 29
Location and mounting
25
5.1 General location requirements
Power supply
When selecting a location for the unit it is important to consider a
number of factors.
Select a location that is as close as possible to the vessel’s DC
power supply. This will help to keep cable runs to a minimum.
Antenna mounting and EME exposure
Ensure that the antenna is connected to the radio before
transmission.
Raymarine declares a Maximum Permissible Exposure (MPE)
radius of 1.5 metres (4.9 ft) (per OET Bulletin 65) for this system,
assuming 25 watts output to an omnidirectional antenna of 3dBi
gain or less.
For watercraft with suitable structures, the antenna base must
be at least 3.5 metres (11.5 ft) above the main deck to meet
the MPE for persons up to 2 metres (6.6 ft) tall. For watercraft
without such structures, the antenna must be mounted so that
its base is a minimum of 1.5 metres (4.9 ft) vertically from heads
of all persons.
The antenna must be isolated from the vessel’s metalwork using
an insulated (e.g. plastic) mounting bracket.
Compass safe distance
To prevent potential interference with the vessel's magnetic
compasses, ensure an adequate distance is maintained from
the product.
When choosing a suitable location for the product you should
aim to maintain the maximum possible distance from any
compasses. Typically this distance should be at least 1 m (3 ft)
in all directions. However for some smaller vessels it may not
be possible to locate the product this far away from a compass.
In this situation, when choosing the installation location for your
product, ensure that the compass is not affected by the product
when it is in a powered state.
Ventilation requirements
To provide adequate airflow:
• Ensure that equipment is mounted in a compartment of
suitable size.
• Ensure that ventilation holes are not obstructed.
• Ensure adequate separation of equipment.
Mounting surface requirements
Ensure units are adequately supported on a secure surface. Do
NOT mount units or cut holes in places which may damage the
structure of the vessel.
Cable routing requirements
Ensure the unit is mounted in a location which allows proper
routing and connection of cables:
• Minimum cable bend radius of 100 mm (3.94 in) is required
unless otherwise stated.
• Use cable supports to prevent stress on connectors.
Water ingress
Base station
Although the base station is waterproof to IPX6 standard, it is
recommended that the base station be mounted below decks,
in an area protected from prolonged and direct exposure to rain
and salt spray.
Handset and speakers
The handsets, passive speakers, and active speakers are
waterproof to IPX7 and can be mounted above or below decks.
Although the unit is waterproof, it is good practice to locate it in
an area protected from prolonged and direct exposure to rain
and salt spray.
Electrical interference
Select a location that is far enough away from devices that
may cause interference, such as motors, generators and radio
transmitters/receivers.
26
Ray260
A
0
B
C
G
The dimensions of the Ray260 base station are shown below.
A
B
5.2 Base station dimensions
C
D
E
F
D
D12607-1
D12606-1
A
112 mm (4.4 in)
B
112 mm (4.4 in)
C
20.3 mm (0.799 in)
D
15.55 mm (0.61 in)
A
269.5 mm (10.6 in)
E
25 mm (0.98 in)
B
168 mm (6.6 in)
F
30 mm (1.18 in)
C
66.12 mm (2.6 in)
G
91.5 mm (3.6 in)
D
80.0 mm (3.15 in)
Handset dimensions
The dimensions of the handset are shown below.
C
B
A
D
0
INTCM
0
0
D12609-2
A
65.4 mm (2.57 in)
B
154.4 mm (6.07 in)
C
7 mm (0.275 in)
D
38.5 mm (1.5 in)
Speaker dimensions
The dimensions of the Ray260 passive / active speaker are
shown below.
Note: The passive speaker does not have a volume control
knob.
Location and mounting
27
5.3 Base station mounting
5.4 Speaker mounting
In order to mount the Ray260 base station follow the steps below.
In order to mount a passive or active speaker follow the steps
below.
Note: Raymarine recommends mounting the unit vertically.
1
2
3
0
D12608-1
D12242-1
1. Check the selected location for the unit, a clear flat area
with suitable clearance for air ventilation around the unit is
required.
2. Secure the Base station mounting template in the chosen
location using adhesive tape.
3. Drills 4 holes at the marked location on the template.
4. Remove the mounting template.
5. Screw in the supplied fixing screws approximately half way
into the holes.
6. Place the unit onto the fixing screws.
7. Push the unit down to engage the key slots in the unit.
8. Tighten the screws.
Note: Drill bit, tap size and tightening torque is dependent on
the thickness and type of material the unit is to be mounted on.
28
The speaker is designed to be flush mounted.
1. Check the selected location for the unit, a clear flat area is
required.
2. Cut out the identified shaded area(s) from the mounting
template
3. Fix the speaker mounting template (supplied) to the selected
location, using adhesive tape.
4. Drill out the required mounting holes, as indicated on the
mounting template.
5. If possible use an appropriate size hole cutting saw and cut
out the center hole, or
6. Using a suitable hole cutting saw, make pilot holes in each
corner of the cut out area and using a jigsaw cut along the
inside edge of the cut out line.
7. Remove the mounting template.
8. Ensure that the unit fits into the removed area and then file
around the cut edges until smooth.
9. Feed the speaker cable through the cut out hole and
connect the opposite end of the speaker wire to the relevant
connector.
10. Attach the 4 x mounting studs to the rear of the speaker.
11. Hold the speaker into place and secure by tightening the
provided thumb nuts onto the mounting studs.
Ray260
5.5 Handset mounting
5. Hold the clip in place and secure using the screws provided.
6. Pull the connector end of the cable through the hole in the
mounting panel.
In order to mount the handset clip follow the steps below.
0
Note: The handset extension cable includes a speaker cable.
If you are not connecting an external passive speaker then
cover the speaker cable with waterproof tape or sealant to
prevent corrosion.
0
1. Check the selected location for the handset clip, a clear flat
area is required, with sufficient space around it to place and
remove the handset.
2. Using a pencil, offer up the handset clip to the desired
location and mark the location of the screw holes on the
mounting surface.
3. Drill the mounting holes using a suitable size drill bit.
4. Hold the clip in place and secure using the screws provided.
7. Insert the washer (labelled 6 in the diagram below) over the
end of the connector.
8. Insert the gasket (labelled 4 in the diagram above) over the
end of the connector.
9. Insert the mounting plate (labelled 3 in the diagram above)
over the end of the connector, ensuring that the screw holes
are aligned with the respective holes in the gasket and the
mounting panel.
10. Place the nut (labelled 5 in the diagram above) over the
connector and tighten clockwise using a 13/16 in. (21 mm)
socket wrench.
11. Align the small end of the splash-proof cap (labelled 1 in the
diagram above) with one of the screw holes on the gasket.
12. Secure the mounting plate to the mounting surface using the
supplied screws.
13. Attach the handset or microphone to the cable connector and
rotate clockwise to secure.
14. Connect the opposite end of the cable to the required
connector either on the base station or to another
pass-through panel plate connector.
Note: Drill bit, tap size and tightening torque is dependent on
the thickness and type of material the unit is to be mounted on.
Note: Drill bit, tap size and tightening torque is dependent on
the thickness and type of material the unit is to be mounted on.
0
0
0
0
0
0
0
0
0
0 0
0
0
0
0
0
0
0
0
0
0
0
0
0
0
0
0
0
0
D12610-1
Pass-through panel plate mounting
When installing the handset use the supplied, handset extension
cable kit to pass the cable through a panel (e.g. bulkhead).
4
3
2
1
7
6
5
D12192-1
1
Splash-proof cap
2
Mounting screws x3
3
Mounting plate
4
Gasket
5
Nut
6
Washer
7
Extension cable connector
1. Check the selected location for the mounting of the handset
cable extension mounting plate, a clear flat area is required.
2. Using a pencil, offer up the mounting plate to the desired
location and mark the location of the screw holes and the
center hole on the mounting surface.
3. Drill the mounting holes using a suitable size drill bit.
4. Drill the center hole using a 25 mm (1 in.) hole cutting saw.
Location and mounting
29
30
Ray260
Chapter 6: Getting started
Chapter contents
•
6.1 Controls on page 32
•
6.2 Switching the radio on on page 32
•
6.3 Switching the radio off on page 33
•
6.4 Voltage detection on page 33
•
6.5 Handset display LCD overview on page 34
•
6.6 Entering your MMSI number on page 35
•
6.7 Entering your ATIS ID on page 36
•
6.8 Selecting NMEA 0183 or SeaTalkng connection on page 37
•
6.9 Regional programming on page 37
•
6.10 Adjusting the LCD backlight level on page 38
•
6.11 Adjusting the LCD contrast on page 38
•
6.12 Changing the transmit power on page 39
•
6.13 GPS setup on page 39
•
6.14 Handset station priority on page 40
Getting started
31
6.1 Controls
6.2 Switching the radio on
You can access all functions, with the exception of adjusting the
active speaker volume, from the handset.
To power the radio on using any connected handset follow the
steps below.
Ray260 / Ray
260 AIS
With the power off:
1. Press the red 16/9 / 16 PLUS button.
The radio will power up and the radios MMSI number is
displayed on-screen for approximately 3 seconds before
displaying the main screen.
Ray260E / Ra
y260EAIS
1
1
5
2
5
2
6
3
INTCM
4
7
8
1
6
3
INTCM
4
2
MY MMSI I S
123456789
7
8
RAY2 6 0 E
V2 .0 0 A
I NPUT MMSI
TO ACTI VATE DSC
PRESS CLEAR
TO CONTI NUE
RAY2 6 0 E
V2 .0 0 A
D12617-1
D12616-2
1. PTT (Push to talk)
Press and hold to send a voice message. Release to return
to receive mode.
Note: The maximum transmit time is limited to 5 minutes
to prevent un-intentional transmissions from occupying
the VHF channel.
1
Startup screen with MMSI registered (auto dismisses after 3
seconds).
2
Startup screen with no MMSI registered (Press CLEAR to
dismiss).
Note: If no MMSI number has been programmed then an
alarm is sounded and a warning message is displayed
INPUT MMSI TO ACTIVATE DSC — PRESS CLEAR TO
CONTINUE. DSC functions will not be available until an MMSI
number has been entered.
2. VOL/SQ
• Adjusts volume up and down.
• Press and release the center button to activate the
squelch threshold adjustment.
• With squelch activated use the up and down buttons to
increase and decrease the squelch level.
3. CLEAR/WX or CLEAR
• Press and release to terminate a function and return to
the last used channel.
• Press and hold for 3 seconds to select the weather mode
(North America and Canada only).
4. 16/9 or 16 PLUS
• Press to power up the radio.
• Press and hold for 5 seconds to power off.
• When powered on press to cycle between priority
channels and last used channel.
5. Soft buttons
The soft button’s functions change according to context,
such as navigate through menus or to make a menu
selection. Press to select the corresponding functions as
identified by the on-screen label.
6. MENU / DSC
• Press and release to access the radio menu.
• Press and hold for 3 seconds to access the DSC menu.
7. OK/INTCM
• Press and release on menu options to confirm a selection
or value.
• Press and hold for 3 seconds to open the intercom menu.
8. Channel Up and Down
• Moves the selected channel up or down.
• Scrolls up or down through menu items.
9. DISTRESS
The Distress button is located on the back of the handset.
Push up the spring loaded cover and press this button to
make a DSC distress call.
32
Ray260
6.3 Switching the radio off
6.4 Voltage detection
To switch the radio off follow the steps below.
The radio detects the power supply voltage and a warning is
displayed if the supply voltage is under or over recommended
power.
With the radio switched on:
1. Press and hold the 16/9 button for 5 seconds.
An over voltage warning is displayed if the radio’s supply voltage
is between 15.7 V dc and 16.0 V dc. The radio will automatically
power down if the supply voltage exceeds 16.5 V dc, the warning
will be cancelled when the radios power supply voltage fails
below 15.6 V dc.
An under voltage alarm is displayed if the radio’s supply voltage
is 10.5 V dc or less. The radio will be unable to operate reliably
below 10.5 V dc.
Getting started
33
6.5 Handset display LCD overview
change request. Applies to Distress and All ships Urgency
calls only.
The information below describes the on-screen characters and
icons which the radio displays on the main screen and what
they mean.
1
2
3
RX TX HI LO ATIS SAVED LOCAL FAV123
4
I NT
6
7
8
DUP
A
0016
DL WATCH
0009
5
M8 2 ° 3 4 .5 N
1 2 3 ° 4 5 .6 W
AM0 1 :2 3 UT
0028A
(Satellite icon) — Indicates that positional data is
available from your GPS.
•
(Envelope icon) — When flashing, indicates that the
radio has received a DSC call. Details of the call can be
viewed in the DSC received calls log.
•
(Cloud icon) — Indicates that the radio is monitoring
for weather alert broadcasts. US and Canada only.
4. Frequency group
Indicates which channel set is selected:
• USA — United States of America.
CHANNEL NAME
0001A
•
• INT — International.
0088A
D12618-1
1. Duplex
• DUP — Indicates the current channel is duplex.
2. Channel suffix
• A — Indicates that the currently selected US or Canadian
channel is simplex, although its International equivalent
is semi-duplex (05A, for example). This channel uses
the transmit frequency of the International channel for
transmitting and receiving. If a channel is simplex in all 3
channel sets (US, Canadian and International — channel
6 for example), the does not require the A suffix.
Note: Simplex means that the radio transmits and
received on the same frequency for this channel.
Semi-duplex channels use separate frequencies to
transmit and receive.
• B — Indicates that you cannot transmit on the currently
selected channel as it is receive only. Used with Canadian
channels only.
3. ICONS
The icon definitions are listed below:
• CAN — Canada.
• WX — Weather
Note: Special licensing is required to receive USA and
Canadian channel sets.
5. Information
• Indicates radio functions, GPS position data or special
conditions, depending on the situation. The screen is
different when transmitting/receiving a DSC call or setting
up a menu item.
6. Channel
Indicates the currently selected channel.
7. Channel name
Indicates the channel name.
8. Soft button legends
Indicates the current function of the associated soft buttons.
DSC Call screen overview
When transmitting or receiving a DSC call, specific call
information is shown on-screen.
• RX (Receiving) — Indicates that the radio is receiving a
radio signal.
RX HI
• TX (Transmitting) — Indicates the PTT button is being
pressed and the radio is transmitting.
• HI (High power) — Indicates that the transmitters power
is set to high (25 watts).
• LO (Low power) — Indicates that the transmitters power
is set to low (1 watt).
• ATIS (ATIS active) — Indicates ATIS transmission is
enabled. Only available in European countries using the
international channel set.
• SAVED (Memory mode) — Indicates the current channel
has been saved in memory. Appears during saved scan
and priority saved scan modes.
• LOCAL (Local/distant mode) — Indicates the radio is in
local reception mode, which decreases receiver sensitivity
in high traffic areas to decrease unwanted reception.
• FAV123 (Favorite channel) — Indicates which of the
3 favorite channel banks is currently selected. Each
bank displays a different favorite channel that you have
assigned for each of the 3 soft button labels at the bottom
of the screen. This gives you a total of 9 favorite channels
that you can switch to at the press of a button.
34
•
(Telephone icon) — Indicates that the radio has
received a voice mail.
•
(Automatic channel changing blocked icon) —
Indicates that your radio will not automatically switch to
the channel requested by an incoming DSC call but will
prompt you to manually accept or decline the channel
1
DI STRESS
0 0 '0 1
ALERT
FROM:1 2 3 4 5 6 7 8 9
EVENT:UNDESI G
OK
PAUSE
2
3
P1 /
5
4
4
D12619-1
1. DSC call information
The DSC call information details.
2. Left soft button function
In this example pressing the left soft button will accept the
incoming distress call.
3. Center soft button function
In this example pressing the center soft button will pause
the current DSC call.
4. Right soft button function
In this example the right soft button is indicating that the
DSC information being shown is page 1 of 4 page of
information, pressing the right soft button will display the
next page of information.
5. Call time
The time the current call has been active.
Ray260
6.6 Entering your MMSI number
Menu screen overview
The radio’s menu options can be viewed on-screen.
To program your radio with your MMSI number follow the steps
below.
HI
1
2
- - - MAI N MENU- - - HAI L/ I NTRCOM/ FOG
GPS SETUP
CONNECTI ON
6
- MY MMSI - - - - - - - ENTER AGAI N
MMSI :- - - - - - - - BACK
OK
HI
HI
OK
3
HI
HI
- - - - DSC MENU- - - RECEI VED CALLS
MY MMSI
PHONEBOOK
4
5
- MY MMSI - - - - - - - ENTER MY MMSI
MMSI :- - - - - - - - -
- MY MMSI - - - - - - - ENTER AGAI N
MMSI :123456789
PRESS [OK]
BACK
BACK
D12620-1
1. Selection arrow
Indicates the currently highlighted menu item.
HI
HI
2. Menu items
This is a list of the available menu items.
- MY MMSI - - - - - - - ENTER MY MMSI
MMSI :1234- - - - -
3. OK
Selecting OK will open the highlighted menu option
BACK
4. Up arrow
Indicates that there are more menu options above , which
can be accessed by pressing the right soft button.
5. Down arrow
Indicates that there are more menu options below, which
can be accessed by pressing the center soft button.
- MY MMSI - - - - - - - CONFI RMED
MMSI :123456789
REGI STER?
NO
HI
YES
HI
- MY MMSI - - - - - - - ENTER MY MMSI
MMSI :123456789
PRESS [OK]
BACK
OK
OK
- MY MMSI - - - - - - - MMSI :123456789
BACK
D12621-1
6. Menu name
Indicates the menu currently displayed.
1. Press and hold the MENU / DSC button to display the DSC
menu.
2. Select MY MMSI from the DSC menu.
• If NO MMSI ID CONTACT DEALER is displayed on-screen
then you must contact your local Raymarine dealer and
request them to input the MMSI number for you.
• If ENTER MY MMSIis displayed then you can manually
enter your MMSI. The first character of the blank MMSI
number will be highlighted.
Note: If ‘0’ is entered as the first digit then the second digit will
automatically be changed to a ‘0’. MMSI numbers beginning
with ‘0’ are only for use by the Coast Guard.
3. Use the Channel Up and Down buttons to cycle through
available numbers.
4. Select Ok to move to the next character.
5. Repeat steps 3 and 4 above until the full 9 digit MMSI number
is displayed on-screen.
6. You can also use the Right arrow and Left arrow soft
buttons to change which character is highlighted.
7. When finished select Ok to confirm the MMSI number.
You will be requested confirm the MMSI number by repeating
the entry.
8. With ENTER AGAIN displayed on-screen follow steps 3 to 6
above to enter the MMSI number again.
9. Select Ok to confirm.
10. If NOT CONFIRMED is displayed then select Back and repeat
steps 2 to 9 above.
11. If CONFIRMED is displayed then select Yes to confirm and
save the MMSI number.
The saved MMSI number is displayed on-screen (e.g.
MMSI:123456789).
12. Select Back to go back to the DSC menu.
Note: You can only enter the MMSI number once, if you have
stored an incorrect MMSI number in your product, the product
will have to be reset by an authorized Raymarine dealer.
Getting started
35
6.7 Entering your ATIS ID
Enabling / Disabling the ATIS function
To program your radio with your ATIS ID follow the steps below.
With the ATIS ID programmed you can now enable or disable
the ATIS function as required by following the steps below.
---MAIN MENU---gGPS SETUP
ATIS OPERATION
CONNECTION
- MY ATI S I D- - - - ENTER AGAI N
I D :- - - - - - - - BACK
OK
HI
HI
HI
-ATIS OPERATIONMY ATIS ID
ATIS FUNCTION
[BACK]
- MY ATI S I D- - - - ENTER AGAI N
I D :123456789
PRESS [OK]
BACK
BACK
HI
- ATI S OPERATI ONMY ATI S I D
ATI S FUNCTI ON
[BACK]
OK
OK
- MY ATI S I D- - - - CONFI RMED
I D :123456789
REGI STER?
NO
BACK
HI
OK
OK
OK
HI
HI
- ATI S FUNCTI ON- ON
OFF
[BACK]
BACK
- ATI S FUNCTI ON- ATI S OFF
THEN DSC ON
PRESS [OK]
OK
BACK
From the ATIS operation menu:
1. Select ATIS Function.
2. Select ON to enable the ATIS function, or
The message ATIS ON THEN DSC OFF is displayed
on-screen to warn that when ATIS is enabled then DSC
functions are not available.
3. Select OFF to disable the ATIS function.
The message ATIS OFF THEN DSC ON is displayed
on-screen to warn that when ATIS is disabled then DSC
functions are available again.
YES
- MY ATI S I D- - - - ID
HI
- ATI S FUNCTI ON- ATI S ON
THEN DSC OFF
PRESS [OK]
D12623-1
HI
-MY ATIS ID----ENTER MY ATIS I D
ID:12 3456 789
PRESS [OK]
- ATI S FUNCTI ON- ON
OFF
[BACK]
OK
HI
HI
-MY ATIS ID----ENTER MY ATIS ID
ID : - --------
BACK
Note: If your radio has been configured to use Marcom-C
mode then ATIS will be permanently enabled and you will not
be able to disable ATIS operation. Marcom-C mode is set by
the dealer at point of sale. If you wish to enable or disable
Marcom-C, please contact your Raymarine dealer.
HI
HI
:123456789
BACK
D12622-2
1. Press and release the MENU / DSC button to display the
main menu.
2. Select ATIS OPERATION from the main menu options.
If no ATIS ID has been programmed then the message PLEASE
INPUT ATIS ID FIRST is displayed.
Note: With the ATIS function enabled the following functions
will be disabled:
• If NO ATIS ID CONTACT DEALER is displayed on-screen
then you must contact your local Raymarine dealer and
request them to input the ATIS ID for you.
• DSC functions.
• If ENTER MY ATIS ID is displayed then you can manually
enter your ATIS ID. All ATIS IDs begin with a 9, this is set
automatically and not shown on the display.
• Multiple watch functions.
• Scan functions.
3. Use the Channel Up and Down buttons to cycle through
available numbers.
4. Select Ok to move to the next character.
5. Repeat steps 3 and 4 above until the full ATIS ID is displayed
on-screen.
6. You can also use the Right arrow and Left arrow soft
buttons to change which character is highlighted.
7. When finished select Ok to confirm the ATIS ID.
You will be requested confirm the ATIS ID by repeating the
entry.
8. With ENTER AGAIN displayed on-screen follow steps 3 to 6
above to enter the ATIS ID again.
9. Select Ok to confirm.
10. If NOT CONFIRMED is displayed then select Back and repeat
steps 2 to 9 above.
11. If CONFIRMED is displayed then select Yes to confirm and
register the ATIS ID.
The saved ATIS ID is displayed on-screen (e.g. ID:
123456789).
12. Select Back to go back to the ATIS Operation menu.
Note: You can only enter the ATIS ID number once, if you
have stored an incorrect ATIS ID number in your product, the
product will have to be reset by an authorized Raymarine
dealer.
36
Ray260
6.8 Selecting NMEA 0183 or SeaTalkng
connection
SeaTalkng
The type of connection in use must be selected (i.e.
or NMEA 0183).
1. Press and release the DSC Menu button.
The main menu is displayed.
2. Select Connection.
3. Select Interface.
4. Select the required connection:
i. Select NMEA 2000 if you are connected to a network or
device using the SeaTalkng connector, or
ii. Select NMEA 0183 if you are connected to a device using
the NMEA 0183 connection.
5. For NMEA 0183 connection on a radio that has a built in AIS
receiver, select the required baud rate, either STD Speed
or High Speed.
6.9 Regional programming
The frequency band of the product can be changed and must be
set to the region the product will be used in.
The regions available are:
• USA
• International
• Canada
Changing the frequency band
Before using the product to make DSC or other calls you must
set the frequency band to the relevant region.
HI
- - - MAI N MENU- - - VHF OPERATIONv
HAIL/INTRCOM/FOG
GPS SETUP
OK
HI
- VHF OPERATI ON- WATCH MODE
v
FREQUENCY BAND
CHANNEL NAME
OK
HI
- FREQUENCY BANDUSA
INTERNATIONAL
CANADA
OK
D12815-1
From the Main menu:
1. Select VHF OPERATION.
2. Select FREQUENCY BAND.
The list of available regions is displayed:
• USA
• International
• Canada
3. Select the relevant region.
The selected region icon will be displayed on the top left of
the LCD screen.
• USA = USA
• INT = International
• CAN = Canada
Getting started
37
6.10 Adjusting the LCD backlight level 6.11 Adjusting the LCD contrast
The LCD’s backlight level can be adjusted by following the steps
below.
1. Press and release the MENU / DSC button to display the
main menu.
2. Select SYSTEM CONFIG.
3. Select BACKLIGHT.
The backlight level is displayed.
4. Use the Channel Up and Channel Down buttons or the Left
Arrow and Right Arrow soft buttons to adjust the backlight
to the required level.
5. Select Ok to confirm the new backlight level.
38
The LCD’s contrast level can be adjusted by following the steps
below.
1. Press and release the MENU / DSC button to display the
main menu.
2. Select SYSTEM CONFIG.
3. Select CONTRAST.
The contrast level is displayed.
4. Use the Channel Up and Channel Down buttons or the Left
Arrow and Right Arrow soft buttons to adjust the contrast to
the required level.
5. Select Ok to confirm the new contrast level.
Ray260
6.12 Changing the transmit power
6.13 GPS setup
You can change the power level at which the radio transmits at
by following the steps below.
1. Press and release the MENU / DSC button to display the
main menu.
2. Select VHF OPERATION.
3. Select HI/LO POWER.
4. Select the HI/LO soft button to switch between high and low
power.
When connected to a GPS receiver over NMEA 0183 or
SeaTalkng, the radio can display relevant GPS information.
The information that can be displayed is as follows:
• latitude
• longitude
• UTC time
• COG and SOG
When GPS data is available the GPS satellite icon is displayed
on-screen.
If no GPS data is available then the latitude, longitude and time
can be entered manually so that it can be included in DSC
distress transmissions.
Position data received from other vessels can be sent to and
displayed on a connected Raymarine multifunction display.
No GPS position
If no GPS data is available, after 10 minutes of no data the
GPS icon flashes, NO POS DATA and NO GPS is displayed on
screen and an audible warning is sounded.
Once the warning has been acknowledged the GPS icon will
continue to flash and NO GPS will remain on screen. The
warning will be repeated every 4 hours as long as position data
is still unavailable or has not been entered manually.
If position data has been entered manually but has not been
updated during the previous 4 hours the GPS icon flashes, POS
DATA OLD is displayed on screen and an audible warning is
sounded. This warning will be repeated every 4 hours until
position is manually updated or GPS position data becomes
available.
Where no position data is available or has not been manually
updated for 23.5 hours then position data will change to ‘9’s and
time data will change to ‘8’s.
Entering position details manually
If no GPS receiver is present you can manually enter your
position details.
From the main menu:
1. Select GPS SETUP.
2. Select MANUAL POS.
3.
4.
5.
6.
The Manual position screen requires you to input latitude,
longitude and UTC time.
Use the Channel Up and Channel Down buttons to cycle
through the available characters.
Select OK to move to the next character.
Use the Right Arrow and Left Arrow soft buttons to highlight
the next or previous character.
When the relevant information has been entered select
DONE to confirm the details.
Selecting GPS information to display
on-screen
You can select which GPS information is displayed on-screen.
From the GPS setup menu (Main menu > GPS SETUP):
1. Select SETTING.
The list of GPS information is displayed:
• LAT/LON DISPLAY
• TIME DISPLAY
• TIME OFFSET
• TIME FORMAT
• COG/SOG
2. Select the relevant option.
3. Select ON to display this information on-screen and OFF to
hide the information
Getting started
39
Setting time format and offset
You can select the time format and whether an offset is applied
to the time.
From the GPS setup menu (Main menu > GPS SETUP):
1. Select SETTING.
2. Select TIME OFFSET or TIME FORMAT as required.
3. Use the Channel Up and Channel Down buttons to cycle
through the available values.
4. Select OK to confirm.
Selecting stations to display
6.14 Handset station priority
The handset connected to station 1 (HS1) is given priority over
handsets connected to stations 2 (HS2) and 3 (HS3).
Stations 2 and 3 are given the same priority, with the first station
in use given priority. When a station is making a distress call that
station is given priority until the distress call has been completed.
Station 1 can interrupt station 2 and 3 and take priority by
pressing the PTT button.
When station 1 is in use stations 2 and 3 will display STATION
1 IN USE. If station 2 or 3 is in use then station 1 will show the
normal display and the other station will display STATION 2 IN
USE or STATION 3 IN USE.
You can select which contacts from your phonebook you want
incoming position data to be displayed on the multifunction
display.
Station 1
TX LO
INT
From the GPS setup menu (Main menu > GPS SETUP):
1. Select NMEA OUTPUT.
2. Select ALL STATION to display all incoming position data on
your multifunction display, or
3. Select LISTED STATION to select a contact from your
phonebook.
Station 1
in use
FA
0016
STATION1 IN USE
STATION1 IN USE
M8 2 ° 3 4 .5 N
1 2 3 ° 4 5 .6 W
AM0 1 :2 3 UT
CHANNEL NAME
0001A
TX LO
INT
Station 2
in use
0028A
FA
DUP
0088A
V1
TX LO
A
INT
0016
M8 2 ° 3 4 .5 N
1 2 3 ° 4 5 .6 W
AM0 1 :2 3 UT
0001A
TX LO
INT
Station 3
in use
0028A
FA
DUP
0088A
V1
STATION2 IN USE
A
0016
M8 2 ° 3 4 .5 N
1 2 3 ° 4 5 .6 W
AM0 1 :2 3 UT
0001A
0028A
0088A
V1
TX LO
A
0016
STATION3 IN USE
M8 2 ° 3 4 .5 N
1 2 3 ° 4 5 .6 W
AM0 1 :2 3 UT
CHANNEL NAME
0001A
FA
DUP
CHANNEL NAME
CHANNEL NAME
An (!) exclamation mark is placed next to the selected
station.
40
Station 3
V1
A
DUP
Station 2
0028A
INT
FA
DUP
V1
A
0016
M8 2 ° 3 4 .5 N
1 2 3 ° 4 5 .6 W
AM0 1 :2 3 UT
CHANNEL NAME
0088A
0001A
0028A
0088A
Ray260
Chapter 7: Digital selective calling (DSC)
Chapter contents
•
7.1 Digital Selective Calling (DSC) on page 42
•
7.2 Distress calls on page 43
•
7.3 Urgency calls on page 45
•
7.4 Safety calls on page 46
•
7.5 Routine calls on page 46
•
7.6 Group calls on page 47
•
7.7 Position requests on page 48
•
7.8 Position tracking on page 48
•
7.9 Test calls on page 49
•
7.10 Voice mail on page 49
•
7.11 Received call logs on page 50
•
7.12 Phonebook on page 50
•
7.13 Group list on page 51
•
7.14 DSC options on page 51
Digital selective calling (DSC)
41
7.1 Digital Selective Calling (DSC)
Routine calls
Traditional VHF radio systems require users to listen until
someone speaks, and then determine whether the call is for
them. DSC ensures that calls are received by alerting or
announcing the intended recipient(s) first so they are ready to
listen to the subsequent message on the relevant channel.
DSC is part of the Global Maritime Distress and Safety System
(GMDSS), a maritime communications system for emergency
and distress messages and all types of routine communications
such as ship-to-ship or ship-to-shore.
DSC is a digital signalling system, which operates on VHF
channel 70. DSC calls include other data such as your vessel’s
identification number, purpose of the call, your position and the
channel you want to speak on.
DSC calls can be divided into 4 categories and are prioritized
as shown below:
Routine calls are used for contacting other vessels, marinas,
or shore stations.
Routine calls are made on channel 70 using the dedicated
Maritime Mobile Service Identity (MMSI) number of the station
to be contacted, selecting a VHF working channel and sending
the call. Both radios automatically switch to the chosen channel
for conversation.
Routine calls can also be made to groups — When groups of
ships need the same information (yacht races, club rallies etc.)
a special group-call identity can be used to enable restricted
broadcast calls.
Note: To transmit precise positions, the radio must be
interfaced to a GPS receiver. Otherwise, regular manual
position updating is required.
1. Distress
2. Urgency
3. Safety
4. Routine
Distress
A Distress call should only be used when there is imminent
danger to a vehicle or person that requires immediate assistance.
When making a distress call the following information is
transmitted to all stations within range:
• Vessel MMSI number.
• Vessel position (must be input manually if no GPS position
data is available).
• Local time (must be input manually if no GPS position data
is available).
• Nature of the distress (when designated).
• Transmission frequency.
The call is automatically repeated at approximately 4 minute
intervals until it is acknowledged either by a coast radio station
(CRS) or a vessel within radio range. Distress calls must be
followed by a MAYDAY call on priority channel 16.
Urgency
An urgency call should be used when there is danger to a vehicle
or person that does not require immediate assistance.
When making an urgency call the following information is
transmitted to all stations within range:
• Vessel MMSI number.
• Vessel position (must be input manually if no GPS position
data is available).
• Local time (must be input manually if no GPS position data
is available).
• Transmission frequency.
Once an urgency call is sent it must be followed with a PAN PAN
voice message on channel 16 and include the necessary details.
Safety
A safety call should be used when there is an important
navigational warning or meteorological forecast/broadcast.
Safety alerts can also used for communications during search
and rescue operations.
When making a safety call the following information is
transmitted to all stations within range:
• Vessel MMSI number.
• Vessel position (must be input manually if no GPS position
data is available).
• Local time (must be input manually if no GPS position data
is available).
• Transmission frequency.
Once a safety call is sent it must be followed with a SECURITE
voice message on channel 16 and include the necessary details.
42
Ray260
7.2 Distress calls
Making a distress call
Making a designated distress call
In an emergency you can use your product to make an automatic
DSC distress call.
When making a distress call you can specify the nature of the
distress and if you do not have a valid GPS position available
you can specify coordinates.
55 60 5
HI
HI
HI
- - - - DSC MENU- - - I NDI VI DUAL
DI STRESS
ALL SHI P
- DI STRESS EVENTUNDESI GNATED
FI RE
FLOODI NG
- - - - DI STRESS- - - EVENT SETUP
POSI TI ON SETUP
[BACK]
OK
OK
OK
10
50
15
45
20
40
35 30 25
0
0
0
0
0
0
0
0
0
RX HI
RX HI
DIS TRESS
UNDESI GNATED
...3
COUNTI NG DOWN
DIS TRESS
UNDESI GNATED
TRANSMITTING ...
OK
OK
RX HI
RX HI
DIS TRESS
UNDESI GNATED
...2
COUNTI NG DOWN
DIS TRESS
AWAITI NG ACK...
REMAINING TI ME
TO RESEND..04'20
OK
RX HI
RX HI
DIS TRESS
UNDESI GNATED
...1
COUNTI NG DOWN
DIS TRESS
00'01
ACKNOWLEDGED
FROM:0012345 6 7
ORI G:mYSHIP
OK
OK
INTCM
PAUSE
CANCEL
PAUSE
P 1/3
D12810-1
1. Open the spring loaded door on the rear of the handset.
2. Press and hold the DISTRESS button for 3 seconds.
HI
DI STRESS POS
O
LAT: 12 34. 5678 N
O
LOT: 123 45. 678 9W
UTC: 12:34
Once the DISTRESS button is pressed a 3 second count
down will begin, when the count down reaches zero the
distress call is transmitted.
3. Wait for an acknowledgement of your distress call.
OK
HI
HI
FI RE
O
LAT: 12 34.5678N
O
LOT: 123 45.6789W
UTC: 12:34
OK
BACK
SEND DI STRESS
HOLDI NG DOWN
DI STRESS BUTTON
BACK
D12816-1
1. Press and hold the Menu / DSC button for 2 seconds.
The DSC menu is displayed.
2. Select DISTRESS.
The Distress event list is displayed.
3. Select a distress event from the list.
• UNDESIGNATED
• FIRE
• FLOODING
The distress call is repeated automatically until it is
acknowledged.
4. Press and hold the PTT button.
5. Slowly and clearly speak the details of the distress:
MAYDAY, MAYDAY, MAYDAY
This is <state name of vessel 3 times>
MAYDAY <state name of vessel 1 time>
My position is <state latitude and longitude, or true bearing
and distance from a known point.>
I am <state nature of distress e.g. sinking, on fire etc.>
I have <state number of persons on board and any other
information — drifting, flares fired etc.>
I REQUIRE IMMEDIATE ASSISTANCE
OVER
6. Release the PTT button.
• COLLISION
Making a Mayday call
• GROUNDING
In an emergency you can use your product to make a Mayday
call.
1. Press the 16/9 or 16 PLUS button.
2. Press and hold the PTT button.
3. Slowly and clearly speak the details of the distress:
MAYDAY, MAYDAY, MAYDAY
This is <state name of vessel 3 times>
MAYDAY <state name of vessel 1 time>
My position is <state latitude and longitude, or true bearing
and distance from a known point.>
I am <state nature of distress e.g. sinking, on fire etc.>
I have <state number of persons on board and any other
information — drifting, flares fired etc.>
I REQUIRE IMMEDIATE ASSISTANCE
OVER
4. Release the PTT button.
5. If an acknowledgement is not received then repeat steps
2 to 4 above.
• LISTING
• SINKING
• ADRIFT
• ABANDONING
• PIRACY
• MANOVERBOARD
4. Select the relevant distress event.
• If your radio is receiving a valid GPS position then the
distress type and coordinates are displayed on-screen,
otherwise you will be prompted to enter your position
coordinates.
5. If prompted enter your position coordinates and local time
using the Left Arrow and Right Arrow soft buttons to move
the cursor and the Numeric keypad to enter the relevant
digits.
6. Select DONE.
7. Select OK to confirm distress details.
8. Follow the steps for making a distress call to transmit the
distress alert.
Cancelling a distress call before transmission
To cancel a distress call before it is transmitted follow the steps
below:
1. Release the DISTRESS button before the count down timer
completes.
When the button is released you will be returned to normal
operation.
Cancelling a distress call after transmission
To cancel a distress call after it has been transmitted follow the
steps below:
Digital selective calling (DSC)
43
1. Press the Cancel soft key.
A warning is displayed to inform the user that they are about
to send a ‘Distress cancel call’.
2. Press the Send soft key.
The ‘Distress cancel call’ is sent.
3. Press the OK soft key.
4. Make a broadcast to all stations giving your vessel’s name,
call sign and MMSI number and cancel the false distress alert
Example: “All, Stations, All Stations, All Stations. This is
<NAME>, <CALL SIGN>, <MMSI ID>, <POSITION>. Cancel
my distress alert of <DATE>, <TIME>, <NAME>, <CALL
SIGN>”.
5. Repeat the broadcast described in step 4.
6. Press End to revert back to normal operation.
Receiving a distress call
It is expected that only a Coast Radio Station (CRS) will
acknowledge DSC distress calls and will act as the coordinator
for the rescue operation.
When a distress call is received an alarm is sounded at full
volume and the LCD displays information pages relating to the
distress. This includes:
1. Press the Clear button to mute the alarm.
2. Press the Clear button again to cancel the distress call
screen.
The envelope icon will be turned off and normal operation is
resumed.
Acknowledging a distress call
Distress calls must only be acknowledged if the call continues
without acknowledgement from a CRS, you are close enough
to the distressed vessel to be of assistance and are prepared
to relay the distress to a CRS by any means possible. Class D
DSC radios are forbidden from automatically acknowledging
distress calls. Acknowledgement must only be made by voice
message on channel 16.
After receiving a distress call that has gone unanswered:
1. Switch to channel 16 to listen for the distress voice message.
2. Wait for the CRS to acknowledge the call.
3. If the distress call is not acknowledged by another station
then acknowledge the call as follows:
MAYDAY
(MMSI of the vessel in distress)
Name of vessel in distress <repeated 3 times>
• MMSI or Name of vessel (Name of distressed vessel is only
displayed if it is a contact saved in the phonebook).
Call sign of the vessel in distress
• Nature of distress.
This is <MMSI of your vessel>, <name of your vessel
repeated 3 times> <call sign of your vessel>
• Latitude and longitude of distressed vessel.
RECEIVED MAYDAY
4. You MUST then notify the shore authorities by any means
possible to relay the distress call.
• Time of distress call.
HI
HI
DISTRESS] 00'01
ALERT
FROM: 1234 56789
FIRE
OK
PAUSE
HI
DISTRESS] 00'02
ALERT
O
LAT: 12 34.5678N
O
LON: 123 45.6789W
P 1/4
OK
PAUSE
HI
1
DISTRESS]
ALERT
UTC: 12:34
P 2/4
OK
00'03
PAUSE
P 3/4
HI
DISTRESS] 00'11
ALERT
AUTO TUNING
IS OPERATE D
OK
PAUSE
P 4/4
DISTRESS] 00'11
ALERT
CH REQ:001 6
PRESS [OK]
OK
PAUSE
2
P 4/4
D12817-1
1. Sequence when auto channel change is turned on.
Manually relaying a distress call
A distress relay should only be sent if: the person or vehicle in
distress is unable to transmit the distress call itself, for example
red flares sighted at night or the person or vehicle in distress
is out of range of a CRS and you have already acknowledged
the distress by voice message. You can also relay a received
distress relay alert manually if it goes unanswered.
1. Switch to channel 16
2. Slowly and clearly speak the details of the distress:
MAYDAY RELAY, MAYDAY RELAY, MAYDAY RELAY
2. Sequence when auto channel change is turned off.
This is <MMSI of your vessel, name of your vessel repeated
3 times and your call sign>
If the Auto channel change function is enabled 10 seconds after
receipt of a distress call the radio will automatically re-tune to
channel 16. Otherwise the user is prompted to change channel
manually.
Received the following MAYDAY from <MMSI of vessel in
distress, name of vessel in distress, call sign of vessel in
distress>
The details of the distress call are recorded in the distress log
and the envelope icon will flash on-screen to let you know a
message has been received. When connected to a Raymarine
multifunction display the position data from a distress call can
also be display in the chart application.
When the received distress call is acknowledged by the CRS or
another station then the radio will resume normal operation.
Accepting a distress call
To accept the distress call follow the steps below.
With an active distress call displayed.
1. With Auto channel change turned on – Select OK.
The alarm is muted, the envelope icon is turned off and the
radio will switch to channel 16.
2. With Auto channel change turned off – Select OK to mute the
alarm and turn off the envelope icon. Select OK again to
accept the channel change to channel 16.
Message begins
Message received from vessel in distress or details of
the distress
Message ends
OVER
Distress relays sent by other stations
When a Coast Station or another vessel, has received, and
acknowledged a DSC distress alert it may transmit a distress
alert relay to other vessels in the immediate area.
Distress relays sent from other stations can be received by the
radio.
The radio cannot re-send a distress relay automatically. If
required you can relay a distress relay message manually.
If a distress relay is sent specifically to the radio then it can be
acknowledged, otherwise acknowledgement is not required.
Muting a distress call
You can ignore a distress call by muting the alarm and cancelling
the distress call screen.
With an active distress call displayed.
44
Ray260
Acknowledging a distress relay sent to your vessel
7.3 Urgency calls
If a distress relay is specifically sent to your vessel this will be
because the sender deems you to be in a position to assist in the
rescue. The distress relay information is displayed on-screen.
Making an urgency call
HI
HI
DISTRESS] 00'01
RELAY
FROM: 1234 56789
ORIG: 1122 33445
OK
PAUSE
P 1/5
HI
HI
DISTRESS] 00'02
RELAY
UNDESIGNATED
O
LAT: 12 34.5678N
OK
PAUSE
P 2/5
OK
PAUSE
DISTRESS] 00'11
RELAY
AUTO TUNING
IS OPERATE D
P 4/5
1
OK
PAUSE
OK
PAUSE
OK
P 4/5
PAUSE
P 4/5
2
OK
PAUSE
00'05
HI
SEND
OK
ALL SHIP
URGENCY
NOT DEFAULT CH
CH: 0072
BACK
SEND
P 5/5
HI
HI
BACK
HI
HI
ALL SHIP
URGENCY
SEND ACK]
HI
INT
ALL SHIP
URGENCY
TX COMPLETE
CH CHG TO: 0016
HI
SEND ACK] 00'06
DISTRESS R ELAY
TO: 123456 789
PRESS [SEND]
ALL SHIP
URGENCY
SELECT CHA NNEL
CH: 0016
ALL SHIP
SAFETY
URGENCY
[BACK]
OK
ALL SHIP
URGENCY
SELECT CHA NNEL
CH: 0016
BACK
HI
HI
HI
- - - - DSC MENU- - - INDIVIDUAL
DISTRESS
ALL SHIP
OK
DISTRESS] 00'04
RELAY
CH REQ:001 6
PRESS [OK]
HI
DISTRESS]
RELAY
ACK IS
REQUIRED
3
P 3/5
HI
HI
DISTRESS] 00'04
RELAY
AUTO TUNING
AFTER 10 S EC
DISTRESS] 00'03
RELAY
O
LON: 123 45.6789W
UTC: 12:34
An urgency call should be used when there is danger to a
vehicle or person that does not require immediate assistance.
Urgency calls are transmitted to all stations.
CALLING...
0016
OK
0001A
0028A
CALLING...
HI
HI
OK
0088A
D12819-1
BACK
4
SEND
SEND ACK
DISTRESS R ELAY
WAS SENT
82° 34.5N
123° 45.6W
AM01:23UT
CHANNEL NAME
SEND ACK
DISTRESS R ELAY
WAS SENT
AUTOMATICALLY
OK
D12818-1
1. Sequence when auto channel change is turned on.
2. Sequence when auto channel change is turned off.
3. Sequence when individual reply is turned off.
4. Sequence when individual reply is turned on.
When a distress relay is received:
1. Select the RIGHT soft button to cycle through the information
pages.
2. If the distress relay was sent individually to you select OK at
any time to acknowledge the distress relay.
3. Ensure the radio is tuned to channel 16.
Note: Distress relay calls can only be acknowledged
automatically when sent individually to you.
BACK
From the DSC menu:
1. Select ALL SHIP.
2. Select URGENCY.
3. If required use the Channel Up and Channel Down buttons
to select the relevant channel for subsequent communication.
The default channel is 16.
4. Select OK to confirm the channel.
5. Select SEND to send the DSC urgency announcement.
6. Wait for the TX COMPLETE message to be displayed
on-screen and then select OK.
The channel is now changed to the chosen channel.
7. Press and hold the PTT button and speak the following
message:
PAN PAN, PAN PAN, PAN PAN
ALL STATIONS, ALL STATIONS, ALL STATIONS
This is <MMSI of your vessel, name of your vessel repeated
3 times, call sign of your vessel>
Position <Your vessel’s position>
Reason for call <State the reason for the call and include all
information which will assist in the rescue.
OVER
Receiving an urgency call
If you receive an urgency call from another station the details
are displayed on-screen.
When an urgency call is received:
1. Press the RIGHT soft button to cycle through the information
pages.
2. Select OK at any time to accept the urgency call.
If auto channel change is turned on then the channel will
automatically change after 10 seconds.
The radio is re-tuned to channel 16.
3. Listen on channel 16 for the urgency message.
Digital selective calling (DSC)
45
7.4 Safety calls
7.5 Routine calls
Making a safety call
Individual calls can be made to ships and coast station contact
saved in your phonebook or to any station by manually entering
the stations MMSI number.
A safety call should be used when there is an important
navigational warning or meteorological forecast/broadcast.
Safety alerts can also used for communications during search
and rescue operations.
ALL SHIP
SAFETY
SELECT CHA NNEL
CH: 0016
ALL SHIP
SAFETY
URGENCY
[BACK]
BACK
OK
OK
1
HI
HI
HI
- - - - DSC MENU- - - INDIVIDUAL
DISTRESS
ALL SHIP
HI
- - - - DSC MENU- - - INDIVIDUAL
DISTRESS
ALL SHIP
OK
HI
HI
INDIVIDUAL
MANUAL
sSHIP- 001
COASTGUARD- 01
OK
HI
HI
INDIVIDUAL
MANUAL
sSHIP- 001
COASTGUARD- 01
2
OK
INDIVIDUAL
MANUAL
sSHIP- 001
COASTGUARD- 01
OK
HI
ALL SHIP
SAFETY
SELECT CHA NNEL
CH: 0016
BACK
3
OK
SEND
ALL SHIP
SAFETY
NOT DEFAULT CH
CH: 0072
BACK
HI
HI
INDIVIDUAL
ROUTINE
MMSI:- - - - - - - - -
SEND
OK
HI
HI
ALL SHIP
SAFETY
CALLING...
BACK
0016
0001A
HI
82° 34.5N
123° 45.6W
AM01:23UT
0028A
INDIVIDUAL
ROUTINE
COASTGUARD- 01
CH: UNSPECIFIED
INDIVIDUAL
ROUTINE
sSHIP- 001
CH: 0072
CHANNEL NAME
OK
OK
HI
HI
INT
ALL SHIP
SAFETY
TX COMPLETE
CH CHG TO: 0016
INDIVIDUAL
ROUTINE
SELECT CHA NNEL
CH: 0072
BACK
BACK
SEND
SEND
0088A
D12820-1
BACK
HI
BACK
From the DSC menu:
1. Select ALL SHIP.
2. Select SAFETY.
3. If required use the Channel Up and Channel Down buttons
to select the relevant channel for subsequent communication.
The default channel is 16.
4. Select OK to confirm the channel.
5. Select SEND to send the DSC safety call.
6. Wait for the TX COMPLETE message to be displayed
on-screen and then select OK.
The channel is now changed to the chosen channel.
7. Press and hold the PTT button and speak the following
message:
SECURITE, SECURITE, SECURITE
INDIVIDUAL
ROUTINE
CALLING...
END
HI
INDIVIDUAL 00'01
ROUTINE
AWAITING ACK...
END
HI
INDIVIDUAL 00'05
ACKNOWLEDG
E
FROM: SHIP - 001
ACCEPTED
OK
PAUSE
p P 1/2
D12821-1
1. Individual routine call using manual MMSI entry.
ALL STATIONS, ALL STATIONS, ALL STATIONS
2. Individual routine call to a vessel saved as a contact.
This is <MMSI of your vessel, name of your vessel repeated
3 times, call sign of your vessel>
3. Individual routine call to a coast station saved as a contact.
Position <Your vessel’s position>
Reason for call <state the reason for the safety call>
OUT
Receiving a safety call
If you receive a safety call from another station the details are
displayed on-screen.
Refer to the Phonebook section for details on adding contacts to
your phonebook.
Note: When calling a coast station there is no need to select
a channel for communication.
If a call cannot be accepted then a reason code will be displayed
on-screen.
100
NO REASON
No reason given
When a safety call is received:
1. Press the RIGHT soft button to cycle through the information
pages.
2. Select OK at any time to accept the safety call.
101
CONGESTION
Congestion at maritime switching centre
102
BUSY
Station Busy
103
QUEUE
Queue indication
If auto channel change is turned on then the channel will
automatically change after 10 seconds.
The radio is re-tuned to channel 16.
3. Listen on channel 16 for the safety message.
104
BARRED
Station barred
105
NO OPERATOR
No operator available
106
UNAVAILABLE
Operator temporarily unavailable
107
DISABLE
Equipment disabled
108
UNABLE CH
Unable to use proposed channel
109
UNABLE MODE
Unable to use proposed mode
46
Ray260
Making a routine DSC call
You can use your product to make a routine DSC call to contact
saved in the phonebook.
1. Press and hold the Menu DSC button for 3 seconds.
The DSC menu is displayed.
2. Select Individual.
The Manual option and the phonebook list is displayed.
3. Select a phonebook entry to make a DSC call to that contact,
or
4. Select MANUAL to manually enter an MMSI number.
5. Use the Channel Up and Channel Down buttons to select a
channel to transmit on.
6. Select OK.
7. Select SEND.
The radio now waits for an acknowledgement to be received.
8. If an acknowledgement is received, press and hold the PTT
button.
9. Speak your message.
10. Release the PTT button when you have completed your
message.
7.6 Group calls
Routine group calls can be made to groups of vessels sharing
the same Group MMSI numbers.
Routine group calls are made by selecting a group from the
Group menu, group calls are only received by stations sharing
the selected group MMSI number.
Refer to the Group list section for details on adding groups to
your radio.
Making a group routine call
To make a routine call to a group of stations use the group menu.
HI
HI
- - - - DSC MENU- - - ALL SHIP
GROUP
POS REQUES T
GROUP
GROUP- A
GROUP- B
[EMPTY-03 ]
OK
OK
OK
HI
HI
GROUP
ROUTINE
SELECT CHA NNEL
CH:0072
BACK
HI
GROUP
CALL
MY GROUP I D
[EXIT ]
OK
HI
GROUP
ROUTINE
SELECT CHA NNEL
CH:0072
BACK
SEND
GROUP
ROUTINE
CALLING...
OK
Receiving a routine individual call
When you receive an individual routine call the details are
displayed on-screen.
When an individual routine call is received.
1. Press the RIGHT soft button to cycle through the information
pages.
2. If you want to accept the call select OK at any time.
If auto channel change is turned on the radio will automatically
change to the request channel in 10 seconds.
3. Select ACCEPT to accept the call, or
4. Select NOT ACCEPT to reject the call.
i. If you do not accept the call you can select a reason from
the list by selecting OP:
• NO REASON
• CONGESTION
• BUSY
• QUEUE
• BARRED
• NO OPERATOR
• UNAVAILABLE
• DISABLE
• UNABLE CH
• UNABLE MODE
ii. Select OK to confirm the reason.
5. Select SEND to send the acceptance or rejection of the call.
Confirmation of the acceptance or rejection of the call is
displayed on-screen. If you have accepted the call then the radio
will re-tune to the requested channel.
HI
HI
INT
GROUP
ROUTINE
TX COMPLETE
CH CHG TO: 0072
0072
82° 34.5N
123° 45.6W
AM01:23UT
CHANNEL NAME
OK
0001A
0028A
0088A
D12822-1
1. Press and hold the DSC Menu button for 3 seconds.
The DSC menu is displayed.
2. Select GROUP.
3. Select CALL.
The group list is displayed.
4. Select a group you want to make a call to.
5. Use the Channel Up and Channel Down buttons to select a
channel you want to use for the communication.
6. Select OK.
7. Select SEND.
The radio now will now call the selected group.
8. When TX COMPLETE is displayed on-screen select OK.
9. Press and hold the PTT button.
10. Speak your message.
11. Release the PTT button when you have completed your
message.
Receiving a group call
If you receive a group call the details are displayed on-screen.
1. Press the RIGHT soft button to cycle through the information
pages.
2. Select OK at any time to accept the group call, or
3. Select CANCEL reject the call and resume normal operation.
4. If the caller has requested an acknowledgement then select
SEND to send the acknowledgement.
With auto channel change turned on the radio will automatically
change to the requested channel after 10 seconds, otherwise
you will be request to confirm the change of channel.
Digital selective calling (DSC)
47
7.7 Position requests
7.8 Position tracking
The radio can request position information from any station
capable of responding to the request.
The position tracking function enables regular position requests
to be sent to selected target stations. The position data will be
available on a Raymarine multifunction display connected over
NMEA 0183 or SeaTalkng.
Position requests can be sent to any contact stored in the phone
book or by manually inputting the MMSI number of the station.
When connected to a Raymarine multifunction display the
position data from the request can also be display in the chart
application.
Making a position request
Up to 3 phonebook contacts can be added to the position
tracking selection menu. The selected contacts will then be
available to be tracked. The position requests are sent out every
5 minutes and where more than 1 vessel is being tracked the
position requests will alternate between selected stations.
Time
Tracking
started
5 minutes
10 minutes
15 minutes
Tracked
station
Vessel 1
Vessel 2
Vessel 3
Vessel 1
You can make a position request following the steps below.
From the DSC menu.
1. Select POS REQUEST.
2. You can select a contact from your phonebook directly from
the POS REQUEST menu, or
3. To request the position of a station that you know the MMSI
number of select MANUAL.
4. Use the Channel Up and Channel Down buttons to select
the required numbers.
5. When you have completed the MMSI number select OK to
confirm.
6. Select SEND to send the position request.
7. Wait for an acknowledgement.
8. When the acknowledgement is received use the RIGHT soft
button to cycle through the received position report pages.
Responding to a position request
If you receive a position request from another station follow the
steps below.
When a position request is received:
1. Select the RIGHT soft button to cycle through the available
information pages.
2. Select OK.
If the position reply option is set to auto the position report
is sent automatically.
3. If the position reply is set to manual then select SEND to
send the position report.
4. Select OK to resume normal operation.
48
Setting up regular position tracking
To enable position tracking you need to track selected stations.
From the DSC menu:
1. Select POS TRACKING.
2. Select SELECT STATION.
3. Select an empty slot.
The phonebook is displayed.
4. Select the relevant contact from the phonebook.
5. Repeat steps 3 and 4 for up to 3 contacts.
The selected contacts are now available to be tracked.
6. Select BACK to go back to the position tracking menu.
7. Select TARGET STATION.
A list of the contacts selected in steps 3 and 4 is displayed.
8. Select up to 3 contacts that you want to track.
9. From the Position Tracking menu select START TRACKING.
The selected vessels will now be tracked.
10. Select END at any time to cancel the position tracking and
return to normal operation.
Ray260
7.9 Test calls
7.10 Voice mail
A Test Call feature is available for the purposes of testing your
DSC VHF radio for correct operation.
The radio includes a voice mail feature. The voice mail feature
enables automated transmission of a pre-recorded message.
There are 2 types of test call:
A voice message up to 15 seconds long can be recorded, stored
on the radio and then sent to a contact stored in the radio’s
phonebook. If the contact’s vessel is in DSC range the message
will be transmitted on the current working channel once an
acknowledgement is received. If the contact’s vessel is not in
DSC range then the voice mail call is repeated every 5 minutes
for up to 1 hour or until the call is acknowledged.
• Test call to the US Coast Guard automated response test call
service (MMSI: 003669999). This type of test call will receive
an automated response (acknowledgement).
• Test call to another vessel that has a radio that supports
the test call feature. If the receiving radio is a Raymarine
radio, this type of test call requires a manual response
(acknowledgement) from the call recipient. Some third-party
radios are capable of providing an automated response to
test calls.
For radios that do NOT support the test call feature, correct radio
operation can be tested by making an individual call on channel
70 to another DSC VHF radio.
Raymarine recommends that once you've successfully placed a
test call you add the test call MMSI to your radio's phonebook
for easy retrieval for future test calls. For information on how
to add an MMSI to your radio's phonebook, refer to the radio's
user documentation.
Note: Individual calls (that is, NOT a test call) to the US Coast
Guard 003669999 MMSI will NOT receive an automated
response.
Note: The US Coast Guard automated response test call
service is only available in the United States and its coastal
waters.
Making a test call
With the radio set to any channel:
1. Select and hold the DSC Menu button.
The DSC menu is displayed.
2. Select TEST CALL.
3. Select MANUAL to enter the MMSI number. Alternatively, a
contact can be selected from the radio's phonebook.
4. Enter the Test Call MMSI (for example, 003669999 for US
Coast Guard automated response test call service).
5. Select OK.
6. Select SEND to initiate the test call.
7. If you called the US Coast Guard automated response test
call MMSI, wait for an acknowledgement. If you made a
test call to another vessel with a test call capable radio, a
response is required from the receiving radio.
When an acknowledgement is received, an audible alarm is
sounded and the message (envelope) icon flashes.
8. Select any key to mute the alarm.
9. Select OK to exit the test call and resume normal operation.
Important: The voice mail feature should only be used with
an operator manning the station. Do NOT operate the voice
mail feature with the station unattended, doing so could cause
undue interference to other users and be in breach of the
terms of your VHF radio license.
Receiving a voice mail follows the same steps as receiving a
routine individual call.
Recording a voice mail message
You can record a voice message by following the steps below.
Recording a voice mail message will overwrite the existing
message.
From the DSC menu.
1. Select VOICE MAIL.
2. Select RECORDER.
3. Press and hold the PTT button.
Recording will start.
4. Speak your message and release the PTT button when your
message is complete.
The message is saved.
5. Select PLAY to listen to your recording.
Deleting a voice mail message
If you want to delete your voice mail message follow the steps
below.
From the DSC menu.
1. Select VOICE MAIL.
2. Select RECORDER.
3. Select DELETE.
4. Select DELETE again to confirm.
The voice mail is deleted.
Sending a voice mail message
To send the voice mail message follow the steps below.
From the DSC menu.
1. Select VOICE MAIL.
2. Select START VOICE MAIL
Receiving a test call
Your radio will automatically acknowledge received test call from
other stations
When a test call is received a notification is displayed on-screen
to alert you that a test call has been received and automatically
acknowledged.
Digital selective calling (DSC)
3.
4.
5.
6.
If no message has been recorded then the MESSAGE IS
NOT RECORDED notification is displayed.
Select the contact from the list.
Select the channel you want to send the voice mail on.
Select OK.
Select SEND.
49
7.11 Received call logs
7.12 Phonebook
All DSC calls received are logged in received call logs.
The phonebook can be used to save up to 200 contacts.
The following call types are recorded in the received call logs:
You can add, edit and delete contacts stored in the phonebook.
• distress
• distress relay
• distress acknowledgements
• sent position requests
• received position requests
• group calls
• all ship calls
• individual routine calls
The details below are recorded for each call:
• station ID
• type of call
• date of call
Adding an entry
You can save contacts in the phonebook by entering their MMSI
and assigning a name to the contact.
From the DSC menu:
1. Select PHONEBOOK.
2. Select NEW.
3. To enter the MMSI number use the Channel Up and
Channel Down buttons to select the number you want then
select OK to confirm and move to the next digit.
When all 9 digits of the MMSI have been entered you can
assign a name for the group.
4. To enter a name for the contact use the Channel Up and
Channel Down buttons to select the characters you want
then select OK to confirm and move to the next character.
If the call was received from a contact in the phonebook then
the contact name is displayed, otherwise the MMSI number is
displayed.
The maximum length of contact names is 10 characters.
5. When you have entered a name for the contact select OK to
save the entry in your phonebook.
You will be returned to the Phonebook.
6. You can use the Left Arrow and Right Arrow soft buttons at
any time to move forward or backwards to correct any errors.
Accessing the received call logs
Editing an entry
Follow the steps below to access the received call logs.
You can edit the MMSI number and name of contacts in your
phonebook.
• latitude and longitude (if sent with the call)
• nature of distress (specified distress calls only)
From the DSC menu:
1. Select RECEIVED CALLS.
The following logs are available:
• unread log
• distress log
• call log
• position log
2. Select the log you want to view.
A list of logged calls is displayed.
3. Select a call to view details.
i. Select CALL BACK to return the call.
ii. Select DELETE to remove the entry from the log.
iii. Select SAVE to save the sender of the call to your
phonebook.
iv. Select ACK SEND to send an acknowledgement to the
sender.
From the DSC Menu:
1. Select PHONEBOOK.
2. Select the contact you want to edit.
The contact’s details are displayed.
3. Select EDIT.
4. Use the Left Arrow and Right Arrow soft buttons to highlight
the character you want to change.
5. Use the Channel Up and Channel Down buttons to select
the characters you want then select OK to confirm and move
to the next character.
6. When you have completed your changes select OK to save
the changes.
You are returned to your phonebook.
Deleting an entry
You can delete contacts stored in your phonebook.
From the DSC menu:
1. Select PHONEBOOK.
2. Select the contact you want to delete.
3. Select DELETE.
4. Select DELETE again to confirm and delete the contact.
The phonebook is displayed and the contact is now deleted.
50
Ray260
7.13 Group list
7.14 DSC options
Groups can be created to the MY GROUP ID list to enable
group calling.
DSC options can be set from the DSC options menu.
Existing groups can be edited and deleted as required.
AUTO CH
CHANGE
Adding a Group MMSI
To make a group routine call you need to add a group MMSI
number to your group list. You can store up to 20 group MMSI
numbers on your radio.
From the DSC Menu:
1. Select MY GROUP ID.
2. Select an empty entry e.g. [EMPTY 01].
3. Use the Channel Up and Channel Down buttons to select
the number you want then select OK to confirm and move
to the next digit.
When all 9 digits of the MMSI have been entered you can
assign a name for the group.
4. Use the Channel Up and Channel Down buttons to select
the characters you want then select OK to confirm and move
to the next character.
• OFF (default)
INDIVIDUAL
REPLY
When individual reply is
set to auto the radio will
automatically acknowledge
individual calls and distress
relay calls when received.
• MANUAL (default)
AUTO END
When set to a time
interval the radio will
automatically end calls sent
or received which have
gone unacknowledged for
the specified time interval.
The timer can be set at 10
second increments from 10
seconds up to 15 minutes.
The default time interval is
30 seconds.
• 30 SECONDS
• AUTO
• SET TIMER
• DISABLE
Note: This does not
apply to distress calls.
Editing a group
From the DSC Menu:
1. Select MY GROUP ID.
2. Select the Group you want to edit.
The group’s details are displayed.
3. Select EDIT.
4. Use the Left Arrow and Right Arrow soft buttons to highlight
the character you want to change.
5. Use the Channel Up and Channel Down buttons to select
the characters you want then select OK to confirm and move
to the next character.
6. When you have completed your changes select OK to save
the changes.
You are returned to your group list.
• ON
is displayed when the
setting is switched off.
The maximum length of group names is 10 characters.
5. When you have entered a name for the group select OK to
save the entry in your group list.
You will be returned to the group list.
6. You can use the Left Arrow and Right Arrow soft buttons at
any time to move forward or backwards to correct any errors.
You can edit the MMSI number and name of groups stored on
your radio.
When automatic channel
change is turned on the
radio will automatically
re-tune after 10 seconds to
the requested channel when
DSC calls are received.
The automatic channel
changing blocked icon
POSITION
REPLY
With position reply set
to auto the radio will
automatically send out
position details when a
position request is received.
• MANUAL (default)
• AUTO
Accessing the DSC options menu
To access the DSC options menu follow the steps below:
1. Press and hold the DSC Menu button.
The DSC menu is displayed.
2. Select DSC OPTIONS.
The DSC options menu is displayed.
Deleting a group
You can delete group MMSI details.
From the DSC menu:
1. Select MY GROUP ID.
2. Select the group you want to delete.
3. Select DELETE.
4. Select DELETE again to confirm and delete the group.
The group list is displayed and the group is now deleted.
Digital selective calling (DSC)
51
52
Ray260
Chapter 8: VHF operations
Chapter contents
•
8.1 Scan mode on page 54
•
8.2 Watch modes on page 54
•
8.3 Priority channels on page 55
•
8.4 Favorite channels on page 55
•
8.5 Sensitivity on page 56
•
8.6 Private channels on page 56
•
8.7 Automatic Transmitter Identification System (ATIS) and Marcom-C mode on page 57
•
8.8 AIS on page 58
•
8.9 Voice recorder on page 58
•
8.10 System configuration on page 59
VHF operations
53
8.1 Scan mode
8.2 Watch modes
Scan mode enables automatic searching for channels that are
currently broadcasting.
The watch modes monitor priority channels and the currently
selected channel.
Scan mode will search channels and stop when it finds a
channel that is broadcasting. If the broadcast stops or is lost for
more than 5 seconds then the scan will resume.
There are 2 type of watch mode; Dual watch and Tri watch.
Channels can be temporarily removed from an active scan,
and the direction of scan can also be changed. When the scan
reaches the last channel in the band the scan cycle is repeated.
The following scans options are available:
• ALL SCAN — All channels in the frequency band the radio is
set to are scanned in sequence.
• ALL SCAN + 16 — All channels in the frequency band the
radio is set to are scanned, after each channel is scanned
priority channel 16 is scanned.
• SAVED SCAN — Only channels saved to the radio’s memory
are scanned in sequence.
• SAVED SCAN + 16 — Only channels saved to the radio’s
memory are scanned, after each channel is scanned priority
channel 16 is scanned.
• Dual watch mode monitors priority channel 16 and the
currently selected channel.
• Tri watch mode monitors priority channel 16, the second
priority channel and the currently selected channel.
When the radio detects a transmission the watch mode is
suspended until the transmission ends then the watch mode
will recommence.
Using watch modes
From the VHF operation menu (Main menu > VHF OPERATION
):
1. Select WATCH MODE.
2. Select either DUAL WATCH or TRI WATCH to start the
watch mode.
3. Select END at any time to stop the watch mode and resume
normal operation.
Note: On the Ray260 and Ray260 AIS, if the weather alert
function is activated the weather alert channel is included in
the scan.
Performing a scan
Scan mode is started from the main menu.
From the VHF operation menu (Main menu > VHF OPERATION
):
1. Select SCAN MODE.
2. Select either:
• ALL SCAN
• ALL SCAN + 16
• SAVED SCAN
• SAVED SCAN + 16
Once selected the scan will start.
3. You can exclude a channel from the current scan by selecting
XCLUDE when the scan stops on that channel.
4. You can stop the current scan at any time by selecting END.
Saving a channel
You can add channels to the radio’s memory so that they are
included in the scan save and scan save +16 scan modes.
From the VHF operation menu (Main menu > VHF OPERATION
):
1. Select SAVE CHANNEL.
2. Use the Channel Up and Channel Down buttons to select
the relevant channel.
3. Select SAVE to save the channel.
4. To remove a saved channel select CLEAR.
The SAVED icon appears on-screen when you are tuned to a
saved channel.
54
Ray260
8.3 Priority channels
8.4 Favorite channels
Channel 16 is the dedicated priority channel.
Favorite channels can be saved to memory and assigned to the
soft buttons during normal operation.
The default secondary priority channel is channel 09, however
this can be changed if required.
Switching between priority channels
1. Press the Priority button to switch between the priority
channels and the last used channel.
A total of 9 channels can be saved as favorites, Favorite
channels are assigned to 1 of 3 banks of favorite channels. A
bank of favorite channels is assigned to the soft buttons. The
bank that is displayed can be changed and channels can be
added and removed as required.
The LCD displays which bank of favorites has been selected
i.e. FAV 1, FAV 2, or FAV 3.
Setting a second priority channel
You can select which channel you want to use as the second
priority channel.
From the VHF operation menu (Main menu > VHF OPERATION
):
1. Select 2ND PRIORITY.
2. Use the Channel Up and Channel Down buttons to select
the required channel.
3. Select OK to confirm.
Adding favorite channels
Follow the steps below to add channels to the 3 favorite channel
banks.
From the VHF operation menu (Main menu > VHF OPERATION
):
1. Select FAVORITE CH.
2. Select either FAV CH BANK-1, FAV CH BANK-2, or FAV
CH BANK-3.
3. Select EDIT BANK.
4. Use the Up Arrow and Down Arrow soft buttons to select
either LEFT, CENTER, or RIGHT as required.
5. Use the Channel Up and Channel Down buttons to change
the assigned channel.
6. Select OK to confirm channel assignment.
7. Repeat the steps above for each favorite bank.
Selecting a favorite channel bank
You can change which favorite channel bank is assigned to the
soft buttons.
From the Favorite channel menu (Main menu > VHF
OPERATION > FAVORITE CH):
1. Select either FAV CH BANK-1, FAV CH BANK-2, or FAV
CH BANK-3.
2. Select SELECT BANK.
3. Select OK to confirm.
The chosen bank is now assigned to the soft buttons and are
displayed during normal operation.
VHF operations
55
8.5 Sensitivity
8.6 Private channels
The sensitivity level of the radio can be set to local mode or
distant mode.
The radio may be able to receive additional private channels
depending on the country it is used in and whether the
appropriate licenses are held.
Local mode decreases the receiver sensitivity in high traffic
areas to decrease unwanted reception. When in local mode
LOCAL is displayed on-screen.
Distant mode sets the receiver sensitivity to full. When in distant
mode the LOCAL icon is removed from the display.
A list of private channel can be found in Appendix 1.
Note: Private channels are only available on the Ray260E
and Ray260E AIS.
Switching sensitivity modes
Selecting private channels
You can switch between local and distant modes at any time.
You can select the set of private channels you want to use.
From the VHF operation menu (Main menu > VHF OPERATION
):
1. Select SENSITIVITY.
2. Select the D/L soft button.
Selecting the D/L soft button switches between local and
distant modes. In local mode LOCAL is displayed on-screen
3. Select BACK or press the Clear button to return to the
previous menu.
From the VHF operation menu (Main menu > VHF OPERATION
):
1. Select PRIVATE CH.
The list of private channel sets is displayed:
• NONE
• BELGIUM
• DENMARK PLEA.
• DENMARK FISH.
• FINLAND PLEA.
• FINLAND FISH.
• HOLLAND (Netherlands)
• NORWAY PLEA.
• NORWAY FISH.
• SWEDEN PLEA.
• SWEDEN FISH.
• UK
2. Select the required private channel set.
56
Ray260
8.7 Automatic Transmitter
Identification System (ATIS) and
Marcom-C mode
Note: With the ATIS function enabled the following functions
will be disabled:
• DSC functions.
ATIS is a European system used on some inland waterways.
VHF radios operating in an ATIS region must be programmed
with a unique ATIS number; this can be obtained from the
relevant licensing authority. The ATIS number is attached as a
digital signal at the end of each transmission and identifies you
to the relevant authorities who monitor the system.
• Scan functions.
• Multiple watch functions.
When operating in ATIS mode, some of the products features
are not available:
• Use of DSC is not permitted in ATIS regions. You will be
unable to make DSC distress and other types of digital
selective call.
• Dual / Tri Watch operation is not permitted in ATIS regions.
You will be unable to use these features.
• Channel scanning is not permitted in ATIS regions. You will be
unable to use the scan features.
• ATIS regulations restrict the transmit power to 1 watt for the
following channels: 6, 8, 10, 11, 12, 13, 14, 71, 72, 74 and 77.
You will be unable to change the power on affected channels.
You can enable or disable ATIS using the menus (except on
Marcom-C configured units).
Marcom-C mode
Marcom-C mode is a restricted Ray260 configuration for VHF
operators with a Marcom-C license. This is applicable to radios
operated exclusively in European inland waterways using the
ATIS system.
A Marcom-C VHF radio has the ATIS permanently enabled. You
will not be able to disable ATIS operation. Marcom-C operation is
set by the dealer at point of sale. If you wish to enable or disable
Marcom-C mode, you must contact your Raymarine dealer.
For further information please contact Raymarine technical
support.
Enabling / Disabling the ATIS function
With the ATIS ID programmed you can now enable or disable
the ATIS function as required by following the steps below.
Note: If your radio has been configured to use Marcom-C
mode then ATIS will be permanently enabled and you will not
be able to disable ATIS operation. Marcom-C mode is set by
the dealer at point of sale. If you wish to enable or disable
Marcom-C, please contact your Raymarine dealer.
HI
HI
- ATI S OPERATI ONMY ATI S I D
ATI S FUNCTI ON
[BACK]
OK
- ATI S FUNCTI ON- ON
OFF
[BACK]
HI
- ATI S FUNCTI ON- ATI S ON
THEN DSC OFF
PRESS [OK]
OK
OK
HI
HI
- ATI S FUNCTI ON- ON
OFF
[BACK]
OK
BACK
- ATI S FUNCTI ON- ATI S OFF
THEN DSC ON
PRESS [OK]
OK
BACK
D12623-1
From the ATIS operation menu:
1. Select ATIS Function.
2. Select ON to enable the ATIS function, or
The message ATIS ON THEN DSC OFF is displayed
on-screen to warn that when ATIS is enabled then DSC
functions are not available.
3. Select OFF to disable the ATIS function.
The message ATIS OFF THEN DSC ON is displayed
on-screen to warn that when ATIS is disabled then DSC
functions are available again.
If no ATIS ID has been programmed then the message PLEASE
INPUT ATIS ID FIRST is displayed.
VHF operations
57
8.8 AIS
8.9 Voice recorder
The Ray260 AIS and Ray260E AIS have a built in AIS receiver.
The radio includes a voice recorder function.
With the built-in AIS receiver switched on AIS information can be
sent to a connected Raymarine multifunction display using either
the NMEA 0183 or SeaTalkng connections.
The voice recorder enables automatic recording of up to 90
seconds of a received transmission. For transmissions over 90
seconds long, only the first 90 seconds is recorded.
Note: If using the built-in AIS receiver and outputting over
NMEA 0183, ensure that the baud rate is set to high speed:
Menu > Connection > Interface > NMEA 0183 > HIGH.
Switching the AIS function on and off
The AIS function on the Ray260 AIS and Ray260E AIS can be
switched on or off.
From the main menu:
1. Select CONNECTION.
2. Select AIS.
3. Select ON or OFF as required.
Only 1 recording can be saved at a time, when a new
transmission is received any saved voice recording is
automatically deleted.
Transmissions are not recorded when a scan mode or a watch
mode is active.
Recording transmissions
To enable automatic recording of transmissions the record
function must be switched on.
From the main menu:
1. Select VOICE RECORDER.
2. Select RECORD.
3. Select ON to turn on automatic recording or,
4. Select OFF to turn off automatic recording.
Playing back a recorded transmission
You can playback the last recorded transmission.
From the main menu:
1. Select VOICE RECORDER.
2. Select REPLAY.
Details of the recorded transmission are displayed.
3. Select PLAY.
Playback starts.
4. Select STOP at any time to stop the recording.
Deleting a recording
You can delete a saved recording.
From the main menu:
1. Select VOICE RECORDER.
2. Select DELETE from the menu.
3. Select the DELETE soft button to confirm and delete the
recording.
58
Ray260
8.10 System configuration
The options available from the system configuration menu are
shown below.
BACKLIGHT
Allows adjustment
to the LCD’s
backlight level.
• OFF to HIGH in 10 increments.
CONTRAST
Allows adjustment
to the LCD’s
contrast level.
• LOW to HIGH in 10 increments.
KEY BEEP
Allows adjustment
of the beep heard
when pressing
handset buttons.
• QUIET
BEARING
MODE
Allows selection of
bearing mode.
• TRUE
SPEED UNIT
Allows selecting
of preferred speed
units.
• KNOTS
• LOUD
• OFF
• MAGNETIC
• MPH
• KPH
FOG FREQ
The frequency of
the fog horn can be
set.
• 50 Hz to 850 Hz in 50 Hz
increments
LANGUAGE
Allows selection
of user interface
language.
• ENGLISH
• SPANISH
• FRENCH
• GERMAN
• ITALIAN
SYSTEM TEST
The System
test function
performs test to
ensure equipment
is connected
and where
applicable the
radio is receiving
appropriate data.
VERSION
NUMBER
Identifies current
hardware and
software versions.
RESET
Performs a reset
to restore data and
settings to factory
default values.
• GPS
• Hailer
• Battery
• DSC
Note: The
reset function
will not reset
MMSI and ATIS
ID numbers.
VHF operations
59
60
Ray260
Chapter 9: Hailer, Fog horn, and Intercom
Chapter contents
•
9.1 Hailer on page 62
•
9.2 Fog horn on page 62
•
9.3 Handset intercom on page 63
Hailer, Fog horn, and Intercom
61
9.1 Hailer
9.2 Fog horn
The hailer function requires an optional loud hailer to be
connected.
The fog horn function requires an optional loud hailer to be
connected.
The hailer is an auxiliary function. When the hailer is active calls
cannot be sent or received.
The fog horn function can be set to manual or to a predefined
automatic mode
In hailer mode anything spoken into the handset is amplified
and broadcast from the hailer, the message is not transmitted
over the radio.
The predefined automatic modes consist of a sequence of tones
which are then repeated.
Fog mode
Description
Pattern
Using the hailer
UNDERWAY
Vessel underway
1 long tone
From the main menu:
1. Select HAILER/FOG/IC.
2. Select HAILER.
3. Press and hold the PTT button.
4. Speak your voice message.
5. Release the PTT button when voice message is complete.
6. Select END to exit hailer mode.
UNDERWAY/STOPPED
Vessel not
underway
2 long tones
SAILING/FISHING
sailing vessel or
any vessel fishing
but not trolling
1 long tone and 2 short tones
RESTRICT/TOW
Restricted in ability
to maneuver or
towing another
vessel
1 long tone and 2 short tones
UNDER TOW
This vessel is being
towed
1 long tone and 3 short tones
PILOT
VESSEL
This vessel is a
pilot vessel
4 short tones
AT ANCHOR
Vessel is at anchor
12 consecutive rings
AGROUND
Vessel is aground
3 short rings, 12 consecutive
rings, 3 short rings
Adjusting hailer volume
You can adjust the volume of the hailer function.
During an active hailer call:
1. Use the Up Arrow soft button to increase the hailer volume.
2. Use the Down Arrow soft button to decrease the hailer
volume.
In manual mode a continuous tone is sounded for as long as the
PTT button is pressed.
Note: Radio calls can only be made between automatic fog
horn soundings.
Setting the fog horn mode
The fog horn can be set to manual or to a predefined automatic
mode.
From the main menu:
1. Select HAILER/FOG/IC.
2. Select FOG.
3. Select AUTO FOG or MANUAL FOG.
4. If auto fog is selected then select the required auto fog mode.
5. Select END to exit fog horn mode and resume normal
operation.
Using the fog horn in manual mode
With the fog horn set to manual:
1. Press and hold the PTT button.
A continuous tone is sounded as long as the PTT button is
pressed.
2. Select END to exit fog horn mode and resume normal
operation.
Adjusting the fog horn volume
You can adjust the volume of the fog horn function.
During manual or auto fog horn mode:
1. Use the Up Arrow soft button to increase the hailer volume.
2. Use the Down Arrow soft button to decrease the hailer
volume.
62
Ray260
9.3 Handset intercom
Installations that contain more than 1 handset can use the
intercom feature.
The intercom feature allows voice communication between
connected handsets. The intercom call can be initiated from
any handset.
Using the intercom
From the main menu:
1. Select HAILER/FOG/IC.
2. Select INTERCOM.
A list of connected handsets is displayed.
3. Select the handset you want to call.
4. Wait for the handset station to acknowledge the call.
5. Press and hold the PTT button and speak your message.
Responding to the intercom
1. Press the PTT button and acknowledge the call and to
respond to subsequent voice messages.
Hailer, Fog horn, and Intercom
63
64
Ray260
Chapter 10: Maintenance
Chapter contents
•
10.1 Maintenance on page 66
•
10.2 Routine checks on page 66
•
10.3 Cleaning on page 67
•
10.4 Unit cleaning instructions on page 67
Maintenance
65
10.1 Maintenance
10.2 Routine checks
The Ray260 has no user serviceable parts or adjustments.
Never remove the cover or attempt to service the product, doing
so may invalidate your product warranty.
The following periodic checks should be made:
To following preventive measures should be followed:
• Although the product is waterproof, keep the unit as dry as
possible.
• If you remove a handset connection ensure the dust cap is
fitted to the connector.
66
• Examine cables for signs of damage, such as chafing, cuts or
nicks.
• Check that the cable connectors are firmly attached and that
their locking mechanisms are properly engaged.
Note: Cable checks should be carried out with the power
supply switched off.
Ray260
10.3 Cleaning
10.4 Unit cleaning instructions
Best cleaning practices.
The unit does not require regular cleaning. However, if you find
it necessary to clean the unit, please follow the steps below:
1. Ensure power is switched off.
2. Wipe unit clean with a damp cloth.
3. If necessary, use a mild detergent solution to remove grease
marks.
When cleaning this product:
• Do NOT wipe the display screen with a dry cloth, as this could
scratch the screen coating.
• Do NOT use abrasive, or acid or ammonia based products.
• Do NOT use a jet wash.
Maintenance
67
68
Ray260
Chapter 11: Troubleshooting
Chapter contents
•
11.1 Troubleshooting on page 70
•
11.2 VHF Radio troubleshooting on page 71
Troubleshooting
69
11.1 Troubleshooting
The troubleshooting information provides possible causes and
corrective action required for common problems associated with
marine electronics installations.
All Raymarine products are, prior to packing and shipping,
subjected to comprehensive test and quality assurance
programs. However, if you experience problems with the
operation of your product this section will help you to diagnose
and correct problems in order to restore normal operation.
If after referring to this section you are still having problems
with your unit, please contact Raymarine Technical Support for
further advice.
70
Ray260
11.2 VHF Radio troubleshooting
Problems with your VHF radio and their possible causes and solutions are described below:
Radio will not power up.
DSC functions are not working.
Position data is not shown.
Loose wiring connection.
Check all cable connections.
Blown fuse.
Check fuse and replace if necessary.
MMSI number not programmed.
Check MMSI number has been entered correctly.
Radio is set to ATIS mode.
Use of DSC is not permitted in ATIS regions. You will be unable
to make DSC distress and other types of digital selective call.
Information not being received from GPS
• Check GPS is switched on and connected to the radio.
• Check correct interface is selected NMEA 0183 or NMEA 2000.
• Power cycle the radio.
Troubleshooting
71
72
Ray260
Chapter 12: Technical support
Chapter contents
•
12.1 Raymarine customer support on page 74
Technical support
73
12.1 Raymarine customer support
Raymarine provides a comprehensive customer support service.
You can contact customer support through the Raymarine
website, telephone and e-mail. If you are unable to resolve a
problem, please use any of these facilities to obtain additional
help.
Web support
Please visit the customer support area of our website at:
www.raymarine.com
This contains Frequently Asked Questions, servicing information,
e-mail access to the Raymarine Technical Support Department
and details of worldwide Raymarine agents.
Telephone and e-mail support
In the USA:
• Tel: +1 603 324 7900
• Toll Free: +1 800 539 5539
• E-mail: [email protected]
In the UK, Europe, and the Middle East:
• Tel: +44 (0)13 2924 6777
• E-mail: [email protected]
In Southeast Asia and Australia:
• Tel: +61 (0)29479 4800
• E-mail: [email protected]
Product information
If you need to request service, please have the following
information to hand:
• Product name.
• Product identity.
• Serial number.
• Software application version.
• System diagrams.
You can obtain this product information using the menus within
your product.
74
Ray260
Chapter 13: Technical specification
Chapter contents
•
13.1 Technical specification on page 76
Technical specification
75
13.1 Technical specification
Environmental specification
Operating temperature
-20ºC to +60ºC
Storage temperature
-25ºC to +70ºC
Relative humidity
95%
Water proofing
• Transceiver unit — IPX6
• Handsets — IPX7
Connections
Hailer
Audio output power
30 W (typical)
Hailer impedance
4 Ohms
Speakers
Passive speaker impedance
8 Ohms
Conformance
• Loudspeakers — IPX7
USA: FCC CFR47 parts 2, 15 and 80
• 1 x Power/NMEA/Audio
Industry Canada: RSS182
• 3 x Handset / Active speaker
EU: R&TTE directive 1999/5/EC
• 1 x SeaTalkng
China: CCS IACS — E10
Australia and New Zealand —C-Tick mark: AS-NZS4415.1 — 2003 + Amd
1:2004
Power specification
Nominal supply voltage
12 V dc
Operating voltage range
10.8 V dc to 15.6 V dc
Current consumption
6 A Max at high power
LEN (Load Equivalency
Number)
1
Transmitter
Channels
All available US, International and Canadian
VHF marine band
Frequency Range
156.025 MHz to 157.425 MHz
155.500 MHz to 163.275 MHz (Private
channels)
Frequency stability
+/- 5 ppm
Channel Spacing
25 kHz
Power Output
• Low power setting — 1 W
International: IEC 62238 and ITU-r M.493–13
Radio usage
The radio can be used worldwide, including the following
European countries:
AT
CZ
FI
IE
LU
PL
SK
BE
DE
FR
IS
LV
PT
TR
BG
DK
GB
IT
MT
RO
CH
EE
GR
LI
NL
SE
CY
ES
HU
LT
NO
SI
• High power setting — 25 W
Duty cycle
5% transmit, 5% receive, 90% standby
Modulation
Frequency modulation
Spurious emissions
Better than –36 dBm at 25 W
Maximum deviation
+/- 5 KHz
Antenna impedance
50 Ohms (typical)
Receiver
Receiver type
Double conversion super heterodyne
Channels
All available US, International and Canadian
VHF marine band
Frequency range
156.025 MHz to 157.425 MHz
155.500 MHz to 163.275 MHz (Private
channels)
Sensitivity (12 dB) SINAD
Less than 0.35 µV
Adjacent channel selectivity
Better than 80 dB
Spurious noise rejection
Better than –80 dB
Inter modulation rejection
80 dB (typical)
Audio output (active
speaker)
5W
Audio distortion
Less than 10%
Hum and noise in audio
Better than –40 dB
Handset
Audio output power
76
3.5 W (typical)
Ray260
Chapter 14: Spares and accessories
Chapter contents
•
14.1 Ray260 Spares & Accessories on page 78
•
14.2 SeaTalkng cables and accessories on page 78
Spares and accessories
77
14.1 Ray260 Spares & Accessories
14.2 SeaTalkng cables and accessories
The following spares and accessories are available for the
Ray260 VHF radio.
SeaTalkng cables and accessories for use with compatible
products.
Description
Part Number
Description
Part No
Notes
Ray260 handset US version with 10 m
(32.8 ft.) adaptor cable
A80196
SeaTalkng
T70134
Includes:
Ray260 handset US version with 20 m
(65.6 ft.) adaptor cable
A80249
Ray260 handset EU version with 10 m
(32.8 ft.) adaptor cable
A80197
Ray260 handset EU version with 20 m
(65.6 ft.) adaptor cable
A80250
starter kit
• 1 x 5 Way connector (A06064)
• 2 x Backbone terminator
(A06031)
• 1 x 3 m (9.8 ft) spur cable
(A06040)
• 1 x Power cable (A06049)
SeaTalkng
Backbone Kit
A25062
Includes:
Passive speaker with 1.5 m (4.9 ft.)
cable attached
A80198
Active speaker with 1.5 m (4.9 ft.)
cable attached
A80199
Ray260 handset extension cable 5 m
(16.4 ft)
A80200
Ray260 handset extension cable 10
m (32.8 ft)
A80201
•
Ray260 handset extension cable 15
m (49.2 ft)
A80202
• 1 x Power cable (A06049)
R70166
SeaTalkng 0.4 m (1.3 ft)
spur
A06038
Ray260 handset adaptor cable 10 m
(32.8 ft)
R70167
SeaTalkng 1 m (3.3 ft)
spur
A06039
Ray260 handset adaptor cable 20 m
(65.6 ft.
A80205
SeaTalkng 3 m (9.8 ft)
spur
A06040
Power/Data cable 1 m (3.3 ft.)
SeaTalkng 5 m (16.4 ft)
spur
A06041
SeaTalkng 0.4 m (1.3 ft)
elbow spur
A06042
SeaTalkng 0.4 m (1.3 ft)
backbone
A06033
SeaTalkng 1 m (3.3 ft)
backbone
A06034
SeaTalkng 3 m (9.8 ft)
backbone
A06035
SeaTalkng 5 m (16.4 ft)
backbone
A06036
SeaTalkng 9 m (29.5 ft)
backbone
A06068
SeaTalkng 20 m (65.6 ft)
backbone
A06037
SeaTalkng to bare ends
1 m (3.3 ft) spur
A06043
SeaTalkng to bare ends
3 m (9.8 ft) spur
A06044
SeaTalkng Power cable
A06049
SeaTalkng
A06031
78
• 2 x 5 m (16.4 ft) Backbone
cable (A06036)
• 1 x 20 m (65.6 ft) Backbone
cable (A06037)
• 4 x T-piece (A06028)
Terminator
2 x Backbone terminator
(A06031)
SeaTalkng T-piece
A06028
Provides 1 x spur connection
SeaTalkng 5–way
connector
A06064
Provides 3 x spur connections
SeaTalkng backbone
extender
A06030
SeaTalk to SeaTalkng
converter kit
E22158
Allows the connection of SeaTalk
devices to a SeaTalkng system.
Ray260
Description
Part No
Notes
SeaTalkng Inline
terminator
A80001
Provides direct connection of
a spur cable to the end of a
backbone cable. No T-piece
required.
SeaTalkng Blanking plug
A06032
ACU / SPX SeaTalkng
spur cable 0.3 m (1.0 ft)
R12112
SeaTalk (3 pin) to
SeaTalkng adaptor cable
0.4 m (1.3 ft)
A06047
SeaTalk to SeaTalkng
spur 1 m (3.3 ft) spur
A22164
SeaTalk2 (5 pin) to
SeaTalkng adaptor cable
0.4 m (1.3 ft)
A06048
DeviceNet adaptor
cable (Female)
A06045
Allows the connection of NMEA
2000 devices to a SeaTalkng
system.
DeviceNet adaptor
cable (Male)
A06046
Allows the connection of NMEA
2000 devices to a SeaTalkng
system.
DeviceNet adaptor
cable (Female) to bare
ends.
E05026
Allows the connection of NMEA
2000 devices to a SeaTalkng
system.
DeviceNet adaptor
cable (Male) to bare
ends.
E05027
Allows the connection of NMEA
2000 devices to a SeaTalkng
system.
Spares and accessories
Connects an SPX course
computer or an ACU to a
SeaTalkng backbone.
79
80
Ray260
Appendix A NMEA 0183 sentences
The radio supports the following NMEA 0183 sentences.
Ray260 / Ray260E
Sentence
Description
DSC
Digital Selective Calling
●
●
DSE
Expanded Digital Selective Calling
●
●
VDM
AIS VHF Data Link Message
GGA
Global Positioning System Fix Data
●
●
GLL
Geographic Position — Lat/Long
●
●
GNS
GNSS Fix Data
●
●
RMA
Recommended Minimum Specific Loran-C Data
●
●
RMC
Recommended Minimum Specific GNSS Data
●
●
NMEA 0183 sentences
Receive
Transmit
Ray260 AIS / Ray260E AIS
Receive
Transmit
●
81
Appendix B NMEA 2000 sentences
The radio supports the following NMEA 2000 sentences. These are applicable to NMEA 2000 and SeaTalkng protocols.
Ray260 / Ray 260E
Ray260 AIS / Ray260E AIS
Sentence
Description
Receive
Transmit
Receive
Transmit
59904
ISO Acknowledgement
●
●
●
●
59392
ISO Request
●
60928
ISO Address Claim
●
65240
ISO Commanded Address
●
126208
NMEA — Group Function
●
126464
PGN List
●
●
126996
Product Information
●
●
126026
COG / SOG Rapid Update
●
●
126029
GNSS Position Data
●
●
129038
AIS Class A Position report
●
129039
AIS Class B Position Report
●
129040
AIS Class B Extended Position
●
129040
AIS SAR Aircraft Position Report
●
●
129040
Radio Frequency / Mode / Power
●
●
129808
DSC Call Information
●
●
129809
AIS Class B “CS” Static Data Report, Part A
●
129810
AIS Class B “CS” Static Data Report, Part B
●
129793
AIS UTC Date and Time Report
●
129801
AIS Safety Related Broadcast Addressed
●
129041
AIS Aids to Navigation
●
129044
Datum
82
●
●
●
●
●
●
●
●
●
●
Ray260
Appendix C VHF Channels
US Marine VHF Channels and Frequencies
CH No.
TX Freq
RX Freq
Single Freq
Use
01A
156.050
156.050
x
Port operations and commercial, VTS.
Available only in New Orleans / Lower Mississippi area.
03A
156.150
156.150
x
US Government only.
Port operations or VTS in the Houston, New Orleans and Seattle areas.
05A
156.250
156.250
x
06
156.300
156.300
x
Intership Safety.
07A
156.350
156.350
x
Commercial.
08
156.400
156.400
x
Commercial (Intership only).
09
156.450
156.450
x
Boater calling.
Commercial and Non-commercial.
10
156.500
156.500
x
Commercial.
11
156.550
156.550
x
Commercial.
VTS in selected areas.
12
156.600
156.600
x
Port operations.
VTS in selected areas.
13
156.650
156.650
x
Intership navigation safety (Bridge-to-bridge).
Ships >20 metres in length maintain a listening watch on this channel in US waters.
14
156.700
156.700
x
Port operations.
VTS in selected areas.
15
-
156.750
x
Environmental (Receive only).
Used by Class ‘C’ EPIRBs.
16
156.800
156.800
x
International Distress, Safety and Calling.
Ships required to carry radio, USCG, and most coast stations maintain a listening watch
on this channel.
17
156.850
156.850
x
State Control.
18A
156.900
156.900
x
Commercial.
19A
156.950
156.950
x
Commercial.
20
157.000
161.600
20A
157.000
157.000
x
Port operations.
157.050
x
US Coast Guard only.
Coast Guard Liaison and Maritime Safety Information Broadcasts.
Broadcasts announced on channel 16.
US Coast Guard only.
21A
157.050
Port operations (duplex).
22A
157.100
157.100
x
23A
157.150
157.150
x
24
157.200
161.800
Public correspondence (Marine operator).
25
157.250
161.850
Public correspondence (Marine operator).
26
157.300
161.900
Public correspondence (Marine operator).
27
157.350
161.950
Public correspondence (Marine operator).
28
157.400
162.000
Public correspondence (Marine operator).
61A
156.075
156.075
x
US Government only.
63A
156.175
156.175
x
Port operations and commercial VTS, Available only in New Orleans / Lower Mississippi
area.
64A
156.225
156.225
x
US Coast Guard only.
65A
156.275
156.275
x
Port operations.
66A
156.325
156.325
x
Port operations.
67
156.375
156.375
x
Commercial.
Used for bridge-to-bridge communications in lower Mississippi river (Intership only).
68
156.425
156.425
x
Non-commercial.
69
156.475
156.475
x
Non-commercial.
71
156.575
156.575
x
Non-commercial.
72
156.625
156.625
x
Non-commercial (Intership only).
VHF Channels
83
CH No.
TX Freq
RX Freq
Single Freq
Use
73
156.675
156.675
x
Port operations.
Port operations.
74
156.725
156.725
x
77
156.875
156.875
x
Port operations (Intership only).
78A
156.925
156.925
x
Non-commercial.
79A
156.975
156.975
x
Commercial.
Non-commercial in Great Lakes only).
80A
157.025
157.025
x
Commercial.
Non-commercial in Great Lakes only).
81A
157.075
157.075
x
US Government only — Environmental protection operations.
82A
157.125
157.125
x
US Government only.
x
US Government only.
83A
157.175
157.175
84
157.225
161.825
Public correspondence (Marine operator).
85
157.275
161.875
Public correspondence (Marine operator).
86
157.325
161.925
Public correspondence (Marine operator).
87
157.375
161.975
Public correspondence (Marine operator).
88
157.425
162.025
Public correspondence only near the Canadian border
88A
157.425
157.425
x
Commercial, Intership only.
Please be aware that:
• Recreational boaters normally use channels listed as Non-commercial: 68, 69, 71, 72 78A.
• Channel 70 is used exclusively for DSC and is not available for regular voice communications.
• Channels 75 and 76 are reserved as guards bands for channel 16 and are not available for regular voice communications.
Note:
1. The letter ‘A’ following a channel number indicates simplex use of the ship station transmit side of an international semi-duplex
channel. Operations are different from that of international operations on that channel.
2. Channel 13 should be used to contact a ship when there is danger of collision. All ships of length 20 metres or greater are
required to guard VHF channel 13, in addition to VHF channel 16, when operating within US territorial waters.
3. Channel 15 is receive only.
4. Channel 16 is used for calling other stations or for distress calls.
5. Channel 17 and channel 77 have a fixed power output of 1 watt.
6. Channel 13 and channel 67 have an initial power output of 1 watt. User can temporarily override this restrictions to transmit at
high power.
Canadian Marine VHF Channels and Frequencies
CH No.
TX Freq
RX Freq
Area of
operation
Use
01
156.050
160.650
PC
Public correspondence.
02
156.100
160.700
PC
Public correspondence.
03
156.150
160.750
PC
Public correspondence.
04A
156.200
156.200
PC
Intership, ship/shore and safety:
Canadian Coast Guard search and rescue.
04A
156.200
156.200
EC
Intership, ship/shore and commercial:
Commercial fishing only.
05A
156.250
156.250
06
156.300
156.300
All areas
Intership, commercial, non-commercial and safety:
Maybe used for search and rescue communications between ships and aircraft.
07A
156.350
156.350
All areas
Intership, ship/shore, commercial.
08
156.400
156.400
WC, EC
Intership, commercial and safety.
Also assigned for operations in the Lake Winnipeg area.
84
Ship movement.
Ray260
CH No.
TX Freq
RX Freq
Area of
operation
09
156.450
156.450
AC
Intership, ship/shore, commercial, non-commercial and ship movement.
Maybe used to communicate with aircraft and helicopters in predominantly maritime
support operations.
10
156.500
156.500
AC, GL
Intership, ship/shore, commercial, non-commercial, safety and ship movement.
May also be used for communications with aircraft engaged in coordinated search and
rescue and antipollution operations.
11
156.550
156.550
PC, AC, GL
Intership, ship/shore, commercial, non-commercial and ship movement.
Also used for pilotage purposes.
12
156.600
156.600
WC, AC, GL
Intership, ship/shore, commercial, non-commercial and ship movement.
Port operations and pilot information and messages.
13
156.650
156.650
All areas
Intership, commercial, non-commercial and ship movement.
Exclusively for bridge-to-bridge navigational traffic. Limited to 1 watt maximum power.
14
156.700
156.700
AC, GL
Intership, ship/shore, commercial, non-commercial and ship movement.
Port operations and pilot information and messages.
15
156.750
156.750
All areas
Intership, ship/shore, commercial, non-commercial and ship movement.
All operations limited to 1 watt maximum power. May also be used for on-board
communications.
16
156.800
156.800
All areas
International distress, safety and calling.
17
156.850
156.850
All areas
Intership, ship/shore, commercial, non-commercial and ship movement.
All operations limited to 1 watt maximum power. May also be used for on-board
communications.
18A
156.900
156.900
All areas
Intership, ship/shore, commercial.
Towing on the Pacific coast.
19A
156.950
156.950
All areas
except PC
Intership, ship/shore.
Canadian Coast Guard only
19A
156.950
156.950
PC
Intership, ship/shore.
Various government departments.
20
157.00
161.600
All areas
Ship/shore, safety and ship movement.
Port operations limited to 1 watt maximum power.
21A
157.050
157.050
All areas
Intership and ship/shore.
Canadian Coast Guard only.
21B
-
161.650
All areas
Safety: Continuous Marine Broadcast (CMB) service.
22A
157.100
157.100
All areas
Intership, ship/shore, commercial and non-commercial.
For communications between Canadian Coast Guard and non-Canadian Coast Guard
stations only.
23
157.150
161.750
PC
Ship/shore and public correspondence.
Also in the inland waters of British Columbia
24
157.200
161.800
All areas
Ship/shore and public correspondence.
25
157.250
161.850
PC
Ship/shore and public correspondence.
Also assigned for operations in the Lake Winnipeg area.
25B
-
161.850
AC
Safety: Continuous Marine Broadcast (CMB) service.
26
157.300
161.900
All areas
Ship/shore, safety and public correspondence.
27
157.350
161.950
AC, GL, PC
Ship/shore and public correspondence.
28
157.400
162.00
PC
Ship/shore, safety and public correspondence.
28B
-
162.000
AC
Safety: Continuous Marine Broadcast (CMB) service.
60
156.025
160.625
PC
Ship/shore and public correspondence.
61A
156.075
156.075
PC
Intership and ship/shore
Canadian Coast Guard only.
61A
156.075
156.075
EC
Intership, ship/shore and commercial
Commercial fishing only.
62A
156.125
156.125
PC
Intership and ship/shore
Canadian Coast Guard only.
62A
156.125
156.125
EC
Intership, ship/shore and commercial
Commercial fishing only.
64
156.225
160.825
PC
Ship/shore and public correspondence.
VHF Channels
Use
85
CH No.
TX Freq
RX Freq
Area of
operation
64A
156.225
156.225
EC
65A
156.275
156.275
Intership, ship/shore, commercial, non-commercial and safety.
Search and rescue and antipollution operations on the Great Lakes.
Towing on the Pacific coast.
Port operations only in the St. Lawrence river area limited to 1 watt maximum power.
Pleasure craft in the inland waters of Alberta, Saskatchewan and Manitobs (excluding
Lake Winnipeg and the Red River.
66A
156.325
156.325
Intership, ship/shore, commercial, non-commercial, safety and ship movement.
Port operations only in the St. Lawrence river / Great Lakes areas limited to 1 watt
maximum power.
67
156.375
156.375
EC
Intership ship/shore and commercial.
Commercial fishing only.
67
156.375
156.375
All areas
except EC
Intership, ship/shore, commercial, non-commercial, safety.
May also be used for communications with aircraft engaged in coordinated search and
rescue and antipollution operations.
68
156.425
156.425
All areas
Intership, ship/shore and non-commercial.
For marinas and yacht clubs.
69
156.475
156.475
All areas
except EC
Intership, ship/shore, commercial and non-commercial.
69
156.475
156.475
EC
Intership, ship/shore and commercial.
Commercial fishing only.
71
156.575
156.575
PC
Intership, ship/shore, commercial, non-commercial, safety and ship movement.
71
156.575
156.575
72
156.625
156.625
EC, PC
Intership, commercial and non-commercial
May be used to communicate with aircraft and helicopters in predominantly maritime
support operations.
73
156.675
156.675
EC
Intership, ship/shore and commercial.
Commercial fishing only.
73
156.675
156.675
All areas
except EC
Intership, ship/shore, commercial, non-commercial and safety.
May also be used for communications with aircraft engaged in coordinated search and
rescue and antipollution operations.
74
156.725
156.725
EC, PC
Intership, ship/shore, commercial, non-commercial and ship movement.
77
156.875
156.875
78A
156.925
156.925
EC, PC
Intership, ship/shore and commercial.
79A
156.975
156.975
EC, PC
Intership, ship/shore and commercial.
80A
157.025
157.025
EC, PC
Intership, ship/shore and commercial.
81A
157.075
157.075
81A
157.075
157.075
PC
Intership, ship/shore and safety.
Canadian Coast Guard antipollution.
82A
157.125
157.125
PC
Intership, ship/shore and safety.
Canadian Coast Guard use only.
82A
157.125
157.1258
83
157.175
161.775
PC
Ship/shore and safety.
Canadian Coast Guard use only.
83A
157.175
157.175
EC
Intership and ship/shore
Canadian Coast Guard and other government agencies.
83B
-
161.775
AC, GL
Safety: Continuous Marine Broadcast (CMB) service.
84
157.225
161.825
PC
Ship/shore and public correspondence.
85
157.275
161.875
AC, GL ,NL
Ship/shore and public correspondence.
86
157.325
161.925
PC
Ship/shore and public correspondence.
86
Use
Intership, ship/shore and commercial
Commercial fishing only.
Intership, ship/shore and non-commercial.
For marinas and yacht clubs on the east coast and on Lake Winnipeg.
Intership, ship/shore, safety and ship movement.
Pilotage on Pacific coast.
Port operations only in the St. Lawrence river / Great Lakes areas limited to 1 watt
maximum power.
Intership, ship/shore.
Canadian Coast Guard use only in the St. Lawrence river / Great Lakes areas.
Intership and ship/shore.
Canadian Coast Guard use only in the St. Lawrence river / Great Lakes areas.
Ray260
CH No.
TX Freq
RX Freq
Area of
operation
Use
87
157.375
161.975
AC, GL, NL
Ship/shore and public correspondence.
88
157.425
162.025
AC, GL, NL
Ship/shore and public correspondence.
Area of operation
• AC — Atlantic Coast, Gulf and St. Lawrence River up to and including Montreal.
• EC — East Coast: includes NL, AC, GL and Eastern Arctic areas.
• GL — Great Lakes: includes St. Lawrence above Montreal.
• NL — Newfoundland and Labrador.
• PC — Pacific Coast.
• WC — West Coast: includes PC, Western Arctic and Athabasca-Mackenzie Watershed areas.
• All areas — Includes East and West Coast areas.
Note:
1. An ‘A’ following a channel number indicates simplex use of the ship station transmit side of an international duplex channel.
Operations are different from that of international operations on that channel.
2. Channel 16 is used for calling other stations or for distress calls.
3. A ‘B’ following a channel number indicates simplex use of the coast station transmit side of an international duplex channel.
The channel is receive only
4. Channel 70 is used exclusively for Digital Selective Calling and is not available for regular voice communications.
5. Channel 75 and channel 76 are reserved as guard bands for channel 16 and are not available for regular voice
communications.
International Marine VHF Channels and Frequencies
CH No.
TX Freq
RX Freq
01
156.050
160.650
Public correspondence, Port operations and Ship movement.
02
156.100
160.700
Public correspondence, Port operations and Ship movement.
03
156.150
160.750
Public correspondence, Port operations and Ship movement.
04
156.200
160.800
Public correspondence, Port operations and Ship movement.
05
156.250
160.850
Public correspondence, Port operations and Ship movement.
06
156.300
156.300
07
156.350
160.950
08
156.400
156.400
x
Intership.
09
156.450
156.450
x
Intership, Port operations and Ship movement.
10
156.500
156.500
x
Intership, Port operations and Ship movement.
156.550
x
Port operations and Ship movement.
Port operations and Ship movement.
11
156.550
Single Freq
x
Use
Intership.
Public correspondence, Port operations and Ship movement.
12
156.600
156.600
x
13
156.650
156.650
x
Intership, Safety, Port operations and Ship movement.
14
156.700
156.700
x
Port operations and Ship movement.
15
156.750
156.750
x
Intership, on-board communications limited to 1 watt maximum power.
16
156.800
156.800
x
Distress, Safety and Calling
17
156.850
156.850
x
Intership, on-board communications limited to 1 watt maximum power.
18
156.900
161.500
Public correspondence, Port operations and Ship movement.
19
156.950
161.550
Public correspondence, Port operations and Ship movement.
20
157.000
161.600
Public correspondence, Port operations and Ship movement.
21
157.050
161.650
Public correspondence, Port operations and Ship movement.
22
157.100
161.700
Public correspondence, Port operations and Ship movement.
23
157.150
161.750
Public correspondence, Port operations and Ship movement.
24
157.200
161.800
Public correspondence, Port operations and Ship movement.
25
157.250
161.850
Public correspondence, Port operations and Ship movement.
26
157.300
161.900
Public correspondence, Port operations and Ship movement.
27
157.350
161.950
Public correspondence, Port operations and Ship movement.
VHF Channels
87
CH No.
TX Freq
RX Freq
28
157.400
162.000
Public correspondence, Port operations and Ship movement.
60
156.025
160.625
Public correspondence, Port operations and Ship movement.
61
156.075
160.675
Public correspondence, Port operations and Ship movement.
62
156.125
160.725
Public correspondence, Port operations and Ship movement.
63
156.175
160.775
Public correspondence, Port operations and Ship movement.
64
156.225
160.825
Public correspondence, Port operations and Ship movement.
65
156.275
160.875
Public correspondence, Port operations and Ship movement.
66
156.325
160.925
Public correspondence, Port operations and Ship movement.
67
156.375
156.375
x
Intership, Port operations and Ship movement.
156.425
x
Port operations and Ship movement.
156.475
x
Intership, Port operations and Ship movement.
Port operations and Ship movement.
68
69
156.425
156.475
Single Freq
Use
71
156.575
156.575
x
72
156.625
156.625
x
Intership.
73
156.675
156.675
x
Intership.
74
156.725
156.725
x
Port operations and Ship movement.
75
156.775
156.775
x
See Note 5.
76
156.825
156.825
x
See Note 5.
x
Intership.
77
156.875
156.875
78
156.925
161.525
Public correspondence, Port operations and Ship movement.
79
156.975
161.575
Public correspondence, Port operations and Ship movement.
80
157.025
161.625
Public correspondence, Port operations and Ship movement.
81
157.075
161.675
Public correspondence, Port operations and Ship movement.
82
157.125
161.725
Public correspondence, Port operations and Ship movement.
83
157.175
161.775
Public correspondence, Port operations and Ship movement.
84
157.225
161.825
Public correspondence, Port operations and Ship movement.
85
157.275
161.875
Public correspondence, Port operations and Ship movement.
86
157.325
161.925
Public correspondence, Port operations and Ship movement.
87
157.375
157.375
x
88
157.425
157.425
x
Port operations and Ship movement.
Port operations and Ship movement.
Please be aware that:
• Intership channels are for communications between ship stations. Intership communications should be restricted to channels 6, 8,
72 and 77. If these are not available, the other channels marked for Intership may be used.
• Channel 70 is used exclusively for Digital Selective Calling (DSC) and is not available for regular voice communications.
Note:
1. Channel 06 may also be used for communications between ship stations and aircraft engaged in coordinated search and
rescue operations. Ship stations should avoid harmful interference to such communications on channel 06 as well as to
communications between aircraft stations, ice breakers and assisted ships during ice seasons.
2. Within the European Maritime Area and in Canada, channels 10, 67 and 73 may also be used by the individual administrations
concerned for communication between ship stations, aircraft stations and participating land stations engaged in coordinated
search and rescue and anti-pollution operations in local areas. Channel 10 or 73 (depending on location) are also used for
the broadcast of Marine Safety Information by the Maritime and Coast Guard Agency in the UK only.
3. Channel 13 is designated for use on a worldwide basis as a navigation safety communication channel, primarily for intership
navigation safety communications.
4. Channels 15 and 17 may also be used for on-board communications provided the effective radiated power does not exceed
1 Watt.
5. The use of channels 75 and 76 should be restricted to navigation related communications only and all precautions should be
taken to avoid harmful interference to channel 16. Transmit power is limited to 1 Watt.
88
Ray260
Private Channels (Europe only)
Country
Channel
Designations
TX Freq
RX Freq
Channel Use
Belgium
96
162.425
162.425
Marina
Denmark
L1
155.500
155.500
Pleasure
L2
155.525
155.525
Pleasure
L1
155.500
155.500
Pleasure
L2
155.525
155.525
Pleasure
L3
155.650
155.650
Pleasure
Holland
(Netherlands)
31
157.550
162.150
Marina
37
157.850
157.850
Leisure
Denmark,
Finland,
Norway &
Sweden
F1
155.625
155.625
Fishing
F2
155.775
155.775
Fishing
F3
155.825
155.825
Fishing
United
Kingdom
M1
157.850
157.850
Marina
M2
161.425
161.425
Marina
Finland,
Norway &
Sweden
The national channels listed above have been allocated for the specific use within the countries listed. To use these channels you
must have the appropriate license.
WX Channels (North America only)
Weather
Channel
Frequency in MHz
WX1
162.550
WX2
162.400
WX3
162.475
WX4
162.425
WX5
162.450
WX6
162.500
WX7
162.525
WX8
161.650
WX9
161.775
WX10
163.275
VHF Channels
89
Appendix D Phonetic alphabet
To help make call letters more clearly understood, and to assist in spelling out similar sounding or unfamiliar word, radiotelephone
users employ the international phonetic alphabet.
A
ALPHA
N
NOVEMBER
B
BRAVO
O
OSCAR
C
CHARLIE
P
PAPA
D
DELTA
Q
QUEBEC
E
ECHO
R
ROMEO
F
FOXTROT
S
SIERRA
G
GOLF
T
TANGO
H
HOTEL
U
UNIFORM
I
INDIA
V
VICTOR
J
JULIET
W
WHISKEY
K
KILO
X
X-RAY
L
LIMA
Y
YANKEE
M
MIKE
Z
ZULU
90
Ray260
Appendix E Prowords
Prowords can be used to simplify and speed up radio
communications.
Proword
Meaning
ACKNOWLEDGE
Have you received and understood?
CONFIRM
Is that correct?
CORRECTION
An error has been made?
I SAY AGAIN
I repeat (e.g. important information).
I SPELL
Phonetically spelling of the word.
OUT
End of communication.
OVER
I have completed this part of the
message and am inviting you to
reply.
RECEIVED
Receipt acknowledgement.
SAY AGAIN
Repeat your message.
STATION CALLING
Used when a station is uncertain
of the identity of a station which is
calling.
Prowords
91
92
Ray260
www.ra ym a rin e .c o m