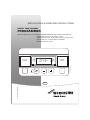
1
INSTALLATION & OPERATING INSTRUCTIONS
DIGITAL TWIN CHANNEL
PROGRAMMER
FOR USE WITH THE FOLLOWING STANDARD AND HIGH EFFICIENCY APPLIANCES:
HEATSLAVE 12/14, 15/19, 20/25, 26/32
DANESMOOR 12/14, 15/19, 20/25, 26/32, 32/50, 50/70
HIGHFLOW 3.5, 4.5, 400, 400 ELECTRONIC
GREENSTAR II HE 12/22
OFF
TIMED
ONCE
ON
LOCK
SELECT
CH ON
OFF
PM
MON TUE WED THU FRI SAT SUN
TEST? CLOCK? PROG? DATE? HDAY?
SET ?
YES
UK/IE
6 720 641 900 (2009/11)
OFF
TIMED
ONCE
ON
HEATING
ADVANCE
6720641900-00.1Wo
HOT WATER
ADVANCE
SELECT
CONTENTS
CONTENTS
1
1.1
1.2
Symbols and Safety Precautions - - - - - - - - - - - - 3
Explanation of symbols - - - - - - - - - - - - - - - - - - - - - - - - 3
Safety Precautions - - - - - - - - - - - - - - - - - - - - - - - - - - - 3
2
General information - - - - - - - - - - - - - - - - - - - - - - 4
3
Fitting the programmer - - - - - - - - - - - - - - - - - - - 6
4
Electrical connections - - - - - - - - - - - - - - - - - - - - 7
5
5.1
5.2
5.3
5.4
5.5
5.6
5.6.1
5.6.2
5.6.3
5.6.4
5.6.5
5.6.6
5.6.7
5.6.8
5.6.9
5.6.10
5.6.11
5.6.12
Programmer controls - - - - - - - - - - - - - - - - - - - - - 8
Central heating - - - - - - - - - - - - - - - - - - - - - - - - - - - - - - 8
Hot water - - - - - - - - - - - - - - - - - - - - - - - - - - - - - - - - - - 9
Pre-set program - - - - - - - - - - - - - - - - - - - - - - - - - - - - 10
Setting the time - - - - - - - - - - - - - - - - - - - - - - - - - - - - 11
Setting the date - - - - - - - - - - - - - - - - - - - - - - - - - - - - 13
Setting the programs - - - - - - - - - - - - - - - - - - - - - - - - 15
Setting CH Mon - Fri - - - - - - - - - - - - - - - - - - - - - - - - 15
Setting HW Mon- Fri - - - - - - - - - - - - - - - - - - - - - - - - 17
Setting individual weekdays - - - - - - - - - - - - - - - - - - - 18
Setting CH individual weekdays: - - - - - - - - - - - - - - - - 18
Setting HW individual weekdays - - - - - - - - - - - - - - - - 20
Setting CH Sat - Sun - - - - - - - - - - - - - - - - - - - - - - - - 21
Setting HW Sat - Sun: - - - - - - - - - - - - - - - - - - - - - - - 22
Setting individual weekend days: - - - - - - - - - - - - - - - 23
Setting CH individual weekend days - - - - - - - - - - - - - 23
Setting HW individual weekend days - - - - - - - - - - - - 25
Testing the programmes - - - - - - - - - - - - - - - - - - - - - - 26
Setting holidays - - - - - - - - - - - - - - - - - - - - - - - - - - - - 27
6
6.1
6.2
6.3
MAINTENANCE AND SPARES - - - - - - - - - - - - - 29
Maintenance - - - - - - - - - - - - - - - - - - - - - - - - - - - - - - 29
Servicing - - - - - - - - - - - - - - - - - - - - - - - - - - - - - - - - - 29
Replacement parts - - - - - - - - - - - - - - - - - - - - - - - - - - 29
2
6 720 641 900 (2009/11)
SYMBOLS AND SAFETY PRECAUTIONS
1
SYMBOLS AND SAFETY PRECAUTIONS
1.1
EXPLANATION OF SYMBOLS
WARNING SYMBOLS
ADDITIONAL SYMBOLS
Safety instructions in this document
are framed and identified by a
warning triangle which is printed on
a grey background.
Electrical hazards are identified by
a lightning symbol surrounded by a
warning triangle.
Signal words indicate the seriousness of the
hazard in terms of the consequences of not
following the safety instructions.
•
NOTICE indicates possible damage to
property or equipment, but where there is no
risk of personal injury.
•
CAUTION indicates possible personal injury.
•
WARNING indicates possible severe personal
injury.
•
DANGER indicates possible risk of life.
IMPORTANT INFORMATION
Notes contain important information
in cases where there is no risk of
personal injury or material losses and
are identified by the symbol shown
on the left. They are bordered by
horizontal lines above and below the
text.
Symbol
Meaning
B
a step in an action sequence
Æ
a reference to a related part in
the document or to other related
documents
•
a list entry
–
Tab. 1
1.2
a list entry (second level)
Symbols
SAFETY PRECAUTIONS
IF YOU SMELL GAS:
B DO NOT SMOKE OR STRIKE MATCHES
B DO NOT TURN ELECTRICAL SWITCHES ON
OR OFF
B PUT OUT NAKED FLAMES
B OPEN DOORS AND WINDOWS
B KEEP PEOPLE AWAY FROM THE AFFECTED
AREA
B TURN OFF THE CONTROL VALVE AT THE GAS
METER
B CALL YOUR GAS COMPANY
OR
B CALL THE EMERGENCY NUMBER 0800 111
999
APPLIANCE OPERATION
This equipment must only be operated by a
responsible adult who has be instructed in,
understands and is aware of the appliance‘s
operating conditions and effects.
6 720 641 900 (2009/11)
3
GENERAL INFORMATION
GENERAL INFORMATION
CH ON
OFF
PM
OFF
TIMED
ONCE
ON
HOT WATER
ADVANCE
LOCK
SELECT
MON TUE WED THU FRI SAT SUN
TEST? CLOCK? PROG? DATE? HDAY?
OFF
TIMED
ONCE
ON
SET ?
YES
SELECT
Fig. 1
SPECIFICATIONS
•
Twin channel programmer for CH and DHW
mounted into the boiler fascia
•
Factory set date and time
•
Automatic switch over to and from Day light
savings time (GMT - BST)
•
Seven day programmer
•
Three ON/OFF periods per day
•
Pre-programmed ON/OFF periods
•
Dedicated advance buttons
•
12 hour digital display
•
Holiday functions
•
Pre-wired connector
4
HEATING
ADVANCE
6720641900-00.1Wo
2
6 720 641 900 (2009/11)
GENERAL INFORMATION
TECHNICAL DATA
DESCRIPTION
UNITS
PROGRAMMER
Electrical supply
Volts a.c.
230
Ambient operating temperatures
°C
0 to +50
Humidity operating range
% non-condensing up to 45°
30 - 95
Class of protection
II
Degree of protection
IP
20
Battery back up: programme
Always
Battery back up: time
Always
Battery back up: display
hours
None
Shortest switching period
minutes
1
DHW & CH on/off periods
number/days
3
DHW & CH programmes
days
7
Tab. 2
6 720 641 900 (2009/11)
5
FITTING THE PROGRAMMER
3
FITTING THE PROGRAMMER
WARNING: Disconnect the electrical mains supply and turn off the gas supply before
working on the appliance.
If you have a fully PUMPED and controlled system you can have central heating without
hot water and vice versa.
A GRAVITY fed hot water system does not permit the heating to be on without the hot
water, although it is possible to have the hot water without the heating.
B Before installing the programmer, set the
selector switch or jumper to PUMPED or
GRAVITY according to the type of system
installed.
PUMPED
PUMPED
GRAVITY
GRAVITY
Selector
Switch
B Refer to the appliance manual to gain access
to the rear of the fascia.
B Unplug the operating switch from the four way
terminal block.
B Remove the four nut securing the operating
switch mounting panel from the fascia.
B Fit the programmer in place of the switch
mounting panel and secure with the four nuts.
B Fit the programmer connector into the four
way terminal block, ensure that the plug-in
connector is properly aligned before making
the connection.
6
6 720 641 900 (2009/11)
6720641900-53.1Wo
ELECTRICAL CONNECTIONS
ELECTRICAL CONNECTIONS
Highflow 400
DHW
Bl
Br
CH
TERMINAL
STRIP
PLUG
W Or G
T11
TERMINAL
STRIP
SOCKET
CH
To T2
DHW
To T1
L
To TL
N
To TN
T12
T13
T14
X12
Highflow 400 Electronic
DHW
Bl
Br
CH
TERMINAL
STRIP
PLUG
W Or G
T17
T16
TERMINAL
STRIP
SOCKET
CH
To T2
DHW
To T1
L
To TL
N
To TN
T15
T14
X2
Danesmoor & Greenstar II Oil Boiler
DHW
Bl
Br
CH
TERMINAL
STRIP
SOCKET
TERMINAL
STRIP
PLUG
W Or G
T8 T2
To T2
To T1
T9 T3
To TL
T7 T1
To TN
T10 T 4
SLPJ & Greenstar II Oil PJ
Oil Heatslave
DHW
Bl
Br
CH
W Or G
TERMINAL
STRIP
SOCKET
TERMINAL
STRIP
PLUG
To CH
To DHW
1
2
To TL
3
4
6720641900-52.1Wo
4
To TN
X4
6 720 641 900 (2009/11)
7
PROGRAMMER CONTROLS
5
PROGRAMMER CONTROLS
5.1
CENTRAL HEATING
OFF
TIMED
ONCE
ON
ON
OFF
HEATING
ADVANCE
OFF
TIMED
ONCE
ON
HEATING
ADVANCE
2
6720641900-01.1Wo
ON
OFF
1
SELECT
SELECT
1. Press SELECT button to choose:
B OFF = constantly off
B TIMED = up to three ON and three OFF time
periods as per programme
B ONCE = ON from first ON and OFF after the
third OFF period
B ON = constantly on
2. Pressing the ADVANCE button:
B CENTRAL HEATING light comes on (heating
stays on until next OFF period)
-orB CENTRAL HEATING light goes off (heating
stays off until next ON period)
ADVANCE will not function with
constant ON or OFF selected.
8
6 720 641 900 (2009/11)
PROGRAMMER CONTROLS
HOT WATER
OFF
TIMED
ONCE
ON
HOT WATER
ADVANCE
MON
2
HOT WATER
ADVANCE
OFF
TIMED
ONCE
ON
MON
6720641900-02.1Wo
5.2
1
LOCK
SET ?
SELECT
LOCK
SELECT
SET ?
1. Press SELECT button to choose:
B OFF = constantly off
B TIMED = up to three ON and three OFF time
periods as per programme
B ONCE = ON from first ON and OFF after the
third OFF period
B ON = constantly on
2. Pressing the ADVANCE button:
B HOT WATER light comes on (hot water stays
on until next OFF period)
-orB HOT WATER light goes off (hot water stays off
until next ON period)
ADVANCE will not function with
constant ON or OFF selected.
6 720 641 900 (2009/11)
9
PROGRAMMER CONTROLS
PRE-SET PROGRAM
TIMED
ONCE
ON
HOT WATER
ADVANCE
LOCK
SELECT
MON TUE
TEST? CLO
OFF
TIMED
ONCE
ON
SET ?
CH ON
OFF
PM
MON TUE WED THU FRI SAT SUN
TEST? CLOCK? PROG? DATE? HDAY?
SET ?
If you need to restore the factory preset
program times, shown in the table below, then:
1. Using a suitable screwdriver, turn the lock
clockwise to release the SET? button
2. Press the SET? and PLUS buttons together to
restore the default program times as shown in
table 3.
3. Reset the lock to prevent any more alterations
1st
1st
2nd
2nd
3rd
3rd
ON
OFF
ON
OFF
ON
OFF
AM
AM
PM
PM
PM
PM
1
YES
1
Two ON/OFF periods can be used
instead of three by setting the 2nd
ON/OFF times to 12:00 as shown in
the default table 3.
One ON/OFF period can be
achieved by setting the 2nd and 3rd
ON/OFF times to the same time.
See page 15 SETTING PROGRAMS
if changes are required to the preprogrammed settings.
Central heating
MON to FRI
Time
6:30
8:30 12:00 12:00 4:30 10:30
SAT & SUN
Time
7:00
9:00 12:00 12:00 4:00 11:00
Hot water
MON to FRI
Time
6:30
8:30 12:00 12:00 4:30 10:30
SAT & SUN
Time
Tab. 3
10
7:00
OFF
TIMED
ONCE
ON
6720641900-03.1Wo
5.3
9:00 12:00 12:00 4:00 11:00
Default program periods
6 720 641 900 (2009/11)
PROGRAMMER CONTROLS
5.4
SETTING THE TIME
The time is preset and normally does
not need to be adjusted.
British Summer Time and GMT
changes are automatically adjusted.
Press SET? repeatedly to step
through “Setting the time” to reach
the next section.
Ensure that the SET? button is
unlocked before attempting any
setttings
CH ON
OFF
1
MON TUE WED THU FRI SAT SUN
TEST? CLOCK? PROG? DATE? HDAY?
SET ?
YES
6720641900-04.1Wo
1. Press the SET? button to show SET and
CLOCK? in the display.
CH ON
OFF
PM
2
MON TUE WED THU FRI SAT SUN
TEST? CLOCK? PROG? DATE? HDAY?
SET ?
YES
6720641900-05.1Wo
2. Press YES to display the time with the hours
flashing.
3
CH ON
OFF
PM
MON TUE WED THU FRI SAT SUN
TEST? CLOCK? PROG? DATE? HDAY?
SET ?
YES
3. Press the PLUS or MINUS button to correct
the hour, taking note of the AM or PM shown.
6 720 641 900 (2009/11)
6720641900-06.1Wo
Hold down either the PLUS or
MINUS button to speed up the
display changes.
11
PROGRAMMER CONTROLS
CH ON
OFF
PM
4
MON TUE WED THU FRI SAT SUN
TEST? CLOCK? PROG? DATE? HDAY?
SET ?
YES
6720641900-07.1Wo
4. Press the SET? button to set the correct hour
and then the minutes will flash.
CH ON
OFF
PM
5
MON TUE WED THU FRI SAT SUN
TEST? CLOCK? PROG? DATE? HDAY?
YES
SET ?
5. Press the PLUS or MINUS button to correct
the minutes.
6720641900 08 1Wo
CH ON
OFF
6
MON TUE WED THU FRI SAT SUN
TEST? CLOCK? PROG? DATE? HDAY?
SET ?
YES
6720641900-09.1Wo
6. Press the SET? button to set the correct
minutes, SET and DATE? then appear in the
display.
If you do not wish to change the
date, press SET? until the normal
display is resumed. Alternatively do
not press any buttons and the
display will revert to the normal
display after two minutes.
12
6 720 641 900 (2009/11)
PROGRAMMER CONTROLS
5.5
SETTING THE DATE
The date is preset and does not
normally need to be changed.
Press SET? repeatedly to step
through “Setting the date” to reach
the next section.
Ensure that the SET? button is
unlocked before attempting any
setttings
CH ON
OFF
1
MON TUE WED THU FRI SAT SUN
TEST? CLOCK? PROG? DATE? HDAY?
SET ?
YES
6720641900-10.1Wo
1. Press the SET? button to show SET and
DATE? in the display.
CH ON
OFF
2
MON TUE WED THU FRI SAT SUN
TEST? CLOCK? PROG? DATE? HDAY?
SET ?
YES
6720641900-11.1Wo
2. Press YES to display the date with the year
flashing.
3
CH ON
OFF
MON TUE WED THU FRI SAT SUN
TEST? CLOCK? PROG? DATE? HDAY?
YES
SET ?
3. Press PLUS or MINUS to correct the year.
6720641900 12 1Wo
Hold down either the PLUS or
MINUS button to speed up the
display changes.
6 720 641 900 (2009/11)
13
PROGRAMMER CONTROLS
CH ON
OFF
4
5
MON TUE WED THU FRI SAT SUN
TEST? CLOCK? PROG? DATE? HDAY?
SET ?
YES
6720641900-13.1Wo
4. Press the SET? button to set the correct year
and the month will flash on the display.
5. Press PLUS or MINUS to correct the month.
CH ON
OFF
6
7
MON TUE WED THU FRI SAT SUN
TEST? CLOCK? PROG? DATE? HDAY?
SET ?
YES
6720641900-14.1Wo
6. Press the SET? button to set the correct
month and the day will flash on the display.
7. Press PLUS or MINUS to correct the day.
CH ON
OFF
8
9
MON TUE WED THU FRI SAT SUN
TEST? CLOCK? PROG? DATE? HDAY?
SET ?
YES
8. Press the SET? button to set the correct day
and the current DLS status will start flashing.
9. Press PLUS or MINUS to turn dLS on or off.
6720641900-15.1Wo
British Summer Time and GMT time
change are automatically adjusted if
dLS is turned on.
CH ON
OFF
PM
10
MON TUE WED THU FRI SAT SUN
TEST? CLOCK? PROG? DATE? HDAY?
SET ?
YES
6720641900-16.1Wo
10. Press SET? to return to normal operation.
14
6 720 641 900 (2009/11)
PROGRAMMER CONTROLS
5.6
SETTING THE PROGRAMS
If you require different ON/OFF
times during the week, refer to
“Setting individual weekdays” on
page 18.
Ensure that the SET? button is
unlocked before attempting any
setttings
5.6.1 SETTING CH MON - FRI
CH ON
OFF
1
MON TUE WED THU FRI SAT SUN
TEST? CLOCK? PROG? DATE? HDAY?
SET ?
YES
6720641900-17.1Wo
1. Press SET? until SET and PROG? are shown
on the display.
2
CH ON
OFF
MON TUE WED THU FRI SAT SUN
TEST? CLOCK? PROG? DATE? HDAY?
SET ?
YES
6720641900-18.1Wo
2. Press YES to enter program.
3
CH ON
OFF
MON TUE WED THU FRI SAT SUN
TEST? CLOCK? PROG? DATE? HDAY?
SET ?
YES
6720641900-19.1Wo
3. Press YES to select MON - FRI.
6 720 641 900 (2009/11)
15
PROGRAMMER CONTROLS
CH ON
OFF
AM
4
5
MON TUE WED THU FRI SAT SUN
TEST? CLOCK? PROG? DATE? HDAY?
SET ?
YES
6720641900-20.1Wo
4. Press YES to select CH.
5. Press PLUS or MINUS to change the ON time.
Hold down either the PLUS or
MINUS button to speed up the
display changes.
CH ON
OFF
AM
6
7
MON TUE WED THU FRI SAT SUN
TEST? CLOCK? PROG? DATE? HDAY?
SET ?
YES
6. Press SET? to set the ON time and select the
OFF time.
8
SET ?
6720641900-21.1Wo
7. Press PLUS or MINUS to change the OFF time.
To set 2nd & 3rd on/off times go back to
YES
6720641900-22.1Wo
8. Press SET? to set the OFF time and select the
next ON time.
Repeat operations 5 to 8 to set the 2nd and
3rd CH ON/OFF times.
After pressing SET? for the 3rd CH
OFF time the display shows SET HW
MON - FRI.
16
5
6 720 641 900 (2009/11)
PROGRAMMER CONTROLS
5.6.2 SETTING HW MON - FRI
3rd CH OFF
9
HW ON
OFF
MON TUE WED THU FRI SAT SUN
TEST? CLOCK? PROG? DATE? HDAY?
SET ?
YES
6720641900-23.1Wo
9. Press YES to select the 1st ON time.
HW ON
OFF
AM
10
MON TUE WED THU FRI SAT SUN
TEST? CLOCK? PROG? DATE? HDAY?
SET ?
YES
6720641900-24.1Wo
10. Press SET? to set the ON and OFF times as
before.
Repeat operations 5 to 8 to set the 1st, 2nd
and 3rd HW ON/OFF times.
After pressing SET? for the 3rd HW
OFF time the display shows SET
MON, refer to the next section.
6 720 641 900 (2009/11)
17
PROGRAMMER CONTROLS
5.6.3 SETTING INDIVIDUAL WEEKDAYS
If you do not require individual
weekday times, press SET? until
SET SAT - SUN are displayed and
continue with page 21
B If you do not wish to change the settings for
the day displayed, then press SET? until the
day you want to change is displayed.
?
CH ON
OFF
MON TUE WED THU FRI SAT SUN
TEST? CLOCK? PROG? DATE? HDAY?
SET ?
YES
6720641900-25.1Wo
5.6.4 SETTING CH INDIVIDUAL WEEKDAYS:
CH ON
OFF
1
MON TUE WED THU FRI SAT SUN
TEST? CLOCK? PROG? DATE? HDAY?
SET ?
YES
6720641900-26.1Wo
1. Press YES to select weekday.
CH ON
OFF
AM
2
3
MON TUE WED THU FRI SAT SUN
TEST? CLOCK? PROG? DATE? HDAY?
SET ?
YES
6720641900-27.1Wo
2. Press YES to select CH
3. Press PLUS or MINUS to change the ON time.
Hold down either the PLUS or
MINUS button to speed up the
display changes.
18
6 720 641 900 (2009/11)
PROGRAMMER CONTROLS
CH ON
OFF
AM
4
5
MON TUE WED THU FRI SAT SUN
TEST? CLOCK? PROG? DATE? HDAY?
SET ?
YES
4. Press SET? to set the ON time and select the
OFF time.
6
SET ?
6720641900-28.1Wo
5. Press PLUS or MINUS to change the OFF time.
To set 2nd & 3rd on/off times go back to
YES
3
6720641900-29.1Wo
6. Press SET? to set the OFF time and select the
next ON time.
Repeat operations 3 to 6 to set the 2nd and
3rd CH ON/OFF times.
After pressing SET? for the 3rd CH
OFF time, the display shows SET
HW for that weekday.
6 720 641 900 (2009/11)
19
PROGRAMMER CONTROLS
5.6.5 SETTING HW INDIVIDUAL WEEKDAYS
3rd CH OFF
HW ON
OFF
7
MON TUE WED THU FRI SAT SUN
TEST? CLOCK? PROG? DATE? HDAY?
SET ?
YES
6720641900-30.1Wo
7. Press YES to select the 1st ON time.
Repeat operations 3 to 6 to set the 1st, 2nd
and 3rd HW ON/OFF times.
HW ON
OFF
AM
8
MON TUE WED THU FRI SAT SUN
TEST? CLOCK? PROG? DATE? HDAY?
SET ?
YES
6720641900-31.1Wo
8. After pressing SET? for the 3rd HW OFF time
SET and the next weekday are displayed.
After completing the steps above for
FRI the display shows SET SAT SUN,
refer to next section.
20
6 720 641 900 (2009/11)
PROGRAMMER CONTROLS
5.6.6 SETTING CH SAT - SUN
CH ON
OFF
1
MON TUE WED THU FRI SAT SUN
TEST? CLOCK? PROG? DATE? HDAY?
SET ?
YES
6720641900-32.1Wo
1. Press YES to select weekend.
CH ON
OFF
AM
2
3
MON TUE WED THU FRI SAT SUN
TEST? CLOCK? PROG? DATE? HDAY?
SET ?
YES
6720641900-33.1Wo
2. Press YES to select CH.
3. Press PLUS or MINUS to change the ON time.
CH ON
OFF
AM
4
5
MON TUE WED THU FRI SAT SUN
TEST? CLOCK? PROG? DATE? HDAY?
SET ?
YES
4. Press SET? to set the ON time and select the
OFF time.
6
SET ?
6720641900-34.1Wo
5. Press PLUS or MINUS to change the OFF time.
To set 2nd & 3rd on/off times go back to
YES
6. Press SET? to set the OFF time and select the
next ON time.
Repeat operations 3 to 6 to set the 2nd and
3rd CH ON/OFF times.
6 720 641 900 (2009/11)
3
6720641900-35.1Wo
After pressing SET? for the 3rd CH
OFF time, the display shows SET
HW SAT - SUN.
21
PROGRAMMER CONTROLS
5.6.7 SETTING HW SAT - SUN:
HW ON
OFF
3rd CH OFF
MON TUE WED THU FRI SAT SUN
TEST? CLOCK? PROG? DATE? HDAY?
SET ?
YES
6720641900-36.1Wo
HW ON
OFF
AM
7
MON TUE WED THU FRI SAT SUN
TEST? CLOCK? PROG? DATE? HDAY?
SET ?
YES
6720641900-37.1Wo
7. Press YES to select the 1st ON time.
Repeat operations 3 to 6 to set the 1st, 2nd
and 3rd HW ON/OFF times.
After pressing SET? for the 3rd HW
OFF time, the display shows SET
SAT.
Refer to the next section.
If you do not require individual
weekend times, press SET? until the
normal display is resumed.
22
6 720 641 900 (2009/11)
PROGRAMMER CONTROLS
5.6.8 SETTING INDIVIDUAL WEEKEND DAYS:
If you do not require individual
weekend times, then press SET?
until the normal display is shown
?
CH ON
OFF
MON TUE WED THU FRI SAT SUN
TEST? CLOCK? PROG? DATE? HDAY?
SET ?
YES
6720641900-38.1Wo
B If you do not wish to change the settings for
SAT, then press SET? to move to SUN.
5.6.9 SETTING CH INDIVIDUAL WEEKEND DAYS
CH ON
OFF
1
MON TUE WED THU FRI SAT SUN
TEST? CLOCK? PROG? DATE? HDAY?
SET ?
YES
6720641900-39.1Wo
1. Press YES to select day displayed.
2
3
CH ON
OFF
AM
MON TUE WED THU FRI SAT SUN
TEST? CLOCK? PROG? DATE? HDAY?
SET ?
YES
6720641900-40.1Wo
2. Press YES to select CH.
3. Press PLUS or MINUS to change the ON time.
Hold down either the PLUS or
MINUS button to speed up the
display changes.
6 720 641 900 (2009/11)
23
PROGRAMMER CONTROLS
CH ON
OFF
AM
4
5
MON TUE WED THU FRI SAT SUN
TEST? CLOCK? PROG? DATE? HDAY?
SET ?
YES
4. Press SET? to set the ON time and select the
OFF time.
6
SET ?
6720641900-41.1Wo
5. Press PLUS or MINUS to change the OFF time.
To set 2nd & 3rd on/off times go back to
YES
6720641900-42.1Wo
6. Press SET? to set the OFF time and select the
next ON time.
Repeat operations 3 to 6 to set the 2nd and
3rd CH ON/OFF times.
After pressing SET? for the 3rd CH
OFF time, the display shows SET
HW for that day.
24
3
6 720 641 900 (2009/11)
PROGRAMMER CONTROLS
5.6.10 SETTING HW INDIVIDUAL WEEKEND DAYS
3rd CH OFF
7
HW ON
OFF
MON TUE WED THU FRI SAT SUN
TEST? CLOCK? PROG? DATE? HDAY?
SET ?
YES
6720641900-43.1Wo
7. Press YES to select the 1st ON time.
Repeat operations 3 to 6 to set the 1st, 2nd
and 3rd HW ON/OFF times.
HW ON
OFF
AM
8
MON TUE WED THU FRI SAT SUN
TEST? CLOCK? PROG? DATE? HDAY?
SET ?
YES
6720641900-44.1Wo
After completing the steps above,
the display shows TEST?.
Refer to the next section to check
your CH and HW settings.
If you do not require to check the
program settings, then press SET?
until the normal program is
displayed.
6 720 641 900 (2009/11)
25
PROGRAMMER CONTROLS
5.6.11 TESTING THE PROGRAMS
CH ON
OFF
1
MON TUE WED THU FRI SAT SUN
TEST? CLOCK? PROG? DATE? HDAY?
SET ?
YES
6720641900-45.1Wo
1. Press the SET? button until TEST? is
displayed.
CH ON
OFF
AM
2
MON TUE WED THU FRI SAT SUN
TEST? CLOCK? PROG? DATE? HDAY?
SET ?
YES
6720641900-46.1Wo
2. Press YES to enter the test program.
CH ON
OFF
AM
3
MON TUE WED THU FRI SAT SUN
TEST? CLOCK? PROG? DATE? HDAY?
SET ?
YES
3. Press and hold down the YES button to
continuously cycle through all the
programmed ON and OFF times for each day
of the week.
The display pauses when a set program time is
shown with the HOT WATER and CENTRAL
HEATING lights ON or OFF according to the
program settings.
6720641900-47.1Wo
B To change the program settings, refer to
SETTING THE PROGRAMs.
B Press the SET? button to return to the normal
run mode.
To temporarily stop the display
advancing, release the YES button,
then press YES again to continue.
26
6 720 641 900 (2009/11)
PROGRAMMER CONTROLS
5.6.12 SETTING HOLIDAYS
Ensure that the SET? button is
unlocked before attempting any
setttings
CH ON
OFF
1
MON TUE WED THU FRI SAT SUN
TEST? CLOCK? PROG? DATE? HDAY?
SET ?
YES
6720641900-48.1Wo
1. Press the SET? button until SET and HDAY? is
displayed.
HW ON
OFF
AM
2
MON TUE WED THU FRI SAT SUN
TEST? CLOCK? PROG? DATE? HDAY?
SET ?
YES
6720641900-49.1Wo
2. Press YES, the display shows 00.
3
SET ?
YES
HW ON
OFF
AM
MON TUE WED THU FRI SAT SUN
TEST? CLOCK? PROG? DATE? HDAY?
6720641900-50.1Wo
3. Press PLUS or MINUS to set the number of
days you require the system to be off.
6 720 641 900 (2009/11)
27
PROGRAMMER CONTROLS
CH ON
OFF
4
MON TUE WED THU FRI SAT SUN
TEST? CLOCK? PROG? DATE? HDAY?
SET ?
YES
6720641900-51.1Wo
4. Press SET? and HDAY is displayed to show
that there is no demand for heating from the
programmer.
The program will return to normal
operation after the set number of
days.
B To cancel the holiday setting and return to
normal operation, press any button.
The programmer counts any pass
through midnight as one day.
For example, if you do not want the
heating ON from Saturday evening
until Tuesday morning, set for three
days.
28
6 720 641 900 (2009/11)
MAINTENANCE AND SPARES
6
MAINTENANCE AND SPARES
6.1
MAINTENANCE
B The programmer requires no maintenance.
B The outer casing can be wiped clean using a
dry cloth, do not use polish or detergents.
6.2
SERVICING
B The unit cannot be serviced.
B Should the existing unit fail to function
correctly, check that the times and program
settings are correct.
6.3
REPLACEMENT PARTS
B Twin channel digital programmer replacement
spare parts number: 7 716 192 007 0
6 720 641 900 (2009/11)
29
CONTACT INFORMATION
WORCESTER, BOSCH GROUP:
TECHNICAL :
08705 266241
SERVICE:
08457 256206
SPARES:
01905 752571
LITERATURE:
01905 752556
TRAINING:
01905 752526
SALES:
01905 752640
WEBSITE:
Worcester, Bosch Group
Cotswold Way, Warndon, Worcester WR4 9SW.
Tel. 01905 754624 Fax. 01905 754619
Worcester, Bosch Group is a brand name of
Bosch Thermotechnology Ltd.
worcester-bosch.co.uk
6 720 641 900
worcester-bosch.co.uk
06490154001 (Iss A)