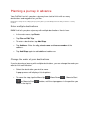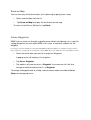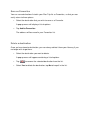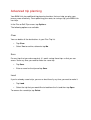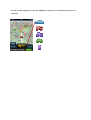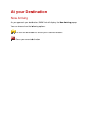
1
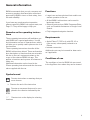
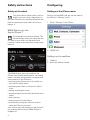
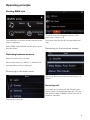
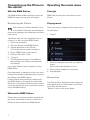
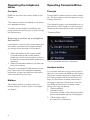
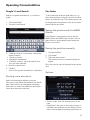
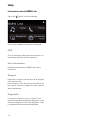
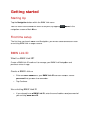
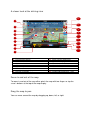
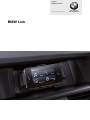
Original BMW Accessories Operating Instructions BMW Link The Ultimate Driving Machine BMW Link Operating instructions Contents General information Remarks on the operating instructions Symbols used Functions Requirements Conditions of use Safety instructions Safety at the wheel Configuring Settings in the iPhone menu Operating principle Starting BMW Link Switching between screens Incoming call Connecting up the iPhone in the car With the BMW Station Without the BMW Station Operating the music menu Principle Playing music Operating the telephone menu Overview Favourites Number Making a call Ending a call Contacts Mailbox Operating ConnectedDrive Principle Accident hotline Google™ Local Search 4 4 4 4 4 4 5 5 5 5 6 6 6 6 7 7 7 7 7 7 8 8 8 8 8 8 9 9 9 9 9 10 © 2011 BMW AG, Munich/Germany Reproduction, even in excerpt form, only with the written consent of BMW AG, Munich. Subject to mistakes and changes. 2 BMW Link Operating instructions Contents Car-finder Weather News Panoramio Roadside Assistance Navigation Activating the navigation function Test version Help Information about BMW Link 10 11 11 11 12 12 12 12 13 13 © 2011 BMW AG, Munich/Germany Reproduction, even in excerpt form, only with the written consent of BMW AG, Munich. Subject to mistakes and changes. 3 General information BMW recommends that you only use parts and accessory products that have been tested and approved by BMW in terms of their safety, function and suitability. If you have any questions about operation, please contact the BMW Link support team, see Page 13. They will be happy to help you. Remarks on the operating instructions These operating instructions will familiarise you with BMW Link’s special applications. You will find information on how to operate them, which will allow you to quickly make optimum use of all the functions. These operating instructions describe all the BMW Link functions offered. There are therefore also descriptions of functions that are not available due to the car’s equipment variant or the scope of the selected BMW Link app. This applies to functions and systems of relevance to safety too. Additional information can be found in the iPhone operating instructions and the documentation supplied with the car. Functions • Large icons and an optimised font enable convenient operation in the car. • All the BMW Link functions can be used in landscape format. • Selected services from BMW ConnectedDrive, such as Roadside Assistance or Google Local Search. • Fully-integrated navigation function. Requirements • Apple iPhone™: 3GS or 4, with iOS 4.2 or more recent, subsequently referred to as iPhone. • Internet connection. Additional costs may be incurred for data services if applicable. Conditions of use The conditions of use for BMW Link are stored in the AppStore from where they can be viewed. Symbols used ! Denotes instructions or warnings that you must observe. Denotes the end of the instruction. Denotes a movement that must be completed in the direction indicated by the arrow. “...” Denotes text on the display for selecting functions. 4 Safety instructions Configuring Safety at the wheel Settings in the iPhone menu Only input data or values when it will not distract you from what is happening on the road. Otherwise the resulting distraction can place the passengers and other road users in danger. Settings for the BMW Link app can be made in the iPhone’s “Settings” menu. ! 1. Select “Settings” in the iPhone. BMW Station for the Apple iPhone™ Set landscape format when driving. The vertical display setting can impair the driver’s field of vision and is not permitted in all countries. Observe the respective country regulations. ! 2. “BMW Link” Setting up the mailbox 1. “Mailbox” 2. Enter the mailbox number. The BMW Station, an in-car cradle for the iPhone, was specially developed for car models without a display and promotes convenient and safe operation of the iPhone by: • connecting the iPhone to the car’s audio system without visible cables • positioning the iPhone in the driver’s field of vision • display in landscape format • integrated hands-free kit with directional microphone • radio silencing • charge function for the iPhone • automatically storing the vehicle’s location when the iPhone is removed Your service team will provide you with information outlining which cars the BMW Station is available for. 5 Operating principle Starting BMW Link The main menu or the last screen selected in the menu is displayed. To switch from the navigation system to the main menu, select key 1. In the map view, the key 1 is located within the map. All the BMW Link functions can be called up via the main menu. Returning to the previous screen Switching between screens Select the menu item you want. After a menu item, e.g. “Music”, is selected, the corresponding screen is displayed. Returning to the main menu Select key 1 to return to the next screen up, e. g. “Music”. Incoming call If you have an incoming call, the iPhone’s telephone menu is displayed automatically. The display switches back to BMW Link after the call is ended or cancelled. Drag tab 1 to the right. 6 Connecting up the iPhone in the vehicle Operating the music menu With the BMW Station Principle The BMW Station enables optimum use of the BMW Link app in the car, also see Page 5. BMW Link accesses the music library on the iPhone. Registering the iPhone Playing music Only register the iPhone when the car is at a standstill. Otherwise the resulting distraction can endanger the passengers and other road users. The music menu is operated in the same way as on the iPhone. ! 1. “Music” The iPhone only has to be registered once to connect it to the car via the BMW Station. 1. Switch on the ignition. 2. Place the iPhone in the BMW Station. 3. Activate Bluetooth on the iPhone. A list of the devices found is displayed. 4. Select “BMW Station” from the list. 5. Enter the PIN code “1234”. 6. “Connect” 7. The Bluetooth connection is established automatically if the iPhone was registered successfully. Up to eight iPhones can be registered on the BMW Station. Once registered, a connection to the car is automatically and quickly established when you place the iPhone in the BMW Station. If other iPhones were previously connected to the BMW Station, you may have to deactivate Bluetooth on the devices that were last connected so the new iPhone to be connected is detected by the BMW Station. Without the BMW Station Please refer to the documentation supplied with the car for information on how to connect the iPhone to the car without the BMW Station. 7 2. Select the category you want, e.g. Genre or Artists. All the entries are displayed in a list. 3. Select further categories if necessary. 4. Start playback. Browse key The Browse key is displayed if music tracks are being played and you switch back to the Music menu from another menu. “Browse”: return to the music library Operating the telephone menu Only input data or values when it will not distract you from what is happening on the road. As the driver, you must not make or receive calls with the iPhone in your hand whilst the car is in motion. You should use the handsfree kit instead. Otherwise the resulting distraction can place the passengers and other road users in danger. ! For information about incoming calls, see Page 6. Overview “Telephone” 5. Dial the phone number you want. The phone number is added to the favourites list. 6. “Done”: return to the telephone menu Number The numerical keypad for manual dialling is displayed. The phone number is entered and dialled in the same way as when using the iPhone menu. Making a call If a connection is established, BMW Link automatically switches to the iPhone telephone menu and an option screen for returning to BMW Link during the call is displayed. “Close”: BMW Link is closed and the iPhone telephone menu opened automatically. “BMW Link app”: return to BMW Link during the call. The telephone menu is displayed. Ending a call Favourites Calls can only be ended in the iPhone telephone menu. The favourites list in BMW Link is an independent list and does not access the data contained in the iPhone’s favourites list. If BMW Link is opened during the call, you must switch to the iPhone telephone menu to end it. 1. Press the home key on the iPhone. 2. Start the iPhone telephone menu. Adding favourites 1. “Favourites” 3. End the call Restart the app to return to BMW Link. 2. “Edit” 3. Select the symbol. A list with the contact details saved in the iPhone is displayed. 4. Select the contact you want. 8 Operating the telephone menu Operating ConnectedDrive Contacts Principle BMW Link accesses the contact details on the iPhone. ConnectedDrive makes selected services available. The exact range of services varies from one country to the next. The contacts stored in the address book are listed in alphabetical order. To display contact details or establish a telephone connection, proceed as you would if using the iPhone menu. The navigation system must be available for certain services. A GPS signal must be received to determine the current position, also see Page 6. “ConnectedDrive” Selecting a contact as a navigation destination If an address is stored in the contact details and the location recorded in the navigation details, you can get route directions to this address. 1. Select the address in the contact details. If several locations with similar address details are stored in the navigation system, a list with the potential destination addresses is displayed. 2. Select the destination address you want from the list if necessary. The route is calculated and indicated on the display. Please refer to the navigation operating instructions to start route directions and select other route directions functions. Mailbox The mailbox number must be set up in the iPhone settings in order to listen to messages, see Page 5. The list of available services is displayed. Accident hotline If you require assistance in the event of an accident, you can contact the BMW accident hotline. The phone number displayed is determined by the country setting selected in the iPhone settings, see the iPhone operating instructions. If Germany is selected, a connection to the German BMW accident hotline is always established, even if you are abroad. 1. “ConnectedDrive” 2. “Accident hotline” The phone number of the emergency hotline and the last available position are displayed. 3. “Call accident hotline” A connection is established. 9 Operating ConnectedDrive Google™ Local Search Car-finder Search for special destinations, e. g. hotels or sights. To find particular locations again later on, e. g. the current position of the car, save the location before you leave the car. The saved position can be displayed and navigation to the car’s location started via the car-finder. 1. “ConnectedDrive” 2. “Google Local Search” Saving the position with the BMW Station If the iPhone is connected to the car via the BMW Station and BMW Link is active, the current position is automatically saved when the iPhone is removed. Saving the position manually 3. “Different location” if necessary: change the search location. 1. “ConnectedDrive” • “Current position” • “Navigation destination” • “Different location”: enter the search location you want manually. 4. Enter the search term. 3. “Save current position” The current position is saved and then displayed. 5. “Search” A list of the special destinations is displayed. 2. “Car-finder” Only one position can be displayed at any given time. Options Starting route directions Select the destination address you want. The route is calculated and indicated on the display. Please refer to the navigation operating instructions to start route directions and select other route directions functions. • “View in map”: view the saved position in the map. • “Navigation”: the route to the saved position is calculated and indicated on the display. Please refer to the navigation operating instructions to 10 Operating ConnectedDrive start route directions and select other route directions functions if necessary. Weather 1. “ConnectedDrive” 2. “Weather” News View current news, such as sports news or top stories. 1. “ConnectedDrive” 2. “News” 3. Select the category you want. A list of headlines is displayed. 4. Select the headline you want. Detailed news is displayed. Panoramio Images can be displayed for selected locations. 1. “ConnectedDrive” Weather information for the current position or, if route directions is active, the destination location is displayed. Options • “Forecast”: weather information for the next three days is displayed. • “Previous search”: the last search locations entered are displayed and can be called up again. 2. “Panoramio” A list of available images for the current position or, if route directions is active, the destination location is displayed. 3. “Different location” if necessary: change the search location. Select one of the following options: • “Current position” • “Navigation destination” • “Different location”: enter the search location you want manually. 4. Select the image you want. • “From address book”: weather information for an address from the list of contacts is displayed. Options • “Different location”: change the search location. Select one of the following options: • Display the next or previous photo: drag your finger across the screen to the right or left. • “Current position” • “Navigation destination” • “Different location”: enter the search location you want manually. 11 • Full-screen mode: tap the image. • Show the operating elements again: tap the image in full-screen mode. • “Panoramio”: return to the list of available images. Operating ConnectedDrive Navigation Roadside Assistance Activating the navigation function Contact the BMW Group Mobile Service if you need assistance in the event of a breakdown. A BMW Link ID is required to use the navigation system. The BMW Link ID is made up of your personal e-mail address and a password at least six characters long and defined by you. The phone number displayed is determined by the country setting selected in the iPhone settings, see the iPhone operating instructions. If Germany is selected, a connection to the BMW Group Mobile Service in Germany is always established, even if you are abroad. 1. “ConnectedDrive” 2. “Roadside Assistance” The phone number of the Roadside Assistance team and the last available position are displayed. 3. “Call Roadside Assistance” A connection is established. 1. “Navigation” 2. “Test now” or “Purchase navigation” 3. “Create a BMW Link ID” 4. Enter your e-mail address and password. 5. If activation was successful: “Continue to BMW Link” 6. Adapt settings if necessary. In the settings, you can select the language, voice and measurement unit for the navigation system. The navigation menu is displayed once activation is complete. Please refer to the navigation operating instructions for operation and other possible settings. Test version The first time the BMW Link app is downloaded, the navigation system can be used free of charge for a maximum of 30 days. The navigation system and additional functions for traffic reports be purchased via In-App Purchase. The App Purchase option must be activated in the iPhone settings, see the iPhone operating instructions. 12 Help Information about BMW Link Select the symbol in the start display. A list of the available information is displayed. FAQ A list of frequently asked questions and the corresponding answers can be requested. User information Operating instructions for BMW Link can be requested. Support Requests for support can be sent via an integrated e-mail function. If the request is sent directly from the iPhone via the support function, a diagnostic code is generated automatically. Diagnostic If a support request is sent e. g. via a PC, we would recommend generating a diagnostic code. “Generate diagnostic code”: the diagnostic code is generated and automatically displayed. 13 More about BMW www.bmw.com 01 29 2 222 765 Version1.0.0 4/2011 The Ultimate Driving Machine (Z/Z) Navigation BMW Link User Manual Draft: 20 April 2011 Getting started Starting Up Tap the Navigation button within the BMW Link menu. You can return to the BMW Link menu at anytime, by tapping navigation screen or Main Menu. Home in the First time setup The first time you launch BMW Link Navigation, you will be asked to create or enter an existing BMW Link ID to get started. BMW Link ID What's a BMW Link ID? Create a BMW Link ID and use it to manage your BMW Link Navigation and purchase extras in-app. Create a BMW Link ID • Enter an email address as your BMW Link ID and then create a secure password that you can also remember. • Tap Continue. Use existing BMW Link ID • If you already have a BMW Link ID, enter the email address and password of your existing BMW Link ID. Cancel To return to the BMW Link menu, tap Cancel. Customise your settings The first time you launch BMW Link Navigation on your phone, you will be asked to customise your settings. • Select Yes, to customise now • Tap No, to skip customisation If you chose Yes to customise your settings now, you can: • Choose your preferred language for on-screen text and voice guidance. • Select a voice for spoken instructions. Tap Next to use a pre-installed voice, tap Download (if available) to get an additional voice or Test to hear a sample of your chosen voice. • Choose between Imperial and Metric for the unit of measurement used in maps and instructions. (Imperial = Miles, Metric = Kilometres) Finding your way around the BMW Link Navigation Menus Every time you start Navigation, the guidance view is displayed. Tap at any time to bring up the Driving Menu or Walking Menu depending on how you are travelling. Driving Menu A quick menu to the key features you'll need when on the move. The features shown may vary depending on your mode of travel. 2D/3DMap - choose between a 2D or 3D map perspective Directions - shows you large, clear text only directions. You can toggle between a large next turn view and a list of upcoming turns by pressing the large turn arrow at the bottom of the screen. Tip: BMW Link can also switch to a map view when you are close to a turn. See Map Options in the Settings menu. Detour - calculates an alternative route to guide you to your destination Find POIs - BMW Link has thousands of useful Points of Interest (POIs) installed as standard. It makes it easy to search and find the nearest petrol station, hotel, restaurant and much more My Route - shows you the best possible route for your journey, lets you calculate an alternative route to the one planned or add a stop Walk - switch to walking mode Main Menu access all of BMW Link’s navigation controls, including destination entry, route features and settings Walking Menu A quick menu to the features you'll need most when walking Find POIs - BMW Link has thousands of useful Points of Interest (POIs) installed as standard My Route – adjust your route, add a stop or find an alternative way to your destination. Drive - switch to driving mode Main Menu – access all of BMW Link’s navigation controls, including destination entry, route features and settings Main menu In the main menu, use the series of tabs at the bottom of the screen to access the submenus. Scroll to see the features, services, options or items available in each tab. Tap on an item to get started or see more options. The following submenu tabs are available: Home - tap this tab to return to the BMW Link menu Go To - enter a destination using Address, Points of Interest, Contact and more Route - plan a journey, check or change your route, set your mode of travel and more My BMW - buy additional content and manage your BMW Link ID Settings - adjust your navigation settings to best suit your personal preferences Your first journey Start your journey to new and familiar places with your BMW Link here. Entering a destination There’s a variety of ways that you can enter a destination. In the Go To menu, you can choose from the following destination entry options: • Address • My Places • Points of Interest • Contact • Browse Map • PhotoNav • Coordinates Address • In the main menu, tap Go To > My Places • Tap Address • Start to type the city, town name or postcode of the destination • As you type, the names of cities or towns that match what you have entered will be displayed. When the name of the place you want to go to appears in the list, tap it to set it as your destination. Tip: ‘Copy and paste’ to enter an address You can copy an address from within a text, email, webpage or even another app and paste the details directly into your BMW Link. Just tap and hold to paste parts of an address or the full address into the Enter City or Postcode box. • Start to type the street name. The names of streets that match those found within the city or town name you selected above will be displayed. When the name of the street that you want to go to appears in the list, tap it to set the street as your destination. • Enter the house number and tap it to set it as your destination. You can also choose to skip this step and go to the town or city centre, or select a cross street to navigate to an intersection. • Tap GO to begin navigating. My Places With My Places you can navigate to frequently visited locations including your Home, Work, Favourites and Recent places Home Enter your home address and save it as one of your favourite locations so that you can enter it quickly every time you want to plan a journey to and from your home. • In the main menu, tap Go To > My Places • Select the Favourites tab • Tap the Home button The easiest way to enter your home address is by choosing Address. • Enter the city, street name and house number of where you live. After that, you’re done. Tip: If you’re already at home, then choose Current Location to save your home address with one tap of a button. A GPS fix is required. Your home address will be saved in your Favourites list. • Tap Go To > My Places > Home anytime you want to plan a route to or from home more easily. Work Save your Work address to give you a quick and easy way to navigate to your work place. • In the Go To menu, select My Places • Select the Favourites tab • Tap the Work button You can save your work address in the same way as entering your Home address. • Tap Address. Enter the city, street name and number of where you work. Your work address will be saved in your Favourites list. • Tap Go To > My Places > Work anytime you want to plan a route to or from your work location. Favourites Favourites are places that you like to visit over and over again. You can create Favourites, so that you can return to your favourite restaurant, shop or place more easily, every time you want to go back there. Create a Favourite • In the map view, tap on any town or city, road, Point of Interest or destination flag on the map. An info box will show the location on the map. • Tap on the info box to bring up location options • Select Add to favourites to save the destination as a Favourite The destination will be saved in your Favourites list. Navigate to a Favourite Once you’ve saved a destination as a favourite, it’s easy to navigate there next time. Here’s how: In the Go To menu, select My Places Tap Favourites Select a Favourite from the list. Tap GO to begin navigating there. Manage your Favourites You can edit a location saved in your Favourites list: Tap Edit. Select the Favourite you want to edit then tap You can enter a name for the Favourite and set it as your Home, Work or Other location. . To delete a Favourites . Tap Edit. Select the Favourite you want to delete then tap Tap Yes to delete the favourite, tap No to keep it saved in your favourites list. . Recent BMW Link remembers all the places you have recently been to so that you can return to those places more easily, every time you want to go back. • In the main menu, tap Go To > My Places • Tap Recent to select a location from a list of places you have recently visited. • Tap GO and you’ll be on your way back there. Note: Only the last 50 places you visited will be saved in your Recent places list. Manage your recent places To delete your recent places list, tap Clear All. You can save one of your recent destinations as a favourite location: • Select a Recent location from the list. • Tap to add it to your Favourite places list. Current location BMW Link can save your current location as a destination so that you can find your way back there later. • In the Go To menu, select Current Location Your current location will be saved in your Recent places list. • When you are ready to go back, tap My Places > Recent and select the place that you want to revisit from the list. Contacts With BMW Link, you can navigate to one of the contacts saved in your phone’s address book. • In the Go To menu, select Contacts • Start to type the name of a contact saved in your phone’s address book. • Select the name of the person you want to visit when their name appears in the list. • Tap GO. Note: Your BMW Link may ask you to enter the city, street name and house number for a contact if the address saved in your address book is not correctly recognised. Points of Interest Whether you’re running low on fuel, looking for a place to eat, or somewhere to stay, BMW Link can help you find it. You can search thousands of Points of Interest (POIs) like ATMs, restaurants, petrol stations and car parks. Navigate to a POI To set a POI as a destination, do the following: In the Go To menu, select Points of Interest. The most frequently used Points of Interest (POI) categories will be displayed: o Restaurant o Hotel o Petrol station To find additional types of POIs, tap More Categories or Search All A list of nearby POIs will be displayed. You can also type the name of a specific POI in the Search box. Select ‘Map’ to view POI search results on the map You can also search for POIs in a different location. Tap on Search Nearby at the top of the screen and choose from: • Nearby - to find POIs that are close to your current location • On My Route - to find POIs along your route • In Different City – for POIs in a certain city or town Select a POI from the list. You can choose to: • Add to favourites – to save the POI as a Favourite • Set as destination – to enter the POI as your destination • Show Map – view the POI location on the map You may also be able to dial the POI directly from a phone-enabled mobile device if a telephone number is displayed Browse Map Find any location on the map and tap it to enter it as a destination. • In the Go To menu, tap Browse Map • Drag the map to pan, or pinch the map to zoom in or out, until you find your destination. • Tap the location on the map. An info box will show the location on the map. • Tap on the info box to bring up location options. • Tap Set Destination • Tap GO to start navigating there PhotoNav When you take a photo using the GPS enabled camera on your phone, it captures both the moment and your exact location, so that you can use your BMW Link to navigate back there. • Take a photo with your phone’s GPS enabled camera. When you take a photo, your phone uses GPS to record your exact position and other geo tagged information which is stored with the photo. Note: Follow the instructions that came with your phone. • In the Go To menu, tap PhotoNav. • All your geo-tagged photographs will be shown in a list. • Tap a picture in the list. BMW Link will display the location on a map together with the GPS coordinates and a photo thumbnail. • Tap GO to begin navigating there. Coordinates Use coordinates to enter a specific location as a destination to find your way to any place. • In the Go To menu, tap Coordinates. • You can enter a destination using coordinates in two ways: Decimal Degrees Ordnance Survey Grid • Enter the latitude and longitude values in the format that you are asked for and then tap Next. • Tap GO to begin navigating there. Planning a journey in advance Your CoPilot Live let’s you plan a journey from start to finish with as many destinations and waypoints as you like. Important: For safety reasons, always plan your journey before you start driving and ensure that your device is securely mounted. Enter multiple destinations BMW Link let’s you plan a journey with multiple destinations. Here’s how: • In the main menu, tap Route. • Tap Plan or Edit Trip. • To enter a destination, tap Add Stop. • Tap Address. Enter the city, street name and house number of the address. • Tap Add Stop again to add additional addresses. Change the order of your destinations If you’re planning a journey with multiple destinations, you can change the order you want to visit each location. • Select the destination you wish to move. A pop-up menu will display a list of options. To move the stop, tap the Move Up or Move to End need in the trip list. , Move Down , Move to Start button, until the stop appears in the position you Show on Map You can view any of the destinations you’re planning on going to on a map: Select a destination from the list. Tap Show on Map to display the destination on the map. To return to the Plan or Edit trip list, tap Back. Create Waypoints BMW Link can route you through a specific place without considering it as a stop. By setting Waypoints you can adjust BMW Link's route, to calculate a detour via the waypoint. Note: A stop is a specific destination in your itinerary that BMW Link will provide guidance to. A waypoint is simply a location that you want to be routed through, it is not treated as a Stop in BMW Link for route optimisation or for estimated time of arrival Select the destination you want to change to a Waypoint. A pop-up menu will display a list of options. Tap Set as Waypoint. The address will now be set as a Waypoint, the arrow next to it will also change to white to indicate that it is a Waypoint. To change a Waypoint back to a Stop, select the destination and choose Set as Stop from the pop-up menu. Save as Favourites You can save destinations listed in your Plan Trip list as Favourites, so that you can easily return to those places. Select the destination that you wish to save as a Favourite. A pop-up menu will display a list of options. • Tap Add to Favourites. The address will be saved in your Favourites list. Delete a destination Once you’ve entered a destination, you can always delete it from your itinerary if you no longer wish to go there. Select the destination you want to delete. A pop-up menu will appear containing a list of options. Tap to remove the selected destination from the list. Select Yes to delete the destination, tap No to keep it in the list. Advanced trip planning Your BMW Link has additional trip planning functions that can help you plan your journey more effectively. From optimising your route, to saving a trip, your BMW Link can help. In the Plan or Edit Trip screen, tap Options. The following options are available: Clear You can delete all the destinations in your Plan Trip list. Tap Clear Select Yes to confirm, otherwise tap No. Save For any trips that you make regularly, it’s worth saving those trips so that you can access them any time you need to make the same trip. Tap Save. Enter a name for the trip and tap Save. Load If you’ve already saved a trip, you can re-load it easily any time you want to make it. Tap Load. Select the trip that you would like to load from the list and then tap Open. To remove the saved trip, tap Delete. Optimise Stops If your trip contains 3 or more stops, you can use BMW Link’s powerful trip optimiser technology to calculate the best way around multiple destinations. Simply enter all of the places you want to visit for your journey and let BMW Link re-order them into the most efficient route. Tap Optimise Stops. BMW Link will reorder all of your stops to give you the most efficient route for your journey. My Route BMW Link makes it easy to find the best way to your destination. Once you have entered a destination, BMW Link will calculate a route there based on your current location (or starting point if you are using Plan or Edit Trip). You can see the route that your BMW Link has created for your journey on a map along with an info box about your destination. The roads for your route will be highlighted in white. Your current location or starting point is indicated with a green flag, your end destination is indicated with a red flag. The total distance and estimated journey is shown at the bottom of the My Route screen. Tap on the info box to view more details about that location, add it to favourites list, edit the trip or delete the destination. If you are happy with the route provided, tap GO to start navigating to your destination. Alternate routes Tap Alternates to view up to 3 possible routes to your destination. The different routes are colour coded according to the roads used plus the distance and journey time for each. Simply tap on the route you want to take and tap GO to be guided to your destination using that route. Drag Route With BMW Link you can drag a route to change it and create the exact route that you want. • In the My Route screen, select the Drag Route button found in the top right of the screen. • Using your finger, select the route and drag the white line to customise your route to suit you. While you’re dragging, you’ll see the route change with a blue dashed line and Waypoints will be added along your route. Keep dragging until you’re happy with the selection. BMW Link will automatically calculate a new route and update the distance and estimated journey time. • Once you are happy with the new route, tap GO to start navigating. Drag the Destination Now you can tap and drag to change the location of the destinations along your route. • In the My Route screen, select the Drag Route button. • Using your finger, select and drag the destination flag from its current position to a new location on the map. As you drag, a blue dashed line shows the previous position of your destination to its new one, together with the name of the road that you moved the destination flag to. • Once you are satisfied with the new location, tap GO to start navigating. If you make a mistake or want to cancel the the new destination, simply tap on the destination info box and select Delete. Route Options Tap the Options button in the bottom left of the My Route screen to further customise your route and access trip preview features. • Vehicle Preferences allows you to change your mode of travel and choose relevant route preferences. • Route Demo plays a simulation of your entire journey • View Turn Maps lets you scroll through all the turns for your trip • View Turn List shows a list of all of the turn instructions instructions for your trip Mode of Travel BMW Link works out the best route to your destination depending on whether you're driving or travelling by foot. Vehicle Preferences You can adjust how your BMW Link calculates routes based on the vehicle you’re driving. In the main menu, tap Route Tap Vehicle Preferences Select your vehicle type, choose from Car, RV (Recreational Vehicle), Motorcycle, Bicycle or Walking. Toll Road: Choose to Use, Avoid if Possible or Always Avoid toll roads along your route. This option is not available for bicycles or walking. Congestion - Set your BMW Link to Avoid or Allow congestion charge zones, or to Warn when driving through one. This option is not available for bicycles or walking. Avoid Ferries – Tick the box to Avoid Ferries along your route where possible Scenic Route: Tick the box to be guided along a route with scenic surroundings. Custom Road Speeds – The ultimate in personal route settings. You can choose to favour or bias against specific road types and allocate a personal speed setting for each. For each road type, first set BMW Link to Strongly Avoid, Avoid, stay Neutral, Favour or Strongly Favour certain roads when calculating routes, then set your preferred speed for each one. This option is not available for bicycles or walking. An icon will be displayed in the dashboard to show you the mode of travel you've selected. Mode of travel Car RV Motorcycle Bicycle Walking. Guidance Display BMW Link gives you a choice of guidance views that make it easy to see which way you need to go. There’s a variety of ways to customise the display, including the trip status and the map perspective. Once you've entered a destination and tapped GO, you’ll be at the map view. Driving The standard BMW Link driving view provides a 3D perspective of the road ahead. Details about the next turn are shown on the dashboard at the bottom of the screen, with a description of the turn, a large turn arrow and the distance to the turn. Lane assist arrows are displayed at the top of the screen when you approach a complex junction. Sign post information is displayed at major intersections that match real-life signs. Driving views There’s a choice of driving views available from the Driving Menu: 3D Map – displays your current position, next turn and route ahead on a 3D map 2D Map – shows your current position, next turn and route ahead on a 2D map Directions – This view lets you see your next turn in full screen view or you can choose to see your next turn in a large display together with a complete itinerary of your entire journey. Here’s how to switch between the single turn instruction and a list of directions: Tap on the dashboard to view your next turn instruction in full screen view Tap in a list to see all roads, turn instructions and distances to each turn displayed A closer look at the driving view 10 1 11 2 12 3 13 4 14 5 15 6 16 7 17 8 18 9 1. 2. 3. 4. 5. 6. 7. 8. 9. Zoom-out from the map Real sign post display Lane assist arrows My Current location Current route My current position/direction Menu button Customisable info display - left Next turn instruction 10. 11. 12. 13. 14. 15. 16. 17. 18. Zoom-in on the map Safety camera display/alert Speed limit display/alert Turn-after-turn indicator Next turn distance and direction Mode of travel GPS status indicator On-screen help Customisable info display – right Zoom in and out of the map To zoom in and out of the map either pinch the map with two fingers or tap the + and - buttons at the top of the map display. Drag the map to pan You can move around the map by dragging up, down, left, or right. Customisable information displays Two additional information displays are shown on the lower left and right hand side of the dashboard, providing useful information such as estimated time of arrival and distance to destination. You can tap on either of these to choose what information you would like shown, including: • Distance • ETA (Estimated Time of Arrival) • Time Remaining to reach your destination • Current Speed • Current Altitude • Heading Turn-after-turn display A small turn indicator is displayed above the large Next Turn indicator for situations when you need to make two turns in quick succession. My Current Location If you drag the map away from your current location or route, the My Current Location button will appear on the middle left of the screen. Tap map back to your current location. to snap the Note this feature only functions if you have GPS fix Speed limit alert BMW Link can display the speed limit of the current road and warn you if you accidentally exceed it. You can adjust this feature in the Settings menu. Note: This feature is not available in North America Safety Camera Alert BMW Link can warn you on the approach to a safety camera location, showing you the distance to the camera and the speed limit of the road. You can adjust this feature in the Settings menu Note: This feature is only available in Western Europe. Driving Menu Tap to access the Driving Menu. Here you can access the 2D, 3D or Directions map view, take a Detour, Find POIs, view or change My Route, switch to walking mode and access the Main Menu. Walking BMW Link is designed to help you find your way around on foot, making it easy to see exactly where you are and where you need to get to. In walking mode, your location is displayed as a dot on-screen rather than a direction arrow. Once you have entered a destination, BMW Link will draw a dashed line there – just follow the line. BMW Link also provides turn by turn directions along streets and footpaths where available in the map. Walking Menu Tap to bring up the Walking Menu to access the most commonly used features when walking. Here you can Find POIs, see or change My Route, switch to driving mode and access the Main Menu. Map tools Tap, GO and discover more You can tap on any town or city, road or Point of Interest on the map to find out more information about the place and to add it as a destination. You can also see more information about the destinations you’ve entered, manage them and change your trip. Here’s how: • Tap on any town or city, road, POI or destination flag on the map An info box will show the location on the map. • Tap on the info box to bring up location options • Choose from the following options, where available: o Set Destination - to set the location as your destination o Add to favourites - to save the destination as a Favourite o Avoid this road - to find an alternative road to the one you have selected o Route through here - to be routed through the road you selected o Telephone number - if the phone number for a POI is available, you can call the place using your phone. For example, you may want to call a restaurant to reserve a table. o Hide category POIs – to choose not to display this category of POI on the map anymore o Delete - to remove the stop from your journey o Edit trip - let's you change the trip you've planned On the move Detour Once you’ve started your journey, you may need to make a detour to reach your destination. Find an alternative road • Select the quick menu button then tap Detour. You can also access this feature from the main menu, tap Route > Detour. • When asked how much of your route ahead do you want to avoid?, choose from the different distance options: o 1 Mile/Kilometre o 2 Miles/Kilometres o 5 Miles/Kilometres o 10 Miles/Kilometres • BMW Link will attempt to calculate an alternative route to avoid the section of the route based on the distance that you selected above. • You can compare both routes on the map and view the distance and estimated journey for each one. o Select Current Route to use the original route o Select New Route to accept the detour • If you’ve start travelling along the new route and something unexpected happens, you can return to your original route by selecting Detour then Cancel Detour. Note: BMW Link can only calculate a detour when suitable alternative routes exist. Find an alternative road Your route may use a particular road that you would prefer to avoid. There are two ways you can do this: 1. Tap on the map to avoid a road • Browse the map to find the road on your route that you wish to avoid. • Tap the road. An info box will be displayed. • Tap • Select Avoid This Road. • BMW Link will attempt to calculate an alternative route, and the original road will be shown in red on the map to indicate that you have chosen to avoid it. • If you change your mind and decide you want to use the road after all, tap the road again and select Allow This Road. on the info box to bring up location options for this road. 2. Avoid a road from the Directions view You can easily choose to avoid a road from the Directions guidance view. • Select Directions in the Driving Menu. A turn-by-turn list of all the roads on your journey will be displayed • Select the road you want to avoid and tap Yes to confirm. • You can compare both routes on the map, and view the distance and estimated journey time for each one. o Select Current Route to use the original route o Select New Route to accept the detour • You can return to your original route by selecting Detour then Cancel Detour. Clear Destination You can clear your current destination and stop receiving turn by turn guidance. • In the Main menu, tap Route. • Tap Clear Destination. • When asked are you sure? tap Yes. This will clear all destinations and waypoints from your trip. You can return to the map view to monitor your current location by selecting the Map button in the top left of the screen At your Destination Now Arriving As you approach your destination, BMW Link will display the Now Arriving popup. You can choose from the following options: To save the destination as one of your Favourite locations Clears your current destination Info Features and upgrades You can review all the standard features in your BMW Link Navigation, together with all the great extra features and services also available, all on one simple screen. • In the main menu, tap Info. • Tap Features and Upgrades. • A list of features will be displayed. You can also see more detail about each feature and a small icon next to it showing you the current status of the feature. Status icons Green Red Blue This icon is shown when you’re licensed for a feature, service or subscription This icon shows you any additional features, services or subscriptions that are available for you to purchase from with the BMW Link app The restore icon lets you re-download any feature(s) you have already purchased from with the app again for free How to purchase extra content You can purchase extra content for your BMW Link from within the app. • Choose the feature or service you wish to purchase from the list • Tap Buy Once you tap Buy, you’ll be required to create or enter your BMW Link ID to continue with the purchase. • You will be asked to confirm your in app purchase, tap Buy. • Enter your iTunes Store account password to complete the purchase. My BMW Link ID To change your BMW Link ID name or password: • In the main menu, tap Info > My BMW Link ID • Tap Edit. • Enter a new email address for your BMW Link ID. • Create a new and secure password that you can also remember easily. • Tap Done to save the changes. Settings You can change the way your BMW Link works and looks to suit you. Tap Settings in the main menu. Important: We recommend you only make changes to your BMW Link’s settings when you are stationary. It is dangerous and illegal to use your phone while you are driving. Map options Let’s you change the look and feel of the maps included with your BMW Link. You can also decide whether certain features like Points of Interest are shown in the map. Tap Map Options The following options are available: Show Turn Restrictions - BMW Link can display a turn restriction sign in the map view to show you where any restricted turnings are along your route. Show Walking Breadcrumb - When you’re making a journey on foot, BMW Link can guide you from your starting point to your end destination by displaying a dashed line for you to follow. A walking breadcrumb can be displayed in the map to show where you have walked. 2D Map Rotation - set the2D map display as Heading Up to always display the road ahead facing upwards on the map or you can select Northup to always keep the map pointing North. 2D Auto Zoom - BMW Link will automatically zoom in to the map as you approach a turn. Here you can choose: • To disable automatic zooming, tap Off. • To re-enable automatic zooming in 2D view, tap Always Show Next Turn • To show the route from your current position to your destination in 2D view, tap, Always show full route Show POIs on Map - To set when to display POIs on the map. Choose to show POIs Always, When Stopped or Never. You can select which specific POI categories are shown on the map, by selecting Currently Displayed POIs. Map Styles – Choose from a variety of map colour schemes and styles for the day and night. Day and Night Mode - Set your BMW Link to use a Day or Night map style, or choose Automatic to switch between the day and night map styles you have selected. Your BMW Link will automatically switch between day and night mode based on UTC time if available, or else it will use the time set on your phone’s clock. Guidance You can choose exactly how you'd like to be guided for every journey you make. Tap Settings > Guidance To show a map view on approach to a turn while in the Directions view, tap Show Map in Directions View. You can also set how near to a turn you’d like to be before your BMW Link switches from the directions view to a map view. Choose one of these options: Metric (Miles) Never 1 mile from turn 0.7 miles from turn 0.5 miles from turn 0.3 miles from turn Metric (Kilometres) Never 2 kilometres 1 kilometre 500 metres Turn Warning Distances lets you choose how far from a turn you wish to be before you receive a next turn instruction. Choose from the following options: • At 2 miles/2 kilometres • At 1 mile/1 kilometre • At 0.3 miles/0.5 kilometres Turn after next turn distance BMW Link can alert you if you need to make two turns in quick succession. You can change the distance at which you’ll receive a turn after next turn instruction. Choose from: • 0.2 miles/0.3 kilometres • 0.3 miles/0.5 kilometres • 0.5 miles/0.7 kilometres • 0.7 miles/1 kilometres To hear a spoken instruction when you need to make a turn, tap turn now announcement. To change how near to a turn BMW Link provides the spoken turn now instruction, select one of the following options: • Never • 50 yards/metres • 100 yards/metres • 150 yards/metres • 200 yards/metres • 250 yards/metres • 300 yards/metres • 350 yards/metres • 400 yards/metres Background navigation Your BMW Link can continue to provide you with turn-by-turn directions while you’re on a call or using another app on your iPhone. To change the way your BMW Link works when minimised, tap Background Navigation. You can select the following options: Disable/Enable Background Navigation - If you enable background navigation, BMW Link will continue to run in the background when using other apps. If you disable background navigation, you will not receive guidance while you use using other apps. Turn GPS Off - if you have enabled Background Navigation, you can set your BMW Link to automatically switch off GPS after a certain period of time to save power on your iPhone. Choose from: 5, 10, 15 and 20 minutes. Display GPS Warning - check this box if you would like to receive an on-screen warning before GPS is switched off to save power. Show ClearTurn™ At some intersections and exits, BMW Link can display a more realistic image of the road layout with lane indicator arrows and real sign post information. To switch ClearTurn on and off, tap Show ClearTurn. Safety Alerts Safety Alerts warn you when you are approaching a safety camera location. BMW Link displays the location of the safety camera on a map and gives you a spoken warning. You can change the way your BMW Link warns you about safety cameras, tap Settings > Safety Alerts. Enable safety camera warnings • Tap Display Safety Alerts to receive on-screen and spoken safety camera warnings. Changing the warning distance You can set how close to a safety camera location you want to be warned. You have three distance options to choose from: • 250 yards/metres ahead • 500 yards/metres ahead • 1,000 yards/metres ahead Updating safety camera locations BMW Link comes pre-installed with a database of thousands of safety camera locations across Western Europe. The location of these safety cameras can change frequently and without any prior notice. We recommend you regularly update the safety camera database so that you have the latest locations for alerts when you’re travelling. *Available in Western Europe only. Safety camera locations are not available in Switzerland, and customers are advised to deactivate camera warnings completely when travelling in Switzerland to comply with local legislation. Speed limit BMW Link can display the speed limit of the road you are on and can warn you to slow down if you’re speed exceeds the maximum speed limit of the road. To set the way your BMW Link warns you about speeds limits, tap Settings > Speed Limit. Note: If the speed limit for the road you are on is available, it is shown next to your speed. If you’re drive faster than the speed limit, your speed is shown in red. • To display the speed limit in Driving Views, select show speed limit. To set BMW Link to warn you if your speed exceeds the limit: • Select show warning when speed exceeds • Select a speed, above the speed limit of a road, to set when you would like to receive a warning To hear an audible warning if you’re speed exceeds the limit, select enable speed warning sound. Always respect the speed limit of a road and drive at a safe speed for conditions such as weather and traffic. Different speed limits may apply to different types of vehicles travelling on a road. Check the road speed limits set by a particular country before you start a journey Language and voice You can change the language used for all buttons, information and instructions displayed on-screen and spoken by your BMW Link navigation. Tap Settings > Language & Voice. Change the language BMW Link provides on-screen and voice guidance in a wide range of languages. You can change the language used by your BMW Link navigation. • Choose a language from the list. Choose a voice Once you have selected a language, you can then choose the voice you want to use. Select a voice from the list. You can: • Select Test to hear a sample of your chosen voice. • Press Download (if available) to download the selected voice to your phone. Your BMW Link has two different kinds of voices: Standard voice – Provides pre-recorded spoken instructions such as ‘Just Ahead Turn Right.’ Text To Speech (TTS) voice. TTS provides more detailed spoken instructions using advanced TTS computer voice technology. TTS converts written text into a computer generated voice to pronounce street names and other announcements. TTS voices are indicated with an asterix. GPS Your BMW Link will automatically use your phone’s built-in GPS receiver for navigation or the built-in GPS receiver of the BMW Link Station. BMW Link relies on GPS satellite signals to locate you on the map and to provide turn-by-turn guidance to your destination. To check the current status of your phone’s GPS reception, select Settings > GPS. The GPS Status screen displays the information received from your phone’s GPS receiver. You can see your current latitude and longitude position, the UTC time and date, your speed and your elevation. GPS Performance It's important that the location, date and time are set correctly on your phone to ensure that the GPS information you receive is accurate. The first time you use a GPS receiver it may take a few minutes to determine your current position. In future, your position will be found much faster. To ensure you have the best possible GPS reception, make sure that your phone has a clear line of sight to the sky. Large objects, like big trees and tall building, can sometimes interfere with your phone’s GPS signal. BMW Link can use enhanced positioning technology to provide continued guidance when you’re driving in a tunnel. The In tunnel mode icon will be displayed. You will not be able to get a GPS signal inside buildings, garages, multi-storey and basement car parks. Sounds BMW Link makes the following kinds of sounds: • Spoken instructions • Warning sounds • Button sounds To adjust the sounds played by your BMW Link, tap Settings > Sound. Change the volume level You can adjust the volume level of your BMW Link using volume buttons on your phone or the volume control of your car radio if you use the BMW Link Station for iPhone. Choose Mute, to turn off all BMW Link navigation sounds. When set to mute, BMW Link doesn’t provide any spoken instructions, alerts or button sounds. Button sounds Choose button click sounds to turn on and off the click sounds that play every time you touch a button in the navigation. Change the way BMW Link provides spoken instructions when music is playing You can set how BMW Link plays spoken instructions when you’re also listening to music on your iPhone. Choose from the following four options: • Mute music during voice prompt • Reduce music volume during voice prompt • Play same volume for music and voice prompt • No voice prompts whilst music is playing Units of Measure To set your preferences for the type of units of measurement used in maps and instructions, tap Units of Measure. Choose from Imperial (distances in miles) and Metric (Kilometres) BMW Link Info Provides details about the software version, maps, Points of Interest, product key and serial number of your BMW Link.