1
Register your product and get support at
WAS6050/05
WAS6050/12
EN User manual
Contact information
1
40
Downloaded From Disc-Player.com Philips Manuals
Contents
1 Important
6
7 Radio 18
2
2
4
Safety
Notice
Disposal of product and packing
material
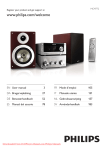
2 Your Wireless Music Station
4
Music follows me
Wirelessly stream music from a PC Install Windows Media Player 11 Configure a PC to share music
More play options
Repeat play
Shuffle play
Play by artist
Play by genre
What you can do with the Wireless Music
Station
Overview
Top panel
Rear panel
Remote control
6
6
6
7
7
3 Prepare
9
Install remote control batteries
9
Position your Music Station
9
Mount the Music Station to a wall 9
Attach the support for table top
installation
10
4 Connect 11
Connect AC power
11
Connect a portable audio device (AUX) 11
Connect a PC
11
Install WADM
11
Create wired connection
11
Create wireless connection
12
Launch WADM 12
5 First-time installation 13
Select language 13
Set-up with a Center (sold separately) 13
Turn on / switch to standby 14
6 Play 15
Play HD music from a Center
Playlists
Create a playlist
Add audio files to a playlist
Play from a portable audio device (AUX)
ii
ENFrom Disc-Player.com Philips Manuals
Downloaded
15
15
15
15
15
16
16
16
16
17
17
17
17
17
FM radio
18
Listen to FM radio
18
Change frequency 18
Manual search 18
Automatic channel search 18
Automatic channel search 19
Select preset channels 19
Internet radio
19
First-time Internet radio registration 19
Register users for Internet radio 20
Listen to Internet radio
20
Place bookmarks for radio stations 20
Listen to Favorite Stations
21
Manually add Internet radio stations 21
Add URL address on the Music Station 21
Add URL address on the PC 21
Listen to My Media
22
8 Search for audio files (music)
23
Scroll at high speed 23
Alphanumeric search 23
9 Settings 24
Change sound settings
Adjust volume
Mute
Adjust Equalizer (EQ)
Activate Smart EQ
Deactivate Smart EQ
Adjust bass / treble
Set Dynamic Bass Boost (DBB)
Adjust display
Switch backlight on/off
Change display contrast
Clock / alarm settings
24
24
24
24
24
24
24
25
25
25
25
25
Eng lis h
25
25
25
26
26
26
26
26
27
Contents
Set the clock
Change the time format
Set the alarm time
Set the alarm repeat
Automatic time update
Synchronize with RDS
Synchronize with NTP
Set standby timer
Change language
10 Maintenance 28
Cleaning 28
Update
28
Restore the default settings 28
11 Technical data 29
Supported audio file formats 29
Supplied accessories
30
PC connection requirements 30
12 Troubleshooting 31
13 Glossary 32
14 Index 40
Downloaded From Disc-Player.com Philips Manuals
EN
iii
1 Important
Safety
Know these safety symbols
This ‘bolt of lightning’ indicates uninsulated
material within your unit may cause an electrical
shock. For the safety of everyone in your
household, please do not remove product
covering.
The ‘exclamation point’ calls attention to
features for which you should read the enclosed
literature closely to prevent operating and
maintenance problems.
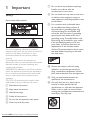
WARNING: To reduce the risk of fire or electric
shock, this apparatus should not be exposed to
rain or moisture and objects filled with liquids,
such as vases, should not be placed on this
apparatus.
CAUTION: To prevent electric shock, match
wide blade of plug to wide slot, fully insert.
a Read these instructions.
b Keep these instructions.
c Heed all warnings.
d Follow all instructions.
e Do not use this apparatus near water.
f Clean only with dry cloth.
ENFrom Disc-Player.com Philips Manuals
Downloaded
g Do not block any ventilation openings.
Install in accordance with the
manufacturer’s instructions.
h Do not install near any heat sources such
as radiators, heat registers, stoves, or
other apparatus (including amplifiers) that
produce heat.
i For countries with a polarized mains,
do not defeat the safety purpose of
the polarized or grounding-type plug.
A polarized plug has two blades with
one wider than the other. A grounding
type plug has two blades and a third
grounding prong. The wide blade or the
third prong are provided for your safety.
If the provided plug does not fit into
your outlet, consult an electrician for
replacement of the obsolete outlet.
Caution: To prevent electric shock, match
the wide blade of the plug to the wide
slot, fully insert.
j Protect the power cord from being
walked on or pinched, particularly at
plugs, convenience receptacles, and the
point where they exit from the apparatus.
k Only use attachments/accessories
specified by the manufacturer.
l Use only with the cart, stand, tripod,
bracket, or table specified by the
manufacturer or sold with the apparatus.
When a cart is used, use caution when
moving the cart/apparatus combination to
avoid injury from tip-over.
o Battery usage CAUTION – To prevent
battery leakage which may result in bodily
injury, property damage, or damage to the
unit:
• Install all batteries correctly, + and - as
marked on the unit.
• Do not mix batteries (old and new or
carbon and alkaline, etc.).
• Remove batteries when the unit is not
used for a long time.
p Apparatus shall not be exposed to
dripping or splashing.
q Do not place any sources of danger on
the apparatus (e.g. liquid filled objects,
lighted candles).
r This product may contain lead and
mercury. Disposal of these materials
may be regulated due to environmental
considerations. For disposal or recycling
information, please contact your local
authorities or the Electronic Industries
Alliance: www.eiae.org.
Eng lis h
n Refer all servicing to qualified service
personnel. Servicing is required when
the apparatus has been damaged in any
way, such as power-supply cord or plug
is damaged, liquid has been spilled or
objects have fallen into the apparatus, the
apparatus has been exposed to rain or
moisture, does not operate normally, or
has been dropped.
Warning
• Never remove the casing of this Music Station.
• Never lubricate any part of this Music Station.
• Place this Music Station on a flat, hard and stable
surface.
• Never place this Music Station on other electrical
equipment.
• Only use this Music Station indoors. Keep this Music
•
Important
m Unplug this apparatus during lightning
storms or when unused for long periods
of time.
Station away from water, moisture and liquid-filled
objects.
Keep this Music Station away from direct sunlight, naked
flames or heat.
How to connect a plug
The wires in the mains lead are coloured with
the following code: blue = neutral (N), brown
= live (L).
As these colours may not correspond with the
colour markings identifying the terminals in your
plug, proceed as follows:
• Connect the blue wire to the terminal
marked N or coloured black.
• Connect the brown wire to the terminal
marked L or coloured red.
• Do not connect either wire to the earth
terminal in the plug, marked E (or e) or
coloured green (or green and yellow).
Before replacing the plug cover, make
certain that the cord grip is clamped over
the sheath of the lead - not simply over
the two wires.
Mains plug
This apparatus is fitted with an approved 13
Amp plug. To change a fuse in this type of plug
proceed as follows:
a Remove fuse cover and fuse.
b Fix new fuse which should be a BS13625
Amp, A.S.T.A. or BSI approved type.
c Refit the fuse cover.
If the fitted plug is not suitable for your socket
outlets, it should be cut off and an appropriate
plug fitted in its place.
If the mains plug contains a fuse, this should
have a value of 5 Amp. If a plug without a fuse
is used, the fuse at the distribution board should
not be greater than 5 Amp.
Downloaded From Disc-Player.com Philips Manuals
EN
The severed plug must be disposed off to avoid
a possible shock hazard should it be inserted
into a 13 Amp socket elsewhere.
Norge
Typeskilt finnes på apparatens bakside.
Observer: Nettbryteren er sekundert innkoplet.
Den innebygde netdelen er derfor ikke
fraktoplet nettet så lenge apparatet er tilsluttet
nettkontakten.
For å redusere faren for brann eller elektrisk
støt, skal apparatet, ikke utsettes for regn eller
fuktighet.
Notice
Notice of compliance
For USA:
This equipment has been tested and found
to comply with the limits for a Class B digital
device, pursuant to Part 15 of the FCC Rules.
These limits are designed to provide reasonable
protection against harmful interference in a
residential installation. This equipment generates,
uses and can radiate radio frequency energy
and, if not installed and used in accordance with
the instructions, may cause harmful interference
to radio communications. However, there is
no guarantee that interference will not occur
in a particular installation. If this equipment
does cause harmful interference to radio or
television reception, which can be determined
by turning the equipment off and on, the user is
encouraged to try to correct the interference
by one or more of the following measures:
• Reorient or relocate the receiving antenna.
• Increase the separation between the
equipment and receiver.
• Connect the equipment into an outlet on
a circuit different from that to which the
receiver is connected.
• Consult the dealer or an experienced
radio/TV technician for help.
For Canada:
This digital apparatus does not exceed the Class
B limits for radio noise emissions from digital
apparatus as set out in the Radio Interference
ENFrom Disc-Player.com Philips Manuals
Downloaded
Regulations of the Canadian Department of
Communications. This Class B digital apparatus
complies with Canadian ICES-003.
This product complies with the radio
interference requirements of the European
Community.
This product complies with the requirements of
the following directives and guidelines: 73/23/
EEC + 89/336/EEC + 93/68/EEC
Class II equipment symbol
This symbol indicates that the unit has a double
insulation system.
Disposal of product and packing
material
Your product is designed and manufactured
with high quality materials and components,
which can be recycled and reused.
When this crossed-out wheeled bin symbol is
attached to a product, it means the product is
covered by the European Directive 2002/96/EC.
Please be informed about the local separate
collection system for electrical and electronic
products.
Please act according to your local rules and
do not dispose of your old product with your
normal household waste. The correct disposal
of your old product will help prevent potential
Downloaded From Disc-Player.com Philips Manuals
Important
Eng lis h
negative consequences to the environment and
human health.
All redundant packing material has been
omitted. We have done our utmost to make the
packaging easily separable into mono materials.
Please observe the local regulations regarding
the disposal of packing materials.
Environmental information
All unnecessary packaging has been omitted.
We have tried to make the packaging easy to
separate into three materials: cardboard (box),
polystyrene foam (buffer) and polyethylene
(bags, protective foam sheet.)
Your system consists of materials which can
be recycled and reused if disassembled by
a specialized company. Please observe the
local regulations regarding the disposal of
packaging materials, exhausted batteries and old
equipment.
Battery disposal information
Batteries (including built-in rechargeable
batteries) contain substances that may pollute
the environment. Always hand the appliance
in at an official collection point to remove
any built-in batteries before you discard the
appliance. All batteries must be disposed of at
an official collection point.
EN
2 Your Wireless
Music Station
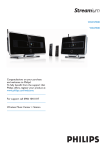
Congratulations on your purchase and welcome
to Philips!
To fully benefit from the support that Philips
offers, register your product at www.Philips.
com/welcome.
What you can do with the
Wireless Music Station
•
•
•
Listen to FM radio or Internet radio.
Play music from a Center (Centers
WAC3500, WAC7000, WAC7500 are sold
separately).
Transfer and play music from your PC.
Overview
Top panel
The top panel features sensor buttons that are
sensitive to touch and moisture.
a MUSIC FOLLOWS ME
b LCD / display
c DBB Digital Bass Boost
d + VOL - volume down / up
e NAVIGATION KEYS
f STOP
g OK /
confirm / play pause
h
skip forward
i
skip back
j MENU
k HOME
l
on / standby / eco standby
m INCR.SURR. Incredible Surround sound
n SMART EQ smart equalizer
o Wi-Fi antenna
ENFrom Disc-Player.com Philips Manuals
Downloaded
Remote control
Rear panel
Eng lis h
Rear panel
a Power supply socket
b FM antenna
c Holes for support attachment screws
d Subwoofer
a
b FM TUNER radio
c HOME
d SEARCH
e VIEW
f MENU
g NAVIGATION KEYS
h OK/
i
navigate
confirm / play pause
skip forward
j
k - VOL + volume down / up
l MUTE
m SHUFFLE (3 def) random play
n REPEAT (2 abc)
Downloaded From Disc-Player.com Philips Manuals
EN
o INCR.SURR. (6 mno) Incredible Surround
sound
p DBB (5 jkl) Digital Bass Boost
q RDS/NEWS (9 wxyz)
r SAME GENRE (8 tuv)
s MUSIC FOLLOWS ME
t (0 )
u MUSIC BROADCAST
v SAME ARTIST (7 pqrs)
w SMART EQ (4 ghi)
x SLEEP (1 .,?!’@-_:;/) standby timer
y SCROLL
z CLEAR /
{ REC
skip back
record
| MARK/UNMARK
} AUX portable audio source
~ CD/MP3-CD
HD hard disk
ENFrom Disc-Player.com Philips Manuals
Downloaded
Position your Music Station
Eng lis h
3 Prepare
Caution
• Risk of product damage! Place the Music Station on a
•
Caution
surface that is level, flat, and strong enough to support
the Music Station.
Risk of interference! Keep the Music Station away from
TVs, VCRs, and other radiation sources.
Prepare
Install remote control
batteries
• Risk of explosion! Keep batteries away from heat,
sunshine or fire. Never discard batteries in fire.
• Risk of decreased battery life! Never mix different
•
1
2
3
brands or types of batteries.
Risk of product damage! When the remote control is
not used for long periods, remove the batteries.
Mount the Music Station to a wall
Caution
• Risk of product damage! Always consult professional
personnel to safely mount the product to a wall.
Open the battery compartment.
Insert 2 AAA batteries with correct
polarity (+/-) as indicated.
Close the battery compartment.
1
3
2
Warning
• Risk of injury! Ensure that no supply ducts such as gas,
water or electricity are harmed when you drill the
holes.
Items you need to mount the Music Station to
a wall (not supplied):
• electric drill
• two suitable wall mounting pegs and
screws
• screwdriver
• pencil
1
Downloaded From Disc-Player.com Philips Manuals
Hold the support (note the direction of
angle) against the wall where you want to
mount the Music Station.
EN
2
3
4
5
Mark the position of the drill holes on the
wall.
Drill the holes.
Insert suitable wall mounting pegs and
screws.
Attach angled support to the Music
Station.
Note
• The angle direction is different when you mount the
Music Station to a wall.
6
Fasten the angled support on the screws.
Attach the support for table top
installation
You can attach the angled support (supplied)
for easy access to the top panel.
1
Attach the angled support:
10 ENFrom Disc-Player.com Philips Manuals
Downloaded
Warning
• Risk of product damage! Ensure that the power supply
•
1
voltage corresponds to the voltage printed on the back
or the underside of the Music Station.
The type plate is located on the rear of the product.
Connect the Music Station to the power
supply
Before you connect the Music Station to a PC:
• Ensure that the PC meets the minimum
requirements. (see ‘PC connection
requirements’ on page 30)
• Install the WADM (Philips Wireless Audio
Device Manager) on the PC. (see ‘Install
WADM’ on page 11)
You can choose among two different
modes of connection:
• Wired connection (see ‘Create wired
connection’ on page 11)
• Wireless connection (see ‘Create wireless
connection’ on page 12)
Install WADM
This chapter shows you how to install the
WADM (Philips Wireless Audio Device
Manager) software. The WADM is necessary to
search and download software updates for the
Music Station.
È Your Music Station turns on and is
ready for use.
1
2
3
Connect a portable audio
device (AUX)
1
Connect an audio cable (not supplied)
from the AUX jack to the portable audio
device.
Insert the PC Suite CD into the PC.
Follow the instructions on the PC to install
WADM.
When the security alert message
(Microsoft Windows Firewall) pops up,
press ‘Unblock’ to allow the WADM
application to run on the PC.
È The firewall is still effective and only
allows the WADM to run.
Tip
• You can also consult the user manual of the PC and
manually add the WADM application to your list of
programs that are safe to run.
Create wired connection
1
2
Downloaded From Disc-Player.com Philips Manuals
Ensure that the Ethernet port on the PC is
enabled.
Ensure that the WADM (Philips Wireless
Audio Device Manager) software is
EN
11
Eng lis h
Connect AC power
Connect a PC
Connect
4 Connect
3
installed on the PC to enable search and
download of updates. (see ‘Install WADM’
on page 11)
Use the supplied Ethernet cable to
connect the Music Station
• directly to the PC.
• to the router that is connected to
the PC.
Launch WADM
1
2
3
•
•
4
Follow the instructions ‘Launch WADM
(see ‘Launch WADM’ on page 12)’ to
complete the connection process.
Create wireless connection
1
2
3
4
5
6
7
Ensure that your wireless access point or
wireless router is enabled.
Ensure that the WADM (Philips Wireless
Audio Device Manager) is installed on the
PC (see ‘Install WADM’ on page 11) to
enable search and download of updates.
(see ‘Install WADM’ on page 11)
Ensure that the Music Station is turned on.
On the Music Station, configure the
network:
Press HOME.
Press MENU.
Select [Settings] > [Network] >
[Wireless].
8 Select network.
9 Enter encryption key (if required).
10Select [Automatic] > [Apply settings?] >
[Yes].
12 ENFrom Disc-Player.com Philips Manuals
Downloaded
Before you try to launch the WADM,
ensure you have installed the WADM
software on the PC. (see ‘Install WADM’
on page 11)
On the PC, double click the WADM icon
Continue with the launch, depending on
the status of your PC:
If the Music Station is found:
ASelect the Music Station from the list.
BClick Connect now.
If the Music Station is not found:
ASelect Connection Wizard.
BIn the Connection Wizard menu,
select Express Mode.
CClick Next.
DFollow the on-screen instructions.
ESelect the Music Station from the list.
FClick Connect now.
When you connect the Music Station to the
power supply, the automatic installation process
starts. You must select the language (see ‘Select
language’ on page 13) before you can continue.
3
4
Complete the set-up process: Consult the
user manual of the Center how to add a
Station to the Center.
Position the Music Station in a suitable
location (within reach of a power socket).
Position the Music Station where it is
separated from the Center by no more
than one wall.
Note
Select language
1
2
• Connections that include a router require that the
router is switched on at all times.
When you connect the Music Station to
the power supply for the first time, wait for
the language selection menu to select your
language.
Press
to select, then press .
È After you set the language, the Music
Station starts the search for a Center
(sold separately).
Tip
• After the first-time language set-up, you can change the
language in the Settings menu (see ‘Change language’
on page 999).
Set-up with a Center (sold
separately)
You can stream your audio to the Music Station
from a Philips Center of the WAC series, such
as WAC3500D, WAC7000, or WAC7500.
You can connect the Music Station to the
Center in two different modes:
• Infrastructure
• Ad-hoc (if you do not have an Internet
connection / PC)
1
Place the Music Station and the Center
side by side on a flat and level surface that
is strong enough to support the two units.
Downloaded From Disc-Player.com Philips Manuals
EN
Eng lis h
2
First-time installation
5 First-time
installation
13
Turn on / switch to standby
You can select from the following status options:
• On
• Standby
• Active standby. The button on the
remote control can turn on the Music
Station.
• The Music Station remembers the last
audio source you selected.
• Eco standby
• Passive standby. Only the button on
the top panel can turn on the Music
Station.
Note
• In stop mode, if no buttons are pressed for 20 minutes,
the Music Station switches to standby.
1
2
3
To turn on the Music Station, press
.
To switch the Music Station to standby,
press .
To switch the Music Station to eco standby,
press and hold the button on the top
panel.
Note
• When the Music Station is in eco standby mode, the
remote control is inactive.
14 ENFrom Disc-Player.com Philips Manuals
Downloaded
You can wirelessly stream music to the Music
Station from a connected Center. The HD play
feature offers the following options:
• [Playlists]: Customizable collection of
audio files sorted by playlist name in
alphanumeric order.
• [Artists]: Collection of albums sorted by
artist name in alphanumeric order.
• [Albums]: Collection of albums sorted by
album name in alphanumeric order.
• [Genres]: Collection of albums sorted
by music style (if album information is
available).
• [All tracks]: All audio files sorted by name
in alphanumeric order.
1
2
3
4
Ensure that the Center is
• turned on.
• switched to standby (active).
Ensure that the Music Station is turned on.
Press HOME.
È The display shows the options.
Press
to select, then press .
• To return to the Home menu, press
HOME.
Playlists
When you connect the Music Station to a
Center you can sort audio files on the HD
(hard disk) of the Center into playlists.
Create a playlist
You can create up to 99 playlists on the hard
disk of a connected Center.
1
2
Ensure the Music Station is connected to a
Center (sold separately). (see ‘Set-up with
a Center (sold separately)’ on page 13)
turned on.
switched to standby (active).
Ensure that the Music Station is turned on.
Press HOME.
Select [HD].
Press MENU to enter the HD menu.
Press
to select [Create playlist], then
press .
È A new playlist with a default album
name, such as Playlist_001, is created.
È To return to the Home menu, press
HOME.
Add audio files to a playlist
You can add up to 300 audio files to a playlist.
1
2
Ensure the Music Station is connected to a
Center (sold separately). (see ‘Set-up with
a Center (sold separately)’ on page 13)
Ensure that the Center is
• turned on.
• switched to standby (active).
3 Ensure that the Music Station is turned on.
4 Press HOME.
5 Select [HD].
6 Press MENU to enter the HD menu.
7 Press to select [Playlists], then press .
8 Press to select audio file, then press .
9 Select [Add to playlist].
10Press MENU to enter the playlist menu.
È The added audio files are displayed.
È To return to the Home menu, press
HOME.
Play from a portable audio
device (AUX)
If you connect a portable audio device (AUX)
to the Music Station (see ‘Connect a portable
Ensure that the Center is
Downloaded From Disc-Player.com Philips Manuals
Eng lis h
Play HD music from a Center
3
4
5
6
7
•
•
EN
15
Play
6 Play
audio device (AUX)’ on page 11), you can play
the music from the device on the Music Station.
1
Start play on the portable audio device.
È You hear the audio from the device
through the Music Station.
Music follows me
As you move around at home, you can let the
music move with you between a Center (sold
separately) and the Music Station. You can start
to listen to a song in one room, the move to
the next room and continue to listen to the
song there.
1
2
On the source unit where the music is
playing, press MUSIC FOLLOWS ME to
stop play from that unit and activate the
function.
È The display shows the icon .
On the destination unit, where you want
to listen, press MUSIC FOLLOWS ME to
continue the play.
• To deactivate the function press STOP
on the destination unit.
Install Windows Media Player 11
1
2
1
2
3
4
retained on the destination unit.
16 ENFrom Disc-Player.com Philips Manuals
Downloaded
Follow the instructions on the PC to install
the Windows Media Player 11.
You can share music from a PC with the
Music Station. This chapter shows you how to
configure the PC to share music.
• Any selected play modes such as repeat or shuffle are
You can wirelessly stream music to the Music
Station from a connected PC, if you install the
Windows Media Player 11 on the PC (see
‘Install Windows Media Player 11’ on page 16)
and configure the PC to share your music (see
‘Configure a PC to share music’ on page 16).
È If Autorun does not start, click on the
WAC_Installer icon in your Explorer
program.
Configure a PC to share music
Tip
Wirelessly stream music from
a PC
On the PC, insert the supplied PC Suite
CD.
È Autorun starts.
5
6
7
8
9
Follow the instructions to install the
Windows Media Player 11 (see ‘Install
Windows Media Player 11’ on page 16).
On the PC, click Start > Programs >
Windows Media Player.
In the Windows Media Player interface,
click on the Library pull-down menu and
select More Options....
In the Media Sharing pop-up window,
check Share my media, then confirm with
OK.
È When the Music Station is connected
to your home network, the display
shows the Music Station with an alert
icon:
Click on the Music Station.
Select Allow, then confirm with OK.
On the Music Station, press HOME.
Press
to select UPnP mode, then press
.
È The display shows [Searching
for<br>UPnP servers…], followed by
the list of media servers.
Press
to select the PC, then press .
You can play all audio files of the same artist
from the HD of the Center.
1
Eng lis h
You can choose between various play options:
• Repeat play (see ‘Repeat play’ on page 17)
• Shuffle play (see ‘Shuffle play’ on page 17)
• Play by artist (see ‘Play by artist’ on page
17)
• Play by genre (see ‘Play by genre’ on page
17)
Play by genre
When you play HD audio, press SAME
GENRE.
More play options
More play options
Repeat play
You can repeat one or all audio files of the
current selection.
1
In play mode, press REPEAT to toggle the
repeat function as follows:
• [Repeat 1]
• The current audio file is continuously
repeated until another mode or
setting is selected.
• [Repeat all]
• All audio files of the current selection
are continuously repeated until
another mode or setting is selected.
• [Off] (default)
Shuffle play
You can play the audio files of the current
selection in random order (shuffled).
1
During play, press SHUFFLE to toggle
shuffle on and off.
È When you turn shuffle on, the current
selection of audio files is played in
random order.
Play by artist
You can play all audio files of the same artist
from the HD of the Center.
1
When you play HD audio, press SAME
ARTIST.
Downloaded From Disc-Player.com Philips Manuals
EN
17
7 Radio
Tip
• You can store channel frequencies under a preset
channel number (see ‘Manual search 999).
FM radio
You can listen to FM radio with the Music
Station.
Listen to FM radio
1
2
3
4
Ensure that the Music Station is turned on.
Ensure that you fully extend the connected
FM antenna.
Press HOME.
Select [Radio] > [FM Tuner].
È The current frequency is displayed.
È To return to the Home menu, press
HOME.
Manual search
You can manually search and store channels.
1
2
3
4
5
6
7
Tips
Ensure that the Music Station is turned on.
Press HOME.
Select [Radio] > [FM Tuner].
È The current frequency is displayed.
Press
to change the frequency.
Press MENU.
Select [Save to preset].
Press
to select, then press .
È The frequency is stored under the
selected preset number.
È To return to the Home menu, press
HOME.
• You can optimize the reception when you rotate the
FM antenna.
• You can use the automatic search & store function
(see ‘Automatic channel search 999) to store channels
under presets.
Tip
• You can overwrite preset channel numbers with new
frequencies.
Change frequency
To fine tune the reception of a channel, you can
adjust the channel frequency.
1
2
3
4
Ensure that the Music Station is turned on.
Press HOME.
Select [Radio] > [FM Tuner].
È The current frequency is displayed.
Press
to adjust the frequency.
• To return to the Home menu, press
HOME.
Automatic channel search
The Music Station can automatically search
available channels.
1
2
3
4
Ensure that the Music Station is turned on.
Press HOME.
Select [Radio] > [FM Tuner]
È The current frequency is displayed.
Press and hold
to start automatic
search function.
È When a channel is found, the search
stops.
È To return to the Home menu, press
HOME.
18 ENFrom Disc-Player.com Philips Manuals
Downloaded
1
2
3
4
Ensure that the Music Station is turned on.
È Press MENU.
Select [Autostore function active…].
È The Music Station searches and stores
channels.
È When all available channels are stored,
the search stops.
È To return to the Home menu, press
HOME.
Select preset channels
You can find your preset channels in the preset
channel list.
1
2
3
4
5
Note
• Internet radio features require broadband Internet
access.
Press HOME.
Select [Radio] > [FM Tuner].
È The current frequency is displayed.
Ensure that the Music Station is turned on.
First-time Internet radio registration
For first-time Internet radio registration you
need a valid email address to register with
Philips. The following steps show you how to
register the Internet radio feature.
1
2
3
4
5
6
Press HOME.
Select [Radio] > [FM Tuner].
È The current frequency is displayed.
Press
to display preset channel numbers.
Press
to select, then press .
• To return to the Home menu, press
HOME.
Internet radio
If you register the Internet radio feature with
Philips, you can listen to Internet radio stations
that have a link on the Philips web service. The
Philips web service maintains and updates links
to Internet radio stations that are active. You
have to register once when using the Internet
feature for the first time (see ‘First-time Internet
radio registration’ on page 19). Additional
listeners can register separately (see ‘Register
Downloaded From Disc-Player.com Philips Manuals
Eng lis h
The Music Station can automatically search
and store up to 60 channels under the preset
numbers.
users for Internet radio’ on page 20) under a
different user name.
7
8
9
Ensure that the Music Station is turned on.
Ensure that the Music Station is connected
to the Internet.
Ensure you have a valid email address.
Ensure that you use the 1-way remote
control of the Music Station for the
registration process.
On the Music Station, press HOME.
Select [Radio] > [Internet Radio].
È The Internet radio registration display
is shown.
Press ALPHANUMERIC BUTTONS on
the 1-way remote control to enter the
valid email address.
Press .
È The display confirms the automated
email dispatch to your mailbox.
On the PC, check the email inbox for a
message from ConsumerCare@Philips.
com with the subject Your Streamium
Registration....
10Follow the instructions in the email to
complete your registration process on the
Philips website.
È The display of the Music Station
returns to the Radio menu.
È The email address is stored in the
memory.
EN
19
Automatic channel search
Automatic channel search
È To return to the Home menu, press
HOME.
Tip
• You can register additional users to the Internet radio
(see ‘Register users for Internet radio’ on page 999).
Register users for Internet radio
The Music Station allows to your register
additional users under a separate email address
and password.
1
2
3
4
5
6
7
8
Ensure that the Music Station is turned on.
Ensure that the Music Station is connected
to the Internet.
Press HOME.
Select [Radio] > [Internet Radio] > [Add
user].
È The Internet radio registration display
is shown.
Press ALPHANUMERIC BUTTONS on
the 1-way remote control to enter the
valid email address.
Press .
È The display confirms the automated
email dispatch to your mailbox.
On the PC, check the email inbox for a
message from ConsumerCare@Philips.
com with the subject Your Streamium
Registration....
Follow the instructions in the email to
complete your registration process on the
Philips website.
È The display of the Music Station
returns to the Radio menu.
È The email address is stored in the
memory.
È To return to the Home menu, press
HOME.
20 ENFrom Disc-Player.com Philips Manuals
Downloaded
Listen to Internet radio
When you have registered the Internet
radio feature (see ‘First-time Internet radio
registration’ on page 19), you can listen to the
Internet radio.
1
2
3
4
5
6
7
Ensure that the Music Station is turned on.
Ensure that the Music Station is connected
to the Internet.
Press HOME.
Select [Radio] > [Internet Radio] >
[User] > [Services].
È The service list is displayed.
Press
to select from the list:
• [RadioIO]
• [Live365]
Press .
Press
to select the station, then press
.
• To return to the Home menu, press
HOME.
Note
• Internet radio features require broadband Internet
access.
Place bookmarks for radio stations
You can place bookmarks for Internet radio
stations so next time you want to listen to a
station, it is easy to find.
1
2
3
Ensure that the Music Station is turned on.
Ensure that the Music Station is connected
to the Internet.
When you listen to Internet radio (see
‘Listen to Internet radio’ on page 20), press
to place a bookmark for the station.
• To return to the Home menu, press
HOME.
• The next time you connect to the
Internet radio, the radio station is
shown in the Favorite Stations (see
Note
• Internet radio features require broadband Internet
access.
Tip
• You can also place bookmarks for Internet radio
stations when you log on at www.philips.com/welcome
and on the registered product site click the link
Streamium Management.
Note
• Internet radio features require broadband Internet
access.
Add URL address on the Music
Station
You can add individual URL addresses for
Internet radio stations on the Music Station.
1
Listen to Favorite Stations
When you place bookmarks for Internet
radio stations (see ‘Place bookmarks for radio
stations’ on page 20), you can find them under
Favorite Stations.
1
2
3
4
5
Ensure that the Music Station is turned on.
2
3
4
Ensure that the Music Station is connected
to the Internet.
Press HOME.
Select [Radio] > [Internet Radio] >
[User] > [Favorite Stations].
Press
to select, then press .
• To return to the Home menu, press
HOME.
Note
• Internet radio features require broadband Internet
access.
Search for the Music Station.
On the registered product site, click the
link Streamium Management.
Follow the online instructions to enter the
URL address of Internet radio station.
• If the manually added Internet radio station is available
•
and broadcast in a compatible format, you can listen to
it on the Music Station.
You can find the manually added Internet radio stations
in the My Media list on the Music Station.
Add URL address on the PC
You can add individual URL addresses for
Internet radio stations on the PC.
Manually add Internet radio stations
Downloaded From Disc-Player.com Philips Manuals
On your PC, log on at www.philips.com/
welcome.
• Register the Music Station, if you have
not done so already.
Notes
1
You can manually enter the URL address of
Internet radio stations that are not listed on
the Philips website. You can choose from the
following options to enter a URL address:
• on the Music Station (see ‘Add URL
address on the Music Station’ on page 21)
on the PC (see ‘Add URL address on the
PC’ on page 21)
Eng lis h
•
2
3
4
On your PC, log on at www.philips.com/
welcome.
• Register the Music Station, if you have
not done so already.
Search for the Music Station.
On the registered product site, click the
link Streamium Management.
Follow the online instructions to enter the
URL address of Internet radio station.
EN
21
Automatic channel search
‘Listen to Favorite Stations’ on page
21) menu.
Notes
• If the manually added Internet radio station is available
•
and broadcast in a compatible format, you can listen to
it on the Music Station.
You can find the manually added Internet radio stations
in the My Media list on the Music Station.
Listen to My Media
When you manually enter the URL address, you
can listen to Internet radio stations that are not
listed on the Philips website.
1
2
3
4
5
Ensure that the Music Station is turned on.
Ensure that the Music Station is connected
to the Internet.
Press HOME.
Select [Radio] > [Internet Radio] >
[User] > [My Media].
Press
to select, then press .
• To return to the Home menu, press
HOME.
Note
• Internet radio features require broadband Internet
access.
22 ENFrom Disc-Player.com Philips Manuals
Downloaded
8
To stop the search, press .
• To return to the Home menu, press
HOME.
Eng lis h
8 Search for audio
files (music)
Search for audio files (music)
You can choose between the following options
to search for specific audio files:
• Scroll at high speed (see ‘Scroll at high
speed’ on page 23)
• Alphanumeric search (see ‘Alphanumeric
search’ on page 23)
Scroll at high speed
You can find a file with fast scroll, which scrolls
through all files in the current list. Scroll speed
depends on the length of the list.
1
2
3
Ensure that the Music Station is turned on.
When a list is displayed, press and hold
SCROLL to scroll through the list at high
speed.
Let go of the button, to stop the scroll.
Alphanumeric search
You can search for specific audio files on
• the HD of a connected Center,
• a connected UPnP device.
1
2
3
4
5
6
7
Ensure that the Music Station is turned on.
Press HOME.
Press
to select
• [HD]
• [UPnP]
Press .
Press SEARCH.
È The display shows a text box.
Press the ALPHANUMERIC BUTTONS
to enter the search word.
Press OK to start the search.
È The Music Station shows the closest
alphabetical match.
Downloaded From Disc-Player.com Philips Manuals
EN
23
9 Settings
Change sound settings
You can adjust the following sound settings:
• Volume (see ‘Adjust volume’ on page 24)
• Dynamic Bass Boost (DBB) (see ‘Set
Dynamic Bass Boost (DBB)’ on page 25)
• Equalizer (see ‘Adjust Equalizer (EQ)’ on
page 24)
• Bass / Treble (see ‘Adjust bass / treble’ on
page 24)
Activate Smart EQ
Note
• When you activate the Smart EQ function, you can
manually deactivate the function.
1
2
During play, press - VOL + to adjust the
volume.
Press SMART EQ.
È The Smart EQ function automatically
selects equalizer settings according to
the genre that is associated with the
audio file.
È If no genre is associated with the audio
file, the default setting is Pop.
Adjust volume
1
Ensure that the Music Station is turned on.
Tip
• You can manually associate your audio files with a genre
to ensure that the Smart EQ function matches the
genre of your audio files.
Mute
You can turn off the sound of your audio.
1
During play, press MUTE.
• To turn the sound back on, press
MUTE again.
Adjust Equalizer (EQ)
You can adjust the audio sound with the
following equalizer settings:
• [Rock]
• [Pop] (default)
• [Jazz]
• [Neutral] (flat)
• [Techno]
• [Classical]
1
2
3
4
Ensure that the Music Station is turned on.
Press MENU.
Press
.
to select [Equalizer], then press
Press
to adjust the settings, then press
.
• To return to the Home menu, press
HOME.
24 ENFrom Disc-Player.com Philips Manuals
Downloaded
Deactivate Smart EQ
1
2
3
4
Ensure that the Music Station is turned on.
Press MENU.
Select Equalizer.
Adjust equalizer settings (see ‘Adjust
Equalizer (EQ)’ on page 24).
È The new equalizer settings deactivate
the Smart EQ feature.
Adjust bass / treble
1
2
3
4
5
Ensure that the Music Station is turned on.
Press HOME.
Select [Settings] > [Bass/Treble].
Press
to select, then press .
Press
to adjust the settings, then press
.
• To return to the Home menu, press
HOME.
1
To toggle between the settings, press DBB.
Adjust display
You can change the following settings of the
display:
• Backlight (see ‘Switch backlight on/off ’ on
page 25)
• Contrast (see ‘Change display contrast’ on
page 25)
Switch backlight on/off
1
2
3
4
Ensure that the Music Station is turned on.
Press MENU.
1
2
3
4
5
Ensure that the Music Station is turned on.
Press HOME.
Select [Settings] > [Display] > [Contrast].
Press
to adjust the contrast.
• To return to the Home menu, press
HOME.
Clock / alarm settings
You can set the clock and alarm of the player.
Downloaded From Disc-Player.com Philips Manuals
Select [Settings] > [Time] > [Set time].
Press
to change the time.
Press to return to the Time menu.
• To return to the Home menu, press
HOME.
You can choose between 12-hr or 24-hr time
display format.
1
2
3
4
5
6
Before you change the time format, set the
clock (see ‘Set the clock’ on page 25).
Ensure that the Music Station is turned on.
Press HOME.
Select [Settings] > [Time] > [Time
format].
Press
to select, then press .
Press to return to the Time menu.
• To return to the Home menu, press
HOME.
Set the alarm time
•
Change display contrast
1
2
3
4
Press HOME.
Change the time format
Select [Settings] > [Display] > [Backlight].
Press
to toggle Backlight [On] and
[Off].
• To return to the Home menu, press
HOME.
Ensure that the Music Station is turned on.
1
2
3
4
5
6
7
Eng lis h
You can choose from the following DBB
settings:
• [DBB1]
• [DBB2]
• [DBB3]
• [Off] (default)
Set the clock
Before you set the alarm time, ensure
that you set the correct current time
on the clock (see ‘Set the clock’ on
page 25).
Ensure that the Music Station is turned on.
Press HOME.
Select [Settings] > [Alarm] > [Alarm
on/off].
Select [Alarm on].
Press
Press
to change the alarm time.
to enter the Alarm on/off menu.
Press
to select, then press .
È If the alarm is activated, the header
displays an alarm icon for 3 seconds.
È To switch off the alarm, select [Alarm
off].
EN
25
Set Dynamic Bass Boost (DBB)
Set Dynamic Bass Boost (DBB)
8
To return to the Home menu, press
HOME.
Tip
• If you switch the Music Station to eco standby, the
alarm is deactivated.
Set the alarm repeat
1
2
3
4
5
6
7
Ensure to set the alarm time (see ‘Set the
alarm time’ on page 25) before you set the
alarm occurrence.
Ensure that the Music Station is turned on.
Press HOME.
Select [Settings] > [Alarm] > [Alarm
time] > [Repeat].
Press
to select
• [Once]
• [Daily]
Press to confirm.
To return to the Home menu, press
HOME.
Automatic time update
You can synchronize the current clock time
with a
• radio station that is RDS (Radio Data
System) (see ‘Synchronize with RDS’ on
page 26) enabled.
• computer that is NTP (Network Time
Protocol) (see ‘Synchronize with NTP’ on
page 26) enabled.
Synchronize with RDS
RDS (Radio Data System) is a service
that allows FM stations to send additional
information along with the FM radio signal.
Automatic time synchronization is one of the
RDS features.
1
Ensure that the radio station you select for
synchronization has RDS.
26 ENFrom Disc-Player.com Philips Manuals
Downloaded
2
3
4
5
6
Ensure that the Music Station is turned on.
Press HOME.
Select [Settings] > [Time] > [Auto time
sync].
Press
to select, then press .
To return to the Home menu, press
HOME.
Synchronize with NTP
1
2
3
4
5
Ensure that the Music Station is turned on.
Press HOME.
Select [Settings] > [Time] > [Auto time
sync].
Press
to select, then press .
To return to the Home menu, press
HOME.
Set standby timer
You can select a set time period after which the
Music Station automatically switches to standby.
The timer offers the following options:
• [15]
• [30]
• [45]
• [60]
• [90]
• [120] minutes
• [Off]
1
2
Ensure that the Music Station is turned on.
Press SLEEP one or more times to select a
time period.
È When you set the timer, the display
shows the sleep icon:
È To view the remaining countdown time
to standby, press SLEEP anytime.
Eng lis h
Change language
You can change the language that you have
set during the first installation (see ‘First-time
installation’ on page 13).
Ensure that the Music Station is turned on.
Change language
1
2
3
4
5
Press HOME.
Select [Settings] > [Language].
Press
to select, then press .
To return to the Home menu, press
HOME.
Downloaded From Disc-Player.com Philips Manuals
EN
27
10Maintenance
Cleaning
Note
• Avoid moisture and abrasion.
1
Clean the Music Station only with a soft
dry cloth.
Update
When the Music Station is connected to a PC,
you can download new firmware updates with
the help of the Wireless Audio Device Manager
(WADM) (see ‘Install WADM’ on page 11) that
is on the supplied PC Suite CD.
1
2
On the PC, to search for new firmware
updates, launch the WADM (see ‘Launch
WADM’ on page 12).
Follow the instructions to update the
firmware.
Restore the default settings
You can restore the default settings (including
network settings) of the Music Station, if you
want to change the way the Music Station
connects to
• a Center
• a home network / PC
1
2
3
4
5
Ensure that the Music Station is turned on.
Press MENU to enter the menu display.
Press
to select [Settings] > [Restore
factory settings].
Press .
Press
to select [Yes], then press .
È The language selection display is
shown.
28 ENFrom Disc-Player.com Philips Manuals
Downloaded
Tip
• You can restore the default settings without losing the
audio files on the HD of a connected Center.
AC Power
Voltage information is
printed on the back or the
underside of the Music
Station.
Dimensions (w x 158 x 103 x 158 mm
h x d)
Weight (net)
approx. 0.92kg
Power consumption
On
Standby (active
Eco standby (passive)
Output power
Frequency response
Signal-to-noise ratio
2 x 7.5W
80 - 20,000Hz (-3dB)
72 dBA (IEC)
HD play
Power
Frequency response
Sensitivity
Impedance
2x7.5W (RMS)
4 kHz - 20 kHz (-6dB)
83 dB / m / W
2x4 Ohms in series = 8
Ohms
Dimensions (w x h) 50 x 43 mm
wOOx bass radiator:
100mm x 50mm
Input sensitivity
AUX IN
Wired standard
Speed
Mode
Crossover detection
(Auto MDIX)
Tuner
Speakers
Full range:
Dimensions
Wired (LAN / Ethernet)
< 36W
< 5W
< 1W
Amplifier
500mV
Wireless
Downloaded From Disc-Player.com Philips Manuals
802.11g, backwards compatible
to 802.11b
WEP (64 or 128 bit),WPA/
WPA2 (8-63 characters)
2412 - 2462MHz (CH1-CH11)
FM wave range
Number of presets
FM antenna/cable
Frequency range
Signal-to-noise
ration
M4A (AAC) bit
rate
MP3 bit rate
WMA bit rate
Sampling
frequencies
802.3 / 802.3u
10 / 100MBit/s
half / full duplex
Yes
87.5 - 108.0 MHz
60
Pigtail
60 - 20,000Hz (-3dB)
72dBA (IEC)
16 - 320kbps, CBR/VBR
32 - 320kbps, CBR/VBR
up to 192kbps, CBR/VBR
32, 44.1, 48kHz
Specifications and external appearance are
subject to change without notice.
Supported audio file formats
The Music Station supports the following audio
file formats:
• MP3 (8-320kbps and VBR)
• WMA (up to 160kbps)
• AAC (MPEG4 AA LC raw format, .m4a/.
m4b files)
EN
Eng lis h
General
Wireless
standard
Wireless
security
Frequency
range
Technical data
11Technical data
29
Note
• The display of the Music Station supports directories
with nesting up to a maximum of 8 levels.
Supplied accessories
•
•
•
•
•
Remote control
2 AAA batteries
AC power adapter with cable
Angled support (for use as table stand or
wall mount)
2 screws to attach angled support
PC connection requirements
The minimum requirements for PC connections
are:
• Windows 2000 SP4 (or above) / XP SP2
/ Vista
• Pentium III 500MHz processor or higher
• 256MB RAM
• CD-ROM drive
• Adapter
• Ethernet enabled (for wired
connection)
• Wireless network 802.11 b/g (for
wireless connection)
• 500MB free hard disk space
30 ENFrom Disc-Player.com Philips Manuals
Downloaded
1
3
Use an Ethernet cable (sold separately) to
connect the Music Station to the PC.
On the PC, launch the WADM on the PC
to update the firmware (see ‘Update’ on
page 28).
I have problems installing WADM or launching
WADM after installation, what do I do?
•
Ensure that the operating system of the
PC meets the requirements (see ‘PC
connection requirements’ on page 30).
•
Ensure that the Microsoft Windows Media
Player is installed on the PC (see ‘Install
Windows Media Player 11’ on page 16).
•
Ensure that the PC is virus-free.
I cannot use all the WADM functions, what do
I do?
Temporarily disable the antivirus software on
the PC, as it may affect the WADM functions.
Ensure that the PC is connected to the
Internet.
Downloaded From Disc-Player.com Philips Manuals
EN
31
Eng lis h
I cannot hear any sound or the sound is poor,
what do I do?
Press - VOL + to increase the volume.
•
Press the MUTE button again to reactivate
•
the sound output.
The radio reception is poor, what do I do?
Adjust the antenna for better reception.
•
Increase the distance between the Music
•
Station and TV or VCR devices.
Is there a maximum distance of transmission
between a Center and the Music Station for
effective streaming?
Yes. The maximum distance of Wi-Fi
transmission is 250m measured in open spaces.
However, in a home environment, where solid
obstacles such as walls and doors are present,
the effective transmission distance is reduced
to 50-100m. Reposition the devices if you
experience transmission problems.
During the first time set-up, the display on the
Music Station shows [Searching for Center…],
what do I do?
Follow the instructions for the set-up with
•
a Center (see ‘Select language’ on page 13).
How do I avoid Wi-Fi interferences from
other devices that operate in the same
(2.4GHz) frequency spectrum, such as Dect
phones or bluetooth devices?
•
Move the Music Station (and the Center,
if applicable) at least 3m away from such
devices.
•
Use a WEP/WPA encryption key when
you create the wireless connection your
PC / home network (see ‘Create wireless
connection’ on page 12).
•
Change the operating channel on the
interfering devices.
•
Turn the devices in different directions to
minimize interference.
The wireless firmware update failed, what do
I do?
2
Troubleshooting
12Troubleshooting
13Glossary
A
AAC (Advanced Audio Coding)
An audio compression scheme defined as part
of the MPEG-2 standard (also known as MPEG2 AAC or MPEG-2 NBC, or Not Backwards
Compatible). It offers better sound and a
compression ratio that is superior by roughly 30
percent compared to the MPEG-1 MP3 format.
AC (alternating current)
An alternating current is an electrical current
whose magnitude and direction vary cyclically,
as opposed to DC (direct current), whose
direction remains constant. The usual waveform
of an AC power circuit is a sine wave, as this
results in the most efficient transmission of
energy. However certain applications use
different waveforms, such as triangular or square
waves.
Amplifier
A device, either a single stage or a large scale
circuit with multiple stages for creating gain, i.e.
it makes small signals larger.
Antenna
A device, such as a rod or wire, which picks up
a received radio frequency signal or radiates a
transmitted RF signal.
Audio output
High-level (speaker) or line-level (RCA) signals
sent from one system component to another;
or the high-level signal from an amplifier to the
system speakers.
AUX
Auxiliary input that allows you to connect
portable audio devices.
B
Bass
32 ENFrom Disc-Player.com Philips Manuals
Downloaded
The lowest three octaves of the audio band.
Low bass is the bottom octave (20-40Hz), midbass is the middle octave (40-80Hz), and upper
bass is the 80-160Hz octave.
Bluetooth
A short-range wireless protocol that is meant
to allow mobile devices to share information
and applications without the worry of cables or
interface incompatibilities. The name refers to a
Viking King who unified Denmark. Operates at
2.4 GHz. For more information, see bluetooth.
com.
C
CBR (constant bit rate)
With CBR the encoder spends the same
amount of bits on each frame, regardless of
how much it may really need. Disadvantage
of CBR: Bits are wasted in case of absolute
blackness of a picture or complete silence in an
audio frame. And pictures or audio frames with
a lot of elements may need those bits.
CD (Compact Disc)
Format developed by Phillips, Sony, and Pioneer
for conveying music and data. CDs record
information by deforming the inner metal foil
on the disc with tiny micro pits burned in by a
laser.
CDDB
A centralized database of CDs, CD tracks, and
artists on the Web, now known as Gracenote.
The audio player or burner program can log on
to CDDB. It uploads the ID of the CD being
played, and then downloads the title, artist, and
track list.
Coaxial
A single copper conductor, surrounded with
a layer of insulation, covered by a surrounding
copper shield and finally, an insulating jacket.
An unbalanced transmission line with constant
impedance. In audio, this type is commonly used
for low level, line signals terminated in RCA
connectors.
D
dB (Decibel)
A unit of measure used to express relative
difference in power or intensity of sound.
D
DC (direct current)
Direct current or continuous current is the
constant flow of electric charge. This is typically
in a conductor such as a wire. In direct current,
the electric charges flow in the same direction,
distinguishing it from AC (alternating current).
Digital
A method to encode information using a binary
code of 0s and 1s. Many wireless phones and
networks use digital technology.
Digital Audio
Digital Audio is a sound signal that has been
converted into numerical values. Digital sound
can be transmitted through multiple channels.
Analog sound can only be transmitted through
two channels.
Duplex (half/full)
• Full duplex is the ability to send and
receive data simultaneously. Duplex is
synonymous with full duplex. Example:
when a modem operates in full-duplex
mode, it can transmit data in two
directions simultaneously. In half-duplex
mode it can transmit data in two directions,
but not simultaneously.
Downloaded From Disc-Player.com Philips Manuals
Eco (Eco Standby)
Eco Standby is the most ‘economic’ mode of
the Music Station and consumes less than 1W. It
is ‘economic’ and environmentally friendly to use
this mode during longer times of non-usage of
the Music Station.
EQ (Equalizer)
A class of electronic filter circuits designed
to augment or adjust electronic or acoustic
systems. Equalizers can be fixed or adjustable,
active or passive. Many equalizers divide the
spectrum into 3 to 12 bands. This allows each
section to be either increased or decreased in
amplitude without changing the response of
the rest.
F
Fidelity
A term used to describe the accuracy of
recording, reproduction, or general quality of
audio processing. “High Fidelity” (Hi-Fi) is the
goal of every designer.
FM (Frequency Modulation)
In radio broadcasting: a method of modulation
in which the frequency of the carrier voltage
is varied with the frequency of the modulation
voltage.
Frequency
The property or condition of occurring at
frequent intervals. In sound, this simply refers
to the regular occurrence of compression and
rarification of air that we experience as sound.
Frequency Response
Is the range of frequencies that a speaker
reproduces, lowest frequency to the highest.
While the optimal normal is 20-20,000 Hz
(Hertz), the range of human hearing for
individuals is often much more restricted.
A good full-range speaker system however,
reproduces as much of this range as possible to
cover all variations. Individual drivers are limited
to reproduce only that part of the spectrum
EN
33
Eng lis h
E
Glossary
Compression
In audio terms, this is a process of temporarily
or permanently reducing audio data for more
efficient storage or transmission. A temporary
reduction in file size is called ‘non-lossy’
compression, and no information is lost. A
permanent reduction in file size (such as with
MP3 files) is called ‘lossy’ compression, and
involves discarding unnecessary information
which is irretrievably lost.
for which they were made, so their response is
limited, but still a necessary point to consider
when designing a complete sound system.
H
Hi-Fi (High Fidelity)
A method of sound reproduction that
emphasizes the highest possible adherence to
the exact character of the original sound. This
is a principal that must be paramount in every
stage of the recording, transportation, and
recreation of the signal to be fully operational. It
is usually the listener’s equipment wherein this
objective is most seriously compromised.
Hz (Hertz)
Cycles per second, named after Heinrich Hertz.
I
Impedance
The resistance to the flow of an electric current
in a circuit. This is effectively the electrical load
that a loudspeaker presents to the amplifier
which drives it and is measured in ohms.
Incredible Surround Sound (Incr.Surr.)
An improved system that creates realistic, threedimensional sound fields. These sound fields are
usually achieved with multiple speakers that are
arranged around the listener.
Kilobits per second. A digital-data-rate
measurement system which is often used with
highly compressed formats such as AAC, DAB,
MP3 etc. The higher the amount, the better the
quality generally is.
K
kHz (kilo Hertz)
1000Hz or 1000 cycles per second.
L
LCD (Liquid Crystal Display)
Probably the most common way to show
visual information on non-computer electronic
equipment.
Lossless compression
A system for reducing the number of data bits
(density) in a musical signal without corrupting
the original.
M
M4A
The audio file format used by Apple in their
iTunes Music Store often appears on your
system with the ‘.m4a’ filename extension. M4A
can produce better audio quality than MP3
using less physical space for the files.
Input sensitivity
SPL (sound pressure level) a speaker produces,
given one watt of power, measured from a
one-meter distance at a typical input frequency
(usually 1kHz unless otherwise noted on the
speaker).
MHz (Mega Hertz)
One million cycles per second.
Interface
A device or protocol which facilitates the linking
of any two devices or systems; or when used as
a verb (‘to interface’), the process of linking.
Mono (monaural)
The operation of an amplifier in one channel
for both input and output. Can refer to an
amplifier with only one channel of amplification
or operating in bridged mode. For lowfrequency amplification applications, it provides
better phase coherence and less distortion than
stereo operation.
K
Kbps
34 ENFrom Disc-Player.com Philips Manuals
Downloaded
Midrange
The middle three octaves (more or less) of the
audio band, where the ear is most sensitive,
usually between 160Hz-3kHz.
Mute
A control found on receivers, and some mixers
or signal processing units that silences (mutes) a
signal path, or output.
O
Ohm
Measure of resistance to current (impedance).
The lower the impedance of a speaker, the
harder it is to drive.
P
PCM (Pulse Code Modulation)
Pioneering form of digital recording.
R
RDS (Radio Data System)
RDS tuners can automatically tune in stations
according to the types of music (or talk) they
broadcast. RDS also enables a receiver to
display text messages and even graphics (usually
call letters and format information) that many
FM stations include on a sub-carrier signal
within their normal broadcast signal. Some RDS
equipped tuners can even override with traffic
alerts or emergency broadcasts, during playback
of other media - CD MD, or cassette. There are
other useful features too, many of which are
offered by the growing number of RDS stations.
RF (radio frequency)
An alternating current or voltage with a
frequency (or carrier wave) above about
100kHz. It is called radio frequency because
these frequencies have a capacity to be radiated
Downloaded From Disc-Player.com Philips Manuals
Rip (ripping)
Using a software program that “grabs” digital
audio from a compact disc and transfers it to a
computer hard drive. The integrity of the data
is preserved, because the signal does not pass
through the computer sound card, and need
not be converted to an analog format. The
digital-to-digital transfer creates a WAV file that
can then be converted into an MP3 file.
RMS (Root Mean Square)
A formula that provides a reasonably accurate
means to measure and compare continuous
AC power. The use of this measure is preferred
when matching system components, like
amplifiers and receivers.
S
S/PDIF (SPDIF) (Sony/Philips Digital Interface)
A standard audio-file transfer-format that was
developed jointly by Sony and Philips. S/PDIF
allows the transfer of digital audio signals from
one device to another, without the need to
convert first to analog. This prevents the quality
of the digital signal degrading during transfer to
analog.
Sampling rate
The precision with which a digital file describes
the analog sound it represents. Basically, a lower
rate produces files that sound worse and take
up less drive space than those with a higher
rate. CDs have a sampling rate of 44.1kHz,
and DAT machines have a sampling rate of
48kHz. MiniDisc player/recorders with a built-in
sampling rate converter can handle both rates.
Sensitivity
Volume that a speaker offers for a specific
voltage input, expressed in decibels per watt
(dB/W).
Shuffle
A feature that plays audio files (tracks) in
random order.
EN
35
Eng lis h
as electromagnetic waves by radio (and
television) stations.
Glossary
MP3
A file format with a sound data compression
system. MP3 is the abbreviation of Motion
Picture Experts Group 1 (or MPEG-1) Audio
Layer 3. With the MP3 format, one CD-R or
CD-RW can contain about 10 times more data
than a regular CD.
Signal to noise ratio
Represents the difference between the level of
the audio signal, and any interference. The larger
the figure, the purer the sound.
SPL (sound pressure level)
An acoustic measurement of sound energy.
1 dB SPL is the smallest increment in sound
level to which the average human is sensitive.
Theoretically, 0 dB SPL is the threshold of
human hearing while approximately 120 dB is
the threshold of pain.
Stereo
Literally means solid. Usually taken to refer to
two channel stereo, though developments in
digital audio facilitate multichannel stereo.
Streaming
A technique for transferring data such that it
can be processed as a steady and continuous
stream. Streaming technologies are often used
on the Internet because many users do not
have fast enough access to download large
multimedia files quickly, so the client browser or
plug-in can start displaying the data before the
entire file has been transmitted.
Subwoofer
The extra-low frequency drive-unit
(loudspeaker) that can be used to augment
both stereo and surround system.
T
Treble
High frequencies at the top end of the audio
band i.e. above 3kHz.
Tweeter
The drive unit (loudspeaker) that reproduces
high frequency sounds.
U
UPnP (Universal Plug and Play)
Universal Plug and Play is a networking
architecture developed by a consortium of
companies to ensure easy connectivity between
36 ENFrom Disc-Player.com Philips Manuals
Downloaded
products from different vendors. UPnP devices
should be able to connect to a network
automatically, handling identification and other
processes on the fly. The standards developed
by the UPnP Forum are media-, platform-, and
device-independent.
USB (universal serial bus)
A hardware interface used to connect devices
such as computer audio players, digital cameras,
and more. USB is UPnP enabled (also called
hot-swappable), meaning that a computer does
not need to be turned off when new devices
are plugged in and the devices do not need to
be configured. USB supports data transfer rates
of up to 60MB per second (in USB 2.0).
V
VBR (variable bit rate)
With VBR, the encoder takes as much bits as
it needs. So black pictures get few bits and
complex pictures get as much as they need.
While this provides the best quality the final
size cannot be predicted at all.
Volume
Volume is the most common word used to
specify the control of relative loudness of
sounds. It also pertains to the function on many
electronic devices that is used to control the
loudness.
W
W (wattage)
A measurement of power. In speakers, wattage
is a term that indicates power-handling
characteristics in dealing with electrical voltage
inputs from the amplifier.
WAP (Wireless Application Protocol)
Global protocol used in some wireless devices
that allows the user to view and interact with
data services. Generally used as a means to
view Internet web pages using the limited
transmission capacity and small display screens
of portable wireless devices.
WEP (Wired Equivalent Privacy)
All 802.11b (Wi-Fi / wireless) networks use
WEP as their basic security protocol. WEP
secures data transmissions using 64-bit or
128-bit encryption; however, it does not
offer complete security and is usually used in
conjunction with other security measures such
as EAP.
WPA / WPA2 (Wi-Fi Protected Access)
A Wi-Fi standard that was designed to improve
upon the security features of WEP. The
technology is designed to work with existing
Wi-Fi products that have been enabled with
WEP (i.e. as a software upgrade to existing
hardware), but the technology includes two
improvements over WEP.
Wi-Fi
Wi-Fi (Wireless Fidelity) is a wireless
technology brand owned by the Wi-Fi Alliance
intended to improve the interoperability of
wireless local area network products based
on the IEEE 802.11 standards. Common
applications for Wi-Fi include Internet and VoIP
phone access, gaming, and network connectivity
for consumer electronics such as televisions,
DVD players, and digital cameras.
Wireless
Telecommunications using electromagnetic
waves rather than wires or cable to transmit
information. Wireless communication can be
used for free-ranging mobile systems such as
cell phones and global positioning systems
(GPS), which use satellite technology. Wireless
systems can also be fixed, such as LANs that
provide wireless communications within a
limited area (such as an office), or wireless
peripherals such as mice and keyboards.
WMA (Windows Media Audio)
An audio format owned by Microsoft, is a
part of Microsoft Windows Media technology.
Includes Microsoft Digital Rights Management
tools, Windows Media Video encoding
technology, and Windows Media Audio
encoding technology.
Woofer
Downloaded From Disc-Player.com Philips Manuals
EN
37
Eng lis h
The drive unit (loudspeaker) that reproduces
the bass (low) frequencies.
Glossary
WAV
A format for sound files developed jointly by
Microsoft and IBM. Built into Windows 95 to XP,
which made it the de facto standard for sound
on PCs. WAV sound files end with a ‘.wav’
extension and works with nearly all Windows
applications that support sound.
Contact
information
Japan
0570-07-6666
Korea
080-600-6600
Luxembourg
40 6661 5644
Malaysia
1800-880-180
United States and Canada (Francophone)
1-800-661-6162
Mexico
01-800-504-6200
Netherlands
0900-8407
(€0.20/min)
United States and Canada (English-speaking)
1-888-744-5477
New Zealand
0800-658-224
Argentina
(54-11) 4544-2047
Norway
2270-8111
Australia
1300-363-391
Pakistan
051-580-902-3
Austria
810000205
(€0.20/min)
Peru
0800-00100
Belgium
78250145
(€0.16/min)
Philippines
632-8164416
Poland
223491504
Brazil
0800-701-02-03
Portugal
2-1359-1442
Bulgaria
2-976-9996
Romania
1-203-2060
Chile
600-744-5477 (600-PHILIPS)
Russia Federation
495-961-1111;
(8-800-200-0880)
China
4008-800-008
(local tariff)
Singapore
65-6882-3999
Slovakia
0800-004537
Colombia
01-800-700-7445
South Africa
(011) 471-5194
Czech Republic
800142840
Denmark
3525-8759
Spain
902-888-784
(€0.10/min)
Finland
09-2311-3415
Sweden
08-5792-9100
France
0821 611655
(€0.23/min)
Switzerland
0844-800-544
Taiwan
0800-231-099
66-2-652-8652
Germany
01803 386 852
(€0.14/min)
Thailand
Turkey
0800-261-3302
Greece
0-0800-3122-1280
Ukraine
044-254-2392
Hong Kong
852-2619-9663
Hungary
680018189
United Kingdom
0870 900 9070
(£0.15/min)
India
1901-180-1111
Uruguay
(598-2) 619-6666
Ireland
01-601-1777
Venezuela
0800-100-4888
Israel
9-9600-900
Italy
840320086 (€0.25/minute)
40
Downloaded
From Disc-Player.com Philips Manuals
Downloaded From Disc-Player.com Philips Manuals
41
42
Downloaded
From Disc-Player.com Philips Manuals
© 2008 Koninklijke Philips Electronics N.V.
All rights reserved.
Downloaded From Disc-Player.com Philips Manuals