1
Register your product and get support at
WAC7500/05
EN User manual
Contact information
1
44
Philips Consumer Electronics
HK- 0738-WAC7500
(report No.)
EC DECLARATION OF CONFORMITY
We,
Philips Consumer Electronics
(manufacturer’s name)
Philips, Glaslaan 2, 5616 JB Eindhoven, The Netherlands
(manufacturer’s address)
declare under our responsibility that the electrical product:
Philips
WAC7500/12, /05
(name)
(type or model)
Wireless Music Center
(product description)
to which this declaration relates is in conformity with the following standards:
EN55013 : 2001 +A1:2003 + A2:2006
EN 300 328 : 2004
EN55020 : 2002 + A1:2003 +A2:2005
EN 301 489-1 : 2005
EN 55022: 2006
EN 301 489-17: 2002
EN 55024: 1998 +A1:2001 +A2:2003
EN 50371
: 2002
EN 60065: 2002 +A1:2006
(title and/or number and date of issue of the standards)
following the provisions of R &TTE Directive 1999/5/EC ( incl. 73/23/EEC & 93/68/EEC
directives and is produced by a manufacturing organization on ISO 9000 level.
Eindhoven,
September 18, 2007
(place, date)
Eric Tijssen
Program Manager
PCE I-Lab Entertainment Solutions
(signature, name and function)
Contents
1 Important
4
4
5
5
2 Your Wireless Music Center
6
6
6
6
7
7
3 Prepare
9
9
9
9
Safety
Notice
Recycling
Overview
Front view
Top view
Side view
Remote control
Position the WAC7500
Connect to AC power
Turn on / switch to standby
4 Connect to a home network 10
Create wireless connection with automatic
IP address
10
Create wireless connection with static IP
address
10
Create wired connection with automatic IP
address
11
Create wired connection with static IP
address
11
5 Build a music library on the harddisk13
Import music from a PC
Install WADM software on the PC Rip music from CDs on the WAC7500
Record music
13
13
14
14
6 Play 15
Adjust volume
Mute the sound
Play CD
Play HD music
Internet radio
Register the WAC7500 with Philips
Listen to Internet radio
EN
15
15
15
15
15
15
15
Mark Internet radio stations as Favorites
16
Listen to Favorite Stations
16
Manually add Internet radio stations 16
Listen to My Media
17
FM radio
17
Listen to FM radio
17
Change frequency
17
Automatic channel search
18
Automatic channel search & autostore18
Select preset channels
18
Manual search & store
18
Wirelessly stream music from a PC 19
Install Windows Media Player 11 19
Configure a PC to share music 19
Play from a flash memory USB device 19
Connect audio devices (AUX) 20
7 Play options 21
Repeat play
Shuffle play
Play by artist
Play by genre
Create a playlist
Add audio files to a playlist
Play from a playlist
21
21
21
21
21
21
22
8 Record from HD to USB 23
9 Alphanumeric search 24
10 Gracenote ® CD information 25
11 Settings 26
Change Equalizer (EQ) settings
Activate Smart EQ
Adjust treble / bass
Set Dynamic Bass Boost (DBB)
Activate Incredible Surround sound Time settings
Synchronize with RDS radio station
Set the time manually
Set the time format
Set standby timer
Alarm
26
26
26
26
26
27
27
27
27
27
27
Eng lis h
28
28
28
28
28
29
Contents
Change language
Maintenance
Cleaning
Update
Update through PC connection
Restore the default settings
12 Add a Philips Wireless Music Station
(sold separately) 30
Add a Philips Wireless Music Station to the
WAC7500
30
Broadcast music to Philips Wireless
Music Stations
30
Music Follows Me
31
Delete a Philips Wireless Music Station
from the WAC7500
31
Relocate a connected WAC7500 or
Philips Wireless Music Station 31
13 Technical data 32
Supplied accessories
PC connection requirements
33
33
14 Troubleshooting 34
15 Glossary 36
EN
1 Important
Safety
Know these safety symbols
This ‘bolt of lightning’ indicates uninsulated
material within your unit may cause an electrical
shock. For the safety of everyone in your
household, please do not remove product
covering.
The ‘exclamation point’ calls attention to
features for which you should read the enclosed
literature closely to prevent operating and
maintenance problems.
WARNING: To reduce the risk of fire or electric
shock, this apparatus should not be exposed to
rain or moisture and objects filled with liquids,
such as vases, should not be placed on this
apparatus.
CAUTION: To prevent electric shock, match
wide blade of plug to wide slot, fully insert.
a Read these instructions.
b Keep these instructions.
c Heed all warnings.
d Follow all instructions.
e Do not use this apparatus near water.
f Clean only with dry cloth.
EN
g Do not block any ventilation openings.
Install in accordance with the
manufacturer’s instructions.
h Do not install near any heat sources such
as radiators, heat registers, stoves, or
other apparatus (including amplifiers) that
produce heat.
i For countries with a polarized mains,
do not defeat the safety purpose of
the polarized or grounding-type plug.
A polarized plug has two blades with
one wider than the other. A grounding
type plug has two blades and a third
grounding prong. The wide blade or the
third prong are provided for your safety.
If the provided plug does not fit into
your outlet, consult an electrician for
replacement of the obsolete outlet.
Caution: To prevent electric shock, match
the wide blade of the plug to the wide
slot, fully insert.
j Protect the power cord from being
walked on or pinched, particularly at
plugs, convenience receptacles, and the
point where they exit from the apparatus.
k Only use attachments/accessories
specified by the manufacturer.
l Use only with the cart, stand, tripod,
bracket, or table specified by the
manufacturer or sold with the apparatus.
When a cart is used, use caution when
moving the cart/apparatus combination to
avoid injury from tip-over.
o Battery usage CAUTION – To prevent
battery leakage which may result in bodily
injury, property damage, or damage to the
unit:
• Install all batteries correctly, + and - as
marked on the unit.
• Do not mix batteries (old and new or
carbon and alkaline, etc.).
• Remove batteries when the unit is not
used for a long time.
Eng lis h
n Refer all servicing to qualified service
personnel. Servicing is required when
the apparatus has been damaged in any
way, such as power-supply cord or plug
is damaged, liquid has been spilled or
objects have fallen into the apparatus, the
apparatus has been exposed to rain or
moisture, does not operate normally, or
has been dropped.
Notice
Class II equipment symbol
This symbol indicates that the unit has a double
insulation system.
Recycling
Your product is designed and manufactured
with high quality materials and components,
which can be recycled and reused.
When you see the crossed-out wheel bin
symbol attached to a product, it means the
product is covered by the European Directive
2002/96/EC:
p Apparatus shall not be exposed to
dripping or splashing.
q Do not place any sources of danger on
the apparatus (e.g. liquid filled objects,
lighted candles).
r This product may contain lead and
mercury. Disposal of these materials
may be regulated due to environmental
considerations. For disposal or recycling
information, please contact your local
authorities or the Electronic Industries
Alliance: www.eiae.org.
Warning
•
•
•
•
•
•
Never remove the casing of this WAC7500.
Never lubricate any part of this WAC7500.
Place this WAC7500 on a flat, hard and stable surface.
Never place this WAC7500 on other electrical
equipment.
Only use this WAC7500 indoors. Keep this WAC7500
away from water, moisture and liquid-filled objects.
Keep this WAC7500 away from direct sunlight, naked
flames or heat.
Never dispose of your product with other
household waste. Please inform yourself about
the local rules on the separate collection of
electrical and electronic products. The correct
disposal of your old product helps prevent
potentially negative consequences on the
environment and human health.
Your product contains batteries covered by the
European Directive 2006/66/EC, which cannot
be disposed of with normal household waste.
Please inform yourself about the local rules on
separate collection of batteries. The correct
disposal of batteries helps prevent potentially
negative consequences on the environment and
human health.
0682
EN
Important
m Unplug this apparatus during lightning
storms or when unused for long periods
of time.
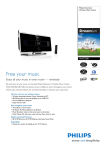
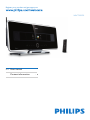
2 Your Wireless
Music Center
Congratulations on your purchase and welcome
to Philips!
To fully benefit from the support that Philips
offers, register your product at www.philips.
com/welcome.
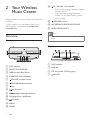
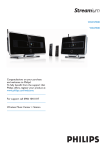
Overview
Front view
n
o
On / Standby / Eco Standby
Press briefly to toggle between modes
Standby and On.
• Press and hold to toggle between
modes On and Eco Standby (powersaving mode).
•
RECORD record
p INCREDIBLE SURROUND SOUND
q MUSIC BROADCAST
Note
• The illumination of one corner of the casing is a design
element.
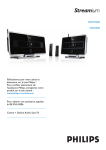
Top view
a LCD (display)
b MUSIC FOLLOWS ME
c DBB Dynamic Bass Boost
d SMART EQ Smart Equalizer
e
VOLUME increase volume
f
VOLUME decrease volume
g
stop
h
skip forward
navigate left/right/up/down
i
j OK/
k
skip back
l MENU
m HOME
confirm / play/pause
EN
a Wi-Fi antenna
b USB jack
c CD slot (insert CD facing you)
d
eject CD
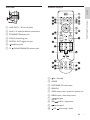
Remote control
Your Wireless Music Center
Eng lis h
Side view
a LINE OUT L / R line out jacks
b AUX L / R external device connections
c ETHERNET Ethernet jack
d DOCK IN docking jack
e DIGITAL OUT digital out jack
f
headphone jack
g 75
FM ANTENNA FM antenna jack
a
On / Standby
b HOME
c FM TUNER FM radio tuner
d SEARCH
e VIEW view screen / previous options list
f MENU enter / exit setup menu.
navigate
g
h OK/
i
j
confirm / play/pause
skip forward
VOL
volume up / down
EN
k MUSIC FOLLOWS ME
l SHUFFLE random play
m INCR.SURR. Incredible Surround sound
n RDS/NEWS
o SAME GENRE
p SAME ARTIST
q DBB Dynamic Bass Boost
r SMART EQ smart equalizer
s SLEEP sleep timer
t REPEAT
u MUSIC BROADCAST
v Alphanumeric keys
w MUTE turn off sound output
x
SCROLL
y
z CLEAR
{ REC
clear entry / skip back
record
| MARK/UNMARK
} AUX select external device
~ HD harddisk music
MP3-CD/CD
EN
3
• The type plate information is located at the back or at
the underside of the WAC7500.
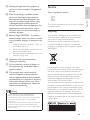
Open the battery compartment.
Insert 2 AAA batteries with correct
polarity (+/-) as indicated.
Close the battery compartment.
Position the WAC7500
Caution
• Risk of product damage! Place the WAC7500 on a
surface that is level, flat, and strong enough to support
the WAC7500.
Top view
1
2
Note
Eng lis h
3 Prepare
Turn on / switch to standby
You can select from the following status options:
• On
• Standby
• Active standby. The button on
the remote control can turn on the
WAC7500.
• Eco standby
• Passive standby. Only the button
on the top panel can turn on the
WAC7500.
Connect to AC power
Note
• If no buttons are pressed for 20 minutes, the WAC7500
switches to standby.
Warning
• Risk of product damage! Ensure that the power supply
voltage corresponds to the voltage printed on the back
or the underside of the WAC7500.
1
Connect the WAC7500 to the power
supply
1
2
3
To turn on the WAC7500, press
.
To switch the WAC7500 to standby, press
.
To switch the WAC7500 to eco standby,
press and hold the button on the top
panel.
Note
• When the WAC7500 is in eco standby mode, the
remote control is inactive.
» Your WAC7500 turns on and is ready
to be set up for use.
EN
4 Connect to a
home network
Before you connect the WAC7500 to a router:
• Ensure that the PC meets the minimum
requirements.
You can choose one of these modes of
connection:
• Wireless connection with automatic IP
address (see ‘Create wireless connection
with automatic IP address’ on page 10)
• Wireless connection with static IP address
(see ‘Create wireless connection with static
IP address’ on page 10)
• Wired connection with automatic IP
address (see ‘Create wired connection
with automatic IP address’ on page 11)
• Wired connection with static IP address
(see ‘Create wired connection with static
IP address’ on page 11)
Create wireless connection
with automatic IP address
This is how to navigate and select with the
remote control:
• Press or to select a menu option.
• Press to confirm a selection.
• Press to go back to the previous
screen.
• Press HOME to go to the Home menu.
The alphanumeric buttons of the remote
control are multi-function buttons:
• To select a number or an alphanumeric
character, press a button once or more
until you see the number or alphabetic
character in the display of the WAC7500.
• To cycle through the alphanumeric
characters that are available, press a button
repeatedly.
• To delete the last character entry from the
display, press CLEAR .
10
EN
1
2
3
4
5
6
7
This chapter shows you how to create a
wireless connection to a home network
with automatic IP address.
Ensure that your network name and
network password or encryption key are
available.
• Some Internet service providers (ISP)
require the use of a proxy server.
Turn on your wireless access point or
wireless router with broadband Internet.
Turn on the WAC7500.
On the WAC7500, press MENU .
Select [Settings] > [Network] >
[Wireless] and confirm.
Select the network from the list in the
display.
• Enter encryption key (if required)
with the remote control, then press
OK to continue.
Select [Automatic] > (Apply settings?)
[Yes] and confirm.
» The WAC7500 displays a confirmation
screen that the settings are saved.
Create wireless connection
with static IP address
This is how to navigate and select with the
remote control:
• Press or to select a menu option.
• Press to confirm a selection.
• Press to go back to the previous
screen.
• Press HOME to go to the Home menu.
The alphanumeric buttons of the remote
control are multi-function buttons:
• To select a number or an alphanumeric
character, press a button once or more
until you see the number or alphabetic
character in the display of the WAC7500.
• To cycle through the alphanumeric
characters that are available, press a button
repeatedly.
1
2
3
4
5
6
7
8
9
•
•
Ensure that your encryption key (if
required) is available.
Turn on your wireless access point or
wireless router with broadband Internet.
1
Turn on the WAC7500.
On the WAC7500, press MENU .
Select [Settings] < [Network] >
[Wireless] and confirm.
Select the network from the list in the
display.
• Enter encryption key (if required)
with the remote control, then press
OK to continue.
Select [Static] and confirm.
Enter the static IP address with the remote
control and confirm with OK .
Select (Apply settings?) [Yes] and confirm.
» The WAC7500 displays a confirmation
screen that the settings are saved.
Create wired connection
with automatic IP address
This is how to navigate and select with the
remote control:
• Press or to select a menu option.
• Press to confirm a selection.
• Press to go back to the previous
screen.
• Press HOME to go to the Home menu.
The alphanumeric buttons of the remote
control are multi-function buttons:
• To select a number or an alphanumeric
character, press a button once or more
until you see the number or alphabetic
character in the display of the WAC7500.
2
3
4
5
To cycle through the alphanumeric
characters that are available, press a button
repeatedly.
To delete the last character entry from the
display, press CLEAR .
This chapter shows you how to create a
wired connection to a home network with
automatic IP address.
Use an Ethernet cable (sold separately) to
connect the WAC7500 to the access point
or router that connects to your home
network with broadband Internet access.
Turn on your wireless access point or
wireless router with broadband Internet.
Turn on the WAC7500.
On the WAC7500, press MENU .
Select [Settings] > [Network] > [Wired]
> [Automatic] > (Apply settings?) [Yes]
and confirm.
» The WAC7500 displays a confirmation
screen that the settings are saved.
Create wired connection
with static IP address
This is how to navigate and select with the
remote control:
• Press or to select a menu option.
• Press to confirm a selection.
• Press to go back to the previous
screen.
• Press HOME to go to the Home menu.
The alphanumeric buttons of the remote
control are multi-function buttons:
• To select a number or an alphanumeric
character, press a button once or more
until you see the number or alphabetic
character in the display of the WAC7500.
• To cycle through the alphanumeric
characters that are available, press a button
repeatedly.
• To delete the last character entry from the
display, press CLEAR .
EN
11
Eng lis h
To delete the last character entry from the
display, press CLEAR .
This chapter shows you how to create a
wireless connection to a home network
with static IP address.
Connect to a home network
•
1
2
3
4
5
6
7
12
This chapter shows you how to create a
wired connection to a home network with
automatic IP address.
Use an Ethernet cable (sold separately) to
connect the WAC7500 to the access point
or router that connects to your home
network with broadband Internet access.
Turn on your wireless access point or
wireless router with broadband Internet.
Turn on the WAC7500.
On the item, press MENU .
Select [Settings] > [Network] > [Wired]
> [Static] and confirm.
Enter the static IP address with the remote
control and confirm with OK .
Select (Apply settings?) [Yes] and confirm.
» The WAC7500 displays a confirmation
screen that the settings are saved.
EN
You have the following options to build a music
library on the harddisk:
• rip music from CDs
• import music from a PC
• record music from FM radio
• record music from an external device
Music recognition technology and related
data are provided by Gracenote®. Gracenote
is the industry standard in music recognition
technology and related content delivery. For
more information, please visit www.gracenote.
com.
CD and music-related data from Gracenote,
Inc., copyright © 2000-2007 Gracenote.
Gracenote Software, copyright © 2000-2007
Gracenote. This product and service may
practice one or more of the following U.S.
Patents: #5,987,525; #6,061,680; #6,154,773,
#6,161,132, #6,230,192, #6,230,207,
#6,240,459, #6,304,523, #6,330,593,
#7,167,857, and other patents issued or
pending. Gracenote and CDDB are registered
trademarks of Gracenote. The Gracenote logo
and logotype, and the “Powered by Gracenote”
logo are trademarks of Gracenote.
Gracenote® is a registered trademark of
Gracenote, Inc. The Gracenote logo and
logotype, and the “Powered by Gracenote” logo
are trademarks of Gracenote.
The import of music into the WAC7500
requires the WADM (Wireless Audio Device
Manager) in the supplied PC installer.
Before you can import music from a PC that
is connected to a home network, you need to
connect the WAC7500 to the PC.
Install WADM software on
the PC
Install the WADM software on the PC and
open the application.
1
2
In the WADM main menu, click Content
Management.
In My Computer (top window), click to
select file(s).
EN
13
Eng lis h
Import music from a PC
Connect to a home network
5 Build a music
library on the
harddisk
3
Drag and drop selected file(s) to
WAC7500 (bottom window).
4
5
6
all tracks of the CD when no tracks are
marked.)
• Long press MARK/UNMARK to
select/deselect all tracks.
Press REC
to start ripping.
To rip another CD, repeat above steps 1 to
4.
To stop ripping, press
.
Tip
• For information about how to change the rip quality,
see chapter Settings.
Record music
You can record from 2 different sources.
Rip music from CDs on the
WAC7500
2
3
Rip from a CD to the harddisk of the
WAC7500 at high speed:
(Audio CD, MP3/WMA CD)
Note
• While the WAC7500 is ripping, only the stop
function is available.
Tip
• You can rip while you listen, if you press REC
•
1
2
3
14
play.
during
On the WAC7500, insert CD with printed
side facing you.
In the track list screen, press REC
.
Press MARK/UNMARK to select/deselect
tracks. (By default, the WAC7500 rips
EN
1
Press
• AUX to record from an external
device.
• FM TUNER to record from FM radio.
Press REC
.
To stop recording, press
.
6 Play
Note
Adjust volume
During play, press
volume.
• Internet radio features require broadband Internet
VOL
to adjust the
Mute the sound
Register the WAC7500 with Philips
You can turn off the sound of your audio.
1
During play, press MUTE .
• To turn the sound back on, press
MUTE again.
Play CD
1
2
Insert CD into the CD slot with printed
side facing you.
Press OK /
to play.
• To eject the CD, ensure the CD is in
stop mode and press .
This is how to navigate and select with the
remote control:
• Press or to select a menu option.
• Press to confirm a selection.
• Press to go back to the previous
screen.
• Press HOME to go to the Home menu.
2
Press HD to enter the HD music menu.
» The display guides you through the
menu.
Press OK/ to play.
• To stop play, press
1
2
3
4
5
6
7
8
Play HD music
1
access.
• Internet radio features require registration.
Build a music library on the harddisk
1
Eng lis h
Internet radio
.
9
The following steps show you how to
register the Internet radio feature.
Turn on the WAC7500.
Turn on your wireless access point or
wireless router with broadband Internet.
Ensure you have a valid email address.
Press HOME.
Press or , then to select[Radio] >
[Internet Radio].
» The display shows the Internet radio
registration screen.
Press alphanumeric buttons on the remote
control to enter the valid email address.
Press OK/ .
» The display confirms the automated
email dispatch to your mailbox.
Check your email inbox for a message
from [email protected] with
the subject Your Streamium Registration....
10Follow the instructions in the email to
•
complete your registration process on the
Philips website.
To return to the Home menu, press
HOME.
Listen to Internet radio
1
2
Follow the steps to register the WAC7500
with Philips (only required once for first
set-up).
Turn on the WAC7500.
EN
15
3
4
5
•
•
Turn on your wireless access point or
wireless router with broadband Internet.
Press HOME.
Press or , then to select[Radio] >
[Internet Radio].
Press or , then to select the Internet
radio service.
To return to the Home menu, press
HOME.
1
2
3
4
5
6
Note
• Internet radio features require broadband Internet
access.
Mark Internet radio stations as
Favorites
2
3
4
Follow the steps to register the WAC7500
with Philips.
When you listen to Internet radio, press
to mark the station.
• To return to the Home menu, press
HOME.
• The next time you connect to the
Internet radio, the radio station is
shown in the Favorite Stations menu.
Note
• Internet radio features require broadband Internet
access.
Listen to Favorite Stations
You must store Internet radio stations as
Favorites, before you can use this feature.
16
EN
Turn on the WAC7500.
Turn on your access point / cable modem
or router with broadband Internet.
Press HOME .
Press or , then to select[Radio]
> [Internet Radio] > [User ID] (user
identification name that was used for the
registration) > [Favorite Stations].
• Press HOME to go to the Home
menu.
• Internet radio features require broadband Internet
access.
Tip
• You can also organize your Favorites under Steamium
Management on the Philips website.
Turn on the WAC7500.
Turn on your access point / cable modem
or router with broadband Internet.
Follow the steps to mark Internet radio
stations as Favorites.
Note
You can mark Internet radio stations as your
Favourites so next time you want to listen to a
station, it is easy to find.
1
Follow the steps to register the WAC7500
with Philips.
Manually add Internet radio stations
This chapter explains how to add individual
URL addresses for Internet radio stations on
the PC.
1
2
3
4
5
6
Follow the steps to register the WAC7500
with Philips, if you have not done so
already.
On the registered product site, click the
link Streamium Management.
Select My Media.
Click on the tab Music.
Enter the URL address of Internet radio
station in the first column.
Enter a nickname in the second column.
Eng lis h
access.
Click on Save to confirm your entries.
• If the manually added Internet radio station is available
•
• Internet radio features require broadband Internet
Enter a description in the third column.
Note
•
Note
and broadcast in a compatible format, you can listen to
it on the WAC7500.
You can find the manually added Internet radio stations
in the My Media list on the WAC7500.
Internet radio features require broadband Internet
access.
Play
7
8
» The nickname is the Internet radio
stations identification that is displayed
the WAC7500.
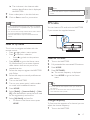
FM radio
You can listen to FM radio with the WAC7500,
if you connect the supplied antenna:
Listen to My Media
This is how to navigate and select with the
remote control:
• Press or to select a menu option.
• Press to confirm a selection.
• Press to go back to the previous
screen.
• Press HOME to go to the Home menu.
My Media allows you to access Internet
radio stations that are not part of the
standard service.
1
2
3
4
5
6
7
Follow the steps to register the WAC7500
with Philips.
Listen to FM radio
1
2
3
4
Turn on the WAC7500.
Fully extended the connected FM antenna.
Press HOME .
Press FM TUNER .
» The current frequency is displayed.
» Press HOME to go to the Home
menu.
Follow the steps to manually add Internet
radio stations.
Turn on the WAC7500.
Turn on your access point / cable modem
or router with broadband Internet.
Press HOME .
Select [Radio] > [Internet Radio] > [User
ID] (user identification name that was used
for the registration) and confirm.
Select [My Media] and confirm.
• To return to the Home menu, press
HOME.
Tip
• You can optimize the reception when you rotate the
FM antenna.
• You can use the automatic search & store function to
store channels under presets.
Change frequency
To fine tune the reception of a channel, you can
adjust the channel frequency.
1
Turn on the WAC7500.
EN
17
2
3
4
» The current frequency is displayed.
Press HOME .
Press FM TUNER .
» The current frequency is displayed.
4
Press
to adjust the frequency.
• Press HOME to go to the Home
menu.
» Press MENU .
Select [Autostore radio].
» The WAC7500 searches and stores
channels.
» When all available channels are stored,
the search stops.
» Press HOME to go to the Home
menu.
Tip
• You can store channel frequencies under a preset
channel number.
Select preset channels
Automatic channel search
The WAC7500 can automatically search
available channels.
1
2
3
4
5
6
7
Turn on the WAC7500.
Press HOME .
Press FM TUNER .
» The current frequency is displayed.
Press and hold or to start automatic
search function.
» When a channel is found, the search
stops.
Press MENU .
Select [Save to Preset].
Press or , then to select.
» The frequency is stored under the
selected preset number.
» Press HOME to go to the Home
menu.
Automatic channel search &
autostore
The WAC7500 can automatically search and
store up to 60 channels under the preset
numbers.
1
2
3
18
Turn on the WAC7500.
Press HOME .
Press FM TUNER .
EN
You can find your preset channels in the preset
channel list.
1
2
3
4
5
Turn on the WAC7500.
Press HOME .
Press FM TUNER .
» The current frequency is displayed.
Press to display preset channel numbers.
Press or , then to select.
• Press HOME to go to the Home
menu.
Manual search & store
You can manually search and store channels.
1
2
3
4
5
6
7
Turn on the WAC7500.
Press HOME .
Press FM TUNER .
» The current frequency is displayed.
Press
to change the frequency.
Press MENU .
Select [Save to Preset].
Press or , then to select.
» The frequency is stored under the
selected preset number.
» Press HOME to go to the Home
menu.
• You can overwrite preset channel numbers with new
frequencies.
Wirelessly stream music from
a PC
You can wirelessly stream music to the
WAC7500 from a connected PC, if you install
Windows Media Player 11 on the PC (see
‘Install Windows Media Player 11’ on page 19)
and configure the PC to share your music. (If
Windows Media Player 11 is already installed
on the PC, you can skip the installation section
and continue with the configuration. For any
other media players, refer to the instructions
supplied with the player.)
Install Windows Media Player 11
1
2
On the PC, insert the supplied software
CD.
» Installation starts.
» If installation does not start, click on
the
icon in your Explorer program.
5
6
7
8
9
In the Media sharing... pop-up window,
select Share my media, then confirm with
OK.
» When the WAC7500 is connected to
your home network, the display shows
the WAC7500 with an alert icon:
Click on the WAC7500.
Select Allow, then confirm with OK.
On the WAC7500, press HOME .
Press or , then to select[UPnP].
» The WAC7500 searches for the
source, then displays the list of media
servers.
Press or , then to select the PC
name (the Windows Media Player adds an
identifier after the PC name) and confirm.
Play from a flash memory
USB device
You can play music from a USB device. You can
also transfer the music library of the WAC7500
to a USB mass storage device.
1
Insert the USB plug of the USB device into
the USB socket of the WAC7500.
Follow the instructions on the PC to install
Windows Media Player 11.
Configure a PC to share music
You can share music from a PC with the
WAC7500. This chapter shows you how to
configure the PC to share music.
1
2
3
Follow the instructions to install Windows
Media Player 11 (see ‘Install Windows
Media Player 11’ on page 19).
On the PC, click Start > Programs >
Windows Media Player.
In the Windows Media Player interface,
right click on the Library pull-down menu
at the top of the screen and select Media
sharing....
2
3
4
Eng lis h
4
Play
Tip
On the WAC7500, press HOME .
Press or , then to select[Portable] >
[USB].
» The display shows the USB device.
Press or , then to select the USB
content,
EN
19
•
Press HOME to go to the Home
menu.
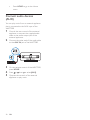
Connect audio devices
(AUX)
You can play music from an external appliance
that is connected to the AUX input of the
WAC7500.
1
2
3
4
5
20
Consult the user manual of the external
appliance to connect the supplied audio
cable to the audio output jack of the
external appliance.
Connect the other end of the audio cable
to the AUX IN jack of the WAC7500.
On the remote control of the WAC7500,
press HOME .
Press or , then to select[AUX].
Operate the controls of the external
appliance to play music.
EN
Repeat play
You can repeat one or all audio files of the
current selection.
1
In play mode, press REPEAT to toggle the
repeat function as follows:
• Repeat 1
• The current audio file is continuously
repeated until another mode or
setting is selected.
• Repeat all
• All audio files of the current selection
are continuously repeated until
another mode or setting is selected.
• Off (default)
Shuffle play
You can play the audio files of the current
selection in random order (shuffled).
1
During play, press SHUFFLE to toggle
shuffle on and off.
» When you turn shuffle on, the current
selection of audio files is played in
random order.
Eng lis h
You can choose between various play options:
• Repeat play (see ‘Repeat play’ on page 21)
• Shuffle play (see ‘Shuffle play’ on page 21)
• Play by artist (see ‘Play by artist’ on page
21)
• Play by genre (see ‘Play by genre’ on page
21)
• Play from a playlist (see ‘Play from a playlist’
on page 22)
Play by artist
You can play all audio files of the same artist
from the HD of the Philips Wireless Music
Center.
1
When you play HD audio, press SAME
ARTIST .
Play
7 Play options
Play by genre
You can play all audio files of the same genre
from the HD of the Philips Wireless Music
Center.
1
When you play HD audio, press SAME
GENRE .
Create a playlist
You can create up to 99 playlists on the hard
disk of the connected Philips Wireless Music
Center.
1
2
3
Press HD to enter HD mode.
Press MENU to enter the HD menu.
Press or , then to select[Create
Playlist].
» A new playlist with a default album
name, such as Playlist_001, is created.
» Press HOME to go to the Home
menu.
Add audio files to a playlist
This is how to navigate and select with the
remote control:
• Press or to select a menu option.
• Press to confirm a selection.
• Press to go back to the previous
screen.
• Press HOME to go to the Home menu.
EN
21
1
2
3
4
5
6
You can add up to 300 audio files to a
playlist.
Turn on the WAC7500.
On the remote control, press HD .
Select an audio file.
Press MENU to enter the HD menu.
Select [Add To Playlist] and confirm.
Select playlist and confirm.
» The audio file is added to the selected
playlist.
» Press HOME to go to the Home
menu.
Play from a playlist
This is how to navigate and select with the
remote control:
• Press or to select a menu option.
• Press to confirm a selection.
• Press to go back to the previous
screen.
• Press HOME to go to the Home menu.
1
2
3
4
5
6
•
22
Turn on the WAC7500.
On the remote control, press HD .
Press MENU to enter the HD menu.
Select [Playlists].
Select the playlist.
Press OK/ to play.
To stop play, press .
• Press HOME to go to the Home
menu.
EN
Eng lis h
8 Record from
HD to USB
1
2
3
4
5
6
Play options
You can record music files from the HD
(harddisk) of the WAC7500 to a flash memory
USB device.
Insert the USB plug of the USB device into
the USB socket of the WAC7500:
Use the remote control of the WAC7500
for the following steps:
Press HD .
Press REC.
Press MARK/UNMARK to select/deselect
tracks. (By default the WAC7500 records
all tracks of the HD when no tracks are
marked.)
• Press MARK/UNMARK for 2 seconds
to select/deselect all tracks.
Press RECto start recording.
To stop recording, press
.
EN
23
9 Alphanumeric
search
You can search for specific audio files on the
HD (harddisk) of the WAC7500.
1
2
3
4
5
6
7
24
Turn on the WAC7500.
Press HD .
» The display shows the available lists.
Press or , then to select the list.
Press SEARCH .
» The display shows a text box.
Press the alphanumeric buttons on the
remote control to enter the search word.
Press OK/
to start the search.
» The WAC7500 shows the closest
alphabetical match.
To stop the search, press .
• Press HOME to go to the Home
menu.
EN
Eng lis h
10Gracenote® CD
information
Alphanumeric search
Gracenote® CD Information
Gracenote MusicID® provides the set with CD
track information (including album, artist, genre,
track information) from its built-in database. It
allows the recorded CD tracks to be properly
categorized (for example, under Artists, Albums,
Genres or All tracks) and be merged with the
existing tracks in the hard disk.
Gracenote® Media Database
A CD database is embedded in every
WAC7500 for quick look-up on track
information. An update file that contains newly
released CDs is available quarterly on www.
club.philips.com for download.
Update Gracenote® Media Database
Use your PC to register your product on www.
club.philips.com and go to “Show Upgrades
& Support” page to download Gracenote®
Media Database update. Note that the updates
are posted quarterly and new updates are
independent from old updates, i.e. a new
update can be installed, even without the
previous update.
EN
25
11Settings
Change Equalizer (EQ)
settings
This is how to navigate and select with the
remote control:
• Press or to select a menu option.
• Press to confirm a selection.
• Press to go back to the previous
screen.
• Press HOME to go to the Home menu.
•
•
•
•
•
•
•
1
2
3
4
You can adjust the audio sound with the
following equalizer settings:
[Rock]
[Pop] (default)
[Jazz]
[Neutral]
[Techno]
[Classical]
[Treble/Bass]
Turn on the WAC7500.
Press MENU .
Select [Equalizer] and confirm.
Select a menu option and confirm.
• Press HOME to go to the Home
menu.
Activate Smart EQ
1
2
26
Adjust treble / bass
This is how to navigate and select with the
remote control:
• Press or to select a menu option.
• Press to confirm a selection.
• Press to go back to the previous
screen.
• Press HOME to go to the Home menu.
1
2
3
4
5
6
Turn on the WAC7500.
Press MENU .
Select [Settings] and confirm.
Select [Treble/Bass]and confirm.
Select [Treble] or [Bass] and confirm.
Press or to adjust the setting and
confirm.
• To return to the Home menu, press
HOME.
Set Dynamic Bass Boost
(DBB)
You can choose from the following DBB
settings:
• [DBB1]
• [DBB2]
• [DBB3]
• [DBB OFF] (default)
1
To toggle between the settings, press DBB .
Turn on the WAC7500.
Press SMART EQUALIZER to toggle
between the options:
• activate Smart EQ
• deactivate Smart EQ
• The Smart EQ function automatically
selects equalizer settings according to
the genre that is associated with the
audio file.
• If no genre is associated with the
audio file, the default setting is Pop.
EN
Activate Incredible Surround
sound
1
To activate the Incredible Surround sound
feature, press INCR.SURR. .
• To deactivate the feature, press the
button again.
This chapter shows you how to change the
time settings.
4
5
Synchronize with RDS radio station
RDS (Radio Data System) is a service
that allows FM stations to send additional
information along with the FM radio signal.
Automatic time synchronization is one of the
RDS features.
1
2
3
4
5
6
Ensure that the radio station you select for
synchronization has RDS.
Turn on the WAC7500.
Press MENU .
Press or , then to select[Settings] >
[Time] > [Auto Time Sync].
Press or , then to select the RDS
station.
Press HOME to go to the Home menu.
4
5
Press to go back to the previous screen.
• Press HOME to go to the Home
menu.
You can select a set time period after which the
WAC7500 automatically switches to standby.
The timer offers the following options in
minutes:
• [Sleep 15]
• [Sleep 30]
• [Sleep 45]
• [Sleep 60]
• [Sleep 90]
• [Sleep 120]
• [Sleep off]
1
2
Ensure that the WAC7500 is turned on.
Turn on the WAC7500.
Press SNOOZE one or more times to
select a time period.
» When you set the timer, the display
shows the sleep icon:
» To view the remaining countdown time
to standby, press SNOOZE anytime.
Press MENU .
Press or , then to select[Settings] >
[Time] > [Set Time].
Press or to adjust the setting and
confirm with OK .
Alarm
Press to go back to the previous screen.
• Press HOME to go to the Home
menu.
You can set the alarm feature of the WAC7500
and choose from different repeat modes.
This is how to navigate and select with the
remote control:
• Press or to select a menu option.
• Press to confirm a selection.
• Press to go back to the previous
screen.
• Press HOME to go to the Home menu.
Tip
• You can also press the numeric buttons (0-9) and enter
the time directly.
Set the time format
1
2
Press or , then to select format.
Set standby timer
Set the time manually
1
2
3
Press or , then to select[Settings] >
[Time] > [Time Format].
Turn on the WAC7500.
1
2
Press MENU to enter the menu screen.
Select [Settings] > [Alarm].
Press MENU .
EN
27
Eng lis h
3
Settings
Time settings
3
4
5
6
Select [On] to activate the alarm and enter
the alarm settings.
• Select [Off] (default) to deactivate
the alarm.
Press or to adjust the setting, then
press to confirm the adjustment.
Press OK to confirm the alarm time
settings.
Press or , then to select the repeat
mode [Once] or [Daily].
» The display briefly shows [Alarm on]
and the alarm icon remains visible
while the alarm feature is activated.
Change language
You can change the language that you have set
during the first-time installation.
1
2
3
4
5
Turn on the WAC7500.
Press MENU .
Select [Settings] > [Language].
Press or , then to select the language.
Press HOME to go to the Home menu.
Update
•
Update through PC connection
This chapter shows you how to install the
WADM (Philips Wireless Audio Device
Manager) software. The WADM is necessary to
search and download software updates for the
WAC7500.
1
2
3
4
5
6
7
Maintenance
This chapter tells you how to care for your
WAC7500.
Cleaning
Note
• Avoid moisture and abrasion.
1
28
Clean the WAC7500 only with a soft dry
cloth.
EN
When the WAC7500 is connected to
a PC, you can download new firmware
updates.
8
9
On the PC, visit the www.philips.com/
welcome.
Download the latest software for the
WAC7500 to the harddisk of the PC.
Turn on the WAC7500.
Ensure that the WAC7500 is connected to
the network of the PC.
Insert the supplied software CD into the
PC.
Follow the instructions on the PC to install
WADM.
When the security alert message
(Microsoft Windows Firewall) pops up,
press ‘Unblock’ to allow the WADM
application to run on the PC.
» The firewall is still effective and only
allows the WADM to run.
On the WADM screen, select Device
Configuration.
In the Device Configuration screen, select
Firmware upgrade and click OK.
10Click Browse to locate the software image
file that you saved on the harddisk of the
PC.
11Click OK to start the update.
» The software update progress is
shown.
» When the software installation is
complete, the WAC7500 restarts.
Tip
Eng lis h
• You can also consult the user manual of the PC and
Time settings
manually add the WADM application to your list of
programs that are safe to run.
Restore the default settings
You can restore the default settings (including
network settings) of the WAC7500.
1
2
3
4
5
6
Turn on the WAC7500.
Press HOME to go to the Home menu.
Press MENU to enter the menu display.
Press or , then to select[Settings] >
[Restore settings].
Press .
Press to select [Yes].
» The WAC7500 restarts when the
factory settings are restored.
» The language selection display is
shown.
Tip
• You can restore the default settings without losing
the audio files on the harddisk of a connected PC or
Center.
EN
29
12Add a Philips
Wireless Music
Station (sold
separately)
5
6
You can add up to 5 Philips Wireless Music
Stations (sold separately) and expand your
wireless music to other locations in your home.
Follow the instructions of the Philips
Wireless Music Station to enter the
‘Installation Mode’ on the Station. (The
Philips Wireless Music Station must be in
‘Installation Mode’ so that the WAC7500
can find it.)
When the display of the WAC7500 shows
that the Philips Wireless Music Station is
found, press .
» The WAC7500 stops to search.
» You can relocate the devices.
Note
Add a Philips Wireless Music
Station to the WAC7500
This connection creates a wireless of the Philips
Wireless Music Station to the home network
that the WAC7500 connects to:
1
2
3
4
Place the WAC7500 and the Philips
Wireless Music Station next to each other.
Follow the instructions of the Philips
Wireless Music Station to connect the
Station to the power supply.
2
3
4
30
can impair the wireless connection.
Broadcast music to Philips Wireless
Music Stations
Note
• This feature requires that you first connect the
WAC7500 to a Philips Wireless Music Station (sold
separately) (see ‘Add a Philips Wireless Music Station
(sold separately)’ on page 30).
Turn on the WAC7500.
Turn on the Philips Wireless Music Station.
• If you turn on the Philips Wireless
Music Station for the first time, follow
the instructions of the Philips Wireless
Music Station to select the language.
• The devices are ready for the
connection setup.
Connection setup:
1
• Thick walls and metal obstacles between the devices
On the remote control of the WAC7500,
press HD.
Press MENU to enter the menu screen.
Press or , then to select[Station
Mgnt].
Press or , then to select[Add New
Station].
» The WAC7500 searches for Philips
Wireless Music Stations.
EN
1
2
3
Turn on the Philips Wireless Music Station.
Turn on the WAC7500.
While playing music, press MUSIC
BROADCAST .
» After a short delay, all connected
Philips Wireless Music Stations play
the music you broadcast from the
WAC7500.
» To stop the broadcast on the
WAC7500, press .
» To stop the broadcast on the
connected Philips Wireless Music
Station, press .
• This feature requires that you first connect the
WAC7500 to a Philips Wireless Music Station (sold
separately) (see ‘Add a Philips Wireless Music Station
(sold separately)’ on page 30).
As you move around at home, let the music
move with you between the WAC7500 and
one or more connected Philips Wireless Music
Stations. The unit where the music is playing is
the source unit. The unit to which you want to
move the music is the destination unit.
1
2
3
Ensure that source unit and the destination
unit are turned on.
On the source unit, press MUSIC
FOLLOWS ME .
» The displays of the source unit and
the destination unit show an icon to
indicate that the feature is activated.
On the destination unit, press MUSIC
FOLLOWS ME .
» The icon disappears from the displays.
Press or , then to select[Yes].
» The Philips Wireless Music Station
is deleted from the network of the
WAC7500.
Relocate a connected WAC7500 or
Philips Wireless Music Station
1
2
3
Turn off (or switch to Eco Standby) the
device you want to relocate.
Disconnect the device from the power
supply.
Reconnect the device to the power supply
in the new location.
» The Wi-Fi connection recovers
automatically.
Note
• Thick walls and metal obstacles between the devices
can impair the wireless connection.
» The music play simultaneously stops
on the source unit and starts on the
destination unit.
» To stop the music play, press
unit where the music plays.
on the
Delete a Philips Wireless Music
Station from the WAC7500
1
2
3
4
On the remote control of the WAC7500,
press HD .
Press MENU .
Press or , then to select[Station
Mgnt].
Press or , then to select[Delete
Station].
» The display shows all the Philips
Wireless Music Stations that are
connected to the network of the
WAC7500.
EN
31
Eng lis h
6
Note
Press or , then to select the Philips
Wireless Music Station you want to delete.
Add a Philips Wireless Music Station (sold separately)
5
Music Follows Me
13Technical data
General
AC Power
Voltage information is
printed on the back or
the underside of the
WAC7500.
Dimensions (w x 387 x 272 x 128 mm
h x d)
Weight (net)
Main unit: ~ 3.6 kg
Power consumption
On
< 25 W
Standby (active)
< 20 W
ECO (passive) standby < 1 W
Amplifier
Output power
Frequency response
Signal to noise ratio
2 x 7.5 + 15 W (RMS)
60 - 20,000 Hz (-3 dB)
72 dBA (IEC)
Speakers - tweeter
Power
20 W (RMS) / 30 W
(MPO)
Frequency response 1 kHz - 20 kHz
Sensitivity
76 dB / m / W
Impedance
6Ω
Dimensions (w x h) 72 x 42 mm
Speakers - mid range
Power
20 W (RMS) / 30 W
(MPO)
Frequency response 130 Hz - 5 kHz
Sensitivity
76 dB / m / W
Impedance
6Ω
Dimensions (w x h) 75 x 75 mm
Speakers - sub-woofer
32
EN
Power
50 W (RMS) / 75 W
(MPO)
Frequency response 75 Hz - 500 Hz
Sensitivity
83 dB / m / W
Impedance
12 Ω
Dimensions (Ø)
125 mm
Headphone
Impedance
16 - 150 Ω
Input sensitivity
AUX IN
500 mV
Wired (LAN / Ethernet)
Wired standard
Speed
Mode
Crossover detection
(Auto MDIX)
802.3 / 802.3 u
10 / 100 MBit/s
half / full duplex
Yes (Auto MDIX)
CD player
Frequency range
Signal to noise
ratio
M4A (AAC) bit
rate
MP3 bit rate
WMA bit rate
Sampling
frequencies
HD player
60 - 20,000 Hz (-3 dB)
75 dBA (IEC)
16 - 320 kbps, CBR / VBR
32 - 320 kbps, CBR / VBR
up to 192 kbps, CBR / VBR
32, 44.1, 48 kHz
Sampling
frequencies
HD storage
cpacity
MPEG AUDIO
•
Ethernet enabled, plus Ethernet cable
(for wired connection)
• Wireless network 802.11 b/g (for
wireless connection)
500 MB free hard disk space
32 - 320 kbps, CBR / VBR
up to 160 kbps, CBR /
VBR
32, 44.1, 48 kHz
80 GB (actual formatted
capacity will be less)
USB player
USB
USB class
Number of tracks
/ titles
12 Mbps, V1.1 (supports
MP3, WMA and M4A
files)
MSC, MTP
maximum 9999
Specifications and external appearance are
subject to change without notice.
Supplied accessories
•
•
•
•
•
Eng lis h
•
60 - 20,000 Hz (-3 dB)
72 dBA (IEC)
Technical data
Frequency range
Signal to noise
ratio
MPEG 1 Layer 3
(MP3-CD)
MP3-CD bit rate
WMA bit rate
Remote control
2 AAA batteries
AC power cable
FM radio antenna
Software CD-Rom
PC connection requirements
The minimum requirements for PC connections
are:
• Windows 2000 SP4 (or above) / XP SP2
/ Vista
• Pentium III 500 MHz processor or higher
• 256 MB RAM
• CD-ROM drive
• Adapter
EN
33
14Troubleshooting
Caution
• Never try to repair the system yourself as this will
invalidate the warranty.
• Do not open the system as there is a risk of electric
shock.
• If a fault occurs, first check the FAQ points, then consult
your dealer or Philips for help.
The WAC7500 is connected to a home
network and music skips during play (from any
source including HD), what do I do?
Ensure that the network router is turned
•
on.
Ensure that the network settings are
•
correct for the selected network (see
section ‘Connect to a home network’).
I cannot hear any sound or the sound is poor,
what do I do?
Press VOL to increase the volume.
•
Press the MUTE button again to reactivate
•
the sound output.
The radio reception is poor, what do I do?
Adjust the antenna for better reception.
•
Increase the distance between the
•
WAC7500 and TV or VCR devices.
Is there a maximum distance of transmission
between a Philips Wireless Music / Micro
Center and the WAC7500 for effective
streaming?
Yes. The maximum distance of Wi-Fi
transmission is 250m measured in open spaces.
However, in a home environment, where solid
obstacles such as walls and doors are present,
the effective transmission distance is reduced
to 50-100m. Reposition the devices if you
experience transmission problems.
How do I avoid Wi-Fi interferences from
other devices that operate in the same
(2.4GHz) frequency spectrum, such as Dect
phones or bluetooth devices?
Move the WAC7500 at least 3m away
•
from such devices.
34
EN
•
Use a WEP/WPA encryption key when
you create the wireless connection your
PC / home network.
Change the operating channel on the
•
interfering devices.
Turn the devices in different directions to
•
minimize interference.
The wireless firmware update failed, what do
I do?
1
2
3
Ensure that the PC is connected to the
Internet.
Use an Ethernet cable (sold separately) to
connect the WAC7500 to the PC.
On the PC, launch the WADM to update
the firmware.
I have done all the steps described to connect
the WAC7500 to my wireless home network,
but the WAC7500 is still not connected.
On the WAC7500, press MENU . Select
•
[Information] > [Wireless] > [Wireless
Mode]. Check that the WAC7500 has
been changed from Ad hoc mode to
Infrastructure mode. Also check that the
SSID, IP address, WEP key, or WPA key
matches the setup of your wireless home
network.
Try to change the SSID on your router
•
to a more unique name to ensure that
it is different from the SSID that your
neighbors use for their router.
The WAC7500 supports wireless and
•
wired connection at the same time. There
is a chance that your wireless IP address
and your wired IP address are on the
same subnet. This will confuse the device.
Consider changing the DHCP range of
your wireless router so that the wireless
IP received by the device is on a different
subnet from its wired IP address.
Try to change the channel of your home
•
network settings on the router.
On your router, consider using a WPA key
•
instead of a WEP key. When you use a
WEP as your encryption key, set all 4 keys
to be the same.
1
2
3
Ensure that the PC is connected to the
Internet.
•
•
•
•
Check if the disc is inserted with the
graphics side (label) facing up.
Wait for the condensation moisture on the
lens to clear.
Replace or clean the disc.
Use a finalized CD-RW or CD-R.
Eng lis h
Ensure that the turbo mode of your
wireless router is switched off, if your
router has this function.
The wireless firmware update failed, what do
I do?
Troubleshooting
•
Use an Ethernet cable (sold separately) to
connect the WAC7500 to the PC.
On the PC, launch the WADM on the PC
to update the firmware.
I have problems installing WADM or launching
WADM after installation, what do I do?
Ensure that the operating system of the PC
•
meets the requirements.
Ensure that the PC is virus-free.
•
Some files on the USB device are not
displayed, what do I do?
Check if the number of folders exceeds 99
•
or the number of titles exceeds 999.
Only completely recorded MP3/WMA files
•
can be found and played. Check if the file
has been recorded completely.
DRM-protected WMA files cannot be
•
played.
The remote control does not function
properly, what do I do?
Reduce the distance between the remote
•
control and the WAC7500.
Insert the batteries with correct polarity
•
(+/- as indicated inside the battery
compartment).
Replace the batteries.
•
Point the remote control directly at the
•
infrared sensor.
The screen of the WAC7500 is stuck in a
menu or shows no response for a long period
of time (2-5 minutes), what do I do?
Press .
•
If the problem persists, restart the power
•
(disconnect and reconnect the power
plug) to reset the WAC7500.
‘No Disc’ / ‘Cannot read CD’ is displayed,
what do I do?
Insert a suitable disc.
•
EN
35
15Glossary
A
AAC (Advanced Audio Coding)
An audio compression scheme defined as part
of the MPEG-2 standard (also known as MPEG2 AAC or MPEG-2 NBC, or Not Backwards
Compatible). It offers better sound and a
compression ratio that is superior by roughly 30
percent compared to the MPEG-1 MP3 format.
AC (alternating current)
An alternating current is an electrical current
whose magnitude and direction vary cyclically,
as opposed to DC (direct current), whose
direction remains constant. The usual waveform
of an AC power circuit is a sine wave, as this
results in the most efficient transmission of
energy. However certain applications use
different waveforms, such as triangular or square
waves.
Amplifier
A device, either a single stage or a large scale
circuit with multiple stages for creating gain, i.e.
it makes small signals larger.
Antenna
A device, such as a rod or wire, which picks up
a received radio frequency signal or radiates a
transmitted RF signal.
Audio output
High-level (speaker) or line-level (RCA) signals
sent from one system component to another;
or the high-level signal from an amplifier to the
system speakers.
AUX
Auxiliary input that allows you to connect
portable audio devices.
36
EN
B
Bass
The lowest three octaves of the audio band.
Low bass is the bottom octave (20-40Hz), midbass is the middle octave (40-80Hz), and upper
bass is the 80-160Hz octave.
Bit / bits
A bit is a binary digit, taking a value of either 0
or 1. For example, the number 10010111 is 8
bits long.
Bit rate
Bit rate is the number of bits that are conveyed
or processed per unit of time. The bit rate is
usually measured in some multiple of bits per
second (kilobits per second: kbps). The term
bit rate is a synonym for data transfer rate (or
simply data rate).
Bluetooth
A short-range wireless protocol that is meant
to allow mobile devices to share information
and applications without the worry of cables or
interface incompatibilities. The name refers to a
Viking King who unified Denmark. Operates at
2.4 GHz. For more information, see bluetooth.
com.
C
CBR (constant bit rate)
With CBR the encoder spends the same
amount of bits on each frame, regardless of
how much it may really need. Disadvantage
of CBR: Bits are wasted in case of absolute
blackness of a picture or complete silence in an
audio frame. And pictures or audio frames with
a lot of elements may need those bits.
CD (Compact Disc)
Format developed by Phillips, Sony, and Pioneer
for conveying music and data. CDs record
information by deforming the inner metal foil
on the disc with tiny micro pits burned in by a
laser.
Coaxial
A single copper conductor, surrounded with
a layer of insulation, covered by a surrounding
copper shield and finally, an insulating jacket.
An unbalanced transmission line with constant
impedance. In audio, this type is commonly used
for low level, line signals terminated in RCA
connectors.
Compression
In audio terms, this is a process of temporarily
or permanently reducing audio data for more
efficient storage or transmission. A temporary
reduction in file size is called ‘non-lossy’
compression, and no information is lost. A
permanent reduction in file size (such as with
MP3 files) is called ‘lossy’ compression, and
involves discarding unnecessary information
which is irretrievably lost.
D
dB (Decibel)
A unit of measure used to express relative
difference in power or intensity of sound.
D
DC (direct current)
Direct current or continuous current is the
constant flow of electric charge. This is typically
in a conductor such as a wire. In direct current,
the electric charges flow in the same direction,
distinguishing it from AC (alternating current).
DHCP
DHCP stands for Dynamic Host Configuration
Protocol. It is a protocol for assigning dynamic
IP addresses to devices on a network.
Digital Audio
Digital Audio is a sound signal that has been
converted into numerical values. Digital sound
can be transmitted through multiple channels.
Analog sound can only be transmitted through
two channels.
Duplex (half/full)
• Full duplex is the ability to send and
receive data simultaneously. Duplex is
synonymous with full duplex. Example:
when a modem operates in full-duplex
mode, it can transmit data in two
directions simultaneously. In half-duplex
mode it can transmit data in two directions,
but not simultaneously.
E
Eco (Eco Standby)
Eco Standby is the most ‘economic’ mode of
the WAC7500 and consumes less than 1W. It is
‘economic’ and environmentally friendly to use
this mode during longer times of non-usage of
the WAC7500.
EQ (Equalizer)
A class of electronic filter circuits designed
to augment or adjust electronic or acoustic
systems. Equalizers can be fixed or adjustable,
active or passive. Many equalizers divide the
spectrum into 3 to 12 bands. This allows each
section to be either increased or decreased in
amplitude without changing the response of
the rest.
F
Fidelity
A term used to describe the accuracy of
recording, reproduction, or general quality of
audio processing. “High Fidelity” (Hi-Fi) is the
goal of every designer.
EN
37
Eng lis h
Digital
A method to encode information using a binary
code of 0s and 1s. Many wireless phones and
networks use digital technology.
Glossary
CDDB
A centralized database of CDs, CD tracks, and
artists on the Web, now known as Gracenote.
The audio player or burner program can log on
to CDDB. It uploads the ID of the CD being
played, and then downloads the title, artist, and
track list.
FM (Frequency Modulation)
In radio broadcasting: a method of modulation
in which the frequency of the carrier voltage
is varied with the frequency of the modulation
voltage.
Incredible Surround Sound (Incr.Surr.)
An improved system that creates realistic, threedimensional sound fields. These sound fields are
usually achieved with multiple speakers that are
arranged around the listener.
Frequency
The property or condition of occurring at
frequent intervals. In sound, this simply refers
to the regular occurrence of compression and
rarification of air that we experience as sound.
Input sensitivity
SPL (sound pressure level) a speaker produces,
given one watt of power, measured from a
one-meter distance at a typical input frequency
(usually 1kHz unless otherwise noted on the
speaker).
Frequency Response
Is the range of frequencies that a speaker
reproduces, lowest frequency to the highest.
While the optimal normal is 20-20,000 Hz
(Hertz), the range of human hearing for
individuals is often much more restricted.
A good full-range speaker system however,
reproduces as much of this range as possible to
cover all variations. Individual drivers are limited
to reproduce only that part of the spectrum
for which they were made, so their response is
limited, but still a necessary point to consider
when designing a complete sound system.
H
Hi-Fi (High Fidelity)
A method of sound reproduction that
emphasizes the highest possible adherence to
the exact character of the original sound. This
is a principal that must be paramount in every
stage of the recording, transportation, and
recreation of the signal to be fully operational. It
is usually the listener’s equipment wherein this
objective is most seriously compromised.
Interface
A device or protocol which facilitates the linking
of any two devices or systems; or when used as
a verb (‘to interface’), the process of linking.
IP address
An IP (Internet Protocol) address is a unique
computer address that enables electronic
devices to communicate with and identify each
other.
K
Kbps
Kilobits per second. A digital-data-rate
measurement system which is often used with
highly compressed formats such as AAC, DAB,
MP3 etc. The higher the amount, the better the
quality generally is.
K
kHz (kilo Hertz)
1000Hz or 1000 cycles per second.
Hz (Hertz)
Cycles per second, named after Heinrich Hertz.
L
I
LCD (Liquid Crystal Display)
Probably the most common way to show
visual information on non-computer electronic
equipment.
Impedance
The resistance to the flow of an electric current
in a circuit. This is effectively the electrical load
that a loudspeaker presents to the amplifier
which drives it and is measured in ohms.
38
EN
M4A
The audio file format used by Apple in their
iTunes Music Store often appears on your
system with the ‘.m4a’ filename extension. M4A
can produce better audio quality than MP3
using less physical space for the files.
MHz (Mega Hertz)
One million cycles per second.
Midrange
The middle three octaves (more or less) of the
audio band, where the ear is most sensitive,
usually between 160Hz-3kHz.
Mono (monaural)
The operation of an amplifier in one channel
for both input and output. Can refer to an
amplifier with only one channel of amplification
or operating in bridged mode. For lowfrequency amplification applications, it provides
better phase coherence and less distortion than
stereo operation.
MP3
A file format with a sound data compression
system. MP3 is the abbreviation of Motion
Picture Experts Group 1 (or MPEG-1) Audio
Layer 3. With the MP3 format, one CD-R or
CD-RW can contain about 10 times more data
than a regular CD.
Mute
A control found on receivers, and some mixers
or signal processing units that silences (mutes) a
signal path, or output.
Ohm
Measure of resistance to current (impedance).
The lower the impedance of a speaker, the
harder it is to drive.
Eng lis h
M
O
P
Glossary
Lossless compression
A system for reducing the number of data bits
(density) in a musical signal without corrupting
the original.
PCM (Pulse Code Modulation)
Pioneering form of digital recording.
R
RDS (Radio Data System)
RDS tuners can automatically tune in stations
according to the types of music (or talk) they
broadcast. RDS also enables a receiver to
display text messages and even graphics (usually
call letters and format information) that many
FM stations include on a sub-carrier signal
within their normal broadcast signal. Some RDS
equipped tuners can even override with traffic
alerts or emergency broadcasts, during playback
of other media - CD MD, or cassette. There are
other useful features too, many of which are
offered by the growing number of RDS stations.
RF (radio frequency)
An alternating current or voltage with a
frequency (or carrier wave) above about
100kHz. It is called radio frequency because
these frequencies have a capacity to be radiated
as electromagnetic waves by radio (and
television) stations.
Rip (ripping)
Using a software program that “grabs” digital
audio from a compact disc and transfers it to a
computer hard drive. The integrity of the data
is preserved, because the signal does not pass
through the computer sound card, and need
not be converted to an analog format. The
digital-to-digital transfer creates a WAV file that
can then be converted into an MP3 file.
EN
39
RMS (Root Mean Square)
A formula that provides a reasonably accurate
means to measure and compare continuous
AC power. The use of this measure is preferred
when matching system components, like
amplifiers and receivers.
S
S/PDIF (SPDIF) (Sony/Philips Digital Interface)
A standard audio-file transfer-format that was
developed jointly by Sony and Philips. S/PDIF
allows the transfer of digital audio signals from
one device to another, without the need to
convert first to analog. This prevents the quality
of the digital signal degrading during transfer to
analog.
Sampling rate
The precision with which a digital file describes
the analog sound it represents. Basically, a lower
rate produces files that sound worse and take
up less drive space than those with a higher
rate. CDs have a sampling rate of 44.1kHz,
and DAT machines have a sampling rate of
48kHz. MiniDisc player/recorders with a built-in
sampling rate converter can handle both rates.
Sensitivity
Volume that a speaker offers for a specific
voltage input, expressed in decibels per watt
(dB/W).
Shuffle
A feature that plays audio files (tracks) in
random order.
Signal to noise ratio
Represents the difference between the level of
the audio signal, and any interference. The larger
the figure, the purer the sound.
SPL (sound pressure level)
An acoustic measurement of sound energy.
1 dB SPL is the smallest increment in sound
level to which the average human is sensitive.
Theoretically, 0 dB SPL is the threshold of
human hearing while approximately 120 dB is
the threshold of pain.
40
EN
Stereo
Literally means solid. Usually taken to refer to
two channel stereo, though developments in
digital audio facilitate multichannel stereo.
Streaming
A technique for transferring data such that it
can be processed as a steady and continuous
stream. Streaming technologies are often used
on the Internet because many users do not
have fast enough access to download large
multimedia files quickly, so the client browser or
plug-in can start displaying the data before the
entire file has been transmitted.
Subwoofer
The extra-low frequency drive-unit
(loudspeaker) that can be used to augment
both stereo and surround system.
T
Treble
High frequencies at the top end of the audio
band i.e. above 3kHz.
Tweeter
The drive unit (loudspeaker) that reproduces
high frequency sounds.
U
UPnP (Universal Plug and Play)
Universal Plug and Play is a networking
architecture developed by a consortium of
companies to ensure easy connectivity between
products from different vendors. UPnP devices
should be able to connect to a network
automatically, handling identification and other
processes on the fly. The standards developed
by the UPnP Forum are media-, platform-, and
device-independent.
USB (universal serial bus)
A hardware interface used to connect devices
such as computer audio players, digital cameras,
and more. USB is UPnP enabled (also called
hot-swappable), meaning that a computer does
not need to be turned off when new devices
V
VBR (variable bit rate)
With VBR, the encoder takes as much bits as
it needs. So black pictures get few bits and
complex pictures get as much as they need.
While this provides the best quality the final
size cannot be predicted at all.
Volume
Volume is the most common word used to
specify the control of relative loudness of
sounds. It also pertains to the function on many
electronic devices that is used to control the
loudness.
W
W (wattage)
A measurement of power. In speakers, wattage
is a term that indicates power-handling
characteristics in dealing with electrical voltage
inputs from the amplifier.
WAP (Wireless Application Protocol)
Global protocol used in some wireless devices
that allows the user to view and interact with
data services. Generally used as a means to
view Internet web pages using the limited
transmission capacity and small display screens
of portable wireless devices.
WAV
A format for sound files developed jointly by
Microsoft and IBM. Built into Windows 95 to XP,
which made it the de facto standard for sound
on PCs. WAV sound files end with a ‘.wav’
extension and works with nearly all Windows
applications that support sound.
WEP (Wired Equivalent Privacy)
All 802.11b (Wi-Fi / wireless) networks use
WEP as their basic security protocol. WEP
secures data transmissions using 64-bit or
128-bit encryption; however, it does not
Wi-Fi
Wi-Fi (Wireless Fidelity) is a wireless
technology brand owned by the Wi-Fi Alliance
intended to improve the interoperability of
wireless local area network products based
on the IEEE 802.11 standards. Common
applications for Wi-Fi include Internet and VoIP
phone access, gaming, and network connectivity
for consumer electronics such as televisions,
DVD players, and digital cameras.
Wireless
Telecommunications using electromagnetic
waves rather than wires or cable to transmit
information. Wireless communication can be
used for free-ranging mobile systems such as
cell phones and global positioning systems
(GPS), which use satellite technology. Wireless
systems can also be fixed, such as LANs that
provide wireless communications within a
limited area (such as an office), or wireless
peripherals such as mice and keyboards.
WMA (Windows Media Audio)
An audio format owned by Microsoft, is a
part of Microsoft Windows Media technology.
Includes Microsoft Digital Rights Management
tools, Windows Media Video encoding
technology, and Windows Media Audio
encoding technology.
Woofer
The drive unit (loudspeaker) that reproduces
the bass (low) frequencies.
WPA / WPA2 (Wi-Fi Protected Access)
A Wi-Fi standard that was designed to improve
upon the security features of WEP. The
technology is designed to work with existing
Wi-Fi products that have been enabled with
WEP (i.e. as a software upgrade to existing
hardware), but the technology includes two
improvements over WEP.
EN
41
Eng lis h
offer complete security and is usually used in
conjunction with other security measures such
as EAP.
Glossary
are plugged in and the devices do not need to
be configured. USB supports data transfer rates
of up to 60MB per second (in USB 2.0).
Gracenote® End User License Agreement
Version 20061005
This application or device contains software
from Gracenote, Inc. of Emeryville, California
(“Gracenote”). The software from Gracenote
(the “Gracenote Software”) enables this
application to perform disc and/or file
identification and obtain music-related
information, including name, artist, track,
and title information (“Gracenote Data”)
from online servers or embedded databases
(collectively, “Gracenote Servers”) and
to perform other functions. You may use
Gracenote Data only by means of the intended
End-User functions of this application or device.
You agree that you will use Gracenote Data, the
Gracenote Software, and Gracenote Servers
for your own personal non-commercial use
only. You agree not to assign, copy, transfer,
or transmit the Gracenote Software or any
Gracenote Data to any third party. YOU AGREE
NOT TO USE OR EXPLOIT GRACENOTE
DATA, THE GRACENOTE SOFTWARE,
OR GRACENOTE SERVERS, EXCEPT AS
EXPRESSLY PERMITTED HEREIN.
You agree that your non-exclusive license
to use the Gracenote Data, the Gracenote
Software, and Gracenote Servers will terminate
if you violate these restrictions. If your license
terminates, you agree to cease any and all
use of the Gracenote Data, the Gracenote
Software, and Gracenote Servers. Gracenote
reserves all rights in Gracenote Data, the
Gracenote Software, and the Gracenote
Servers, including all ownership rights. Under
no circumstances will Gracenote become liable
42
EN
for any payment to you for any information that
you provide. You agree that Gracenote, Inc. may
enforce its rights under this Agreement against
you directly in its own name.
The Gracenote service uses a unique identifier
to track queries for statistical purposes. The
purpose of a randomly assigned numeric
identifier is to allow the Gracenote service to
count queries without knowing anything about
who you are. For more information, see the
web page for the Gracenote Privacy Policy for
the Gracenote service.
The Gracenote Software and each item of
Gracenote Data are licensed to you “AS
IS.” Gracenote makes no representations
or warranties, express or implied, regarding
the accuracy of any Gracenote Data from in
the Gracenote Servers. Gracenote reserves
the right to delete data from the Gracenote
Servers or to change data categories for
any cause that Gracenote deems sufficient.
No warranty is made that the Gracenote
Software or Gracenote Servers are error-free
or that functioning of Gracenote Software
or Gracenote Servers will be uninterrupted.
Gracenote is not obligated to provide you
with new enhanced or additional data types or
categories that Gracenote may provide in the
future and is free to discontinue its services at
any time.
GRACENOTE DISCLAIMS ALL WARRANTIES
EXPRESS OR IMPLIED, INCLUDING, BUT
NOT LIMITED TO, IMPLIED WARRANTIES
OF MERCHANTABILITY, FITNESS FOR
A PARTICULAR PURPOSE, TITLE, AND
NON-INFRINGEMENT. GRACENOTE
DOES NOT WARRANT THE RESULTS
THAT WILL BE OBTAINED BY YOUR USE
OF THE GRACENOTE SOFTWARE OR
ANY GRACENOTE SERVER. IN NO CASE
WILL GRACENOTE BE LIABLE FOR ANY
CONSEQUENTIAL OR INCIDENTAL
DAMAGES OR FOR ANY LOST PROFITS OR
LOST REVENUES.
© Gracenote 2006
EN
43
Glossary
Eng lis h
Contact
information
Korea
080-600-6600
Luxembourg
40 6661 5644
Malaysia
1800-880-180
Mexico
01-800-504-6200
Canada (Francophone)1-800-661-6162
Netherlands
0900-8407
(€0.20/min)
New Zealand
0800-658-224
United States and Canada (English and Spanish
speaking)
1-888-744-5477
Argentina
(54-11) 4544-2047
Norway
2270-8111
Australia
1300-363-391
Pakistan
051-580-902-3
Austria
810000205
(€0.20/min)
Peru
0800-00100
Philippines
632-8164416
Belgium
78250145
(€0.16/min)
Poland
223491504
Brazil
0800-701-02-03
Portugal
2-1359-1442
Bulgaria
2-976-9996
Romania
1-203-2060
Chile
600-744-5477 (600-PHILIPS)
Russia Federation
495-961-1111;
(8-800-200-0880)
China
4008-800-008
(local tariff)
Singapore
65-6882-3999
Slovakia
0800-004537
Colombia
01-800-700-7445
South Africa
(011) 471-5194
Czech Republic
800142840
Denmark
3525-8759
Spain
902-888-784
(€0.10/min)
Finland
09-2311-3415
Sweden
08-5792-9100
France
0821 611655
(€0.23/min)
Switzerland
0844-800-544
Taiwan
0800-231-099
Germany
01803 386 852
(€0.14/min)
Thailand
66-2-652-8652
Turkey
0800-261-3302
Greece
0-0800-3122-1280
Ukraine
044-254-2392
Hong Kong
852-2619-9663
Hungary
680018189
United Kingdom
0870 900 9070
(£0.15/min)
India
1901-180-1111
Uruguay
(598-2) 619-6666
Ireland
01-601-1777
Venezuela
0800-100-4888
Israel
9-9600-900
Italy
840320086 (€0.25/minute)
Japan
0570-07-6666
44
45
46
© 2008 Koninklijke Philips Electronics N.V.
All rights reserved.
Document order number:
wk8324