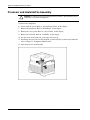
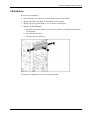
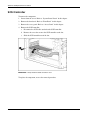
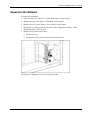
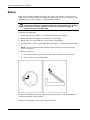
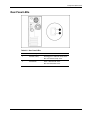
1
HP ProLiant ML330 Generation 3 Server
Maintenance and Service Guide
January 2004 (Fourth Edition)
Part Number 322375-004
© 2003, 2004 Hewlett-Packard Development Company, L.P.
Microsoft, Windows, and Windows NT are U.S. registered trademarks of Microsoft Corporation.
Intel and Xeon are trademarks or registered trademarks of Intel Corporation or its subsidiaries in the United States
and other countries.
Hewlett-Packard Company shall not be liable for technical or editorial errors or omissions contained herein. The
information in this document is provided “as is” without warranty of any kind and is subject to change without
notice. The warranties for HP products are set forth in the express limited warranty statements accompanying such
products. Nothing herein should be construed as constituting an additional warranty.
HP ProLiant ML330 Generation 3 Server Maintenance and Service Guide
January 2004 (Fourth Edition)
Part Number 322375-004
Contents
About This Guide
Audience Assumptions............................................................................................................................... vii
Technician Notes........................................................................................................................................ vii
Where to Go for Additional Help.............................................................................................................. viii
Telephone Numbers ............................................................................................................................ viii
Chapter 1
Illustrated Parts Catalog
Mechanical Components ........................................................................................................................... 1-1
System Components .................................................................................................................................. 1-3
Chapter 2
Removal and Replacement Procedures
Safety Considerations................................................................................................................................ 2-1
Electrostatic Discharge Information ................................................................................................... 2-1
Rack Warnings and Cautions.............................................................................................................. 2-2
Server Warnings and Cautions............................................................................................................ 2-2
System Power Down ................................................................................................................................. 2-4
Front Bezel ................................................................................................................................................ 2-5
Bezel Blanks.............................................................................................................................................. 2-6
Access Panel.............................................................................................................................................. 2-7
Air Baffle................................................................................................................................................... 2-8
DIMMs ...................................................................................................................................................... 2-9
Processor and Heatsink/Fan Assembly ................................................................................................... 2-10
Processor Retention Brackets .................................................................................................................. 2-12
System Fan .............................................................................................................................................. 2-13
Power Supply .......................................................................................................................................... 2-15
Media Devices......................................................................................................................................... 2-16
Cable Routing Diagrams................................................................................................................... 2-16
CD-ROM Drive ................................................................................................................................ 2-19
Media Bay Drive Tray ...................................................................................................................... 2-20
Hard Drive Compartment ................................................................................................................. 2-21
Diskette Drive ................................................................................................................................... 2-22
Hard Drives....................................................................................................................................... 2-23
Removable Media Bay Devices........................................................................................................ 2-28
Power Button/LED Assembly ................................................................................................................. 2-29
SCSI Controller ....................................................................................................................................... 2-32
Expansion Slot Retainer .......................................................................................................................... 2-33
Battery ..................................................................................................................................................... 2-34
HP ProLiant ML330 Generation 3 Server Maintenance and Service Guide
iii
Contents
System Board ...........................................................................................................................................2-35
Re-entering the Server Serial Number .....................................................................................................2-37
Chapter 3
Diagnostic Tools
Automatic Server Recovery-2....................................................................................................................3-1
Insight Manager 7 ......................................................................................................................................3-1
Integrated ATA RAID Configuration Utility (ATA models only) ............................................................3-1
Integrated Management Log ......................................................................................................................3-2
Management Agents ..................................................................................................................................3-3
Option ROM Configuration for Arrays .....................................................................................................3-3
Power-On Self-Test ...................................................................................................................................3-3
ROM-Based Setup Utility..........................................................................................................................3-3
ROMPaq ....................................................................................................................................................3-4
SmartStart Software ...................................................................................................................................3-4
SmartStart Autorun Menu ...................................................................................................................3-5
SmartStart Scripting Toolkit................................................................................................................3-5
Enterprise Diagnostics LX32 Utility ...................................................................................................3-5
Survey Utility.............................................................................................................................................3-6
System Online ROM Flash Utility.............................................................................................................3-6
Additional Information ..............................................................................................................................3-6
Chapter 4
Component Identification
Front Panel Components............................................................................................................................4-1
Front Panel LEDs.......................................................................................................................................4-2
Media Components ....................................................................................................................................4-3
Rear Panel Components.............................................................................................................................4-4
Rear Panel LEDs........................................................................................................................................4-5
System Board Components........................................................................................................................4-6
System Configuration Switch..............................................................................................................4-7
System ID Switch ................................................................................................................................4-8
Jumper Settings ...................................................................................................................................4-8
System Board LEDs...................................................................................................................................4-9
SCSI Controller Components ..................................................................................................................4-10
SCSI Cable Components..........................................................................................................................4-11
ATA Cable Components..........................................................................................................................4-12
Chapter 5
Specifications
Server Unit .................................................................................................................................................5-1
Environmental Specifications ....................................................................................................................5-2
DIMMs.......................................................................................................................................................5-2
Diskette Drive ............................................................................................................................................5-3
IDE CD-ROM Drive..................................................................................................................................5-3
ATA Hard Drives.......................................................................................................................................5-5
Wide Ultra3 SCSI Hard Drives..................................................................................................................5-6
NC7760 PCI Gigabit Server Adapter (Integrated/Embedded)...................................................................5-7
Integrated Single Channel Ultra3 SCSI Adapter .......................................................................................5-7
iv
HP ProLiant ML330 Generation 3 Server Maintenance and Service Guide
Contents
Integrated Dual Channel Ultra ATA/100 Adapter with Integrated ATA RAID 0, 1, and 1+0 (ATA
Models)...................................................................................................................................................... 5-8
Index
HP ProLiant ML330 Generation 3 Server Maintenance and Service Guide
v
About This Guide
This maintenance and service guide can be used for reference when servicing the HP
ProLiant ML330 Generation 3 server.
WARNING: To reduce the risk of personal injury from electric shock and hazardous
energy levels, only authorized service technicians should attempt to repair this
equipment. Improper repairs can create conditions that are hazardous.
Audience Assumptions
This guide is for service technicians. HP assumes you are qualified in the servicing of
computer equipment and trained in recognizing hazard in products with hazardous energy
levels and are familiar with weight and stability precautions for rack installations.
Technician Notes
WARNING: Only authorized technicians trained by HP should attempt to repair this
equipment. All troubleshooting and repair procedures are detailed to allow only
subassembly/module-level repair. Because of the complexity of the individual boards
and subassemblies, no one should attempt to make repairs at the component level or
to make modifications to any printed wiring board. Improper repairs can create a safety
hazard.
WARNING: To reduce the risk of personal injury from electric shock and hazardous
energy levels, do not exceed the level of repairs specified in these procedures.
Because of the complexity of the individual boards and subassemblies, do not attempt
to make repairs at the component level or to make modifications to any printed wiring
board. Improper repairs can create conditions that are hazardous.
WARNING: To reduce the risk of electric shock or damage to the equipment:
•
Disconnect power from the system by unplugging all power cords from the power
supplies.
•
Do not disable the power cord grounding plug. The grounding plug is an important
safety feature.
•
Plug the power cord into a grounded (earthed) electrical outlet that is easily
accessible at all times.
HP ProLiant ML330 Generation 3 Server Maintenance and Service Guide
vii
About This Guide
CAUTION: To properly ventilate the system, you must provide at least 7.6 cm (3.0 in) of
clearance at the front and back of the server.
CAUTION: The computer is designed to be electrically grounded (earthed). To ensure proper
operation, plug the AC power cord into a properly grounded AC outlet only.
NOTE: Any indications of component replacement or printed wiring board modifications may void any
warranty.
Where to Go for Additional Help
In addition to this guide, the following information sources are available:
•
User documentation
•
Service Quick Reference Guide
•
Service training guides
•
Service advisories and bulletins
•
QuickFind information services
•
Insight Manager software
Telephone Numbers
For the name of the nearest HP authorized reseller:
•
In the United States, call 1-800-345-1518.
•
In Canada, call 1-800-263-5868.
For HP technical support:
viii
•
In the United States and Canada, call 1-800-652-6672.
•
Outside the United States and Canada, refer to the HP website (www.hp.com).
HP ProLiant ML330 Generation 3 Server Maintenance and Service Guide
1
Illustrated Parts Catalog
Mechanical Components
HP ProLiant ML330 Generation 3 Server Maintenance and Service Guide
1-1
Illustrated Parts Catalog
Table 1-1: Mechanical Components
Item
Description
Spare Part Number
Chassis
1
Front bezel
324713-001
2
Access panel
307549-001
a) Hood panel (right)
—
b) Access panel (left)
—
Miscellaneous
3
4
Hardware kit
325036-001
a) Hard drive compartment
—
b) Media bay drive tray
—
c) Expansion board knockout
—
d) Hard drive screws
—
e) Processor retention brackets*
—
Miscellaneous plastics kit
176617-001
a) Air baffle
—
b) Expansion slot retainer*
—
c) Rubber bumpers*
—
d) Removable media bezel blank*
—
e) Cable clips*
—
f) Miscellaneous clamps*
—
g) LED shield*
—
*Not shown
1-2
HP ProLiant ML330 Generation 3 Server Maintenance and Service Guide
Illustrated Parts Catalog
System Components
HP ProLiant ML330 Generation 3 Server Maintenance and Service Guide
1-3
Illustrated Parts Catalog
Table 1-2: System Components
Item
Description
Spare Part Number
Mass Storage Devices
5
IDE CD-ROM drive, 48X
288894-001
6
Diskette drive
233409-001
7
Hard drive
a) 36-GB Wide Ultra3 hard drive, 10K RPM (SCSI model)
177986-001
b) 40-GB ATA hard drive (ATA model)*
232008-001
c) 18-GB Wide Ultra3 hard drive, 10K RPM (SCSI model)*
152191-001
d) 80-GB ATA hard drive (ATA model)*
287685-001
e) 160-GB ATA hard drive (ATA model)*
326510-001
Boards
8
PC2100 ECC Registered DDR SDRAM DIMM
a) 128-MB*
301691-001
b) 256-MB
300699-001
c) 512-MB*
300700-001
d) 1-GB*
300701-001
9
System board, 533-MHz front side bus
324709-001
10
Integrated Single Channel Ultra3 SCSI adapter
324710-001
11
TM
Intel® Xeon processor
a) 2.4-GHz*
325034-001
b) 2.8-GHz
324708-001
c) 3.06-GHz*
333055-001
Fans and Power
12
Heatsink/fan assembly
325035-001
13
System fan
324711-001
14
Power supply, 300 W, CE Mark-compliant
324714-001
15
CR2032 lithium battery
234556-001
16
Power cable kit
287181-001
a) Power button/LED assembly
—
b) Power shield cable*
—
c) Power extension cable*
—
*Not shown
continued
1-4
HP ProLiant ML330 Generation 3 Server Maintenance and Service Guide
Illustrated Parts Catalog
Table 1-2: System Components continued
Item
Description
Spare Part Number
Miscellaneous
17
Enhanced keyboard*
244000-001
a) European keyboard—UK*
244000-031
b) European keyboard—GR*
244000-041
c) European keyboard—FR*
244000-051
d) Spacesaver keyboard—JP*
244000-291
Signal cable kit*
253826-001
a) ATA ribbon cable assembly
—
b) Diskette drive cable assembly
—
c) CD cable assembly
—
19
Ultra3 SCSI cable*
289229-001
20
Rack enabling kit*
302569-001
21
Country kit*
308250-001
22
Return kit*
176621-001
18
*Not shown
HP ProLiant ML330 Generation 3 Server Maintenance and Service Guide
1-5
2
Removal and Replacement Procedures
To service the server, you might need the following:
•
Torx T-15 screwdriver
•
Flat-blade screwdriver
•
Phillips screwdriver
•
Diagnostics software from the SmartStart CD
Safety Considerations
Before performing service procedures, review all the safety information.
Electrostatic Discharge Information
An electrostatic discharge (ESD) can damage static-sensitive devices or microcircuitry.
Proper packaging and grounding techniques are necessary precautions to prevent damage. To
prevent electrostatic damage, observe the following precautions:
•
Transport products in static-safe containers such as conductive tubes, bags, or boxes.
•
Keep electrostatic-sensitive parts in their containers until they arrive at static-free
stations.
•
Cover workstations with approved static-dissipating material. Use a wrist strap connected
to the work surface, and properly grounded (earthed) tools and equipment.
•
Keep work area free of nonconductive materials, such as ordinary plastic assembly aids
and foam packing.
•
Be sure that you are always properly grounded when touching a static-sensitive
component or assembly.
•
Avoid touching pins, leads, or circuitry.
•
Always place drives with the Printed Circuit Board (PCB) assembly-side down.
•
Use conductive field service tools.
HP ProLiant ML330 Generation 3 Server Maintenance and Service Guide
2-1
Removal and Replacement Procedures
Rack Warnings and Cautions
WARNING: Because the rack allows stacking of computer components on a vertical
rather than horizontal plane, be sure that precautions have been taken to provide for
rack stability and safety. It is important to follow these precautions providing for rack
stability and safety, and to protect both personnel and property. Heed all cautions and
warnings throughout the installation instructions provided with the device.
WARNING: To reduce the risk of personal injury or damage to the equipment:
•
Observe local occupational safety requirements and guidelines for heavy
equipment handling.
•
Obtain adequate assistance to lift and stabilize the product during installation or
removal.
•
Always load the heaviest item first, and load the rack from the bottom up. This
makes the rack bottom-heavy and helps prevent the rack from becoming unstable.
•
Extend the leveling jacks to the floor.
•
Rest the full weight of the rack on the leveling jacks.
•
Attach the stabilizing feet to the rack if it is a single-rack installation.
•
Couple the racks together in multiple-rack installations.
•
Fully extend the bottom stabilizers on the equipment. Be sure that the equipment is
properly supported/braced when installing options and boards.
•
Be sure that the rack is adequately stabilized before extending a component
outside the rack. Extend only one component at a time. A rack may become
unstable if more than one component is extended for any reason.
•
Do not attempt to move a fully loaded equipment rack. Remove equipment from the
rack before moving the rack.
•
At least two people are needed to safely unload the rack from the pallet. An empty
42U rack weighs 115 kg (253 lb), is over 2.1m (7 ft) tall, and may become unstable
when being moved on its casters. Do not stand in front of the rack as it rolls down
the ramp from the pallet; handle it from the sides. Stabilize the device by keeping
the unit on the rails.
Server Warnings and Cautions
Before installing a system, be sure that you understand the following warnings and cautions.
WARNING: To reduce the risk of personal injury or damage to the equipment, observe
all warnings and cautions throughout this chapter.
WARNING: Do not exceed the level of repair specified in the procedures in the product
documentation. All troubleshooting and repair procedures are detailed to allow only
subassembly or module-level repair. Because of the complexity of the individual
boards and subassemblies, do not attempt to make repairs at the component level or to
make modifications to any printed wiring board. Improper repairs can create a safety
hazard.
2-2
HP ProLiant ML330 Generation 3 Server Maintenance and Service Guide
Removal and Replacement Procedures
WARNING: Be sure that the AC power supply branch circuit that provides power to the
rack is not overloaded. Not overloading AC power to the rack power supply circuit
reduces the risk of personal injury, fire, or damage to the equipment. The total rack
load should not exceed 80 percent of the branch circuit rating. Consult the electrical
authority having jurisdiction over your facility wiring and installation requirements.
WARNING: To reduce the risk of personal injury or damage to the equipment, the
installation of options other than hot-plug power devices should be performed only by
individuals who are qualified in servicing computer equipment and trained to deal with
products capable of producing hazardous energy levels.
WARNING: To reduce the risk of electric shock or damage to the equipment:
•
Do not disable the power cord grounding plug. The grounding plug is an important
safety feature.
•
Plug the power cord into a grounded (earthed) electrical outlet that is easily
accessible at all times.
•
Unplug the power cord from the power supply to disconnect power to the
equipment.
•
Do not route the power cord where it can be walked on or pinched by items placed
against it. Pay particular attention to the plug, electrical outlet, and the point where
the cord extends from the system.
•
Do not use conductive tools that could bridge live parts.
•
Remove all watches, rings, or loose jewelry when working in hot-plug areas of an
energized device.
WARNING: To reduce the risk of personal injury from hot surfaces, allow the drives
and the internal system components to cool before touching them.
CAUTION: Protect the device from power fluctuations and temporary interruptions with a
regulating uninterruptible power supply (UPS). This device protects the hardware from
damage caused by power surges and voltage spikes, and keeps the system in operation
during a power failure.
HP ProLiant ML330 Generation 3 Server Maintenance and Service Guide
2-3
Removal and Replacement Procedures
System Power Down
WARNING: To reduce the risk of personal injury, electric shock, or damage to the
equipment, remove the power cord to remove power from the system. The front panel
Power On/Standby button does not completely shut off system power. Portions of the
power supply and some internal circuitry remain active until AC power is removed.
CAUTION: Failure to follow these directions could result in damage to equipment or loss of
data.
IMPORTANT: If installing a hot-plug device, it is not necessary to power down the system.
To power down the server:
1. Back up the server data and record configuration information.
2. Shut down the operating system as directed in the operating system instructions.
3. Press the Power On/Standby button to place the server in standby mode. When the server
acquires standby mode, the system power LED goes from green to amber.
4. After the system power LED is amber, disconnect the power cord.
5. Disconnect any other external equipment from the server.
2-4
HP ProLiant ML330 Generation 3 Server Maintenance and Service Guide
Removal and Replacement Procedures
Front Bezel
CAUTION: To prevent equipment damage or data loss, be sure that the server is powered
down, all cables are disconnected from the back of the server, and the power cord is
disconnected from the grounded (earthed) AC outlet before removing the front bezel.
To remove the component:
1. Power down the server. Refer to “System Power Down” in this chapter.
2. Pull up on the bezel locking latch until it disengages.
3. Rotate the bezel upward and slide it away from the chassis. A small amount of force may
be necessary to detach the bezel.
To replace the component, reverse the removal procedure.
IMPORTANT: When replacing the front bezel, be sure to place the top hinge points in the chassis
before rotating the front bezel downward to its original position.
HP ProLiant ML330 Generation 3 Server Maintenance and Service Guide
2-5
Removal and Replacement Procedures
Bezel Blanks
WARNING: To reduce the risk of personal injury and to prevent damage to the
equipment, before removing the front bezel, be sure that the server is powered down,
all cables are disconnected from the back of the server, and the power cord is
disconnected from the grounded AC outlet.
NOTE: It is not necessary to remove a bezel blank when installing a hard drive into a removable media
bay.
To remove the component:
1. Power down the server. Refer to “System Power Down” in this chapter.
2. Remove the front bezel. Refer to “Front Bezel” in this chapter.
3. Remove the bezel blank:
a. On the back of the front bezel, press the tabs on each end of the bezel blank toward
each other.
b. Push the bezel blank through the front bezel.
To replace the component, reverse the removal procedure.
2-6
HP ProLiant ML330 Generation 3 Server Maintenance and Service Guide
Removal and Replacement Procedures
Access Panel
WARNING: To reduce the risk of injury from hot surfaces, allow the drives and the
internal system components to cool before touching them.
CAUTION: Do not operate the server for long periods without the access panel. Operating
the server without the access panel results in improper airflow and improper cooling that can
lead to thermal damage.
NOTE: The interior of the access panel contains labels with information about the server system board.
To remove the component:
1. Power down the server. Refer to “System Power Down” in this chapter.
2. Remove the front bezel. Refer to “Front Bezel” in this chapter.
3. Remove the access panel:
a. Remove the thumbscrew from the front left side of the chassis.
b. Slide the access panel forward.
c. Pull from the top of the access panel to remove it from the chassis.
To replace the component, reverse the removal procedure.
HP ProLiant ML330 Generation 3 Server Maintenance and Service Guide
2-7
Removal and Replacement Procedures
Air Baffle
To remove the component:
1. Power down the server. Refer to “System Power Down” in this chapter.
2. Remove the front bezel. Refer to “Front Bezel” in this chapter.
3. Remove the access panel. Refer to “Access Panel” in this chapter.
4. Remove the air baffle.
To replace the component, reverse the removal procedure.
2-8
HP ProLiant ML330 Generation 3 Server Maintenance and Service Guide
Removal and Replacement Procedures
DIMMs
To remove the component:
1. Power down the server. Refer to “System Power Down” in this chapter.
2. Remove the front bezel. Refer to “Front Bezel” in this chapter.
3. Remove the access panel. Refer to “Access Panel” in this chapter.
4. Remove the air baffle. Refer to “Air Baffle” in this chapter.
5. Remove the DIMM:
a. Press outward on both latches of the memory module socket at the same time to
release the DIMM and push it partially out of the socket.
b. Lift the memory module from the socket.
CAUTION: When handling a memory module, be careful not to touch any of the contacts.
Doing so may damage the module.
CAUTION: Do not mix ECC and non-ECC SDRAM DIMMs. If different types of memory
modules are mixed, the server does not properly function.
IMPORTANT: DIMMs must be industry-standard, ECC Registered PC2100 DDR SDRAM DIMMs and
support CAS Latency 2.5 (CL=2.5).
NOTE: HP recommends that the DIMMs be installed sequentially in slots 1, 2, 3, and then 4.
To replace the component, reverse the removal procedure.
HP ProLiant ML330 Generation 3 Server Maintenance and Service Guide
2-9
Removal and Replacement Procedures
Processor and Heatsink/Fan Assembly
CAUTION: To reduce the risk of personal injury from hot surfaces, allow the internal server
components to cool before touching them.
To remove the component:
6. Power down the server. Refer to “System Power Down” in this chapter.
7. Remove the front bezel. Refer to “Front Bezel” in this chapter.
8. Remove the access panel. Refer to “Access Panel” in this chapter.
9. Remove the air baffle. Refer to “Air Baffle” in this chapter.
10. Lay the server on the right side, so the open side faces up.
11. Disconnect the processor fan cable from the system board. For system board connectors,
refer to Chapter 4, “Component Identification.”
12. Open the processor retaining clips.
2-10
HP ProLiant ML330 Generation 3 Server Maintenance and Service Guide
Removal and Replacement Procedures
13. Remove the heatsink/fan assembly.
14. Open the processor socket locking lever and remove the processor.
To replace the component, reverse the removal procedure.
HP ProLiant ML330 Generation 3 Server Maintenance and Service Guide
2-11
Removal and Replacement Procedures
Processor Retention Brackets
To remove the components:
1. Power down the server. Refer to “System Power Down” in this chapter.
2. Remove the front bezel. Refer to “Front Bezel” in this chapter.
3. Remove the access panel. Refer to “Access Panel” in this chapter.
4. Remove the air baffle. Refer to “Air Baffle” in this chapter.
5. Remove the processor and heatsink/fan assembly. Refer to “Processor and Heatsink/Fan
Assembly” in this chapter.
6. Remove the processor retention brackets:
a. Remove the screws securing the bracket to the system board.
b. Lift the bracket off the system board.
To replace the component, reverse the removal procedure.
2-12
HP ProLiant ML330 Generation 3 Server Maintenance and Service Guide
Removal and Replacement Procedures
System Fan
To remove the component:
1. Power down the server. Refer to “System Power Down” in this chapter.
2. Remove the front bezel. Refer to “Front Bezel” in this chapter.
3. Remove the access panel. Refer to “Access Panel” in this chapter.
4. Remove the air baffle. Refer to “Air Baffle” in this chapter.
5. Disconnect the fan power cable from the system board fan connector.
HP ProLiant ML330 Generation 3 Server Maintenance and Service Guide
2-13
Removal and Replacement Procedures
6. Remove the system fan:
a. Use a Torx T-15 screwdriver to remove the four mounting screws from the rear of the
server.
b. Pull the fan out and away from the chassis.
To replace the component, reverse the removal procedure.
2-14
HP ProLiant ML330 Generation 3 Server Maintenance and Service Guide
Removal and Replacement Procedures
Power Supply
WARNING: To reduce the risk of electric shock or damage to the equipment:
•
Unplug the power cord before removing the power supply from the server.
•
Install the power supply before connecting the power cord to the power supply.
CAUTION: When sliding the power supply out of the chassis, use one hand to support the
weight of the power supply.
To remove the component:
1. Power down the server. Refer to “System Power Down” in this chapter.
2. Remove the front bezel. Refer to “Front Bezel” in this chapter.
3. Remove the access panel. Refer to “Access Panel” in this chapter.
4. Remove the air baffle, as needed to access power supply connectors. Refer to “Air
Baffle” in this chapter.
5. Disconnect all power cables from the devices and system board.
6. Remove the power supply:
a. Remove the four screws securing the power supply to the rear of the chassis.
b. Slide the power supply forward.
c. Lift the power supply from the chassis.
To replace the component, reverse the removal procedure.
HP ProLiant ML330 Generation 3 Server Maintenance and Service Guide
2-15
Removal and Replacement Procedures
Media Devices
Cable Routing Diagrams
SCSI Device Cabling
NOTE: Air baffle removed for clarity.
2-16
HP ProLiant ML330 Generation 3 Server Maintenance and Service Guide
Removal and Replacement Procedures
ATA Device Cabling
NOTE: Air baffle removed for clarity.
Table 2-1: ATA Cabling Routing
Item
Channel/Cable
Cable Connector
Drive Location
1
ATA/100 RAID primary
controller
Device 0
Hard drive bay 2
2
ATA/100 RAID secondary
controller
Device 0
Media bay 3
3
ATA/100 RAID primary
controller
Device 1
Hard drive bay 3
4
ATA/100 RAID secondary
controller
Device 1
Media bay 4
HP ProLiant ML330 Generation 3 Server Maintenance and Service Guide
2-17
Removal and Replacement Procedures
ATAPI Tape Drive Cabling
NOTE: Air baffle removed for clarity.
Table 2-2: ATAPI Tape Drive Cable Routing
Item
2-18
Connector
1
Integrated IDE channel
2
Device 1
3
Device 0
HP ProLiant ML330 Generation 3 Server Maintenance and Service Guide
Removal and Replacement Procedures
CD-ROM Drive
To remove the component:
1. Power down the server. Refer to “System Power Down” in this chapter.
2. Remove the front bezel. Refer to “Front Bezel” in this chapter.
3. Remove the access panel. Refer to “Access Panel” in this chapter.
4. Remove the CD-ROM drive:
a. Disconnect the cables from the rear of the drive. Refer to “Cable Routing Diagrams”
in this chapter.
b. Press the release latches.
c. Slide the drive out of the bay.
To replace the component, reverse the removal procedure.
HP ProLiant ML330 Generation 3 Server Maintenance and Service Guide
2-19
Removal and Replacement Procedures
Media Bay Drive Tray
NOTE: The drive trays in the removable media bays can be used to mount internal 3.5-inch devices.
The rails mounted inside the drive trays can be removed and used to mount other devices in the
removable media bays.
To remove the component:
1. Power down the server. Refer to “System Power Down” in this chapter.
2. Remove the front bezel. Refer to “Front Bezel” in this chapter.
3. Remove the access panel. Refer to “Access Panel” in this chapter.
4. Remove the drive tray:
a. Remove the screws that secure the drive tray on each side.
b. Gently slide the drive tray out of the chassis.
To replace the component, reverse the removal procedure.
2-20
HP ProLiant ML330 Generation 3 Server Maintenance and Service Guide
Removal and Replacement Procedures
Hard Drive Compartment
To remove the component:
1. Power down the server. Refer to “System Power Down” in this chapter.
2. Remove the front bezel. Refer to “Front Bezel” in this chapter.
3. Remove the access panel. Refer to “Access Panel” in this chapter.
4. Disconnect any cabling attached to the drives in the compartment. Refer to “Cable
Routing Diagrams” in this chapter.
5. Remove the drive compartment:
a. Remove the three shipping screws.
b. Press the tabs on each side of the drive compartment.
c. Pull the drive compartment out of the chassis.
To replace the component, reverse the removal procedure.
HP ProLiant ML330 Generation 3 Server Maintenance and Service Guide
2-21
Removal and Replacement Procedures
Diskette Drive
To remove the component:
1. Power down the server. Refer to “System Power Down” in this chapter.
2. Remove the front bezel. Refer to “Front Bezel” in this chapter.
3. Remove the access panel. Refer to “Access Panel” in this chapter.
4. Remove the hard drive compartment. Refer to “Hard Drive Compartment” in this chapter.
5. Remove the diskette drive:
a. Disconnect the cables from the rear of the drive. Refer to “Cable Routing Diagrams”
in this chapter.
b. Remove the four screws that secure the drive to the compartment.
c. Slide the drive out of the bay.
To replace the component, reverse the removal procedure.
2-22
HP ProLiant ML330 Generation 3 Server Maintenance and Service Guide
Removal and Replacement Procedures
Hard Drives
To remove the component:
1. Power down the server. Refer to “System Power Down” in this chapter.
2. Remove the front bezel. Refer to “Front Bezel” in this chapter.
3. Remove the access panel. Refer to “Access Panel” in this chapter.
4. Disconnect any cabling attached to the drives in the compartment. Refer to “Cable
Routing Diagrams” in this chapter.
5. Remove the hard drive compartment. Refer to “Hard Drive Compartment” in this chapter.
6. Remove the hard drive:
a. Using a Phillips screwdriver, loosen the screws that secure the diskette drive.
b. Remove the two screws on each side of the hard drive to be removed.
c. Gently pull the hard drive out of the drive bay.
To replace the component, reverse the removal procedure.
HP ProLiant ML330 Generation 3 Server Maintenance and Service Guide
2-23
Removal and Replacement Procedures
ATA Drive Failure Scenarios
IMPORTANT: This section applies only to ATA models of the server.
When a drive fails:
•
Insight Manager notifies you of the drive failure.
•
If applicable to the operating system, the RAID status icon changes from green to red to
indicate that a problem exists. The icon is represented as a round figure wearing
sunglasses and is located in the tray bar at the lower right of the screen.
•
Some operating systems also write to the console and/or a log file.
IMPORTANT: Some operating systems do not display the RAID status icon or the icon may display
differently.
The following sections provide instructions for rebuilding an array when a drive fails.
RAID 0 Configurations
A drive failure in a RAID 0 configuration causes data loss across the entire array. To recover
from a drive failure, the array must be rebuilt from scratch. To rebuild the array:
1. Determine the failed drive by viewing the information provided at Power-On Self Test
(POST) and in the Integrated ATA RAID Configuration Utility by pressing the F8 key.
2. Replace the failed drive. Refer to “Hard Drives” in this chapter.
3. Reboot the server and configure the array using the menu options in the Integrated ATA
RAID Configuration Utility by pressing the F8 key.
Refer to “Integrated ATA RAID Configuration Utility” in this chapter for information on the
utility menu options.
RAID 1 Configurations
NOTE: This configuration is the only one where a spare pool configuration has any value. A spare
provides a means by which a failed drive in a RAID 1 configuration can be rebuilt online.
In a RAID 1 configuration, use the following scenarios depending on whether an online spare
is configured.
When an online spare is configured, the auto-rebuild process occurs without user
intervention, removing the failed drive from the array and adding the spare to the array.
To reconfigure the online spare:
1. Replace the failed drive. Refer to “Hard Drives” in this chapter.
2. Run the Integrated ATA RAID Configuration Utility by pressing the F8 key.
3. Configure the drive as a spare.
2-24
HP ProLiant ML330 Generation 3 Server Maintenance and Service Guide
Removal and Replacement Procedures
When an online spare is not configured, you must rebuild the array.
To rebuild the array:
1. Replace the failed drive. Refer to “Hard Drives” in this chapter.
2. Reboot the server.
3. Use one of the following methods to rebuild the array:
— Run the Integrated ATA RAID Configuration Utility by pressing the F8 key, and
then run Rebuild.
— Let the auto-rebuild take place when the operating system is up and running.
Refer to “Integrated ATA RAID Configuration Utility” in this chapter for information on the
utility menu options.
RAID 1+0 Configurations
NOTE: RAID 1+0, RAID 0+1, and RAID 10 are used synonymously. Four ATA hard drives are required
to support a RAID 1+0 configuration.
In a RAID 1+0 situation, multiple drive failures can be handled as long as both elements of a
mirror have not failed.
To rebuild the array:
1. Replace the failed drive. Refer to “Hard Drives” in this chapter.
2. Reboot the server.
3. Use one of the following methods to rebuild the array:
— Run the Integrated ATA RAID Configuration Utility by pressing the F8 key, and
then run Rebuild.
— Let the auto-rebuild take place when the operating system is up and running.
Refer to “Integrated ATA RAID Configuration Utility” in this chapter for information on the
utility menu options.
Integrated ATA RAID Configuration Utility
The setup screen of the Integrated ATA RAID Configuration Utility has three menu
windows:
•
Array Information
•
Physical Drive Information
•
Help Information
HP ProLiant ML330 Generation 3 Server Maintenance and Service Guide
2-25
Removal and Replacement Procedures
Array Information
The Array Information window of the setup screen displays all configured drive arrays. Use
this section to create, delete, or edit the existing configurations. The window displays the
drive arrays as a node in a tree, like Microsoft® Windows® Explorer. Open the node to
display the properties of the array. Press the up arrow and down arrow keys to navigate the
properties, and then press the Enter key to edit your selection.
CAUTION: Adding or removing drives from a configured array results in data loss.
Physical Drive Information
The Physical Drive Information window displays all the physical drives connected to the
ATA/100 controller channels and the drive properties. Press the up arrow and down arrow
keys to navigate this section. You cannot edit information in this window.
Help
The Help window displays hints on available options and provides a list of keys that you can
use to perform tasks, such as:
•
Switch Windows (the Tab key)—toggles control back and forth between the Array
Information and the Physical Drive Information windows.
•
Auto Configure RAID 0 (the F1 key)—automatically creates and configures a striped
array based on the available physical drives installed.
•
Auto Configure RAID 1 (the F2 key)—automatically creates and configures a mirrored
array based on the available physical drives installed. You must have a minimum of two
free hard drives in the array.
•
Auto Configure RAID 0+1 (the F3 key)—automatically creates and configures a
RAID 0+1 array based on the available physical drives installed. You must have four
hard drives in the array.
IMPORTANT: All previous settings are lost when the Auto Configure option is run for striped,
mirrored, and RAID 0+1 arrays.
•
Create Array (the F4 key)—creates a drive array. When this option is selected, a default
array template is created. You must edit the array properties to complete the array
creation. Use the arrow keys to highlight a property field, and then press the Enter key to
edit that property. The array properties are as follows:
— Array Type—selects the intended RAID mode including RAID 0, RAID 1,
RAID 0+1, and Spare. The default for the Array Type option is RAID 0.
— Drive(s)—selects the drives for the array. This term refers to the drive number listed
in the Physical Drives Information box, not the number of drives attached. Use the
arrow keys, and then press the spacebar to select or deselect the drive or drives. Press
the Enter key when done. No default exists for this setting.
2-26
HP ProLiant ML330 Generation 3 Server Maintenance and Service Guide
Removal and Replacement Procedures
— Stripe Size—changes the stripe size. This field applies only to RAID 0 arrays. The
default stripe size is 64 KB.
IMPORTANT: RAID configurations do not support a stripe size less than 32 KB. You cannot
change the stripe size of an array that has been configured already.
— Drive Size—displays the size of the array and cannot be edited. If the array type is
stripe, then the drive size is the total of all the drives selected. When mirrored, the
drive size is shown by an individual drive.
— Build Array—rebuilds the array using a spare drive. When Build Array starts, the
utility prompts the user to select the target drive before rebuilding the array. This
option applies only to RAID 1 and RAID 0+1 arrays.
— Initialize Array—clears the configuration information from drives attached to the
integrated ATA controller.
•
Delete Array (the F5 key)—deletes a currently configured array.
•
Restore Old Configuration (the F6 key)—restores the configuration that existed before
you entered the utility.
•
Edit Options (the F7 key)—edits the physical drive option status boxes located in the top
right corner of the Physical Drive Information window. The options are as follows:
— WC-OFF—enables or disables write cache.
CAUTION: Enabling write cache may cause data loss or corruption during an unexpected
loss of power.
— DMA-ON—enables or disables Direct Memory Access (DMA) transfers, in which
data is transferred directly from the memory to the hard drive without microproccesor
intervention.
Pressing the F7 key enables or disables these options. Press the F7 key, move the cursor
to the desired box, and then press the spacebar to select the option. When enabled, the
option status boxes change from red to green.
•
Save and Exit (the F10 key)—saves the configuration and exits the utility.
To exit the utility without saving the configuration or any changes, press the Esc key.
Respond appropriately to the subsequent message boxes requiring confirmation.
HP ProLiant ML330 Generation 3 Server Maintenance and Service Guide
2-27
Removal and Replacement Procedures
Removable Media Bay Devices
To remove the component:
1. Power down the server. Refer to “System Power Down” in this chapter.
2. Remove the front bezel. Refer to “Front Bezel” in this chapter.
3. Remove the access panel. Refer to “Access Panel” in this chapter.
4. Remove the air baffle, as needed to access cabling. Refer to “Air Baffle” in this chapter.
5. Disconnect any cabling attached to the drives in the compartment. Refer to “Cable
Routing Diagrams” in this chapter.
6. Remove the media bay drive tray. Refer to “Media Bay Drive Tray” in this chapter.
7. Remove the device from the tray:
a. Remove the screws from the bottom of the device.
b. Lift the device from the tray.
To replace the component, reverse the removal procedure.
2-28
HP ProLiant ML330 Generation 3 Server Maintenance and Service Guide
Removal and Replacement Procedures
Power Button/LED Assembly
To remove the component:
1. Power down the server. Refer to “System Power Down” in this chapter.
2. Remove the front bezel. Refer to “Front Bezel” in this chapter.
3. Remove the access panel. Refer to “Access Panel” in this chapter.
4. Disconnect the power button cable from the system board.
NOTE: Air baffle removed for clarity.
HP ProLiant ML330 Generation 3 Server Maintenance and Service Guide
2-29
Removal and Replacement Procedures
5. Remove the LED shield:
a. Press the locking levers.
b. Pull the shield away from the chassis.
2-30
HP ProLiant ML330 Generation 3 Server Maintenance and Service Guide
Removal and Replacement Procedures
6. Disengage the power button:
a. From the front of the chassis, squeeze the sides of the power button to disengage the
two retainer clips from the chassis.
b. Gently remove the power button from the chassis.
7. Disengage the LEDs:
a. Squeeze the sides of the LED to disengage the two retainer clips from the chassis.
b. Gently remove the LED from the chassis.
c. Repeat for the other LEDs.
To replace the component, reverse the removal procedure.
HP ProLiant ML330 Generation 3 Server Maintenance and Service Guide
2-31
Removal and Replacement Procedures
SCSI Controller
To remove the component:
1. Power down the server. Refer to “System Power Down” in this chapter.
2. Remove the front bezel. Refer to “Front Bezel” in this chapter.
3. Remove the access panel. Refer to “Access Panel” in this chapter.
4. Remove the SCSI controller:
a. Disconnect the SCSI cable attached to the SCSI controller.
b. Remove the screw that secures the SCSI controller to the slot.
c. Slide the SCSI controller out of the slot.
IMPORTANT: Always install the SCSI controller in slot 1.
To replace the component, reverse the removal procedure.
2-32
HP ProLiant ML330 Generation 3 Server Maintenance and Service Guide
Removal and Replacement Procedures
Expansion Slot Retainer
To remove the component:
1. Power down the server. Refer to “System Power Down” in this chapter.
2. Remove the front bezel. Refer to “Front Bezel” in this chapter.
3. Remove the access panel. Refer to “Access Panel” in this chapter.
4. Disconnect any cabling attached to the drives in the compartment. Refer to “Cable
Routing Diagrams” in this chapter.
5. Remove the expansion slot retainer:
a. Loosen the screw.
b. Pivoting the retainer back towards the front of the chassis.
To replace the component, reverse the removal procedure.
HP ProLiant ML330 Generation 3 Server Maintenance and Service Guide
2-33
Removal and Replacement Procedures
Battery
If the server no longer automatically displays the correct date and time, you may need to
replace the battery that provides power to the real-time clock. Always use a battery from the
approved spare parts list in Chapter 1, “Illustrated Parts Catalog.”
WARNING: The system board contains a lithium battery. A risk of fire and chemical
burn exists if the battery is improperly handled. Do not disassemble, crush, puncture,
or short external contacts, dispose of in water or fire, or expose the battery to
temperatures higher than 60°C (140°F).
To remove the component:
1. Power down the server. Refer to “System Power Down” in this chapter.
2. Remove the front bezel. Refer to “Front Bezel” in this chapter.
3. Remove the access panel. Refer to “Access Panel” in this chapter.
4. Locate the battery on the system board. Refer to Chapter 4, “Component Identification.”
NOTE: If you have expansion boards installed, it may be necessary to remove them to gain
access to the battery.
5. Remove the battery:
a. Press outward on the latch at the top of the battery holder to release the battery.
b. Lift the battery away from the holder.
For more information about battery replacement or proper disposal, contact an authorized
reseller or authorized service provider.
To replace the component, reverse the removal procedure.
2-34
HP ProLiant ML330 Generation 3 Server Maintenance and Service Guide
Removal and Replacement Procedures
IMPORTANT: Positive (+) polarity must be positioned up.
IMPORTANT: Replacing the system board battery resets the system ROM to its default configuration.
After replacing the battery, reconfigure the system through RBSU. Refer to the setup and installation
guide.
System Board
To remove the component:
1. Power down the server. Refer to “System Power Down” in this chapter.
2. Remove the front bezel. Refer to “Front Bezel” in this chapter.
3. Remove the access panel. Refer to “Access Panel” in this chapter.
4. Remove the air baffle. Refer to “Air Baffle” in this chapter.
5. Remove all DIMMs. Refer to “DIMMs” in this chapter.
6. Remove all processors. Refer to “Processor and Heatsink/Fan Assembly” in this chapter.
7. Remove the SCSI controller (SCSI models). Refer to “SCSI Controller” in this chapter.
8. Remove all expansion boards.
9. Disconnect all cables from the system board.
HP ProLiant ML330 Generation 3 Server Maintenance and Service Guide
2-35
Removal and Replacement Procedures
10. Remove the system board:
a. Remove the nine screws securing the system board to the chassis.
b. Slide the system board toward the front of the server to clear the four alignment
standoffs.
c. Gently pull the system board out of the chassis.
To replace the component, reverse the removal procedure.
IMPORTANT: The server serial number must be re-entered through RBSU after replacing the system
board. Refer to the “Re-entering the Server Serial Number” section in Chapter 2.
2-36
HP ProLiant ML330 Generation 3 Server Maintenance and Service Guide
Removal and Replacement Procedures
Re-entering the Server Serial Number
After replacing the system board or clearing the NVRAM, the server serial number must be
re-entered.
1. During the server startup sequence, press the F9 key to access RBSU.
2. Select the System Options menu.
3. Select Serial Number. The following warning is displayed:
WARNING! WARNING! WARNING! The serial number is loaded into the
system during the manufacturing process and should NOT be
modified. This option should ONLY be used by qualified service
personnel. This value should always match the serial number
sticker located on the chassis.
Press the Enter key to clear the warning.
4. Enter the serial number and press the Enter key.
5. Press the Escape key to close the menu.
6. Press the Escape key to exit RBSU.
7. Press the F10 key to confirm exiting RBSU. The server will automatically reboot.
HP ProLiant ML330 Generation 3 Server Maintenance and Service Guide
2-37
3
Diagnostic Tools
Automatic Server Recovery-2
ASR-2 is a feature that causes the system to restart when a catastrophic operating system
error occurs, such as a blue screen, ABEND (abnormal end), or panic. A system fail-safe
timer, the ASR-2 timer, starts when the System Management driver, also known as the Health
Driver, is loaded. When the operating system is functioning properly, the system periodically
resets the timer. However, when the operating system fails, the timer expires and restarts the
server.
ASR-2 increases server availability by restarting the server within a specified time after a
system hang or shutdown. At the same time, the Insight Manager 7 console notifies you by
sending a message to a designated pager number that ASR-2 has restarted the system. You
can disable ASR-2 from the Insight Manager 7 console or through RBSU.
Insight Manager 7
Insight Manager 7 is a Web-based application that allows system administrators to
accomplish normal administrative tasks from any remote location, using a Web browser.
Insight Manager 7 provides device management capabilities that consolidate and integrate
management data from HP and third-party devices.
For additional information, refer to the Management CD in the HP ProLiant Essentials
Foundation Pack.
Integrated ATA RAID Configuration Utility (ATA models only)
Supports and configures RAID arrays. The features include:
•
Optimized drive access
•
RAID support before operating system loads
•
Automatic detection and configuration
•
Ability to handle configuration changes
•
Support for PIO modes 0-4, MDMA modes 0-2, and Ultra DMA modes 0-5 (0-5 for
ATA/100)
•
Support for RAID levels 0, 1, and 1+0
HP ProLiant ML330 Generation 3 Server Maintenance and Service Guide
3-1
Diagnostic Tools
•
Multiple drive rebuilding
•
Special handling of error log, spare drive, and rebuilding
After all hard drives have been installed and connected, press the F8 key during startup to run
the Integrated ATA RAID Configuration Utility and view the setup screen. ROM will
automatically configure drives to RAID 0 if you do not run the F8 utility.
To turn off the Integrated ATA RAID Management:
•
In Microsoft operating systems, right-click on the tray icon and select Quit Spy.
•
In Novell operating systems, enter Unload Spy at the console.
•
In Linux operating systems, enter Spy-Stop at the prompt.
Turning off this utility turns off the ability for online spares to be rebuilt if a drive failure
occurs. You need to power up the server and rebuild the spare in the RAID Configuration
Utility by pressing the F8 key.
To turn on the Integrated ATA RAID Configuration Utility:
•
In Microsoft operating systems, power up the server or log off the server and then log
back on.
•
In Novell operating systems, enter Load Spy at the console.
•
In Linux operating systems, enter Spy-Start at the prompt.
Integrated Management Log
The IML records hundreds of events and stores them in an easy-to-view form. The IML time
stamps each event with 1-minute granularity.
You can view recorded events in the IML in several ways, including the following:
•
From within Insight Manager 7
•
From within Survey Utility
•
From within operating system-specific IML viewers
— For NetWare: IML Viewer
— For Windows: Event Viewer or IML Viewer
— For Linux: IML Viewer Application
•
From within Enterprise Diagnostics LX32 Utility
For more information, refer to the HP Servers Troubleshooting Guide on the Documentation
CD, or the Management CD in the HP ProLiant Essentials Foundation Pack.
3-2
HP ProLiant ML330 Generation 3 Server Maintenance and Service Guide
Diagnostic Tools
Management Agents
The server is equipped with the latest Management Agents, allowing easy manageability of
the server through Insight Manager 7 software, and third-party SNMP management
platforms. Management agents monitor key subsystems that are instrumental in making
health, configuration, and performance data available to the agent software. The agents act
upon that data by initiating alarms in the event of faults. The agents also provide updated
management information, such as network interface or subsystem performance statistics, to
the management systems.
For additional information, refer to the Management CD in the HP ProLiant Essentials
Foundation Pack or refer to the HP website (www.hp.com/servers/manage).
Option ROM Configuration for Arrays
Before installing an operating system, you can use the ORCA utility to create the first logical
drive, assign RAID levels, and establish online spare configurations.
The utility provides support for the following functions:
•
Configuring one or more logical drives using physical drives on one or more SCSI buses
•
Viewing the current logical drive configuration
•
Deleting a logical drive configuration
If you do not use the utility, ORCA will default to the standard configuration.
For more information about array controller configuration, refer to the HP ROM-Based Setup
Utility User Guide on the Documentation CD.
Power-On Self-Test
POST is a series of diagnostic tests that checks firmware and assemblies to ensure that the
server is functioning properly. This utility runs automatically every time the server is
powered up.
For the normal power-up sequence and diagnosis of problems encountered during POST,
refer to the setup and installation guide.
ROM-Based Setup Utility
RBSU performs a wide range of configuration activities, including the following:
•
Configuring server devices and installed options
•
Viewing server information
•
Selecting the operating system
•
Selecting the primary boot controller
HP ProLiant ML330 Generation 3 Server Maintenance and Service Guide
3-3
Diagnostic Tools
To make selections within RBSU, use the following keys:
•
Access RBSU by pressing the F9 key when prompted during startup.
•
Use the arrow keys navigate through the menu system.
•
Make selections by pressing the Enter key.
•
Cancel selections by pressing the Esc key.
•
Save selections and changes by pressing the F10 key.
For information on RBSU not found in this guide, refer to the HP ROM-Based Setup Utility
User Guide on the Documentation CD.
ROMPaq
Flash ROM enables you to upgrade the firmware (BIOS) with system or option ROMPaq
utilities. To upgrade the BIOS, insert a ROMPaq diskette into the diskette drive and boot the
system.
The ROMPaq utility checks the system and provides a choice (if more than one exists) of
available ROM revisions. This procedure is the same for both system and option ROMPaq
utilities.
CAUTION: Do not power down during a firmware upgrade. A loss of power during upgrade
may corrupt the firmware and prevent the server from starting.
For more information about the ROMPaq utility, refer to the HP website
(www.hp.com/servers/manage).
SmartStart Software
The SmartStart CD is used to load the server software, thereby achieving a well-integrated
server and ensuring maximum dependability and supportability. The SmartStart CD contains
diagnostic utilities and ROMPaq tools.
SmartStart software enables you to:
3-4
•
Install selected server operating systems using packaged product CDs.
•
Install the latest optimized drivers.
•
Test server hardware using the new Enterprise Diagnostics LX32 Utility.
•
Update the latest system or option ROM using the ROM Update Utility.
•
Install software drivers directly from the CD. With systems that have internet connection,
the SmartStart Autorun Menu provides access to the complete list of ProLiant System
Software on the website.
HP ProLiant ML330 Generation 3 Server Maintenance and Service Guide
Diagnostic Tools
To install the SmartStart software:
1. Press the F9 key to run RBSU and configure the primary operating system.
2. Locate the SmartStart CD in the HP ProLiant Essentials Foundation Pack.
3. After you power up the server, press the CD-ROM drive eject button.
4. Insert the SmartStart CD into the CD-ROM drive with the labeled side up. Handle the CD
by its edges, not by the flat surfaces of the disc.
5. When the busy indicator turns green, the SmartStart sequence begins.
Refer to the SmartStart documentation included with the server to install the operating
system, create updated driver diskettes, and run upgrade utilities.
For more information about SmartStart software, refer to the HP website
(www.hp.com/servers/smartstart).
SmartStart Autorun Menu
The SmartStart Autorun Menu enables you to access the latest system software directly from
the operating system environment, simply by inserting the SmartStart CD into a configured
system. The Autorun Menu enables you to install the latest HP ProLiant Support Packs.
SmartStart Scripting Toolkit
The SmartStart Scripting Toolkit is a set of Microsoft MS-DOS®-based utilities that enables
you to configure and deploy servers in a customized, predictable, and unattended manner.
These utilities provide scripted server and array replication for mass server deployment and
duplicate the configuration of a source server onto target systems with minimum user
interaction.
For more information, and to download the SmartStart Scripting Toolkit, refer to the HP
website (www.hp.com/servers/sstoolkit).
Enterprise Diagnostics LX32 Utility
The Enterprise Diagnostics LX32 Utility displays information about the server hardware and
tests the system to be sure that it is operating properly. To access the Enterprise Diagnostics
LX32 Utility, refer to the SmartStart CD or refer to the HP website
(www.hp.com/servers/manage).
For more information, refer to the Management CD in the HP ProLiant Essentials Foundation
Pack.
HP ProLiant ML330 Generation 3 Server Maintenance and Service Guide
3-5
Diagnostic Tools
Survey Utility
Survey Utility gathers critical hardware and software information on servers running
Microsoft Windows NT®, Novell NetWare, SCO OpenServer, or SCO UnixWare operating
systems.
IMPORTANT: This utility supports operating systems that may not be supported by the server. For
operating systems supported by the server, refer to the HP FTP site
(ftp://ftp.compaq.com/pub/products/servers/os-support-matrix-310.pdf).
If a significant change occurs between data-gathering intervals, the Survey Utility marks the
previous information and overwrites the Survey text files to reflect the latest changes in the
configuration.
To install the Survey Utility, use the Management CD in the HP ProLiant Essentials
Foundation Pack or refer to the HP website (www.hp.com/servers/manage).
System Online ROM Flash Utility
The Online ROM Flash Utility enables system administrators to efficiently upgrade system or
controller ROM images across a wide range of servers and array controllers. This tool has the
following features:
•
Works offline and online
•
Supports Microsoft Windows NT, Windows 2000, Windows Server 2003, Novell
NetWare, and Linux operating systems
IMPORTANT: This utility supports operating systems that may not be supported by the server. For
operating systems supported by the server, refer to the HP FTP site
(ftp://ftp.compaq.com/pub/products/servers/os-support-matrix-310.pdf).
•
Integrates with other software maintenance, deployment, and operating system tools
•
Automatically checks for hardware, firmware, and operating system dependencies, and
installs only the correct ROM upgrades required by each target server
To download the tool and for more information, refer to the HP website
(www.compaq.com/support/ files/server/us/webdoc/rom/RemoteROMUser-001.pdf).
Additional Information
For detailed information about each of these diagnostic tools, refer to the HP Servers
Troubleshooting Guide on the Documentation CD. For the most recent version of the guide,
refer to the HP website (www.hp.com).
3-6
HP ProLiant ML330 Generation 3 Server Maintenance and Service Guide
4
Component Identification
Front Panel Components
Table 4-1: Front Panel Components
Item
Description
1
CD-ROM drive eject button
2
Diskette drive eject button
3
Power On/Standby button
IMPORTANT: The Power On/Standby button does not remove all power from the system. The Standby
mode removes power from most of the electronics and the drives, but portions of the power supply and
some internal circuitry remain active. To remove power completely, refer to “System Power Down” in
Chapter 2, “Removal and Replacement Procedures.”
HP ProLiant ML330 Generation 3 Server Maintenance and Service Guide
4-1
Component Identification
Front Panel LEDs
Table 4-2: Front Panel LEDs
Item
LED Description
Status
1
CD-ROM drive activity
On = Drive activity exists.
2
Diskette drive activity
Off = No drive activity exists.
3
System power
Green = Server is on.
Amber = Server is in standby mode.
Off = Server is off; power cord is
disconnected.
4
Hard drive activity
Green or flashing green = Hard drive
activity exists.
Off = No hard drive activity exists.
5
NIC link/activity
Green = Network link exists.
Flashing green = Network activity exists.
Off = No network link exists or server in
standby.
6
Internal health
Green = Server is powered up and server
health is good.
Amber = Server health is degraded; a
pre-failure warning exists.
Red = Server health is critical; attention is
required.
Off = Server is off; power cord is
disconnected.
4-2
HP ProLiant ML330 Generation 3 Server Maintenance and Service Guide
Component Identification
Media Components
Table 4-3: Media Components
Item
Description
Location
Dimensions
1
IDE CD-ROM drive
Media bay 1
13.34 × 4.06 cm
2
Available removable
media bay
Media bay 2
(5.25 × 1.60 in)
3
Available removable
media bay
Media bay 3
4
Available removable
media bay
Media bay 4
5
Diskette drive
Hard drive bay 1
8.90 × 2.54 cm
6
Hard drive bay
Hard drive bay 2
(3.5 × 1.0 in)
7
Hard drive bay
Hard drive bay 3
HP ProLiant ML330 Generation 3 Server Maintenance and Service Guide
4-3
Component Identification
Rear Panel Components
Table 4-4: Rear Panel Components
4-4
Item
Description
1
Power connector
2
Mouse connector
3
Keyboard connector
4
Serial connector
5
Video connector
6
USB connectors
7
RJ-45 connector
8
Parallel connector
HP ProLiant ML330 Generation 3 Server Maintenance and Service Guide
Component Identification
Rear Panel LEDs
Table 4-5: Rear Panel LEDs
Item
LED Description
Status
1
Network activity
Flashing green = Network activity exists.
Off = No network activity exists.
2
Network link
Green = Network link exists.
Off = No network link exists.
HP ProLiant ML330 Generation 3 Server Maintenance and Service Guide
4-5
Component Identification
System Board Components
Table 4-6: System Board Components
Item
Description
Item
Description
1
Power supply connectors
12
Remote Insight connector (30-pin)
2
DIMM slot 4
13
System configuration switch
3
DIMM slot 3
14
Expansion slot 4
4
DIMM slot 2
15
Expansion slot 3
5
DIMM slot 1
16
Expansion slot 2
6
Diskette drive connector
17
Expansion slot 1
7
IDE connector (ATAPI devices)
18
Processor fan connector 2
8
ATA/100 RAID primary connector
19
Processor socket 2
9
ATA/100 RAID secondary connector
20
Processor socket 1 (populated)
10
Power button assembly connector
21
System fan connector
11
System battery
22
Processor fan connector 1
Note: In SCSI model servers, the SCSI controller populates expansion slot 1.
4-6
HP ProLiant ML330 Generation 3 Server Maintenance and Service Guide
Component Identification
System Configuration Switch
CAUTION: Clearing nonvolatile RAM (NVRAM) deletes the system configuration. For
instructions on configuring the server, refer to the setup and installation guide.
Table 4-7: System Configuration Switch Settings
Position
Default
Description
Status
1
Off
Reserved
—
2
Off
Lock configuration
Off = Configuration can be changed
On = Configuration is locked
3
Off
Tower/rack configuration
Off = Tower configuration
On = Rack configuration
4
Off
Diskette boot
Off = Server uses RBSU diskette boot
selection
On = User can override RBSU diskette boot
selection and boot from diskette
5
Off
Password override
Off = Password protection is active
On = User can override password
6
Off
Clear CMOS and
NVRAM*
Off = No function
On = Server configuration is erased at
power-up
7
Off
Reserved**
—
8
Off
Reserved**
—
* The server serial number must be re-entered through RBSU after clearing the NVRAM. Refer to
“Re-entering the Server Serial Number” in Chapter 2.
** Switch positions 1, 7, and 8 are reserved for authorized service providers only.
HP ProLiant ML330 Generation 3 Server Maintenance and Service Guide
4-7
Component Identification
System ID Switch
The system ID switch is reserved for use by authorized service providers only. Do not change
the indicated default settings.
Jumper Settings
SCSI Device Jumper Settings
No two SCSI devices connected to the same SCSI controller can have the same SCSI ID. If
another SCSI device is connected to the controller, check its SCSI ID before beginning the
installation procedure for the additional device. Jumpers located on each device set the
SCSI ID. For more information, refer to the SCSI device option documentation.
IDE Device Jumper Settings
When installing any IDE devices (ATA hard drives, ATAPI CD-ROM drives, or ATAPI tape
drives), be sure that the jumper on the device is set to Cable Select (CS). This setting allows
the cable to automatically assign the device ID of an IDE drive attached to the cable. For
information on installing and cabling IDE devices, refer to the setup and installation guide.
4-8
HP ProLiant ML330 Generation 3 Server Maintenance and Service Guide
Component Identification
System Board LEDs
Table 4-8: System Board LEDs
Item
LED Description
Status
1
System fan failure
Amber = The system fan has failed or is not installed.
Off = The system fan is functioning.
2
Processor 1 failure
Amber = Processor 1 has failed or is not installed.
Off = Processor 1 is functioning.
3
Processor fan 1 failure
Amber = Processor fan 1 has failed or is not installed.
Off = Processor fan 1 is functioning.
4
5
Processor power connector
not installed
Amber = Power connector is not installed.
Integrated PPM failure
Amber = The PPM has failed.
Off = Power connector is installed.
Off = The PPM is functioning.
6
DIMM 1 failure
Amber = The DIMM is failed.
7
DIMM 2 failure
Off = The DIMM is functioning.
8
DIMM 3 failure
9
DIMM 4 failure
10
Processor 2 failure
Amber = Processor 2 has failed or is missing.
Off = Processor 2 is functioning.
11
System overtemperature
Amber = The temperature threshold has been exceeded.
Off = The temperature is normal.
continued
HP ProLiant ML330 Generation 3 Server Maintenance and Service Guide
4-9
Component Identification
Table 4-8: System Board LEDs continued
Item
LED Description
Status
12
Processor fan 2 failure
Amber = Processor fan 2 has failed or is not installed.
Off = Processor fan 2 is functioning.
13
AC power
Green = The power supply is attached to AC power.
Off = The AC power cord is not connected to the power supply, the power
supply connector is not attached to the system board, or the power supply
has failed.
SCSI Controller Components
The SCSI controller has a single SCSI connector to support the internal SCSI bus.
4-10
HP ProLiant ML330 Generation 3 Server Maintenance and Service Guide
Component Identification
SCSI Cable Components
Before performing SCSI cabling procedures, identify the SCSI cable components.
The SCSI cable supports up to five SCSI devices and comes with a terminator on the end.
One cable is included with SCSI models of the server.
HP ProLiant ML330 Generation 3 Server Maintenance and Service Guide
4-11
Component Identification
ATA Cable Components
Before performing ATA cabling procedures, identify the ATA cable components.
The type of ATA cable that ships with the server supports up to two ATA devices. Two
cables are included with ATA models of the server.
Table 4-9: ATA Cable Components
4-12
Item
Description
1
Device 0 (primary)
2
Device 1 (secondary)
HP ProLiant ML330 Generation 3 Server Maintenance and Service Guide
5
Specifications
Server Unit
Table 5-1: Server Unit Specifications
Specification
Value
Dimensions
Height
42.7 cm (16.8 in)
Width
19.1 cm (7.5 in)
Depth
48.5 cm (19.1 in)
Approximate weight (depending on options)
18.18 kg (40 lb)
Input specifications
Rated input voltage
100 VAC to 199 VAC (U.S.)
200 VAC to 240 VAC (International)
Rated input frequency
50 Hz to 60 Hz
Rated input current
6 A (100 VAC to 199 VAC)
3 A (200 VAC to 240 VAC)
Input power (rated)
462 W
Output specifications
Rated steady-state power
300 W
Maximum peak power
400 W
BTUs for tower model
935 BTU/hr (based on 274 W input)
Acoustic noise
Idle (hard drives spinning)
5.5 NPEL (Bels)/45 AVERAGE SPL (dba)
Operating (random seeks to hard drives)
6.0 NPEL (Bels)/45 AVERAGE SPL (dba)
HP ProLiant ML330 Generation 3 Server Maintenance and Service Guide
5-1
Specifications
Environmental Specifications
Table 5-2: Environmental Specifications
Specification
Value
Temperature range*
Operating
50°F to 95°F (10°C to 35°C)
Shipping
-40°F to 158°F (-40°C to 70° C)
Maximum wet bulb temperature
82.4°F (28°C)
Relative humidity (noncondensing)
Operating
10% to 90%
Non-operating
5% to 95%
* All temperature ratings shown are for sea level. The specification uses an altitude derating of 1°C
per 300 m to 3,000 m (1.8°F p er 1,000 ft to 10,000 ft).
DIMMs
Table 5-3: DIMM Specifications
5-2
Specification
Value
Size
128 MB, 256 MB, and 512 MB, and 1 GB
Speed
DDR 266 MHz
Type
ECC Registered PC2100 DDR SDRAM DIMMs
HP ProLiant ML330 Generation 3 Server Maintenance and Service Guide
Specifications
Diskette Drive
Table 5-4: 1.44-MB Diskette Drive Specifications
Specification
Value
Size
8.89 cm (3.5 in)
LEDs (front panel)
Green
Read/write capacity per diskette
(high/low density)
1.44 MB/720 KB
Drives supported
1
Drive height
Third, 1 inch
Drive rotation
300 rpm
Transfer rate bits/sec (high/low)
500 Kbps/250 Kbps
Bytes/sector
512
Sectors per rack (high/low)
18/9
Tracks per side (high/low)
80/80
Access times
Track-to-track (high/low)
3 ms/6 ms
Average (high/low)
94 ms/169 ms
Settling time
15 ms
Latency average
100 ms
Cylinders (high/low)
80/80
Read/write heads
2
IDE CD-ROM Drive
Table 5-5: IDE CD-ROM Specifications
Specification
Value
Applicable disk
CD-ROM (modes 1 and 2); mixed mode (audio and data
combined); CD-DA; Photo CD (single- and
multiple-session), CD-XA (mode 2, forms 1 and 2); CDI
ready; CD-WO
Capacity
650 MB
Rotational speed
5,200 rpm
Block size
2,328 bytes (CD-XA)
2,340 bytes, 2,336 bytes, 1,024 bytes (mode 2)
2,048 bytes, 1,024 bytes (mode 1)
2,352 bytes (CD-DA)
continued
HP ProLiant ML330 Generation 3 Server Maintenance and Service Guide
5-3
Specifications
Table 5-5: IDE CD-ROM Specifications continued
Specification
Value
Dimensions
Height
42.9 mm (1.69 in)
Width
208.0 mm (8.2 in)
Depth
150.1 mm (5.91 in)
Weight
0.950 kg (2.09 lb)
Data transfer rate
Sustained
150 KBps (single), 1,500 to 4,800 KBps (10X to 32X)
Burst
150 KBps to 4,800 KBps
Interface
IDE (ATAPI)
Access times (typical)
Full stroke
<150 ms
Random
<100 ms
Diameter
12 cm, 8 cm (4.7 in, 3.15 in)
Center hole
15 mm (0.6 in)
Thickness
1.2 mm (0.05 in)
Track pitch
1.6 µm
Cache/buffer
128 KB
Startup time
<7 seconds
Stop time
<4 seconds
Laser parameters
Type
Semiconductor Laser GaA1As
Wave length
780 ± 25 nm
Divergence angle
53.5° ± 1.5°
Output power
0.14 mW
Operating conditions
5-4
Temperature
5°C to 45°C (41°F to 113°F)
Humidity
5% to 90% (10% to 80%)
HP ProLiant ML330 Generation 3 Server Maintenance and Service Guide
Specifications
ATA Hard Drives
Table 5-6: ATA Hard Drive Specifications
Specification
40 GB 7.2K rpm
80 GB 7.2K rpm
160 GB 7.2K rpm
Capacity
40,020.0 MB
80,020.0 MB
160,040.0 MB
Height
26.1 mm (1.028 in)
26.1 mm (1.028 in)
26.1 mm (1.028 in)
Width
101.6 mm (4 in)
101.6 mm (4 in)
101.6 mm (4 in)
Interface
Ultra ATA/100
Ultra ATA/100
Ultra ATA/100
Transfer rate synchronous (max)
100 MBps
100 MBps
100 MBps
Single track
1.2 ms
3.0 ms
3.0 ms
Average
<9.00 ms
<9.00 ms
<9.00 ms
Full stroke
<30.0 ms
<30.0 ms
<30.0 ms
Rotational speed
7,200 rpm
7,200 rpm
7,200 rpm
Logical blocks
78,165,360
156,301,488
312,581,808
Bytes/sector
512
512
512
Celsius
5° to 55°
5° to 55°
5° to 55°
Fahrenheit
41° to 131°
41° to 131°
41° to 131°
Seek time (typical, including
setting)
Physical configuration
Operating temperature
HP ProLiant ML330 Generation 3 Server Maintenance and Service Guide
5-5
Specifications
Wide Ultra3 SCSI Hard Drives
Table 5-7: Wide Ultra3 SCSI Hard Drive Specifications
Specification
18.2 GB 10 K rpm
36.4 GB 10 K rpm
Capacity
18,209.3 MB
36,419.2 MB
Height
25.4 mm (1 in)
25.4 mm (1 in)
Width
101.6 mm (4.0 in)
101.6 mm (4.0 in)
Interface
Wide Ultra3 SCSI
Wide Ultra3 SCSI
Transfer rate synchronous (max)
160 MBps
160 MBps
Single track
0.7 ms
0.7 ms
Average
5.4 ms
5.4 ms
Full stroke
11.0 ms
11.0 ms
Rotational speed
10,000 rpm
10,000 rpm
Bytes/sector
512
512
Logical blocks
35,565,080
71,132,000
Celsius
10° to 35°
10° to 35°
Fahrenheit
50° to 95°
50° to 95°
Seek time (typical, including setting)
Physical configuration
Operating temperature
5-6
HP ProLiant ML330 Generation 3 Server Maintenance and Service Guide
Specifications
NC7760 PCI Gigabit Server Adapter (Integrated/Embedded)
Table 5-8: NC7760 PCI Gigabit Server Adapter (Integrated/Embedded) Specifications
Specification
Value
Network interface
1000Base-T/100Base-TX/10Base-T
Compatibility
IEEE 802.3am, 802.3u, 802.3
Data transfer method
32-bit, 33-MHz PCI bus master
Network transfer rate
10/100/1000 MBps
Connector
RJ-45
Compliance
PCI 2.2
OS support
For specific OS support, refer to
www.hp.com/products/servers/platforms
Management support
Wake-on-LAN (WOL), Pre-Boot eXecution
Environment (PXE)
Integrated Single Channel Ultra3 SCSI Adapter
Table 5-9: Integrated Single Channel Ultra3 SCSI Adapter Specifications
Specification
Value
SCSI protocol
Wide Ultra3 SCSI, Wide Ultra2 SCSI,
Wide Ultra SCSI-3, Fast-Wide SCSI-2, and Fast
SCSI-2
Electrical protocol
Low Voltage Differential (LVD)
Drives supported
Up to 14 SCSI devices per channel
Data transfer method
64-bit/33-MHz PCI bus master
Maximum host bus transfer rate
267 MBps per channel
Maximum SCSI transfer rate
160 MBps per channel
Storage capacity
Up to 1019.2 GB
HP ProLiant ML330 Generation 3 Server Maintenance and Service Guide
5-7
Specifications
Integrated Dual Channel Ultra ATA/100 Adapter with Integrated
ATA RAID 0, 1, and 1+0 (ATA Models)
Table 5-10: Integrated Dual Channel Ultra ATA/100 Adapter Specifications
Specification
Value
Protocol
UDMA Mode (0-5)
PIO Mode (0-4)
5-8
Drives supported
Up to 4 ATA (2 devices per channel)
Data transfer method
32-bit/33-MHz PCI bus-master
Maximum transfer rate per PCI Bus (peak)
133 MBps per channel
ATA 100 Cable
80-conductor cable
ATA channel transfer rate
100 MBps per channel
ATA connectors
Two 40-pin connectors (primary and secondary)
HP ProLiant ML330 Generation 3 Server Maintenance and Service Guide
Index
A
C
AC power LEDs 4-10
access panels
airflow caution 2-7
part number 1-2
removing and replacing 2-7
air baffle
part number 1-2
removing and replacing 2-8
ATA cable
assembly, part number 1-5
components 4-12
ATA cable routing 2-17
ATA devices
ID, setting 4-8
jumper settings 4-8
ATA drive failure scenarios 2-24
ATA ribbon cable assembly, part number 1-5
ATA/100 RAID connectors 4-6
ATAPI tape drive cabling 2-18
Automatic Server Recovery-2 (ASR-2) 3-1
Autorun Menu 3-5
cable clips, part number 1-2
cable routing diagrams
ATA cable routing 2-17
ATAPI tape drive cabling 2-18
SCSI cable routing 2-16
cables and cabling
ATA components 4-12
SCSI components 4-11
CD-ROM drive
bay dimensions 4-3
bay, locating 4-3
eject button 4-1
LED 4-2
part number 1-4
specifications 5-3
CE Mark-compliant power supply See power supply
clamps, part number 1-2
compartment, hard drive
part number 1-2
removing and replacing 2-21, 2-22
component-level repairs vii
components
ATA cable 4-12
front panel 4-1
mechanical 1-1
media 4-3
rear panel 4-4
SCSI cable 4-11
SCSI controller 4-10
system 1-3
system board 4-6
connectors
rear panel 4-4
system board 4-6
controllers, specifications
ATA 5-8
NIC 5-7
SCSI 5-7
country kit, part number 1-5
B
baffle See air baffle
battery
configuring system with RBSU 2-35
location 4-6
part number 1-4
removing and replacing 2-34
bays 4-3
bezel blank
part number 1-2
removing and replacing 2-6
buttons, locations 4-1
HP ProLiant ML330 Generation 3 Server Maintenance and Service Guide
Index-1
Index
D
H
devices, jumper settings 4-8
diagnostic tools 3-1
diagnostics utility 2-1, 3-5
DIMM slots, location 4-6
DIMMs
part numbers 1-4
removing and replacing 2-9
specifications 5-2
types supported 2-9
diskette drive
cable assembly, part number 1-5
connector, system board 4-6
dimensions 4-3
eject button 4-1
LED 4-2
locating 4-3
part number 1-4
specifications 5-3
drive failure scenarios, ATA 2-24
drive tray See media bay drive tray
hard drive
ATA, specifications 5-5
bays 4-3
LEDs 4-2
part number 1-4
removing and replacing 2-23
SCSI, specifications 5-6
hard drive compartment
part number 1-2
removing and replacing 2-21, 2-22
hardware kit, part number 1-2
heatsink/fan assembly
part number 1-4
removing and replacing 2-10
help viii
HP authorized reseller viii
humidity, specifications 5-2
E
electrostatic discharge (ESD) 2-1
enhanced keyboard See keyboard
Enterprise Diagnostics LX32 Utility 3-5
expansion board knockout, part number 1-2
expansion slot retainer
part number 1-2
removing and replacing 2-33
expansion slots, location 4-6
F
fan failure LEDs 4-9
fan, processor See heatsink/fan assembly
fan, system
connector 4-6
part number 1-4
removing and replacing 2-12, 2-13
firmware, upgrading 3-4
flash ROM 3-4
floppy drive See diskette drive
front bezel
part number 1-2
removing and replacing 2-5
front panel
components 4-1
LEDs 4-2
G
grounding viii
grounding plug vii
Index-2
I
IDE CD-ROM drive See CD-ROM drive
IDE connector 4-6
IML 3-2
Insight Manager 7 3-1
Integrated ATA RAID Configuration Utility
Array Information window 2-26
exiting 2-27
features 3-1
Help window 2-26
overview 2-25
Physical Drive Information window 2-26
Integrated Management Log (IML) 3-2
internal health LED 4-2
J
jumpers
ATA devices 4-8
SCSI devices 4-8
K
keyboard
connector 4-4
part numbers 1-5
kits
country 1-5
hardware 1-2
plastics, miscellaneous 1-2
power cable 1-4
return 1-5
signal cable 1-5
tower-to-rack option 1-5
HP ProLiant ML330 Generation 3 Server Maintenance and Service Guide
Index
L
LED shield
part number 1-2
removing and replacing 2-30
LEDs
front panel 4-2
rear panel 4-5
system board 4-9
M
management agents 3-3
mechanical components 1-1
media bay drive tray
part number 1-2
removing and replacing 2-20
media bays See removable media bays
media components 4-3
memory module See DIMMs
miscellaneous plastics kit, part number 1-2
mouse connector 4-4
N
NIC
LEDs 4-2, 4-5
specifications 5-7
O
Online ROM Flash Component Utility 3-6
Option ROM Configuration for Arrays (ORCA) 3-3
overtemperature LEDs 4-9
P
parallel connector 4-4
part numbers
mechanical components 1-2
system components 1-4
plastics kit, miscellaneous 1-2
power button/LED assembly
connector 4-6
part number 1-4
removing and replacing 2-29
power cable kit, part number 1-4
power connector 4-4
power extension cable, part number 1-4
Power On/Standby button 4-1
power shield cable, part number 1-4
power supply
part number 1-4
removing and replacing 2-15
weight caution 2-15
power supply connectors, system board 4-6
power switch See power button/LED assembly;
Power On/Standby button
powering down the server 2-4
Power-On Self-Test 3-3
processor
part number 1-4
removing and replacing 2-10
processor failure LEDs 4-9
processor fan See heatsink/fan assembly
processor fan connectors 4-6
processor power connector LEDs 4-9
processor retention brackets
part number 1-2
removing and replacing 2-12
processor sockets, location 4-6
R
rack warnings 2-2
rear panel
components 4-4
LEDs 4-5
Remote Insight connector 4-6
removable media bay devices, removing and
replacing 2-28
removable media bays
dimensions 4-3
locating 4-3
removable media bezel blank, part number 1-2
removing and replacing
access panel 2-7
air baffle 2-8
battery 2-34
bezel blank 2-6
DIMMs 2-9
expansion slot retainer 2-33
fan, system 2-13
front bezel 2-5
hard drive compartment 2-21, 2-22
hard drives 2-23
heatsink/fan assembly 2-10
LED shield 2-30
media bay drive tray 2-20
power button/LED assembly 2-29
power supply 2-15
processor 2-10
processor retention brackets 2-12
removable media bay devices 2-28
system board 2-35
system fan 2-13
resources viii, 3-6
return kit, part number 1-5
RJ-45 connector 4-4
ROM flashing 3-4
ROM-Based Setup Utility (RBSU) 3-3
ROMPaq Utility 3-4
HP ProLiant ML330 Generation 3 Server Maintenance and Service Guide
Index-3
Index
rubber bumpers, part number 1-2
S
safety considerations 2-1
SCSI cable components 4-11
SCSI controller
components 4-10
part number 1-4
specifications 5-7
SCSI devices
jumper settings 4-8
setting the ID 4-8
SCSI ID, setting 4-8
serial connector 4-4
serial number 2-37
server warnings 2-2
shipping temperatures 5-2
signal cable kit, part number 1-5
slots, locations 4-6
SmartStart
installing 3-5
overview 3-4
SmartStart Autorun Menu 3-5
SmartStart Scripting Toolkit 3-5
specifications
CD-ROM drive 5-3
DIMMs 5-2
diskette drive 5-3
hard drives 5-5
NIC 5-7
server unit 5-1
Ultra ATA/100 controller 5-8
Ultra3 SCSI controller 5-7
Wide Ultra3 SCSI hard drive 5-6
support packs 3-5
Survey Utility 3-6
switches
system configuration 4-7
system ID 4-8
system battery See battery
system board
components 4-6
LEDs 4-9
part number 1-4
removing and replacing 2-35
system components 1-3
Index-4
system configuration switch
location 4-6
settings 4-7
system fan
connector 4-6
part number 1-4
removing and replacing 2-13
system ID switch 4-8
system power down 2-4
system power LED 4-2
T
technician notes vii
telephone numbers viii
temperature, specifications 5-2
tools, required for service procedures 2-1
tower-to-rack option kit, part number 1-5
troubleshooting, hard drive failure 2-24
U
Ultra ATA/100 controller, specifications 5-8
Ultra3 SCSI cable, part number 1-5
Ultra3 SCSI controller, specifications 5-7
USB connectors 4-4
utilities
Enterprise Diagnostics LX32 3-5
Integrated ATA RAID Configuration 3-1
RBSU 3-3
ROMPaq 3-4
SmartStart 3-4
SmartStart Scripting Toolkit 3-5
Survey 3-6
V
ventilation clearances viii
video connector 4-4
W
warranty viii
Wide Ultra3 SCSI hard drive, specifications 5-6
HP ProLiant ML330 Generation 3 Server Maintenance and Service Guide