1
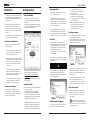
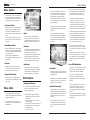
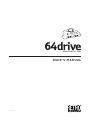
DEVELOPMENT TOOL
USER’S MANUAL
121414
COPYRIGHT INFORMATION
Product comprising physical circuit board,
software and related IP
© 2010-2014 Retroactive
“Nintendo” is a registered trademark of
Nintendo of America Inc. Nintendo 64
is a registered trademark of Nintendo
Company, Limited.
Disclaimer:
This document is for informational use
only. The user of this device assumes full
responsbility ensuring its use in accordance with local and federal laws.
The software and hardware of the
product are provided “as-is”, without any
express or implied warranty or guarantee.
NOTICES
Information contained herein reflects the
current state of the product at the time
of writing.
For the most current document please
see the Support page on the product
website at:
http://64drive.retroactive.be
See the About tab in the product Menu
to see more specific attributions and
software revision information.
ii
CONTENTS
COPYRIGHT INFORMATION
iv
NOTICES
iv
CONTENTS
v
Introduction
Physical Considerations
In Case of a Problem
1
1
1
Getting Started
Check Formatting
Install the Menu
Copy Image Files
Turn It On
Getting Around the Menu
Loading an Image
After You’re Done
1
1
1
2
2
2
2
2
Menu - Options
Use ‘Saves’ Folder
Reset Button Action
Font Size
Controller Pak Saving
3
3
3
3
3
Menu - About
Menu
Firmware
Bootloader
3
3
3
3
Other Features
Background Skinning
Quick-Start
Controller Pak Saving
Force NTSC Menu Mode
Using Saves From an Emulator
NES Emulation
MP3 Playback
3
3
4
4
4
5
5
5
USB Mode
How it Works
Considerations
Tools
6
6
6
6
Tech Details
Region Information
Saving Methods
Lockout Chips
Support for 6105/7105
7
7
7
8
9
FAQ
9
Specifications
Hardware
Transfer Rates (FW 1.xx)
Supported Save Types
10
10
10
10
Troubleshooting
Startup Problems
In Menu
10
10
11
Support Info
Website
E-mail
11
11
11
iii
USER’S MANUAL
DEVELOPMENT TOOL
Introduction
The 64drive is a tool designed to be used
with the Nintendo 64 video game console
for the ends of game development and/or
modification.
Conceived out of frustration at the lack
of options available on the market, it
incorporates a capable feature set, robust
hardware design, and incredible attention
to detail.
Getting Started
Check Formatting
The 64drive only works with memory
cards that are formatted with the FAT32
filesystem.
Older cards may need to be re-formatted
to work. Under Windows you can check by
viewing the card’s Properties.
I hope that you as the user will appreciate
the polish and enjoy the product.
• The cart is designed for indoor use only.
Keep it dry, avoid dropping it, and don’t
let foreign objects get into it.
Refer to the Troubleshooting section.
In the event of a problem not detailed in
this document, see the Contact section to
send an email to Support.
For best results, you should use the SD
Association’s Formatter Software http://www.sdcard.org/downloads/
formatter_4/ (Mac, Windows). 64GB and
larger cards will default to exFAT, which is
not supported.
It should pause for just a second while it
finds the menu program and loads it.
Within just a moment you should see the
menu for the first time.
Install the Menu
Download the last menu from the Support
page on the website.
This is distributed as a compressed
ZIP archive, containing the MENU.BIN
(actual menu program) and also a text file
changelog describing the new features or
bugfixes relevant to that version.
Copy MENU.BIN to the root directory of
your SD or CompactFlash memory card.
This means that the file should not be
within any other sub-folders on the card.
PA G E 1
Both .Z64 (big-endian) and .V64/.N64
(byte-swapped) formats are supported.
The latter is byteswapped by the hardware
while loading so there is no speed penalty.
• ‘A’ button selects item or tab
• ‘B’ button cancels or returns to the
previous screen
• ‘C’-Up/Down buttons can be used to
scroll quickly through long listings
• ‘C’-Left/Right jump to the start and end
of the current folder
• Both the analog stick and the d-pad
may be used to move the cursor. The
current highlighted item will have a
pulsing border around it.
Loading an Image
Once a file has been picked, the loading
options screen will be shown.
In most cases, the 64drive can pick the
best settings and you can just press A to
load the image straight away.
Now power it on. The first thing you should
see is the bootloader icon - a small rotating symbol.
• Special attention should be paid to the
edge connector on the bottom. If it gets
dirty there will not be a good connection and in rare cases you might lose
some data.
In Case of a Problem
Organization doesn’t matter. However,
there is a limit of about 1000 entries per
folder. You may choose to categorize your
images in folders, or you can dump them
all in the root directory.
Put the memory card in your 64drive.
MicroSD cards go in the rear, with the gold
contacts facing towards you. CompactFlash cards go in the front with the label
facing the front of the console.
If both cards are in at the same time, CF
will take priority.
Please observe these guidelines when
using the product:
• All common sense rules for the proper
treatment of expensive electronic
equipment should be observed.
Next, copy over any images you want to
run on the memory card.
Turn It On
Physical Considerations
• This product supports upgrades in the
field. It is possible to render the cartridge otherwise unusable if care is not
taken when applying upgrades.
Copy Image Files
If the image to be loaded uses an internal
cartridge save method, the 64drive will
create a file to hold the save data on the
memory card.
In some cases the software to be loaded
may not be designed to run on your
console’s region. You can try forcing the
region, but it is best to leave it on “Auto”.
After You’re Done
Press the RESET button on the N64 console to return back to the menu, or if the
option was enabled, reset back to the
same image.
Getting Around the Menu
The buttons control the menu much the
same way as they do in most games.
!
On firmwares 1.xx, you MUST press
reset to flush the savegame data
back to the memory card, or your progress
will not be updated!
PA G E 2
USER’S MANUAL
DEVELOPMENT TOOL
Menu - Options
Every time the 64drive is booted, it will
check for the presence of this file. If it is
found, and you also have an Expansion
Pak installed, it will decode the JPEG,
convert it to an intermediate format and
render a transparent overlay using FloydSteinberg dithering.
In the “Options” tab you can tweak a few
things. The changes are committed once
you load an image, and are stored in the
“settings.cfg” file on the memory card.
Use ‘Saves’ Folder
By default, when an image is loaded that
supports internal savegames, the menu
will create a new folder called “Saves”,
and also create a new save file within that
folder.
Turn off this option if you want to keep
the save files in the same place as each
image file.
Reset Button Action
When the RESET button on the console is
pressed, this option determines whether
the menu is loaded or it instantly reboots
to the same image.
In both cases, any changed internal
save progress will be written back to the
memory card.
Font Size
Changes the width of the menu listing
font. The smaller font looks better when
stretched on widescreen displays.
Controller Pak Saving
Opens a submenu for management of
virtual pak files. More details follow in the
next section.
The menu will create a system file called
“background.bin” after the conversion is
complete.
Menu
This is the version of the MENU.BIN
file stored on your memory card, and is
upgraded by copying a new file from the
Support page onto the memory card.
Inside the 64drive itself is some memory
that controls the details of how the cartridge works, at a very low level.
It is upgraded with a special program over
USB. Periodically there may be a new
firmware available for download from the
product website that may fix problems.
Other Features
This tab displays the list of tools and
people that helped and shaped the development of the 64drive.
It also displays the current versions of
the software on your cartridge. These are
detailed below:
PA G E 3
The menu supports background images.
However, the console must have an
Expansion Pak installed.
• Create a JPEG image that is exactly
640x480 pixels, and less than about
100KB in size.
• Rename the file so that it is exactly
“background.jpg”.
• Copy the picture to the root directory of
the memory card, just like you did for
the MENU.BIN file.
• Turn on the console.
All software designed for the N64 console
utilizing a Controller Pak should have a
menu for editing Game Notes - this is accessed by holding START on the controller
just as the software starts (just after the
menu loading screen goes away).
Force NTSC Menu Mode
Bootloader
Also contained within the cartridge is a
small program that loads the menu itself
at each power-on. Generally this won’t
need to be updated, but it’s possible.
The menu supports 6 of these virtual
“containers”, so that if you run out of
space on your real Controller Pak, it may
be set aside. You may move around the
pak contents as whole, but at this time removing individual entries is unsupported.
The virtual containers are stored on the
memory card as “virtpak1.bin”, “virtpak2.
bin”, and so on. The format is a raw 32KB
dump.
Astute readers may wonder if this is the
same as a DexDrive save file - it is, but not
quite. DexDrive saves have an additional
0x1040 byte-long header at the start of
the file.
Firmware
Background Skinning
Menu - About
The menu will detect a change in the
JPEG’s filesize and apply the changes if
it is found. To remove the background,
delete both “background.jpg” and “background.bin”.
With this option you can have 1 physical
Pak plugged into your controller, and copy
the entire contents into a virtual “container” file stored on the memory card.
Quick-Start
While in the menu, you can instantly load
the previously started image by pressing
the START button.
Additionally, you can hold down the START
button when turning on the console, and
bypass the menu completely.
Controller Pak Saving
While the 64drive can easily handle and
isolate savegames that are supposed to
be stored internally, it cannot access the
Controller Pak while it is running user
software.
For PAL users only, the menu will be slightly squashed vertically due to the higher
line count of the PAL video standard.
If you have a TV that supports 60hz,
you can press Z+DpadLeft, and then
Z+DpadRight to switch the display mode
to NTSC.
This option is persistent. If your TV does
not support this mode, you may see
“SYNC LOST” or something similar. Just
enter the button combo again to toggle it
back off.
Alternatively, you can delete the “settings.
cfg” file from the memory card to revert to
the defaults.
A lot of software will use up the entire
Controller Pak and because the 64drive
can’t easily get around that, this option
exists.
PA G E 4
USER’S MANUAL
DEVELOPMENT TOOL
Using Saves From an Emulator
Internal game saves can be used in an
emulator, and vice versa. However, file
naming is very important.
PC emulators such as Project64, Mupen,
1964, etc., generally create their own
save files when they run games that need
them. EEPROM saves can be simply copied back and forth, if the file names are
what the emulator or 64drive expects.
SRAM and FlashRAM saves tend to be
stored by emulators as little-endian, due
to the heritage of the Intel x86 platform
the emulators were designed for.
64drive saves in the game’s native bigendian format. So to exchange these you
will have to perform a 32-bit endian swap
on the data.
NES Emulation
USB Mode
The 64drive has a dedicated USB 2.0 High
Speed FIFO that can be used to:
•
•
•
•
Load images into SDRAM
Select save emulation type
Upgrade firmware/bootloader
Do custom communications between
code running on the console and the
PC
Files with the .NES extension are loaded
via the Neon64 program, a great achievement by “hcs”. Download his emulator
and extract the “neon64bu.rom” file to the
memory card’s root directory.
This functionality is ideal for development.
Since the bootloader is disabled, you can
reset the console immediately without
corrupting the RDRAM state.
While not a supported feature, the menu
has very basic music playback support.
MPEG Audio layer I, II, and III can be
played.
When an image is loaded, playback is
stopped.
PA G E 5
You can also read and write directly to the
USB FIFO using a set of memory mapped
registers.
The specifics are detailed in the separate
Hardware Specification document available from the support website.
When the 64drive detects that a USB
cable has been plugged in, it immediately
switches modes.
In this mode,
• Save writebacks are disabled
• Bootloader is disabled
• 64drive appears as a plain cartridge
• USB registers are enabled
When the USB cable is NOT connected,
• Save writebacks are re-enabled
• Bootloader is enabled
MP3 Playback
The “64drive_usb” tool is available from
the support website. With it you can transfer your homebrew images to the cartridge
for testing and debugging.
How it Works
While the menu does not directly emulate
anything, it does support automatic loading via an external emulator.
The INES image is automatically placed at
the 2 megabyte offset in SDRAM, and the
emulator loaded at 0x0 before it.
Tools
Considerations
Because the bootloader, menu, and by
extension, bootemu are bypassed in
this mode, the header type of the image
you upload must match the physical CIC
installed in the 64drive.
For example, with a 6102 installed, you
could load Super Mario 64, but not 1080
Snowboarding, which uses a 6103 CIC.
Homebrew images can easily be patched
with the proper header type using a hex
editor or the “RN64CRC” tool.
PA G E 6
USER’S MANUAL
DEVELOPMENT TOOL
Tech Details
This section pertains to information that
some may find useful as background
knowledge, or to further their understanding with troubleshooting an odd issue.
Region Information
• NTSC - Used in the United States, Japan
• PAL - Used in most other countries such
as the UK, most of the EU, Australia
• MPAL - Brazil
For more detailed country listings consult
your favorite search engine.
To see what region console you have, flip
over your N64 and look at the printed
label on the bottom. The region is located
after the model number (NUS-001).
Cartridges original intended for sale in the
USA have notches on the rear lower corners of the cart case. Conversely, all other
parts of the world received cartridges
whose notches are inset by about 1cm.
It is possible for software running on the
N64 to detect what region of console it
is using. Some titles were able to adapt
to these changes and apply video and
sound changes to work in both regions.
Others were hard-coded to only accept
one region.
It is possible to have the 64drive to “fake”
the proper region, but since the actual
N64 hardware has different clocking
schemes, the video encoding (PAL vs
NTSC color encoding) and audio timing
will not be updated. The result is some
minor audio pops, and not all TVs will be
able to sync to the unconventional video
signal.
Once again a great deal about region
modding has been written. More information on this subject can be found on the
Internet.
PA G E 7
Saving Methods
Games originally could contain custom
chips that held game progress inside the
physical cartridge. Appearing in decreasing frequency in production carts:
•
•
•
•
•
Lockout Chips
In addition to the physical notches in
each cartridge case, there was additional
region enforcement in original games.
EEPROM (4Kbit)
EEPROM (16Kbit)
SRAM (256Kbit)
FlashRAM (1Mbit)
SRAM 3x (768Kbit)
Generally, first-party titles utilized these
kinds of built-in save mechanisms. As they
added cost to each unit built, cheaper
games relied on the user already owning a
Controller Pak (which is 256Kbit).
The last save type was used in only one
game, Dezaemon 3D. This Japan-only title
had three physical SRAM chips with some
glue logic to do rudimentary address
mapping.
Of special note is the x105 CIC, which contains additional functionality. It can accept
a “challenge” request and provide a magic
“response” value to the software running
on the N64, if so required.
Jet Force Gemini was the first title to
utilize this. In true Rareware style, the
game would still run on non-x105 CICs,
but it would crash randomly (on purpose)
and disallow the player from jumping or
shooting.
Each cartridge contains a small microcontroller (CIC) that maintains constant
communication with a similar chip (PIF)
inside the N64 console. If the chip is
absent, the wrong type, or does not
exactly match the region, the system will
not boot.
Banjo Tooie, another Rare title, took the
idea further. All the game assets were encrypted, and during runtime the responses from the CIC challenges were used to
decrypt them. This was not defeated until
recently.
The 64drive can emulate all of these
methods. A look-up table is used by the
menu to determine what kind of save
type should be assumed for each image
loaded. While this has been thoroughly
tested, it is still possible to override.
There are prototypes in the wild that
assume a certain save method and will
crash if it can’t be accessed. An example
is Mini Racers. In the worst case you can
try all 4 save types if a title hangs upon
boot.
As detailed before, save files can be
exchanged between emulators and the
64drive. All types except EEPROM files
must be 32bit endian swapped when
changing platforms.
The known CIC types for NTSC are:
• 6102
• 6101
• 6103
• 6105
• 6106
The known types for PAL are:
• 7101
• 7102
• 7103
• 7105
• 7106
Generally, the 6102/7101 is by far the
most common. Star Fox/Lylat Wars was
the first game to receive its own CIC, and
the trend continued with each major firstparty title.
In addition, the CIC inside the 64DD is
5101 which expects a NTSC-J console.
PA G E 8
USER’S MANUAL
DEVELOPMENT TOOL
Support for 6105/7105
A 64drive with a corresponding
6102/7101 chip will run all known software in the wild with the exception of the
two previously named. For those that want
complete compatiblity without patches,
the 64drive hardware has a provision for
that.
A x105 may be soldered on to the circuit
board in lieu of the 6102/7101, and the
“BANK” jumper immediately above the
CIC footprint should also then be shorted
closed. This selects an alternate bootloader that is compatible with the new CIC.
No compatibility problems have been
found as a result of using this method.
Otherwise, there are patches in the wild
for both these two situations.
FAQ
• Is the hardware region specific?
No, but the physical case, and the installed CIC are.
• What SD cards are supported?
SD, SDHC, and SDXC cards have been
tested up to 32GB. At least a Class 4 card
is recommended. However, Class 10 cards
typically have much more consistent read/
write speeds and better build quality.
• Can I use this with a Gameshark?
Mostly not. It is possible to run in USB
mode for only those games whose CIC
matches the physically installed one.
Otherwise regularly the boot mechanism
does not play well with the Gameshark.
Replacement functionality may be added
at some point in the future.
• What image formats are supported?
.Z64 and .V64 formats. Most .rom and
.bin files fall under this category as well.
• Are there any compatibility issues?
See the previous Lockout Chip section.
• Will hacked games run?
Depends. Many of these hacks, especially
SM64 hacks, are poorly coded and only
work because emulators are actually very
inaccurate and let things slide.
A counter-example is Goldeneye X which
since it is very well designed and executed
runs on the 64drive with no problems.
• What about “high-res” texture packs?
Those are physically impossible to use on
the N64, regardless of the hardware. The
console’s texture memory is limited to
4KB in silicon.
PA G E 9
Specifications
Hardware
•
•
•
•
•
•
•
64 Megabytes SDRAM
USB 2.0 High-Speed FIFO
Secure Digital
CompactFlash
Custom FPGA logic
512KB shared bootloader
512KB configuration ROM
Transfer Rates (FW 1.xx)
• Memory card: 9Mbyte/sec
• USB: 8Mbytes/sec
Transfer Rates (FW 2.xx)
• CompactFLash: 9Mbyte/sec
• Secure DIgital: 21Mbyte/sec
• USB: 8Mbytes/sec
Supported Save Types
•
•
•
•
•
EEPROM (4Kbit)
EEPROM (16Kbit)
SRAM (256Kbit)
FlashRAM (1Mbit)
SRAM 3x (768Kbit)
Troubleshooting
Startup Problems
• I am using CompactFlash and loading
is erratic, or goes to a black screen
instead of the menu.
→→ Try holding ‘Z’ when turning on the
console. This selects Compatibility
Mode in the bootloader which is
specific to CF only, and may help
some very old cards as well as
microdrives.
• I get the error “FAT32 partition not
found”.
→→ The card may be corrupted, or formatted as FAT16/NTFS. Reformat.
• I pressed Reset after removing the card
and it hangs.
→→ The cards are not hot swappable,
power off and on.
• I installed a 6105 and now it won’t
boot.
→→ Jump the BANK connection described in a previous section.
• The spinny icon (bootloader) shows
for a short time, then disappears to a
black screen, and no menu.
→→ This may indicate a physical connection issue with the SDRAM.
You can try loading an image over
USB. Read the USB section for
considerations.
→→ Possible incompatiblity with the
memory card, causing corrupted
data transfer. Email support
• “Undefined error” shows.
→→ This is intentional, and triggered by
holding the L button. Try a different
controller. This may happen with
cheap 3rd party controllers.
PA G E 10
DEVELOPMENT TOOL
In Menu
• After upgrading menus some buttons
are inconsistent with the effects I’m
seeing, or inexplicably broken.
→→ Delete the “settings.cfg” file from
the memory card, and let the menu
rebuild it.
• “Sector too close to MBR” error
→→ Please email me at the support
address.
• “Filesystem issue”
→→ This may indicate a problem with
the FAT table. Put the memory card
in a computer and run a disk integrity scan such as “chkdsk”.
• “Settings.cfg is corrupt”
→→ Delete the file and try again
PA G E 11
Support Info
Website
http://64drive.retroactive.be
Click “Support” tab
E-mail
support -(at)- retroactive.be
64drive.retroactive.be