1
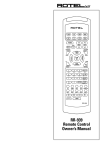
RR-949
REMOTE CONTROL
TÉLÉCOMMANDE
FERNBEDIENUNG
MANDO A DISTANCIA
COMANDO A DISTANZA
AFSTANDSBEDIENING
AUD
CD
TAPE
DVD
SAT
TV
VCR
CBL
POWER
VOL
BAND
MUTE
CH
T/V
PRESET TUNE PRESET
SURROUND +
ON SCREEN
GUIDE
MENU
SEARCH +
TRACK –
SEARCH –
PAUSE
PLAY
SEL
UP
TRACK +
DOWN
STOP
PRE
CH
RECALL
OPN/CLS
SUR-DELAY
1
2
3
DISC 1
DISC 2
DISC 3
MOVIE FILT
PROG
4
5
6
5.1 CH
DISC 4
DISC 5
DISC 6
TIME [REVIEW]
7
8
9
SELECT
CLEAR [SCAN]
10
0
ENTER
BACK
RANDOM [REPEAT]
CD
TUNER
AUX/V4
TAPE 1
TAPE 2
VIDEO 1
PTY
[SHIFT]
OFF
TA
AUX/V5
PHONO
VIDEO 2
VIDEO 3
TP
LIGHT
DISPLAY
ZONE
REC
RR-949
Owner’s Manual ............................. 3
Guide d’utilisation ........................ 10
Bedienungsanleitung .................. 18
Manual de Instrucciones ............ 26
Manuale di Istruzioni .................. 34
Gebruiksaanwijzing .................... 41
L
English
RR-949
○ ○ ○ ○ ○ ○ ○ ○ ○ ○ ○ ○ ○ ○ ○ ○ ○ ○ ○ ○ ○ ○
Introduction
Thank you for purchasing the RR-949 Universal Remote
Control. It is designed to operate all current Rotel products as well as a wide range of popular audio and video
components from other manufacturers. You will find that
the RR-949 Remote Control is a significant improvement
over conventional remotes in overall convenience and
ease of operation.
AUD
CD
TAPE
DVD
1
SAT
TV
VCR
CBL
Some Preliminary Precautions
POWER
VOL
BAND
CH
• The RR-949 is surprisingly rugged but it is not
indestructible. So please don’t drop it — particularly
not on a concrete floor! With normal care, the RR-949’s
low maintenance design will let you enjoy its convenience for years to come.
T/V
MUTE
PRESET TUNE PRESET
SURROUND +
ON SCREEN
GUIDE
MENU
SEARCH +
SEARCH –
PAUSE
TRACK –
PLAY
SEL
UP
TRACK +
STOP
PRE
CH
RECALL
OPN/CLS
SUR-DELAY
1
2
3
DISC 1
DISC 2
DISC 3
PROG
4
5
6
5.1 CH
DISC 4
DISC 5
DISC 6
TIME [REVIEW]
7
8
9
10
0
SELECT
ENTER
BACK
RANDOM [REPEAT]
CD
TUNER
AUX/V4
TAPE 1
TAPE 2
VIDEO 1
[SHIFT]
TA
AUX/V5
PHONO
VIDEO 2
VIDEO 3
TP
LIGHT
OFF
DISPLAY
ZONE
• Above all, don’t try to take the RR-949 apart. There isn’t
anything inside you can fix anyway and disassembly
will void the warranty.
Battery Installation
Remove the RR-949 and the package of 4 AAA batteries
from the packing material. Turn the RR-949 over and lift
the cover off the battery compartment by compressing
the release tab and lifting up.
Place the four AAA batteries inside (follow the polarity
drawing on the bottom of the compartment) and replace
the cover. MAKE SURE you install the batteries correctly!
○ ○ ○ ○ ○ ○ ○ ○ ○ ○ ○ ○ ○ ○ ○ ○ ○ ○ ○ ○ ○ ○
Using the RR-949
REC
RR-949
3
2
MOVIE FILT
CLEAR [SCAN]
2
• When the RR-949 needs a bit of cleaning, use a soft,
lint-free damp cloth.
DOWN
PTY
Please take a few moments to read this user guide. You’ll
find the time well spent as it will significantly shorten
your search for remote control sanity.
4
The RR-949 can replace up to eight different remote controls. Stored in memory are control codes to operate your
specific audio/video components, selected from hundreds of models in the RR-949’s extensive database. Programming the RR-949 to operate your components takes
just minutes and need only be done once. See the PROGRAMMING section of this manual for easy to follow instructions.
3
English
RR-949
Once the programming is complete, you select a component with the press of a button and turn the RR-949 into
the remote control for your Rotel CD player or your Sony
TV set or your Panasonic video recorder. Then, you simply press command buttons that duplicate the functions
on the remote that came with your component.
Below the source selection button are five more command buttons: a row of four buttons used to control RDS
functions on tuners and receivers and a ZONE/REC button used for certain functions on preamplifiers and processors.
To operate the RR-949:
To get started, look at the layout of the RR-949 and the
following operating instructions:
Device Buttons
1
Eight buttons at the top of the RR-949 determine which
set of commands is currently active. For example, if you
press the AUDIO button (labeled AUD), the RR-949 becomes the remote control for your Rotel Surround Sound
Processor. If you press the TV button, the RR-949 becomes the remote control for your TV set.
These buttons are also used in programming the RR-949.
See the PROGRAMMING section below for details.
Command Buttons
Step Two: Press COMMAND buttons to operate the
component you have selected.
Remember that the COMMAND buttons duplicate many
controls on many different types of audio/video components and their function may vary depending on the type
of component selected. For example, the PLAY/SELECT
button engages the play mode on a CD Player, but it duplicates the SELECT function on a cable TV converter.
2
This large group of buttons duplicates the functions on
the remote controls for your audio/video components. A
general description of these functions follows. Detailed
information on the specific function of each button can
be found in the CONTROL COMMANDS tables.
At the top of this group of buttons are basic controls
such as Power, Volume, Channel Selection, etc.
Below these is a group of buttons that duplicate the
transport functions on a tape recorder or VCR (Stop,
Play, Pause, etc.) as well as the Up and Down commands
that might be found on a cable or satellite TV receiver.
The next group of buttons duplicates the numeric keypad
buttons such as might be used for direct track selection
on a CD Player or direct channel selection on a TV set.
Included in this section are special command buttons
providing functions found on various components.
Near the bottom of this group of buttons are ten round
source selection buttons labelled CD, TUNER, TAPE, etc.
These duplicate the source input selection buttons on a
receiver, preamplifier, or surround sound processor. The
function of these buttons is not the same as the DEVICE
buttons at the top of the remote control. The DEVICE buttons determine which command set is active on the
RR-949. The source select COMMAND buttons switch
inputs on the audio/video component being controlled.
4
Step One: Press a DEVICE button to activate the commands for the desired component. This command set
will remain active until you press a different DEVICE button.
Note: The RR-949 tells you which command set is active.
Each time you press a COMMAND button, the active DEVICE key blinks red to tell you which component you are
controlling. If the COMMAND button that you press has
no function in the active command set (for example, the
numeric keys in VCR mode), no DEVICE button will blink,
indicating that the COMMAND button is inactive.
The COMMAND buttons are labelled, often with multiple
labels if the button serves different purposes for different
kinds of components. As long as you remember that
pressing a DEVICE button turns the RR-949 into, for example, a CD player remote control or a VCR remote control, the functions of each button should be intuitive.
Tables listing the function of each button for each type of
component are supplied with this manual.
A few buttons have a second function, activated by
pressing and releasing the SHIFT button before pressing
the COMMAND button, as described below.
Shift Button
3
The SHIFT button activates additional commands for
some buttons. These functions are shown in italics on
the illustrations and in the command tables. To activate
one of these commands, press and release the SHIFT
button and then press the desired COMMAND button.
5
English
RR-949
Light Button
4
The LIGHT button turns on backlighting so you can see
the buttons in a dark room. The lights stay on for 7 seconds and will stay on for an additional 7 seconds each
time another button is pressed.
○ ○ ○ ○ ○ ○ ○ ○ ○ ○ ○ ○ ○ ○ ○ ○ ○ ○ ○ ○ ○ ○
Programming
Step Four: Store the code number by pressing the corresponding DEVICE button again. The button will blink
twice to confirm the storage of the code in memory.
Step Five: Test the COMMAND buttons, using the tables
as a reference for the available functions. If the functions
do not work correctly, repeat the above steps, with the
next available 3-digit code from the list for your brand of
component.
The RR-949 can replace up to eight different remote controls, one for each of the eight DEVICE buttons. Before
you use it, you must program the RR-949, i.e. tell it which
audio/video components you wish it to control.
Repeat the steps above for each of up to eight components, assigning each one to the appropriate DEVICE key.
The RR-949 contains hundreds of command sets for various A/V components. Programming the remote involves
selecting the command sets that correspond to the components in your system, and assigning them to the eight
DEVICE buttons by entering a three digit code. This need
only be done once during initial set-up of the RR-949.
If the code table does not provide a 3-digit code or if
none of the code numbers assigned to your brand of
component work, use the following auto-search method
to find a code number that will operate your components.
The easiest way to proceed is to find your components
and corresponding three-digit codes from the list of
codes supplied with this manual. If your component is
not listed, there is an alternative auto-search method for
finding the right command set.
Step Two: Press the corresponding DEVICE button and
the MUTE button, simultaneously for one second or
more. The LED will light for 20 seconds.
Three Digit Code Programming
Find your audio/video component in the code list and
note the 3-digit code(s):
Step One: Turn on the component you wish to memorize.
Step Two: Press the corresponding DEVICE button (for
example, if you are memorizing the command set for a
CD player, press the CD DEVICE button at the top of the
RR-949). While pressing the DEVICE button, simultaneously press the MUTE button and hold both for at least
one second. The DEVICE key will light in red for 20 seconds, indicating that you have entered the program
mode. The next step must be done within this 20 second
period, or the RR-949 will revert to its standard operating
mode.
Auto-Search Programming
Step One: Turn on the component you wish to operate.
Step Three: Press and hold the CH UP or CH DOWN button. This sends a succession of Power ON/OFF code signals that are stored in memory. Stop pressing the CH
button as soon as the component turns off, signifying that
you have found a code set that operates that component.
Step Four: Press the DEVICE button to store the code set
you have found. The button will blink twice to confirm
that you have stored the code.
Step Five: Test the remote control functions. If any do not
work properly, repeat the preceding steps until you find
the right code.
Step Three: Point the RR-949 at the audio/video component and enter the 3-digit code, using the numeric buttons. The DEVICE key will flash each time you enter a
digit. If you have entered the correct code, the component will turn off. If there is more than one 3-digit code
for your brand of source component, continue entering
additional 3-digit codes from the list until the component
turns off, indicating that you have found the right one.
6
7
RR-949
Displaying a Code Number
To find out which 3-digit code is currently stored on a DEVICE button:
Step One: Press the DEVICE button and the MUTE button
simultaneously for one second or more. The DEVICE button will light red for 20 seconds.
Step Two: Press the RECALL button. The DEVICE button
will blink a number of times, indicating the first digit in the
code, followed by a one second interval with the light off,
followed by a number of blinks indicating the second
digit, followed by another interval, followed by blinks indicating the third digit. For example, one blink, three
blinks, and eight blinks, with one second intervals in between, represents the 3-digit code number 138.
Note: The number ZERO in a 3-digit code is represented
by 10 blinks.
○ ○ ○ ○ ○ ○ ○ ○ ○ ○ ○ ○ ○ ○ ○ ○ ○ ○ ○ ○ ○ ○
Volume Punch Through
It may be desirable to have the AUDIO or TV volume
commands available at all times. For example, when using the RR-949 to control your CD player, you might want
the VOLUME buttons (which would normally be inactive
in CD mode) to change the volume of your preamp or surround sound processor. This feature, called Volume
Punch Through, can be used to make the volume commands from either the AUDIO or TV device mode available in other device modes.
English
○ ○ ○ ○ ○ ○ ○ ○ ○ ○ ○ ○ ○ ○ ○ ○ ○ ○ ○ ○ ○ ○
Mapping a Component to
Another Device Button
In some systems, you may need to program one command set to another DEVICE button. For example, if you
have two CD players, you may wish to use the SAT DEVICE button to store and activate commands for a second CD player. To reassign device codes to another
button:
Step One: Press the new DEVICE button where you wish
to store the command set and the MUTE button simultaneously for at least one second.
Step Two: Press the DEVICE button corresponding to the
command set you wish to transfer in order to access the
command sets for that type of component.
Step Three: Enter the 3-digit code for the audio/video
component you wish to transfer.
Step Four: Press the DEVICE button where you wish to
store the command set. It will blink twice to confirm.
Example: To store CD commands on the SAT DEVICE button, press the SAT DEVICE button in Steps One and Four.
Press the CD DEVICE button in Step Two.
To set-up the Volume Punch Through feature:
Step One: Press the DEVICE button (the device you wish
to transfer the volume function to) and the MUTE button
simultaneously for at least one second.
Step Two: Press the VOLUME UP button.
Step Three: Press the AUDIO or TV DEVICE button (the
device you wish to transfer the volume function from).
The DEVICE button will blink twice to confirm.
Example: To have the AUDIO volume command prevail in
the VCR mode, press the VCR DEVICE button in Step One
and the AUDIO DEVICE button in Step 3.
8
9
Français
RR-949
○ ○ ○ ○ ○ ○ ○ ○ ○ ○ ○ ○ ○ ○ ○ ○ ○ ○ ○ ○ ○ ○
Introduction
Nous vous remercions d’avoir fait l’achat de la
télécommande universelle RR-949 de Rotel. Cette
télécommande est conçue pour commander tous les
appareils Rotel que l’on retrouve actuellement sur le
marché ainsi qu’une vaste gamme de composantes
audio et vidéo populaires d’autres marques. La
télécommande RR-949 de Rotel s’avère assez différente
des autres télécommandes, plus pratique et plus facile
d’utilisation.
Nous vous invitons à prendre quelques minutes pour lire
ce guide d’utilisation. Vous gagnerez ainsi un temps
précieux en recherche ultérieure sur le fonctionnement
de la télécommande.
Quelques précautions
• La télécommande RR-949 est étonnamment robuste
mais pas indestructible. On doit donc éviter de la
laisser tomber par terre, surtout sur un plancher de
béton. Utilisée dans des conditions normales, la
télécommande RR-949 nécessite peu d’entretien et
vous procurera beaucoup de plaisir pendant de
nombreuses années.
• Si on doit nettoyer la télécommande, utiliser un linge
doux et sec sans charpie.
• On ne doit surtout pas tenter de démonter la
télécommande qui ne contient aucune pièce qui peut
être réparée par l’usager. Une telle manipulation
annulera la garantie.
Installation des piles
Enlever la télécommande et les quatre piles AAA de
l’emballage. Enlever ensuite le couvercle que l’on
retrouve à l’arrière de la télécommande en tirant sur la
patte du couvercle.
parmi des centaines de modèles et entrées dans la
gigantesque base de données de l’appareil. Il suffit de
quelques minutes pour programmer la télécommande de
façon définitive. Se reporter à la section intitulée
«PROGRAMMATION» de ce guide pour suivre les
instructions de programmation faciles à consulter.
Lorsque la programmation est terminée, une simple
commande du doigt permet de convertir votre
télécommande RR-949 en une télécommande dédiée qui
commandera votre lecteur de disques compacts Rotel,
votre téléviseur Sony ou votre magnétoscope Panasonic.
Il suffit ensuite d’appuyer sur les touches de commande
qui reproduisent les mêmes fonctions que l’on retrouve
sur la télécommande de la composante en question.
Avant de débuter, consulter le schéma de la
télécommande RR-949 et les instructions d’utilisation
correspondantes :
Touches de choix de composante
1
Huit touches en haut de la télécommande déterminent
quel groupe de commande est actif. Par exemple,
lorsqu’on appuie sur la touche AUDIO (identifiée AUD), la
télécommande devient la télécommande du processeur
ambiophonique Rotel. Lorsqu’on appuie sur la touche TV,
elle permet de commander les fonctions du téléviseur.
On utilise aussi ces touches pour programmer la
télécommande RR-949. Se reporter à la section intitulée
«PROGRAMMATION».
Touches de commande
2
Cette importante série de touches reproduit les fonctions
que l’on retrouve sur la télécommande des composantes
audio et vidéo. On trouvera ci-dessous une description
générale de ces fonctions. On trouvera dans la liste des
COMMANDES des renseignements précis sur la fonction
de chaque touche.
Installer les quatre piles dans le logement des piles en
respectant la polarité (suivre le schéma que l’on retrouve
au fond du logement des piles) et replacer le couvercle.
On doit S’ASSURER de placer les piles correctement.
Au-dessus de ce groupe de touches, on retrouve les
commandes de base telles que les commandes
d’alimentation, de volume, de choix de canaux, etc.
○ ○ ○ ○ ○ ○ ○ ○ ○ ○ ○ ○ ○ ○ ○ ○ ○ ○ ○ ○ ○ ○
Sous ces touches, on retrouve un groupe de touches qui
reproduisent les fonctions de transport d’un
magnétophone ou d’un magnétoscope (arrêt, marche,
pause, etc.) ainsi que les commandes «canal suivant» et
«canal précédent» que l’on peut retrouver sur un
téléviseur raccordé au réseau de câblodistribution ou à un
satellite.
Utilisation de la télécommande
La télécommande RR-949 peut remplacer jusqu’à huit
télécommandes différentes. Des codes de commande
sont stockés dans sa mémoire et permettent de
commander des composantes audio et vidéo choisies
10
11
Français
RR-949
Le prochain groupe de touches permet de reproduire le
clavier numérique que l’on utilise habituellement pour
choisir un plage sur un lecteur de disques compacts ou
un canal sur un téléviseur. On retrouve aussi dans cette
section des touches de commande spéciales qui
commandent des fonctions que l’on retrouve sur
diverses composantes.
Près de la partie inférieure de l’appareil, on retrouve dix
commutateurs de source ronds identifiés CD, TUNER,
TAPE, etc. qui permettent de reproduire les sélecteurs
d’entrée sur un ampli-syntoniseur, un préamplificateur ou
un processeur ambiophonique. La fonction de ces
touches n’est pas la même que celle des touches de
CHOIX DE COMPOSANTE que l’on retrouve dans la partie
supérieure de la télécommande. Les touches de CHOIX
DE COMPOSANTE déterminent quel groupe de
commandes est actif sur la télécommande. Quant aux
touches de choix de source, elles permettent de mettre
en circuit les entrées sur la composante audio ou vidéo
commandée.
Sous le sélecteur de source, on retrouve cinq autres
touches de commande dont une rangée de quatre
touches qui commandent les fonctions RDS d’un
syntoniseur et d’un ampli-syntoniseur et une touche
ZONE/REC qui permet de commander certaines fonctions
d’un préamplificateur ou d’un processeur.
Remarque: La télécommande RR-949 vous indique quelle
groupe de commandes est actif. Chaque fois que l’on
appuie sur une touche COMMAND, le témoin rouge
DEVICE (COMPOSANTE) clignote pour indiquer quelle
composante est commandée. Si on appuie sur une touche
COMMAND qui ne commande aucune fonction dans le
groupe de commandes (par exemple les touches
numériques d’un mode MAGNÉTOSCOPE), aucun témoin
ne clignotera, ce qui indique que la touche COMMAND est
inactive.
Les touches COMMAND (COMMANDES) sont identifiées
et portent souvent plusieurs indications si elles servent à
commander différentes composantes. Il suffit de se
rappeler qu’une touche DEVICE (CHOIX DE
COMPOSANTE) sert à convertir la télécommande pour
télécommander par exemple un lecteur de disques
compacts ou un magnétoscope. Les fonctions de chaque
touche devraient être intuitives. Des tables indiquant la
fonction de chaque touche pour chaque type de
composante sont fournies au verso de ce guide.
Quelques touches ont une deuxième fonction qui est
activée lorsqu’on enclenche ou lorsqu’on relâche la
touche SHIFT avant d’appuyer sur la touche COMMAND
(COMMANDES), tel qu’on le décrit ci-dessous.
Touche SHIFT
3
Pour utiliser la télécommande RR-949 :
Première étape: Appuyer sur une touche DEVICE (CHOIX
DE COMPOSANTE) pour mettre en circuit les
commandes de la composante choisie. Ce groupe de
commandes reste actif jusqu’à ce qu’on appuie sur une
autre touche DEVICE (CHOIX DE COMPOSANTE).
Deuxième étape: Appuyer sur les touches COMMAND
(COMMANDE) pour commander la composante choisie.
On ne doit pas oublier que les touches COMMAND
(COMMANDE) reproduisent plusieurs des commandes
que l’on retrouve sur différentes marques de
composantes audio et vidéo et que leur fonction peut
varier en fonction du type de composante choisie. Ainsi,
la touche PLAY/SELECT permet de mettre un lecteur de
disques compacts en mode lecture alors qu’elle
commande la fonction SELECT sur un câblosélecteur.
12
La touche SHIFT permet d’obtenir des commandes
additionnelles à partir de certaines touches. Ces
fonctions sont affichées en italiques sur les illustrations
et sur les tableaux des commandes. Pour lancer une
commande, appuyer sur la touche SHIFT et la relâcher.
Appuyer ensuite sur la touche de COMMANDE désirée.
Touche LIGHT
4
La touche LIGHT met en circuit un éclairage d’appoint
qui vous permet de voir les touches dans le noir.
L’éclairage reste allumé pendant 7 secondes et pendant
7 autres secondes chaque fois qu’on appuie sur une
touche.
13
RR-949
○ ○ ○ ○ ○ ○ ○ ○ ○ ○ ○ ○ ○ ○ ○ ○ ○ ○ ○ ○ ○ ○
Programmation
La télécommande RR-949 peut remplacer jusqu’à dix
télécommandes différentes, soit une pour chaque touche
COMPOSANTE. Avant de pouvoir utiliser la
télécommande, on doit d’abord la programmer, c’est-àdire lui indiquer quelle composante audio/vidéo on désire
commander.
La télécommande RR-949 renferme des centaines de
séries de commandes destinées à diverses composantes
audio/vidéo. Lorsqu’on programme la télécommande
RR-949, on choisit une série de commandes qui
correspondent aux commandes qui doivent être fournies
aux composantes de votre chaîne. On affecte ensuite
ces séries de commandes aux huit touches
COMPOSANTES en entrant un code de trois chiffres. On
exécute cette manœuvre une seule fois lors de la
préparation initiale de la télécommande.
La façon la plus facile de programmer la télécommande
consiste à trouver vos composantes et les codes de trois
chiffres correspondants à partir de la liste des codes. Si
votre composante n’apparaît pas sur la liste, il existe un
autre méthode de recherche automatique qui vous
permettra de trouver la bonne série de commandes pour
votre composante.
Programmation de la télécommande à
l’aide d’un code de trois chiffres
Français
Troisième étape: Pointer la télécommande vers la
composante audio/vidéo et entrer le code de trois
chiffres à l’aide des touches numériques. Le témoin
COMPOSANTE rouge clignote chaque fois qu’on entre
un chiffre. Si l’on a entré le bon code, la composante se
mettra hors circuit. S’il existe plus d’un code de trois
chiffre pour la composante source, continuer à entrer les
autres codes de trois chiffres à partir de la liste jusqu’à
ce que la composante se mette hors circuit. Ceci signifie
que l’on a trouvé le bon code.
Quatrième étape: Entrer le code en mémoire en
appuyant à nouveau sur la touche COMPOSANTE
correspondante. Le témoin clignotera deux fois pour
confirmer que le code a bel et bien été entré en mémoire.
Cinquième étape: Effectuer un essai avec la touche COMMAND en utilisant les tables fournies comme référence
aux fonctions disponibles. Si les fonctions ne s’exécutent
pas correctement, répéter les étapes données ci-dessus
en utilisant le prochain code de trois chiffres de la liste
pour votre marque de composante.
Répéter les étapes données ci-dessus pour chacune des
huit composantes en affectant chaque composante à la
touche COMPOSANTE appropriée.
Programmation en mode de recherche
automatique
Trouvez votre composante audio/vidéo à partir de la liste
fournie et notez le codes de trois chiffres:
Si la liste des codes ne donne pas le code de trois
chiffres d’une composante, utiliser la méthode de
recherche automatique suivante pour trouver un code
qui permettra de commander l’appareil en question.
Première étape: Mettre en circuit la composante que
l’on désire commander.
Première étape: Mettre la composante à commander en
circuit.
Deuxième étape: Appuyer sur la touche COMPOSANTE
correspondante (par exemple, si on entre en mémoire la
série de commandes destinées à un lecteur de disques
compacts, appuyer sur la touche COMPOSANTE CD
dans la partie supérieure de la télécommande). Tout en
appuyant sur la touche COMPOSANTE, appuyer sur la
touche MUTE et maintenir les deux touches enfoncées
pendant au moins une seconde. Le témoin rouge
COMPOSANTE clignotera pendant 20 secondes pour
indiquer que l’on a entré en mémoire le mode
programmation. La prochaine manœuvre doit être
exécutée dans les 20 secondes, sinon la télécommande
reviendra au mode de fonctionnement normal.
Deuxième étape: Appuyer simultanément sur la touche
COMPOSANTE et la touche MUTE correspondante
pendant au moins une seconde. Le témoin restera allumé
pendant 20 secondes.
Troisième étape: Appuyer sur la touche CH UP ou CH
DOWN et la maintenir enfoncée. Ceci permet à l’appareil
d’émettre une série de signaux codés de MISE EN
CIRCUIT / MISE HORS CIRCUIT qui sont stockés en
mémoire. Relâcher la touche CH dès que la composante
se met hors circuit pour indiquer que le bon code de
commande de la composante a été trouvé.
Quatrième étape: Appuyer sur la touche COMPOSANTE
pour stocker le code en mémoire. Le témoin clignotera
deux fois pour confirmer l’entrée en mémoire du code.
14
15
RR-949
○ ○ ○ ○ ○ ○ ○ ○ ○ ○ ○ ○ ○ ○ ○ ○ ○ ○ ○ ○ ○ ○ ○ ○
3-Digit Code List
Le Codes de Trois Chiffres
Lista de Códigos Numéricos
Liste der Dreizifferncodes
Elenco codici a tre cifre
De 3-cijferige Code Lijst
TAPE
Rotel RD960
Rotel RMZ955
Denon
Pioneer
Pioneer (LD)
Yamaha
Rotel RSP966
001
Rotel RSP975
001
Rotel RX975
001
Rotel RSX965
001
Rotel RSX965RDS 001
Rotel RTC965
001
Rotel RSP976
001
Rotel RT955
001
Rotel RA985
001
Rotel RC995
001
Rotel RC972
001
Rotel RSP985
001
Rotel RSP980
001
Rotel RTC970
002
Rotel RT940
002
Rotel RTC940
003
Rotel RTC950
003
Rotel RX950
003
Rotel RMZ955
004
002
002
Pioneer
002
002
002
002
002
002
Krell
Marantz
1
001
001
001
001
001
001
001
002
002
002
002
002
002
002
003
003
003
004
005
006
008
009
011
015
017
018
022
Proceed
Sony
Yamaha
026
020
027
030
034
038
039
043
046
046
050
054
056
023
028 029
032 033
035 036 037
AOC
Candle
Cetronic
Citizen
040 041 042
044 045
Classic
Concerto
Contec
Coronado
Crown
Curtis Mathes
CXC
Daewoo
047 048 049
051 052 053
055
057 058
DVD
Rotel
Denon
JVC
LG
Magnavox
Mitsubishi
Panasonic
Philips
Pioneer
Proscan
RCA
Samsung
Sony
Toshiba
Yamaha
CD
Rotel RCD930
Rotel RCD951
Rotel RCD971
Rotel RCD991
Rotel RCD950
Rotel RCC945
Rotel RCC955
Rotel RCD970
Rotel RCD975
Rotel RCD855
Rotel RCD865
Rotel RCD955
Rotel RCD965
Rotel RCD945
Rotel RCC935
Rotel RCC940
Rotel RCD940
Rotel RCD990
Rotel RMZ955
Adcom
Arcam
Denon
JVC
McIntosh
Mission
NAD
Nakamichi
Onkyo
012
001
012
010
013
002
003
013
004
005 006
005 006
011 015
007
008
009
LDP
007
010
012 013 014
016
019 020 021
023 024 025
Daewoo
Denon
Goldstar
Kenwood
Magnavox
Optimus
Panasonic
Philips
Pioneer
RCA
Realistic
Samsung
Sharp
Sony
Technics
Toshiba
Yamaha
024
030
027
025
026
032
021
026
020 034
031
032
023 029
025 028
022
021
025
033
Nikei
Onking
Onwa
Optonica
Panasonic
Philco
001
003
011 012
004 007 008
002
005 006 009
TV
Admiral
Akai
Ampro
Anam
AUDIO
NEC
Daytron
Dynasty
Electrohome
Emerson
Fisher
Funai
Futuretech
GE
Goldstar
Grundig
Hallmart
Infinity
JBL
JCP
JCPenny
JVC
Kenwood
Kloss
KTV
Lodgenet
Logik
Luxman
LXI
Magnavox
Marantz
Mitsubishi
MTC
NAD
Philips
072
001
073
043
131
001
001
043
001
143
043
004
043
143
143
001
043
004
111
004
043
024
001
043
143
007
028
043
004
130
161
004
004
012
158
205
004
164
164
001
004
101
034
001
059
043
072
072
004
007
160
001
059
164
001
004
001
015
081 161
055 056 080
Pioneer
004
003 004
Portland
Proton
003 004 101
004 101 143
055 076 103
114 127 143
143
143
004 005 028
048 076 096
155
057
043
034 056 073
144 155 160
106
007
023
163
207
127
010
075
203
209
143
011
143
204
024 030 065
143 160
038 070
070
143
015 052 081
164
003 004 022
060 063 127
Quasar
Radio Shack
RCA
Realistic
Runco
Sampo
Samsung
Sanyo
Scott
Sears
Sharp
Signature
Sony
Soundesign
SSS
Sylvania
Symphonics
Tandy
Tatung
Technics
Techwood
Teknika
Telerent
Thomson
TMK
Toshiba
Television
Vidikron
Vidtech
Wards
Yamaha
York
Yupiteru
Zenith
001
130
043
043
043
019
034
001
056
127
001
038
180
184
188
004
176
004
161
004
173
034
004
001
056
156
007
072
001
004
143
007
004
143
004
030
143
004
028
072
070
003
004
001
063
052
081
056
034
004
003
043
072
194
198
004
015
143
174
004
004
063
004
004
043
072
019 024 056
134
081
056
003
059
143
003
059
181
185
189
023
080
004
060
164
004
093
182
186
190
025
164
024
063
005
164
183
187
192
135
143 144 160
131 143 171
056
019
004
065
160
019
168
004
101
160
057
028
007
057
160
014
143
127 143
023 024
144 152
161
169
127 133
082
043 048
015 028
082 094
019 022
175
126
004 028 043
043
003 059 060
127 160 164
080
004 024 028
072 101 143
195 196 197
199 200 201
030 101
019 028 060
072 164
073 095 103
164
024 109
004 101
025
2
RR-949
VCR
Aiwa
Ampro
Anam
Audio Dynamics
Broksonic
Canon
Craig
Curtis Mathes
Daewoo
DBX
Dynatech
Electrohome
Emerson
Fisher
Funai
GE
Go Video
Goldstar
Grundig
Harman Kardon
Hitachi
Instant Replay
JCL
JCPenny
Jensen
JVC
Kenwood
Lloyd
LXI
Magin
Magnavox
Marantz
Marta
Matsui
MEI
Memorex
MGA
Minolta
Mitsubishi
MTC
Multitech
NEC
Nordmende
Optonica
Panasonic
Pentax
Philco
Philips
Pilot
Pioneer
Pulsar
Quartz
3
RCA
034
072
031
012
035
031
001
031
005
117
012
034
059
006
034
131
001
034
031
144
132
004
160
165
012
018
150
031
031
004
043
012
055
152
014
034
001
034
040
031
012
101
030
031
001
034
101
059
004
004
034
034
012
043
053
070
004
031
031
101
168
101
004
072
014
043
023 043
037
040
041
010 017 111
023 043
053
017 029 031
035 037 101
153
008 009 010
072 107 109
147
012 101
162 163 164
166
026 034 043
012 040 101
031 043 048
060 130 150
034 048
004 009 017
034 041 067
031 067 069
010 014 031
040 053 072
059 061
040
023 043 048
054
031
034
034
162
169
004
107
Realistic
001
030
054
Ricoh
058
Runco
072
Salora
014
Samsung
017
113
Sansui
043
Sanyo
001
Scott
017
Sears
001
010
101
Sharp
031
Sony
001
056
Soundesign
034
STS
004
Sylvania
031
Symphonic
034
Tandy
010
Tatung
043
Teac
034
Technics
031
Teknika
031
Thomas
034
Thomson
177
TMK
006
Toshiba
004
082
Totevision
040
Unitech
040
Vector Research 012
Victor
048
Video Concepts 012
Videosonic
040
Wards
001
034
131
Yamaha
012
Zenith
034
072
034
109
008
034
101
040
144
010
040
040 107 109
048
010
037
004
014
014 040
131
008 009
017 081
054
009 031 052
057 058
021 048
Americast
Jerrold
Pioneer
Scientific-Atlanta
Tocom
Zenith
Rotel Control Commands
○ ○ ○ ○ ○ ○ ○ ○ ○ ○ ○ ○ ○ ○ ○ ○ ○ ○ ○ ○ ○ ○ ○ ○
○ ○ ○ ○ ○ ○ ○ ○ ○ ○ ○ ○ ○ ○ ○ ○ ○ ○ ○ ○ ○ ○ ○ ○
Gerätetasten und Codenummern
für Rotel-Geräte
○ ○ ○ ○ ○ ○ ○ ○ ○ ○ ○ ○ ○ ○ ○ ○ ○ ○ ○ ○ ○ ○ ○ ○
Ordenes de Control
○ ○ ○ ○ ○ ○ ○ ○ ○ ○ ○ ○ ○ ○ ○ ○ ○ ○ ○ ○ ○ ○ ○ ○
Comandi di controllo Rotel
034 059 067
034
○ ○ ○ ○ ○ ○ ○ ○ ○ ○ ○ ○ ○ ○ ○ ○ ○ ○ ○ ○ ○ ○ ○ ○
Rotel Functie Commandos
043
070
034 101
178
008 017 059
131
101
034
004 017 031
040 053 054
034 043
048 056 058
080 101
001
006
011 012
003
013
001
004
008
Note: [SHIFT] button functions shown in italics
Remarque: les fonctions de la touche [SHIFT] sont
données en italique.
Hinweis: Die mit der [SHIFT]-Taste zu aktivierenden
Funktionen sind kursiv gedruckt.
Nota: Las teclas de función [SHIFT] se indican en cursiva.
CABLE
067
054 067
166 167
170
○ ○ ○ ○ ○ ○ ○ ○ ○ ○ ○ ○ ○ ○ ○ ○ ○ ○ ○ ○ ○ ○ ○ ○
Codes de Commande
SAT
GE
Echostar
Hitachi
Hughes
Panasonic
RCA
Sony
Toshiba
041
147
014
053
005
006 007
001 002 003
004
010
008 009
Nota: Le funzioni del tasto [SHIFT] sono evidenziate in
corsivo.
Attentie: (SHIFT) knop functies worden in italic getoond.
4
RR-949
RTC975/RSP975
RSX965/RTC965
RSP985
RA985/RT955
RSP980
RTC940/950
RMZ955
RC995/972/RSP976 RT940/RTC970
POWER
VOL+
VOL –
MUTE
PLAY
STOP
SEARCH –
SEARCH +
PAUSE
RECALL
GUIDE
MENU
PRE CH
T/V
CH +
CH –
O
1
2
3
4
5
6
7
8
9
10
ENTER
MOVIE FILT
5.1 CH
SELECT
BACK
TUNER
CD
TAPE 1
TAPE 2
PHONO
VIDEO 1
VIDEO 2
VIDEO 3
AUX/V4
AUX/V5
[SHIFT]
PTY
TA
TP
DISPLAY
ZONE
AUDIO 001
Power
Volume +
Volume –
Mute [Preset]
Enter
Dynamic
–
+
C. Delay
Recall
Surround +
On Screen
Sur. Delay
Band [T/Pre]
Tuning +
Tuning –
O
1
2
3
4
5
6
7
8
9
AUDIO 002
Power [Pow]
Volume +
Volume –
Mute
Enter
Stop
–
+
Pause
Up
Surround +
Menu
Down
Band
Tuning +
Tuning –
O
1
2
3
4
5
6
7
8
9
10
Out. Balance Enter
Movie Filter Movie Filter
5.1 Channel 5.1 Channel *
Input Select Center Focus
Bal. Check
Back
Tuner
Tuner
CD
CD
Tape 1
Tape Monitor
Tape 2
Tape 2
Phono/LD
Phono/LD
Video 1
Video 1
Video 2
Video 2
Video 3
Video 3
Aux 1
Aux 1
Aux 2
Aux 2
Off
Off
PTY
PTY
TA
TA
TP
TP
Display
Display
Zone/Rec
Zone/Rec
RCD991/971
RCD975/970/965
RCD950/951/930
RCD955/945
RCC945/955
AUDIO 003
Power
Volume +
Volume –
Mute
Band
Tuning +
Tuning –
1
2
3
4
5
6
7
8
Plus 8
Tuner
CD
Tape 1
Tape 2
Aux 1
POWER
VOL+
VOL –
MUTE
PLAY
STOP
SEARCH –
SEARCH +
PAUSE
RECALL
GUIDE
MENU
PRE CH
T/V
CH +
CH –
O
1
2
3
4
5
6
7
8
9
10
ENTER
MOVIE FILT
5.1 CH
SELECT
BACK
TUNER
CD
TAPE 1
TAPE 2
PHONO
VIDEO 1
VIDEO 2
VIDEO 3
AUX/V4
AUX/V5
[SHIFT]
AUDIO 004
Standby
Volume +
Volume –
Mute
Play
Stop
Rewind
Fast Forward
Fav. Station
Preset +
Preset –
Select
Back
Tuner
CD
Tape/SAT
CD 001
CD 002
Play
Stop
Search –
Search +
Pause
Open/Close
Track –
Track +
Play
Stop
Search –
Search +
Pause
A–B
A–B
10
1 [Disc 1]
2 [Disc 2]
3 [Disc 3]
4 [Disc 4]
5 [Disc 5]
6 [Disc 6]
7
8
9
Plus 10
Disc Select
Program
Time [Review]
Clear [Scan]
Random [Rep]
0
1
2
3
4
5
6
7
8
9
Track –
Track +
Disc Select
Program
Time [Review]
Clear [Scan]
Random [Rep]
Video/CD
X
* RTC970 requires [Shift] function for 5.1 CH input
* On droit utiliser la fonction [SHIFT] pour commander l’entrée du canal
5.1 CH de l’appareil RTC970
* El RTC-970 requiere la función [Shift] para la entrada de 5.1 canales
* Beim RTC-970 muß für den 5.1-Eingang die [SHIFT]-Taste gedrückt werden
* L’RTC-970 richiede la funzione [SHIFT] per l’ingresso del canale 5.1
* RTC970 heeft een (SHIFT) functie voor de 5.1 ingang nodig
5
6
RR-949
RCC935
RCD990
RMZ955
CD 004
CD 005
RD960
Pioneer LD
RMZ955
TAPE 001
TAPE 002
Power
TAPE 003
Power
Play
Stop
Rewind
Fast Forward
Pause
Record
Play
Stop
Rewind
Fast Forward
Pause
Open/Close
Play
Stop
Rewind
Fast Forward
RCC940
RCD940
CD 003
POWER
VOL+
VOL –
MUTE
PLAY
STOP
SEARCH –
SEARCH +
PAUSE
RECALL
GUIDE
MENU
PRE CH
T/V
CH +
CH –
O
1
2
3
4
5
6
7
8
9
10
ENTER
MOVIE FILT
5.1 CH
SELECT
BACK
TUNER
CD
TAPE 1
TAPE 2
PHONO
VIDEO 1
VIDEO 2
VIDEO 3
AUX/V4
AUX/V5
[SHIFT]
7
Play
Stop
Search –
Search +
Pause
Track –
Track +
0
1
2
3
4
5
6
7
8
9
[Disc 1]
[Disc 2]
[Disc 3]
[Disc 4]
[Disc 5]
Play
Stop
Search –
Search +
Pause
Open/Close
Track –
Track +
Play
Stop
Skip –
Skip +
0
1
2
3
4
5
6
7
8
9
Disc Select
Program
Program
Disc
Time [Review] Time [Review]
Clear [Scan]
Random [Rep] Random [Rep] Random
POWER
VOL+
VOL –
MUTE
PLAY
STOP
SEARCH –
SEARCH +
PAUSE
RECALL
GUIDE
MENU
PRE CH
T/V
CH +
CH –
O
1
2
3
4
5
6
7
8
9
10
ENTER
MOVIE FILT
5.1 CH
SELECT
BACK
TUNER
CD
TAPE 1
TAPE 2
PHONO
VIDEO 1
VIDEO 2
VIDEO 3
AUX/V4
AUX/V5
[SHIFT]
Skip +
Skip –
8
RR-949
POWER
VOL+
VOL –
MUTE
PLAY
STOP
SEARCH –
SEARCH +
PAUSE
RECALL
GUIDE
MENU
PRE CH
T/V
CH +
CH –
O
1
2
3
4
5
6
7
8
9
10
ENTER
MOVIE FILT
5.1 CH
SELECT
BACK
TUNER
CD
TAPE 1
TAPE 2
PHONO
VIDEO 1
VIDEO 2
VIDEO 3
AUX/V4
AUX/V5
[SHIFT]
9
TV
VCR
Power
Volume +
Volume –
Mute
Select
Down
Left
Right
Up
Clear/Std.
Display/Rec.
Menu
Prev. Channel
TV/VCR
Channel +
Channel –
0
1
2
3
4
5
6
7
8
9
Power
Enter
Sleep Timer
CABLE
Power
Volume +
Volume –
Mute
Play
Select
Stop
Down
Rewind
Left
Fast Forward Right
Pause
Up
Record
Exit
Guide
Menu
Prev. Channel
TV/VCR
Switch
Channel +
Channel +
Channel –
Channel –
0
1
2
3
4
5
6
7
8
9
Pay Per View
Enter
Fav. Station
Info
Bypass
Music
Page +
Day +
Day –
Page –
POWER
VOL+
VOL –
MUTE
PLAY
STOP
SEARCH –
SEARCH +
PAUSE
RECALL
GUIDE
MENU
PRE CH
T/V
CH +
CH –
O
1
2
3
4
5
6
7
8
9
10
ENTER
MOVIE FILT
5.1 CH
SELECT
BACK
TUNER
CD
TAPE 1
TAPE 2
PHONO
VIDEO 1
VIDEO 2
VIDEO 3
VIDEO 4
AUX/V4
[SHIFT]
DVD
SAT
Power
Volume +
Volume –
Mute
Play
Stop
Search –
Search +
Pause
Open/Close
Guide
Menu
Return
Power
Volume +
Volume –
Mute
Select
Down
Left
Right
Up
Exit
Guide
Menu
Prev. Channel
Switch
Channel +
Channel –
0
1
2
3
4
5
6
7
8
9
Skip +
Skip –
Up
Left
Right
Down
Enter
Sub. On/Off
Display
Clear
Enter
Fav. Station
Info
Next
Alt
10
RR-949
REMOTE CONTROL
TÉLÉCOMMANDE
FERNBEDIENUNG
MANDO A DISTANCIA
COMANDO A DISTANZA
AFSTANDSBEDIENING
The Rotel Co. Ltd.
10-10 Shinsen-Cho
Shibuya-Ku
Tokyo 150-0045
Japan
Phone: +81-3-5458-5325
Fax: +81-3-5458-5310
Rotel of America
54 Concord Street
North Reading, MA 01864-2699
USA
Phone: +1 978-664-3820
Fax: +1 978-664-4109
Rotel Europe
Meadow Road
Worthing, West Sussex BN11 2RX
England
Phone: +44 (0)1903 524 813
Fax: +44 (0)1903 524 831
Rotel Deutschland
Kleine Heide 12
D-33790 Halle/Westf.
Germany
Phone: +49 5201-87170
Fax: +49 5201-73370
082 OMRR-949CODES 070899