1
/1™3OXV
(PXODWLRQ
IRU406® 3ULQWHUV
'
7UDGHPDUNV
The following are tradem ar ks or registered trademarks of their respective owners. Other
pr oduct names mentioned in this manual may also be trademarks or registered
trademarks of their respective owner s. Register ed tradem ar ks are registered in the
United States Patent and Trademark Office; some tradem ar ks may also be registered in
other countries. QMS, QMS-PS, and the QM S logo are registered trademar ks of QMS,
Inc. DEC, VMS, DECnet, LN03, LN03 Plus/Digital Equipment Cor poration. HP, HP-GL,
HP PCL/Hewlett-Packard Corporation. PostScript/Adobe Systems, Inc. Tektronix/
Tektronix, Incorporated.
3URSULHWDU\6WDWHPHQW
The digitally encoded software included with this emulation is Copyr ighted © 1997 by
QMS, Inc. All Rights Reser ved. This software may not be r eproduced, modified,
displayed, transferr ed, or copied in any form or in any m anner or on any media, in whole
or in par t, without the express written per mission of QMS, Inc.
&RS\ULJKW1RWLFH
This m anual is Copyr ighted © 1997 by QMS, Inc., One Magnum Pass, Mobile, AL
36618. All Rights Reser ved. This manual may not be copied in whole or in par t, nor
transferred to any other media or language, without the express written per mission of
QMS, Inc.
0DQXDO1RWLFH
QMS, Inc. reser ves the right to make changes to this manual and to the equipm ent
described herein without notice. Considerable effor t has been made to ensure that this
manual is free of inaccuracies and omissions. However, QMS, Inc. makes no warrant y
of any kind including, but not limited to, any implied warranties of merchantability
and f itness for a par ticular purpose with regard t o this manual. QMS, Inc. assumes
no r esponsibility for, or liability for, errors contained in this m anual or for incidental,
special, or consequential damages ar ising out of the furnishing of this manual, or the
use of this manual in operating the equipment, or in connection with the performance of
the equipment when so operated.
&RQWHQWV
,QVWDOODWLRQ
About the QMS LN03 Plus Emulation ........................................ 1-2
Host Software Compatibility 1-2
Printer Compatibility 1-2
About this Manual ........................................................................ 1-3
Typographic Conventions 1-4
LN03 Plus Escape Sequences 1-5
Installing the QMS LN03 Plus Emulation ................................... 1-6
The LN03 Plus Emulation Diskette 1-6
Unzipping the LN03 Plus Emulation File 1-6
Installation via a Parallel or Serial Port 1-7
Installation via an Ethernet Network Connection
1-8
Deinstalling the QMS LN03 Plus Emulation ............................ 1-11
Deinstallation via a Parallel or Serial Port 1-11
Deinstallation via an Ethernet Network Connection
1-12
For Further Assistance .............................................................. 1-14
&RQILJXUDWLRQ
Changing the Configuration ....................................................... 2-2
Configuration Options ................................................................ 2-3
Setting the K Mem Emulation Option ........................................ 2-5
Using configcartemulation ......................................................... 2-6
3ULQWHU6WDWXVDQG5HVHW
&RPPDQGV
About Printer Status and Reset Commands ............................. 3-2
Printer Status Commands .......................................................... 3-2
Product Identification (DA) 3-2
Device Status Request (DSR) 3-3
Device Status Reports 3-4
Cursor Position Report 3-5
Printer Reset Commands ............................................................ 3-6
Reset to Initial State (RIS) 3-6
Soft Terminal Reset (DECSTR) 3-6
6HW5HVHW6HTXHQFHV
About Set/Reset Sequences ....................................................... 4-2
Set/Reset Sequences .................................................................. 4-2
Line Feed/New Line Mode (LNM) 4-2
Carriage Return/New Line Mode (DECCRNLM)
Autowrap Mode (DECAWM) 4-3
Pitch Select Mode (DECPSM) 4-4
Proportional Spacing (DECPSP) 4-4
Origin Placement Mode (DECOPM) 4-4
Position Unit Mode (PUM) 4-5
Select Size Unit (SSU) 4-5
LL
4-3
/13OXV(PXODWLRQIRU4063ULQWHUV
&RQWURO&KDUDFWHUV
Supported Control Characters .................................................... 5-2
3DJH)RUPDWWLQJDQG
3ULQWLQJ&RPPDQGV
Setting Line and Character Spacing .......................................... 6-2
Spacing Pitch Increment (SPI) 6-2
Select Vertical Line Spacing (SVS) 6-2
Set Vertical Pitch (DECVERP) 6-3
Select Horizontal Character Spacing (SHS)
Set Horizontal Pitch (DECSHORP) 6-4
6-3
Setting Page Format .................................................................... 6-5
Page Format Select (PFS) 6-5
Set Lines per Physical Page (DECSLPP) 6-7
Set Top and Bottom Margins (DECSTBM) 6-7
Set Left and Right Margins (DECSLRM) 6-8
Horizontal Position Absolute (HPA) 6-9
Horizontal Position Relative (HPR) 6-9
Horizontal Position Backward (HPB) 6-10
Vertical Position Absolute (VPA) 6-10
Vertical Position Relative (VPR) 6-10
Vertical Position Backward (VPB) 6-11
Moving Cursor/Line Position Up or Down ............................... 6-11
Cursor Up (CUU) 6-11
Partial Line Up (PLU) 6-12
Partial Line Down (PLD) 6-12
Setting and Clearing Tab Stops ................................................ 6-12
Set Horizontal Tab Stops (DECSHTS) 6-12
Set Vertical Tab Stops (DECSVTS) 6-13
Tabulation Clear (TBC) 6-13
Setting Text Justification .......................................................... 6-14
Justification
6-14
Drawing Lines ............................................................................. 6-14
Drawing Vectors
&RQWHQWV
6-14
LLL
)RQW+DQGOLQJ
Selecting Fonts ............................................................................ 7-2
Fonts Available 7-2
Downloading Fonts (DECLFF) 7-3
The Font File ID 7-3
Deleting a Type Family or Font File (DECDTFF)
Assign Type Family or Font (DECATFF) 7-7
Select Graphic Rendition (SGR) 7-8
7-6
Selecting Character Sets ............................................................ 7-9
Selecting Graphic Character Sets 7-9
Graphic Size Selection (GSS) 7-11
Graphic Size Modification (GSM) 7-11
Requesting Font Status Reports .............................................. 7-12
Request Font Status (DECRFS) 7-12
Font Status Report (DECFSR) 7-13
'(&7(.(PXODWLRQ
Using the DECTEK Emulation .................................................... 8-2
Entering DECTEK Emulation 8-2
Exiting DECTEK Emulation 8-3
DECTEK Fonts ............................................................................. 8-4
DECTEK Control Characters and Escape Sequences ............. 8-4
DECTEK Modes ........................................................................... 8-6
Alpha Mode 8-6
Graph Mode 8-8
Point Plot Mode 8-9
Incremental Plot Mode 8-9
Bypass Mode 8-10
Switching Modes 8-10
Vector Coordinate Encoding 8-11
Shortened Address Transmission 8-13
LY
/13OXV(PXODWLRQIRU4063ULQWHUV
6L[HO*UDSKLFV
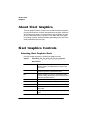
About Sixel Graphics ................................................................... 9-2
Sixel Graphics Controls .............................................................. 9-2
Selecting Sixel Graphics Mode 9-2
Selecting the Horizontal Grid Size (HGS)
Selecting the Aspect Ratio 9-4
Exiting Sixel Graphics Mode 9-5
9-3
Sixel Graphics Data ..................................................................... 9-6
About Sixel Graphics Data 9-6
Decoding Sixel Graphics Data 9-7
$ 406&XVWRPHU6XSSRUW
Sources of Support ..................................................................... A-2
Your QMS Vendor A-2
Your Application Vendor A-2
Q-FAX A-2
The QMS Corporate Bulletin Board System A-3
CompuServe A-3
Internet A-3
QMS Customer Response Center (CRC) A-4
QMS World-wide Offices ............................................................ A-5
% &KDUDFWHU6HWV
Character Sets ............................................................................. B-2
Selecting Character Sets ............................................................ B-3
Using GL and GR Tables ............................................................ B-4
GL and GR Tables ....................................................................... B-6
,QGH[
&RQWHQWV
Y
,QVWDOODWLRQ
,QWKLVFKDSWHU
“About the QMS LN03 Plus Emulation” on page 1-2
“About this Manual” on page 1-3
“Installing the QMS LN03 Plus Emulation” on page 1-6
“Deinstalling the QMS LN03 Plus Emulation” on page 1-11
“For Further Assistance” on page 1-14
$ERXWWKH406
/13OXV
(PXODWLRQ
$ERXWWKH406/13OXV
(PXODWLRQ
The QMS LN03 Plus Emulation offers all of the features of an LN03
Plus laser printer, including DECTEK emulation and Digital’s Tektronix 4014 emulation.
If you already have files containing LN03 Plus escape sequences, or
if you have set your application to print to an LN03 Plus printer, you
only need to follow the installation instructions in this chapter to begin
using the emulation in your QMS printer.
+RVW6RIWZDUH&RPSDWLELOLW\
Since LN03 Plus runs under VMS, VMS compatibility is important.
The QMS VMS DECnet host software 2.x is compatible with version
3.x QMS daughterboard software.
3ULQWHU&RPSDWLELOLW\
This LN03 emulation can be installed only on QMS printers that contain a hard disk drive (either internal or external).
/13OXV(PXODWLRQIRU4063ULQWHUV
$ERXWWKLV
0DQXDO
$ERXWWKLV0DQXDO
This manual is organized as follows:
$
Introduction
Presents an overview of and explains
how to install this emulation.
Configuration
Explains how to configure this
emulation.
Printer Status and
Reset Commands
Explains the request and response
commands for printer status and the
escape sequences for resetting the
printer.
Set/Reset
Sequences
Control Characters
Page Formatting
and Printing
Commands
Explains the escape sequences that set
certain operating modes for the printer.
Explains the single-character control
codes supported by the emulation.
Explains the escape sequences
controlling horizontal and vertical
spacing, page margins, tab stops, and
absolute and relative positioning.
Font Handling
Explains how to download and select
fonts.
DECTEK Emulation
Explains the escape sequences that
initiate Tektronix mode.
Sixel Graphics
QMS Customer
Support
,QVWDOODWLRQ
Explains how to use sixel graphics.
Provides product sales and support
telephone numbers and describes how
to communicate with QMS through the
QMS Bulletin Board, CompuServe,
Internet, and Q-FAX.
$ERXWWKLV
0DQXDO
% Character Sets
,QGH[
Shows the character sets included with
this emulation.
7\SRJUDSKLF&RQYHQWLRQV
The following typographic conventions are used in this manual:
»
Mixed-Case
Courier
Text you type, and messages and information
displayed on the screen
Mixed-Case
Italic
Courier
Variable text you type; replace the italicized
word(s) with information specific to your printer
or computer
UPPERCASE
COURIER
Information displayed in the printer message
window
lowercase bold
PostScript operators and DOS commands
lowercase italic
Variable information in text
UPPERCASE
File and utility names
↵
Press the Enter key (PC) or Return key
(Macintosh)
^
Press and hold down the Ctrl key (PC)
Note: Notes contain tips, extra information, or important information
that deserves emphasis or reiteration.
▲ Caution: Cautions present information that you need to know to avoid
equipment damage, process failure, or extreme annoyance.
/13OXV(PXODWLRQIRU4063ULQWHUV
$ERXWWKLV
0DQXDO
/13OXV(VFDSH6HTXHQFHV
All supported LN03 Plus escape sequences are documented fully
(not just listed) in this manual. Throughout the manual, the following
conventions are used when describing the escape sequences.
<ESC>
All control characters (characters with hex values less
than Hex 20).
Pn, Pn1, Pn2
Numeric variables in an escape sequence are
expressed with Pn’s. Left and right margin values are
examples of numeric variables. Numeric variables
have a range of 0 to 9999. If a variable outside this
range is used, the printer ignores the entire escape
sequence.
Ps, Ps1, Ps2
Selection variables in an escape sequence are
expressed with Ps’s. Justification on or off is an
example of a selection variable.
,QVWDOODWLRQ
,QVWDOOLQJWKH
406/13OXV
(PXODWLRQ
,QVWDOOLQJWKH 406/13OXV
(PXODWLRQ
These procedures are used to install the QMS LN03 Plus Emulation
to QMS printers. Since this emulation is stored on a hard disk, your
printer must have either an internal or external hard disk.
7KH/13OXV(PXODWLRQ'LVNHWWH
The LN03 Plus Emulation Diskette contains the following files:
PKUNZIP.EXE
LN03.ZIP (contains LN03.PS)
LN03-DEL.PS
LN03.PS contains the LN03 Plus Emulation. To install the emulation,
this file is sent to the printer using the installation procedures presented later in this chapter.
LN03-DEL.PS is the deinstallation file. To deinstall the emulation, this
file is sent to the printer using the deinstallation procedures presented
later in this chapter.
To obtain LN03.PS, PKUNZIP.EXE is used to unzip LN03.ZIP. When
unzipped, LN03.PS consumes almost 1.8 MB. LN03.PS was zipped
to fit on one diskette.
8Q]LSSLQJWKH/13OXV(PXODWLRQ)LOH
Before you install the LN03 Plus Emulation to your printer, you must
first obtain LN03.PS from LN03.ZIP. Do this as follows:
1
Insert the LN03 Plus Emulation diskette into your PC’s 3.5"
disk drive.
2
Either in Windows or DOS, create a temporary subdirectory
on your PC’s hard disk and copy PKUNZIP.EXE and LN03.ZIP
into the subdirectory.
3
In DOS, change to the temporary subdirectory.
/13OXV(PXODWLRQIRU4063ULQWHUV
,QVWDOOLQJWKH
406/13OXV
(PXODWLRQ
4
At the DOS prompt, enter the following command to unzip
LN03.ZIP.
pkunzip ln03.zip↵
5
Confirm that LN03.PS is now in the temporary subdirectory.
6
Remove the LN03 Plus Emulation diskette from your PC’s
disk drive, and store it in a safe place.
,QVWDOODWLRQYLDD3DUDOOHORU6HULDO3RUW
This procedure is used to install the LN03 Plus Emulation to printers
via a parallel or serial port. If you want to install this emulation over a
network, refer to “Installation via an Ethernet Network Connection” on
page 1-8.
»
Note: This procedure assumes that LN03.PS has been unzipped
from LN03.ZIP and resides in a temporary directory on your PC’s
hard disk. For the unzipping procedure, refer to “Unzipping the LN03
Plus Emulation File” on page 1-6.
1
If your printer has an Administration/Emulations/PostScript/
Emulation Level menu, set it to Level 2.
2
Download the LN03 Plus Emulation to the printer.
a
With your computer at the DOS prompt and at the temporary
subdirectory, enter one of the following commands as
appropriate:
For a parallel connection:
copy /b ln03.ps lpt#↵
where # is the port number (1 to 3).
For a serial connection:
copy /b ln03.ps com#↵
where # is the port number (1 to 4).
3
When the download is complete, restart the printer.
,QVWDOODWLRQ
,QVWDOOLQJWKH
406/13OXV
(PXODWLRQ
The LN03 Plus Emulation is now listed in the Options section of
the printer’s start-up page, in the Administration/Emulation section of the printer’s configuration menu, and on the advanced status page. On some older QMS printers, emulations are not listed
on the printer’s start-up page.
4
Increase the printer’s K Mem Emulation client (Administration/Memory/K Mem Emulation) by at least 1 MB or, for optimum performance, by 2 MB.
See your printer documentation for more information on this
memory client and on using your printer’s configuration menu.
5
The LN03 Plus Emulation is ready to receive data from your
host. Now, you can custom configure your LN03 Plus Emulation to match your printing environment. See chapter 2
“Emulation Configuration”.
Note: You may want to erase any installation files left on your PC
and then remove any temporary directories.
»
,QVWDOODWLRQYLDDQ(WKHUQHW1HWZRUN
&RQQHFWLRQ
This procedure is used to install the QMS LN03 Plus Emulation to
printers over an Ethernet network. If you want to install the emulation
via a parallel or serial port, refer to “Installation via a Parallel or Serial
Port” on page 1-7.
»
Note: Before you begin this procedure, your printer and your PC (or
UNIX workstation) must be connected to an Ethernet network running
TCP/IP and have valid IP addresses.
»
Note: This procedure assumes that LN03.PS has been unzipped
from LN03.ZIP and resides in a temporary directory on your PC’s
hard disk. For the unzipping procedure, refer to “Unzipping the LN03
Plus Emulation File” on page 1-6.
1
If your printer has an Administration/Emulations/PostScript/
Emulation Level menu, set it to Level 2.
/13OXV(PXODWLRQIRU4063ULQWHUV
,QVWDOOLQJWKH
406/13OXV
(PXODWLRQ
2
Make sure your printer is on line, and that the printer’s message window reads IDLE.
3
If you’re downloading the emulation from a UNIX workstation, copy LN03.PS from your PC to a temporary directory on
your workstation.
4
Open an ftp session from your PC or workstation by typing
one of the following commands:
ftp printername↵
ftp ipaddress↵
5
(for example, ftp pctdev6↵)
(for example, ftp 161.33.130.45↵)
When prompted for a user name and password, press the
Enter key.
If your entries are correct, an ftp> prompt displays.
6
At the ftp> prompt, change to binary mode by typing
bin↵
7
At the ftp> prompt, send the emulation file to the printer’s
hard disk by typing
put ln03.ps↵
The printer’s message window reads 1 Active Job, and the
Disk light flashes to indicate that the emulation is being downloaded to the hard disk. The ftp> prompt returns when the emulation has finished loading.
8
When the download is complete, at the ftp> prompt, end the
ftp session by typing
quit↵
9
When the Disk light stops flashing and the printer’s message
window reads Idle for at least 30 seconds, restart the
printer.
10 When the printer’s message window reads Idle again, the
LN03 Plus Emulation is ready to use.
The LN03 Plus Emulation is now listed in the Options section of
the printer’s start-up page, in the Administration/Emulation sec,QVWDOODWLRQ
,QVWDOOLQJWKH
406/13OXV
(PXODWLRQ
tion of the printer’s configuration menu, and on the advanced status page. On some older QMS printers, emulations are not listed
on the printer’s start-up page.
11 Increase the printer’s K Mem Emulation client (Administration/Memory/K Mem Emulation) by at least 1 MB or, for optimum performance, by 2 MB.
See your printer documentation for more information on this
memory client and on using your printer’s configuration menu.
12 The LN03 Plus Emulation is ready to receive data from your
host. Now, you can custom configure your LN03 Plus Emulation to match your printing environment. See chapter 2
“Emulation Configuration”.
»
Note: You may want to erase any installation files left on your PC
(and/or workstation), and then remove any temporary directories.
/13OXV(PXODWLRQIRU4063ULQWHUV
'HLQVWDOOLQJWKH
406/13OXV
(PXODWLRQ
'HLQVWDOOLQJWKH406/1
3OXV(PXODWLRQ
Deinstalling the QMS LN03 Plus Emulation is similar to installing it.
As the installation file was downloaded to the printer, the deinstallation file must also be downloaded to the printer. However, because
the deinstallation file is not supplied zipped as is the installation file,
the deinstallation file can be downloaded from the diskette drive on
your PC rather than from the hard drive.
'HLQVWDOODWLRQ YLDD3DUDOOHORU6HULDO3RUW
This procedure is used to deinstall the QMS LN03 Plus Emulation
from printers via a parallel or serial port. If you want to deinstall this
option over a network, refer to “Deinstallation via an Ethernet Network
Connection” on page 1-12.
1
If your printer has an Administration/Emulations/PostScript/
Emulation Level menu, set it to Level 2.
2
Download the deinstallation software to the printer.
a
If your computer is running Windows, change to DOS.
b
Insert the LN03 Plus Emulation diskette into your PC’s 3.5"
disk drive.
c
Change to that drive (for example, if the diskette is in the A
drive, type a:↵ at the DOS prompt).
d
At the DOS prompt, enter one of the following commands as
appropriate:
For a parallel connection:
copy /b ln03-del.ps lpt#↵
where # is the port number (1 to 3).
,QVWDOODWLRQ
'HLQVWDOOLQJWKH
406/13OXV
(PXODWLRQ
For a serial connection:
copy /b ln03-del.ps com#↵
where # is the port number (1 to 4).
On most new QMS printers (for example: a QMS 2060, 2425,
or 4060), a page is printed with a message stating that the
LN03 emulation was removed.
3
Restart the printer if it doesn’t automatically restart.
Note: Some QMS printers automatically restart themselves at
this point.
»
The LN03 Plus Emulation is now no longer listed in the Options
section of the printer’s start-up page, in the Administration/Emulation section of the printer’s configuration menu, and on the
advanced status page. On some older QMS printers, emulations
are not listed on the printer’s start-up page.
'HLQVWDOODWLRQYLDDQ(WKHUQHW1HWZRUN
&RQQHFWLRQ
This procedure is used to deinstall the QMS LN03 Plus Emulation
from printers over an Ethernet network. If you want to deinstall the
option via a parallel or serial port, refer to “Deinstallation via a Parallel
or Serial Port” on page 1-11.
»
Note: Before you begin this procedure, your printer and your PC (or
UNIX workstation) must be connected to an Ethernet network running
TCP/IP and have valid IP addresses.
1
If your computer is running Windows, change to DOS.
2
Insert the LN03 Plus Emulation diskette into your PC’s 3.5"
disk drive.
3
Change to that drive (for example, if the diskette is in the A
drive, type a:↵ at the DOS prompt).
4
If you’re downloading the deinstallation file (LN03-DEL.PS)
from a UNIX workstation, copy the file from your PC to a temporary directory on your workstation.
/13OXV(PXODWLRQIRU4063ULQWHUV
'HLQVWDOOLQJWKH
406/13OXV
(PXODWLRQ
5
If your printer has an Administration/Emulations/PostScript/
Emulation Level menu, set it to Level 2.
6
Make sure your printer is on line, and that the printer’s message window reads IDLE.
7
Open an ftp session from your PC or workstation by typing
one of the following commands:
ftp printername↵
ftp ipaddress↵
8
(for example, ftp pctdev6↵)
(for example, ftp 161.33.130.45↵)
When prompted for a user name and password, press the
Enter key.
If your entries are correct, an ftp> prompt displays.
9
At the ftp> prompt, change to binary mode by typing
bin↵
10 At the ftp> prompt, send the deinstallation file to the
printer’s hard disk by typing
put ln03-del.ps↵
The ftp> prompt returns when the deinstallation file has finished
loading.
On most new QMS printers (for example: a QMS 2060, 2425, or
4060), a page is printed with a message stating that the LN03
emulation was removed.
11 At the ftp> prompt, end the ftp session by typing
quit↵
12 When the Disk light stops flashing and the printer’s message
window reads Idle, restart the printer if it doesn’t automatically restart.
»
Note: Some QMS printers automatically restart themselves at
this point.
The LN03 Plus Emulation is now no longer listed in the Options
section of the printer’s start-up page, in the Administration/Emulation section of the printer’s configuration menu, and on the
,QVWDOODWLRQ
)RU)XUWKHU
$VVLVWDQFH
advanced status page. On some older QMS printers, emulations
are not listed on the printer’s start-up page.
»
Note: If you downloaded the deinstallation file from a workstation,
you may want to erase any deinstallation files left on your
workstation, and then remove any temporary directories.
)RU)XUWKHU$VVLVWDQFH
For assistance with installing the QMS LN03 Plus Emulation, refer to
appendix A, “QMS Customer Support,” in the rear of this manual.
/13OXV(PXODWLRQIRU4063ULQWHUV
&RQILJXUDWLRQ
,QWKLVFKDSWHU
“Changing the Configuration” on page 2-2
“Configuration Options” on page 2-3
“Setting the K Mem Emulation Option” on page 2-5
“Using configcartemulation” on page 2-6
&KDQJLQJWKH
&RQILJXUDWLRQ
&KDQJLQJWKH&RQILJXUDWLRQ
You can change your LN03 Plus Emulation configuration by selecting
new configuration option settings through your printer’s control panel,
through QMS Document Option Commands (DOC), or through the
PostScript configcartemulation operator. Refer to “Configuration
Options” on page 2-3 for descriptions of the configuration options.
Control panel selections
This is the most convenient way to change configuration settings.
Refer to the printer user's guide and/or setup manual for instructions on using the control panel to change configuration settings.
Configuration changes made through the control panel are in
effect from job-to-job unless overridden with the PostScript configcartemulation operator or with QMS Document Option Commands.
QMS Document Option Commands (DOC)
LN03 Plus configuration options can be selected through QMS
Document Option Commands. Configuration changes made with
DOC are in effect only for that job. After the print job is completed,
the printer automatically resets to the default configuration. Refer
to the QMS Document Option Commands manual for information
about using DOC and complete descriptions of the commands
and their parameters.
PostScript configcartemulation operator
Refer to “Using configcartemulation” on page 2-6 for information
on using this PostScript operator to change emulation configuration settings. Configuration changes made through the PostScript
configcartemulation operator are the same as making configuration changes through the printer’s control panel and are in
effect from job-to-job unless overridden with QMS Document
Option Commands.
/13OXV(PXODWLRQIRU4063ULQWHUV
&RQILJXUDWLRQ
2SWLRQV
&RQILJXUDWLRQ2SWLRQV
The LN03 Plus Emulation has the following configuration options.
3URGXFW,'
Purpose
This is the emulation printer model. If your host
sends a Device Attributes request to the printer, the
printer responds with the Product ID.
Choices
LN03, LQP02, and LA100
Default
LN03
$XWRZUDS
Purpose
Determines whether text that exceeds the right
margin wraps to the next line.
Choices
Off and On
Default
On
3DSHU6L]H
Purpose
Specifies the paper size used at power-up or when
no paper size is specified.
Choices
Letter, A4, Legal, and 11x17
Default
Letter
&RQILJXUDWLRQ
&RQILJXUDWLRQ
2SWLRQV
3DSHU6L]H2YHUULGH
Purpose
Controls the paper selection. If Paper Size Override
is disabled, the emulation uses the transformation
point for the size of paper selected and uses the
current paper size (does not change paper trays). If
Paper Size Override is enabled, the transformation
is the same as above, and the specified paper size
is selected.
Choices
Off and On
Default
Off
;2ULJLQ,QVHW
Purpose
Moves the lower left corner of the image to the right
from 0 to 300 dots (1 inch at a resolution of 300
dpi). Use this option to eliminate clipping of the
right edge of the image on some systems.
Range
0-300
Default
75
<2ULJLQ,QVHW
Purpose
Moves the lower left corner of the image downward
from 0 to 300 dots (1 inch at a resolution of 300
dpi). Use this option to eliminate clipping of the top
edge of the image on some systems.
Range
0-300
Default
75
/13OXV(PXODWLRQIRU4063ULQWHUV
6HWWLQJWKH.0HP
(PXODWLRQ2SWLRQ
5HVHW2YHUULGH
Purpose
Determines whether the printer automatically
resets to the initial power-up configuration before
every print job or whether it retains the
configuration from the previous print job.
Choices
Off and On
Default
Off
2ULHQWDWLRQ
Purpose
Sets the printing direction of the print media.
Choices
Portrait—Prints y axis parallel to the long edge of
the page.
Landscape—Prints y axis parallel to the short
edge of the page.
Default
Portrait
6HWWLQJWKH.0HP(PXODWLRQ
2SWLRQ
The K Mem Emulation option in the Memory submenu on your printer
must be set to a minimum of 660 KB for LN03 Plus to run properly.
&RQILJXUDWLRQ
8VLQJ
FRQILJFDUWHPXODWLRQ
8VLQJFRQILJFDUWHPXODWLRQ
On QMS printers that support the configcartemulation operator, the
LN03 Plus Emulation default values can be changed by this operator.
You can include this operator in an ASCII file and send the file to the
printer over any interface.
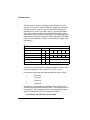
The configcartemulation operator takes three integers as shown in
the following figure.
0
1
2
3
4
5
6
emul#
item
value
Product ID
AutoWrap
Paper Size
Paper Size Override
X Origin Inset
Y Origin Inset
Reset Override
configcartemulation
The setting for the selected item.
12 (The identifier assigned to LN03 Plus emulation. Use this
identifier with other emulation-dependent PostScript operators
such as setdefaultemulation.)
The emulation identifier (emul#) for the LN03 Plus Emulation is 12.
(Other printer emulations for QMS printers have different identifiers.)
The configuration selection (item) is the setting you want to configure.
You can configure only one setting with a single configcartemulation
operator. The selection setting (value) is the setting for the item.
Depending on the selection, there may be two or more possible values. For example, Product ID has three possible values.
/13OXV(PXODWLRQIRU4063ULQWHUV
8VLQJ
FRQILJFDUWHPXODWLRQ
The configcartemulation operator must be included in an ASCII text
file that accesses the PostScript language statusdict in the printer.
The following example shows an ASCII file that uses the configcartemulation operator and the PostScript operators for accessing the
statusdict:
%!
serverdict begin 0 exitserver
statusdict begin
12 0 0 configcartemulation
12 1 0 configcartemulation
end
^D
The last line of the file is ^D (Ctrl-D), a special command that signals
the end of the file for the printer. The following tables contain the possible values for changing Product ID, Autowrap, Paper Size, Paper
Size Override, X Origin Inset, Y Origin Inset, Reset Override, and Orientation. Pick the settings you want, and use the corresponding lines
in your ASCII text file.
6HWWLQJ3URGXFW,'
Setting
emul#
item
value
configcartemulation
LN03 Plus
LQP02
LA100
12
12
12
0
0
0
0
1
2
configcartemulation
configcartemulation
configcartemulation
Default
LN03 Plus
6HWWLQJ$XWRZUDS
Setting
emul#
item
value
configcartemulation
Disabled
Enabled
12
12
1
1
0
1
configcartemulation
configcartemulation
Default
Enabled
&RQILJXUDWLRQ
8VLQJ
FRQILJFDUWHPXODWLRQ
6HWWLQJ3DSHU6L]H
Setting
emul#
item
value
configcartemulation
Letter
A4
Legal
11x17
12
12
12
12
2
2
2
2
0
1
2
3
configcartemulation
configcartemulation
configcartemulation
configcartemulation
Default
Letter
6HWWLQJ3DSHU6L]H2YHUULGH
Setting
emul#
item
value
configcartemulation
Disabled
Enabled
12
12
3
3
0
1
configcartemulation
configcartemulation
Default
Disabled
6HWWLQJ;2ULJLQ,QVHW
Setting
emul#
item
value
configcartemulation
0 dots
75 dots
300 dots
12
12
12
4
4
4
0
75
300
configcartemulation
configcartemulation
configcartemulation
Range
0 to 300
Default
75 Dots
Notes
X Origin Inset can be set to any value from 0
to 300 dots.
/13OXV(PXODWLRQIRU4063ULQWHUV
8VLQJ
FRQILJFDUWHPXODWLRQ
6HWWLQJ<2ULJLQ,QVHW
Setting
emul#
item
value
configcartemulation
0 dots
75 dots
300 dots
12
12
12
5
5
5
0
75
300
configcartemulation
configcartemulation
configcartemulation
Range
0 to 300
Default
75 Dots
Notes
Y Origin Inset can be set to any value from 0
to 300 dots.
6HWWLQJ5HVHW2YHUULGH
Setting
emul#
item
value
configcartemulation
Off
On
12
12
6
6
0
1
configcartemulation
configcartemulation
Default
Off
6HWWLQJ2ULHQWDWLRQ
Setting
emul#
item
value
configcartemulation
Portrait
Landscape
12
12
7
7
0
1
configcartemulation
configcartemulation
Default
Portrait
Substitute your choices from the above options for the similar lines in
the ASCII file example shown previously. Send the ASCII file to the
printer just as you would any other file to be printed.
&RQILJXUDWLRQ
3ULQWHU6WDWXV
DQG5HVHW
&RPPDQGV
,QWKLVFKDSWHU
“About Printer Status and Reset Commands” on page 3-2
“Printer Status Commands” on page 3-2
“Printer Reset Commands” on page 3-6
$ERXW3ULQWHU
6WDWXVDQG
5HVHW
&RPPDQGV
$ERXW3ULQWHU6WDWXVDQG
5HVHW&RPPDQGV
In LN03 Plus Emulation, your printer must be able to respond to queries from the host. The host requests device attributes from the
printer. The printer responds with status reports.
▲ Caution: In order to respond successfully to the host, the printer and
host must be connected via the serial port. If you do not use serial
communications, you may experience undesirable results if your
application uses the Product Identification or Cursor Position Report
sequences.
3ULQWHU6WDWXV&RPPDQGV
3URGXFW,GHQWLILFDWLRQ'$
The host computer can request that the printer identify itself. The
identification that the printer returns to the host depends on the control panel setting. Depending on your application and the printers it
supports, you may set Product ID to the LN03 Plus printer, the LQP02
printer, or the LA100 printer. Refer to chapter 2, “Emulation Configuration” for information on how to set Product ID.
The host may request Device Attributes (DA) from the printer using
either of the following sequences:
<ESC>[c
<ESC>[0c
/13OXV(PXODWLRQIRU4063ULQWHUV
3ULQWHU6WDWXV
&RPPDQGV
Depending on its Product ID setting, the printer responds to the DA
request with one of the following sequences:
<ESC>[?26;2c
LN03
<ESC>[?13;0c
LQP02
<ESC>[?10;3c
LA100
'HYLFH6WDWXV5HTXHVW'65
The host can inquire about the printer’s current state by sending the
Device Status Request sequence. Device Status Reports are the
means of printer status communication between the host and printer.
The host may send any of the following escape sequences to request
various reports from the printer:
<ESC>[n
Request for extended status report.
<ESC>[0n
Request for extended status report.
<ESC>[6n
Request for cursor position report of active column
and line.
The host may also command the printer to enable or disable certain
types of reports by sending any of the following sequences:
<ESC>[?1n
Disable all unsolicited status reports.
<ESC>[?2n
Enable brief unsolicited status reports and send an
extended status report.
<ESC>[?3n
Enable extended unsolicited status reports and send
an extended status report.
The printer sends unsolicited status reports only when an error
occurs. See “Device Status Reports” on page 3-4 for details of
extended and brief status reports.
3ULQWHU6WDWXVDQG5HVHW&RPPDQGV
3ULQWHU6WDWXV
&RPPDQGV
'HYLFH6WDWXV5HSRUWV
The printer communicates its status to the host through either brief
(an error has or has not occurred) or extended (includes an error
code detail) reports. The host may disable reports (see “Device Status Request (DSR)” on page 2-3“Device Status Request (DSR)” on
page 3-3).
Brief reports inform the host that an error condition has been detected
or that no error has been detected. If no error was detected, the brief
report sequence is
<ESC>[0n
If an error was detected, the brief report sequence is
<ESC>[3n
Extended reports include the brief report but follow it with an error
code(s). If no error condition exists, an extended report sequence is
<ESC>[0n<ESC>[?20n
The sequence <ESC>[0n is the brief report for No error. The
sequence <ESC>[?20n contains the code (20) for No error.
If an error condition exists, the extended report has this structure:
<ESC>[3n<ESC>[?generic code;specific code ... n
»
Note: When unsolicited status reports are enabled, each error is
reported only once per page.
The sequence <ESC>[3n is the brief report for Error detected. The
extended report contains a pair (or more) of generic and specific error
codes that define the detected error(s). These codes are listed in the
following table.
/13OXV(PXODWLRQIRU4063ULQWHUV
3ULQWHU6WDWXV
&RPPDQGV
GENERIC CODES
20
No error detected.
40
Character not available.
41
Line content exceeded.
42
Font file format error.
44
Font memory exceeded.
SPECIFIC CODES
102
Lost characters or part of rule (line vector).
103
Font memory exceeded. Only complete fonts downloaded.
104
Excess fonts not loaded into memory.
112
Illegal codes in downloaded fonts.
124
Character not defined in selected font.
&XUVRU3RVLWLRQ5HSRUW
When requested by the host (see “Device Status Request (DSR)” on
page 2-3), the printer reports the current line and column with the following sequence:
<ESC>[Pn1 ;Pn2 R
Pn1 is the current line; Pn2 is the current column. The numeric values
for the two positions are expressed in the current unit of measure.
(The current unit of measure is either decipoints, pixels, or character
cells as determined by the Position Unit Mode sequence and the
Select Size Unit sequence. See chapter 4, “Set and Reset
Sequences,” for more information.)
3ULQWHU6WDWXVDQG5HVHW&RPPDQGV
3ULQWHU5HVHW
&RPPDQGV
3ULQWHU5HVHW&RPPDQGV
5HVHWWR,QLWLDO6WDWH5,6
This sequence resets the LN03 Plus emulation settings to their
power-up state.
Syntax:
<ESC>c
The table below lists the settings that this sequence resets.
6RIW7HUPLQDO5HVHW'(&675
This sequence is equivalent to the RIS sequence but also exits
DECTEK mode.
Syntax:
<ESC>[!p
The table below lists the settings that this sequence resets.
/13OXV(PXODWLRQIRU4063ULQWHUV
3ULQWHU5HVHW
&RPPDQGV
Receive data
8-bit data.
Transmit data
7-bit data & control character between hex 80 & hex FF.
Download fonts
Not erased.
SGR font numbers
See chapter 7, “Font Handling,” for default settings.
Default font
Multinational 10 cpi / 10 pt.
Page margins
LTR
A4
LEG
11X17
Top
0"
8.1 mm
0”
0"
Bottom
10.56"
276.4 mm
13.5”
16.5”
Left
0"
0 mm
0”
0"
Right
8.0"
196.3 mm
8.0”
10.56”
Tab settings
Horizontal tabs every 8 spaces.
Vertical tabs every line.
Page format
Portrait.
Form length
LTR
A4
LEG
11X17
11"
287.8 mm
14"
17”
Origin
(upper left corner)
0.25" (6.4 mm) from edges of paper.
Spacing increments
LTR
A4
LEG
11X17
Horizontal
10 cpi
10.3 cpi
10 cpi
10 cpi
Vertical
6.25 lpi
6.25 lpi
6.25 lpi
6.25 lpi
Active position
(upper left corner)
0.25" (6.4 mm) from edges of paper.
Font attributes
Justification off.
SGR attributes off.
CR / Newline mode off.
LF / Newline mode off.
Unit of measure
Character cell size.
3ULQWHU6WDWXVDQG5HVHW&RPPDQGV
6HW5HVHW
6HTXHQFHV
,QWKLVFKDSWHU
“About Set/Reset Sequences” on page 4-2
“Set/Reset Sequences” on page 4-2
$ERXW6HW
5HVHW
6HTXHQFHV
$ERXW6HW5HVHW6HTXHQFHV
The following modes of operation may be turned on (set) or turned off
(reset) with a Set/Reset sequence. Each of these modes has a
unique selection parameter.
Line Feed/New Line Mode (LNM)
Carriage Return/New Line Mode (DECCRNLM)
Autowrap Mode (DECAWM)
Pitch Select Mode (DECPSM)
Proportional Spacing Mode (DECPSP)
Origin Placement Mode (DECOPM)
Position Unit Mode (PUM)
Select Size Unit (SSU)
Set and reset escape sequences have the same syntax; only the terminator differentiates between set or reset.
The syntax for a set sequence is
<ESC>[Psh
The syntax for a reset sequence is
<ESC>[Psl
(The terminator for a reset sequence is a lowercase L.)
6HW5HVHW6HTXHQFHV
/LQH)HHG1HZ/LQH0RGH/10
This mode controls how the printer performs a line feed in response
to a line feed character. When LNM is set (on), the printer moves the
current position down one line and moves the active column to the left
/13OXV(PXODWLRQIRU4063ULQWHUV
6HW5HVHW
6HTXHQFHV
margin whenever it receives a line feed from the host. When LNM is
reset (off), the printer moves the current position down one line but
does not move the active column. The default state of LNM is reset
(off).
<ESC>[20h
Set LNM
<ESC>[20l
Reset LNM
&DUULDJH5HWXUQ1HZ/LQH0RGH'(&&51/0
This mode controls how the printer performs a carriage return in
response to a carriage return character. When DECCRNLM is set
(on), the printer moves the active column to the left margin and moves
the current position down one line whenever it receives a carriage
return from the host. When DECCRNLM is reset (off), the printer
moves the active column to the left margin but does not move the current vertical position. The default state of DECCRNLM is reset (off).
<ESC>[?40h
Set DECCRNLM
<ESC>[?40l
Reset DECCRNLM
$XWRZUDS0RGH'(&$:0
This mode controls what happens when a line of text exceeds the
right margin. When DECAWM is set (on), text that exceeds the right
margin automatically wraps to the next line, the active column moves
to the left margin, and the current position advances to the line where
the remaining text prints. When DECAWM is reset (off), text that
exceeds the right margin does not print. The default state of
DECAWM depends on the Autowrap configuration setting.
<ESC>[?7h
Set DECAWM
<ESC>[?7l
Reset DECAWM
6HW5HVHW6HTXHQFHV
6HW5HVHW
6HTXHQFHV
3LWFK6HOHFW0RGH'(&360
This mode controls which horizontal pitch formats text on the line.
When DECPSM is set (on), the printer uses the default horizontal
pitch determined by the current font. When DECPSM is reset (off),
the printer uses the horizontal pitch specified by the DECSHORP
sequence. (The DECSHORP sequence is discussed later in this
manual.) The default state of DECPSM is reset (off).
<ESC>[?29h
Set DECPSM
<ESC>[?29l
Reset DECPSM
3URSRUWLRQDO6SDFLQJ'(&363
This mode controls the type of intercharacter spacing used: proportional or monospacing. When DECPSP is set (on), the printer uses
the proportional spacing value built into the current font. (The current
font must have proportional spacing in its attributes.) When DECPSP
is reset (off), the printer returns to monospacing and the spacing values return to those in effect before the proportional spacing was
selected. The default state of DECPSP is reset (off).
<ESC>[?27h
Set DECPSP
<ESC>[?27l
Reset DECPSP
2ULJLQ3ODFHPHQW0RGH'(&230
This mode places the origin point for the page. When DECOPM is set
(on), the origin is the top left corner of the physical page. When the
origin placement mode is reset (off), the origin is placed 0.25"/6.35
mm from the left edge and 0.25"/6.35 mm from the top edge of the
/13OXV(PXODWLRQIRU4063ULQWHUV
6HW5HVHW
6HTXHQFHV
physical page. The default state of the DECOPM is reset (off).
<ESC>[?52h
Set DECOPM
<ESC>[?52l
Reset DECOPM
3RVLWLRQ8QLW0RGH380
This mode specifies the unit of measure used with other spacing
modes. When PUM is set (on), the printer uses either decipoints or
pixels as the unit of measure depending on the setting of the Select
Size Unit (SSU) sequence. When PUM is reset (off), the printer uses
a spacing unit that is equal to one character position (character cell).
A character cell's width equals the current horizontal spacing increment and its height equals the current vertical spacing increment. The
default state of the PUM is reset (off).
<ESC>[11h
Set PUM
<ESC>[11l
Reset PUM
6HOHFW6L]H8QLW668
This sequence works in conjunction with the PUM sequence to specify the unit of measurement used for spacing modes. When PUM is
set (on), the SSU selects either decipoints or pixels as the unit of
measurement. If the printer receives an SSU sequence while PUM is
reset (off), the unit of measurement (defined by the SSU) does not
take effect until PUM is set. This SSU remains in effect until another
SSU is sent or the printer receives a PUM reset sequence. The
default SSU is decipoints.
<ESC>[2<SP>I
Selects decipoints (1/720" or 0.35mm) as unit of
measure.
<ESC>[7<SP>I
Selects pixels (1/300" or 0.85mm) as unit of measure.
6HW5HVHW6HTXHQFHV
6HW5HVHW
6HTXHQFHV
To convert decipoints into pixel values, the printer uses the following
formula and rounds off to the nearest integer:
Pixels = (Decipoints ÷ 5) × 12
The printer converts 1 decipoint to 0 pixels and 2 decipoints to 1 pixel.
The following table illustrates the interaction of PUM and SSU to
define the unit of measure.
SSU Ps = 2
SSU Ps = 7
PUM Set
Decipoints
Pixels
PUM Reset
Character cells
Character cells
/13OXV(PXODWLRQIRU4063ULQWHUV
&RQWURO
&KDUDFWHUV
,QWKLVFKDSWHU
“Supported Control Characters” on page 5-2
6XSSRUWHG
&RQWURO
&KDUDFWHUV
6XSSRUWHG&RQWURO&KDUDFWHUV
The following control characters are in the range Hex 00 to Hex 1F
and Hex 7F to Hex 8F.
<NUL>
Hex 00
The printer ignores this control character.
<BS>
Hex 08
Backspace moves the current print position one
character space to the left. Movement cannot exceed
the left margin.
<HT>
Hex 09
Horizontal Tab moves the current print position to the
next horizontal tab stop on the current line. Movement
cannot exceed the right margin.
<LF>
Hex 0A
Line Feed moves the current print position one line
down without changing the horizontal position. If LNM
is set, a <LF> also moves the current position to the
left margin.
<VT>
Hex 0B
Vertical Tab moves the current print position to the
next vertical tab stop. Movement cannot exceed the
bottom margin.
<FF>
Hex 0C
Form Feed moves the current print position to the top
left margin of the next page.
<CR>
Hex 0D
Carriage Return moves the current print position to
the left margin. If DECCRLNM is set, current print
position also moves one line down.
<SO>
Hex 0E
Shift Out selects character set G1 for the GL table.
(See chapter 7, “Font Handling.”)
<SI>
Hex 0F
Shift In selects character set G0 for the GL table.
(See chapter 7, “Font Handling.”)
<DC1>
Hex 11
Device Control 1 signals the host computer that the
printer is ready to receive data.
<DC3>
Hex 13
Device Control 3 signals the host computer to stop
sending data until it receives a <DC1> control
character from the printer.
<CAN>
Hex 18
Cancel ends any escape sequence or command in
progress.
/13OXV(PXODWLRQIRU4063ULQWHUV
6XSSRUWHG
&RQWURO
&KDUDFWHUV
<SUB>
Hex 1A
Substitute ends any escape sequence or command
in progress. During sixel graphics, <SUB> prints as a
space.
<ESC>
Hex 1B
Escape begins escape sequences. If received during
an escape sequence, it ends that sequence and
begins a new one.
<DEL>
Hex 7F
The printer ignores this control character.
<IND>
Hex 84
Index moves the current print position one line down
without changing the horizontal position. If movement
exceeds the bottom margin, the current print position
moves to the top margin of the next page.
<NEL>
Hex 85
Next Line moves the current print position to the left
margin of the next line down. If movement exceeds
the bottom margin, the current print position moves to
the left margin of the next page.
<HTS>
Hex 88
Horizontal Tab Set establishes a horizontal tab stop
at the current print position.
<VTS>
Hex 8A
Vertical Tab Set establishes a vertical tab stop at the
current print position.
<PLD>
Hex 8B
Partial Line Down moves the current print position
one-half line down. (See chapter 6, “Page Formatting
and Printing Commands.”)
<PLU>
Hex 8C
Partial Line Up moves the current print position onehalf line up. (See chapter 6, “Page Formatting and
Printing Commands.”)
<RI>
Hex 8D
Reverse Index moves the current print position up
one line. Movement cannot exceed the top margin.
<SS2>
Hex 8E
Single Shift 2 selects character set G2 for the GL
table. (See chapter 7, “Font Handling.”)
<SS3>
Hex 8F
Single Shift 3 selects character set G3 for the GL
table. (See chapter 7, “Font Handling.”).
&RQWURO&KDUDFWHUV
3DJH)RUPDWWLQJ
DQG3ULQWLQJ
&RPPDQGV
,QWKLVFKDSWHU
“Setting Line and Character Spacing” on page 6-2
“Setting Page Format” on page 6-5
“Moving Cursor/Line Position Up or Down” on page 6-11
“Setting and Clearing Tab Stops” on page 6-12
“Setting Text Justification” on page 6-14
“Drawing Lines” on page 6-14
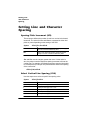
6HWWLQJ/LQH
DQG&KDUDFWHU
6SDFLQJ
6HWWLQJ/LQHDQG&KDUDFWHU
6SDFLQJ
6SDFLQJ3LWFK,QFUHPHQW63,
This sequence defines the number of units in a vertical or horizontal
increment. The values for Pn1 and Pn2 are expressed in either decipoints or pixels depending on the setting of the SSU.
Syntax:
<ESC>[Pn1 ;Pn2 <SP>G
Pn1
Value of the vertical spacing increment (line height) in
the unit of measure defined by SSU.
Pn2
Value of the horizontal spacing increment (space
width) in the unit of measure defined by SSU.
Pn1 and Pn2 must be integers greater than zero. If either value is
zero, the printer uses the respective spacing increment built into the
current font. For example, the following sequence sets the line height
to 120 decipoints (6 lines per inch) and character width to the spacing
of the current font:
<ESC>[120;0<SP>G
6HOHFW9HUWLFDO/LQH6SDFLQJ696
Use this sequence to select a specific line spacing value.
Syntax:
<ESC>[Ps<SP>L
Ps =
0 (default)
6 lines per inch (lpi),1 line = 1/6"
1
4 lines per inch (lpi),1 line = 1/4"
2
3 lines per inch (lpi),1 line = 1/3"
3
12 lines per inch (lpi),1 line = 1/12"
4
8 lines per inch (lpi),1 line = 1/8"
/13OXV(PXODWLRQIRU4063ULQWHUV
6HWWLQJ/LQH
DQG&KDUDFWHU
6SDFLQJ
5
6 lines per 30mm, 1 line = 5 mm
6
4 lines per 30mm, 1 line = 7.5 mm
7
3 lines per 30mm, 1 line = 10 mm
8
12 lines per 30mm, 1 line = 2.5 mm
9
2 lines per inch (lpi),1 line = 1/2"
6HW9HUWLFDO3LWFK'(&9(53
Use this sequence to select a value for lines per inch.
Syntax:
<ESC>[Ps z
Ps =
0 (default)
Line spacing determined by current font.
1
6 lpi
2
8 lpi
3
12 lpi
4
2 lpi
5
3 lpi
6
4 lpi
11
6.25 lpi (66 lines per 11" page)
6HOHFW+RUL]RQWDO&KDUDFWHU6SDFLQJ6+6
This sequence sets the character spacing for monospaced fonts.
Syntax:
<ESC>[Ps<SP>K
Ps =
0 (default)
10 characters per inch (cpi), 1/10" cell width
1
12 characters per inch (cpi), 1/12" cell width
2
15 characters per inch (cpi), 1/15" cell width
3
6 characters per inch (cpi), 1/6" cell width
Note
SHS has no effect when proportional spacing is set.
3DJH)RUPDWWLQJDQG3ULQWLQJ&RPPDQGV
6HWWLQJ/LQH
DQG&KDUDFWHU
6SDFLQJ
6HW+RUL]RQWDO3LWFK'(&6+253
This sequence sets both the character spacing (horizontal pitch) and
character width of monospaced fonts. The sequence also
sets left and right margins to the left and right edges of the printable area of the page
sets the Line Home position to the left edge of the printable area
and the Line End position to the right edge of the printable area
resets all horizontal tab stops by multiplying their values by the
new horizontal pitch then dividing by the old pitch
You may use the DECPSM (pitch select mode) sequence to switch
between the horizontal pitch selected by DECSHORP and the pitch
value for the current font.
Syntax:
<ESC>[Ps w
Ps =
0 (default)
Current font value
1
10 cpi
2
12 cpi
3
13.2 cpi
4
16.5 cpi
5
5 cpi
6
6 cpi
7
6.6 cpi
8
8.25 cpi
9
15 cpi
/13OXV(PXODWLRQIRU4063ULQWHUV
6HWWLQJ3DJH
)RUPDW
6HWWLQJ3DJH)RUPDW
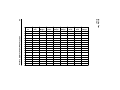
3DJH)RUPDW6HOHFW3)6
Use this sequence to select between several standard page formats.
Each PFS selection has predefined values for the following parameters:
orientation
margins
form length
line home position (active position after a carriage return)
line end position (last possible position on a line)
page home line (active line after a form feed)
page end line (last possible line on a page)
Syntax:
<ESC>[Ps<SP>J
The values for Ps and the page formats they select are given in the
following table.
3DJH)RUPDWWLQJDQG3ULQWLQJ&RPPDQGV
/13OXV(PXODWLRQIRU4063ULQWHUV
Page
Size
Left
Margin
Line
Home
Right
Margin
Top
Margin
Page
Home
Page
End
Bottom
Margin
0
8.5x11
0
150
2310
0
150
2842
3140
1
11x8.5
0
150
3150
0
150
1992
2290
2
8.2x11.5
0
150
2311
0
150
3042
3340
3
11.5x8.2
0
150
3301
0
150
1992
2290
4
8.5x11
0
150
2400
0
150
2842
3140
5
11x8.5
0
150
3150
0
150
2042
2340
6
8.2x11.5
0
150
2311
0
0
3290
3290
7
11.5x8.2
0
150
3301
0
0
2190
2190
?10
8.5x14
0
0
2400
0
0
4050
4050
?11
14x8.5
132
132
3918
0
0
2375
2375
?20
8.5x11
0
0
2400
0
0
3158
3158
?21
11x8.5
111
111
3016
0
0
2366
2366
?22
8.2x11.5
0
0
2321
0
97
3254
3254
?23
11.5x8.2
220
220
3126
0
0
2366
2366
?26
11x17
0
0
3168
0
0
4950
4950
?27
17x11
0
0
4950
0
0
3168
3168
6HWWLQJ3DJH
)RUPDW
Ps
6HWWLQJ3DJH
)RUPDW
6HW/LQHVSHU3K\VLFDO3DJH'(&6/33
Use this sequence to establish the form length of the page. The maximum form length is determined by page orientation, origin point, and
paper size. The form length established by this sequence may be
expressed in either pixels, decipoints, or character cells (lines)
depending on the PUM and SSU sequences.
The DECSLPP sets top margin to 1 and bottom margin to the specified form length.
Syntax:
Pn
<ESC>[Pn t
A numeric value greater than 0 and less than or equal
to the maximum value for the current paper size. If Pn
is 0, DECSLPP sets form length to the maximum
value for the paper size. If Pn is greater than the
maximum value for the paper, DECSLPP sets form
length to the maximum value.
6HW7RSDQG%RWWRP0DUJLQV'(&67%0
This sequence sets the top and bottom margins relative to the current
origin point. The top margin is the page home position. The bottom
margin is the page end position. The printer cannot print text on the
current page outside these margins. (It can, however, draw vectors
outside the margins.)
Syntax:
<ESC>[Pn1 ;Pn2 r
Pn1
Numeric value for top margin expressed in unit of
measure determined by PUM and SSU.
Pn2
Numeric value for bottom margin expressed in unit of
measure determined by PUM and SSU.
The new margins take effect as soon as they are received by the
printer with the following exceptions:
If the value of Pn1 is omitted or set to 0, the top margin does not
change.
3DJH)RUPDWWLQJDQG3ULQWLQJ&RPPDQGV
6HWWLQJ3DJH
)RUPDW
If the value of Pn2 is omitted or set to 0, the bottom margin does
not change.
If the value of Pn1 is greater than the value of Pn2 , the printer
ignores the sequence.
If the value of Pn2 exceeds the overall form length, the bottom of
the form becomes the new bottom margin.
If the current active position is above the new top margin, the active
position moves to the top margin. If the current active position is
below the new bottom margin, the next character printed generates a
form feed.
Whenever form length changes, the printer clears the top and bottom
margins, sets the top margin to 1, and sets the bottom margin to the
bottom of the new form length.
If the unit of measure is decipoints, the following sequence sets both
top and bottom margins to 1"/25.4 mm:
<ESC>[720;720r
6HW/HIWDQG5LJKW0DUJLQV'(&6/50
This sequence sets the left and right margins. The left margin is the
line home position. The printer cannot print text on the current page
outside these margins. (It can, however, draw vectors outside the
margins.)
Syntax:
<ESC>[Pn1 ;Pn2 s
Pn1
Numeric value for left margin expressed in unit of
measure determined by PUM and SSU.
Pn2
Numeric value for left margin expressed in unit of
measure determined by PUM and SSU.
The new margins take effect as soon as they are received by the
printer with the following exceptions:
If the value of Pn1 is omitted or set to 0, the left margin does not
change.
/13OXV(PXODWLRQIRU4063ULQWHUV
6HWWLQJ3DJH
)RUPDW
If the value of Pn 2 is omitted or set to 0, the right margin does not
change.
If the value of Pn1 is greater than the value of Pn2 , the printer
ignores the sequence.
If the value of Pn2 exceeds the printable width of the page, the
right edge of the printable area becomes the new right margin.
If the current active position is left of the new left margin, the active
position moves to the left margin. If the current active position is right
of the new right margin, the next character printed generates a carriage return/line feed.
If the unit of measure is decipoints, the following sequence sets a left
margin of 1"/25.4 mm and a right margin of 0.5"/12.7 mm:
<ESC>[720;360s
+RUL]RQWDO3RVLWLRQ$EVROXWH+3$
Use this sequence to move the current position on the current line.
Syntax:
Pn
<ESC>[Pn `
(` = hex 60)
A numeric value for the new position expressed in
units determined by PUM and SSU settings. The
value for Pn is measured from the left margin. The
default value of Pn is 1.
The HPA position cannot exceed the right margin.
+RUL]RQWDO3RVLWLRQ5HODWLYH+35
Use this sequence to move on the current line relative to the current
position.
Syntax:
Pn
<ESC>[Pn a
A numeric value, expressed in units determined by
PUM and SSU settings, to add to the current position.
The default value of Pn is 1.
3DJH)RUPDWWLQJDQG3ULQWLQJ&RPPDQGV
6HWWLQJ3DJH
)RUPDW
The HPR position cannot exceed the right margin.
+RUL]RQWDO3RVLWLRQ%DFNZDUG+3%
Use this sequence to move to the left on the current line relative to the
current position.
Syntax:
Pn
<ESC>[Pn j
A numeric value, expressed in units determined by
PUM and SSU settings, to subtract from the current
position. The default value of Pn is 1.
The HPB position cannot exceed the left margin.
9HUWLFDO3RVLWLRQ$EVROXWH93$
This sequence moves the current line vertically on the page.
Syntax:
Pn
<ESC>[Pn d
A numeric value for the new position expressed in
units determined by PUM and SSU settings. The
value for Pn is measured from the top margin.
The default value for Pn depends on the paper size used. The default
value for LTR size paper is 1. The default value for A4 size paper is 3.
9HUWLFDO3RVLWLRQ5HODWLYH935
This sequence moves the active line down relative to the current line
without changing the horizontal position.
Syntax:
Pn
<ESC>[Pn e
A numeric value, expressed in units determined by
PUM and SSU settings, to add to the current position.
The default value is 0.
/13OXV(PXODWLRQIRU4063ULQWHUV
0RYLQJ&XUVRU
/LQH3RVLWLRQ
8SRU'RZQ
If the VPR sequence moves the active position past the bottom margin, the printer sets the active position to the bottom margin and prints
the page with the next character.
9HUWLFDO3RVLWLRQ%DFNZDUG93%
Use this sequence to move up the page vertically relative to the current position.
Syntax:
Pn
<ESC>[Pn k
A numeric value, expressed in units determined by
PUM and SSU settings, to subtract from the current
position. The default value of Pn is 0.
The VPB position cannot exceed the top margin.
0RYLQJ&XUVRU/LQH3RVLWLRQ
8SRU'RZQ
&XUVRU8S&88
This sequence moves the current line up a specific number of lines
(cells), decipoints, or pixels depending on the current settings of PUM
and SSU.
Syntax:
Pn
<ESC>[Pn A
A numeric value for the number of units to move up
from the current line.
The default value for CUU is 1. Movement cannot exceed the top margin.
3DJH)RUPDWWLQJDQG3ULQWLQJ&RPPDQGV
6HWWLQJDQG
&OHDULQJ7DE
6WRSV
3DUWLDO/LQH8S3/8
Use this sequence for superscript characters. PLU moves the current
line up one-half the line spacing increment of the current font.
Syntax:
<ESC>L
If the current line is the top margin when the PLU sequence is issued,
the superscript character may print as a space. Use the Partial Line
Down (PLD) sequence to return to the original current line.
3DUWLDO/LQH'RZQ3/'
Use this sequence for subscript characters. PLD moves the current
line down one-half the line spacing increment of the current font.
Syntax:
<ESC>K
If the current line is the bottom margin when the PLD sequence is
issued, the subscript character will print as a space. Use the Partial
Line Up (PLU) sequence to return to the original current line.
6HWWLQJDQG&OHDULQJ7DE
6WRSV
6HW+RUL]RQWDO7DE6WRSV'(&6+76
Use this sequence to set horizontal tabs. You may set up to 16 tabs
with a single escape sequence. You may have a maximum of 32 individual horizontal tabs defined at any time.
Syntax:
Pn1 ... Pn16
<ESC>[Pn1 ; ... ;Pn16 u
Up to 16 numeric values for horizontal tabs. If you set
more than one tab with a single escape sequence,
you must use the semicolon separators between tab
values.
/13OXV(PXODWLRQIRU4063ULQWHUV
6HWWLQJDQG
&OHDULQJ7DE
6WRSV
Tab values are expressed in pixels, decipoints, or character cells
depending on the settings of PUM and SSU.
If 32 tabs have been set, the highest tab value is erased when you
add the next new tab. If the new tab value is higher than any of the
older 32 tabs, the printer ignores the new tab value.
6HW9HUWLFDO7DE6WRSV'(&6976
Use this sequence to set vertical tabs. You may set up to 16 tabs with
a single escape sequence. You may have a maximum of 67 individual
vertical tabs defined at any time.
Syntax:
Pn1 ... Pn16
<ESC>[Pn1 ; ... ;Pn16 v
Up to 16 numeric values for horizontal tabs. If you set
more than one tab with a single escape sequence,
you must use the semicolon separators between tab
values.
Tab values are expressed in pixels, decipoints, or character cells
depending on the settings of PUM and SSU.
If 67 tabs have been set, the highest tab value is erased when you
add the next new tab. If the new tab value is higher than any of the
older 67 tabs, the printer ignores the new tab value.
7DEXODWLRQ&OHDU7%&
Use this sequence to delete some or all of the horizontal and vertical
tabs.
Syntax:
<ESC>[Ps g
Ps =
0
Clear the horizontal tab at the current position.
1
Clear the vertical tab at the current position.
2
Clear all horizontal tabs.
3DJH)RUPDWWLQJDQG3ULQWLQJ&RPPDQGV
6HWWLQJ7H[W
-XVWLILFDWLRQ
3
Clear all horizontal tabs.
4
Clear all vertical tabs.
6HWWLQJ7H[W-XVWLILFDWLRQ
-XVWLILFDWLRQ
This sequence turns right-justification of text on and off.
Syntax:
<ESC>[Ps<SP>F
Ps =
0
Turn off justification.
1
Turn on justification with limits.
2
Turn on justification without limits.
If Ps is 1, the printer expands the space between words to right-justify
text depending on the spacing value built into the current font. The
limit on expansion varies depending on the current font.
If Ps is 2, the printer can contract interword spacing to 0 or expand it
as much as necessary to right justify the text.
When you select justification, the printer automatically disables
autowrap mode. Any characters that exceed the right margin
(depending on the current font) do not print.
'UDZLQJ/LQHV
'UDZLQJ9HFWRUV
Use this sequence to draw horizontal and vertical lines.
/13OXV(PXODWLRQIRU4063ULQWHUV
'UDZLQJ/LQHV
Syntax:
<ESC>[Ps;Pn1 ;Pn 2;Pn 3 ;Pn4 ! |
Ps = 0
Draws a horizontal vector relative to the current X
axis of the page.
Ps = 1
Draws a horizontal vector relative to the current X
axis of the page.
Pn1
Numeric value, expressed in units depending on
SSU, for the starting X position of the vector. The
default value of Pn1 is 0.
Pn2
Numeric value, expressed in units depending on
SSU, for the starting Y position of the vector. The
default value of Pn2 is 0.
Pn3
Numeric value, expressed in units depending on
SSU, for the length of the vector. If Ps is 0, this value
is the X length of the vector. If Ps is 1, this value is the
Y length. The default value of Pn3 is 1.
Pn4
Numeric value, expressed in units depending on
SSU, for the width (thickness) of the vector. If Ps is 0,
this value is the X width of the vector. If Ps is 1, this
value is the Y width. The default value of Pn4 is 1.
For example, the following sequence draws a horizontal vector, starting at coordinates (300, 300), that is 4"/101.6 mm long and 7 pixels
thick (SSU is pixels):
<ESC>[0;300;300;1200;7!|
3DJH)RUPDWWLQJDQG3ULQWLQJ&RPPDQGV
)RQW+DQGOLQJ
,QWKLVFKDSWHU
“Selecting Fonts” on page 7-2
“Selecting Character Sets” on page 7-9
“Requesting Font Status Reports” on page 7-12
6HOHFWLQJ)RQWV
6HOHFWLQJ)RQWV
)RQWV$YDLODEOH
When you select QMS LN03 Plus emulation, you must have fonts
(either resident on the printer or downloaded to the printer from your
host computer) that are designed for LN03 Plus printers. These fonts
must comply with the DEC Type 1 Variant 0 font specification. The following font files are included with the QMS LN03 Plus emulation:
Courier Medium [ASCII] LN03, 6.7 Point, 13.6 CPI
Courier Medium Supplemental LN03, 6.7 Point 13.6 CPI
Courier Medium Line Draw LN03, 6.7 Point, 13.6 CPI
DEC Tech Set LN03, 6.7 point, 13.6 CPI
Courier Medium [ASCII] LN03, 10 point, 10 CPI
Courier Medium Supplemental LN03, 10 Point 10 CPI
Courier Medium Line Draw LN03, 10 Point, 10 CPI
DEC Tech Set LN03, 10 point, 10 CPI
Courier Medium [ASCII] LN03, 10 point, 10.3 CPI
Courier Medium Supplemental LN03, 10 Point 10.3 CPI
Courier Medium Line Draw LN03, 10 Point, 10.3 CPI
DEC Tech Set LN03, 10 point, 10.3 CPI
Prestige Elite Medium [ASCII] LN03, 10 Point, 12 CPI
Prestige Elite Medium Supplemental LN03, 10 Point, 12 CPI
Prestige Elite Medium Line Draw LN03, 10 Point, 12 CPI
DEC Tech Set LN03, 10 Point, 12 CPI
Letter Gothic Medium [ASCII] LN03, 14 Point, 8 CPI
Letter Gothic Medium Supplemental LN03, 14 Point, 8 CPI
These fonts correspond to the fonts available in an LN03 Plus printer.
/13OXV(PXODWLRQIRU4063ULQWHUV
6HOHFWLQJ)RQWV
'RZQORDGLQJ)RQWV'(&/))
A font file contains an encoded “description” of the font and the sixel
graphic data for all the characters in the font. The font download
escape sequence encapsulates the font file with selection values and
a comment field.
Syntax:
»
<ESC>PPs1;Ps2;Ps3yFont Record Data;Comments<ESC>\
Ps1
This value must be 0 (indicating that the font file is in
the Digital font file format) or the printer ignores the
sequence.
Ps2
This value determines whether a summary sheet
prints. If the value is 0 (default), the summary sheet
prints. If the value is 1, the sheet does not print.
Ps3
This value determines which font files to delete. If
Ps3 is 0, the printer deletes all downloaded font files
before continuing. If Ps 3 is 1, the printer deletes only
the downloaded font files whose font file ID matches
the ID in this download.
Font
Record
Data
The download font file in Digital font file format.
Comments
Any comments you want to add to the font file. The
printer ignores all comments.
Note: Downloaded fonts are permanent. They are removed by a
LN03 Plus delete font command.
7KH)RQW)LOH,'
The font record data field in the DECLFF sequence consists of a 31byte encoded description for the character set and attributes of the
download font and the encoded font data itself in sixel graphics.
)RQW+DQGOLQJ
6HOHFWLQJ)RQWV
The 31-byte (base 36) description consists of the items in the following table:
Type ID
Bytes 1-7
Identifies the type family. The first byte must
be Q.
Spacing
Byte 8
0 = Proportional
1 = 13.6 cpi
2 = 10.3 cpi
3 = 6.8 cpi
4 thru 9 = Reserved. Do not use.
A thru Z = Monospaced.
(A = 1cpi, B=2 cpi, C=3 cpi, ... , Z=26 cpi)
Type Size
Bytes 9-11
Three-byte base-36 value expressed in
decipoints for the character height (e.g., 02S
= 100 decipoints = 10 pt character height).
Scaling
Byte 12
Scaling of fonts is not supported. Value of
byte 12 must be “K”.
Type Style
Bytes 13-14
Two-byte (10 bit base 36) value describing
the type style for the font. Each bit describes
a different style (00 = Normal):
Bit 0 = 1 = Italic
Bit 1 = 1 = Slant
Bit 2 = 1 = Underlined
Bit 3 = 1 = Overlined
Bit 4 = 1 = Strike-Through
Bit 5 = 1 = Reverse Video
Bits 6 - 9 are reserved (always 0)
Weight
Byte 15
4 = Ultra Light
7 = Extra Light
A = Light
D = Semi Light
G = Regular
J = Medium
M = Semi Bold and Demi
P = Bold
S = Heavy and Extra Bold
V = Black, Ultra Bold, and Ultra Heavy
/13OXV(PXODWLRQIRU4063ULQWHUV
6HOHFWLQJ)RQWV
Proportion
Byte 16
4 = Ultra Expanded
7 = Extra Expanded
A = Expanded
D = Semi Expanded
G = Regular
J = Medium
M = Semi Condensed
P = Condensed
S = Extra Condensed
V = Ultra Condensed
Rotation
Bytes 17-18
00 = Portrait (No rotation).
Values other than 00 are landscape rotation.
Character Set Bytes 19-21
01U = ASCII
01O = DEC Supplemental
01Q = DEC Technical
01C = VT100 Line Drawing
Character
ZZZZ = Full character set subset.
Bytes 22-25
File Encoding Bytes 26-27
02 = Binary data.
Resolution
Byte 28
F = 300 dots per inch.
Reserved
Bytes 29-31
Set these three bytes to 000.
For example, this is the 31-byte descriptor for a Courier 10pt/10cpi
ASCII character set download font:
QCOURIRJ02SK00GG0001UZZZZ02F000
QCOURIR
Type family ID.
J
Spacing (J=10cpi).
02S
Height (100 decipoints).
K
No scaling.
00
Normal style.
G
Regular weight.
G
Regular proportion.
00
Portrait orientation.
)RQW+DQGOLQJ
6HOHFWLQJ)RQWV
01U
ASCII character set.
ZZZZ
Full character set subset.
02
Binary encoding.
F
300 dpi resolution.
000
Reserved characters.
The sixel graphics data for the download font immediately follows byte
31. Only one character set may be downloaded to the printer at a
time. You can follow the sixel graphics data with another 31-byte
descriptor for another font or character set.
'HOHWLQJD7\SH)DPLO\RU)RQW)LOH
'(&'7))
Use this sequence to delete downloaded fonts by their type family or
font file ID strings.
Syntax:
<ESC>P Ps~ID string<ESC>\
Ps = 0
ID string is type family ID.
Ps = 1
ID string is font file ID.
The following example sequence deletes the font file Courier 10 point/
10 cpi ASCII character set:
<ESC>P1~QCOURIRJ02SK00GG0001UZZZZ02F000<ESC>\
You can also delete all downloaded fonts from memory before beginning a font download sequence by setting the DECLFF Ps3 value to
0. You may also use the following DECLFF sequence to delete all
download fonts without sending font record data:
<ESC>P0;0;0y<ESC>\
/13OXV(PXODWLRQIRU4063ULQWHUV
6HOHFWLQJ)RQWV
$VVLJQ7\SH)DPLO\RU)RQW'(&$7))
Once you have downloaded a font, you must assign a Select Graphics Rendition (SGR) number to the font. This SGR number will be
used by the SGR escape sequence to select a font for printing.
Syntax:
<ESC>P Ps1 ;Ps2 ;}ID string<ESC>\
Ps1 =
0
Assign SGR number in Ps2 to the font ID string.
1
Assign SGR number in Ps2 to the font ID string.
2
Assign SGR number in Ps2 to the type family ID
string.
Ps2
SGR number. (Range = 10 to 19)
ID String
If Ps1 is 0 or 1, this is the first 16 bytes of the 31-byte
download font descriptor. If Ps1 is 2, this is the first 7
bytes (the type family ID) of the download font
descriptor.
The following SGR numbers are automatically assigned when you
turn on the printer:
10
QMS Built-In-1 Family (power-up default selection)
11
Courier Family
12
Elite Family
13
Courier 10pt, 10cpi
14
Elite 10pt, 12cpi
15
Courier 6.7pt, 13.6cpi
16
Courier 10pt, 10.3cpi
17
QMS Built-In-1 Family
18
QMS Built-In-1 Family
19
Modern Gothic 14pt
)RQW+DQGOLQJ
6HOHFWLQJ)RQWV
You may use DECATFF to reassign these SGR numbers to any fonts
you have downloaded to the printer.
6HOHFW*UDSKLF5HQGLWLRQ6*5
Use this sequence to select a font and any of four font attributes.
Syntax:
<ESC>[Ps m
Ps =
1
Bold printing on.
22
Bold printing off.
3
Italic printing on.
23
Italic printing off.
4
Underlining on.
24
Underlining off.
9
Strike-through printing on.
29
Strike-through printing off.
10
Font selection (see DECATFF).
11
Font selection (see DECATFF).
12
Font selection (see DECATFF).
13
Font selection (see DECATFF).
14
Font selection (see DECATFF).
15
Font selection (see DECATFF).
16
Font selection (see DECATFF).
17
Font selection (see DECATFF).
18
Font selection (see DECATFF).
19
Font selection (see DECATFF).
0
Turn all attributes off.
You may select more than one font attribute with one SGR sequence
but you must use a semicolon to separate the selection values.
/13OXV(PXODWLRQIRU4063ULQWHUV
6HOHFWLQJ
&KDUDFWHU6HWV
6HOHFWLQJ&KDUDFWHU6HWV
6HOHFWLQJ*UDSKLF&KDUDFWHU6HWV
A character set is a complete group of characters: alphanumeric and
any special symbols (depending on the type of character set). Before
printing, you must select a character set and a font. To select a character set, you must first designate it as either G0, G1, G2, or G3.
Syntax:
<ESC>(Ps
Designates G0 (default for GL)
Syntax:
<ESC>)Ps
Designates G1
Syntax:
<ESC>*Ps
Designates G2 (default for GR)
Syntax:
<ESC>+Ps
Designates G3
Syntax:
<ESC>-Ps
Designates G1 (96-character sets)
Syntax:
<ESC>.Ps
Designates G2 (96-character sets)
Syntax:
<ESC>/Ps
Designates G3 (96-character sets)
Ps =
B
ASCII (default for G1 and G0)
<
Supplemental (default for G2 and G3)
>
Technical
0
Line Drawing
A
United Kingdom
4
Dutch
5
Finnish
R
French
9
French Canadian
K
German
Y
Italian
J
JIS Roman
6
Norwegian/Danish
)RQW+DQGOLQJ
6HOHFWLQJ
&KDUDFWHU6HWV
Z
Spanish
7
Swedish
=
Swiss
`
ISO Norwegian/Danish (value is hex 60)
After designating a character set as G0, G1, G2, or G3, map it to
either the “graphics left” (GL) table or the “graphics right” (GR) table.
The GL table corresponds to character values between Hex 00 and
Hex 7F. The GR table corresponds to character values from Hex 80 to
Hex FF.
<SI>
(Hex 0F) Maps G0 to GL
<SO>
(Hex 0E) Maps G1 to GL
<ESC>~
Maps G1 to GR
<ESC>n
Maps G2 to GL
<ESC>}
Maps G2 to GR
<ESC>o
Maps G3 to GL
<ESC>|
Maps G3 to GR
<ESC>N
Maps G2 to GL for one character
<ESC>O
Maps G3 to GL for one character
See appendix B, “Character Sets,” for complete information on the
character sets and GL/GR tables. The following series of commands
illustrate how the graphics character set selection sequences could
be used:
<ESC>(B
<ESC>)B
Designates the ASCII character set as both G0 and
G1. This is the default setup for the printer.
<ESC>*<
Designates the Supplemental character set as G2.
This is also the default setup for the printer.
<ESC>+5
Designates the Finnish character set as G3.
/13OXV(PXODWLRQIRU4063ULQWHUV
6HOHFWLQJ
&KDUDFWHU6HWV
<SI>
Maps the ASCII character set (G0) to the GL table.
This is the default setup for the printer.
<SO>
Maps the ASCII character set (G1) to the GR table.
This is the default setup for the printer.
<ESC>}
Maps the Supplemental character set (G2) to the GR
table. This is the default setup for the printer.
<ESC>|
Maps the Finnish character set (G3) to the GR table.
These designations remain in effect until you issue new designations
or mappings.
*UDSKLF6L]H6HOHFWLRQ*66
Use this sequence to set the character height of characters in the font
selected after this sequence.
Syntax:
<ESC>P Pn<SP>C
Pn
Numeric value, expressed in units determined by
PUM and SSU, for the desired height of the
characters.
The height of the characters implies the width of characters in the
font. The default value of Pn is 100.
For example, the following sequence selects an 8pt font:
<ESC>P80<SP>C
If an 8pt font has not been downloaded to the printer, the next greater
size font will be selected.
*UDSKLF6L]H0RGLILFDWLRQ*60
Use this sequence to select a new character size expressed as a
percentage of the size selected by the previous GSS command in
the current font.
)RQW+DQGOLQJ
5HTXHVWLQJ
)RQW6WDWXV
5HSRUWV
Syntax:
<ESC>P Pn1 ;Pn2 <SP>B
Pn1
Numeric value expressing character height as a
percentage of the current character height.
Pn2
Numeric value expressing character width as a
percentage of the current character width.
For example, if the character height selected as a result of the GSS
command is 10pt, the following sequence selects a 6pt font:
<ESC>P60;100<SP>B
If a 6pt font has not been downloaded to the printer, the next greater
size font will be selected.
5HTXHVWLQJ)RQW6WDWXV
5HSRUWV
5HTXHVW)RQW6WDWXV'(&5)6
Send this sequence to the printer to request status reports on fonts
and download memory.
Syntax:
<ESC>[Ps "{
Ps =
0
Request status of resident fonts, download fonts, and
font memory.
1
Request status of resident and download fonts.
2
Request status of download font memory.
/13OXV(PXODWLRQIRU4063ULQWHUV
5HTXHVWLQJ
)RQW6WDWXV
5HSRUWV
)RQW6WDWXV5HSRUW'(&)65
The printer uses this sequence when responding to the DECRFS
sequence from the host.
Syntax:
<ESC>P Ps "{ID string<ESC>\
Ps =
1
Font status.
2
Download memory status.
ID String
If Ps is 1, this is the font status report. If Ps is 2, this
is the number of bytes of download memory available
in the printer.
The following sequence is an example of a font status report format:
<ESC>P1"{font ID(font family ID):<CR>
<SP><SP><ESC>font file ID,<CR><LF>
<SP><SP>font file ID,<CR><LF>
<SP><SP>font file ID,<CR><LF>
...
...
<SP><SP>font file ID;<CR><LF>
<ESC>\
)RQW+DQGOLQJ
'(&7(.
(PXODWLRQ
,QWKLVFKDSWHU
“Using the DECTEK Emulation” on page 8-2
“DECTEK Fonts” on page 8-4
“DECTEK Control Characters and Escape Sequences” on page
8-4
“DECTEK Modes” on page 8-6
8VLQJWKH
'(&7(.
(PXODWLRQ
8VLQJWKH'(&7(.(PXODWLRQ
Your QMS printer emulates the Tektronix 4010/4014 mode (DECTEK)
of the DEC LN03 Plus printer. In DECTEK, the printer processes text
or graphics data (vectors or plot data) as would a DEC LN03 Plus
printer.
You can use DECTEK to mix ANSI text with Tektronix graphics on the
same page as long as DECTEK occurs before any ANSI text has
been printed on the page.
SL[HOV
/HWWHU6L]H3DJH
SL[HOV
SL[HOV
When in DECTEK emulation, the printer plots data within a “Tekpage”
that is 3072 pixels wide by 2304 pixels and always in landscape orientation (see the following figure). The Tekpage always keeps these
dimensions regardless of the physical page dimensions. The Tekpage
is slightly smaller than letter-size paper. If you use A4-size paper, the
Tekpage leaves a large right margin.
SL[HOV
$6L]H3DJH
DECTEK emulation has five individual modes: Alpha Mode, Graph
Mode, Point Plot Mode, Incremental Plot Mode, and Bypass Mode
(See “DECTEK Modes” on page 8-6).
(QWHULQJ'(&7(.(PXODWLRQ
To enter DECTEK emulation, use the following escape sequence:
/13OXV(PXODWLRQIRU4063ULQWHUV
8VLQJWKH
'(&7(.
(PXODWLRQ
<ESC>[?38h
The printer makes these preparations for Tektronix emulation after
receiving the DECTEK sequence:
If the printer's page buffer contains any data, the printer performs
a form feed. If the buffer is empty, the printer does not perform a
form feed.
The printer saves the current state of ANSI mode (non-DECTEK
mode). The printer will restore this state after exiting DECTEK
emulation.
The printer establishes the DECTEK mode “page” and selects
DECTEK fonts.
The printer resets to their defaults any DECTEK modes that may
have been previously changed.
([LWLQJ'(&7(.(PXODWLRQ
To leave DECTEK emulation, use one of the following escape
sequences:
<ESC>[?38l
<ESC>[!p
Soft Terminal Reset (DECSTR)
The DECSTR command also resets the printer to its power-up state.
For more information, see DECSTR, in chapter 3, “Printer Status and
Reset Commands.” Do not use the RIS (Reset to Initial State) escape
sequence (<ESC>c) to exit DECTEK emulation. During DECTEK
emulation, the printer interprets the RIS escape sequence as a valid
DECTEK command.
'(&7(.(PXODWLRQ
'(&7(.)RQWV
'(&7(.)RQWV
The DECTEK emulation on your printer includes these two resident
DECTEK fonts:
DMDRGTH
14pt Modern Gothic
DCOURIR
6.7pt Courier
For more information about these fonts, see “Alpha Mode” on page 86.
'(&7(.&RQWURO&KDUDFWHUV
DQG(VFDSH6HTXHQFHV
In addition to the escape sequences in this list, several DECTEK
modes have their own escape sequences. For more information, see
“DECTEK Modes” on page 8-6.
<BEL>
Clears Bypass Mode.
<BS> (Back Space)
Backspaces the current position one
character to the left. The backspace cannot
move the current position past the left
margin. If the current position moves onto an
existing Alpha Mode character, the next
character overprints the existing one.
<HT> (Horizontal Tab)
Moves the current position one character to
the right. If the current position is at the right
margin, the horizontal tab moves the current
position to the left margin of the next line.
/13OXV(PXODWLRQIRU4063ULQWHUV
'(&7(.
&RQWURO
&KDUDFWHUVDQG
(VFDSH
<LF> (Line Feed)
Moves the current position to the next line
without changing the horizontal position. If
the current position is at the bottom margin,
line feed moves the current position to the
top of the Tekpage and switches margins.
Line feed also clears Bypass Mode.
<VT> (Vertical Tab)
Moves the current position up one line
without changing the horizontal position.
The current position cannot move beyond
the top margin.
<CR> (Carriage Return)
Moves the current position to the current left
margin (Margin-1 or Margin-2) and clears
Bypass Mode if Alpha Mode is active. If
Graph Mode is active, a carriage return
enables Alpha Mode and moves the current
position to Margin-1 (horizontally) and the
closest printable position relative to the
graphics cursor (vertically). If Incremental
Plot Mode is active, a carriage return
enables Alpha Mode and moves the current
position horizontally to the nearest left
margin (Margin-1 or Margin-2) and vertically
to the current character cursor position. A
carriage return also changes Graph Mode
vector pattern and width to the default
settings unless transparent vectors have
been specified (see <ESC><FF> for
transparent vectors).
<ESC>
Begins an escape sequence. If the Escape
character occurs in an escape sequence,
the printer ignores the first escape
sequence and begins a new one.
<FS>
Switches from Alpha Mode or Graph Mode
to Point Plot Mode, and resets vector pattern
and width to the default settings unless
transparent vectors have been specified
(see <ESC><FF> for transparent vectors).
<GS>
Switches from Alpha Mode to Graph Mode.
<RS>
Switches to Incremental Plot Mode from any
mode.
'(&7(.(PXODWLRQ
'(&7(.0RGHV
<US>
Switches to Alpha Mode from any mode and
clears Bypass Mode.
<ESC><BEL>
Same as <BEL>.
<ESC><BS>
Same as <BS>.
<ESC><HT>
Same as <HT>.
<ESC><LF>
Embeds a line feed in the file when followed
by a “no-op” code, such as <ACK>.
<ESC><CR>
Embeds a carriage return in the file when
followed by a “no-op” code such as <ACK>.
<ESC><VT>
Same as <VT>.
<ESC><FF>
Switches to Alpha Mode from any mode,
moves the current position to the home
position of the Tekpage and sets the current
left margin to Margin-1, clears EGM, ejects
the current page, and clears Bypass Mode.
Also resets vector pattern and width
(including transparent vectors) to the default
settings.
<ESC><FS>
Same as <FS>.
<ESC><GS>
Same as <GS>.
<ESC><RS>
Same as <RS>.
<ESC><CAN>
Switches to Bypass Mode.
<ESC><SUB>
Switches to Alpha Mode from any mode.
<ESC><US>
Same as <US>.
'(&7(.0RGHV
$OSKD0RGH
The DECTEK Alpha Mode is the default mode. Whenever the printer
receives the DECTEK escape sequence, it enables Alpha Mode. You
may enter Alpha Mode from any of the other modes by using any one
of these commands:
/13OXV(PXODWLRQIRU4063ULQWHUV
'(&7(.0RGHV
<CR>
<US>
<ESC><FF>
<ESC><US>
<ESC><SUB>
In Alpha Mode, you may select from four character sizes:
<ESC>8
Large character size, Modern Gothic typeface
<ESC>9
Medium large character size, Modern Gothic typeface
<ESC>:
Medium small character size, Courier typeface
<ESC>;
Small character size, Courier typeface
You may use the DECLFF command to download different typefaces
to use instead of the default Alpha Mode faces. The fonts you download must use the identical font descriptor as the resident Alpha Mode
fonts. For the two large character sizes (<ESC>8 and <ESC>9), use
QMDRGTHH03WK00GG0001UZZZZ02F000 (ASCII character set)
QMDRGTHH03WK00GG0001OZZZZ02F000 (Supp. character set)
For the two smaller character sizes (<ESC>: and <ESC>;), use
QCOURIR101VK00GG0001UZZZZ02F000 (ASCII character set)
QCOURIR101VK00GG0001OZZZZ02F000 (Supp. character set)
You may print in Alpha Mode in either one column (full page width) or
two columns in the Tekpage. Printing extends to full width if text
exceeds the middle of the Tekpage before you issue a <CR><LF> to
end each line. Printing is in two columns if you issue a <CR><LF> to
end each line before text reaches the middle of the Tekpage.
If you are printing full width, you must issue an <ESC><FF> at the
end of the last text line on the page before automatic wrapping moves
the current print position to column 2 at the top of the same page. The
<ESC><FF> continues full width printing to the next page.
'(&7(.(PXODWLRQ
'(&7(.0RGHV
If you are printing in two columns, a <CR><LF> at the bottom of column 1 moves the current print position to the left margin of column 2
(an imaginary line in the middle of the Tekpage) at the top line. To
continue two column printing on the next page, you must issue an
<ESC><FF> in the last line of text in column 2 before the text automatically wraps back to column 1.
*UDSK0RGH
DECTEK Graph Mode is the vector plotting mode. You can enter
Graph Mode from Alpha Mode (only) by issuing the <GS> or
<ESC><FS> command.
In Graph Mode, the first byte that the printer receives after the <GS>
defines the starting point of the vector. The second and successive
bytes define the endpoints of the vectors. For example, the following
sequence plots vectors to points B, C, and D beginning at point A.
<GS>ABCD
<GS>AB<GS>CD
You may select from a variety of vector styles using any of the following escape sequences after the <GS> command:
<ESC>`
Normal intensity, solid vectors (` = hex 60)
<ESC>a
Normal intensity, dotted vectors
<ESC>b
Normal intensity, dot-dash vectors
<ESC>c
Normal intensity, short dash vectors
<ESC>d
Normal intensity, long dash vectors
<ESC>e
Normal intensity, solid vectors
<ESC>f
Normal intensity, solid vectors
<ESC>g
Normal intensity, solid vectors
<ESC>h
Bold, solid vectors
<ESC>i
Bold, dotted vectors
<ESC>j
Bold, dot-dash vectors
<ESC>k
Bold, short dash vectors
/13OXV(PXODWLRQIRU4063ULQWHUV
'(&7(.0RGHV
<ESC>l
Bold, long dash vectors
<ESC>m
Bold, solid vectors
<ESC>n
Bold, solid vectors
<ESC>o
Bold, solid vectors
<ESC>p
Transparent, solid vectors
<ESC>q
Transparent dotted vectors
<ESC>r
Transparent dot-dash vectors
<ESC>s
Transparent short dash vectors
<ESC>t
Transparent long dash vectors
<ESC>u
Transparent, solid vectors
<ESC>v
Transparent, solid vectors
<ESC>w
Transparent, solid vectors
3RLQW3ORW0RGH
In Point Plot Mode, only the ending points of vectors are plotted. Vectors are not plotted. Addressing of points is the same as in Graph
Mode.
You enter Point Plot Mode from either Graph Mode or Alpha Mode by
sending the <FS> or <ESC><FS> command.
,QFUHPHQWDO3ORW0RGH
In Incremental Plot Mode, the printer plots points relative to the character cursor position. You enter Incremental Plot Mode from any other
mode by sending either the <RS> or <ESC><RS> command.
Incremental Plot Mode uses the following characters to move the
character cursor position (“pen”) and plot points:
<SP>
Pen Up
P
Pen Down
D
Up (north)
'(&7(.(PXODWLRQ
'(&7(.0RGHV
E
Up right (northeast)
A
Right (east)
I
Down right (southeast)
H
Down (south)
J
Down left (southwest)
B
Left (west)
F
Up left (northwest)
All characters in Incremental Plot Mode must be uppercase.
%\SDVV0RGH
In Bypass Mode, the printer receives data but does not print or
change the current position. You enter Bypass Mode from any other
mode by sending the <ESC><CAN> command. To exit Bypass Mode,
use any one of the following commands:
<ESC><CR>
<ESC><LF>
<ESC><FF>
<ESC><US>
<BEL>
<CR>
<LF>
<US>
<BEL>
6ZLWFKLQJ0RGHV
The following figure illustrates the commands you can use to switch
modes in DECTEK emulation.
/13OXV(PXODWLRQIRU4063ULQWHUV
'(&7(.0RGHV
3RLQW3ORW
0RGH
(6&!)6!
RU)6!
*UDSK0RGH
56!
56!
6HH
1RWH
,QFUHPHQWDO
3ORW0RGH
6HH
(6&!)6!
1RWH
RU)6!
*6!
(6&!>"K
56!
6HH1RWH
$OSKD0RGH
(6&!>"O
(QWHU
([LW
1RWH8VH86!&5!(6&!))!(6&!86!
RU(6&!68%!
9HFWRU&RRUGLQDWH(QFRGLQJ
In Graph Mode, vectors are plotted on the Tekpage whose coordinates are expressed in “Tekpoints” (3 pixels per Tekpoint in normal
Graph Mode or 0.75 pixels per Tekpoint via the Enhanced Graphics
Module feature). The dimensions of the Tekpage are 1024 Tekpoints
by 768 Tekpoints in normal Graph Mode or 4096 Tekpoints by 3072
Tekpoints with EGM.
To plot the Tekpoints, the Tekpage is divided into a 32 X 32 unit imaginary grid. Each “cell” of this matrix can be assigned a coordinate pair
(called HI-X and HI-Y). Each cell is subdivided into its own 32 X 32
units. Each unit of this subdivided matrix can also be assigned a coordinate pair (called LO-X and LO-Y).
'(&7(.(PXODWLRQ
'(&7(.0RGHV
The HI-X and HI-Y values are assigned the characters from <SP>
(hex 20) to ? (hex 3F). The LO-X values are assigned the characters
from @ (hex 40) to - (hex 5F). The LO-Y values are assigned the
characters from \ (hex 5C) to <DEL> (hex 7F). By using the characters in these ranges, the start and end Tekpoints for vectors can be
expressed in 10-bit encoding (normal mode). The following table illustrates the format and order of bytes for defining addresses. (The EGM
mode uses the Extra Byte to achieve 12-bit encoding for higher definition plotting.)
7-BIT ASCII CHARACTER
Tag Bits
Address Bits
Byte Name
7
6
5
4
3
2
1
Hi-Y
0
1
Extra Byte
1
1
Lo-Y
1
1
5 inter. bits of Y address
Hi-X
1
1
5 MSBs of X address
Lo-X
1
1
5 inter. bits of X address
5 MSBs of Y address
*
Y2
Y1
X2
X1
The eighth bit of each character is always discarded. The printer must
receive the characters in this order: HI-Y, LO-Y, HI-X, LO-X.
For example, assume that the following characters were received:
)
00101001
l
01101100
,
00101100
P
01010000
The eighth bit of each character is discarded. Bits 7 and 6 of each
character are interpreted according to table 7.1 and stripped from the
remaining bits. The remaining bits of the HI-X character are paired
with the remaining bits of the LO-X character as follows:
0110010000 = 400 (decimal) = X coordinate
/13OXV(PXODWLRQIRU4063ULQWHUV
'(&7(.0RGHV
The remaining bits of the HI-Y character are paired with the remaining
bits of the LO-Y character as follows:
0100101100 = 300 (decimal) = Y coordinate
The resulting X,Y pair (400,300) is expressed in Tekpoints, converted
to pixels by the printer, and plotted on the Tekpage.
In Enhanced Graphics Mode (EGM), the Extra Byte further divides
the (LO-X,LO-Y) unit into a 4 X 4 unit grid. Processing of the five characters is similar to 10-bit addressing. However, the order of characters received must be: HI-Y, EB (Extra Byte), LO-Y, HI-X, LO-X. Bit 5
of the EB is discarded. Bits 4 and 3 of the EB are added to the 10-bit
Y address. Bits 2 and 1 are added to the 10-bit X address. If the EB is
01100000, then (using the previous examples) the resulting 12-bit
addresses would be:
011001000000 = 1600 (decimal) = X coordinate
010010110000 = 1200 (decimal) = Y coordinate
The resulting X,Y pair (1600,1200) is expressed in Tekpoints, converted to pixels by the printer, and plotted on the Tekpage.
6KRUWHQHG$GGUHVV7UDQVPLVVLRQ
If only a portion of an address changes, only certain bytes must be
sent, as shown in the following table.
SHORTENED ADDRESS TRANSMISSION RULES
If these change:
These bytes must be sent:
Hi-Y
Hi-Y
Lo-Y
Yes
Hi-X
Yes
Lo-X
Lo-X
EB
Yes
Lo-Y
Extra Byte
Hi-X
Yes
Yes
Yes
Yes
Yes
Yes
'(&7(.(PXODWLRQ
6L[HO*UDSKLFV
,QWKLVFKDSWHU
“About Sixel Graphics” on page 9-2
“Sixel Graphics Controls” on page 9-2
“Sixel Graphics Data” on page 9-6
$ERXW6L[HO
*UDSKLFV
$ERXW6L[HO*UDSKLFV
The sixel graphics feature of LN03 Plus emulation enables the printer
to print pictures and to mix them with text data on the page. Sixels are
vertical lines of six pixels. To most printers, a pixel is equal to one dot.
On your QMS laser printer, one dot is 1/300” wide. With sixel graphics, printing a picture requires less data (depending on the size of the
sixels) transmitted from the host.
6L[HO*UDSKLFV&RQWUROV
6HOHFWLQJ6L[HO*UDSKLFV0RGH
Use this escape sequence to initiate sixel graphics mode:
Syntax:
<ESC>P Ps1 ;Ps2 ;Pn1 q”Pn2 ;Pn3 ;Pn4 ;Pn5 <picture
data><ESC>\
Ps1
Value from the following table that selects a horizontal
grid size (HGS). The HGS defines the width of the
pixel in dots.
Ps2
Background color. Since your printer is a
monochrome device, it ignores this value.
Pn1
Numeric value that, if not zero, overrides the HGS
selection in Ps1 . Expressed in units of measurement
defined by the SSU selection.
q
Indicates the start of the sixel graphics data stream.
"
Defines the pixel aspect ratio.
Pn2
Vertical size portion of the aspect ratio.
Pn3
Horizontal size portion of the aspect ratio. Does not
affect HGS.
Pn4
Height of the picture data. The printer ignores this
value.
/13OXV(PXODWLRQIRU4063ULQWHUV
6L[HO*UDSKLFV
&RQWUROV
Pn5
Width of the picture data. The printer ignores this
value.
picture
data
Generated by the graphics software application.
<ESC>\
Terminator. Restores text mode.
6HOHFWLQJWKH+RUL]RQWDO*ULG6L]H+*6
The HGS defines the spacing between pixels. For example, if the
HGS is 1/150", each pixel is 2 dots wide. If HGS is 1/75”, each pixel is
4 dots wide.
p
p
p
You select the HGS with the Ps1 value (see the table below) in the
sixel mode sequence. As pixels become wider, less data is required
for your picture but the sharpness of the picture decreases.
6L[HO*UDSKLFV
6L[HO*UDSKLFV
&RQWUROV
HGS
ASPECT RATIO
VGS
Ps1
Inches
Inches
vert:horiz
Inches
Inches
0
0.0067
1/150
200:100
0.0133
1/75
1
0.0067
1/150
200:100
0.0133
1/75
2
0.0030
1/337.5
450:100
0.0133
1/75
3
0.0044
1/225
300:100
0.0133
1/75
4
0.0053
1/187.5
250:100
0.0133
1/75
5
0.0067
1/150
200:100
0.0133
1/75
6
0.0089
1/112.5
150:100
0.0133
1/75
7
0.0103
1/97.5
130:100
0.0133
1/75
8
0.0119
1/84
112:100
0.0133
1/75
9
0.0133
1/75
100:100
0.0133
1/75
If the HGS you want is not in the above table, you may use the Pn1
parameter to define a specific HGS. The value of Pn1 may be any
non-zero number and is expressed in either decipoints (1/720") or
dots (1/300") depending on the setting of the SSU. For example, the
following portion of a sixel graphics mode command selects an HGS
of 1/150" (Ps1 ) but overrides it with a Pn1 value of 4 (4 dots or 1/75").
(The example assumes that SSU is dots.)
<ESC>P0;0;4.....
6HOHFWLQJWKH$VSHFW5DWLR
The aspect ratio defines the shape of the pixel. The value of Pn 2 and
Pn3 may be any non-zero decimal integer. Any other character in
either of these parameters terminates the ratio value.
ASPECT RATIO = VERTICAL SIZE (DOTS) / HORIZONTAL SIZE (DOTS) = Pn2 / Pn3
/13OXV(PXODWLRQIRU4063ULQWHUV
6L[HO*UDSKLFV
&RQWUROV
The following portion of a sixel graphics mode command defines a
pixel that is 3 dots wide with an aspect ratio of 2:1:
<ESC>P0;0;3q"2;1.....
The following figure illustrates the pixel described by the above command.
GRWVKLJK
GRWVZLGH
6,;(/
3,;(/
DVSHFWUDWLR
([LWLQJ6L[HO*UDSKLFV0RGH
When the printer processes the string terminator (<ESC>\), it exits
sixel graphics mode and establishes a new current position at the
graphics left margin 70 decipoints below the current sixel graphics
line.
6L[HO*UDSKLFV
6L[HO*UDSKLFV
'DWD
6L[HO*UDSKLFV'DWD
$ERXW6L[HO*UDSKLFV'DWD
The “picture data” in the sixel mode command is the sixel graphics
data. Sixel graphics data is encoded in 8-bit bytes, each byte being an
ASCII character code between Hex 3F and Hex 7E. If a bit has a 1
value, the printer prints the pixel. If the bit is 0, no pixel prints. The following characters have special meanings in sixel graphics data.
<CAN>
Abort sixel graphics data mode.
<SUB>
Prints a blank sixel.
<ESC>
Exits sixel graphics data mode and begins a new
escape sequence.
!
Graphics Repeat Introducer (DECGRI). Precedes a
decimal integer repeat value for the next sixel. If the
integer is omitted or 0, the repeat value is 1. The
maximum repeat value is 32767.
“
Graphics Raster Attributes (DECGRA). Introduces
the pixel aspect ratio.
$
Graphics Carriage Return (DECGCR). Use this
character to overprint a sixel graphics line. Returns
the current position to the graphics left margin.
-
Graphics New Line (DECGNL). Returns the current
position to the graphics left margin and down one
sixel graphics line.
Any character greater than Hex 7F exits sixel graphics data mode.
The following characters are reserved for future use:
<SP>
%
&
'
(
)
*
+
,
.
/
:
<
=
>
/13OXV(PXODWLRQIRU4063ULQWHUV
6L[HO*UDSKLFV
'DWD
'HFRGLQJ6L[HO*UDSKLFV'DWD
Before transmitting data to the printer, the host computer adds an “offset value” of Octal 77 to each byte. When the printer receives each
byte it subtracts this offset and discards the eighth bit. The six least
significant of the remaining bits determine which pixels of the sixel
print.
For example, when it receives the byte 01001000, the printer subtracts octal 77 from the byte which results in 00001001. Then it discards the eighth bit which results in 0001001. The printer prints the
pixels according to the six least significant bits.
%LW
%LW
%LW
%LW
%LW
%LW
3ULQWSL[HO
%ODQN
%ODQN
3ULQWSL[HO
%ODQN
%ODQN
6L[HODVSHFWUDWLR
HDFKSL[HOGRWVE\
GRWV
6L[HO*UDSKLFV
$
406&XVWRPHU
6XSSRUW
,Q7KLV$SSHQGL[
Sources of customer support on page A-2
QMS world-wide offices on page A-5
6RXUFHVRI
6XSSRUW
6RXUFHVRI6XSSRUW
Several sources of help and information are available, depending on
the type of help you need:
<RXU4069HQGRU
Your local vendor (the one from whom you bought the printer) may be
best equipped to help you. Your vendor has specially trained service
technicians available to answer questions, and the equipment to analyze your printer problems.
<RXU$SSOLFDWLRQ9HQGRU
Often, “printing” problems have more to do with the application being
used than with the printer. In this case, the application manufacturer
is the best source of help.
4)$;
Q-FAX, a QMS information retrieval service, provides application
notes, technical support notes on common printing problems, and
information about printer specifications, options, accessories, consumables, and prices.
In the United States and Canada, call (800) 633-7213 to reach QFAX. In all other countries, call (334) 633-3850. Have your fax number
handy when you call (or place the call from your fax machine's handset).
You can choose to have either a directory (a list of currently available
documents) or a specific document sent to you. The first time you call,
request the directory (press 2 on your phone or fax keypad when
prompted). Then call back to request specific documents. You can
order up to three documents per call.
$
/13OXV(PXODWLRQIRU4063ULQWHUV
6RXUFHVRI
6XSSRUW
7KH406&RUSRUDWH%XOOHWLQ%RDUG6\VWHP
The QMS Corporate Bulletin Board System (BBS) contains technical
support notes, application notes, drivers, patches, and utilities, and
you may leave technical questions not requiring an immediate
response on electronic mail for the Sysop (System Operator).
The bulletin board [(334) 633-3632] operates at 1200, 2400, 9600,
and 14400 baud, 8 data bits, no parity, 1 stop bit, with XMODEM,
YMODEM, and ZMODEM capabilities. Contact the QMS Customer
Response Center (CRC) for more information about the bulletin
board.
&RPSX6HUYH
Through CompuServe, you ask general (non-technical) questions,
share information with other users, and access printing information
and programs. When you use CompuServe, type go qmsprint↵ to
go directly to the forum where QMS is located. The QMS library section contains application notes, printer drivers, utilities, technical information, and announcement files.
,QWHUQHW
The QMS server provides access to technical reports, new product
announcements, a trade show schedule, and other general information about QMS.
If you have access to the World Wide Web, you can view the QMS
home page at http://www.qms.com/. The QMS ftp resource is
ftp.qms.com.
406&XVWRPHU6XSSRUW
$
6RXUFHVRI
6XSSRUW
406&XVWRPHU 5HVSRQVH&HQWHU &5&
You can contact the QMS Customer Response Center (CRC) in three
different ways:
Telephone—You can call the CRC at (334) 633-4500 (US)
Monday–Friday, 7:00 am–6:00 pm, Central Time.
Note: If you call for assistance, have the following information
ready so our technicians can help you more quickly:
»
; Your phone number, fax number, and shipping address
; A description of the problem
; The printer model
; The type of host computer you’re using
; The type and version of operating system you’re using
; The interface you’re using, and, if serial, the protocol (for
example, XON/XOFF)
; The application and version you’re using
; The emulation you’re using
; Your printer firmware version (listed on the status/start-up
pages)
$
Fax—You can fax questions to the CRC at (334) 633-3716 (US).
Provide the same information as listed above, and indicate
whether you would like a faxed or a phoned reply.
Internet—If you have access to the World Wide Web, you can
access the CRC through the QMS home page at
http://www.qms.com/
/13OXV(PXODWLRQIRU4063ULQWHUV
406:RUOG
ZLGH2IILFHV
406:RUOGZLGH2IILFHV
4068QLWHG6WDWHVDQG/DWLQ$PHULFD
General Contact
1 (334) 633-4300
Fax 1 (334) 633-4866
Email [email protected]
Customer Response Center (CRC)
Technical Assistance
1 (334) 633-4500
7:00 am–6:00 pm Central Time
Bulletin Board Service
1 (334) 633-3632
Latin America Fax
1 (334) 639-3347
National Service
Service Information, Installation, and Maintenance Pricing
1 (800) 762-8894
On-Site Service and Depot Repair Information
1 (800) 858-1597
7:00 am–7:00 pm Central Time
Spare Parts Ordering and Information
1 (334) 633-4300 x2530
8:00 am–5:00 pm Central Time
406&DQDGD
General Contact
1 (514) 333-5940
Fax 1 (514) 333-5949
Supplies and Accessories
1 (800) 268-0343 x223
National Service
On-Site Service and Depot Repair Information
1 (800) 268-4969
8:30 am–7:00 pm Eastern Time
Spare Parts Ordering and Information
1 (905) 206-9234 x238
8:30 am–5:00 pm Eastern Time
Bulletin Board Service
1 (905) 206-0084
406LQ-DSDQ
General Contact
(+81)- 3 3779-9600
Fax (+81)-3 3779-9650
406&XVWRPHU6XSSRUW
$
406:RUOG
ZLGH2IILFHV
406LQ/DWLQ$PHULFD
General Contact
Cra 43 DD#8-42
Officina 201
Medellin, Colombia
(+57) (4) 312 13 70
Fax (+57) (4) 268 92 97
406(0($
406$XVWUDOLD 30, Atchison Street
St. Leonards NSW 2065
Australia
(+61) 2–9901 3235
Fax (+61) 2–9901 3273
406%HQHOX[ Planetenbaan 60 ‘Corner Plaza’
3606 AK Maarssen
Belgium, NetherThe Netherlands
lands, and all
(+31) 346–551333
unlisted countries
Fax (+31) 346–550170
Internet http://www.qms.nl
406)UDQFH
406*0%+
Germany and
Austria
406,WDO\
$
Vélizy Plus
1 Bis, Rue du Petit Clamart
78142 Vélizy Cedex
France
(+33) 1–410 79 393
Fax (+33) 1–408 30 110
Willstätterstrasse 10
40549 Düsseldorf
Germany
(+49) 211–596 1333
Fax (+49) 211–596 1397
Via della Repubblica 56
43100 Parma
Italy
(+39) 52–1231 998
Fax (+39) 52–1232 902
/13OXV(PXODWLRQIRU4063ULQWHUV
406:RUOG
ZLGH2IILFHV
4061RUGLF
Arenavägen 41, 6th floor
121 77 Johanneshov
Sweden, Finland,
Sweden
Norway, and
(+46) 8–600 01 30
Denmark
Fax (+46) 8–600 01 33
4066RXWK
$IULFD
4068.
United Kingdom
and Ireland
Saskay House
Unit 24 Sunninghill Business Park
Peltier Road, Sunninghill, Johannesburg
Republic of South Africa
(+27) 11–807 6957
Fax (+27) 11–807 6960
Old Bridge House, The Hythe
Staines, Middlesex TW18 3JF
United Kingdom
(+44) 1784–442255
Fax (+44) 1784–461641
406&XVWRPHU6XSSRUW
$
%
&KDUDFWHU6HWV
,Q7KLV$SSHQGL[
Character Sets
Selecting Character Sets
Using GL and GR tables
GL and GR Tables
&KDUDFWHU6HWV
&KDUDFWHU6HWV
A character set is a group of characters (usually alphanumeric and an
assortment of special characters and symbols) with assigned hexadecimal values in the range hex 21 to hex FE. Your QMS printer
includes these character sets for LN03 Plus emulation:
ASCII
Supplemental
Technical
Line Draw
United Kingdom
Dutch
Finnish
French
French Canadian
German
Italian
JIS (Japan Industrial Standards) Roman
Norwegian/Danish
Spanish
Swedish
Swiss
ISO Norwegian/Danish
The contents of these character sets are listed in the tables at the end
of this appendix. See “GL and GR Tables” on page 6.
%
/13OXV(PXODWLRQIRU4063ULQWHUV
6HOHFWLQJ
&KDUDFWHU6HWV
6HOHFWLQJ&KDUDFWHU6HWV
You may "activate" up to four character sets at a time. These four
active character sets (referred to as G0, G1, G2, and G3) may then be
called into action quickly by using special escape sequences.
The following escape sequences designate the character sets to the
four active positions. In these escape sequences, you supply the
identifying value for the character set you want. These values are:
B
ASCII
<
Supplemental
>
Technical
0
LineDraw
A
United Kingdom
4
Dutch
5
Finnish
R
French
9
French Candian
K
German
Y
Italian
J
JIS Roman
6
Norwegian/Danish
Z
Spanish
7
Swedish
=
Swiss
`
ISO Norwegian/Danish (value is hex 60)
&KDUDFWHU6HWV
%
8VLQJ*/DQG
*57DEOHV
Substitute any of the above values for Ps in the following escape
sequences:
<ESC>(Ps
Activate character set as G0
<ESC>)Ps
Activate character set as G1
<ESC>*Ps
Activate character set as G2
<ESC>+Ps
Activate character set as G3
<ESC>-Ps
Activate character set as G1
<ESC>.Ps
Activate character set as G2
<ESC>/Ps
Activate character set as G3
The following example activates the ASCII character set as G0:
<ESC>(B
The following example activates the ASCII character set as G0, the
Supplemental characters as G1, the Line Draw character set as G2,
and the Technical character set as G3:
<ESC>(B<ESC>)<<ESC>*0<ESC>+>
8VLQJ*/DQG*57DEOHV
Once you have activated the character sets you need, you must
"map" the contents of the sets into either the GL or GR table. When
you map a character set into the GL table, you must send the hex values in the GL column of the character set table to print the characters.
When you map a character set into the GR table, you must send the
hex values in the GR column of the character set table to print the
characters.
Use the following escape sequences to map the activated character
sets to the GL and GR tables:
%
/13OXV(PXODWLRQIRU4063ULQWHUV
8VLQJ*/DQG
*57DEOHV
<SI>
Maps the character set activated as G0 into the GL
table.
<SO>
Maps the character set activated as G1 into the GL
table.
<ESC>~
Maps the character set activated as G1 into the GR
table.
<ESC>n
Maps the character set activated as G2 into the GL
table.
<ESC>}
Maps the character set activated as G2 into the GR
table.
<ESC>o
Maps the character set activated as G3 into the GL
table.
<ESC>|
Maps the character set activated as G3 into the GR
table.
<ESC>N
Maps the character set activated as G2 into the GL
table for one character only.
<ESC>O
Maps the character set activated as G3 into the GL
table for one character only.
The following example uses the escape sequences in the first line to
activate the ASCII character set as G0 and the Supplemental characters set as G2. The escape sequences in the second line map the
ASCII character set into the GL table to print the characters "The
price of the item is" and then map the Supplemental character set into
the GL table for one character to print the cent character (hex 22 is
the double quotes character).
<ESC>(B<ESC>+<
<SI>The price of the item is 59<ESC>N"
The printed output would appear as follows:
The price of the item is 59¢
&KDUDFWHU6HWV
%
*/DQG*5
7DEOHV
In the following example, the French character set is activated as G1
and mapped into the GL table:
<ESC>)R<SO>Jos{ is from Cura\ao
The printed output would appear as follows:
José is from Curaçao
*/DQG*57DEOHV
The following seventeen tables contain the GL and GR codes for the
character sets supplied with your LN03 Plus emulation in your QMS
printer.
Each character in each set is assigned two hex values. One hex value
(7-bit) designates the character in the "GL" (graphics left) table. The
other hex value (8-bit) designates the character in the "GR" (graphics
right) table. By using the techniques explained previously in this
appendix, you can quickly call up either the GL or GR table to print a
special character or characters.
%
/13OXV(PXODWLRQIRU4063ULQWHUV
*/DQG*5
7DEOHV
$6&,,&KDUDFWHU6HW3V %
Character
!
"
#
$
%
&
’
(
)
*
+
,
.
/
0
1
2
3
4
5
6
7
8
9
:
;
<
=
>
?
GL
21
22
23
24
25
26
27
28
29
2A
2B
2C
2D
2E
2F
30
31
32
33
34
35
36
37
38
39
3A
3B
3C
3D
3E
3F
GR
Character
GL
GR
Character
GL
GR
A1
A2
A3
A4
A5
A6
A7
A8
A9
AA
AB
AC
AD
AE
AF
B0
B1
B2
B3
B4
B5
B6
B7
B8
B9
BA
BB
BC
BD
BE
BF
@
A
B
C
D
E
F
G
H
I
J
K
L
M
N
O
P
Q
R
S
T
U
V
W
X
Y
Z
[
\
]
^
_
40
41
42
43
44
45
46
47
48
49
4A
4B
4C
4D
4E
4F
50
51
52
53
54
55
56
57
58
59
5A
5B
5C
5D
5E
5F
C0
C1
C2
C3
C4
C5
C6
C7
C8
C9
CA
CB
CC
CD
CE
CF
D0
D1
D2
D3
D4
D5
D6
D7
D8
D9
DA
DB
DC
DD
DE
DF
‘
a
b
c
d
e
f
g
h
i
j
k
l
m
n
o
p
q
r
s
t
u
v
w
x
y
z
{
|
}
~
60
61
62
63
64
65
66
67
68
69
6A
6B
6C
6D
6E
6F
70
71
72
73
74
75
76
77
78
79
7A
7B
7C
7D
7E
E0
E1
E2
E3
E4
E5
E6
E7
E8
E9
EA
EB
EC
ED
EE
EF
F0
F1
F2
F3
F4
F5
F6
F7
F8
F9
FA
FB
FC
FD
FE
&KDUDFWHU6HWV
%
*/DQG*5
7DEOHV
6XSSOHPHQWDO&KDUDFWHU6HW3V Character
¡
¢
£
¥
§
¤
©
ª
«
°
±
²
³
µ
¶
·
¹
º
»
¼
½
¿
%
GL
21
22
23
24
25
26
27
28
29
2A
2B
2C
2D
2E
2F
30
31
32
33
34
35
36
37
38
39
3A
3B
3C
3D
3E
3F
GR
A1
A2
A3
A4
A5
A6
A7
A8
A9
AA
AB
AC
AD
AE
AF
B0
B1
B2
B3
B4
B5
B6
B7
B8
B9
BA
BB
BC
BD
BE
BF
Character
GL
GR
Character
GL
GR
À
Á
Â
Ã
Ä
Å
Æ
Ç
È
É
Ê
Ë
Ì
Í
Î
Ï
40
41
42
43
44
45
46
47
48
49
4A
4B
4C
4D
4E
4F
50
51
52
53
54
55
56
57
58
59
5A
5B
5C
5D
5E
5F
C0
C1
C2
C3
C4
C5
C6
C7
C8
C9
CA
CB
CC
CD
CE
CF
D0
D1
D2
D3
D4
D5
D6
D7
D8
D9
DA
DB
DC
DD
DE
DF
à
á
â
ã
ä
å
æ
ç
è
é
ê
ë
ì
í
î
ï
60
61
62
63
64
65
66
67
68
69
6A
6B
6C
6D
6E
6F
70
71
72
73
74
75
76
77
78
79
7A
7B
7C
7D
7E
E0
E1
E2
E3
E4
E5
E6
E7
E8
E9
EA
EB
EC
ED
EE
EF
F0
F1
F2
F3
F4
F5
F6
F7
F8
F9
FA
FB
FC
FD
FE
Ñ
Ò
Ó
Ô
Õ
Ö
Œ
Ø
Ù
Ú
Û
Ü
Ÿ
ß
ñ
ò
ó
ô
õ
ö
œ
ø
ù
ú
û
ü
ÿ
/13OXV(PXODWLRQIRU4063ULQWHUV
*/DQG*5
7DEOHV
7HFKQLFDO&KDUDFWHU6HW3V !
Character
!
"
GL
21
22
23
24
25
26
27
28
29
2A
2B
2C
2D
2E
2F
30
31
32
33
34
35
36
37
38
39
3A
3B
3C
3D
3E
3F
GR
A1
A2
A3
A4
A5
A6
A7
A8
A9
AA
AB
AC
AD
AE
AF
B0
B1
B2
B3
B4
B5
B6
B7
B8
B9
BA
BB
BC
BD
BE
BF
&KDUDFWHU6HWV
Character
GL
GR
Character
GL
GR
#
$
%
&
'
(
)
*
+
,
.
/
0
1
2
3
4
40
41
42
43
44
45
46
47
48
49
4A
4B
4C
4D
4E
4F
50
51
52
53
54
55
56
57
58
59
5A
5B
5C
5D
5E
5F
C0
C1
C2
C3
C4
C5
C6
C7
C8
C9
CA
CB
CC
CD
CE
CF
D0
D1
D2
D3
D4
D5
D6
D7
D8
D9
DA
DB
DC
DD
DE
DF
C
D
E
F
G
H
I
J
K
L
M
N
O
60
61
62
63
64
65
66
67
68
69
6A
6B
6C
6D
6E
6F
70
71
72
73
74
75
76
77
78
79
7A
7B
7C
7D
7E
E0
E1
E2
E3
E4
E5
E6
E7
E8
E9
EA
EB
EC
ED
EE
EF
F0
F1
F2
F3
F4
F5
F6
F7
F8
F9
FA
FB
FC
FD
FE
6
9
:
;
<
=
>
?
@
A
B
Q
R
S
T
U
V
W
X
Y
Z
[
\
]
^
_
`
%
*/DQG*5
7DEOHV
/LQH'UDZ&KDUDFWHU6HW3V Character
!
"
#
$
%
&
’
(
)
*
+
,
.
/
0
1
2
3
4
5
6
7
8
9
:
;
<
=
>
?
%
GL
21
22
23
24
25
26
27
28
29
2A
2B
2C
2D
2E
2F
30
31
32
33
34
35
36
37
38
39
3A
3B
3C
3D
3E
3F
GR
A1
A2
A3
A4
A5
A6
A7
A8
A9
AA
AB
AC
AD
AE
AF
B0
B1
B2
B3
B4
B5
B6
B7
B8
B9
BA
BB
BC
BD
BE
BF
Character
GL
GR
Character
GL
GR
@
A
B
C
D
E
F
G
H
I
J
K
L
M
N
O
P
Q
R
S
T
U
V
W
X
Y
Z
[
\
]
^
40
41
42
43
44
45
46
47
48
49
4A
4B
4C
4D
4E
4F
50
51
52
53
54
55
56
57
58
59
5A
5B
5C
5D
5E
5F
C0
C1
C2
C3
C4
C5
C6
C7
C8
C9
CA
CB
CC
CD
CE
CF
D0
D1
D2
D3
D4
D5
D6
D7
D8
D9
DA
DB
DC
DD
DE
DF
♦
å
°
±
(
»
¹
¸
º
À
¶
B
¼
½
¿
¾
·
≤
≥
π
≠
£
.
60
61
62
63
64
65
66
67
68
69
6A
6B
6C
6D
6E
6F
70
71
72
73
74
75
76
77
78
79
7A
7B
7C
7D
7E
E0
E1
E2
E3
E4
E5
E6
E7
E8
E9
EA
EB
EC
ED
EE
EF
F0
F1
F2
F3
F4
F5
F6
F7
F8
F9
FA
FB
FC
FD
FE
/13OXV(PXODWLRQIRU4063ULQWHUV
*/DQG*5
7DEOHV
8QLWHG.LQJGRP&KDUDFWHU6HW3V $
Character
!
"
£
$
%
&
’
(
)
*
+
,
.
/
0
1
2
3
4
5
6
7
8
9
:
;
<
=
>
?
GL
21
22
23
24
25
26
27
28
29
2A
2B
2C
2D
2E
2F
30
31
32
33
34
35
36
37
38
39
3A
3B
3C
3D
3E
3F
GR
Character
GL
GR
Character
GL
GR
A1
A2
A3
A4
A5
A6
A7
A8
A9
AA
AB
AC
AD
AE
AF
B0
B1
B2
B3
B4
B5
B6
B7
B8
B9
BA
BB
BC
BD
BE
BF
@
A
B
C
D
E
F
G
H
I
J
K
L
M
N
O
P
Q
R
S
T
U
V
W
X
Y
Z
[
\
]
^
_
40
41
42
43
44
45
46
47
48
49
4A
4B
4C
4D
4E
4F
50
51
52
53
54
55
56
57
58
59
5A
5B
5C
5D
5E
5F
C0
C1
C2
C3
C4
C5
C6
C7
C8
C9
CA
CB
CC
CD
CE
CF
D0
D1
D2
D3
D4
D5
D6
D7
D8
D9
DA
DB
DC
DD
DE
DF
‘
a
b
c
d
e
f
g
h
i
j
k
l
m
n
o
p
q
r
s
t
u
v
w
x
y
z
{
|
}
~
60
61
62
63
64
65
66
67
68
69
6A
6B
6C
6D
6E
6F
70
71
72
73
74
75
76
77
78
79
7A
7B
7C
7D
7E
E0
E1
E2
E3
E4
E5
E6
E7
E8
E9
EA
EB
EC
ED
EE
EF
F0
F1
F2
F3
F4
F5
F6
F7
F8
F9
FA
FB
FC
FD
FE
&KDUDFWHU6HWV
%
*/DQG*5
7DEOHV
'XWFK&KDUDFWHU6HW3V Character
!
"
£
$
%
&
’
(
)
*
+
,
.
/
0
1
2
3
4
5
6
7
8
9
:
;
<
=
>
?
%
GL
21
22
23
24
25
26
27
28
29
2A
2B
2C
2D
2E
2F
30
31
32
33
34
35
36
37
38
39
3A
3B
3C
3D
3E
3F
GR
Character
GL
GR
Character
GL
GR
A1
A2
A3
A4
A5
A6
A7
A8
A9
AA
AB
AC
AD
AE
AF
B0
B1
B2
B3
B4
B5
B6
B7
B8
B9
BA
BB
BC
BD
BE
BF
¾
A
B
C
D
E
F
G
H
I
J
K
L
M
N
O
P
Q
R
S
T
U
V
W
X
Y
Z
ij
½
|
^
_
40
41
42
43
44
45
46
47
48
49
4A
4B
4C
4D
4E
4F
50
51
52
53
54
55
56
57
58
59
5A
5B
5C
5D
5E
5F
C0
C1
C2
C3
C4
C5
C6
C7
C8
C9
CA
CB
CC
CD
CE
CF
D0
D1
D2
D3
D4
D5
D6
D7
D8
D9
DA
DB
DC
DD
DE
DF
‘
a
b
c
d
e
f
g
h
i
j
k
l
m
n
o
p
q
r
s
t
u
v
w
x
y
z
¨
ƒ
¼
’
60
61
62
63
64
65
66
67
68
69
6A
6B
6C
6D
6E
6F
70
71
72
73
74
75
76
77
78
79
7A
7B
7C
7D
7E
E0
E1
E2
E3
E4
E5
E6
E7
E8
E9
EA
EB
EC
ED
EE
EF
F0
F1
F2
F3
F4
F5
F6
F7
F8
F9
FA
FB
FC
FD
FE
/13OXV(PXODWLRQIRU4063ULQWHUV
*/DQG*5
7DEOHV
)LQQLVK&KDUDFWHU6HW3V Character
!
"
#
$
%
&
’
(
)
*
+
,
.
/
0
1
2
3
4
5
6
7
8
9
:
;
<
=
>
?
GL
21
22
23
24
25
26
27
28
29
2A
2B
2C
2D
2E
2F
30
31
32
33
34
35
36
37
38
39
3A
3B
3C
3D
3E
3F
GR
Character
GL
GR
Character
GL
GR
A1
A2
A3
A4
A5
A6
A7
A8
A9
AA
AB
AC
AD
AE
AF
B0
B1
B2
B3
B4
B5
B6
B7
B8
B9
BA
BB
BC
BD
BE
BF
@
A
B
C
D
E
F
G
H
I
J
K
L
M
N
O
P
Q
R
S
T
U
V
W
X
Y
Z
Ä
Ö
Å
Ü
_
40
41
42
43
44
45
46
47
48
49
4A
4B
4C
4D
4E
4F
50
51
52
53
54
55
56
57
58
59
5A
5B
5C
5D
5E
5F
C0
C1
C2
C3
C4
C5
C6
C7
C8
C9
CA
CB
CC
CD
CE
CF
D0
D1
D2
D3
D4
D5
D6
D7
D8
D9
DA
DB
DC
DD
DE
DF
é
a
b
c
d
e
f
g
h
i
j
k
l
m
n
o
p
q
r
s
t
u
v
w
x
y
z
ä
ö
å
ü
60
61
62
63
64
65
66
67
68
69
6A
6B
6C
6D
6E
6F
70
71
72
73
74
75
76
77
78
79
7A
7B
7C
7D
7E
E0
E1
E2
E3
E4
E5
E6
E7
E8
E9
EA
EB
EC
ED
EE
EF
F0
F1
F2
F3
F4
F5
F6
F7
F8
F9
FA
FB
FC
FD
FE
&KDUDFWHU6HWV
%
*/DQG*5
7DEOHV
)UHQFK&KDUDFWHU6HW3V 5
Character
!
"
£
$
%
&
’
(
)
*
+
,
.
/
0
1
2
3
4
5
6
7
8
9
:
;
<
=
>
?
%
GL
21
22
23
24
25
26
27
28
29
2A
2B
2C
2D
2E
2F
30
31
32
33
34
35
36
37
38
39
3A
3B
3C
3D
3E
3F
GR
Character
GL
GR
Character
GL
GR
A1
A2
A3
A4
A5
A6
A7
A8
A9
AA
AB
AC
AD
AE
AF
B0
B1
B2
B3
B4
B5
B6
B7
B8
B9
BA
BB
BC
BD
BE
BF
à
A
B
C
D
E
F
G
H
I
J
K
L
M
N
O
P
Q
R
S
T
U
V
W
X
Y
Z
°
Ç
§
^
_
40
41
42
43
44
45
46
47
48
49
4A
4B
4C
4D
4E
4F
50
51
52
53
54
55
56
57
58
59
5A
5B
5C
5D
5E
5F
C0
C1
C2
C3
C4
C5
C6
C7
C8
C9
CA
CB
CC
CD
CE
CF
D0
D1
D2
D3
D4
D5
D6
D7
D8
D9
DA
DB
DC
DD
DE
DF
‘
a
b
c
d
e
f
g
h
i
j
k
l
m
n
o
p
q
r
s
t
u
v
w
x
y
z
é
ù
è
¨
60
61
62
63
64
65
66
67
68
69
6A
6B
6C
6D
6E
6F
70
71
72
73
74
75
76
77
78
79
7A
7B
7C
7D
7E
E0
E1
E2
E3
E4
E5
E6
E7
E8
E9
EA
EB
EC
ED
EE
EF
F0
F1
F2
F3
F4
F5
F6
F7
F8
F9
FA
FB
FC
FD
FE
/13OXV(PXODWLRQIRU4063ULQWHUV
*/DQG*5
7DEOHV
)UHQFK&DQDGLDQ&KDUDFWHU6HW3V Character
!
"
#
$
%
&
’
(
)
*
+
,
.
/
0
1
2
3
4
5
6
7
8
9
:
;
<
=
>
?
GL
21
22
23
24
25
26
27
28
29
2A
2B
2C
2D
2E
2F
30
31
32
33
34
35
36
37
38
39
3A
3B
3C
3D
3E
3F
GR
Character
GL
GR
Character
GL
GR
A1
A2
A3
A4
A5
A6
A7
A8
A9
AA
AB
AC
AD
AE
AF
B0
B1
B2
B3
B4
B5
B6
B7
B8
B9
BA
BB
BC
BD
BE
BF
à
A
B
C
D
E
F
G
H
I
J
K
L
M
N
O
P
Q
R
S
T
U
V
W
X
Y
Z
â
ç
ê
î
_
40
41
42
43
44
45
46
47
48
49
4A
4B
4C
4D
4E
4F
50
51
52
53
54
55
56
57
58
59
5A
5B
5C
5D
5E
5F
C0
C1
C2
C3
C4
C5
C6
C7
C8
C9
CA
CB
CC
CD
CE
CF
D0
D1
D2
D3
D4
D5
D6
D7
D8
D9
DA
DB
DC
DD
DE
DF
ô
a
b
c
d
e
f
g
h
i
j
k
l
m
n
o
p
q
r
s
t
u
v
w
x
y
z
é
ù
è
û
60
61
62
63
64
65
66
67
68
69
6A
6B
6C
6D
6E
6F
70
71
72
73
74
75
76
77
78
79
7A
7B
7C
7D
7E
E0
E1
E2
E3
E4
E5
E6
E7
E8
E9
EA
EB
EC
ED
EE
EF
F0
F1
F2
F3
F4
F5
F6
F7
F8
F9
FA
FB
FC
FD
FE
&KDUDFWHU6HWV
%
*/DQG*5
7DEOHV
*HUPDQ&KDUDFWHU6HW3V .
Character
!
"
#
$
%
&
’
(
)
*
+
,
.
/
0
1
2
3
4
5
6
7
8
9
:
;
<
=
>
?
%
GL
21
22
23
24
25
26
27
28
29
2A
2B
2C
2D
2E
2F
30
31
32
33
34
35
36
37
38
39
3A
3B
3C
3D
3E
3F
GR
Character
GL
GR
Character
GL
GR
A1
A2
A3
A4
A5
A6
A7
A8
A9
AA
AB
AC
AD
AE
AF
B0
B1
B2
B3
B4
B5
B6
B7
B8
B9
BA
BB
BC
BD
BE
BF
§
A
B
C
D
E
F
G
H
I
J
K
L
M
N
O
P
Q
R
S
T
U
V
W
X
Y
Z
Ä
Ö
Ü
^
_
40
41
42
43
44
45
46
47
48
49
4A
4B
4C
4D
4E
4F
50
51
52
53
54
55
56
57
58
59
5A
5B
5C
5D
5E
5F
C0
C1
C2
C3
C4
C5
C6
C7
C8
C9
CA
CB
CC
CD
CE
CF
D0
D1
D2
D3
D4
D5
D6
D7
D8
D9
DA
DB
DC
DD
DE
DF
‘
a
b
c
d
e
f
g
h
i
j
k
l
m
n
o
p
q
r
s
t
u
v
w
x
y
z
ä
ö
ü
ß
60
61
62
63
64
65
66
67
68
69
6A
6B
6C
6D
6E
6F
70
71
72
73
74
75
76
77
78
79
7A
7B
7C
7D
7E
E0
E1
E2
E3
E4
E5
E6
E7
E8
E9
EA
EB
EC
ED
EE
EF
F0
F1
F2
F3
F4
F5
F6
F7
F8
F9
FA
FB
FC
FD
FE
/13OXV(PXODWLRQIRU4063ULQWHUV
*/DQG*5
7DEOHV
,WDOLDQ&KDUDFWHU6HW3V <
Character
!
"
£
$
%
&
’
(
)
*
+
,
.
/
0
1
2
3
4
5
6
7
8
9
:
;
<
=
>
?
GL
21
22
23
24
25
26
27
28
29
2A
2B
2C
2D
2E
2F
30
31
32
33
34
35
36
37
38
39
3A
3B
3C
3D
3E
3F
GR
Character
GL
GR
Character
GL
GR
A1
A2
A3
A4
A5
A6
A7
A8
A9
AA
AB
AC
AD
AE
AF
B0
B1
B2
B3
B4
B5
B6
B7
B8
B9
BA
BB
BC
BD
BE
BF
§
A
B
C
D
E
F
G
H
I
J
K
L
M
N
O
P
Q
R
S
T
U
V
W
X
Y
Z
°
ç
é
^
_
40
41
42
43
44
45
46
47
48
49
4A
4B
4C
4D
4E
4F
50
51
52
53
54
55
56
57
58
59
5A
5B
5C
5D
5E
5F
C0
C1
C2
C3
C4
C5
C6
C7
C8
C9
CA
CB
CC
CD
CE
CF
D0
D1
D2
D3
D4
D5
D6
D7
D8
D9
DA
DB
DC
DD
DE
DF
ù
a
b
c
d
e
f
g
h
i
j
k
l
m
n
o
p
q
r
s
t
u
v
w
x
y
z
à
ò
è
ì
60
61
62
63
64
65
66
67
68
69
6A
6B
6C
6D
6E
6F
70
71
72
73
74
75
76
77
78
79
7A
7B
7C
7D
7E
E0
E1
E2
E3
E4
E5
E6
E7
E8
E9
EA
EB
EC
ED
EE
EF
F0
F1
F2
F3
F4
F5
F6
F7
F8
F9
FA
FB
FC
FD
FE
&KDUDFWHU6HWV
%
*/DQG*5
7DEOHV
-,65RPDQ&KDUDFWHU6HW3V -
Character
!
"
#
$
%
&
’
(
)
*
+
,
.
/
0
1
2
3
4
5
6
7
8
9
:
;
<
=
>
?
%
GL
21
22
23
24
25
26
27
28
29
2A
2B
2C
2D
2E
2F
30
31
32
33
34
35
36
37
38
39
3A
3B
3C
3D
3E
3F
GR
Character
GL
GR
Character
GL
GR
A1
A2
A3
A4
A5
A6
A7
A8
A9
AA
AB
AC
AD
AE
AF
B0
B1
B2
B3
B4
B5
B6
B7
B8
B9
BA
BB
BC
BD
BE
BF
@
A
B
C
D
E
F
G
H
I
J
K
L
M
N
O
P
Q
R
S
T
U
V
W
X
Y
Z
[
¥
]
^
_
40
41
42
43
44
45
46
47
48
49
4A
4B
4C
4D
4E
4F
50
51
52
53
54
55
56
57
58
59
5A
5B
5C
5D
5E
5F
C0
C1
C2
C3
C4
C5
C6
C7
C8
C9
CA
CB
CC
CD
CE
CF
D0
D1
D2
D3
D4
D5
D6
D7
D8
D9
DA
DB
DC
DD
DE
DF
‘
a
b
c
d
e
f
g
h
i
j
k
l
m
n
o
p
q
r
s
t
u
v
w
x
y
z
{
|
}
~
60
61
62
63
64
65
66
67
68
69
6A
6B
6C
6D
6E
6F
70
71
72
73
74
75
76
77
78
79
7A
7B
7C
7D
7E
E0
E1
E2
E3
E4
E5
E6
E7
E8
E9
EA
EB
EC
ED
EE
EF
F0
F1
F2
F3
F4
F5
F6
F7
F8
F9
FA
FB
FC
FD
FE
/13OXV(PXODWLRQIRU4063ULQWHUV
*/DQG*5
7DEOHV
1RUZHJLDQ'DQLVK&KDUDFWHU6HW3V Character
!
"
#
$
%
&
’
(
)
*
+
,
.
/
0
1
2
3
4
5
6
7
8
9
:
;
<
=
>
?
GL
21
22
23
24
25
26
27
28
29
2A
2B
2C
2D
2E
2F
30
31
32
33
34
35
36
37
38
39
3A
3B
3C
3D
3E
3F
GR
Character
GL
GR
Character
GL
GR
A1
A2
A3
A4
A5
A6
A7
A8
A9
AA
AB
AC
AD
AE
AF
B0
B1
B2
B3
B4
B5
B6
B7
B8
B9
BA
BB
BC
BD
BE
BF
Ä
A
B
C
D
E
F
G
H
I
J
K
L
M
N
O
P
Q
R
S
T
U
V
W
X
Y
Z
Æ
Ø
Å
Ü
_
40
41
42
43
44
45
46
47
48
49
4A
4B
4C
4D
4E
4F
50
51
52
53
54
55
56
57
58
59
5A
5B
5C
5D
5E
5F
C0
C1
C2
C3
C4
C5
C6
C7
C8
C9
CA
CB
CC
CD
CE
CF
D0
D1
D2
D3
D4
D5
D6
D7
D8
D9
DA
DB
DC
DD
DE
DF
ä
a
b
c
d
e
f
g
h
i
j
k
l
m
n
o
p
q
r
s
t
u
v
w
x
y
z
æ
ø
å
ü
60
61
62
63
64
65
66
67
68
69
6A
6B
6C
6D
6E
6F
70
71
72
73
74
75
76
77
78
79
7A
7B
7C
7D
7E
E0
E1
E2
E3
E4
E5
E6
E7
E8
E9
EA
EB
EC
ED
EE
EF
F0
F1
F2
F3
F4
F5
F6
F7
F8
F9
FA
FB
FC
FD
FE
&KDUDFWHU6HWV
%
*/DQG*5
7DEOHV
6SDQLVK&KDUDFWHU6HW3V =
Character
!
"
£
$
%
&
’
(
)
*
+
,
.
/
0
1
2
3
4
5
6
7
8
9
:
;
<
=
>
?
%
GL
21
22
23
24
25
26
27
28
29
2A
2B
2C
2D
2E
2F
30
31
32
33
34
35
36
37
38
39
3A
3B
3C
3D
3E
3F
GR
Character
GL
GR
Character
GL
GR
A1
A2
A3
A4
A5
A6
A7
A8
A9
AA
AB
AC
AD
AE
AF
B0
B1
B2
B3
B4
B5
B6
B7
B8
B9
BA
BB
BC
BD
BE
BF
§
A
B
C
D
E
F
G
H
I
J
K
L
M
N
O
P
Q
R
S
T
U
V
W
X
Y
Z
¡
Ñ
¿
^
_
40
41
42
43
44
45
46
47
48
49
4A
4B
4C
4D
4E
4F
50
51
52
53
54
55
56
57
58
59
5A
5B
5C
5D
5E
5F
C0
C1
C2
C3
C4
C5
C6
C7
C8
C9
CA
CB
CC
CD
CE
CF
D0
D1
D2
D3
D4
D5
D6
D7
D8
D9
DA
DB
DC
DD
DE
DF
‘
a
b
c
d
e
f
g
h
i
j
k
l
m
n
o
p
q
r
s
t
u
v
w
x
y
z
°
ñ
ç
~
60
61
62
63
64
65
66
67
68
69
6A
6B
6C
6D
6E
6F
70
71
72
73
74
75
76
77
78
79
7A
7B
7C
7D
7E
E0
E1
E2
E3
E4
E5
E6
E7
E8
E9
EA
EB
EC
ED
EE
EF
F0
F1
F2
F3
F4
F5
F6
F7
F8
F9
FA
FB
FC
FD
FE
/13OXV(PXODWLRQIRU4063ULQWHUV
*/DQG*5
7DEOHV
6ZHGLVK&KDUDFWHU6HW3V Character
!
"
#
$
%
&
’
(
)
*
+
,
.
/
0
1
2
3
4
5
6
7
8
9
:
;
<
=
>
?
GL
21
22
23
24
25
26
27
28
29
2A
2B
2C
2D
2E
2F
30
31
32
33
34
35
36
37
38
39
3A
3B
3C
3D
3E
3F
GR
Character
GL
GR
Character
GL
GR
A1
A2
A3
A4
A5
A6
A7
A8
A9
AA
AB
AC
AD
AE
AF
B0
B1
B2
B3
B4
B5
B6
B7
B8
B9
BA
BB
BC
BD
BE
BF
É
A
B
C
D
E
F
G
H
I
J
K
L
M
N
O
P
Q
R
S
T
U
V
W
X
Y
Z
Ä
Ö
Å
Ü
_
40
41
42
43
44
45
46
47
48
49
4A
4B
4C
4D
4E
4F
50
51
52
53
54
55
56
57
58
59
5A
5B
5C
5D
5E
5F
C0
C1
C2
C3
C4
C5
C6
C7
C8
C9
CA
CB
CC
CD
CE
CF
D0
D1
D2
D3
D4
D5
D6
D7
D8
D9
DA
DB
DC
DD
DE
DF
é
a
b
c
d
e
f
g
h
i
j
k
l
m
n
o
p
q
r
s
t
u
v
w
x
y
z
ä
ö
å
ü
60
61
62
63
64
65
66
67
68
69
6A
6B
6C
6D
6E
6F
70
71
72
73
74
75
76
77
78
79
7A
7B
7C
7D
7E
E0
E1
E2
E3
E4
E5
E6
E7
E8
E9
EA
EB
EC
ED
EE
EF
F0
F1
F2
F3
F4
F5
F6
F7
F8
F9
FA
FB
FC
FD
FE
&KDUDFWHU6HWV
%
*/DQG*5
7DEOHV
6ZLVV&KDUDFWHU6HW3V
Character
!
"
ù
$
%
&
’
(
)
*
+
,
.
/
0
1
2
3
4
5
6
7
8
9
:
;
<
=
>
?
%
GL
21
22
23
24
25
26
27
28
29
2A
2B
2C
2D
2E
2F
30
31
32
33
34
35
36
37
38
39
3A
3B
3C
3D
3E
3F
GR
Character
GL
GR
Character
GL
GR
A1
A2
A3
A4
A5
A6
A7
A8
A9
AA
AB
AC
AD
AE
AF
B0
B1
B2
B3
B4
B5
B6
B7
B8
B9
BA
BB
BC
BD
BE
BF
à
A
B
C
D
E
F
G
H
I
J
K
L
M
N
O
P
Q
R
S
T
U
V
W
X
Y
Z
é
ç
ê
î
è
40
41
42
43
44
45
46
47
48
49
4A
4B
4C
4D
4E
4F
50
51
52
53
54
55
56
57
58
59
5A
5B
5C
5D
5E
5F
C0
C1
C2
C3
C4
C5
C6
C7
C8
C9
CA
CB
CC
CD
CE
CF
D0
D1
D2
D3
D4
D5
D6
D7
D8
D9
DA
DB
DC
DD
DE
DF
ô
a
b
c
d
e
f
g
h
i
j
k
l
m
n
o
p
q
r
s
t
u
v
w
x
y
z
ä
ö
ü
û
60
61
62
63
64
65
66
67
68
69
6A
6B
6C
6D
6E
6F
70
71
72
73
74
75
76
77
78
79
7A
7B
7C
7D
7E
E0
E1
E2
E3
E4
E5
E6
E7
E8
E9
EA
EB
EC
ED
EE
EF
F0
F1
F2
F3
F4
F5
F6
F7
F8
F9
FA
FB
FC
FD
FE
/13OXV(PXODWLRQIRU4063ULQWHUV
*/DQG*5
7DEOHV
,621RUZHJLDQ'DQLVK&KDUDFWHU6HW3V µ ´
Character
!
"
#
$
%
&
’
(
)
*
+
,
.
/
0
1
2
3
4
5
6
7
8
9
:
;
<
=
>
?
GL
21
22
23
24
25
26
27
28
29
2A
2B
2C
2D
2E
2F
30
31
32
33
34
35
36
37
38
39
3A
3B
3C
3D
3E
3F
GR
Character
GL
GR
Character
GL
GR
A1
A2
A3
A4
A5
A6
A7
A8
A9
AA
AB
AC
AD
AE
AF
B0
B1
B2
B3
B4
B5
B6
B7
B8
B9
BA
BB
BC
BD
BE
BF
@
A
B
C
D
E
F
G
H
I
J
K
L
M
N
O
P
Q
R
S
T
U
V
W
X
Y
Z
Æ
Ø
Å
^
_
40
41
42
43
44
45
46
47
48
49
4A
4B
4C
4D
4E
4F
50
51
52
53
54
55
56
57
58
59
5A
5B
5C
5D
5E
5F
C0
C1
C2
C3
C4
C5
C6
C7
C8
C9
CA
CB
CC
CD
CE
CF
D0
D1
D2
D3
D4
D5
D6
D7
D8
D9
DA
DB
DC
DD
DE
DF
‘
a
b
c
d
e
f
g
h
i
j
k
l
m
n
o
p
q
r
s
t
u
v
w
x
y
z
æ
ø
å
~
60
61
62
63
64
65
66
67
68
69
6A
6B
6C
6D
6E
6F
70
71
72
73
74
75
76
77
78
79
7A
7B
7C
7D
7E
E0
E1
E2
E3
E4
E5
E6
E7
E8
E9
EA
EB
EC
ED
EE
EF
F0
F1
F2
F3
F4
F5
F6
F7
F8
F9
FA
FB
FC
FD
FE
&KDUDFWHU6HWV
%
,QGH[
$
Backspace 5-2, 8-4
BEL 8-4
Boldface 7-8
Brief reports 3-4
Bulletin board, QMS A-3
Character width 6-4
Compatibility 1-2
Host software 1-2
Printer 1-2
configcartemulation 2-6
Control characters 5-2
CPI 6-3
Cursor position report 3-5
Customer Response Center (CRC),
QMS A-4
Customer support, QMS A-2
CUU 6-11
&
'
ANSI text 8-2
Aspect ratio, sixel graphics 9-4
Autowrap mode 4-3
%
Cancel command 5-2
Carriage return 4-3, 5-2, 8-5, 8-6
Character height 7-11
Character sets 7-9
Character spacing 6-3, 6-4
DA 3-2
DC1 5-2
DC3 5-2
DECATFF 7-7
DECAWM 4-3
DECCRNLM 4-3
DECDTFF 7-6
DECFSR 7-13
Decipoints 4-5
DECLFF 7-3
DECnet compatibility 1-2
DECOPM 4-4
DECPSM 4-4, 6-4
DECPSP 4-4
DECRFS 7-12
DECSHORP 4-4, 6-4
DECSHTS 6-12
DECSLPP 6-6
DECSLRM 6-7
DECSTBM 6-6
DECSTR 3-6, 8-3
DECSVTS 6-12
DECTEK
Alpha mode 8-7
And soft reset 8-3
Bypass mode 8-10
Command 8-2
Control characters 8-4
Coordinate encoding 8-11
Downloading fonts 8-7
EGM mode 8-13
Exit command 8-3
Graph mode 8-8
Incremental Plot mode 8-10
Mode switching 8-11
Modes 8-2
Page width printing 8-8
Point Plot mode 8-9
Resident fonts 8-4
Short address 8-14
Tekpage 8-2, 8-11
Tekpoints 8-11
Two column printing 8-8
Vector styles 8-8
DECVERP 6-3
Delete fonts 7-6
Device Attributes 2-3
Documentation
,
Overview of this manual 1-2, 2-3
Download memory 7-13
Download memory status 7-12
Downloading fonts 7-3
DSR 3-3
(
Emulation identifier 2-6
Error codes 3-4
Escape command 5-3, 8-5
Extended reports 3-4
)
Font file 7-3
Font file ID 7-3
Fonts
Attributes 7-8
Deleting download 7-6
Description 7-3
Downloading 7-3
Resident 7-2
Selecting 7-8, 7-11
SGR number 7-7
Status report 7-13
Status request 7-12
Form feed 5-2
Form length 6-5, 6-6
FS 8-5
*
Graphics table 7-10
GS 8-5
GSM 7-11
GSS 7-11
+
Horizontal grid, sixel graphics 9-3
Horizontal movement
Absolute 6-8
Backward 6-9
Relative 6-9
/13OXV(PXODWLRQIRU4063ULQWHUV
Horizontal pitch 6-2
Horizontal tab 5-2, 8-4
Host Software Compatibility 1-2
HPA 6-8
HPB 6-9
HPR 6-9
,
Index command 5-3
Internet A-3
Italics 7-8
Justified lines 6-13
/
Line end position 6-4, 6-5
Line feed 4-3, 5-2, 8-5, 8-6
Line home position 6-4, 6-5, 6-7
Line spacing 6-2, 6-3
LN03 Plus Versions 1-2
LNM command 4-2
LPI 6-3
0
Manual
Contents 1-2, 2-3
Overview 1-2, 2-3
Margins
Left/right 6-7
Top/bottom 6-6
1
Next line command 5-3
2
Origin point 4-4
,QGH[
3
Page end line 6-5
Page end position 6-6
Page home line 6-5
Page home position 6-6
Page margins 6-4, 6-5
Page orientation 6-5
Partial line down 5-3
Partial line up 5-3
PFS 6-5
Pitch select 4-4
Pixels 4-5
PLD 6-11
PLU 6-11
Printer compatibility 1-2
Product ID 3-2
Proportional spacing 4-4
PUM 4-5
4
Q-FAX A-2
QMS
Customer Response Center (CRC)
A-4
World-wide offices A-5
5
Reset printer 3-6
Reset printer command 8-3
Reverse index 5-3
RIS 3-6, 8-3
RS 8-5
6
Service
United States A-4
Set/reset commands 4-2
SGR 7-8
SGR numbers 7-7
Shift out/in 5-2
Graphics table 5-2
,
US 8-6
SHS 6-3
Single shift 5-3
Graphics table 5-3
Sixel data 9-6, 9-7
Sixel graphics 9-2
Software Compatibility 1-2
Spacing increment 4-5
SPI 6-2
SSU 4-5
Status reports 3-2, 3-3
statusdict, PostScript 2-7
Strike-through 7-8
Subscript 6-11
Substitute command 5-3
Superscript 6-11
Support, QMS
Bulletin board A-3
Customer A-2
Internet A-3
Technical A-4
World-wide A-5
SVS 6-2
9
Vertical movement
Absolute 6-9
Backward 6-10
Partial 6-11
Up 6-11
Vertical pitch 6-2
Vertical tab 5-2, 8-5
VMS compatibility 1-2
VPA 6-9
VPB 6-10
7
Tab
Set horizontal 5-3
Set vertical 5-3
Tabs
Clearing 6-13
Horizontal 6-12
Reset 6-4
Setting 6-12
Vertical 6-12
TBC 6-13
Technical support, QMS A-4
Tektronix
DECTEK 8-2
Type family ID 7-5
8
Underline 7-8
Unit of measure 4-5
,
/13OXV(PXODWLRQIRU4063ULQWHUV