1
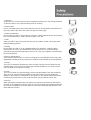
HELP LINE: 0870 100 2525
With queries, please quote the page number,
reference number and model number.
CAUTION
RISK OF ELECTRIC SHOCK DO NOT OPEN
CAUTION : TO REDUCE THE RISK OF ELECTRIC SHOCK
DO NOT REMOVE COVER (OR BACK).
NO USER-SERVICEABLE PARTS INSIDE.
REFER SERVICING TO QUALIFIED SERVICE PERSONNEL.
The lightning flash with arrowhead symbol, within an equilateral triangle, is
intended to alert the user to the presence of uninsulated “dangerous voltage”
within the product’s enclosure that may be of sufficient magnitude to constitute a
risk electric shock.
The exclamation point within an equilateral triangle is intended to alert the user to
the presence of important operating and servicing instructions in the literature
accompanying the appliance.
WARNING: To reduce the risk of fire or electric shock hazard, do not expose this appliance to rain or moisture.
1. Cleaning
Unplug the LCD TV from the AC power outlet before cleaning. Do not use liquid cleaner
or aerosol cleaner. Use a soft and damp cloth for cleaning.
2. Attachments
Do not use attachments not recommended by the LCD TV equipment manufacturer as
they may result in the risk of fire, electronic shock or other injury.
3. Water and Moisture
Do not place the LCD TV near water, for example:- near a bathtub, kitchen sink, laundry
tub, in a wet basement or near a swimming pool, or the like.
4. Heat
Keep the LCD TV away from heat sources such as radiator, heater, stoves and other
heat-generating products.
5. Setting
Do not place the LCD TV on an unstable platform, for example:- a stand or table.
Placing the LCD TV on an unstable base can cause the LCD TV to fall resulting in
personal injuries as well as damage to the LCD TV. Use only a platform recommended
by the manufacturer.
6. Wall or Ceiling Mount
When mounting the product on a wall or ceiling be sure to install the product using the
designated mounting tools according to the method recommended by the manufacturer.
7. Power
The LCD TV should be operated only from the type of power source indicated on the
marking label. If you are not sure of the type of power supplied to your home consult
your TV dealer or local power company.
8. Pixels
The LCD TV panel is a high technology product with thousands of thin film transistors
which give you super-fine picture detail. Occasionally a few non-active pixels may
appear on the screen as a fixed point of blue, green or red. Please note that this does
not affect the performance of your product and can be very difficult to even see.
9. Moving
When moving the product place your fingers of one hand in the socket on the back of
the LCD TV and support the front of the LCD TV with the other hand. Please make sure
no pressure is applied to the screen itself as it can and will damage the sensitive LCD
pixels within the screen.
Important Safeguards ………………………………………………………………………………...
1
Supplied Accessories …………………………………………………………………………………
2
Functional Overview ………………………………………………………………………………….
… Connecting & powering up ………………………………………………………………………..
… Connecting the LCD TV monitor …………………………………………………………………
3
4
5
Preparation
… Remote Controller …………………………………………………………………………………
… Operation & Adjustment …………………………………………………………………………..
… Connecting external equipment ………………………………………………………………….
6
7
8
Start Up
… Menu Installation – Key Process for TV mode …………………………………………………
… - Install > Auto search ……………………………………………………………………………..
… - Install > Edit Channel …………………………………………………………………………....
… - Install > Manual Tuning …………………………………………………………………………
… - Install > Fine tune ………………………………………………………………………………..
… - Picture ……………………………………………………………………………………………..
… - Feature ……………………………………………………………………………………………
… - Sound ……………………………………………………………………………………………..
9
9
10
11
12
12
12
13
… Menu Installation – Key Process for PC mode ………………………………………………
… - Colour ……………………………………………………………………………………………..
… - Picture ……………………………………………………………………………………………..
… - Function > Auto Adjust …………………………………………………………………….…….
… - OSD Menu ………………………………………………………………………………………..
… - Misc …………………………………………………………………………………………….….
… - Sound ……………………………………………………………………………………………..
14
14
14
14
15
15
15
Wall/Arm Mounting ……………………………………………………………………………………
16
Troubleshooting ……………………………………………………………………………………….
17
Specifications ………………………………………………………………………………………….
19
Location
Heat, Moisture, Dust, Vibration
Position your LCD TV so that bright light or sunlight doesn’t fall directly onto the screen.
Care should be taken not to expose the set to any unnecessary vibration, moisture, dust or heat.
Do not expose the set to dripping or splashing.
Ventilation
Also ensure that the set is placed in a position to allow a free flow of air.
Do not cover the ventilation openings on the back cover.
Leave at least 10 cm around each side of the TV set.
Mounting
This set can be positioned by using the table top stand or wall mounting bracket.
When you install the set using the wall mounting bracket, fix it carefully so it is secure.
Object Entry
Do not insert foreign objects, such as needles and coins, into the ventilation openings.
Lightning Strikes
You should disconnect your set from the mains and the aerial system during thunderstorms.
Cleaning
Unplug the set from the mains before cleaning.
Dust the set by wiping the LCD screen and the cabinet with a soft, clean cloth.
If the screen requires additional cleaning, use a clean, damp cloth.
Do not use liquid cleaners or aerosol cleaners.
Do not rub or strike the LCD with anything hard as this may scratch or damage the LCD permanently.
Service
Never remove the back cover of the set as this can expose you to high voltage and other hazards.
If the set does not operate properly,unplug it and call your dealer.
European Union Notice
Products with the CE Marking comply with both the EMC Directive (89/336/EEC) and the
the Low Voltage Directive (73/23/EEC) issued by the Commission of the European
Community.
Compliance with these directives implies conformity to the following European Norms (in
brackets are the equivalent international standards):
• EN55022 (CISPR 22) - Electromagnetic Interference
• EN55024 - Immunity Test for ITE Product
• EN60950 (IEC950) - Product Safety
• EN61000-3-2 (IEC555-2) - Power Line Harmonics
As an ENERGY STAR® Partner, Daewoo Electronics co., Ltd has determined that this
product meets the Energy Star® guidelines for energy efficiency.
The product is also designed for IT power system with phase to phase voltage of 230V.
1
Make sure that the following accessories are provided with the product.
•
Power Cord
•
Remote Controller + Batteries
•
Scart-to-Phono cable
If any item is missing or damaged, please contact your dealer.
Please keep the box and packaging materials so that you may properly store or transport your LCD Television.
2
•
The LCD TV is designed for use in a small environment or for those who need more space.
•
The convenient and user-friendly on-screen display allows for easy and accurate adjustments of the various
features.
•
The LCD TV complies with the VESA Display Data Channel (DDC) specification for Plug and Play compatibility.
•
The LCD TV features Advanced Colour Controls and fine-tuning to meet your own personal settings or application
requirements.
•
PC MODE - use the on-screen controls to adjust the colour temperature for the best possible screen colour and
intensity.
•
Selecting the Reset button in PC Mode will activate the Auto Tracking to determine whether your monitor is
functioning normally, not receiving a signal, or is receiving a signal that is out of scanning range.
•
The LCD TV has a native resolution of 1280x1024 at 75Hz. Optimal for any PC configuration you require.
•
The LCD TV can be connected to various types of video devices with supporting video input signals like Composite
video(CVBS), Seperate video(S-Video).
•
The built-in TV tuner and antenna connection terminal enables you to watch TV without a separate receiving
device.
•
The LCD TV is equipped with a remote controller enabling function control for TV and PC modes.
•
Internal speakers provide sound therefore, separate audio equipment is unnecessary.
•
PC MODE – with the Picture Mode function you can experience high contrast, vivid, movies or any other
multimedia utilization.
3
Connecting & Powering-up (PC MODE)
1
Turn off the computer and LCD TV
2
Connect a 15 pin signal cable (not supplied) to the output port of the video card in your
computer and monitor
3
Tighten the screws of the 15 pin signal cable
4
Connect an audio cable (not supplied) to the output port of the sound card in your computer
5
Plug the power cord into the AC POWER port located on the back of the LCD TV
6
Plug the other end of the power cord into the AC outlet
4
Connecting the LCD TV
Aerial connection
Connect an Aerial cable (75ohm coaxial cable) to the Aerial Terminal on the back of the LCD TV connection panel.
5
Remote Controller
1
Power - power the LCD TV on and off
2
Source - select the input mode (video, s-video, TV, PC)
3
PR [up] - channel select
4
Volume - adjust volume (sound) level
5
Menu - display main menu
6
Normal - recall preferred settings (Normal I, II, Favourite)
7
Sleep - set the Sleep Timer
8
OK - select menu items
9
Numerical buttons to select channels
10
Display - show the current program
11
Mute - disable and enable sound
NB: The PR and numerical buttons
can be used to switch the TV on (9).
Inserting batteries into the Remote Control unit
To load the batteries turn the remote control handset over and open the battery compartment. Insert the batteries (2x 1.5v
type R03 or AAA). Make sure that the polarity matches with the (+) and (-) marks inside of the battery compartment.
Note: To avoid damage from possible battery leakage, remove the batteries if you do not plan to use the remote control
handset for an extended period of time.
6
Operation & Adjustment (Front Control Panel)
1
2
3
4
5
6
Power on / off
Power indicator light
Volume adjust
Volume adjust
Source
Menu
7
8
9
PR[down]
PR[up]
Sensor window
Switches the LCD TV on and off (Standby mode)
Shows Green LED when in use
Adjusts volume up and after pressing MENU, adjusts menu settings
Adjusts volume down and after pressing MENU, adjusts menu settings
Selects input source and after pressing MENU sets menu functions
Turns the OSD window on / Turns the OSD window off - and moves from
sub menu to top menu in the OSD window to adjust picture features (use
Remote controller) for installation and functions
Selects programme or menu
Selects programme or menu
Remote control. Receives signal from the Remote controller
FRONT CONTROL PANEL
Key Process
•
To select MENU press the MENU button.
•
Use up- down-PR (VOL buttons) to select the
main menu on the left.
•
Use SOURCE button to select the submenus on the right.
•
Use VOL buttons to select sub-menu
function.
•
Press SOURCE button, then using VOL
buttons you can make adjustments as
necessary.
•
To exit press MENU.
7
Connecting external equipment
Plug the connector for S-Video port [1] on the rear of the LCD TV and the other end into the device you are intending to
connect (VCR, DVD etc.)
Plug the Phono connectors for the Composite video / Sound inputs to the RCA ports [2] on the rear of the LCD TV and the
other end to a Camcorder, VCR, DVD etc.
Note: If you only have a Scart socket on your VCR or DVD then you will need to use the Scart-to-Phono connector
(supplied).
Plug the connector to the audio input port [3] on the rear of the LCD TV and the other end to the PC, CD Player etc.).
Plug the connector to the audio output port [4] on the rear of the LCD TV and the other end to the Headphones or an audio
Amplifier with speakers.
8
Menu Installation
Key Process for TV mode
Press the MENU button on the Remote controller.
This will bring up the OSD.
Here, with INSTALL highlighted, you can make the
changes necessary to configure the TV options available
such as searching for channels, tuning channels, naming
channels and editing those channels.
The four directional arrows on the Remote will navigate the
OSD. When making changes, a right-arrow movement will
select it (changing it to RED) and subsequent right-arrow
depressions will move through the available options in that
range.
Press MENU to confirm the change (the selection will
change back to BLACK) and then press Menu again to
advance the OSD backward to the main menu (and again
to close the Menu altogether).
AUTO SEARCH allows you to select the country from
where you are receiving transmissions and then search for
channels in your area.
After selecting MENU press the right-arrow button (VOL+)
to highlight Auto search and then again to highlight the
country code (this will change the country code to RED).
Press the right-arrow button to select your country code.
Now press the OK button to commence channel searching
(see pic).
OK button
When this function has been completed all the channels
found will be available, but not in the correct order and will
not be named. This has to be conducted in the Edit
Channel selection (see next page).
9
Menu Installation
Key Process for TV mode
Edit Channel
To attach the names to each channel number and put them
in the correct order, conduct the following procedure:Press the MENU button and then press arrow-right (VOL+)
once and then the down-PR button to select EDIT
CHANNEL. Now press the OK button to bring up the edit
screen (see pic).
You will note that there are no channel names in the Edit list
only programme numbers. To put names and numbers in
the correct order, do the following:
1.
2.
3.
4.
5.
6.
select Pr 01 and right-arrow (VOL+)
press OK
press up- or –down PR – to select letter or number
press VOL+ to select next dash
repeat process until name is completed
press OK button to store
From this position, once all available channels have been
named they can be sorted into the correct order.
1. press left-arrow (VOL-) and select the channel you
wish to be number one using up- down-PR buttons,
example: BBC1 should be in position Pr 01
2. press OK. The number will turn green
3. press up-PR button to select Pr number 01 to match
the channel
4. press OK to store. The number will turn black
5. press down-PR button to select channel you wish to
be number two
6. press OK. The number will turn green
7. press up-PR button to select Pr number 02 to match
the channel
8. press OK. The number will turn black
9. repeat process on all other Pr numbers
Continue this process with all other programme numbers
until they are in their correct order (see pic).
Found channels that are not required can be skipped [SKIP]
when selecting your channels via the up- or down-PR
buttons. This is achieved by selecting the SKIP column in
the Edit channel mode with right-arrow (VOL+) button. Then
press the OK button and the X will change to RED. Change
this to O with the down-PR button and then press the OK
button to store it (changing it to BLACK). To unskip a
channel reverse the above process.
10
Menu Installation
Key Process for TV mode
Manual Tuning
To select manual tuning, press MENU, then VOL+, then
down-PR, then OK.
At this position set the SYSTEM to match country you are
in.
1. press right-hand (VOL+), the Country will change
RED, then again to select correct Country
2. press MENU to set
3. now, press down-PR and VOL+ to select
programme numbers (PR, see pic)
4. press up- or down-PR to change programme
number
5. press MENU (or OK) to set
6. press down-PR to select SEARCH
7. press VOL+ or VOL- to select DOWN or UP
8. press OK to search
If the channel found matches the programme number, press
MENU to set. If not, press the OK button to search again.
9.
10.
11.
12.
13.
14.
15.
16.
17.
18.
press down-PR to select name
press VOL+ to select first ‘dash’
press up- or down-PR to select letter or number
press VOL+ to select next ‘dash’
press up- or down-PR to select next letter or
number
repeat until name completed
press MENU to set
press down-PR to STORAGE
press VOL+ and YES will change to RED
press OK to store
11
Menu Installation
Key Process for TV mode
Fine tune
With the Preset channel running in the background, the
signal can be fine-tuned. The detection process is however,
accurate, but additional fine-tuning may improve the signal
to your specific requirements depending on quality of the
signal received.
The default Fine-tune point is 0 so if adjusting this does not
positively affect your TV signal, return it to 0 to effectively
restore the original detection.
Press the MENU button on the Remote controller.
This will bring up the OSD.
PICTURE adjusts the Contrast, Brightness, Colour and
Sharpness of the picture.
Tip: If you are receiving a clean TV signal, reduce
Sharpness to 0.
Press the MENU button on the Remote controller.
This will bring up the OSD.
FEATURE selects the Language, Child Lock can be set on
or off and the Sleep Time[r] can be adjusted from 0 to 120
minutes.
12
Menu Installation
Key Process for TV mode
Press the MENU button on the Remote controller.
This will bring up the OSD.
SOUND can be turned on and off and the Volume can be
adjusted.
13
Menu installation
Key Process for PC mode
Press the MENU button on the Remote controller.
This will bring up the OSD.
COLOUR configures the PC display to suite your
requirements.
GAMMA reflects the level of white against black and
COLOUR TEMP is depedant on the amount of RGB (Red
Green, Blue).
9300 is BLUE orientated, 6550 is RED orientated and
USER is dependant on colour adjustment (but defaults to
GREEN).
Colour Adjust gives you the option of manually adjusting the
RGB values.
Press the MENU button on the Remote controller.
This will bring up the OSD.
PICTURE adjustments can be made to certain resolutions
that are not correctly aligned to the display.
In most cases, a H Position, V Position of 50 and a Phase of
0 together with a Clock of 100, will fit to most requirements.
Sharpness can be adjusted as well, but a value of 1 is
normal for PC desktop useage.
Press the MENU button on the Remote controller.
This will bring up the OSD.
AUTO ADJUST is a useful feature to correct H Position and
V Position manual values quickly and easily.
To achieve this, right-arrow so that NO is highlighted in
RED, then left-arrow so that YES is now highlighted in RED.
As soon as you do this, Auto Adjust will take effect. Do not
press OK or MENU. After a few seconds, YES will turn
BLACK.
Auto Adjust has now completed.
14
Menu installation
Key Process for PC mode
Press the MENU button on the Remote controller.
This will bring up the OSD.
OSD MENU has a LANGUAGE OSD setting. Once
highlighted, press OK. A selection of Languages are
selectable: English, French, Dutch, Spain, Italian and
Korean.
OSD H POS and OSD V POS re-positions the OSD on the
LCD display.
OSD TIMER when ON, turns of the OSD in 15 seconds of
inactivity. In an OFF state, the OSD will remain until the
MENU button is pressed (more than once if necessary).
TRANSLUCENT changes the level of transparency of the
OSD to the background.
Press the MENU button on the Remote controller.
This will bring up the OSD.
MISC. has a SIGNAL SOURCE setting which gives you the
control to set the default Signal Source on power-up (press
the MENU).
PICTURE MODE provides three settings: PC, GAME,
MOVIE; each one adjusts the display to suite whatever type
of mode the LCD monitor is being used for.
RESET restores the factory default settings. Arrow-right
(NO will be highlighted RED). Arrow-left, YES will be
highlighted RED. Press OK.
The screen will go blank and then reset. NO SIGNAL will
appear and then if a PC connection is still present, it will
return with default settings in a few seconds.
Press the MENU button on the Remote controller.
This will bring up the OSD.
SOUND on and Sound off enables or disables the inbuilt
speakers on the LCD monitor.
VOLUME adjusts the sound (whether enabled or disabled).
15
Attaching a Wall or Arm mounting device
1. Turn off the monitor and pull out the power cable.
2. Place the product on top of a soft cloth or other smooth material on the floor and move the LCD TV to a ‘face-down’
position making sure it is flat and balanced.
3. Detach the rear cover of the stand with a screwdriver.
4. Remove the four screws connecting the stand and the body.
5. The stand is now disassembled.
Hole spacing: 100 x 100mm
Screw length: 8~12mm
This LCD TV’s installation surface is compatible with various VESA standard stands.
16
Symptom
Check
No TV / Video displayed
Check TV/Video Mode has been set using the SOURCE button.
Check Video cable terminal is connected
Unclear TV display
Check connection status of TV cable, exterior Antenna and adjust
FINE TUNING from TV OSD menu if necessary
No TV signal
Auto Search from TV OSD menu and set Edit channel or search
channels manually with MANUAL SET ON from TV OSD menu
Remote Controller not
functioning
Check batteries are correctly inserted [+] and [-] polarity
Check battery power status
No Video or S-Video mode
Check Video cable is connected to the TV and set to Video mode or
S-Video mode
Poor colour in Video
Adjust Saturation on the OSD menu in PICTURE mode
Blurred picture in Video
Adjust Sharpness in the OSD menu in PICTURE mode
Picture jitter (PC mode)
Adjust clock to set the screen position and adjust until no noise is
detected in the OSD Menu in PICTURE MODE
No picture (PC mode)
Check mains switch and the PC power switch are ON
Power LED not lit (PC
mode)
Check main switch is ON. Check if the power cord is connected
Image is unstable (PC
mode)
Check signal cable is connected to video card correctly
Image not centred, too small
or too large (PC mode)
Adjust clock or H&V Centre
Picture bounce or wave
pattern (PC mode)
Magnetic interference from electrical devices are too close to the
monitor
Picture is blurred (PC mode)
Adjust contrast and brightness
No sound (PC mode)
Low sound (PC mode)
Check audio cable is connected correctly. Adjust volume. Check
audio system on PC
Adjust the volume on the OSD Menu or adjust the volume on the
sound card of the PC
17
Self Diagnosis (PC mode)
If there is no image, the Self Diagnosis screen will be displayed.
The Self Diagnosis function checks the status of the LCD TV screen under certain conditions.
18
MODEL NAME
L710T LCD Television
PANEL
SCREEN SIZE
DISPLAY COLOUR
CONTRAST RATIO
PIXEL PITCH
ASPECT RATIO
RESOLUTION
NUMBER OF PIXELS
VIDEO BANDWIDTH
COLOUR FILTER
17”
337.9 x 270.3mm
16.2M
400:1
0.264
4:3
1280 x 1024
1,310,720 pixels
140MHz
RGB
70 degrees
60 degrees
5 degrees
30 degrees
2W + 2W
VESA DDC Compatible
30 – 80KHz
56 – 77KHz
VIEWING ANGLE
TILT RANGE
SOUND OUTPUT
PLUG & PLAY
SYNCHRONIZATION
APPEARANCE (mm)
WEIGHT
POWER
CONSUMPTION
POWER
REQUIREMENT
POWER SAVING
DC POWER
TERMINALS
TV SIGNAL TYPE
386 x 398 x 190mm
386 x 346 x 60mm
Net 5.3kg
/ DETAIL
250cd/m2 Brightness
@ 60Hz / 75Hz
Vertical Stripe
Right / Left
Up / Down
Forward
Backward
Horizontal
Vertical
[with stand]
[without stand]
Gross 7kg
40W
AC 100V-240V ~ 50/60Hz
EPA, VESA DPMS
Nutek Compliant
DC 12V
PC Input Signal:
Sync H/V Separate (TTL)
Video 15pin mini D-Sub (Analogue RGB)
AV Input Signal:
Video CVBS (RCA), S-Video (mini-DIN)
Audio Stereo mini-Jack Input / Output
PAL
19