1
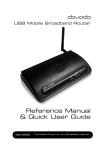
USB Mobile Broadband Router
Reference Manual 6.1.1
T h e M o b i le C h o ic e f o r y o u r B r o a d b a n d I n t e r n e t
2
Reference Manual 6.1.1
Table of Contents
Introduction
Part 1
3
................................................................................................................................... 3
1 Package contents
2 Access the
router
...................................................................................................................................
3
Part 2
Status Overview Bar
4
Part 3
Menu System
4
1 Home
................................................................................................................................... 4
2 Modem ................................................................................................................................... 5
3 Internet ................................................................................................................................... 5
4 LAN
................................................................................................................................... 7
5 WLAN
................................................................................................................................... 8
6 SMS
................................................................................................................................... 10
7 System ................................................................................................................................... 12
8 Upgrade................................................................................................................................... 14
9 Restart ................................................................................................................................... 14
10 Logout ................................................................................................................................... 14
15
API
Part 4
1 Enabling...................................................................................................................................
the API
15
2 Connecting
to the API
...................................................................................................................................
15
15
3 Logging...................................................................................................................................
in to the API
4 Using the
API
...................................................................................................................................
15
................................................................................................................................... 16
5 Router info
6 SMS
................................................................................................................................... 16
...................................................................................................................................
18
7 Check services
available
8 API Coding
................................................................................................................................... 18
Troubleshooting
Part 5
20
................................................................................................................................... 20
1 Scenarios
2 Frequently
Asked Questions
...................................................................................................................................
20
Support
Part 6
24
T h e M o b i le C h o ic e f o r y o u r B r o a d b a n d I n t e r n e t
© 2012 Dovado FZ-LLC
Introduction
1
3
Introduction
Thank you for choosing a Dovado USB Mobile Broadband Router. Dovado has quickly become the
leading brand in terms of support for 4G/LTE and 3G USB modems. Simply insert your compatible
USB modem into the Dovado router, and the two will be automatically paired in order to get you
online on the Internet. A well-known fact about Dovado is that it is quick to support new modems
and features, and provide you a smooth upgrade process with help of the DOVADO Firmware
Utility (Express Upgrader).
On every page in the router's User Interface, you will see this icon. Click it, and you will be
directed to the appropriate chapter in the reference manual automatically for further
information and guidance.
1.1
Package contents
Make sure all of the listed items below are included in your package. If something is missing, kindly
contact your reseller.
Router - USB Mobile Broadband router
Power supply
Quick Wizard Guide
USB extension cable
WLAN antenna
Velcro pads, for optional surface mounting of the router
Additional required items:
In addition to the items above you will need a mobile broadband USB modem in order to connect to
a mobile network.
This modem provides the wireless link to your operator's network and is sold separately.
To use the Internet you need a computer.
1.2
Access the router
To access your router's menu system, connect your computer via WLAN or LAN port (with an
Ethernet cable) and access the http://192.168.0.1 website.
To connect by Wireless LAN (WLAN), search for a wireless network called "DOVADO".
Once you have reached the login page, the information below is the default settings for your router:
Username:
admin
Password:
password
T h e M o b i le C h o ic e f o r y o u r B r o a d b a n d I n t e r n e t
© 2012 Dovado FZ-LLC
4
2
Reference Manual 6.1.1
Status Overview Bar
Atop of the user interface, a bar displays an overview of your Internet connection.
This information sits outside the security zone of your router, and does not need to be accessed via
an authorized login, thus saving time on checking the connection status.
The Connection Status Overview Bar shows the following information:
Date: Synchronized with a Dovado NTP (Network Time Protocol) server upon each new successful
Internet connection.
Signal: The latest measurement gathered by the USB modem upon connection is displayed in a
percentage value, along with the technology (2G, 3G or 4G).
The value is only updated after initiating a new connection.
SMS: Shows the number of unread SMS's.
WLAN: Shows whether a 20 or 40MHz channel has been manually selected. The value within the
brackets indicates the channel(s) currently used.
Time: Displayed in a 24-hour format (HH:MM). In case the displayed time is incorrect, you can set
the timezone in the System->NTP page.
Connection: Indicates whether your current Internet connection is via the inserted USB modem or
via an Ethernet WAN port. This is useful if your router has been configured to perform automated
failovers between one dropped Internet connection to a secondary (backup) connection.
Connection Indicator: Green color indicates that the Dovado router is connected to the Internet
via a USB modem. Red color indicates that it is disconnected from the Internet.
Traffic: Quickly displaying this month's Internet consumption in gigabytes (GB) on the downlink
and uplink of both Internet interfaces (USB modem traffic only).
3
Menu System
The menu system is structured into sub-categories related to various functions and features. For
each topic, there are sub-menus to the right side where you can alter the settings to suit your
needs. All changes that are applied must be saved. Regardless of how many changes have been
applied throughout the menu, they will only take effect once you have applied a Restart.
3.1
Home
To view information about your Dovado router, click on the Home button in the menu. This is the
first page you will see once logging into your router.
3.1.1
Home
This page displays information such as the router's serial number and also which firmware version
it currently operates on.
T h e M o b i le C h o ic e f o r y o u r B r o a d b a n d I n t e r n e t
© 2012 Dovado FZ-LLC
Menu System
3.1.2
5
Start Wizard
The Setup Wizard is a simple walk-through configuration that will ask you which settings you wish
to use in order to access the Internet as well as secure your wireless network.
3.1.3
Troubleshooting
By default, the Troubleshooting Wizard is continuously enabled. If it detects during the course of
your setup that there is something wrong, the Troubleshooting Wizard will then advise you on what
the possible faults may be.
Note: The Troubleshooting Wizard will not operate if either the Connection Tracker, Ethernet WAN
port or a CDMA modem is being used.
3.2
Modem
This submenu will provide you the means of checking the reception signal of your mobile
broadband, as well as configure/alter the settings of your mobile broadband Internet connection.
3.2.1
Modem Status
This page details your USB modem's radio signal with the corresponding mobile operator base
station. It will also display which network mode the router is connected to (4G, 3G or 2G). In
addition to which, exact details regarding which mobile operator your SIM card is registered to,
along with the USB modem's unique IMEI number, and the SIM card's unique IMSI number. This
information might be useful when dealing with your mobile operator's helpdesk.
3.2.2
Modem Settings
On the Modem->Modem Settings page, you will be able to insert all the valid inputs in order to
access the Internet via your mobile operator.
There are several relevant bits of information which are necessary in order to complete this task
successfully:
APN (Access Point Name). If you are not sure what your mobile operator's APN is, please
contact them or check with your modem manual.
PIN code.This is your PIN code provided with your SIM card which resides in your USB modem.
3.2.3
PPP
Username & Password: Some operators may require you to insert a username and password
along with APN information in order to authenticate towards the mobile network.
If you haven't been provided with this, then using only an APN might be sufficient. If not, then
please contact your operator.
3.3
Internet
Once you have configured your Mobile Internet connection in the Modem section, you can define
the role of your Internet interface (USB modem or Ethernet WAN port) as well as improve the
general Internet uptime. This section will also give you the means to access your monthly data
consumption as well as configure your Ethernet WAN interface settings.
Improvement of connection uptime: If your mobile Internet connection is not holding well in terms
of uptime, then please make use of the Connection TrackerTM feature within the sub-menu. This
feature will poll the Internet to see if it is responding. If there is no response, the router will take
steps to correct the situation.
Bridge Mode (NAT disabled): For usage scenarios where an additional private network (Network
Address Translation) would impose difficulties, your Dovado router can be converted from the
T h e M o b i le C h o ic e f o r y o u r B r o a d b a n d I n t e r n e t
© 2012 Dovado FZ-LLC
6
Reference Manual 6.1.1
regular Routed Mode (NAT enabled) to Bridged Mode (NAT disabled). Please note that by
selecting Bridge Mode, the Dovado router will not be operating its firewall.
3.3.1
Internet Connection
The router can be used in two different modes: Routed or Bridged.
Routed Mode (NAT Enabled)
In the (default) routed mode, multiple devices share a single public IP address. In this mode, the
Dovado router can be used with either a USB modem (default mode) or with a fixed broadband
connection such as ADSL or Public Ethernet.
Make sure to connect your ADSL/CABLE-TV modem with an Ethernet cable to the WAN Port of
the Dovado Router.
Bridge Mode* (NAT disabled)
Bridge Mode will disable the NAT/routing functionality and allow you to connect any device to the
router's LAN port or WLAN interface. The device you connect to the router will get its IP address
directly from the mobile network.
In this mode, the router will be transformed into a converter between USB and LAN or WLAN. As it
will no longer retain any functionality dependent on IP, certain features such as Data Traffic
Counter, Connection Tracker, E-Mail Notifications, Home Automation, GPS, etc will not be
operational during use of Bridge Mode.
*Please check http://www.dovado.com/modems to see which modems support Bridge Mode
To alter your router into a bridge, go to the Internet->Internet Connection page within the router
menu, and select either of two Bridge Modes. If you are not planning on using any specific WLAN
client, then use the "Bridging USB with LAN" option in order to avoid any associated issues that
may arise later on. Once the Bridge Mode has been applied, saved and restarted; the router will
indicate "CONNECTION: BRIDGE" when you log into the menu page again.
3.3.2
WAN Port Settings
The default setting is that your operator automatically will allocate you an IP address. Should your
operator have given you a static (specific) IP address, then select Manual (Static) settings and fill in
the given information in the relevant fields.
3.3.3
Connection Tracker
In order to ensure maximum Internet availability you can use the Connection Tracker feature.
When inserting a minimum of 2 unique IP addresses, these addresses will be "pinged" with an
interval that you specify in minutes in the Interval field. After entering the selected IP addresses,
you can test the ping function to these addresses by pushing the Test now button directly below the
IP address fields. The result will be shown to the right of each IP address field.
WARNING: Please note that if you are paying for bandwidth usage, activating this function will add
data consumption to your monthly bill. An approximate figure for the additional monthly data
consumption will be indicated directly to the right of the Interval field. Raising the interval value will
lower the monthly consumption.
Should your internet connection drop, you have 3 options on how the router should react:
Redial only (in WAN Ethernet mode: Reinitialize interface). Default value that attempts to
reestablish the broadband connection.
Redial and Restart (the router restarts itself after 3 failed redial attempts). Using this option, your
local area/wireless network will be unreachable for a short while during the restart of the router.
Auto fail-over to secondary interface. (WAN-to-USB or USB-to-WAN). The router is connected to
both a USB modem and a fixed broadband connection. Both of these interfaces must be
properly configured in the event of a fail-over between each other. You can check which
interface is your primary connection on the Internet->Internet Connection page.
T h e M o b i le C h o ic e f o r y o u r B r o a d b a n d I n t e r n e t
© 2012 Dovado FZ-LLC
Menu System
3.3.4
7
Traffic
It is possible to keep track of how much Internet traffic is consumed each new calendar month. A
log is also held for the previous month. The chart displays how much data has been downloaded
via the USB modem. A total is also calculated for the month per interface. As these figures are
automatically updated every few minutes, a forced update can be manually requested by pushing
the Update button.
3.3.4.1
Notification of Data Traffic Usage
Upon enabling this feature, the router can send you an SMS and/or E-Mail notification after a
certain amount of data has been consumed by your Internet connection. It will then continuously
update each time it passes that interval, thus providing you with an overview of your monthly data
consumption.
The router can alert you after every 100MB, 250MB, 500MB and 1000MB of downloaded or totally
accumulated bi-directional traffic passed during the calendar month.
Note: By using your USB modem directly in the computer, the router will only be able to display the
amount of data the router itself has consumed when the USB modem is inserted into it. It will not
display what the USB modem has consumed; therefore, to acquire the most accurate accumulated
figures, please contact your Internet service operator.
To enable notification by SMS, go to SMS->Remote Control, and select the Traffic Limit Reached,
located under Notification SMS.
To enable notification by E-Mail, go to System->E-Mail, and enter your E-Mail account
configuration.
Then proceed to Internet->Traffic, and select how often you would like to be notified by SMS and/
or E- Mail for an updated total of your calendar month's data consumption. You can also specify
which kind of data to keep track of (downloaded only, or downloaded and uploaded; depending on
your mobile broadband subscription terms).
For more information, please visit http://www.dovado.com/traffic
3.4
LAN
Here you can alter the settings that are relevant to your specific network, such as the Local Area
Network (LAN) IP addressing, the Dynamic IP address pool (DHCP) as well as the Port Forwarding
rules that will allow inbound access to your computers from the outside (Internet).
3.4.1
LAN Settings
The network settings for the router.
Network Settings allows you to change the default IP address for your router.
However, in most cases you do not need to change this setting.
Note: The IP address for the router is used on your private network only. It is not possible to
change the subnet mask.
Click on Save LAN Settings and then Restart for the changes to take effect.
3.4.2
DHCP
DHCP Server allows you to enable or disable the built-in DHCP server.
When enabled, all clients on your private network will automatically obtain an IP address from the
range specified under Client IP Address Range (valid range is from 1 to 254). When disabled you
have to manually enter an IP address from this range into each client.
Client Network Information allows you to set a domain name for the router and specify an
additional DNS server.
Static Address Assignment: Can be used when you want a client to obtain the same IP address
each time it logs on to your private network. This setting works no matter if the DHCP Server is
enabled or disabled. Select how you want to identify the client, either by hostname or MAC address
T h e M o b i le C h o ic e f o r y o u r B r o a d b a n d I n t e r n e t
© 2012 Dovado FZ-LLC
8
Reference Manual 6.1.1
(it is possible to define 253 static IP addresses based on MAC addresses or hostnames).Type in
the hostname or the MAC address under Host Identifier and finally, set the desired IP address
under Internal Address.
Please make sure not to assign the IP address of the router to any of the clients.
Click on Add and then Save DHCP Settings when you are finished.
View DHCP Table: is a function that shows the IP and MAC addresses of all clients that are
connected to the router.
Click on Save DHCP Settings and then Restart for the changes to take effect.
3.4.3
Port Forwarding
The settings for manually unblocking certain communication ports in your private network.
Reserved Ports is a list of logical ports that cannot be used to access your private network from the
public Internet.
Port Forwarding to LAN lets you specify which ports clients on the public Internet shall be able to
communicate through, to clients on your private network.
Under Port Range, select a range (any range that does not contain the ports listed under Reserved
Ports) from 0-65535. Select the type of traffic that should be let through on these ports, TCP or
UDP, or Both. Finally, type in the Destination Address, which is the IP address of the client on your
private network that you want to be accessible from the public Internet.
It is also possible to forward incoming GRE (Generic Routing Encapsulation) traffic to a single host.
Click on Add when you are finished.
Note: that by default, no traffic is permitted inwards if the request is initiated by an external user.
However, clients on your private network can always access the public Internet.
Click on Restart for the changes to take effect.
3.4.4
UPnP
The settings for Universal Plug and Play.
The router supports Universal Plug and Play. UPnP is a feature that enables client application on
devices behind the router to automatically trigger the opening of TCP/UDP ports through the
firewall in the router.
As a security precaution, this feature is disabled by default and can be enabled manually.
3.4.5
Hosts
To view the current list of connected devices, click on "Show Hosts on LAN". The list will present
the IP addresses along with their corresponding unique hardware (MAC) addresses.
As certain devices on your LAN might require a familiar representation (such as
"server.mynetwork.com"), you can pair the LAN IP address of that computer to
"server.mynetwork.com". This means that if you try to surf to http://server.mynetwork.com from
another computer on the same network, the router will redirect you locally to that specific
computer.
3.5
WLAN
This menu will provide you the possibility to view/modify the Wireless LAN (WLAN) Settings.
3.5.1
WLAN Settings
Here are the settings for the wireless network.
Wireless Band drop-down menu lets you choose what wireless standard to use in your private
network. Possible choices are 802.11b with a maximum transfer rate of 11Mbps, 802.11g with a
maximum transfer rate of 54Mbps, 802.11n with a maximum transfer rate of 150Mbps or
802.11b+g+n if you have clients with mixed types of network cards.
T h e M o b i le C h o ic e f o r y o u r B r o a d b a n d I n t e r n e t
© 2012 Dovado FZ-LLC
Menu System
9
Channel drop-down menu lets you change the radio channel for the wireless communication. This
is useful if you experience poor performance that could be as a result of interference from other
wireless devices.If Auto is selected, the router will automatically determine which channel it should
select.
Bandwidth drop-down menu will be enabled whenever 802.11b+g+n or 802.11n is selected as the
Wireless Band. By default, 20MHz is selected as it ensures the best compatibility with client
devices. When selecting 40MHz, a second channel is enabled which can increase throughput for
compatible 802.11n which also support 40MHz. Please note that by selecting 40MHz, you might
experience incompatibility with certain devices. In such case, please use 20MHz.
The 2nd Channel drop-down menu will be available once the Bandwidth has been manually set to
40MHz. From there, you can appoint the placement of the secondary channel to be located either
below or above the primary channel. Please note that when using 40MHz, the gap between two
bonded channel points is equivalent to 4 numbered channels. Therefore, if selecting channel 6, the
paired channel will either be 2 or 10, depending on your selection of placement.
Data Rate drop-down menu is the setting for the transmission speed at the selected Wireless
Band. If you experience problems at high data rates, then we recommend that you select a lower
data rate.
SSID (Service Set Identifier): is the name of the router that will appear in other Wireless LAN
clients when they perform a network search.
Default value is DOVADO
SSID Broadcast: enables or disables transmission of the SSID from the router.
When disabled, other Wireless LAN clients will not find the router when they perform a network
search.
Fragment length: is a setting that affects the quality of the wireless transmissions. If you
experience a high packet error rate you can decrease this value in small steps to reduce this
problem. Setting the fragment length too low may result in poor performance.
Default value is 2346.
RTS length: is a setting that affects the quality of the wireless transmissions. If you experience
inconsistent data flow you can decrease this value in small steps to reduce this problem.
Default value is Off.
Wireless Radio: enables or disables the WLAN. If you do not use any Wireless LAN devices it is
recommended that you select disable.
Click on Save WLAN Settings and then Restart for the changes to take effect.
3.5.2
Authentication
The encryption settings for your Wireless LAN.
Encryption is disabled by default. Choose Enable to show the available settings.
There are three main types of encryption methods in the Authentication Type dropdown menu,
which are WPA1/WPA2-PSK, WEP Shared Key and WPA1/WPA2-Enterprise.
WPA-PSK is the most secure, and therefore the best recommended method. Choose it from the
Authentication Type drop-down menu and then enter a pass phrase between 8 and 63 characters.
The key is case sensitive. All Wireless LAN clients must use the exact same pass phrase in order
to access your network. The absolute securest setting is to use WPA2 together with AES
ciphering; however, older devices might not support it.
If you have a device that does not support WPA-PSK authentication, then select WEP Shared Key.
Choose a Key Type, either HEX or ASCII. Then choose Key Size; 64 bits (for HEX this is 10
characters and for ASCII 5 characters) or 128 bits (for HEX this is 26 characters and for ASCII 13
characters): the longer the key, the stronger the encryption. The key is case sensitive. You have
T h e M o b i le C h o ic e f o r y o u r B r o a d b a n d I n t e r n e t
© 2012 Dovado FZ-LLC
10
Reference Manual 6.1.1
the possibility to define up to 4 different keys at once so that you can rotate keys in order to
randomize your security.
WPA1/WPA2-Enterprise is based on the strong WPA-PSK authentication. However, the
authentication is done on a RADIUS authentication server. For the router to negotiate with such a
server, the server's IP address, communication port and login password must be configured. Such
a solution is typically used in an enterprise environment.
Click on Save Authentication Settings and then Restart for the changes to take effect.
3.5.3
MAC Address Control
The settings for restricting access to your private network via white-listing of authorized clients.
MAC Address Control enables or disables the MAC address filtering on the MAC addresses under
WLAN->MAC Address Control.
MAC Address Control is a security function that limits which clients can access your private
network and the public Internet through your router. Enter the MAC address of the client that you
want to grant access to your network (instructions on how to obtain the MAC address in Windows
and Mac OS X are listed below). Click on Add in order to grant access for a new device.
Note: that the function is enabled or disabled under WLAN->WLAN Settings. Disabling the
function does not clear the MAC Address Control List.
Windows
1. Click on the Start button and then Run.
2. Type cmd and press enter.
3. Type ipconfig /all in the command prompt and press enter. The MAC address is found on the
physical address line
Mac OSX
1. Click on the Finder icon, followed by System Preferences.
2. Open the Network icon and click on the relevant interface.
3. Click on Advanced, and the hardware ID will be shown. This is your MAC address.
3.6
SMS
Dovado routers support SMS traffic with most USB modems, though not all.
To see a list of supported modems, kindly visit http://www.dovado.com/modems
3.6.1
Inbox
This page will display any received messages. It displays the number of the sender along with the
message. You can reply to or delete an SMS within this page.
3.6.2
Send
You can compose an SMS message and send it either to a number stored in your router's
Phonebook, or to any other number. The telephone number must be entered in the proper
international format beginning with a country code; for example 4670xxxxxxx.
If you wish to send any messages to a short service number (usually only a few digits long; shorter
than a regular telephone number), then tick in the Short Number box above the message.
A regular SMS supports 160 characters, however the Dovado router also supports long text
messages, and will display how many messages your inserted text is equivalent to.
3.6.3
Remote Control
A short text command can be sent from your phone to administer certain tasks. The configuration
allows a range of authorized mobile phone numbers to be added to the list.
You can specify which number will be allowed for sending commands, receiving notifications, or
T h e M o b i le C h o ic e f o r y o u r B r o a d b a n d I n t e r n e t
© 2012 Dovado FZ-LLC
Menu System
11
both. To insert the number, use international dialing format (e.g. 46 for Sweden, followed by the
rest). For each number that is inserted with its rights, click on Add to list.
Note: For each number that is added (and tagged with a "Notification" tick mark), an individual SMS
shall be sent by the router in case of any notification.
Using SMS functionality may generate an extra cost to your mobile broadband subscription
3.6.3.1
Remote Commands
The short text commands are: Status, Restart, Disconnect, Connect (or Reconnect).
Status: The router will reply to you stating that it's either connected or disconnected from the
Internet. It will also contain the IP address (if connected) of it's Ethernet WAN / USB Modem along
with signal information.
Restart: The router will restart itself.
Disconnect: The router will disconnect itself from the mobile broadband network. Internet
connection will be dropped, though SMS will still be active.
Connect (or Reconnect): The router will connect itself to the mobile broadband network. Internet
connection will be enabled.
3.6.3.2
Notification SMS
Unexpected events which occur in regards to the Internet connection along with the overall status
of the router can be reported by SMS to all numbers listed for "Notification". Notification messages
can be sent to recipients for the following events:
Restart: In case the router was forced to restart itself after 3 unsuccessful connection attempts
(based on the settings located in the Connection Tracker). A restart can also be affected by an
unexpected power failure.
Connection down: The Internet connection has been dropped. The router at this point has
acknowledged a drop, and is working on resolving this situation by either redialing the connection,
restarting itself or switching connection to the secondary Internet interface (depending on what has
been defined in the Internet–>Connection Tracker site)
Connection up: An Internet connection has been established. It is very likely that your router will
be handed a new IP address from the operator.The SMS will display the new IP address in case
you would like to remotely connect to it for administration purposes.
Traffic limit reached: More information about this is available in section Notification of Data Traffic
Usage.
T h e M o b i le C h o ic e f o r y o u r B r o a d b a n d I n t e r n e t
© 2012 Dovado FZ-LLC
12
Reference Manual 6.1.1
Switched connection: In case your Connection Tracker has been configured to automatically
perform a connection fail-over between two interfaces, you will be notified of this change, along
with further information pertaining to that new connection.
3.6.4
Settings
To activate the usage of any SMS features, click on Activate the SMS handler. By default, the
router will select the Auto method for retrieving the incoming messages. You can also manually
select which method it should access the messages, be it either from the SIM card or from the
USB modem. Auto mode will attempt both.
Should the router experience any issues in receiving text messages from your phone, then type in
the SMS Service Center number that is tied to the SIM card you are using inside the USB modem.
If you do not know what it is, then either check the advanced settings within the modem dashboard
software (when using modem in computer), or contact your mobile operator for details. Make sure
to insert the SMSC telephone number in international dialing format.
3.6.5
Phonebook
If you are sending frequent SMS texts to a regular list of recipients, then enter those recipients to
the router's Phonebook. Once inserted, you can compose a new message and simply select the
recipient by name.
All entries into the Phonebook are to be stored in the international number format. It is also
possible to store Short Numbers as well.
3.7
System
The System sub-menu offers you to alter some of the advanced settings within the router, along
with the user management.
3.7.1
Users
This page allows you to manage your login account credentials, as well as add additional users
along with corresponding privileges. The usernames and passwords can be modified, and services
can be enabled/disabled.
For example, if you wish to allow users the possibility to use the SMS API, then add/modify an
account and select only the API SMS. Apply all changes by clicking on the Save Settings button,
and applying a restart of the router.
Apply all changes by clicking on the Save Settings button, and applying a restart of the router.
3.7.2
Remote Management
The settings for enabling remote management of the router from another location.
Web Access Port: Select which port you would like to access the router interface page from the
Internet. The Standard port is port 80, which is the regular port for HTTP.
Example: Should you wish to access the settings on your router from elsewhere on the Internet,
simply open a browser, type in http://<ip address of router>:<port>.
For instance, http://183.168.0.35:4430.
Hostname lookup interval: Select how often a hostname entered in the Client Access List should
be updated. Frequent updates are needed if the IP-address behind the hostname changes often.
Allowed Clients: The router will only allow access for clients visible in the Client Access List. To
put a client in the list, enter the corresponding IP-address or Hostname (For instance 217.65.34.12
or myhost.dyndns.org) in the Host/IP-field and click Add to list. Repeat the procedure in order to
grant more clients access. Access can be granted from anywhere on the Internet by marking "Any
Host" and pressing "Add to List".
T h e M o b i le C h o ic e f o r y o u r B r o a d b a n d I n t e r n e t
© 2012 Dovado FZ-LLC
Menu System
13
Show Mapping: Displays the router's view of IP-addresses associated with hostnames in the
"Client Access List".
All changes will take effect upon restart of the router
3.7.3
Network Settings
The router uses default settings of 1500 bytes as the MTU/MRU on most USB modems. Should
your operator be using anything different, then alter the value by disabling the option "Let the router
select safe settings" and manually entering the MTU & MRU values. It is also important to enable
the MSS Clamping once having altered the values. The router also contains certain templates that
are operator specific in cases where deviations are known.
3.7.4
DNS
Here you can alter the DNS (Domain Name System) settings in the router.
Dynamic DNS Server Settings:
In most cases, the operator which provides the internet service towards your router is handing out
a constantly-shifting (dynamic) IP address. The Dynamic DNS feature allows you to contact your
router via an easily accessible hostname, such as myrouter.mydyndns.com
Custom DNS:
If your operator's DNS servers are unavailable, or if you wish to use a 3rd party DNS server, then
insert the IP address of up to two different servers which the router should use. As a result, all
devices on your network will then use those specified DNS servers.
3.7.5
NTP
Dovado routers synchronize their clocks via NTP (Network Time Protocol) servers located out on
the Internet. The synchronization occurs upon each new connection with the Internet, be it the
initial (when powering up) or even during a redial while the router is on.
For the router to contain the accurate time zone, you may have to manually select your region/
country/city to make sure the router will be able to present you with the right time and date. By
making this selection, your router will automatically update itself whenever a time change occurs
throughout a year, depending on the time zone you’re in.
By default, the router will attempt to auto-detect the time zone when using a USB mobile
broadband modem as your primary form of Internet access. Should this fail, then select your
location manually.
If you wish to use your own NTP server settings, then activate the Custom NTP option, and fill in
up to two different IP/DNS addresses of such servers.
3.7.6
E-Mail
The E-Mail sender will dispatch notifications of your consumed Internet data traffic. Enter the EMail address destination along with the SMTP server you wish to use in order to send out the EMails. To enable/select the Internet traffic reports, visit the Internet->Traffic page and select the
notification method for the chosen quota.
If you are unsure of which SMTP server settings your mail service uses, then kindly check with
your e-mail service provider. Aside from inserting the correct username and password, it is
important to confirm which SMTP port and authentication protocol you should use. After saving
these settings, click on Send Test Message to verify.
T h e M o b i le C h o ic e f o r y o u r B r o a d b a n d I n t e r n e t
© 2012 Dovado FZ-LLC
14
3.8
Reference Manual 6.1.1
Upgrade
The latest firmware is available on http://www.dovado.com/firmware
Warning! Do not remove the power or the USB modem during upgrading as this will break your
router!
3.8.1
Firmware Utility Upgrader
The simplest recommended method of firmware upgrade is to visit http://www.dovado.com/
firmware and download the latest version of Firmware Utility Upgrader. The Upgrader allows you to
quickly establish contact with the router, type in the router's password, and perform the upgrade
with the click of a button.
3.8.2
HTTP Method
Point a web browser to http://www.dovado.com/firmware and download the upgrade file to your
computer. Remember where you store the file. Go to Upgrade->Upgrade HTTP. Click on the
Browse button and select the upgrade file you just downloaded, and then click on Open. Click on
Start HTTP Upload to start the upgrade process.
When the upgrade is done, the router will automatically restart and a login button will appear in the
web browser. The router is ready to use once it has been restarted.
3.8.3
FTP Method
If you have an FTP server you have the choice to upgrade the router via FTP.
Once the upgrade file is on the FTP server in the root directory. Go to Upgrade->Upgrade FTP.
Then, type in the IP address of the FTP server under FTP Server IP and the filename under
Filename, then click on Start FTP Download to start the upgrade process.The text "Restarting..."
will appear in your web browser when the upgrade has finished.
Note: In order to use the FTP upgrade option, the FTP server which contains the firmware image
must be accessible via an anonymous FTP account.
Close the web browser and wait until the router has restarted. The router is now ready to use.
3.8.4
Configurations
This function allows you to create, as well as restore, the working configuration of your Dovado
router. Each backup you save to your computer will contain all the configuration parameters you
have entered in your router.
Should you have performed a factory reset to clear out all your settings, you can then restore your
settings by uploading your saved configuration file via this interface.
To save the current configuration of your router to your computer, go to Upgrade->Configurations,
then simply push the Download button. To restore your configuration, click on Browse (to locate the
file on your computer), and then push Upload.
Tip: The configuration file which you download from your Dovado router can also be used on other
routers of the same model and firmware revision. This can come in handy if performing a massdeployment of clone configurations.
3.9
Restart
Push Restart in order to restart the router and initiate all the settings you have saved within the
menu.
3.10
Logout
Normally, the login session will expire after 10 minutes of no activity. Should you wish to manually
terminate the login session, then click on Logout
T h e M o b i le C h o ic e f o r y o u r B r o a d b a n d I n t e r n e t
© 2012 Dovado FZ-LLC
Menu System
4
15
API
The Application Programmable Interface (API) allows you to create your own custom interface with
the router. You can control certain features such as SMS messaging.
4.1
Enabling the API
To enable the API please do the following.
LAN Access:
Go to System-> Remote Management
Click Enable LAN management
Click API Over LAN
Do not forget to reboot the router after activating the API.
4.2
Connecting to the API
The API operates on port 6435.
To connect you can for example, type in the following within a console:
telnet 192.168.0.1 6435 (or change 192.168.0.1 to the IP of your router).
If the connection was successful you will receive something similar to:
This is version X.Y of the API
SMS is enabled
Followed by a '>>'-prompt
4.3
Logging in to the API
The API uses the Username and Password as specified in the Web GUI.
To log in as user admin, type:
user admin
When prompted for a password, enter it using the following syntax:
pass password
(The password is the is configured unser SYSTEM->USERS)
If the login fails, control & re-enter your credentials until access is granted.
4.4
Using the API
To display information about the GUI functions and syntax, type help.
Commands:
help (show this help)
exit|quit|bye (close the telnet session)
user [username] (log in as user)
pass [secret_password] (log in with secret_password)
info (prints general information about the router)
services (lists services)
SMS:
sms list (returns number of unread/read messages)
sms send [PDU]
sms sendtxt NUMBER [ENCODING]
NUMBER:international format without the leading +. A leading s indicates short SMS
(eg s4612345678)
ENCODING:ISO|UCS (ISO for ascii < 256). Leave blank for autodetection
sms recv [ID] (returns PDU with ID or all PDUs in the inbox if ID is empty [ID:PDU])
sms recvtxt [ID] (returns cleartext SMS with ID or all cleartext SMS in the inbox
if ID is empty)
T h e M o b i le C h o ic e f o r y o u r B r o a d b a n d I n t e r n e t
© 2012 Dovado FZ-LLC
16
Reference Manual 6.1.1
sms del ID
4.5
Router info
To display information about the router, execute the command:
info
It will respond with a list of parameters, for example:
Firmware_Revision:6.1.0
API_version:1.1
PRODUCT_NAME=Dovado Tiny
SIGNAL_STRENGTH=TRAFFIC_MODEM_TX=0
TRAFFIC_MODEM_RX=0
TRAFFIC_WAN_TX=0
TRAFFIC_WAN_RX=0
CONNECTION=modem
MODEM_STATUS=DISCONNECTED
EXTERNAL_IP=DATE=2010-04-10
TIME=08:11
GPS_TYPE=FIXED
GPS_LAT=59.2222
GPS_LONG=18.1111
SUNRISE=05:48
SUNSET=19:50
SMS_UNREAD=0
SMS_TOTAL=0
CONNECTED_DEVICES=TELLSTICK
4.6
SMS
The router can handle both SMS´s in cleartext (UTF-8/UCS encoded) and in PDU mode.
To view the clear-text contents of a PDU you need to convert it either on your own or, preferably,
using a third-party software such as SMS TOOLS LÄNK
Below is the API commands available related to SMS
SMS:
sms list (returns number of unread/read messages)
sms send [PDU]
sms sendtxt NUMBER [ENCODING]
NUMBER:international format without the leading +. A leading s indicates short SMS (eg s4612)
ENCODING:ISO|UCS (ISO for ascii < 256). Leave blank for autodetection
sms recv [ID] (returns PDU with ID or all PDUs in the inbox if ID is empty [ID:PDU])
sms recvtxt [ID] (returns cleartext SMS with ID or all cleartext SMS in the inbox if ID is empty)
sms del ID
4.6.1
Listing the number of SMS/PDUs
sms list (returns number of unread/read messages)
You can list the number of SMS/PDUs on your router using: sms list
The first digit of the response shows the current number of unread SMS / PDU’s and the second
digit the total amount in the inbox.
4.6.2
Sending SMS
The API can handle two ways of send SMS, either by receiving a PDU or via UTF-8/UCS encoded
text messages.
4.6.2.1
Sending an SMS via text
sms sendtxt NUMBER [ENCODING]
NUMBER:international format without the leading +. A leading s indicates short SMS (eg s4612)
ENCODING:ISO|UCS (ISO for ascii < 256). Leave blank for autodetection
T h e M o b i le C h o ic e f o r y o u r B r o a d b a n d I n t e r n e t
© 2012 Dovado FZ-LLC
API
17
To send a SMS via text use the command sms sendtxt
Example:
>>sms sendtxt 46791044794 ISO
This is a text message
.
>>
4.6.2.2
Sending an SMS via PDU
sms send [PDU]
To send a SMS, you first have to make a PDU of it. Once you have the PDU, use the following
syntax: sms send <pdu>
Example:
sms send 07910447946400F011000A9270042079330000AA0CC337392C2F83A6CD292804
4.6.3
Reading an SMS
The API can handle two ways of reading SMS, either by showing a PDU or via UTF-8/UCS
encoded text messages.
4.6.3.1
Reading an SMS via text
sms recvtxt [ID] (returns cleartext SMS with ID or all cleartext SMS in the inbox if ID is empty)
To read a SMS via text use the command sms recvtxt
Example:
>> sms list
new/total
1/1
Stored IDs: 1
>> sms recvtxt 1
From: 46XXXXXXXXX
Sent: 12-07-23 11:27:36
Alphabet: UTF-8
ID: 1
Räksmörgås
End of SMS
>>
4.6.3.2
Reading an SMS via PDU
sms recv [ID] (returns PDU with ID or all PDUs in the inbox if ID is empty [ID:PDU])
You can list all the current PDUs in your in the inbox using: sms recv
This will list all PDUs using in the format ID:PDU where ID is a unique internal descriptor of that
PDU (used for removing PDUs).
Conversion is needed to see the actual contents of the PDU.
T h e M o b i le C h o ic e f o r y o u r B r o a d b a n d I n t e r n e t
© 2012 Dovado FZ-LLC
18
Reference Manual 6.1.1
Example:
>> sms list
new/total
1/1
Stored IDs: 1
>> sms recv 1
1:07916407970900F1040B91640XXXXXXXF40000217032117263800A
>>
4.6.4
Removing a SMS/PDU
sms del ID
First you need the ID of the PDU you want to remove. It can be obtained using the sms recv
command. Then to remove a SMS/PDU, type: sms del ID
Example:
>> sms list
new/total
0/1
Stored IDs: 1
>> sms del 1
>>
4.7
Check services available
Services available in current session:
To display which services that are available in current session, execute the command:
services
It will respond with the services (Home Automation and SMS) that are currently available
Example:
SMS=enabled
4.8
API Coding
The API can easily be extended with a custom front-end. When implementing a front-end, mind the
following:
The router might be behind a high-latency connection. Set a high timeout for your connection.
When logging in to the API, the password must be encoded either ISO-8859-1or UTF-8
When executing a command (for example ts aliases), each line of output from the API is
terminated with LF (Line Feed, ASCII character 10d) and the last line of output from the
command is ETB (End of Transmission Block, ASCII character 23d).
Since there can only be one instance of the API running on the Router, a session that has been
inactive for more than 60 seconds will be dropped in favor of a new session.
4.8.1
Example code
API example code for different platforms are available on http://www.dovado.mobi/
4.8.1.1
PHP
Below is a sample php script that will connect to the router and then send a SMS via the API
<?php
T h e M o b i le C h o ic e f o r y o u r B r o a d b a n d I n t e r n e t
© 2012 Dovado FZ-LLC
API
19
error_reporting(E_ALL);
echo "Code example on how to send a SMS via the Dovado router API\n";
/* The following variables are set
$username= your username to the router with API access
$password= your password for the above username
$ipaddress = ipaddress of your router
$api_port = 6435;
$smsnr = Number to send SMS to
$smstxt = Message content for your SMS
*/
$username = "admin";
$password = "password";
$api_port = 6435;
$ipaddress = ('192.168.0.1');
$smsnr = "Enter your phonenumber in international format (4670000000)";
$smstxt = "Enter Text Here";
$readbuf = '';
/* Function to wait for >> answers */
function respons_wait($insocket)
{
do {
$readbuf = socket_read($insocket, 4096, PHP_BINARY_READ) ;
}while (strpos($readbuf,'>>') === false);
$readbuf = '';
}
/* Create a TCP/IP socket. */
$socket = socket_create(AF_INET, SOCK_STREAM, SOL_TCP);
if ($socket === false) {
echo "socket_create() failed: reason: " . socket_strerror(socket_last_error()) . "\n";
} else {
echo "OK.\n";
}
echo "Attempting to connect to '$ipaddress' on port '$api_port'...";
$result = socket_connect($socket, $ipaddress, $api_port);
if ($result === false) {
echo "socket_connect() failed.\nReason: ($result) " . socket_strerror(socket_last_error($socket)) .
} else {
echo "\nConnected to router\n";
}
respons_wait($socket);
/* Sending username to the API */
echo "Sending User Name...\n";
socket_write($socket, "user $username \r\n", strlen($username)+8);
echo "OK.\n";
respons_wait($socket);
/* Sending password to the API */
echo "Sending password...\n";
socket_write($socket, "pass $password \r\n", strlen($password)+8);
echo "OK.\n";
respons_wait($socket);
/* Setting up destination SMS number */
echo "Sending SMS number...\n";
socket_write($socket, "sms sendtxt $smsnr \r\n", strlen($smsnr)+15);
/* Sending text */
socket_write($socket, "$smstxt \r\n", strlen($smstxt)+3);
/* Sending end of message */
socket_write($socket, ".\r\n",3);
respons_wait($socket);
echo "Closing socket...";
socket_write($socket, "bye \r\n",6);
socket_close($socket);
T h e M o b i le C h o ic e f o r y o u r B r o a d b a n d I n t e r n e t
© 2012 Dovado FZ-LLC
20
Reference Manual 6.1.1
echo "OK.\n\n";
?>
5
Troubleshooting
Dovado routers are designed with simplicity in mind. If you are experiencing difficulties with certain
features or unable to get online via the router, then kindly check the hints on the Troubleshooting
page within the router menu. If those hints do not help, then proceed to http://www.dovado.com/faq
for further details. If you still cannot find the answer, then take contact with us via http://
www.dovado.com/contactsupport
5.1
Scenarios
The following scenarios should assist you in enabling your router for Internet access, depending on
which type of USB modem you have inserted into the router.
If your scenario is not available in this guide, then please visit http://www.dovado.com/support for
latest update. Once the information has been inserted, the unit will automatically try to establish a
connection to the operator's network. A solid green light on the Internet LED indicates a successful
connection.
Note: Mobile operators typically have an Access Point Name (APN) as the key relevant point of
entry towards the mobile broadband network. Make sure to have the name of your APN in advance
of configuring your USB modem. If you are using any other technology besides 2G/3G or 4G, you
might not require an APN.
5.1.1
Scenario 1: USB modem using a SIM card
Go to Modem->Modem Settings page.
Enter your operator Access Point Name and a PIN code if using one.
Push Save Modem Settings.
Restart the router.
5.1.2
Scenario 2: USB modem using a SIM card along with a username and
password
Go to Modem->Modem Settings page.
Enter your operator Access Point Name and a PIN code if using one.
Push Save Modem Settings.
Go to Modem->PPP and make sure that PPP is enabled.
Enter your Username and Password
Save PPP Settings.
Restart the router
5.1.3
Scenario 3: Fixed connection through the WAN port
In the Internet->Internet Connection page, choose Ethernet cable in WAN port as the primary
Internet connection .
Push Save Settings.
Restart the router
5.2
Frequently Asked Questions
Read further to see if any of the following scenarios will assist you in getting online with the
Internet.
For updated Frequently Asked Questions (FAQ), please visit http://www.dovado.com/faq
5.2.1
My router is not connecting to the Internet!
Do all of the following:
First check if the Internet LED on the router is OFF. If so, continue with the following steps
T h e M o b i le C h o ic e f o r y o u r B r o a d b a n d I n t e r n e t
© 2012 Dovado FZ-LLC
Troubleshooting
21
otherwise go to section The Internet LED on the front of the router is lit, yet I can't surf!.
Please verify that you are able to connect to your mobile operator using the USB modem in your
computer!
Always insert the USB modem into the router before powering it on!
Log into the router on default address http://192.168.0.1/
Check that your router has identified the USB modem (Check the Reported Backhaul
Technology under Home upon logging into the router). If not, check if your USB modem is
supported:
http://www.dovado.com/modems
Check the signal strength in the Modem->Modem Status page.
Verify that a correct Access Point Name (APN) and/or Username and Password has been
inserted in the PDP or PPP sections of the Modem Settings.
Check that the APN information provided by your mobile operator is identical with the APN
information used in the router settings.
If using a PIN code on your SIM card, insert it in Modem->Modem Settings page
5.2.2
The Internet LED on the front of the router is lit, yet I can't surf!
Test to see if you can do the following (in listed order):
1. Ping the internal IP address of the router.
Ping the router on address 192.168.0.1 (see instructions for Window and Mac OS X below) and
see if pings are replied positively
If positive, then try the next step.
If negative, please try with another computer if possible. Also check your IP settings and switch
to DHCP (dynamic IP) settings on your computer's network interface.
2. Ping an external IP address.
Try to ping www.yahoo.com and note if 4 pings are replied positively.
If so, then please check your web browser's settings for any conflicting proxy settings.
Windows
1. Click on Start followed by Run and type in cmd.
2. Once the black command prompt is open, type in ping 192.168.0.1 followed by Enter.
Mac OS X
1. Click on Finder in the dock.
2. Then click on Utilities in the Go menu.
3. Make then sure to double-click on Network Utility. In the Network Utility window, click on the
Ping tab. Enter the IP address 192.168.0.1 in the provided field. Click on Ping.
5.2.3
I forgot my router's password or username for accessing the router
interface
The default username and password for logging in to the router interface is "admin" and
"password", if you have changed it - tough luck! Nothing to do now but apply a factory reset, which
will wipe out all your settings. To do this, make sure your router is running and fully booted. Then
hold down the RESET button on the front of the router for about 7-10 seconds until the PWR
(power) lamp begins to flicker on the front of the router. At this point, you can release the RESET
button and wait approximately 2 minutes before logging in again. Make sure to write down your
password next time.
It is also advised that, once you have made your ideal configuration, you save it to your computer
in case of future manual resets of the router. To do this, go to Upgrade->Configurations page
and extract a backup configuration file.
T h e M o b i le C h o ic e f o r y o u r B r o a d b a n d I n t e r n e t
© 2012 Dovado FZ-LLC
22
5.2.4
Reference Manual 6.1.1
My firmware upgrade seems to have failed and I cannot access my router
anymore
Download the latest version of the DOVADO Firmware Utility Upgrader for your router, and select
the Rescue tab to restore your router.
http://www.dovado.com/firmware
If the Firmware Utility Upgrader is not available for your router model, please get in touch with us
at
http://www.dovado.com/contactsupport
5.2.5
My computer claims to be connected to my DOVADO network, but I can't
reach/log onto the configuration page
The configuration page is reached through the routers IP address, which by default is 192.168.0.1.
If this page returns an error start by doing a factory reset on the router by holding the reset button
for about 8 seconds and then wait for 2 minutes. If that doesn't do it, clear the cache in your web
browser. Also try disabling any antivirus, firewall or other security software as these can interfere
with accessing the interface.
5.2.6
I changed the settings for the WLAN and now some or all of my computers
or devices can't access it anymore
Most computers and devices remembers the settings for a WLAN by default, so that you don't
have to enter the passkey every time you connect to it. This is usually convenient but if you change
the passkey or remove the encryption altogether, the device will still try to connect with the old
passkey. You can change this manually but it is usually easier and faster just to "forget" the
network and then reconnect.
Instructions for doing this in Windows and Mac OS X are as follows.
Windows 7
1. Go to Control Panel -> Network and Internet -> Network and Sharing Center -> Manage
wireless networks.
2. Right click your WLAN in the list and choose Remove network.
3. Reconnect to the WLAN.
Windows XP
1. Go to Control Panel -> Network Connections and right click Wireless network connection and
choose Properties.
2. Go to the Wireless Networks tab and select your WLAN under Preferred networks and click
Remove.
3. Reconnect to the WLAN.
Mac OS X
1. Go to System Preferences -> Network -> Airport -> Advanced
2. Select your WLAN in the list and click the minus sign to remove it.
3. Reconnect to the WLAN.
5.2.7
How do I connect my game console (XBOX, PS3, etc) to the Internet?
You may need to open ports for the online games to work, often just enabling UPnP which opens
ports automatically does the trick (LAN->UPnP).
If not, you will have to find out which ports and protocols are required and then see the Port
Forwarding page for instructions on how to set it up manually.
5.2.8
I have enabled the SMS functionality, but I still can't send/receive SMS
First make sure that the SMS functionality is supported by both the USB modem on our list, and
that the SIM card is activated by your operator for SMS traffic. The simplest way to know is to try
T h e M o b i le C h o ic e f o r y o u r B r o a d b a n d I n t e r n e t
© 2012 Dovado FZ-LLC
Troubleshooting
23
the USB modem directly in the computer, and see if messages can be sent/received.
Following that, check the USB modem's connection manager in your computer to see which SMS
Service Center (also known as SMS-C) it is using.
Having identified the SMS-C, place that number into the SMS Service Center field in your router,
located under SMS -> Settings. If this does not help, try upgrading the firmware on your USB
modem.
An upgrade of the USB modem firmware might also solve the issue.
5.2.9
My connection speed isn't as good with the router as when I use the
modem in my computer
Check that you are using the EXACT same APN in the router as you are in the dialer software in
the computer.
Check that you are using the USB modem in the exact same angle and position when
conducting speeds tests with/without the router involved.
If you're using a 4G modem, make sure you separate the router and modem at least 55 cm with
USB cable to avoid interference between WLAN and 4G.
For more information on this issue: http://www.dovado.com/4G
Verify with a network cable to a LAN port on the router in case you are using WLAN.
Disconnect all other computers as they might be downloading updates in the background.
Make sure the Dovado router aswell as the USB modem have the latest stable firmwares.
Go to System->Network Settings and deselect Let the router select safe settings. Select the
appropriate preset from the drop-down menu. Save settings and then restart the router.
T h e M o b i le C h o ic e f o r y o u r B r o a d b a n d I n t e r n e t
© 2012 Dovado FZ-LLC
24
6
Reference Manual 6.1.1
Support
Should you require any technical support, please visit http://www.dovado.com/support
For Frequently Asked Questions (FAQ), please visit http://www.dovado.com/faq
If you are unable to find what you are looking for, please contact our support via http://
www.dovado.com/contactsupport
T h e M o b i le C h o ic e f o r y o u r B r o a d b a n d I n t e r n e t
© 2012 Dovado FZ-LLC