1
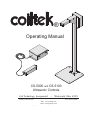
®
coi
ltek
Operating Manual
CS-5000 and CS-5100
Ultrasonic Controls
Coil Technology, Incorporated — Wadsworth, Ohio 44281
Phone: 330-334-1525
Fax: 330-335-4406
Web: www.coiltek.com
e-mail: [email protected]
This Manual can be downloaded from our website.
COILTEK
Operating Manual
CS-5000 SeriesUltrasonic Controlsl
TABLE OF CONTENTS
Page I
INTRODUCTION
3
I I
DESIGN
4
I I I
HOW THE CONTROL WORKS
5
IV
WIRING & INSTALLATION
Mainboard Wiring (Figure 1)
7
Transducer Assembly (Figure 2)
8
V
PROGRAMING SWITCHES
VI
PROGRAMMING
Basic Manual Programming
12
Storing Programs
13
Switching between Programs
14
VII
TROUBLESHOOTING
14
14
VIII
SPECIFICATIONS
Switch Settings (Figure 3)
Default Settings (Table 1)
6-8
9-11
9
12-14
15-16
INTRODUCTION
This manual contains information about the normal installation, operation and
maintenance of COILTEK CS-5000 Series Ultrasonic Controls as used with
SCR (DC) motor controls, variable-frequency AC motor controls, and eddy-current drive controls.
The manual tells how the loop control works, and gives basic setup procedures. Because different drives and motor controls have unique terminal arrangements
and input requirements, it is essential that you consult the specific manual for
any equipment connected to the CS-5000. Maintenance personnel should have
access to those manuals as well as this one.
Our service department stands ready to help with any problems.
You may wish to contact our web site for useful application information.
www.coiltek.com
COILTEK Service Department
Phone: (330) 334-1524 Fax: (330) 335-4406
Or E-Mail:
[email protected]
October 2006
Page DESIGN
COILTEK CS-5000 Series controls operate on 120
or 240-volt ac current. Properly enclosed, it will give
years of reliable service in normal industrial environments. Both CS-5000 and CS-5100 controls come
with a NEMA-12 enclosure.
Auto ranging and easy-to-understand switch settings
simplify setup. To prevent unauthorized changes,
setup controls are on the circuit board inside an
enclosure. No external adjustments are available to
unauthorized personnel.
For special setup and gaging applications, CS-5000
Series controls connect to any IBM-compatible computer through a standard DB-9 RS-232C Serial Port
cable. Menu-driven CSWIN32 software gives access
to all of the many control parameters and functions. The computer can remain interactive with the control
while the system is on line. You can observe the effect
of changes on operation, fine tune the system, then
remove the computer interface. The control retains all
program parameters in memory. The control stores up
to 8 separate control programs. You can also select
from three programs from a remote switch location.
The control is microprocessor based and will not
drift. Periodic adjustments are not necessary after
initial setup. Changeable control parameters are held in a non-volatile memory chip. The stated memory
retention of this device is ten years.
The ultrasonic sensor is rugged and protected by a grid. However, some care is necessary.
Do not:
Allow fluids to contact it.
Paint over it.
Puncture it.
Expose it to temperatures over 180oF.
Page HOW THE CONTROL WORKS
CS24-Series controls monitor distance between a sensor and a target by echolocation, the same principle that bats and porpoises use to find their way in the
dark. The sensor emits a burst of high-frequency sound (50 to 60 kHz.) varying
from 15 to 82 times per second. (Rate depends on target distance.) This burst is
actually a controlled sequence of four separate frequencies. After each burst the
control measures how long it takes until the sensor picks up the echo. Because
sound travels at a known speed, distance equals time. The control senses the distance to a target,
but it can’t tell what that target is. A useful
control must have a limited range of “vision”. It should see only the thing that we want to
control, and that thing should exist as a
target within known limits. If the control sees beyond those limits,
the floor may confuse it, or the wall, or ceiling. The Figure at the
right shows the Range concept and explains the terms used in this
manual. You always know when the sensor detects a target within
the control range. The alignment light on the front glows green. If
the light is red, there is no target within the control range.
coil
tek
Base Distance
13” Minimum
The microprocessor performs calculations that relate target distance and time to an analog or digital control signal. Loop control
is the primary application for CS24 Series controls. The control
monitors the loop of strip material between processing stations
Control
and automatically matches the speed of one process to another. Range
It controls either the PAYOUT or the TAKEUP process by keeping
the drape of material constant. The program contains the control
algorithms necessary to stabilize the control process. The control
can synchronize takeup and payout to iterative processes (run/stop)
so that the equipment runs continuously at the right speed rather
than bumping on and off. The same signals can be used to perform
Lower Set Point
other control functions such as:
Control of winding and payoff tension by diameter
measurement.
Controlling levels of liquids, solids, or stacked materials.
Position control and contour measurement.
Page WIRING
Figure 1 (Opposite) details the wiring connections to the Main Board.
J4 provides optically buffered inputs that duplicate of PreSet Switches #1, & #2 to permit program change from a remote location.
Figure 2 (Page 8) shows cable connections to the Range (Sensor) board.
INSTALLATION
Motor Control Settings
Power Connections
IMPORTANT: Set the AC Power Switch for 115 or 230 VAC.
Use # 16 ga wire to the mains. The control should remain powered at all times
during system operation. That is, if the system switches power to the motor or
drive control during standby, run a separate unswitched power source to the Coiltek
control. The control is fused for 1 Amp.
Control Wiring
IMPORTANT! Check the reference signal required by the motor control: 0-10 vdc, 4-20
ma, polarity and maximum voltage or current. INCORRECT SIGNAL POLARITY CAN
DAMAGE BOTH MOTOR CONTROL AND CS24. Make sure the drive operates normally
before connecting the Coiltek control. Minimum speed setting should be zero (full CCW)
and the maximum speed set to limit motor speed to its rated (not overspeed) rpm.
Most DC SCR controls take a 0-10 vdc signal that is positive with respect to common. Eddy-current drives often require a negative signal. Regenerative SCR controls take
either polarity to control the direction of motor rotation. Use the positive reference
setup for regenerative drives. Two diagrams below show basic hookups for positive
and negative reference controls. Follow wire size and shielding recommendations
of drive manufacturer.
Page WIRING CS-5000 Series Controls
3
X
0
0
B
0
X
X
C
0
0
X
GREEN
A
Cable to Range Board
BROWN
2
YELLOW
PURPLE
BLACK
BLUE
WHITE
RED
ORANGE
1
Optional Setup
for Remote
Selection of
Preset Programs
1
2
3
A
B
NC
C
Control
Relay
L2
L1
AC Power
120 or 240 vac
(Set Power Switch)
RESET
SIGNAL (4-20mA)
COMMON
SIGNAL (0-10vdc)
JOG (0-12vdc)
RESET
Near
Relay
Earth Ground
Far
Relay
The above circuit is available as a
prepackaged 3CPO Option.
More information about multiple
program presets is available on
our website. www.coiltek.com
Note: NEAR and FAR relays are ON when target is in range.
Relays release when target moves out of range.
Figure 1
Page GND
Sensitivity
Adjustment
HV
Transformer and
Choke
DO NOT
ATTEMPT
ADJUSTMENT!
PC Board
Locking Clip
NOTE: WHEN CONNECTING CABLE , ORIENT
CONNECTOR SO THAT LOCKING CLIP
ENGAGES RAMP AS SHOWN ABOVE.
N
Cable to Processor Board
CB-5000R
Transducer Rangeboard Assembly
NOTE: If your unit was purchased on or after May 2007, you may have the
RB-2006R Rangeboard Assembly. See next page.
Figure 2A
Page GREEN
PURPLE
YELLOW
BLUE
BLACK
ORANGE
RED
WHITE
Cable
OW
Connector
BR
G REEN
Ramp
BLUE
YELLOW
SW1
Both
Switches
OFF
GND
HV
Transformer and
Choke
DO NOT
ATTEMPT
ADJUSTMENT!
Sensitivity
Adjustment
PC Board
Locking Clip
OW
GREEN
PURPLE
YELLOW
NOTE: WHEN CONNECTING CABLE , ORIENT
CONNECTOR SO THAT LOCKING CLIP
ENGAGES RAMP AS SHOWN ABOVE.
BLUE
BLACK
ORANGE
RED
WHITE
Cable
BR
Connector
N
GREEN
Ramp
BLUE
YELLOW
SW1
Both
Switches
OFF
Cable to Processor Board
RB-2006R
Transducer Rangeboard Assembly
Introduced MAY 2007
Figure 2B
Page CONTROL
RANGE
SW1
SW2
ON
1 2 3 4 5 6 7 8
OFF
OFFSET
SETTINGS
Open RS-232 Port
5 6 7 8
5 6 7 8
5 inches
5 6 7 8
15 inches
5 6 7 8
5 6 7 8
25 inches
10inches
1 2 3
20 inches
1 2 3
30 inches
5 6 7 8
5 6 7 8
35 inches
1 2 3
40 inches
5 6 7 8
5 6 7 8
45 inches
1 2 3
50 inches
5 6 7 8
5 6 7 8
55 inches
1 2 3
60 inches
5 6 7 8
5 6 7 8
65 inches
1 2 3
70 inches
5 6 7 8
5 6 7 8
1 2 3
Switch 1 is OFF
Switch 2 is ON
NOTE
1 2 3
1 2
Figure 3
Page 10
Offset #1
Offset #2
Offset #3
PreSet #1
PreSet #2
PreSet #3
TEST
Master / Slave
PayOut / TakeUp
Linear / Adaptive
HOLD
Calibrate / RUN
40 inches
20 inches
10 inches
5 inches
SWITCH SETTINGS
CS-5000 Series
0.0%
2.0%
5.7%
9.6%
13.5%
17.5%
21.6%
25.6%
PRESET
PROGRAMS
4 5 6
4 5 6
4 5 6
4 5 6
4 5 6
4 5 6
4 5 6
4 5 6
Program 0
Program 1
Program 2
Program 3
Program 4
Program 5
Program 6
Program 7
PROGRAMING SWITCHES
CS-5000 Series Controls use two blocks of DIP switches for setup. Each block has
eight switches. Blocks carry the labels SW1 and SW2. Figure 3 (Page9) shows
the position, label and function of each switch. IMPORTANT NOTE! With the exception of the CAL/RUN switch,the
processor only recognizes switch changes after it is RESET. Cycle
power momentarily, or briefly connect the RESET and COMMON output
terminals. This is like pressing the Enter key on your computer.
SW 1
Payout — TakeUp: In PayOut (OFF), the output voltage increases as the target moves toward the
transducer. In TakeUp (ON), the output voltage decreases as the target moves
toward the transducer. Linear — Adaptive: In Linear (OFF), the output voltage is linearly proportional to the distance between
sensor and target.
In Adaptive (ON), a control algorithm holds a loop of moving strip material at the
middle of the control range (±10% ) to compensate for the buildup (or depletion)
of material in winding applications. HOLD: With the HOLD switch OFF, output voltage drops to zero if the control fails to see
the target within a preset number of samples. (Default is 8 samples.) With HOLD
switch ON, the output voltage stays at the last-seen value and does not drop to
zero. The HOLD function helps when targets swing outside of the sensing pattern
or are marginally reflective.
Calibrate — RUN: In Calibrate (OFF) position, the control automatically seeks the target closest to
the transducer and sets its position as the Sensing Limit. The calibration target
must be farther away than 13 inches + the control range and
closer than 360 inches. Returned to RUN position, the switch
locks the Sensing Limit into memory. This setting stays in
memory until the control is recalibrated. Memory does not
depend on power. The parameters are stored in one of eight
13"
program locations. Which one depends upon the setting
of the PreSet switches (SW2) when the Calibrate — Run
switch returns to the RUN position (ON). The parameters
stored are:
Control Range
Total
Near
Relay
Trip
Point
Base
Cone
Diameter
Far Relay
Trip Point
Target
PayOut — TakeUp
Linear — Adaptive
HOLD
Range settings
Offset settings
Position of the Sensing Limit
RANGE: Four switches(5, 6, 7 & 8), used in combination set up 15 standard control ranges, from 5 inches to 70
inches. Combinations are additive as shown in Figure1.
The RANGE switches effect only Program #0. If any Preset
switches are ON, Preset Programs (1 through 7) take precedence over the range switches. If Preset Programs are
in use, (see SW2 settings) at least one range switch should
be ON.
Page 11
Computer Connection:
To open the RS-232 port for computer programming, set all four Range switches OFF and RESET
POWER. The port is now open for serial communication with any IBM compatible personal computer
loaded with Coiltek CSWIN32 Control Software.
The CSWIN32 Software can be downloaded from
our website. www.coiltek.com
NOTE. Unless a computer is connected, at least one range switch should remain ON to
close the port and protect the unit from noise.
WARNING! All four switches can be ON at the same time to create a 75-inch range provided the TEST switch (on SW2) is OFF. Applying power with all four Range switches and
the TEST switch ON will erase the active program and substitute factory default settings
into memory. Look under TROUBLESHOOTING on Page 14.
SW 2
Offset #1, #2, #3:
Some drive systems do not react until the control voltage reaches a certain
value. (This problem often shows up in payout applications.) These switches
introduce offset bias — equivalent to a minimum speed setting. When the
control signals the drive to start, its output voltage jumps from 0 to a preset
PAYOUT MODE
Control Range
100%
Output Voltage
Output Voltage
100%
TAKEUP MODE
Control Range
50%
0%
50%
0%
Distance from Sensor
13.5% Offset
Distance from Sensor
5.7% Offset
0% Offset
percentage of the maximum signal output voltage (set by the Output Level
Adjust). Figure 1 (Page 8) gives the offset value settings.
PreSet #1, #2, #3 CS-5000 Series controls store up to seven operating programs. Figure 1
(Page 8) shows switch settings associated with the programs. Any setting
other than 0, lets the stored program superceed all other switch settings. You
can transfer programs manually-set parameters from Program 0 into preset
locations, or use Coiltek CSWIN32 computer software to store parameters
for each program. TEST:
This switch is used to reset default parameters (See RANGE SWITCHES)
and for factory tests and servicing. With TEST switch ON and at least one
(BUT NOT ALL) Range switches ON, the control runs a self-test. SWITCH
OUTPUTS (CONTROL, NEAR, & FAR) turn ON and OFF in sequence.
Master — Slave:
Normal setting is OFF: Master. When multiple controls are connected for
multiplexed operation, set this switch is in Slave position on all units. See
Figure 3 (Page 16).
Page 12
PROGRAMMING
CAUTION! When connecting the Coiltek Control to a motor control for the first time, DISABLE THE MOTOR! Switch the drive to STANDBY, disconnect power to the motor control,
or disconnect the signal input wire from the Coiltek control.
Unless ordered with a special preset program, CS-5000 Series controls are shipped with
default values loaded into preset programs #0 through #7. Default values are listed in
Table I. Any special factory loaded program will be placed in Program #7 (all three Preset
switches ON)
If your unit has a factory loaded program, be careful that you DO NOT inadvertently perform
the RESET function with all three Preset Switches ON.
BASIC MANUAL PROGRAMMING
Step 1.
Set to Program #0 by turning PreSet Switches #1, #2, and #3 OFF.
Step 2. Set PayOut — TakeUp switch.
If you’re familiar with the control, set the OUT/UP switch
to match your application. If working with the control
for the first time, set the switch to PayOUT(OFF). It’s
easier to adjust output voltage levels. If your application requires the TakeUP mode, remember to change
the switch before you put the unit on line! Step 3. Set LINear — ADAPtive switch to Linear (OFF).
Step 4. Set HOLD switch OFF
Step 5. Set desired control range. We suggest ranges from 10 to 25 inches for normal loop control applications. Do not use
ranges greater than 40 inches with the 54-inch CS24-5000 Stand.
Step 6. Reset Processor.
Step 7. Locate Control Range.
Set a target at the SENSING LIMIT (the FAR relay limit point). With the
standard 54-inch sensor stand this point is usually about 4 inches from
the floor. A small box makes a good target.
Now set the CAL/RUN switch to the Calibrate (OFF) position. The transducer clicks more slowly, and the alignment light turns red. After a
short time (less than a minute) the alignment light will turn green
to let you know that the control has locked on to your target and
set the SENSING LIMIT. Return DIP switch #4 to the ON position. The transducer will resume its rapid clicking.
The BASE DISTANCE will be the SENSING LIMIT less the
CONTROL RANGE you set in Step 1. Cycle power or jump RESET terminal to COMMON.
The processor now recognizes the switch settings.
Page 13
ERROR INDICATION. If the ALIGNMENT light flashes rhythmically from red to
green, there is a program error. The BASE DISTANCE (the top of the control range)
must be greater than 13 inches from the sensor. Recheck the Range Setting. Return to Step 5 and alter the Control Range.
Step 8. Check Settings.
Remove the target. The alignment light will turn red. Run your hand up and down under
the sensor. The alignment light should turn green as your hand moves above the SENSING LIMIT, stay green as you move through the CONTROL RANGE, then turn red as your
hand moves above the BASE DISTANCE.
STORING PROGRAMS
While the control will operate continuously in Program #0, all Range and function switches
remain operable. If someone changes a switch, the program will change the next time the
processor RESETS. To secure the program and to take advantage of the programming
capability, lock the “working” parameters into Program addresses #1 through #7. That way,
you can experiment in Program #0, yet always return to one of the seven programs you’ve
stored. Step 1. If you need to modify the program— change to TakeUP, add Offset, etc— do it now before
you store the program.
Step 2.
Reset the Processor
Step 3.
Cycle power or jump RESET terminal to COMMON.
The processor now recognizes that you’re in program
#0 and all other switch settings.
Place the temporary target Set the CAL/RUN Switch to
Calibrate. When the control locks on the target (e.g., the
alignment light turns green), DO NOT touch the CAL/RUN
switch.
Step 4.
Select one of the seven Program Addresses using the three
PreSet switches .Program #3 Shown
Step 5.
Now return the Calibrate — RUN switch to RUN. This act stores
all parameters in the selected program.
Once stored, PreSet Programs switches dominate all other switch
settings. To set alternate programs, return to Step 1. Repeat the procedures storing each setup to different program address.
More elaborate setups can be entered directly to the program addresses via computer and Coiltek
Software. Procedures are covered in the Software Manual. Page 14
SWITCHING BETWEEN PROGRAMS
When changing from one preset program to another remember —
Reset the Processor
Cycle power or jump RESET terminal to COMMON.
The processor now recognizes the program switch
change.
TROUBLESHOOTING
RELOADING DEFAULT CONDITIONS
If a system that includes a CS-5000 Series control suddenly acts up, the first task is to isolating the fault.
Is it a:
Processor or Program glitch,
Motor Control failure,
Ground fault, or
failed Coiltek Control.
A simple procedure clears any of the Program addresses #0
to #7 and substitutes default conditions. To reload defaults,
select the program you wish to clear using the three PreSet
switches. Set all four Range switches plus the TEST switch
ON. position.
Then
Reset the Processor
Cycle power or jump RESET terminal to COMMON.
The processor now clears the preset program and substitutes the default parameters. (See Table 1.)
Page 15
SPECIFICATIONS
Range
13 inches to 360 inches.
Angle of Vision
The sensor views a conical area with a beam angle of 17.3° (8.6° from center
line. The diameter of the cone (d) as a function of distance from the sensor
(y) is d ≈ 0.3·y.
Sampling and Averaging 15 to 82 samples per second depending on distance between transducer
and target. In default mode, the control computes a running average of
8 samples and recognizes an out-of-range condition after 10 “misses.” CSWIN32 software can alter these parameters within the limits of 4 to 255
to affect integration time.
The distance between sensor and target over which the control output signal
varies from minimum to maximum. With manual setup procedures, 5 to
75 inches in 5-inch increments. With computer, the user can program the
control range from 1 to 347 inches in 1-inch increments.
Resolution Basic resolution of the
instrument is
±0.0068 inches (±0.171
mm). However, resolution
depends upon
the speed of
sound which
varies with
temperature.
The following
graph plots
th e ch a n g e
Temperature (F)
in resolution
(inches/µsec) as a function of temperature.
This graph plots resolution, not accuracy. Absolute distance between sensing head & target can be inaccurate(4). However, relative shifts in target
position will be correct within the resolution shown in the plot. Errors in
distance between sensor and target depend upon the surface of the target. If the target surface remains constant, measurement of relative motion of
the target will be accurate within the stated resolution.
Resolution (+/- inch)
Control Range OUTPUTS
Analog:
Control Signal The principle control output is an electrically isolated dc voltage signal. It connects directly to any variable-speed drive or control system. An OUTPUT ADJUST
potentiometer sets the output range from 0-1 to 0-12 volts DC. Both CONTROL
SIGNAL and JOG outputs (below) are positive with respect to COMMON.
Jog A dc voltage, set from 0-12 vdc by JOG ADJUST potentiometer provides a constant
voltage reference .
COMMON for both SIGNAL and JOG outputs is electrically isolated from earth
ground and from the 120/240 V ac power line.
Page 16
Status Outputs:
Three Form-C relay outputs provide ON/OFF control functions. Near Output
The near relay is normally ON. It trips OFF when a target is closer than the Base
Distance. Far Output
The far relay is normally ON. It trips OFF when no target is present within the
control range. Control Output
This output is normally inactive. A computer, outfitted with Coiltek CSWIN32 control
software, can program the CONTROL OUTPUT to trip ON at one target distance
and OFF at another.
Remote Inputs: Three optically isolated input terminals (J4) duplicate physical switches on the main board. Shorting any of these terminals to COM (COMMON) has the following effect:
1
2
Turns Preset #1 switch ON
Turns Preset #2 switch ON
R/C
Turns CAL/RUN switch OFF
Program Select
Input teminals duplicate the Program Preset switches to allow remote selection of
three of the eight preset programs held in memory.
Reset Momentary contact of this terminal to COMMON resets the microprocessor— the
same effect as cycling power.
Provisions for Non-Standard Functions
A 20-pin header provides auxilliary input and output functions. These functions are used on Coiltek special
systems and are available for advanced system design. Full details of these functions and their uses are
beyond the scope of this manual. For details, consult with Coiltek Engineering. Functions include:
Three multiplexed A/D converter inputs.
Four unassigned digital I/O lines. Secondary RS-232 port for data acquisition or multiplexing.
When multiplexing two or more controls, slave units (designated by the position of the Master
—Slave switch) are daisy-chained to the master through this second RS-232 port. Slave units
respond to the master unit in sequence; reporting serial number and data.
Page 17