1
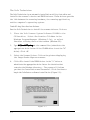
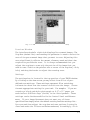
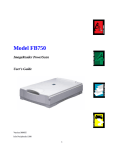
ImageReader Express
Compact Color Flatbed Scanner
User’s Guide
P/N DOC-FB4B
799250
Info
580 Division Street
Campbell CA, 95008
Phone (408) 538-2500 • Fax (408) 538-2599
Copyright © 1996 – 1997 All rights reserved. No portion of this
document may be reproduced without prior written authorization.
The Info Technician
Copyright © 1994 – 1997 All Rights Reserved
The material in this document is for informational purposes only and is
subject to change without notice. The manufacturer assumes no
responsibility for errors or omissions in this document, nor any
damages resulting from the use of the information contained herein.
Info and ImageReader Express are trademarks of Info Peripherals. Any
other trademarks, registration marks, or brand names mentioned
within this publication are the property of their respective owners.
i
Table of Contents
Chapter 1
Introduction .....................................
Welcome ........................................
Using this manual ............................
Assistance .................................
What is TWAIN? ...................................
A note about application software ................
Package contents .................................
System requirements ...............................
1-1
1-1
1-1
1-1
1-1
1-2
1-3
1-3
Chapter 2
Scanner Installation and Info Technician ...............
Installation .......................................
Connecting the scanner .......................
Using the pass-through ........................
The Info Technician .................................
Installing the device driver ......................
Installing the application software .......................
2-1
2-1
2-1
2-1
2-2
2-2
2-2
Chapter 3
Using your scanner ...............................
Scanning features and controls ........................
Hardware features ...........................
Software controls ............................
Scanning images ..................................
Select the TWAIN source ......................
The scanning process .........................
Other scanning features .......................
3-1
3-1
3-1
3-2
3-6
3-8
3-9
3-9
Appendix A
GeneralScanningTips................................................................A-1
Troubleshooting ................................. A-1
PrinterProblems................................................................A-2
ErrorMessages...................................................................A-3
Scanner care ............................... A-5
FCC radio frequency interference statement ............... A-5
Limited two year warranty ............................ A-6
i
iii
Chapter 1
Introduction
Welcome
Thank you for purchasing the Info ImageReader Express Scanner. This
product is the result of our efforts to develop high technology
computer peripherals that are easy to use, affordably priced, and that
enhance your computing experience.
Using this manual
This manual includes complete instructions for scanner installation,
use, and maintenance. Note that “use,” in this context, refers to
scanner operation independent of the task performed with the
application software. This guide is organized in a “do as you read”
format. For best results, perform the tasks as they are presented.
This manual assumes that you have a basic understanding of the DOS
and Windows operating system. As a convention, this guide presents
all references to guide names or sections in italics, and commands
you must type at a command line are presented in a different typeface.
Assistance
If you experience difficulties and cannot find solutions within this
guide, please contact Info’s Technical Support Department at (800)
777-3280, Monday through Friday, between 8:00 AM and 4:30 PM,
Pacific time. If you wish, you may fax questions to (408) 538-2577, or
email questions to [email protected]. Provide a fax number or
email address for return contact. We maintain a BBS at (408) 5382580 that contains the latest updates to our software, as well as a
web site at www.infoconnection.com, and fax back system at (408)
538-2585.
What is TWAIN?
TWAIN is the interface that links the scanner with scanning software
applications. TWAIN is an industry standard that enables you to use
the ImageReader with any TWAIN-compliant software application.
1-1
With the introduction of Windows 95, the TWAIN specification has
been overhauled to take advantage of the 32-bit architecture. When
you install our scanner driver under Windows 95, you will have two
TWAIN sources — one for 16-bit applications and one for 32-bit
applications. Use the following as a guide to select the appropriate
source.
16-bit applications are legacy Windows 3.x programs that you are
running under Windows 95. InfoCenter and Image Pals 2 GO!
image editor are 16-bit applications.
32-bit applications are programs specifically designed for
Windows 95, to take advantage of performance enhancements
provided by the new architecture.
You may experience scanning problems if you do not use the
appropriate source before scanning.
There is no change to the TWAIN source for Windows 3.x users. Only
the 16-bit TWAIN source is installed.
A note about application software
The scanner hardware by itself is not very useful. It takes a combination
of the scanner hardware and application software to perform any task.
Before you begin scanning, you need to choose the appropriate
application to use for the task at hand. Please read this section to gain
an understanding of the types of scanning software there are.
Scanning software generally falls into two groups, Graphics (image
editing), or OCR (Optical Character Recognition). Each type has
specific features designed to address the technical challenges faced in
the scanning of graphics or of text.
Graphics: Software provides the user with image editing tools for
performing extensive modifications to art, photographs, or other
continuous tone images. While having the ability to scan text, unlike
OCR software it is not designed to specifically identify individual
characters. Any image scanned using a graphics program can only be
saved in a graphics file format (i.e. TIFF or JPEG). It cannot be saved as
an editable text file. Your scanner package contains Image Pals 2GO!
image editing software to facilitate your image editing requirements.
1-2
OCR: Software in this category is designed to recognize alphanumeric
characters in preparation for export to word processing and desktop
publishing applications. In other terms, it creates text files. OCR
software will not provide image editing capabilities. If there is no
intention of editing a given piece of text (with or without graphics), it
may be simpler to scan and save it as a graphic. OCR is one of many
scanning control features included in the InfoCenter application
software.
Additional types of applications are available that offer solutions for
special or unique tasks. These include document storage, form
scanning, fax utilities, copy utilities, custom screen saver creation,
photo album creation, and so on. If applications are intended to link
directly to the scanning device, look for the TWAIN-compliant
specification. If compliant, they are compatible with Info ImageReader
scanners.
Package contents
Verify that all materials have been received before setting up and using
your scanner. This package contains:
• ImageReader Express scanner
• Interface cable
• Power adapter
• Quick Start Guide
• This User’s Guide
• Info’s System Software CD-ROM including installation
and application software
• Scanner registration card
System requirements
System requirements are largely dependent on the “work” performed.
By work, we are referring to the task or operation performed using the
scanner in conjunction with application software.
1-3
Because scanners are capable of inputting large amounts of data in
relatively short periods of time, they commonly push computer
systems to the limits of their capabilities. Before beginning any
scanning task or operation, carefully consider your system’s
processing capabilities, especially processor speed, RAM, and
available hard disk space. OCR processes, fax operations, and the
processing of simple black & white graphics are least demanding.
High resolution scanning of large images in full color creates an
extreme demand for processor time and memory.
When you are scanning with the TWAIN interface, the number labeled
image size (calculated in bytes) provides the working file size that is
the result of the selected scanning mode, resolution, and image size.
Take careful note of this information.
Minimum and recommended system requirements are:
•
486 processor or 100% compatible
•
DOS 5.0 or later with Windows 3.1x, or higher
•
CD-ROM drive
•
8 MB RAM minimum; 16 MB RAM recommended
•
10 MB available hard disk space; 50 MB recommended
•
VGA/SVGA monitor with at least 256 color capability, 24 Bit True
Color recommended
•
Enhanced Parallel port
1-4
Chapter 2
Scanner Installation and Info Technician
Installation
Installation of the scanner is comprised of few steps and designed to
be as easy as possible. The following instructions walk you through
connecting the scanner and cable. It is important to note that both the
scanning hardware and its supporting software (e.g. Info Technician
and the included applications) must be installed in order for the
scanner to operate.
Connecting the scanner
Attach the female connector of the interface cable to the port on the
scanner labeled Host. Place the scanner unit in the desired location,
and route the interface cable to the computer in such a way as to
assure it is safe from possible damage due to pinching or crimping.
Insert the male connector on the cable into the parallel port on your
computer. The cable can only be inserted one way — do not force a
connection.
Important: The scanner will not function until the device driver is
installed. This is loaded when you run the Info Technician, described
laterin thischapter.
Using the pass-through
This scanner is equipped with an additional port for connecting your
printer or other parallel device. This way, two devices can share the
parallel port, and you won’t be inconvenienced by having to switch
cables when you want to use one or the other.
To use the pass-through port, connect the printer’s cable to the port
labeled Printer on the back of the scanner. Both the scanner and the
printer are now sharing the parallel port and can be used at any time,
except in tandem.
2-1
The Info Technician
The Info Technician is an automatic installation utility that edits and
installs the scanner’s device and TWAIN drivers. These drivers provide
the link between the scanning hardware, the scanning application,
and the computer’s operating system.
Installing the device driver
Run the Info Technician to install the scanner drivers. To do so:
1. Place the Info Scanner System Software CD-ROM in the
CD Rom drive. Select Run from the File Menu in the
Windows Program Manager (Windows 3.1x), or select
Run after clicking Start on the taskbar (Windows 95).
2. Type d:\install\setup at the command line (substitute the
appropriate drive letter if the CD-ROM drive is not the “d”
drive). Click OK.
3. Select the Scanner Driver: Click on the picture displaying
the Image Reader Express scanner.
4. Click OK to install the TWAIN driver in the “c” drive or
substitute the appropriate drive letter for the drive that
contains the Windows directory. The screen will inform
you that the Installation was Successful. Click Continue to
begin the InfoCenter software installation (Figure 2.1).
Figure. 2.1
2-2
Installing the application software
When the hardware and device driver software are installed, install the
InfoCenter application software from the System Software CD. Please
refer to the Quick Start Guide for InfoCenter and Image Pals 2 GO!
Image Editor installation instructions. Manuals for both applications
are also included on the Info System Software CD.
Perform Utility Diagnostic
After installing the device driver and application software, check that
your driver is installed at the correct port address by performing a
scanner utility diagnostic. This step will determine if the scanner
is recognized by the computer
1.
Select Info Tech from the program manager in Windows 3.1x or
from the Start menu in Windows 95.
2. From Info Tech select Scanner Utility check the EPP box and click
on Verify Port in the Utility window.
(Figure 2.2)
3. The diagnostic will search for and connect to correct port ad
dress. If the diagnostic is successful you will receive the following
message (figure 2.3). Click O.K. and perform a test scan.
figure 2.3
2-3
If the diagnostic is unsuccessful you will receive the following message
(fig. 2.3) which most commonly indicates that you need to follow the directions below to change the Parallel port option in your computer’s
BIOS setup.
figure 2.3
In order to ensure the best results possible with your ImageReader
Express scanner, you will need to select EPP (Enhanced Parallel Port)
mode in your computer’s BIOS or CMOS settings - see instructions
below.
Enhanced Parallel Port is supported by late model motherboards (i.e.
VLB and PCI). Contact your computer manufacturer if you are unsure
about whether or not your system supports the EPP mode. If your
system does not support the enhanced parallel mode, contact Info
Peripherals Inc. at (408) 538-2500 ext. 2534 to order an EPP interface
card.
Important!
Changing your BIOS or CMOS settings can render your computer
system inoperable. Use caution to ensure that only the Parallel mode
is changed (this will effect you parallel port only). Please consult your
computer hardware manual for instructions specific to your system.
To Change Your Parallel Port Mode Setting (in most systems):
1. Restart your computer and when in start up mode press your
delete key, this will take you to the BIOS Menu.
2. Locate the Parallel Port option, it will tell you what address the
parallel port is set for and the mode of the port.
3. Read your screen for instructions on how to change settings,
and change your parallel port setting to EPP.
4. Go back to the main menu.
5. Exit and save changes.
If you encounter difficulty changing your BIOS setting, please
refer to your computer manual or contact your computer
manufacturer.
2-4
2-5
Chapter 3
Using your scanner
Scanning features and controls
Before scanning images, it is important to understand the scanner’s
basic hardware features as well as the software controls.
Hardware features
Power
The scanner requires its own power source (use the adapter provided).
There is no on/off power switch on the unit. When the scanner is
plugged in to a power source, its power is on and the indicator light is lit.
Please note: The power light may remain dimly lit even when it is not
plugged into a power supply because it receives a small portion of its
power from the computer. The scanner is activated when first powered
on or when you choose Acquire. By default, the lamp is programmed to
remain on even when the scanner is not in use - indicating that power is
available. You can use the Lamp Control section contained in the
Scanner Utility to adjust the amount of time the scanning light remains
on when the scanner is not in use.
To adjust the Lamp Control options select Info Tech > Scanner Utility
from your Programs menu and click on the Lamp Control tab.
Figure 3.1
3-1
Paper loading
Place the document to be scanned face down on the scanning glass.
Books, magazines and other 3-dimensional objects can be easily
scanned as well, by laying them on the scanning glass. With bound
materials and other objects, the cover is designed to lift up at the
hinge to accommodate the item being scanned. Do not force the cover
down when scanning these items, it may break or scratch the glass.
Paper size
The scanner will handle documents ranging in size from that of a postage
stamp to a letter size document (8.5" x 11”), and A4 (8.5” x 11.7”).
Paper condition
If the sheet to be scanned has any of the following conditions, please
take the following precautions before inserting.
• Remove paper clips, pins or staples
• Let wet paper dry first
• Avoid scanning documents with correction fluid (dry or otherwise)
This avoids scratching or marring the scanning glass, and ensures
years of beautiful scans.
Software controls
The Info Technician loads a TWAIN-compliant driver. This driver
functions as a “user interface” linking the scanning hardware and
application software.
Scanning is initiated from within the application software. All scanning
activities are controlled from the user interface window titled Flatbed
Scanner. The Flatbed Scanner window’s Pre-scan command is used
to preview the image in order to adjust the scanning area, contrast,
and intensity before executing the actual “working” scan. The actual
scan is then placed into the application software for viewing, editing,
printing, or storage. In this section, the components and controls of
the Flatbed Scanner window are explained.
3-2
Fig. 3.2 TWAIN Interface (Using Image Pals 2 GO! software)
Preview Window
The interface window’s right side displays Pre-scanned images. The
Crop Box (dashed line) surrounding the perimeter is used to select the
area of the pre-scanned image that you want to scan. Adjusting this
area significantly effects the amount of memory used and thus time
required to perform the scan. It is always recommended that you
adjust the crop box to scan only the portion of the image that you
need to scan. Position the pointer over a corner of the crop box, click,
hold, and drag the border to adjust the scanning area.
Settings
The settings box is located in the top portion of your TWAIN window.
By clicking on the down arrow you may select from a list of predefined scan settings. These settings represent files containing
information about how the scanner should scan the image. Choose
the most appropriate setting for your task. For example: If you are
scanning a black and white photograph on 8.5” x 11” paper you
would select B/W Photo Page (letter) in the Settings menu. These
settings can be further modified in the Control Panel and Enhance
menu. If your image/document does not meet any of these
specifications simply select the default setting from the settings list.
Pre-scan and then adjust the crop box and scan options (located in
Panel and under the Filters and Advanced menus) accordingly. Click
3-3
on Help in the top portion of the window for more information about
scan settings.
Gamma
Gamma refers to the numerical value for the level of intensity or
brightness in the tones of color or grayscale images. As the number
increases the tonal intensity increases. Your TWAIN interface allows
you to make adjustments for two types of gamma settings. Image
Gamma refers to the gamma values that directly affect the outcome
of the scan and will be saved with the rest of your scanned image
information. This differs from Monitor Gamma which defines how the
tones in an image will be displayed on your monitor. Monitor Gamma
can be adjusted in the Advanced menu located at the top of the
TWAIN window.
If the color or tones in your Pre-scanned image are off balance, using
the Gamma controls to make adjustments to the pre-scanned image
will save you time correcting the image later in an editing application.
The Settings menu located above the preview window limits you to
Gamma 1.0 or Gamma 1.5 for scanning color or grayscale images.
However, The Image Gamma levels for each RGB channel can be
balanced individually in the Enhance window (located under
Advanced). These changes are effective immediately, and are shown
in your pre-scanned image.
Image Information
Information about your pre-scanned image is displayed in boxes along
the bottom of your TWAIN window. Use this information as a guide
when determining what scan mode and resolution you want to scan
at. The information as displayed from left to right is as follows:
• Cursor Position Displays the coordinates of your cursor
position as it appears on the image.
• Scan Area Coordinates Displays the coordinates at which
the top left corner of the cropping box originates.
• Scan Area Dimensions Displays the dimensions of the image
in inches or centimeters.
3-4
• Image Size Displays the amount of memory that the image
will use: Image size = scan mode x resolution x scan area.
Tip: Image size can be reduced by cropping pre-scanned
image.
• Image Measurement Displays unit of image measurement.
Can be converted between inches or centimeters by selecting
Advanced > Preferences.
Pre-scan
A Pre-scan is a low resolution scan of your image displayed in the
TWAIN interface window only. You do a Pre-scan to make your
selections for size, and to make contrast and intensity adjustments.
Scan
A scan is the actual image captured at the selected settings. The scan
does not appear in the preview window, it is displayed in the
application’s workspace.
Panel
View your scanning preferences by clicking the
Panel button located in the left portion of your
interface window. The scanning control
panel (figure 3-3) will appear. This panel allows
you to make all of the image adjustments described in the following four pages.
Figure 3.3
Scan Mode
Your scanning mode options are RGB Color, Gray Scale, and black
and white. These selections indicate the amount of data you want to
capture for the image. Follow these guidelines when selecting a scan
mode from the control panel:
Figure 3.4
3-5
RGB Color: Scan color images and photographs in RGB Color mode
when you want to capture and reproduce all the color data. To manage
file sizes efficiently, take careful note of the guidelines for resolution
(described later) when scanning in RGB. The combination of RGB Color
and a high dpi can create an extremely large file size, as well as take
several minutes to scan.
Gray Scale: What is referred to as black and white photographs are
actually gray scale images. Different shades of gray are used to make
up the whole picture. When you scan these types of images, you want
to scan using the gray scale mode. Also use this mode to convert color
photographs to black and white. Scanning a color photograph in gray
scale will capture the continuous tones.
B/W: This mode captures black and white only. Use this mode when
scanning single color (usually black) images, such as drawings or
sketches, business logos, or text.
Resolution
Resolution is measured in dots per inch (dpi). The higher the resolution
is set, the more detail in your image is captured. There are some
guidelines you should follow when determining the resolution to
scan at..
On-line graphics: If you are scanning an image to be used on-line, such
as the Internet, a BBS or in a multimedia presentation, you needn’t
scan any higher than 100 dpi. This is because a monitor’s resolution is
either 72 dpi (Mac), or 96 or 120 dpi (PC), and is not capable of
displaying a higher resolution. Images scanned at 300 dpi and viewed
on a monitor will appear three times as large as the actual image. This
enlargement results because your monitor displays images in a 1:1 ratio
of pixels (or dots), meaning one dot in the image equals one dot onscreen. At 300 dpi, the image contains 3 times as many dots when
displayed on the monitor.
Printed images: If you plan to print the images you scan, set the
scanning resolution no higher than equal to the resolution of your
printer, typically 300 dpi or 600 dpi. This will avoid sizing distortions in
your printed image.
3-6
Faxing images: Any image you intend to fax from a PC-based fax
modem should be scanned at 200 dpi. Fax machines only receive
images at 200 dpi, and some programs may fault if you try to scan at
higher resolutions.
Refer to the chart below for resolution setting guidelines.
IC = InfoCenter, IPG = Image Pals GO!
Function
Application Scan Mode, Resolution
Scan ‘n Fax
OCR
Color Picture on Monitor
Color Picture to Print
Copier Function
Document Images
Word Processor, Scan to Clipboard
High Resolution Images
Color Image Editing
IC
IC
IC or IPG
IPG
IC
IC
IC
IPG
IPG
B&W line art, 200 DPI
B&W line art, 300 DPI
True Color, 72-100 DPI
True Color, 150 DPI
Color, 200 DPI
Color, GS, B&W, 72 DPI
Color, GS, B&W, 72 DPI
Color, up to 4800 DPI
Color, up to 4800 DPI
Scale
Scaling allows you to specify an image size before scanning. This option is useful because it allows you to control the image file size - thus
minimize scanning time and occupied disk space. It also eliminates
the neccesity to change the images size after it is transferred into another application.
Inverse
This command reverses an image’s display. Black pixels will be white,
and white pixels will become black. The resulting image is like a photo
negative of the original.
Brightness and
Contrast
These controls adjust the brightness and contrast of the image you
are about to scan. Increasing the contrast will sharpen the image by
excagerating the images colors or tones. Increase the brightness to
lighten the image and compensate for the contrast selection.
Experiment with these controls to determine the look you prefer.
Usually these controls are adjusted together in a 2:1 ratio of
brightness to contrast.
3-7
Scanning images
Scanning images with your ImageReader scanner is a relatively simple
process. The steps below walk you through selecting the appropriate
TWAIN source to use, and then scanning an image or document. If
you experience problems during any of these steps, please refer to
the appendix, Troubleshooting. You may need to modify the
configuration.
Select the TWAIN source
Before you can scan with your ImageReader, you need to tell the
application what scanner you are using. The scanner is referred to as
the “source,” and you need to select the appropriate source for the
application you are using.
Note: In some cases, an application’s User Guide may direct you to
use the application’s custom “ImageReader” driver. In these cases,
the instructions provided below are inappropriate for that application.
Refer to that application’s user guide for scanning instructions.
1. Start the image editing application software in Windows.
2. Choose Select Source from the File menu.
3. Follow the appropriate instructions for the Windows version you
are running.
Windows 3.1 and 3.11
Select Flatbed Scanner_16
Windows 95 or later
Select either Flatbed Scanner_16 or Flatbed Scanner_32 from the
Source list, depending on what type of application you are
scanning into.
Note: If you are using a 16-bit application, and select Flatbed
Scanner_32 as your source, you may get a TWAIN error and not
be able to scan. Be sure to select the correct source to use with
32-bit applications and 16-bit applications. Refer to Chapter 1,
What is TWAIN for more information.
4. Click OK.
The application is now set to use your ImageReader Express to scan.
3-8
The scanning process
The initiation of the scanning process may vary from application to
application. Consult the application’s manual for more information if
the steps below don’t result in a scan. The instructions provided in
these steps assume the application uses the most common process.
To scan an image:
1. Start the TWAIN compliant image editing application in Windows.
2. Select Acquire from the File menu. This displays the Flatbed
Scanner window.
3. Place the image face down on the scanner glass. Click Prescan.
The prescanned image displays in the Prescan window.
4. Adjust the image as you desire. Make your selections for scan
mode, resolution, etc., and use the crop box in the Prescan
window to select the area you want to scan. Follow the guidelines
described in the previous section to make your selections.
Note: If the image is not as large as the Crop box, the additional
blank area is also scanned, creating an unnecessarily large file. Be
sure to adjust the Crop box to fit the exact area you want to scan.
To do so, simply click and drag one of the box corners.
5. When you are satisfied with the selected settings, click Scan.
The image is scanned using the selected settings, and transferred
into the application’s workspace.
6. Click Cancel to close the Flatbed Scanner window.
You are returned to the application, and the scanned image is
displayed in the workspace. You may now manipulate, save, print, or
fax the image.
Other scanning features
Your ImageReader scanner is capable of scanning all types of
documents and images. The scanning instructions provided here are
to ensure the installation is complete and your scanner is working
properly. For more detailed instructions about manipulating images
once they are scanned, or for using your scanner for OCR, document
archiving/retrieval, and faxing, refer to those applications’ manuals.
3-9
3-10
Appendix A
General Scanning Tips
16-bit versus 32-bit applications:
Image Pals 2 GO! - the image editing software and InfoCenter the
scanning control software included with the ImageReader Express
scanner- are both16 bit applications. 16 bit applications are supported
by Windows 3.1x and Windows 95.
Selecting the correct source:
Before attempting to scan with your ImageReader Express scanner
you need to select the source from which you are scanning. To select
your source click on File> Select source or File>Acquire>Select
Source (depending on the application you are scanning with). If you
will be scanning into a 16 bit application such as InfoCenter or Image
Pals 2 GO! image editor you should select the Flatbed (
(16)
choice in the “source” dialog box. If you are scanning with a
32 bit application such as Adobe Photoshop you should select
Flatbed (32). If you do not select the correct source you may
receive an error message when attempting to scan or run into
complications when trying to transfer your scanned image.
Troubleshooting
Scanner does not turn on
Confirm that the scanner’s power adapter is plugged into a power
source and the indicator light is on.
Scanner turns on but does not respond
Reinstall the Info Technician to ensure the driver is properly loaded or
restart your computer to reset the system. Check the cable
connections on the scanner and parallel port. Be sure the cable is
plugged into the port labeled Host on the back of the scanner. Check
that the parallel connection on the computer is secure.
Scans extremely slow
This is common when scanning true color at high resolutions. Follow
the setting guidelines in Chapter 3 for the particular scanning task.
Avoid scanning at higher settings than necessary—this improves
A-1
performance. If you still experience problems with your scanning
speed, follow the directions on page A-2 and A-3 to verify the
scanner’s port address and possibly change your computer’s BIOS
setup.
Printer Problems?
Cannot print to printer
Check the cable connections on the printer and the scanner. Be sure
the cable is plugged into the port marked Printer on the back of the
scanner.
Bi-Directional Printers
The parallel port does not support Bi-directional printers such as those
made by Hewlett-Packard. Therefore you will need to change your
printer port in your computer’s BIOS or CMOS settings to EPP or SPP
instead of bi-directional. In this case, you may also need to disable
your printer’s bi-directional printing option (refer to your printer manual
for instructions) Refer to page A-3 for instructions on changing your
computer’s parallel port mode.
About the pass-through port
The ImageReader Express and ImageReader Elite EPP scanners are
both conveniently equipped with a pass-through port. This port allows
you to connect any other parallel port device such as a printer to the
scanner so that they can share the same port from your computer.
To use the pass-through port, connect the printer’s cable to the port
labeled Printer on the back of the scanner. Both the scanner and the
printer are now sharing the same parallel port and can be used at any
time, except in tandem.
TWAIN Errors
If your computer cannot find or does not recognize the scanner:
1. Some computer systems will not recognize an installed scanner
unless the computer has completed it start-process entirely BEFORE
the scanner is plugged-in. Turn off the computer and un-plug the
scanner’s AC power cord from the power outlet, then turn on the
computer. After the computer has completed start-up and is running
windows, plug-in scanner and attempt scan.
A-2
2. Be sure you have selected the appropriate source for the
application you are scanning into. Most 32-bit applications require
you use the Flatbed Scanner (32) source, and 16-bit applications
require you use the Flatbed Scanner (16) source.
3. If your computer cannot find or does not recognize the scanner:
a) Check your cable connection and retry scanning.
b) Verify your port by selecting Info Tech from the program
manager in Windows 3.1x or from the Start menu in Windows
95. From Info Tech select Scanner Utility and click Verify Port in
the Utility window. This feature will search for and connect to
correct port address.
Error messages
“Image Transfer Failed”
This error message indicates that the selected scan settings have
created a file size that exceeds available disk space. Reduce the dpi,
image size, or select a lower mode to reduce the file size.
“Error 82 Scanner not Found” message when attempting a
scan
This error is most common with Compaq and Aptiva systems or any
system not equipped with an enhanced parallel port. Check with your
computer manufacturer to verify if your system supports the Enhanced Parallel Port mode (if your system is not equipped with an
EPP card call (408) 538-2500 or fax (408) 538-2577 to order an EPP
interface card). If your system supports EPP, check for the following
situations:
1. The computer detects a conflict with the scanners I/O ad
dress. Perform the following fix:
Run your flatbed utility program and click the verify port icon. If the
utility cannot find the scanner, you may need to change the parallel
port mode in your computer’s BIOS or CMOS setup so that it
matches the setting of your scanner driver. In this case refer to step 2.
A-3
2. Check your computer’s BIOS setup to make sure that your
printer port is set for EPP or SPP.
The ImageReader Express scanner will work on ports that are set for
EPP and SPP. The fastest of the modes is EPP. Follow these directions to change your computers parallel port mode.
Changing Your Parallel Port Mode
1. Open your System setup (BIOS or CMOS) (check your
computer manual for instructions on how to do this).
2. Go to the area in which you can change the parallel mode
settings and change the LPT type to EPP or SPP.
3. Save your changes and exit. Now reboot your computer
and attempt to scan again.
Grainy images
Check the video driver settings within Windows. The difference
between 16 colors viewed and 256 colors viewed is dramatic. Select
256 Colors (or higher) if the system hardware supports such.
Specs or lines across scanning area
Open the document feed cover and clean the glass with a soft lens
cloth.
A-4
Scanner care
Info ImageReader scanners are designed to provide years of trouble
free service. To assist in realizing this end, follow the guidelines listed
below.
1. Avoid using the scanner in a dusty environment, and keep it as
dust-free as possible.
2. If necessary, clean the scanner glass with a soft lens cloth.
3. Do not scan documents with correction fluid. This will cause
spotting on the scanner glass.
4. Do not scan documents with paper clips or staples. The glass
may become scratched.
5. Don’t touch the scanner glass. Fingerprints or scratches will show
up as unwanted marks on your scanned image.
6. Don’t remove the scanner case. There are no consumer
serviceable parts inside. There is a danger of electric shock, and
the warranty will be void.
7. Don’t move the scanner excessively or subject it to excessive
vibration, as the lens focus may become distorted.
8. The scanner operates best in temperatures of 10°C to 40°C (50°F
to 104°F).
FCC radio frequency interference statement
This equipment has been tested and found to comply with the limits
for a Class B digital device, pursuant to Part 15 of the FCC rules.
These limits are designed to provide reasonable protection against
harmful interference in a residential installation. This equipment
generates, uses and can radiate radio frequency energy and, if not
installed and used in accordance with the instructions, may cause
harmful interference to radio communications. However, there is no
guarantee that interference will not occur in a particular installation. If
this equipment does cause harmful interference to radio or television
reception (which can be determined by turning the equipment off and
on), the user is encouraged to try to correct the interference by one or
more of the following measures:
A-5
•
Changes or modifications not expressly approved by the
manufacturer or authorized service center could void the user’s
authority to operate this equipment.
•
Reorient or relocate the receiving antenna
•
Increase the separation between the equipment and receiver.
•
Connect the equipment to an outlet on a circuit different from that
which the receiver is connected.
•
Shielded interconnect cables and shielded power cord which are
supplied with this equipment must be employed with this
equipment to ensure compliance with the pertinent RF emission
limits governing this device.
•
Consult the dealer or an experienced radio/TV technician for help
if the conditions persist.
Limited two year warranty
Info warrants this scanner to be free of manufacturing defects, both
materials and workmanship, for a period of two years from the date of
original purchase. This warranty applies only to the original purchaser.
In the event of a defect, Info will repair this product free of charge,
including parts, labor, and return postage.
This warranty does not cover damage, loss, abuse, misuse,
unauthorized repair, shipping damage, natural phenomena, or effects
of use other than intended. Info is not responsible for consequential
damages, including but not limited to, lost profits, lost sales, loss of
use, or injury to property.
For scanner service, contact us at (800) 777-3280, and request a
Return Authorization (RA) number. Repackage the product in its
original packing container (for protection), and return postage
prepaid to:
Info Service Center
580 Division Street
Campbell, CA 95008
Include an address, phone number, the RA number, and a description
of the scanner’s defect. Enclose a copy of the original purchase
receipt to verify warranty eligibility. Write the RA number legibly on the
outside of the package.
A-6