1
Technical Preview
Reference Architecture:
Deploying Red Hat Enterprise Linux OpenStack Platform
(RHEL-OSP) on FlexPod® with Cisco UCS, Cisco Nexus,
and NetApp Storage
November 2013
1 Introduction ................................................................................................................. 2 1.1 Executive Summary .......................................................................................................... 2 1.2 A Preview Reference Architecture .................................................................................... 3 1.3 Authors and Contributors .................................................................................................. 3 2 Physical Infrastructure Model ..................................................................................... 4 2.1 Software and Hardware Versions Used ............................................................................ 4 Software ................................................................................................................................. 4 Hardware ................................................................................................................................ 4 Network Subnets and VLANs ................................................................................................. 4 3 Basic Red Hat Enterprise Linux OpenStack Platform Deployment ............................ 5 3.1 Provisioning NetApp Storage ............................................................................................ 5 A Quick Primer for clustered DATA ONTAP ........................................................................... 5 Provision NFS Storage in clustered Data ONTAP .................................................................. 5 3.2 Systems Installation .......................................................................................................... 7 Assumptions ........................................................................................................................... 7 3.3 Deploy RHEL 6.4 on Cisco UCS Blades ........................................................................... 8 3.4 Packstack Installation of OpenStack ................................................................................. 8 3.5 Configuring Neutron & Open vSwitch (OpenStack Networking) ....................................... 9 Pre-Configuration ................................................................................................................. 10 Configure OpenStack Networking ........................................................................................ 10 Test Networking .................................................................................................................... 12 3.6 Configure Glance ............................................................................................................ 13 3.7 Configure Cinder (OpenStack Block and File Services) ................................................. 13 NetApp Clustered Data ONTAP Direct Driver for NFS ......................................................... 13 3.8 Validation: Deploy Your First VM .................................................................................... 15 4 Summary .................................................................................................................. 16 5 Appendix ................................................................................................................... 17 5.1 Example Packstack file ................................................................................................... 17 5.2 Document information ..................................................................................................... 21 List of Tables
Table 1: Software Versions Used .................................................................................................................4 Table 2: Hardware Models Used ..................................................................................................................4 Table 3: Network VLANs & Subnets .............................................................................................................4 Table 4: Document version control .............................................................................................................22
1 INTRODUCTION
1.1
EXECUTIVE SUMMARY
OpenStack is one of the fastest growing open source projects today, with thousands of active developers
and hundreds of actively supporting companies and individuals. Getting started with OpenStack has been
2
Technical Preview
simplified by the existence of this large development community to such a degree that a single script can
turn a virtual machine into a usable OpenStack test environment.
However, there has been little work done around a complete reference architecture or converged
infrastructure solutions for OpenStack. This document serves as a preview to a subsequent series of
documents intended to provide a reference architecture for deploying OpenStack on FlexPod. Red Hat
Enterprise Linux OpenStack Platform (RHEL-OSP) is used to provide an example of a fully supported
OpenStack distribution. Red Hat provides world-class support for many open source products including
Red Hat Enterprise Linux and ranging from JBoss middleware suite to CloudForms and OpenShift.
From a compute and networking standpoint, the Cisco Unified Computing System (Cisco UCS) unifies
computing, networking, management, virtualization, and storage access into a single integrated
architecture. Cisco Nexus switches provide the network foundation for your next-generation data center.
Finally, NetApp FAS storage provides a means of scaling up and out from the storage standpoint. All of
TM
the benefits of the infrastructure platform is packaged and supported via FlexPod – converged
infrastructure solution from Cisco / NetApp Together, RHEL-OSP, Cisco UCS & Nexus, and NetApp
storage provide a true enterprise solution for OpenStack in the enterprise.
Please note that this first document provides only the foundational material needed to deploy RHEL-OSP
on Cisco UCS & Nexus and NetApp storage. And although the effort has been validated in a lab, that
validation is very basic in its initial preview form:
1.2
•
Several instances (VMs) have been created
•
The instances are backed by NetApp NFS using the NetApp Clustered ONTAP Direct NFS
Cinder driver.
•
Open vSwitch based network configuration to act as software switch to enable instances to
communicate with each other, as well as access to the instances from the management network
•
Horizon dashboard to act as self service portal to provision VMs
A PREVIEW REFERENCE ARCHITECTURE
This reference architecture is meant to be a basic guide for deploying Red Hat Enterprise Linux
OpenStack Platform (RHEL-OSP) on Cisco UCS servers, Cisco Nexus switches, and NetApp FAS
Storage. It highlights the basic steps required to get RHEL-OSP up and running on Cisco and NetApp,
without advocating a specific workload or configuration. The reference architecture allows for flexibility in
the context of how different OpenStack services are deployed. This reference architecture, in its initial
form, does not include provisions for High Availability (HA), specific tuning, or backup and recovery.
In this regard, without committing to any specific design, product, or collateral, this document is meant to
be a “preview” of things to come.
1.3
AUTHORS AND CONTRIBUTORS
Much of this document was based around a reference architecture created by Tom Francis, Britt Houser,
and Mark Voelker; all of Cisco. Additionally Steven Carter of Cisco provided much needed insight, as did
Karthik Prabhakar of Red Hat. The NetApp and Red Hat OpenStack specific content was added by Jon
Benedict of NetApp, who also provided significant technical editing. Rob Esker & Sumit Lahiri of NetApp,
Mehul Bhatt of Cisco, and Ian Pilcher of Red Hat also made additional remarkable contributions.
3
Technical Preview
2 PHYSICAL INFRASTRUCTURE MODEL
2.1
SOFTWARE AND HARDWARE VERSIONS USED
SOFTWARE
The following software versions were used to validate this effort:
Table 1: Software Versions Used
Purpose
Version
Note
Hypervisor
RHEL 6.4 + KVM
For compute systems
Cloud Operating System
RHEL-OSP 3.0
OpenStack “Grizzly”
Guest Operating System
CirrOS
Cloud optimized Linux OS Guest
Storage Operating System
Clustered Data ONTAP 8.2
Deployed on FAS
HARDWARE
The following hardware pieces were used to validate this effort:
Table 2: Hardware Models Used
Purpose
Model/Version
Notes
Server
Cisco B200 m3 Blades
Storage
NetApp FAS3250, clustered
HA Pair
Disk Shelves/Disks
NetApp DS2246 Disk Array
600GB SAS drives
Network Switch
Cisco Nexus 5548
10GbE
The Cisco UCS blades are used to host RHEL 6.4 and RHEL 6.4+KVM for OpenStack services and
virtualization, respectively. The blades themselves boot over iSCSI that is hosted on the NetApp clustered
Data ONTAP deployment. A Cisco Nexus 5548 10GbE switch handles all network traffic.
Support for RHEL-OSP
Cisco supports the use of RHEL-OSP on Cisco UCS blades as the I/O is handled by RHEL 6.4. For exact
support statements for individual UCS blades, firmware revisions, and RHEL versions, please view the
Cisco UCS Hardware & Software Interoperability Matrix.
Red Hat supports the use of RHEL-OSP on Cisco components. Additionally, Red Hat supports the use of
Cisco’s variety of Nexus Neutron plugins included in the RHEL-OSP distribution of upstream OpenStack.
For specifics of Red Hat’s support, please consult http://www.redhat.com/support/.
Additionally, Cisco’s UCS C-series rack servers and B-series blade servers have received Red Hat
OpenStack certification for compute.
NETWORK SUBNETS AND VLANS
Individual interfaces on the OpenStack host were created by configuring VNICs on the Cisco 1280 VIC
with the following subnets and VLANs:
Table 3: Network VLANs & Subnets
4
VLAN
Description
Subnet
3070
Out of Band Mgmt
172.20.70.0/24
3071
In band Mgmt
172.20.71.0/24
Technical Preview
3072
iSCSI A (primary)
172.20.72.0/24
3073
iSCSI B (secondary)
172.20.73.0/24
3074
NFS
172.20.74.0/24
3075
VM Traffic
172.20.75.0/24
The 3070 VLAN is only mentioned here and is not talked about elsewhere in the document; it is the
management network for physical server management. The 2 iSCSI VLANs are used solely for iSCSI
boot, but could have been used for iSCSI data or iSCSI VM storage. VLANs 3071, 3074, and 3075 are
the main focus.
L2 traffic is segmented by VLANs in this example, while L3 traffic (within OpenStack) is handled by the L3
Agent network. Security will be provided by the IPtables security and NAT functionality driven by Neutron.
Note:
The “Quantum” network provider for OpenStack has since been renamed “Neutron”. However,
the “quantum” command will persist until RHEL-OSP (and other “Grizzly-based” OpenStack
distributions) are re-based on “Havana”.
3 BASIC RED HAT ENTERPRISE LINUX OPENSTACK PLATFORM
DEPLOYMENT
In a production environment, RHEL-OSP is typically deployed across many servers. However, for this
document, a very simple single server deployment was used and it is meant to be a simple validation of
RHEL-OSP on Cisco and NetApp.
3.1
PROVISIONING NETAPP STORAGE
The guidelines below apply to NetApp clustered Data ONTAP 8.2, and do not include steps for Data
ONTAP “7-mode.” Separate documentation for alternate configurations is available through NetApp’s
OpenStack Deployment & Operations Guide at http://www.netapp.com/openstack.
A QUICK PRIMER FOR CLUSTERED DATA ONTAP
Data ONTAP is NetApp’s storage operating system and is deployed on all FAS and V-Series controllers.
Clustered ONTAP is the latest evolution and allows for non-disruptive scale-up and scale-out operations.
One of the key features of clustered ONTAP is the Storage Virtual Machine (SVM), and this is the
construct that provides NAS and SAN storage. Additionally, the SVM provides secure tenant storage as
required by cloud and cloud-like environments.
While a clustered ONTAP deployment can support many SVM’s, we are only utilizing one for this
document. The steps below highlight the use of NetApp’s OnCommand System Manager to prepare
NetApp systems for Cinder provisioning. Additionally, while iSCSI storage is fully supported by RHELOSP and the NetApp Cinder driver, NFS is used for the example.
PROVISION NFS STORAGE IN CLUSTERED DATA ONTAP
The following steps were used to provision NFS storage
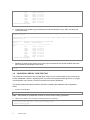
1. Create a volume by highlighting “Volumes” under your SVM, then click the “Create” button. Enter the
appropriate values, then click “Create”.
5
Technical Preview
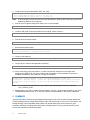
2. Ensure that the export policy for the NFS export is correct. Select “Namespace”, that highlight the
NFS export, and click on “Change Export Policy”. Select the proper export policy:
3. To view the actual policy, select “Export Policies”, then select the policy, and then select “Modify
Rule”.
6
Technical Preview
3.2
SYSTEMS INSTALLATION
The following section walks through the software steps required to install RHEL-OSP on Cisco UCS
blades. This process presumes an environment as described above.
ASSUMPTIONS
These instructions primarily target deployment of Red Hat OpenStack onto UCS blade servers, but UCS
rack mount servers would work as well. Deployment on non-UCS gear may well work, particularly if the
gear has functional IPMI, but may require additional configuration or additional manual steps to manage
systems, and would not be considered a FlexPod©. Non-UCS servers are far beyond the scope of this
document.
The version of Open vSwitch (OVS) provided with RHEL-OSP 3.0 does not support GRE-tunneling, so
tenant segmentation must be performed using provider VLANs. The controller and every compute node
must have an interface that is connected to a shared L2-network and is able to trunk the set of VLANs
assigned to the cluster. The control node additionally needs connectivity to the public network from which
floating IPs will be assigned.
Finally, it is assumed that the Cisco Nexus, Cisco UCS Blades, and NetApp storage are already deployed
including, but not limited to:
•
•
•
NetApp Clustered ONTAP ready to provision iSCSI & NFS storage
Cisco Nexus switches configured with VLANs
Cisco UCS blades with service profiles configured for iSCSI boot
The remaining tasks include provisioning storage, deployment RHEL, and then deployment and
configuration of RHEL-OSP.
7
Technical Preview
3.3
DEPLOY RHEL 6.4 ON CISCO UCS BLADES
The first steps of deploying Red Hat OpenStack (RHEL-OSP) depend on first deploying Red Hat
Enterprise Linux (RHEL) version 6.4. Red Hat utilizes the “packstack” utility to deploy RHEL-OSP, and as
such, “packstack” will manage the installation of all necessary packages as part of the deployment.
Because of this, only a minimal RHEL 6.4 install is required.
For more detailed instructions and information on RHEL-OSP, please view Red Hat’s official
documentation.
Alternately, a template image could be used to speed up deployment. It is recommended to not install any
packages that have no bearing on OpenStack. This includes graphical packages, development libraries,
compilers, sniffers, or any other packages not specific to OpenStack.
1. Deploy RHEL 6.4 on UCS using your preferred provisioning tools.
Note:
While an install DVD will work, it does not scale. Recommended methods include PXE, Cobbler,
kickstart, or any combination thereof. In this scenario where NetApp is used to host the boot
LUNs, it is also possible to deploy the first server via DVD, then use NetApp FlexClone to clone
the boot LUN as many times as necessary, leaving the original LUN as a template. This last
method is also useful if anything needs to be rebuilt - simply clone the base LUN again.
2. Once deployed and basic networking is configured (IP addresses, DNS, /etc/hosts), register the
system with Red Hat Network (RHN), and add access to the OpenStack software channel:
# subscription-manager register --username labadmin --password labpasswd --auto-attach
# yum-config-manager --enable rhel-server-ost-6-3-rpms
3. Update the system
# yum -y update
3.4
PACKSTACK INSTALLATION OF OPENSTACK
Now that RHEL 6.4 is installed, we can begin to deploy RHEL-OSP.
1. Generate a packstack answer file:
[root@ostack11 ~]# packstack --gen-answer-file=packstack.txt
2. Edit the packstack answer file to configure OpenStack setup:
[root@ostack11 ~]# vim packstack.txt
Editing the packstack answer file allows for switching from randomly generated passwords to human
readable passwords, as well as starting our Open vSwitch configuration.
Note:
The packstack configuration used for this example is in the Appendix.
3. Deploy OpenStack using the packstack.txt file
[root@ostack11 ~]# packstack --answer-file=packstack.txt
Welcome to Installer setup utility
8
Technical Preview
~~~trimmed for brevity~~~
**** Installation completed successfully ******
Additional information:
* To use the command line tools you need to source the file /root/keystonerc_admin created on
172.20.71.101
* To use the console, browse to http://172.20.71.101/dashboard
* The installation log file is available at: /var/tmp/packstack/20131007-124627vDsgvi/openstack-setup.log
4. A new kernel has been installed as part of the configuration. Reboot the host in order to load the new
kernel.
[root@ostack11 ~]# init 6
5. When the host comes back up, log into the Horizon dashboard. Create a new user and project. Both
should be named “demo”. This helps validate the installation and performs steps required for later.
Use the credentials found in the /root/keystonerc_admin file.
Note:
Internet Explorer may have issues properly rendering Horizon. It is highly recommended to use
Chrome or Firefox for access to the Horizon dashboard.
6. Create a new identity, “demo”, by copying the “keystonerc_admin” file to “keystonerc_demo”. Be sure
to edit the file to change user from admin to demo, change the password as appropriate
3.5
CONFIGURING NEUTRON & OPEN VSWITCH (OPENSTACK NETWORKING)
The network configuration will be fairly straightforward, as it will consist of 2 subnets and a virtual router.
The networks are labeled Public and demo_net, and the virtual router sits between the two. Before these
pieces can be configured, some changes to the physical network interfaces must be performed.
9
Technical Preview
In this setup, the control node used Eth0 to access the public network on VLAN 3071 during the
installation. The first part of the configuration below moves the IP address from eth0 to the external
bridge, br-ex.
PRE-CONFIGURATION
1. Switch to the OpenStack admin identity and change to the directory containing the network
configuration files
[root@ostack11 ~]# source keystonerc_admin
[root@ostack11 ~(keystone_admin)]# cd /etc/sysconfig/network-scripts/
2. Backup the eth0 file:
cp ifcfg-eth0 ifcfg-eth0.orig
3. Reconfigure eth0 (ifcfg-eth0) as an Open vSwitch port:
DEVICE=eth0
HWADDR=00:00:00:AA:0A:3F
TYPE=OVSPort
DEVICETYPE=ovs
UUID=c4d7c5f8-c718-45bb-b6da-71ed377e3a9d
ONBOOT=yes
NM_CONTROLLED=no
BOOTPROTO=none
OVS_BRIDGE=br-ex
4. Create the external bridge (ifcfg-br-ex):
DEVICE=br-ex
DEVICETYPE=ovs
TYPE=OVSBridge
BOOTPROTO=static
IPADDR=172.20.71.101
NETMASK=255.255.255.0
GATEWAY=172.20.71.1
DNS1=10.60.132.40
ONBOOT=yes
5. Restart networking:
$ service network restart
Note: Double check that eth0 doesn’t have an IP assigned to it as this will affect connectivity. It may be necessary to perform an ifup/ifdown on eth0. CONFIGURE OPENSTACK NETWORKING
Interfaces eth0 and eth4 are used to handle all of the network traffic. The interfaces between (eth1 - eth3)
nd
are used for iSCSI boot and NFS for the host node. In practice the 2 interface may be eth1, eth2, or
whichever is available. Eth4 will map to a bridge “br-eth4”.
1. Verify the contents of the /etc/quantum/plugins/openvswitch/ovs_quantum_plugin.ini file. Towards the
bottom of the [OVS] section, but above the [AGENT] section, the contents are as follows:
integration_bridge=br-int
network_vlan_ranges=physnet4:3074:3075
enable_tunneling=False
bridge_mappings=physnet4:br-eth4
10
Technical Preview
tenant_network_type=vlan
2. Restart Neutron (quantum) and Open vSwitch services as necessary
$
$
>
>
$
cd /etc/init.d
for i in quantum*; do
service $i restart
done
service openvswitch restart
Note:
The “Quantum” network provider for OpenStack has since been renamed “Neutron”. However,
the “quantum” command will persist until RHEL-OSP (and other “Grizzly-based” OpenStack
distributions) are re-based on “Havana”.
3. Ensure that “eth0” exists as a port on “br-ex”:
[root@ostack11 ~]# ovs-vsctl show
e7ed5133-18f1-4f2b-9f70-048ba51afab2
Bridge "br-eth4"
Port "eth4"
Interface "eth4"
Port "br-eth4"
Interface "br-eth4"
type: internal
Port "phy-br-eth4"
Interface "phy-br-eth4"
Bridge br-int
Port "int-br-eth4"
Interface "int-br-eth4"
Port br-int
Interface br-int
type: internal
Bridge br-ex
Port "eth0"
Interface "eth0"
Port br-ex
Interface br-ex
type: internal
4. Create the public network:
$ quantum net-create public --shared --router:external=True
5. Create the public subnet:
$ quantum subnet-create --name public_sub --enable_dhcp=False \
--allocation- pool=start=172.20.71.5,end=172.20.71.25 \
--gateway=172.20.71.1 public 172.20.71.0/24
6. Switch to the demo identity:
[root@ostack11 ~]# source keystonerc_demo
7. Create a network for the demo project:
[root@ostack11 ~(keystone_demo)]# quantum net-create demo_net
8. Create the private network for the VM traffic:
[root@ostack11 ~(keystone_demo)]# quantum subnet-create --name priv01 --enable_dhcp=True \
11
Technical Preview
--allocation-pool=start=172.20.75.5,end=172.20.75.25 demo_net 172.20.75.0/24
9. Create a floating IP:
[root@ostack11 ~(keystone_demo)]# quantum floatingip-create public
[root@ostack11 ~(keystone_demo)]# quantum floatingip-list
+--------------------------------------+------------------+---------------------+---------+
| id
| fixed_ip_address | floating_ip_address | port_id |
+--------------------------------------+------------------+---------------------+---------+
| 4921358c-fd90-44e2-922c-f7333d50cc3c |
| 172.20.71.5
|
|
+--------------------------------------+------------------+---------------------+---------+
10. Create a virtual router
[root@ostack11 ~(keystone_demo)]# quantum router-create router01
11. Add the private network to the router:
[root@ostack11 ~(keystone_demo)]# quantum router-interface-add router01 priv01
12. Switch back to the admin identity:
root@ostack11 ~(keystone_demo)]# source keystonerc_admin
13. Set the gateway for the virtual router:
[root@ostack11 ~(keystone_admin)]# quantum router-gateway-set router01 public
14. As the admin identity, double check the ports on the router and ensure that the subnets networks are
listed in the output:
[root@ostack11 ~(keystone_admin)]#
[root@ostack11 ~(keystone_admin)]#
quantum router-port-list router01
quantum net-list
15. As the demo identity, perform the same checks:
root@ostack11 ~(keystone_admin)]# source keystonerc_demo
root@ostack11 ~(keystone_demo)]# quantum net-list
root@ostack11 ~(keystone_demo)]# quantum router-list
TEST NETWORKING
1. List out the existing networks and test using the namespaces listed:
# ip netns list | grep qrouter
# ip netns exec <qrouter-namespace> ip addr list
# ip netns exec <qrouter-namespace> ping <fixed-ip-of-instance>
2. (Optional) The lab environment used a “jump host” as in intermediary between the office network and
the lab network. It was helpful to add a route to the jump host in order to forward any traffic for the
private VM subnet through the public side of the virtual router:
$ route add -net 172.20.75.0/24 gateway 172.20.71.6
12
Technical Preview
It should also be noted that Cisco has Neutron plug-in that is included in both the upstream OpenStack as
well as RHEL-OSP. The Cisco Nexus plug-in for OpenStack Neutron provides operational simplicity by
enabling configuration of both physical and virtual switches deployed across multiple hosts. The Cisco
Nexus plugin overlays on top of the Open vSwitch plug-in. More details around the Cisco UCS/ Nexus
plugin configuration will be covered in future releases of this publication.
3.6
CONFIGURE GLANCE
1. Configure Glance to use NetApp NFS to back the image repository. This does not require any special
configuration or use of any special driver. Be sure to enable “deduplication” on the NFS volume used
for Glance.
$ mount <nfs_ip>:/nfs_export /var/lib/glance/images
As there is only 1 image being used for this example, the Glance configuration will only consist of
downloading and configuring that image. A “CirrOS” image is used here because of it’s small size - 13MB.
2. Download the cloud ready disk image:
$ wget http://download.cirros-cloud.net/0.3.1/cirros-0.3.1-x86_64-disk.img
3. Switch to the demo identity $ source keystonerc_demo
4. Add the image to Glance
root@ostack11 ~(keystone_demo)]# glance image-create --name cirros --disk-format=qcow2 \
--container=bare < cirros-0.3.1-x86_64-disk.img
3.7
CONFIGURE CINDER (OPENSTACK BLOCK AND FILE SERVICES)
The following steps provide the means to configure the NetApp Clustered Data ONTAP Direct Driver for
NFS in Cinder. Please note that there are a number of other driver configuration options available as
well. For example, iSCSI can be used as an alternative to NFS for consumption of Cinder by bare-metal /
non-virt clients. This document, in its initial preview form, does not delve into the variety of other options
nor offer advice on which use cases they align to. Further detail on their configuration, however, can be
obtained from:
http://docs.openstack.org/grizzly/openstack-block-storage/admin/content/netapp-volume-driver.html
It should also be noted that because the NetApp Cinder drivers exist in the upstream OpenStack code,
Red Hat fully supports the use of the NetApp Cinder drivers in conjunction with RHEL-OSP.
The driver requires a storage controller running clustered Data ONTAP 8.1 or later; this document was
validated with Data ONTAP 8.2. The storage system should be installed with the following licenses:
•
•
•
•
Base
NFS
FlexClone
iSCSI (Used for SAN boot as well as Cinder driver, if used)
NETAPP CLUSTERED DATA ONTAP DIRECT DRIVER FOR NFS
The following steps outline how to configure the NetApp Direct NFS driver. There is an assumption that an NFS export has already been created along with a corresponding export policy allowing access to the OpenStack node. And while there are NFS and iSCSI drivers for both Data ONTAP 7-‐mode and clustered Data ONTAP, this 13
Technical Preview
example uses only the NFS driver for Clustered Data ONTAP. More information and configuration details can be found in the NetApp OpenStack Deployment and Configuration Guide. The NetApp NFS export in this example uses NetApp clustered ONTAP. As such NFS exports are not configured in an /etc/exports file with permissions. Instead, individual volumes are exported from a global namespace and have export policies applied to the namespace root and the NFS export itself. In this example, the namespace root is left open and the individual NFS export is locked down to the OpenStack host IP, allowing only NFSv3 with read/write and superuser access. Note:
There is a known issue with the RHEL-OSP package python-cinder-2013.1.3-2.el6ost.noarch that
affects the NetApp Cinder drivers. If the openstack-cinder-volume service stops as soon as it is
started and the cinder volume log shows error “object has no attribute 'shares' “, then the bug has
been hit. It is described in detail in Red Hat Bugzilla #1013072. As of the date of this writing, there
is a patch available here.
1. Test the NFS export by mounting it manually (and assuming that it is successful, unmount it):
$ mount 172.20.74.13:ostackdemo /mnt
$ mount | grep mnt
$ umount /mnt
2. Add the following declaration to the top of the /etc/cinder/cinder.conf file right under the
[DEFAULT] directive:
enabled_backends=cmodeDirectNFS
Note:
The enabled backend, “cmodeDirectNFS” in this case, must match the backend defined in the
next step, as specified between the brackets.
3. Add the following variable list to the bottom of the /etc/cinder/cinder.conf file:
[cmodeDirectNFS]
volume_driver= cinder.volume.drivers.netapp.nfs.NetAppDirectCmodeNfsDriver
netapp_server_hostname=172.20.71.30
netapp_server_port=80
netapp_login=admin
netapp_password=s3cr3t
nfs_shares_config=/etc/cinder/shares.conf
Where the variables are: [cmodeDirectNFS]
volume_driver= cinder.volume.drivers.netapp.nfs.NetAppDirectCmodeNfsDriver
netapp_server_hostname=IP or hostname of the cluster admin
netapp_server_port=80
netapp_login=login account of cluster admin
netapp_password=the password for the cluster admin
nfs_shares_config=path to file that contains the NFS export to mount
4. Create the /etc/cinder/shares.conf file with a single line that represents the NFS export that the
NFS Cinder driver should use:
172.20.74.13:/ostack_nfs
Note:
This is different from the cluster administration IP and login defined in the previous step. The IP
address reflected here is the NFS LIF defined on the NetApp Storage Virtual Machine (SVM)
providing storage to the environment.
5. Log into the NetApp cluster as the cluster administrator and ensure that the http protocol is enabled:
FVL1-cluster::> system services firewall policy show mgmt
Policy
Service
Action IP-List
---------------- ---------- ------ --------------------
14
Technical Preview
mgmt
dns
http
https
ndmp
ntp
snmp
ssh
telnet
8 entries were displayed.
allow
deny
allow
allow
allow
allow
allow
deny
0.0.0.0/0
0.0.0.0/0
0.0.0.0/0
0.0.0.0/0
0.0.0.0/0
0.0.0.0/0
0.0.0.0/0
0.0.0.0/0
6. If http needs to be enabled, type the following command to delete the entry, add a new entry and
recheck the status:
FVL1-cluster::> system services firewall policy delete -policy mgmt -service http -action deny ip-list 0.0.0.0/0
FVL1-cluster::> system services firewall policy create -policy mgmt -service http -action allow ip-list 0.0.0.0/0
FVL1-cluster::> system services firewall policy show mgmt
Policy
Service
Action IP-List
---------------- ---------- ------ -------------------mgmt
dns
allow 0.0.0.0/0
http
allow 0.0.0.0/0
https
allow 0.0.0.0/0
ndmp
allow 0.0.0.0/0
ntp
allow 0.0.0.0/0
snmp
allow 0.0.0.0/0
ssh
allow 0.0.0.0/0
telnet
deny
0.0.0.0/0
8 entries were displayed.
7. Restart the Cinder volume service and run the mount command and verify that the NFS export has
been mounted by the NetApp Cinder driver:
$ service openstack-cinder-volume restart
$ mount
3.8
VALIDATION: DEPLOY YOUR FIRST VM
The command line instructions are provided below. Most, if not all, of these actions can be done via the
Horizon dashboard. However, Internet Explorer may have issues properly rendering Horizon. It is highly
recommended to use Chrome or Firefox for access to the Horizon dashboard.
The following deployment steps should be used after completing the installation and configurations
above.
1. Create a set of SSH keys: # ssh-keygen -t rsa
Note:
When asked for a passphrase, hit enter in order to decline having a password.
2. Switch to the “demo” user and create new key pair from the public key: $ source keystonerc_demo
$ nova keypair-add --pub_key ~/.ssh/id_rsa.pub demo_kp.pem
$ chmod 600 demo_kp.pem
15
Technical Preview
3. Create a security group that allows “SSH” and “ping”:
$ nova secgroup-create demo_sg
$ nova secgroup-add-rule demo_sg tcp 22 22 192.168.1.1/0
$ nova secgroup-add-rule demo_sg icmp -1 -1 192.168.1.1/0
Note:
In future iterations of this document (and with OpenStack in general), Nova security groups will be
replaced by Neutron security groups
4. Find the ID of the glance image to be used (cirros, in this example):
[root@ostack11 ~(keystone_demo)]# IMAGE_ID=$(glance image-list | awk '/cirros/ {print $2}')
5. Create a 1GB cinder volume that uses the cirros image, named “cirros01”:
[root@ostack11 ~(keystone_demo)]# cinder create --image-id $IMAGE_ID --display_name=cirros01 1
6. Find the ID of the cinder volume:
[root@ostack11 ~(keystone_demo)]# VOL_ID=$(cinder list | awk '/cirros01/ {print $2}')
7. Boot the new instance (VM):
[root@ostack11 ~(keystone_demo)]# nova boot --flavor 1 --block_device_mapping vda=$VOL_ID \
--security_groups=demo_sg --key_name demo_kp cirros01
8. Verify the new instance:
[root@ostack11 ~(keystone_demo)]# [root@ostack11 ~(keystone_demo)]# nova list
9. Verify that your instance has spawned successfully:
[root@ostack11 ~(keystone_demo)]# nova show <your_instance_name>
10. Verify connectivity to the new instance. In order to access the instance from the single node
deployment of RHEL-OSP, we must use the proper namespace. That namespace is used to list
available IP addresses, ping instances, and log into instances:
[root@ostack11
[root@ostack11
[root@ostack11
[root@ostack11
instance>
Note:
~(keystone_demo)]#
~(keystone_demo)]#
~(keystone_demo)]#
~(keystone_demo)]#
ip
ip
ip
ip
netns
netns
netns
netns
list
exec
exec
exec
| grep qrouter
<qrouter-namespace> ip addr list
<qrouter-namespace> ping <fixed-ip-of-instance>
<qrouter-namespace> ssh <login>@<fixed-ip-of-
You can get the internal fixed IP of your instance with the following command: nova show
<your_instance_name>
11. Repeat steps 5-9 in order to create a second instance. Log into 1 of the instances either by way of the
namespace described in step 10, or from the instance console available in the Horizon dashboard.
4 SUMMARY
If the previous sets of instructions are followed as described, you should now have a simple deployment
of Red Hat Enterprise Linux OpenStack Platform that is fully functioning on Cisco UCS, Cisco Nexus, and
NetApp storage. Future OpenStack white papers may look at tailoring the environment for a given
production workload, managing users and projects, scaling systems, running multi-site systems, and a
host of other operations and scale out tasks.
16
Technical Preview
5 APPENDIX
5.1
EXAMPLE PACKSTACK FILE
[general]
# Set to 'y' if you would like Packstack to install Glance
CONFIG_GLANCE_INSTALL=y
# Set to 'y' if you would like Packstack to install Cinder
CONFIG_CINDER_INSTALL=y
# Set to 'y' if you would like Packstack to install Nova
CONFIG_NOVA_INSTALL=y
# Set to 'y' if you would like Packstack to install Quantum
CONFIG_QUANTUM_INSTALL=y
# Set to 'y' if you would like Packstack to install Horizon
CONFIG_HORIZON_INSTALL=y
# Set to 'y' if you would like Packstack to install Swift
CONFIG_SWIFT_INSTALL=n
# Set to 'y' if you would like Packstack to install the OpenStack
# Client packages. An admin "rc" file will also be installed
CONFIG_CLIENT_INSTALL=y
# Comma separated list of NTP servers. Leave plain if Packstack
# should not install ntpd on instances.
CONFIG_NTP_SERVERS=0.pool.ntp.org
# Set to 'y' if you would like Packstack to install Nagios to monitor
# openstack hosts
CONFIG_NAGIOS_INSTALL=n
# Comma separated list of servers to be excluded from installation in
# case you are running Packstack the second time with the same answer
# file and don't want Packstack to touch these servers. Leave plain if
# you don't need to exclude any server.
EXCLUDE_SERVERS=
# Path to a Public key to install on servers. If a usable key has not
# been installed on the remote servers the user will be prompted for a
# password and this key will be installed so the password will not be
# required again
CONFIG_SSH_KEY=.ssh/id_rsa.pub
# The IP address of the server on which to install MySQL
CONFIG_MYSQL_HOST=172.20.71.101
# Username for the MySQL admin user
CONFIG_MYSQL_USER=root
# Password for the MySQL admin user
CONFIG_MYSQL_PW=Netapp123
# The IP address of the server on which to install the QPID service
CONFIG_QPID_HOST=172.20.71.101
# The IP address of the server on which to install Keystone
CONFIG_KEYSTONE_HOST=172.20.71.101
# The password to use for the Keystone to access DB
CONFIG_KEYSTONE_DB_PW=Netapp123
# The token to use for the Keystone service api
CONFIG_KEYSTONE_ADMIN_TOKEN=69770285c5864f21b28c65b47f930f90
17
Technical Preview
# The password to use for the Keystone admin user
CONFIG_KEYSTONE_ADMIN_PW=Netapp123
# The password to use for the Keystone demo user
CONFIG_KEYSTONE_DEMO_PW=Netapp123
# Kestone token format. Use either UUID or PKI
CONFIG_KEYSTONE_TOKEN_FORMAT=UUID
# The IP address of the server on which to install Glance
CONFIG_GLANCE_HOST=172.20.71.101
# The password to use for the Glance to access DB
CONFIG_GLANCE_DB_PW=Netapp123
# The password to use for the Glance to authenticate with Keystone
CONFIG_GLANCE_KS_PW=Netapp123
# The IP address of the server on which to install Cinder
CONFIG_CINDER_HOST=172.20.71.101
# The password to use for the Cinder to access DB
CONFIG_CINDER_DB_PW=Netapp123
# The password to use for the Cinder to authenticate with Keystone
CONFIG_CINDER_KS_PW=Netapp123
# Create Cinder's volumes group. This should only be done for testing
# on a proof-of-concept installation of Cinder. This will create a
# file-backed volume group and is not suitable for production usage.
CONFIG_CINDER_VOLUMES_CREATE=y
# Cinder's volumes group size
CONFIG_CINDER_VOLUMES_SIZE=20G
# The IP address of the server on which to install the Nova API
# service
CONFIG_NOVA_API_HOST=172.20.71.101
# The IP address of the server on which to install the Nova Cert
# service
CONFIG_NOVA_CERT_HOST=172.20.71.101
# The IP address of the server on which to install the Nova VNC proxy
CONFIG_NOVA_VNCPROXY_HOST=172.20.71.101
# A comma separated list of IP addresses on which to install the Nova
# Compute services
CONFIG_NOVA_COMPUTE_HOSTS=172.20.71.101
# The IP address of the server on which to install the Nova Conductor
# service
CONFIG_NOVA_CONDUCTOR_HOST=172.20.71.101
# The password to use for the Nova to access DB
CONFIG_NOVA_DB_PW=Netapp123
# The password to use for the Nova to authenticate with Keystone
CONFIG_NOVA_KS_PW=Netapp123
# The IP address of the server on which to install the Nova Scheduler
# service
CONFIG_NOVA_SCHED_HOST=172.20.71.101
# The overcommitment ratio for virtual to physical CPUs. Set to 1.0
# to disable CPU overcommitment
CONFIG_NOVA_SCHED_CPU_ALLOC_RATIO=16.0
# The overcommitment ratio for virtual to physical RAM. Set to 1.0 to
# disable RAM overcommitment
CONFIG_NOVA_SCHED_RAM_ALLOC_RATIO=1.5
18
Technical Preview
# Private interface for Flat DHCP on the Nova compute servers
CONFIG_NOVA_COMPUTE_PRIVIF=eth1
# The IP address of the server on which to install the Nova Network
# service
CONFIG_NOVA_NETWORK_HOST=172.20.71.101
# Public interface on the Nova network server
CONFIG_NOVA_NETWORK_PUBIF=eth0
# Private interface for Flat DHCP on the Nova network server
CONFIG_NOVA_NETWORK_PRIVIF=eth1
# IP Range for Flat DHCP
CONFIG_NOVA_NETWORK_FIXEDRANGE=192.168.32.0/22
# IP Range for Floating IP's
CONFIG_NOVA_NETWORK_FLOATRANGE=10.3.4.0/22
# Name of the default floating pool to which the specified floating
# ranges are added to
CONFIG_NOVA_NETWORK_DEFAULTFLOATINGPOOL=nova
# Automatically assign a floating IP to new instances
CONFIG_NOVA_NETWORK_AUTOASSIGNFLOATINGIP=n
# The IP addresses of the server on which to install the Quantum
# server
CONFIG_QUANTUM_SERVER_HOST=172.20.71.101
# Enable network namespaces for Quantum
CONFIG_QUANTUM_USE_NAMESPACES=y
# The password to use for Quantum to authenticate with Keystone
CONFIG_QUANTUM_KS_PW=Netapp123
# The password to use for Quantum to access DB
CONFIG_QUANTUM_DB_PW=Netapp123
# A comma separated list of IP addresses on which to install Quantum
# L3 agent
CONFIG_QUANTUM_L3_HOSTS=172.20.71.101
# The name of the bridge that the Quantum L3 agent will use for
# external traffic, or 'provider' if using provider networks
CONFIG_QUANTUM_L3_EXT_BRIDGE=br-ex
# A comma separated list of IP addresses on which to install Quantum
# DHCP agent
CONFIG_QUANTUM_DHCP_HOSTS=172.20.71.101
# The name of the L2 plugin to be used with Quantum
CONFIG_QUANTUM_L2_PLUGIN=openvswitch
# A comma separated list of IP addresses on which to install Quantum
# metadata agent
CONFIG_QUANTUM_METADATA_HOSTS=172.20.71.101
# A comma separated list of IP addresses on which to install Quantum
# metadata agent
CONFIG_QUANTUM_METADATA_PW=Netapp123
# The type of network to allocate for tenant networks
CONFIG_QUANTUM_LB_TENANT_NETWORK_TYPE=vlan
# A comma separated list of VLAN ranges for the Quantum linuxbridge
# plugin
CONFIG_QUANTUM_LB_VLAN_RANGES=
# A comma separated list of interface mappings for the Quantum
19
Technical Preview
# linuxbridge plugin
CONFIG_QUANTUM_LB_INTERFACE_MAPPINGS=
# Type of network to allocate for tenant networks
CONFIG_QUANTUM_OVS_TENANT_NETWORK_TYPE=vlan
# A comma separated list of VLAN ranges for the Quantum openvswitch
# plugin
CONFIG_QUANTUM_OVS_VLAN_RANGES=physnet4:3075:3075
# A comma separated list of bridge mappings for the Quantum
# openvswitch plugin
CONFIG_QUANTUM_OVS_BRIDGE_MAPPINGS=physnet4:br-eth4
# A comma separated list of colon-separated OVS bridge:interface
# pairs. The interface will be added to the associated bridge.
CONFIG_QUANTUM_OVS_BRIDGE_IFACES=br-eth4:eth4
# The IP address of the server on which to install the OpenStack
# client packages. An admin "rc" file will also be installed
CONFIG_OSCLIENT_HOST=172.20.71.101
# The IP address of the server on which to install Horizon
CONFIG_HORIZON_HOST=172.20.71.101
# To set up Horizon communication over https set this to "y"
CONFIG_HORIZON_SSL=n
# PEM encoded certificate to be used for ssl on the https server,
# leave blank if one should be generated, this certificate should not
# require a passphrase
CONFIG_SSL_CERT=
# Keyfile corresponding to the certificate if one was entered
CONFIG_SSL_KEY=
# The IP address on which to install the Swift proxy service
CONFIG_SWIFT_PROXY_HOSTS=172.20.71.101
# The password to use for the Swift to authenticate with Keystone
CONFIG_SWIFT_KS_PW=ca6c301e38b245c3
# A comma separated list of IP addresses on which to install the
# Swift Storage services, each entry should take the format
# <ipaddress>[/dev], for example 127.0.0.1/vdb will install /dev/vdb
# on 127.0.0.1 as a swift storage device(packstack does not create the
# filesystem, you must do this first), if /dev is omitted Packstack
# will create a loopback device for a test setup
CONFIG_SWIFT_STORAGE_HOSTS=172.20.71.101
# Number of swift storage zones, this number MUST be no bigger than
# the number of storage devices configured
CONFIG_SWIFT_STORAGE_ZONES=1
# Number of swift storage replicas, this number MUST be no bigger
# than the number of storage zones configured
CONFIG_SWIFT_STORAGE_REPLICAS=1
# FileSystem type for storage nodes
CONFIG_SWIFT_STORAGE_FSTYPE=ext4
# Whether to provision for demo usage and testing
CONFIG_PROVISION_DEMO=n
# Whether to configure tempest for testing
CONFIG_PROVISION_TEMPEST=n
# The uri of the tempest git repository to use
CONFIG_PROVISION_TEMPEST_REPO_URI=https://github.com/redhat-openstack/tempest.git
# The revision of the tempest git repository to use
20
Technical Preview
CONFIG_PROVISION_TEMPEST_REPO_REVISION=stable/grizzly
# Whether to configure the ovs external bridge in an all-in-one
# deployment
CONFIG_PROVISION_ALL_IN_ONE_OVS_BRIDGE=n
# To subscribe each server to EPEL enter "y"
CONFIG_USE_EPEL=n
# A comma separated list of URLs to any additional yum repositories
# to install
CONFIG_REPO=
# To subscribe each server with Red Hat subscription manager, include
# this with CONFIG_RH_PW
CONFIG_RH_USER=
# To subscribe each server with Red Hat subscription manager, include
# this with CONFIG_RH_USER
CONFIG_RH_PW=
# To subscribe each server to Red Hat Enterprise Linux 6 Server Beta
# channel (only needed for Preview versions of RHOS) enter "y"
CONFIG_RH_BETA_REPO=n
# To subscribe each server with RHN Satellite,fill Satellite's URL
# here. Note that either satellite's username/password or activation
# key has to be provided
CONFIG_SATELLITE_URL=
# Username to access RHN Satellite
CONFIG_SATELLITE_USER=
# Password to access RHN Satellite
CONFIG_SATELLITE_PW=
# Activation key for subscription to RHN Satellite
CONFIG_SATELLITE_AKEY=
# Specify a path or URL to a SSL CA certificate to use
CONFIG_SATELLITE_CACERT=
# If required specify the profile name that should be used as an
# identifier for the system in RHN Satellite
CONFIG_SATELLITE_PROFILE=
# Comma separated list of flags passed to rhnreg_ks. Valid flags are:
# novirtinfo, norhnsd, nopackages
CONFIG_SATELLITE_FLAGS=
# Specify a HTTP proxy to use with RHN Satellite
CONFIG_SATELLITE_PROXY=
# Specify a username to use with an authenticated HTTP proxy
CONFIG_SATELLITE_PROXY_USER=
# Specify a password to use with an authenticated HTTP proxy.
CONFIG_SATELLITE_PROXY_PW=
# The IP address of the server on which to install the Nagios server
CONFIG_NAGIOS_HOST=172.20.71.101
# The password of the nagiosadmin user on the Nagios server
CONFIG_NAGIOS_PW=1c4e472e4c214f9f
[root@ostack11 ~]#
5.2
DOCUMENT INFORMATION
This section contains the version control details for this document.
21
Technical Preview
Table 4: Document version control
Date
Version
Description
Author(s)
6/27/2013
0.1
Draft
Jon Benedict
8/18/2013 10/29/2013
0.2 0.9
Feedback from first review,
addition of installation, test
information, final partner & peer
review
10/30/2013
1.0
Preview Document
10/30/2013
1.1
Preview Document tweaks
Jon Benedict, Rob Esker
NetApp provides no representations or warranties regarding the accuracy, reliability, or serviceability of any
information or recommendations provided in this publication, or with respect to any results that may be
obtained by the use of the information or observance of any recommendations provided herein. The
information in this document is distributed AS IS, and the use of this information or the implementation of
any recommendations or techniques herein is a customer’s responsibility and depends on the customer’s
ability to evaluate and integrate them into the customer’s operational environment. This document and
the information contained herein may be used solely in connection with the NetApp products discussed
in this document.
22
© 2013 NetApp, Inc. All rights reserved. No portions of this document may be reproduced without prior written consent of NetApp,
Inc. Specifications are subject to change without notice. NetApp, the NetApp logo, Go further, faster, xxx, and xxx are trademarks or
registered trademarks of NetApp, Inc. in the United States and/or other countries. <<Insert third-party trademark notices here.>> All
other brands or products are trademarks or registered trademarks of their respective holders and should be treated as such. TRTechnical Preview
XXXX-MMYR