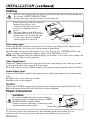
1
Own your audience.
Main Office: 9440Carroll Park Drive, San Diego, CA 92121-2298
(858)457-5500, FAX(858)457-9647, (800)447-7692 (U.S. and Canada)
European Office: K.G. Meldahlsvei 9, Postboks 1403
N-1602 Fredrikstad, Norway, +47 69 6401 55, FAX + 47 69 34 06 32
Technical support & service: Horsterweg 24, 6191 RX Beek, The Netherlands, +31 43 358 5210, FAX +31 43 358 5202
www.proxima.com
www.presentersuniversity.com
User's Guide 710-00866
Part No.710-00866
ULTRALIGHT S520 User's Manual.qxd
Printed in Japan
710-00866
QR47451
Bitte lessen Sie diese Bedienungsanleitung zugunsten der korrekten Bedienung
aufmerksam.
MANUEL D'UTILISATION
Nous vous recommandons de lire attentivement ce menuel pour bien assimiler le
fonctionnement de l'appareil.
MANUAL D'ISTRUZIONI
Vi preghiamo voler leggere attentamente il manuale d'sitruzioni in modo tale da poter
comprendere quanto riportato ai fini di un corretto utilizzo del proiettore.
MANUAL DE USUARIO
Lea cuidadosamente este manual del usuario para poder utilizar corretamente el
producto.
GEBRUIKSAANWIJZNG
Lees voor het qebruik alstublieft deze handleiding aandachtig door, om volledig profijt te
hebben van de uitgebreide mogelijkheden.
BRUKERHÅNDBOK
Vennligst les denne bruksanvisningen grundig for å være garantert driftssikker bruk.
INSTRUÇÕES DO PROPRIETÁRIO
Para assegurar o uso correto do equipamento, por favor leia atentamente este manual do
usuário.
TECHNICAL
ENGLISH
ITALIANO FRANÇAIS DEUTSCH
BEDIENUNGSANLEITUNG
NEDERLANDS ESPAÑOL
Please read this user's manual thoroughly to ensure correct usage through understanding.
NORSK
USER'S MANUAL
TECHNICAL PORTGÊS
UltraLight S520
USER'S MANUAL
Thank you for purchasing this PROXIMA liquid crystal projector.
Please read the “SAFETY INSTRUCTIONS” and this “USER'S
MANUAL” thoroughly to ensure correct usage through understanding. After reading,
store this instruction manual in a safe place for future reference.
NOTE:
* The information in this manual is subject to change without notice.
* The manufacturer assumes no responsibility for any errors that may appear in this manual
* The reproduction, transmission or use of this documents or contents is not permitted without
express written authority.
TRADEMARK ACKNOWLEDGMENT:
* PS/2, VGA and XGA are registered trademark of International Business Machines Corporation.
* Apple, Macintosh, Mac and ADB are registered trademarks of Apple Computer, Inc.
* VESA and SVGA are trademarks of the Video Electronics Standard Association.
* Windows is registered trademarks of Microsoft Corporation.
* Carefully observe the trademarks and registered trademarks of all companies, even when not
mentioned.
CONTENTS
FEATURES ....................................P.2
TROUBLESHOOTING.................P.19
BEFORE USE ................................P.2
OSD Message...................................P.19
Indicators Message ...........................P.20
Symptom ...........................................P.21
Contents of Package...........................P.2
Part Names .........................................P.3
Loading the Battery .............................P.4
SPECIFICATIONS .......................P.22
INSTALLATION .............................P.5
WARRANTY AND AFTER-SERVICE...P.23
Installation of the projector and Screen.....P.5
Angle Adjustment ................................P.5
Cabling ................................................P.6
Power Connection...............................P.6
Example of System Setup...................P.7
Plug & Play..........................................P.7
OPERATIONS................................P.8
Switching the Power Supply ON/OFF ....P.8
Basic Operation...................................P.9
Setup Menu.......................................P.11
Input Menu ........................................P.12
Image Menu ......................................P.13
Options Menu....................................P.14
No Signal Menu.................................P.15
REGULATORY NOTICES ...........P.24
Tables:
Table 1. Installation Reference .............P.5
Table 2. Basic Operations.....................P.9
Table 3. Setup Menu...........................P.11
Table 4. Input Menu ............................P.12
Table 5. Image Menu ..........................P.13
Table 6. Options Menu........................P.14
Table 7. No Signal Menu.....................P.15
Table 8. OSD Message.......................P.19
Table 9. Indicator Message.................P.20
Table 10. Symptom .............................P.21
Table 11. Specifications ......................P.22
MAINTENANCE...........................P.16
Lamp .................................................P.16
Air Filter Maintenance .......................P.18
Other Maintenance............................P.18
ENGLISH-1
ENGLISH
UltraLight S520
FEATURES
This liquid crystal projector is used to project various computer signals as well as NTSC / PAL /
SECAM video signals onto a screen. Little space is required for installation and large images can
easily be realized.
• Outstanding brightness
The UHB lamp and high-efficiency optical system assure a high level of brightness.
• Partial magnification function
Interesting parts of images can be magnified for closer viewing.
• Distortion correction function
Distortion-free images are quickly available.
BEFORE USE
Contents of package
Make sure all of the following items are included in the package. If anything is missing, please
contact your dealer.
NOTE: Keep the original packing material for future reshipment.
Power Cord
US Type
Power Cord
Europe Type
RGB Cable
Projector
S-Video Cable Video Cable
Audio Cable
(RCA / Mini)
Audio Cable
(Mini / Mini)
User’s Manual
(this manual)
VIDEO
STANDBY/ON
RGB
MENU
SELECT
Mac Adapter
MENU
MAGNIFY
POSITION RESET
FREEZE VOLUME
MUTE
OFF
AUTO
Safety Instructions
TIMER
BLANK
Registration Card
Remote Controller
containing Battery
ENGLISH-2
Carrying Bag
Part Names
Zoom Knob
Focus Ring
Remote Control Sensor
Power Switch
Lens
Slide Lens door
Foot Adjuster
FRONT/LEFT VIEW OF
THE PROJECTOR
AC Inlet
(to the Power Cord)
Ventilation Openings
(Intake)
Control Panel (Refer to P.8 "OPERATIONS")
LAMP Indicator
TEMP Indicator
POWER Indicator
MENU Button
RESET Button
MUTE Button
INPUT Button
STANDBY/ON Button
Foot Adjuster Button
Ventilation Openings
(exhaust)
Air Filter and Intake
(for the Cooling Fan)
Speaker
Rear Foot Adjuster
REAR/RIGHT VIEW OF
THE PROJECTOR
Terminal Panel
(Refer below)
Remote Control Sensor
S-VIDEO Terminal
RGB IN Terminal
CONTROL Terminal
AUDIO IN Terminal
VIDEO Terminal
TERMINAL PANEL
ENGLISH-3
ENGLISH
B E F O R E U S E ( c o n t i nu e d )
BEFORE USE (continued)
Part Names (continued)
VIDEO Button
STANDBY/ON Button
VIDEO
STANDBY/ON
RGB
Button
RGB Button
MENU SELECT Button
Button
MENU
SELECT
Button
POSITION Button
Button
MENU
MENU Button
MAGNIFY
RESET Button
Button
MAGNIFY
MAGNIFY
POSITION RESET
Button
OFF
MAGNIFY
FREEZE VOLUME
Button
MUTE
OFF
AUTO
TIMER
AUTO Button
BLANK
VOLUME
Button
VOLUME
Button
FREEZE Button
MUTE Button
BLANK Button
TIMER Button
Battery Holder
(Refer to P.8 "OPERATIONS")
REMOTE CONTROLLER
Loading the Battery
CAUTION
Danger of explosion if battery is incorrectly replaced.
Be careful in handling the battery according to instructions of the accompanying manual
“SAFETY INSTRUCTIONS” and this manual.
Replace only with the same or equivalent type recommended by the manufacturer.
Use the 3V micro lithium battery type no. CR2025 only.
When you dispose the battery, you must obey the law in the relative area or country.
Keep the battery away from children and pets.
First Loading:
In original packing, the battery is installed in the battery
holder of the remote controller with protection film(the
transparent filmsome of which is inside the battery
folder). Pull out the protection film to load the battery.
“+” side
Replacing:
1. See the reverse side of the remote controller.
2. Pinch the groove and pull out battery holder as the
drawing right.
3. Remove the worn battery.
4. Install the new battery with “+” side facing.
5. Push in and click the battery holder.
ENGLISH-4
Pull out
Battery Holder
INSTALLATION
ENGLISH
Installation of the Projector and Screen
Install the projector in a suitable environment according to instructions of the
accompanying manual “SAFETY INSTRUCTIONS” and this manual.
Refer to the drawing and table below for determining of the screen size and projection distance.
a: Distance from the LCD projector to the screen.
The projection distance shown in the table below
are for full size (800 x 600 dots).
b: Distance from the lens center to the bottom of the
screen (a, b: +/-10%)
Table 1. Installation Reference
TOP VIEW
b
a
a (inches)
Screen size
(inches)
Min.
Max.
40
37
46
3
60
57
69
5
80
77
93
7
100
96
116
9
120
116
139
10
150
145
174
13
200
194
233
17
b (inches)
SIDE VIEW
Installation of liquid crystal projector
Please basically use liquid crystal projector at the horizontal position.
If you use liquid crystal projector by the lens up position, the lens down position and the side up
position, this may cause the heat inside to build up and become the cause of damage.
Be especially careful not to install it with ventilation holes blocked.
Angle Adjustment
Use the foot adjuster on the bottom of the projector to adjust the projection angle. It is variable
within 0˚ to 10˚ approximately.
Foot Adjuster
Press the foot adjuster button
1. Lift up the front side of the projector, and pressing
the foot adjuster button, adjust the projection angle.
2. Release the button to lock at the angle to be fixed.
3. Turn the rear foot adjuster to adjust the left-right slope.
Rear Foot Adjuster
Do not release the foot adjuster button unless the projector is being held; otherwise, the
projector could overturn or the fingers could get caught and cause personal injury.
ENGLISH-5
INSTALLATION (continued)
Cabling
* Incorrect connecting could result in fire or electrical shock. Please read this manual and
the separate “SAFETY INSTRUCTIONS”.
* Before connecting, turn off to all devices to be connected.
*Before connecting, read the instruction
manuals of the devices to be
connected, and make sure that the
projector is compatible with the
device.
*The cables (Power cord, RGB cable
and other cables) may have to be used
with the core set to the projector side.
Use the cables which are included
with the projector or specified.
Core
RGB Signal Input:
Connect the RGB IN terminal of the projector to the display signal output of the computer by the
enclosed RGB cable. Secure the screws on the connector and tighten.
For some modes, the enclosed Mac adapter is necessary. Refer to P.22 “SPECIFICATION” and
“Table 1. Example of Compatible Computer Signal” of the TECNICAL section.
NOTE: Some computers may have multiple display screen modes. Use of some of these modes will
not be possible with this projector.
Video Signal Input:
Connect the VIDEO terminal of the projector to the video signal output of the video tape recorder
by the enclosed video cable except for S-Video signal.
For S-Video signal, use the S-VIDEO terminal of the projector and the optional cable for S-Video.
Audio Signal Input:
Connect the AUDIO IN terminal of the projector to the audio signal output by the enclosed audio
cable.
RCA/Mini cable: to the video tape recorder
Mini/Mini cable: to the computer
RS-232C:
Connect the CONTROL terminal of the projector to the computer by the optional RS-232C cable.
Refer to the manual of the RS-232C cable for the control command.
Power Connection
WARINING
Power outlet
Be carful in handling the power cord according to
instructions of the accompanying manual "SAFETY
INSTRUCTIONS" and this manual.
Connect the power cord firmly. Avoid using a loose,
unsound outlet or contact failure.
Power Cord
AC Inlet
Use the correct one of the enclosed power cords depending on the power outlet to be use.
Connect the AC inlet of the projector to the power outlet firmly by the power cord.
ENGLISH-6
INSTALLATION (continued)
ENGLISH
Example of system setup
AC Inlet
Video tape recorder with S jack
RGB Cable
Audio Cable
(Mini/Mini)
Computer
(notebook type)
Audio Cable
(RCA/Mini)
RGB Cable
RS-232C Cable
Audio Cable
(Mini/Mini)
Computer
(desktop type)
Audio Cable
(RCA/Mini)
Video tape recorder
Connecting with notebook computer
When connecting with notebook computer, set to valid the RGB external image output
(setting CRT display or simultaneous display of LCD and CRT).
Please read instruction manual of the notebook for more information.
Plug & Play
This projector is VESA DDC 1/2B compatible. Plug & play is possible by connecting to a computer
that is VESA DDC (Display Data Channel) compatible.
(Plug & play is a system configured with peripheral equipment including a computer and display,
and an operating system.
NOTE: Use the RGB cable included with this projector when using plug & play. With other cables,
pins (12) (14) (15) are sometimes not connected.
ENGLISH-7
OPERATIONS
Please read this manual, and the separate “SAFETY INSTRUCTIONS” thoroughly before
using the equipment. Always ensure that the equipment is used safely.
Switching the Power Supply ON/OFF
Switching Power ON
1. Check that the power cord is connected correctly.
2. Set the power switch to [ | ]. The standby mode is selected, and the Power indicator is turned to
orange.
3. Press the STANDBY/ON
button on the control panel or the remote. Warm-up begins and the
Power indicator blinks in green.
4. The Power indicator ceases blinking and turns to green when power is ON. Open the lens door.
5. Adjust picture size using the projection lens Zoom Knob.
6. Adjust focus using the projection lens Focus Ring.
STANDBY/ON Button
POWER Indicator
STANDBY/
ON Button
VIDEO
STANDBY/ON
RGB
MENU
SELECT
ZOOM knob
MENU
POSITION RESET
FOCUS ring
MAGNIFY
Power Switch
FREEZE VOLUME
Slide Lens door
Switching Power OFF
1. Press the STANDBY/ON button on the control panel or the remote for approximately two
second. The projector lamp is extinguished and lamp cooling begins. The Power indicator blinks
orange during lamp cooling. Pressing the STANDBY/ON
button has no effect while the
Power indicator is blinking.
2. The system assumes the Standby mode when cooling is complete, and the Power indicator ceases
blinking and changes to orange. Check that the indicator is orange and set the Power switch to
[O].
3. The Power indicator is extinguished when power is OFF. Do not forget to close the lens door.
Except in emergencies, do not switch power OFF unless the Power indicator is orange as it
will reduce the life of the projector lamp.
ENGLISH-8
Basic Operation
The Basic operation shown in Table 2 is performed from the projector control panel or the supplied
remote. (items indicated by * may be used from the control panel)
Use the remote controller at a distance of approximately 3m from the sensor on the front
of the projector, and within a range of 30° left-right. Strong light and obstacles will
interfere with operation of the remote.
Table 2 . Basic Operation
Item
Description
Changes in input signal in sequence: Press INPUT
button.*
RGB → VIDEO → S-VIDEO (→ RGB)
Select RGB input: Press RGB button.
INPUT
SELECT
VIDEO/S-VIDEO → RGB
Select VIDEO/S-VIDEO input: Press VIDEO button.
RGB → VIDEO/S-VIDEO
S-VIDEO ↔ VIDEO
* The selected signal name is displayed for approximately three seconds
when the input signal is changed.
POSITION
Set/Clear position adjustment mode: Press POSITION button.
The [ ] icon is displayed in the POSITION mode.
Image position adjustment: Press the , ,
and
buttons in the
position adjustment mode.
* Valid only in the MAGNIFY mode with VIDEO/S-VIDEO input.
* The [ ] icon is extinguished, and the position adjustment mode cleared
automatically, after approximately ten seconds of inactivity.
RESET *
Initialise menu items: Select an item and press the RESET
button.
Initialise position adjustment: Press the RESET
button
and the POSITION mode.Valid only when RGB signal is input.
* Valid except for VOLUME, LANGUAGE and H PHASE.
MAGNIFY
Set MAGNIFY mode: Press the MAGNIFY
button.
Move magnified area: Run Position Adjustment in MAGNIFY mode.
Adjust magnification: Press MAGNIFY
/
in MAGNIFY mode.
Clear MAGNIFY mode: Press MAGNIFY
button.
* MAGNIFY is cleared by running or setting AUTO, ASPECT, INPUT
SELECT or VIDEO, or by changing the input signal.
OFF
FREEZE
Set/Clear FREEZE mode: Press FREEZE button.
The [II] icon is displayed, and the image frozen, in the FREEZE mode.
* FREEZE is cleared by running or setting POSITION, VOLUME, MUTE,
Auto Adjust, BLANK ON/OFF, or MENU ON/OFF, or by changing the
input signal.
* Do not forget to clear frozen static images.
(It continue the next page.)
ENGLISH-9
ENGLISH
OPERATIONS (continued)
OPERATIONS (continued)
Table 2. Basic Operation (continued)
Item
Description
VOLUME
Volume adjustment : Reduce VOLUME
↔ Increase VOLUME
MUTE *
Set/Clear Mute mode: Press the MUTE
No sound is heard in the MUTE mode.
button.
AUTO
TIMER
ON/OFF
Automatic adjustment at RGB input: Press the AUTO button.
Horizontal position(H.POSIT), vertical position (V.POSIT),clock phase
(H.PHASE), and horizontal size(H.SIZE) are automatically adjusted. Use
with the window at maximum size in the application display.
Automatic adjustment at VIDEO/S-VIDEO input:
Press the AUTO button.
A signal type appropriate for the input signal is selected automatically.
Valid only when AUTO is set for VIDEO on the menu.
* This operation requires approximately ten seconds. It may not function
correctly with some input signals.
Timer start/stop: Press the TIMER button.
Count-down and display by the minute from the initial value (1~99) set in
TIMER on the Options menu to 0.
* The timer is not displayed in the BLANK MODE or FREEZE MODE.
BLANK
ON/OFF
Set/Clear Blank mode: Press the BLANK button.
No image is displayed in the Blank mode. The screen color is as set in
BLANK on the Image menu.
MENU
ON/OFF *
Menu display start/stop: Press the MENU button.
* The menu display is terminated automatically after approximately ten
seconds of inactivity.
MENU
SELECT
Select menu type: Press the MENU SELECT button.
Allows the user to select the normal menu or the single menu. Only the
selected item is displayed on the single menu, and other items are
displayed with the
and
buttons as with the normal menu.
* Valid only when the Setup menu is used. Push the MENU SELECT button
after selecting items such as "BRIGHTNESS".
Normal menu
Single menu
(MENU SELECT)
SETUP
INPUT
BRIGHT
CONTRAST
V POSIT
H POSIT
H PHASE
H SIZE
COLOR BAL R
COLOR BAL B
ASPECT
ENGLISH-10
IMAGE
OPT.
0
-2
100
100
+1
800
0
0
CONTRAST
-2
Setup Menu
The following adjustments and settings are
possible when SETUP is selected at the top of
the menu. Part of the Setup menu differs
between RGB input and VIDEO/S-VIDEO
input. Select an item with the
and
buttons, and start operation. Use the Single
menu to reduce menu size (see Table 2 MENU
SELECT).
SETUP
INPUT
IMAGE
OPT.
SETUP
0
-2
BRIGHT
CONTRAST
V POSIT
H POSIT
H PHASE
H SIZE
COLOR BAL R
COLOR BAL B
ASPECT
INPUT
IMAGE
OPT.
0
+1
+1
0
0
0
0
BRIGHT
CONTRAST
SHARPNESS
COLOR
TINT
COLOR BAL R
COLOR BAL B
ASPECT
100
100
+1
800
0
0
VIDEO/S-VIDEO
RGB
Table 3. Setup Menu
Item
VIDEO
Description
RGB S-VIDEO
✔
✔
↔ Strong
✔
✔
↔ Up
✔
-
↔ Right
✔
-
H PHASE
Adjustment: Left
↔ Right
* Adjust to eliminate flicker.
✔
-
H SIZE
Adjustment: Small
↔ Large
* The image may not displayed correctly if the horizontal size
is excessive. In such cases, press the RESET
button,
and initialise the horizontal size.
✔
-
↔ Clear
-
✔
↔ Dark
-
✔
-
✔
BRIGHT
Adjustment: Dark
CONTRAST
Adjustment: Weak
V POSIT
Adjustment: Down
H POSIT
Adjustment: Left
SHARPNESS Adjustment: Soft
↔ Light
COLOR
Adjustment: Light
TINT
Adjustment: Red
↔ Green
* Valid only when NTSC or NTSC 4.43 signals is received.
COLOR BAL R Adjustment: Light
↔ Dark
✔
✔
COLOR BAL B Adjustment: Light
↔ Dark
✔
✔
✔
✔
Select image aspect ratio:
4:3[
]
↔
16:9[
]
ASPECT
↔
4:3 small[
]
Select position of 16:9:[
]/4:3 small[
] image:
Press
button while 16:9[
]/4:3 small[
] is selected.
Center →
Down →
Up ( → Center
)
* 4:3small may not be displayed correctly with some input
signals.
ENGLISH-11
ENGLISH
OPERATIONS (continued)
OPERATIONS (continued)
Input Menu
SETUP
The following functions are available when INPUT is selected on the
menu. Select an item with the
and
buttons, and start or stop
operation with the
and
buttons.
RGB
VIDEO
AUTO
INPUT
IMAGE
OPT.
fH:38kHz
fV:60Hz
Table 4. Input Menu
Item
Description
RGB
Displays RGB input frequency: Displays the horizontal and vertical sync
signal frequency for RGB input.
* Valid only at RGB input.
VIDEO
Select video signal type:
Select the signal type with the
and
buttons.
Select NTSC, PAL SECAM, NTSC4.43, M-PAL, or N-PAL as appropriate
for the input signal.
Auto Adjust is valid at VIDEO/S-VIDEO input when AUTO is selected,
and is then used for automatic selection of the signal type.
* Use this function when the image becomes unstable (eg. the image
becomes irregular, or lacks color).
* Auto Adjust requires approximately ten seconds. It may not function
correctly with some input signals. Pressing the AUTO button in this case
may correct this problem.
AUTO
ENGLISH-12
Automatic adjustment at RGB input: Select EXECUTE with the
button.
Horizontal position, vertical position, clock phase, and horizontal size are
automatically adjusted when EXECUTE is selected. Use with the window
at maximum size in the application display.
Automatic adjustment at VIDEO/S-VIDEO input:
button.
Select EXECUTE with the
A signal type appropriate for the input signal is selected automatically
when EXECUTE is selected. Valid only if AUTO is selected in VIDEO (see
above).
* This operation requires approximately ten seconds. It may not function
correctly with some input signals. Pressing the AUTO button in this case
may correct this problem.
* This function is the same as for Auto Adjust in Basic operation.
Image Menu
SETUP
The following adjustments and settings are available when IMAGE is
selected on the menu. Select an item with the
and
buttons, and
start operation.
INPUT
IMAGE
OPT.
+1
KEYSTONE
BLANK
MIRROR
START UP
Table 5. Image Menu
Item
Description
Adjustment:
KEYSTONE
Reduce size of bottom of image
↔ Reduce size of top of image
BLANK
Select blank screen color: Select color with the
and
buttons.
* The image is cleared when the BLANK mode is set with BLANK ON, or
when there is no signal, and the entire screen is displayed in the selected
color. Note that if TURN OFF is selected on the START UP the blank
screen is displayed in blue when there is no signal.
MIRROR
Operation start/stop: Press the
or
button.
Select Mirror status: Select mirror status with
and
START UP
Operation start/stop: Press the
or
button.
Setup initial screen display: Select TURN ON with the
button.
Clear initial screen display: Select TURN OFF with the
button.
* Note that if TURN OFF is selected the blank screen is displayed in blue
when there is no signal.
buttons.
ENGLISH-13
ENGLISH
OPERATIONS (continued)
OPERATIONS (continued)
Options Menu
SETUP
The following adjustments and settings are available when OPT. is
selected on the menu. Select an item with the
and
buttons, and
start operation.
INPUT
IMAGE
OPT.
128
VOLUME
MENU COLOR
TIMER
LANGUAGE
AUTO OFF
SYNC ON G
Table 6. Options Menu
Item
Description
↔ Increase VOLUME
VOLUME
Volume adjustment: Reduce VOLUME
MENU COLOR
Select menu background color: Select with the
TIMER
Operation start/stop: Press the
or
button.
Setup initial timer value:
Set 1~99 minutes with the
and buttons.
LANGUAGE
Operation start/stop: Press the
or
button.
Select menu display language: Select with the
AUTO OFF
Operation start/stop: Press the
or
button.
Set AUTO OFF: Set 1~99 minutes with the
and
buttons.
The system automatically enters the standby mode when a signal is
not received for the set time.
Clear AUTO OFF: Select STOP (0 min.) with the
button.
Wind Stop is selected the system does not enter the standby mode
even if no signal is received.
SYNC ON G
Operation start/stop: Press the
or
button.
SYNC ON G valid: Select TURN ON with the
button.
SYNC ON G invalid: Select TURN OFF with the
button.
* May not be displayed correctly with some input signals when SYNC
ON G is valid. In such cases, remove the signal connector so that
knows signal is received, set SYNC ON G to invalid, and reconnect
the signal.
ENGLISH-14
and
and
buttons.
buttons.
No Signal Menu
The same adjustments and settings are available as with the Image and
Options menus when the MENU button is pressed during display of the
“NO INPUT IS DETECTED ON ***” or “SYNC IS OUT OF RANGE
ON ***” message while no signal is received.
Table 7. No Signal Menu
Item
40
+1
Description
VOLUME
Volume adjustment: Reduce VOLUME
KEYSTONE
Adjustment:
Reduce size of bottom of image
↔ Increase VOLUME
↔ Reduce size of top of image
Select blank screen color: Select color with the
BLANK
VOLUME
KEYSTONE
BLANK
MIRROR
START UP
MENU COLOR
TIMER
LANGUAGE
AUTO OFF
SYNC ON G
and
buttons.
* When the blank mode is set with BLANK ON, by absence of a signal, or by
input of a non-standard signal, the image is cleared and the complete screen is
displayed in the selected colour. Note that if No Display is selected in Initial
Screen the blank screen is displayed in blue when no signal is received.
MIRROR
Operation start/stop: Press the
or
button.
Select Mirror status: Select mirror status with
and
START UP
Operation start/stop: Press the
or
button.
Setup initial screen display: Select TURN ON with the
button.
Clear initial screen display: Select TURN OFF with the
button.
* Note that if TURN OFF is selected the blank screen is displayed in
blue when there is no signal.
MENU COLOR
Select menu background color: Select with the
TIMER
Operation start/stop: Press the
or
button.
Setup initial timer value: Set 1~99 minutes with the
LANGUAGE
Operation start/stop: Press the
or
button.
Select menu display language: Select with the
AUTO OFF
Operation start/stop: Press the
or
button.
Set AUTO OFF: Set 1~99 minutes with the
and
buttons.
The system automatically enters the standby mode when a signal is
not received for the set time.
Clear AUTO OFF: Select STOP (0 min.) with the
button.
When STOP is selected the system does not enter the standby mode
even if no signal is received.
SYNC ON G
buttons.
and
buttons.
and
and
buttons.
buttons.
Operation start/stop: Press the
or
button.
SYNC ON G valid: Select TURN ON with the
button.
SYNC ON G invalid: Select TURN OFF with the
button.
* May not be displayed correctly with some input signals when SYNC ON G is
valid. In such cases, remove the signal connector so that knows signal is
received, set SYNC ON G to invalid, and reconnect the signal.
ENGLISH-15
ENGLISH
OPERATIONS (continued)
MAINTENANCE
Lamp
HIGH VOLTAGE
HIGH TEMPERATURE
HIGH PRESSURE
Contact your dealer before replacing the lamp.
(Option lamp: DT00301)
Before replacing the lamp, switch power OFF, remove the power cord from the power outlet, and
wait approximately 45 minutes until the lamp has cooled. The lamp may explode if handled at high
temperatures.
* For disposal of used lamp, treat according to the instruction of community authorities.
* Since the lamp is made of glass, do not apply shock to it and do
Lamp
not scratch it.
* Also, do not use old lamp. This could also cause explosion of the
lamp.
* If it is probable that the lamp has exploded (explosive sound is
heard), disconnect the power plug from the power outlet and ask
your dealer to replace lamp.
The lamp is covered by front glass , but, in rare cases, the
Reflector
Front
reflector and the inside of the projector may be damaged by
glasss
scattered broken pieces of glass, and broken pieces could cause
injury when being handled.
* Do not use the projector with the lamp cover removed.
Lamp Life
Projector lamps have a finite life. The image will become darker, and hues will become weaker,
after a lamp has been used for a long period of time.
Replace the lamp if the LAMP indicator is red, or the CHANGE THE LAMP message (see P.19
Table 8) appears when the projector is switched ON.
The LAMP is also red when the lamp unit reaches high temperature. Before replacing the
lamp, switch power OFF, wait approximately 20 minutes, and switch power ON again. If
the LAMP indicator is still red, replace the lamp.
ENGLISH-16
MAINTENANCE (continued)
ENGLISH
Replacing the Lamp
1. Switch the projector OFF, remove the power cord from the
power outlet, and wait at least 45 minutes for the unit to cool.
2. Prepare a new lamp.
3. Check that the projector has cooled sufficiently, and gently
turn it upside down.
4. Loosen the two screws as shown in the diagram, and remove
the lamp cover.
5. Loosen the one screw, and gently remove the lamp while
holding the grips. Touching the inside of the lamp case may
result in uneven coloring.
6. Install the new lamp and tighten the one screw firmly. Also
steadily push the opposite side of the screwed lamp into the
unit.
7. Replace the lamp cover in position and tighten the two
screws firmly.
8. Gently turn the projector right-side up.
* Ensure that screws are tightened properly. Screws not
tightened fully may result in injury or accidents.
* Do not use the projector with the lamp cover removed.
Resetting the Lamp Timer
Reset the lamp timer after replacing the lamp. When the lamp has been replaced after the LAMP
indicator is red, or the CHANGE THE LAMP message is displayed, complete the following
operation within ten minutes of switching power ON. The power will be turned off automatically in
over 10 minutes.
1. Switch power ON, and press the TIMER button on the remote controller, or the RESET
button
on the control panel, for approximately three seconds. The ‘LAMP xxxx hr’ message will appear
on the lamp timer on the bottom of the screen.
2. Press the MENU button on the remote controller, or the RESET button on the control panel,
while the lamp timer is displayed. The ‘LAMP xxxx → 0 ■ CANCEL’ message will then
appear.
3. Press the
and select 0, and wait until the timer display is cleared.
Do not reset the lamp timer without replacing the lamp. Reset the lamp timer always when
replace the lamp. The message functions will not operate properly if the lamp timer is not
reset correctly.
ENGLISH-17
MAINTENANCE (continued)
Air Filter Maintenance
Switch power OFF and remove the power cord from the power outlet before beginning
maintenance work. Please read the separate “SAFETY INSTRUCTIONS” thoroughly to
ensure that maintenance is performed correctly.
The air filter should be cleaned as described below at intervals of approximately 100 hours.
1. Switch the projector power supply OFF, and remove the power cord from the power outlet.
2. Clean the air filter with a vacuum cleaner.
* Replace the air filter if contamination cannot be removed, or if it is damaged. Contact
your dealer in such case.(Option Air filter : MU01291)
* Do not use the equipment with the air filter removed.
* When the air filter is clogged with dust etc. the CHECK AIR FLOW message appears on
the screen and the power supply is switched OFF automatically to prevent the
temperature rising inside the projector.
Other Maintenance
Switch power OFF and remove the power cord from the power outlet before beginning
maintenance work. Please read the separate “SAFETY INSTRUCTIONS” thoroughly to
ensure that maintenance is performed correctly.
Maintenance Inside the Equipment
For safety reasons, ensure that the equipment is cleaned and checked by the dealer once every two
years. Maintaining the equipment by yourself is dangerous.
Cleaning the Lens
Gently wipe the lens with lens cleaning paper. Do not touch the lens with your hands.
Cleaning the Cabinet and Remote Controller
Gently wipe with a soft cloth. If dirt and stained etc. are not easily removed, use a soft cloth
dampened with water, or water and a neutral detergent, and wipe dry with a soft, dry cloth.
* Do not use detergents or chemicals other than those noted above (e.g. benzene or
thinners).
* Do not use cleaning sprays.
* Do not rubber with hard materials, or tap the equipment.
ENGLISH-18
OSD Message
The messages as described below may appear on the screen at power ON. Take the appropriate
measures when such a message appears.
Table 8. OSD Messages
Message
Contents
The message shown at left appears after the lamp has
been used for more than 1700 hours.
CHANGE THE LAMP
The lamp is approaching the end of its life.
AFTER REPLACING LAMP,
Power is switched OFF automatically when the lamp
RESET THE LAMP TIME.
*1) reaches the end of its life. Prepare a new lamp for
installation.
Always reset the lamp timer after replacing the lamp.
CHANGE THE LAMP
AFTER REPLACING LAMP,
RESET THE LAMP TIME.
THE POWER WILL TURN OFF
AFTER ** hr.
*1)
CHANGE THE LAMP
AFTER REPLACING LAMP,
RESET THE LAMP TIME.
THE POWER WILL
TURN OFF
AFTER 0 hr.
NO INPUT IS DETECTED
ON ***
SYNC IS OUT OF RANGE
ON ***
CHECK THE AIR FLOW
The lamp will reach the end of its life in ** hours.
Power will be switched OFF automatically in ** hours.
Replace the lamp as shown in P.16 “Lamp”.
Always reset the lamp timer after replacing the lamp.
The lamp has reached the end of its life. Power will be
switched OFF in a few moments.
Switch power OFF immediately and replace the lamp as
shown in P.16 “Lamp”.
Always reset the lamp timer after replacing the lamp.
No input signal found.
Check signal input connections and signal sources.
The horizontal or vertical frequency of the input signal is
not within the specified range.
Check the specifications of the equipment and the signal
source.
The internal temperature has risen.
Switch power OFF, and wait 20 minutes until the
equipment cools.
Check the following and Switch power ON again.
* Are the ventilation openings blocked.
* Is the air filter dirty.
* Is the ambient temperature in excess of 35°C.
*1) This message is cleared automatically after approximately three minutes, and appears
every time power is switched ON.
ENGLISH-19
ENGLISH
TROUBLESHOOTING
TROUBLESHOOTING (continued)
Indicators Message
The POWER indicator, LAMP indicator, and TEMP indicator are lit and blank as follows. Take the
appropriate measures.
Table 9. Indicators Message
POWER LAMP
TEMP
indicator indicator indicator
Contents
Lights
orange
Turns off Turns off The Standby mode has been set.
Blinks
green
Turns off Turns off Warming up. Please wait.
Lights
green
Turns off Turns off ON. Normal operation possible.
Blinks
orange
Turns off Turns off Cooling. Please wait.
Lights
red
Lights
red
Lights
red
Lights
red
Lights
red
Lamp is not lit.
The interior of the equipment may be too hot. Switch
Turns off power OFF, wait 20 minutes until the equipment cools,
and Switch power ON again. Replace the lamp if the
same problem occurs.
Blinks
red
No lamp or lamp cover is found, or hasn’t been fitted in
correctly.
Switch power OFF, and wait for 45 minutes until the
Turns off
equipment cools. Check fitting of the lamp and lamp
cover, and switch power ON again. Contact your dealer if
the same problem occurs again.
Turns off
Turns off
Blinks
red
The cooling fan is not operating.
Switch power OFF, and wait for 20 minutes until the
equipment cools. Check for foreign matters in the fan,
and switch power ON again. Contact your dealer if the
same problem occurs again.
Lights
red
The interior of the equipment is too hot. *1)
Switch power OFF, and wait for 20 minutes until the
equipment cools. Check whether the ventilation openings
are blocked, whether the air filter is dirty, or whether the
ambient temperature exceeds 35 °C. Then switch power
ON again. Contact your dealer if the same problem
occurs again.
*1) When the internal temperature becomes excessive power is switched OFF
automatically for safety reasons, and the indicator is extinguished. Set the power switch to
[O] and wait for 20 minutes until the equipment has cooled sufficiently.
ENGLISH-20
Symptom
Before requesting repair, check in accordance with the following chart. If the situation cannot be
corrected, then contact your dealer.
Table 10. Symptom
Symptom
The power is not
turned on.
Possible cause
Remedy
Page
The main power switch is not
turned on.
Turn on the main power switch.
The power cord is
disconnected.
Plug the power cord into an AC
power outlet.
The input is not correctly set.
Use the projector or remote control
to set.
No signal input.
Connect correctly.
6,7
The projector is not correctly
connected.
Connect correctly.
6,7
No video or audio.
Press VOLUME
on the remote
Video is present but
The volume is seet to minimum. control or display the menu screen
no audio.
and adjust the volume.
Mute is turned on.
Press the MUTE
The projector is not correctly
connected.
Connect correctly.
Colors are pale and Color density and color
color matching is
matching are not correctly
poor.
adjusted.
Images are dark.
Video is blurred.
9
10,14
10
button.
6,7
Audio is present but The brightness adjustment knob Select BRIGHT with the MENU
button and the press the
button.
is rotated fully clockwise.
no video.
The slide lens door is still
closed.
6,8
11
8
Open the slide lens door.
Adjust the video.
11
Brightness and contrast are not
correctly adjusted.
Adjust the video.
11
The lamp is nearing the end of
its service life.
with a new lamp.
16
Focus or H PHASE is out of
adjustment.
Adjust the focus or H PHASE.
11
This product is supplied with a written warranty. Please read it thoroughly, enter the
required details, and storage in a safe place.
ENGLISH-21
ENGLISH
TROUBLESHOOTING (continued)
SPECIFCATIONS
NOTE : This specifications are subject to change without notice.
Table 11. Specifications
Item
Specification
Product name
Liquid crystal projector
Model
ULTRALIGHT S520
Liquid
crystal
panel
Panel size
1.8 cm (0.7 type)
Drive system TFT active matrix
Pixels
480,000 pixels (800 horizontal x 600 vertical)
Lens
Zoom lens F=2.0 ~ 2.3 f=18 ~ 21 mm
Lamp
130 W UHB
Speaker
1.0 W
Power supply
AC100 ~ 120V, 2.0A / AC220 ~ 240V, 0.9A
Power consumption
200 W
Temperature range
0 ~ 35°C (Operating)
Size
289 (W) x 76 (H) x 210 (D) mm
Weight (mass)
2.4 kg or less
Video: Analog 0.7Vp-p, 75Ω terminator (positive)
H/V. sync.: TTL level (positive/negative)
Compound sync.: TTL level
D-sub 15-pin shrink jack
5
1
15
11
7 Ground Green
10
RGB
INPUT
signal
VIDEO
6
9 -
1 Video input Red
10 Ground
2 Video input Green
11 -
3 Video input Blue
12 DDC jack
4 -
13 H. sync./ Compound sync.
5 Ground (DDC)
14 Vertical sync
6 Ground Red
15 DDC jack
1.0Vp-p, 75Ω terminator, RCA jack
Mini DIN 4-pin jack
S-VIDEO
AUDIO
CONTROL signal
ENGLISH-22
8 Ground Blue
2
Ground
1
Ground
1
Brightness signal: 1.0Vpp, 75Ω terminator
Color signal: 0.286Vp-p
2 (burst signal), 75Ω
terminator
200mVrms, 47 kΩ or less (max. 3.0Vp-p)
Stereo mini jack (Speaker output is L/R mixed.)
D-sub 15-pin shrink jack
SPECIFCATIONS (continued)
210
ENGLISH
Dimension Diagram
289
60
76
45.6
74.5
Unit : mm
WARRANTY AND AFTER-SERVICE
This product is supplied with a written warranty. Please read it thoroughly, enter the
required details, and storage in a safe place.
* If a problem occurs with the equipment, first refer to the P.19 “TROUBLESHOOTING” section
and run through the suggested checks. If this does not resolve the problem contact your dealer or
service company. If repairs are possible, and desirable, they will be charged.
ENGLISH-23
REGULATORY NOTICES
FCC Statement Warning
WARNING: This equipment has been tested and found to comply with the
limits for a Class B digital device, pursuant to Part 15 of the FCC Rules. These
limits are designed to provide reasonable protection against harmful
interference in a residential installation. This equipment generates, uses, and
can radiate radio frequency energy and, if not installed and used in accordance
with the instructions, may cause harmful interference to radio communications.
However, there is no guarantee that interference will not occur in a particular
installation. If this equipment does cause harmful interference to radio or
television reception, which can be determined by turning the equipment off and
on, the user is encouraged to try to correct the interference by one or more of
the following measures:
- Reorient or relocate the receiving antenna.
- Increase the separation between the equipment and receiver.
- Connect the equipment into an outlet on a circuit different from that to which
the receiver is connected.
- Consult the dealer or an experienced radio/TV technician for help.
INSTRUCTIONS TO USERS: This equipment complies with the requirements
of FCC (Federal Communication Commission) equipments provided that
following conditions are met.
The cables (Power cord, RGB cable and other cables) may have to be used
with the core set to the projector side. Use the cables which are included with
the projector or specified.
Core
CAUTION: Changes or modifications not expressly approved by the party
responsible for compliance could void the user’s authority to operate the
equipment.
For the Customers in CANADA
NOTICE: This Class B digital apparatus complies with Canadian ICES-003.
ENGLISH-24
TECHNICAL
Table 1. Example of computer signal
Resolution
H×V
fH (kHz)
fV (Hz)
Rating
Signal mode
Display
mode
640 × 350
37.9
85.1
VESA
VGA-1
Zoom in
640 × 400
37.9
85.1
VESA
VGA-2
Zoom in
720 × 400
37.9
85.0
VESA
TEXT
Zoom in
640 × 480
31.5
59.9
VESA
VGA-3
Zoom in
640 × 480
35.0
66.7
Mac13"mode
Zoom in
640 × 480
37.9
72.8
VESA
VGA-3(72Hz)
Zoom in
640 × 480
37.5
75.0
VESA
VGA-3(75Hz)
Zoom in
640 × 480
43.3
85.0
VESA
VGA-3(85Hz)
Zoom in
800 × 600
35.2
56.3
VESA
SVGA(56Hz)
800 × 600
37.9
60.3
VESA
SVGA(60Hz)
800 × 600
48.1
72.2
VESA
SVGA(72Hz)
800 × 600
46.9
75.0
VESA
SVGA(75Hz)
800 × 600
53.7
85.1
VESA
SVGA(85Hz)
832 × 624
49.7
74.5
1024 × 768
48.4
60.0
1024 × 768
56.5
70.1
1024 × 768
60.0
75.0
Note 1:
Mac16"mode
Zoom out
VESA
XGA(60Hz)
Zoom out
VESA
XGA(70Hz)
Zoom out
VESA
XGA(75Hz)
Zoom out
Mac adapter is necessary to the resolution mode.
Projector is compatible with 13 inch mode and 16 inch mode.
Mac 13" mode=switch 1 and switch 2 are ON.
Mac 16" mode=switch 2 and switch 4 are ON.
Note 1
SW 1 ON
SW 2 ON
SW 2 ON
SW 4 ON
ON
1 2 3 4 5 6
OFF
(Example 16 inch mode)
• Some computers may have multiple display screen modes. Use of some of these modes
will not be possible with this projector.
• Be sure to check jack type, signal level, timing and resolution before connecting this
projector to a computer.
• Depending on the input signal, full-size display may not be possible in some cases. Refer
to the number of display pixels above.
TECHNICAL
Caution
TECHNICAL - 1
TECHNICAL (continued)
Table 2. Initial set signals
The following signals are used for the initial settings.
The signal timing of some computer models may be different. In such case, refer to adjust the
V.POSIT and H.POSIT of the menu.
Back porch b
Front porch d
Display interval c
DATA
HSYNC
Sync a
Computer /
Signal
Horizontal signal timing (µs)
Computer /
Signal
Horizontal signal timing (µs)
SVGA(56Hz)
a
2.0
b
3.6
c
22.2
d
0.7
1.0
SVGA(60Hz)
3.2
2.2
20.0
1.0
1.0
SVGA (72Hz)
2.4
1.3
16.0
1.1
25.4
0.6
SVGA (75Hz)
1.6
3.2
16.2
0.3
3.2
21.2
2.1
SVGA (85Hz)
1.1
2.7
14.2
0.6
1.3
3.8
20.3
1.0
Mac 16"mode
1.1
3.9
14.5
0.6
2.0
3.8
20.3
0.5
XGA (60Hz)
2.1
2.5
15.8
0.4
1.6
2.2
17.8
1.6
XGA (70Hz)
1.8
1.9
13.7
0.3
XGA (75Hz)
1.2
2.2
13.0
0.2
VGA-1(85Hz)
a
2.0
b
3.0
c
20.3
d
1.0
VGA-2(85Hz)
2.0
3.0
20.3
TEXT
2.0
3.0
20.3
VGA-3
3.8
1.9
Mac 13"mode
2.1
VGA-3(72Hz)
VGA-3(75Hz)
VGA-3(85Hz)
Back porch b
Front porch d
Display interval c
DATA
VSYNC
Computer /
Signal
Sync a
Vertical signal timimg (lines)
Computer /
Signal
Vertical signal timimg (lines)
SVGA(56Hz)
a
2
b
22
c
600
1
SVGA(60Hz)
4
23
600
1
1
SVGA (72Hz)
6
23
600
37
480
10
SVGA (75Hz)
3
21
600
1
39
480
3
SVGA (85Hz)
3
27
600
1
28
480
9
Mac 16"mode
3
39
624
1
3
16
480
1
XGA (60Hz)
6
29
768
3
3
25
480
1
XGA (70Hz)
6
29
768
3
XGA (75Hz)
3
28
768
1
VGA-1(85Hz)
a
3
b
60
c
350
d
32
VGA-2(85Hz)
3
41
400
TEXT
3
42
480
VGA-3
2
33
Mac 13"mode
3
VGA-3(72Hz)
3
VGA-3(75Hz)
VGA-3(85Hz)
TECHNICAL - 2
d
1
BEDIENUNGSANLEITUNG – Andere Band
Bevor Sie dieses Produkt benutzen, sollten Sie die Sicherheitsvorschriften gründlich
durchlesen und sich mit ihnen vertraut machen, um korrekten Gebrauch zu
gewährleisten. Bewahren Sie die Sicherheitsvorschriften nach dem Durchlesen
zusammen mit der BEDIENUNGSANLEITUNG auf.
CONSIGNES DE SÉCURITÉ
MANUEL D’UTILISATION – Volume Annexe
Avant d'utiliser ce produit, veuillez lire attentivement les consignes de sécurité afin
d'utiliser l'appareil dans les meilleures conditions. Une fois que vous avez terminé,
rangez les Consignes de sécurité avec le MANUEL D'UTILISATION.
ISTRUZIONI DI SICUREZZA
MANUAL D’ISTRUZIONI – Volume Separato
Prima di usare questo prodotto, leggere attentamente ed assimilare le istruzioni di
sicurezza per garantire un corretto uso dello stesso. Dopo averle lette riporre le istruzioni
di sicurezza con il MANUALE D'ISTRUZIONI.
INSTRUCCIONES DE SEURIDAD
MANUAL DE USUARIO – Volumen Separdo
Antes de usar este producto, se recomienda leer y comprender cabalmente todas las
instrucciones de seguridad para poderlo utilizar correctamente. Después de leer las
instrucciones de seguridad, guárdelas junto con el MANUAL DE USUARIO.
VEILIGHEIDSINSTRUCTIES
GEBRUIKSAANWIJZNG – Afzonder Band
Lees voor gebruik de Veiligheidsinstructies aandachtig door zodat u het apparaat op de
juiste wijze behandelt. Bewaar de Veiligheidsinstructies samen met de
GEBRUIKSAANWIJZNG voor het geval u deze in de toekomst nogmaals nodig hebt.
SIKKERHETSINSTRUKSJONER
BRUKERHÅNDBOK – Separate Håndbok
Før dette produktet tas i bruk, må "Sikkerhetsregler" til fulle leses og forstås for å sikre
korrekt bruk. Etterpå må de oppbevares sammen med BRUKERHÅNDBOK.
INSTRUÇÕES DE SEGURANÇA
INSTRUÇÕES DO PROPRIETÁRIO – Folheto à Parte
Antes de usar este produto, leia atentamente as Instruções de Segurança para
assegurar o uso correto do equipamento. Após a leitura, guarde as Instruções de
Segurança juntamente com o INSTRUÇÕES DO PROPRIETÁRIO.
ITALIANO FRANÇAIS DEUTSCH
SICHERHEITSVORSCHRIFTEN
NEDERLANDS ESPAÑOL
Before using this product, please read and understand the Safety Instructions thoroughly
to ensure correct usage.
After reading, store the Safety Instructions together with the USER'S MANUAL.
NORASK
USER’S MANUAL – Separate Volume
PORTGÊS
SAFETY INSTRUCTIONS
ENGLISH
Liquid Crystal Projector
BEFORE USING
Various symbols are used in this manual, the user’s manual and on the product itself to
ensure correct usage, to prevent danger to the user and others, and to prevent property
damage. The meanings of these symbols are described below. It is important that you
read these descriptions thoroughly and fully understand the contents.
Warning
This symbol indicates information that, if ignored, could
possibly result in personal injury or even death due to
incorrect handling.
Caution
This symbol indicates information that, if ignored, could result
possibly in personal injury or physical damage due to
incorrect handling.
Typical Symbols
This symbol indicates an additional warning (including cautions). An
illustration is provided to clarify the contents.
This symbol indicates a prohibited action. The contents will be clearly
indicated in an illustration or nearby (the symbol to the left indicates that
disassembly is prohibited).
This symbol indicates a compulsory action. The contents will be clearly
indicated in an illustration or nearby (the symbol to the left indicates that the
power plug should be disconnected from the power outlet).
ENGLISH - 1
ENGLISH
About the Symbols
SAFETY PRECAUTIONS
WARNING
Never use the projector if a problem should occur.
Abnormal operations such as smoke, strange odor, no image, no sound,
excessive sound, damaged casing or elements or cables, penetration of
liquids or foreign matter, etc. can cause a fire or electrical shock.
In such case, immediately turn off the power switch and then disconnect the
power plug from the power outlet. After making sure that the smoke or odor
has stopped, contact your dealer. Never attempt to make repairs yourself
because this is dangerous this could be dangerous.
* The power outlet should be close to the projector and easily accessible.
Disconnect the
plug from the
power outlet.
Do not insert liquids or foreign object.
Penetration of liquids or foreign objects could result in fire or electrical shock.
Use special caution in households where children are present.
If liquids or foreign object should enter the projector, immediately turn off the
power switch, disconnect the power plug from the power outlet and contact your
dealer.
* Do not place the projector in a bathroom.
* Do not expose the projector to rain or moisture.
* Do not place flower vases, pots, cups, cosmetics, liquids such as water, etc on
or around the projector.
* Do not place metals, combustibles, etc on or around the projector.
Never modify.
The projector contains high voltage components. Modification could result in
fire or electrical shock.
* Never open the cabinet.
* Ask your dealer to repair and clean insider.
Do not
disassemble.
Do not give the projector any shock or impact.
If the projector should be shocked and/or broken, it could result in an injury, and
continued use could result in fire or electrical shock.
If the projector is shocked, immediately turn off the power switch, disconnect the
power plug from the power outlet and contact your dealer.
ENGLISH - 2
SAFETY PRECAUTIONS (continued)
Do not place the projector on an unstable surface.
If the projector should be dropped and/or broken, it could result in an injury, and
continued use could result in fire or electrical shock.
* Do not place the projector on an unstable, slant or vibrant surface such as a
wobbly or inclined stand.
* Use the caster brakes placing the projector on a stand with casters.
* Do not place the projector in the side up position, the lens up position or the
lens down position.
Be cautious of High temperatures of the projector.
High temperatures are generated when the lamp is lit. It could result in fire or
burn. Use special caution in households where children are present.
Do not touch about the lens, air fans and ventilation openings during use or
immediately after use, to prevent a burn. Take care of ventilation.
* Keep a space of 30 cm or more between the sides and other objects such as
walls.
* Do not place the projector on the metallic table.
* Do not place anything about the lens, air fans and ventilation openings of the
projector.
* Never block the air fan and ventilation openings.
* Do not use with the ventilation opening facing downwards.
* Do not cover the projector with a tablecloth, etc.
* Do not place the projector on a carpet or bedding.
Never look through the lens or openings when the lamp is on.
The powerful light could adversely affect vision. Use special caution in
households where children are present.
Use only the correct power outlet.
Incorrect power supply could result in fire or electrical shock. Use only the
correct power outlet depending on the indication on the projector and the safety
standard.
* The enclosed power cord must be used depending on the power outlet to be
used.
Be cautious of the power cord connection.
Incorrect connection of the power cord could result in fire or electrical shock.
* Do not touch the power cord with a wet hand.
* Check that the connecting portion of the power cord is clean (with no dust),
before using. Use a soft and dry cloth to clean the power plug.
* Insert the power plug into a power outlet firmly. Avoid using a loose, unsound
outlet or contact failure.
ENGLISH - 3
ENGLISH
WARNING
SAFETY PRECAUTIONS (continued)
WARNING
Be careful in handling the the light source lamp.
Incorrect handling the lamp could result in explosion.
* Since the lamp is made of glass, do not apply shock to it and not scratch it.
* When replacing lamp, turn off and remove AC cord, waite 45 minutes to let
lamp cool. High-pressure lamp when hot, may explode if improperly handled.
* The lamp has a service life. For details, read the user's manual. Please contact
your dealer or service company for replacement. Do not use old use old lamp.
This could also cause explosion of the lamp.
Be careful in handling the power cord and external connection
cables.
If you keep using a damaged the power cord or cables, it can cause a fire or
electrical shock. Do not apply too much heat, pressure or tension to the power
cord and cables.
If the power cord or cables is damaged (exposed or broken core wires, etc.),
contact your dealer.
* Do not place the projector or heavy objects on the power cord and cables. Also,
do not place a spread, cover, etc, over them because this could result in the
inadvertent placing of heavy objects on the concealed power cord or cables.
* Do not pull the power cord and cables. When connecting and disconnecting the
power cord or cables, do it with your hand holding the plug or connector.
* Do not place the cord near the heater.
* Avoid bending the power cord sharply.
* Do not attempt to work on the power cord.
Be careful in handling the battery of the remote controller.
Incorrect handling of the battery could result in fire or personal injury. The
battery may explode if not handled properly.
* Keep the battery away from children and pets. If swallowed consult a physician
immediately for emergency treatment.
* Do not allow the battery in a fire or water.
* Avoid fire or high-temperature environment.
* Do not hold the battery with the metallic tweezers.
* Keep the battery in a dark, cool and dry play.
* Do not short circuit the battery.
* Do not recharge, disassemble or solder the battery.
* Do not give the battery a physical impact.
* Use only the battery specified in the user’s manual.
* Make sure the plus and minus terminals are correctly aligned when loading the
battery.
* If you observe a leakage of the battery, wipe out the flower and then replace
the battery. If the flower adheres your body or clothes, rinse well with water.
* Obey the local laws on disposing the battery.
ENGLISH - 4
SAFETY PRECAUTIONS (continued)
ENGLISH
CAUTION
Be careful in moving the projector.
Neglect could result in an injury or damage.
* Do not move the projector during use. Before moving, disconnect the power
cord and all external connections, and close the slide lens door.
* Avoid any impact or shock to the projector.
* For carrying, use the enclosed carrying bag if provided, depending on the
manual of the carrying bag.
Do not put anything on top of the projector.
Placing anything on the projector could result in loss of balance or falling, and
cause an injury or damage. Use special caution in households where children are
present.
Avoid a humid or dusty place.
Placing the projector in a highly humid, dusty place, oily soot or corrosive gas
could result in fire or electrical shock.
* Do not place near the kitchen, a humidifier or other place where there is oily
smoke or humidity.
Avoid a high temperature environment.
The heat could have adverse influence on the cabinet of the projector and other
parts. Do not place the projector, the remote controller and other parts in direct
sunlight or near a hot object such as heater, etc.
Remove the power cord for complete separation.
* For safety purposes, disconnect the power cord if the projector is not to be
used for prolonged periods of time.
* Before cleaning, turn off and unplug the projector. Neglect could result in
fire or electrical shock.
Disconnect the
plug from the
power outlet.
Ask your dealer to cleaning inside of the projector about every two
years.
Accumulations of dust inside the projector cause result in fire or malfunction.
Cleaning inside is more effective if performed before every humid periods such
as rainy season.
* Do not clean inside yourself because it is dangerous.
ENGLISH - 5
SAFETY PRECAUTIONS (continued)
NOTE
Do not give the remote controller any physical impact.
A physical impact could cause damage or malfunction of the remote controller.
* Take care not to drop the remote controller.
* Do not place the projector or heavy objects on the remote controller.
Take care of the lens.
* Close the slide lens door to prevent the lens surface being scratched when the
projector is not used.
* Do not touch the lens to prevent fog or dirt of the lens that cause deterioration
of display quality.
* Use commercially available lens tissue to clean the lens (used to clean cameras,
eyeglasses, etc.). Be careful not to scratch the lens with hard objects.
Clean the air filter about every 100 hours.
When the air filter becomes clogged with dust, etc., the projector may display the
message such as “CHECK THE AIR FLOW” or turn off the projector, to prevent
the internal heat level rising. Take care of the air filter to normal ventilate.
* Do not turn on the projector without air filter.
* If the air filter is damaged or lost, order the air filter specified in the user’s
manual to your dealer.
Take care of the cabinet and the remote controller.
Incorrect care could have adverse influence such as discoloration, peeling paint,
etc.
* Use a soft cloth to clean the cabinet and control panel of the projector and the
remote controller. When excessively soiled dilute a neutral detergent in water,
wet and wring out the soft cloth and afterward wipe with a dry soft cloth. Do
not use undiluted detergent directly.
* Do not use an aerosol sprays, solvents, volatile substances or abrasive cleaner.
* Before using chemical wipes, be sure to read and observe the instructions.
* Do not allow long-term close contact with rubber or vinyl.
ENGLISH - 6
SAFETY PRECAUTIONS (continued)
Avoid strong rays.
Any strong ray (such as direct rays of the sun or room lighting) onto the remote control
sensors could invalidate the remote control.
Avoid radio interference.
Any interfering radiation could cause disordered image or noises.
* Avoid radio generator such as a mobile telephone, transceiver, etc. around the projector.
About displaying characteristic.
The display condition of the projector (such as color, contrast, etc.) depends on
characteristic of the screen, because the projector uses a liquid crystal display panel. The
display condition can differ from the display of CRT.
* Do not use a polarized screen. It can cause red image.
Turn the power on/off in right order.
To prevent any trouble, turn on/off the projector in right order mentioned below unless
specifying.
* Power on the projector before the computer or video tape recorder.
* Power off the projector after the computer or video tape recorder.
Take care not to fatigue your eyes.
Rest the eyes periodically.
Set the sound volume at a suitable level to avoid bothering other people.
* It is better to keep the volume level low and close the windows at night to protect the
neighborhood environment.
Connecting with notebook computer
When connecting with notebook computer, set to valid the RGB external image output (setting CRT
display or simultaneous display of LCD and CRT).
Please read instruction manual of the notebook for more information.
ENGLISH - 7
ENGLISH
NOTE
VOR DEM BETRIEB
Bedeutung der Symbole
Zugunsten der korrekten Bedienung des Geräts befinden sich in dieser Anleitung sowie auf
dem Projektor selbst bestimmte Symbole, die auf Sicherheitsrisiken und entsprechende
Vorsichtsmaßregeln hinweisen, um Körperverletzungen und Sachschäden zu vermeiden.
Die Bedeutung dieser Symbole ist nachfolgend erklärt. Es ist wichtig, daß Sie die folgenden
Sicherheitshinweise aufmerksam durchlesen und verstehen.
WARNUNG
Dieses Symbol weist auf Vorsichtsmaßregeln hin, deren
Mißachtung bei falscher Bedienung zu körperlichen
Verletzungen mit möglicher Todesfolge führen können.
VORSICHT
Dieses Symbol weist auf Vorsichtsmaßregeln hin, deren
Mißachtung bei falscher Bedienung zu
Personenverletzungen oder Sachschäden führen können.
Typische Symbole
Dieses Symbol weist auf eine zusätzliche Warnung (einschließlich
Vorsichtsmaßregeln) hin, wobei eine Abbildung den Textinhalt verdeutlicht.
Dieses Symbol weist auf eine unzulässige Handlung hin, wobei eine
Abbildung den Textinhalt verdeutlicht. (Das linksstehende Symbol bedeutet,
daß das Gerät oder eine bestimmte Baugruppe nicht zerlegt werden darf.)
Dieses Symbol weist auf eine Pflichthandlung hin, wobei eine Abbildung
den Textinhalt verdeutlicht. (Das linksstehende Symbol bedeutet, daß der
Netzstecker aus der Steckdose zu ziehen ist.)
DEUTSCH - 1
SICHERHEITSVORKEHRUNGEN
Im Falle einer Störung den Projektor niemals weiterbenutzen.
Anormale Erscheinungen, wie Rauch, seltsamer Geruch, kein Bild, kein
Ton, zu lauter Ton, Beschädigung von Gehäuse, Elementen oder Kabeln,
Eindringen von Flüssigkeiten oder Fremdkörpern usw., können einen
Brand oder elektrischen Schlag verursachen.
Den
Netzstecker aus
In solchen Fällen sofort den Netzschalter ausschalten, und dann den
der Steckdose
Netzstecker von der Netzsteckdose abziehen. Wenden Sie sich an Ihren
ziehen.
Händler, nachdem Sie sich vergewissert haben, dass die Rauch- oder
Gerucherzeugung aufgehört hat. Versuchen Sie niemals, Reparaturen selbst
durchzuführen, weil das gefährlich sein kann.
* Die Netzsteckdose sollte sich in der Nähe des Projektors befinden und leicht
zugänglich sein.
Das Eindringen von Flüssigkeiten oder Fremdkörper in den
Projektor verhüten.
Das Eindringen von Flüssigkeiten oder Fremdkörpern kann einen Brand oder
elektrischen Schlag verursachen.
Lassen Sie in Haushalten mit Kindern besondere Vorsicht walten.
Falls Flüssigkeiten oder Fremdkörper in den Projektor eindringen, schalten Sie
sofort den Netzschalter aus, ziehen Sie den Netzstecker von der Netzsteckdose
ab, und kontaktieren Sie Ihren Händler.
* Den Projektor nicht in ein Badezimmer stellen.
* Den Projektor weder Regen noch Feuchtigkeit aussetzen.
* Keine Blumenvasen, Töpfe, Tassen, Kosmetika oder Flüssigkeiten, wie z.B.
Wasser usw., auf oder neben den Projektor stellen.
* Keine metallischen oder brennbaren Gegenstände usw. auf oder neben den
Projektor stellen.
Keine Veränderungen vornehmen.
Der Projektor enthält unter Hochspannung stehende Teile. Eine Veränderung
könnte zu einem Brand oder elektrischen Schlag führen.
* Niemals das Gehäuse öffnen.
* Lassen Sie Reparaturen und Reinigung der Innenteile nur von Ihrem Händler
ausführen.
Nicht
zerlegen.
Den Projektor vor Stößen oder Erschütterungen schützen.
Falls der Projektor erschüttert und/oder beschädigt wird, kann es zu einer
Verletzung kommen, und fortgesetzter Gebrauch kann einen Brand oder
elektrischen Schlag zur Folge haben.
Falls der Projektor erschüttert wird, schalten Sie sofort den Netzschalter aus,
ziehen Sie den Netzstecker von der Netzsteckdose ab, und kontaktieren Sie Ihren
Händler.
DEUTSCH - 2
DEUTSCH
WARNUNG
SICHERHEITSVORKEHRUNGEN (Fortsetzung)
WARNUNG
Stellen Sie den Projektor nicht auf eine instabile Fläche.
Falls der Projektor fallen gelassen und/oder beschädigt wird, kann es zu einer
Verletzung kommen, und fortgesetzter Gebrauch kann einen Brand oder
elektrischen Schlag zur Folge haben.
* Stellen Sie den Projektor nicht auf eine instabile, schiefe oder vibrierende
Fläche, wie z.B. einen wackligen oder geneigten Ständer.
* Benutzen Sie die Laufrollenbremsen, wenn Sie den Projektor auf einen Ständer
mit Laufrollen stellen.
* Den Projektor nicht mit der Seite nach oben, dem Objektiv nach oben oder
dem Objektiv nach unten hinstellen.
Beachten Sie hohe Temperaturen des Projektors.
Bei eingeschalteter Lampe werden hohe Temperaturen erzeugt. Diese können
einen Brand oder Verbrennungen verursachen. Lassen Sie in Haushalten mit
Kindern besondere Vorsicht walten.
Vermeiden Sie eine Berührung des Objektivs, der Lüfter und der
Ventilationsöffnungen während oder unmittelbar nach dem Gebrauch, um eine
Verbrennung zu verhüten. Achten Sie auf die Ventilation.
* Einen Abstand von mindestens 30 cm zwischen dem Projektor und anderen
Objekten, wie z.B. Wänden, einhalten.
* Den Projektor nicht auf einen Metalltisch stellen.
* Keine Gegenstände in der Nähe des Objektivs, der Lüfter und der
Ventilationsöffnungen des Projektors abstellen.
* Niemals die Lüfter und die Ventilationsöffnungen blockieren.
* Nicht mit der Ventilationsöffnung nach unten verwenden.
* Den Projektor nicht mit einer Tischdecke usw. abdecken.
* Den Projektor nicht auf einen Teppich oder Bettzeug stellen.
Bei eingeschalteter Lampe niemals in das Objektiv oder die
Öffnungen blicken.
Das starke Licht kann die Sehkraft beeinträchtigen. Lassen Sie in Haushalten
mit Kindern besondere Vorsicht walten.
Nur eine vorschriftsmäßige Netzsteckdose verwenden.
Eine falsche Stromversorgung kann einen Brand oder elektrischen Schlag
verursachen. Verwenden Sie eine korrekte Netzsteckdose gemäß den Angaben
am Projektor und in den Sicherheitsvorschriften.
* Das mitgelieferte Netzkabel muss in Übereinstimmung mit der vorhandenen
Netzsteckdose verwendet werden.
Beim Umgang mit dem Netzkabel Vorsicht walten lassen.
Falscher Anschluss des Netzkabels kann einen Brand oder elektrischen Schlag
verursachen.
* Das Netzkabel nicht mit nassen Händen berühren.
* Vergewissern Sie sich vor dem Anschließen, dass der Stecker des Netzkabels
sauber ist (kein Staub). Verwenden Sie ein weiches und trockenes Tuch zum
Reinigen des Netzsteckers.
* Den Netzstecker bis zum Anschlag in die Netzsteckdose einführen. Eine
lockere, nicht intakte Netzsteckdose oder Wackelkontakt vermeiden.
DEUTSCH - 3
SICHERHEITSVORKEHRUNGEN (Fortsetzung)
Die Lichtquellenlampe vorsichtig handhaben.
Falsche Handhabung der Lampe kann zu Explosion führen.
* Da die Lampe aus Glas ist, müssen Stöße und Kratzer vermieden werden.
* Zum Auswechseln der Lampe den Projektor ausschalten, das Netzkabel abtrennen,
und 45 Minuten zum Abkühlen der Lampe warten. Die Lampe erreicht beim
Betrieb eine hoher Druck und kann bei falscher Handhabung explodieren.
* Die Lampe hat eine begrenzte Verwendungsdauer. Beziehen Sie sich für
Einzelheiten auf die Bedienungsanleitung. Bitte wenden Sie sich für Auswechseln
der Lampe an Ihren Händler oder an eine Wartungsfirma. Verwenden Sie nicht
eine alte Lampe. Dies kann auch eine Explosion der Lampe verursachen.
Netzkabel und externe Anschlusskabel sorgfältig behandeln.
Fortgesetzter Gebrauch eines beschädigten Netzkabels oder beschädigter
Anschlusskabel kann einen Brand oder elektrischen Schlag verursachen. Netzkabel
und Anschlusskabel vor übermäßiger Hitze, Druck oder Spannung schützen.
Falls das Netzkabel oder die Anschlusskabel beschädigt sind (freiliegende oder
gerissene Kernadern usw.), kontaktieren Sie Ihren Händler.
* Stellen Sie nicht den Projektor oder andere schwere Gegenstände auf das
Netzkabel und die Anschlusskabel. Decken Sie die Kabel auch nicht mit einem
Tuch oder einer Decke usw. ab, weil sonst versehentlich schwere Gegenstände
auf die verdeckten Kabel gestellt werden können.
* Nicht am Netzkabel und den Anschlusskabeln ziehen. Halten Sie beim
Anschließen und Abziehen des Netzkabels oder der Anschlusskabel stets den
Kabelstecker mit der Hand.
* Die Kabel nicht in der Nähe eines Heizkörpers verlegen.
* Starkes Knicken des Netzkabels vermeiden.
* Unterlassen Sie jede Abänderung des Netzkabels.
Die Batterie der Fernbedienung sorgfältig behandeln.
Falsche Behandlung der Batterie kann einen Brand oder Verletzungen zur Folge
haben. Bei unsachgemäßer Behandlung kann die Batterie explodieren.
* Die Batterie von Kindern und Haustieren fernhalten. Falls die Batterie verschluckt
wird, wenden Sie sich zwecks einer Notbehandlung sofort an einen Arzt.
* Die Batterie nicht in Feuer oder Wasser werfen.
* Feuer oder heiße Umgebungen vermeiden.
* Die Batterie nicht mit einer Metallpinzette halten.
* Die Batterie an einem dunklen, kühlen und trockenen Ort aufbewahren.
* Die Batterie nicht kurzschließen.
* Die Batterie nicht aufladen, zerlegen oder löten.
* Die Batterie vor Erschütterungen schützen.
* Nur die im Bedienungsanleitung angegebene Batterie verwenden.
* Achten Sie beim Einlegen der Batterie darauf, dass Plus- und Minuspol der
Batterie korrekt ausgerichtet sind.
* Falls Sie Auslaufen der Batterie feststellen, wischen Sie erst das Batteriefach
aus und dann die Batterie ab.
Falls Elektrolyt mit irgendwelchen Körperteilen oder Kleidung in Berührung
kommt, waschen sie ihn mit Wasser gut ab.
* Entsorgen Sie die Batterie gemäß den örtlichen Gesetzen.
DEUTSCH - 4
DEUTSCH
WARNUNG
SICHERHEITSVORKEHRUNGEN (Fortsetzung)
VORSICHT
Beim Transportieren des Projektors Sorgfalt walten lassen.
Missachtung kann zu Verletzungen oder Beschädigung führen.
* Den Projektor nicht während des Betriebs bewegen. Ziehen Sie das Netzkabel
und alle Anschlusskabel ab, und schließen Sie den Objektivschieber, bevor Sie
den Projektor bewegen.
* Den Projektor vor Stößen oder Erschütterungen schützen.
* Benutzen Sie zum Transportieren die mitgelieferte Tragetasche, falls
vorhanden, gemäß der Gebrauchsanweisung der Tragetasche.
Keine Gegenstände auf den Projektor stellen.
Das Ablegen von Gegenständen auf dem Projektor kann zu Gleichgewichtsverlust oder
Umkippen führen und Verletzungen oder Beschädigung zur Folge haben. Lassen Sie in
Haushalten mit Kindern besondere Vorsicht walten.
Feuchte oder staubige Orte vermeiden.
Wird der Projektor einer sehr feuchten oder staubigen Umgebung mit öligem
Ruß oder korrosiven Gasen ausgesetzt, kann es zu einem Brand oder elektrischen
Schlag kommen.
* Den Projektor nicht in der Nähe einer Küche, eines Luftbefeuchters oder an
einem anderen Ort mit ölhaltigem Rauch oder hoher Luftfeuchtigkeit abstellen.
Heiße Umgebungen vermeiden.
Die Hitze könnte sich schädlich auf das Gehäuse und andere Teile des Projektors
auswirken. Setzen Sie den Projektor, die Fernbedienung und andere Teile nicht
direktem Sonnenlicht oder der Hitze eines Heizkörpers usw. aus.
Das Netzkabel zur Aufbewahrung abziehen.
* Aus Sicherheitsgründen ist das Netzkabel abzuziehen, wenn der Projektor
längere Zeit nicht benutzt wird.
* Vor der Reinigung den Projektor ausschalten und vom Stromnetz trennen.
Eine Missachtung kann zu einem Brand oder elektrischen Schlag führen.
Den
Netzstecker aus
der Steckdose
ziehen.
Lassen Sie die Innenteile des Projektors etwa alle zwei Jahre
von Ihrem Händler reinigen.
Staubansammlung im Inneren des Projektors kann zu einem Brand oder
Funktionsstörungen führen.
Die Reinigung der Innenteile ist wirksamer, wenn sie vor Beginn von feuchten
Jahreszeiten, z.B. vor der Regenzeit, durchgeführt wird.
* Versuchen Sie nicht, die Innenteile selbst zu reinigen, weil dies gefährlich ist.
DEUTSCH - 5
SICHERHEITSVORKEHRUNGEN (Fortsetzung)
Setzen Sie die Fernbedienung keinen Erschütterungen aus.
Erschütterungen können eine Beschädigung oder Funktionsstörung der Fernbedienung
verursachen.
* Lassen Sie die Fernbedienung nicht fallen.
* Stellen Sie nicht den Projektor oder andere schwere Gegenstände auf die
Fernbedienung.
Behandeln Sie das Objektiv mit Sorgfalt.
* Wenn der Projektor nicht benutzt wird, schließen Sie den Objektivschieber, um die
Linsenoberfläche vor Kratzern zu schützen.
* Unterlassen Sie das Berühren des Objektivs, um Verschlechterung der Bildqualität
durch Beschlagen oder Verschmutzen des Objektivs zu vermeiden.
* Verwenden Sie zum Reinigen des Objektivs im Fachhandel erhältliches Objektivpapier
(zur Reinigung von Kameras, Brillen usw.). Achten Sie darauf, dass Sie das Objektiv
nicht mit harten Gegenständen verkratzen.
Reinigen Sie den Luftfilter etwa alle 100 Betriebsstunden.
Wenn der Luftfilter mit Staub usw. zugesetzt wird, zeigt der Projektor eine Meldung wie
"ANS. LUFTSTROM UBERPR." an. Schalten Sie in diesem Fall den Projektor aus, um
einen Anstieg des internen Wärmepegels zu verhüten. Reinigen Sie den Luftfilter, um den
Kühlluftstrom wieder zu normalisieren.
* Schalten Sie den Projektor nicht ohne Luftfilter ein.
* Falls der Luftfilter beschädigt wird oder verloren geht, bestellen Sie den im
Bedienungsanleitung angegebenen Luftfilter bei Ihrem Händler.
Pflege des Gehäuses und der Fernbedienung.
Unsachgemäße Pflege kann negative Auswirkungen wie Verfärbung, Lackablösung usw.
zur Folge haben.
* Verwenden Sie ein weiches Tuch zur Reinigung des Gehäuses und der Bedienungstafel
des Projektors sowie der Fernbedienung. Bei starker Verschmutzung ein neutrales
Reinigungsmittel mit Wasser verdünnen, ein weiches Tuch durchtränken und
auswringen, und anschließend mit einem trockenen, weichen Tuch nachwischen. Kein
unverdünntes Reinigungsmittel direkt auftragen.
* Keine Aerosol-Sprays, Lösungsmittel, leichtflüchtige Substanzen oder Scheuermittel
verwenden.
* Wenn Sie chemisch behandelte Tücher verwenden, sollten Sie die Gebrauchsanweisung
lesen und befolgen.
* Vermeiden Sie engen Kontakt mit Gummi oder Vinyl über längere Zeit.
DEUTSCH - 6
DEUTSCH
HINWEIS
SICHERHEITSVORKEHRUNGEN (Fortsetzung)
HINWEIS
Starke Lichtstrahlen vermeiden.
Starker Lichteinfall (wie direktes Sonnenlicht oder Zimmerbeleuchtung) auf den
Fernbedienungssensor kann die Fernbedienung funktionsunfähig machen.
Funkfeldeinfluss vermeiden.
Jeder Funkfeldeinfluss kann Bildstörungen oder Rauschen verursachen.
* Vermeiden Sie den Einsatz von Hochfrequenz erzeugenden Geräten (z.B.
Mobiltelefone, Funkgeräte usw.) in der Nähe des Projektors.
Hinweise zur Projektionsqualität.
Die Projektionsqualität des Projektors (z.B. Farbe, Kontrast usw.) hängt von der
Beschaffenheit der Leinwand ab, weil der Projektor ein Flüssigkristallfeld verwendet. Die
Projektionsqualität kann von der Anzeige einer Kathodenstrahlröhre abweichen.
* Verwenden Sie keine polarisierte Leinwand. Diese kann ein rotes Bild verursachen.
Die Stromversorgung in der richtigen Reihenfolge ein- und ausschalten.
Um Störungen zu vermeiden, sollte der Projektor in der unten angegebenen Reihenfolge
ein- und ausgeschaltet werden, wenn nicht anders angegeben.
* Den Projektor vor dem Computer oder Videorecorder einschalten.
* Den Projektor nach dem Computer oder Videorecorder ausschalten.
Die Augen vor Ermüdung schützen.
Geben Sie Ihren Augen regelmäßige Erholungspausen.
Die Lautstärke nicht zu hoch einstellen, um Nachbarn nicht zu stören.
* Wenn Sie den Projektor zu später Stunde benutzen, sollten Sie die Lautstärke verringern
und die Fenster schließen, um die Nachbarn nicht zu stören.
Anschluß an einen Notebook-Computer
Sorgen Sie beim Anschluß an einen Notebook-Computer dafür, daß der externe RGB-Bildausgang
wirksam ist (stellen Sie auf CRT-Anzeige oder auf gleichzeitige LCD- und CRT-Anzeige). Bitte
beziehen Sie sich für weitere Informationen auf die Bedienungsanleitung für das Notebook.
DEUTSCH - 7
AVANT I'UTILISATION
Explication des symboles
AVERTISSEMENT
ATTENTION
Risques de blessure corporelle grave ou mortelle en
cas de mauvaise manipulation consécutive à un
manquement aux recommandations indiqués sous ce
symbole.
Risques de blessure corporelle ou de dommage
matériel en cas de mauvaise manipulation
consécutive à un manquement aux recommandations
indiquées sous ce symbole.
Symboles types
Ce symbole indique un avertissement supplémentaire (y compris des
précautions). Il est accompagné d’une illustration qui précise la nature du
danger.
Ce symbole indique une opération interdite. Les détails sont précisés à
l’intérieur de l’illustration ou à côté (celui de gauche indique qu’il est interdit
de démonter l’appareil).
Ce symbole indique une opération obligatoire. Les détails sont précisés à
l’intérieur de l’illustration ou à côté (celui de gauche indique qu’il faut
débrancher le fil électrique de la prise de courant murale.
FRANÇAIS - 1
FRANÇAIS
Différents symboles sont utilisés dans le manuel de fonctionnement et sur le produit
lui-même pour garantir une utilisation correcte de l’appareil, protéger l’utilisateur et le
public contre les dangers éventuels ou contre les dommages matériels. Lisez
attentivement la description qui en est donnée ci-après afin d’en assimiler la
signification et le contenu.
CONSIGNES DE SÉCURITÉ
AVERTISSEMENT
Ne jamais utiliser le projecteur si vous détectez un problème
quelconque.
Tout fonctionnement anormal, se manifestant par de la fumée, une odeur
suspecte, pas d'image, pas de son, trop de son, un boîtier, des éléments ou des
câbles défectueux, la pénétration de liquides ou de corps étrangers etc., peut
provoquer un incendie ou un choc électrique.
Dans ce cas, mettez immédiatement l'appareil hors tension, puis débranchez la
fiche de la prise électrique. Une fois que vous êtes sûr que la fumée ou l'odeur a
disparu, contactez votre revendeur. N'essayez jamais d'effectuer les réparations
vous-même car cela peut être dangereux.
* La prise électrique doit se trouver à proximité du projecteur et être facilement
accessible.
Débranchez
la prise
murale
Ne jamais introduire de liquides ou de corps étrangers.
L'introduction de liquides ou de corps étrangers peut occasionner un incendie ou
un choc électrique. Soyez particulièrement vigilant si vous avez des enfants à la
maison.
En cas de pénétration de liquides ou de corps étrangers dans le projecteur,
mettez immédiatement l'appareil hors tension, débranchez la fiche de la prise
électrique et contactez votre revendeur.
* Ne placez pas le projecteur dans la salle de bains
* N'exposez pas le projecteur à la pluie ou à l'humidité.
* Ne placez pas de fleurs, de vases, de pots, de tasses, de produits de beauté, ni
de liquides tels que de l'eau, etc. sur ou à proximité du projecteur.
* Ne placez pas de métaux, de combustibles, etc. sur ou à proximité du
projecteur.
N'effectuez jamais de modifications vous-même.
Le projecteur contient des composants haute tension. Toute modification risque
de provoquer un incendie ou un choc électrique.
* N'ouvrez jamais le boîtier.
* Pour toute réparation ou nettoyage de l'intérieur de l'appareil, contactez votre
revendeur.
Le projecteur ne doit subir aucun choc ou impact.
Si le projecteur subit un choc et/ou qu'il se casse, vous risquez de vous blesser.
Par ailleurs, si vous continuez à l'utiliser, vous risquez de provoquer un
incendie ou un choc électrique.
Si le projecteur subit un choc, mettez immédiatement l'appareil hors tension,
débranchez la fiche de la prise électrique et contactez votre revendeur.
FRANÇAIS - 2
Ne pas
démonter
CONSIGNES DE SÉCURITÉ (Suite)
AVERTISSEMENT
Faites attention, le projecteur peut atteindre des températures élevées.
Lorsque la lampe est allumée, elle génère des températures élevées. Celles-ci
peuvent provoquer un incendie ou des brulûres. Soyez particulièrement vigilant
si vous avez des enfants à la maison.
Ne touchez pas l'objectif, les ventilateurs ni les fentes de ventilation pendant que
vous utilisez l'appareil ou juste après son utilisation, afin d'éviter de vous brûler.
Contrôlez la ventilation.
* Laissez un espace de 30 cm ou plus entre les côtés du projecteur et d'autres
objets, comme par exemple des murs.
* Ne placez pas le projecteur sur une table en métal.
* Ne placez aucun objet à proximité de l'objectif, des ventilateurs et des fentes de
ventilation du projecteur.
* Ne bloquez jamais le ventilateur ni les fentes de ventilation.
* N’utilisez pas l’appareil avec les trous de ventilation dirigés vers le bas.
* Ne couvrez pas le projecteur avec une nappe, etc.
* Ne placez pas le projecteur sur un tapis ou sur un dessus-de-lit.
Ne regardez jamais au travers de l'objectif ou des fentes lorsque la
lampe est allumée.
Le puissant faisceau lumineux risque de gravement affecter votre vue. Soyez
particulièrement prudent si vous avez des enfants à la maison.
Utilisez uniquement la prise électrique appropriée.
Un courant électrique incorrect risque de provoquer un incendie ou un choc
électrique. Utilisez seulement la prise électrique appropriée en fonction des
indications précisées sur le projecteur et des normes de sécurité.
* Le cordon électrique fourni avec le projecteur ne doit être utilisé qu'en fonction
de la prise électrique que vous allez utiliser.
Faites attention au branchement du cordon électrique.
Tout branchement incorrect du cordon électrique risque de provoquer un
incendie ou un choc électrique.
Ne touchez pas au cordon électrique lorsque vous avez les mains mouillées.
* Veillez à ce que la partie du cordon électrique qui se branche dans la prise soit
propre (sans poussière) avant de l'utiliser. Utilisez un chiffon sec et doux pour
nettoyer la fiche d'alimentation.
* Insérez à fond la fiche d'alimentation dans la prise électrique. Évitez d'utiliser
une prise électrique mal fixée, non reliée à la terre ou avec un faux contact.
FRANÇAIS - 3
FRANÇAIS
Ne placez pas le projecteur sur une surface instable.
Si le projecteur tombe ou se casse, vous risquez de vous blesser et de recevoir
un choc électrique ou de provoquer un incendie si vous continuez à l'utiliser.
* Ne placez pas le projecteur sur une surface instable, inclinée ou vibrante telle
qu'un support branlant ou incliné.
* Utilisez les freins pour roulettes en plaçant le projecteur sur un support à
roulettes.
* Ne placez pas le projecteur sur le côté, avec l’objectif dirigé vers le haut ou
vers le bas.
CONSIGNES DE SÉCURITÉ (Suite)
AVERTISSEMENT
Faites attention lors de la manipulation de la lampe source de lumière.
Une manipulation incorrecte de la lampe peut entraîner son explosion.
* La lampe est faite de verre. Ne la soumettez pas à des chocs ni ne la rayez.
* Lors du remplacement de la lampe, mettez l’appareil hors tension,retirez le
cordon d’alimentation et attendez 45 minutes pour que la lampe refroidisse. À
haute pression, quand la lampe n’a pas encore refroidi, une mauvaise
manipulation peut la faire exploser.
* La lampe a une durée de vie déterminée. Pour plus de détails, lisez le mode d’emploi.
Veuillez contacter votre revendeur ou un service d’assistance pour son remplacement.
N’utilisez pas une vieille lampe. Cela pourrait aussi causer son explosion.
Soyez prudent lorsque vous manipulez le cordon électrique et les
câbles de connexion externes.
Si vous continuez à utiliser un cordon électrique ou des câbles endommagés, vous
risquez de provoquer un incendie ou un choc électrique. Évitez d'exposer le cordon
électrique et les câbles à une chaleur, une pression ou une tension trop élevée.
Si le cordon électrique ou les câbles sont endommagés (si les fils sont dénudés
ou cassés), contactez votre revendeur.
* Ne placez pas le projecteur ou des objets lourds sur le cordon électrique ou sur les
câbles. Évitez aussi de les recouvrir de quoi que ce soit qui pourrait les dissimuler
et risquer que des objets lourds soient placés dessus par inadvertance.
* Ne tirez pas sur le cordon électrique ou sur les câbles. Pour brancher ou
débrancher le cordon électrique ou sur les câbles, faites-le en tenant la prise ou
le connecteur d'une main, pendant que vous branchez ou débranchez le cordon
électrique ou les câbles de l'autre.
* Ne placez pas le cordon près du chauffage.
* Évitez de trop courber le cordon électrique.
* N'essayez pas de réparer le cordon électrique.
Manipulez la pile de la télécommande avec précaution.
Toute manipulation incorrecte de la télécommande risque de provoquer un
incendie ou d'entraîner des dommages corporels. La pile peut exploser si elle
n'est pas manipulée de façon appropriée.
* Conservez la pile hors de la portée des enfants et des animaux domestiques. En
cas d'ingestion, consultez immédiatement un médecin afin qu'il prescrive un
traitement d'urgence.
* Ne laissez pas la pile au contact du feu ou de l'eau.
* Évitez tout environnement avec présence de flammes ou de températures élevées.
* Ne tenez pas la pile par les bornes métalliques.
* Conservez la pile dans un endroit frais et sec, à l'abri de la lumière.
* Évitez de court-circuiter la pile.
* Évitez de recharger, de démonter ou de souder la pile.
* Évitez que la pile subisse un choc physique.
* Utilisez uniquement la pile spécifiée dans la manuel de l'utilisateur.
* Veillez à ce que les bornes plus et moins soient correctement alignées lors du
chargement de la pile.
* Si la pile fuit, essuyez le liquide et remplacez la pile. Si vous avez du liquide
sur le corps ou sur vos vêtements, rincez le tout abondamment à l'eau.
* Respectez la législation locale en matière d'élimination des piles de batterie.
FRANÇAIS - 4
CONSIGNES DE SÉCURITÉ (Suite)
ATTENTION
Ne placez aucun objet sur le projecteur.
Tout objet placé sur le projecteur risque de perdre l'équilibre ou de tomber et de
provoquer des dommages corporels ou matériels. Soyez particulièrement prudent
si vous avez des enfants à la maison.
Évitez d'exposer le projecteur à l'humidité ou à la poussière.
Toute exposition du projecteur à une forte humidité, à la poussière, à de la suie
ou à un gaz corrosif risque de provoquer un incendie ou un choc électrique.
* Ne placez pas le projecteur à proximité de la cuisine, d'un humidificateur ou
d'autres endroits humides ou chargés de fumées grasses.
Évitez d'exposer le projecteur à des températures élevées.
La chaleur peut avoir des effets nocifs sur le boîtier du projecteur ainsi que sur
d'autres composants. Évitez d'exposer le projecteur, la télécommande et d'autres
composants à la lumière directe du soleil ou à proximité d'objets chauds tels que
le chauffage, etc.
Pour une déconnexion totale, retirez le cordon électrique.
* Pour des raisons de sécurité, débranchez le cordon électrique si vous ne
comptez pas utiliser le projecteur pendant de longues périodes.
* Avant de nettoyer l'appareil, mettez-le hors tension et débranchez-le de
l'alimentation électrique. Toute négligence de votre part, risque de provoquer
un incendie ou un choc électrique.
Débranchez
la prise
murale
Demandez à votre revendeur de nettoyer l'intérieur du projecteur
environ tous les deux ans.
Toute poussière accumulée à l'intérieur du projecteur risque de provoquer un
incendie ou un mauvais fonctionnement de l'appareil.
Le nettoyage interne sera plus efficace s'il est effectué par temps sec.
*Évitez de nettoyer l'intérieur de l'appareil vous-même, afin d'éviter tout danger.
FRANÇAIS - 5
FRANÇAIS
Soyez prudent lorsque vous déplacez le projecteur.
Toute négligence de votre part risque de provoquer des dommages corporels ou
matériels.
* Ne déplacez pas le projecteur pendant que vous l'utilisez. Avant de le déplacer,
débranchez le cordon électrique et toutes les connexions externes, et fermez la
porte coulissante de l'objectif.
* Évitez tout impact ou choc sur le projecteur.
* Pour le transporter, utilisez le sac de transport joint si nécessaire, en suivant les
instructions du manuel du sac de transport.
CONSIGNES DE SÉCURITÉ (Suite)
REMARQUE
Évitez tout impact physique sur la télécommande.
Tout impact physique risque d'endommager ou d'entraîner un mauvais fonctionnement de
la télécommande.
* Veillez à ne pas laisser tomber la télécommande par terre.
* Ne placez pas le projecteur ou des objets lourds sur la télécommande.
Prenez soin de l'objectif.
* Fermez la porte coulissante de l'objectif afin d'éviter de rayer la surface de l'objectif
lorsque vous n'utilisez pas le projecteur.
* Ne touchez pas l'objectif afin d'éviter que de la buée ou de la poussière ne détériore la
qualité de l'affichage.
* Pour nettoyer l'objectif, utilisez les chiffons spéciaux vendus dans le commerce (ceux
qui sont utilisés pour nettoyer les appareils photos, les lunettes de vue, etc.). Veillez à ne
pas rayer l'objectif avec des objets durs.
Nettoyez le filtre à air environ toutes les 100 heures.
Lorsque le filtre à air est plein de poussière, etc. il se peut que le projecteur affiche un
message du type "VÉR. DÉBIT AIR". Vous pouvez aussi mettre le projecteur hors tension
afin d'éviter toute hausse de la température interne. Rétablissez la ventilation normale par
le filtre à air.
* Évitez de mettre le projecteur sous tension sans le filtre à air.
* Si le filtre à air est endommagé ou perdu, commandez à votre revendeur le filtre à air
indiqué dans la manuel de l'utilisateur.
Prenez soin du boîtier et de la télécommande.
Toute négligence de votre part dans l'entretien de ces éléments peut entraîner la
décoloration ou l'écaillement de la peinture, etc.
* Utilisez un chiffon doux pour nettoyer le boîtier et le panneau de configuration du
projecteur et de la télécommande. Si ces pièces sont très sales, diluez un produit
détergent neutre dans un peu d'eau, trempez un chiffon doux dans cette solution et
essorez-le, puis essuyez les parties sales avant de passer un chiffon doux et sec dessus.
Évitez d'utiliser un produit détergent non dilué directement sur les parties à nettoyer.
* Évitez d'utiliser des aérosols, des solvants, des matières volatiles ou des produits de
nettoyage abrasifs.
* Avant d'utiliser des nettoyants chimiques, lisez toujours attentivement la notice et
respectez les instructions du mode d'emploi.
* Évitez tout contact prolongé et permanent avec du caoutchouc ou du vinyle.
FRANÇAIS - 6
CONSIGNES DE SÉCURITÉ (Suite)
REMARQUE
Évitez toute exposition à de forts rayonnements.
Tout fort rayonnement (tels que les rayonnements directs du soleil ou la lumière
artificielle) vers les capteurs de la télécommande peut rendre la télécommande
inutilisable.
À propos des caractéristiques d'affichage.
Le mode d'affichage du projecteur (tel que la couleur, le contraste, etc.) dépend des
caractéristiques de l'écran, car le projecteur utilise un panneau avec affichage à cristaux
liquides. Le mode d'affichage peut varier par rapport à celui d'un écran cathodique.
* Évitez l'utilisation d'un écran polarisant. Il risque d'engendrer des images rouges.
Protocole de mise sous/hors tension.
Afin d'éviter tout problème et sauf indication contraire, effectuez la mise sous/hors tension
dans l'ordre mentionné ci-dessous :
* Mettez le projecteur sous tension avant de mettre l'ordinateur ou le magnétoscope sous
tension.
* Mettez le projecteur hors tension avant de mettre l'ordinateur ou le magnétoscope hors
tension.
Faites attention de ne pas vous fatiguer les yeux.
Reposez-vous les yeux régulièrement.
Réglez le volume sonore à un niveau correct, afin de ne pas déranger les
autres.
* Il est préférable de baisser le volume et de fermer les fenêtres la nuit, afin de ne pas
déranger le voisinage.
Connexion avec un ordinateur portatif
Lors de la connexion avec un ordinateur portatif, réglez pour valider la sortie vidéo RVB extérieure
(réglage sur l’écran à tube cathodique ou simultanément sur l’écran LCD et à tube cathodique).
Veuillez vous reportez au mode d’emploi de l’ordinateur portatif pour plus d’informations.
FRANÇAIS - 7
FRANÇAIS
Éviter les interférences radio.
Toute interférence par radiation risque de déformer les images ou les bruits.
* Évitez l'utilisation de tout générateur radio tel qu'un téléphone mobile, un émetteurrécepteur etc. à proximité du projecteur.
PRIMA DELL’USO
Simboli
Nel presente manuale di istruzioni e sui prodotti stessi sono utilizzati diversi simboli
atti a garantire un corretto utilizzo, evitare rischi per l’utente e per le altre persone,
nonché evitare danni alla proprietà. I significati di questi simboli sono qui di seguito
riportati. E’ importante che leggiate attentamente le descrizioni e ne comprendiate
totalmente il significato.
AVVERTENZA
Questo simbolo riporta un tipo di informazione da non
ignorare per evitare rischi di lesioni personali o anche
morte, per maneggiamento errato dell’apparecchio.
ATTENZIONE
Questo simbolo riporta un tipo di informazione da non
ignorare per evitare eventuali rischi di lesioni personali o
danni fisici per maneggiamento errato dell’apparecchio.
Simboli tipici
Questo simbolo indica un’avvertenza aggiuntiva (note di attenzione incluse).
Viene riportata un’illustrazione atta a chiarirne il contenuto.
Questo simbolo indica un divieto. Il contenuto sarà chiaramente indicato
nell’ambito di un’illustrazione o nelle sue vicinanze (il simbolo riportato sulla
sinistra indica divieto di smontaggio).
Questo simbolo indica un obbligo. Il contenuto sarà chiaramente indicato
nell’ambito di un’illustrazione o nelle sue vicinanze (il simbolo riportato sulla
sinistra indica che la spina deve essere scollegata dalla presa di corrente).
ITALIANO - 1
PRECAUZIONI DI SICUREZZA
AVVERTENZA
Non usare mai il proiettore in caso di problemi.
Un funzionamento anormale quale emissione di fumo, odori strani, nessuna
visualizzazione d'immagine, nessuna emissione di suono o suono troppo alto,
parte esterna del proiettore o elementi o cavi danneggiati, penetrazione di
liquidi o di corpi estranei, etc. può provocare incendi o scosse elettriche.
In questo caso, disattivare immediatamente l'interruttore d'alimentazione e
staccare la spina dalla presa. Controllare che non vi sia più emissione di fumo
o d'odore, quindi rivolgersi al rivenditore. Non tentare mai di ripararlo
personalmente perché potrebbe essere pericoloso.
* La presa deve essere vicina al proiettore e facilmente accessibile.
Scollegare la
spina dalla
presa di
corrente
Non eseguire modifiche.
Il proiettore contiene componenti ad alta tensione. Eventuali modifiche
potrebbero provocare incendi o scosse elettriche.
* Non aprire mai la parte esterna del proiettore.
* Chiedere al rivenditore di eseguire le riparazioni e la pulizia interna.
ITALIANO
Non introdurre liquidi o corpi estranei.
La penetrazione di liquidi o di corpi estranei potrebbe provocare incendi o scosse
elettriche.
Adottare le precauzioni necessarie nelle case dove vi sono bambini.
In caso di penetrazione di liquidi o di corpi estranei all'interno del proiettore,
disattivare immediatamente l'interruttore d'alimentazione e staccare la spina dalla
presa e rivolgersi al rivenditore.
* Non collocare il proiettore nel bagno.
* Non esporre il proiettore alla pioggia o all'umidità.
* Non collocare vasi di fiori, vasi, tazze, cosmetici, liquidi, quali acqua, etc.
sopra o attorno al proiettore.
* Non collocare oggetti di metallo, combustibili, etc. sopra o attorno al
proiettore.
Non
smontare.
Non urtare o far cadere il proiettore.
L'urto e/o la rottura del proiettore potrebbe provocare delle lesioni, mentre l'uso
continuo in queste condizioni potrebbe provocare incendi o scosse elettriche.
In caso d'urto, disattivare immediatamente l'interruttore d'alimentazione, staccare
la spina dalla presa e rivolgersi al rivenditore.
ITALIANO - 2
PRECAUZIONI DI SICUREZZA (continua)
AVVERTENZA
Non collocare il proiettore su una superficie instabile.
La caduta e/o la rottura del proiettore potrebbe provocare delle lesioni, mentre l'uso
continuo in queste condizioni potrebbe provocare incendi o scosse elettriche.
* Non collocare il proiettore su superfici instabili, inclinate o vibranti quali
sostegni oscillanti o inclinati.
* Bloccare le ruote con i relativi fermi se il proiettore è posato su un sostegno
dotato di ruote.
* Non collocare il proiettore in posizione capovolta o con l'obiettivo rivolto
verso l'alto o verso il basso.
Controllare le temperature elevate del proiettore.
L'accensione della lampada genera alte temperature. Potrebbe essere fonte
d'incendio o di bruciature. Adottare particolari precauzioni nelle case dove vi
sono dei bambini.
Non toccare le lenti, i ventilatori e le aperture di ventilazione durante l'uso o
subito dopo, per evitare bruciature. Controllare la ventilazione.
* Mantenere uno spazio pari o uguale a 30 cm tra i lati ed altri oggetti, per
esempio muri.
* Non collocare il proiettore su un tavolo metallico.
* Non collocare nulla sulle lenti, sui ventilatori e sulle aperture di ventilazione
del proiettore.
* Non bloccare mai i ventilatori né le aperture di ventilazione.
* Non utilizzare con i fori di ventilazione rivolti verso il basso.
* Non coprire il proiettore con tovaglie, etc.
* Non collocare il proiettore su un tappeto o su un letto.
Non guardare mai attraverso le lenti o le aperture quando la
lampada è accesa.
La luce potente può danneggiare la vista. Adottare particolari precauzioni nelle
case dove vi sono dei bambini.
Usare solo la presa d'alimentazione corretta.
Un'alimentazione errata potrebbe provocare incendi o scosse elettriche. Usare
solo la presa d'alimentazione corretta secondo le indicazioni che figurano sul
proiettore e le norme di sicurezza.
* Il cordone d'alimentazione incluso deve essere usato in base al tipo di presa
usato.
Controllare il collegamento del cordone d'alimentazione.
Il collegamento errato del cordone d'alimentazione potrebbe provocare incendi o
scosse elettriche.
* Non toccare il cordone d'alimentazione con le mani bagnate.
* Controllare che la parte di collegamento del cordone d'alimentazione sia pulita
(priva di polvere), prima di usarlo. Usare un panno morbido e asciutto per
pulire la spina del cordone.
* Inserire la spina nella presa in modo fermo. Evitare di usare una presa allentata,
insicura o un contatto difettoso.
ITALIANO - 3
PRECAUZIONI DI SICUREZZA (continua)
AVVERTENZA
Usare cautela nel maneggiare il cordone d'alimentazione ed i cavi di
collegamento esterni.
L'uso continuato di un cordone d'alimentazione o di cavi danneggiati può
provocare incendi o scosse elettriche. Non riscaldare, premere o tendere in modo
eccessivo il cordone d'alimentazione ed i cavi.
Se il cordone d'alimentazione o i cavi sono danneggiati (conduttori interni
esposti o rotti, etc.) rivolgersi al rivenditore.
* Non collocare il proiettore o oggetti pesanti sul cordone d'alimentazione e sui cavi. Non
collocare inoltre coperture, etc. sugli stessi perché ciò potrebbe favorire l'appoggio
accidentale di oggetti pesanti sul cordone d'alimentazione o sui cavi nascosti.
* Non tirare il cordone d'alimentazione ed i cavi. Per collegare e scollegare il
cordone d'alimentazione ed i cavi, tenere con la mano la spina o il connettore.
* Non collocare il cordone vicino ad un riscaldatore.
* Evitare di piegare il cordone d'alimentazione ad angolo retto.
* Non tentare di eseguire interventi sul cordone d'alimentazione.
Usare cautela nel maneggiare le pile del telecomando.
La manipolazione errata delle pile potrebbe provocare incendi o lesioni
personali. Le pile possono esplodere se non sono maneggiate correttamente.
* Tenere le pile lontane dalla portata di bambini e animali domestici. In caso
d'ingestione rivolgersi immediatamente ad un medico per un soccorso tempestivo.
* Non lasciare cadere le pile nel fuoco o nell'acqua.
* Evitare ambienti a rischio d'incendio o di alte temperature.
* Non prendere le pile con pinzette metalliche.
* Conservare le pile in luogo scuro, fresco e asciutto.
* Evitare di cortocircuitare le pile.
* Non ricaricare, smontare, né saldare le pile.
* Non far cadere le pile.
* Usare solo le pile indicate nel manuale dell'utilizzatore.
* Controllare che i morsetti positivo e negativo siano correttamente allineati
quando si caricano le pile.
* In caso di perdite dalle pile, pulire accuratamente il liquido fuoriuscito e sostituire le pile.
Se il liquido fuoriuscito entra in contatto con la pelle o con i vestiti, sciacquare
abbondantemente con acqua.
* Rispettare le norme locali per lo smaltimento delle pile usate.
ITALIANO - 4
ITALIANO
Fare attenzione nel maneggiare la lampada sorgente di luce.
Maneggiare la lampada in modo errato può essere causa di esplosione.
* La lampada è di vetro e pertanto bisogna evitare di esporla a rischi d'urto o di
graffiatura.
* Prima di sostituire la lampada, spegnere e rimuovere il cavo di alimentazione in c.a., e
attendere 45 minuti perché la lampada si raffreddi. La lampada calda può raggiungere
una pressione molto alta e, se maneggiata impropriamente, può esplodere.
* La lampada ha una durata di vita di servizio utile. Per i dettagli, leggere il
manuale di istruzioni. Per la sostituzione, rivolgersi al rivenditore di fiducia o il
centro di assistenza tecnica. Non sostituire con una lampada vecchia. Anche
questo potrebbe essere causa di esplosione della lampada.
PRECAUZIONI DI SICUREZZA (continua)
ATTENZIONE
Usare cautela nello spostare il proiettore.
La negligenza può provocare lesioni o danni.
* Non spostare il proiettore durante l'uso. Prima di spostarlo, scollegare il
cordone d'alimentazione e tutti i collegamenti esterni e chiudere lo sportellino
scorrevole delle lenti.
* Evitate urti o colpi al proiettore.
* Per trasportarlo, usare la borsa acclusa, se fornita, seguendo le istruzioni del
manuale della borsa.
Non collocare nulla sulla parte superiore del proiettore.
Il deposito di oggetti sul proiettore può provocare squilibrio o cadute con
conseguenti lesioni personali o danni. Adottare le precauzioni necessarie nelle
case dove vi sono bambini.
Evitare luoghi polverosi e umidi.
Collocare il proiettore in un luogo umido, polveroso, dove siano presenti
fuliggine o gas corrosivi potrebbe provocare incendi o scosse elettriche.
* Non collocare vicino a cucine, umidificatori o altri luoghi dove siano presenti
fumi oleosi o umidità.
Evitare ambienti con temperature elevate.
Il calore può influenzare in modo negativo la parte esterna del proiettore ed altre
parti. Non esporre il proiettore, il telecomando ed altre parti alla luce diretta del
sole o vicino ad un oggetto caldo, quale un riscaldatore, etc.
Togliere il cordone d'alimentazione per la disconnessione totale.
* per motivi di sicurezza, scollegare il cordone d'alimentazione se il proiettore
non sarà usato per periodi prolungati.
* Prima di pulirlo disattivare e scollegare dalla presa il proiettore. Il non
rispetto di quest'istruzione potrebbe provocare incendi o scosse elettriche.
Scollegare la
spina dalla
presa di
corrente
Richiedere al rivenditore di pulire l'interno del proiettore ogni due
anni circa.
L'accumulo di polvere all'interno del proiettore può provocare incendi o errato
funzionamento.
La pulizia dell'interno del proiettore è più efficace se è eseguita prima dei periodi
umidi, quali la stagione delle piogge.
* Non pulire l'interno personalmente perché è pericoloso.
ITALIANO - 5
PRECAUZIONI DI SICUREZZA (continua)
NOTA
Evitare ogni urto al telecomando.
Un urto può danneggiare o provocare un errato funzionamento del telecomando.
* Prestare attenzione a non far cadere il telecomando.
* Non appoggiare il proiettore o oggetti pesanti sul telecomando.
Pulire il filtro dell'aria ogni 100 ore circa.
Quando il filtro è intasato di polvere, etc. il proiettore può visualizzare un messaggio del
tipo "CONTROLLO FLUSSO ARIA" o spegnere il proiettore per evitare che aumenti la
temperata all'interno dello stesso. Controllare il filtro dell'aria per garantire la ventilazione
normale.
* Non accendere il proiettore senza il filtro dell'aria.
* Se il filtro dell'aria è danneggiato o manca, richiedere al rivenditore il filtro dell'aria
specificato nel manuale dell'utilizzatore.
Avere cura della parte esterna del proiettore e del telecomando.
Un'errata cura può provocare danni quali scolorimento, distacco della vernice, etc.
* Usare un panno morbido per pulire la parte esterna del proiettore, il quadro di comando
ed il telecomando. Se molto sporchi, diluire un detergente neutro in acqua, bagnare e
strizzare bene il panno morbido, pulire, quindi asciugare con un panno asciutto. Non
usare nessun detergente senza diluirlo.
* Non usare prodotti in spray, solventi, sostanze volatili o detergenti abrasivi.
* Prima di usare sostanze chimiche, leggere e seguire scrupolosamente le istruzioni
fornite.
* Non lasciare per lungo tempo a contatto con gomma o vinile.
ITALIANO - 6
ITALIANO
Avere cura delle lenti.
* Chiudere lo sportellino scorrevole delle lenti per evitare graffi alla superficie delle lenti
quando il proiettore non è in uso.
* Non toccare le lenti per evitare di appannare o sporcare le lenti con conseguente
deterioramento della qualità dell'immagine.
* Usare tessuti specifici per lenti, disponibili in commercio, per pulire le lenti (per la
pulizia delle macchine fotografiche, occhiali, etc.). Prestare attenzione a non graffiare le
lenti con oggetti duri.
PRECAUZIONI DI SICUREZZA (continua)
NOTA
Evitare raggi di luce molto forti.
Qualsiasi raggio di luce (quali raggi solari diretti o illuminazione di una stanza) diretto sul
sensore del telecomando può danneggiarlo.
Evitare le interferenze radio.
Qualsiasi interferenza radio può dare origine ad immagini confuse o a
rumore.
* Evitare di collocare generatori di onde radio, quali telefoni portatili, ricetrasmettitori,
etc. vicino al proiettore.
Caratteristiche di visualizzazione.
Le condizioni di visualizzazione del proiettore (quali colori, contrasto, etc.) dipendono
dalle caratteristiche dello schermo, perché il proiettore usa un display a cristalli liquidi. Le
condizioni di visualizzazione possono essere diverse da quelle del CRT.
* Non usare schermi polarizzati. Possono dare origine a immagini rosse.
Accendere/Spegnere il proiettore nel modo corretto.
Per evitare problemi, accendere/spegnere il proiettore nel modo corretto secondo quando
indicato nel seguito se non diversamente specificato.
* Accendere il proiettore prima del computer o del videoregistratore.
* Spegnere il proiettore dopo il computer o il videoregistratore.
Aver cura di non affaticare la vista.
Far riposare periodicamente gli occhi.
Impostare il volume su un livello adeguato onde evitare di disturbare altre
persone.
* E' consigliabile mantenere il volume basso e chiudere le finestre di notte per non
disturbare i vicini.
Collegamento con un computer di tipo notebook
Per collegare un computer di tipo notebook, abilitare l'uscita immagine esterna RGB (predisporre la
visualizzazione CRT o la visualizzazione simultanea LCD e CRT).
Leggere il manuale d'istruzioni del computer notebook per maggiori informazioni.
ITALIANO - 7
ANTES DEL USO
Acerca de los símbolos
En este manual de instrucciones y en el producto propiamente dicho, se utilizan varios
símbolos para asegurar un uso correcto y prevenir riesgos de lesiones personales o de
daños materiales. Los significados de estos símbolos se explican a continuación. Es
importante que usted lea y comprenda cabalmente todas estas medidas de seguridad.
ADVERTENCIA
PRECAUCIÓN
Este símbolo estipula la existencia de riesgos de muerte
o lesiones de gravedad, si el producto llega a operarse
Este símbolo estipula la existencia de riesgos de
lesiones, así también como la posibilidad de daños
físicos, si el producto llega a operarse incorrectamente
ignorándose esta indicación.
Símbolos típicos
Este símbolo indica una advertencia adicional (incluyendo precauciones).
Para aclarar la advertencia, se provee una ilustración.
Este símbolo indica una acción que debe ser realizada. Las indicaciones que
figuran dentro o cerca de este símbolo están específicamente instruidas para
ser realizadas (el ejemplo de la izquierda indica que la clavija de
alimentación debe ser desconectada del tomacorriente).
ESPAÑOL - 1
ESPAÑOL
Este símbolo indica una acción que no se debe realizar. Las indicaciones
que figuran dentro o cerca de este símbolo están específicamente prohibidas
(el ejemplo de la izquierda indica que el desarmado está prohibido).
PRECAUCIONES DE SEGURIDAD
ADVERTENCIA
No utilice nunca el proyector cuando haya algún problema.
La operación en condiciones anormales tales como emisión de humos, olores
extraños, ausencia de imagen, ausencia de sonido, sonido excesivo, daños en la
carcasa, cables o elementos, entrada de líquidos o cuerpos extraños, etc.,
puede ocasionar incendio o descargas eléctricas. Si se produce alguna
anormalidad, apague el proyector inmediatamente y desenchufe la clavija de
alimentación del tomacorriente. Después de confirmar que ha dejado de salir Desenchufar
humo u olores extraños, póngase en contacto con su distribuidor. No intente la clavija de
alimentación
realizar la reparación por su cuenta, pues podría resultar peligroso.
del
* Procure que el tomacorriente esté cerca del proyector y que sea fácilmente tomacorriente.
accesible.
No introduzca líquidos ni cuerpos extraños.
La entrada de líquidos o cuerpos extraños puede ocasionar incendio o descargas
eléctricas.
Preste especial atención cuando hayan niños en la casa.
Si llegara a entrar líquido o cuerpos extraños dentro del proyector, apáguelo
inmediatamente, desenchufe la clavija de alimentación del tomacorriente y
póngase en contacto con su distribuidor.
* No instale el proyector en un cuarto de baño.
* No exponga el proyector a la lluvia o la humedad.
* No coloque floreros, macetas, vasos, cosméticos, ni nada que contenga agua u
otros líquidos cerca de este proyector.
* No ponga objetos de metal, sustancias combustibles, etc., sobre o alrededor del
proyector.
No efectúe ninguna modificación.
El proyector alberga componentes de alto voltaje. La modificación puede
ocasionar incendio o descargas eléctricas.
* No abra nunca la carcasa.
* Deje que su distribuidor realice las tareas de reparación y limpieza interior.
No aplique golpes ni impactos al proyector.
Un proyector golpeado y/o dañado puede ocasionar lesiones, y el uso en tales
condiciones puede ocasionar incendio o descargas eléctricas. Si llegara a aplicar
algún golpe al proyector, apáguelo inmediatamente, desconecte la clavija de
alimentación del tomacorriente y póngase en contacto con su distribuidor.
ESPAÑOL - 2
No
desarmar.
PRECAUCIONES DE SEGURIDAD (continuación)
ADVERTENCIA
Preste atención al aumento de la temperatura del proyector.
Se generan altas temperaturas cuando la lámpara está encendida. Esto puede
producir incendio o quemaduras. Preste especial atención en presencia de niños.
Para evitar quemaduras, no toque el objetivo, los ventiladores de aire o las
rejillas de ventilación durante o inmediatamente después del uso. Preste atención
a la ventilación.
* Mantenga un espacio de 30 cm o más entre los laterales y otros objetos o las
paredes.
* No coloque el proyector sobre una mesa metálica.
* No ponga nada cerca del objetivo, los ventiladores de aire y las rejillas de
ventilación del proyector.
* No bloquee nunca los ventiladores de enfriamiento ni las rejillas de ventilación.
* Evite el uso con las rendijas de ventilación dirigidas hacia abajo.
* No cubra el proyector con un mantel, etc.
* No coloque el proyector sobre una alfombra o un colchón.
No mire nunca a través del objetivo o de las rejillas de ventilación
cuando la lámpara está encendida.
La luz potente podría dañar la vista. Preste especial atención en presencia de niños.
Utilice únicamente el tomacorriente correcto.
El uso de una fuente de alimentación incorrecta puede producir incendio o
descargas eléctricas. Utilice únicamente la fuente de alimentación indicada en el
proyector y observe las normas de seguridad.
* Utilice el cordón de alimentación adjunto dependiendo del tomacorriente que
se va a utilizar.
Tenga cuidado con la conexión del cable de alimentación.
La conexión incorrecta del cordón de alimentación puede producir incendio o
descargas eléctricas.
* No toque el cordón de alimentación con las manos mojadas.
* Antes del uso, verifique que no haya suciedad (ni polvo) en la parte de
conexión del cordón de alimentación. Para limpiar la clavija de alimentación,
utilice un paño suave y seco.
* Inserte firmemente la clavija de alimentación en el tomacorriente. Evite las
conexiones flojas, defectuosas o inseguras.
ESPAÑOL - 3
ESPAÑOL
No coloque el proyector sobre una superficie inestable.
Si el proyector llegara a caerse y/o dañarse, podría ocasionar lesiones, y el uso
en tales condiciones podría provocar incendio o descargas eléctricas.
* No coloque este proyector sobre una superficie inestable, desnivelada o
insegura como por ejemplo una mesa tambaleante o inclinada.
* Cuando instale este proyector sobre una mesa con ruedecillas, asegúrese de
utilizar los topes de freno de las ruedecillas.
* No ponga el proyector con su lateral hacia arriba, o con el objetivo hacia arriba
o hacia abajo.
PRECAUCIONES DE SEGURIDAD (continuación)
ADVERTENCIA
Preste atención al manejo de la lámpara de luminosidad.
Un manejo incorrecto de la lámpara puede producir una explosión.
*Puesto que la lámpara está hecha de vidrio, evite los golpes y las rayaduras.
* Para reemplazar la lámpara, apague el proyector, extraiga el cable de CA, y
espere 45 minutos hasta que la lámpara se enfríe. Cuando la lámpara de alta
presión está caliente, puede explotar si semanipula indebidamente.
* La lámpara tiene una duración de vida de servicio útil. Para mayor información,
consulte el manual del usuario. Para el reemplazo, póngase en contacto con su
distribuidor o con un establecimiento de servicio técnico. No utilice una lámpara
usada. Esto también podrá producir la explosión de la lámpara.
Tenga cuidado con el manejo del cordón de alimentación y de los
cables de conexión externos.
El uso de un cordón de alimentación o cables de conexión dañados puede
provocar incendio o descargas eléctricas. No aplique demasiado calor, presión o
tensión al cordón de alimentación y a los cables.
Póngase en contacto con su distribuidor cuando haya algún cable o cordón de
alimentación dañado (deshilachado, hilos al descubierto, etc.).
* No coloque el proyector u otros objetos pensados encima del cordón de
alimentación o de los cables de conexión. Asimismo, no coloque ninguna colcha,
cubierta, etc., encima del mismo pues alguien podría colocar inadvertidamente
objetos pesados encima del cordón de alimentación y de los cables.
* No tire del cordón de alimentación y de los cables. Para la conexión o
desconexión, tire de la clavija o de los conectores.
* No coloque el cordón cerca de un calefactor.
* Evite doblar bruscamente el cordón de alimentación.
* No intente modificar el cordón de alimentación.
Tenga cuidado con el manejo de pila del mando a distancia.
Un manejo incorrecto de la pila puede producir incendio o lesiones. Si no la
maneja correctamente, la pila puede explotar.
* Mantenga la pila alejada de los niños y animales. Si llegara a ser ingerida,
consulte inmediatamente con un médico para un tratamiento de emergencia.
* No arroje la pila al fuego o al agua.
* Evite los lugares donde existan llamas abiertas o de altas temperaturas.
* No sujete la pila con pinzas metálicas.
* Guarde la pila en un sitio oscuro, fresco y seco.
* No ponga la pila en cortocircuito.
* No recargue, desarme ni suelde la pila.
* No aplique golpes a la pila.
* Utilice únicamente la pila indicada en el manual del usuario.
* Al instalar la pila, asegúrese de que los terminales positivo y negativo estén
correctamente alineados.
* Si la pila se sulfata, limpie el líquido derramado y cambie la pila. Si llegara a
adherirse líquido a su cuerpo o su vestimenta, lave con abundante cantidad de agua.
* Respete las leyes locales sobre la disposición de las pilas usadas.
ESPAÑOL - 4
PRECAUCIONES DE SEGURIDAD (continuación)
PRECAUCIÓN
Tenga cuidado al mover el proyector.
Cualquier negligencia puede producir daños personales o materiales.
* No mueva el proyector durante el uso. Antes de moverlo, desconecte el cordón
de alimentación y todas las conexiones externas, y deslice la puerta deslizante
del objetivo.
* No aplique golpes ni impactos al proyectos.
* Para trasladarlo, utilice la bolsa para el transporte, de proveerse, dependiendo
del manual de la bolsa de transporte.
No coloque nada encima del proyector.
La colocación de objetos pesados podría provocar una pérdida de equilibrio y la
caída del proyector, causando daños personales o materiales. Preste especial
atención cuando hayan niños en la casa.
Evite los lugares de altas temperaturas.
El calor podría tener efectos adversos sobre la carcasa del proyector y otros
elementos. No coloque el proyector, el mando a distancia y otros elementos a la
luz directa del sol o cerca de objetos que emitan calor, como calefactor, etc.
Desenchufe el cordón de alimentación para una desconexión
completa.
* Para fines de seguridad, desconecte el cordón de alimentación cuando no
vaya a utilizar el proyector por un tiempo prolongado.
* Antes de la limpieza, apague el proyector y desenchúfelo. La negligencia
puede resultar en incendio o descargas eléctricas.
Desenchufar
la clavija de
alimentación
del
tomacorriente.
Solicite a su distribuidor la limpieza del interior del proyector una
vez cada dos años.
La acumulación de polvo en el interior del proyector puede provocar incendio o
fallas de funcionamiento. Se obtendrán mejores resultados si la limpieza se
realiza antes de cada época de alta humedad, como las épocas de lluvia, etc.
* No intente realizar la limpieza por su cuenta debido a que puede resultar
peligroso.
ESPAÑOL - 5
ESPAÑOL
Evite los lugares húmedos o polvorientos.
No instale este proyector en un sitio húmedo, polvoriento o expuesto a humos
grasos o gases corrosivos, pues podrá resultar en incendio o descargas eléctricas.
* Evite la instalación cerca de la cocina, un deshumidificador o en cualquier otro
sitio expuesto a humedad o humos grasos.
PRECAUCIONES DE SEGURIDAD (continuación)
NOTA
Evite aplicar golpes al mando a distancia.
Los golpes pueden provocar daños o fallos de funcionamiento del mando a distancia.
* Procure no dejar caer el mando a distancia.
* No coloque el proyector u otros objetos pesados encima del mando a distancia.
Tenga cuidado con el objetivo.
* Cuando no esté usando el proyector, cierre la puerta deslizante del objetivo para proteger
su superficie contra los arañazos.
* No toque el objetivo para evitar que las huellas o la suciedad del objetivo deterioren la
calidad de la imagen.
* Para limpiar el objetivo, utilice un papel para limpiar objetivos (utilizado para limpiar
cámaras, anteojos, etc.) disponible en las tiendas del ramo. Tenga cuidado de no rayar el
objetivo con materiales abrasivos.
Limpie el filtro de aire aprox. cada 100 horas.
Cuando el filtro de aire esté obstruido por el polvo, etc., el proyector podría visualizar el
mensaje "CHEQUEAR FLUJO DE AIRE" o apagarse, con el fin de evitar el aumento de
la temperatura interior. Para permitir una buena ventilación, mantenga el filtro de aire en
buenas condiciones.
* No encienda el proyector sin haber instalado el filtro de aire.
* Si el filtro de aire está dañado o se ha extraviado, pida a su distribuidor el filtro de aire
especificado en el manual del usuario de su distribuidor.
Tenga cuidado con la carcasa y el mando a distancia.
Un cuidado incorrecto puede tener efectos perjudiciales como pérdida de color,
descascarillado de la pintura, etc.
* Utilice un paño suave para limpiar la carcasa y el panel de control del proyector y del
mando a distancia. Cuando haya mucha suciedad, utilice un paño limpio y humedecido
con detergente neutro diluido en agua, y luego seque con un paño seco. No aplique
directamente detergente sin diluir.
* No utilice pulverizadores en aerosol, solventes, sustancias volátiles ni limpiadores
abrasivos.
* Antes de utilizar paños químicos, asegúrese de leer y de observar las instrucciones.
* Evite el contacto prolongado con caucho o vinilo.
ESPAÑOL - 6
PRECAUCIONES DE SEGURIDAD (continuación)
NOTA
Evite los rayos potentes.
Los rayos potentes (como los rayos directos del sol o de la luz ambiental) sobre los
sensores del mando a distancia pueden hacer que el mando a distancia quede inoperante.
Evite las interferencias de radio.
Las radiointerferencias pueden causar la distorsión de imágenes o de sonido.
* Evite usar aparatos generadores de ondas radioeléctricas como teléfonos celulares,
transceptores, etc., cerca del proyector.
Acerca de la característica de visualización.
Las condiciones de visualización del proyector (como color, contraste, etc.) dependen de
las características de la pantalla, debido a que el proyector utiliza un panel de
visualización de cristal líquido. Las condiciones de visualización pueden diferir de la
visualización de CRT.
* No utilice una pantalla polarizada. Se pueden producir imágenes rojas.
Tenga cuidado con la fatiga visual.
Descanse sus ojos periódicamente.
Ajuste el volumen de sonido a un nivel adecuado para no molestar a los
demás.
* De noche se recomienda mantener el volumen a un nivel bajo y cerrar las ventanas
como consideración a sus vecinos.
Conexión con el ordenador notebook.
Cuando conecte con un ordenador notebook, ajuste la salida de la imagen exterior RGB a válida
(ajuste de pantalla CRT o visualización simultánea de LCD y CRT).
Para mayor información, tenga a bien leer el manual de instrucciones del ordenador notebook.
ESPAÑOL - 7
ESPAÑOL
Efectúe el encendido/apagado en el orden correcto.
Para evitar posibles averías, encienda/apague el proyector en el orden mencionado abajo,
a menos que se especifique de otro modo.
* Encienda el proyector antes del ordenador o de la videograbadora.
* Apague el proyector después del ordenador o de la videograbadora.
ALVORENS GEBRUIK
Waarschuwingssymbolen
In deze gebruiksaanwijzing en op het apparaat zelf staan diverse symbolen vermeld, die
u de juiste bediening tonen en u waarschuwen om schade en gevaar voor uzelf en
anderen te voorkomen. De betekenis van deze symbolen wordt hieronder uitgelegd.
Lees de beschrijving aandachtig door, om volledig kennis te nemen van de betekenis.
WAARSCHUWING
LET OP
Dit symbool vergezelt aanwijzingen die u niet mag
veronachtzamen, omdat onjuiste bediening hier
gevaar voor verwonding of zelfs fatale ongelukken
kan veroorzaken.
Dit symbool vergezelt aanwijzingen die u dient te
volgen om gevaar voor schade of lichamelijk letsel
te voorkomen.
Toegepaste symbolen
Dit symbool vergezelt een aanvullende waarschuwing (of
bedieningsaanwijzing). Hierbij geeft het teken in het midden de inhoud aan.
Dit symbool waarschuwt voor een handeling die verboden is. De inhoud
wordt verduidelijkt door het teken in het midden (het voorbeeld links geeft
aan dat demontage niet is toegestaan).
Dit symbool geeft een noodzakelijke handeling aan. De inhoud wordt
verduidelijkt door het teken in het midden (het voorbeeld links geeft aan dat
u de stekker uit het stopcontact moet trekken).
NEDERLANDS - 1
VEILIGHEIDSMAATREGELEN
WAARSCHUWING
Gebruik de projector nooit indien deze niet juist werkt.
Gebruik de projector niet als deze rook uitstoot, vreemd ruikt, als er geen beeld
of geluid is of als het geluid te luid is, als de behuizing, kabels of andere
onderdelen beschadigd zijn, of als er een vloeistof of voorwerp in het apparaat
is terechtgekomen, want dit kan resulteren in brand of een elektrische schok.
In zulke gevallen moet u de projector meteen uitschakelen en de stekker uit het
stopcontact trekken. Controleer of de rook of geur stopt en neem dan contact op
met uw dealer. Probeer het apparaat nooit zelf te repareren want dit kan
bijzonder gevaarlijk zijn.
* Gebruik een stopcontact dat dicht bij de projector is en dat gemakkelijk
bereikbaar is.
Trek de
stekker uit
het
stopcontact.
Breng geen wijzigingen in de projector aan.
In de projector zijn hoge spanningen aanwezig. Wijzigingen kunnen resulteren in
brand of een elektrische schok.
* Maak nooit de behuizing open.
* Neem voor reparatie of reiniging van het inwendige van de projector contact
Niet
op met uw dealer.
demonteren.
Stel de projector niet aan stoten of schokken bloot.
Als de projector aan stoten of schokken wordt blootgesteld, kan deze beschadigd
worden en eventueel letsel veroorzaken. Bovendien bestaat de kans op brand of
een elektrische schok.
Als de projector gevallen is of iets dergelijks, moet u deze meteen uitschakelen,
de stekker uit het stopcontact trekken en contact opnemen met uw dealer.
NEDERLANDS - 2
NEDERLANDS
Let op dat geen vloeistof of voorwerp in het inwendige terechtkomt.
Als vloeistoffen of voorwerpen in het inwendige terechtkomen, kan dit resulteren
in brand of een elektrische schok. Wees vooral voorzichtig wanneer er kinderen
in de buurt zijn.
Indien toch vloeistof of een voorwerp in de projector terechtkomt, moet u het
apparaat meteen uitschakelen, de stekker uit het stopcontact trekken en contact
opnemen met uw dealer.
* Zet de projector niet in de badkamer.
* Stel de projector niet aan regen of vocht bloot.
* Zet geen bloemenvazen, planten, kopjes, make-up of vloeistoffen zoals water
enz. op of dicht in de buurt van de projector.
* Leg geen metalen of brandbare voorwerpen of andere gevaarlijke stoffen op of
dicht in de buurt van de projector.
VEILIGHEIDSMAATREGELEN (vervolg)
WAARSCHUWING
Zet de projector niet op een onstabiele ondergrond.
Als de projector valt, kan deze beschadigd worden en eventueel letsel
veroorzaken. Bovendien bestaat de kans op brand of een elektrische schok.
* Zet de projector niet op een onstabiel, schuin of trillend oppervlak zoals een
wankel of schuin aflopend tafeltje.
* Vergrendel de zwenkwieltjes wanneer u de projector op een tafeltje met
zwenkwieltjes plaatst.
* Plaats de projector niet met de zijkant naar boven, de lens naar boven of de
lens naar beneden.
Wees voorzichtig, de projector geeft veel hitte af.
Wanneer de lamp brandt, geeft de projector veel hitte af. Er bestaat kans op
brand en u kunt zich verbranden. Wees vooral voorzichtig wanneer er kinderen
in de buurt zijn.
Raak de lens, de ventilators en de ventilatieopeningen niet aan tijdens gebruik of
meteen na gebruik, om verbranding te voorkomen. Zorg ervoor dat de ventilatie
niet belemmerd wordt.
* Houd ten minste 30 cm ruimte vrij tussen de zijkant van de projector en de
muur e.d.
* Zet de projector niet op een metalen tafeltje.
* Plaats geen voorwerpen dicht bij de lens, de ventilators of de
ventilatieopeningen van de projector.
* Let op dat de ventilators en de ventilatieopeningen niet geblokkeerd worden.
* Gebruik de projector niet met de ventilatieopeningen naar beneden gekeerd.
* Leg geen tafelkleed e.d. over de projector.
* Zet de projector niet op een vloerkleed of bed.
Kijk nooit in de lens of de openingen wanneer de lamp brandt.
Het sterke licht kan uw gezichtsvermogen beschadigen. Wees vooral voorzichtig
wanneer er kinderen in de buurt zijn.
Gebruik de projector op de juiste stroomvoorziening.
Gebruik op de verkeerde stroomvoorziening kan resulteren in brand of een
elektrische schok. De projector mag alleen worden aangesloten op een
stopcontact dat voldoet aan de stroomspecificaties die op het apparaat staan.
* Gebruik het juiste netsnoer voor het stopcontact waarop u de projector aansluit.
Sluit het netsnoer zorgvuldig aan.
Een verkeerde aansluiting van het netsnoer kan resulteren in brand of een
elektrische schok.
* Raak het netsnoer niet met natte handen aan.
* Controleer of de stekker van het netsnoer schoon is (geen stof) voordat u deze
aansluit. Gebruik een zacht, droog doekje om de stekker schoon te maken.
* Steek de stekker stevig in het stopcontact. Gebruik een juist werkend, degelijk
stopcontact.
NEDERLANDS - 3
VEILIGHEIDSMAATREGELEN (vervolg)
WAARSCHUWING
Behandel de lichtbronlamp voorzichtig.
Bij een verkeerde behandeling van de lamp kan deze ontploffen.
* Aangezien de lamp van glas is, mag u deze niet bekrassen of aan sterke
schokken blootstellen.
* Voordat u de lamp vervangt, schakelt u de projector uit en trekt dan het netsnoer uit
het stopcontact. Wacht vervolgens 45 minuten om de lamp te laten afkoelen.
Wanneer de lamp staat onder hoge druk heet is, kan deze bij verkeerde behandeling
ontploffen.
* De lamp heeft een beperkte levensduur. Zie de gebruiksaanwijzing voor nadere
bijzonderheden. Neem contact op met uw dealer of servicecentrum voor een
vervangingslamp. Gebruik de oude lamp niet opnieuw. De lamp zou kunnen ontploffen.
Behandel de batterij van de afstandsbediening voorzichtig.
Een verkeerde behandeling van de batterij kan resulteren in brand of letsel. De
batterij kan zelfs ontploffen indien deze niet juist wordt behandeld.
* Houd de batterij uit de buurt van kinderen en huisdieren. Als de batterij wordt
afgeslikt, moet u meteen de hulp van een arts inroepen voor spoedbehandeling.
* Zorg dat de batterij niet in water of vuur terechtkomt.
* Vermijd omgevingen met een hoge temperatuur of open vuur.
* Pak de batterij niet met een metalen pincet vast.
* Bewaar de batterij op een donkere, koele en droge plaats.
* Zorg dat u de batterij niet kortsluit.
* Probeer de batterij niet op te laden, te demonteren of te solderen.
* Stel de batterij niet aan harde schokken of stoten bloot.
* Gebruik uitsluitend de batterij vermeld in de gebruiksaanwijzing.
* Zorg er bij het aanbrengen van de batterij voor dat de plus en min in de juiste
richting zijn gekeerd.
* Als de batterij heeft gelekt, moet u de batterijhouder goed schoonmaken en de
batterij vervangen. Als het poeder aan uw huid of kleding blijft hangen, moet u
dit grondig met water afspoelen.
* Volg de plaatselijke wetgeving voor het weggooien van gebruikte batterijen.
NEDERLANDS - 4
NEDERLANDS
Behandel het netsnoer en de aansluitkabels voorzichtig.
Wanneer u een beschadigd netsnoer of een beschadigde aansluitkabel gebruikt,
kan dit brand of een elektrische schok veroorzaken. Let erop dat het netsnoer en
de aansluitkabels niet aan te grote hitte worden blootgesteld. Druk het snoer en
de kabels niet klem en trek ze ook niet te strak.
Neem contact op met uw dealer als het netsnoer of de aansluitkabels beschadigd
zijn (blootliggende of gebroken kerndraadjes e.d.).
* Zet niet de projector of een ander zwaar voorwerp op het netsnoer of de aansluitkabels.
Leg ook geen sprei, deken e.d. over het netsnoer of de kabels, want dan is het mogelijk
dat u per ongeluk een zwaar voorwerp op het snoer of de kabels plaatst.
* Trek niet aan het netsnoer of de aansluitkabels. Pak bij het aansluiten of losmaken
van het netsnoer of de aansluitkabels altijd de stekker of plug met uw hand vast.
* Leg het netsnoer niet in de buurt van een verwarming.
* Zorg dat het netsnoer niet te sterk gebogen wordt.
* Probeer nooit zelf reparaties aan het netsnoer uit te voeren.
VEILIGHEIDSMAATREGELEN (vervolg)
LET OP
Wees voorzichtig wanneer u de projector vervoert.
Wanneer u niet voorzichtig te werk gaat, kan letsel of beschadiging worden
veroorzaakt.
* Verplaats de projector niet tijdens gebruik. Alvorens u de projector verplaatst,
maakt u het netsnoer en alle aansluitkabels los en schuift u het lenskapje dicht.
* Let op dat u de projector niet aan een harde stoot of schok blootstelt.
* Vervoer de projector in de draagtas, indien deze is bijgeleverd, overeenkomstig
de aanwijzingen voor het gebruik van de draagtas.
Zet niets bovenop de projector.
Wanneer u iets bovenop de projector zet, kan de projector verschuiven of vallen
met letsel of beschadiging tot gevolg. Wees vooral voorzichtig wanneer er
kinderen in de buurt zijn.
Houd de projector uit de buurt van vochtige of stoffige plaatsen.
Wanneer u de projector in een vochtige of stoffige ruimte, of in een ruimte met
vettige rook e.d. zet, kan dit resulteren in brand of een elektrische schok.
* Zet de projector niet in de keuken, bij een luchtbevochtigingsapparaat of op
een andere plaats met hoge vochtigheid of vettige rook.
Vermijd opstelling in een omgeving met hoge temperaturen.
De hitte kan een nadelige invloed hebben op de behuizing en de interne
onderdelen van de projector. Stel de projector, de afstandsbediening en de
andere onderdelen niet aan direct zonlicht bloot en houd ze uit de buurt van
hittebronnen zoals een verwarmingsradiator e.d.
Trek de stekker uit het stopcontact wanneer de projector langere
tijd niet wordt gebruikt.
* Om veiligheidsredenen moet u de stekker uit het stopcontact trekken wanneer
u de projector langere tijd niet denkt te gebruiken.
* Voordat u de projector gaat schoonmaken, moet u deze uitschakelen en de
stekker uit het stopcontact trekken. Dit om brand of een elektrische schok te
voorkomen.
Laat uw dealer iedere twee jaar het inwendige van de projector
schoonmaken.
Opeenhoping van stof in de projector kan resulteren in brand of een defect. U
kunt het inwendige van de projector het beste laten schoonmaken iedere keer
voordat een vochtig seizoen begint (bijv. de regentijd in tropische landen).
* Maak het inwendige van de projector niet zelf schoon, want dit is gevaarlijk.
NEDERLANDS - 5
Trek de
stekker uit
het
stopcontact.
VEILIGHEIDSMAATREGELEN (vervolg)
OPMERKINGEN
Stel de afstandsbediening niet aan schokken bloot.
Harde stoten of schokken kunnen resulteren in een defect of beschadiging van de
afstandsbediening.
* Laat de afstandsbediening niet vallen.
* Zet niet de projector of een ander zwaar voorwerp op de afstandsbediening.
Verzorging van de lens.
* Wanneer de projector niet gebruikt wordt, moet u het lenskapje dichtschuiven om
krassen op de lens te voorkomen.
* Raak de lens niet aan om vlekken of vuil op de lens te voorkomen, hetgeen resulteert in
een minder goede beeldkwaliteit.
* Gebruik een in de handel verkrijgbaar lensreinigingsdoekje om de lens schoon te maken
(zoals een reinigingsdoekje voor cameralenzen, brillenglazen e.d.). Wees voorzichtig dat
u geen krassen op de lens maakt.
Verzorging van de projector-behuizing en de afstandsbediening.
Bij een verkeerde behandeling kan verkleuren, afschilferen e.d. optreden.
* Gebruik een zachte doek om de behuizing en het bedieningspaneel van de projector en
de afstandsbediening schoon te maken. Voor het verwijderen van hardnekkig vuil kan
een zachte doek bevochtigd met een mild reinigingsmiddel, verdund met water, worden
gebruikt. Wring de doek goed uit voordat u begint en wrijf met een droge, zachte doek
na. Gebruik geen onverdund reinigingsmidddel.
* Gebruik geen aërosolsprays, oplosmiddelen, schuurmiddelen of andere bijtende
reinigingsmiddelen.
* Lees zorgvuldig de instructies op het reinigingsmiddel voordat u dit gebruikt.
* Vermijd langdurig contact met rubber of vinyl.
NEDERLANDS - 6
NEDERLANDS
Maak het luchtfilter na iedere 100 gebruiksuren schoon.
Wanneer het luchtfilter verstopt raakt met stof e.d., toont de projector de melding
"CONTROLEER LUCHTSTROOM" of wordt de projector automatisch uitgeschakeld,
om oververhitting van de inwendige onderdelen te voorkomen. In dat geval moet het
luchtfilter worden schoongemaakt.
* Schakel de projector niet in wanneer het luchtfilter niet is aangebracht.
* Als het luchtfilter beschadigd is of kwijtgeraakt, moet u een nieuw luchtfilter bestellen.
Zie gebruiksaanwijzing voor de gegevens van het vereiste filter.
VEILIGHEIDSMAATREGELEN (vervolg)
OPMERKINGEN
Vermijd sterke lichtstralen.
Zorg dat geen sterke lichtstralen (zoals direct zonlicht of het licht van een sterke lamp) op
de afstandsbedieningssensors vallen want dan zal de afstandsbediening niet werken.
Vermijd hoogfrequentstoringen.
Bij hoogfrequentstoringen kan het beeld of geluid worden aangetast.
* Vermijd het gebruik van een hoogfrequentgenerator zoals een mobiele telefoon,
zendontvanger e.d. in de buurt van de projector.
Betreffende de weergavekwaliteit.
De weergavekwaliteit van de projector (zoals de kleur, het contrast enz.) wordt eveneens
bepaald door de eigenschappen van het scherm, want de projector maakt gebruik van een
LCD-paneel. Het weergavebeeld kan verschillen van het beeld voortgebracht door een
beeldbuis.
*Gebruik geen gepolariseerd scherm, want dit kan een rood beeld geven.
Schakel de apparatuur in de juiste volgorde in en uit.
Om storingen te voorkomen, moet u de projector en de andere apparatuur in de
onderstaande volgorde in- en uitschakelen, tenzij anders aangegeven.
* Schakel eerst de projector in en dan de computer of videorecorder.
* Schakel de projector pas uit nadat u de computer of videorecorder hebt uitgeschakeld.
Zorg dat u uw ogen niet te zeer belast.
Het verdient aanbeveling regelmatig een rustpauze in te lassen.
Stel de geluidssterkte niet te hoog in om overlast voor anderen te
voorkomen.
*Stel de geluidssterkte zodanig in dat er geen overlast voor anderen wordt veroorzaakt.
Aansluiten op een notebook-computer
Bij het aansluiten op een notebook-computer moet de externe RGB beelduitgang worden
ingeschakeld (instelling voor CRT display of gelijktijdig LCD en CRT display).
Zie de gebruiksaanwijzing van de notebook-computer voor verdere informatie.
NEDERLANDS - 7
FØR BRUK
Angående symbolene
Forskjellige symboler har blitt tatt i bruk i denne bruksanvisningen og på selve enheten
for å sikre riktig bruk, og for å forhindre skade på brukeren, andre persjoner og
eiendeler. Symbolenes betydninger beskrives i avsnittet nedenfor. Det er viktig å lese
beskrivelsene av de forskjellige symbolenes betydning grundig og gjøre seg innforstått
med deres betydning.
ADVARSEL
FORSKING
Dette symbolet indikerer informasjon som, dersom det
ignoreres, kan resultere i skade på person eller i verste fall
tap av menneskeliv pga. uriktig håndtering.
Dette symbolet indikerer informasjon som, dersom det
ignoreres, kan resultere i skade på person eller eiendeler
pga. av uriktig håndtering.
Typiske symboler
Denne typen symbol indikerer en ytterligere advarsel (inklusive
oppfordringer til varsomhet). En illustrasjon vises som forklaring på
advarselens innhold.
Denne typen symbol indikerer en utilrådelig betjeningsmåte. Illustrasjonen i
varselmerket viser betjeningsmåten som ikke må utføres (symbolet til
venstre viser at enheten ikke må demonteres).
NORASK
Denne typen symbol indikerer en bydende handling. Illustrasjonen i
varselsymbolet viser betjeningsmåten som må utføres (symbolet til venstre
viser at strømpluggen må frakoples stikkontakten).
NORASK - 1
SIKKERHETSREGLER
ADVARSEL
Bruk ikke prosjektøren hvis det oppstår problemer.
Unormale tilstander som f.eks. røyk, rar lukt, ikke noe bilde, ingen lyd, for mye
lyd, ødelagt hus, elementer eller kabler, eller hvis væske eller andre
fremmedlegemer har trengt inn i apparatet, etc., kan forårsake branntilløp
eller elektrisk støt. Hvis noen av de ovennevnte tilstandene skulle forekomme,
må apparatet slås av og støpslet trekkes ut av stikkontakten. Når du er sikker Frakople
strømpluggen
på at det ikke lenger røyker eller lukter rart, må forhandleren kontaktes. Gjør fra
stikkontakten.
aldri forsøk på å utføre reparasjoner selv, det medfører stor farerisiko.
* Stikkontakten må være i nærheten av prosjektøren og lett tilgjengelig.
Unngå at væske eller fremmedlegemer trenger inn i apparatet.
Hvis væske eller fremmedlegemer skulle trenge inn i apparatet, kan det forårsake
branntilløp eller elektrisk støt.
Utvis stor varsomhet når barn er tilstede.
Hvis væske eller fremmedlegemer skulle trenge inn i prosjektøren, må strømmen
slås av omgående, støpslet trekkes ut av stikkontakten og forhandleren kontaktes.
* Prosjektøren må ikke plasseres i et badeværelse.
* Prosjektøren må ikke utsettes for regn eller fuktighet.
* Plasser ikke blomstervaser, potteplanter, kopper, kosmetikk, væske slik som
vann, etc., oppå eller nær prosjektøren.
* Plasser ikke metall, brennbart materiale, etc., oppå eller nær prosjektøren.
Modifiser ikke prosjektøren.
Prosjektøren inneholder høyspenningskomponenter. Modifisering av apparatet
kan resultere i branntilløp eller elektrisk støt.
* Åpne aldri kabinettet.
* Overlat eventuelle reparasjoner eller innvendig rengjøring til forhandleren.
Utsett ikke prosjektøren for støt eller slag.
Hvis prosjektøren utsettes for slag og/eller ødelegges, kan det resultere i
personskader, og fortsatt bruk kan føre til branntilløp eller elektrisk støt.
Skulle prosjektøren utsettes for slag, må strømmen slås av omgående, støpslet
trekkes ut av stikkontakten og forhandleren kontaktes.
NORASK - 2
Ikke
demonter.
SIKKERHETSREGLER (forts.)
ADVARSEL
Plasser ikke prosjektøren på et utstabilt underlag.
Hvis prosjektøren skulle falle i gulvet og/eller ødelegges, kan det forårsake
personskader og fortsatt bruk kan føre til branntilløp eller elektrisk støt.
* Plasser ikke prosjektøren på et underlag som er utstabilt, skjevt eller som
vibrerer, f.eks. et vaklevorent eller skråstilt stativ.
* Plasser prosjektøren på et stativ med trinser og sett bremsene på.
* Ikke sett prosjektøren sidelengs, eller med linsen vendt oppover eller nedover.
Vær oppmerksom på prosjektørens høye temperatur.
Apparatet blir veldig varmt når lampen er tent. Det kan resultere i brann eller
forbrenninger. Utvis stor varsomhet når det er barn tilstede.
Objektivet, viften og ventilasjonsåpninger må ikke berøres under eller like etter
bruk, det kan forårsake forbrenninger. Sørg for god ventilasjon.
* Se til at det er en klaring på minst 30 cm mellom prosjektøren og f.eks. vegger.
* Plasser ikke prosjektøren på bord av metall.
* Plasser ikke noe nær objektivet, viftene og ventilasjonsåpningene.
* Se til at ikke viften eller ventilasjonsåpningene blokkeres.
* Må ikke brukes med ventilasjonsåpningen ned.
* Dekk ikke til prosjektøren med en duk, e.l.
* Plasser ikke prosjektøren på et gulvteppe eller sengetøy.
Se aldri gjennom objektivet eller åpninger når lampen er tent.
Det kraftige lyset er skadelig for øynene. Utvis spesielt stor varsomhet når det er
barn tilstede.
Sørg for korrekt tilkopling av nettledningen.
Feilaktig tilkopling kan resultere i branntilløp eller elektrisk støt.
* Rør aldri nettledningen med våte hender.
* Kontroller at koplingsenden av ledningen er ren (støvfri), før bruk. Tørk
støpslet med en myk og tørr klut.
* Sett støpslet helt inn i stikkontakten. Unngå stikkontakter hvor fatningen er løs
eller skadet på noen måte.
NORASK - 3
NORASK
Bruk korrekt voltspenning.
Feil voltspenning kan resultere i branntilløp eller elektrisk støt. Bruk bare den
spenningen som er angitt prosjektøren og i sikkerhetsreglene.
* Den vedlagte nettledningen må brukes i samsvar med nettstrømmen som skal
brukes.
SIKKERHETSREGLER (forts.)
ADVARSEL
Behandle lyskildelampen forsiktig.
Uforsiktig behandling kan resultere i en eksplosjon.
*Siden lampen er laget av glass, må den ikke utsettes for slag og riping.
*Når lampen skal skiftes ut, slås apparatet av og nettledningen trekkes ut av
stikkontakten., vent 45 minutter til lampen er avkjølt. Lyspæren har høyt trykk
når den er varm og kan eksplodere hvis den ikke håndteres korrekt.
*Lampen har en viss levetid. Se brukerhåndboken for nærmere detaljer. Ta
kontakt med forhandleren eller serviceverkstedet når lampen skal skiftes ut.
Bruk ikke en gammel lampe, det kan også forårsake eksplosjon.
Behandle nettledningen og eventuelle eksterne koplingskabler
varsomt.
Fortsatt bruk av en skadet nettledning eller kabler kan resultere i branntilløp
eller elektrisk støt. Utsett ikke nettledningen eller kabler for sterk varme, trykk
eller belastninger.
Hvis nettledningen eller kabler kommer til skade (viklingen blottlegges eller
knekker, etc.), må forhandleren kontaktes.
* Plasser ikke prosjektøren eller andre tunge gjenstander oppå nettledningen eller
kablene. Legg heller ikke tepper, kluter, etc. oppå ledningen eller kablene da de
kan bli vanskelig å få øye på og noen ved et uhell kan komme til å plassere
tunge gjenstander oppå.
* Dra ikke i nettledningen eller kablene for å få støpslet ut av stikkontakten med
trekk i selve støpslet.
* Unngå at ledningen plasseres nær en varmekilde.
* Unngå at nettledningen bøyes kraftig.
* Demonter ikke nettledningen.
Behandle fjernkontrollens batteri varsomt.
Feilaktig behandling av batteriet kan resultere i branntilløp eller elektrisk støt.
Batteriet kan eksplodere hvis det ikke behandles korrekt.
* Hold barn og kjæledyr unna batteriet. Hvis batteriet skulle svelges, må lege
kontaktes øyeblikkelig.
* Batteriet må ikke utsettes for vann eller brennes.
* Batteriet må ikke utsettes for flammer eller høye temperaturer.
* Hold aldri batteriet ved hjelp av et metallpinsett.
* Oppbevar batteriet på et kjølig, mørkt og tørt sted.
* Kortslutt ikke batteriet.
* Batteriet må ikke gjenopplades, demonteres eller loddes.
* Batteriet må ikke utsettes for slag.
* Bruk bare det batteriet som er spesifisert i brukerhåndboken.
* Se til at pluss- og minuspolene peker riktig vei ved innsetting av batteriet.
* Hvis det oppdages batterilekkasje, må dette tørkes opp og batteriet skiftes ut.
Ved søl av batterilekkasje på hud eller klær, skyll med rikelig med vann.
* Følg gjeldende regelverk ved kassering av batteriet.
NORASK - 4
SIKKERHETSREGLER (forts.)
FORSKING
Utvis varsomhet ved flytting av prosjektoren.
Uforsvarlig håndtering kan resultere i en ulykke eller skader.
* Flytt ikke prosjektøren under bruk. Før den eventuelt flyttes, må støpslet
trekkes ut av stikkontakten, alle kontakter koples fra og objektivhetten settes
på.
* Unngå at prosjektøren utsettes for slag eller støt.
* Ved bæring, må eventuell vedlagt bæreveske brukes.
Sett ikke noe oppå prosjektøren.
Hvis det settes noe oppå prosjektøren, kan den komme til å velte og forårsake
skader på personer og gjenstander. Vær spesielt forsiktig når det er barn
tilstede.
Unngå fuktighet og støv.
Hvis prosjektøren plasseres på steder med høy fuktighet, mye støv, fettos eller
korroderende gasser kan det resultere i branntilløp eller elektrisk støt.
* Må ikke plasseres nær kjøkken, luftfukter eller andre steder hvor det fins fettos
eller fuktighet.
Unngå omgivelser med høy temperatur.
Varme kan ha negativ innvirkning på prosjektørens kabinett og andre deler.
Prosjektøren, fjernkontrollen eller andre deler må ikke utsettes for direkte sol
eller andre varmekilder som f.eks. en varmeovn, etc.
Frakople
strømpluggen
fra
stikkontakten.
Be forhandleren om å rengjøre prosjektøren innvendig hvert 2. år.
Hvis det samler seg støv og skitt inni prosjektøren kan det resultere i branntilløp
eller funksjonssvikt. Innvendig rengjøring er mest effektiv hvis den utføres før
en årstid hvor det kan forventes mye regn eller fuktighet.
* Rengjøringen må av sikkerhetsmessige årsaker ikke utføres av kunden selv.
NORASK - 5
NORASK
Kople nettledningen fra hvis apparatet ikke skal brukes på en
stund.
* Av sikkerhetsmessige grunner, må nettledningen koples fra hvis
prosjektoren ikke skal brukes på en lang stund.
* Trekk støpslet ut av stikkontakten før eventuell rengjøring. Hvis dette ikke
gjøres kan det resultere i branntilløp eller elektrisk støt.
SIKKERHETSREGLER (forts.)
NB:
Utsett ikke fjernkontrollen for slag.
Hvis fjernkontrollen utsettes for slag kan det forårsake skader eller funksjonssvikt.
* Se til at fjernkontrollen ikke faller i gulvet.
* Plasser aldri prosjektøren eller andre gjenstander oppå fjernkontrollen.
Vedlikehold av objektivet.
* Lukk objektivhetten så linsen ikke utsettes for riper når prosjektøren ikke er i bruk.
* Ta ikke på selve linsen for å unngå at dugg og skitt reduserer visningskvaliteten.
* Bruk en kommersielt tilgjenglig renseklut (til kameraer, briller, etc) til å rengjøre linsen
med. Pass på at riper unngås.
Rens luftfilteret cirka hver 100. time.
Når luftfilteret stoppes til av støv og skitt, vil prosjektøren vise en melding som sier
"SJEKK LUFTSTRØMMEN". Slå av prosjektøren for å unngå at den overopphetes. Sjekk
deretter filteret ved å gå frem.
* Slå ikke på prosjektøren uten at luftfilteret er påmonteret.
* Hvis luftfilteret er skadet eller blitt borte, må nytt skaffes ved bestilling gjennom
forhandleren. Se detaljer under brukerhåndboken.
Vedlikehold av kabinett og fjernkontroll.
Ved feilbehandling kan det forekomme misfarging, avskalling, etc.
* Bruk en myk klut til å rengjøre prosjektørens kabinett og kontrollpanel og
fjernkontrollen. Hvis delene er veldig skitne, tørkes de med en myk klut som er godt
oppvridd i nøytralt rengjøringsmiddel. Bruk ikke ufortynnet rengjøringsmiddel direkte
på prosjektøren eller andre deler.
* Bruk ikke aerosolspray, løsemidler, flyktige væsker eller slipemidler.
* Før eventuelt bruk av kjemiske rensemidler, må bruksanvsingen for slike midler leses
nøye.
* Unngå at gummi eller vinyl er i kontakt med utstyret over lenger tid.
NORASK - 6
SIKKERHETSREGLER (forts.)
NB:
Unngå sterke stråler.
All sterk bestråling som direkte sol eller rombelysning på fjernkontrollens sensor kan sette
den ut av funksjon.
Unngå radiointerferens.
Enhver slags stråling kan forårsake interferens som forvrengte bilder og støy.
* Unngå generatorer som f.eks. mobiltelefoner, senderutstyr, etc., i nærheten av
prosjektøren.
Litt om displayfunksjoner.
Prosjektørens displayfunksjoner (slik som farge, kontrast, etc) avhenger av skjermegenskapene siden prosjektøren benytter et LCD-panel. Displayforholdene er forskjellig
fra CRT.
* Polariserte skjermer må ikke brukes, siden det kan foråsake at bildet blir rødlig.
Slå strømmen på/av i riktig rekkefølge.
For å unngå problemer må strømmen slås på i riktig rekkefølge med mindre annet er
nevnt.
* Slå strømmen til prosjektøren på før PC’en eller videospilleren.
* Slå strømmen til prosjektøren av etter PC’en eller videospilleren.
Anstreng ikke øynene.
Hvil øyene med jevne mellomrom.
Still lyden inn på et nivå som ikke er til sjenanse for andre.
* Om kvelden bør lyden settes ned og vinduet lukkes så naboer ikke fortyrres.
Tilkopling med notisblokk datamaskin
NORASK
Når det koples til med notisblokk datamaskin, still inn for å gjøre RGB eksternt bilde uttak gyldig
(innstilling av CRT (bilderør) display, eller display til LCD (vindu av flytende krystall) og CRT
samtidig.
Vennligst les instruksjonsheftet til notisblokken for mer informasjon.
NORASK - 7
ANTES DE USAR
Sobre os símbolos
Vários símbolos são usados neste manual, no Manual do Usuário e no próprio produto
para assegurar o uso correto, evitar riscos ao usuário e a outras pessoas, e prevenir
danos a propriedades. Descreve-se abaixo o significado destes símbolos. É importante
ler atentamente as descrições e compreender seu significado na íntegra.
ADVERTÊNCIA
PRECAUÇÃO
Este símbolo indica informação que, se ignorada, acarreta
risco de ferimentos ou até mesmo morte em conseqüência
de manuseio inadequado.
Este símbolo indica informação que, se ignorada, acarreta
risco de ferimentos ou danos materiais em conseqüência de
manuseio inadequado.
Símbolos comuns
DEste símbolo indica advertência adicional (incluindo precauções).
Uma ilustração é apresentada para facilitar a compreensão.
Este símbolo indica ação proibida. A ação estará claramente indicada por
uma ilustração ou recurso similar (o símbolo à esquerda indica que é
proibido desmontar o equipamento).
Este símbolo indica ação obrigatória. Os conteúdos serão indicados
claramente em uma ilustração ou recurso similar (o símbolo à esquerda
indica que o plugue de alimentação deve ser desconectado da tomada
elétrica).
PORTGÊS - 1
PRECAUÇÕES DE SEGURANÇA
ADVERTÊNCIA
Nunca use o projetor se ocorrer algum problema com o aparelho.
Há risco de incêndio ou choque elétrico se o aparelho for operado em condições
anormais, como de emissão de fumaça ou odor estranho; de falta de imagem
ou de som; de som excessivamente alto; ou quando sua superfície externa,
componentes ou cabos estiverem danificados; quando líquidos ou matéria
estranha tiverem penetrado no aparelho, etc.
Desconecte
Nestes casos, desligue imediatamente o aparelho através da chave liga-desliga o plugue da
e desconecte o plugue de alimentação da tomada elétrica. Depois de se
tomada
elétrica.
certificar da inexistência de fumaça ou odor, entre em contato com o
revendedor do aparelho. Nunca tente consertar o aparelho por conta própria,
pois seria perigoso.
* A tomada elétrica deve estar próxima do projetor e facilmente acessível.
Líquidos ou objetos estranhos não devem penetrar no aparelho.
A penetração de líquidos ou objetos estranhos no aparelho poderá resultar em
incêndio ou choque elétrico.
Tome cuidado especial quando houver crianças no ambiente.
Se líquidos ou objetos estranhos penetrarem no projetor, desligue-o
imediatamente através da chave liga-desliga, desconecte o plugue de alimentação
da tomada elétrica e entre em contato com o revendedor do aparelho.
* Não coloque o projetor em banheiros.
* Não exponha o projetor à chuva ou a umidade.
* Não coloque vasos de flores, panelas, xícaras, cosméticos, água ou outros
líquidos, etc. sobre o projetor ou próximo dele.
* Não coloque metais, combustíveis, etc. sobre o projetor ou próximo dele.
Não submeta o projetor a choque ou impacto.
Se o projetor for submetido a choque e/ou se quebrar, poderá causar ferimentos,
e seu uso continuado nesta condição poderá resultar em incêndio ou choque
elétrico.
Se o projetor for submetido a choque, desligue-o imediatamente através da chave
liga-desliga, desconecte o plugue de alimentação da tomada elétrica e entre em
contato com o revendedor do aparelho.
PORTGÊS - 2
PORTGÊS
Nunca modifique o aparelho.
O projetor contém componentes de alta voltagem. Modificações poderão resultar
em incêndio ou choque elétrico.
* Nunca abra o gabinete.
Não
* Solicite consertos e limpeza interna ao revendedor do aparelho.
desmonte.
PRECAUÇÕES DE SEGURANÇA (continuação)
ADVERTÊNCIA
Não coloque o projetor em base instável.
Se o projetor cair ao chão e/ou se quebrar, poderá causar ferimentos, e seu uso
continuado nesta condição poderá resultar em incêndio ou choque elétrico.
* Não coloque o projetor em base instável, inclinada ou vibratória, como estante
pouco firme ou inclinada.
* Se colocar o projetor em uma estante com rodinhas, acione a trava das rodinhas.
* Não posicione o projetor de cristal líquido com uma de suas laterais voltada
para cima, com a lente voltada para cima ou com a lente voltada para baixo.
Cuidado com as temperaturas elevadas do projetor.
A lâmpada do projetor, quando acesa, gera temperaturas elevadas, capazes de dar
origem a incêndio ou queimaduras. Tome cuidado especial quando houver
crianças no ambiente.
Para evitar queimaduras, não toque na lente, ventiladores e aberturas de ventilação
durante o uso ou imediatamente após o uso. Providencie ventilação adequada.
* Deixe um espaço de 30 cm ou mais entre as laterais do aparelho e outros
objetos ou paredes.
* Não coloque o projetor em cima de mesas metálicas.
* Não coloque nada próximo da lente, dos ventiladores e das aberturas de
ventilação do projetor.
* Nunca bloqueie o ventilador ou as aberturas de ventilação.
* Não utilize o aparelho com a abertura de ventilação voltada para baixo.
* Não cubra o projetor com toalha de mesa, etc.
* Não coloque o projetor sobre tapete ou roupa de cama.
Nunca olhe através da lente ou das aberturas quando a lâmpada
estiver ligada.
A potente iluminação pode afetar adversamente a visão. Tome cuidado especial
quando houver crianças no ambiente.
Use sempre a tomada elétrica correta.
Uma alimentação elétrica inadequada poderá resultar em incêndio ou choque
elétrico. Use sempre a tomada elétrica correta, de acordo com a indicação
afixada no projetor e dentro do padrão de segurança.
* O cabo de alimentação fornecido deve corresponder à tomada elétrica a ser
utilizada.
Conecte adequadamente o cabo de alimentação.
Uma conexão incorreta do cabo de alimentação poderá resultar em incêndio ou
choque elétrico.
* Não toque no cabo de alimentação com a mão molhada.
* Certifique-se de que a extremidade de conexão do cabo de alimentação esteja
limpa (sem poeira) antes de sua utilização. Use um pano macio e seco para
limpar o plugue de alimentação.
* Introduza o plugue de alimentação com firmeza na tomada elétrica. Evite usar
uma tomada frouxa, defeituosa, que possa gerar falha de contato.
PORTGÊS - 3
PRECAUÇÕES DE SEGURANÇA (continuação)
ADVERTÊNCIA
Manuseie com cuidado a lâmpada de fonte luminosa.
Um manuseio inadequado da lâmpada pode dar origem a explosão.
* Como a lâmpada é feita de vidro, não submeta-a a choque nem a arranhões.
* Ao substituir a lâmpada, desligue e remova o cabo de alimentação de AC, e
aguarde 45 minutos para deixar a lâmpada resfriar. Em alta pressão, quando
aquecida, a lâmpada pode explodir se for manuseada indevidamente.
* A lâmpada tem uma período de duração limitado. Leia detalhes no manual do
usuário. Entre em contato com o revendedor do aparelho ou com a companhia
de assistência técnica para substituição da lâmpada. Não use lâmpadas velhas,
pois há risco de explosão.
Manuseie cuidadosamente a pilha do controle remoto.
Um manuseio inadequado da pilha poderá resultar em incêndio ou ferimentos. A
pilha poderá explodir se não for manuseada adequadamente.
* Mantenha a pilha longe de crianças e de animais de estimação. Se ocorrer
ingestão acidental da pilha, consulte imediatamente um médico para tratamento
de emergência.
* Não coloque a pilha no fogo ou água.
* Evite o fogo ou ambientes com temperatura elevada.
* Não segure a pilha com pinças metálicas.
* Mantenha a pilha em local escuro, fresco e seco.
* Não ponha a pilha em curto-circuito.
* Não recarregue, desmonte nem solde a pilha.
* Não submeta a pilha a impacto físico.
* Use somente a pilha especificada na Manual do Usuário.
* Certifique-se de que os pólos positivo e negativo estejam na posição correta ao
instalar a pilha.
* Se constatar vazamento da pilha, remova a oxidação e troque a pilha. Se a
oxidação aderir a seu corpo ou roupas, remova bem com água.
* Obedeça às leis locais sobre o descarte de pilhas.
PORTGÊS - 4
PORTGÊS
Tenha cuidado ao manusear os cabos de alimentação e conexão
externa.
Se os cabos de alimentação e conexão estiverem danificados, seu uso continuado
poderá dar origem a incêndio ou choque elétrico. Não aplique excessivos calor,
pressão ou tensão aos cabos de alimentação e conexão.
Se os cabos de alimentação e conexão estiverem danificados (fios internos
expostos ou quebrados, etc.), entre em contato com o revendedor do aparelho.
* Não coloque o projetor ou outros objetos pesados em cima dos cabos de
alimentação e conexão. Não coloque tampouco nenhuma cobertura, capa, etc.
em cima dos cabos de alimentação e conexão, pois o encobrimento dos cabos
poderá resultar na colocação inadvertida de objetos pesados sobre eles.
* Não puxe os cabos de alimentação e conexão. Para conectar ou desconectar os
cabos de alimentação e conexão, segure o plugue ou o conector dos cabos.
* Não coloque os cabos perto de aquecedores.
* Evite formar dobras acentuadas no cabo de alimentação.
* Procure não trabalhar sobre o cabo de alimentação.
PRECAUÇÕES DE SEGURANÇA (continuação)
PRECAUÇÃO
Tenha cuidado ao mover o projetor.
Deixar de tomar estas precauções poderá resultar em ferimentos ou danos.
∑ Não mova o projetor durante o uso. Antes de mover o aparelho, desconecte o
cabo de alimentação e todas as conexões externas, e feche a porta deslizante da
lente.
* Evite submeter o projetor a qualquer impacto ou choque.
* Para transportar o aparelho, use a bolsa de transporte, se fornecida, de acordo
com o manual específico da bolsa de transporte.
Não coloque nada em cima do projetor.
A colocação de qualquer objeto em cima do projetor poderá resultar em perda de
equilíbrio ou queda, com risco de ferimentos ou danos. Tome cuidado especial
quando houver crianças no ambiente.
Evite locais úmidos ou poeirentos.
A colocação do projetor em local com intensa umidade, poeira, fuligem
gordurosa ou gás corrosivo poderá resultar em incêndio ou choque elétrico.
* Não coloque o aparelho perto de cozinhas, umidificadores ou em outro locais
onde haja fumaça gordurosa ou umidade.
Evite ambientes com temperatura elevada.
O calor pode produzir efeitos adversos no gabinete do projetor e em outras
partes. Não coloque o projetor, o controle remoto e outras partes sob luz solar
direta ou perto de objetos quentes, como aquecedores, etc.
Remova o cabo de alimentação para assegurar uma desconexão
completa.
* Por razões de segurança, desconecte o cabo de alimentação se não for usar o
projetor por longos períodos de tempo.
* Antes de limpar o projetor, desligue-o e remova o plugue da tomada. Deixar
de tomar esta precaução poderá resultar em incêndio ou choque elétrico.
Desconecte
o plugue da
tomada
elétrica.
Solicite ao revendedor do aparelho uma limpeza interna do projetor
a cada dois anos.
A acumulação de pó no interior do projetor poderá resultar em incêndio ou mau
funcionamento.
Limpezas internas serão mais eficazes se realizadas antes de períodos úmidos,
como épocas de chuvas intensas.
* Não limpe o aparelho internamente pois é perigoso.
PORTGÊS - 5
PRECAUÇÕES DE SEGURANÇA (continuação)
NOTAS
Não submeta o controle remoto a nenhum impacto físico.
Impactos físicos poderão causar dano ou mau funcionamento do controle remoto.
* Tome cuidado para não deixar cair o controle remoto.
* Não coloque o projetor ou objetos pesados em cima do controle remoto.
Cuidados com a lente.
* Feche a porta deslizante da lente para evitar que a superfície de lente sofra arranhões
quando o projetor não for utilizado.
* Não toque na lente de modo a evitar que obscurecimento ou sujeira cause deterioração
da qualidade de exibição.
* Para limpar a lente, use lenços de limpeza à venda no comércio (para limpeza de
máquinas fotográficas, óculos, etc.). Tenha cuidado para não arranhar a lente com
objetos ásperos.
Limpe o filtro de ar a cada 100 horas.
Se o filtro de ar ficar impregnado de pó, etc., o projetor poderá exibir uma mensagem
semelhante a "VERIFIQUE O FLUXO DE AR" ou até mesmo se desligar
automaticamente para evitar a elevação do nível de aquecimento interno. Para restaurar a
ventilação normal, limpe o filtro de ar.
* Não ligue o projetor sem o filtro de ar.
* Se danificar ou extraviar o filtro de ar, solicite ao revendedor do projetor o filtro de ar
especificado na Manual do Usuário .
PORTGÊS
Cuidados com o gabinete e o controle remoto.
Cuidados inadequados poderão produzir efeitos adversos, como descoloração,
descascamento da pintura, etc.
* Use um pano macio para limpar o gabinete e o painel de controle do projetor, e o
controle remoto. Se a sujeira for excessiva, dilua detergente neutro em água, molhe e
torça um pano macio para a limpeza. Em seguida, enxugue com um pano macio seco.
Não use diretamente detergente não diluído em água.
* Não use sprays aerossóis, solventes, substâncias voláteis ou limpadores abrasivos.
* Se usar substâncias químicas de limpeza, certifique-se de ler e obedecer às instruções.
* Não mantenha em contato direto com borracha ou plástico por longo tempo.
PORTGÊS - 6
PRECAUÇÕES DE SEGURANÇA (continuação)
NOTAS
Evite raios fortes.
Qualquer incidência de raios fortes (como raios diretos do sol ou iluminação artificial)
sobre os sensores de controle remoto poderá inutilizar o controle remoto.
Evite interferências de rádio.
Qualquer irradiação de interferência poderá causar distorção da imagem ou ruídos.
* Evite o uso de aparelhos que emitem ondas de rádio, como telefones celulares,
transreceptores, etc. nas proximidades do projetor.
Sobre características de exibição.
As condições de exibição do projetor (como cor, contraste, etc.) dependem das
característica da tela, visto que o projetor emprega um painel de cristal líquido. As
condições de exibição podem diferir das propiciadas por tubos de raios catódicos.
* Não use tela polarizada, que poderá produzir imagem vermelha.
Ligue e desligue a alimentação na ordem correta.
Para evitar dificuldades, ligue/desligue o projetor na ordem correta descrita abaixo, salvo
se houver determinação em sentido contrário.
* Ligue o projetor antes do computador ou do gravador de videocassete.
* Desligue o projetor depois do computador ou do gravador de videocassete.
Cuidado para não ficar com a vista cansada.
Descanse a vista periodicamente.
Mantenha o volume do som em nível satisfatório para não importunar
outras pessoas.
* Convém manter baixo o nível de volume e fechar as janelas à noite para assegurar um
ambiente tranqüilo na vizinhança.
Conexão com computador tipo “notebook”
Ao conectar com computador tipo “notebook”, configure para válida a saída de imagem externa
RGB (selecionando monitor CRT ou monitores simultâneos de LCD e CRT).
Leia maiores detalhes no manual de instruções do computador tipo “notebook”.
PORTGÊS - 7
*QR46291W*
QR46291
Printed in Japan