1
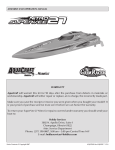
™
™
WARNING:
• NEVER attempt to swim after a stalled RC boat!
• Never operate your RC boat while standing in the water.
• Never operate your RC boat in the presence of swimmers.
• Always use a Personal Flotation Device (PFD) when boarding and operating your retrieval craft, i.e. Jon boat or duck boat.
NOTE: Because of the sharp running hardware included with this RC boat, we do not recommend a rubber blow up raft.
• RC boat running hardware is very sharp. Be very careful when working on and around the metal parts.
• While the motor is running pay close attention to the propeller. Do not come in contact with the propeller at any time the
engine is running or serious injury will result.
• AquaCraft products are to be used by ages 14 and over.
www.aquacraftmodels.com
REQUIRED ITEMS
THE FOLLOWING TOOLS ARE REQUIRED (NOT INCLUDED) TO
ASSEMBLE AND INSTALL THE BATTERIES IN YOUR RIO 51Z
❏ 5.5mm Nut Driver (HCAR1112)
❏ 7mm Nut Driver (HCAR1116)
❏ 3mm Hex Driver (HCAR1156)
❏ #2 Phillips Screwdriver (HCAR1024)
❏ #2 Slotted Screwdriver (HCAR1002)
❏ 10mm Wrench
NECESSARY COMPONENTS FOR OPERATING YOUR RIO 51Z
❏ Personal retrieval system.
❏ Friend to help you start and launch the boat. Besides, R/C boating
is the most fun when you have a friend with you.
❏ 8 “AA” batteries
❏ Approved gasoline can (with standard pump gas)
❏ 2-cycle oil
❏ Graduated mixing cups (GPMR8056)
❏ Small funnel
❏ GrimRacer™ 50 weight cable oil (AQUB9550)
❏ GrimRacer Speed Grease drive cable lubricant (AQUB9500)
EXTRA SUPPLIES YOU MIGHT WANT TO HAVE WITH YOU DURING
THE OPERATION OF YOUR RIO 51Z
As with any hobby, it is a good idea to assemble a useful collection
of tools and accessories to bring along when you head out to the
pond. Here are some items you will want to keep handy:
❏ Extra “AA” Batteries
❏ RX Balloons (AQUB9504)
❏ Threadlocking Compound (GPMR6060)
❏ Pliers (HCAR0625)
❏ Hobby Knife (HCAR0109)
❏ Metric hex wrench set (HCAR0521)
❏ Stubby Metric hex wrench set
❏ 5/8 [16mm] inch spark plug wrench
OTHER USEFUL ITEMS TO HAVE ON HAND:
❏ Waders or rubber boots
❏ Paper Towels
❏ Spray-On Cleaner
❏ Sunglasses
❏ Sunblock
❏ Folding table
❏ Lawn chairs
❏ First-Aid kit
❏ Cooler with plenty of ice and soda
❏ Canopy or shelter
2
THANK YOU!
Thank you for purchasing the Rio 51Z! We at AquaCraft know how
exciting a new R/C boat purchase can be and we know you’re anxious
to get started. Please take time first to read this manual carefully and
completely before attempting to operate your model. This manual
contains the instructions you need to safely operate and maintain
your boat. Remember as with any hobby, there is a possibility of
injury if this product is misused, so please be careful.
If for any reason you think that this model is not for you, return it to
your local dealer immediately. PLEASE NOTE: Your hobby dealer
cannot accept a return on any model after the final assembly
sequence has begun.
MANUAL SPECIFICATION & DESCRIPTION CHANGES
All pictures, descriptions, and specifications found in this instruction
manual are subject to change without notice. AquaCraft™ and Zenoah™
maintain no responsibility for inadvertent errors in this manual.
SAFETY PRECAUTIONS
• Never ever attempt to swim after a stalled R/C boat. Do not get
in the water for any reason to retrieve your boat. To aid you in
retrieving a stalled R/C boat, set up a fishing reel with a tennis
ball tied to the end of the line. Or better yet, get yourself a small
Jon boat so you can row out and pick up your boat. Remember
to use a PFD (personal flotation device) any time you enter your
retrieval craft.
• AquaCraft products are to be used by ages 14 and over.
• Do not touch the propeller anytime the engine is running. Pay
equally close attention to items such as loose clothing, shirtsleeves,
ties, scarves, long hair or anything that may become entangled in
the spinning prop. If your fingers, hands, etc. come in contact with
the spinning propeller, you may be severely injured.
• The speed and mass of this boat can inflict property damage and
severe personal injury if a collision occurs. Never run this boat
in the presence of swimmers or where the possibility of collision
with people or property exists.
• Model engines generate considerable heat. Do not touch any part
of your engine until it has cooled. Touching the muffler, cylinder
head, or exhaust header may result in a serious burn.
• This boat is controlled by radio signals, which are susceptible to
possible interference from other R/C transmitters, paging systems,
or other electrical noise. Before turning your radio transmitter and
receiver on, make sure no one else in the area is operating a radio
on the same frequency (channel).
• Gasoline is poisonous. Do not allow it to come into contact with the eyes
or mouth. Always store gasoline in an appropriate labeled container and
out of the reach of children!
• Gasoline is highly flammable. Keep it away from open flame,
excessive heat, sources of sparks, or anything else that might
ignite it. Do not smoke or allow anyone else to smoke in close
proximity to open gasoline containers. Make sure that gas lines
are in good condition so that gasoline will not leak onto a hot
engine causing a fire.
WARRANTY & SERVICE
ENGINE WARRANTY SERVICE
• R/C models produce vibrations which will cause screws, nuts,
bolts, etc, on your model to become loose over time. It is important
to make sure that all hardware is secure before operating your
model.
Aquacraft will warrant your G260PUM engine for 90 days after
purchase from defects in materials or workmanship of original
manufacture. Aquacraft, at their option, will repair or replace at
no charge the incorrectly made part. This warranty does not cover
damage caused by crash, abuse, or misuse. To return your engine for
repairs you will need to provide proof of purchase, such as your store
receipt or an invoice. Send the engine to the address listed below or
see the ZENOAH owner’s manual for other warranty information.
• In the event that weeds become entangled in the propeller, stop the
engine before attempting to remove them.
BOAT WARRANTY SERVICE
• Never operate your engine in an enclosed space. Model engines,
like automobile engines, exhaust deadly carbon monoxide. Run
your engine only in an open area.
• If your Rio 51Z should happen to stall, water currents will slowly
carry it to shore. The bad news is that the boat could be carried
to the opposite shore. When surveying areas to run your Rio 51,
keep variables in mind such as wind direction, size of the lake, etc.
It is not advisable to run R/C boats on any free-flowing bodies of
water such as creeks or rivers.
• It’s a good idea to use eye protection when starting and running
your Rio 51Z.
SPECIFICATIONS
AquaCraft will warrant your Rio 51Z for 90 days after purchase
from defects in materials or workmanship of original manufacture.
AquaCraft, at their option, will repair or replace at no charge the
incorrectly made part. This warranty does not cover damage caused
by crash, abuse, misuse, alteration or accident. To return your boat
for repairs you need to provide proof of purchase. Your store receipt
or product invoice will suffice.
IN NO EVENT SHALL THE PURCHASER BE ENTITLED TO ANY
INCIDENTAL, SPECIAL, INDIRECT OR CONSEQUENTIAL DAMAGES,
WHETHER RESULTING FROM THE USE, MISUSE OR INABILITY TO
USE THE PRODUCT OR FROM DEFECTS IN THE PRODUCT.
This warranty gives you specific legal rights and you may also have
other rights, which vary from state to state.
RIO 51Z BOAT SPECIFICATIONS
51.5" long [130cm]
57" overall length [145cm]
13.5" beam [34cm]
8" tall [21cm]
13" overall height [33cm]
14 lbs, 4oz [6.4 Kilo]
26 oz fuel capacity [768cc]
20 minute run time per tank
Hobby Services
3002 N. Apollo Drive, Suite 1
Champaign, Illinois 61822
Attn: Service Department
Phone: (217) 398-0007
9:00 am - 5:00 pm Central Time M-F
E-mail: [email protected]
ZENOAH® G260PUM ENGINE SPECIFICATIONS
Stroke: 1.1 in [28mm]
Bore: 1.34 in [34mm]
Displacement: 26cc (1.58 cubic in)
Horsepower: 2.1
Ignition Style: Spark
Fuel: Gasoline/Oil mix 16:1
Weight: 3.75 lb [1.7K]
RADIO SPECIFICATIONS
Transmitter: Tactic™ TTX240 with servo reversing and
dual rate functions
Receiver: Tactic TRX324
Servos: Tactic TSX200 Throttle servo (56 oz-in at 6 volts)
Tactic TSX201 Steering servo (90 oz-in at 6 volts)
3
STANDARD REPAIR SERVICE
After the 90-day warranty has run out, you can still have your Rio
51Z repaired for a service fee by the experts at AquaCraft. To speed
up the repair process, please follow these five simple steps:
1. It is best (recommended) to return the ENTIRE system, boat,
radio and engine.
2. Make sure batteries are removed from the transmitter and receiver.
Also make sure any gas and oil is drained from the tanks.
3. Send written instructions which include a list of all items returned
and a THOROUGH explanation of the problem or problems needing
service. Be sure to include your return address and daytime phone
number. If you have access to e-mail please provide us with your
e-mail address to help speed communication.
4. Send to Hobby Services at the address above. When shipping
your item(s) to us, we recommend that you insure it and use a
company that offers a tracking service (such as Federal Express
Ground or UPS Ground). Our staff will carefully inspect your item
and notify you of their findings, at which time you will be notified
of your options for return, repair, or replacement. Please note that
items sent back unrepaired will still carry a service charge and
return shipping.
NOTE: Hobby Services accepts Visa®, Mastercard®, or personal
check. We can return the item C.O.D., but additional charges apply.
PREPARE TO RUN
SPARK PLUG
The recommended spark plug is a EMR7H (ZENG7151). The plug
gap should be .027" [or .7mm]. If the plug gap is incorrect, adjust it
with a spark plug gapping tool. This spark plug uses a 5/8" [16mm]
spark plug wrench to remove and install the plug.
GASOLINE
Your Zenoah G260PUM engine requires a 16:1 gasoline to 2-cycle
oil mix ratio for best engine performance and sustained engine life.
• Follow the mixing direction on the oil container. Always use highquality oil intended for 2-cycle engines. Prepare only the amount
needed. Aged gasoline could damage the engine and cause it to
overheat. We find that gasoline mix over 3 months should be
discarded and replaced.
• Use only low octane, alcohol-free gasoline. The carburetor diaphragm
will gradually deteriorate if you use gasoline with alcohol.
• Gasoline can go bad. Store your gasoline out of the sunlight and in
a cool place. Bad gasoline is one of the most difficult problems to
diagnose in engines. If you have tried everything you can think of
to remedy an engine that is not running correctly, try using some
fresh gas/oil mix.
ENGINE BREAK-IN
• Make sure that the engine has adequate cooling. When the boat
is in motion, look at the port side for water spraying out the water
cooling exit.
• During engine break-in it’s best to use non synthetic oil like LawnBoy
ashless oil. Mix 6 oz of oil to 1/2 gallon of gasoline. Run the boat in
8 minute intervals, allowing the engine to fully cool between runs.
Use caution not to run the tank dry during the break-in process.
• Take your time breaking in your new engine. When having fun it
can be hard to make short break-in runs but your patience will be
rewarded with long engine life and great performance!
• NOTE: Be certain you have the high speed needle set for a slightly rich
mixture setting. It is also good to keep in mind that no matter how
much oil you mix with your gasoline, a lean mixture setting on the
carburetor can ruin a good running motor during break-in or after.
• After the first tank break-in is complete and the motor has cooled,
run the rest of the break-in gas through the engine. Allow the
engine to fully cool between tanks. Do not run the tank dry.
• When it’s time to make your next run, switch to a good quality
synthetic oil like Klotz KL-200 (KSFP0200) mixing to a ratio of 8oz
oil to one gallon of gasoline. This is the operating mixture and is
recommended for the life of your engine.
HOW TO CHECK FOR A PROPER NEEDLE ADJUSTMENT:
If your boat does not seem to be running clearly or smoothly, the
best way to check for a proper needle setting is by reading (looking
at) the spark plug. Remove the spark plug and look at the insulator
firing nose. When new, the nose color is bright white. This bright
white should become a light to medium tan color when the engine
is performing at its best. If the nose insulator is a dark, wet black or
black, the engine is overly rich and/or the spark plug gap is to large.
4
FINAL ASSEMBLY
Some decals are installed on your boat for you. Extra
decals provided in your kit allow you to customize
your Rio 51Z. Simply peel and stick! See the photos
on the box for decal placement example.
TRANSMITTER FEATURES
1. ON/OFF Switch
2. Servo Reversing Switches
3. Power Light (LED)
4. Steering Rate Adjustment Knob
5. Steering Trim Knob
6. Throttle Trim Knob
7. Throttle Trigger
8. Steering Wheel
INSTALLING THE TX BATTERIES
1. Slide off the battery door on the bottom of the transmitter.
2. Install four (4) fresh “AA” batteries into the bottom of the
transmitter in the configuration molded into the battery holder.
5
3. Reinstall the battery door onto the bottom of the transmitter.
4. Turn the transmitter “ON” using the switch on the
transmitter’s side. The battery level indicator light
(LED) should glow red. If the light is flashing, the
batteries are low and need to be replaced.
INSTALLING THE RX BATTERIES
1. Locate the cowl locks at the rear of the hatch.
Turn the locks 1/4 turn to remove the hatch.
2. Using a standard screwdriver, remove the wire radio box
lid retainer by gently prying the wire over the holding tabs
on the side of the box and remove the radio box lid.
6
3. Place four (4) new “AA” batteries into the
receiver battery holder. Be sure to follow the polarity
diagram molded into the battery holder.
4. Replace the battery holder inside the radio box. Make sure
that it will not interfere with any of the control linkages.
5. Replace the radio box cover and radio box lid retainer.
6. Using the screwdriver, carefully pry the retainer over the tabs.
7
INSTALLING THE RUDDER BLADE
1. Remove the 3mm and 4mm nuts and
bolts from the rudder pivot bracket.
2. Insert the rudder into the rudder control arm assembly as
shown. Replace the 4 x 15mm screw and 3 x 15mm screw
and secure them with the 4mm and 3mm nuts, respectively.
CHECK THE RADIO SYSTEM
1. Stand behind the boat with both the transmitter and
receiver turned on. Rotate the steering wheel to the left.
The back of the rudder should move to the left.
2. Move the steering wheel to the right. The back of the
rudder should move to the right. If this is not the case,
simply move the steering servo reverse switch located on
the front of the transmitter (2) to the other position.
8
3. Squeeze the throttle trigger on the transmitter;
this should open the throat of the carburetor. This is
the proper throttle arm position for full throttle.
4. Idle position.
5. Off or stop position. If this is not the case, move the steering
servo reverse switch located on the front of the transmitter (2) to
the other position. Note: You might have to readjust the position
of the throttle arm on the throttle servo to to match the pictures.
9
INSTALLING THE PROPELLER
1. Use a 10mm wrench to remove the
prop nut from the stub shaft.
2. Install the propeller on the shaft; replace
the nut, making sure it is tight.
3. Assembly is now complete.
10
STARTING & LAUNCHING
There are several simple steps to starting the engine. It is a good
idea to have another person hold the boat in place while you start
the engine.
STARTING PROCEDURE
IMPORTANT: The propeller will begin spinning as soon as the engine
starts! Be certain that the propeller is unobstructed; failure to do so
will damage the prop.
1. Turn on the transmitter and raise the antenna.
2. Turn on the boat’s receiver.
3. Fill the fuel tank with the appropriate gas to oil mixture.
4. Fill the cable oil reservoir with cable oil and
open the cable oil shut off clip.
5. Press the clear primer bulb on the carburetor until gas
begins to enter the bulb. DO NOT OVER PRIME.
6. Choke the engine by rotating the choke
adjustment counter clockwise.
• If your engine should ever become submerged, remove the
spark plug and pull the handle of the recoil starter several
times until water has been expelled from the engine. Once you
are positive that all water has been removed from the engine
and the spark plug is completely dry, reinstall the spark plug
and perform the starting procedure. This may take several
attempts. Make sure you get the engine running again as this
will remove any remaining water from the inside of the engine.
• Be sure to keep your driveshaft well-lubricated. Failure
to do so may cause the cable to break. Remove and
relubricate the driveshaft after each day of running.
• Do not use silicone fuel line as gasoline line. Use
vinyl or neoprene rubber gasoline line instead.
• Total run time of the Rio 51Z is approximately 20 minutes
(assuming you begin with a full tank of fuel). When
you notice an increase in power, it means the fuel tank
is nearly empty and it’s time to head for shore.
• Windy conditions cause rough water that will affect
the performance of your Rio 51Z and increase
the chances of capsizing. Take it easy in rough
water until you learn to drive the boat.
7. Pull the starter cord 3 times or until you
feel the engine pop or skip.
8. Open the choke by rotating the choke adjustment clockwise.
9. Pull the starter cord until the engine starts.
NOTE: If the engine does not start by the 3rd or 4th pull
repeat the above procedure. Once the engine has started
put the cowl back in place and secure it with the cowl
locks. Be carful not the touch the spinning prop.
TIPS & HINTS FOR DRIVING YOUR RIO 51Z
NEEDLE ADJUSTMENTS
WARNING: Never run an R/C boat engine at full throttle (over
rev) with the boat out of the water. Damage can result.
Your engine comes preset from the factory, but
due to altitude changes and the fuel you are using,
your carburetor might need adjusting.
Always make high- and low-speed needle adjustments when
the boat is out of the water and with the engine not running.
• Turning the steering dual rate knob increases or decreases
the rudder movement. Your Rio 51Z does not require
a lot of steering movement to allow the boat to turn.
Keep this in mind as you learn to drive your boat.
• Due to prop rotation, it is the nature of model
boats to make smoother right turns than left turns.
Unlike full-scale boats, model boats like the Rio 51Z
race and turn best in a clockwise direction.
• Launch the boat in water that is at least 12” deep and free of
obstacles. Be sure to stay clear of the spinning prop during the
launch. It is best to have a buddy launch your boat for you.
• Slowly advance the throttle and note if the boat has
a tendency to turn right or left. Adjust the steering
trim knob on your transmitter until the boat runs in a
straight line when the steering wheel is at neutral.
• When finished running, push back on the throttle trigger to stop
the engine. Retrieve the boat, remove the cowl, lock the oil shut
off clip and turn off the receiver and transmitter (in that order).
• Take caution to not overheat the engine. Keep an eye on the
water outlet on the port side of the boat. You should see water
exiting the outlet when the boat is underway. It is normal for
the water to take a few seconds to start flowing after launch.
A. High-Speed Needle (HSN). The needle located on
the left when viewing the boat from the front.
B. Low-Speed Needle (LSN). The needle located on the
right when viewing the boat from the front.
C. Idle Adjustment Needle. It is located near
the bottom of the carburetor.
D. Primer bulb.
E. Choke lever, located on the back of the carburetor.
11
It is not necessary to change the needle settings if the engine
runs smoothly. Normally only the high-speed needle will need
adjustment from time to time and only by a small amount.
Factory carburetor settings are:
A. HSN 1-5/8 turns from the closed position (± 1/4 turn)
B. LSN 1 turn from the closed position (± 1/4 turn)
If you run into problems tuning your engine settings, it is best
to re-set the needles to the above settings and start over.
IDLE STOP ADJUSTMENT
The idle speed screw is used to adjust how fast the engine
runs at idle.
Once the high and low speed needles are properly adjusted
the idle speed can be set. To increase the idle speed turn the
screw in (clockwise), to slow the idle speed turn the screw out
(counter-clockwise).
course. To compete successfully, it may be necessary to “tighten”
the ride characteristics. This can be accomplished by adjusting the
angle of the strut or trim plates.
Wakes caused by other boats can upset the balance and ride
characteristics of even a well trimmed model boat. When running
down the straight-aways, don’t follow in another boat’s wake. Wakes
generated by other boats while entering and negotiating a corner are
especially dangerous. Cutting across a wake when entering a corner
can cause the boat to “hook” (spin out).
Racing other boats through a corner may be a competitor’s greatest
challenge, especially the first corner after the start of a race. The
boat entering the corner first has the task of holding its position
(often called “holding your lane”) through the corner. The trailing
boats must then attempt to hold their lanes, too.
NATIONAL MODEL BOATING ORGANIZATIONS
There are two national model boating organizations in the United
States and Canada:
IMPBA or International Model Power Boat Association
www.impba.net
TROUBLESHOOTING
Problem:
s4HEENGINEHESITATESWHEN
ACCELERATEDRAPIDLY
s4HE20-INCREASESATIDLING
Solution:
s4HE,3.ISADJUSTEDTOO
LEAN/PENITUPABOUTTH
OFATURNANDTRYAGAIN
Problem:
s4HEIDLEISNOTSTEADY
Solution:
s4HE,3.ISADJUSTEDISTOO
RICH#LOSEITTHOFATURN
ANDTRYAGAIN
Problem:
s%NGINESTOPSATFULLTHROTTLE
s%NGINESAGSWHEN
ACCELERATEDRAPIDLY
s%NGINESAGSWITHTHEBOATAT
FULLSPEED
Solution:
s4HE(3.ISTOOLEAN/PEN
ITUPTHOFATURNAND
TRYAGAIN
Problem:
s9OURENGINEDOESNOTREACH
FULL20-
s#ARBONBUILDUPAPPEARS
CONSISTENTLYONYOUR
SPARKPLUG
Solution:
s4HE(3.ISTOORICH4URN
ITINTHOFATURNAND
TRYAGAIN
NAMBA or North American Model Boat Association
www.namba.com
Each of these organizations has its own rules governing model boat
racing, sanctioned events and recognized records. Organized model
boat racing is offered at both regional and national levels. Location of
clubs, race dates and locations, membership applications, and other
information can be obtained through their respective web sites.
A good source of information regarding all aspects of model boat
operation is:
International Waters
www.intlwaters.com
MAINTENANCE
When you are through operating your boat for the day, be sure to
perform these basic maintenance procedures. This will prolong
the life of the Rio 51Z and help to ensure trouble-free running.
• Wipe down the entire boat, inside and out, with spray-on
cleaner and a paper towel. If water is left in the boat, it could
get into the engine, potentially causing the piston ring to rust.
RACING
Although it is very enjoyable to run the Rio 51Z by yourself or with
a buddy, the real fun and excitement of R/C boating is experienced
when you get involved in racing. Racing against other boats is much
different than running your boat alone. The following suggestions
will hopefully provide helpful strategies when racing a model boat.
A good set-up for running alone may not be the best for racing. Race
water conditions create challenges different from running alone
and water conditions constantly change during a race. Five or six
boats racing against one another will create rough water on the race
12
• Leave the cowl off the boat overnight to let
any water evaporate from the hull.
ENGINE MAINTENANCE AND STORAGE
RADIO BOX MAINTENANCE
• After a day of running, start your engine and choke it while
it is running to get a lot of fuel into the engine. Run it for
about 30 seconds, constantly choking the engine. Afterwards
it is a good idea to cover the inlet to the carburetor to keep
foreign materials out and moisture from entering the motor.
• When finished running, open the radio box and leave the
radio box lid off overnight to allow any water to evaporate.
Remove standing water by pulling out the drain plug and
draining away any water that might have entered the hull.
• Remove and toss out the old batteries.
• For long term (winter) storage it is a good idea to flood the
engine as described above as well as coating the inside
of the engine with After Run Oil 2 oz (HCAP3000)
• Before transporting your model, remove all of
the gasoline from the tank and lines and make
sure your oil line shut off clip is locked.
GREASE THE DRIVESHAFT
Remove the driveshaft by loosening the two
4mm screws from the outer strut housing.
Slide the inner strut assembly with shaft out of
the boat. Wipe away any oil and grease.
Re-grease the shaft using GrimRacer Speed Grease
(AQUB9500). Re-install the shaft and inner strut housing,
making sure the two 4mm screws are tight.
13
HULL TUNING TIPS
To change the thrust angle use a 4mm Allen wrench to
loosen the two large screws on the side of strut mounting
brackets. Once loose you can rotate the strut up or down
depending on the type of handling you are looking to achieve.
As an initial starting point, try running the Rio 51Z with
a neutral propeller thrust angle. This can be checked
by placing a straightedge along the bottom of the
hull and checking its relation to the prop shaft.
Neutral Propeller Thrust: This setting provides
thrust without letting it affect the ride attitude of the
hull (the bow’s tendency to ride up or down).
Positive Propeller Thrust: This setting causes the bow to
run high. This makes the boat run faster but looser at the
same time. In rough water this can cause the boat to blow
off (crash by having the bow of the boat lift off the water).
Negative Propeller Thrust: Causes the bow to run low (flat
on the water). This reduces speed and may cause the boat
to stuff (crash by having the boat’s bow tuck under water).
14
ADJUSTING THE TRIM PLATES
You can also use the trim plates to adjust the ride of the boat.
Bending the plates down will help keep the boat from porpoising
(the front bouncing up and down). Bending them up will make
for a looser (faster) ride but at the same time make the boat
unstable. It is best to make small adjustments one at a time.
You can use a large pair of pliers to adjust the trim plates.
Remember, just tweaking the plates as a very small
adjustment can drastically change the way the boat runs.
BALANCING THE PROPELLER
Always use a balanced prop. An unbalanced prop
will cause high levels of vibration that may be
harmful to your driveshaft and engine.
WARNING: Make sure you use a dust mask anytime
you are working on your propeller. Ingesting airborne
particles from the propeller is hazardous to your health.
Go to www.aquacraftmodels.com to learn
more about balancing your propeller.
15
ZENOAH G260PUM REPLACEMENT PARTS LIST
REPLACEMENT PARTS
To order replacement parts for the Rio 51Z, use the order numbers in
the Replacement Parts List that follows. Replacement parts are available
only as listed and can be purchased from hobby shops or mail order/
Internet order firms. Hardware items (screws, nuts, bolts) are also
available from these outlets. If you need assistance locating a dealer to
purchase parts, visit www.hobbico.com and click on “Where to buy.” If
this kit is missing parts, contact Hobbico Product Support.
Order #
AQUB6207
AQUB6208
AQUB6209
AQUB6323
AQUB6420
AQUB6507
AQUB6598
AQUB6905
AQUB6906
AQUB6907
AQUB7200
AQUB7201
AQUB7767
AQUB7874
AQUB7893
AQUB8608
AQUB8609
AQUB8715
AQUB8716
AQUB8717
AQUB8718
AQUB8719
AQUB8720
AQUB8721
AQUB8722
AQUB8804
AQUB8806
AQUB8807
AQUB8809
AQUB8851
AQUB9002
AQUB9003
AQUB9026
AQUB9250
AQUB9251
AQUB9252
AQUB9270
AQUB9275
AQUB9524
AQUB9526
AQUB9527
AQUB9528
AQUB9785
SUPG1565
Description
Cowl – Blue
Cowl – Yellow
Cowl – Red
Decal Sheet
Cable Oiler Collar
Engine Drive Pully (Rio 51Z)
Iso-Mount (Rio 51Z)
Fuel Tank w/Cap
Oil Tank w/Cap
Oil line Clip
Kill Switch Servo Horn
Engine Kill Switch (Rio 51Z)
Prop Nut
1/4" Flex Cable Propshaft (Rio 51Z)
1/4" Engine Cable Coupler
Radio Box
Radio Box Spring Wire
Rudder Linkage
Rudder Throttle Ball Stud
Rudder Blade
Rudder Hinge Pin
Rudder Bracket
Rudder Arm
Rudder Transom Bracket
Rudder Mount Bolt / Nuts
Strut Thrust Washers
Strut Housing
Inner Strut Assembly
Strut Mounting Brackets
Switch Mounting Plate
Throttle Cable Mount (Rio 51Z)
Throttle Cable (Rio 51Z)
Tow Hook Large
Water Pick Up Assembly
Water Pick Up Tube
Water Pick Up Bracket
Tank Bungee Cord
Transom Hardwood Mounting Plates
1/4" Drive Dog
Turn Fin Transom Large
Turn Fin Mounting Bracket
Trim Plate SS Large
GrimRacer 65 x 100 2-Blade Metal Prop (Stock)
Zenoah 260PUM Muffler
UPGRADE COMPONENTS FOR THE RIO 51Z:
AQUB9785
FUTM1383
FUTM4350
DXTP4086
GrimRacer 67 x 105 3-Blade Metal Prop
5-cell 6V 600mAh NiCd Hump Pack
Receiver Switch
Receiver Pack Charger
ZENG1675... Carburetor WT-644
ZENG1680... Coil (Red)
ZENG1699... Cover WT-644
ZENG1700... Crankcase Bolt M5x30
ZENG1701... Crankcase
ZENG1702... Crankcase Gasket
ZENG1750... Crankshaft Bearing
ZENG1751... Crankshaft Bearing Shim
ZENG1752... Crankshaft
ZENG1753... Crankshaft Key
ZENG1754... Crankshaft Seal 12x22x7
ZENG1755... Crankshaft Seal Front 12x28x7
ZENG1756... Crankshaft Snap Ring
ZENG1900... Cylinder
ZENG1901... Cylinder Gasket
ZENG1902... Cylinder Head Bolt M5x20
ZENG2000... Diaphragm WT-644
ZENG2005... Diaphragm Pump WT-644
ZENG2336... Engine Carburetor Gasket
ZENG3010... Gasket Diaphragm WT-644
ZENG3015... Gasket Pump WT-644
ZENG3400... Head Jacket
ZENG3700... Ignition Coil
ZENG3701... Insulator
ZENG3702... Insulator Gasket
ZENG4000... Jacket O-Ring 3x40
ZENG4001... Jacket O-Ring 1.5x15.5
ZENG4002... Jacket Bolt M3x8
ZENG4700... Lever WT-644
ZENG5010... Mount Plate
ZENG5015... Mount Plate Screw M5x16
ZENG5400... Needle High Speed WT-644
ZENG5500... Needle Low Speed WT-644
ZENG6000... Pin
ZENG6100... Piston
ZENG6150... Piston Stop Tool
ZENG6200... Plug Cap
ZENG6205... Plug Socket Wrench
ZENG6310... Pulley
ZENG6325... Pump WT-644
ZENG6675... Recoil Assembly
ZENG6680... Cover Coil Screw M4x14
ZENG6700... Ring
ZENG6800... Rotor
ZENG7020... Screw M4x22
ZENG7030... Screw M5x55
ZENG7100... Spacer 5x10x1.6
ZENG7150... Spark Plug CMR6H
ZENG7151... Spark Plug CMR7H
ZENG7152... Spark Plug RZ7C
ZENG7200... Spring Spark Plug Cap
ZENG7201... Spring WT-644
ZENG7202... Spring LS Needle WT-644
ZENG7203... Spring HS Needle WT-644
ZENG7400... Tube
ZENG8010... Valve Inlet WT-644
ZENG8025... Venturi WT-644
ZENG8350... Water Nipple Joint
ZENG8400... Wrist Pin Bearing
ZENG8405... Wrist Pin
ZENG8410... Wrist Pin Snap Ring
ZENG8415... Wrist Pin Washer
AQUB41**Mnl
© 2010 Hobbico®, Inc.