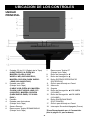
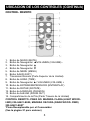
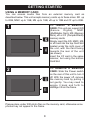
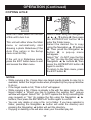
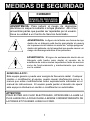
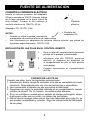
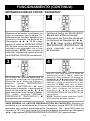
1
Job # MDF8402 manual cover
Colors: 1-color print
FO LD
Pantone 364u
User Guide
Guía del usario
Environmentally Responsible Electronics
8” digital photo frame
www.memorexelectronics.com
MDF8402-LWD
MDF8402-DWD
Memcorp, Inc. Weston, FL
Printed in China
Memorex, the Memorex logo, and "Is it live or is it Memorex?"
are trademarks of the affiliates of Memorex Products, Inc.
Please read these instructions
completely, before operating
this product.
Por favor lea toda las
instruciones antes de tratar
de usar este producto.
SAFETY PRECAUTIONS
CAUTION
RISK OF ELECTRIC SHOCK
DO NOT OPEN
CAUTION: TO REDUCE THE RISK OF ELECTRIC SHOCK,
DO NOT REMOVE COVER (OR BACK). NO USERSERVICEABLE PARTS INSIDE. REFER SERVICING TO
QUALIFIED SERVICE PERSONNEL.
DANGEROUS VOLTAGE:
The lightning flash with arrowhead symbol within an
equilateral triangle is intended to alert the user to the
presence of uninsulated dangerous voltage within the
product’s enclosure that may be of sufficient magnitude to
constitute a risk of electric shock to persons.
ATTENTION:
The exclamation point within an equilateral triangle is
intended to alert the user to the presence of important
operating and maintenance (servicing) instructions in the
literature accompanying the appliance.
FCC WARNING:
This equipment may generate or use radio frequency energy. Changes or
modifications to this equipment may cause harmful interference unless
the modifications are expressly approved in the instruction manual. The
user could lose the authority to operate this equipment if an unauthorized
change or modification is made.
ATTENTION:
POUR ÉVITER LES CHOC ÉLECTRIQUES, INTRODUIRE LA LAME LA
PLUS LARGE DE LA FICHE DANS LA BORNE CORRESPONDANTE DE
LA PRISES ET POUSSER JUSQU’AU FOND.
1
SAFETY PRECAUTIONS
INFORMATION:
This equipment complies with Class B digital device regulations.
This equipment generates, uses and can radiate radio frequency
energy and, if not installed and used in accordance with the
instructions, may cause harmful interference to radio
communications. However, there is no guarantee that interference
will not occur in a particular installation. If this equipment does
cause harmful interference to radio or television reception, which
can be determined by turning the equipment off and on, the user is
encouraged to try to correct the interference by one or more of the
following measures:
• Reorient or relocate the receiving antenna.
• Increase the separation between the equipment and receiver.
• Connect the equipment into an outlet on a circuit different from
that to which the receiver is connected.
• Consult the dealer or an experienced radio/TV technician for help.
WARNING: TO PREVENT FIRE OR SHOCK
HAZARD, DO NOT EXPOSE THIS UNIT TO RAIN
OR MOISTURE.
SURGE PROTECTORS:
It is recommended to use a surge protector for AC connection.
Lightning and power surges ARE NOT covered under warranty
for this product.
This Class B digital apparatus complies with Canadian
ICES-003.
Cet appareil numérique de la classe B est conforme à la
norme NMB-003 du Canada.
2
Dear Customer:
Selecting fine audio and video equipment such as the unit you’ve just purchased
is only the start of your musical enjoyment. Now it’s time to consider how you
can maximize the fun and excitement your equipment offers. This manufacturer
and the Electronic Industries Association’s Consumer Electronics Group want
you to get the most out of your equipment by playing it at a safe level. One that
lets the sound come through loud and clear without annoying blaring or
distortion-and, most importantly, without affecting your sensitive hearing.
Sound can be deceiving. Over time your hearing “comfort level” adapts to higher
volumes of sound. So what sounds “normal” can actually be loud and harmful to
your hearing. Guard against this by setting your equipment at a safe level
BEFORE your hearing adapts.
To establish a safe level:
• Start your volume control at a low setting.
• Slowly increase the sound until you can hear it comfortably and clearly, and
without distortion.
Once you have established a comfortable sound level:
• Set the dial and leave it there.
Taking a minute to do this now will help to prevent hearing damage or loss in the
future. After all, we want you listening for a lifetime.
We Want You Listening For A Lifetime
Used wisely, your new sound equipment will provide a lifetime of fun and
enjoyment. Since hearing damage from loud noise is often undetectable until it is
too late, this manufacturer and the Electronic Industries Association’s Consumer
Electronics Group recommend you avoid prolonged exposure to excessive noise.
This list of sound levels is included for your protection.
Decibel
Level
Example
30
Quiet library, soft whispers
40
Living room, refrigerator, bedroom away from traffic
50
Light traffic, normal conversation, quiet office
60
Air conditioner at 20 feet, sewing machine
70
Vacuum cleaner, hair dryer, noisy restaurant
80
Average city traffic, garbage disposals, alarm clock at
two feet
THE FOLLOWING NOISES CAN BE DANGEROUS UNDER
CONSTANT EXPOSURE:
90
Subway, motorcycle, truck traffic, lawn mower
100
Garbage truck, chain saw, pneumatic drill
120
Rock band concert in front of speakers, thunderclap
140
Gunshot blast, jet engine
180
Rocket launching pad
We
Want You
LISTENING
Information courtesy of the Deafness Research Foundation.
For A Lifetime
NI
C
IND
N
O
O C I A TI
IES
ELECT
TR
A
EST. 1924
S
S
3
U
S
R
O
EIA
MAIN UNIT
LOCATION OF CONTROLS
1
2
3
6
4
7
5
14
15
16
8
9
10
17
18
11
12
13
1. DC 12V IN Jack
(Under Cover)
8.
9.
10.
11.
12.
13.
14.
(AC ADAPTER PART NO. LIGHT
WOOD (LWD) 295-04985-E010, DARK
WOOD (DWD) 295-04985-E000*)
2. USB Jack
(Under Cover)
(USB CABLE PART NO. LIGHT
WOOD (LWD) 337-01000-E052, DARK
WOOD (DWD) 337-01000-E050*)
3. Screen
4. Headphones Jack
(Under Cover)
5. Remote Sensor
6. SD/MMC/MS/xD Card Slot
(Under Cover)
7. CF Card Slot
(Under Cover)
15.
16.
17.
18.
Navigation † Button
Navigation π Button
ENTER/PLAY Button
Wall Mount Hole
Speakers
Stand
Navigation ®/
VOLUME + Button
Navigation √/
VOLUME - Button
EXIT/CANCEL Button
Wall Mount Hole
Power Switch
*Consumer Replaceable Part
(See page 21 to order.)
4
LOCATION OF CONTROLS (CONTINUED)
REMOTE
7
1
8
2
9
3
10
4
11
5
12
6
13
1. MUTE Button
2. Navigation √/VOLUME - Button
3. Navigation π Button
4. Navigation † Button
5. MENU Button
6. EXIT Button
7. Remote Transmitter (Top of Unit)
8. TIME Button
9. Navigation ®/ VOLUME + Button
10. ENTER/PLAY Button
11. ROTATE Button
12. ZOOM IN Button
13. ZOOM OUT Button
14. Battery Compartment (Rear of Unit)
14
REMOTE PART NO. LIGHT WOOD (LWD) 239-04421-E000,
DARK WOOD (DWD) 239-04421-E001*
*Consumer Replaceable Part (See page 21 to order.)
5
AC CONNECTION
POWER SOURCE
Insert the small end of the AC adapter into
the DC 12V IN jack (located under the left
cover on the side of this unit). Connect the
other end to a wall outlet having 120V AC,
60 Hz.
AC Adapter, DC 12V Z
NOTES:
•
Remove both the DC plug and the ACIN plug to disconnect the AC adapter
when not in use.
To DC 5V IN Jack
•
Only use the supplied AC adapter which has the following specs: DC 12V Z
REMOTE BATTERY INSTALLATION
1.
2.
3.
Remove the Battery Compartment by
pressing in on the tab and then sliding the
compartment out.
Install a CR2025 battery, paying attention
to the polarity diagram in the Battery
Compartment (positive side up).
Replace the Battery Compartment.
BATTERY PRECAUTIONS
Follow these precautions when using batteries in this device:
1. Warning–Danger of explosion if batteries are incorrectly replaced.
Replace only with the same or equivalent type.
2. Use only the size and type of batteries specified.
3. Be sure to follow the correct polarity when installing the batteries as
indicated next to the battery compartments. A reversed battery may
cause damage to the device.
4. If the device is not to be used for a long period of time, remove the
batteries to prevent damage or injury from possible battery leakage.
5. Do not try to recharge a battery not intended to be recharged; it can
overheat and rupture. (Follow battery manufacturer’s directions.)
6
OPTIONAL FEATURES
HEADPHONES JACK (UNDER LEFT COVER)
For private listening, plug headphones into this jack. The speakers will be
disconnected when a plug is inserted into this jack.
WALL MOUNT HOLES (2) (REAR OF UNIT)
If desired, the digital frame can be mounted onto a wall. Simply hang
using the Wall Mount holes, as you would hang an ordinary photo frame
or painting.
STAND (REAR OF UNIT)
To use the stand, lift the stand up and then rotate counterclockwise until
it is in position. When viewing photos vertically, it is recommended that
you gently pull the stand back a little further to ensure that the frame
is stable.
7
GETTING STARTED
USING A MEMORY CARD
You can access media files from an external memory card as
described below. This unit accepts memory cards up to these sizes: SD up
to 2GB, MMC up to 1GB, MS up to 1GB, xD up to 1GB and CF up to 2GB.
1
TO INSERT A MEMORY
CARD: This unit can support SD
(Secure
Digital),
MMC
(MultiMedia Card), MS (Memory
Stick), xD or CF (CompactFlash)
memory cards.
Simply insert the SD, MMC, MS
or xD card into the top Card Slot
located under the right cover of
the unit, with the card facing
towards the rear of the unit
(as shown).
Insert the CF card in the same
manner, but using the bottom
Card Slot.
2
TO REMOVE A MEMORY
CARD: Slide the Power switch
on the rear of this unit to turn it
off. With the power off, remove
the memory card by pulling it
out gently. You may need to
wiggle it back and forth to
dislodge it from the frame.
Please place under 300 photo files on the memory card, otherwise some
photos may not appear in the frame.
8
GETTING STARTED (CONTINUED)
COPYING MEDIA FILES FROM YOUR COMPUTER
You can also copy media files directly from your computer to this digital
frame using a USB cable.
USB cable
USB jack
Computer
1. Connect this unit to an AC power source, as shown on page 6, and
turn this unit on by sliding the Power switch on the rear of the unit.
This unit will either show the Main menu or automatically start showing
a photo Slideshow (if the Auto Play option in the Setup menu is set to
ON). If the unit is in Slideshow mode, press the EXIT button twice to
exit and access the Main menu.
2. Connect the USB cable to the USB jack located under the left cover of
this unit and connect the other end to your computer (as shown).
3. On your computer, double-click My Computer. This unit will appear as
a removable drive named “Memorex”.
4. Navigate to the media files that you want to copy. Then, drag and drop
them to the “Memorex” drive. (Refer to the owners manual
accompanying your computer for more information on copying files.)
NOTES:
• If a memory card is inserted (as shown on the previous page) and is
selected as the Select Card option in the Setup menu (as shown on
page 19), the memory card, not this unit, will appear as a removable
drive in Step 3.
• You can also copy files from the digital frame or external memory card
to your computer, if desired.
9
OPERATION
SETTING THE TIME AND DATE
1
2
2
1
3
Slide the Power switch on the rear
of this unit to turn it on.
Press the ENTER/PLAY button 1 to
start setting the time and date.
Use the Navigation π, † buttons 2
to set the current hour (make sure
to set the correct AM/PM setting if
you selected the 12 Hour mode in
the Time Mode Setup option).
Press the Navigation ® button 2 to
select the minutes. Use the
Navigation π, † buttons 2 to set
the current minutes.
Repeat to set the month, day
and year.
To save your setting press ENTER/
PLAY button 1, then press EXIT
button 3 return to main menu.
This unit will either show the Main
menu or automatically start
1
1
showing a photo Slideshow (if the
Auto Play option in the Setup
menu is set to ON).
Press the TIME button to access
the clock/calendar page.
ACCESSING THE CLOCK/CALENDAR PAGE
1
2
The clock/calendar page will
automatically appear after one
minute of inactivity. You can also
press the TIME button at any time
to access the clock/calendar page.
1
1
To exit and return to the Main
menu, press the EXIT button.
1
10
1
OPERATION (Continued)
BASIC PHOTO PLAYBACK (Supported format: JPEG)
1
2
1
2
3
Slide the Power switch on the rear
of this unit to turn it on.
Select Photo using the Navigation
√, ®, π, † buttons 1; then press
the ENTER/PLAY button 2 to
enter the Photo Thumbnail view.
1
This unit will either
show
1 the Main
menu or automatically start
showing a photo Slideshow (if the
Auto Play option in the Setup
menu is set to ON).
Select the desired photo, or page
of photos, to view using the
Navigation √, ®, π, † buttons
1; then press the ENTER/PLAY
button 2 again to playback the
selected photo. Press the
ENTER/PLAY button 2 again to
begin a Slideshow of all photos
from the selected media source.
If the unit is in Slideshow mode,
press the EXIT button twice to exit
and access the Main menu.
To stop playback and return to the
Photo Thumbnail view, press the
EXIT button 3. Press again to exit
to the Main menu.
11
OPERATION (Continued)
ROTATE
ZOOM
1
2
2
1
4
3
While viewing a photo (see the
previous page), press the ZOOM
IN button 1; the unit will zoom x2.
Repeatedly press to zoom up
to x13.
Use the Navigation √,®,π,†
buttons 2 to move the photo on
the screen.
Press the ZOOM OUT button 3 to
zoom back out of the photo.
To exit Zoom mode and return to
normal photo playback, press the
EXIT button 4.
While viewing a photo (see the
previous page), press the ROTATE
button to rotate the photo 90
degrees clockwise. Repeat to
continue to rotate as desired.
1
SKIP
1
While viewing a photo (see the
previous page), press the
Navigation √ and/or ® button
to skip to the previous or
next picture.
12
1
OPERATION (Continued)
PHOTO “FAVORITES” PLAYBACK
1
2
1
2
2
3
1
While in Photo Thumbnail view (see
page 11), select a photo to add to
your Favorites using the Navigation
√, ®, π, † buttons 1. Then press
the ZOOM IN button 2 to confirm; a
red frame will appear around the
selected photo.
NOTE: To deselect the photo,
simply press the ZOOM IN
button again.
3
2
Press the EXIT button 1 to exit to
the Main menu.
Select Favorites using the
Navigation √, ®, π, † buttons 2;
then press the ENTER/PLAY
button 3 to enter the Favorites
menu.
4
1
1
2
Once you have chosen the viewing
mode (if desired), select Play using
the Navigation π, † buttons 1; then
press the ENTER/PLAY button 2 to
confirm and start playback of your
Favorites. OR To exit the Favorites
menu and return to the Main menu,
select Exit using the Navigation π,
† buttons 1; then press the
ENTER/PLAY button 2 to confirm.
NOTE: You can also press the EXIT
button to exit the Favorites menu.
In the Favorites menu, you have the
option of selecting to view your
Favorites in Landscape or
Portrait
mode.
Press
the
ENTER/PLAY button 1 to select
Direction. Then, press the Navigation
√, ®, π, † buttons 2 to select
between Landscape and Portrait;
then press the ENTER/PLAY button
1 again to confirm.
TO CLEAR THE FAVORITES PLAY LIST: In Photo Thumbnail view, press the
ROTATE button; a pop-up window will appear. Select “No” (to NOT clear the
Favorites) or “Yes” (to clear the Favorites) using the Navigation √, ® buttons; then
press the ENTER/PLAY button to confirm.
13
OPERATION (Continued)
BASIC MUSIC PLAYBACK (Supported format: MP3)
1
2
1
2
3
Slide the Power switch on the
rear of this unit to turn it on.
This unit will either show the Main
1
1
menu or automatically
start
showing a photo Slideshow (if the
Auto Play option in the Setup
menu is set to ON).
If the unit is in Slideshow mode,
press the EXIT button twice to
exit and access the Main menu.
Select Music using the Navigation √,
®, π, † buttons 1; then press the
ENTER/PLAY button 2 to enter the
Music menu. Select the desired MP3
to listen to using the Navigation π,
† buttons 1; then press the
ENTER/PLAY button 2 again to
confirm. Playback will begin with the
MP3 that you selected. To stop
playback and return to the Main
menu, press the EXIT button 3.
ADJUSTING THE VOLUME
1
1
2
2
To adjust the main volume:
Press the Navigation √/VOLUME
- 1 and/or Navigation ®/VOLUME
+ 2 button to increase and/or
decrease the volume.
1
2
3
To mute the main volume:
Press the MUTE button 1. Press
this button again, or either of the
Navigation √/VOLUME - 2 and/or
Navigation ®/VOLUME + 3
buttons to unmute.
NOTES:
• See page 19 to select a Play Mode (i.e. Repeat All, etc.).
• You can pause playback at anytime by pressing the ENTER/PLAY button; the Pause
icon will appear on screen and the file will remain paused until the button is
pressed again.
• You can use the Navigation π, † buttons to skip to the previous or next MP3 file.
14
OPERATION (Continued)
BASIC VIDEO PLAYBACK (Supported format: MOV)
Video:
Audio:
1
Compress type: MPEG-4 Video
Dimensions: 352 x 288 CIF
µ-Law 2:1 or A-Law 2:1
2
If the unit is in Slideshow mode,
press the EXIT button twice to exit
and access the Main menu.
ADJUSTING THE VOLUME
2
2
To adjust the main volume:
Press the Navigation √/VOLUME
- 1 and/or Navigation ®/VOLUME
+ 2 button to increase and/or
decrease the volume.
2
Select Movie using the Navigation √,
®, π, † buttons 1; then press the
ENTER/PLAY button 2 to enter the
Movie menu. Select the desired video
to watch using the Navigation √, ®,
π, † buttons 1; then press the
ENTER/PLAY button 2 again to
confirm. Playback will begin with the
video file that you selected. Press
ENTER/PLAY button 2 to pause the
video, press again to resume
playback. To stop playback and return
to the Movie menu, press the EXIT
button 3. Press again to exit to the
Main menu.
This unit will either
show
1
1 the Main
menu or automatically start
showing a photo Slideshow (if the
Auto Play option in the Setup
menu is set to ON).
1
1
3
Slide the Power switch on the rear
of this unit to turn it on.
1
Frame Rate: 30fps
15
1
2
3
To mute the main volume:
Press the MUTE button 1. Press this
button again, or either of the
Navigation √/VOLUME - 2 and/or
Navigation ®/VOLUME + 3 buttons
to unmute.
OPERATION (Continued)
DELETING A FILE
1
2
1
2
3
Slide the Power switch on the rear
of this unit to turn it on.
Select Folder using the Navigation
√, ®, π, † buttons 1; then press
the ENTER/PLAY button 2 to
enter the Folder menu.
1
1 the Main
This unit will either
show
menu or automatically start
showing a photo Slideshow (if the
Auto Play option in the Setup
menu is set to ON).
Select the desired file to delete
using the Navigation π, † buttons
1. Then press the Navigation √
button 1; a pop-up menu
will appear.
If the unit is in Slideshow mode,
press the EXIT button twice to exit
and access the Main menu.
Select “No” (to NOT delete the
file) or “Yes” (to delete the file)
using the Navigation √, ® buttons
1; then press the ENTER/PLAY
button 2 again to confirm.
To return to the Main menu, press
the EXIT button 3.
NOTES:
• You can only delete or copy a file, not a folder. If you have selected a
folder, pressing the Navigation ® button will enter the directory and
pressing the Navigation √ button will exit the directory.
• Copying or deleting a file will also clear your Favorites play list.
16
OPERATION (Continued)
COPYING A FILE
1
2
1
2
3
Slide the Power switch on the rear
of this unit to turn it on.
Select Folder using the Navigation
√, ®, π, † buttons 1; then press
the ENTER/PLAY button 2 to
enter the Folder menu.
Select the desired file to copy
using the Navigation π, † buttons
1. Then press the Navigation ®
button 1; a pop-up menu
will appear.
Select “No” (to NOT copy the file)
or “Yes” (to copy the file) using the
Navigation √, ® buttons 1; then
press the ENTER/PLAY button 2
again to confirm.
To return to the Main menu, press
the EXIT button 3.
1
1 the Main
This unit will either
show
menu or automatically start
showing a photo Slideshow (if the
Auto Play option in the Setup
menu is set to ON).
If the unit is in Slideshow mode,
press the EXIT button twice to exit
and access the Main menu.
NOTES:
• While copying a file, if more than one target media (media to copy to) is
available, select the target media when prompted by the pop-up window
to do so.
• If the target media is full, "Disk is Full" will appear.
• While copying a file, if there is already a file with the same name on the
target media, a “Would you like to replace the existing file?” pop-up
window will appear. Select “No” (to NOT replace the file by cancelling the
copy request) or “Yes” (to replace the file) using the Navigation √, ®
buttons; then press the ENTER/PLAY button again to confirm.
• You can only delete or copy a file, not a folder. If you have selected a
folder, pressing the Navigation ® button will enter the directory and
pressing the Navigation √ button will exit the directory.
• Copying or deleting a file will also clear your Favorites play list.
17
SETUP MENU
OPERATION (Continued)
The Setup menu lets you customize this digital frame by allowing you to
select the source for your media files, set the effects between your photos,
adjust the speed of the Slideshow and more!
Use the following instructions to navigate and change the options which
are described on the following page.
1. Slide the Power switch on the rear
of this unit to turn it on.
This unit will either show the Main
menu or automatically start showing
2
a photo Slideshow (if the Auto Play
3
option in the Setup menu is set
to ON).
If the unit is in Slideshow mode,
press the EXIT button 1 twice to
1
exit and access the Main menu.
2. Select Setup using the Navigation
√, ®, π, † buttons 2; then press
the ENTER/PLAY button 3 to enter
the Setup menu. (NOTE: You can also access the Setup menu at any
time by pressing the MENU button.)
3. Use the Navigation π,† buttons 2 to select one of the Setup
options (i.e. “Select Card”) on the two available pages of options,
then press the ENTER/PLAY button 3 to select it; the option will be
highlighted in blue.
4. Use the Navigation π,† buttons 2 to change the desired option
setting (i.e. choose between SD/MMC, Internal Flash, etc.), then
press the ENTER/PLAY button 3 to make the change.
5. Exit by pressing the EXIT button 1. (NOTE: You can also exit by
selecting the Exit Setup option.)
CONTINUED ON THE NEXT PAGE
18
OPERATION (Continued)
SETUP OPTIONS
Select Card: Use this Setup option to select the source for your media files.
Choose from Internal Flash, as well as any external media inserted (i.e.
SD/MMC).
Photo Mode: Use this Setup option to select the mode in which the photos
will be displayed. Choose from Full (which will stretch the picture to fill the
screen) or Normal (which will display the photo with its original proportions).
Slide Effect: Use this Setup option to select the transition effect between
your slides. Choose from Split Out, Split In, Cut Out, Cut In, Wrap Left, Wrap
Right, Wrap Up, Wrap Down or Random (will randomly select among the
other modes to transition between the photos).
Slide Speed: Use this Setup option to select the speed for your Slideshow.
Choose from Slow, Medium or Fast.
Auto Play: Use this Setup option to choose whether your frame will
automatically start showing a photo Slideshow after being turned on. Choose
to set Auto Play to ON or OFF.
Music Mode: Use this Setup option to select a Play mode when listening to
MP3s on this unit. Choose from Repeat All (will repeat all of the files from the
selected media source continuously until you exit the Music menu), Repeat
One (will repeat the selected file continuously until you exit the Music menu)
or Repeat Off (for Normal Music playback).
Background Music: Use this Setup option to choose whether your frame
will play background music while viewing a Slideshow. Choose to set
Background Music to ON or OFF. The volume of the Background music can
be adjusted in the same way as normal music playback (see page 14).
Brightness: Use this Setup option to adjust the brightness of the screen.
Choose from 00% to 100%.
Time Mode: Use this Setup option to set the internal clock to 12 or 24 hour
mode. Choose from 12 Hour or 24 Hour.
Language: Use this Setup option to select the desired language for the
menus. Choose from English, Spanish or French.
19
TROUBLESHOOTING GUIDE
If you experience a problem with this unit, check the chart below before
calling for service.
SYMPTOM
Main unit, no power.
Remote, no power.
No photos in frame.
Computer does not
recognize frame as a
Removable Disk.
CAUSE
SOLUTION
connected.
as shown on page 6.
inserted incorrectly.
as shown on page 6.
AC adapter is not
Battery not inserted or
No photos are present in
Internal Flash or external
Connect AC adapter
Insert battery correctly
Copy files onto the frame
or insert external media
media source.
source, see pages 8 & 9.
connected securely.
connection.
USB cable not
Frame is not turned on.
Secure USB cable
Turn on frame using
the Power switch on the
rear of the frame.
20
SPECIFICATIONS
GENERAL:
Power Source ...........................AC Adapter, DC 12V Z
Weight..........................................................................2 Lbs
Dimensions ...........................6.9" (H) x 9.9" (W) x 1.75" (D)
Weight and dimensions are approximate.
Resolution .............................................................800 x 480
Internal Memory ........................................................128MB
Speaker .................................................................2 x 0.6 W
Specifications are subject to change without notice.
FOR ADDITIONAL SET-UP OR OPERATING ASSISTANCE, PLEASE VISIT
OUR WEBSITE AT:
WWW.MEMOREXELECTRONICS.COM
OR CONTACT CUSTOMER SERVICE AT 1-800-919-3647.
PLEASE KEEP ALL PACKAGING MATERIAL FOR AT LEAST 90 DAYS IN
CASE YOU NEED TO RETURN THIS PRODUCT TO YOUR PLACE OF
PURCHASE OR MEMOREX.
FOR CONSUMER REPLACEABLE PART(S), SEE PART NUMBER(S) ON
PAGES 4 AND 5 AND THEN CONTACT FOX INTERNATIONAL
AT 1-800-321-6993.
21
MEDIDAS DE SEGURIDAD
CUIDADO
RIESGO DE DESCARGA
ELÉCTRICA. NO ABRIR
ADVERTENCIA: Para reducir el riesgo de descargas
eléctricas no saque la cubierta o la tapa posterior. Allí no se
encuentran partes que puedan ser reparadas por el usuario.
Lleve su unidad a un Centro de Servicio Autorizado.
ADVERTENCIA: La figura de la flecha con forma de rayo
dentro de un triángulo está hecho para alertar al usuario
de la presencia de cables sin aislar de "voltaje peligroso"
dentro del gabinete, de tal magnitud que puede causar un
riesgo de descarga eléctrica a las personas.
ADVERTENCIA: El signo de exclamación dentro de un
triángulo está hecho para alertar al usuario de la
existencia de instrucciones importantes tanto de servicio
como de funcionamiento y mantenimiento que vienen
con la unidad.
AVISO DE LA FCC:
Este equipo genera o puede usar energía de frecuencia radial. Cualquier
cambio o modificación al equipo, puede causar interferencia nociva, a
menos que estas modificaciones esten expresamente indicadas en el
manual de instrucciones. El usuario puede perder el derecho de operar
este equipo si efectuara un cambio o modificación no autorizadas.
ATTENTION:
POUR ÉVITER LES CHOC ÉLECTRIQUES, INTRODUIRE LA LAME LA
PLUS LARGE DE LA FICHE DANS LA BORNE CORRESPONDANTE DE
LA PRISES ET POUSSER JUSQU’AU FOND.
1
MEDIDAS DE SEGURIDAD
INFORMACIÓN:
Este equipo cumple con aparato digital de Clase B regulaciones.
Este equipo genera, usa y puede irradiar energía de radiofrecuencia
y, si no se instala y usa conforme a las instrucciones, puede generar
interferencia dañina con las radiocomunicaciones. Sin embargo, no
hay garantía de que no habrá interferencia en una instalación
particular. Si este equipo llegara a causar interferencia dañina con la
recepción de radio o televisión, lo cual se puede determinar
encendiendo y apagando el equipo, le pedimos que intente corregir
la interferencia con las siguientes medidas:
• Reoriente o reubique la antena receptora.
• Incremente la distancia entre el equipo y el receptor.
• Conecte el equipo a un contacto eléctrico que esté en un circuito
distinto al que está conectado el receptor.
• Consulte al vendedor o a un técnico de radio y televisión con
experiencia.
ADVERTENCIA: PARA EVITAR LOS PELIGROS DE
ELECTROCUTAMIENTO O INCENDIO, NO EXPONGA ESTE
APARATO A LA LLUVIA O HUMEDAD.
PROTECTORES DE OLEADA:
Se recomienda para utilizar un protector de oleada para la
conexión de la CA. Las oleadas del relámpago y de la energía
no se cubren bajo garantía para este producto.
Este aparato digital de Clase B cumple con la norma
ICES-003 de Canadá.
Cet appareil numérique de la classe B est conforme à la
norme NMB-003 du Canada.
2
Estimado Cliente:
En el momento en que seleccionó un equipo de tan alta tecnología como el que usted acaba
de comprar, su entretenimiento musical recién comenzó. Ahora es tiempo de pensar en cómo
puede optimizar el entretenimiento que su equipo le ofrece. Este fabricante y la Asociación de
Industrias Electrónicas del Grupo de Consumidores Electrónicos desean que usted obtenga
el mejor resultado de su equipo, usándolo a un nivel seguro como es escuchar un sonido claro
y sonoro, sin distorsión y, sobre todo, sin que afecte su sentido auditivo. El sonido es
engañoso, ya que con el tiempo su nivel de audición puede adaptarse a escuchar sólo en
volumen alto, resultando en un serio daño a su sentido auditivo. Protéjase contra este daño
innecesario ajustando el volumen de su equipo a un nivel bajo antes de acostumbrarse a
escuchar siempre la música a un volumen alto.
Para establecer un nivel auditivo seguro:
•
Ponga el control de volumen en posición baja.
•
Lentamente aumente el nivel hasta que escuche el sonido de manera clara y
confortable, sin distorsión.
Una vez que establece el nivel de audición confortable:
•
Deje fijo el control de volumen en dicho nivel.
Eso le tomará tan solo un minuto, y le ayudará a prevenir la pérdida del oído en el futuro.
Nosotros deseamos que usted pueda oír durante toda su vida
Si sabe usar su equipo, éste le proveerá mucho tiempo de satisfacción y entretenimiento.
Debido a que el daño causado al oído es imperceptible hasta que ya es muy tarde, el
fabricante y la Asociación de Industrias Electrónicas recomiendan que evite la exposición
prolongada a ruidos excesivos. La lista que le damos a continuación le servirá de guía:
Nivel de decibeles
30
40
50
60
70
80
Ejemplo
Una biblioteca, susurros.
Sala, refrigerador, dormitorio lejos del tráfico.
Semáforo, conversación normal, oficina tranquila.
Aire acondicionado a 20 pies, máquina de coser
Aspiradora, secadora de pelo, restaurante bullicioso.
Tráfico en la calle, triturador de basura, alarma de reloj
a 60 cm.
LOS SIGUIENTES RUIDOS PUEDEN SER PELIGROSOS SI SE SOMETE A ELLOS EN
FORMA CONSTANTE:
90
100
120
140
180
Metro, motocicletas, tráfico de camiones,
podadora de césped.
Camión de basura, sierra eléctrica, perforadora
neumática.
Concierto de rock frente a las bocinas, ruido
de truenos.
Sonido de disparo, motor de avión.
Lanzamiento de una nave espacial.
Esta información fue proporcionada gratuitamente por la Fundación de
Investigación de la Sordera. (sólo válido en Estados Unidos de América)
3
UBICACIÓN DE LOS CONTROLES
UNIDAD
PRINCIPAL
1.
2.
3.
4.
5.
6.
Entrada CC de 12V (Debajo de la Tapa)
(ADAPTADOR CA–PIEZA NO.
MADERA CLARA (LIGHT
WOOD–LWD) 295-04985-E010,
MADERA OSCURA (DARK WOOD–DWD) 295-04985-E000*)
Entrada para USB
(Debajo de la Tapa)
(CABLE USB–PIEZA NO. MADERA
CLARA (LIGHT WOOD–LWD) 33701000-E052, MADERA OSCURA
(DARK WOOD–DWD) 337-01000E050*)
Pantalla
Entrada para Auriculares
(Debajo de la Tapa)
Sensor Remoto
Ranura para Tarjeta SD/MMC/MS/xD
(Debajo de la Tapa)
7.
8.
9.
10.
11.
12.
13.
14.
15.
16.
17.
18.
Ranura para Tarjeta CF
(Debajo de la Tapa)
Botón de Navegación †
Botón de Navegación π
Botón ENTRAR/ REPRODUCIR
(ENTER/PLAY)
Orificio para Montaje en Pared
Altavoces
Soporte
Botón de Navegación ®/VOLUMEN
(VOLUME) +
Botón de Navegación √/VOLUMEN
(VOLUME) Botón SALIR/CANCELAR
(EXIT/CANCEL)
Orificio para Montaje en Pared
Interruptor Encendido/Apagado (Power)
*Pieza Reemplazable por el Consumidor
(Vea la página 21 para ordenar)
4
UBICACIÓN DE LOS CONTROLES (CONTINÚA)
CONTROL REMOTO
1. Botón de MUDO (MUTE)
2. Botón de Navegación √/VOLUMEN (VOLUME) 3. Botón de Navegación π
4. Botón de Navegación †
5. Botón de MENÚ (MENU)
6. Botón SALIR (EXIT)
7. Transmisor Remoto (Parte Superior de la Unidad)
8. Botón de HORA (TIME)
9. Botón de Navegación ®/ VOLUMEN (VOLUME) +
10. Botón de ENTRAR/REPRODUCIR (ENTER/PLAY)
11. Botón de ROTAR (ROTATE)
12. Botón de ACERCAR (ZOOM IN)
13. Botón de ALEJAR (ZOOM OUT)
14. Compartimiento de la Pila (Parte Trasera de la Unidad)
CONTROL REMOTO- PIEZA NO. MADERA CLARA (LIGHT WOODLWD) 239-04421-E000, MADERA OSCURA (DARK WOOD- DWD)
239-04421-E001*
*Pieza Reemplazable por el Consumidor
(Vea la página 21 para ordenar)
5
FUENTE DE ALIMENTACIÓN
CONEXIÓN A CORRIENTE ELÉCTRICA
Inserte el extremo pequeño del adaptador
CA en la entrada de 12VCD (ubicada debajo
de la tapa izquierda en la parte lateral de
esta unidad). Conecte el otro extremo al
contacto eléctrico de 120VCA, 60 Hz.
Contacto
eléctrico
Adaptador CA, 12VCD Z
Enchufe del
NOTAS:
adaptador CA
•
Cuando no utilice la unidad, desconecte
el adaptador de corriente alterna de ambos lados.
•
Use únicamente un adaptador de corriente alterna incluido, que posea las
siguientes especificaciones: 12VCD Z
INSTALACIÓN DE LAS PILAS EN EL CONTROL REMOTO
1.
Quite la tapa del compartimiento ejerciendo
presión en la pestaña y deslizándola.
2.
Introduzca una pila CR2025, poniendo
atención al diagrama de polaridad en
el compartimiento de pila (el lado positivo
hacia arriba).
3.
Coloque nuevamente el compartimiento
de Pila.
CUIDADO DE LAS PILAS
Cuando use pilas, tome las siguientes precauciones:
1. Advertencia: Existe riesgo de explosión si la pila se reemplaza de modo
incorrecto. Reemplácela sólo con una del mismo tipo o equivalente.
2. Use únicamente el tamaño de pila que indica el fabricante.
3. Asegúrese de seguir la polaridad indicada en el compartimiento cuando
coloque la misma. De no hacerlo, la unidad podría dañarse.
4. Si no va a utilizar su unidad por un período de tiempo prolongado, saque
la pila para evitar que se oxide y se dañen las terminales.
5. Nunca intente recargar pilas que no han sido fabricadas para este fin, ya
que pueden recalentarse y reventar (Siga las indicaciones del fabricante
de las pilas).
6
FUNCIONES OPCIONALES
ENTRADA PARA AURICULARES
(DEBAJO DE LA TAPA IZQUIERDA)
Para escuchar el sonido de manera privada, conecte los auriculares en
esta entrada. Los altavoces de desconectarán cuando se inserte un
enchufe a este conector.
ORIFICIOS PARA MONTAJE EN PARED (2)
(PARTE TRASERA DE LA UNIDAD)
Si a sí lo de sea pu ede montar el marco d igital s obre la pa red.
Simplemente cuélguelo utilizando los orificios para Montaje en Pared, de
la misma forma que colgaría un un marco para fotos común o un cuadro.
SOPORTE (PARTE TRASERA DE LA UNIDAD)
Para utilizar el soporte, levántelo y luego gírelo hacia la derecha hasta
que quede en posición. Se recomienda que al visualizar fotografías de
manera vertical lo empuje cuidadosamente un poco para asegurar que
se mantiene estable.
7
INTRODUCCIÓN
UTILIZACIÓN DE LA TARJETA DE MEMORIA
Podrá acceder a los archivos multimedia desde una tarjeta de memoria externa según se explica a
continuación. Esta unidad admite como máximo los siguientes tamaños de tarjetas de memoria: SD
hasta 2GB, MMC hasta 1GB, MS hasta 1GB, xD hasta 1GB y CF hasta 2GB.
1
PARA COLOCAR UNA TARJETA
DE MEMORIA: Esta unidad admite
las tarjetas de memoria SD (Secure
Digital), MMC (MultiMedia Card), MS
(Memory Stick), xD o CF
(CompactFlash).
Simplemente coloque la tarjeta SD,
MMC, MS o xD en la ranura superior
ubicada debajo de la tapa derecha
de la unidad , con la tarjeta mirando
hacia la parte trasera de la unidad.
(según se muestra en la ilustración).
Coloque la tarjeta CF de la misma
manera pero utilizando la ranura
posterior.
2
PA R A Q U I TAR LA TA R J E TA D E
MEMORIA: Ubique el interruptor de
ENCENDIDO/APAGADO (POWER)
localizado en la parte trasera para
apagar la unidad. Con la unidad
apagada, quite la tarjeta de memoria
tirando hacia afuera con cuidado. Es
posible que necesite moverla hacia
adelante y atrás para sacarla del
marco.
Cargue menos de 300 archivos de fotos en la tarjeta de memoria, ya que
algunas fotografías podrían no aparecer en el marco.
8
INTRODUCCIÓN (CONTINÚA)
COPIAR ARCHIVOS MULTIMEDIA DESDE SU
COMPUTADORA
Podrá copiar archivos multimedia directamente desde su computadora a
este marco digital, utilizando un cable USB.
1.
Conecte la unidad a una fuente de alimentación AC, como se explica en la
página 6. Encienda la unidad ubicando el interruptor de
ENCENDIDO/APAGADO (POWER) localizado en la parte trasera. La
unidad mostrará el Menú principal o iniciará automáticamente la
Presentación de las fotos como diapositivas (en caso que la opción de
Auto Reproducción esté activada (ON)). Si la unidad se encuentra en el
modo de Presentación de diapositivas, oprima el botón de SALIR (EXIT)
dos veces para salir y acceder al menún principal.
2. Conecte el cable USB a la entrada USB ubicada debajo de la tapa
izquierda de la unidad y conecte el otro extremo a su computadora (según
indica la ilustración)
3. En su computadora haga clic en “Mi PC”. Esta unidad aparecerá como un
dispositivo extraíble llamado “Memorex”.
4. Navegue hasta los archivos multimedia que desea copiar. Luego
arrástrelos y colóquelos en el dispositvo “Memorex” (Para más
información sobre cómo copiar archivos. lea el manual del usuario de
su computadora).
NOTAS:
•
Si coloca una tarjeta de memoria (como se explica en la página anterior) y
selecciona la opción Seleccionar Tarjeta del Menú de Configuración (como
se explica en la página 19), la tarjeta de memoria, no la unidad, aparecerá
como un controlador extraíble en el Paso 3.
•
Si lo desea, también podrá copiar archivos desde el marco digital o la
memoria externa hacia la computadora.
9
FUNCIONAMIENTO
AJUSTE DE LA FECHA Y HORA
1
2
Deslice
el
interruptor
de
E N C E N D I D O / A PAGADO (POWER)
ubicado en la parte trasera de la unidad
para encenderla.
La unidad mostrará el menú principal o
iniciará
automáticamente
la
presentación de las fotos como
diapositivas (en caso que la opción de
Auto Reproducción del Menú de
configuración esté activada).
Presione el Botón de HORA ( T I M E )
para acceder a la página de
reloj/calendario.
Presi one
el
bo tó n
E NTRAR/
REPRODUCIR (ENTER/PLAY) 1
p a r a
ajustar la fecha y hora. Utilice los botones
de Navegación π, †
2
para ajustar la
hora actual (asegúrese de ajustar la
configuración AM/PM en caso que haya
seleccionado el modo de 12 Horas en la
opció n de Con fi gur ación del Mod o
Hora). Oprima el botón de navegación ®
2 para seleccionar los minutos. Utilice
los botones de Navegación π, † 2 para
ajustar los minutos actuales. Repita para
ajustar el mes, día y año. Para guardar
las configuraciones oprima ENTRAR/
REPRODUCIR (ENTER/PLAY) 1, luego
presione SALIR (EXIT) 3 para volver al
menú principal.
ACCESO A LA PÁGINA DE RELOJ/CALENDARIO
1
2
La página de reloj/calendario aparecerá
automáticamente luego de un minuto
de inactividad. También puede oprimir
el botón de HORA (TIME) en cualquier
momento para acceder a dicha página.
Para salir y volver al menú principal
presione el botón de SALIR (EXIT).
10
FUNCIONAMIENTO (CONTINÚA)
REPRODUCCIÓN BÁSICA DE FOTOGRAFÍAS
(Formato compatible: JPEG)
1
2
Ubique
el
interruptor
de
E N C E N D I D O / A PA G A D O
(POWER), localizado en la parte
trasera, para encender la unidad.
Seleccione una foto utilizando los
botones de Navigación √, ®, π, †
1; luego presione ENTRAR/
REPRODUCIR (ENTER/PLAY) 2
para iniciar la vista en miniatura de las
fotografías.
Seleccione la foto deseada o página
de fotos. Para visualizarlas utilice los
botones de navegación √, ®, π, †
1;
luego
oprima
ENTRAR
/REPRODUCIR (ENTER/PLAY ) 2
nuevamente para reproducir la foto
seleccionada. Presione ENTRAR/
REPRODUCIR (ENTER/PLAY) 2
nuevamente para iniciar la
Presentación en diapositivas de todas
las fotos desde el soporte de origen
seleccionado.
Para detener la reproducción y volver
a la Visualización en Miniatura de las
fotos, oprima SALIR (EXIT) 3.
Presione nuevamente para salir al
Menú principal.
La unidad mostrará el Menú
principal o iniciará automáticamente
la presentación de las fotos como
diapositivas (en caso que la opción
de Auto Reproducción del Menú de
configuración esté activada).
Si la unidad se encuentra en el
modo de Presentación de
diapositivas, oprima el botón SALIR
(EXIT) dos veces para salir y
acceder al Menú principal.
11
FUNCIONAMIENTO (CONTINÚA)
ACERCAR Y ALEJAR (ZOOM)
ROTAR
1
2
Mientras visualiza una foto (vea la
página anterior) oprima el botón de
ACERCAR (ZOOM IN) 1; la unidad
ac ercará la imagen x2. O prima
repetidamente para acercar la
imagen x13.
Utilice los botones de Navegación
√,®,π,† 2 para mover la fotografía
en la pantalla. Presione el botón de
ALEJAR (ZOOM OUT) 3 para alejar
la imagen de la foto.
Para salir del Modo zoom y volver a la
reproducción normal de fotografías,
oprima SALIR (EXIT) 4.
Mientras visualiza una foto (vea la
página anterior) oprima ROTA R
( R O TATE) para rotar la foto 90
grados hacia la derecha. Repita
para continuar rotando según
lo desee.
SALTO
1
Mientras visualiza una foto (vea la
página anterior), oprima el botón
de Navegación √ y/o ® p a r a
saltar a la foto anterior o
la siguiente.
12
FUNCIONAMIENTO (CONTINÚA)
REPRODUCCIÓN DE FOTOS “FAVORITAS”
1
2
Mientras se encuentra visualizando las
fotos en miniatura (vea la página 11),
seleccione una foto para agregar a sus
Favoritos utilizando los botones de
Navegación √, ®, π, †
1. Luego
oprima el botón de ACERCAR (ZOOM
I N ) 2 para confirmar; aparecerá un
recuadro rojo alrededor de la foto
seleccionada. NOTA: Para cancelar la
selección, simplemente oprima el botón
de ACERCAR (ZOOM IN) nuevamente.
Oprima el botón de SALIR (EXIT)
1 para salir al Menú principal.
Seleccione las Favoritas utilizando
los botones de Navegación √, ®,
π, †
2; luego oprima ENTRAR/
REPRODUCIR (ENTER/PLAY) 3
para ingresar en el menú
de Favoritos.
3
4
Una vez que haya elegido el modo de
visualización (si así lo desea), seleccione
Reproducir (Play) utilizando los botones de
Navegación π, †
1; luego oprima ENTRAR/
REPRODUCIR (ENTER/PLAY ) 2 p a r a
confirmar e iniciar la reproducción de sus
Favoritos. O BIEN, para salir del Menú
favoritos y volver al Menú principal, seleccione
Salir (Exit) utilizando los botones de
Navegación π, †
1 y luego oprima
ENTRAR/REPRODUCIR (ENTER/PLAY) 2
para confirmar.
N O TA : También puede presionar SALIR
(EXIT) para salir del Menú Favoritos.
En el Menú de Favoritos usted tiene la
opción de visualizar las fotografías
Favoritas en el Modo de Paisaje o
Retrato. Oprima REPRODUCIR/
ENTRAR (ENTER/PLAY) 1 p a r a
seleccionar la dirección. Luego oprima el
botón de Navegación √, ®, π, †
2
para seleccionar entre Paisaje y Retrato.
Por último presione ENTRAR/
REPRODUCIR (ENTER/PLAY) 1
nuevamente para confirmar.
PARA BORRAR LA LISTA DE REPRODUCCIÓN DE FAV O R I TO S : Mientras se
encuentra en la visualización de Fotos en Miniatura oprima ROTAR (ROTATE);
aparecerá una ventana automáticamente. Seleccione “No” (para NO borrar las
Favoritos) o “Si” (Yes) (para borrar los Favoritos) utilizando los botones de Navegación
√, ® ; luego oprima ENTRAR/REPRODUCIR (ENTER/PLAY) para confirmar.
13
FUNCIONAMIENTO (CONTINÚA)
REPRODUCCIÓN BÁSICA DE MÚSICA (Formato compatible: MP3)
1
2
Ubique
el
interruptor
de
E N C E N D I D O / A PAGADO
(POWER),
localizado en la parte trasera, para
encender la unidad.
La unidad mostrará el Menú principal o
iniciará automáticamente la presentación de
las fotos como diapositivas (en caso que la
opción de Auto Reproducción del Menú de
configuración esté activada).
Si la unidad se encuentra en el modo de
Presentación de diapositivas, oprima el
botón SALIR (EXIT) dos veces para salir y
acceder al Menú principal.
Seleccione Música con los botones de
Navegación √, ®, π, †
1; luego oprima
ENTRAR/REPRODUCIR (ENTER/PLAY)
2
para ingresar al Menú de Música.
Seleccione el MP3 que desea escuchar
utilizando los botones de Navegación
π, † 1; luego oprima ENTRAR/
REPRODUCIR
(ENTER/PLAY ) 2
nuevamente para confirmar. La
reproducción se iniciará con el MP3
seleccionado.
Para
detener
la
reproducción y volver al Menú principal ,
oprima SALIR (EXIT) 3.
AJUSTAR EL VOLUMEN
1
2
Para ajustar el volumen principal:
Oprima el botón de Navegación
√/ VOLUMEN (VOLUME) - 1
y/o el
botón de Navegación ®/ V O L U M E N
(VOLUME) + 2
para aumentar o
disminuir el volumen.
Para silenciar el volumen principal:
Oprima MUDO (MUTE) 1. Para
devolver el sonido, oprima este botón
nuevamente o bien uno de los botones
de Navegación √ /VOLUME - 2 y/o
®/VOLUME + 3.
NOTAS:
• Vea la página 19 para seleccionar un Modo de Reproducción (por ejemplo. Repetir Todos, etc.).
• Puede pausar la reproducción en cualquier momento presionando ENTRAR/REPRODUCIR
(ENTER/PLAY); el ícono de Pausa aparecerá en la pantalla y el archivo permanecerá pausado
hasta que el botón se oprima nuevamente.
• Puede uitilizar los botones de Navegación π, † para saltar al archivo MP3 anterior o siguiente.
14
FUNCIONAMIENTO (CONTINÚA)
REPRODUCCIÓN BÁSICA DE VIDEO (Formato compatible: MOV)
Video:
Tipo de compresión: MPEG-4 Video
Velocidad de imagen: 30fps
Dimensiones: 352 x 288 CIF
Audio:
µ-Law 2:1 o A-Law 2:1
1
2
Ubique
el
interruptor
de
E N C E N D I D O / A PAGADO (POWER),
localizado en la parte trasera, para
encender la unidad.
La unidad mostrará el Menú principal o
iniciará
automáticamente
la
presentación de las fotos como
diapositivas (en caso que la opción de
Auto Reproducción del Menú de
configuración esté activada).
Si la unidad se encuentra en el modo
de Presentación de diapositivas, oprima
el botón SALIR (EXIT) dos veces para
salir y acceder al Menú principal.
Seleccione la película con los botones de
Navegación √, ®, π, † 1; luego oprima
ENTRAR/REPRODUCIR (ENTER/PLAY)
2
para ingresar al Menú de Películas.
Seleccione el video que desea ver
utilizando los botones de Navegación √,
®, π, † 1; luego oprima ENTRAR/
REPRODUCIR
(ENTER/PLAY ) 2
nuevamente para confirmar. La
reproducción se iniciará con el archivo de
video seleccionado. Presione ENTRAR/
REPRODUCIR (ENTER/PLAY) 2 p a r a
pausar el video, oprima nuevamente para
retomar la reproducción. Para detener la
reproducción y volver al Menú de Películas
oprima SALIR (EXIT) 3. Presione
nuevamente para salir al Menú Principal.
AJUSTAR EL VOLUMEN
1
2
Para ajustar el volumen principal:
Oprima el botón de Navegación
√/VOLUMEN (VOLUME) - 1
y/o el botón
de Navegación ®/VOLUMEN (VOLUME)
+ 2
para aumentar o disminuir el
volumen.
Para silenciar el volumen principal:
Oprima MUDO (MUTE) 1. Para
devolver el sonido, oprima este botón
nuevamente o bien uno de los botones
de Navegación √/VOLUME - 2 y / o
®/VOLUME + 3.
15
FUNCIONAMIENTO (CONTINÚA)
BORRAR UN ARCHIVO
1
2
Ubique
el
interruptor
de
E N C E N D I D O / A PA G A D O
(POWER), localizado en la parte
trasera, para encender la unidad.
La unidad mostrará el Menú
principal o iniciará automáticamente
la presentación de las fotos como
diapositivas (en caso que la opción
de Auto Reproducción del Menú de
configuración esté activada).
Si la unidad se encuentra en el
modo de Presentación de
diapositivas, oprima el botón SALIR
(EXIT) dos veces para salir y
acceder al Menú principal.
Seleccione la carpeta con los botones
de Navegación √, ®, π, †
1; luego
oprima
ENTRAR/REPRODUCIR
( E N T E R / P L AY) 2
para ingresar al
Menú de Carpetas. Seleccione el
archivo que desea borrar utilizando los
botones de Navegación π, † 1; luego
oprima el botón de Navegación √ 1.
Aparecerá automáticamente la ventana
de un menú.
Seleccione “No” (para NO borrar los
archivos) o “Si” (“Yes”) (para borrar los
archivos) utilizando los botones de
N a v e g a c i ó n √, ® 1; luego oprima
ENTRAR/REPRODUCIR
( E N T E R / P L AY) 2 nuevamente para
confirmar.
Para volver al Menú principal , oprima
SALIR (EXIT) 3.
NOTAS:
• Usted puede borrar o copiar sólo un archivo en lugar de la carpeta entera.
Si ha seleccionado una carpeta, presione el botón de Navegación ®
para ingresar al directorio y presione el botón de Navegación √ para salir
del mismo.
• Al copiar o borrar un archivo también se borrará la lista de reproducción
de Favoritos.
16
FUNCIONAMIENTO (CONTINÚA)
COPIAR UN ARCHIVO
1
2
Ubique
el
interruptor
de
E N C E N D I D O / A PAGADO (POWER),
localizado en la parte trasera, para
encender la unidad.
La unidad mostrará el Menú principal o
iniciará
automáticamente
la
presentación de las fotos como
diapositivas (en caso que la opción de
Auto Reproducción del Menú de
configuración esté activada).
Si la unidad se encuentra en el modo
de Presentación de diapositivas, oprima
el botón SALIR (EXIT) dos veces para
salir y acceder al Menú principal.
Seleccione la carpeta con los botones de
Navegación √, ®, π, †
1; luego oprima
ENTRAR/REPRODUCIR (ENTER/PLAY)
2
para ingresar al Menú de Carpetas.
Seleccione el archivo que desea copiar
utilizando los botones de Navegación π,
† 1; luego oprima el botón de
Navegación
®
1.
Aparecerá
automáticamente la ventana de un menú.
Seleccione “No” (para NO copiar los
archivos) o “Si” (“Yes”) (para copiar los
archivos) utilizando los botones de
N a v e g a c i ó n √, ®
1; luego oprima
ENTRAR/REPRODUCIR (ENTER/PLAY)
2 nuevamente para confirmar.
Para volver al Menú principal , oprima
SALIR (EXIT) 3.
NOTAS:
• Mientras está copiando un archivo, si más de un dispositivo de destino está disponible
(dispositivo al cual copiar), seleccione el dispositivo de destino cuando la ventana se
lo solicite.
• Si dicho dispositivo esta completo, aparecerá “El Disco está Lleno” (Disk is Full) en
la pantalla.
• Mientras está copiando un archivo , si ya existe otro archivo con el mismo nombre en el
dispositivo de destino, aparecerá automáticamente una ventana que indica “Desea
reemplazar el archivo actual”? (Would you like to replace the existing file?) . Seleccione
“No” (para NO reemplazar el archivo y cancelar la solicitud de copia) o “Si” (Yes) (para
reemplazar el archivo) utilizando los botones de Navegación √, ®; luego oprima
ENTRAR/REPRODUCIR (ENTER/PLAY) 2 nuevamente para confirmar.
• Sólo podrá borrar o copiar un archivo, no una carpeta. Si ha seleccionado una carpeta,
oprima el botón de Navegación ® para ingresar al directorio o el botón √ para salir.
• Al copiar o borrar un archivo también se borrará la lista de reproducción de Favoritos.
17
FUNCIONAMIENTO (CONTINÚA)
MENÚ DE CONFIGURACIÓN (SETUP)
El Menú de configuración le permite personalizar el marco digital para que usted
pueda seleccionar el origen de sus archivos multimedias, configurar los efectos de
sus fotos, ajustar la velocidad de la Presentación en dispositivas y mucho mas...
Utilice las siguientes instrucciones para navegar y cambiar las opciones explicadas
en la próxima página.
1.
2.
3.
4.
5.
Ubique el interruptor de ENCENDIDO/
APAGADO (POWER), localizado en la
parte trasera, para encender la unidad.
La unidad mostrará el Menú principal o
iniciará automáticamente la presentación
de las fotos como diapositivas (en caso
que la opción de Auto Reproducción del
Menú de configuración esté activada).
Si la unidad se encuentra en el modo de
Presentación de diapositivas, oprima el
botón SALIR (EXIT) 1 dos veces para
salir y acceder al Menú principal.
Seleccione Configurar con los botones
de Navegación √, ®, π, †
2; luego
oprima
ENTRAR/REPRODUCIR
(ENTER/PLAY) 3 para ingresar al Menú
de Configuración. (NOTA: También podrá acceder al Menú de configuración
en cualquier momento oprimiendo MENÚ)
Utilice los botones de Navegación π,† 2 para seleccionar una de las
opciones de Configuración (por ejemplo. “Seleccionar Tarjeta” -“Select Card”)
en las dos páginas de opciones disponibles, luego presione
ENTRAR/REPRODUCIR (ENTER/PLAY) 3 para seleccionarla; la opción
quedará resaltada en azul.
Utilice los botones de Navegación π,† 2 para cambiar la configuración de
la opción deseada (por ejemplo elija entre SD/MMC, Internal Flash, etc.), luego
oprima ENTRAR/REPRODUCIR (ENTER/PLAY) 3 para efectuar los cambios.
Para salir oprima Salir (Exit) 1. (NOTA: También puede hacerlo seleccionando
la opción de Salir de la Configuración.)
CONTINUA EN LA PRÓXIMA PAGINA
18
FUNCIONAMIENTO (CONTINÚA)
OPCIONES DE CONFIGURACIÓN
Seleccionar Tarjeta (Select Card): Utilice esta opción de configuración
para seleccionar el origen de sus archivos multimedia. Elija desde Internal
Flash, así como también desde cualquier dispositivo externo insertado. (por
ejemplo SD/MMC).
Modo Fotografía (Photo Mode): Utilice esta opción para seleccionar el
modo en que se mostrarán las fotos. Elija entre Completo (Full) (la foto se
ampliará para mostrarse en la pantalla completa) o Normal (la foto se
mostrará con su tamaño original).
Efecto de Diapositiva (Slide Effect): Utilice esta opción para seleccionar
el efecto de transición entre sus diapositivas. Elija entre Split Out, Split In,
Cut Out, Cut In, Wrap Left, Wrap Right, Wrap Up, Wrap Down o
Aleatoriamente (Se seleccionará aleatoriamente entre los otros modos para
pasar las fotos).
Velocidad de Diapositivas (Slide Speed): Utilice esta opción para
seleccionar la velocidad de sus dispositvas. Elija entre Despacio (Slow),
Normal (Medium) o Rápido (Fast).
Auto Reproducción (Auto Play): Utilice esta opción para que el marco
inicie automáticamente una Presentación de diapositivas luego de
encenderlo. Elija configurar entre Auto Reproducción (Auto Play)
ENCENDIDA (ON) o APAGADA (OFF).
Modo Música (Music Mode): Utilice esta opción para seleccionar un Modo
de reproducción al escuchar archivos MP3 en esta unidad. Elija entre
Repetir Todos (Repeat All) (repetirá todos los archivos desde el origen
multimedia seleccionado de forma continua hasta que salga del Menú de
música), Repetir Una (Repeat One) (repetirá el archivo seleccionado
continuamente hasta que salga del Menú de música) o Repetir Apagado
(Repeat Off) (para la reproduccion de Música Normal).
Música de Fondo (Background Music): Utilice esta opción para que el
marco digital reproduzca música de fondo mientras se visualiza una
Presentación de diapositivas. Elija configurar entre Música de Fondo
ENCENDIDA (ON) o APAGADA o (OFF). El volumen de la música de fondo
puede ajustarse del mismo modo que la reproducción normal de música.
(vea la página 14).
Brillo (Brightness): Utilice esta opción para ajustar el brillo de la pantalla.
Elija entre 00% y 100%.
Modo de Hora (Time Mode): Utilice esta opción para configurar el reloj
interno en 12 o 24 horas. Elija entre 12 y 24 horas.
Idioma (Language): Utilice esta opción para seleccionar el idioma deseado
de los menús. Elija entre inglés (English), español (Spanish) o
francés (French).
19
GUÍA DE RESOLUCIÓN DE PROBLEMAS
Si la unidad presentara cualquier inconveniente, lea el siguiente cuadro
antes de llamar al servicio técnico.
PROBLEMA
POSIBLE CAUSA
POSIBLE SOLUCIÓN
La unidad principal
El adaptador de CA no
Conecte el adaptador de
no enciende.
está conectado.
CA (vea la página 6).
El control remoto no
No tiene pilas/las mismas
Coloque las pilas
enciende.
no están bien colocadas.
correctamente (vea pág. 6).
No hay fotos en el
No hay fotos en Internal
Copie los archivos en el
marco digital.
Flash o en el soporte de
marco digital/inserte el
origen externo.
soporte de origen
externo (vea pags. 8 y 9).
La computadora no
El cable USB no está
Asegure la conexión del
reconoce el marco
firmemente conectado.
cable USB.
digital como un Disco
El marco no está
Encienda el marco con el
Extraíble.
encendido.
interruptor de ENCENDIDO/
APAGADO (POWER)
ubicado en la parte trasera
de la unidad.
20
ESPECIFICACIONES
GENERAL:
Fuente de Alimentación ..... .................... Adaptador de CA,
..................................................................CC de 12V Z
Peso.............................................................................2 Lbs
Tamaño .................................6.9" (H) x 9.9" (W) x 1.75" (D)
El peso y el tamaño son aproximados.
Resolución ............................................................800 x 480
Memoria Interna ........................................................128MB
Altavoz...................................................................2 x 0.6 W
Las especificaciones están sujetas a
cambios sin previo aviso.
PARA ASISTENCIA ADICIONAL SOBRE LA CONFIGURACIÓN O EL
FUNCIONAMIENTO, INGRESE EN
WWW.MEMOREXELECTRONICS.COM
O COMUNÍQUESE CON ATENCIÓN AL CLIENTE 1-800-919-3647.
CONSERVE EL EMBALAJE AL MENOS 90 DÍAS EN CASO QUE
NECESITE DEVOLVER EL PRODUCTO AL LUGAR DE COMPRA O A
MEMOREX.
PARA
OBTENER
PIEZAS
REEMPLAZABLES
POR
EL
CONSUMIDOR, CONSULTE EL NÚMERO DE PIEZA EN LAS
PÁGINAS 4 Y 5 Y LUEGO COMUNÍQUESE CON FOX
INTERNATIONAL AL 1-800-321-6993.
21
Job # MDF8402 manual cover
Colors: 1-color print
FO LD
Pantone 364u
User Guide
Guía del usario
Environmentally Responsible Electronics
8” digital photo frame
www.memorexelectronics.com
MDF8402-LWD
MDF8402-DWD
Memcorp, Inc. Weston, FL
Printed in China
Memorex, the Memorex logo, and "Is it live or is it Memorex?"
are trademarks of the affiliates of Memorex Products, Inc.
Please read these instructions
completely, before operating
this product.
Por favor lea toda las
instruciones antes de tratar
de usar este producto.