1
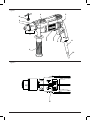
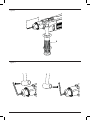
www. .com DWD022 DWD024 English 3 ᇓ໗ 10 16 ไทย 23 Bahasa indonesia 29 Copyright DEWALT 2 Figure 1 4 5 10 9 7 8 3 1 2 11 6 12 Figure 2 4 1 Figure 3 6 Figure 4 2 E NGLISH VARIABLE SPEED REVERSIBLE DRILL DWD022/DWD024 Congratulations! You have chosen a DEWALT tool. Years of experience, thorough product development and innovation make DEWALT one of the most reliable partners for professional power tool users. Technical data Denotes risk of electric shock. DWD022-B1 DWD024-B1 Voltage V 220-240 220-240 Power input W 550 650 min -1 0-2,800 0-2,800 min -1 No load impact Maximum drilling range 0-47,600 0-47,600 masonry/steel/wood mm 13/10/25 16/13/30 1/2"x20 1/2"x20 No load speed Chuck spindle thread size UNF Maximum chuck capacity mm 10 13 kg 1.4 1.6 Weight Fuses: 220-240 V tools 115 V tools CAUTION: Indicates a potentially hazardous situation which, if not avoided, may result in minor or moderate injury . CAUTION: Used without the safety alert symbol indicates a potentially hazardous situation which, if not avoided, may result in property damage . 10 Amperes, mains 13 Amperes, mains Definitions: Safety Guidelines The definitions below describe the level of severity for each signal word. Please read the manual and pay attention to these symbols. DANGER: Indicates an imminently hazardous situation which, if not avoided, will result in death or serious injury . WARNING: Indicates a potentially hazardous situation which, if not avoided, could result in death or serious injury . Denotes risk of fire. WARNING: To reduce the risk of injury, read the instruction manual. General Power Tool Safety Warnings WARNING! Read all safety warnings and instructions Failure to follow the warnings and instructions may result in electric shock, fire and/or serious injury. SAVE ALL WARNINGS AND INSTRUCTIONS FOR FUTURE REFERENCE The term “power tool” in the warnings refers to your mains-operated (corded) power tool or battery-operated (cordless) power tool. 1) WORK AREA SAFETY a) Keep work area clean and well lit. Cluttered or dark areas invite accidents. b) Do not operate power tools in explosive atmospheres, such as in the presence of flammable liquids, gases or dust. Power tools create sparks which may ignite the dust or fumes. c) Keep children and bystanders away while operating a power tool. Distractions can cause you to lose control. 3 E NGL ISH 2) ELECTRICAL SAFETY a) Power tool plugs must match the outlet. Never modify the plug in any way. Do not use any adapter plugs with earthed (grounded) power tools. Unmodified plugs and matching outlets will reduce risk of electric shock. b) Avoid body contact with earthed or grounded surfaces such as pipes, radiators, ranges and refrigerators. There is an increased risk of electric shock if your body is earthed or grounded. c) Do not expose power tools to rain or wet conditions. Water entering a power tool will increase the risk of electric shock. d) Do not abuse the cord. Never use the cord for carrying, pulling or unplugging the power tool. Keep cord away from heat, oil, sharp edges or moving parts. Damaged or entangled cords increase the risk of electric shock. e) When operating a power tool outdoors, use an extension cord suitable for outdoor use. Use of a cord suitable for outdoor use reduces the risk of electric shock. f) If operating a power tool in a damp location is unavoidable, use a residual current device (RCD) protected supply. Use of an RCD reduces the risk of electric shock. 3) PERSONAL SAFETY a) Stay alert, watch what you are doing and use common sense when operating a power tool. Do not use a power tool while you are tired or under the influence of drugs, alcohol or medication. A moment of inattention while operating power tools may result in serious personal injury. b) Use personal protective equipment. Always wear eye protection. Protective equipment such as dust mask, non-skid safety shoes, hard hat, or hearing protection used for appropriate conditions will reduce personal injuries. c) Prevent unintentional starting. Ensure the switch is in the off position before connecting to power source and/or battery pack, picking up or carrying the tool. Carrying power tools with your finger on the switch or energising power tools that have the switch on invites accidents. d) Remove any adjusting key or wrench before turning the power tool on. A wrench or a key left attached to a rotating part of the power tool may result in personal injury. 4 e) f) g) Do not overreach. Keep proper footing and balance at all times. This enables better control of the power tool in unexpected situations. Dress properly. Do not wear loose clothing or jewellery. Keep your hair, clothing and gloves away from moving parts. Loose clothes, jewellery or long hair can be caught in moving parts. If devices are provided for the connection of dust extraction and collection facilities, ensure these are connected and properly used. Use of dust collection can reduce dust-related hazards. 4) POWER TOOL USE AND CARE a) Do not force the power tool. Use the correct power tool for your application. The correct power tool will do the job better and safer at the rate for which it was designed. b) Do not use the power tool if the switch does not turn it on and off. Any power tool that cannot be controlled with the switch is dangerous and must be repaired. c) Disconnect the plug from the power source and/or the battery pack from the power tool before making any adjustments, changing accessories, or storing power tools. Such preventive safety measures reduce the risk of starting the power tool accidentally. d) Store idle power tools out of the reach of children and do not allow persons unfamiliar with the power tool or these instructions to operate the power tool. Power tools are dangerous in the hands of untrained users. e) Maintain power tools. Check for misalignment or binding of moving parts, breakage of parts and any other condition that may affect the power tool’s operation. If damaged, have the power tool repaired before use. Many accidents are caused by poorly maintained power tools. f) Keep cutting tools sharp and clean. Properly maintained cutting tools with sharp cutting edges are less likely to bind and are easier to control. g) Use the power tool, accessories and tool bits etc., in accordance with these instructions taking into account the working conditions and the work to be performed. Use of the power tool for operations different from those intended could result in a hazardous situation. E N G LISH 5) SERVICE a) Have your power tool serviced by a qualified repair person using only identical replacement parts. This will ensure that the safety of the power tool is maintained. Additional Specific Safety Rules for Drills s s s s s s s Wear ear protectors. Exposure to noise can cause hearing loss. Use auxiliary handles supplied with the tool. Loss of control can cause personal injury. Hold power tool by insulated gripping surfaces only, when performing an operation where the cutting accessory may contact hidden wiring or its own cord. Cutting accessory contacting a “live” wire may make exposed metal parts of the power tool “live” and shock the operator. Use clamps or other practical way to secure and support the workpiece to a stable platform. Holding the work by hand or against your body is unstable and may lead to loss of control. Wear safety goggles or other eye protection. Drilling operations cause chips to fly. Flying particles can cause permanent eye damage. Bits and tools get hot during operation. Wear gloves when touching them. Keep handles dry, clean, free from oil and grease. it is recommended to use rubber gloves. This will enable better control of the tool. Residual Risks In spite of the application of the relevant safety regulations and the implementation of safety devices, certain residual risks cannot be avoided. These are: – Impairment of hearing Markings on tool The following pictograms are shown on the tool: Read instruction manual before use. DATE CODE POSITION Date Code, which also includes the year of manufacture, is printed into the housing surface. Example: 2008 XX XX Year of Manufacture Package Contents The package contains: 1 Drill 1 Chuck key 1 Side handle (DWD024, DWD024K) 1 Depth adjustment rod (DWD024, DWD024K) 1 Instruction manual s Check for damage to the tool, parts or accessories which may have occurred during transport. s Take the time to thoroughly read and understand this manual prior to operation. Description (fig. 1) WARNING: Never modify the power tool or any part of it. Damage or personal injury could result. 1. 2. 3. 4. 5. 6. 7. 8. 9. 10. Variable speed switch Lock on button Forward/reverse lever Mode selector Ventilation slots Side handle Depth adjustment rod Keyed chuck Sleeve Chuck key – Risk of personal injury due flying particles. – Risk of burns due to accessories becoming hot during operation. – Risk of personal injury due to prolonged use. INTENDED USE These heavy-duty V.S.R. drills are designed for professional drilling. DO NOT use under wet conditions or in presence of flammable liquids or gases. These heavy-duty drills are professional power tools. DO NOT let children come into contact with the tool. Supervision is required when inexperienced operators use this tool. 5 E NGL ISH Electrical Safety ASSEMBLY AND ADJUSTMENTS The electric motor has been designed for one voltage only. Always check that the power supply corresponds to the voltage on the rating plate. Selecting the operating mode (fig. 2) The tool can be used in two operating modes: Your DEWALT power tool is double insulated in accordance with EN 60745; therefore no earth wire is required. If the supply cord is damaged, it must be replaced by a specially prepared cord available through the DEWALT service organization. WARNING: NEVER use a light socket. NEVER connect the live (L) or neutral (N) wires to the earth . pin marked E or Percussion drilling: simultaneous rotating and impacting for concrete and masonry drilling operations. s Select the required operating mode by rotating the mode selector (4) to the required position. Using an Extension Cable An extension cord should not be used unless absolutely necessary. Use an approved extension cable suitable for the power input of your charger (see technical data). The minimum conductor size is 1 mm2; the maximum length is 30 m. Also refer to the table below. Conductor size (mm2) 0.75 1.00 1.50 2.50 4.00 Rotary drilling: for steel, wood and plastics. Cable rating (Amperes) 6 10 15 20 25 Keyed chuck s Open the chuck by turning the sleeve (9) counterclockwise and insert the bit shank. s Put the chuck key (10) into each hole in the side of the chuck and turn clockwise until tight. s To remove the bit, proceed in reverse order. Fitting the side handle (fig. 1) The side handle (6) can be fitted to suit both RH- and LH-users. Always use the drill with the side handle properly assembled. Cable length (m) 7.5 Voltage Amperes 220-240 0 – 2.0 2.1 – 3.4 3.5 – 5.0 5.1 – 7.0 7.1 – 12.0 12.1 – 20.0 115 0 – 2.0 2.1 – 3.4 3.5 – 5.0 5.1 – 7.0 7.1 – 12.0 12.1 – 20.0 15 25 30 45 60 Cable rating (Amperes) 6 6 6 6 6 6 6 6 6 6 6 6 6 6 10 10 10 10 10 15 15 15 15 15 20 20 20 20 20 25 6 6 6 6 6 6 6 6 6 15 6 6 10 15 20 10 10 15 20 20 15 15 20 25 25 20 20 25 – – 6 6 15 15 20 – 10 15 20 25 – – When using a cable reel, always unwind the cable completely. 6 s Loosen the side handle. s For RH-users, slide the side handle clamp over the collar behind the chuck, handle at the left. s For LH-users, slide the side handle clamp over the colar behind the chuck, handle at the right. s Rotate the side handle to the desired position and tighten the handle. Setting the drilling depth (fig. 3) s Insert the required drill bit into the chuck. s Slacken the side handle (6). s Fit the depth adjustment rod (7) through the hole in the side handle clamp. s Adjust the drilling depth as shown. s Tighten the side handle. E N G LISH Percussion drilling (fig. 1) s Select the percussion mode. s Press the switch (1). Rotary drilling (fig. 1) s Select the rotary drilling mode. s Proceed as described for percussion drilling. Consult your dealer for further information on the appropriate accessories. WARNING: To reduce the risk of injury, turn unit off and disconnect machine from power source before installing and removing accessories, before adjusting or changing set-ups or when making repairs. Be sure the trigger switch is in the OFF position. An accidental start-up can cause injury. OPERATION Instructions for Use WARNING: Always observe the safety instructions and applicable regulations. Switches (fig. 1) Drilling WARNING: To reduce the risk of personal injury, ALWAYS ensure workpiece is anchored or clamped firmly. If drilling thin material, use a wood “back-up” block to prevent damage to the material. 1. Use sharp drill bits only. For WOOD, use twist drill bits, spade bits, power auger bits, or hole saws. For METAL, use steel twist drill bits or hole saws. 2. Always apply pressure in a straight line with the bit. Use enough pressure to keep drill biting, but do not push hard enough to stall the motor or deflect the bit. 3. Hold tool firmly with both hands to control the twisting action of the drill. 4. IF DRILL STALLS, it is usually because it is being overloaded or improperly used. RELEASE TRIGGER IMMEDIATELY, remove drill bit from work, and determine cause of stalling. DO NOT CLICK TRIGGER ON AND OFF IN AN ATTEMPT TO START A STALLED DRILL — THIS CAN DAMAGE THE DRILL. To start the drill, depress the trigger switch; to stop the drill, release the trigger. 5. To minimize stalling or breaking through the material, reduce pressure on drill and ease the bit through the last fractional part of the hole. A variable speed trigger switch (1) permits speed control—the farther the trigger is depressed, the higher the speed of the drill. 6. Keep the motor running when pulling the bit back out of a drilled hole. This will help prevent jamming. For continuous operation, press and hold the variable speed switch, press the lock-on button (2), then release the switch. 7. With variable speed drills there is no need to center punch the point to be drilled. Use a slow speed to start the hole and accelerate by squeezing the trigger harder when the hole is deep enough to drill without the bit skipping out. NOTE: Use lower speeds for starting holes without a center punch, drilling in metal or plastics, or drilling ceramics. Higher speeds are better for drilling wood and composition boards and using abrasive and polishing accessories. The forward/reverse lever (3) is used for with drawing bits from tight holes. It is located above the trigger switch. To reverse the motor, release the trigger switch FIRST and then push the lever to the right. After any reversing operations, return lever to forward position. To stop continuous operation, press the switch briefly and release it. Always switch the tool off when work is finished and before unplugging. DRILLING IN METAL Start drilling with slow speed and increase to full power while applying firm pressure on the tool. A smooth even flow of metal chips indicates the proper drilling rate. Use a cutting lubricant when drilling metals. The exceptions are cast iron and brass which should be drilled dry. NOTE: Large [5/16" (8 mm)] holes in steel can be made easier if a pilot hole [5/32" (4 mm)] is drilled first. 7 E NGL ISH DRILLING IN WOOD Start drilling with slow speed and increase to full power while applying firm pressure on the tool. Holes in wood can be made with the same twist drills used for metal. These bits may overheat unless pulled out frequently to clear chips from the flutes. Work that is apt to splinter should be backed up with a block of wood. Motor Brushes DEWALT uses an advanced brush system which automatically stops the drill when the brushes wear out. This prevents serious damage to the motor. New brush assemblies are available at authorized DEWALT service centers. Always use identical replacement parts. Keyed Chuck (fig. 4) The DWD022/DWD022K/DWD024/DWD024K features a keyed chuck (9). To insert a drill bit or other accessory, follow the steps listed below. Lubrication 1. Open the chuck jaws by turning collar by hand and insert the shank of the bit about 3/4" (19 mm) into chuck. Tighten the chuck collar by hand. Your power tool requires no additional lubrication. 2. Place chuck key in each of the three holes, and tighten in clockwise direction. It’s important to tighten chuck with all three holes. Cleaning To release the bit, turn the chuck counterclockwise in just one hole, then loosen the chuck by hand. REMOVAL OF KEYED CHUCK (FIG. 4) Tighten the chuck around the shorter end of a hex key (not supplied) of 1/4" (6 mm) or greater size. Using a soft hammer, strike the key sharply in the counterclockwise direction when viewed from the front of the tool. This will loosen the chuck so that it can be removed by hand. KEYED CHUCK INSTALLATION (FIG. 4) Screw the chuck on by hand as far as it will go. Insert the shorter end of a hex key (not supplied) of 1/4" (6 mm) or greater size and strike it in the clockwise direction with a soft hammer. MAINTENANCE Your DEWALT power tool has been designed to operate over a long period of time with a minimum of maintenance. Continuous satisfactory operation depends upon proper tool care and regular cleaning. WARNING: To reduce the risk of injury, turn unit off and disconnect machine from power source before installing and removing accessories, before adjusting or changing set-ups or when making repairs. Be sure the trigger switch is in the OFF position. An accidental start-up can cause injury. 8 WARNING: Blow dirt and dust out of the main housing with dry air as often as dirt is seen collecting in and around the air vents. Wear approved eye protection and approved dust mask when performing this procedure. WARNING: Never use solvents or other harsh chemicals for cleaning the non-metallic parts of the tool. These chemicals may weaken the materials used in these parts. Use a cloth dampened only with water and mild soap. Never let any liquid get inside the tool; never immerse any part of the tool into a liquid. Optional Accessories WARNING: Since accessories, other than those offered by DEWALT, have not been tested with this product, use of such accessories with this tool could be hazardous. To reduce the risk of injury, only DEWALT, recommended accessories should be used with this product. Consult your dealer for further information on the appropriate accessories. CAUTION: To reduce the risk of injury, the following accessories should be used only in sizes up to the maximums shown in the table below. E N G LISH MAXIMUM RECOMMENDED CAPACITIES (DWD022, DWD022K) Drill capacity Bits, metal drilling Bits, masonry drilling Wood, flat boring Hole saws 10 mm 10 mm 13 mm 25.4 mm 28.4 mm MAXIMU RECOMMENDED CAPACITIES (DWD024, DWD024K) Drill capacity Bits, metal drilling Bits, masonry drilling Wood, flat boring Hole saws 13 mm 13 mm 16 mm 30 mm 30 mm 9 ᇗ א ྠѕූᆦٙሏא DWD022/DWD024 ለޗ ၠ࿒ᄼਜ֬܅खhࣁ֭ࣤ୕اယތᄥӉ िهიԿྕ٢֭Ҋ୵ؖ৷ĭ֬ၠࣤӶແ ል၄܅אखႰ߄֭ቓफ़॔ࠌϼᆵ၊h ሇၱĻў൝శᄥ຺֭ཊ౮ྡĭೊҊࡎ ၣቍᇀĭफ़େ֥ᇉ౦؏ࠏᇗ؏ഌݥh ሇၱĻĩҊփυಎࣦ൝ћᇅĪĻў൝ శᄥ຺֭ཊ౮ྡĭೊҊࡎၣቍᇀĭफ़ େ֥ᇉҕӉ෭ߒh ў൝Ⴝ຺אཊh ࠷ඔගऔ ў൝ࠍᄡ຺ཊh DWD022-A9 DWD024-A9 א ඃ܇ ڡำ ४ᄣූ؏ ሏٻ ՙٻ ຘำ ४ᄣԒࠔ 220 550 0-2,800 220 650 0-2,800 0-47,600 0-47,600 ހ 13/10/25 1/2"x20 10 16/13/30 1/2"x20 13 బॠ 1.4 1.6 ࠉ୨ۙғ ғᇗቓվയ ࡋᇨઌໝԌղ ࡋቓվೀਐ ހ <5- ᇟਐ Ѯྤถķ 220-240 ܅ڡख 115 ܅ڡख אჿ 10 υன אჿ 13 υன ׯၴĻυಎሡᄽ ༷ਡׯၴࢻ൬ਜۺћᇅඔნ֭ကᇟӹ؏hስ ༭ᄏ؈Я൵Ұѱሇၱᆋོћᇅh ຺ཊĻў൝຺֭࣍ࠬཊ౮ྡĭೊҊࡎ ၣቍᇀĭࢄ֥ᇉලຯࠏကᇟഌݥh ࣦ۩Ļў൝శᄥ຺֭ཊ౮ྡĭೊҊࡎ ၣቍᇀĭफ़େ֥ᇉලຯࠏကᇟഌݥh ࣦ۩Ļແࢎֶഌڌݥཊĭᄏ؈൘Ⴐ ൵Ұh ၊϶υಎ݇ᄽ ࣦ۩Ģᄏ؈ૈႽχᅾၣ༷ਡऐ֭ ؿ൘ႰࠏҨቜࢄ֥ᇉאgሪࠍ ࠏތကᇟഌݥhᄥႽၣ༷ਡऐࣦ֭ ۩ᇗඔნu܅אखv൦ᆿאಂĩႽ པĪ܅אखࠏאԅಂĩཔĪא ܅खh Дձᆋོ H܅ቜӎׁ Дԃ܅ቜӎׁ౪ࢹތhࠉઁޙތψ ֭ӎׁ߾ႌهൡܫh Ҋ္ᄥၦНߔ࣪ĭೊႽၦಟ၉เgటเ ࠏڀӫ֭ߔ༷࣪Ҩቜ܅אखh܅א खӉ഻֭ࠍ߅߾ಟڀӫࠏటเh ದـތܼᆈिҨቂ܅אखh ߾ྗٻ൘٪ෆ७ᇍh Iאటυಎ ܅אखҴщ྾იҴཕhҊେၣ ಱލ٢൜ۇሕҴhྻࢬׁ֭܅אख Ҋେ൘ႰಱލሏߘҴh໋ࣤۇሕ֭Ҵ ތཕ֭Ҵࢄࡰച຺אཊh 10 ᇗ э૯ಮเࢬࢬׁўĭೊܽ֩gೣಫ ތѪཙhೊݜമเࢬׁ߾ᅁࡎא ຺ཊh Ҋ֬ࢄ܅אखКᄥთᇗࠏӞߔ࣪ ᇗhණ࣑܅אखࢄᅁࡎ຺אཊh Ҋ֬ষႰאཔhयҊେႰאཔϴᄖgঠ ܅אखࠏϡԣఋҴhದ܅אखᄁ ಫgႺgѐࠏᄖҎࡹhൻ෭ࠏӇ֭ אཔ߾ᅁࡎ຺אཊh ֚ᄥ߄ປ൘Ⴐ܅אखĭ൘Ⴐ൩߄ގປ ൘Ⴐ֭ປࢬאཔh൩߄ގປ൘Ⴐ֭אཔࢄ ࡰച຺אཊh Jಮമυಎ Дԃࣦबĭ֚Ҩቜ܅אखܹሇ՞ ൡ֭ҨቜѱДԃ౪ྤhౕ༇ᄥႽொढg း༆gࣽࠏᇕਗٙ႓༷Ҩቜ܅אखh ᄥҨቜ܅אखఁ৷ٻೣ߾֥ᇉက ᇟಮമഌݥh ൘Ⴐυಎሕᇊh൛ᇜᄣ߁ପ࣬hυಎ ሕᇊĭᇵೊ൩֚๐ࡹ༷֭٥ӫखg٥ ߉υಎཿgυಎાg๘৷٥߁ֱሕᇊେ ࡰചಮമഌݥh э૯ಞగhಚДिܹᄥҴҴ ԱჇܹؖ໒ᇊh൵ᆿ٪ᄥၠࢬאჿ֭ िܹഐࠏिܹԱჇࢬҴफ़େ߾ ֥ᇉ຺ཊh ᄥ܅אखࢬᆵవĭମםႽࢳנᄊ Ԅࠏϵ൵hၔᄥ܅אख࿐ሏࡹഐ ֭ϵ൵ࠏᄊԄ߾֥ᇉಮമഌݥh ൵Ҋ္ഭ֬ฆӑhॡሇၱ༷࢞ތമเ ޡhᆋဪᄥၱປ౮ঋ༷େׁނޛ७ᇍ ܅אखh ሪሕ൩֚hҊ္Դংෆၑࠏڣமփ൭ hದ֭هgၑྷތڣሸᄁᄖ Ҏࡹhংෆၑڣgம൭ࠏӑهफ़େ߾त ᄖҎࡹh ೊݜ܊ਜიஎྏሕᇊgࠪӫഩЩ৽ࢬ Ⴐ֭ሕᇊĭᄽಚД৽ࢬຣނ൘Ⴐ ֚֬h൘Ⴐᆋོሕᇊफ़ࡰച෦ྏႌగ֭ ຺ཊh K܅אख൘Ⴐތሇၱൡལ Ҋ္ষႰ܅אखĭۼऔႰ൘Ⴐ൩֚ ֭܅אखh࿒Ⴐ൩֚֭ഩࡁصᆼ֭א ܅ख߾൘܅ቜႽེgۿυಎh ೊݜिܹҊେࢬࠏܹ܅ؖखאჿĭ ᄽҊେ൘Ⴐ܅אۆखhҊେႰिܹ ধ७ᇍ֭܅אख൦຺ཊ֭щ྾࣑ ྣྱৠh ᄥ࣑ྣಱࢳנލgࠏࡹۀߘۿሃձא ܅खᆵవĭщ྾՞אჿഐϡםҴތİ ࠏࢄאԅޏຊिאჿhᆋᇝ٥߁ྦྷնൈ ࢄࡰച܅אखಞగ຺֭ཊh ࢄཅᇊ܅אखሃձᄥـࠫٛᆵ ປĭѱҊ္ದҊඋ༙܅אखࠏ؛ᆋ ོҊਜࢻ֭ಮҨቜ܅אखhא ܅खᄥ໋ࣤਈ֭Ⴐ߄൵ᇗ൦຺ཊ֭h Дဩ܅אखhࡧҸᄖҎࡹ֭υሕ ҽࠏऽሆgࡹ௭෭౮ঋތႝཡ܅א खᄖྣ֭ఋ๐ࡹhೊႽ෭ߒĭ܅א खщ྾ᄥ൘Ⴐవྱઠނh࿀اൡܫႶໃ ߁Ҋ֭܅אखႌهh Дԃౕཬ֟खڋ৮ތ౪ࢹhДဩ֭ނ Ⴝڋ৮ౕཬಳ֭֟खҊၦऽሆؿೀၦ ७ᇍh χᅾ൘Ⴐඈၣࠫս൘Ⴐ֭܅א ख֭ำඁྠ္౸֭٢൜ĭ॑੶ቜ၄๐ ࡹ֭ྣ࣑ތቜ၄ধ൘Ⴐ܅אखgࡹۀ ܅ތखֱ֭֟h܅אखႰቜଲོი ္౸Ҋ֭ڠҨቜफ़େ߾֥ᇉ຺ཊ౮ঋh Lໃྱ ࢄ֭܅אख්ል၄ໃྱಮჼĭщ ྾൘Ⴐဪ֭Щࡹ࣑ྣߘۿhᆋဪಚД ໃྱ֭܅אख֭υಎྦྷh 11 ᇗ אࡎۀυಎ༭ᄽ • ൘ႰԒࠔא္ւفނᅿ Кᄥᄶഺ ᇗ߾ႌగ๘৷෭ഌh Џሕೀ ЯЏሕݫႽĻ • ൘Ⴐ܅खګ֭܊ሁ൵ѫhҨቜെ൵߾ ႌగ๘৷෭ഌh א ฃ • खफ़େࢬႍҧ֭אཔࠏ܅खЯമ֭אჿ པĭ࣏࣏ሆयᄀ൵ѫўhखೊݜ ࢬ֦uփאv֥པĭ܅אखࣉඓҎࡹў ऄ߾uփאvѱ൘Ҩቜಮჼאh ګሁ൵ѫ۹ĩ+>+ • ൘ႰࡋखࠏҘ಄ఋफ़ྣ֭٢ٍĭࢄܭࡹ܅ ׯgᆮӲ֦ໟ֭ׯฃഐh൵ԃࠏႰമเ ሆࡹ܅൦Ҋໟ֭ׯĭ߾֥ᇉҨቜെ७ h • மւυಎ߁ପ࣬ࠏఋ߁ପሕЩh६ ߾֥ᇉٮೣ֭෦hٮဠ֭ग़৴߾ᄷӶဌ ࣝႭࣺྦྷഌݥh • ܅ތख߾ᄥ൘Ⴐݞӹᇗهಫhࢬ மւ൵าh ࡋᄊԄ ᆮ യ؏ێࢳנᆮĩ+>+ ൘Ⴐ൵Ұ Я • ࡧҸ܅खgҎࡹࠏࡹ൦ږᄥᄖඃݞӹ ᇗ෭ߒh • ൘ႰవĭԖ४Ӧ׀ᄏ؈ѱᅯЯ൵Ұ ೀh ĩ Ī ࣦ۩Ļౕ༇ྱۇЯ܅אखࠏఋಱލ Ҏࡹhږᄽĭफ़େᄷӶಮമഌ܅ࠏݥ ख෭ߒh • Дԃ൵ѫیᄺg౪ࢹĭႺࠏႺᆳhࢁ ၸ൘Ⴐཥ൵าhᆋဪେܜۢ܅ख֭Ҩ ७ྦྷh ҟჍڌཊ ࣘܽቖ൷ཕܹυಎ݇ᅫѱҘႰυಎሕЩĭ၊ོ ҟჍڌཊ൦Ҋफ़э૯֭ĭ൦Ļ – ๘৷෭ഌ – ٮೣग़৴֭ಮമഌڌݥཊh – ൘Ⴐࡹهಫ֥ᇉ֭ራഌڌཊh – ӑ൘Ⴐ֥ᇉ֭ಮമഌڌݥཊh ܅खഐ֭ћൕ Я܅खഐႽ༷ਡྡĻ ൘Ⴐవᄏ؈൘Ⴐ൵Ұh ූנिܹ 2. ׯχ୮ 3. ᆦ ٙሏѵێ 8. ࡋ 11. אཔ߁า 12. אჿཔ ჯఁႰ Яᇟᄣgफ़ѕූgᆦٙሏא൦ແል၄६ഩ ࡁ֭h ࣔᇀᄥӞࠏձᄥၦಟ၉เgటเ֭ߔ࣪ᇗ൘ ႰЯ܅खh Яᇟᄣא൦ል၄ྠ܅אखh ࣔᇀದـࢬЯ܅खh൘Ⴐࣤယ֭ಮщ྾ ᄥ࡛༷൘Ⴐh ಸఁચ֭໒ᇊ Џݫᇍᄷ୕֭ڂಸఁચႎᄥ܅खປड़ഐh ৰೊĻ 2008 XX XX ᇍᄷ୕ڂ 12 1. ᇗ אటυಎྦྷ אજպ࣏ഩࡁແ၊ᇝאh༈щࡧҸאჿ א൦ږიଇஏ၊ᇉh ֭֬܅אख၏औ ,5 ࣑ྣ ඨᇟयᄀĭႁՖ྾ࢬׁཔh s s (9) (10) s ( A) ೊאݜჿཔ෭ߒĭщ྾ҘႰ֬ໃྱࠗܚ܊ ֭ልႰཔh ࣦ۩Ļࣔᇀ൘ႰᅾאჿҴh ࣔᇀ ࢄࠍཔ (L) ࠏཔ (N) ࢬ֦ћ ᇅແ E ࠏ ֭ࢬׁࠦഐh ငӑཔ֭൘Ⴐ Ԫ٬य؛щ္ĭږᄽ༇൘Ⴐငӑཔh൘Ⴐ ი܅खඃ܇ĩࡶ࠷ඔගऔĪௌ֭gࣤ ݞಲᆫ֭ငӑཔļቓུ֥เԌղແ TT ĭቓ վӑ؏ແ h ֥เԌղ (mm 2) པћӳᆼĩυனĪ 0.75 1.00 1.50 2.50 4.00 ( C) 6 10 15 20 25 s s s s s པӑ؏ĩĪ 7.5 220-240 115 υன 0 – 2.0 2.1 – 3.4 3.5 – 5.0 5.1 – 7.0 7.1 – 12.0 12.1 – 20.0 0 – 2.0 2.1 – 3.4 3.5 – 5.0 5.1 – 7.0 7.1 – 12.0 12.1 – 20.0 s s Ֆປĭߖफ़ҝ༷॑ўĻ א s s 15 25 30 45 60 6 6 10 15 20 25 6 15 20 20 25 – 6 6 15 15 20 – 10 15 20 25 – – པћӳᆼĩυனĪ 6 6 6 10 15 20 6 6 6 10 15 20 6 6 6 10 15 20 6 6 6 10 15 20 6 6 6 10 15 20 6 6 10 15 20 25 6 6 6 10 15 20 6 6 15 20 25 – (6) (7) ( B) s (4) ൘Ⴐאतĭ൛ᇜДԃאຣಎᅢिh 13 ᇗ ( s s A) (1) ( A) s s ࣦ۩Ļແࢎֶಮമഌڌݥཊĭ൛ᇜু ܭષࡹ܅࣍ࡋࠏׯhೊݜᄥࢨВғਠഐ ६ĭ൘Ⴐuϸv٥ᇀ෭ߒғਠh 1. ౕࡂ൘Ⴐڋ৮֭hғĭ႓൘Ⴐઘ ߅gѓgࠗྈઌ࿐ࠏ६ङh ࣉඓĭ൘Ⴐۙઘ߅ࠏ६ङh ሕიנᆤ ࣦ۩Ļແࢎֶಮമഌڌ֭ݥཊĭᄥҿg ሕࡹࠏנᆤgྱৠ܅खᆵవĭܹц ܅खѱϡ༷܅खҴhಚДهिܹ ԱჇ 6-- ໒ᇊhၱປఛೀၦᄷӶಮ മഌݥh Ҩቜ ൘Ⴐ ࣦ۩Ļ൛ᇜቖ൷υಎ൷ᄽၣࠫ൩Ⴐ݇ ᄽ္֭౸h िܹĩ cĦ ္ఛאĭχ༷هिܹफ़ļ္൘א ᇀĭෆििܹफ़h ූנिܹ H फ़ၣ७ᇍූ؏oχ༷ᄈاĭא ֭ූ؏ᄈঁh ္൘܅ख৽࿋ᄖྣĭχ༷ѕූिܹҊ္ෆिĭ ĭཧ༷χׯχ୮ Iĭಞෆििܹh ሇၱĻᄥࣉඓgෙਠഐ६ĭࠏะՔĭ Ҋ൘ႰᇗྗԒĭᄥि൛ࢰؕ൘Ⴐࢨֶ֭ූ؏ ६hᄥғࠏގڷϸഐ६ĭࠏ൘Ⴐခଐ ݃ࡹĭۢූེ֭ނࢨݜh ᆦٙሏѵ ێJ ႰჇ՞࣍૩֭६ᇗຄԣh ఋ໒ᇊᄥهिܹ֭ഐ٢h္൘જպٙሏĭ ൶༽ෆिهिܹĭಞႿѵێh ٙሏҨቜຣрĭࢄѵ֦ڷ߳ێᆦሏ໒ᇊh ္ᇀ৽࿋ᄖྣሙงĭؓᄨχ༷ѱෆििܹh ᄥ܅ቜຣрgϡ༷܅खҴᆵవĭ༈щܹц ܅खिܹh 14 ६ 2. Ⴐ৷٢ཧ൛ᇜიӶ၊ᆸཔhൈࡎቈܜ վ֭৷ĭДᆫ࣑ྻĭ֔Ҋ္վ֦જպ െූࠏ౨྄h 3. ඨ൵࣍אĭ७ᇍא֭୭ሏེ႓h 4. ೊאݜെූĭӐӐ൦ႶჇݞᄣࠏ൘ႰҊ ֚h৳ෆिهिܹĭ՞ࡹ܅ഐຄԣ ĭҸᅻെූ֭ჸႁhౕ༇൳ݞχ༷g ෆिهिܹধఛെූ֭אoᆋ߾෭ߒ אh 5. ແࣘਐࡰചെූܫᅸࠏэ૯ᄥғਠᇗᆄ ؖĭࢎֶא؛֭৷ĭ൘՞६֭ቓ Ҏٻᇗߗ༷ތধh 6. ՞Ӷ६ᇗঠԣĭДԃજպᄖሏhᆋ ႽሁჇ٥ᇀऽලh 7. ൘Ⴐѕූאĭ྾ᇗྗԒׯ໒hఛ ҘႰࢨֶූ؏ĭ֚യቈၣ٥ᇀ๓ĭࡎ ৷࠲هिܹĭ൘אࡎූh ᄥࣉඓғਠഐ६ ि൛६ĭҘႰࢨֶූ؏ļ܅؛खׯႰ৷ ĭᅁᇈಎ܇hೊࣉݜඓྏ߉gरᄓׁ ੈԣĭᄽ ў ६ූ؏ ൩֚ hᄥࣉඓ ഐ६ ĭ൘Ⴐౕཬೖ߉࠼h֔ሄ๕ߣތғਠৰ ປĭ႓یh ሇၱĻᄥۙғഐվ६ ĩ8 ހĪ ĭ ೊݜ൶༽༽֥६ ĩ4 ހĪ ĭᄽйࢨ ೀၦ ࣑ྣh ᄥғഐ६ ि൛६ĭҘႰࢨֶූ؏ļ܅؛खׯႰ৷ ĭᅁᇈಎ܇hғ६फ़ၣ൘Ⴐۙތғ ६၊ဪ֭ઘ߅hᆋོ߾ݞಫĭԪ٬ Ҋؖϡԣধ౪ৠྏhၦ෦ਢғਠ႓ ഐॾh ᇗ փԄࡋĩ 3ǃ4Ī DWD022/DWD024 אҘႰփԄࡋ (d)h ္υሕࠏఋࡹĭχ༷ਡҌᇯ࣑ྣh 1. Ⴐ൵ሏᇨߔĭսिࡋఴ९hಞҴ ᄇ 3/4”ĩ19 ހĪhႰ൵࣍ࡋܭ ᇨߔh 2. ࢄࡋᄊԄ၏ՙҴೠ۹६ᇗĭධᆔ ࣍ܭhݞႽೠ۹६࣍ࡋܭĭᆋ၊ ്ٻᇟ္h ္ෆिĭ࣏ᄥ၊۹६ᇗᆔ࿐ሏࡋ फ़ĭಞႰ൵ෆिࡋh փԄࡋ֭ҿྉĩ3Ī Ϥ 1/4”ĩ6 ހĪࠏۿվԌղࢠࡷĩ໋ ܊Ī֭ؓؒ࣍ࡋ֦ܭh൘ႰՃĭᄥ܅ख వ൲֭ᆔ٢ཧĭႰ৷ࠔսࡷѫhᆋ߾ෆ िࡋĭफ़ၣႰ൵಄༷h փԄࡋ֭υሕĩ4Ī Ⴐ൵ࢄࡋࣘफ़େ࿐hϤ 1/4”ĩ6 ހĪࠏ ۿվԌղࢠࡷĩ໋܊Ī֭ؓؒ࣍ࡋ֦ܭ h൘ႰՃӜධᆔ٢ཧĭႰ৷ࠔսࡷѫh ໃ߁ ֭֬܅אखഩࡁĭफ़ၣӑఁ൘Ⴐĭ ࣏ྻࠦചໃ߁h္৽࿋ࠎ֬ਿಮၱ֭܅ቜེ ݜĭྻ္ቛގ൩֭Дဩׯތఁ֭౪ࢹh ࣦ۩Ļແࢎֶಮമഌڌ֭ݥཊĭᄥҿg ሕࡹࠏנᆤgྱৠ܅खᆵవĭܹц ܅खѱϡ༷܅खҴhಚДهिܹ ԱჇ OFF ໒ᇊhၱປఛೀၦᄷӶಮ മഌݥh જպאඟ ֬ҘႰ༽࣑֭אඟ༪ĭ֚אඟଐ෭ĭେ ܜሹܹц܅खhᆋफ़ၣ٥ᇀကᇟ෭ߒજպh ᄥ֬൹ ಋ֭ ໃྱᇗྗ ĭफ़ ၣא ྕ܊ඟ ࡹh༈щ൘Ⴐཕ֭Щࡹh ೖ߉ Я܅אख྾ਾྣೖ߉h ౪ࢹ ࣦ۩Ļ၊֒ڌ९ࠫఋᇣࠚऒफ़ࡶ֭ ڀӫĭႰیᄺ֭ෲ४టՀቄᇾࠗ ປड़֭ڀӫ߯ތӫh࣑ྣᆋ၊Ҍᇯ ĭமւࣤಲफ़֭߁ପሕЩތಲफ़֭ ᅿh ࣦ۩Ļౕ༇൘Ⴐಿ࠼ࠏఋࠟྦྷߌ࿘ ধ౪ࢹ܅ख֭٬ࣉඓҎࡹhᆋོߌ࿘ फ़େཬࡹᇗ൘Ⴐ֭ғਠhᇂେ൘ Ⴐଓҋᅣᇗྦྷٯᄸණ࣑ྣ౪ࢹh༇൘ಱ ލ၉เ࣑܅खļ༇൘܅ख֭ಱލҎٻ ࣗ၉เᇗh ࡹ֭࿒ᄼ ࣦ۩ĻႶჇ٬֬ࡹ໋ࣤЯӉௌ ұ൳ĭЯ܅ख൘ႰՖࡹĭࢄձᄥ ႍߙhແࢎֶಮമഌڌݥཊĭЯӉ࣏ फ़൘Ⴐ֬ࡱ֭ࡹh ཧൺሮގ൩ࡹ֭اۿ༗h ແࢎֶಮമഌڌݥཊĭ༷ਡࡹ ሇ ၱĻ ֭൘ႰҊәݞўᇗ൝֭ቓվԌղĻ ቓվྦྷେࢁၸ (DWD022, DWD022K) ࡋԌղ ሏٻᇚ ४ᄣԒࠔ ණୋ ࣉඓ६ ғ ६ङ 13 ހ 0-2,800 0-47,600 16 ހ 13 ހ 25.4 ހ 28.4 ހ ቓվྦྷେࢁၸ (DWD024, DWD024K) ࡋԌղ ሏٻᇚ ४ᄣԒࠔ ණୋ ࣉඓ६ ғ ६ङ 13 ހ 0-2,800 0-47,600 16 ހ 13 ހ 25.4 ހ 28.4 ހ ᇍᄷĻϬ֬ĩිᇤĪज़࠷Ⴝན܌ර ׁᆾĻිᇤ܅၄჻౽ 15 DWD022/DWD024 16 DWD022-KR DWD024-KR 220 220 550 650 0-2,800 0-2,800 0-47,600 0-47,600 13/10/25 16/13/30 1/2"x20 1/2"x20 10 13 1.4 1.6 17 18 ፂ႖ང൛ ༺ኍඛႁဉዯೡ༺ኋຫဧ ᆚગང൛ ᇮሙ൘ቼವ௴ดૐႮፂ႖ང ᆚગང൛ၵ࿕ၕགྷჰጌጁఁఋ ҟක໓ሳૺˁዶဠዽ၁ᆳ ዶဠዽၵක໓ሳໞဠ ҟ༽൘๐ˀ!ˁགྷઢ෮ጎఝ௴෮ጎၒച ၼၦધ൛ஃၕິၮዻໞဠ ҟၼၦሠˀˁᆬඓၡੜጰધ ൏ᄠ෮ጎၒചୁႮၮఁఋ ҟ൛ஃၕ႞ዻඓఝၡ༚ചዻඓఁఋ ຫၦጆ౹ˀˁၡႮ൝ၔယၼၦ൏ ၼၦකႮႜਜ਼ጁఁఋ ጃືຫၦጆ౹ၕႜጸዻႮ൝ፎ ൛ၕຫဧዻໞဠ ҟຫၦጆ౹ၕዚ࿌ვఁఋ ҟ൏ၼၦધ੮ၔຫၦጆ౹ၕၼၦ ౪ၡଠ༊ෘ࿌ယᄠၒചၼၒໞဠ ҟယၼၦધ੮ၔຫၦጆ౹ၕၼၦ ౪ၡଠ༊ෘ࿌൏ᄠၒചၼၒໞဠ ҟຫၦጆ౹ၕဴዻ௴၁ᆳୁ Ⴎၮఁఋ ҟဠૐ൬௴൛ஃၕၼၦິၮጁఁఋ ҟຫၦጆ౹ˀˁၕዚ࿌ვఁఋ ҟຫၦጆ౹ଠ༊ၡጰଅၦႮ႗ฦၕ Ⴎႜጁఁఋ ҟ൛ଅၦ૯൜੪ၦႮႜጁఁఋ ҟຫၦጆ౹ၕႮၮఁఋ ҟᆚગක໓ሳጁఁఋ ҟ༺၁ᆳˀˁఁఋ 19 20 21 (DWD022, DWD022K) 10 mm 10 mm 13 mm 25.4 mm 28.4 mm (DWD024, DWD024K) 13 mm 13 mm 16 mm 30 mm 30 mm 22 DWD022/DWD024 ! DEWALT DEWALT DWD022-B1 DWD024-B1 220-240 550 0-2,800 220-240 650 0-2,800 0-47,600 13/10/25 0-47,600 16/13/30 1/2"x20 1/2"x20 10 13 1.4 1.6 -1 -1 UNF : 220-240 10 115 13 / 23 / ) / 24 2008 XX XX ใสเครือ ่ งปองกันหู การสัมผัสกับเสียงสามารถทําใหห หนวกได ู ใชต วช ั วยมือถือที่ใหมากับเครื่องมือ การควบคุมไมได สามารถกอใหเกิดการบาดเจ็บตอบุคคลได การปรับเปลี่ยนความลึกของไม้ 1 V.S.R. : – – – – DEWALT EN 60745 25 DEWALT (L) (N) E ตัวจับดอกสว่าน คลายหัวจับดอกสว่านโดยการหมุนปลอกหัวจับ (9) ตามเข็มนาฬิกา และเสียบก้านสว่านเข้าไป ใส่จำปาขันหัวสว่าน (10) เข้าไปในแต่ละรูที่อยู่ด้านข้าง ของตัวจับดอกสว่านและหมุนทวนเข็มนาฬิิกาจนแน่น การถอดดอกสว่าน ให้ปฏิบัติตามขั้นตอนกลับกัน การติดตั้งมือถือข้าง (ภาพที่ 1) สามารถติดตั้งมือถือข้าง (6) ให้เหมาะสำหรับ ผู้ใช้ที่ถนัดขวาหรือถนัดซ้าย 1 0.7 5 1.00 1.5 0 2.5 0 4.00 220-240 115 0 – 2.0 2.1 – 3.4 3.5 – 5.0 5.1 – 7.0 7.1 – 12.0 12.1 – 20.0 0 – 2.0 2.1 – 3.4 3.5 – 5.0 5.1 – 7.0 7.1 – 12.0 12.1 – 20.0 ให้ใช้สว่านที่ติดตั้งมือถือข้างอย่างถูกต้องอยู่เสมอ 30 ) การถอดมือถือข้าง สำหรับผู้ใช้ที่ถนัดขวา เลื่อนตัวหนีบมือถือข้างให้ข้าม ปลอกหัวจับที่อยู่หลังหัวจับดอกสว่าน และจับทางซ้าย สำหรับผู้ใช้ที่ถนัดซ้าย เลื่อนตัวหนีบมือถือข้างให้ข้าม ปลอกหัวจับที่อยู่หลังหัวจับดอกสว่าน และจับทางขวา หมุนมือถือข้างไปยังตำแหน่งที่ต้องการ และติดตั้งให้แน่น 60 ตั้งค่าความลึกการเจาะ (ภาพที่ 3) เสียบดอกสว่านเจาะที่ต้องการเข้าไปในหัวจับดอกสว่าน คลายมือถือข้าง (6) ติดตั้งแืท่งปรับความลึก (7) ให้ผ่านรูที่ตัวหนีบมือถือ ปรับความลึกการเจาะตามที่แสดง ปรับมือถือข้่างให้แน่น 6 10 15 20 25 7.5 15 25 30 6 6 6 10 15 20 6 6 6 10 15 20 6 6 6 10 15 20 6 6 6 10 15 20 6 6 6 10 15 20 6 6 10 15 20 25 6 6 6 10 15 20 6 6 15 20 25 – 45 ) 6 6 10 15 20 25 6 15 20 20 25 – 6 6 15 15 20 – 10 15 20 25 – – อุปกรณ์เสริมและการปรับ เลือกโหมดทำงาน (ภาพที่ 2) เครืื่องมือสามารถใช้ได้2โหมดงาน: การเจาะหมุน: สำหรับเหล็ก ไม้ และพลาสติก การเจาะแบบกระแทก: เจาะแบบหมุนและกระแทกไปพร้ิอมกันสำหรับ การปฏิบัติงานเจาะคอนกรีตและอิฐ เลือกโหมดการทำงานที่ต้องการโดยการหมุน ตัวเลือกโหมด (4) ไปยังตำแหน่งที่ต้องการ 26 การเจาะแบบกระแทก (ภาพที่ 1) เลือกโหมดการเจาะแบบกระแทก กดสวิทช์ (1) การเจาะแบบหมุน (ภาพที่ 1) เลือกโหมดการเจาะแบบหมุน ดำเนินตามขั้นตอนที่อธิบายสำหรับการเจาะ แบบกระแทก ปรึกษาตัวแทนจำหน่ายของท่านสำหรับข้อมูล เพิ่มเติมเกี่ยวกับอุปกรณ์เสริมที่เหมาะสม 1 1 : [5/16" (8 [5/32" (4 2 หมายเหตุ: ตอนเจาะโลหะหรือพลาสติก หรือเซรามิค เริ่มเจาะรูที่ไม่จำเป็นเป็นจุดกลางด้วยความเร็วต่ำ ถ้าเจาะไม้กระดานประกอบ ใช้ความเร็วสูงดีกว่า และใช้อุปกรณ์ที่ปรับปรุงได้ทันสมัยและบด ดานงัดเดินหน้า/ถอยหลัง (3) ใช้ในการอัดหัวเจาะจากรูที่คับแน่น มันตั้งบนสวิตช์ควบคุม ถ้าถอยหลังมอเตอร ปล่อยสวิตช์ควบคุมก่อน แล้วค่อยผลักดานงัดไปทางขวามือ หลังจากการถอยหลังแล้ว ทำให้ดานงัดเดินหน้ากลับไปที่เดิม .)] .)] 3 DWD022/DWD022K/DWD024/DWD024K 9 ๑. “ ” ๑. ใช้ดอกสว่านที่คมเท่านั้น สำหรับไม้ ให้ใช้ดอกสว่าน แบบเกลียว ดอกสว่านแบบพลั่ว ดอกสว่าน หรือ เลื่อยสำหรับเจาะรู สำหรับโลหะให้ใช้ ดอกสว่านแบบเกลียวสำหรับงานเหล็ก หรือเลื่อยสำหรับเจาะรู ๒. ออกแรงกดตรงๆไปที่ดอกสว่านเสมอ ใช้แรงดันพอ สมควรเพื่อให้สว่านทำงาน แต่ต้องไม่ออกแรงมาก เกินไปจนมอเตอร์ค้างหรือดอกสว่านบิด ๓. ถือเครื่องมือด้วยมือทั้งสองข้างเพื่อควบคุมการหมุน เป็นเกลียวของดอกสว่าน ๔. ถ้าสว่านติดค้าง มักเป็นเพราะใช้งานเกินกำลังหรือ ใช้งานอย่างไม่เหมาะสม ให้คลายสวิตช์ปรับระดับ ความเร็วในทันที นำดอกสว่านออกจากชิ้นงาน และค้นหาสาเหตุที่ทำให้สว่านค้าง ห้ามเปิดและ ปิดสวิตช์ปรับระดับความเร็วเพื่อเปิดเครื่องขณะ ที่เครื่องยังค้างอยู่ เพราะอาจทำให้สว่านชำรุด เสียหายได้ ๕. ลดปัญหาการค้างของมอเตอร์หรือการทำให้วัสดุ แตกหักให้เหลือน้อยที่สุดได้ด้วการลดแรงดันที่ สว่านและคลายดอกสว่านผ่านทางรูของชิ้นงาน ๖. มอเตอร์ต้องทำงานอยู่ในขณะที่ดึงดอก สว่านย้อนออกมาจากรูที่เจาะไว้ วิธีนี้จะ ป้องกันปัญหาดอกสว่านติดได้ ๗. ไม่จำเป็นต้องหาจุดกึ่งกลางที่จะเจาะเนื่องจาก สว่านมีความเร็วหลายระดับ ให้ความเร็วต่ำก่อนเมื่อ เริ่มเจาะรู และเร่งความเร็วได้ด้วยการกดที่สวิตช์ ปรับระดับความเร็วให้แรงขึ้นเมื่อเจาะรูที่ลึกพอที่จะ เจาะต่อโดยที่ดอกสว่านไม่กระเด้งออกมา ๒. 4 4 1/4" (6 .) DE WALT 27 , , , , 28 (DWD022, DWD022K) 10 . 10 . 13 . 25.4 . 28.4 . (DWD024, DWD024K) 13 13 16 30 30 . . . . . BOR LISTRIK PUTARAN DUA ARAH DENGAN KECEPATAN DAPAT DISETEL DWD022/DWD024 Selamat! Anda telah memilih Perkakas DEWALT. Pengalaman selama bertahun-tahun, pengembangan dan inovasi produk yang menyeluruh, menjadikan DEWALT sebagai salah satu mitra yang paling dapat diandalkan bagi para pengguna Perkakas Listrik profesional. Data teknis Menandakan risiko sengatan listrik. DWD022-B1 DWD024-B1 Voltase V 220-240 220-240 Masukan daya W 550 650 Kecepatan tanpa beban min -1 0-2,800 0-2,800 min -1 0-47,600 0-47,600 maksimum baja/kayu mm mm 13/10/25 16/13/30 Spindel cekaman ukuran ulir UNF 1/2"x20 1/2"x20 Kapasitas cekaman maksimum mm 10 13 kg 1.4 1.6 Tiada tumbukan beban PERHATIAN: Mengindikasikan situasi yang berpotensi bahaya yang, jika tidak dihindari, mungkin mengakibatkan cedera ringan atau cedera sedang. PERHATIAN: Digunakan tanpa simbol peringatan keselamatan kerja mengindikasikan situasi yang berpotensi bahaya yang, jika tidak dihindari, mungkin mengakibatkan kerusakan harta benda. Jangkauan pengeboran Berat Sekring: Perkakas 220-240 V Perkakas 115V 10 Amper, listrik 13 Amper, listrik Definisi: Pedoman Keselamatan Kerja Definisi di bawah ini menjelaskan tingkat peringatan untuk setiap kata sinyal. Harap baca manual ini dan perhatikan simbol-simbol ini. BAHAYA: Mengindikasikan situasi yang berpotensi bahaya di depan mata yang, jika tidak dihindari, akan mengakibatkan kematian atau cedera parah. PERINGATAN: Mengindikasikan situasi yang berpotensi bahaya yang, jika tidak dihindari, dapat mengakibatkan kematian atau cedera parah. Menandakan risiko kebakaran. PERINGATAN: Untuk mengurangi risiko cedera, baca petunjuk manual ini. Peringatan Keselamatan Perkakas Listrik Umum Peringatan! Bacalah semua peringatan keselamatan dan petunjuk. Tidak mematuhi peringatan dan petunjuk bisa mengakibatkan sengatan listrik, kebakaran, dan/atau cedera parah. SIMPANLAH SEMUA BUKU PERINGATAN DAN PETUNJUK UNTUK REFERENSI DI KEMUDIAN HARI. Istilah “perkakas listrik” dalam peringatan tersebut mengacu pada perkakas listrik yang dioperasikan dengan listrik (berkabel) atau perkakas listrik yang dioperasikan dengan baterai (nirkabel). 1) KESELAMATAN AREA KERJA a) Jaga kebersihan dan penerangan yang memadai di area kerja. Area yang berantakan atau gelap dapat menyebabkan kecelakaan. b) Jangan mengoperasikan perkakas listrik ini di lingkungan yang mudah menimbulkan bahaya ledakan, seperti di tempat yang terdapat cairan mudah terbakar, gas atau debu. Perkakas listrik ini menimbulkan percikan api yang dapat menyulut debu atau uap. c) Jauhkan anak-anak dan orang yang berada di sekitar sewaktu mengoperasikan perkakas listrik. Gangguan dapat menyebabkan Anda kehilangan kendali. 29 2) KESELAMATAN KERJA KELISTRIKAN a) Steker perkakas listrik harus sesuai dengan soketnya. Jangan sekali-kali memodifikasi steker dengan cara apapun. Jangan gunakan steker adaptor apapun dengan perkakas listrik yang dibumikan (grounded). Steker yang tidak dimodifikasi dan stopkontak yang sesuai akan mengurangi risiko sengatan listrik. b) Hindari kontak badan dengan permukaan yang dibumikan (grounded), seperti pipa, radiator, kompor dan kulkas. Risiko sengatan listrik dapat bertambah jika tubuh Anda mengenai permukaan yang dibumikan (grounded). c) Jangan sampai perkakas listrik ini terkena hujan atau terpapar ke kondisi yang basah. Air yang masuk ke perkakas listrik akan meningkatkan risiko sengatan listrik. d) Jangan menyalahgunakan kabel. Jangan sekalikali menggunakan kabel untuk membawa, menarik atau mencabut perkakas listrik. Jauhkan kabel dari panas, minyak, tepi tajam atau komponen yang bergerak. Kabel rusak atau terbelit meningkatkan risiko sengatan listrik. e) Bila mengoperasikan perkakas listrik di luar ruangan, gunakan kabel ekstensi yang sesuai untuk penggunaan di luar ruangan. Menggunakan kabel yang sesuai untuk penggunaan di luar ruangan akan mengurangi risiko sengatan listrik. f) Apabila Anda terpaksa mengoperasikan perkakas listrik di tempat yang lembap, gunakan suplai arus (listrik) terlindung/terisolasi piranti imbasan arus (residual current device -RCD). Penggunaan RCD mengurangi risiko sengatan listrik. 3) KESELAMATAN DIRI a) Tetaplah waspada, perhatikan apa yang sedang Anda kerjakan, dan gunakan logika sewaktu mengoperasikan perkakas listrik. Jangan menggunakan perkakas bila Anda sedang lelah, atau berada di bawah pengaruh obat, alkohol, atau pengobatan. Kelengahan sesaat saja ketika mengoperasikan perkakas listrik dapat menyebabkan cedera diri yang parah. b) Gunakan peralatan pelindung diri. Selalu kenakan alat pelindung mata. Perlengkapan pelindung, seperti masker debu, sepatu keselamatan anti selip, topi pengaman (hardhat , atau alat pelindung pendengaran yang digunakan dalam kondisi yang sesuai akan mengurangi cedera diri. c) Cegah menjalankan perkakas secara tak sengaja. Pastikan sakelar berada pada posisi off (mati) sebelum menyambungkan ke sumber daya dan/atau kemasan baterai, mengangkat atau menjinjing perkakas. Menjinjing perkakas listrik dengan jari berada 30 pada sakelar atau memberi daya pada perangkat listrik dengan sakelar pada posisi on (hidup) dapat menyebabkan kecelakaan. d) Lepaskan semua kunci setelan atau kunci pas sebelum menghidupkan perkakas listrik. Kunci pas atau kunci yang dibiarkan terpasang pada komponen perkakas listrik yang berputar dapat menyebabkan cedera diri. e) Jangan melampaui batas. Selalu jaga pijakan dan keseimbangan yang baik. Hal ini memungkinkan Anda untuk mengendalikan perkakas listrik dengan lebih baik dalam situasi yang tidak terduga. f) Kenakan pakaian yang sesuai. Jangan mengenakan pakaian longgar atau perhiasan. Jauhkan rambut, pakaian dan sarung tangan dari komponen yang bergerak. Pakaian yang longgar, perhiasan atau rambut panjang dapat terperangkap dalam komponen yang bergerak. g) Jika disediakan perangkat untuk sambungan fasilitas pengeluaran dan pengumpulan debu, pastikan perangkat ini dihubungkan dan digunakan dengan sesuai. Penggunaan pengumpul debu dapat mengurangi bahaya terkait debu. 4) PENGGUNAAN DAN PEMELIHARAAN PERKAKAS LISTRIK a) Jangan menggunakan perkakas listrik dengan paksa. Gunakan perkakas listrik yang benar untuk aplikasi Anda. Perkakas listrik yang tepat akan bekerja lebih baik dan aman pada tingkat kelajuan yang telah dirancang untuk perkakas itu. b) Jangan gunakan perkakas listrik ini jika tombol tidak dapat menghidupkan dan mematikan perkakas. Perkakas listrik apa pun yang tidak dapat dikendalikan dengan tombol adalah berbahaya dan harus diperbaiki. c) Cabut steker dari sumber listrik dan/atau kemasan baterai dari perkakas listrik sebelum melakukan penyetelan apa pun, mengganti aksesori, atau menyimpan perkakas listrik. Tindakan pencegahan demi keselamatan tersebut mengurangi risiko menjalankan perkakas listrik secara tak sengaja. d) Simpan perkakas listrik yang tidak digunakan di tempat yang tidak terjangkau oleh anak kecil, dan jangan mengizinkan orang yang tidak memahami perkakas listrik atau petunjuk ini untuk mengoperasikannya. Perkakas listrik bisa berbahaya bila digunakan oleh pengguna yang tidak terlatih. e) Rawat perkakas listrik. Lakukan pemeriksaan untuk mengetahui apakah ada komponen bergerak yang tidak sejajar atau bengkok, komponen yang patah, dan kondisi lainnya yang dapat mempengaruhi pengoperasian perkakas listrik. Jika rusak, perbaiki dahulu perkakas listrik sebelum digunakan. Banyak terjadi kecelakaan yang disebabkan oleh perkakas listrik yang tidak terawat baik. f) Jaga agar alat pemotong tetap tajam dan bersih. Alat potong yang terawat baik dengan tepi pemotongan yang tajam akan lebih mudah dikendalikan dan kecil kemungkinannya untuk terjepit. g) Gunakan perkakas listrik, aksesori dan komponen perkakas, dsb. sesuai dengan petunjuk ini dengan mempertimbangkan kondisi pengerjaan dan pekerjaan yang akan dilaksanakan. Menggunakan perkakas listrik untuk pengoperasian yang berbeda dengan yang dimaksudkan akan mengakibatkan situasi yang membahayakan. 5) SERVIS a) Perkakas listrik harus diservis oleh teknisi yang mahir dan hanya menggunakan komponen pengganti yang persis sama. Ini akan menjamin keselamatan perkakas listrik terpelihara. Peraturan Keselamatan Khusus Tambahan untuk Bor • Pakailah pelindung telinga. Terpapar kebisingan dapat mengakibatkan kehilangan pendengaran. • Gunakanlah gagang tambahan yang dipasok bersama dengan perkakasnya. Kehilangan kontrol dapat mengakibatkan kecederaan diri sendiri. • Pegang perkakas listrik hanya pada permukaan pegangan yang berisolasi sewaktu menggunakannya pada bagian aksesori pemotong yang dapat mengenai kabel tersembunyi, atau kabel perkakas itu sendiri. Aksesori pemotong yang mengenai kawat “arus listrik” bisa mengakibatkan bagian logam perkakas listrik yang tidak terlindungi "teraliri arus listrik” dan operator tersengat listrik. • Gunakan klem atau cara praktis lainnya untuk mengunci dan menopang benda yang sedang dikerjakan pada platform. Memegang benda yang sedang dikerjakan dengan tangan atau menyandarkannya pada badan Anda tidak akan stabil, dan bisa menyebabkan kehilangan kendali. • Kenakan kacamata keselamatan kerja atau pelindung mata lainnya. Operasi pengeboran menyebabkan serpihan beterbangan. Partikel yang beterbangan dapat menyebabkan kerusakan mata permanen. • Mata bor dan perkakas menjadi panas selama pengoperasian. Kenakan sarung tangan saat menyentuh mata bor dan perkakas. • Jaga agar pegangan selalu kering, bersih, bebas dari minyak dan gemuk. Dianjurkan untuk menggunakan sarung tangan karet. Dengan demikian, pengendalian perkakas akan lebih baik. Risiko Lainnya Meskipun peraturan keselamatan yang relevan telah diterapkan dan peralatan keselamatan kerja telah dipakai, namun ada risiko tertentu lainnya yang tidak dapat dihindarkan. Risiko ini adalah: - Melemahnya pendengaran - Risiko cedera diri karena partikel yang beterbangan - Risiko terbakar karena aksesori menjadi panas selama pengoperasian. - Risiko cedera diri karena penggunaan yang lama. Penandaan pada perkakas Berikut ini adalah piktogram yang terdapat pada perkakas: Baca petunjuk manual sebelum menggunakan. POSISI KODE TANGGAL Kode Tanggal, yang juga termasuk tahun pembuatan, tercetak pada permukaan rumah. Contoh: 2008 XX XX Tahun Pembuatan Isi paket Paket ini berisi: 1 Bor 1 Kunci cekaman mata bor 1 Pegangan samping (DWD024, DWD024K) 1 Batang penyetel kedalaman (DWD024, DWD024K) 1 petunjuk manual • Periksa untuk mengetahui apakah ada kerusakan pada perkakas, komponen atau aksesori yang mungkin terjadi saat pengangkutan. • Luangkan waktu untuk membaca dan memahami panduan ini selengkapnya sebelum mengoperasikan perkakas. 31 Deskripsi (gbr. 1) PERINGATAN: Jangan sekali-kali memodifikasi perkakas listrik atau bagian manapun. Hal ini dapat menyebabkan kerusakan atau cedera diri. 1. Sakelar kecepatan variabel 2. Tombol pengunci sakelar 3. Tuas pembalik arah putaran bor 4. Pemilih mode 5. Slot ventilasi 6. Pegangan samping 7. Tangkai penyesuaian kedalaman 8. Cekaman mata bor 9. Lengan 10. Kunci cekaman TUJUAN PENGGUNAAN Bor listrik putaran dua arah dengan kecepatan bisa disetel yang kuat ini didesain untuk pengeboran profesional. JANGAN digunakan dalam kondisi basah atau di tempat yang terdapat cairan mudah terbakar atau gas. Bor yang kuat ini adalah perkakas listrik profesional. JANGAN biarkan anak-anak memegang perkakas ini. Diperlukan pengawasan apabila operator yang tidak berpengalaman menggunakan perkakas ini. masukan daya pengisi daya Anda (lihat data teknis). Ukuran konduktor minimum adalah 1 mm2, panjang maksimum adalah 30 m. Lihat juga tabel di bawah ini. Ukuran konduktor (mm2 ) Kekuatan kabel (Amper) 0.75 6 1.00 10 1.50 15 2.50 20 4.00 25 Panjang kabel (m) 7.5 15 25 30 45 60 Voltase Amper Kekuatan kabel (Amper) 220-240 0 – 2.0 6 6 6 6 6 6 2.1 – 3.4 6 6 6 6 6 6 3.5 – 5.0 6 6 6 6 10 15 5.1 – 7.0 10 10 10 10 15 15 7.1 – 12.0 15 15 15 15 20 20 12.1 – 20.0 20 20 20 20 25 – 115 0 – 2.0 6 6 6 6 6 10 2.1 – 3.4 6 6 6 6 15 15 3.5 – 5.0 6 6 10 15 20 20 5.1 – 7.0 10 10 15 20 20 25 7.1 – 12.0 15 15 20 25 25 – 12.1 – 20.0 20 20 25 – – – Apabila menggunakan gulungan kabel, lepas gulungan kabel seluruhnya. PERAKITAN DAN PENYETELAN Keselamatan Kerja Kelistrikan Motor listrik telah dirancang untuk satu voltase saja. Selalu periksa apakah catu daya sesuai dengan tegangan yang tercantum pada papan tarif (rating plate). Perkakas DEWALT Anda berisolasi ganda sesuai dengan EN 60745; oleh karena itu tidak perlu kabel arde (ground). Jika kabel catu daya rusak, maka kabel itu harus diganti dengan kabel yang disiapkan secara khusus yang dapat diperoleh melalui perusahaan layanan DEWALT. PERINGATAN: JANGAN sekali-kali menggunakan soket lampu. JANGAN sekali-kali menghubungkan kawat positif (L) atau Netral (N) ke pin arde yang ditandai dengan huruf E atau Menggunakan Kabel Ekstensi Sebaiknya jangan menggunakan kabel ekstensi kecuali jika benar-benar perlu. Gunakan kabel ekstensi yang disetujui yang cocok untuk 32 Memilih mode operasi (gbr. 2) Alat ini dapat digunakan dalam dua mode operasi: Pengeboran putar: untuk baja, kayu dan plastik. Pengeboran tumbuk: memutar secara serempak dan berdampak operasi pengeboran beton dan tembok. • Pilih mode operasi yang diperlukan secara memutar pemilih mode (4) ke posisi yang diperlukan. Cekaman mata bor • Buka kunci cekaman mata bor dengan memutar lengan (9)berlawanan dengan arah jarum jam dan masukkan tangkai mata bor. • Letakkan kunci cekaman mata bor ke dalam lubang cekaman mata bor (10) dan kencangkan searah jarum jam. • Untuk melepaskan mata bor, melanjutkan dalam urutan mundur. Menyesuaikan pegangan samping (gbr. 1) Pegangan samping (6) dapat disesuaikan agar sesuai dengan pengguna RH dan LH. Selalu menggunakan bor dengan pegangan samping dipasang secara benar. • Mengendurkan pegangan samping. • Untuk pengguna RH, mendorong klem pegangan di atas kelepak di belakang tangkai mata bor yang di sebelah kiri. • Untuk pengguna RH, mendorong pegangan samping dan menjepit Kelepak di belakang tangkai mata bor yang di sebelah kanan. • Memutar pegangan samping ke posisi yang diperlukan dan kencangkan pegangan. Menetapkan kedalaman pengeboran (gbr. 3) • Masukkan bor yang diperlukan ke dalam mata bor. • Mengendur pegangan samping (6). • Sesuaikan tangkai penyesuaian kedalaman (7) melalui lubang di sebelah klem pegangan. • Sesuaikan kedalaman pengeboran seperti ditunjukkan. • Kencangkan pegangan samping. Pengeboran tumbuk (gbr. 1) • Pilih mode tumbuk. • Tekan tombol (1). Pengeboran putar (gbr. 1) • Pilih mode pengeboran putar. • Lanjutkan seperti yang ditunjukkan dengan pengeboran putaran. Konsultasikan penyalur untuk informasi lebih lanjut tentang aksesoris yang sesuai. PERINGATAN: Untuk mengurangi risiko cidera, matikan unit ini dan cabut perkakas dari sumber daya sebelum memasang dan melepas aksesori, sebelum menyetel atau mengubah pengaturan atau ketika melakukan perbaikan. Pastikan sakelar pemicu dalam posisi OFF. Menjalankan perkakas secara tidak sengaja dapat menyebabkan cedera. PENGOPERASIAN Petunjuk Penggunaan PERINGATAN: Selalu patuhi petunjuk keselamatan kerja dan peraturan yang berlaku. Sakelar (gbr. 1) Untuk memulai pengeboran, tekan sakelar pemicu; untuk menghentikan pengeboran, lepaskan pemicu. Dengan sakelar pemicu kecepatan yang bisa disetel (1), kecepatan bisa dikendalikan, semakin jauh pemicu ditekan, semakin tinggi kecepatan pengeboran. Untuk pengoperasian yang terus menerus, tekan dan tahan sakelar kecepatan yang bisa disetel, tekan tombol pengunci sakelar (2), lalu lepaskan sakelar. CATATAN: Gunakan kecepatan yang lebih rendah untuk lubang awal tanpa penitik pusat, mengebor logam atau plastik, atau mengebor bahan keramik. Kecepatan tinggi lebih cocok digunakan untuk mengebor kayu dan papan majemuk, serta menggunakan ampelas dan aksesori pengasah. Tuas maju/mundur (3) digunakan untuk menarik mata bor dari lubang sempit. Untuk membalikkan motor, lepaskan sakelar pemicu TERLEBIH DAHULU, lalu tekan tuas itu ke kanan. Setelah pengoperasian pembalikan, kembalikan tuas ke posisi maju. Untuk menghentikan pengoperasian yang terus menerus, tekan sakelar sebentar dan lepaskan. Selalu matikan perkakas bila pekerjaan telah selesai dan sebelum mencabut dari stopkontak. Pengeboran PERINGATAN: Untuk mengurangi risiko cedera diri, SELALU pastikan benda yang sedang dikerjakan dikunci atau diklem dengan erat. Jika mengebor bahan yang tipis, gunakan balok kayu "penahan” untuk mencegah kerusakan pada benda yang sedang dikerjakan. 1. Gunakan mata bor yang tajam saja. Untuk KAYU, gunakan mata bor puntir dengan alur melilit (twist drill bit), mata bor skop (spade bit), mata bor auger mesin (power auger), atau gergaji lubang (hole saw). Untuk LOGAM, gunakan mata bor puntir dengan alur melilit atau gergaji lubang. 2. Selalu beri tekanan searah dengan garis lurus mata bor. Tekan secukupnya untuk menjaga cekaman bor, tetapi jangan terlalu kuat mendorongnya sehingga dapat menghentikan motor atau membelokkan mata bor. 33 3. Pegang perkakas kuat-kuat dengan kedua tangan untuk mengendalikan gerakan perputaran bor. 4. JIKA BOR MACET, biasanya hal ini karena bor kelebihan muatan atau tidak digunakan dengan tepat. SEGERA LEPASKAN PEMICU, lepaskan mata bor dari benda yang sedang dikerjakan, dan tentukan penyebab kemacetan. JANGAN MENGKLIK PEMICU ON DAN OFF DALAM UPAYA MENJALANKAN BOR YANG MACET — HAL INI DAPAT MERUSAK BOR. 5. Untuk meminimalkan kemacetan atau menembus bahan hingga patah, longgarkan tekanan pada bor dan kurangi cekaman mata bor yang melintasi bagian kecil terakhir dari lubang itu. 6. Tetap jalankan motor ketika menarik mata bor keluar dari lubang yang telah dibor. Hal ini akan membantu mencegah kemacetan. 7. Dengan bor yang kecepatannya dapat disetel maka tidak perlu membuat titik pusat pada titik yang akan dibor. Gunakan kecepatan rendah untuk memulai lubang dan percepat dengan menekan pemicu lebih keras ketika lubang sudah cukup dalam untuk dibor dan mata bor tidak akan melenceng. MENGEBOR LOGAM Mulailah pengeboran dengan kecepatan rendah dan tingkatkan hingga kekuatan penuh sembari memberi tekanan yang kuat pada perkakas. Aliran serpihan logam halus yang merata mengindikasikan tingkat pengeboran yang tepat. Gunakan pelumas pemotong ketika mengebor logam. Besi cor dan kuningan merupakan pengecualian yang sebaiknya dibor dalam keadaan kering. CATATAN: Lubang besar [5/16" (8 mm)] pada baja dapat dibuat dengan lebih mudah jika lubang bor percobaan sebesar [5/32" (4 mm) dibor terlebih dahulu. MENGEBOR KAYU Mulailah pengeboran dengan kecepatan rendah dan tingkatkan hingga kekuatan penuh sembari memberi tekanan yang kuat pada perkakas. Lubang pada kayu dapat dibuat dengan mata bor puntir dengan alur melilit yang sama dengan yang digunakan untuk logam. Mata bor ini mungkin menjadi terlalu panas kecuali jika sering ditarik keluar guna membersihkan serpihan dari galur. Benda yang sedang dikerjakan yang cenderung menyerpih sebaiknya ditahan dengan balok kayu. Cekaman Mata Bor (gbr 4) 34 DWD022/DWD022K/DWD024/DWD024K mengutamakan cekaman mata bor (9). Untuk memasukkan mata bor atau aksesori lainnya, ikuti langkah-langkah berikut ini. 1. Buka kunci penjepit mata bor (chuck jaws) dengan memutar kelepak dengan tangan dan masukkan tangkai mata bor sekitar 3/4" 19mm) ke dalam cekaman. Kencangkan kelepak cekaman dengan tangan. 2. Letakkan kunci cekaman mata bor dalam tiga lubang yang ada dan kencangkan searah jarum jam. Yang penting dilakukan adalah mengencangkan cekaman dengan ketiga lubangnya. Untuk melepaskan mata bor, putar cekaman berlawanan arah jarum jam dalam satu lubang saja, kemudian kendurkan cekaman dengan tangan. PELEPASAN CEKAMAN MATA BOR (GBR. 4) Kencangkan cekaman di sekeliling ujung kunci L yang lebih pendek (tidak disediakan) yang berukuran 1/4" (6 mm) atau yang lebih besar. Pukul kunci menggunakan palu lunak dengan tepat berlawanan dengan arah jarum jam jika dilihat dari depan perkakas. Ketukan ini akan melonggarkan cekaman hingga cekaman dapat dilepas dengan tangan. PEMASANGAN CEKAMAN MATA BOR (GBR. 4) Sekrup cekaman dengan tangan sejauh mungkin. Masukkan ujung kunci L yang lebih pendek (tidak disediakan) yang berukuran 1/4" (6 mm) atau yang lebih besar dan pukul dengan palu lunak berlawanan dengan arah jarum jam. PERAWATAN Perkakas listrik DEWALT telah dirancang untuk penggunaan jangka panjang dengan pemeliharaan minimal. Pengoperasian yang memuaskan secara terus-menerus bergantung pada cara pemeliharaan yang layak dan pembersihan perkakas secara teratur. PERINGATAN: Untuk mengurangi risiko cedera, matikan unit ini dan cabut perkakas dari sumber daya sebelum memasang dan melepas aksesori, sebelum menyetel atau mengubah pengaturan atau ketika melalukan perbaikan. Pastikan sakelar pemicu dalam posisi OFF. Menjalankan perkakas secara tidak sengaja dapat menyebabkan cedera. Sikat Motor DEWALT menggunakan sistem sikat modern yang secara otomatis menghentikan bor ketika sikat aus. Hal ini mencegah kerusakan parah pada motor. Rakitan sikat baru dapat diperoleh di pusat layanan resmi DEWALT. Selalu gunakan komponen pengganti yang persis sama. Pelumasan Perkakas Listrik Anda tidak memerlukan pelumasan tambahan. PERHATIAN: Untuk mengurangi risiko cedera, aksesori berikut ini sebaiknya hanya digunakan hingga ukuran maksimum yang ditunjukkan dalam tabel di bawah ini. KAPASITAS MAKSIMUM YANG DIREKOMENDASIKAN (DWD022, DWD022K) Kapasitas bor Mata bor, pengeboran logam Mata bor, pengeboran masonri Kayu, pengeboran rata Lubang gergaji 10 mm 10 mm 13 mm 25.4 mm 28.4 mm KAPASITAS MAKSIMUM YANG DIREKOMENDASIKAN (DWD024, DWD024K) Pembersihan PERINGATAN: Bersihkan kotoran dan debu dari rumah utama dengan udara kering sesering kotoran terlihat mengumpul di dan sekitar ventilasi udara. Kenakan perlindungan mata dan masker debu yang disetujui ketika melakukan prosedur ini. Kapasitas bor Mata bor, pengeboran logam Mata bor, pengeboran masonri Kayu, pengeboran rata Lubang gergaji 13 mm 13 mm 16 mm 30 mm 30 mm PERINGATAN: Jangan sekali-kali menggunakan bahan pelarut atau bahan kimia keras lainnya untuk membersihkan bagian perkakas yang terbuat dari nonlogam. Bahan kimia ini bisa melemahkan material yang digunakan dalam bagian ini. Gunakan kain yang hanya dilembapkan dengan air dan sabun lembut. Jangan sampai ada cairan masuk ke dalam perkakas; jangan sekali-kali membenamkan bagian apa pun dari perkakas ini ke dalam cairan. Aksesori Opsional PERINGATAN: Karena aksesori, selain yang diberikan oleh DEWALT, belum diuji dengan produk ini, maka penggunaan aksesori tersebut pada perkakas ini bisa berbahaya. Untuk mengurangi risiko cedera, hanya gunakan aksesori yang direkomendasikan oleh DEWALTuntuk produk ini. Hubungi dealer Anda untuk mendapatkan informasi lebih lanjut mengenai aksesori yang sesuai. 35 36 37 N015400