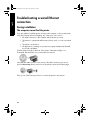
1
Marlin_NG.book Page i Friday, June 18, 2004 2:54 PM
HP Deskjet
6800 series
Network Guide
Marlin_NG.book Page ii Friday, June 18, 2004 2:54 PM
Marlin_NG.book Page 1 Friday, June 18, 2004 2:54 PM
English
English
Edition 1 May 2004
Copyright 2004 Hewlett-Packard Development Company, L.P.
Notice
Reproduction, adaptation, or translation without prior written permission is prohibited, except as
allowed under the copyright laws.
The information contained herein is subject to change without notice.
The only warranties for HP products and services are set forth in the express warranty statements
accompanying such products and services. Nothing herein should be construed as constituting an
additional warranty. HP shall not be liable for technical or editorial errors or omissions contained
herein.
Acknowledgements
Microsoft®, MS-DOS, and Windows are registered trademarks of Microsoft Corporation.
Mac, Macintosh, AppleTalk, and Mac OS are trademarks of Apple Computer, Inc., registered in
the U.S. and other countries.
This product includes software developed by the OpenSSL Project for use in the OpenSSL Toolkit
(http://www.openssl.org).
Wi-Fi® and the Wi-Fi logo are registered trademarks of the Wi-Fi Alliance.
PictBridge and the PictBridge logo are trademarks of the Camera & Imaging Products Association
(CIPA).
1
English
Marlin_NG.book Page 2 Friday, June 18, 2004 2:54 PM
Networking the HP Deskjet 6800 series
printer
Thank you for buying the HP Deskjet 6800 series printer!
This guide contains the following information about networking your printer:
Connecting the printer to a wireless network . . . . . . . . . . . . . . . . 3
Step 1: Find the network basic wireless settings . . . . . . . . . . . . . . . . . . . . .5
Step 2: Find the network wireless security settings . . . . . . . . . . . . . . . . . . .7
Step 3: Install the printer software for a wireless connection . . . . . . . . . . .9
Troubleshooting a wireless connection . . . . . . . . . . . . . . . . . . . . . . . . . . . .27
Connecting the printer to a wired Ethernet network . . . . . . . . . 36
Step 1: Connect the printer to the network . . . . . . . . . . . . . . . . . . . . . . . . .37
Step 2: Install the printer software over a wired Ethernet connection . . .39
Troubleshooting a wired Ethernet connection . . . . . . . . . . . . . . . . . . . . . .42
Managing the printer on a network . . . . . . . . . . . . . . . . . . . . . . . 48
HP Report page. . . . . . . . . . . . . . . . . . . . . . . . . . . . . . . . . . . . . . . . . . . . . . . .49
Embedded Web server (EWS) . . . . . . . . . . . . . . . . . . . . . . . . . . . . . . . . . . . .50
Changing wireless security settings . . . . . . . . . . . . . . . . . . . . . . . . . . . . . .51
Configuring the printer for a software firewall. . . . . . . . . . . . . . . . . . . . . . .52
Resetting the printer to factory default settings . . . . . . . . . . . . . . . . . . . . .57
Glossary . . . . . . . . . . . . . . . . . . . . . . . . . . . . . . . . . . . . . . . . . . . . . 58
2
Marlin_NG.book Page 3 Friday, June 18, 2004 2:54 PM
English
Connecting the printer to a wireless
network
Getting started
Has the printer hardware been set up?
Follow the instructions on the setup poster that came with the printer to set up the
printer hardware before connecting the printer to the network.
Are computers on the network protected by a software firewall?
If the any of the computers on the network are protected by a software firewall, follow
the instructions under “Configuring the printer for a software firewall” on page 52
before connecting the printer to the network.
Connecting to the printer
Step 1: Find the network basic wireless settings
You need to know the network name (SSID) and communication mode of the network.
Consult the configuration utility for the network Wireless Access Point (WAP) or the
computer network card for these settings.
For more information, see “Step 1: Find the network basic wireless settings” on
page 5.
Step 2: Find the network wireless security settings
You need to know what type of security your network uses: WPA, WEP, or none.
For more information, see “Step 2: Find the network wireless security settings” on
page 7.
Go to the next page...
3
Marlin_NG.book Page 4 Friday, June 18, 2004 2:54 PM
English
Step 3: Install the printer software for a wireless connection
The steps for installing the printer software on your computer vary by operating
system and communication mode.
For installation instructions, see “Step 3: Install the printer software for a wireless
connection” on page 9.
Wireless Network Key? If you use a USB flash drive as a Wireless Network Key
to configure devices for your wireless network, skip steps 1 and 2 and go to
“Infrastructure network with a Wireless Network Key” on page 10.
4
Marlin_NG.book Page 5 Friday, June 18, 2004 2:54 PM
English
Step 1: Find the network basic wireless
settings
In order to install the printer on a wireless network, you need to know the
communication mode and network name (SSID) of the network. To find these settings,
consult the configuration utility for the computer network card or for the network
Wireless Access Point (WAP).
Communication mode
There are two options for the network communication mode:
•
Infrastructure
•
Ad hoc
Infrastructure (recommended)
If you want to use a Wireless Access Point (WAP) to connect the printer to a network,
then set the printer to the infrastructure communication mode. In the Infrastructure
mode the printer communicates with other devices on the network, whether the
devices are wired or wireless, through a WAP. WAPs commonly act as routers or
gateways on small networks.
Ad hoc or computer-to-computer networks
If you do not want to use a WAP to connect the printer to a wireless network, then set
the printer to the ad hoc, or “computer-to-computer,” communication mode. In the ad
hoc mode, the printer communicates directly with other wireless devices.
5
Marlin_NG.book Page 6 Friday, June 18, 2004 2:54 PM
English
Network name (SSID)
A network name, or “Service Set Identifier (SSID),” identifies a particular wireless
network. In order to operate on a network, a device must know the network name of
the network.
More information
For more information about wireless networking concepts, see the online user’s guide.
The online user’s guide is available after you install the printer software on your
computer.
6
Marlin_NG.book Page 7 Friday, June 18, 2004 2:54 PM
The printer must share the same network wireless security settings as the other devices
on the network. If the printer does not have the correct wireless security settings, other
devices on the network will not be able to use the printer.
To find the security settings for the wireless network, consult the configuration utility for
the computer wireless network card or the network Wireless Access Point (WAP).
Types of wireless security
You can configure the printer to use the following wireless security options:
•
Open system (no security)
•
Wired Equivalent Privacy (WEP)
•
Wi-Fi Protected Access (WPA)
Open system (no security)
On an open system, the network does not require authorization or encryption.
To configure the printer to operate on an open system, you need to know the network
communication mode and network name (SSID). For help finding these items, see
“Step 1: Find the network basic wireless settings” on page 5.
7
English
Step 2: Find the network wireless security
settings
Marlin_NG.book Page 8 Friday, June 18, 2004 2:54 PM
English
Wired Equivalent Privacy (WEP)
Wired Equivalent Privacy (WEP) provides security by encrypting data sent over radio
waves from one wireless device to another wireless device. Devices on a WEPenabled network use WEP keys to encode data.
To configure the printer to operate on a network that uses WEP, you must know the
WEP key(s) that the network uses.
Wi-Fi Protected Access (WPA)
Wi-Fi Protected Access (WPA) provides security by doing the following:
•
Encrypting data sent over radio waves from one wireless device to another
wireless device
•
Controlling access to network resources through authentication protocols
To configure the printer to operate on a network that uses WPA, you must know the
passphrase and authentication protocol that the network uses.
8
Marlin_NG.book Page 9 Friday, June 18, 2004 2:54 PM
English
Step 3: Install the printer software for a
wireless connection
Software Firewall? If your computer is protected by a software firewall, follow the steps
under “Configuring the printer for a software firewall” on page 52 before installing the
printer software.
Windows
Wireless Network Key? If you use a USB flash drive as a Wireless Network Key
to configure devices for your wireless network, see “Infrastructure network with
a Wireless Network Key” on page 10.
Infrastructure network (recommended)
1.
Use an Ethernet cable to connect the printer to an Ethernet port on the network,
such as an available Ethernet port on a Wireless Access Point (WAP), router, hub,
or wall socket.
2.
Insert the printer software CD in the computer CD-ROM drive, and then follow the
onscreen instructions.
3.
On the Connection Type screen, select Wireless, and then click Next.
4.
Follow the onscreen instructions to complete the software installation.
Additional computers
You must install the printer software on each computer that will use the printer. Follow
steps 2 through 4 above to install the printer software on other network computers.
The Ethernet cable is only needed when installing the printer software and configuring
its wireless settings during the first installation on the network. The Ethernet cable is
not required for installing the printer on other computers on the network.
9
wireless_install.fm Page 10 Monday, July 12, 2004 12:33 PM
English
Infrastructure network with a Wireless Network Key
Getting ready
Using a USB flash drive as a Wireless Network Key is a fast and convenient way to
configure a device to operate on a wireless network.
In order to use a USB flash drive as a Wireless Network Key to configure
the printer, you must have a computer with Windows XP Service Pack 2
and a wireless network card installed. To obtain Windows XP Service
Pack 2, visit the Microsoft Web site at this address: www.microsoft.com.
Using the Wireless Network Key
Follow these steps to use a Wireless Network Key to configure the printer for your
wireless network:
1.
On the Windows desktop, click Start, point to Programs, point to Accessories,
point to Communications, and then click Wireless Network Setup.
2.
On the wireless network setup wizard, enter the network name of the wireless
network, then do one of the following tasks:
•
To let Windows create the Wireless Network Key, select the automatic option.
•
To create the Wireless Network Key yourself, select the manual option.
Note: If the router on your network does not support the use of a Wireless
Network Key, you must select the manual option. If you select the manual option,
you must know the wireless network security settings.
3.
Follow the onscreen instructions until you are prompted to remove the Wireless
Network Key from the computer.
Go to the next page...
10
Marlin_NG.book Page 11 Friday, June 18, 2004 2:54 PM
With the printer powered on, plug the Wireless Network Key into the PictBridge
USB port on the front of the printer.
5.
Wait for the printer lights to flash simultaneously three times.
6.
Plug the Wireless Network Key into the computer, and then follow the onscreen
instructions to complete the wireless network setup wizard.
7.
Insert the printer software CD in the computer CD-ROM drive, and then follow the
onscreen instructions.
8.
On the Connection Type screen, select Wireless, and then click Next.
9.
Follow the onscreen instructions to complete the software installation.
English
4.
Additional computers
You must install the printer software on each computer that will use the printer. Follow
steps 7 through 9 above to install the printer software on other network computers.
11
wireless_install.fm Page 12 Monday, June 21, 2004 2:30 PM
Ad hoc
English
Devices on the ad hoc network must:
•
Be 802.11b compatible
•
Have ad hoc as the communication mode
•
Have the same network name (SSID)
•
Be on the same subnet
•
Be on the same channel
•
Have the same wireless security settings
Follow these steps to connect to the printer using the factory default ad hoc network
settings:
1.
Open the configuration utility for the computer wireless network card, and then
do the following tasks:
a.
b.
Create a new wireless profile with the following values:
•
Communication mode: ad hoc
•
Network Name (SSID): hpsetup
•
Security (encryption): disabled
Activate the profile.
2.
Wait two minutes for the printer to obtain an IP address, and then press the Report
Page button to print an HP Report page.
3.
On the HP Report page, verify the following settings:
•
The network name (SSID) is hpsetup
•
The communication mode is ad hoc
•
The subnet mask and channel match those of your wireless network
•
The IP address is something other than 0.0.0.0
If one of the above is not true, delete the wireless profile created in step 1, and
then repeat steps 1 through 3.
Go to the next page...
12
Marlin_NG.book Page 13 Friday, June 18, 2004 2:54 PM
Insert the printer software CD in the computer CD-ROM drive, and then follow the
onscreen instructions.
5.
On the Connection Type screen, select Wireless, and then click Next.
6.
Follow the onscreen instructions to complete the software installation.
Additional computers
You must install the printer software on each computer that will use the printer. Follow
steps 4 through 6 above to install the printer software on other network computers.
Advanced setup
For instructions on configuring the printer to operate on ad hoc networks other than
the hpsetup factory default, visit the HP Web site at www.hp.com/support.
802.11g
The printer defaults to 802.11b in ad hoc mode in order to be compatible with the
widest assortment of 802.11 devices. If your network is made up of only 802.11g
devices, then you might want to configure the printer to operate in 802.11g mode in
order to optimize network performance.
Follow these steps to configure the printer to operate in 802.11g mode while
connected to an ad hoc network:
1.
Open the printer embedded Web server (EWS). For help opening the EWS, see
page 50.
2.
Click the Networking tab.
3.
Under the Connections heading, click Wireless (802.11).
4.
Click the Advanced tab.
5.
Scroll to the bottom of the Web page, and clear the In an ad hoc network use
802.11b behavior check box.
6.
Click the Apply button, and then close the EWS.
13
English
4.
Marlin_NG.book Page 14 Friday, June 18, 2004 2:54 PM
English
Macintosh
Mac OS X
Infrastructure network (recommended)
1.
Use an Ethernet cable to connect the printer to an Ethernet port on the network,
such as an available Ethernet port on a Wireless Access Point (WAP), router, hub,
or wall socket.
2.
Insert the printer software CD in the computer CD-ROM drive, and then doubleclick the CD desktop icon.
3.
Double-click the HP Deskjet 6800 installer icon, and then follow the onscreen
instructions.
4.
On the Connection Type screen, select Wireless Network (802.11), and then click
Next.
5.
Proceed through the next several screens to find the printer on the network.
Go to the next page...
14
Marlin_NG.book Page 15 Friday, June 18, 2004 2:54 PM
6.
On the Confirm or Change Settings screen, click the Change Settings button.
English
7.
On the Change Settings screen, click the Change Settings button.
The printer embedded Web server (EWS) opens.
8.
On the EWS, click the Networking tab.
9.
Under the Connections heading, click Wireless (802.11).
10. On the Wireless (802.11) Interface screen, click the Start Wizard button to start the
Wireless Configuration Wizard.
Go to the next page...
15
Marlin_NG.book Page 16 Friday, June 18, 2004 2:54 PM
11. Follow the onscreen instructions to configure the printer settings.
English
12. After the Wireless Configuration Wizard is finished, close the EWS.
13. On the Confirm or Change Settings screen, click Next.
14. Follow the onscreen instructions to complete the printer software installation.
15. On the Add Printer screen, click Open Print Center.
16. Click Add Printer.
17. Do one of the following depending on the version of Mac OS X you are using:
Mac OS X v 10.2.3 and later
Select Rendezvous.
Mac OS X v 10.2.2 and earlier
Select HP IP Printing, then click the
Discover button.
18. Select the printer, and then click the Add button.
19. Close Print Center.
Additional computers
Follow these steps to install the printer software on each computer that will use the
printer.
1.
Insert the printer software CD in the computer CD-ROM drive, and then doubleclick the CD desktop icon.
2.
Double-click the HP Deskjet 6800 installer icon, and then follow the onscreen
instructions.
3.
Close the HP Deskjet 6800 series printer Setup Assistant when it appears.
Since the printer is already configured for the network, you do not need to use the
setup assistant.
4.
16
Open Print Center, and then follow steps 15 through 19 above.
Marlin_NG.book Page 17 Friday, June 18, 2004 2:54 PM
Ad hoc or computer-to-computer
Use an Ethernet cable to connect the printer to the computer.
2.
Insert the printer software CD in the computer CD-ROM drive, and then doubleclick the CD desktop icon.
3.
Double-click the HP Deskjet 6800 installer icon, and then follow the onscreen
instructions.
4.
On the Connection Type screen, select Wireless Network (802.11), and then click
Next.
5.
Proceed through the next several screens to find the printer on the network.
Go to the next page...
17
English
1.
Marlin_NG.book Page 18 Friday, June 18, 2004 2:54 PM
On the Confirm or Change Settings screen, click the Change Settings button.
English
6.
7.
On the Change Settings screen, click the Change Settings button.
The printer embedded Web server (EWS) opens.
8.
On the EWS, click the Networking tab.
9.
Under the Connections heading, click Wireless (802.11).
10. On the Wireless (802.11) Interface screen, click the Advanced tab.
11. Enter the wireless network settings for the wireless network to which you want to
connect the printer:
•
Under the Network Name heading, enter the network name (such as
“MyNetwork”) in the SSID box.
•
Under the Network Settings heading:
•
Select Ad Hoc.
•
Select the channel from the Channel drop-down list.
•
Enter the network wireless security settings.
12. After entering the wireless network settings, click the Apply button, and then close
the EWS.
13. On the Add Printer screen, click Open Print Center.
14. Click Add Printer.
Go to the next page...
18
Marlin_NG.book Page 19 Friday, June 18, 2004 2:54 PM
15. Do one of the following depending on the version of Mac OS X you are using:
Mac OS X v 10.2.3 and later
Mac OS X v 10.2.2 and earlier
English
Select Rendezvous.
Select HP IP Printing, then click the
Discover button.
16. Select the printer, and then click the Add button.
17. Close Print Center.
Additional computers
Follow these steps to install the printer software on each computer that will use the
printer.
1.
Insert the printer software CD in the computer CD-ROM drive, and then doubleclick the CD desktop icon.
2.
Double-click the HP Deskjet 6800 installer icon, and then follow the onscreen
instructions.
3.
Close the HP Deskjet 6800 series printer Setup Assistant when it appears.
Since the printer is already configured for the network, you do not need to use the
setup assistant.
4.
Open Print Center, and then follow steps 13 through 17 above.
19
English
Marlin_NG.book Page 20 Friday, June 18, 2004 2:54 PM
802.11g
The printer defaults to 802.11b in ad hoc mode in order to be compatible with the
widest assortment of 802.11 devices. If your network is made up of only 802.11g
devices, then you might want to configure the printer to operate in 802.11g mode in
order to optimize network performance.
To configure the printer to operate in 802.11g mode while connected to an ad hoc
network, follow the steps under “802.11g” on page 13.
Mac OS X Classic
1.
Follow the steps on page 14 to install the printer software on a Mac OS X
computer.
2.
Open Chooser, and then select the HP Inkjet 6.x icon.
Note: If you do not see the HP Inkjet 6.x icon, then insert the printer software CD
into the computer CD-ROM drive and follow the onscreen instructions to install the
Mac OS 9 printer driver. Then repeat step 1.
3.
When asked if you want the computer to scan for TCP/IP network printers, click
Yes.
4.
Select the printer, and then close Chooser.
20
Marlin_NG.book Page 21 Friday, June 18, 2004 2:54 PM
Mac OS 9
1.
Use an Ethernet cable to connect the printer to an Ethernet port on the network,
such as an available Ethernet port on a Wireless Access Point (WAP), router, hub,
or wall socket.
2.
Verify that the Network light is illuminated. If not, check the cable connections.
3.
Press the printer Report Page button to print an HP Report page.
4.
Launch the computer Internet browser, and then enter the printer URL listed on the
HP Report page in the address box to open the printer embedded Web server
(EWS).
5.
On the EWS, click the Networking tab.
6.
Under the Connections heading, click Wireless (802.11).
7.
On the Wireless (802.11) Interface screen, click the Start Wizard button to start the
Wireless Configuration Wizard.
Go to the next page...
21
English
Infrastructure network without encryption
English
Marlin_NG.book Page 22 Friday, June 18, 2004 2:54 PM
8.
Follow the onscreen instructions to configure the printer settings.
9.
After the Wireless Configuration Wizard is finished, close the EWS.
10. Unplug the Ethernet cable from the printer to enable wireless communication.
11. Insert the printer software CD in the computer CD-ROM drive, and then double-
click the CD desktop icon.
12. Double-click the HP Deskjet 6800 installer icon, and then restart the computer
when prompted.
13. Open Chooser, and then select the HP Inkjet 6.x icon.
14. When asked if you want the computer to scan for TCP/IP network printers, click
Yes.
15. Select the printer, and then close Chooser.
Additional computers
You must install the printer software on each computer that will use the printer. Follow
steps 11 through 15 above to install the printer software on other network computers.
22
Marlin_NG.book Page 23 Friday, June 18, 2004 2:54 PM
Infrastructure network with encryption
1.
Open the AirPort Admin Utility, then do the following:
Click Base Station, and then select Equivalent Network Password.
b.
Write down the WEP key on a piece of paper.
c.
Close the AirPort Admin Utility.
English
a.
2.
Use an Ethernet cable to connect the printer to an Ethernet port on the network,
such as an available Ethernet port on a Wireless Access Point (WAP), router, hub,
or wall socket.
3.
Verify that the Network light is illuminated. If not, check the cable connections.
4.
Press the printer Report Page button to print an HP Report page.
5.
Launch the computer Internet browser, and then enter the printer URL listed on the
HP Report page in the address box to open the printer embedded Web server
(EWS).
6.
On the EWS, click the Networking tab.
7.
Under the Connections heading, click Wireless (802.11).
Go to the next page...
23
Marlin_NG.book Page 24 Friday, June 18, 2004 2:54 PM
On the Wireless (802.11) Interface screen, click the Start Wizard button to start the
Wireless Configuration Wizard.
9.
Follow the onscreen instructions to configure the printer settings, including the
WEP key you wrote down in step 1.
English
8.
10. After the Wireless Configuration Wizard is finished, close the EWS.
11. Unplug the Ethernet cable from the printer to enable wireless communication.
12. Insert the printer software CD in the computer CD-ROM drive, and then double-
click the CD desktop icon.
13. Double-click the HP Deskjet 6800 installer icon, and then restart the computer
when prompted.
14. Open Chooser, and then select the HP Inkjet 6.x icon.
15. When asked if you want the computer to scan for TCP/IP network printers, click
Yes.
16. Select the printer, and then close Chooser.
Additional computers
You must install the printer software on each computer that will use the printer. Follow
steps 12 through 16 above to install the printer software on other network computers.
24
Marlin_NG.book Page 25 Friday, June 18, 2004 2:54 PM
Ad hoc or computer-to-computer
Press the printer Report Page button to print an HP Report page.
2.
Open the AirPort Setup Assistant, and then follow the onscreen instructions for
joining an existing wireless network. Use hpsetup as the existing network to join.
3.
Find the URL listed on the HP Report page.
4.
Launch the computer Internet browser, and then enter the printer URL listed on the
HP Report page in the address box to open the printer embedded Web server
(EWS).
5.
On the EWS, click the Networking tab.
6.
Under the Connections heading, click Wireless (802.11).
7.
On the Wireless (802.11) Interface screen, click the Advanced tab.
8.
Enter the wireless network settings for the wireless network to which you want to
connect the printer:
English
1.
9.
•
Under the Network Name heading, enter the network name (such as
“MyNetwork”) in the SSID box.
•
Under the Network Settings heading:
•
Select Ad Hoc.
•
Select the channel from the Channel drop-down list.
•
Enter the network wireless security settings.
After entering the wireless network settings, click the Apply button, and then close
the EWS.
10. Open the AirPort Setup Assistant, and then reset the computer to the original
AirPort configuration.
Go to the next page...
25
Marlin_NG.book Page 26 Friday, June 18, 2004 2:54 PM
11. Insert the printer software CD in the computer CD-ROM drive, and then doubleEnglish
click the CD desktop icon.
12. Double-click the HP Deskjet 6800 installer icon, and then restart the computer
when prompted.
13. Open Chooser, and then select the HP Inkjet 6.x icon.
14. When asked if you want the computer to scan for TCP/IP network printers, click
Yes.
15. Select the printer, and then close Chooser.
Additional computers
You must install the printer software on each computer that will use the printer. Follow
steps 11 through 15 above to install the printer software on other network computers.
802.11g
The printer defaults to 802.11b in ad hoc mode in order to be compatible with the
widest assortment of 802.11 devices. If your network is made up of only 802.11g
devices, then you might want to configure the printer to operate in 802.11g mode in
order to optimize network performance.
To configure the printer to operate in 802.11g mode while connected to an ad hoc
network, follow the steps under “802.11g” on page 13.
26
Marlin_NG.book Page 27 Friday, June 18, 2004 2:54 PM
Troubleshooting a wireless connection
English
During software installation
During the software installation process, the setup wizard searches for the printer
twice, once when the Ethernet cable is connected to the printer, and then after the
Ethernet cable has been removed.
The computer cannot find the printer when the Ethernet cable
is connected
If the computer cannot find the printer when the Ethernet cable is connected, verify the
following before investigating any of the topics in this section:
•
All cable connections to the computer and the printer are secure.
•
The network is operational and the network hub, switch, router, or Wireless
Access Point (WAP) is powered on.
•
The printer is powered on, paper is loaded in the In tray, and the print
cartridges are correctly installed.
•
All applications, including virus protection programs and personal firewalls,
are closed or disabled.
If you corrected any of the above, try running the installation wizard again.
Connect the Ethernet cable if it is not connected
Connecting the Ethernet cable to the printer is crucial to successfully configuring the
printer to operate on a wireless network.
Use an Ethernet cable to connect the printer to an Ethernet port on the network, such
as an available Ethernet port on a Wireless Access Point (WAP), router, hub, or wall
socket.
After connecting the cable, rerun the installation wizard. When prompted during the
installation, remove the Ethernet cable.
27
Marlin_NG.book Page 28 Friday, June 18, 2004 2:54 PM
English
Check the Network light
Check the Network light on the front of the printer. If the Network light is not
illuminated, then the printer is not connected to the network.
Verify that the cable connections are secure. If the cable connections are secure,
press the Report Page button on the front of the printer to print an HP Report page.
Then try one of the following solutions to connect the printer to the network.
•
Disable any software firewall running on the computer
A software firewall can prevent the computer from finding the printer on the
network during the printer software installation process. If the computer cannot
discover the printer, then the printer software cannot be installed on the computer.
If the computer has a software firewall other than the firewall included with
Windows XP installed (such as, BlackICE®, ZoneAlarm®, or Brickhouse®),
consult the documentation that came with the firewall for help in disabling the
firewall.
Note: The software firewall included with Windows XP does not interfere with the
connection to the printer. If the computer is only running the Windows XP
software firewall, then you do not need to disable the firewall during software
installation or assign the printer a static IP address.
Before installing the printer software on a computer, temporarily disable the
software firewall on the computer, and then assign the printer a static IP address.
After the printer software is installed on the computer, re-enable the firewall.
For instructions about connecting the printer to a network on which computers are
protected by a software firewall, go to “Configuring the printer for a software
firewall” on page 52.
28
Marlin_NG.book Page 29 Friday, June 18, 2004 2:54 PM
•
Place the printer and the computer on the same subnet
Compare the printer IP address listed on the HP Report page with the IP address
for the computer. If the first set of digits in the IP addresses are not identical, then
the printer and the computer are not on the same subnet. For example, if the
computer IP address begins with 169 and the printer IP address begins with 10,
then the printer and the computer are not on the same subnet.
To find the IP address on a Windows computer:
1.
Click Start, click Run, and then enter Command.
2.
Type ipconfig at the command prompt, and then press Enter.
To find the IP address on a Macintosh OS X computer:
1.
Open the Network control panel.
2.
Select Airport in the Show drop-down list, and then click TCP/IP.
To find the IP address on a Macintosh OS 9 computer, select TCP/IP from the
Apple menu.
If the computer and the printer are not on the same subnet, move the printer to
the same subnet as the computer, and then run the setup wizard again.
The computer and the printer are on different subnets.
The computer and the printer are on the same subnet.
29
English
A subnet is a small network that is part of a larger network. If the computer is on
a different subnet than the printer, the software installation can be problematic.
Marlin_NG.book Page 30 Friday, June 18, 2004 2:54 PM
English
•
Verify that the computer is connected to the network
Verify that the computer is connected to the network and the computer LAN or
network card is operating correctly.
The computer cannot find the printer after you remove the
network cable
Check the Wireless Status light on the front of the printer. If the Wireless Status light is
not illuminated, then the printer wireless radio is not active.
Verify that the network cable has been removed from the printer. The printer cannot
communicate over a wireless connection if the network cable is connected to the
printer Ethernet port.
Check the Network light
Check the Network light on the front of the printer. If the Network light is not
illuminated, then the printer is not connected to the network.
30
Marlin_NG.book Page 31 Friday, June 18, 2004 2:54 PM
Try the following solutions:
•
Check the Signal Strength indicator
English
Check the Signal Strength indicator on the front of the printer. If all three bars
are illuminated, then the printer is receiving a strong radio signal.
If none or only one of the bars on the Signal Strength indicator is illuminated,
then verify the following conditions:
•
•
No large objects are obstructing the path between the printer and the
WAP or the printer and the computer.
•
The printer is within range of the WAP or computer.
•
A cordless phone or microwave oven is not operating near the wireless
network.
Compare the printer wireless settings to the network wireless settings
Press the Report Page button on the front of the printer to print an HP Report
page.
Check the settings displayed on the HP Report page against the wireless settings
for the network. Find the settings that do not match. Use the Ethernet cable to
connect the printer to the network, rerun the setup wizard, and then enter the
correct network wireless settings to configure the printer for the network.
31
Marlin_NG.book Page 32 Friday, June 18, 2004 2:54 PM
•
The Wireless Access Point (WAP) filters by MAC address
English
If the network WAP or router filters network devices by MAC address, then follow
these steps:
1.
Find the printer hardware address (MAC address) on the HP Report page.
2.
Open the configuration utility for the WAP or router.
3.
Enter the printer MAC address for the printer.
For help using the configuration utility for the WAP or router, consult the
documentation that came with the WAP or router.
After software installation
Printer does not print
If the printer does not print, then verify the following:
•
The printer is loaded with paper.
•
The printer is not experiencing a paper jam.
•
The Print Cartridge Status lights on the front of the printer are not illuminated
or flashing.
•
The printer is selected in the application from which you are attempting to
print.
•
The network is operational and the network hub, switch, router, or Wireless
Access Point (WAP) is powered on.
•
The printer is powered on.
For further troubleshooting information, see the printer online user’s guide installed on
the computer.
If each of the above conditions is true, then follow the steps to check the Network light
as shown under “Check the Network light” on page 30.
32
wireless_trouble.fm Page 33 Monday, June 21, 2004 2:33 PM
1.
Connect the Ethernet cable to the printer Ethernet port, and then do one of the
following tasks:
•
For an ad hoc network: connect the Ethernet cable to your computer.
•
For an infrastructure network: connect the Ethernet cable to the Wireless
Access Point or router.
2.
Open the printer embedded Web server (EWS). For help opening the EWS, see
page 50.
3.
On the EWS, click the Networking tab.
4.
Under the Connections heading click Wireless (802.11).
5.
On the Wireless Setup tab, click the Start Wizard button.
6.
After the wireless setup wizard has finished, close the EWS, and then disconnect
the Ethernet cable.
33
English
Network settings are wrong or have changed
If any of the settings displayed on the HP Report page do not match the network
settings, or if the network wireless security settings have changed, follow these steps:
Marlin_NG.book Page 34 Friday, June 18, 2004 2:54 PM
If the printer still does not print, try the following solutions:
•
Network authentication protocol is not supported by the printer
English
If you changed the network authentication protocols on your wireless network
after connecting the printer to the network, you might have selected a protocol
that is not supported by the printer.
The printer can support WEP authentication, WPA-AES, and WPA-TKIP. The
network to which the printer is connected must use one of these authentication
protocols or no authentication at all.
•
Software firewall is blocking access to the printer
If your network uses DHCP or AutoIP to assign IP addresses to network devices,
then a software firewall installed on your computer might block access to the
printer after the printer is connected to the network and the printer software is
installed on the computer.
Note: The software firewall included with Windows XP does not interfere with the
connection to the printer. If the computer is only running the Windows XP
software firewall, then you do not need to disable the firewall during software
installation or assign the printer a static IP address.
To fix this problem, follow the steps under “Configuring the printer for a software
firewall” on page 52.
34
Marlin_NG.book Page 35 Friday, June 18, 2004 2:54 PM
•
The printer and the computer are not on the same subnet
Compare the printer IP address listed on the HP Report page with the IP address
for the computer. If the first set of digits in the IP addresses are not identical, then
the printer and the computer are not on the same subnet. For example, if the
computer IP address begins with 169 and the printer IP address begins with 10,
then the printer and the computer are not on the same subnet.
To find the IP address on a Windows computer:
1.
Click Start, click Run, and then enter Command.
2.
Type ipconfig at the command prompt, and then press Enter.
To find the IP address on a Macintosh OS X computer:
1.
Open the Network control panel.
2.
Select Airport in the Show drop-down list, and then click TCP/IP.
To find the IP address on a Macintosh OS 9 computer, select TCP/IP from the
Apple menu.
If the computer and the printer are not on the same subnet, move the printer to
the same subnet as the computer.
The computer and the printer are on different subnets.
The computer and the printer are on the same subnet.
35
English
A subnet is a small network that is part of a larger network. If the computer is on
a different subnet than the printer, the computer and the printer might not be
able to communicate.
English
Marlin_NG.book Page 36 Friday, June 18, 2004 2:54 PM
Connecting the printer to a wired Ethernet
network
Getting started
Has the printer hardware been set up?
Follow the instructions on the setup poster that came with the printer to set up the
printer hardware before connecting the printer to the network.
Are computers on the network protected by a software firewall?
If any of the computers on the network are protected by a software firewall follow the
instructions under “Configuring the printer for a software firewall” on page 52 before
connecting the printer to the network.
Connecting to the printer
Step 1: Connect the printer to the network
Use an Ethernet cable to connect the printer to the network hub, switch, or router.
For instructions on connecting the printer to a network, see “Step 1: Connect the
printer to the network” on page 37.
Step 2: Install the printer software over a wired Ethernet connection
The steps for installing the printer software on your computer vary by operating
system: Windows, Mac OS9, and Mac OSX.
For installation instructions, see “Step 2: Install the printer software over a wired
Ethernet connection” on page 39.
36
Marlin_NG.book Page 37 Friday, June 18, 2004 2:54 PM
Step 1: Connect the printer to the network
English
Follow these steps to connect the printer to an Ethernet network:
1.
Verify that the printer is powered on.
2.
Connect the Ethernet cable to the network hub, switch, or router.
Note: Do not plug the Ethernet cable into
a port labeled Internet, WAN, or Uplink.
3.
Connect the Ethernet cable to the Ethernet port on the back of the printer.
4.
Do one of the following:
State of the Link light
Task
On
Go to step 5.
Off
Repeat steps 2 through 4.
If the Link light is still off, then verify the following:
• The printer is powered on.
• The network hub, switch, or router is powered on.
• All cable connections are secure.
• You are using an Ethernet cable.
Go to the next page...
37
Marlin_NG.book Page 38 Friday, June 18, 2004 2:54 PM
Press the printer Report Page button to print an HP Report page.
6.
Install the printer software on each computer that will use the printer (see “Step 2:
Install the printer software over a wired Ethernet connection” on page 39).
English
5.
Note: It is recommended that the printer and the computers that use the printer be
on the same subnet.
38
Marlin_NG.book Page 39 Friday, June 18, 2004 2:54 PM
English
Step 2: Install the printer software over a
wired Ethernet connection
Software Firewall? If your computer is protected by a software firewall follow the steps
under “Configuring the printer for a software firewall” on page 52 before installing the
printer software.
Windows
1.
Insert the printer software CD in the computer CD-ROM drive, and then follow the
onscreen instructions.
2.
On the Connection Type screen, select Wired Network, and then click Next.
3.
Follow the onscreen instructions to complete the software installation.
Macintosh
Mac OS X
1.
Insert the printer software CD in the computer CD-ROM drive, and then doubleclick the CD desktop icon.
2.
Double-click the HP Deskjet 6800 installer icon, and then follow the onscreen
instructions.
3.
On the Connection Type screen, select Wired Network (802.3), and then click Next.
Go to the next page...
39
English
Marlin_NG.book Page 40 Friday, June 18, 2004 2:54 PM
4.
Follow the onscreen instructions to complete the software installation.
5.
On the Add Printer screen, click Open Print Center.
6.
Click Add Printer.
7.
Do one of the following depending on the version of Mac OS X you are using:
Mac OS x v 10.2.3
Select Rendezvous.
Mac OS x v 10.2.2 and lower
Select HP IP Printing, and then click the
Discover button.
8.
Select the printer, and then click the Add button.
9.
Close Print Center.
40
Marlin_NG.book Page 41 Friday, June 18, 2004 2:54 PM
Mac OS 9
Insert the printer software CD in the computer CD-ROM drive, and then doubleclick the CD desktop icon.
2.
Double-click the HP Deskjet 6800 installer icon, and then restart the computer
when prompted.
3.
Open Chooser, and then select the HP Inkjet 6.x icon.
4.
When asked if you want the computer to scan for TCP/IP network printers, click
Yes.
5.
Select the printer, and then close Chooser.
41
English
1.
English
Marlin_NG.book Page 42 Friday, June 18, 2004 2:54 PM
Troubleshooting a wired Ethernet
connection
During installation
The computer cannot find the printer
If you are unable to install the printer software on the computer or discover the printer,
verify the following before investigating any of the topics in this section:
•
All cable connections to the computer and the printer are secure.
•
The network is operational and the network hub, switch, or router is powered
on.
•
The printer is powered on.
•
All applications, including virus protection programs and personal firewalls,
are closed or disabled.
Check the Network light on the front of the printer. If the Network light is not
illuminated, then the printer is not connected to the network.
Verify that the cable connections are secure. If the cable connections are secure,
press the Report Page button on the front of the printer to print an HP Report page.
Then try one of the following solutions to connect the printer to the network.
42
Marlin_NG.book Page 43 Friday, June 18, 2004 2:54 PM
•
Printer and computer are on different subnets
Compare the printer IP address listed on the HP Report page with the IP address
for the computer. If the first set of digits in the IP addresses are not identical, then
the printer and the computer are not on the same subnet. For example, if the
computer IP address begins with 169 and the printer IP address begins with 10,
then the printer and the computer are not on the same subnet.
To find the IP address on a Windows computer:
1.
Click Start, click Run, and then enter Command.
2.
Type ipconfig at the command prompt, and then press Enter.
To find the IP address on a Macintosh OS X computer:
1.
Open the Network control panel.
2.
Select Airport in the Show drop-down list, and then click TCP/IP.
To find the IP address on a Macintosh OS 9 computer, select TCP/IP from the
Apple menu.
If the printer and the computer are not on the same subnet, move the printer to
the same subnet as the computer and then run the installation wizard again.
The computer and the printer are on different subnets.
The computer and the printer are on the same subnet.
43
English
A subnet is a small network that is part of a larger network. If the computer is on
a different subnet than the printer, the software installation can be problematic.
Marlin_NG.book Page 44 Friday, June 18, 2004 2:54 PM
•
Disable any firewall running on the computer
English
A software firewall can prevent the computer from finding the printer on the
network during the printer software installation process. If the computer cannot
discover the printer, then the printer software cannot be installed on the computer.
If the computer has a software firewall other than the firewall included with
Windows XP installed (such as BlackICE®, ZoneAlarm®, or Brickhouse®),
consult the documentation that came with the firewall for help in disabling the
firewall.
Note: The software firewall included with Windows XP does not interfere with the
connection to the printer. If the computer is only running the Windows XP
software firewall, then you do not need to disable the firewall during software
installation or assign the printer a static IP address.
Before installing the printer software on a computer, temporarily disable the
software firewall on the computer, and then assign the printer a static IP address.
After the printer software is installed on the computer, re-enable the firewall.
For instructions about connecting the printer to a network on which computers are
protected by a software firewall, go to “Configuring the printer for a software
firewall” on page 52.
44
Marlin_NG.book Page 45 Friday, June 18, 2004 2:54 PM
After installation
English
Printer does not print
If the printer does not print, then verify the following:
•
The printer is loaded with paper.
•
The printer is not experiencing a paper jam.
•
The Print Cartridge Status lights on the front of the printer are not illuminated
or flashing.
•
The printer is selected in the application from which you are attempting to
print.
•
The network is operational and the network hub, switch, or router is powered
on.
•
The printer is powered on.
•
All cable connections to the computer and the printer are secure.
For further troubleshooting information, see the printer online user guide installed on
the computer.
Check the Network light on the front of the printer. If the Network light is not
illuminated, then the printer is not connected to the network.
Verify that the cable connections are secure. If the cable connections are secure,
press the Report Page button on the front of the printer to print an HP Report page.
Then try one of the following solutions to connect the printer to the network.
45
Marlin_NG.book Page 46 Friday, June 18, 2004 2:54 PM
•
Printer and computer are on different subnets
English
A subnet is a small network that is part of a larger network. If the computer is on
a different subnet than the printer, the computer and the printer might not be
able to communicate.
Compare the printer IP address listed on the HP Report page with the IP address
for the computer. If the first set of digits in the IP addresses are not identical, then
the printer and the computer are not on the same subnet. For example, if the
computer IP address begins with 169 and the printer IP address begins with 10,
then the printer and the computer are not on the same subnet.
To find the IP address on a Windows computer:
1.
Click Start, click Run, and then enter Command.
2.
Type ipconfig at the command prompt, and then press Enter.
To find the IP address on a Macintosh OS X computer:
1.
Open the Network control panel.
2.
Select Airport in the Show drop-down list, and then click TCP/IP.
To find the IP address on a Macintosh OS 9 computer, select TCP/IP from the
Apple menu.
If the printer and the computer are not on the same subnet, move the printer to
the same subnet as the computer.
The computer and the printer are on different subnets.
The computer and the printer are on the same subnet.
46
Marlin_NG.book Page 47 Friday, June 18, 2004 2:54 PM
•
Software firewall is blocking access to the printer
Note: The software firewall included with Windows XP does not interfere with the
connection to the printer. If the computer is only running the Windows XP
software firewall, then you do not need to disable the firewall during software
installation or assign the printer a static IP address.
To fix this problem, follow the steps under “Configuring the printer for a software
firewall” on page 52.
Network settings have changed
Follow these steps to check the printer network settings listed on the HP Report page
against the actual settings for the network:
1.
Open the configuration utility for the network hub, switch, or router and find the
network settings.
For help using the configuration utility for the network hub, switch, or router,
consult the documentation that came with the hub, switch, or router.
2.
Open the printer embedded Web server (EWS). For help opening the EWS, see
page 50.
3.
On the EWS, click the Networking tab.
4.
Under the Connections heading, click Wired (802.3).
5.
Click the IP Configuration tab.
6.
Enter the correct settings for network, and then click the Apply button.
7.
Close the EWS.
8.
Press the printer Report Page button to print an HP Report page.
9.
Compare the printer network settings to the actual setting for the network. If the
settings do not match, repeat steps 2 through 9.
47
English
If your network uses DHCP or AutoIP to assign IP addresses to network devices,
then a software firewall installed on your computer might block access to the
printer after the printer is connected to the network and the printer software is
installed on the computer.
Marlin_NG.book Page 48 Friday, June 18, 2004 2:54 PM
English
Managing the printer on a network
The printer offers several tools to help you manage the printer on a network.
HP Report page . . . . . . . . . . . . . . . . . . . . . . . . . . . . . . . . . . . . . . . 49
Embedded Web server (EWS). . . . . . . . . . . . . . . . . . . . . . . . . . . . 50
Changing wireless security settings . . . . . . . . . . . . . . . . . . . . . . 51
Configuring the printer for a software firewall . . . . . . . . . . . . . . 52
Resetting the printer to factory default settings. . . . . . . . . . . . . 57
48
Marlin_NG.book Page 49 Friday, June 18, 2004 2:54 PM
HP Report page
English
Press the Report Page button to print an HP Report page.
The HP Report page supplies useful information about the printer wireless, wired, and
PictBridge connections, such as the following items:
•
URL: The address of the printer embedded Web server.
•
Hardware address (MAC): The printer media access control (MAC) address.
•
IP address: The IP address of the printer.
•
Subnet mask: The subnet mask of the network to which the printer is
connected.
•
Default gateway: The IP address of the gateway.
•
Communication mode: The wireless communication mode to which the printer
is set.
•
Network name (SSID): The network name of the wireless network to which the
printer is connected.
•
Channel: The number of the channel on which the printer wireless radio is
broadcasting.
•
Authentication type: The authentication protocol that the printer is using.
•
Encryption: The wireless encryption strategy that the printer is using.
49
Marlin_NG.book Page 50 Friday, June 18, 2004 2:54 PM
English
Embedded Web server (EWS)
The printer has an internal Web page, called the embedded Web server (EWS). You
can access the EWS with an Internet browser.
To use the EWS, the printer must have a valid IP address and be on the same subnet
as the computer you are using.
Follow these steps to open the EWS:
1.
Press the printer Report Page button to print an HP Report page.
2.
Find the printer URL on the HP Report page.
Note: Verify the printer URL is something other than http://0.0.0.0 and that the
subnet mask matches that of your computer. If either of these conditions is not
true, connect an Ethernet cable to the printer and the network router, and then
repeat steps 1 and 2.
3.
Launch the Web browser (use either Internet Explorer 5 and higher, Netscape
4.75 and higher, or Safari).
4.
Enter the printer URL in the browser address box, and then press Enter.
50
Marlin_NG.book Page 51 Friday, June 18, 2004 2:54 PM
Changing wireless security settings
English
If you change the wireless security settings for your wireless network, you must
reconfigure the printer with the new settings.
Getting started
Before reconfiguring the printer, you must find the following settings:
•
Network name (SSID)
•
The new wireless security settings:
•
WEP: Find the WEP key(s)
•
WPA: Find the passphrase and authentication protocol
Consult the configuration utility for the network Wireless Access Point (WAP) to find
the wireless security settings.
Configuring the printer
Follow these steps to reconfigure the printer with new wireless security settings:
1.
Use an Ethernet cable to connect the printer to an Ethernet port on the network,
such as an available Ethernet port on a Wireless Access Point (WAP), router, hub,
or wall socket.
2.
Open the printer embedded Web server (EWS). For help opening the EWS, see
page 50.
3.
On the EWS, click the Networking tab.
4.
Under the Connections heading, click Wireless (802.11).
5.
On the Wireless Setup tab, click the Start Wizard button.
6.
Follow the onscreen instructions to enter the new settings and finish the
configuration.
51
English
Marlin_NG.book Page 52 Friday, June 18, 2004 2:54 PM
Configuring the printer for a software
firewall
A software firewall protects a computer from unauthorized access when a computer is
connected to the Internet.
Popular software firewalls include: BlackICE®, ZoneAlarm®, and Brickhouse®.
Note: Windows XP has a software firewall included. If your computer uses only
the Windows XP firewall, then you do not need to follow the instructions
contained in this section.
Problem
Unfortunately, a software firewall can cause two problems when using the printer on
a wired or wireless network.
• Failed installation: A software firewall can prevent the computer from finding the
printer on the network during the printer software installation process. If the
computer cannot discover the printer, then the printer software cannot be installed
on the computer.
• Lost connection: If the printer is connected to a wired or wireless network that uses
DHCP or AutoIP to assign IP addresses, then if the printer IP address changes, a
software firewall can prevent the computer from finding the printer on the network
even if the printer software has been successfully installed on the computer.
Solution
In order for the printer to be usable on a network on which computers are protected
by a software firewall, you must do the following:
1.
Temporarily disable the software firewall before installing the printer software on
a computer.
2.
Assign the printer a static IP address.
52
Marlin_NG.book Page 53 Friday, June 18, 2004 2:54 PM
Temporarily disabling the software firewall before installation
Whenever the software firewall is disabled, HP strongly recommends that the
following items be installed on the computer:
•
A hardware device, such as a gateway, that provides firewall protection
between the computer and the Internet
•
An up-to-date anti-virus software program
For maximum virus protection while the firewall is disabled, disconnect the computer
or router from the Internet while you install the printer software on the computer. After
the printer software is installed, you can reconnect the computer or router to the
Internet.
After disabling the software firewall, follow the steps for assigning the printer a static
IP address.
53
English
Before assigning the printer a static IP address and then installing the printer software
on a computer, temporarily disable the software firewall on the computer. For
instructions about disabling the software firewall, see the documentation that came
with the software firewall.
Marlin_NG.book Page 54 Friday, June 18, 2004 2:54 PM
English
Assigning the printer a static IP address
Getting ready
Before assigning the printer a static IP address, you must find the following
information about your network:
•
The IP address range of the network DHCP server
•
Subnet mask
•
Gateway
To find this information, see the configuration utility for the network router or switch.
Otherwise, see the documentation that came with the network router or switch.
The static IP address must be outside the range of IP addresses that your network
assigns to devices on the network.
For example, a network might use DHCP to assign IP addresses that range from
1.1.1.1 to 1.1.1.100. In this case, 1.1.1.25 would not be a good static IP address to
assign to the printer since it falls in the range of IP addresses assigned by the network.
However, 1.1.1.101 would be a good static IP address because it falls outside the
range of IP addresses assigned by the network.
54
Marlin_NG.book Page 55 Friday, June 18, 2004 2:54 PM
Assigning the static IP address
Follow these steps to assign the printer a static IP address:
Use an Ethernet cable to connect the printer to an Ethernet port on the network,
such as an available Ethernet port on a Wireless Access Point (WAP), router, hub,
or wall socket.
2.
When the Network light on the front of the printer is turned on and solid, press
the Report Page button to print an HP Report page.
3.
Find the printer URL on the HP Report page.
4.
Launch the computer Internet browser, and then enter the printer URL listed on the
HP Report page in the address box to open the printer embedded Web server
(EWS).
5.
On the EWS, click the Networking tab.
6.
Under the Connections heading, click one of the following options:
•
If you are connecting the printer to a wired Ethernet network, click
Wired (802.3).
•
7.
If you are connecting the printer to a wireless network, click Wireless
(802.11), and then click the IP Configuration tab.
Under the IP Address Configuration heading, select Manual IP, and then enter the
static IP address you want to assign to the printer, the subnet mask, and default
gateway.
Note: Remember, the static IP address must be outside the range of IP addresses
assigned by the network. Also, if you do not have a subnet mask or default
gateway to enter, then enter 0.0.0.0 for each item.
Go to the next page...
55
English
1.
Marlin_NG.book Page 56 Friday, June 18, 2004 2:54 PM
English
8.
Under the DNS Address Configuration heading, enter the preferred and alternate
DNS servers.
Note: If your do not have preferred and alternate DNS servers to enter, then enter
0.0.0.0 for each item.
9.
After entering all of the information, click the Apply button, and then close the
EWS.
10. Open the configuration utility for the software firewall, and then enter the IP
address that you assigned to the printer in the list of accepted IP addresses.
For help with the software firewall configuration utility, see the documentation that
came with the software firewall.
After assigning the printer a static IP address, follow the printer software installation
instructions appropriate for how you want to connect the printer to the network:
•
Wireless connection: go to page 9.
•
Wired Ethernet connection: go to page 37.
Note: After installing the printer software, re-enable the software firewall on the
computer.
56
Marlin_NG.book Page 57 Friday, June 18, 2004 2:54 PM
English
Resetting the printer to factory default
settings
Resetting the printer to the factory default settings clears all the settings from the
printer memory for your network. This should only be done as a last resort when
troubleshooting the printer.
Resetting the printer to the factory default settings may require you to reinstall the
printer software. Additionally, you will also have to reconfigure the printer security
settings.
The printer default settings are:
Option
Default setting
Communication mode
Ad hoc
Network name (SSID)
hpsetup
Encryption
None
IP address
Automatic
Wireless radio
On
EWS administrator password
[blank]
Follow these steps to reset the printer to the factory default settings:
1.
Verify that the printer is powered on.
2.
Press and hold down the Report Page button.
3.
While holding down the Report Page button, press the Cancel button three times.
4.
Release the Report Page button.
57
Marlin_NG.book Page 58 Friday, June 18, 2004 2:54 PM
English
Glossary
802.11g and b: 802.11g and 802.11b are wireless standards that communicate in
the 2.4 GHz band. 802.11g provides speeds up to 54 Mbps. 802.11b provides
speeds up to 11 Mbps.
Ad hoc network: A type of wireless network in which devices directly communicate
with each other rather than through a Wireless Access Point (WAP). Ad hoc networks
are typically small and simple (for example, two wireless PCs or a wireless PC and a
wireless printer). Performance on these types of networks can degrade if more than
six devices are on the network. Ad hoc networks are also known as “computer-tocomputer networks,” “peer-to-peer networks,” “independent basic service stations
(IBSS),” or “direct-connect wireless networks.”
Authentication: Authentication is a wireless network security strategy. On a network
with authentication, devices use a shared key as a password and communicate only
with devices that know the key. Unlike WEP, authentication does not encrypt the data
sent between wireless devices. However, authentication can be used in conjunction
with WEP. Authentication keys and WEP keys can be identical.
Channel: One of several pre-set frequencies at which 802.11-enabled devices
communicate in order to reduce interference. The number of channels available varies
by country/region.
Embedded Web server (EWS): The printer embedded Web server is a networking
configuration utility that is accessed through an Internet browser. For more
information, see “Embedded Web server (EWS)” on page 50.
Encryption: A network security strategy that encodes the data sent across a wireless
network making the data unintelligible to eavesdroppers. The printer supports WEP
and WPA.
Encryption keys: A sequence of characters or digits that a wireless device uses to
encode data. Encryption keys can be static (as they are in WEP) or dynamic (as they
are in WPA).
58
Marlin_NG.book Page 59 Friday, June 18, 2004 2:54 PM
Ethernet: A popular form of wired computer networking for Local Area Networks.
Firewall: A combination of hardware and software tools that protect a network from
unwanted entry.
Gateway: A dedicated device (router or computer) that connects two different
networks. For example, a computer on an Ethernet network may act as a gateway
between the network and the Internet.
Hub: A simple device that acts as the center of an Ethernet network. Other devices on
the network are connected to the hub.
IP address (Internet Protocol address): A unique number that identifies a device on a
network. The IP address is often automatically assigned by DHCP or AutoIP. However,
a device can be manually assigned a static IP address.
Infrastructure network: A type of wireless network in which devices communicate with
each other through a Wireless Access Point (WAP), such as a wireless network hub,
router, or gateway.
Network card: A network card enables a computer to communicate on a wired or
wireless network.
Network name: A network name is an alphanumeric, case-sensitive character string
that provides basic access control to a wireless network. A network name is also
known as a “Service Set Identifier (SSID).”
Subnet: A small network that acts as part of a large network. It is recommended that
the printer and the computers that use the printer all be on the same subnet.
Subnet mask: A number that identifies the IP addresses that belong to a subnet.
Switch: A network device that manages network traffic in order to minimize collisions
and maximize speed.
59
English
Ethernet cable: There are two types of Ethernet cables. A straight-through cable is the
most common and is used to connect devices on a network to a hub or router. A
crossover cable is used to connect two devices that have Ethernet ports but that are
not hubs or routers.
Marlin_NG.book Page 60 Friday, June 18, 2004 2:54 PM
USB flash drive: A USB flash drive is a portable storage device that plugs into a USB
English
port. USB flash drives are sometimes called “thumbdrives” or “jumpdrives.”
WEP: Wired Equivalent Privacy (WEP) provides security by encrypting data sent over
radio waves from one wireless device to another wireless device. WEP encodes the
data sent across the network making the data unintelligible to eavesdroppers. Only
devices that share the same WEP settings as the printer will be able to communicate
with the printer. WEP depends on encryption keys that are static and provides less
security than WPA.
WEP key: A WEP key, or encryption key, is a sequence of alphanumeric characters or
hexadecimal digits. After creating a WEP key, you must remember it or store it in a
secure location. You may not be able to retrieve the WEP key if you lose it. A WEP
key is either 64- or 128-bits long. The first 24 bits of the key are provided
automatically. When creating the WEP key, the person creating the key provides the
remaining bits (40 bits in the case of a 64-bit key, or 104 bits in the case of a 128-bit
key).
Wireless Access Point (WAP): A Wireless Access Point (WAP) is a device through which
devices (for example, computers and printers) on an infrastructure wireless network
communicate with one another. A WAP is also called a “base station.”
Wireless Network Key: On a computer that is running Windows XP service pack 2,
you can use a USB flash drive to create a Wireless Network Key. A Wireless Network
Key allows you to easily configure wireless devices for a wireless network. For more
information, see “Infrastructure network with a Wireless Network Key” on page 10.
Wireless profile: A wireless profile is a collection of wireless network settings that
applies to a particular wireless network. For example, a wireless LAN card can have
one profile for a home network and another profile for an office network. When
installing a device on a network, be sure to select the appropriate profile.
WPA: Wi-Fi Protected Access (WPA) provides security by encrypting data sent over
radio waves from one wireless device to another wireless device and by controlling
access to network resources through authentication protocols. Only devices that share
the same WPA settings as the printer will be able to communicate with the printer.
WPA uses encryption keys that change frequently. WPA provides better security than
WEP.
60
Marlin_NG.book Page 9 Friday, June 18, 2004 2:54 PM
BackCover.fm Page 10 Tuesday, June 22, 2004 5:21 PM
Printed on minimum 50% recycled fiber and
30% postconsumer waste.
© Copyright 2004
Copyright 2004 Hewlett-Packard Development
Company, L.P.
*C9029-90066*
C9029-90066
Printed in [country] 07/2004
Printed in [country] 07/2004