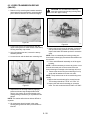
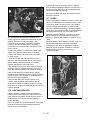
1
Sierra
®
Service Manual
Models 936014-026, 936305-313
03675400 04/00
Printed in USA
SECTION
- INTRODUCTION
TABLE1OF
CONTENTS
Section 1 - Introduction . . . . . . . . . . . . . . . . . .
1.1 The Manual . . . . . . . . . . . . . . . . . . . . . . . .
1.2 Service and Replacement Parts . . . . . . . .
1.3 Product Registration . . . . . . . . . . . . . . . . .
1.4 Unauthorized Replacement Parts . . . . . . .
1.5 Disclaimer . . . . . . . . . . . . . . . . . . . . . . . . .
1.6 Technical Service Communications . . . . . .
1.7 Preparation . . . . . . . . . . . . . . . . . . . . . . . .
1-2
1-3
1-3
1-3
1-3
1-3
1-3
1-4
Section 2 - Safety . . . . . . . . . . . . . . . . . . . . . . .
2.1 Safety Alerts . . . . . . . . . . . . . . . . . . . . . . .
2.2 Signal Words . . . . . . . . . . . . . . . . . . . . . . .
2.3 Notations . . . . . . . . . . . . . . . . . . . . . . . . . .
2.4 Practices and Laws . . . . . . . . . . . . . . . . . .
2.5 Required Operator Training . . . . . . . . . . . .
2.6 Safety Precautions. . . . . . . . . . . . . . . . . . .
2-4
2-4
2-4
2-4
2-4
2-4
2-4
6.6 Hydro Transmission Installation . . . . . . . . 6-33
Section 6 - Hydro Drive Train . . . . . . . . . . . . .
6.1 Hydro Transmission Troubleshooting . . . .
6.2 Fluids/Greases. . . . . . . . . . . . . . . . . . . . .
6.3 Hydro Transmission Removal . . . . . . . . .
6.4 Hydro Transmission Repair (Minor) . . . . .
6.5 Hydro Transmission Repair (Major) . . . . .
6-25
6-25
6-26
6-26
6-27
6-28
Section 8 - Steering. . . . . . . . . . . . . . . . . . . . .
8.1 Steering Unit Removal . . . . . . . . . . . . . . .
8.2 Steering Unit Assembly . . . . . . . . . . . . . .
8.3 Tie Rod Adjustment . . . . . . . . . . . . . . . . .
8-37
8-37
8-37
8-37
Section 10 - Fuel System . . . . . . . . . . . . . . . . 9-39
10.1 Fuel System Troubleshooting. . . . . . . . 10-39
10.2 Fuel Pump . . . . . . . . . . . . . . . . . . . . . . 10-40
10.3 Fuel System Contamination. . . . . . . . . 10-40
10.4 Fuel Tank . . . . . . . . . . . . . . . . . . . . . . . 10-40
Section 4 - General Maintenance
& Adjustments . . . . . . . . . . . . . . . . . . . . . . 4-15
4.1 Controls and Features . . . . . . . . . . . . . . . 4-15
4.2 Filling The Fuel Tank . . . . . . . . . . . . . . . . 4-16
4.3 General Lubrication . . . . . . . . . . . . . . . . . 4-16
4.4 Checking Fasteners . . . . . . . . . . . . . . . . . 4-16
4.5 Checking Engine Oil . . . . . . . . . . . . . . . . 4-16
4.6 Changing Oil . . . . . . . . . . . . . . . . . . . . . . 4-17
4.7 Checking Engine Cooling. . . . . . . . . . . . . 4-17
4.8 Cleaning The Air Cleaner . . . . . . . . . . . . 4-17
4.9 Changing The Air Cleaner Element . . . . . 4-17
4.10 Checking The Tires . . . . . . . . . . . . . . . . 4-17
4.11 Checking The Transmission Fluid (Hydro)4-18
4.12 Priming The Transmission (Hydro). . . . . 4-18
4.13 Checking The PTO Clutch . . . . . . . . . . . 4-18
4.14 Adjustment Of Transmission Neutral
(Hydro) . . . . . . . . . . . . . . . . . . . . . . . . . 4-19
4.15 Adjustment Of Transaxle Neutral (Gear) 4-19
4.16 Adjustment Of Directional Control Pedal 4-20
4.17 Adjusting The Brake (Hydro) . . . . . . . . . 4-20
4.18 Adjusting The Brake (Gear) . . . . . . . . . . 4-20
4.19 Adjusting The Seat . . . . . . . . . . . . . . . . 4-21
4.20 Mower Deck Belt Adjustment. . . . . . . . . 4-21
4.21 Mower Belt Replacement. . . . . . . . . . . . 4-21
4.22 Mower Spindle Lubrication/
Jackshaft Lubrication . . . . . . . . . . . . . . 4-21
4.23 Transaxle Belt Replacement . . . . . . . . . 4-22
4.24 Steering . . . . . . . . . . . . . . . . . . . . . . . . . 4-22
5-23
5-23
5-24
5-24
7-34
7-34
7-35
7-35
7-36
Section 9 - Lift System . . . . . . . . . . . . . . . . . .9-38
9.1 Lift System Over View . . . . . . . . . . . . . . . 9-38
9.2 Lift System Removal . . . . . . . . . . . . . . . . 9-38
9.3 Lift System Installation . . . . . . . . . . . . . . . 9-38
Section 3 - Specifications . . . . . . . . . . . . . . . . 3-7
Section 5 - Engine. . . . . . . . . . . . . . . . . . . . . .
5.1 Engine Troubleshooting . . . . . . . . . . . . . .
5.2 Engine Removal. . . . . . . . . . . . . . . . . . . .
5.3 Engine Installation . . . . . . . . . . . . . . . . . .
Section 7 - Gear Drive Train . . . . . . . . . . . . . .
7.1 Gear Transmission Troubleshooting . . . . .
7.2 Gear Transaxle Removal (Peerless) . . . .
7.3 Transaxle Teardown . . . . . . . . . . . . . . . . .
7.4 Transaxle Installation . . . . . . . . . . . . . . . .
Section 11 - Electrical . . . . . . . . . . . . . . . . . . 11-41
11.1 Tools. . . . . . . . . . . . . . . . . . . . . . . . . . . 11-41
11.2 Electrical Measurements . . . . . . . . . . . 11-41
11.3 Battery . . . . . . . . . . . . . . . . . . . . . . . . . 11-42
11.4 Switches. . . . . . . . . . . . . . . . . . . . . . . . 11-43
11.5 Solenoid And Relays . . . . . . . . . . . . . . 11-44
11.6 Lighting Circuits . . . . . . . . . . . . . . . . . . 11-45
11.7 Fuses . . . . . . . . . . . . . . . . . . . . . . . . . . 11-45
11.8 Diodes And Rectifiers . . . . . . . . . . . . . 11-46
11.9 Electric Clutch . . . . . . . . . . . . . . . . . . . 11-46
11.10 Electrical . . . . . . . . . . . . . . . . . . . . . . 11-46
11.11 Switch Continuity . . . . . . . . . . . . . . . . 11-48
11.12 Wiring Diagrams . . . . . . . . . . . . . . . . 11-52
Section 12 - Mower . . . . . . . . . . . . . . . . . . . . 12-62
12.1 40" And 48" Mower Removal . . . . . . . . 12-62
12.2 40" And 48" Mower Installation . . . . . . 12-62
12.3 40" Mower Spindle Removal . . . . . . . . 12-62
12.4 40" Spindle Repair . . . . . . . . . . . . . . . . 12-62
12.5 Spindle Installation. . . . . . . . . . . . . . . . 12-63
12.6 40" Jackshaft Removal And Repair . . . 12-63
12.7 40" Jackshaft Installation . . . . . . . . . . . 12-63
Section 13 - Sno-Thro Attachment . . . . . . . 13-64
13.1 Installation . . . . . . . . . . . . . . . . . . . . . . 13-64
13.2 Shear Bolt Replacement . . . . . . . . . . . 13-64
13.3 Mule Drive Belt. . . . . . . . . . . . . . . . . . . 13-64
13.4 Power Take Off (PTO) Belt . . . . . . . . . . 13-64
13.5 Auger/Impeller Drive Belt . . . . . . . . . . . 13-64
13.6 Oil And Grease Locations . . . . . . . . . . 13-64
13.7 Scraper Blade . . . . . . . . . . . . . . . . . . . 13-65
13.8 Runners . . . . . . . . . . . . . . . . . . . . . . . . 13-65
13.9 Discharge Chute Cable . . . . . . . . . . . . 13-65
13.10 Auger/Impeller, Gear Case Removal . 13-65
13.11 Gear Case . . . . . . . . . . . . . . . . . . . . . 13-65
2
SECTION 1 - INTRODUCTION
1.1 THE MANUAL
1.3 PRODUCT REGISTRATION
The purpose of this manual is to provide complete
instructions for service, maintenance, disassembly,
repair, and installation of the mechanical components
for the unit.
A warranty registration card must be filled out, signed,
and returned at time of purchase. This card activates
the warranty. Claims meeting requirements during
limited warranty period will be honored.
Dealer trained service personnel should use this
manual as a supplement to and reminder of the training
sessions conducted by the company.
1.4 UNAUTHORIZED REPLACEMENT
PARTS
Use only Ariens replacement parts. The replacement of
any part on this vehicle with anything other than a
Ariens authorized replacement part may adversely
affect the performance, durability, or safety of this unit
and may void the warranty. Ariens disclaims liability for
any claims or damages, whether warranty, property
damage, personal injury, or death arising out of the use
of unauthorized replacement parts.
Read all information for servicing a part or system
before repair work is started to avoid needless
disassembly.
Operation
Before operation of the unit, carefully and completely
read manuals supplied with the unit. The contents will
provide you with an understanding of safety
instructions and controls during normal operation and
maintenance.
1.5 DISCLAIMER
Directional Reference
Ariens reserves the right to discontinue, make changes
to, and add improvements upon its products at any
time without public notice or obligation. The
descriptions and specifications contained in this
manual were in effect at printing. Equipment described
within this manual may be optional. Some illustrations
may not be applicable to your unit.
All reference to left, right, front, or rear are given from
the operator in the operator position and facing the
direction of forward travel.
1.6 TECHNICAL SERVICE
COMMUNICATIONS
Safety Messages
For your safety and the safety of others always read,
understand, and follow all DANGER, WARNING, and
CAUTION messages found in manuals and on safety
decals.
1.2 SERVICE AND REPLACEMENT PARTS
When ordering publications, replacement parts, or
making service inquiries, know the Model and Serial
numbers of your unit and engine.
Numbers are located on the product registration form in
the unit literature package. They are printed on a serial
number label, located on the frame of your unit.
Ariens Technical Service communicates information to
the field using Service Letters, Service Bulletins,
Product Notices, and Campaigns. Each
communication signifies a type of information and
priority. The dealer is responsible to carry out the
directive provided in the communication. The types of
communication are:
Service Letter - General technical information for the
dealer. Technical information on how to service the
product and product improvements.
Service Bulletin - Notification to update products to
resolve certain issues or a notification of a policy
change.
Product Notices - Notification of limited product
located in a certain region. This is a limited distribution
to only those who received the product involved.
Campaigns - Notification of a safety related issue. All
products must be updated and are tracked by the
factory until all units are corrected.
Serial Number
Figure 1
1-3
1.7 PREPARATION
Before starting any removal of parts, proper
preparation is very important for efficient work. A clean
work area at the start of each job will allow you to
perform service repairs easily and quickly.
in the disassembly order on a clean work surface.
Organization is a key part of proper reassembly.
Tools, instruments, and parts needed for the job should
be gathered before work is started. Interrupting a job to
locate tools or parts is a needless delay.
To reduce the incidence of misplaced tools or parts,
place removed components with all attaching hardware
SECTION 2 - SAFETY
2.1 SAFETY ALERTS
moderate, or serious injury or death. Learn applicable
rules and laws in your area.
Look for these symbols to point out
important safety precautions. They
mean:
2.5 REQUIRED OPERATOR TRAINING
Original purchaser of this unit was instructed by the
seller on safe and proper operation. If unit is to be used
by someone other than original purchaser; loaned,
rented or sold, ALWAYS provide the Operator’s Manual
and any needed safety training before operation.
Attention!
Personal Safety Is Involved!
Become Alert!
Obey The Message!
2.6 SAFETY PRECAUTIONS
2.2 SIGNAL WORDS
Safe Operation Practices for Ride-On Mowers
The safety alert symbol is used in decals on the unit
and with proper operation procedures in this manual.
They alert you to the existence and relative degree of
hazards.
This cutting machine is capable of amputating hands
and feet and throwing objects. Failure to observe the
following safety instructions could result in serious
injury or death. Your complete and unimparied
attention is required at all times.
Understand the safety message. It contains important
information about personal safety on or near the unit.
General Operation
DANGER: IMMINENTLY HAZARDOUS
SITUATION! If not avoided, WILL RESULT in
death or serious injury.
Read, understand, and follow all instructions in this
owners manual, the engine manual and on the
machine before starting.
Only allow responsible adults, who are familiar with the
instructions, to operate the machine.
WARNING: POTENTIALLY HAZARDOUS
SITUATION! If not avoided, COULD RESULT
in death or serious injury.
Clear the area of objects such as rocks, toys, wire, etc.,
which could be picked up and thrown by the blade.
Be sure the area is clear of other people and pets
before mowing. Stop machine if anyone enters the
area.
CAUTION: POTENTIALLY HAZARDOUS
SITUATION! If not avoided, MAY RESULT in
minor or moderate injury. It may also be used
to alert against unsafe practices.
Never carry passengers.
Do not mow in reverse unless absolutely necessary.
Always look down and behind before and while
backing.
2.3 NOTATIONS
NOTE: General reference information for proper operation and maintenance practices.
IMPORTANT: Specific procedures or information
required to prevent damage to unit or attachment.
Be aware of the mower discharge direction and do not
point it at anyone. Do not operate the mower without
either the entire grass catcher or the guard in place.
Slow down before turning to prevent tipping or loss of
control.
2.4 PRACTICES AND LAWS
Practice usual and customary safe working
precautions, for the benefit of yourself and others.
Understand and follow all safety messages. Be alert to
unsafe conditions and the possibility of minor,
Never leave a running machine unattended. Always
turn off blades, set parking brake, stop engine, and
remove keys to prevent unauthorized use before
dismounting.
Turn off blades when not mowing.
2-4
Disengage mower clutch, stop engine, remove key and
wait for moving parts to stop before leaving operators
position for any reason such as removing grass catcher
or unclogging chute.
Mow only in daylight or good artificial light.
Do not operate the machine while under the influence
of medication, alcohol or drugs.
Do Not
Do not turn on slopes unless necessary, and then, turn
slowly and gradually, downhill, if possible.
Do not mow near drop-offs, ditches, or embankments.
The mower could suddenly turn over if a wheel is over
the edge of a cliff or ditch, or if an edge caves in.
Do not mow on wet grass. Reduced traction could
cause sliding.
Watch for traffic when operating near or crossing
roadways or drives.
Use extra care when loading or unloading the machine
into a trailer to truck.
Use only attachments or accessories designed for your
unit. See your Ariens Dealer.
Wear sturdy foorwear. Do not operate riding mower
barefoot or when wearing open sandals or canvas
shoes. Do not wear loose clothing that may get caught
in rotating parts of unit. Wear safety glasses with side
shields when operating mower.
Slope Operation
Slopes are a major factor related to loss-of-control and
tip-over accidents, which can result in severe injury or
death. All slopes require extra caution. If you cannot
back up the slope or if you feel uneasy on it, do not
mow it.
Do
Do not try to stabilize the machine by putting your foot
on the ground.
Do not use grass catcher on steep slopes.
Children
Tragic accidents can occur if the operator is not alert to
the presence of children. Children are often attracted to
the machine and the mowing activity. Never assume
that children will remain where you last saw them.
Keep children out of the mowing area and under the
watchful care of another responsible adult.
Be alert and turn machine off if children enter the area.
Before and when backing, look behind and down for
small children.
Never carry children, even when attachments are off.
They may fall off and be seriously injured or interfere
with safe machine operation.
Never allow children to operate the machine.
Mow up and down slopes, not across.
Remove obstacles such as rocks, free limbs, etc.
Use extra care when approaching blind corners,
shrubs, trees, or other objects that may obscure vision.
Watch for holes, ruts, or bumps. Uneven terrain could
overturn the machine. Tall grass can hide obstacles.
Service
Use slow speed. Choose a low gear so that you will not
have to stop or shift while on the slope.
Follow the manufacturer’s recommendations for wheel
weights or counterweights to improve stability.
Use extra care with grass catchers or other
attachments. These can change the stability of the
machine. Use only approved hitch points.
Do not change engine governor setting or over speed
the engine.
Replace damaged or worn out mufler immediately.
Continued use could result in fire or explosion.
Use extra care in handling gasoline and other fuels.
They are flammable and vapors are explosive.
Use only an approved container.
Never remove gas cap or add fuel with the engine
running. Allow engine to cool before refueling. Do
not smoke. Wipe off any spilled gasoline and allow
vapors to dissipate before starting engine.
Limit loads to those you can safely control.
Keep all movement on the slopes slow and gradual. Do
not make sudden changes in speed or direction.
Avoid starting or stopping on a slope. If tires lose
traction, disengage mower clutch and proceed slowly
straight down the slope. If you must stop when going
up the slope and can not safely back down: for gear
drive models, depress clutch/brake pedal, disengage
mower clutch, place travel speed selector in first gear
(low speed) and slowly release the clutch/brake pedal.
For hydro models depress clutch/brake pedal only if
necessary, disengage mower clutch, slowly release
clutch brake pedal and slowly engage the forward
pedal.
Replace fuel tank cap and container cap securely.
Never refuel the machine indoors.
Never store the machine or fuel container inside
where there is an open flame, such as in a water
heater.
Never run a machine inside a closed area. Exhaust
fumes contain carbon monoxide an odorless and
deadly gas.
Keep nuts and bolts, especially blade attachment bolts,
tight and keep equipment in good condition.
Never tamper with safety devices. Check their proper
operation regularly.
2-5
Keep machine free of grass, leaves, or other debris
build-up. Clean up oil or fuel spillage. Allow machine to
cool before storing.
Stop and inspect the equipment if you strike an object.
Repair any damage before restarting.
Never make adjustments or repairs with the engine
running or when engine and exhaust parts are hot from
operation.
Grass catcher components are subject to wear,
damage, and deterioration, which could expose moving
parts or allow objects to be thrown. Frequently check
components and replace, with manufacturer’s
recommended parts when necessary.
Mower blades are sharp and can cut. Wrap the
blade(s) or wear gloves, and use extra caution when
servicing them.
Check brake operation frequently. Adjust and service
as required.
Refer to Storage Section of this owners manual if unit
is to be stored for extended period.
2-6
SECTION 3 - SPECIFICATIONS
Model No.
936014
936015
936016
Description Name
Sierra 1340G
Sierra 1440G
Sierra 1340H
66.50 (1.68)
41.25 (1.05)
52.00 (1.32)
46.00 (1.17)
480 (217)
66.50 (1.68)
41.25 (1.05)
52.00 (1.32)
46.00 (1.17)
480 (217)
66.50 (1.68)
41.25 (1.05)
52.00 (1.32)
46.00 (1.17)
480 (217)
Length, in. (m)
Height, in. (m)
Width, in. (m)
Wheel Base, in. (m)
Actual Weight, lbs. (kg)
Battery
12 Volt 290 CCA
12 Volt 290 CCA
12 Volt 290 CCA
Hour Meter
Optional (736008)
Optional (736008)
Optional (736008)
Medium
Medium
Medium
Brakes
Disc.
Disc.
Disc.
Steering
Gear
Gear
Gear
26 (66)
26 (66)
26 (66)
Front
15x6.00-6
15x6.00-6
15x6.00-6
Rear
20x8.80-8
20x8.80-8
20x8.80-8
No
No
Yes
OHV 13 HP
OHV 14 HP
OHV 13 HP
Seat
Turning Radius, in. (cm)
Tire Size
Diagnostic Lights
Engine
Manufacture
Fuel and Capacity, gal. (L)
Tecumseh
Briggs
Tecumseh
Unleaded, 3 (11.4)
Unleaded, 3 (11.4)
Unleaded, 3 (11.4)
Idle R.P.M.
2100
1800
2100
Governed R.P.M.
3250
3250
3250
32 (.95)
Crank Case Capacity, oz. (L)
32 (.95)
56 (1.7)
(Oil Filter)
(No)
(Yes)
(No)
Air Cleaner
Paper Element
Paper Element
Paper Element
Foam Precleaner
Foam Precleaner
Foam Precleaner
3/5 AMP Unregulated
3/5 AMP Unregulated
3/5 AMP Unregulated
120 Micron
120 Micron
120 Micron
2 1/2 GPA Capacity
2 1/2 GPA Capacity
2 1/2 GPA Capacity
5W30 Below 40oF (4oC)
5W30 Below 40oF (4oC)
5W30 Below 40oF (4oC)
30W Above 40oF (4oC)
30W Above 40oF (4oC)
30W Above 40oF (4oC)
.030 Champion RN-4C
.030 Champion RC12YC
.030 Champion RN-4C
Peerless 206-517
Peerless 206-517
Hydrogear 325-0750
6 Speed
6 Speed
0.8 - 5.5 MPH
0.8 - 5.5 MPH
0.0 - 5.5 MPH
1.9 MPH
1.9 MPH
0.0 - 2.5 MPH
Charging Capacity
Fuel Filter
Engine Oil
Spark Plug Gap
Transmission
Speed - Forward Max.
- Reverse Max
Transmission Lube
Drive Clutch
Axle Capacity
Grease
Grease
20W50 Oil
Belt Clutched
Belt Clutched
Belt Clutched
150 ft lb (110 Nm)
150 ft lb (110 Nm)
175 ft lb (129 Nm)
Allowable Added Weight
130 lb (58.9 kg)
130 lb (58.9 kg)
130 lb (58.9 kg)
Rear Axle Maximum Load
450 lb (204 kg)
450 lb (204 kg)
568 lb (257 kg)
10 PSI/10 PSI
10 PSI/10 PSI
10 PSI/10 PSI
14 PSI/10PSI
14 PSI/10 PSI
14 PSI/10 PSI
Lift System
Manual
Manual
Manual
Power Take Off - Front
Electric
Electric
Electric
Tire Pressure With Loads
Front/Rear - Light & Medium
- Heavy (SnoThro)
Mower Pan, in. (cm)
40 (101)
40 (101)
40 (101)
836008/836007
836008/836007
836008/836007
Sno-Thro
836010
836010
836010
Dozer Blade
834034
834034
834034
Bagger 3 Bucket/1 Bag
3-7
Model No.
936017
936018
936019
Description Name
Sierra 1440H
Sierra 1540H
Sierra 1640H
66.50 (1.68)
41.25 (1.05)
52.00 (1.32)
46.00 (1.17)
480 (217)
66.50 (1.68)
42.00 (1.07)
52.00 (1.32)
46.00 (1.17)
480 (217)
66.50 (1.68)
42.00 (1.07)
52.00 (1.32)
46.00 (1.17)
480 (217)
Length, in. (m)
Height, in. (m)
Width, in. (m)
Wheel Base, in. (m)
Actual Weight, lbs. (kg)
Battery
Hour Meter
Seat
Brakes
Steering
12 Volt 290 CCA
12 Volt 290 CCA
12 Volt 290 CCA
Optional (736008)
Optional (736008)
Optional (736008)
Medium-High
High
High
Disc.
Disc.
Disc.
Gear
Gear
Gear
20/26 (51/66)
20/26 (51/66)
20/26 (51/66)
Front
15x6.00-6
15x6.00-6
15x6.00-6
Rear
20x8.00-8
20x8.00-8
20x8.00-8
Yes
Yes
Yes
OHV 14 HP
OHV 15 HP
OHV 16 HP
Briggs
Kohler
Briggs
Unleaded, 3 (11.4)
Unleaded, 3 (11.4)
Unleaded, 3 (11.4)
1800
1800
2100
Turning Radius, in. (cm)
Tire Size
Diagnostic Lights
Engine
Manufacture
Fuel and Capacity, gal. (L)
Idle R.P.M.
Governed R.P.M.
3250
3250
3250 Max
56 (1.7)
64 (1.9)
56 (1.7)
(Oil Filter)
(Yes)
(Yes)
(Yes)
Air Cleaner
Paper Element
Paper Element
Paper Element
Crank Case Capacity, oz. (L)
Charging Capacity
Fuel Filter
Engine Oil
Spark Plug Gap
Transmission
Speed - Forward Max.
- Reverse Max
Transmission Lube
Drive Clutch
Axle Capacity
Foam Precleaner
Foam Precleaner
Foam Precleaner
3/5 AMP Unregulated
15 AMP Regulated
16 AMP Regulated
120 Micron
120 Micron
120 Micron
2 1/2 GPA Capacity
2 1/2 GPA Capacity
2 1/2 GPA Capacity
5W30 Below 40oF (4oC)
5W30 Below 40oF (4oC)
5W30 Below 40oF (4oC)
30W Above 40oF (4oC)
10W Above 40oF (4oC)
30W Above 40oF (4oC)
.030 Champion RC12YC
.030 Champion RC12YC
.030 Champion RN-4C
Hydrogear 325-0750
Hydrogear 325-0750
Hydrogear 325-0750
0.0 - 5.5 MPH
0.0 - 5.5 MPH
0.0 - 5.5 MPH
0.0 - 2.5 MPH
0.0 - 2.5 MPH
0.0 - 2.5 MPH
20W50 OIl
20W50 Oil
20W50 Oil
Belt Clutched
Belt Clutched
Belt Clutched
175 ft lb (129 Nm)
175 ft lb (129 Nm)
175 ft lb (129 Nm)
Allowable Added Weight
130 lb (58.9 kg)
130 lb (58.9 kg)
130 lb (58.9 kg)
Rear Axle Maximum Load
568 lb (257 kg)
568 lb (257 kg)
568 lb (257 kg)
10 PSI/10 PSI
10 PSI/10 PSI
10 PSI/10 PSI
14 PSI/10 PSI
14 PSI/10 PSI
14 PSI/10 PSI
Lift System
Manual
Manual
Manual
Power Take Off - Front
Electric
Electric
Electric
Tire Pressure With Loads
Front/Rear - Light & Medium
- Heavy (SnoThro)
Mower Pan, in. (cm)
40 (101)
40 (101)
40 (101)
836008/836007
836008/836007
836008/836007
Sno-Thro
836010
836010
836010
Dozer Blade
834034
834034
834034
Bagger 3 Bucket/1 Bag
3-8
Model No.
936020
936021
936022
Description Name
Sierra 1640H
Sierra 1648H
Sierra 1340G
66.50 (1.68)
42.00 (1.07)
52.00 (1.32)
46.00 (1.17)
480 (217)
66.50 (1.68)
42.00 (1.07)
52.00 (1.32)
46.00 (1.17)
518 (234)
66.50 (1.68)
41.50 (1.06)
52.00 (1.32)
46.00 (1.17)
480 (217)
Length, in. (m)
Height, in. (m)
Width, in. (m)
Wheel Base, in. (m)
Actual Weight, lbs. (kg)
Battery
Hour Meter
12 Volt 290 CCA
12 Volt 290 CCA
12 Volt 290 CCA
Optional (736008)
Optional (736008)
Optional (736008)
Seat
High
High
Medium
Brakes
Disc.
Disc.
Disc.
Steering
Gear
Gear
Gear
20/26 (51/66)
20 (51)
26 (66)
Front
15x6.00-6
15x6.00-6
15x6.00-6
Rear
20x8.00-8
20x8.00-8
20x8.00-8
Yes
Yes
No
OHV 16 HP
OHV 16 HP
OHV 13 HP
Tecumseh
Briggs
Tecumseh
Unleaded, 3 (11.4)
Unleaded 3 (11.4)
Unleaded 3 (11.4)
1800
1800
2100
Turning Radius, in. (cm)
Tire Size
Diagnostic Lights
Engine
Manufacture
Fuel and Capacity, gal. (L)
Idle R.P.M.
Governed R.P.M.
3250
3400
3250 Max
56 (1.7)
56 (1.7)
32 (.95)
(Oil Filter)
(Yes)
(Yes)
(No)
Air Cleaner
Paper Element
Paper Element
Paper Element
Crank Case Capacity, oz. (L)
Charging Capacity
Fuel Filter
Engine Oil
Spark Plug Gap
Transmission
Speed - Forward Max.
- Reverse Max
Transmission Lube
Drive Clutch
Axle Capacity
Foam Precleaner
Foam Precleaner
Foam Precleaner
16 AMP Regulated
16 AMP Regulated
315 AMP Unregulated
120 Micron
120 Micron
120 Micron
2 1/2 GPA Capacity
2 1/2 GPA Capacity
2 1/2 GPA Capacity
5W30 Below 40oF (4oC)
5W30 Below 30oF (-1oC)
5W30 Below 40oF (4oC)
30W Above 40oF (4oC)
10W Above 40oF (4oC)
30W Above 40oF (4oC)
.030 Champion RC12YC
.030 Champion RC12YC
.030 Champion RN-4C
Hydrogear 325-0750
Hydrogear 325-0750
Peerless 206-517
0.0 - 5.5 MPH
0.0 - 5.5 MPH
0.8 - 5.5 MPH
0.0 - 2.5 MPH
0.0 - 2.5 MPH
1.9 MPH
20W50 OIl
20W50 Oil
Grease
Belt Clutched
Belt Clutched
Belt Clutched
175 ft lb (129 Nm)
175 ft lb (129 Nm)
150 ft lb (110 Nm)
Allowable Added Weight
130 lb (58.9 kg)
130 lb (58.9 kg)
130 lb (58.9 kg)
Rear Axle Maximum Load
568 lb (257 kg)
568 lb (257 kg)
450 lb (204 kg)
10 PSI/10 PSI
10 PSI/10 PSI
10 PSI/10 PSI
14 PSI/10 PSI
14 PSI/10 PSI
14 PSI/10 PSI
Lift System
Manual
Manual
Manual
Power Take Off - Front
Electric
Electric
Electric
40 (101)
48 (122)
Tire Pressure With Loads
Front/Rear - Light & Medium
- Heavy (SnoThro)
Mower Pan, in. (cm)
Bagger 3 Bucket/1 Bag
836008/836007
40 (101)
836008/836007
Sno-Thro
836010
836010
836010
Dozer Blade
834034
834034
834034
3-9
Model No.
936023
936024
936025
Description Name
Sierra 1540H
Sierra 1548H
Sierra 1640H
66.50 (1.68)
42.00 (1.07)
52.00 (1.32)
46.00 (1.17)
480 (217)
66.50 (1.68)
42.00 (1.07)
52.00 (1.32)
46.00 (1.17)
518 (234)
66.50 (1.68)
41.50 (1.06)
52.00 (1.32)
46.00 (1.17)
518 (234)
Length, in. (m)
Height, in. (m)
Width, in. (m)
Wheel Base, in. (m)
Actual Weight, lbs. (kg)
Battery
Hour Meter
12 Volt 290 CCA
12 Volt 290 CCA
12 Volt 290 CCA
Optional (736008)
Optional (736008)
Optional (736008)
Seat
High
High
High
Brakes
Disc.
Disc.
Disc.
Steering
Gear
Gear
Gear
26 (66)
26 (66)
26 (66)
Front
15x6.00-6
15x6.00-6
15x6.00-6
Rear
20x8.50-8
20x8.00-8
20x8.00-8
Yes
Yes
Yes
Turning Radius, in. (cm)
Tire Size
Diagnostic Lights
Engine
Manufacture
Fuel and Capacity, gal. (L)
Idle R.P.M.
Governed R.P.M.
Crank Case Capacity, oz. (L)
OHV 15 HP
OHV 15 HP
OHV 13 HP
Briggs & Stratton
Kohler
Briggs & Stratton
Unleaded, 3 (11.4)
Unleaded, 3 (11.4)
Unleaded, 3 (11.4)
1800
1800
1800
3250
3250
3400
56 (1.7)
64 (1.9)
56 (1.7)
(Oil Filter)
(Yes)
(Yes)
(Yes)
Air Cleaner
Paper Element
Paper Element
Paper Element
Charging Capacity
Fuel Filter
Engine Oil
Spark Plug Gap
Transmission
Foam Precleaner
Foam Precleaner
Foam Precleaner
16 AMP Regulated
15 AMP Regulated
16 AMP Unregulated
120 Micron
120 Micron
120 Micron
2 1/2 GPA Capacity
2 1/2 GPA Capacity
2 1/2 GPA Capacity
5W30 Below 40oF (4oC)
5W30 Below 30oF (-1oC)
5W30 Below 30oF (-1oC)
10W30 Above 40oF (4oC)
10W30 Above 40oF (4oC)
30W Above 30oF (-1oC)
.030 Champion RN-46
.030 Champion RC12YC
.030 Champion RC12YC
Hydrogear 325-0750
Hydrogear 325-0750
Hydrogear 325-0750
0.0 - 5.5 MPH
0.0 - 5.5 MPH
0.0 - 5.5 MPH
0.0 - 2.5 MPH
0.0 - 2.5 MPH
0.0 - 2.5 MPH
20W50 OIl
20W50 Oil
20W50 Oil
6 Speed
Speed - Forward Max.
- Reverse Max
Transmission Lube
Drive Clutch
Belt Clutched
Belt Clutched
Belt Clutched
175 ft lb (129 Nm)
175 ft lb (129 Nm)
175 ft lb (129 Nm)
Allowable Added Weight
130 lb (58.9 kg)
130 lb (58.9 kg)
130 lb (58.9 kg)
Rear Axle Maximum Load
568 lb (257 kg)
568 lb (257 kg)
568 lb (257 kg)
10 PSI/10 PSI
10 PSI/10 PSI
10 PSI/10 PSI
14 PSI/10 PSI
14 PSI/10 PSI
14 PSI/10 PSI
Manual
Manual
Manual
Axle Capacity
Tire Pressure With Loads
Front/Rear - Light & Medium
- Heavy (SnoThro)
Lift System
Power Take Off - Front
Electric
Electric
Electric
Mower Pan, in. (cm)
40 (101)
48 (122)
48 (122)
Bagger 3 Bucket/1 Bag
836008/836007
N/A
Sno-Thro
836010
836010
836010
Dozer Blade
834034
834034
834034
3 - 10
Model No.
936026
936305
936306
Description Name
Sierra 1540H
Sierra 1640G
Sierra 1640H
66.50 (1.68)
66.50 (1.68)
66.50 (1.68)
42.50 (1.08)
42.50 (1.08)
41.25 (1.05)
52.00 (1.32)
52.00 (1.32)
52.00 (1.32)
46.00 (1.17)
46.00 (1.17)
46.00 (1.17)
480 (217)
400 (181)
480 (217)
12 Volt 290 CCA
12 Volt 290 CCA
12 Volt 290 CCA
Optional (736008)
Optional (736008)
Optional (736008)
Seat
High
Medium
Medium
Brakes
Disc.
Disc.
Disc.
Steering
Gear
Gear
Gear
26 (66)
26 (66)
26 (66)
Front
15x6.00-6
15x6.00-6
15x6.00-6
Rear
20x8.00-8
20x8.00-8
20x8.00-8
Yes
No
Yes
OHV 15 HP
OHV 14 HP
OHV 14.0 HP
Kohler
Briggs
Briggs
Unleaded, 3 (11.4)
Unleaded, 3 (11.4)
Unleaded, 3 (11.4)
1800
1800
1800
3250 Max
3050 Max
2900 Max
64 (1.9)
56 (1.7)
56 (1.7)
(Oil Filter)
(Yes)
(Yes)
(Yes)
Air Cleaner
Paper Element
Paper Element
Paper Element
Length, in. (m)
Height, in. (m)
Width, in. (m)
Wheel Base, in. (m)
Actual Weight, lbs. (kg)
Battery
Hour Meter
Turning Radius, in. (cm)
Tire Size
Diagnostic Lights
Engine
Manufacture
Fuel and Capacity, gal. (L)
Idle R.P.M.
Governed R.P.M.
Crank Case Capacity, oz. (L)
Charging Capacity
Fuel Filter
Engine Oil
Spark Plug Gap
Transmission
Foam Precleaner
Foam Precleaner
Foam Precleaner
15 AMP Regulated
16 AMP Regulated
3/5 AMP Unregulated
120 Micron
120 Micron
120 Micron
2 1/2 GPA Capacity
2 1/2 GPA Capacity
2 1/2 GPA Capacity
5W30 Below 30oF (-1oC)
5W30 Below 40oF (4oC)
5W30 Below 40oF (4oC)
10W30 Above 30oF (-1oC)
30W Above 40oF (4oC)
30W Above 40oF (4oC)
.030 Champion RC12YC
.030 Champion RC12YC
.030 Champion RC12YC
Hydrogear 325-0750
Peerless 206-517
Hydrogear 312-0750
0.0 - 5.5 MPH
0.7-4.8 MPH
0-5.0 MPH
0.0 - 2.5 MPH
1.6 MPH
0-2.5 MPH
20W50 Oil
Grease
20W50 Oil
6 Speed
Speed - Forward Max.
- Reverse Max
Transmission Lube
Drive Clutch
Belt Clutched
Belt Clutched
Belt Clutched
175 ft lb (129 Nm)
150 ft lb (110 Nm)
175 ft lb (129 Nm)
Allowable Added Weight
130 lb (58.9 kg)
130 lb (58.9 kg)
130 lb (58.9 kg)
Rear Axle Maximum Load
568 lb (257 kg)
450 lb (204 kg)
568 lb (257 kg)
10 PSI/10 PSI
10 PSI/10 PSI
10 PSI/10 PSI
14 PSI/10 PSI
14 PSI/10 PSI
14 PSI/10 PSI
Manual
Manual
Manual
Axle Capacity
Tire Pressure With Loads
Front/Rear - Light & Medium
- Heavy (SnoThro)
Lift System
Power Take Off - Front
Electric
Electric
Electric
Mower Pan, in. (cm)
40 (101)
49 (124) Optional 836301
30 (76.2)
Bagger 3 Bucket/1 Bag
836008/836007
836008/836007
836008/836007
Sno-Thro
836010
836010
836010
Dozer Blade
834034
834034
834034
3 - 11
Model No.
936307
936308
936309
Description Name
Sierra 1640H
Sierra 1640G
Sierra 1648H
66.50 (1.68)
42.00 (1.07)
52.00 (1.32)
46.00 (1.17)
480 (217)
66.50 (1.68)
41.25 (1.05)
52.00 (1.32)
46.00 (1.17)
480 (217)
66.50 (1.68)
42.00 (1.07)
52.00 (1.32)
46.00 (1.17)
518 (234)
Length, in. (m)
Height, in. (m)
Width, in. (m)
Wheel Base, in. (m)
Actual Weight, lbs. (kg)
Battery
12 Volt 290 CCA
12 Volt 290 CCA
12 Volt 290 CCA
Optional (736008)
Optional (736008)
Optional (736008)
Seat
High
Medium
High
Brakes
Disc.
Disc.
Disc.
Hour Meter
Steering
Gear
Gear
Gear
20/26 (51/66)
20/26 (51/66)
20 (51)
Front
15x6.00-6
15x6.00-6
15x6.00-6
Rear
20x8.00-8
20x8.00-8
20x8.00-8
Yes
Yes
Yes
OHV 16 HP
Turning Radius, in. (cm)
Tire Size
Diagnostic Lights
Engine
Manufacture
Fuel and Capacity, gal. (L)
Idle R.P.M.
Governed R.P.M.
Crank Case Capacity, oz. (L)
1.6 HO V-Twin
14.0 HP OHV
Briggs & Stratton
Briggs & Stratton
Tecumseh
Unleaded, 3 (11.4)
Unleaded, 3 (11.4)
Unleaded, 3 (11.4)
1800
1800
1800
3000
3250 Max
3400
56 (1.7)
56 (1.7)
56 (1.7)
(Oil Filter)
(Yes)
(Yes)
(Yes)
Air Cleaner
Paper Element
Paper Element
Paper Element
Charging Capacity
Fuel Filter
Engine Oil
Spark Plug Gap
Transmission
Foam Precleaner
Foam Precleaner
Foam Precleaner
16 AMP Regulated
3/5 AMP Unregulated
16 AMP Regulated
120 Micron
120 Micron
120 Micron
2 1/2 GPA Capacity
2 1/2 GPA Capacity
2 1/2 GPA Capacity
5W30 Below 40oF (4oC)
5W30 Below 40oF (4oC)
5W30 Below 40oF (4oC)
30w Above 40oF (4oC)
30W Above 40oF (4oC)
30W Above 40oF (4oC)
.030 Champion RC12YC
.030 Champion RC12YC
.030 Champion RC12YC
Hydrogear 312-0750
Peerless 206-517
Hydrogear 325-0750
0.0 - 5.0 MPH
0.8-5.5 MPH
0.0-5.5 MPH
0.0 - 2.5 MPH
1.9 MPH
0.0-2.5 MPH
20W50 Oil
Grease
20W50 Oil
6 Speed
Speed - Forward Max.
- Reverse Max
Transmission Lube
Drive Clutch
Belt Clutched
Belt Clutched
Belt Clutched
175 ft lb (129 Nm)
150 ft lb (110 Nm)
175 ft lb (129 Nm)
Allowable Added Weight
130 lb (58.9 kg)
130 lb (58.9 kg)
130 lb (58.9 kg)
Rear Axle Maximum Load
568 lb (257 kg)
450 lb (204 kg)
568 lb (257 kg)
10 PSI/10 PSI
10 PSI/10 PSI
10 PSI/10 PSI
14 PSI/10 PSI
14 PSI/10 PSI
14 PSI/10 PSI
Manual
Manual
Manual
Axle Capacity
Tire Pressure With Loads
Front/Rear - Light & Medium
- Heavy (SnoThro)
Lift System
Power Take Off - Front
Electric
Electric
Electric
Mower Pan, in. (cm)
40 (101)
40 (101)
48 (122)
Bagger 3 Bucket/1 Bag
836008/836007
836008/836007
Sno-Thro
836010
836010
836010
Dozer Blade
834034
834034
834034
3 - 12
Model No.
936310
936311
936312
Description Name
Sierra 1648H
Sierra 1640H
Sierra 1540G
66.50 (1.68)
42.00 (1.07)
52.00 (1.32)
46.00 (1.17)
480 (217)
66.50 (1.68)
41.25 (1.05)
52.00 (1.32)
46.00 (1.17)
480 (217)
66.50 (1.68)
42.00 (1.07)
52.00 (1.32)
46.00 (1.17)
480 (217)
Length, in. (m)
Height, in. (m)
Width, in. (m)
Wheel Base, in. (m)
Actual Weight, lbs. (kg)
Battery
Hour Meter
12 Volt 290 CCA
12 Volt 290 CCA
12 Volt 290 CCA
Optional (736008)
Optional (736008)
Optional (736008)
Seat
High
High
High
Brakes
Disc.
Disc.
Disc.
Steering
Gear
Gear
Gear
26 (66)
26 (66)
26 (66)
Front
15x6.00-6
15x6.00-6
15x6.00-6
Rear
20x8.00-8
20x8.00-8
20x8.00-8
Yes
Yes
No
Turning Radius, in. (cm)
Tire Size
Diagnostic Lights
Engine
Manufacture
Fuel and Capacity, gal. (L)
Idle R.P.M.
Governed R.P.M.
Crank Case Capacity, oz. (L)
OHV 15 HP
OHV 16.0 HP
OHV 15 HP
Briggs & Stratton
Briggs & Stratton
Briggs & Stratton
Unleaded, 3 (11.4)
Unleaded, 3 (11.4)
Unleaded, 3 (11.4)
1800
1800
1800
3250
3250 Max
3050
56 (1.7)
56 (1.7)
56 (1.7)
(Oil Filter)
(Yes)
(Yes)
(Yes)
Air Cleaner
Paper Element
Paper Element
Paper Element
Charging Capacity
Fuel Filter
Engine Oil
Spark Plug Gap
Transmission
Speed - Forward Max.
- Reverse Max
Transmission Lube
Drive Clutch
Foam Precleaner
Foam Precleaner
Foam Precleaner
16 AMP Regulated
16 AMP Regulated
16 AMP Regulated
120 Micron
120 Micron
120 Micron
2 1/2 GPA Capacity
2 1/2 GPA Capacity
2 1/2 GPA Capacity
5W30 Below 40oF (4oC)
5W30 Below 40oF (4oC)
5W40 Below 40oF (4oC)
30w Above 40oF (4oC)
30W Above 40oF (4oC)
30W Above 40oF (4oC)
.030 Champion RN-4C
.030 Champion RC12YC
.030 Champion RN-4C
Hydrogear 325-0750
Hydrogear 325-0750
Peerless 206-517
6 Speed
6 Speed
0.0 - 5.5 MPH
0.0-5.5 MPH
0.8-5.5 MPH
0.0 - 2.5 MPH
0.0-2.5 MPH
1.9 MPH
20W50 Oil
20W50 Oil
Grease
Belt Clutched
Belt Clutched
Belt Clutched
175 ft lb (129 Nm)
175 ft lb (129 Nm)
150 ft lb (110 Nm)
Allowable Added Weight
130 lb (58.9 kg)
130 lb (58.9 kg)
130 lb (58.9 kg)
Rear Axle Maximum Load
568 lb (257 kg)
568 lb (257 kg)
450 lb (204 kg)
10 PSI/10 PSI
10 PSI/10 PSI
10 PSI/10 PSI
14 PSI/10 PSI
14 PSI/10 PSI
14 PSI/10 PSI
Manual
Manual
Manual
Axle Capacity
Tire Pressure With Loads
Front/Rear - Light & Medium
- Heavy (SnoThro)
Lift System
Power Take Off - Front
Electric
Electric
Electric
Mower Pan, in. (cm)
40 (101)
40 (101)
40 (101)
Bagger 3 Bucket/1 Bag
836008/836007
836008/836007
836008/836007
Sno-Thro
836010
836010
836010
Dozer Blade
834034
834034
834034
3 - 13
Model No.
936313
Description Name
Sierra 1648H
Length, in. (m)
Height, in. (m)
Width, in. (m)
Wheel Base, in. (m)
Actual Weight, lbs. (kg)
Battery
66.50 (1.68)
42.00 (1.07)
52.00 (1.32)
46.00 (1.17)
518 (234)
12 Volt 290 CCA
Hour Meter
Optional (736008)
Seat
High
Brakes
Disc.
Steering
Gear
Turning Radius, in. (cm)
26 (66)
Tire Size
Front
15x6.00-6
Rear
20x8.00-8
Diagnostic Lights
Engine
Yes
OHV 16 HP
Manufacture
Briggs & Stratton
Fuel and Capacity, gal. (L)
Unleaded, 3 (11.4)
Idle R.P.M.
1800
Governed R.P.M.
3050
Crank Case Capacity, oz. (L)
(Oil Filter)
Air Cleaner
56 (1.7)
(Yes)
Paper Element
Foam Precleaner
Charging Capacity
Fuel Filter
16 AMP Regulated
120 Micron
2 1/2 GPA Capacity
Engine Oil
5W30 Below 30oF (-1oC)
30w Above 30oF (-1oC)
Spark Plug Gap
Transmission
Speed - Forward Max.
- Reverse Max
Transmission Lube
Drive Clutch
Axle Capacity
.030 Champion RC12YC
Hydrogear 325-0750
0.0 - 5.5 MPH
0.0 - 2.5 MPH
20W50 Oil
Belt Clutched
175 ft lb (129 Nm)
Allowable Added Weight
130 lb (58.9 kg)
Rear Axle Maximum Load
568 lb (257 kg)
Tire Pressure With Loads
Front/Rear - Light & Medium
- Heavy (SnoThro)
10 PSI/10 PSI
14 PSI/10 PSI
Lift System
Manual
Power Take Off - Front
Electric
Mower Pan, in. (cm)
48 (122)
Bagger 3 Bucket/1 Bag
N/A
Sno-Thro
836010
Dozer Blade
834034
3 - 14
SECTION 4 - GENERAL MAINTENANCE & ADJUSTMENTS
4.1 CONTROLS AND FEATURES
3
1
14
13
6
077180
OT0200
12
11
21
1. Fuel Tank Fill
2. Clutch/Brake Pedal
3. Attachment Lift Lever
4. Throttle/Choke Lever
5. Head Light Switch
6. Travel Speed Selector (Gear only)
7. Ignition/Key Switch
8. PTO Switch
9. Headlights
10.Parking Brake control
11.Fuel Level Indicator
12.Seat Position or Adjustment
13.Transmission Disconnect Control
(Hydro Only)
14.Expansion Hose with Vent (Hydro Only)
15.Mower Height Indicator
16.Choke Control (16 HP B&S Twin Only)
17.Cruise Control Switch (Hydro Only)
18.Indicator Lights (Hydro Only)
19.Forward Pedal (Hydro Only)
20.Reverse Pedal (Hydro Only)
21.Anti-Scalp Roller
9
18
PT0640
5
4
17
8
16
7
2
19
20
15
Figure 2
4 - 15
10
OT0121
4.2 FILLING THE FUEL TANK
WARNING: Use caution with fuel. Fuel is very
flammable. Keep fuel in a clean and tight
container. Keep fuel away from fire and heat.
Never put fuel in the fuel tank while the engine
is running or hot. Clean up any spilled fuel
before starting the engine.
Add fuel to the fuel tank as needed. See your engine
manual for the correct type and grade of fuel to be
used.
1. Put the unit in an open and well ventilated area
prior to refueling.
2. Stop the engine and set the parking brake.
Figure 4
OT0572
4.4 CHECKING FASTENERS
Each day before operating the unit, check all nuts,
bolts and other fasteners. Replace fasteners that are
missing or damaged.
Tighten all nuts and bolts that are loose.
4.5 CHECKING ENGINE OIL
Figure 3
Check the engine oil daily prior to use. Never operate
the engine with the oil below the low mark on the
dipstick.
936-2
3. Raise the seat and clean the fuel cap and in the
area around the fuel cap. Remove the cap from the
fuel tank.
See your engine manual for oil specifications and oil
filter service instructions.
To check oil level:
1. Move the unit to level location.
4. Fill the fuel tank with the proper grade of fuel
recommended by the engine manufacturer. Be
careful not to spill any fuel.
2. Clean around the dipstick and filter tube to prevent
dirt from entering the engine.
5. Install fuel cap on the fuel tank and tighten.
6. Clean up any spilled fuel before starting engine.
4.3 GENERAL LUBRICATION
All grease fittings should be greased at 25-hour
intervals. Clean the fittings before attaching the grease
gun.
Use a moly-lithium grease. Add grease until it appears
at the ends of the bearing or ends of the shaft.
See Figure 3 for the locations of the grease fittings on
your machine.
Every 25 hours apply motor oil to all pin connections,
pivots points and areas where sliding occurs.
Figure 5
3. Remove the dipstick and wipe off the oil.
4 - 16
936-3
4. Put the dipstick back into the engine, tighten in
place, and remove again.
5. When the dipstick is removed, note the oil level
and add oil accordingly. Do not over fill.
4.6 CHANGING OIL
WARNING: Engine muffler and other parts
will be hot if unit has been running.
Engine oil should be changed after the first 5 hours of
operation and every 25 hours there after.
1. Move the unit to a level and well ventilated area
and set the parking brake.
2. If the engine is cold, let the unit run for 5 minutes.
Figure 7
3. When the engine is warm, stop the engine and
raise the hood. Clean the area around the dipstick
and drain plug.
936-5
Check the air intake screen on the engine each day.
Remove any grass, dirt, or debris that may have
accumulated on it. The air intake screen must be kept
clean.
4.8 CLEANING THE AIR CLEANER
Check the air cleaner element every day. Clean the air
cleaner precleaner every 25 hours. Wash the
precleaner with soap and water. Dry the precleaner,
apply oil and reinstall over the paper air filter element.
Figure 6
936-4
4. Put an open container that will hold 1 gallon of oil
under the drain plug. Remove the drain plug.
5. Allow the engine oil to drain completely. Clean and
reinstall the oil drain plug.
6. Remove the oil filter. Clean the oil filter port and
install a new oil filter according to the instructions
on the oil filter. Fill with new oil to the "full" mark on
the dipstick. Start and run the engine.
7. Stop the engine and recheck the oil level and add
as necessary. Check for leakage at the drain plug
and oil filter. Tighten the fittings as necessary if
leakage occurs.
8. Lower the hood and latch in place, release the
parking brake and return the unit to service.
4.7 CHECKING ENGINE COOLING
IMPORTANT: To prevent severe damage to the
engine, proper cooling will need to be maintained.
Check the engine cooling yearly. Clean more often in
dirty conditions. Remove the engine blower housing
and clean the outer surface of the engine. Do not run
the engine with the blower housing removed.
Figure 8
936-6
Wipe out the air cleaner cover to remove any dirt build
up in the cover. Reinstall the cover over the air cleaner
prior to operating the engine. See your engine manual
for instructions.
4.9 CHANGING THE AIR CLEANER
ELEMENT
Replace the air cleaner element when clogged or every
100 hours. Do not attempt to clean. See your engine
manual for instructions.
4.10 CHECKING THE TIRES
Before each use, make a visual check of the tires. For
correct air pressure see Section 3 for specifications.
4 - 17
4.11 CHECKING THE TRANSMISSION
FLUID (HYDRO)
The transaxle is filled and tested at the factory and
should not require fluid when the unit is put into
service. Inspect the transaxle for leaks or damage to
the housing. If leakage is observed, do not operate
until the leakage is repaired.
Check the oil level and fill to the correct level if needed.
Figure 10
936-8
3. Start engine and run at low idle.
4. Stroke the travel control pedal forward for five
seconds and then reverse for five seconds. Do this
three times in each direction.
Figure 9
936-7
The oil should be between 1.25 and 1.60" from the top
of the housing in the 310-0750 axle. It may be checked
by removing the expansion hose. Typically, an API
classification CG/CD engine oil is used with a viscosity
range equivalent to 20W50.
4.12 PRIMING THE TRANSMISSION
(HYDRO)
The following is suggested for the priming of new or
repaired transaxles to assure proper operating
performance.
1. Locate the unit on a flat level surface to limit the
chance of the unit rolling while performing the
following procedures.
2. Actuate the bypass (freewheel control).
Figure 11
936-9
5. Return the travel control to neutral.
6. Disengage the bypass and drive the unit forward
and then reverse. Do this three times each way for
a distance of approximately five feet.
7. Some units may require repeating the previous six
steps to achieve proper operating performance.
4.13 CHECKING THE PTO CLUTCH
Measure Clutch Coil Resistance:
1. Turn engine and power take off (PTO) switch off.
2. Disconnect clutch wire connections.
3. Set meter to check ohms.
4. Connect meter leads in clutch connector.
4 - 18
2
3
1
Figure 12
936-8
1. Neutral Adjustment Bolt
2. Spring-Forward
3. Spring-Reverse
5. If meter reads below 6.00 ohms or above 8.00
ohms, then the clutch has failed and needs to be
replaced.
Figure 13
6. If meter reads between 6.00 to 8.00 ohms, proceed
to measure clutch current draw.
OT0041
4. Turn the adjustment bolt counterclockwise until the
wheels turn in the other direction.
Measure Clutch Current Draw
1. Turn engine off.
5. Center the adjustment bolt between these two
points.
2. Remove 30 amp fuse.
3. Set meter to check amps (10 amp scale).
4. Connect one meter lead to the fuse holder.
5. Connect the other meter lead to the second wire in
the fuse connector.
6. Turn the ignition switch to run, sit on the seat and
turn the PTO switch to on.
4.15 ADJUSTMENT OF TRANSAXLE
NEUTRAL (GEAR)
1. Raise and block the rear of the unit so that the rear
wheels are of the ground.
2. Remove the left rear wheel.
7. If the meter reads below 3.5 amps, the problem
would be in the electrical system leading to the
clutch (battery, relay, switch wiring).
3. Remove the spring loaded ball joint from the
transaxle shift arm.
If after completing the tests:
• The resistance falls between 6.00 and 8.00 ohms.
• The amp draw is 3.50 or above.
The electric clutch is within factory specifications and is
not the source of the problem.
1
3
4.14 ADJUSTMENT OF TRANSMISSION
NEUTRAL (HYDRO)
2
1. Raise and block the rear of the unit so that the rear
wheels are off the ground.
2. With the operator in the seat, start the unit and
allow the transmission to warm up prior to
adjustment.
1. Speed Selector
2. Ball Joint (2)
3. Link
3. With the parking brake released, turn the
adjustment bolt clockwise until the rear wheels turn
in one direction.
Figure 14
OT0030
4. Place the operator shift lever in neutral.
5. Move the transaxle shift arm to neutral, the OK To
Start light will come on in the dash if the parking
brake is set and the ignition switch is in the run
position.
4 - 19
6. Adjust the ball joint to align with ball on the
transaxle shift arm. Attach the ball joint to the ball
on the shift arm.
4.16 ADJUSTMENT OF DIRECTIONAL
CONTROL PEDAL
Remove the clevis pin holding the shift rod to the
control pedal cross shaft. Push the forward pedal down
and mark the pedal arm. Depress the rear directional
control pedal and mark the pedal arm.
Place the pedal arm in the center of the forward and
reverse marks and adjust the clevis to allow the clevis
pin to be installed. Hold in place with the hardware
removed earlier.
Figure 16
936-12
If the clearance is not correct, make the necessary
adjustment with the brake lever tension nut.
The brake arm compression spring in the front of the
brake arm should be compressed to 0.75" with the
parking brake set.
6
2
Figure 15
3
936-11
5
1
4.17 ADJUSTING THE BRAKE (HYDRO)
The brake was set at the factory for a specific running
clearance. To check for proper setting, place a feeler
gage between two of the disks (the brake will need to
be released). There should be 0.015" to 0.025"
clearance.
4
1.
2.
3.
4.
5.
6.
Disc Brake
Castellated Nut w/Cotter Pin
Compression Spring- .78" OD x 1 " long
Feeler Gage
Washer
Nylon Lock Nut
Figure 17
OT0840
4.18 ADJUSTING THE BRAKE (GEAR)
The brake was set at the factory for a specific running
clearance.
Raise and support the rear of the unit with the wheels
off the ground.
Tighten the brake adjustment nut and then back off the
nut until the rear wheel drag is eliminated.
4 - 20
tension spring is 4.5" or shorter the belt is worn and will
need to be replaced.
3
4
1
2
1. Disc
Brake
2. Adjustment Nut
3. Compression Spring .78" x 1" long
Figure 18
Figure 20
936-15
OT0830
With the parking brake set, the rear compression
spring on the brake arm should be compressed to
0.75" long.
4.21 MOWER BELT REPLACEMENT
Disconnect the main idler spring from the unit frame
and remove the PTO drive belt from the PTO clutch
and the top of the mower deck jackshaft assembly.
Adjust the rear lock nut on the brake control rod until
0.75" is obtained.
4.19 ADJUSTING THE SEAT
The seat is mounted on adjustable rails and may be
adjusted by moving the lever at the front center of the
seat.
Figure 21
936-16
Remove the mower deck belt tension idler spring from
the anchor post.
Figure 19
936-14
Move the lever to the center of the seat and slide seat
to the desired position. Release the lever. The seat will
latch into place.
Remove the left hand spindle sheave cover. Remove
the mower deck belt from the spindles and the
jackshaft.
Replace the new belt in the reverse order.
4.20 MOWER DECK BELT ADJUSTMENT
4.22 MOWER SPINDLE LUBRICATION/
JACKSHAFT LUBRICATION
The mower deck belt adjustment is controlled by a
tension spring hooked to the mower deck belt idler.
The mower deck spindles and jackshaft assemblies
use sealed prelubricated bearings.
If the tension spring is 4.5" or longer the belt is in good
condition and will not need to be replaced. If the
No lubrication is needed through the life of machine.
Oil idler arm pivot point every 50 Hrs. Grease may be
added to fill the cavity.
4 - 21
4.23 TRANSAXLE BELT REPLACEMENT
1. Disconnect the main idler spring from the unit
frame and remove the PTO drive belt from the PTO
clutch and the top of the mower deck jackshaft
assembly.
1
3
2
2
1
Figure 22
1. Tie Rod End
2. Jam Nut
3. Tie Rod
936-17
2. Remove the wire harness from the PTO clutch.
Figure 23
3. Remove the cap screw, holding the step in the
center of the PTO clutch and remove the strap
from the clutch.
4. Loosen the hardware securing the belt finger to the
main drive belt idler.
5. Depress clutch/brake pedal and remove the main
drive belt from the idler, engine and transmission
pulleys.
6. Install new main drive belt in reverse order and
secure belt finger hardware with 1/16" to 1/8"
clearance between belt fingers and belt.
4.24 STEERING
If looseness is noticed in the steering system, check
hardware for tightness and wear points for excessive
wear. Replace as needed.
Proper front wheel toe-in is necessary to assure proper
steering and to reduce tire wear. Proper toe-in is when
front of wheels are 1/16-1/8 in (.016-.032 mm) closer
together than rear of wheels (measured at horizontal
centerline of rim flange).
If unit wanders or excessive tire wear develops, toe-in
should be checked. To correct toe-in, loosen jam nuts
at tie rods ends, turn tie rod clockwise to decrease or
counterclockwise to increase toe-in. Tighten jam nuts.
4 - 22
PT0092
SECTION 5 - ENGINE
5.1 ENGINE TROUBLESHOOTING
The following trouble shooting chart is to be used to
isolate engine problems and give possible causes and
corrective action responses.
TROUBLE
The trouble shooting key is generic and can be used
for several types of engines. Use only those possible
causes and corrective actions that apply to the unit.
POSSIBLE CAUSES
Black Exhaust
Blue/White Exhaust
Difficult Starting
Erratic Running
Excessive Fuel Consumption
Excessive Crankcase Pressure
High Oil Pressure
Knocking
Loss of Power or System
Low Cranking Power
Low Oil Pressure
Misfiring
Overheating
Poor Compression
Starts and Stops
(Refer to Key Below)
1, 20, 22, 25, 29, 31, 32, 33
4, 20, 25, 31, 33, 34
1, 5, 7, 8, 9, 10, 20, 21, 22, 29, 31, 32, 33
1, 7, 8, 9, 10, 20, 21, 23, 26, 29, 33, 59, 62
1, 20, 22, 23, 25, 29, 31, 32, 33
25, 31, 33, 34, 45, 55
4, 41
22, 26, 29, 31, 33, 36, 46, 59
1, 8, 10, 20, 21, 22, 23, 25, 26, 31, 32, 33
2, 3, 4, 11
4, 36, 37, 39
10, 20, 25, 26, 28, 29, 32
1, 19, 25
25, 28, 29, 31, 32, 33, 34, 59
1, 6, 10, 62
Vibration
Will Not Crank
Will Not Start
20, 23, 25, 26, 29, 33, 45, 49
2, 11, 45
1, 10, 62
CORRECTIVE ACTION
repair or replace
repair or replace
repair or replace
repair or replace
repair or replace
repair or replace
repair or replace
repair or replace
repair or replace
repair or replace
repair or replace
repair or replace
repair or replace
repair or replace
repair or replace
see electrical systems
see engine service manual
repair or replace
charge battery or replace
repair or replace
see electrical systems
see engine service manual
TROUBLESHOOTING KEY
1
2
Restriction in air cleaner
Bad electrical connection
22
23
3
4
5
6
7
Faulty starter motor
Incorrect grade of lubricating oil
Low cranking speed
Fuel tank empty
Controls not in correct operation
position
Blocked fuel feed line
Faulty fuel lift pump
Choked fuel filter
Battery capacity low
Air in fuel system
24
25
26
27
28
8
9
10
11
12
13
14
15
16
17
18
19
20
21
Faulty fuel injection pump
Faulty fuel injectors or incorrect
type
Incorrect use of cold start
equipment
Faulty cold start equipment
Broken fuel injection pump drive
Incorrect fuel pump timing
Incorrect valve timing
Poor compression
Blocked fuel tank vent
Incorrect grade of fuel
Sticking throttle/restricted
movement
Exhaust pipe restriction
Leaking cylinder head gasket
Overheating
Cold running
Incorrect tappet adjustment
43
44
Faulty suction pipe
Choked oil filter
45
46
47
48
49
50
51
52
53
54
34
35
Sticking valves
Incorrect high pressure pipes
Worn cylinder bores
Pitted valves and seats
Broken, worn or sticking piston
ring(s)
Worn valve stems and guides
Over full air cleaner
Bad solenoid switch
Incorrect piston height
Damaged fan
Faulty engine mounting
Incorrectly aligned flywheel and/or flywheel
housing
Faulty thermostat
Restriction in water jacket
Loose fan belt
Choked radiator
Faulty water pump
55
56
Choked breather pipe
Damaged valve stem oil deflector (if fitted)
36
Worn or damaged bearings
57
Coolant level too low
37
38
39
40
41
42
Insufficient oil in sump
Bad/defective oil temperature switch
Oil pump worn
Pressure relief valve sticking open
Pressure relief valve sticking closed
Broken relief valve spring
58
59
60
61
62
Blocked sump strainer
Broken valve spring
Exhaust or vacuum pipe leak
Bad or defective water temperature switch
Bad spark plug(s)
29
30
31
32
33
5 - 23
5.2 ENGINE REMOVAL
5.3 ENGINE INSTALLATION
1. Open and remove the hood from the unit.
1. Check the engine base and unit frame for damage
before installing the engine.
2. Remove the negative cable from the battery.
2. Place the throttle, choke control, and electrical wire
out of the way prior to placing the engine onto the
unit frame.
3. Remove the attachment from the unit.
4. Remove the PTO clutch from the bottom of the
engine sheave. Remove the main drive belt from
the engine sheave by setting the parking brake.
3. Once the engine is bolted onto the frame install the
exhaust system and then tighten the mounting
hardware.
5. Remove the throttle and choke control from the
engine.
4. Install the engine sheave and belts. Connect PTO
clutch, electrical wiring, throttle and choke controls.
6. Remove the electrical wiring from the engine
(charge lead, oil pressure lead, fuel solenoid lead,
and magneto kill wire).
7. Remove the exhaust system from under the frame.
Separate the muffler from the exhaust pipe that is
bolted to the engine.
8. Remove the engine bolts and lift the engine with a
hoist to remove it from the frame.
Figure 24
5. Prior to installing the attachment check for proper
belt alignment and clutch function.
6. Install the negative battery cable onto the battery.
7. Reinstall the attachment onto the unit.
8. Install and close the unit hood and test operation
and function of the engine.
Figure 25
9336-18
5 - 24
936-19
SECTION 6 - HYDRO DRIVE TRAIN
6.1 HYDRO TRANSMISSION TROUBLESHOOTING
The following troubleshooting chart is to be used to
isolate hydro transmission problems and give possible
causes and corrective action responses.
TROUBLE
Axles Will Not Turn
Difficult Starting
Erratic Running
Jerky When Starting
Jumps Out of Gear
Knocking
Loss of Power or System
Noisy
Oil Leakage
Operates Hot
Operates in One Direction Only
Pump Failure
Speed Loss Under Load
Speed Loss Under Load
Will Not Drive
Will Not Shift
The troubleshooting key is generic and can be used for
several types of transmissions. Use only those
possible causes and corrective actions that apply to the
unit.
POSSIBLE CAUSES
CORRECTIVE ACTION
(Refer to Key Below)
1, 7, 8, 12, 16, 18, 28, 32, 38, 42, 46
1, 6, 7, 8, 12, 16, 25, 26, 28, 38, 42, 46, 55
1, 4, 6, 7, 8, 12, 18, 25, 26, 28, 42, 46, 55
1, 4, 7, 8, 12, 18, 28, 38, 46
N/A
4, 8, 12, 18, 28, 37, 42
4, 12, 18, 28, 37, 42, 46
4, 12, 18, 26, 28, 32, 37, 42
4, 22, 51, 16
4, 16, 28, 32, 35, 42
1, 8, 12, 30, 46
4, 12, 37
1, 6, 11, 28, 37, 46, 51
1, 4, 7, 12, 18, 28, 26
1, 7, 8, 18, 28, 37, 38, 46, 48
repair or replace
repair or replace
repair or replace
repair or replace
repair or replace
repair or replace
repair or replace
repair or replace
repair or replace
repair or replace
repair or replace
TROUBLESHOOTING KEY
1
2
3
Inspect control linkage
Inspect acceleration valves
Inspect charge check valves
22
23
24
Inspect hoses and lines for wear
Inspect implement relief valve
Inspect charge pump
43
44
45
4
5
6
7
8
9
10
11
12
13
14
15
16
25
26
27
28
29
30
31
32
33
34
35
36
37
Bad transmission pump
Overheating
Cold running
Bad transmission motor
Check system pressure
Shift rod grooves worn
Reverse chain broken
Damaged cooling fan
Inspect auxiliary relief valve
Inspect cooling fan
Inspect transmission cooling fins
Worn or damaged bearings
Metallic pieces or foreign objects in unit
46
47
48
49
50
51
52
53
54
55
17
Incorrect grade of lubricating oil
Low cranking speed
Controls not in correct operation position
Belts are missing, to tight, loose or glazed
Overload of vehicle
Replacement parts damaged
Replacement parts improperly installed
Improperly torqued attaching screws
Air in hydraulic system
Broken shifter stop
Inspect charge check valves
Inspect acceleration valves
Check oil level-gear box sump or
reservoir
Inspect heat exchanger
38
18
19
20
21
Inspect by-pass valve
Inspect charge pressure
Inspect inlet filter
Inspect charge relief valve
39
40
41
42
Inspect for loosely mounted
components
Steering column loose or binding
Pressure relief valve sticking open
Pressure relief valve sticking closed
Broken relief valve spring
6 - 25
Burrs on gearing
Gears improperly installed
Forks & rod assembly incorrectly
installed
Shifting keys broken or damaged
Shifting washer in backwards
Shifter/Brake shaft keyways damaged
Unit clutch not disengaging
Shifter stop assembled backwards
Improper fit of case to cover
Dowel pins not installed
Differential bevel gears broken
Spring in shifter weak or broken
Worn or stripped gear teeth
6.2 FLUIDS/GREASES
The fluids used in Hydro-gear transaxles have been
carefully selected. If substitutions are made, use
equivalent products.
Typically, an engine oil with a minimum rating of 55 sus
at 210oF (99oC) and an API classification of SH/CD is
recommended. A 20W-50 engine oil has been selected
for use by the factory.
The grease used in the manufacture of Hydro-Gear
products is a STEMS Premium grease and should be
substituted with equivalent products only if it is not
readily available in your area.
NOTE: This grease is not compatible with all grease
types.
Figure 26
936-8
6.3 HYDRO TRANSMISSION REMOVAL
1. Place the unit on a flat surface and remove the
negative lead from the battery and the spark plug
lead from the spark plug.
9. Remove the rear wheels by removing the hub cap,
snap ring, hub cap ring, rear wheel, axle key, two
flat washers and spacers.
2. Raise the mower pan lift arm and remove the four
nuts holding the plastic insert onto the left side of
the rear deck and remove the plastic insert.
10.Set the parking brake and remove the main drive
belt from the input sheave on top of the transaxle.
3. Raise the seat and remove the wire harness from
the seat switch, and remove the four carriage bolts
holding the rear deck to the unit frame and remove
the fuel cap from the fuel tank.
4. Lower the seat and rotate the seat deck forward
and over the mower deck lift arm and off the unit
frame.
5. Replace the fuel cap on the fuel tank and remove
the fuel tank from the unit by releasing the fuel line
from the fuel pickup tube in the tank.
6. Raise and block the unit frame on jack stands
forward of the transaxle in the frame.
7. Remove the unit tail board by removing the upper
two carriage bolts and the lower self tapping
screws.
8. Move the tail board to the rear and up to release
the transaxle dump valve link and transaxle oil
expansion hose.
11.Release the parking brake.
12.Remove the lock nut on the end of the brake rod,
along with the flat washers and spring.
13.Remove the cotter pin and washer on the shift rod
and remove the shift rod from the transaxle cam
arm. Do not remove or loosen the hardware on
the transaxle sub-frame at this point.
14.Release the upper and lower tension springs on
the left rear of the transaxle sub-frame.
15.Support the transaxle with a floor jack from the rear
of the unit.
16.Remove the two right front anchor bolts holding the
transaxle subframe to the unit frame and remove
the left front bolts holding the transaxle subframe
to the unit frame.
17.Remove the two rear bolts on both sides of the unit
frame holding the transaxle subframe to the unit
frame.
6 - 26
major disassembly of the unit. Replacement of these
seals will require removal of the transaxle from the
machine frame.
1. To remove the input shaft seal carefully pull the
seal out of the housing bore with a "hook" type tool
or a slide hammer type puller. Care must be taken
to avoid damage to the housing bore or to the shaft
sealing surface.
Figure 27
18.Move the transaxle assembly to the rear and out of
the unit frame.
19.With the transaxle assembly removed from the unit
frame, place the axle assembly on a flat work
surface.
6.4 HYDRO TRANSMISSION REPAIR
(MINOR)
Figure 29
936-35
Minor repairs may be performed, following the
procedures in this section.
2. Lubricate the new seal prior to installation with a
petroleum jelly.
Cleanliness is a primary means of assuring satisfactory
life of either new or repaired units. Cleaning parts by
using solvent wash and air drying is usually adequate.
As with any precision equipment, all parts must be kept
free of foreign materials and chemicals.
3. Wrap the shaft spline with a thin plastic or
cellophane tape to prevent damage to the new seal
lip during installation.
4. Slide the seal over the shaft and press it into the
housing bore. Be careful not damage the seal. The
seal should seat against the retaining ring.
The displacement control shaft seal and bypass
actuator shaft seal may be replaced following similar
procedures.
Figure 28
936-35
Protect all exposed sealing surfaces and open cavities
from damage and foreign material. The outer surfaces
of the transaxle should be cleaned before beginning
any repairs.
Shaft Seals
Lip type seals are used on the pump input shaft, the
displacement control shaft and bypass actuator shaft of
the transaxle. These seals can be replaced without
6 - 27
6.5 HYDRO TRANSMISSION REPAIR
(MAJOR)
CAUTION: The axle/differential assembly
may stick as the lower housing is being lifted
off of the upper housing.
1. Drain the oil by removing the breather assembly
and positioning the transmission so the breather
port is down to allow the oil to drain thoroughly.
Figure 30
936-37
Figure 32
2. Position and secure the transmission with the
upper housing down to allow access to the twenty
housing assembly cap screws.
3. Using the appropriate tool, remove the twenty
assembly screws.
4. Loosen the nut and the brake arm mounting bolt.
936-22
7. Inspect the lower housing for damage. Inspect the
axle journal bearing pockets for excessive wear.
Inspect the brake rotor/stator pocket for excessive
wear.
NOTE: Prior to reassembly the housing mating surfaces must be thoroughly cleaned and old sealant must
be removed.
8. Lift the axle/differential assembly out of the upper
housing.
NOTE: It will be necessary to remove any burrs or rust
from the axle ends prior to the removal of the two
bronze bearings or damage to the bearings will occur.
9. Remove the two bronze journal bearings, four lip
seals and flat washers from the axle ends.
NOTE: The lip seals must not be re-used during reassembly.
10.Inspect the bronze bearings for excessive wear.
The bearings should be 0.7535" to 0.7561" I.D.
Figure 31
936-38
11.Inspect the axle ends for damage or excessive
wear. The axle ends should be 0.7486" to 0.7496".
5. Separate the two housing halves by applying
pressure with two large straight blade screw
drivers. Use caution to prevent damage to the
mating sealing surfaces as you separate the two
halves.
NOTE: The sealant will make two halves difficult to
separate.
6. All components should remain in the upper
housing half (positioned down) as the bottom is
lifted off.
6 - 28
Figure 33
936-23
Figure 34
12.Inspect the differential bevel gears by rotating the
axle ends.
13.Inspect the final drive gear teeth for excessive
wear or damage.
14.Check the differential assembly screw for proper
torque. The correct torque should be 12-14 ft. lbs.
(.75-.9 Nm).
15.Inspect the journal bearings inside the differential
housing for excessive wear by feeling the shafts for
an unreasonable amount of play.
936-29
24.Remove the center section assembly from the
housing. The pump block assembly should remain
in the upper housing on the input shaft, but may
stick to the center section. Inspect the check valve
plate bolt torque, but do not remove. Two styles of
check plates have been used one has three bolts
while the other has four. The one with four bolts
should be torqued from 170-240 in. lbs.
(10.5-14.7 Nm) while the one with three bolts
should be torqued from 135-185 in. lbs.
(8-11.5 Nm).
16.If excessive wear or damage has been found, the
complete assembly must be replaced.
CAUTION: The aligning pins, motor shaft,
bypass plate, pump block and motor block
assemblies are NOT retained to the center
section or the upper housing and may
become separated from the assembly during
removal.
17.Remove the brake rotors and stators by sliding one
at a time off the ends of the splined motor shaft.
18.Inspect each side of both rotors for excessive wear
or damage.
19.Inspect the rotors internal splines for excessive
wear or damage.
20.Inspect the stators for excessive wear and
damage.
21.Replace rotors and stators as a complete kit if
excessive wear or damage is found, and inspect all
other mating parts.
22.Remove the oil filter. After inspecting the filter for
unusual particles that it may have trapped, dispose
of it properly and replace it with a new oil filter
during reassembly.
23.Using a 9/16" socket (or box end) wrench, remove
the three assembly bolts retaining the center
section in the upper housing.
CAUTION: The pump and motor piston
springs may push the center section
assembly out of position while you remove
these bolts.
Figure 35
936-30
25.Remove the motor block assembly from the motor
shaft and inspect for unusual wear or damage. The
pistons should fit with very little side clearance in
the block bores, but must slide freely.
6 - 29
NOTE: The correct bore diameter for the block is
0.6776" to 0.6784" and the pistons should be 0.6767"
to 0.6770".
taken to avoid damage to the housing bore, shaft
sealing surface or bearing. Once removed, the seal
is not reusable.
26.Remove the motor shaft, washers and bypass
plate from the center section and inspect for
unusual wear or damage.
38.Remove the input shaft bearing ring.
27.Inspect the center section running surfaces for
unusual wear or damage.
40.Inspect the shaft and bearing for unusual wear or
damage.
28.Remove the pump block assembly, block thrust
washer and spring from the input shaft and inspect
for unusual wear or damage. The pistons should fit
with very little side clearance in the block bores,
but must slide freely.
41.Reposition the top housing and remove the
displacement control shaft and lip seal.
39.Remove the pump input shaft assembly from the
housing.
NOTE: The correct bore diameter for the block is
0.6295" to 0.6303" and the pistons should be 0.6288"
to 0.6291".
42.Inspect the housing for damage.
Replacement of Parts
All parts should be thoroughly cleaned in a suitable
solvent. All sealant material MUST be removed from
the housing halves prior to reassembly.
29.Remove the two internal hex head cap screws
retaining the jackshaft to the housing with a 5mm
hex wrench and remove the jackshaft/pinion gear
assembly from the housing.
1. Inspect all parts for damage, nicks or unusual wear
patterns. Replace all parts having unusual,
excessive wear or discoloration.
30.Inspect the jackshaft running surface for excessive
wear or damage. The jackshaft should be 0.4986"
to 0.4996".
31.Inspect the pinion gear bore for excessive wear or
damage. The bore should be 0.5014" to 0.5024".
32.Inspect the pinion gear teeth for excessive wear or
damage.
33.If excessive wear or damage was found, the
complete assembly should be replaced.
2. Inspect the sealing surfaces, bearing surfaces, and
shaft splines. Polish the sealing areas on the
shafts if necessary. Replace any worn or
damaged parts.
NOTE: The running surfaces of the cylinder blocks
MUST be flat and free from scratches. If scratches or
wear are found on the running surface of the cylinder
block or center section, polish or replace the parts.
when polishing these surfaces, up to 0.0004" may be
removed. If this is not sufficient to obtain a flat surface
free of scratches, the part should be replaced.
3. Clean and lightly oil parts prior to assembly of the
transmission.
4. Be sure to torque all threaded parts to the
recommended torque levels.
5. Replace all o-rings and shaft seals.
CAUTION: Most parts have critical high
tolerance surfaces. Care must be exercised to
prevent damage to these surfaces during
assembly. Protect exposed surfaces,
openings and parts from damage or foreign
material.
Figure 36
936-31
6. Install the displacement control shaft.
34.Remove the motor thrust bearing assembly,
swashplate kit and cradle bearing from the housing
and inspect for unusual wear or damage.
35.Remove the slot guide from the displacement
control shaft.
7. Install the pump input shaft assembly and retaining
ring into the housing.
8. Install the pump shaft lip seal.
9. Reposition the upper housing and install the cradle
bearings.
10.Install the slot guide block onto the displacement
control shaft.
36.Remove the bypass actuator from the housing.
37.Reposition the housing and remove the input shaft
tip seal from the housing bore. A hook type tool
may be used to pry the seal out. Care must be
6 - 30
Figure 37
936-32
Figure 38
11.Install the swashplate assembly into the housing.
The slot on the swashplate must engage the slot
guide block on the displacement control shaft. Use
a tool such as a screwdriver to hold the guide block
in position while installing the swashplate.
12.Install the thrust washer and pump block spring
onto the pump shaft.
936-33
21.Insert the three assembly bolts into the center
section and press center section down onto the
aligning pins and pump input shaft until sealed on
mounting bosses. While holding the center section
in position, torque the bolts evenly from 525-700 in.
lbs. (32-43 Nm).
22.Install the motor thrust bearing (with the thicker
race towards the pistons) by compressing the
piston springs and sliding the bearing assembly in
to place.
NOTE: To simplify the installation of the pump block,
wrap a rubber band snugly around the pistons. This is
intended to hold the pistons in their bores as the block
kit is handled during installation. Be certain to remove
the rubber band.
13.With the swashplate in the neutral (0 angle),
lubricate the running surfaces and install the block
kit onto the pump input shaft. Make sure the
splines engage properly.
14.Install the pinion gear and washers onto the
jackshaft. Install the jackshaft assembly into the
housing and torque the bolts from 12-170 in. lbs.
(7.4-10.5 Nm).
NOTE: The tool being shown is an example of what
you will need to compress the pistons and allow the
bearing to be installed.
23.Fill the axle pockets of the upper housing with
Rykon Premium grease (inside of bearing
locations).
NOTE: This grease is not compatible with all grease
types.
24.Do not overfill, and wipe off any excess grease or
sealant will not cure properly.
15.Install the aligning pins and the bypass actuator
into the housing.
16.Install the washers and lip seal onto the motor
shaft.
17.Install the motor shaft into the center section.
18.Install the bypass plate (small end first) into the
center section.
19.Lubricate the running faces and install the motor
block kit onto the motor shaft.
20.Position the washers and seal and install the
center section assembly onto the aligning pins and
pump input shaft.
Figure 39
936-21
25.Install the washers and seals onto the differential
axle assembly and align them for installation.
6 - 31
than 10 PSI to be applied or seal damage may
occur. To locate a leak, apply a soap mixture
around the housing seam and at all lip seals. Do
not submerge unit or the brake will be damaged.
26.Install the differential axle assembly into the
housing.
27.Install a new filter onto the center section check
valve plate.
28.Install the rotors and stators. Install a stator, then a
rotor (hub to inside), then a stator, then a rotor (hub
to inside), then two stators.
Oil Fill & Start-Up Procedures
29.Install the brake bolt (with nut) into the upper
housing.
It is recommended that the unit be purged prior to
installing into the unit frame. The following is the
suggested purging procedures for repaired transaxle.
30.Apply the sealant to the lower housing.
NOTE: Sealant must be of good quality, oil and heat
resistant.
Fill the transmission with a 20W-50 engine oil. The
correct volume for fill should be 2-1/2 quarts (2.4 L).
1. Spin the input shaft in a clockwise direction at
1000-1500 RPM. This may be performed in a drill
press (or equivalent).
2. Engage (actuate) the bypass.
3. Stroke the control lever forward for five seconds
and then reverse for five seconds. Do this three
times in each direction.
4. Return the control lever to neutral.
5. Disengage the bypass.
6. Stroke the control lever forward for five seconds
and then reverse for five seconds. Do this three
times in each direction.
NOTE: It may be necessary to repeat these steps in
the vehicle to fully purge the transmission.
Figure 40
7. Check the oil level after fully purging the unit of air.
It should be between 1.25-1.62" (3.1-4.1 cm) from
the top of the housing.
936-24
Position the lower housing onto the upper housing and
secure with assembly bolts. Torque the bolts from
135-165 in. lbs. (8-10 Nm).
8. After installing the transmission, make sure all
linkages and actuators are functioning properly.
NOTE: The bolts around the front of the housing are
installed simultaneously at our factory. The order in
which you torque them is not important.
31.After torquing all bolts, wipe off any excess sealant
from the seam of the housing.
32.Reposition the transaxle assembly and check the
bypass actuator and axle shafts for freedom of
movement. The axle should not lock up but may be
tight, while the bypass actuator must rotate freely.
33.Torque the nut on the brake bolt from 120-185 in.
lbs. (7-11 Nm).
34.Install a new lip seal on the displacement control
shaft and bypass actuator shaft.
35.Install the brake pins and brake arm.
36.Adjust the brake clearance as described in the
brake adjustment section.
37.Install the control arm and friction pack.
38.Install the bypass actuator arm and retaining ring.
Use care to avoid over extending the retaining ring.
39.Prior to adding oil to the transmission it is
recommended that you test for leaks. This may be
performed with a small hand pump or by using
compressed air and a regulator. Do not allow more
6 - 32
6.6 HYDRO TRANSMISSION
INSTALLATION
8. Check the belt fingers and belt alignment.
Before installing the transaxle assembly into the unit
frame with the axle subassembly installed the following
items will need to be completed.
10.Reinstall the fuel tank and attach the fuel line,
route the seat switch wires over the fuel tank.
6
2
3
9. Reinstall the rear tail board on the unit installing the
dump valve rod and transaxle oil expansion hose.
Reuse the hardware removed earlier, two carriage
bolts and two self tapping cap screws.
11.With the mower deck lift arm in the up position
reinstall the rear deck onto the unit frame and over
the fuel tank.
12.Route the seat switch wires through the rear deck
and attach to the seat switch.
5
13.Install the fuel cap onto the fuel tank, attach the
rear deck to the unit frame.
14.Before installing the left rear wheel install the two
flat washers and spacers, install the rear wheel
with key in the key way.
1
15.Replace the hub cap retainer and snap ring and
place the hub cap over hub cap retainer.
4
1.
2.
3.
4.
5.
6.
16.Leave the right wheel off the transaxle for neutral
adjustment.
Disc Brake
Castellated Nut w/Cotter Pin
Compression Spring- .78" OD x 1 " long
Feeler Gage
Washer
Nylon Lock Nut
Figure 41
Transaxle Neutral Adjustment
Make sure that the rear of the unit is suspended before
the unit is started, set the parking brake and start the
engine.
Make sure that the interlock system is operational
before proceeding.
1. Place a weight onto the seat to activate the seat
switch, and release the parking brake.
OT0840
Make sure the brake rod has two flat washers and a
heavy coil spring installed on it before inserting the
transaxle into the unit frame.
2. Turn in the cap screw on the bottom of the
transaxle subframe that will pivot the top of the shift
arm to the rear.
1. Guide the shift rod into the shift arm and the brake
rod into the brake arm as the transaxle is inserted
into the frame from the rear of the unit.
2. Start the two rear 3/8" self tapping bolts into the
rear of the transaxle sub frame to support the axle
assembly while installing the rest of the hardware.
3. The axle should drive to the rear.
4. Turn the cap screw out on the axle subframe which
will allow the shift arm to pivot forward and the axle
should rotate forward.
5. Center the cap screw between these two points
and the transaxle should be in hydraulic neutral.
Do not tighten any hardware until all the support
hardware is installed.
6. Reinstall the right rear wheel identical to the left
rear wheel.
3. When all the hardware is in place, tighten to an
appropriate torque.
4. Reinstall the tension spring to the shift linkage on
the top and bottom of the right axle.
5. Install the two flat washers, compression spring,
and lock nut on the rear of the brake rod which
operates the brake arm.
6. Install the flat washer and cotter pin on the shift
rod.
7. Set the parking brake and install the main drive belt
on the transaxle input sheave and check the belt
routing on the idler arm and engine pulley, release
the parking brake.
6 - 33
SECTION 7 - GEAR DRIVE TRAIN
7.1 GEAR TRANSMISSION TROUBLESHOOTING
The following troubleshooting chart is to be used to
isolate hydro transmission problems and give possible
causes and corrective action responses.
TROUBLE
Axles Will Not Turn
Difficult Starting
Erratic Running
Jerky When Starting
Jumps Out of Gear
Knocking
Loss of Power or System
Noisy
Oil Leakage
Operates Hot
Operates in One Direction Only
Pump Failure
Speed Loss Under Load
Speed Loss Under Load
Will Not Drive
Will Not Shift
The troubleshooting key is generic and can be used for
several types of transmissions. Use only those
possible causes and corrective actions that apply to the
unit.
POSSIBLE CAUSES
CORRECTIVE ACTION
(Refer to Key Below)
7, 8, 10, 13, 30, 31, 36, 38, 44, 45, 56, 53, 55
1, 5, 6, 38, 45
1, 7, 8, 10, 13, 26, 30, 36, 44, 45, 46, 47, 48, 53
6, 7, 8, 30, 31, 36, 38, 44, 46, 48, 53, 54, 55
1, 8, 13, 30, 36, 44, 45, 46, 54
4, 8, 13, 30, 36, 37, 44, 46, 53, 55
7, 8, 11
4, 8, 11, 36, 37, 38, 43, 55
26, 36, 51
4, 8, 32, 34, 36, 43
1, 6, 36, 43, 48, 55
N/A
1
1, 6, 7, 8, 11, 36, 37, 44, 46, 48, 53, 55
1, 8, 13, 30, 36, 44, 45, 47, 50, 51, 54
30, 44
repair or replace
repair or replace
repair or replace
repair or replace
repair or replace
repair or replace
repair or replace
repair or replace
repair or replace
repair or replace
repair or replace
TROUBLESHOOTING KEY
1
2
3
Inspect control linkage
Inspect acceleration valves
Inspect charge check valves
22
23
24
Inspect hoses and lines for wear
Inspect implement relief valve
Inspect charge pump
43
44
45
4
5
6
25
26
27
Bad transmission pump
Overheating
Cold running
46
47
48
28
Bad transmission motor
49
Unit clutch not disengaging
29
30
31
Check system pressure
Shift rod grooves worn
Reverse chain broken
50
51
52
Shifter stop assembled backwards
Improper fit of case to cover
Dowel pins not installed
32
33
34
35
36
37
Damaged cooling fan
53
Inspect auxiliary relief valve
54
Inspect cooling fan
55
Inspect transmission cooling fins
Worn or damaged bearings
Metallic pieces or foreign objects in unit
17
Incorrect grade of lubricating oil
Low cranking speed
Controls not in correct operation
position
Belts are missing, to tight, loose or
glazed
Overload of vehicle
Replacement parts damaged
Replacement parts improperly
installed
Improperly torqued attaching screws
Air in hydraulic system
Broken shifter stop
Inspect charge check valves
inspect acceleration valves
Check oil level-gear box sump or
reservoir
Inspect heat exchanger
Burns on gearing
Gears improperly installed
Forks & rod assembly incorrectly
installed
Shifting keys broken or damaged
Shifting washer in backwards
Shifter/Brake shaft keyways damaged
38
18
19
20
21
Inspect by-pass valve
Inspect charge pressure
Inspect inlet filter
Inspect charge relief valve
Inspect for loosely mounted
components
Steering column loose or binding
Pressure relief valve sticking open
Pressure relief valve sticking closed
Broken relief valve spring
7
8
9
10
11
12
13
14
15
16
39
40
41
42
7 - 34
Differential bevel gears broken
Spring in shifter weak or broken
Worn or stripped gear teeth
7.2 GEAR TRANSAXLE REMOVAL
(PEERLESS)
8. Remove the oil from the unit prior to removing the
gear shaft assemblies.
9. Remove the top bearing block on the bull gear of
the differential. Remove the bull gear, bevel pinion
gears with center shaft and the axles.
1. Place the unit on a flat surface and remove the
negative lead from the battery and remove the
spark plug lead from the spark plug.
2. Raise and support the rear of the unit. Remove the
rear wheel with associate hardware.
3. Remove the rear tailboard from the unit. Engage
the parking brake and remove the main drive belt
from the input sheave on top of the transaxle.
There are 3 shaft assemblies in this transaxle: the
output shaft, the countershaft, and the shifter/brake
shaft assembly. Remove these assemblies as
complete as possible from the case.
As these assemblies are taken apart, lay the parts out
in a systematic order. This will help to make
reassembly easier and inspection of all parts possible.
Clean each part as the parts are laid out.
4. Release the parking brake and remove the brake
rod from the transaxle brake arm.
5. Remove the shift link ball joint from the shift arm.
6. Support the transaxle and remove the mounting
hardware and lower the transaxle out of the frame.
7.3 TRANSAXLE TEARDOWN
This unit contains an aluminum tag showing the model
number.
The following steps will need to be taken prior to
disassembly.
The input shaft can also be removed and inspected or
serviced. Remove the snap ring on the bevel gear and
pull the shaft through the case. The square cut "O" ring
must be replaced if the shaft is removed.
Tecumseh tool part No. 670251, is used for removal
and installation of needle bearings for the input shaft.
The needle bearing on the inboard side is installed
.135-.150" below flush.
Reassembly
1. Clean the outside surface of the transaxle.
1. Apply grease between the bearings in the cover
and install the input shaft, bevel gear and snap
ring.
2. Position the shift lever in the neutral position.
3. Remove the set screw, spring and index ball.
2. Oil both keyways and slide keys and collar on the
shifter/brake shaft.
4. Remove the neutral start switch.
5. Remove the hex head screws that hold the cover
to the case.
6. Push the shift lever rod while pulling cover off of
the case. The shifting lever may temporarily remain
in the case. Lift off cover.
NOTE: Assemble the countershaft and the shifter/
brake shaft. Match them together and place into the
housing as a single unit.
7. Remove the two brake bracket screws and remove
the brake assembly.
Figure 42
7 - 35
8. Place the large washer on the end of the shifter/
brake shaft, the bronze bushing and the "O" ring.
9. Place the spur gear onto the splines on the other
end of the shifter/brake shaft. The thin washer and
bushing conclude the assembly of these 2 shafts.
10.Place the output gear on the stepped end of the
output pinion. The shaft in the output pinion is
permanently pressed. Place the thrust washers on
each end and then the bronze bushings.
7.4 TRANSAXLE INSTALLATION
1. With the transaxle support plates mounted on the
axle, place the axle assembly into the unit frame.
2. Place the brake rod into the brake arm assembly
prior to mounting the axle.
3. Install all the axle mounting hardware and tighten.
4. Set the parking brake and install the main drive belt
onto the axle sheave.
5. Release the parking brake and check the belt
finger locations and belt routing.
Figure 43
6. Install the link ball joint onto the shift arm.
7. Attach the neutral switch wiring plug onto the
neutral switch, check for OK to start light.
8. Attach the rear tailboard onto the rear of the unit.
9. Check for proper operation and place the unit on
the ground and test the unit.
3. Push the shifting keys through the reverse
sprocket and push the neutral collar over the end
of the keys and pull the neutral collar and reverse
gear up against the shoulder of the shifter/brake
shaft.
4. Insert the countershaft into the smaller reverse
gear. Insert a thin thrust washer next to the gear
and then install the larger bevel towards the
reverse gear. Place another thin thrust washer on
the back side of the bevel gear.
NOTE: As all the gears are placed back into the
assembly, each should be oiled prior to assembly.
5. Build the gears on the counter shaft and shifter/
brake shaft alternately, meshing each gear with it’s
mating gear on the other shaft. The first gear on
the shifter/brake would be the largest of the shifting
gears. Place this gear next to the neutral collar with
the flat side of the gear next to the collar.
6. Then place a shifting washer onto the shifter/brake
shaft with the rounded edge towards the shifting
keys. Continue this procedure until all the gears on
both shafts have been added.
NOTE: It is not only important that the gears match up
diameter-wise, but must match up according to thickness.
7. Add the spacer to countershaft on the other side of
the reverse gear. Then place a thrust washer on
each end of the counter shaft and insert the bronze
bushings.
7 - 36
SECTION 8 - STEERING
8.1 STEERING UNIT REMOVAL
8.2 STEERING UNIT ASSEMBLY
1. Open and remove the hood from the unit. Remove
the battery by first removing the negative battery
cable and then the positive battery cable. Release
the battery hold down strap and remove the
battery.
1. Reassemble the steering pinion support and shim
for correct back lash.
2. Remove the indicator lights from the dash, remove
the wiring plugs from all the switches and hour
meter if installed.
3. Remove the steering wheel and steering column
cone from the top of the dash assembly. Remove
the knob from the throttle control, and remove the
throttle control from the dash support. Remove the
screws that hold the side panels to the dash
support.
4. Remove the remaining screws around the base of
the dash assembly from the unit frame and lift the
dash assembly off the unit.
Figure 45
5. Remove the upper dash support and steering shaft
bearing.
2. Insert the steering assembly through the lower
dash support and add the flange bushings and
snap rings to hold the unit in place.
3. Rotate the steering shaft up and install the upper
dash support with the steering shaft bearing.
4. Reinstall the electrical components on the right
side of the upper dash support. Install the dash
assembly and secure to the unit frame with the
screws removed earlier.
5. Secure the side panels to the dash assembly and
reattach the wiring and indicating lights if used.
6. Reattach the steering wheel and the steering
column cone to the top of the dash assembly.
Figure 44
8.3 TIE ROD ADJUSTMENT
936-20
6. Remove the electrical components from the right
side of the top dash support and remove the upper
dash support from the unit.
7. Remove the steering rod arm from the left side of
the unit. Remove the two snap rings from the ends
of the shaft and rack assembly.
8. Remove the flange bushings from the side of the
lower dash support and move the steering gear
assembly to the left and rotate out of the right side
of the dash support.
9. Disassemble the pinion gear support bracket and
check for wear on the rack or pinion gear. Replace
the parts as needed.
1. With the pinion gear in the center of the rack
assembly the steering rod arm should be on the
end of the rack shaft in the vertically down position.
2. The front wheels should be toed in 1/8 of an inch in
the front of the wheel compared to the rear of the
front wheels. Adjust tie rod and ball joints to hold
this dimension.
3. With the front wheels pointed straight forward
attach the tie rod from the top of the left front wheel
to the steering arm in the vertically down position.
this will give you the maximum steering rotation
right and left.
8 - 37
SECTION 9 - LIFT SYSTEM
9.1 LIFT SYSTEM OVER VIEW
The lift system on the unit uses a spring assisted
system to take the weight of the attachment away from
the operator.
1
9.2 LIFT SYSTEM REMOVAL
1. With the mower attachment removed from the unit
the lift handle should be left in the up position.
2. Remove the cotter pins on the mower lift link.
3. Remove the left center lift bracket support. Support
the lift assembly and remove the left bracket.
Remove the spring assembly from the unit.
2
4. Removal of the upper lift assembly handle on the
rear deck of the unit will need to be removed.
3
5. Move the fuel tank forward to allow access to the
mounting hardware.
6. Remove the plastic handle covering on the lift
handle.
7. Release and remove the detent lever tension
spring.
4
8. Remove the pivot pin from the lift linkage and
remove detent lever from the linkage.
9. Remove the external ring from the ends of the lift
lever pivot and remove the washers and bushings.
10.Remove the carriage bolts and nuts holding the
pivot rod to the rear deck supports.
1.
2.
3.
4.
Lift Handle
Lift Link
Tension Spring
Spring Assembly
Figure 46
9.3 LIFT SYSTEM INSTALLATION
1. Insert the cross shaft and coil assembly into the
support bracket still in the unit and mount the left
with the hardware removed with it.
2. Insert the fuel line and wire harness into the J
clamp and bend closed.
3. Insert the lift rod into the lift arm cross shaft and
secure with washers and cotter pin.
4. Reassemble the upper lift assembly into the rear
deck support and secure with the hardware
removed earlier.
5. Install the bushings and washers onto the rod ends
and secure with the external retaining rings.
6. Install the pivot pin into the lift linkage and attach
the detent lever tension spring.
7. Reinstall the plastic handle covering over the metal
lift handle subframe.
8. Attach the mower lift link and secure with the cotter
pin.
9. Check function and operation prior to installing the
mower attachment.
9 - 38
PT0111
SECTION 10 - FUEL SYSTEM
10.1 FUEL SYSTEM TROUBLESHOOTING
The following troubleshooting chart is to be used to
isolate fuel system problems and give possible causes
and corrective action responses. The troubleshooting
TROUBLE
Hard Starting
Fuel Leak At Carburetor
Engine Floods
Will Not Idle
Rich Idle
Idles With Needle Closed
Hunts Erratic Idle
Idles Fast Lean
Will Not Accelerate
Over Rich Acceleration
Hesitates
Will Not Run at High Speed
Low Power
Hunts at High Speed
Runs With Needle Closed
Engine Overspeeds
key is generic and can be used for several types of
engines. Use only those possible causes and
corrective actions that apply to the unit.
POSSIBLE CAUSES
CORRECTIVE ACTION
(Refer to Key Below)
1, 3, 4, 6, 11, 12, 14, 16, 17, 18
5, 7, 17
5, 15, 17
1, 2, 3, 6
1, 6, 14
14
2, 3, 6, 7, 12, 13, 14, 15, 18
2, 3, 7,
1, 6, 12, 14, 15, 16
1, 15
2, 6, 11, 12, 16
1, 11, 12, 14, 16
1, 3, 11, 14, 15, 16, 17, 18
3, 6, 7, 12, 14, 15, 16, 18
14
2, 3, 7, 14
clean, repair or replace
repair or replace
repair or replace
repair or replace
repair or replace
repair or replace
repair or replace
repair or replace
repair or replace
repair or replace
repair or replace
repair or replace
repair or replace
repair or replace
repair or replace
repair or replace
TROUBLESHOOTING KEY
1
2
3
4
5
6
Plugged air filter
Leaky carburetor gasket
Throttle or choke shaft worn
Choke not functioning properly
Plug atmospheric vent
Air bleed restricted
7
8
9
10
11
12
Damaged or leaky "O" rings
Damaged diaphragm
Stuck or dirty ball check
Diaphragm upside down
Plugged tank or vent
Fuel pick-up restricted
10 - 39
13
14
15
16
17
18
Idler port restricted
Damage adjustment needle and seat
Incorrect float height
Main nozzle restricted
Dirty, stuck needle and seat
Fuel inlet plugged
10.2 FUEL PUMP
The impulse style fuel pump is the most commonly
used fuel pump. Impulse fuel pumps may either be
mounted externally onto the carburetor fuel inlet or
remotely mounted. These pumps are connected in the
fuel line between the fuel supply and the carburetor or
directly to the fuel inlet.
Figure 47
Impulse fuel pumps are operated by crankcase
impulses created by the up and down movement of the
piston. A hose called a pulse line connects the fuel
pump diaphragm chamber and transmits the impulses
to the pump diaphragm. The impulses actuate the
diaphragm and the flap valves to lift the fuel from the
fuel tank to the carburetor.
10.3 FUEL SYSTEM CONTAMINATION
Any time fuel contamination is found in the fuel system
(dirt, water, algae, etc.) replace the fuel, fuel filter and
flush the fuel lines. Remove the carburetor bowl and
clean. Replace all items that cannot be cleaned.
Reassemble the fuel system and check for proper
operation.
10.4 FUEL TANK
The fuel tank is made of composite material for long life
with out breaking down from the additive used in
today’s blended fuels.
10 - 40
SECTION 11 - ELECTRICAL
11.1 TOOLS
11.2 ELECTRICAL MEASUREMENTS
There are some specialized tools and test equipment
that are needed for electrical repair work. A brief
description of these follows.
In many electrical circuits, there is some visible effect
which indicates that the circuit is functioning properly. A
switch is turned "ON" and a lamp lights. A key is
turned, a starter motor runs and cranks the engine.
If the lamp does not light, or the starter motor does not
run, some means of measuring voltage, current flow,
resistance and continuity is needed, (continuity means
there is a complete electrical path through the circuit or
component.)
To know exactly what conditions exist in an electrical
circuit requires AC and DC Voltmeter, AC and DC
Ammeter, and an Ohmmeter.
Long or needle-nose pliers - used to connect or bend
wires and connectors in close quarters.
Diagonal cutters - used to cut wires or trim
connections.
Wire stripper/crimping tool - available separately or
as a combination tool, used to strip insulation from
wires of various sizes, crimp terminals and connector
on wires.
Soldering gun or soldering iron - used to solder all
splices and connections to terminals, connectors, etc.
A soldering gun is faster and more convenient than
waiting for a soldering iron to heat.
Multimeter
A single combination meter that does all of these things
is available. Such a meter is called a Multimeter or VoltOhm-multitester (VOM). Meters of this kind are available in many forms and all change functions and
ranges with switches, or by plugging test leads into different jacks. Multimeters are available in two basic
types, Analog and Digital.
Multimeter - analog or digital to measure voltage,
amperage and ohms.
Tachometer - used to measure engine speed.
Required to properly test alternator and charging
circuits where output is dependent upon engine.
Heat gun - used to shrink insulated tubing in place.
Used to replace electrical tape or insulated sleeving. To
use place a piece of shrink tubing over a wire joint,
heat with the heat gun, and it shrinks tightly around the
joint to insulate it.
Supplies - electrical tape, rosin core solder (never use
acid or acid core solder on electrical joints), an
assortment of various size terminals, connectors,
insulated or heat shrink tubing (for use on joints and
connections), and an assortment of automotive type
wire (in several colors).
Ariens recommends that all work be done in a
professional manner. The use of the tubing to cover
joints and the soldering of connections contribute to a
professional looking job. In addition to a pleasing
appearance. repairs made in this manner are more
likely to withstand vibration. (The weakest points in an
electrical system are at the joints where wires are
attached. Vibration causes wires to flex at these points
and eventually to break).
Replace all defective components with Ariens Factory
replacement parts only. Engine parts, such as rectifiers
or alternator components should be secured through
the nearest engine service center.
Ariens does not recommend attempting to repair
electrical components. Most do not lend themselves to
repair and you would have more money invested in
"time of repair" than the part would cost and the results
may not be as good.
Analog Meters
Analog Meters have a needle that moves across a
scale to give a reading. The longer the scale, the easier
it is to read and more accurate the reading will be. A
jeweled movement is used in this type of meter is more
likely to be damaged through rough handling (except
for overloaded Protected Meters) or by measuring high
values that exceed the range set on the meter than a
digital meter. They provide excellent service for the
money as long as they are used with care.
Digital Meters
Digital Meters do not have a movement and are therefore more rugged. The reading shows up directly on a
display window of some type. Since they read direct,
no skill in reading the scale is required, nor is it necessary to set the range. The meter switches the ranges
automatically. One has only to select the function DC
Volts, AC Ampere, Ohms, etc.,) connect the test leads,
and the reading is shown on the display. Because of
the internal circuitry and the lack of a movement, these
meters are not likely to be damaged by overloads.
In the discussions that follow, either type of meter may
be used. Test procedures are the same. It is best to
learn proper procedures, even though some meters
may be more forgiving of mistakes. Where differences
in use may occur, they will be covered in the discussion.
11 - 41
Voltage Measurement
Maintenance:
A voltmeter measures the voltage difference between
the test leads and the voltmeter is always connected
across the circuit under test.
Do an occasional visual inspection. See to it that the
battery remains clean, both the case and the terminals.
This visual inspection should be done once a month.
Current Measurement
Check the level of the electrolyte. It may be necessary
to add distilled water. This should be checked before
each usage.
The rules to remember when measuring current with
an ammeter are; an ammeter measures the current
that flows through the meter, and to measure current
an ammeter must be connected into the circuit.
The latter rule means that the circuit must be opened,
and the ammeter wired into it. Because this procedure
is usually difficult, an ammeter is seldom used for troubleshooting.
Resistance Measurement
An ohmmeter is used to make resistance measurements and to check continuity through wires and electrical components.
The ohmmeter has a self contained battery and
requires no electrical power. Using the ohmmeter on a
circuit that has power applied may result in damage to
the meter.
Another important check is the specific gravity. The
specific gravity should be checked with the hydrometer.
The reading on the gauge should be above 1.225. If
the reading is allowed to fall below 1.225 specific
gravity you will have an insufficient charge. If this
happens charge the battery until specific gravity of
1.265 is reached over 3 successive readings. This
check should be done monthly.
The state of charge can be determined approximately
by the cell specific gravity or the rested open circuit
voltage at room temperature and the charging time can
be estimated. For example:
IMPORTANT: Disconnect the equipment battery when
making Ohmmeter test or damage to the Ohmmeter
may result.
OCV
Specific
Gravity
% of
Charge
Charging
Time
IMPORTANT: An ohmmeter reads the resistance of
whatever component is connected between the test
leads. It can be used to check wires, coils, light bulbs,
or any item that conducts current.
12.60
1.265
100%
---
12.40
1.225
75%
3 hours
12.20
1.180
50%
7 hours
11.3 BATTERY
12.00
1.130
25%
10 hours
Set-Up:
11.80
1.100
0%
12 hours
The battery is dry charged. The dealer or customer
must add electrolyte (sulfuric acid and water).
1. Remove the battery from the unit.
2. Remove all the vent caps from the battery and set
the caps to one side.
3. Take the electrolyte which should be 1.265 specific
gravity at 80oF (27oC), and fill each cell so that the
electrolyte is level with the bottom of the fill ring.
4. The battery should stand for 1/2 hour. Now check
electrolyte level in each cell again. If necessary
add more electrolyte to bring the level up to the
bottom of the ring.
5. Charge until all cells are gassing freely, and the
specific gravity is constant over three successive
readings taken at 30 minute intervals.
If using an automatic tapering 12 volt charger, choosing
a good quality 5 to 10 amps 15VDC minimum output
charger and charge for 3 to 12 hours according to the
battery state of charge (see table above) or until the
specific gravity in each cell reaches 1.255 - 1.265
specific gravity at 80oF (27oC).
If using a constant current charger, charge at 1 to 2
amperes for the time given on the table above or until
full specific gravity is reached.
IMPORTANT: Charging at higher rates will damage the
battery and cause excessive gassing and acid
spewing.
WARNING: When charging battery, remove it
from the unit and make certain that you
connect the positive (+) lead of the charger to
the positive (+) terminal and the negative (-)
lead to the negative (-) terminal. Reverse
connections can cause sparks and potential
unsafe conditions.
6. Immediately after charging, check level of
electrolyte. If the level is low add distilled water to
bring it up to the required level.
7. Replace the vent caps. It is not necessary to
tighten more than finger tight.
8. Wash off the battery to remove electrolyte which
may have spilled.
11 - 42
Storage:
11.4 SWITCHES
During the off season it is important to have the battery
in the same good condition or it will not deliver power
when needed.
Switches either open a circuit to stop current flow or
close and allow current to flow through.
1. Make sure the battery is fully charged and the
electrolyte is to the proper level.
2. Make sure the battery is clean (both the case and
terminals.)
3. After cleaning the terminals, spread petroleum jelly
on the terminals to prevent loss of charge and
prevent corrosion.
4. Leave the cables disconnected.
5. It would be best to leave the battery in a cool, dry
area during the off season. This will slow down the
loss of charge during non-use periods.
6. Check your battery monthly during the off season
and if the battery has a low specific gravity apply a
charge to it. The battery is a perishable item and it
should be stored properly to obtain a long, useful
life.
Batteries not in use will self discharge and plates will
sulfate permanently if not recharged. If the battery will
not be used for more than three months, it should be
removed and stored in a cool, dry place. Any collection
of dirt, grease or electrolyte should be removed from
the top of the battery. The battery must be recharged
monthly or when the cell specific gravity reads less
than 1.255 specific gravity before reinstalling the
battery in the spring. It should always be fully
recharged.
NOTE: The specific gravity should be checked in each
cell and should be the same for all cells. A variation in a
cell reading could be an indication of a problem. Subtract .004 from 1.265 for each 10oF (12oC) below 80oF
(27oC) or add .004 to 1.265 for each 10oF (12oC)
above 80oF (27oC) .
A normally open (N.O.) switch prevents current flow
until the switch is actuated, completing the circuit and
allowing current to flow through it. An example is a light
switch - the lights are off until the switch is actuated
and the lights go on.
A normally closed (N.C.) switch allows current to flow
until the switch is actuated, breaking the circuit and
stopping current flow through it. An example is an
ignition switch that grounds the magneto when in the
off position (completing the circuit) but opens the circuit
when in the ON position allowing the engine to operate.
Switches are selected with regard to Current rating
(contacts must be of sufficient size to carry the required
current), Voltage rating (switches insulated for specific
voltages), Case or housing (switches that are exposed
to moisture and must be sealed to prevent moisture
from entering), and Actuating type (push, pull, rotary,
momentary contact, or micro switches).
NOTE: Check that the connections to the switches are
secure and that a switch is being activated properly
before performing electrical test on switches. (Safety
switches on speed selector and clutch levers may be
out of adjustment and not activating.)
IMPORTANT: When checking switches electrically,
remove them from their respective circuit by
disconnecting the wires from the switch at the
connector(s) before testing or damage could result to
the meter or machine components.
When an ohmmeter or multimeter set on the ohms
scale, check the switch for three things: continuity
between contacts of a normally open switch that closes
when the switch is activated; that contacts of a
normally closed switch open when the switch is
activated; and that there are no shorts between
contacts or between contact and ground (switch case)
that should not be there.
Variation from test results described indicates a
defective switch.
Normally Open Switch
To test a normally open switch (key, headlight, safety,
or seat) connect the ohmmeter across the switch
terminals. Meter should indicate open circuit (high
resistance). Activate the switch. The ohmmeter should
read up scale to zero resistance (Close Circuit). This
indicates the switch is operating properly. Also check
from each terminal to the switch case (if case is metal).
Reading should show high resistance indicating no
short to ground.
Normally Closed Switch
To test a normally closed switch connect the ohmmeter
across the switch terminals. Meter should indicate a
closed circuit (zero resistance). Activate the switch and
11 - 43
the meter should move to open circuit (high
resistance). Check from each terminal to ground
(switch case). Meter should show open circuit (high
resistance).
Relay
(03042800)
Ignition Switch
87
NOTE: Refer to the wiring diagram of the unit involved
to determine switch functions and test using the methods described.
86 87A
87
85
86 87A
30
85
30
Key Switch
NOT ENERGIZED
(03602300)
A
A
S2
S1
B
M
G
OFF
S2
S1
B
M
Figure 49
A
S2
ENERGIZED
G
RUN
S1
B
M
G
START
Figure 48
The ignition switch incorporates a number of functions,
although not all functions are used on all equipment.
The switch has three positions: OFF, RUN, and a
momentary contact START position. Use an ohmmeter
to check the continuity of the switch in each position.
OFF Position - Should be continuity between contacts
G and M. These connections ground the engine
magneto and stop the engine in the OFF position.
RUN Position - Should be continuity between contacts
B and A. These connections supply power to the rest of
the wiring harness. Connections G and M open to each
other.
START Position - Hold switch in START position while
testing. There should be continuity between contacts
S1 and S2. These connections apply power to close
the solenoid contacts and operate the starter motor.
In addition to the above test, place the switch in the run
position and check between each contact and ground
(metal case) to be sure no terminals are grounded. If
the switch is operating properly, there will be no
continuity between contacts other that those described.
11.5 SOLENOID AND RELAYS
Solenoid and relays are both magnetically operated
devices. Both devices operate on the principle that
passing a current of electricity through a coil of wire will
create a magnetic field strong enough to attract a piece
of iron or steel. Each device uses this principle in a
slightly different manner.
Relay - A basic relay consists of a coil of wire wound
around a soft iron (magnetic) core. When current is
passed through the coil, the core is magnetized and
pulls down on a magnetic lever. The lever in turn is
attached to several switch contacts which open or
close other electrical circuits. In this fashion, a small
current can control one or more larger electrical
currents and actuate several other devices. In most
cases a relay contact moves only a fraction of an inch
and the magnetic pull is small.
Solenoid - A basic solenoid consists of a coil of wire
wound around a hollow tube. A magnetic core slides
inside the tube. When current is passed through the
coil, the core is pulled into the solenoid with
considerable force. With proper design, a solenoid can
exert considerable force over a distance of several
inches. A solenoid can therefore, pull a lever, close a
heavy contact, or perform other jobs that require a
straight line pull.
If a relay or solenoid fails to operate, the cause may be
either electrical or mechanical.
To check electrically, connect a voltmeter across the
coil of the device and activate the circuit that operates
the relay or solenoid. If the meter indicates no voltage
is applied, the cause is in the control circuit.
If the meter indicates proper voltage across the coil but
the device does not function, remove the power,
disconnect the wiring and check the continuity of the
coil with an ohmmeter. The meter should indicate
resistance, in the order of 3 to 5 ohms, if the coil is
intact. A high resistance indicates an open coil and a
defective device.
There are also a number of mechanical problems that
may cause the problem.
11 - 44
If all the lights are out, check the fuse for continuity
(high resistance indicates a defective or blown fuse). If
the fuse is blown, check for a short in the wiring and
correct before replacing the fuse.
If the fuse and lamps are good, check the circuit with
an AC/DC voltmeter.
11.7 FUSES
Fuses are connected in electrical circuits to protect the
circuits from damage due to overload or short circuits.
Fuses are a "weak link" in the circuit. They contain a
metal link designed to melt when a certain current
value is exceeded thus opening or disconnecting the
wiring. Once a fuse blows or melts it must be discarded
and replaced with a new fuse of the same value.
Figure 50
Since the function of the fuse is to protect the circuit,
NEVER attempt to defect the protective device by
bridging or replacing with a device of a higher current
rating.
The starter solenoid in the Ariens equipment is a
sealed unit used to actuate the starter motor on the
engines. This solenoid may have three or four
connections.The two large connections carry high
current to operate the starter motor. The small
connections are connected to the coil and carry the
control current.
Electrical testing of these devices is simple, since the
device either conducts current (and is therefore
functioning) or the device is open and is therefore
defective. Use an ohmmeter to check for continuity.
Replace defective devices only with factory
replacements parts.
To check the solenoid, disconnect the cables to the
starter motor, turn the ignition switch to the start
position, and listen for the solenoid to snap inside
contacts closed.
If no snap is heard, check across the coils with a
voltmeter. The voltage should read 12 volts with the
ignition switch in the start position. If no voltage
appears, the defect is in the start circuit.
If the voltage is correct, turn off the power and check
continuity of the coil with an ohmmeter. If the coil is
open, the solenoid is defective and must be replaced.
If the coil has the proper voltage applied, and the
continuity check indicates the coil is intact, the solenoid
plunger is stuck or the contacts are welded shut and
the solenoid must be replaced.
If the solenoid snaps shut, but the start does not
operate, check across the large contacts with an
ohmmeter. If there is no continuity when the solenoid
snaps shut, the contacts are defective and the solenoid
must be replaced.
11.6 LIGHTING CIRCUITS
Lighting circuits are simple circuits and easiest to
trouble shoot in most equipment. They consist of the
lights connected in parallel, a normally open switch, a
protective fuse and a source of power (battery or
engine alternator).
Figure 51
If only one light is out, check the connector, then check
the bulb for continuity (high resistance indicates a
defective or burned out bulb).
11 - 45
11.8 DIODES AND RECTIFIERS
Diodes are solid state, semiconductor devices. They
contain no moving parts and conduct current better in
one direction than the other. They are electrical "check
valves" and permit current flow in one direction, but not
in the other.
Diodes allow current to flow through one circuit without
"backing up" into another. In engine alternator circuits a
diode is used to convert current which flows back and
forth (AC) in a circuit to current which flows only in one
direction (DC). A device which converts alternating
current to a direct current is called a RECTIFIER. A
diode is one type of a rectifier.
To check a diode, isolate if from the circuit by
disconnecting one end. With a multitester set on the
lowest ohms scale setting, measure the resistance in
one direction, reverse the test leads, and measure in
the other direction. Readings should be high in one
direction and low in the other. (If the readings are low in
both directions, the diode is shorted, and if the
readings are high, the diode is open.) If the readings
are the same in both directions, the diode is defective
and must be replaced.
IMPORTANT: Diodes are marked to indicate polarity (a
band on one end, an arrow on the side, or they fit on a
holder only one way.
Rectifiers
A battery is charged through the use of an alternator
located in or on the engine. A charging circuit contains
a rectifier because alternators produce alternating
current (AC) and batteries require direct current (DC)
for charging.
The rectifier may be built into the engine or it may be
an external part. It may also contain a regulator to
prevent overcharging the battery. (Servicing of
rectifiers built into the engine should be done by an
approved engine manufacturer’s service center. Such
a service center has access to the information and
parts required to test and repair or replace engine
components, including rectifiers and regulators.)
Figure 52
The field coil is mounted to a bearing support and does
not rotate. The rotor is attached to the power output
shaft and rotates around the field assembly. The
armature is attached to the output pulley. The armature
assembly is held close to the rotor by the brake
assembly. The clutch is engaged by applying current to
the coil connection. This results in a current flowing
through the coil, magnetizing the coil pulling the
armature onto the rotor with sufficient force to hold the
two pieces together, effectively connecting the output
and the input shafts together. Pulling armature against
the rotor pulls it away from the brake, releasing the
brake.
Engine Electrical Components
Units that contain both a rectifier and regulator are
tested in a working circuit to make sure the regulator
portion of the device is operating.
Engine servicing and repair should be referred to local
engine manufacturers service centers that have the
service information and parts available to properly
service the engine. Ariens dealers should be able to
test engines and engine components to pinpoint
troubles and narrow them down to properly advise the
engine serviceman.
11.9 ELECTRIC CLUTCH
11.10 ELECTRICAL
The electric clutch is used to turn on and off the
attachment used on the unit by use of a switch on the
dash panel. The clutch is also designed so that a brake
is applied to the output shaft when the clutch is
disengaged (off).
Initial check out: Make sure that all switches are in their
proper position for starting: (A) PTO off. (B) transaxle in
neutral position. (C) operator on the seat. (D) the
parking brake pedal pushed. (E) cruise control in the
off position. If no power to start the engine, start the
following check list:
Step 1: Check out the battery. Use a hydrometer on all
the battery cells to see if one or more is bad. Also use a
voltmeter to check for proper voltage. Replace the
battery if necessary and/or charge to proper level.
11 - 46
Step 2: Use a voltmeter to make sure you have power
to terminal (B) on the back side of the ignition switch in
the off position. If you don’t have power to terminal (B)
check the battery connections and the fuse in the red
lead.
Step 3: With the ignition switch in the "run" position,
check to see if power has been transferred from
terminal (B) to terminal (A). Terminal (A) on the ignition
switch supplies power to the back of the PTO switch on
the purple lead and on to the brake switch on the
brown/yellow lead out of the brake switch on the red/
violet lead to the start light and to terminal (S2) on the
ignition switch and to terminal 86 on solenoid #2.
Terminal (A) also supplies power to terminal 30 and
terminal 86 on solenoid #1 and to the hour meter, and
the voltage sensor and sensor light. When the operator
is in the seat, power will transfer from terminal 30 to
terminal 67 and on to the front PTO switch, and on to
terminal 86 on the solenoid #2 in the yellow/red lead
and on to the cruise control switch. Power is supplied
to the fuel shut off solenoid from terminal 86 on
solenoid #2.
Step 4: With the ignition switch in the start position,
power is transferred from terminal (S2) to (S1).
Terminal solenoid and goes to ground through the base
of the starter solenoid.
Clutch check out: Remove the clutch lead to the
wiring harness and check the clutch with a VOM for
field resistance to see if the coil is good (3.0 - 3.9). If
bad, the resistance will be high or not at all.
Ignition switch check out: Voltage check out in the
"off" position, check for voltage at terminal B. Voltage
should not be present on terminals A, S1, S2.
With the ignition switch in the "run" position, check for
voltage at terminals B, A, S2. It should not be present
on terminal S1.
With the ignition switch in the "start" position, check for
voltage at terminals B, A, S2, S1.
PTO switch check out: The PTO switch is a push/pull
switch with straight across contacts. Power transfer
should be checked with a voltmeter. The switch
contacts should be checked with an Ohm meter with
the wire harness plug removed. The light switch is
similar to the PTO switch with only one contact.
Diode check out: Diodes are checked with an Ohm
meter set on diode check, and should pass voltage in
only one direction. If a diode passes voltage in both
directions or not at all the diode is defective and will
need to be replaced.
11 - 47
11.11 SWITCH CONTINUITY
The diagrams below show the various states of connection for electrical components.
The solid lines on switches show continuity.
NOTE: All switches are viewed from the rear.
Key Switch
Seat Switch
(03602300)
(03654200)
A
A
S2
A
S2
S1
B
G
M
S2
S1
B
G
M
OFF
2
1
G
M
RUN
2
1
S1
B
OPERATOR
OFF SEAT
START
Light Switch
Relay
(03656800)
(03042800)
OPERATOR
ON SEAT
87
87
86 87A
OFF
85
30
ON
86 87A
30
NOT ENERGIZED
ENERGIZED
Clutch / Brake Switch
Transmission Neutral Switch
(03657100)
(08803700)
1
1
1
2
ENGAGED
(button in)
2
ENAGED
(button in)
PTO Switch
Safety Switch
(53603800)
(03657100)
1
2
1
2
3
4
3
4
1
ENGAGED
(03656900)
4
1
4
1
4
5
5
5
6
6
6
OFF
CRUISE ON
2
ENGAGED
(button out)
Cruise Control Switch
1
2
1
2
DISENGAGED
(button out)
DISENGAGED
85
SET
11 - 48
DISENGAGED
(button out)
1
2
DISENGAGED
(button in)
Key Switch
Off
B
Run
11:50-13:00
A
Start
11.50-13.00 Vdc
11.50-13.00 Vdc
11.50-13.00 Vdc
11.50-13.00 Vdc
S-1
11.50-13.00 Vdc
S-2
11.50-13.00 Vdc
11.50-13.00 Vdc
Contact Resistance Is 0.1-0.3 Ohms When Correct.
Seat Switch
Off
Run
Pink
11.50-13.00 Vdc
Black
Connected To Ground
Start
11.50-13.00 Vdc
Normally Open Contacts Manually Activated. Contact Resistance Is 0.1-0.3 Ohms When Correct.
PTO Switch
Off
Run
Yellow/red (2)
11.50-13.00 Vdc
Purple/white (2)
Start
11.50-13.00 Vdc
Connected To PTO Clutch And Light
Purple
11.50-13.00 Vdc
11.50-13.00 Vdc
Brown/yellow
11.50-13.00 Vdc
11.50-13.00 Vdc
2 Sets Of Contacts, One Normally Open, One Normally Closed. Contact Resistance Is 0.1-0.3 Ohms When
Correct
Brake Switch
Off
Run
Start
Brown/yellow
11.50-13.00 Vdc
11.50-13.00 Vdc
Red/violet (3)
11.50-13.00 Vdc
11.50-13.00 Vdc
Normally Open Contacts Manually Activated. Contact Resistance Is 0.1-0.3 Ohms When Correct.
Relay #1
Off
Pink
85
Run
Start
11.50-13.00 Vdc
11.50-13.00 Vdc
Purple
86
11.50-13.00 Vdc
11.50-13.00 Vdc
Yellow/red
87
11.50-13.00 Vdc
11.50-13.00 Vdc
Not Used
Not Used
11.50-13.00 Vdc
11.50-13.00 Vdc
87a
Purple (3)
30
Pins 85-86 Coil Resistance 87-100 Ohms. Pins 30-87 Normally Open. Pins 30-87a Normally Closed. Contact
Resistance Is 0.1-0.3 When Correct.
11 - 49
Relay #2
Off
Run
Black
85
11.50-13.00 Vdc
Yellow/red
86
Connected To Ground
Not Used
Start
11.50-13.00 Vdc
Not Used
87
White/black
87a
Black
30
Connected To Ignition Module
Connected To Ground
Pins 85-86 Coil Resistance 87-100 Ohms. Pins 30-87 Normally Open Pins 30-87a Normally Closed Contact
Resistance Is O.1-0.3 Ohms When Correct.
Light Switch - Off Position
Off
Run
Orange
11.50-13.00 Vdc
Start
11.50-13.00 Vdc
Orange
Normally Open Contacts Manually Activated. Contact Resistance Is 0.1-0.3 Ohms When Correct.
Headlight
Off
Orange
Run
Start
11.50-13.00 Volt W/switch On
Black
Solenoid
Off
Run
Small Brown
Start
11.50-13.00 Vdc
Small Black
Connector To Ground
Large Red (Battery)
11.50-13.00 Vdc
11.50-13.00 Vdc
Large Red (Starter)
11.50-13.00 Vdc
11.50-13.00 Vdc
Normally Open Contacts (Big Terminals) Coil Resistance 3.0-5.0 Ohms. Contact Resistance Is 0.1-0.3 Ohms
When Correct. Electrically Activated.
PTO Clutch
Off
Run
Purple/white (2)
Black
Connected To Ground
Coil Resistance 6.0-8.0 Ohms Reference Page 10.
11 - 50
Start
Cruise Switch
Off
Yellow/red
Run
11.50-13.00
Black
Start
11.50-13.00
Connector To Ground
Green/white
Yellow
Normally Open Contacts, Manually Activated. Contact Resistance Is 0.1-0.3 Ohms When Correct.
Cruise Relay
Off
Yellow
85
Black
86
Yellow
87
Run
Start
87a
Yellow
30
Pins 85-85 Coil Resistance 87-100 Ohms. Pins 30-87 Normally Open. Pins 30-87a Normally Closed. Contact
Resistance Is 0.1-0.3 Ohms When Correct.
Cruise Magnet
Off
Run
Start
Yellow
Black
Connected To Ground
Cruise Control Resistance Is 23.3-26.8 Ohms When Correct.
Cruise Safety Switch
Off
Run
Start
Green/white
Blue
Normally Open Contacts, Manually Activated. Contact Resistance Is 0.1-0.3 Ohms When Correct.
11 - 51
11.12 WIRING DIAGRAMS
Models 936305, 308
1
13
HOUR
METER
YELLOW / RED
PURPLE
ORANGE
ORANGE
PURPLE
BLACK
2
3
30
87
86
87a
7.5A
85
SEAT SWITCH
SEAT RELAY
ORANGE
17
PINK
16
PTO
SWITCH
BLACK
YELLOW / RED
6
PURPLE / WHITE
ORANGE
BLACK
12
PTO CLUTCH
RED
7.5A
RED
PURPLE
3
4
M
30 87
87a
+
-
RED
BLACK
86
85
YELLOW / RED
17
BLACK
G
ENGINE
BLACK
5
BROWN
BLACK
NEUTRAL
SWITCH
18
START
DIODE
YELLOW / RED
9
S1
RED
STARTER
START
RELAY
RED / VIOLET
S2
15
KEY
SWITCH
7
10
BRAKE
SWITCH
RED
14
11
8
BLACK
RED / VIOLET
11 - 52
BROWN / YELLOW
WHITE / BLACK
BLACK
GREEN / BLACK
MAGNETO
CHARGE DC
LIGHTING
SOLENIOD
A
B
Model 936018
VOLT
MODULE
BLACK
ABCDEF
PURPLE
WHITE / RED
1
19
10
LOW BATTERY
LIGHT
OIL PRESSURE
LIGHT
13
PURPLE
PURPLE
BLACK
PURPLE
9
PURPLE
HOUR
METER
BLACK
BLUE / WHITE
PURPLE
PURPLE
YELLOW / RED
2
3
30
7.5A
20
87
86
87a
85
SEAT SWITCH
RED
PURPLE
PURPLE
PINK
9
PTO LIGHT
PURPLE / WHITE
16
PTO
SWITCH
12
6
AGE SENSOR
30A
BLACK
PURPLE
RED
B
YELLOW / RED
4
M
87
87a
30
86
85
BLACK
RED / VIOLET
15
S2
KEY
SWITCH
RED
14
S1
10
7
17 ON
START LIGHT
9
BRAKE SWITCH
8
11
87a
86
87
MOM
8
30
YELLOW
CRUISE SWITCH
BLUE
BLACK
BROWN / YELLOW
BLACK
20
85
YELLOW
BLACK
RED
STARTER
YELLOW / RED
BLACK
BLACK
GREEN / WHITE
2
1
ENGINE
BROWN
BLACK
OFF
BLACK
G
5
21
20
RED
+
-
PURPLE / WHITE
BLACK
RED / VIOLET
3
WHITE / BLACK
RED / VIOLET
MAGNETO
CHARGE
OIL PRESSURE
A
18
CRUISE
MAGNET
BLACK
11 - 53
Model 936019
VOLT
MODULE
BLACK
WHITE / RED
1
LOW BATTERY
LIGHT
15
ABCDEF
PURPLE
21
10
PURPLE
HOUR
METER
BLACK
3
7.5A
PURPLE
2
PURPLE
PURPLE
PURPLE
PURPLE
BLACK
30
86
85
PURPLE / WHITE
PTO
SWITCH
PINK
SEAT SWITCH
YELLOW / RED
30A
RED
BLACK
87
87a
30
86
85
YELLOW / RED
7
BLACK
G
11
5
RED
BLACK
YELLOW / RED
BLACK
BROWN
RED / VIOLET
ENGINE
S1
RED / VIOLET
17
S2
KEY
SWITCH
RED
12
8
BLACK
11
7
85
19 ON
START LIGHT
10
87a
86
87
MOM
30
YELLOW
9
SAFETY SWITCH
BLUE
YELLOW
M
RED
OFF CRUISE
SWITCH
BLACK
BLACK
4
STARTER
PURPLE / WHITE
BLACK
B
RED / VIOLET
MAGNETO
SOLENOID
CHARGE
3
WHITE / BLACK
-
14
6
AGE SENSOR
A
+
18
GREEN / WHITE
RED
PURPLE
10
PTO LIGHT
YELLOW / RED
7
87
87a
BRAKE SWITCH
20
16
9
13
BLACK
CRUISE
MAGNET
BROWN / YELLOW
BLACK
BLACK
11 - 54
Model 936020
VOLT
MODULE
BLACK
WHITE / RED
1
LOW BATTERY
LIGHT
ABCDEF
PURPLE
21
10
OIL PRESSURE
LIGHT
15
PURPLE
PURPLE
BLACK
PURPLE
10
PURPLE
HOUR
METER
BLACK
3
7.5A
PURPLE
2
PURPLE
PURPLE
BLUE / WHITE
30
86
85
PURPLE / WHITE
PTO
SWITCH
PINK
SEAT SWITCH
YELLOW / RED
10
PTO LIGHT
YELLOW / RED
7
87
87a
18
14
6
PURPLE
AGE SENSOR
RED
30A
RED
87
87a
30
86
85
7
BLACK
G
11
BLACK
5
BLACK
RED
STARTER
BROWN
YELLOW / RED
S1
RED / VIOLET
17
S2
KEY
SWITCH
RED
16
RED / VIOLET
ENGINE
12
8
19 ON
START LIGHT
10
87a
86
87
MOM
30
YELLOW
9
SAFETY SWITCH
BLUE
BRAKE SWITCH
9
13
7
85
YELLOW
M
RED
BLACK
11
BLACK
BLACK
4
+
-
OFF CRUISE
SWITCH
YELLOW / RED
GREEN / WHITE
3
WHITE / BLACK
PURPLE / WHITE
BLACK
BLACK
RED / VIOLET
MAGNETO
SOLENOID
CHARGE
OIL PRESSURE
A
B
BROWN / YELLOW
BLACK
20
BLACK
CRUISE
MAGNET
BLACK
11 - 55
Models 936021, 307, 309
VOLT
MODULE
BLACK
WHITE / RED
1
LOW BATTERY
LIGHT
ABCDEF
PURPLE
19
9
13
OIL PRESSURE LIGHT
PURPLE
PURPLE
BLACK
PURPLE
9
PURPLE
HOUR
METER
BLACK
3
7.5A
PURPLE
2
PURPLE
PURPLE
BLUE / WHITE
30
20
87
86
87a
PURPLE / WHITE
PTO
SWITCH
PINK
SEAT SWITCH
YELLOW / RED
9
PTO LIGHT
YELLOW / RED
85
16
12
6
PURPLE
AGE SENSOR
RED
30A
RED
87
87a
30
86
85
20
BLACK
G
21
BLACK
5
BLACK
RED
STARTER
BROWN
YELLOW / RED
S1
RED / VIOLET
17
S2
KEY
SWITCH
RED
14
RED / VIOLET
ENGINE
10
7
19 ON
START LIGHT
9
87a
86
87
MOM
30
YELLOW
8
SAFETY SWITCH
BLUE
BRAKE SWITCH
8
11
20
85
YELLOW
M
RED
BLACK
21
BLACK
4
+
-
OFF CRUISE
SWITCH
BLACK
YELLOW / RED
GREEN / WHITE
3
WHITE / BLACK
PURPLE / WHITE
BLACK
BLACK
RED / VIOLET
MAGNETO
SOLENOID
CHARGE
OIL PRESSURE
A
B
BROWN / YELLOW
BLACK
18
BLACK
CRUISE
MAGNET
BLACK
11 - 56
Model 936022
1
15
HOUR
METER
YELLOW / RED
PURPLE
ORANGE
ORANGE
PURPLE
BLACK
2
3
30
87
86
87a
7.5A
85
SEAT SWITCH
SEAT RELAY
ORANGE
7
PINK
18
PTO
SWITCH
BLACK
RED
7.5A
RED
6
PURPLE / WHITE
ORANGE
BLACK
14
PTO CLUTCH
PURPLE
3
4
M
30 87
87a
+
-
RED
BLACK
BLACK
86
85
YELLOW / RED
7
BLACK
G
ENGINE
5
BROWN
NEUTRAL
SWITCH
11
START
DIODE
YELLOW / RED
10
S1
RED
STARTER
BLACK
START
RELAY
BLACK
RED / VIOLET
S2
17
KEY
SWITCH
8
12
BRAKE
SWITCH
RED
16
13
9
BLACK
RED / VIOLET
11 - 57
BROWN / YELLOW
WHITE / BLACK
GREEN / BLACK
MAGNETO
AC COIL
CHARGE DC
A
B
Models 936023, 310
VOLT
MODULE
BLACK
WHITE / RED
1
LOW BATTERY
LIGHT
13
ABCDEF
PURPLE
19
9
PURPLE
HOUR
METER
BLACK
ORANGE
ORANGE
ORANGE
PURPLE
BLACK
2
3
30
7.5A
20
87
86
87a
85
PURPLE / WHITE
PTO
SWITCH
PINK
SEAT SWITCH
ORANGE
YELLOW / RED
4
M
87
87a
30
86
85
21
YELLOW / RED
S1
RED / VIOLET
15
S2
KEY
SWITCH
RED
14
RED / VIOLET
BLACK
RED
STARTER
BLACK
BROWN
10
7
20
85
9
87
MOM
17 ON
START LIGHT
87a
86
30
YELLOW
BLUE
8
SAFETY SWITCH
18
BRAKE SWITCH
8
11
BLACK
21
BLACK
BLACK
G
ENGINE
5
OFF CRUISE
SWITCH
YELLOW / RED
20
RED
+
PURPLE / WHITE
BLACK
BLACK
YELLOW
WHITE / BLACK
B
BLACK
3
RED / VIOLET
MAGNETO
SOLENOID
CHARGE
LIGHTING
RED
A
-
12
6
AGE SENSOR
PURPLE
10 A
22
16
GREEN / WHITE
RED
9
PTO LIGHT
YELLOW / RED
BLACK
CRUISE
MAGNET
BLACK
BROWN / YELLOW
BLACK
11 - 58
Models 936024, 026
VOLT
MODULE
BLACK
ABCDEF
PURPLE
WHITE / RED
1
19
10
LOW BATTERY
LIGHT
OIL PRESSURE
LIGHT
13
PURPLE
PURPLE
BLACK
9
PURPLE
HOUR
METER
PURPLE
BLACK
BLUE / WHITE
PURPLE
PURPLE
YELLOW / RED
2
3
30
7.5A
20
87
86
87a
85
PURPLE
PURPLE
PINK
RED
9
PTO LIGHT
SEAT SWITCH
PURPLE / WHITE
16
PTO
SWITCH
12
6
AGE SENSOR
30A
BLACK
PURPLE
RED
B
YELLOW / RED
4
M
87
87a
30
86
85
OFF
BLACK
S1
RED / VIOLET
15
S2
KEY
SWITCH
RED
14
YELLOW / RED
10
7
BLACK
17 ON
START LIGHT
9
BRAKE SWITCH
8
11
87a
86
87
MOM
8
30
YELLOW
CRUISE SWITCH
BLUE
BLACK
BROWN / YELLOW
BLACK
20
85
YELLOW
BLACK
RED
STARTER
BLACK
GREEN / WHITE
2
1
ENGINE
BROWN
BLACK
BLACK
G
5
21
20
RED
+
-
PURPLE / WHITE
BLACK
RED / VIOLET
3
WHITE / BLACK
RED / VIOLET
MAGNETO
CHARGE
OIL PRESSURE
A
18
CRUISE
MAGNET
BLACK
11 - 59
Models 936025, 027, 311, 313
VOLT
MODULE
BLACK
WHITE / RED
1
LOW BATTERY
LIGHT
ABCDEF
PURPLE
19
9
13
OIL PRESSURE LIGHT
PURPLE
PURPLE
BLACK
PURPLE
9
PURPLE
HOUR
METER
BLACK
3
7.5A
PURPLE
2
PURPLE
30
20
87
86
87a
PURPLE / WHITE
PTO
SWITCH
PINK
SEAT SWITCH
YELLOW / RED
PURPLE
30A
AGE SENSOR
B
4
M
87
87a
30
86
85
BLACK
G
21
BLACK
RED
STARTER
BLACK
YELLOW / RED
S1
RED / VIOLET
17
S2
KEY
SWITCH
RED
14
RED / VIOLET
ENGINE
BROWN
10
7
BLACK
21
20
85
19 ON
START LIGHT
9
87a
86
87
MOM
30
YELLOW
8
SAFETY SWITCH
BLUE
BRAKE SWITCH
8
11
OFF CRUISE
SWITCH
BLACK
YELLOW / RED
20
RED
5
PURPLE / WHITE
BLACK
BLACK
BLACK
3
RED / VIOLET
MAGNETO
SOLENOID
CHARGE
OIL PRESSURE
A
+
12
6
RED
WHITE / BLACK
-
16
YELLOW
RED
9
PTO LIGHT
YELLOW / RED
85
GREEN / WHITE
PURPLE
BLUE / WHITE
BROWN / YELLOW
BLACK
18
BLACK
CRUISE
MAGNET
BLACK
11 - 60
Model 936312
1
13
HOUR
METER
YELLOW / RED
PURPLE
ORANGE
ORANGE
PURPLE
BLACK
2
3
30
87
86
87a
7.5A
85
SEAT SWITCH
SEAT RELAY
ORANGE
17
PINK
16
PTO
SWITCH
BLACK
YELLOW / RED
6
PURPLE / WHITE
ORANGE
BLACK
12
PTO CLUTCH
RED
10 A
RED
PURPLE
A
3
4
M
30 87
87a
+
-
RED
BLACK
BLACK
86
85
YELLOW / RED
17
BLACK
G
ENGINE
BLACK
5
BROWN
BLACK
NEUTRAL
SWITCH
18
START
DIODE
YELLOW / RED
9
S1
RED
STARTER
START
RELAY
RED / VIOLET
S2
15
KEY
SWITCH
7
10
BRAKE
SWITCH
RED
14
11
8
BLACK
RED / VIOLET
11 - 61
BROWN / YELLOW
WHITE / BLACK
B
GREEN / BLACK
MAGNETO
CHARGE DC
LIGHTING
SOLENIOD
19
SECTION 12 - MOWER
12.1 40" AND 48" MOWER REMOVAL
4. Remove the mower deck spindle drive belt from
the spindle sheaves.
1. Remove the key from the ignition switch and the
negative cable from the battery prior to removing
the mower assembly.
5. Remove the mower deck right side support arms to
provide clearance to remove the right spindle.
6. Remove the spindle sheaves and shaft assemblies
2. Release the mower PTO belt tension by releasing
the idler spring on the left side of the unit behind
the front wheel. Lower the mower assembly and
remove the hair pins and washers from the lift
links.
7. Remove the mower spindle housings from the
mower deck stamping.
48" Mower Spindle Removal
With the mower deck removed from the unit, the
disassembly of the mower may be done.
3. Remove the two hair pins from the rear support
control arms on the mower support linkage.
4. Slide the mower pan assembly forward to release
the front hanger rod from the retainer hooks under
the front axle.
5. Remove the mower deck drive belt from the PTO
clutch and the top of the jackshaft assembly.
1. Remove the right and left side mower spindle
cover.
2. Remove the mower deck blades hardware, mower
deck blades, blade trays retainer hub, spindle key
and bearing slinger.
3. Remove the mower deck spindle drive belt form
the spindle sheaves.
6. Raise the front of the unit to provide clearance for
the mower assembly and remove the mower from
under the unit.
4. Remove the spindle sheaves from the shaft
assemblies.
12.2 40" AND 48" MOWER INSTALLATION
1. Raise the front of the unit and position the mower
deck under the unit and hook the mower front
support rod in the support hooks under the front
axle.
5. Remove the mower spindle housings from the
mower deck stamping.
12.4 40" SPINDLE REPAIR
When the spindle housing has been removed from the
mower deck the bearings may be removed from the
housing.
2. Lower the front of the unit, insert the rear support
control arms into the rear support brackets, and
secure with hair pins removed earlier.
1. Prior to removal of the bearings check for bearing
damage and remove if necessary.
3. Lower the mower lift mechanism and attach the
mower lift links and secure with washers and hair
pins removed earlier.
2. Attach a bearing puller to the bearing in the
housing and remove the spindle bearings.
4. Attach the mower drive belt to the top of the mower
jackshaft assembly and route the belt inside of the
belt finger on the PTO idler, and on to the PTO
clutch.
5. Using a spring puller reattach the PTO idle tension
spring to the unit frame behind the left front tire,
check location and routing of the PTO belt before
engaging the PTO clutch with engine running.
3. If the housing has been damaged replace the
bearings and housings.
4. Press new bearings into the spindle housing with a
press, make sure to insert the spacer tube into the
housing before pressing the second bearing into
place.
48" Spindle Repair
When the spindle housing has been removed from the
mower deck, the spindle shaft and bearings may be
removed from the housing.
6. Reattach the battery negative cable to the battery
and insert the ignition key into the ignition switch.
12.3 40" MOWER SPINDLE REMOVAL
1. Prior to removal of the bearing in the housing out in
a press.
1. With the mower deck removed from the unit the
disassembly of the mower may be done.
2. If the housing has been damaged replace the
spindle shaft, bearings and housing.
2. Remove the left side mower spindle cover.
3. Remove the mower deck blades hardware, mower
deck blades, blade trays retainer hub, spindle key
and bearing slinger.
3. Press new bearings into the spindle housing with a
press, make sure to insert the spindle shaft into the
housing before pressing the second bearing into
place.
12 - 62
12.5 SPINDLE INSTALLATION
12.7 40" JACKSHAFT INSTALLATION
1. Place the spindle housings into the mower deck
stamping and attach with new hardware.
2. Insert spindle shaft and sheave assemblies into the
spindle housings with spacer washer under
sheaves.
3. Reattach the right side mower support arms to the
mower deck stamping.
4. Reattach the mower deck spindle drive belt.
5. Reinstall the bearing slinger, spindle key, retainer
hub, blade trays, and mower deck blades with
hardware removed earlier.
1. Place the jackshaft assembly on the mower deck
stamping and attach with new hardware and torque
according to the torque table.
2. Reinstall the mower spindle drive belt onto the
jackshaft assembly and attach the mower deck
idler tension spring to the spring anchor.
3. Rotate the mower jackshaft assembly and check
routing of the belt and idler clearance to the mower
deck stamping.
6. Check mower deck blades for clearance inside of
the mower deck stamping and mounting flatness.
12.6 40" JACKSHAFT REMOVAL AND
REPAIR
1. Remove the mower deck idler tension spring from
the spring anchor.
2. Remove the mower deck drive belt from the
jackshaft assembly.
3. Remove the hardware holding the jackshaft
assembly to the mower deck stamping, remove the
assembly.
4. Remove the nylock nut on the top of the spindle
assembly and remove the double pulley assembly.
5. Check the bearings, and spindle shaft for wear and
replace the damage parts.
6. Bearings need to be removed with a bearing puller
and replaced with a bearing driver in a press.
NOTE: The bearings should have a light press fit to the
bore of the pulley assembly, to tight of a press fit will
preload the bearing and cause premature bearing failure.
7. Check idler arm pivot bushings for wear and
movement, check the idler for run out and
interferences.
8. Reassemble the double pulley assembly with the
bearing spacer tube inside the assembly.
9. Place the double pulley assembly onto the spindle
shaft and hold in place with a flat washer and
nylock lock nut.
12 - 63
SECTION 13 - SNO-THRO ATTACHMENT
13.1 INSTALLATION
13.3 MULE DRIVE BELT
1. With the housing and push frame assembly
positioned on a flat level surface, roll unit into
position over push frame with the front of the unit
over the pivot support.
1. Remove belt guard hardware and guard from
housing. Release tension on flat idler and remove
belt from "V" and flat idler on push frame.
2. Lift pivot support into position on the front of the
unit frame and install upper mounting latch pin into
the unit frame.
3. Raise the rear of the push frame and secure to the
unit with the latch pin on each side of the frame.
4. With the PTO in the off position and connect the
PTO drive belt from the PTO clutch to the top drive
spindle on the push frame.
5. Manual lift the front of the auger/impeller housing
and block it 3 to 4 inches from the floor. Insert gas
cylinder onto the anchor arm and
7. Connect the lift arm to the lift bell crank and secure
with a clevis pin.
8. Secure the chute crank support to the right side of
the unit frame with capscrews and lock nuts.
9. Attach the lift arm to the lift lever with clevis pin and
hair pin.
10.Remove the blocking from under the snow head,
attachment may now be raised or lowered with the
attachment lift lever on the blower push frame.
11.Secure the discharge chute crank to the spool with
a hair pin.
WARNING: Stop engine, lower attachment,
remove key, and wait for moving parts to stop
before leaving operators position and
attempting to maintain or inspect auger.
3. Remove belt from drive spindle pulley and housing
double pulley. Replace mule drive belt in reverse
order; be sure belt seats properly in housing pulley,
idlers, over lower mounting pin, around bottom
groove in drive spindle pulley, and around two
idlers on idler bracket- (flat idler rides against back
of "V" groove and "V" groove idler against front).
Mule Drive Belt Adjustment
6. Connect the lift link on the housing to the lift bell
crank, install a washer and secure with a hair pin.
13.2 SHEAR BOLT REPLACEMENT
2. Remove lower mounting rod and stabilizer strap
from pivot support (to free mule drive belt from
double idler).
Mule drive belt idler spring is to extend 4 inches inside
hook to inside hook. To increase tension, position pivot
pin (on idler assembly at bottom rear of housing) to
next lower hole in mounting bracket.
13.4 POWER TAKE OFF (PTO) BELT
Release tension on the push frame idlers and remove
mule drive belt from drive spindle pulley.
Remove PTO belt fro PTO and drive spindle pulley.
Replace PTO belt in reverse order and adjust
accordingly.
13.5 AUGER/IMPELLER DRIVE BELT
Remove belt guard hardware and guard from housing.
Release tension on flat idler and remove mule drive
belt from "V" and flat idler on push frame, and double
pulley on auger/impeller housing.
Pull spring loaded idler away from drive belt, remove
belt from large lower pulley and top double pulley.
13.6 OIL AND GREASE LOCATIONS
Occasionally an object may enter auger/impeller
housing and jam auger, breaking shear bolts which
secure auger to shaft. This allows auger to turn freely
on shaft preventing damage to gear drive.
IMPORTANT: Use only Ariens Shear Bolts for
replacement. Use of any other type of shear bolt may
result in sever damage to unit.
To replace shear bolt, slide auger outward against
rollpin and align hole in shaft with hole in auger (holes
in shaft for roll pins and shear bolts line up). Drive
shear bolt through hole; (if shear bolt was broken this
will drive remaining part from shaft and secure with
nut).
CAUTION: DO NOT touch Sno-Thro drive
parts which are hot from operation. Allow
such parts to cool before servicing unit.
IMPORTANT: Wipe each fitting clean before and after
lubrication.
NOTE: Use Ariens Multi-Purpose Grease (Part Number 000150) or good grade of general purpose grease
at zerk fittings and oil at lubrication points.
Sno-Thro should be lubricated at beginning of season
and every 25 operating hours. Refer to illustration for
grease and oiling points.
13 - 64
13.7 SCRAPER BLADE
7. Remove two way lock nuts and shear bolts
securing augers to auger shaft and remove augers.
IMPORTANT: If scraper blade wears too far auger/
impeller housing may be damaged.
8. Drive roll pins securing impeller to worm shaft and
remove impeller.
Scraper blade is adjustable to compensate for wear.
To adjust scraper blade, raise and block Sno-Thro
securely. With runners adjusted to their full position,
loosen lock nuts retaining scraper blade, reposition it
down, (Flush with runners) and tighten lock nuts.
13.11 GEAR CASE
1. Remove four bolts from bearing flange.
2. Remove flange and gasket.
NOTE: At this point bronze gear cannot be removed.
13.8 RUNNERS
3. Using bearing adjustment wrench remove
adjustment plug.
CAUTION: Adjust auger/impeller housing
height to provide clearance over gravel or
crushed rock surfaces to avoid throwing these
objects.
4. While holding input shaft in one hand and using a
mallet, strike case until bearing cone pops out of
the case.
5. Bronze gear can then be removed from case.
6. After bronze gear is removed, input shaft can be
removed.
Runners should be adjusted as conditions require.
Raising or lowering runners controls distance scraper
blade is held above surface to be cleared.
When operating unit on gravel surface, lower runners
so that the housing will not pick up gravel. On concrete,
black-topped, or packed snow surfaces raise runners
so that the scraper blade scrapes clean. To reduce
tendency of housing to ride up over heavy, wet, or
hardpacked snow, remove runners and install in their
narrow edge down position.
To adjust runners, place unit on a flat level surface and
insert a spacer under center of scraper blade that will
provide desired clearance. loosen runner hardware,
raise or lower runners to surface unit is resting upon,
and tighten hardware.
NOTE: Uneven rear tire pressure or runner adjustment
will result in uneven clearing.
13.9 DISCHARGE CHUTE CABLE
To adjust discharge chute cable, loosen clamp, rotate
discharge chute in desired direction (to stop), and
reposition cable. Tighten clamp and replace guard.
NOTE: It is not necessary to remove the end cap from
case.
7. To remove worm gear and bearings, simply
remove bolt and washer from end of shaft.
8. Check all parts for wear or damage and replace as
necessary.
9. Assembly is done by inserting bronze and worm
gear at same time.
10.Using adjustment wrench, tighten down on
adjustment plug until input shaft is snug.
11.Replace side cover using a sealant on threads of
two bottom bolts.
Gear Case Lubrication
Fill gear case with Ariens Special L-2 Gear Lubricant
(Part No. 000080) until lever reaches bottom of threads
in filler hole.
Check auger gear case lubricant level every 25 hours
of operation.
To check, place unit in a warm location over night to
allow lubricant to flow to level. Remove filler plug.
Lubricant must be at least up to bottom of filler hole
with unit resting on a level surface (extra lubricant will
not damage gear case).
13.10 AUGER/IMPELLER, GEAR CASE
REMOVAL
1. Remove taptite, washer, cap screw, washer, and
lock washer securing belt guard to housing and
remove belt guard.
2. Remove belt from pulley.
3. Remove set screws securing pulley to worm shaft
and remove pulley and woodruff key.
4. Remove three nuts securing flange bearing to
housing and remove bearing.
5. Remove cap screw, lock washer, washer, and
flange bushing from ends of auger shaft. Remove
rib neck bolts and flange whiz lock nuts securing
bearing supports to housing and remove supports.
6. Pull auger/impeller and gear case from housing.
13 - 65
Ariens Company
655 West Ryan Street
P.O. Box 157
Brillion, WI 54110-0157
920-756-2141
Fax 920-756-2407
www.ariens.com