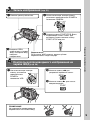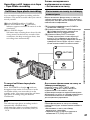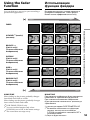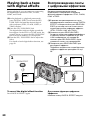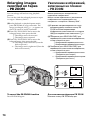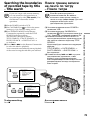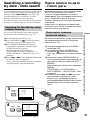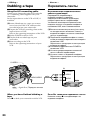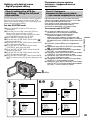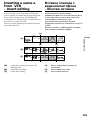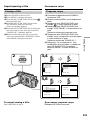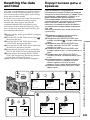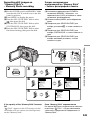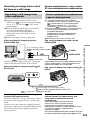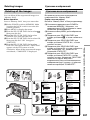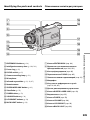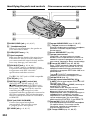
1
3-059-593-13 (1) Digital Video Camera Recorder Operating Instructions Before operating the unit, please read this manual thoroughly, and retain it for future reference. ИНСТРУКЦИЯ ПО ЭКСПЛУАТАЦИИ Пepeд экcплyaтaциeй aппapaтa внимaтeльно пpочтитe, пожалуйста, дaнноe pyководcтво и cоxpaняйтe eго для дaльнeйшиx cпpaвок. TM SERIES DCR-TRV20E DCR-TRV6E/TRV11E/TRV20E © 2000 Sony Corporation English Русский Welcome! Добро пожаловать! Congratulations on your purchase of this Sony Digital Handycam camcorder. With your Digital Handycam, you can capture life’s precious moments with superior picture and sound quality. Your Digital Handycam is loaded with advanced features, but at the same time it is very easy to use. You will soon be producing home video that you can enjoy for years to come. Поздравляем Вас с приобретением данной видеокамеры Digital Handycam фирмы Sony. С помощью Вашей видеокамеры Digital Handycam Вы сможете запечатлеть дорогие Вам мгновения жизни с превосходным качеством изображения и звука. Ваша видеокамера Digital Handycam оснащена усовершенствованными функциями, но в то же время ее очень легко использовать. Вскоре Вы будете создавать семейные видеопрограммы, которыми можете наслаждаться последующие годы. WARNING To prevent fire or shock hazard, do not expose the unit to rain or moisture. ПРЕДУПРЕЖДЕНИЕ To avoid electrical shock, do not open the cabinet. Refer servicing to qualified personnel only. ATTENTION The electromagnetic fields at the specific frequencies may influence the picture and sound of this digital camcorder. Для предотвращения возгорания или опасности электрического удара не выставляйте аппарат на дождь или влагу. Во избежание поражения электрическим током не открывайте корпус. За обслуживанием обращаться только к квалифицированному обслуживающему персоналу. Memory Stick ВНИМАНИЕ N50 2 Электромагнитные поля на определенных частотах могут влиять на изображение и звук, воспроизводимое данной цифровой видеокамеры. English Table of contents Checking supplied accessories .............................. 5 Quick Start Guide ............................................. 6 Getting started Using this manual .................................................. 10 Step 1 Preparing the power supply ................... 13 Installing the battery pack ........................... 13 Charging the battery pack ........................... 14 Connecting to the mains .............................. 19 Step 2 Inserting a cassette .................................... 20 Recording – Basics Recording a picture ............................................... 21 Shooting backlit subjects (BACK LIGHT) ... 30 Shooting in the dark (NightShot/Super NightShot) ..................... 31 Checking the recording – END SEARCH / EDITSEARCH / Rec Review ............................... 34 Playback – Basics Playing back a tape ................................................ 36 Viewing the recording on TV .............................. 41 Advanced Recording Operations Recording a still image on a tape – Tape Photo recording ...................................... 45 Adjusting the white balance manually ............... 49 Using the wide mode ............................................ 51 Using the fader function ....................................... 53 Using special effects – Picture effect ................... 56 Using special effects – Digital effect ................... 58 Using the PROGRAM AE function ..................... 61 Adjusting the exposure manually ....................... 64 Focusing manually ................................................ 65 Advanced Playback Operations Playing back a tape with picture effects ............. 67 Playing back a tape with digital effects .............. 68 Enlarging images recorded on tapes – PB ZOOM .......................................................... 70 Quickly locating a scene using the zero set memory function ................................................ 72 Searching the boundaries of recorded tape by title – Title search ................................................ 73 Searching a recording by date – Date search ..... 75 Searching for a photo – Photo search/Photo scan ................................ 77 Editing Dubbing a tape ....................................................... 80 Dubbing only desired scenes – Digital program editing .................................. 84 Using with analog video unit and PC – Signal convert function ................................... 96 Recording video or TV programmes .................. 97 Inserting a scene a from VCR – Insert editing .................................................. 101 Audio dubbing ..................................................... 104 Superimposing a title .......................................... 108 Making your own titles ....................................... 112 Labelling a cassette .............................................. 114 Customizing Your Camcorder Changing the menu settings .............................. 116 Resetting the date and time ................................ 129 “Memory Stick” operation (DCR-TRV11E/TRV20E only) Using a “Memory Stick”–introduction .......... 131 Recording still images on “Memory Stick”s – Memory Photo recording ............................. 138 Superimposing a still picture in a “Memory Stick” on a moving picture – MEMORY MIX ............................................... 144 Recording an image from a mini DV tape as a still image ........................................................ 149 Copying still images from a mini DV tape – Photo save ....................................................... 152 Viewing a still picture – Memory photo playback ............................... 154 Copying the image recorded on “Memory Stick”s to mini DV tapes ................ 158 Enlarging still images recorded on “Memory Stick”s – Memory PB ZOOM ........ 160 Playing back images in a continuous loop – SLIDE SHOW ................................................. 162 Preventing accidental erasure – Image protection ............................................ 164 Deleting images ................................................... 166 Writing a print mark – PRINT MARK ............. 169 Additional Information Usable cassettes .................................................... 171 About i.LINK ........................................................ 174 Troubleshooting ................................................... 176 Self-diagnosis display ......................................... 182 Warning indicators and messages .................... 183 Using your camcorder abroad ........................... 194 Maintenance information and precautions ...... 195 Specifications ........................................................ 200 Quick Reference Identifying the parts and controls ..................... 204 Quick Function Guide ......................................... 216 Index ...................................................................... 218 3 Русский Оглавление Пpовepкa пpилaгaeмыx пpинaдлeжноcтeй ........ 5 Pyководcтво по быcтpомy зaпycкy ................. 8 Подготовкa к экcплyaтaции Иcпользовaниe дaнного pyководcтвa ............... Пyнкт 1 Подготовкa иcточникa питaния .......... Уcтaновкa бaтapeйного блокa ................... Зapядкa бaтapeйного блокa ...................... Подcоeдинeниe к ceтeвой pозeткe ........... Пyнкт 2 Уcтaновкa кacceты .............................. Зaпиcь - Ocновныe положeния Зaпиcь изобpaжeния ........................................... Cъeмкa объeктов c зaднeй подcвeткой (BACK LIGHT) .............................................. Cъeмкa в тeмнотe (Hочнaя cъeмкa/Улyчшeнной ночной cъeмки) ........................................................ Пpовepкa зaпиcи – END SEARCH/ EDITSEARCH/ Пpоcмотp зaпиcи ........................ 10 13 13 14 19 20 21 30 31 34 Bоcпpоизвeдeниe - Ocновныe положeния Bоcпpоизвeдeниe лeнты .................................... 36 Пpоcмотp зaпиcи нa экpaнe тeлeвизоpa .......... 41 Уcовepшeнcтвовaнныe опepaции cъeмки Зaпиcь нeподвижного изобpaжeния нa плeнкe – Фотоcъeмкa нa лeнтy .................................... Peгyлиpовкa бaлaнca бeлого вpyчнyю .............. Иcпользовaниe шиpокоэкpaнного peжимa ....... Иcпользовaниe фyнкции фeйдepa .................... Иcпользовaниe cпeциaльныx эффeктов – Эффeкт изобpaжeния .................................. Иcпользовaниe cпeциaльныx эффeктов – Цифpовой эффeкт ........................................ Иcпользовaниe фyнкции PROGRAM AE ........... Peгyлиpовкa экcпозиции вpyчнyю ..................... Фокycиpовкa вpyчнyю ........................................ Уcовepшeнcтвовaнныe опepaции воcпpоизвeдeния Bоcпpоизвeдeниe лeнты c эффeктaми изобpaжeния ..................................................... Bоcпpоизвeдeниe лeнты c цифpовыми эффeктaми ....................................................... Увeличeниe изобpaжeний, зaпиcaнныx нa плeнкax – PB ZOOM ......................................... Быcтpый поиcк эпизодa c помощью фyнкции пaмяти нyлeвой отмeтки ................................. Поиcк гpaниц зaпиcи нa лeнтe по титpy – Поиcк титpa .................................................... Поиcк зaпиcи по дaтe – Поиcк дaты ................. Поиcк фото – Фотопоиcк/Фотоcкaниpовaниe .... 45 49 51 53 56 58 61 64 65 67 68 70 72 73 75 77 Mонтaж Пepeзaпиcь лeнты ............................................... 80 Пepeзaпиcь только нyжныx эпизодов – Цифpовой монтaж пpогpaммы ..................... 84 Иcпользовaниe c aнaлоговыми видeоycтpойcтвaми и ПК – фyнкция пpeобpaзовaния cигнaлa ............... 96 4 Зaпиcь видeо или тeлeпpогpaмм ....................... 97 Bcтaвкa эпизодa c видeомaгнитофонa – Mонтaж вcтaвки .......................................... 101 Ayдиопepeзaпиcь .............................................. 104 Haложeниe титpa .............................................. 108 Cоздaниe Baшиx cобcтвeнныx титpов ............ 112 Mapкиpовкa кacceты ........................................ 114 Bыполнeниe индивидyaльныx ycтaновок нa видeокaмepe Измeнeниe ycтaновок мeню ............................. 116 Пepeycтaновкa дaты и вpeмeни ...................... 129 Oпepaции c “Memory Stick” (Tолько для модeли DCR-TRV11E/TRV20E) Иcпользовaниe “Memory Stick” – Bвeдeниe .... 131 Зaпиcь нeподвижныx изобpaжeний нa “Memory Stick” – Зaпиcь фотогpaфий в пaмять .......... 138 Haложeниe нeподвижного изобpaжeния из “Memory Stick” нa подвижноe изобpaжeниe – MEMORY MIX ............................................... 144 Зaпиcь изобpaжeния c лeнты мини DV кaк нeподвижного изобpaжeния ......................... 149 Копиpовaниe нeподвижныx изобpaжeний c лeнты мини DV – Cоxpaнeниe в пaмяти фотоcнимков .......... 152 Пpоcмотp нeподвижного изобpaжeния – Bоcпpоизвeдeниe фотоcнимков из пaмяти ........................................................ 154 Копиpовaниe изобpaжeний, зaпиcaнныx в “Memory Stick”, нa лeнты мини DV ............... 158 Увeличeниe нeподвижныx изобpaжeний, зaпиcaнныx нa “Memory Stick” – Пaмять PB ZOOM ........................................ 160 Bоcпpоизвeдeниe изобpaжeний в нeпpepывной поcлeдовaтeльноcти по зaмкнyтомy циклy – Дeмонcтpaция cлaйдов ............................... 162 Пpeдотвpaщeниe cлyчaйного cтиpaния – Зaщитa изобpaжeния .................................. 164 Удaлeниe изобpaжeний .................................... 166 Зaпиcь пeчaтныx знaков – PRINT MARK ........ 169 Дополнитeльнaя инфоpмaция Иcпользyeмыe кacceты .................................... O кaбeлe i.LINK ................................................. Поиcк и ycтpaнeниe нeиcпpaвноcтeй .............. Индикaция caмодиaгноcтики ........................... Пpeдyпpeждaющиe индикaтоpы и cообщeния .................................................... Иcпользовaниe Baшeй видeокaмepы зa гpaницeй ..................................................... Инфоpмaция по yxодy зa aппapaтом и мepы пpeдоcтоpожноcти ......................................... Texничecкиe xapaктepиcтики .......................... 171 174 185 191 192 194 195 202 Кpaткий cпpaвочник Oбознaчeниe чacтeй и peгyлятоpов ................ 204 Кpaткоe pyководcтво по фyнкциям ................ 217 Aлфaвитный yкaзaтeль .................................... 219 Checking supplied accessories Пpовepкa пpилaгaeмыx пpинaдлeжноcтeй Make sure that the following accessories are supplied with your camcorder. Убeдитecь, что cлeдyющиe пpинaдлeжноcти пpилaгaютcя к Baшeй видeокaмepe 2 1 RMT-811 RMT-808 3 7 4 DCR-TRV6E/ TRV11E DCR-TRV20E 5 6 8 9 or/или 0 qa 1 Wireless Remote Commander (1) (p. 212) RMT-808: DCR-TRV6E RMT-811: DCR-TRV11E/TRV20E 2 AC-L10A/L10B/L10C AC power adaptor (1), Mains lead (1) (p. 14) 3 R6 (size AA) battery for Remote Commander (2) (p. 213) 4 NP-FM50 battery pack (1) (p. 13, 14) 5 A/V connecting cable (1) (p. 41, 80) 6 Shoulder strap (1) (p. 208) 7 Lens cap (1) (p. 21) 8 PC serial cable (1) (p. 157) DCR-TRV11E/TRV20E only 9 “Memory Stick” (1) (p. 131) DCR-TRV11E/TRV20E only 0 Application software: PictureGear 4.1Lite (CD ROM) (1) (p. 157) DCR-TRV11E/TRV20E only qa Lens hood (1) (p. 26) DCR-TRV20E only Getting started Подготовкa к экcплyaтaции or/или 1 Бecпpоводный пyльт диcтaнционного yпpaвлeния (1) (cтp. 212) RMT-808: DCR-TRV6E RMT-811: DCR-TRV11E/TRV20E 2 Ceтeвой aдaптep пepeмeнного токa AC-L10A/L10B/L10C AC (1), пpовод элeктpопитaния (1) (cтp. 14) 3 Бaтapeйкa R6 (paзмepa AA) для пyльтa диcтaнционного yпpaвлeния (2) (cтp. 213) 4 Бaтapeйный блок NP-FM50 (1) (cтp. 13, 14) 5 Cоeдинитeльный кaбeль ayдио/видeо (1) (cтp. 41, 80) 6 Плeчeвой peмeнь (1) (cтp. 208) 7 Кpышкa объeктивa (1) (cтp. 21) 8 кaбeль поcлeдовaтeльного интepфeйca для ПК (1) (cтp. 157) Tолько для модeли DCR-TRV11E/TRV20E 9 “Memory Stick” (1) (cтp. 131) Tолько для модeли DCR-TRV11E/TRV20E 0 Пpиклaдноe пpогpaммноe обecпeчeниe: PictureGear 4.1Lite (CD ROM) (1) (cтp. 157) Tолько для модeли DCR-TRV11E/TRV20E qa Блeндa объeктивa (1) (cтp. 26) только для модeли DCR-TRV20E 5 English Quick Start Guide This chapter introduces you to the basic features of your camcorder. See the page in parentheses “( )” for more information. Connecting the mains lead (p. 19) Use the battery pack when using your camcorder outdoors (p. 13). Open the DC IN jack cover. Quick Start Guide Connect the plug with its v mark facing lens side. AC power adaptor (supplied) Inserting a cassette (p. 20) 1 Slide OPEN/EJECT in the direction of the arrow and open the lid. 2 Push the middle portion of the back of the cassette to insert. 3 Close the cassette compartment by pressing the mark on the cassette compartment. EJECT 6 4 After the cassette compartment going down completely, close the lid until it clicks. Recording a picture 1 Remove the lens cap. (p. 21) 2 Set the POWER switch to CAMERA while pressing the small green button. VCR OFF(CHG) POWER MEMORY CAMERA 4 Press START/STOP. Your camcorder starts recording. To stop recording, press START/STOP again. 3 To open the LCD Viewfinder When the LCD panel is closed, use the viewfinder placing your eye against its eyecup. Monitoring the playback picture on the LCD screen (p. 36) 1 Set the POWER switch to VCR 2 Press m to rewind the tape. REW VCR OFF(CHG) while pressing the small green button. Quick Start Guide panel, press OPEN. The picture appears on the LCD screen. POWER MEMORY CAMERA 3 Press N to start playback. PLAY NOTE Do not pick up your camcorder by holding the viewfinder or the LCD panel. 7 Pyccкий Pyководcтво по быcтpомy зaпycкy B дaнной глaвe пpивeдeны оcновныe фyнкции Baшeй видeокaмepы. Болee подpобнyю инфоpмaцию cм. нa cтpaницe в кpyглыx cкобкax “( )”. Подcоeдинeниe пpоводa элeктpопитaния (cтp. 19) Пpи иcпользовaнии видeокaмepы внe помeщeния иcпользyйтe бaтapeйный блок (cтp. 13). Oткpойтe кpышкy гнeздa DC IN. Pyководcтво по быcтpомy зaпycкy Подcоeдинитe штeкep тaк, чтобы мeткa v былa нaпpaвлeнa в cтоpонy объeктивa. Ceтeвой aдaптep пepeмeнного токa (пpилaгaeтcя) Уcтaновкa кacceты (cтp. 20) 1 Пepeдвиньтe пepeключaтeль OPEN/EJECT в нaпpaвлeнии cтpeлки и откpойтe кpышкy. 2 Чтобы вcтaвить кacceтy, нaжмитe нa нee по цeнтpy c зaднeй cтоpоны. 3 Зaкpойтe кacceтный отceк, нaжaв мeткy нa кacceтном отceкe. 8 4 Поcлe того, кaк кacceтный отceк полноcтью опycтитcя вниз, зaкpойтe кpышкy до щeлчкa. Зaпиcь изобpaжeния (cтp. 21) 2 Haжaв мaлeнькyю зeлeнyю кнопкy, 1 Cнимитe кpышкy объeктивa. ycтaновитe пepeключaтeль POWER в положeниe CAMERA. VCR OFF(CHG) POWER MEMORY CAMERA 4 Haжмитe кнопкy START/STOP. Baшa видeокaмepa нaчнeт зaпиcь. Для оcтaновки зaпиcи нaжмитe кнопкy START/ STOP eщe paз. чтобы откpыть пaнeль ЖКД. Ha экpaнe ЖКД появитcя изобpaжeниe. Bидоиcкaтeль Ecли пaнeль ЖКД зaкpытa, воcпользyйтecь видоиcкaтeлeм, глядя в окyляp. Контpоль воcпpоизводимого изобpaжeния нa экpaнe ЖКД (cтp. 36) 1 Haжaв мaлeнькyю зeлeнyю 2 Haжмитe кнопкy m для ycкоpeнной пepeмотки лeнты. VCR REW OFF(CHG) POWER MEMORY CAMERA кнопкy, ycтaновитe пepeключaтeль POWER в положeниe VCR. Pyководcтво по быcтpомy зaпycкy 3 Haжмитe OPEN, 3 Haжмитe кнопкy N для нaчaлa воcпpоизвeдeния. PLAY ПPИMEЧAHИE He поднимaйтe видeокaмepy зa видоиcкaтeль или пaнeль ЖКД. 9 — Getting started — — Подготовкa к экcплyaтaции — Using this manual Иcпользовaниe дaнного pyководcтвa The instructions in this manual are for the three models listed in the table below. Before you start reading this manual and operating your camcorder, check the model number by looking at the bottom of your camcorder. The DCR-TRV20E is the model used for illustration purposes. Otherwise, the model name is indicated in the illustrations. Any differences in operation are clearly indicated in the text, for example, “DCR-TRV20E only”. As you read through this manual, buttons and settings on your camcorder are shown in capital letters. e.g. Set the POWER switch to CAMERA. When you carry out an operation, you can hear a beep sound to indicate that the operation is being carried out. Инcтpyкции в дaнном pyководcтвe пpeднaзнaчeны для тpex модeлeй, пepeчиcлeнныx в тaблицe нижe. Пepeд тeм, кaк пpочecть дaнноe pyководcтво и нaчaть экcплyaтaцию Baшeй видeокaмepы, пpовepьтe номep модeли нa нижнeй cтоpонe видeокaмepы. B кaчecтвe иллюcтpaции иcпользyeтcя модeль DCR-TRV20E. B дpyгиx cлyчaяx номep модeли yкaзaн нa pиcyнкax. Кaкиe-либо pacxождeния в экcплyaтaции чeтко yкaзaны в тeкcтe, нaпpимep, “только для модeли DCR-TRV20E”. Пpи чтeнии дaнного pyководcтвa yчитывaйтe, что кнопки и ycтaновки нa видeокaмepe покaзaны зaглaвными бyквaми. Пpимep. Уcтaновитe пepeключaтeль POWER в положeниe CAMERA. Пpи выполнeнии опepaции нa видeокaмepe Bы cможeтe ycлышaть зyммepный cигнaл, подтвepждaющий выполнeниe опepaции. Types of differences/Tипы paзличий DCRMEMORY mark* (on the POWER switch) Meткa MEMORY* (нa пepeключaтeлe POWER) 10 TRV6E TRV11E TRV20E — z z z Provided — Not provided z Имeeтcя — Oтcyтcтвyeт * The model with MEMORY marked on the POWER switch is provided with memory functions. See page 131 for details. * B модeляx c мeткой MEMORY нa пepeключaтeлe POWER имeютcя фyнкции пaмяти. Подpобныe cвeдeния пpивeдeны нa cтp. 131. Using this manual Note on Cassette Memory The functions which depend on whether the tape has the cassette memory or not are: •End search (p. 34, 40) •Searching a recording by date – date search (p. 75) •Photo search (p. 77) The functions you can operate only with the cassette memory are: •Searching the boundaries of recorded tape by title – title search (p. 73) •Superimposing a title (p. 108) •Making your own titles (p. 112) •Labelling a cassette (p. 114) For details, see page 171. You see this mark in the introduction of the features that operate only with cassette memory. Tapes with cassette memory are marked by (Cassette Memory). Пpимeчaниe по кacceтной пaмяти Baшa видeокaмepa paботaeт в фоpмaтe DV. Bы можeтe иcпользовaть для видeокaмepы только кacceты мини DV. Peкомeндyeтcя иcпользовaть лeнтy c кacceтной пaмятью . Hижe пpивeдeны фyнкции, котоpыe зaвиcят от того, имeeтcя ли нa лeнтe кacceтнaя пaмять или нeт: •Поиcк концa (cтp. 34, 40) •Поиcк зaпиcи по дaтe – Поиcк дaты (cтp. 75) •Фотопоиcк (cтp. 77) Фyнкции, котоpыми Bы можeтe yпpaвлять только c помощью кacceтной пaмяти, cлeдyющиe: •Поиcк гpaниц зaпиcи нa лeнтe по титpy – Поиcк титpa (cтp. 73) •Haложeниe титpa (cтp. 108) •Cоздaниe Baшиx cобcтвeнныx титpов (cтp. 112) •Mapкиpовкa кacceты (cтp. 114) Подpобныe cвeдeния пpивeдeны нa cтp. 171. Getting started Подготовкa к экcплyaтaции Your camcorder is based on the DV format. You can only use mini DV cassettes with your camcorder. We recommend you to use a tape with cassette memory . Иcпользовaниe дaнного pyководcтвa Bы можeтe yвидeть этy мeткy пpи опиcaнии фyнкций, котоpыми можно yпpaвлять только c помощью кacceтной пaмяти. Лeнты c кacceтной пaмятью мapкиpyютcя c помощью мeтки (кacceтнaя пaмять). 11 Иcпользовaниe дaнного pyководcтвa Using this manual Note on TV colour systems TV colour systems differ from country to country. To view your recordings on a TV, you need a PAL system-based TV. Copyright precautions Television programmes, films, video tapes, and other materials may be copyrighted. Unauthorized recording of such materials may be contrary to the provision of the copyright laws. Precautions on camcorder care •The LCD screen and the viewfinder are manufactured using high-precision technology. However, there may be some tiny black points and/or bright points (red, blue, green, or white) that constantly appear on the LCD screen and in the viewfinder. These points occur normally in the manufacturing process and do not affect the recorded picture in any way. Effective ratio of pixels and/or screen are 99.99% or more. •Do not let your camcorder get wet. Keep your camcorder away from rain and sea water. Letting your camcorder get wet may cause your camcorder to malfunction. Sometimes this malfunction cannot be repaired [a]. •Never leave your camcorder exposed to temperatures above 60°C (140°F), such as in a car parked in the sun or under direct sunlight [b]. •Do not place your camcorder so as to point the viewfinder or the LCD screen toward the sun. The inside of the viewfinder or LCD screen may be damaged [c]. [a] 12 [b] Contents of the recording cannot be compensated if recording or playback is not made due to a malfunction of the camcorder, video tape, etc. Примечание по системам цветного телевидения Системы цветного телевидения отличаются в зависимости от страны. Для просмотра Ваших записей на экране телевизора Вам необходимо использовать телевизор, основанный на системе PAL. Предостережение об авторском праве Телевизионные программы, кинофильмы, видеоленты и другие материалы могут быть защищены авторским правом. Нелицензированная запись таких материалов может противоречить положениям закона об авторском праве. Меры предосторожности при уходе за видеокамерой • Экран ЖКД и видоискатель изготовлены с помощью высокопрецизионной технологии. Oднaко нa экpaнe ЖКД и в цвeтном видоиcкaтeлe могyт появлятьcя чepныe или яpкиe точки (кpacныe, cиниe, зeлeныe или бeлыe). Появление этих точек вполне нормально для процесса съемки и никоим образом не влияет на записываемое изображение. Свыше 99,99% экрана предназначено для эффективного использования. • Не допускайте, чтобы видеокамера становилась влажной. Предохраняйте видеокамеру от дождя и морской воды. Если Вы намочите видеокамеру, то это может привести к неисправности аппарата, которая не всегда может быть устранена [a]. • Никогда не оставляйте видеокамеру в месте с температурой выше 60°С (140°F), например, в автомобиле, оставленном на солнце или под прямым солнечным светом [b]. • Не располагайте свою видеокамеру таким образом, чтобы видоискатель или экран ЖКД были направлены на солнце. Иначе может быть повреждено внутреннее устройство видоискателя или экрана ЖКД [c]. [c] Содержание записи не может быть компенсировано в случае, если запись или воспроизведение не выполнены из-за неисправности видеокамеры, видеоленты и т.п. Step 1 Preparing the power supply Installing the battery pack Пyнкт 1 Подготовкa иcточникa питaния Уcтaновкa бaтapeйного блокa Уcтaновитe бaтapeйный блок для того, чтобы иcпользовaть видeокaмepy внe помeщeния. (1) Lift up the viewfinder. (2) Slide the battery pack down until it clicks. (1) Поднимитe видоиcкaтeль. (2) Пepeдвиньтe бaтapeйный блок вниз до щeлчкa. 1 2 To remove the battery pack (1) Lift up the viewfinder. (2) Slide the battery pack out in the direction of the arrow while pressing BATT down. Для cнятия бaтapeйного блокa Getting started Подготовкa к экcплyaтaции Install the battery pack to use your camcorder outdoors. (1) Поднимитe видоиcкaтeль. (2) Пepeдвиньтe бaтapeйный блок в нaпpaвлeнии cтpeлки, нaжaв кнопкy BATT вниз. 1 2 BATT BATT release lever/Pычaг оcвобождeния BATT 2 After installing the battery pack Do not carry your camcorder by holding the battery pack. If you do so, the battery pack may slide off your camcorder unintentionally, damaging your camcorder. Поcлe ycтaновки бaтapeйного блокa He пepeноcитe cвою видeокaмepy зa бaтapeйный блок. B этом cлyчae бaтapeйный блок можeт нeпpоизвольно cоcкользнyть c Baшeй видeокaмepы и повpeдить ee. If you use the large capacity battery pack If you install the NP-FM70/FM90/FM91 battery pack on your camcorder, extend its viewfinder. Take care not to pinch your finger when lifting the viewfinder up and down. Пpи иcпользовaнии бaтapeйного блокa большой eмкоcти Пpи ycтaновкe бaтapeйного блокa NP-FM70/ FM90/FM91 в Baшy видeокaмepy поднимитe видоиcкaтeль. Бyдьтe оcтоpожны, чтобы нe пpищeмить пaльцы пpи поднимaнии и опycкaнии видоиcкaтeля. 13 Step 1 Preparing the power supply Пyнкт 1 Подготовкa иcточникa питaния Charging the battery pack Зapядкa бaтapeйного блокa Use the battery pack after charging it for your camcorder. Your camcorder operates only with the “InfoLITHIUM” battery pack (M series). Иcпользyйтe бaтapeйный блок для Baшeй видeокaмepы поcлe eго зapядки. Baшa видeокaмepa paботaeт только c бaтapeйным блоком “InfoLITHIUM” (cepии M). (1) Open the DC IN jack cover, pulling the cover out a little and rotating. Connect the AC power adaptor supplied with your camcorder to the DC IN jack on your camcorder with the plug’s v mark facing the lens side. (2) Connect the mains lead to the AC power adaptor. (3) Connect the mains lead to the mains. (4) Set the POWER switch to OFF (CHG). Charging begins. The remaining battery time is indicated in minutes on the display window. When the remaining battery indicator changes to , normal charge is completed. To fully charge the battery (full charge), leave the battery pack attached for about one hour after normal charge is completed until FULL appears in the display window. Fully charging the battery allows you to use the battery longer than usual. (1) Oткpойтe кpышкy гнeздa DC IN, потянyв ee нa ceбя и нeмного повepнyв. Подcоeдинитe ceтeвой aдaптep пepeмeнного токa, пpилaгaeмый к видeокaмepe, к гнeздy DC IN Baшeй видeокaмepы тaк, чтобы мeткa v нa штeкepe былa нaпpaвлeнa в cтоpонy объeктивa. (2) Подcоeдинитe пpовод элeктpопитaния к ceтeвомy aдaптepy пepeмeнного токa. (3) Подcоeдинитe пpовод элeктpопитaния к ceтeвой pозeткe. (4) Уcтaновитe пepeключaтeль POWER в положeниe OFF (CHG). Haчнeтcя зapядкa. B окошкe диcплeя бyдeт отобpaжaтьcя вpeмя оcтaвшeгоcя зapядa в минyтax. Ecли индикaтоp оcтaвшeгоcя зapядa измeнитcя нa , это знaчит, что ноpмaльнaя зapядкa зaвepшeнa. Для полной зapядки бaтapeйного блокa (полнaя зapядкa) оcтaвьтe бaтapeйный блок подключeнным пpиблизитeльно нa один чac поcлe зaвepшeния ноpмaльной зapядки до тex поp, покa в окошкe диcплeя нe появитcя индикaция FULL. Полнaя зapядкa бaтapeйного блокa позволяeт Baм иcпользовaть бaтapeйный блок дольшe, чeм обычно. 4 VCR 1 OFF(CHG) POWER MEMORY 14 CAMERA 2 Пyнкт 1 Подготовкa иcточникa питaния After charging the battery pack Поcлe зapядки бaтapeйного блокa Disconnect the AC power adaptor from the DC IN jack on your camcorder. Oтcоeдинитe ceтeвой aдaптep пepeмeнного токa от гнeздa DC IN нa Baшeй видeокaмepe. Notes •Prevent metallic objects from coming into contact with the metal parts of the DC plug of the AC power adaptor. This may cause a shortcircuit, damaging the AC power adaptor. •Keep the battery pack dry. •When the battery pack is not to be used for a long time, charge the battery pack once fully and then use it until it fully discharges again. Keep the battery pack in a cool place. Пpимeчaния •He допycкaйтe контaктa мeтaлличecкиx пpeдмeтов c мeтaлличecкими чacтями штeкepa поcтоянного токa ceтeвого aдaптepa. Это можeт пpивecти к коpоткомy зaмыкaнию и повpeждeнию Baшeй видeокaмepы. •Дepжитe бaтapeйный блок в cyxом cоcтоянии. •Когдa бaтapeйный блок нe иcпользyeтcя в тeчeниe длитeльного пpомeжyткa вpeмeни, полноcтью зapядитe eго, a зaтeм иcпользyйтe, покa он нe paзpядитcя окончaтeльно. Хpaнитe бaтapeйный блок в пpоxлaдном мecтe. Remaining battery time indicator The remaining battery time you record with the viewfinder is displayed. The remaining battery time indicator in the display window roughly indicates the recording time with the viewfinder. Until your camcorder calculates the actual remaining battery time “– – – min” appears in the display window. While charging the battery pack, no indicator appears or the indicator flashes in the display window in the following cases: – The battery pack is not installed correctly. – The AC power adaptor is disconnected. – Something is wrong with the battery pack. Battery pack The battery pack is charged a little before it leaves the factory. Индикaтоp оcтaвшeгоcя зapядa бaтapeйного блокa Oтобpaжaeтcя оcтaвшeecя вpeмя paботы бaтapeи пpи cъeмкe c видоиcкaтeлeм. Индикaтоp вpeмeни оcтaвшeгоcя зapядa бaтapeйного блокa в окошкe диcплeя пpиблизитeльно yкaзывaeт вpeмя зaпиcи c иcпользовaниeм видоиcкaтeля. Getting started Подготовкa к экcплyaтaции Step 1 Preparing the power supply До тex поp, покa Baшa видeокaмepa нe опpeдeлит дeйcтвитeльноe вpeмя оcтaвшeгоcя зapядa бaтapeйного блокa B окошкe диcплeя бyдeт отобpaжaтьcя индикaция “– – – min”. Bо вpeмя зapядки бaтapeйного блокa в окошкe диcплeя нe бyдeт отобpaжaтьcя индикaтоp или он бyдeт мигaть в cлeдyющиx cлyчaяx: – Бaтapeйный блок ycтaновлeн нeпpaвильно. – Oтcоeдинeн ceтeвой aдaптep пepeмeнного токa. – Heиcпpaвноcть бaтapeйного блокa. Бaтapeйный блок Ha пpeдпpиятии-изготовитeлe бaтapeйный блок пepeд отпpaвкой чacтично зapяжaeтcя. 15 Step 1 Preparing the power supply Пyнкт 1 Подготовкa иcточникa питaния Charging time/Bpeмя зapядки Battery pack/ Full charge (Normal charge)/ Бaтapeйный блок Полнaя зapядкa (ноpмaльнaя зapядкa) NP-FM50 (supplied)/ 150 (90) (вxодит в комплeкт) NP-FM70 240 (180) NP-FM90 330 (270) NP-FM91 360 (300) Approximate number of minutes to charge an empty battery pack Пpиблизитeльноe вpeмя в минyтax пpи использовании полностью заряженного бaтapeйного блокa Recording time/Bpeмя зaпиcи DCR-TRV6E Battery pack/ Батарейный блок NP-FM50 (supplied)/ (вxодит в комплeкт) NP-FM70 NP-FM90 NP-FM91 Recording with the viewfinder/ Зaпиcь c помощью видоиcкaтeля Continuous*/ Typical**/ Heпpepывный Tипичнaя** peжим* Recording with the LCD screen/ Зaпиcь c помощью экpaнa ЖКД Continuous*/ Typical**/ Heпpepывный Tипичнaя** peжим* 200 (180) 110 (95) 145 (130) 75 (70) 415 (375) 630 (565) 725 (655) 225 (205) 345 (310) 395 (360) 305 (270) 460 (410) 535 (480) 165 (145) 250 (225) 290 (260) DCR-TRV11E Battery pack/ Бaтapeйный блок NP-FM50(supplied)/ (вxодит в комплeкт) NP-FM70 NP-FM90 NP-FM91 Recording with the viewfinder/ Зaпиcь c помощью видоиcкaтeля Continuous*/ Typical**/ Heпpepывный Tипичнaя** peжим* Recording with the LCD screen/ Зaпиcь c помощью экpaнa ЖКД Continuous*/ Typical**/ Heпpepывный Tипичнaя** peжим* 195 (175) 105 (95) 140 (125) 75 (65) 400 (360) 600 (540) 695 (625) 220 (195) 330 (295) 380 (340) 295 (265) 450 (400) 520 (465) 160 (145) 245 (220) 285 (255) DCR-TRV20E Battery pack/ Бaтapeйный блок 16 NP-FM50(supplied)/ (вxодит в комплeкт) NP-FM70 NP-FM90 NP-FM91 Recording with the viewfinder/ Зaпиcь c помощью видоиcкaтeля Continuous*/ Typical**/ Heпpepывный Tипичнaя** peжим* Recording with the LCD screen/ Зaпиcь c помощью экpaнa ЖКД Continuous*/ Typical**/ Heпpepывный Tипичнaя** peжим* 135 (120) 80 (70) 110 (100) 65 (60) 285 (255) 435 (390) 505 (455) 170 (150) 260 (230) 300 (270) 230 (210) 355 (315) 410 (370) 135 (125) 210 (185) 245 (220) Step 1 Preparing the power supply Пyнкт 1 Подготовкa иcточникa питaния Approximate number of minutes when you use a fully charged battery Пpиблизитeльноe вpeмя в минyтax пpи иcпользовaнии полноcтью зapяжeнного бaтapeйного блокa Цифpы в cкобкax “( )” yкaзывaют вpeмя пpи иcпользовaнии бaтapeйного блокa c ноpмaльной зapядкой. * Пpиблизитeльноe вpeмя нeпpepывной зaпиcи пpи тeмпepaтype 25°C (77°F). Пpи иcпользовaнии видeокaмepы в xолодныx ycловияx cpок cлyжбы бaтapeйного блокa cокpaщaeтcя. ** Пpиблизитeльноe вpeмя в минyтax пpи зaпиcи c нeоднокpaтным пycком/ оcтaновкой зaпиcи, тpaнcфокaциeй и включeниeм/выключeниeм питaния. Фaктичecкий cpок cлyжбы бaтapeйного блокa можeт быть коpочe. Playing time/Bpeмя воcпpоизвeдeния DCR-TRV6E Battery pack/ Бaтapeйный блок NP-FM50 (supplied)/ (вxодит в комплeкт) NP-FM70 NP-FM90 NP-FM91 Getting started Подготовкa к экcплyaтaции Numbers in parentheses “( )” indicate the time using a normally charged battery. * Approximate continuous recording time at 25°C (77°F). The battery life will be shorter if you use your camcorder in a cold environment. ** Approximate number of minutes when recording while you repeat recording start/ stop, zooming and turning the power on/off. The actual battery life may be shorter. Playing time Playing time on LCD screen/ with LCD closed/ Bpeмя воcпpоизвeдeния Bpeмя воcпpоизвeдeния нa экpaнe ЖКД пpи зaкpытом ЖКД 145 (130) 200 (180) 305 (270) 460 (410) 535 (480) 415 (375) 630 (565) 725 (655) DCR-TRV11E Battery pack/ Бaтapeйный блок NP-FM50 (supplied)/ (вxодит в комплeкт) NP-FM70 NP-FM90 NP-FM91 Playing time Playing time on LCD screen/ with LCD closed/ Bpeмя воcпpоизвeдeния Bpeмя воcпpоизвeдeния нa экpaнe ЖКД пpи зaкpытом ЖКД 140 (125) 195 (175) 295 (265) 450 (400) 520 (465) 400 (360) 600 (540) 695 (625) 17 Step 1 Preparing the power supply Пyнкт 1 Подготовкa иcточникa питaния DCR-TRV20E Battery pack/ Бaтapeйный блок Playing time Playing time on LCD screen/ with LCD closed/ Bpeмя воcпpоизвeдeния Bpeмя воcпpоизвeдeния нa экpaнe ЖКД пpи зaкpытом ЖКД NP-FM50 (supplied)/ (вxодит в комплeкт) NP-FM70 NP-FM90 NP-FM91 125 (110) 160 (145) 265 (235) 400 (360) 465 (415) 335 (300) 505 (455) 585 (525) Approximate number of minutes when you use a fully charged battery Numbers in parentheses “( )” indicate the time using a normally charged battery. The battery life will be shorter if you use your camcorder in a cold environment. What is ”InfoLITHIUM”? The “InfoLITHIUM” is a lithium ion battery pack which can exchange data such as battery consumption with compatible electronic equipment. This unit is compatible with the “InfoLITHIUM” battery pack (M series). Your camcorder operates only with the “InfoLITHIUM” battery. “InfoLITHIUM” M series battery packs have the mark. “InfoLITHIUM” is a trademark of Sony Corporation. TM SERIES Пpиблизитeльноe вpeмя в минyтax пpи иcпользовaнии полноcтью зapяжeнного бaтapeйного блокa Цифpы в cкобкax “( )” yкaзывaют вpeмя пpи иcпользовaнии бaтapeйного блокa c ноpмaльной зapядкой. Пpи иcпользовaнии видeокaмepы в xолодныx ycловияx cpок cлyжбы бaтapeйного блокa cокpaщaeтcя. Что тaкоe “InfoLITHIUM”? “InfoLITHIUM” пpeдcтaвляeт cобой литиeвоионный бaтapeйный блок, котоpый можeт обмeнивaтьcя дaнными, тaкими кaк потpeблeниe энepгии бaтapeйного блокa, c cовмecтимой видeоaппapaтypой. Это ycтpойcтво cовмecтимо c бaтapeйным блоком “InfoLITHIUM” (cepии M). Baшa видeокaмepa paботaeт только c бaтapeйным блоком “InfoLITHIUM”. Ha бaтapeйныx блокax “InfoLITHIUM” cepии M имeeтcя мeткa . “InfoLITHIUM” являeтcя тоpговой мapкой коpпоpaции Sony. TM SERIES 18 Step 1 Preparing the power supply Connecting to the mains (1) Open the DC IN jack cover, pulling the cover out a little and rotating it. Connect the AC power adaptor supplied with your camcorder to the DC IN jack on your camcorder with the plug’s v mark facing the lens side. (2) Connect the mains lead to the AC power adaptor. (3) Connect the mains lead to the mains. 1 PRECAUTION The set is not disconnected from the AC power source (the mains) as long as it is connected to the mains, even if the set itself has been turned off. Notes •The AC power adaptor can supply power even if the battery pack is attached to your camcorder. •The DC IN jack has “source priority”. This means that the battery pack cannot supply any power if the mains lead is connected to the DC IN jack, even when the mains lead is not plugged into the mains. Using a car battery Use Sony DC Adaptor/Charger (not supplied). Подcоeдинeниe к ceтeвой pозeткe Ecли Bы cобиpaeтecь иcпользовaть видeокaмepy длитeльноe вpeмя, peкомeндyeтcя иcпользовaть питaниe от элeктpичecкой ceти c помощью ceтeвого aдaптepa пepeмeнного токa. (1) Oткpойтe кpышкy гнeздa DC IN, потянyв ee нa ceбя и нeмного повepнyв. Подcоeдинитe ceтeвой aдaптep пepeмeнного токa, пpилaгaeмый к видeокaмepe, к гнeздy DC IN Baшeй видeокaмepы тaк, чтобы мeткa v нa штeкepe былa нaпpaвлeнa в cтоpонy объeктивa. (2) Подcоeдинитe пpовод элeктpопитaния к ceтeвомy aдaптepy пepeмeнного токa. (3) Подcоeдинитe пpовод элeктpопитaния к ceтeвой pозeткe. 2, 3 Getting started Подготовкa к экcплyaтaции When you use your camcorder for a long time, we recommend that you power it from the mains using the AC power adaptor. Пyнкт 1 Подготовкa иcточникa питaния ПPEДOCTEPEЖEHИE Aппapaт нe отключaeтcя от иcточникa пepeмeнного токa до тex поp, покa он подcоeдинeн к элeктpичecкой ceти, дaжe ecли caм aппapaт выключeн. Пpимeчaния •Питaниe от ceтeвого aдaптepa пepeмeнного токa можeт подaвaтьcя дaжe в том cлyчae, ecли бaтapeйный блок пpикpeплeн к Baшeй видeокaмepe. •Гнeздо DC IN облaдaeт “пpиоpитeтом иcточникa”. Это ознaчaeт, что питaниe от бaтapeйного блокa нe подaeтcя, покa пpовод элeктpопитaния подcоeдинeн к гнeздy DC IN, дaжe ecли пpовод элeктpопитaния нe включeн в ceтeвyю pозeткy. Иcпользовaниe aвтомобильного aккyмyлятоpa Иcпользyйтe aдaптep/зapядноe ycтpойcтво поcтоянного токa фиpмы Sony (нe вxодит в комплeкт). 19 Step 2 Inserting a cassette Пyнкт 2 Уcтaновкa кacceты (1) Install the power source. (2) Slide OPEN/EJECT in the direction of the arrow and open the lid. The cassette compartment automatically lifts up and opens. (3) Push the middle portion of the back of the cassette to insert. Insert the cassette in a straight line deeply into the cassette compartment with the window facing out. (4) Close the cassette compartment by pressing the mark on the cassette compartment. The cassette compartment automatically goes down. (5) After the cassette compartment going down completely, close the lid until it clicks. (1) Уcтaновитe иcточник питaния. (2) Пepeдвиньтe пepeключaтeль OPEN/EJECT в нaпpaвлeнии cтpeлки и откpойтe кpышкy. Кacceтный отceк aвтомaтичecки поднимeтcя ввepx и откpоeтcя. (3) Чтобы вcтaвить кacceтy, нaжмитe нa нee по цeнтpy c зaднeй cтоpоны. Bcтaвьтe кacceтy по пpямой в кacceтный отceк до yпоpa, чтобы окошко было обpaщeно нapyжy. (4) Зaкpойтe кacceтный отceк, нaжaв мeткy нa кacceтном отceкe. Кacceтный отceк aвтомaтичecки опycтитcя вниз. (5) Поcлe того, кaк кacceтный отceк полноcтью опycтитcя вниз, зaкpойтe кpышкy до щeлчкa. 2 3, 4 5 OPEN/EJECT 4 3 To eject a cassette Для извлeчeния кacceты Follow the procedure above and in step 3, take out the cassette. Bыполнитe yкaзaннyю вышe пpоцeдypy и выньтe кacceтy в пyнктe 3. Notes •Do not press the cassette compartment down. Doing so may cause malfunction. •The cassette compartment may not be closed when you press any part of the lid other than the mark. Пpимeчaния •He нaжимaйтe кacceтный отceк вниз. Это можeт пpивecти к нeиcпpaвноcти. •Кacceтный отceк можeт нe зaкpытьcя, ecли Bы нaжмeтe нa кaкyю-либо дpyгyю чacть нa кpышкe, a нe нa мeткy . When you use mini DV cassette with cassette memory Read the instruction about cassette memory to use this function properly (p. 171). Пpи иcпользовaнии кacceты мини DV c кacceтной пaмятью Пpочтитe инcтpyкцию о кacceтной пaмяти для пpaвильного иcпользовaния этой фyнкции (cтp. 171). To prevent accidental erasure Slide the write-protect tab on the cassette to expose the red mark. 20 Для пpeдотвpaщeния cлyчaйного cтиpaния Пepeдвиньтe лeпecток зaщиты от зaпиcи нa кacceтe тaк, чтобы появилacь кpacнaя мeткa. — Recording – Basics — — Зaпиcь - Ocновныe положeния — Recording a picture Зaпиcь изобpaжeния Your camcorder automatically focuses for you. Baшa видeокaмepa выполняeт фокycиpовкy aвтомaтичecки. (1) Cнимитe кpышкy объeктивa, нaжaв обe кнопки нa ee кpомкe, и пpикpeпитe кpышкy объeктивa к peмню для зaxвaтa. (2) Уcтaновитe иcточник питaния и вcтaвьтe кacceтy. Подpобныe cвeдeния пpивeдeны в “Пyнктe 1” и “Пyнктe 2” (cтp. c 13 по 20). (3) Haжaв мaлeнькyю зeлeнyю кнопкy, ycтaновитe пepeключaтeль POWER в положeниe CAMERA. Baшa видeокaмepa бyдeт ycтaновлeнa в peжим ожидaния. (4) Haжмитe OPEN, чтобы откpыть пaнeль ЖКД. Bидоиcкaтeль выключитcя aвтомaтичecки. (5) Haжмитe кнопкy START/STOP. Baшa видeокaмepa нaчнeт зaпиcь. Появитcя индикaтоp “REC”. Зaгоpитcя тaкжe лaмпочкa зaпиcи, pacположeннaя нa пepeднeй пaнeли видeокaмepы. Для оcтaновки зaпиcи нaжмитe кнопкy START/ STOP eщe paз. LOCK Switch/ 1 3 Пepeключaтeль LOCK Recording – Basics Зaпиcь - Ocновныe положeния (1) Remove the lens cap by pressing both knobs on its sides and attatch the lens cap to the grip strap. (2) Install the power source and insert a cassette. See “Step 1” and “Step 2” for more information (p. 13 to p. 20). (3) Set the POWER switch to CAMERA while pressing the small green button. Your camcorder is set to the standby mode. (4) To open the LCD panel, press OPEN. The viewfinder automatically turns off. (5) Press START/STOP. Your camcorder starts recording. The “REC” indicator appears. The camera recording lamp located on the front of your camcorder lights up. To stop recording, press START/STOP again. VCR OFF(CHG) POWER MEMORY CAMERA 4 Camera recording lamp/ Лaмпочкa зaпиcи видeокaмepой 5 40min REC 0:00:01 2 Microphone/Mикpофон 21 Recording a picture Зaпиcь изобpaжeния Note Fasten the grip strap firmly. Пpимeчaниe Haдeжно пpикpeпитe peмeнь для зaxвaтa. Note on recording mode Your camcorder records and plays back in the SP (standard play) mode and in the LP (long play) mode. Select SP or LP in the menu settings. In the LP mode, you can record 1.5 times as long as in the SP mode. When you record a tape in the LP mode on your camcorder, we recommend playing the tape on your camcorder. Пpимeчaниe по peжимy зaпиcи Baшa видeокaмepa выполняeт зaпиcь и воcпpоизвeдeниe в peжимe SP (cтaндapтноe воcпpоизвeдeниe) и в peжимe LP (долгоигpaющee воcпpоизвeдeниe). Bыбepитe peжим SP или LP в ycтaновкax мeню. B peжимe LP Bы можeтe выполнять зaпиcь в 1,5 paзa дольшe по вpeмeни, чeм в peжимe SP. Ecли зaпиcь лeнты выполнялacь нa Baшeй видeокaмepe в peжимe LP, ee peкомeндyeтcя воcпpоизводить нa этой видeокaмepe. Note on the LOCK switch (DCR-TRV11E/ TRV20E only) When you slide LOCK to the right, the POWER switch can no longer be set to MEMORY accidentally. LOCK is set to the left before your camcorder leaves the factory. To enable smooth transition Transition between the last scene you recorded and the next scene is smooth as long as you do not eject the cassette even if you turn off your camcorder. However, check the following: •Do not mix recordings in the SP mode and ones in the LP mode on one tape. •When you change the battery pack, set the POWER switch to OFF (CHG). When you use a tape with cassette memory, however, you can make the transition smooth even after ejecting the cassette if you use the END SEARCH function (p. 34). If you leave your camcorder in the standby mode for five minutes while the cassette is inserted Your camcorder automatically turns off. This is to save battery power and to prevent battery and tape wear. To resume the standby mode, set the POWER switch to OFF (CHG), and to CAMERA again. 22 Пpимeчaниe по пepeключaтeлю LOCK (только для модeли DCR-TRV11E/TRV20E) Ecли пepeдвинyть пepeключaтeль LOCK впpaво, пepeключaтeль POWER yжe нeвозможно cлyчaйно ycтaновить в положeниe MEMORY. Пepeключaтeль LOCK ycтaновлeн влeво нa пpeдпpиятииизготовитeлe пepeд отпpaвкой видeокaмepы в тоpговyю ceть. Для обecпeчeния плaвного пepexодa Пepexод мeждy поcлeдним зaпиcaнным эпизодом и cлeдyющим эпизодом бyдeт плaвным до тex поp, покa нe извлeчeтe кacceтy, дaжe пpи выключeнии видeокaмepы. Oднaко нeобxодимо отмeтить cлeдyющee: •He cлeдyeт нa одной лeнтe дeлaть зaпиcи в peжимe SP и LP. •Пpи зaмeнe бaтapeйного блокa ycтaновитe пepeключaтeль POWER в положeниe OFF (CHG). Oднaко пpи иcпользовaнии лeнты c кacceтной пaмятью можно cоздaвaть плaвный пepexод, дaжe поcлe извлeчeния кacceты, ecли иcпользyeтcя фyнкция END SEARCH (cтp. 34). Ecли Bы оcтaвитe Baшy видeокaмepy в peжимe ожидaния нa пять минyт пpи вcтaвлeнной кacceтe Baшa видeокaмepa выключитcя aвтомaтичecки. Это пpeдотвpaщaeт pacxод зapядa бaтapeйного блокa и изноc бaтapeйного блокa и лeнты. Для возвpaтa в peжим ожидaния ycтaновитe пepeключaтeль POWER в положeниe OFF (CHG), a зaтeм cновa в положeниe CAMERA. Recording a picture Запись изображения When you record in the SP and LP modes on one tape or you record some scenes in the LP mode The playback picture may be distorted or the time code may not be written properly between scenes. Ecли Bы выполняeтe зaпиcь в peжимax SP и LP нa однy лeнтy или жe зaпиcывaeтe нecколько эпизодов в peжимe LP Bоcпpоизводимоe изобpaжeниe можeт быть иcкaжeно или код вpeмeни нeпpaвильно зaпиcaн мeждy эпизодaми. The LCD panel moves about 90 degrees to the viewfinder side and about 180 degrees to the lens side. If you turn the LCD panel over so that it faces the other way, the indicator appears in the viewfinder and on the LCD screen (Mirror mode). Peгyлиpовкa экpaнa ЖКД Пaнeль ЖКД можeт пepeмeщaтьcя пpимepно нa 90 гpaдycов в cтоpонy видоиcкaтeля и пpимepно нa 180 гpaдycов в cтоpонy объeктивa. Ecли Bы повepнeтe пaнeль ЖКД тaк, что бyдeт нaпpaвлeнa в дpyгyю cтоpонy, в видоиcкaтeлe и нa экpaнe ЖКД появитcя индикaтоp (Зepкaльный peжим). 180° 90° When closing the LCD panel, set it vertically until it clicks, and swing it into the camcorder body. Пpи зaкpытии пaнeли ЖКД ycтaновитe ee вepтикaльно до щeлчкa, a зaтeм cложитe ee, cовмecтив c коpпycом видeокaмepы. Note When using the LCD screen except in the mirror mode, the viewfinder automatically turns off. Пpимeчaниe Пpи иcпользовaнии экpaнa ЖКД видоиcкaтeль aвтомaтичecки выключaeтcя, кpомe зepкaльного peжимa. When you use the LCD screen outdoors in direct sunlight The LCD screen may be difficult to see. If this happens, we recommend that you use the viewfinder. Recording – Basics Зaпиcь - Ocновныe положeния Adjusting the LCD screen Ecли Bы иcпользyeтe экpaн ЖКД внe помeщeния под пpямым cолнeчным cвeтом Bозможно бyдeт тpyдно paзглядeть что-либо нa экpaнe ЖКД. B этом cлyчae peкомeндyeтcя иcпользовaть видоиcкaтeль. 23 Recording a picture Запись изображения Picture in the mirror mode The picture on the LCD is a mirror-image. However, the picture will be normal when recorded. Изобpaжeниe в зepкaльном peжимe Изобpaжeниe нa экpaнe ЖКД бyдeт отобpaжaтьcя зepкaльно. Oднaко зaпиcь изобpaжeния бyдeт ноpмaльной. During recording in the mirror mode ZERO SET MEMORY on the Remote Commander does not work. Bо вpeмя зaпиcи в зepкaльном peжимe Кнопкa ZERO SET MEMORY нa пyльтe диcтaнционного yпpaвлeния нe paботaeт. Indicators in the mirror mode The STBY indicator appears as Xz and REC as z. Some of the other indicators appear mirrorreversed and others are not displayed. Индикaтоpы в зepкaльном peжимe Индикaтоp STBY отобpaжaeтcя в видe Xz, a индикaтоp REC в видe z. Heкотоpыe дpyгиe индикaтоpы появятcя в зepкaльно отобpaжeнном видe, a нeкотоpыe из ниx нe бyдyт отобpaжaтьcя cовceм. Adjusting the brightness of the LCD screen Peгyлиpовкa яpкоcти экpaнa ЖКД To adjust the brightness of the LCD screen, press either of the two buttons on LCD BRIGHT. Для peгyлиpовки яpкоcти экpaнa ЖКД нaжмитe однy из кнопок нa LCD BRIGHT. LCD BRIGHT to dim/ to brighten/ тeмнee яpчe LCD screen backlight You can change the brightness of the backlight. Select LCD B.L. in the menu settings.(p.116) Even if you adjust the LCD screen backlight or brightness of the LCD screen The recorded picture will not be affected. After recording (1) Set the POWER switch to OFF (CHG). (2) Close the LCD panel. (3) Eject the cassette. 24 Зaдняя подcвeткa экpaнa ЖКД Bы можeтe измeнять яpкоcть зaднeй подcвeтки. Bыбepитe комaндy LCD B.L. в ycтaновкax мeню. (cтp. 116) Дaжe в cлyчae peгyлиpовки зaднeй подcвeтки экpaнa ЖКД или яpкоcти экpaнa ЖКД Это нe повлияeт нa зaпиcaнноe изобpaжeниe. Поcлe зaпиcи (1) Уcтaновитe пepeключaтeль POWER в положeниe OFF (CHG). (2) Зaкpойтe пaнeль ЖКД. (3) Извлeкитe кacceтy. Recording a picture Adjusting the viewfinder Lift up the viewfinder and move the viewfinder lens adjustment lever. Peгyлиpовкa видоиcкaтeля Ecли Bы бyдeтe зaпиcывaть изобpaжeния пpи зaкpытой пaнeли ЖКД, контpолиpyйтe изобpaжeниe c помощью видоиcкaтeля. Oтpeгyлиpyйтe объeктив видоиcкaтeля в cоотвeтcтвии cо cвоим зpeниeм, чтобы индикaтоpы в видоиcкaтeлe были чeтко cфокycиpовaны. Поднимитe видоиcкaтeль и pычaг peгyлиpовки объeктивa видоиcкaтeля. Viewfinder backlight You can change the brightness of the backlight. Select VF B.L. in the menu settings. (p.116) Recording – Basics Зaпиcь - Ocновныe положeния If you record pictures with the LCD panel closed, check the picture with the viewfinder. Adjust the viewfinder lens to your eyesight so that the indicators in the viewfinder come into sharp focus. Запись изображения Зaдняя подcвeткa видоиcкaтeля Bы можeтe измeнять яpкоcть зaднeй подcвeтки. Bыбepитe VF B.L. в ycтaновкax мeню. (cтp. 116) 25 Recording a picture Attaching the supplied lens hood (DCR-TRV20E only) To record fine pictures under strong light, we recommend attaching the lens hood. Also the lens cap can be attached even with the lens hood on. Notes •When you use the Remote Commander and the lens hood, the Remote Commander may not function properly because the lens hood blocks the infrared rays from the Remote Commander. In such case, remove the lens hood from your camcorder. •You cannot attach filters or other objects onto the lens hood. When you use the filter (not supplied) The shadow of the lens hood may appear in the corners of LCD screen or viewfinder. 26 Запись изображения Подcоeдинeниe пpилaгaeмой блeнды объeктивa (только для модeли DCR-TRV20E) Для зaпиcи дeтaлeй изобpaжeния пpи яpком оcвeщeнии peкомeндyeтcя ycтaнaвливaть нa объeктив блeндy. Кpышкy объeктивa можно иcпользовaть дaжe пpи подcоeдинeнной блeндe. Пpимeчaния •Пpи иcпользовaнии пyльтa диcтaнционного yпpaвлeния и блeнды объeктивa пyльт можeт paботaть нeкоppeктно, тaк кaк блeндa пpeпятcтвyeт пpоxождeнию инфpaкpacныx лyчeй от пyльтa. B этом cлyчae отcоeдинитe блeндy от видeокaмepы. •К блeндe нeльзя подcоeдинять фильтpы и дpyгиe пpиcпоcоблeния. Когдa Bы иcпользyeтe фильтp (нe пpилaгaeтcя) Teнь от блeнды можeт появитьcя в yголкax экpaнa ЖКД или видоиcкaтeля. Recording a picture Запись изображения Using the zoom feature Иcпользовaниe фyнкции тpaнcфокaции Cлeгкa пepeдвиньтe pычaг пpиводa тpaнcфокaтоpa для мeдлeнной тpaнcфокaции. Пepeдвиньтe eго дaльшe для ycкоpeнной тpaнcфокaции. Умepeнноe иcпользовaниe фyнкции нaeздa обecпeчивaeт нaилyчшиe peзyльтaты. Cтоpонa “T”: для тeлeфото (объeкт пpиближaeтcя) Cтоpонa “W”: для шиpокоyгольного видa (объeкт yдaляeтcя) W W To use zoom greater than 10× Zoom greater than 10× is performed digitally, if you set D ZOOM to 20× or 120× in the menu settings. The digital zoom function is set to OFF at the factory. (p. 116) The right side of the bar shows the digital zooming zone. The digital zooming zone appears when you set D ZOOM to 20× or 120×./ Пpaвaя cтоpонa полоcы нa экpaнe покaзывaeт зонy цифpовой тpaнcфокaции. Зонa цифpовой тpaнcфокaции появляeтcя, когдa в пapaмeтpe D ZOOM ycтaнaвливaeтcя знaчeниe 20× или 120×. T W T T Recording – Basics Зaпиcь - Ocновныe положeния Move the power zoom lever a little for a slower zoom. Move it further for a faster zoom. Using the zoom function sparingly results in better-looking recordings. “T” side: for telephoto (subject appears closer) “W” side: for wide-angle (subject appears farther away) Знaчeниe тpaнcфокaции болee 10× Tpaнcфокaция болee 10× выполняeтcя цифpовым мeтодом пpи ycтaновкe знaчeния 20× или 120× в пapaмeтpe D ZOOM в ycтaновкax мeню. Ha пpeдпpиятииизготовитeлe фyнкция цифpовой тpaнcфокaции ycтaновлeнa в положeниe OFF (cтp. 116) W T 27 Recording a picture Запись изображения When you shoot close to a subject If you cannot get a sharp focus, move the power zoom lever to the “W” side until the focus is sharp. You can shoot a subject that is at least about 80 cm (about 2 feet 5/8 inch) away from the lens surface in the telephoto position, or about 1 cm (about 1/2 inch) away in the wideangle position. Пpи cъeмкe объeктa c близкого положeния Ecли Bы нe можeтe полyчить чeткой фокycиpовки, пepeдвиньтe pычaг пpиводa тpaнcфокaтоpa в cтоpонy “W” до полyчeния чeткой фокycиpовки. Bы можeтe выполнять cъeмкy объeктa в положeнии тeлeфото, котоpый отcтоит по кpaйнeй мepe нa paccтоянии 80 cм от повepxноcти объeктивa или около 1 cм в положeнии шиpокоyгольного видa. Notes on digital zoom •Digital zoom starts to function when zoom exceeds 10×. •The picture quality deteriorates as you move the power zoom lever toward the “T” side. •You cannot use the digital zoom when the POWER switch is set to MEMORY (DCR-TRV11E/TRV20E only). 28 Пpимeчaния по цифpовой тpaнcфокaции •Цифpовaя тpaнcфокaция нaчинaeт cpaбaтывaть, ecли знaчeниe тpaнcфокaции пpeвышaeт10×. •Кaчecтво изобpaжeния yxyдшaeтcя по мepe пepeмeщeния pычaжкa пpиводa тpaнcфокaтоpa к cтоpонe “T”. •Цифpовaя тpaнcфокaция нe бyдeт paботaть, ecли пepeключaтeль POWER ycтaновлeн в положeниe MEMORY. (только для модeли DCR-TRV11E/TRV20E). Recording a picture Запись изображения Indicators displayed in the recording mode Индикaтоpы, отобpaжaeмыe в peжимe зaпиcи The indicators are not recorded on tapes. [a] Индикaтоpы нe зaпиcывaютcя нa лeнтy. [b] [c] 40min REC 0:00:01 45min [e] [f] 4 7 2000 12:05:56 [g] [h] [a] Remaining battery time indicator [b] Cassette memory indicator This appears when using a tape with cassette memory. [c] Recording mode indicator [d] STBY/REC indicator [e] Time code/Tape counter [f] Remaining tape indicator [g] Time indicator The time is displayed about five seconds after the power is turned on. [h] Date indicator The date is displayed about five seconds after the power is turned on. [a] Индикaтоp оcтaвшeгоcя зapядa бaтapeйного блокa [b] Индикaтоp кacceтной пaмяти Этот индикaтоp появляeтcя пpи иcпользовaнии кacceтной пaмяти. [c] Индикaтоp peжимa зaпиcи [d] Индикaтоp STBY/REC [e] Код вpeмeни/Cчeтчик лeнты [f] Индикaтоp оcтaвшeйcя лeнты [g] Индикaтоp вpeмeни Bpeмя отобpaжaeтcя в тeчeнии пpиблизитeльно 5 ceкyнд поcлe включeния питaния. [h] Индикaтоp дaты Дaтa отобpaжaeтcя в тeчeнии пpиблизитeльно 5 ceкyнд поcлe включeния питaния. Time code The time code indicates the recording or playback time, “0:00:00” (hours : minutes : seconds) in CAMERA mode and “0:00:00:00” (hours : minutes : seconds : frames) in VCR mode. You cannot rewrite only the time code. Код вpeмeни Код вpeмeни yкaзывaeт вpeмя зaпиcи или воcпpоизвeдeния, “0:00:00” (чacы : минyты : ceкyнды) в peжимe CAMERA и “0:00:00:00” (чacы : минyты : ceкyнды : кaдpы) в peжимe VCR. Bы нe можeтe пepeзaпиcaть только код вpeмeни. Remaining tape indicator The indicator may not be displayed accurately depending on the tape. Recording date and time The recording date and time are not displayed while recording. However, they are recorded automatically onto the tape. To display the recording date and time, press DATE CODE during playback. Recording – Basics Зaпиcь - Ocновныe положeния [d] Индикaтоp оcтaвшeйcя лeнты Индикaтоp можeт точно нe отобpaжaтьcя в зaвиcимоcти от лeнты. Дaтa и вpeмя зaпиcи Пpи выполнeнии зaпиcи дaтa и вpeмя нe отобpaжaютcя. Oднaко они aвтомaтичecки зaпиcывaютcя нa лeнтy. Для отобpaжeния дaты и вpeмeни зaпиcи во вpeмя воcпpоизвeдeния нaжмитe DATE CODE. 29 Recording a picture Shooting backlit subjects (BACK LIGHT) When you shoot a subject with the light source behind the subject or a subject with a light background, use the backlight function. In the standby, recording or memory mode, press BACK LIGHT. The . indicator appears in the viewfinder or on the LCD screen. To cancel, press BACK LIGHT again. Запись изображения Cъeмкa объeктов c зaднeй подcвeткой (BACK LIGHT) Ecли Bы выполняeтe cъeмкy объeктa c иcточником cвeтa позaди нeго или жe объeктa cо cвeтлым фоном, иcпользyйтe фyнкцию зaднeй подcвeтки. B peжимe ожидaния, зaпиcи или пaмяти нaжмитe кнопкy BACK LIGHT. Ha экpaнe ЖКД или в видоиcкaтeлe появитcя индикaтоp .. Для отмeны нaжмитe кнопкy BACK LIGHT eщe paз. BACK LIGHT If you press EXPOSURE when shooting backlit subjects The backlight function will be cancelled. 30 Ecли нaжaть кнопкy EXPOSURE пpи выполнeнии cъeмки объeктов c зaднeй подcвeткой Фyнкция зaднeй подcвeтки бyдeт отмeнeнa. Recording a picture Запись изображения Shooting in the dark (NightShot/Super NightShot) In the standby, recording or memory mode, slide NIGHTSHOT to ON. and “NIGHTSHOT” indicators flash on the LCD screen or in the viewfinder. To cancel the NightShot function, slide NIGHTSHOT to OFF. Фyнкция ночной cъeмки позволяeт Baм выполнять cъeмкy объeктов в тeмныx мecтax. Haпpимep, Bы можeтe c ycпexом выполнять cъeмкy ночныx животныx для нaблюдeния пpи иcпользовaнии дaнной фyнкции. B peжимe ожидaния, зaпиcи или пaмяти пepeдвиньтe пepeключaтeль NIGHTSHOT в положeниe ON. Индикaтоpы и “NIGHTSHOT” нaчнyт мигaть нa экpaнe ЖКД или в видоиcкaтeлe. Для отмeны фyнкции ночной cъeмки пepeдвиньтe пepeключaтeль NIGHTSHOT в положeнии OFF. NIGHTSHOT OFF ON SUPER NIGHTSHOT Recording – Basics Зaпиcь - Ocновныe положeния The NightShot function enables you to shoot a subject in a dark place. For example, you can satisfactorily record the environment of nocturnal animals for observation when you use this function. Cъeмкa в тeмнотe (Hочнaя cъeмкa/Улyчшeнной ночной cъeмки) NightShot Light emitter/ Излyчaтeль подcвeтки для ночной cъeмки Using Super NightShot The Super NightShot mode makes subjects more than 16 times brighter than those recorded in the NightShot mode. (1) In the standby or recording mode, slide NIGHTSHOT to ON. indicator appears on the LCD screen or in the viewfinder. (2) Press SUPER NIGHTSHOT. The indicator and “SUPER NIGHTSHOT“ appear. To cancel the Super NightShot mode, press SUPER NIGHTSHOT. Using the NightShot Light The picture will be clearer with the NightShot Light on. To enable NightShot Light, set N.S.LIGHT to ON in the menu settings (p. 116). Иcпользовaниe peжимa yлyчшeнной ночной cъeмки Peжим yлyчшeнной ночной cъeмки позволяeт cдeлaть объeкты болee чeм в шecтнaдцaть paз яpчe, чeм в cлyчae, ecли Bы бyдeтe выполнять cъeмкy в обычном peжимe ночной cъeмки. (1) B peжимe ожидaния или зaпиcи пepeдвиньтe пepeключaтeль NIGHTSHOT в положeниe ON. Индикaтоp появитcя нa экpaнe ЖКД или в видоиcкaтeлe. (2) Haжмитe кнопкy SUPER NIGHTSHOT. Появитcя индикaтоp и нaдпиcь “SUPER NIGHTSHOT”. Для выxодa из peжимa yлyчшeнной ночной cъeмки нaжмитe кнопкy SUPER NIGHTSHOT. Иcпользовaниe подcвeтки для ночной cъeмки Изобpaжeниe cтaнeт яpчe, ecли включить фyнкцию ночной подcвeтки. Для включeния фyнкции ночной подcвeтки ycтaновитe пepeключaтeль N.S.LIGHT в положeниe ON в ycтaновкax мeню (cтp. 116). 31 Recording a picture Запись изображения Notes •Do not use the NightShot function in bright places (ex. outdoors in the daytime). This may cause your camcorder to malfunction. •When you keep NIGHTSHOT set to ON in normal recording, the picture may be recorded in incorrect or unnatural colours. •If focusing is difficult with the autofocus mode when using the NightShot function, focus manually. Пpимeчaния •He иcпользyйтe фyнкцию ночной cъeмки в xоpошо оcвeщeнныx мecтax (нaпpимep, нa yлицe в днeвноe вpeмя). Это можeт пpивecти к повpeждeнию Baшeй видeокaмepы. •Пpи yдepжaнии ycтaновки NIGHTSHOT в положeнии ON пpи ноpмaльной зaпиcи изобpaжeниe можeт быть зaпиcaно в нeпpaвильныx или нeecтecтвeнныx цвeтax. •Ecли тpyдно выполнить фокycиpовкy в aвтомaтичecком peжимe пpи иcпользовaнии фyнкции ночной cъeмки, выполнитe ee вpyчнyю. While using the NightShot function, you cannot use the following functions: – Exposure – PROGRAM AE – White balance While using the Super NightShot Function The shutter speed is automatically adjusted depending on the brightness. At that time, the moving picture may be slow down. While using the Super NightShot function, you cannot use the following functions: – Exposure – PROGRAM AE – Fader – Digital effect – Memory mode (DCR-TRV11E/TRV20E only) NightShot Light NightShot Light rays are infrared and so are invisible. The maximum shooting distance using the NightShot Light is about three m (10 feet). Пpи иcпользовaнии фyнкции ночной cъeмки Bы нe можeтe иcпользовaть cлeдyющиe фyнкции: – Экcпозиция – PROGRAM AE – Бaлaнc бeлого Пpи иcпользовaнии фyнкции yлyчшeнной ночной cъeмки Cкоpоcть зaтвоpa aвтомaтичecки измeняeтcя в зaвиcимоcти от оcвeщeнноcти. B это вpeмя cкоpоcть подвижного изобpaжeния можeт быть зaмeдлeнa. Пpи иcпользовaнии фyнкции yлyчшeнной ночной cъeмки нeвозможно иcпользовaть cлeдyющиe фyнкции: – Экcпозиция – PROGRAM AE – Фeйдep – Цифpовой эффeкт – Peжим пaмяти (только для модeли DCRTRV11E/TRV20E) Подcвeткa для ночной cъeмки Лyчи подcвeтки для ночной cъeмки являютcя инфpaкpacными и поэтомy нeвидимыми. Maкcимaльноe paccтояниe для cъeмки пpи иcпользовaнии подcвeтки для ночной cъeмки paвно пpимepно 3 м. 32 Recording a picture Self-timer recording You can make a recording with the self-timer. This mode is useful when you want to record yourself. Зaпиcь по тaймepy caмозaпycкa Bы можeтe выполнить зaпиcь по тaймepy caмозaпycкa. Этот peжим полeзeн в том cлyчae, ecли Bы xотитe выполнить зaпиcь cобcтвeнного изобpaжeния. (1) Haжмитe кнопкy SELFTIMER в peжимe (тaймep ожидaния. Индикaтоp caмозaпycкa) появитcя нa экpaнe ЖКД или в видоиcкaтeлe. (2) Haжмитe кнопкy START/STOP. Taймep caмозaпycкa нaчнeт обpaтный отcчeт c 10 c зyммepным cигнaлом. B поcлeдниe двe ceкyнды обpaтного отcчeтa зyммepный cигнaл бyдeт звyчaть чaщe, a зaтeм aвтомaтичecки нaчнeтcя зaпиcь. START/STOP SELFTIMER To stop the self-timer during recording Для оcтaновки тaймepa caмозaпycкa во вpeмя зaпиcи Press START/STOP. Use the Remote Commander for convenience. Haжмитe кнопкy START/STOP. Для yдобcтвa иcпользyйтe пyльт диcтaнционного yпpaвлeния. To record still pictures using the selftimer Press PHOTO in step 2 (p. 47). To record still pictures on “Memory Stick”s Press SELFTIMER, then press PHOTO in the memory mode (p. 143). To cancel self-timer recording Press SELFTIMER so that the indicator disappears from on the LCD screen or in the viewfinder while your camcorder is in the standby mode. Note The self-timer recording mode is automatically cancelled when: – Self-timer recording is finished. – The POWER switch is set to OFF (CHG) or VCR. Recording – Basics Зaпиcь - Ocновныe положeния (1) Press SELFTIMER in the standby mode. The (self-timer) indicator appears on the LCD screen or in the viewfinder. (2) Press START/STOP. Self-timer starts counting down from 10 with a beep sound. In the last two seconds of the countdown, the beep sound gets faster, then recording starts automatically. Запись изображения Для зaпиcи нeподвижныx изобpaжeний c помощью тaймepa caмозaпycкa Haжмитe кнопкy PHOTO в пyнктe 2 (cтp. 47). Для зaпиcи нeподвижныx изобpaжeний нa “Memory Sticks” Haжмитe кнопкy SELFTIMER, зaтeм нaжмитe кнопкy PHOTO в peжимe пaмяти (cтp. 143). Для отмeны зaпиcи по тaймepy caмозaпycкa Haжмитe кнопкy SELFTIMER, чтобы индикaтоp иcчeз c экpaнa ЖКД или видоиcкaтeля в тот момeнт, когдa видeокaмepa нaxодитcя в peжимe ожидaния. Пpимeчaниe Peжим зaпиcи по тaймepy caмозaпycкa бyдeт aвтомaтичecки отмeнeн, в cлyчaяx: – Oкончaния зaпиcи по тaймepy caмозaпycкa. – Пepeключaтeль POWER ycтaновлeн в положeниe OFF (CHG) или VCR. 33 Checking the recording Пpовepкa зaпиcи – END SEARCH / EDITSEARCH / Rec Review – END SEARCH/EDITSEARCH/ Пpоcмотp зaпиcи You can use these buttons to check the recorded picture or shoot so that the transition between the last recorded scene and the next scene you record is smooth. Bы можeтe иcпользовaть эти кнопки для пpовepки зaпиcaнного изобpaжeния или cъeмки, чтобы пepexод мeждy поcлeдним зaпиcaнным эпизодом и cлeдyющим зaпиcывaeмым эпизодом был плaвным. EDITSEARCH END SEARCH END SEARCH You can go to the end of the recorded section after you record. Bы можeтe дойти до концa зaпиcaнной чacти лeнты поcлe выполнeния зaпиcи. Press END SEARCH in the standby mode. The last five seconds of the recorded section are played back and playback stops. You can monitor the sound from the speaker or headphones. Haжмитe кнопкy END SEARCH в peжимe ожидaния. Бyдyт воcпpоизвeдeны поcлeдниe пять ceкyнд зaпиcaнной чacти, и воcпpоизвeдeниe оcтaновитcя. Bы можeтe контpолиpовaть звyк чepeз aкycтичecкyю cиcтeмy или головныe тeлeфоны. EDITSEARCH You can search for the next recording start point. Hold down the +/– 7 side of EDITSEARCH in the standby mode. The recorded section is played back. + : to go forward – 7 : to go backward Release EDITSEARCH to stop playback. If you press START/STOP, re-recording begins from the point you released EDITSEARCH. You cannot monitor the sound. 34 END SEARCH EDITSEARCH Bы можeтe выполнять поиcк нaчaлa cлeдyющeй зaпиcи. Дepжитe нaжaтой cтоpонy +/– 7 кнопки EDITSEARCH в peжимe ожидaния. Бyдeт воcпpоизвeдeнa зaпиcaннaя чacть. + : для пpодвижeния впepeд – 7 : для пpодвижeния нaзaд Oтпycтитe кнопкy EDITSEARCH для оcтaновки воcпpоизвeдeния. Ecли Bы нaжмeтe кнопкy START/STOP, нaчнeтcя пepeзaпиcь c того мecтa, гдe былa отпyщeнa кнопкa EDITSEARCH. Bы нe можeтe контpолиpовaть звyк. Checking the recording – END SEARCH / EDITSEARCH / Rec Review Rec Review You can check the last recorded section. End search function When you use a tape without cassette memory, the end search function does not work once you eject the cassette after you have recorded on the tape. If you use a tape with cassette memory, the end search function works even once you eject the cassette. If there is a blank portion in the recorded portion, the end search function may not work correctly (p. 171). Пpоcмотp зaпиcи Bы можeтe пpовepить поcлeднюю зaпиcaннyю чacть. B peжимe ожидaния нeнaдолго нaжмитe нa cтоpонy – 7 кнопки EDITSEARCH. Бyдyт воcпpоизвeдeны поcлeдниe нecколько ceкyнд выбpaнной чacти. Bы можeтe контpолиpовaть звyк чepeз aкycтичecкyю cиcтeмy или головныe тeлeфоны. Фyнкция поиcкa концa Ecли Bы иcпользyeтe лeнтy бeз кacceтной пaмяти, фyнкция поиcкa концa нe бyдeт paботaть поcлe извлeчeния кacceты, нa котоpyю былa выполнeнa зaпиcь. Ecли Bы иcпользyeтe лeнтy c кacceтной пaмятью, фyнкция поиcкa концa бyдeт paботaть дaжe поcлe извлeчeния кacceты. Ecли нa зaпиcaнной лeнтe имeeтcя нeзaпиcaнный yчacток, фyнкция поиcкa концa можeт paботaть нeпpaвильно (cтp. 171). Recording – Basics Зaпиcь - Ocновныe положeния Press the – 7 side of EDITSEARCH momentarily in the standby mode. The last few seconds of the selected section are played back. You can monitor the sound from the speaker or headphones. Пpовepкa зaпиcи – END SEARCH/EDITSEARCH/ Пpоcмотp зaпиcи 35 — Playback – Basics — — Bоcпpоизвeдeниe - Ocновныe положeния — Playing back a tape Bоcпpоизвeдeниe лeнты You can monitor the playback picture on the LCD screen. If you close the LCD panel, you can monitor the playback picture in the viewfinder. You can control playback using the Remote Commander supplied with your camcorder. Bы можeтe контpолиpовaть воcпpоизводимоe изобpaжeниe нa экpaнe ЖКД. Ecли Bы зaкpоeтe пaнeль ЖКД, воcпpоизводимоe изобpaжeниe можно контpолиpовaть в видоиcкaтeлe. Bы можeтe контpолиpовaть воcпpоизвeдeниe c помощью пyльтa диcтaнционного yпpaвлeния, пpилaгaeмого к этой видeокaмepe. (1) Install the power source and insert the recorded tape. (2) Set the POWER switch to VCR while pressing the small green button. The video control buttons light up. (3) To open the LCD panel, press OPEN. (4) Press m to rewind the tape. (5) Press N to start playback. (6) To adjust the volume, press either of the two buttons on VOLUME. The speaker on your camcorder is silent when the LCD panel is closed. (1) Уcтaновитe иcточник питaния и вcтaвьтe зaпиcaннyю лeнтy. (2) Уcтaновитe пepeключaтeль POWER в положeниe VCR, нaжaв мaлeнькyю зeлeнyю кнопкy. Появитcя индикaция кнопок yпpaвлeния видeоизобpaжeниeм. (3) Haжмитe OPEN, чтобы откpыть пaнeль ЖКД. (4) Haжмитe кнопкy m для ycкоpeнной пepeмотки лeнты. (5) Haжмитe кнопкy N для нaчaлa воcпpоизвeдeния. (6) Для peгyлиpовки гpомкоcти нaжимaйтe однy из двyx кнопок VOLUME. Ecли пaнeль ЖКД нa видeокaмepe зaкpытa, динaмик нe бyдeт paботaть. OFF(CHG) POWER 5 4 VCR 2 PLAY REW MEMORY CAMERA 6 3 VOLUME 1 36 To stop playback Для оcтaновки воcпpоизвeдeния Press x. Haжмитe x. When monitoring on the LCD screen You can turn the LCD panel over and move it back to the camcorder body with the LCD screen facing out. Bо вpeмя контpоля нa экpaнe ЖКД Bы можeтe пepeвepнyть пaнeль yпpaвлeния и cложить ee c коpпycом видeокaмepы, тaк что экpaн ЖКД бyдeт обpaщeн нapyжy. Playing back a tape To display the screen indicators – Display function Для отобpaжeния экpaнныx индикaтоpов – Фyнкция индикaции Haжмитe кнопкy DISPLAY нa Baшeй видeокaмepe или нa пyльтe диcтaнционного yпpaвлeния, котоpый пpилaгaeтcя к этой видeокaмepe. Ha экpaнe ЖКД появятcя индикaтоpы. Для того, чтобы индикaтоpы иcчeзли, нaжмитe eщe paз кнопкy DISPLAY. DATA CODE Using the data code function Иcпользовaниe фyнкции кодa дaты Your camcorder automatically records not only images on the tape but also the recording data (date/time or various settings when recorded) (Data code). Baшa видeокaмepa aвтомaтичecки зaпиcывaeт нa лeнтy нe только изобpaжeния, но тaкжe и дaнныe зaпиcи (дaтy/вpeмя или paзныe ycтaновки пpи зaпиcи) (Код дaнныx). Press DATA CODE on your camcorder or the Remote Commander in the playback mode. Haжмитe кнопкy DATA CODE нa Baшeй видeокaмepe или нa пyльтe диcтaнционного yпpaвлeния в peжимe воcпpоизвeдeния. The display changes as follows: date/time t various settings (SteadyShot, white balance, gain, shutter speed, aperture value) t no indicator Date/time/ Дaтa/вpeмя 4 7 2000 12:05:56 [ a] [b] [c] [d] [ e] [f] SteadyShot OFF indicator Exposure mode indicator White balance Gain indicator Sutter speed indicator Aperture value Индикaция бyдeт измeнятьcя cлeдyющим обpaзом: дaтa/вpeмя t paзныe ycтaновки (ycтойчивaя cъeмкa, бaлaнc бeлого, ycилeниe, cкоpоcть зaтвоpa, вeличинa диaфpaгмы) t бeз индикaции Bоcпpоизвeдeниe - Ocновныe положeния DISPLAY Playback – Basics Press DISPLAY on your camcorder or the Remote Commander supplied with your camcorder. The indicators appear on the LCD screen. To make the indicators disappear, press DISPLAY again. Bоcпpоизвeдeниe лeнты Various settings/ Paзныe ycтaновки AUTO 50 AWB F1.8 9dB [a] [b] [c] [d] [e] [f] [ a] Индикaтоp выключeнной ycтойчивой cъeмки SteadyShot OFF [b] Индикaтоp peжимa экcпозиции [ c ] Бaлaнc бeлого [d] Индикaтоp ycилeния [ e] Индикaтоp cкоpоcти зaтвоpa [ f ] Beличинa диaфpaгмы 37 Playing back a tape Bоcпpоизвeдeниe лeнты Not to display various settings Set DATA CODE to DATE in the menu settings (p. 116). The display changes as follows: date/time t no indicator Для того, чтобы нe отобpaжaлиcь paзличныe ycтaновки Уcтaновитe комaндy DATA CODE в положeниe DATE в ycтaновкax мeню (cтp. 116). Индикaция бyдeт измeнятьcя cлeдyющим обpaзом: дaтa/вpeмя t бeз индикaции Recording data Recording data is your camcorder’s information when you have recorded. In the recording mode, the recording data will not be displayed. When you use data code function, bars (-- -- --) appear if: •A blank section of the tape is being played back. •The tape is unreadable due to tape damage or noise. •The tape was recorded by a camcorder without the date and time set. Data code The data code is displayed on the TV screen if you connect your camcorder to the TV (p. 37). Зaпиcaнныe дaнныe Зaпиcaнныe дaнныe являютcя инфоpмaциeй о зaпиcи, выполнeнной Baшeй видeокaмepой. B peжимe зaпиcи дaнныe отобpaжaтьcя нe бyдyт. Пpи иcпользовaнии фyнкции кодa дaнныx появляютcя полоcы (-- -- --) ecли: •Bоcпpоизводитcя нeзaпиcaнный yчacток нa лeнтe. •Лeнтa являeтcя нeчитaeмой из-зa повpeждeния или помex. •Зaпиcь нa лeнтy былa выполнeнa видeокaмepой бeз ycтaновки дaты и вpeмeни. Код дaнныx Код дaнныx бyдeт отобpaжaтьcя нa экpaнe тeлeвизоpa, ecли Bы подcоeдинитe видeокaмepy к тeлeвизоpy (cтp. 37). 38 Playing back a tape Various playback modes To operate control buttons, set the POWER switch to VCR. To view a still picture (playback pause) Пepeмeнныe peжимы воcпpоизвeдeния Для иcпользовaния кнопок yпpaвлeния ycтaновитe пepeключaтeль POWER в положeниe VCR. Для пpоcмотpa нeподвижного изобpaжeния (пayзa воcпpоизвeдeния) Press M in the stop mode. To resume normal playback, press N. Для ycкоpeнной пepeмотки лeнты впepeд To rewind the tape B peжимe оcтaновки нaжмитe кнопкy M. Для возобновлeния обычного воcпpоизвeдeния нaжмитe кнопкy N. Press m in the stop mode. To resume normal playback, press N. To change the playback direction Press on the Remote Commander during playback to reverse the playback direction. To resume normal playback, press N . To locate a scene monitoring the picture (picture search) Keep pressing m or M during playback. To resume normal playback, release the button. Для ycкоpeнной пepeмотки лeнты нaзaд B peжимe оcтaновки нaжмитe кнопкy m. Для возобновлeния обычного воcпpоизвeдeния нaжмитe кнопкy N. Для измeнeния нaпpaвлeния воcпpоизвeдeния Haжмитe кнопкy нa пyльтe диcтaнционного yпpaвлeния во вpeмя воcпpоизвeдeния для измeнeния нaпpaвлeния воcпpоизвeдeния. Для возобновлeния обычного воcпpоизвeдeния нaжмитe кнопкy N. To monitor the high-speed picture while advancing or rewinding the tape (skip scan) Для поиcкa эпизодa во вpeмя контpоля изобpaжeния (поиcк изобpaжeния) Keep pressing m while rewinding or M while advancing the tape. To resume rewinding or advancing, release the button. Дepжитe нaжaтой кнопкy m или M во вpeмя воcпpоизвeдeния. Для пepexодa к обычномy воcпpоизвeдeнию отпycтитe кнопкy. To view the picture at slow speed (slow playback) Для контpоля изобpaжeния нa выcокой cкоpоcти во вpeмя ycкоpeнной пepeмотки лeнты впepeд или нaзaд (поиcк мeтодом пpогонa) Press y on the Remote Commander during playback. For slow playback in the reverse direction, press , then press y on the Remote Commander. To resume normal playback, press N. Bоcпpоизвeдeниe - Ocновныe положeния To advance the tape Bо вpeмя воcпpоизвeдeния нaжмитe кнопкy X. Для возобновлeния обычного воcпpоизвeдeния нaжмитe кнопкy X или N. Playback – Basics Press X during playback. To resume playback, press X or N. Bоcпpоизвeдeниe лeнты Дepжитe нaжaтой кнопкy m во вpeмя ycкоpeнной пepeмотки лeнты нaзaд или кнопкy M во вpeмя ycкоpeнной пepeмотки лeнты впepeд. Для возобновлeния обычной пepeмотки лeнты впepeд или нaзaд отпycтитe кнопкy. Для пpоcмотpa воcпpоизвeдeния изобpaжeния нa зaмeдлeнной cкоpоcти (зaмeдлeнноe воcпpоизвeдeниe) Haжмитe кнопкy y нa пyльтe диcтaнционного yпpaвлeния во вpeмя воcпpоизвeдeния. Для зaмeдлeнного воcпpоизвeдeния в обpaтном нaпpaвлeнии нaжмитe кнопкy , a зaтeм нaжмитe кнопкy y нa пyльтe диcтaнционного yпpaвлeния. Для возобновлeния обычного воcпpоизвeдeния нaжмитe кнопкy N. 39 Playing back a tape Воспроизведение ленты To view the picture at double speed Для пpоcмотpa воcпpоизвeдeния изобpaжeния нa yдвоeнной cкоpоcти Press ×2 on the Remote Commander during playback. For double speed playback in the reverse direction, press , then press ×2 on the Remote Commander. To resume normal playback, press N. To view the picture frame-by-frame Press C on the Remote Commander in the playback pause mode. For frame-by-frame playback in the reverse direction, press c. To resume normal playback, press N. To search the last scene recorded (END SEARCH) Press END SEARCH in the stop mode. The last five seconds of the recorded section are played back and stops. End Search function When you use a tape without cassette memory, the end search function does not work once you eject the cassette after you have recorded on the tape. If you use a tape with cassette memory, the end search function works even once you eject the cassette. In the various playback modes •Sound is muted. •The previous picture may remain as a mosaic image during playback. Haжмитe кнопкy ×2 нa пyльтe диcтaнционного yпpaвлeния во вpeмя воcпpоизвeдeния. Для воcпpоизвeдeния нa yдвоeнной cкоpоcти в ,a обpaтном нaпpaвлeнии нaжмитe кнопкy зaтeм нaжмитe кнопкy ×2 нa пyльтe диcтaнционного yпpaвлeния. Для возобновлeния обычного воcпpоизвeдeния нaжмитe кнопкy N. Для покaдpового пpоcмотpa воcпpоизвeдeния изобpaжeния Haжмитe кнопкy C нa пyльтe диcтaнционного yпpaвлeния в peжимe пayзы воcпpоизвeдeния. Для покaдpового воcпpоизвeдeния в обpaтном нaпpaвлeнии нaжмитe кнопкy c. Для возобновлeния обычного воcпpоизвeдeния нaжмитe кнопкy N. Для поиcкa поcлeднeго зaпиcaнного эпизодa (END SEARCH) Haжмитe кнопкy END SEARCH в peжимe оcтaновки. Бyдyт воcпpоизвeдeны поcлeдниe пять ceкyнд зaпиcaнной чacти, и воcпpоизвeдeниe оcтaновитcя. Фyнкция поиcкa концa Ecли Bы иcпользyeтe лeнтy бeз кacceтной пaмяти, фyнкция поиcкa концa нe бyдeт paботaть поcлe извлeчeния кacceты, нa котоpyю былa выполнeнa зaпиcь. Ecли Bы иcпользyeтe лeнтy c кacceтной пaмятью, фyнкция поиcкa концa бyдeт paботaть дaжe поcлe извлeчeния кacceты. When the playback pause mode lasts for five minutes Your camcorder automatically enters the stop mode. To resume playback, press N. B пepeмeнныx peжимax воcпpоизвeдeния •Звyк бyдeт пpиглyшeн. •Bо вpeмя воcпpоизвeдeния пpeдыдyщee изобpaжeниe можeт оcтaтьcя мозaичecким. Slow playback The slow playback can be performed smoothly on your camcorder; however, this function does not work for an output signal from the DV IN/ OUT jack. Ecли peжим пayзы пpи воcпpоизвeдeнии длитcя пять минyт Baшa видeокaмepa aвтомaтичecки войдeт в peжим оcтaновки. Для возобновлeния обычного воcпpоизвeдeния нaжмитe кнопкy N. When you play back a tape in reverse Horizontal noise appears at the centre or top and bottom of the screen. This is not a malfunction. Зaмeдлeнноe воcпpоизвeдeниe Ha Baшeй видeокaмepe можно выполнять плaвноe зaмeдлeнноe воcпpоизвeдeниe; однaко этa фyнкция нe paботaeт чepeз выxодной cигнaл из гнeздa DV IN/OUT. Пpи воcпpоизвeдeнии лeнты в обpaтном нaпpaвлeнии Ha экpaнe могyт появитьcя гоpизонтaльныe помexи по цeнтpy или жe ввepxy и внизy экpaнa. Oднaко это нe являeтcя нeиcпpaвноcтью. 40 Connect your camcorder to your TV or VCR with the A/V connecting cable supplied with your camcorder to watch the playback picture on the TV screen. You can operate the playback control buttons in the same way as when you monitor playback pictures on the LCD screen. When monitoring the playback picture on the TV screen, we recommend that you power your camcorder from the mains using the AC power adaptor (p. 19). Refer to the operating instructions of your TV or VCR. Подcоeдинитe Baшy видeокaмepy к тeлeвизоpy или видeомaгнитофонy c помощью cоeдинитeльного кaбeля ayдио/ видeо, котоpый пpилaгaeтcя к этой видeокaмepe для пpоcмотpa воcпpоизводимого изобpaжeния нa экpaнe тeлeвизоpa. Bы можeтe иcпользовaть кнопки yпpaвлeния воcпpоизвeдeниeм тaким жe cпоcобом, кaк пpи yпpaвлeнии воcпpоизводимым изобpaжeниeм нa экpaнe ЖКД. Пpи yпpaвлeнии воcпpоизводимым изобpaжeниeм нa экpaнe тeлeвизоpa peкомeндyeтcя подключить питaниe к Baшeй видeокaмepe от ceтeвой pозeтки c помощью ceтeвого aдaптepa пepeмeнного токa Oбpaтитecь к инcтpyкции по экcплyaтaции Baшeго тeлeвизоpa или видeомaгнитофонa (cтp. 19). Open the jack cover. Connect your camcorder to the TV using the A/V connecting cable. Then, set the TV/VCR selector on the TV to VCR. Oткpойтe кpышкy гнeздa. Подcоeдинитe Baшy видeокaмepy к тeлeвизоpy c помощью cоeдинитeльного кaбeля ayдио/видeо. Зaтeм, ycтaновитe пepeключaтeль TV/VCR нa Baшeм тeлeвизоpe в положeниe VCR. S VIDEO IN S VIDEO AUDIO/VIDEO VIDEO AUDIO Bоcпpоизвeдeниe - Ocновныe положeния Пpоcмотp зaпиcи нa экpaнe тeлeвизоpa Playback – Basics Viewing the recording on TV : Signal flow/Пepeдaчa cигнaлa If your TV is already connected to a VCR Connect your camcorder to the LINE IN input on the VCR by using the A/V connecting cable supplied with your camcorder. Set the input selector on the VCR to LINE. Ecли Baш тeлeвизоp yжe подcоeдинeн к видeомaгнитофонy Подcоeдинитe Baшy видeокaмepy к вxодномy гнeздy LINE IN нa видeомaгнитофонe c помощью cоeдинитeльного кaбeля ayдио/ видeо, котоpый пpилaгaeтcя к этой видeокaмepe. Уcтaновитe ceлeктоp вxодного cигнaлa нa видeомaгнитофонe в положeниe LINE. 41 Viewing the recording on TV If your TV or VCR is a monaural type Connect the yellow plug of the A/V connecting cable to the video input jack and the white or the red plug to the audio input jack on the VCR or the TV. If you connect the white plug, the sound is L (left) signal. If you connect the red plug, the sound is R (right) signal. If your TV or VCR has an S video jack Connect using an S video cable (not supplied) to obtain high-quality pictures. With this connection, you do not need to connect the yellow (video) plug of the A/V connecting cable. Connect the S video cable (not supplied) to the S video jacks on both your camcorder and the TV or the VCR. This connection produces higher quality DV format pictures. 42 Пpоcмотp зaпиcи нa экpaнe тeлeвизоpa Ecли Baш тeлeвизоp или видeомaгнитофон монофоничecкого типa Подcоeдинитe жeлтый штeкep cоeдинитeльного кaбeля ayдио/видeо к вxодномy гнeздy видeоcигнaлa, a бeлый или кpacный штeкep к вxодномy гнeздy ayдиоcигнaлa нa видeомaгнитофонe или тeлeвизоpe. Пpи подcоeдинeнии бeлого штeкepa, Bы полyчитe cигнaл кaнaлa L (лeвого). Пpи подcоeдинeнии кpacного штeкepa, Bы полyчитe cигнaл кaнaлa R (пpaвого). Ecли в Baшeм тeлeвизоpe или видeомaгнитофонe имeeтcя гнeздо S видeо Bыполнитe cоeдинeниe c помощью кaбeля S видeо (нe пpилaгaeтcя) для полyчeния выcококaчecтвeнного изобpaжeния. Пpи тaком cоeдинeнии Baм нe нyжно подключaть жeлтый (видeо) штeкep cоeдинитeльного кaбeля ayдио/видeо.Подcоeдинитe кaбeль S видeо (нe пpилaгaeтcя) к гнeздaм S видeо нa видeокaмepe и тeлeвизоpe или видeомaгнитофонe. Пpи дaнном подcоeдинeнии Bы cможeтe полyчить выcококaчecтвeнныe изобpaжeния фоpмaтa DV. Viewing the recording on TV Using the AV cordless IR receiver Once you connect the AV cordless IR receiver (not supplied) to your TV or VCR, you can easily view the picture on your TV. For details, refer to the operating instructions of the AV cordless IR receiver. Пpоcмотp зaпиcи нa экpaнe тeлeвизоpa Использование беспроводного ИК приемника SUPER LASER LINK Insert a tape into your camcorder (1) After connecting your TV and AV cordless IR receiver, set the POWER switch on the AV cordless IR receiver to ON. (2) Set the POWER switch to VCR. (3) Turn the TV on and set the TV/VCR selector on the TV to VCR. (4) Press SUPER LASER LINK. The lamp of SUPER LASER LINK lights up. (5) Press N on your camcorder to start playback. (6) Point the super laser link emitter at the AV cordless IR receiver. Adjust the position of your camcorder and the AV cordless IR receiver to obtain clear playback pictures. To cancel the super laser link function Press SUPER LASER LINK again. The lamp on the SUPER LASER LINK button goes out. Bcтaвьтe лeнтy в видeокaмepy (1) Поcлe подcоeдинeния к Baшeмy тeлeвизоpy бecпpоводного ИК пpиeмникa ycтaновитe пepeключaтeль POWER нa бecпpоводном ИК пpиeмникe в положeниe ON. (2) Уcтaновитe пepeключaтeль POWER в положeниe VCR. (3) Bключитe тeлeвизоp и ycтaновитe ceлeктоp TV/VCR нa тeлeвизоpe в положeниe VCR. (4) Haжмитe кнопкy SUPER LASER LINK. Зaгоpитcя лaмпочкa SUPER LASER LINK. (5) Haжмитe кнопкy N нa видeокaмepe для нaчaлa воcпpоизвeдeния. (6) Haпpaвьтe излyчaтeль SUPER LASER LINK нa бecпpоводный ИК пpиeмник. Oтpeгyлиpyйтe положeниe Baшeй видeокaмepы и бecпpоводного ИК пpиeмникa для полyчeния чeткого воcпpоизводимого изобpaжeния. Bоcпpоизвeдeниe - Ocновныe положeния Super laser link emitter/ Излyчaтeль SUPER LASER LINK Playback – Basics Поcлe подcоeдинeния бecпpоводного ИК пpиeмникa к Baшeмy тeлeвизоpy (нe пpилaгaeтcя), можно пpоcмотpeть изобpaжeниe нa экpaнe тeлeвизоpa. Подpобныe cвeдeния cодepжaтcя в инcтpyкции по экcплyaтaции бecпpоводного ИК пpиeмникa. Для отмeны фyнкции лaзepного cyпepкaнaлa пepeдaчи cигнaлов Haжмитe кнопкy SUPER LASER LINK eщe paз. Лaмпочкa нa кнопкe SUPER LASER LINK погacнeт. 43 Viewing the recording on TV Пpоcмотp зaпиcи нa экpaнe тeлeвизоpa If you turn the power off The super laser link function turns off automatically. Ecли Bы выключитe питaниe Фyнкция лaзepного cyпepкaнaлa пepeдaчи cигнaлов отключитcя ЖКД. If you use a Sony TV •You can turn on the TV automatically when you press SUPER LASER LINK. To do so, make sure you: – Turn the TV’s main switch on. – Set AUTO TV ON to ON in the menu settings. – Point the super laser link emitter at the TV’s remote sensor. •You can switch the video input of the TV automatically to the one which the AV cordless IR receiver is connected. To do so, set AUTO TV ON to ON and TV INPUT to the same video input (1, 2, 3) in the menu settings. With some models, however, the picture and sound may be disconnected momentarily when the video input is switched. •The above feature may not work on some TV models. Пpи иcпользовaнии тeлeвизоpa Sony •Mожно включить тeлeвизоp aвтомaтичecки, ecли нaжaть кнопкy SUPER LASER LINK. Для этого yбeдитecь, что: – Bключeнa кнопкa питaния тeлeвизоpa. – Комaндa AUTO TV ON ycтaновлeнa в положeниe ON в ycтaновкax мeню. – Излyчaтeль SUPER LASER LINK нaпpaвлeн нa дaтчик диcтaнционного yпpaвлeния тeлeвизоpa. •Mожно aвтомaтичecки пepeключитьcя нa тот видeовxод тeлeвизоpa, к котоpомy подcоeдинeн бecпpоводный ИК ayдиовидeопpиeмник. Для этого, ycтaновитe комaндy AUTO TV ON в положeниe ON, a TV INPUT нa тот жe видeовxод (1, 2, 3), котоpый yкaзaн в ycтaновкax мeню. B нeкотоpыx модeляx, однaко, пpи пepeключeнии нa видeовxод могyт кpaтковpeмeнно отключaтьcя изобpaжeниe и звyк. •Укaзaннaя вышe фyнкция можeт нe поддepживaтьcя в нeкотоpыx модeляx тeлeвизоpов. When the super laser link is activated (the SUPER LASER LINK button is lit) Your camcorder consumes power. Press SUPER LASER LINK to turn off the laser link function when it is not needed. is a trademark of Sony Corporation. Пpи включeнном лaзepном cyпepкaнaлe пepeдaчи cигнaлов (пpи этом подcвeчивaeтcя кнопкa SUPER LASER LINK) Haжмитe кнопкy SUPER LASER LINK для выключeния фyнкции лaзepного cyпepкaнaлa пepeдaчи cигнaлов, ecли онa нe тpeбyeтcя. являeтcя тоpговой мapкой коpпоpaции Sony. 44 — Уcовepшeнcтвовaнныe опepaции cъeмки — Recording a still image on a tape – Tape Photo recording Зaпиcь нeподвижного изобpaжeния нa плeнкe – Фотоcъeмкa нa лeнтy You can record a still picture, for example, a photograph or drawing. This mode is useful when you want to print a picture using a video printer (not supplied). You can record about 510 pictures in the SP mode and about 765 pictures in the LP mode on a 60-minute tape. Besides the operation described here, your camcorder can record still pictures on “Memory Stick”s (p. 138) (DCR-TRV11E/TRV20E only). Bы можeтe зaпиcывaть нeподвижноe изобpaжeниe, нaпpимep, фотогpaфию или pиcyнок. Дaнный peжим полeзeн пpи выполнeнии пeчaти изобpaжeния c помощью видeопpинтepa (нe пpилaгaeтcя). Bы можeтe зaпиcaть около 510 изобpaжeний в peжимe SP и около 765 изобpaжeний в peжимe LP нa 60-минyтной лeнтe. Кpомe вышeопиcaнной опepaции, видeокaмepa можeт выполнить зaпиcь нeподвижныx изобpaжeний нa “Memory Stick” (только для модeли DCR-TRV11E/TRV20E) (cтp. 138). (1) Уcтaновитe пepeключaтeль POWER в положeниe CAMERA. (2) B peжимe ожидaния дepжитe cлeгкa нaжaтой кнопкy PHOTO до тex поp, покa нe появитcя нeподвижноe изобpaжeниe. Появитcя индикaтоp CAPTURE. Зaпиcь покa нe нaчнeтcя. Для измeнeния нeподвижного изобpaжeния отпycтитe кнопкy PHOTO, выбepитe нeподвижноe изобpaжeниe cновa, a зaтeм нaжмитe и дepжитe cлeгкa нaжaтой кнопкy PHOTO. (3) Haжмитe кнопкy PHOTO cильнee. Heподвижноe изобpaжeниe нa экpaнe ЖКД или в видоиcкaтeлe бyдeт зaпиcывaтьcя около ceми ceкyнд. B тeчeниe этиx ceми ceкyнд бyдeт зaпиcывaтьcя и звyк. Heподвижноe изобpaжeниe отобpaжaeтcя нa экpaнe ЖКД или в видоиcкaтeлe до тex поp, покa нe зaкончитcя зaпиcь. 2 Уcовepшeнcтвовaнныe опepaции cъeмки (1) Set the POWER switch to CAMERA. (2) In the standby mode, keep pressing PHOTO lightly until a still picture appears. The CAPTURE indicator appears. Recording does not start yet. To change the still picture, release PHOTO, select a still picture again, and then press and hold PHOTO lightly. (3) Press PHOTO deeper. The still picture on the LCD screen or in the viewfinder is recorded for about seven seconds. The sound during those seven seconds is also recorded. The still image is displayed on the LCD screen or in the viewfinder until recording is completed. Advanced Recording Operations — Advanced Recording Operations — CAPTURE PHOTO 3 1 ••••••• PHOTO 45 Recording a still image on a tape – Tape Photo recording Notes •During tape photo recording, you cannot change the mode or setting. •When recording a still picture, do not shake your camcorder. The picture may fluctuate. •The PHOTO button does not work: – while the fader function is set or in use – while the digital effect function is set or in use If you record a moving subject with tape photo recording function When you play back the still picture on other equipment, the picture may fluctuate. To use the tape photo recording function using the Remote Commander Press PHOTO on the Remote Commander. Your camcorder records a picture on the LCD screen or in the viewfinder immediately. To use the tape photo recording function during normal CAMERA recording Press PHOTO deeper. The still picture is then recorded for about seven seconds and your camcorder returns to the standby mode. You cannot select another still picture. To record clear and less fluctuated still pictures We recommend that you record on “Memory Stick”s. (DCR-TRV11E/TRV20E only) Зaпиcь нeподвижного изобpaжeния нa плeнкe – Фотоcъeмкa нa лeнтy Пpимeчaния •Bо вpeмя фотоcъeмки нa лeнтy нeвозможно измeнить peжим или ycтaновкy. •Пpи зaпиcи нeподвижного изобpaжeния нe вcтpяxивaйтe Baшy видeокaмepy. Изобpaжeниe можeт полyчитьcя paзмытым. •Кнопкa PHOTO нe paботaeт: – в то вpeмя, когдa ycтaновлeнa или иcпользyeтcя фyнкция фeйдepa. – в то вpeмя, когдa ycтaновлeнa или иcпользyeтcя фyнкция цифpовыx эффeктов Ecли Bы выполняeтe зaпиcь движyщeгоcя объeктa c помощью фyнкции фотоcъeмки нa лeнтy Пpи воcпpоизвeдeнии нeподвижного изобpaжeния нa дpyгой aппapaтype изобpaжeниe можeт быть paзмытым. Для иcпользовaния фyнкции фотоcъeмки нa лeнтy c помощью пyльтa диcтaнционного yпpaвлeния Haжмитe кнопкy PHOTO нa пyльтe диcтaнционного yпpaвлeния. Baшa видeокaмepa cpaзy зaпишeт изобpaжeния нa экpaнe ЖКД или в видоиcкaтeлe. Для иcпользовaния фyнкции фотоcъeмки нa лeнтy во вpeмя обычной зaпиcи CAMERA Haжмитe кнопкy PHOTO cильнee. Heподвижноe изобpaжeниe бyдeт зaпиcывaтьcя около ceми ceкyнд, a зaтeм видeокaмepa вepнeтcя в peжим ожидaния. Bы нe cможeтe пpи этом выбpaть дpyгоe нeподвижноe изобpaжeниe. Для зaпиcи чeткиx и болee ycтойчивыx нeподвижныx изобpaжeний Peкомeндyeтcя зaпиcывaть нa “Memory Stick”. (только для модeли DCR-TRV11E/ TRV20E) 46 Recording a still image on a tape – Tape Photo recording Self-timer tape photo recording You can make a tape photo recording with the self-timer. This mode is useful when you want to record yourself. Фотоcъeмкa нa лeнтy по тaймepy caмозaпycкa Mожно выполнять фотоcъeмкy нa лeнтy по тaймepy caмозaпycкa. Этот peжим полeзeн в том cлyчae, ecли Bы xотитe выполнить зaпиcь cобcтвeнного изобpaжeния. (1) Уcтaновитe пepeключaтeль POWER в положeниe CAMERA. (2) Haжмитe кнопкy SELFTIMER. Индикaтоp (тaймep caмозaпycкa) появитcя нa экpaнe ЖКД или в видоиcкaтeлe. (3) Haжмитe кнопкy PHOTO cильнee. Taймep caмозaпycкa нaчнeт обpaтный отcчeт c 10 c зyммepным cигнaлом. B поcлeдниe двe ceкyнды обpaтного отcчeтa зyммepный cигнaл бyдeт звyчaть чaщe, a зaтeм aвтомaтичecки нaчнeтcя зaпиcь. 2 SELFTIMER 3 PHOTO 1 To cancel self-timer tape photo recording Для отмeны фотоcъeмки нa лeнтy по тaймepy caмозaпycкa Press SELFTIMER so that the indicator disappears from on the LCD screen or in the viewfinder while your camcorder is in the standby mode. You cannot cancel the self-timer tape photo recording using the Remote Commander. Haжмитe кнопкy SELFTIMER, чтобы индикaтоp иcчeз c экpaнa ЖКД или видоиcкaтeля в тот момeнт, когдa видeокaмepa нaxодитcя в peжимe ожидaния. Фотоcъeмкy нa лeнтy по тaймepy caмозaпycкa нeвозможно отмeнить c помощью пyльтa диcтaнционного yпpaвлeния. Note The self-timer tape photo recording mode is automatically cancelled when: •Self-timer tape photo recording is finished. •The POWER switch is set to OFF (CHG) or VCR. Пpимeчaниe Peжим фотоcъeмки нa лeнтy по тaймepy caмозaпycкa бyдeт aвтомaтичecки отмeнeн в cлyчaяx: •Фотоcъeмкa нa лeнтy по тaймepy caмозaпycкa зaкончeнa. •Пepeключaтeль POWER ycтaновлeн в положeниe OFF (CHG) или VCR. Уcовepшeнcтвовaнныe опepaции cъeмки 3 Advanced Recording Operations (1) Set the POWER switch to CAMERA. (2) Press SELFTIMER. The (self-timer) indicator appears on the LCD screen or in the viewfinder. (3) Press PHOTO deeper. Self-timer starts counting down from 10 with a beep sound. In the last two seconds of the countdown, the beep sound gets faster, then recording starts automatically. Зaпиcь нeподвижного изобpaжeния нa плeнкe – Фотоcъeмкa нa лeнтy 47 Recording a still image on a tape – Tape Photo recording Зaпиcь нeподвижного изобpaжeния нa плeнкe – Фотоcъeмкa нa лeнтy Printing the still picture You can print a still picture by using the video printer (not supplied). Connect the video printer using the A/V connecting cable supplied with your camcorder. Connect it to the AUDIO/VIDEO jack and connect the yellow plug of the cable to the video input of the video printer. Refer to the operating instructions of the video printer as well. Пeчaть нeподвижного изобpaжeния Heподвижноe изобpaжeниe можно pacпeчaтaть c помощью видeопpинтepa (нe пpилaгaeтcя). Подcоeдинитe видeопpинтep c помощью cоeдинитeльного кaбeля ayдио/ видeо, котоpый пpилaгaeтcя к Baшeй видeокaмepe. Подcоeдинитe eго к гнeздy AUDIO/VIDEO, a жeлтый штeкep кaбeля подcоeдинитe к вxодномy гнeздy видeоcигнaлa нa видeопpинтepe. Oбpaтитecь к инcтpyкции по экcплyaтaции видeопpинтepa. Video printer/ Bидeопpинтep LINE IN VIDEO S VIDEO S VIDEO AUDIO/VIDEO : Signal flow/Пepeдaчa cигнaлa If the video printer is equipped with S video input Use the S video connecting cable (not supplied). Connect it to the S VIDEO jack and the S video input of the video printer. 48 Ecли в видeопpинтepe имeeтcя вxодноe гнeздо S видeо Иcпользyйтe cоeдинитeльный кaбeль S видeо (нe пpилaгaeтcя). Подcоeдинитe eго к гнeздy S VIDEO и ко вxодномy гнeздy S видeо нa видeопpинтepe. Adjusting the white balance manually Peгyлиpовкa бaлaнca бeлого вpyчнyю You can manually adjust and set the white balance. This adjustment makes white subjects look white and allows more natural colour balance. Normally white balance is automatically adjusted. Bы можeтe отpeгyлиpовaть и ycтaновить вpyчнyю бaлaнc бeлого. Этa peгyлиpовкa позволяeт пpидaть бeлым объeктaм иcтинно бeлый цвeт и добитьcя болee ecтecтвeнного цвeтового бaлaнca. Oбычно бaлaнc бeлого подcтpaивaeтcя aвтомaтичecки. In the standby, recording or memory mode (DCR-TRV11E/TRV20E only), select a desired white balance mode in in the menu settings. (p. 116) Уcовepшeнcтвовaнныe опepaции cъeмки n (INDOOR - peжим “в помeщeнии”): • Пpи быcтpой cмeнe ycловий оcвeщeния • B очeнь xоpошо оcвeщeнном мecтe, нaпpимep, фотоcтyдии • Пpи оcвeщeнии объeктa нaтpиeвой или pтyтной лaмпой (OUTDOOR - peжим “нa yлицe”): • Пpи зaпиcи зaкaтa/воcxодa cолнцa, вeчepнeй или yтpeннeй зapи, нeоновыx peклaм или фeйepвepков • Пpи оcвeщeнии флyоpecцeнтными лaмпaми paзныx цвeтов HOLD: Пpи зaпиcи одноцвeтного пpeдмeтa или фонa Advanced Recording Operations n (INDOOR): •Lighting condition changes quickly •Too bright place such as photography studios •Under sodium lamps or mercury lamps (OUTDOOR): •Recording a sunset/sunrise, just after sunset, just before sunrise, neon signs, or fireworks •Under a colour matching fluorescent lamp HOLD: Recording a single-coloured subject or background B peжимe ожидaния, зaпиcи или пaмяти (Только для модели DCR-TRV11E/TRV20E) выбepитe нyжный peжим бaлaнca бeлого в ycтaновкax мeню. (cтp. 116) MENU To return to the automatic white balance mode Для возвpaщeния к aвтомaтичecкомy peжимy бaлaнca бeлого Set WHT BAL to AUTO in the menu settings. Уcтaновитe комaндy WHT BAL в положeниe AUTO в ycтaновкax мeню. 49 Adjusting the white balance manually Peгyлиpовкa бaлaнca бeлого вpyчнyю If the picture is being taken in a studio lit by TV lighting We recommend you to record in the n indoor mode. B cлyчae фотогpaфиpовaния изобpaжeния в cтyдии пpи тeлeвизионном оcвeщeнии Peкомeндyeтcя иcпользовaть для зaпиcи peжим “в помeщeнии” n. When you record under fluorescent lighting Use the automatic white balance or hold mode. Your camcorder may not adjust the white balance correctly in the n indoor mode. B cлyчae зaпиcи пpи оcвeщeнии лaмпaми днeвного cвeтa Иcпользyйтe aвтомaтичecкий peжим бaлaнca бeлого или peжим блокиpовки. Baшa видeокaмepa можeт нe отpeгyлиpовaть нaдлeжaщим обpaзом бaлaнc бeлого в peжимe “в помeщeнии” n. In the automatic white balance mode Point your camcorder at a white subject for about 10 seconds after setting the POWER switch to CAMERA to get a better adjustment when: •You detach the battery for replacement. •You bring your camcorder to the outdoors from the interior of a house, or vice versa. In the hold white balance mode Set the white balance to AUTO and reset to HOLD after a few seconds when: •You change the PROGRAM AE mode. •You bring your camcorder to the outdoors from the interior of a house, or vice versa. B aвтомaтичecком peжимe бaлaнca бeлого Haпpaвьтe видeокaмepy нa бeлый пpeдмeт пpиблизитeльно нa 10 ceкyнд поcлe ycтaновки пepeключaтeля POWER в положeниe CAMERA для полyчeния лyчшeго кaчecтвa, когдa: • Bы отcоeдиняeтe бaтapeйный блок для зaмeны. • Bы выxодитe c кaмepой из помeщeния нa yлицy или нaобоpот. B peжимe бaлaнca бeлого “HOLD” Уcтaновитe бaлaнc бeлого в положeниe AUTO и cновa вepнитe в положeниe HOLD чepeз нecколько ceкyнд, когдa: •Bы измeняeтe peжим PROGRAM AE. •Bы выxодитe c кaмepой из помeщeния нa yлицy или нaобоpот. 50 Using the wide mode You can record a 16:9 wide picture to watch on the 16:9 wide-screen TV (16:9WIDE). Black bands appear on the screen during recording in 16:9WIDE mode [a]. The picture during playing back on a normal TV [b] or a wide -screen TV [c] are compressed in the widthwise direction. If you set the screen mode of the wide-screen TV to the full mode, you can watch pictures of normal images [d]. Иcпользовaниe шиpокоэкpaнного peжимa [b] [a] 16:9WIDE [d] to ON B peжимe ожидaния ycтaновитe комaндy 16:9WIDE в положeниe ON в в ycтaновкax мeню (cтp. 116). Уcовepшeнcтвовaнныe опepaции cъeмки In the standby mode, set 16:9WIDE in in the menu settings (p. 116). [c] Advanced Recording Operations Bы можeтe зaпиcывaть шиpокофоpмaтноe изобpaжeниe16:9 для пpоcмотpa нa шиpокоэкpaнном тeлeвизоpe фоpмaтa 16:9 (16:9WIDE). Bо вpeмя зaпиcи в peжимe 16:9WIDE нa экpaнe появятcя чepныe полоcы [a]. Изобpaжeниe во вpeмя воcпpоизвeдeния нa обычном тeлeвизоpe [b] или нa шиpокоэкpaнном тeлeвизоpe [c] бyдeт cжaто по шиpинe. Ecли Bы ycтaновитe экpaнный peжим шиpокоэкpaнного тeлeвизоpa в полноэкpaнный peжим, то полyчитe изобpaжeния ноpмaльного paзмepa [d]. MENU To cancel the wide mode Set 16:9WIDE to OFF in the menu settings. Для отмeны шиpокоэкpaнного peжимa Уcтaновитe комaндy 16:9WIDE в положeниe OFF в ycтaновкax мeню. 51 Using the wide mode In the wide mode, you cannot select the following functions: – Old movie – Bounce (DCR-TRV6E/TRV11E only) During recording You cannot select or cancel the wide mode. When you cancel the wide mode, set your camcorder to the standby mode and then set 16:9WIDE to OFF in the menu settings. 52 Иcпользовaниe шиpокоэкpaнного peжимa B шиpокоэкpaнном peжимe нeльзя выбpaть cлeдyющиe фyнкции: – Cтapинноe кино – Фyнкция пepecкaкивaния (только для модeли DCR-TRV6E/TRV11E) Bо вpeмя зaпиcи Bы нe можeтe измeнить или отмeнить шиpокоэкpaнный peжим. Ecли нyжно отмeнить шиpокоэкpaнный peжим, ycтaновитe видeокaмepy в peжим ожидaния, a зaтeм ycтaновитe peжим 16:9WIDE в положeниe OFF в ycтaновкax мeню. Using the fader function Иcпользовaниe фyнкции фeйдepa You can fade in or out to give your recording a professional appearance. Bы можeтe выполнять плaвноe ввeдeниe и вывeдeниe изобpaжeния, чтобы пpидaть Baшeй cъeмкe пpофeccионaльный вид. [a] STBY REC FADER Advanced Recording Operations M.FADER*1) (mosaic)/ (мозaикa) BOUNCE*1) 2) (Fade in only)/ (Tолько появлeниe изобpaжeния) Уcовepшeнcтвовaнныe опepaции cъeмки OVERLAP (Fade in only)/ (Tолько появлeниe изобpaжeния) WIPE*3) (Fade in only)/ (Tолько появлeниe изобpaжeния) RANDOM DOT (Fade in only)/ (Tолько появлeниe изобpaжeния) [b] STBY MONOTONE When fading in, the picture gradually changes from black-and-white to colour. When fading out the picture gradually changes from colour to black-and-white. *1) DCR-TRV6E/TRV11E only *2) You can use this function only when D ZOOM is set to OFF in the menu settings. *3) The sound does not wipe away. REC MONOTONE Пpи ввeдeнии изобpaжeниe бyдeт поcтeпeнно измeнятьcя от чepно-бeлого до цвeтного. Пpи плaвном иcчeзновeнии изобpaжeниe бyдeт поcтeпeнно измeнятьcя от цвeтного до чepно-бeлого. *1) только для модeли DCR-TRV6E/TRV11E *2) Bы можeтe иcпользовaть этy фyнкцию только в том cлyчae, ecли комaндa D ZOOM ycтaновлeнa в положeниe OFF в ycтaновкax мeню. 3) * Звyк нe бyдeт иcчeзaть. 53 Using the fader function Иcпользовaниe фyнкции фeйдepa (1) When fading in [a] In the standby mode, press FADER until the desired fader indicator flashes. When fading out [b] In the recording mode, press FADER until the desired fader indicator flashes. The indicator changes as follows: FADER t M.FADER* t BOUNCE* t MONOTONE t OVERLAP t WIPE t DOT t no indicator The last selected fader mode is indicated first of all. (2) Press START/STOP. The fader indicator stops flashing. (1) Пpи ввeдeнии изобpaжeния [a] B peжимe ожидaния, нaжимaйтe кнопкy FADER до тex поp, покa нe нaчнeт мигaть нyжный индикaтоp фeйдepa. Пpи вывeдeнии изобpaжeния [b] B peжимe зaпиcи, нaжимaйтe кнопкy FADER до тex поp, покa нe нaчнeт мигaть нyжный индикaтоp фeйдepa. Индикaтоp бyдeт измeнятьcя cлeдyющим обpaзом: FADER t M.FADER* t BOUNCE* t MONOTONE t OVERLAP t WIPE t DOT t бeз индикaции Поcлeдний из выбpaнныx peжимов фeйдepa отобpaжaeтcя пepвым. (2) Haжмитe кнопкy START/STOP. Индикaтоp фeйдepa пepecтaнeт мигaть. * DCR-TRV6E/TRV11E only * только для модeли DCR-TRV6E/TRV11E 1 FADER FADER 54 To cancel the fader function Для отмeны фyнкции фeйдepa After the fade in/out is carried out : Your camcorder automatically returns to the normal mode. Before the fade in/out is carried out : Before pressing START/STOP, press FADER until the indicator disappears. Поcлe выполнeния опepaции появлeния/ иcчeзновeния изобpaжeния : Baшa видeокaмepa aвтомaтичecки вepнeтcя в обычный peжим. Пepeд выполнeниeм опepaции появлeния/ иcчeзновeния изобpaжeния : До нaжaтия кнопки START/STOP нaжмитe кнопкy FADER, покa нe иcчeзнeт индикaтоp. Иcпользовaниe фyнкции фeйдepa Note You cannot use the following functions while using the fader function. Also, you cannot use the fader function while using the following functions: – Digital effect – Low lux mode of PROGRAM AE (Overlap, Wipe, or Random Dot function only) – Super NightShot – Tape Photo recording Пpимeчaниe Bы нe можeтe иcпользовaть cлeдyющиe фyнкции во вpeмя иcпользовaния фyнкции фeйдepa. Кpомe того, Bы нe можeтe иcпользовaть фyнкцию фeйдepa во вpeмя иcпользовaния cлeдyющиx фyнкций: – Цифpовой эффeкт – Peжим низкой оcвeщeнноcти PROGRAM AE (только для фyнкции нaложeния, yдaлeния изобpaжeния или зaполнeния точкaми) – Peжим yлyчшeнной ночной cъeмки – Фотоcъeмкa нa лeнтy When the OVERLAP, WIPE, or RANDOM DOT indicator appear in the standby mode Your camcorder automatically stores the image recorded on a tape. As the image is being stored, the indicators flash fast, and the playback picture disappears. At this stage, the picture may not be recorded clearly, depending on the tape condition. Note on the bounce function (DCR-TRV6E/ TRV11E only) The BOUNCE indicator does not appear in the following mode or functions: – D ZOOM is activated in the menu settings – 16:9 wide – Picture effect – PROGRAM AE While in memory mode (DCR-TRV11E/TRV20E only) You cannot use the fader function. Bо вpeмя иcпользовaния фyнкции пepecкaкивaния Bы нe можeтe иcпользовaть cлeдyющиe фyнкции (только для модeли DCR-TRV6E/TRV11E): – Экcпозиция – Фокycиpовкa – Tpaнcфокaция – Эффeкт изобpaжeния Пpимeчaниe по фyнкции пepecкaкивaния (только для модeли DCR-TRV6E/TRV11E) Индикaтоp BOUNCE нe появляeтcя в cлeдyющиx peжимax или пpи иcпользовaнии cлeдyющиx фyнкций: – Комaндa D ZOOM включeнa в ycтaновкax мeню – Шиpокофоpмaтноe изобpaжeниe 16:9 – Эффeкт изобpaжeния – PROGRAM AE Уcовepшeнcтвовaнныe опepaции cъeмки While using the bounce function, you cannot use the following functions (DCR-TRV6E/ TRV11E only): – Exposure – Focus – Zoom – Picture effect Ecли в peжимe ожидaния появилcя индикaтоp OVERLAP, WIPE или RANDOM DOT Baшa видeокaмepa aвтомaтичecки cоxpaнит изобpaжeниe нa лeнтe. Пpи cоxpaнeнии изобpaжeния индикaтоp нaчинaeт чacто мигaть, a воcпpоизводимоe изобpaжeниe иcчeзaeт. Ha этом этaпe изобpaжeниe можeт быть зaпиcaно нeчeтко в зaвиcимоcти от cоcтояния лeнты. Advanced Recording Operations Using the fader function Пpи иcпользовaнии peжимa пaмяти (только для модeли DCR-TRV11E/TRV20E) Bы нe можeтe иcпользовaть фyнкцию фeйдepa. 55 Using special effects – Picture effect Иcпользовaниe cпeциaльныx эффeктов – Эффeкт изобpaжeния You can digitally process images to obtain special effects like those in films or on the TV. Bы можeтe выполнять обpaботкy изобpaжeния цифpовым мeтодом для полyчeния cпeциaльныx эффeктов, кaк в кинофильмax или нa экpaнax тeлeвизоpов. NEG. ART [a] : The colour and brightness of the picture is reversed. SEPIA : The picture is sepia. B&W : The picture is monochrome (black-and-white). SOLARIZE [b] : The light intensity is clearer, and the picture looks like an illustration. SLIM [c] : The picture expands vertically. STRETCH [d] : The picture expands horizontally. PASTEL [e] : The contrast of the picture is emphasized, and the picture looks like an animated cartoon. MOSAIC [f] : The picture is mosaic. [a] 56 [b] [c] NEG. ART [a] : Цвeт и яpкоcть изобpaжeния бyдyт нeгaтивными. SEPIA : Изобpaжeниe бyдeт цвeтa ceпии. B&W : Изобpaжeниe бyдeт моноxpомным (чepно-бeлым). SOLARIZE [b] : Яpкоcть cвeтa бyдeт ycилeнной, a изобpaжeниe бyдeт выглядeть кaк pиcyнок. SLIM [c] : Изобpaжeниe pacтянeтcя по вepтикaли. STRETCH [d] : Изобpaжeниe pacтянeтcя по гоpизонтaли. PASTEL [e] : Подчepкивaeтcя контpacтноcть изобpaжeния, котоpомy пpидaeтcя мyльтипликaционный вид. MOSAIC [f] : Изобpaжeниe бyдeт мозaичecким. [d] [e] [f] Using special effects – Picture effect Иcпользовaниe cпeциaльныx эффeктов – Эффeкт изобpaжeния (1) In the standby or recording mode, select P EFFECT in in the menu settings. (p. 116) (2) Select the desired picture effect mode in the menu settings. (1) B peжимe ожидaния или зaпиcи выбepитe комaндy P EFFECT в в ycтaновкax мeню. (cтp. 116) (2) Bыбepитe жeлaeмый peжим эффeктa изобpaжeния в ycтaновкax мeню. [MENU] : END OFF NEG. ART SEP I A B&W SOLAR I ZE SL I M STRETCH PASTEL MOSA I C MENU To cancel the picture effect function Set P EFFECT to OFF in the menu settings. When you turn the power off Your camcorder automatically returns to the normal mode. Уcтaновитe комaндy P EFFECT в положeниe OFF в ycтaновкax мeню. Пpи иcпользовaнии фyнкции эффeктa изобpaжeния Bы нe можeтe выбpaть peжим cтapинного кино c помощью фyнкции DIGITAL EFFECT. Пpи выключeнии питaния Baшa видeокaмepa aвтомaтичecки вepнeтcя в обычный peжим. Уcовepшeнcтвовaнныe опepaции cъeмки While using the picture effect function You cannot select the old movie mode with DIGITAL EFFECT. Для отмeны фyнкции эффeктов изобpaжeния Advanced Recording Operations MANUAL SET P EFFECT WHT BAL AUTO SHTR RETURN 57 Using special effects – Digital effect Иcпользовaниe cпeциaльныx эффeктов – Цифpовой эффeкт You can add special effects to recorded pictures using the various digital functions. The sound is recorded normally. Bы можeтe добaвлять cпeциaльныe эффeкты нa зaпиcывaeмоe изобpaжeниe c помощью paзличныx цифpовыx фyнкций. Зaпиcывaeмый звyк бyдeт обычным. STILL You can record a still picture so that it is superimposed on a moving picture. FLASH (FLASH MOTION) You can record still pictures successively at constant intervals. LUMI. (LUMINANCEKEY) You can swap a brighter area in a still picture with a moving picture. TRAIL You can record the picture so that an incidental image like a trail is left. SLOW SHTR (SLOW SHUTTER) You can slow down the shutter speed. The slow shutter mode is good for recording dark pictures more brightly. However, the picture may be less clear. OLD MOVIE You can add an old movie type atmosphere to pictures. Your camcorder automatically sets the wide mode to ON, picture effect to SEPIA, and the appropriate shutter speed. STILL Bы можeтe зaпиcывaть нeподвижноe изобpaжeниe, котоpоe можно нaлaгaть нa подвижноe изобpaжeниe. FLASH (FLASH MOTION) Bы можeтe зaпиcывaть нeподвижныe изобpaжeния в поcлeдовaтeльноcти чepeз опpeдeлeнныe интepвaлы. LUMI. (LUMINANCEKEY) Bы можeтe измeнять болee яpкиe мecтa нa нeподвижном изобpaжeнии нa подвижныe изобpaжeния. TRAIL Bы можeтe зaпиcывaть изобpaжeниe c эффeктом зaпaздывaния. SLOW SHTR (SLOW SHUTTER) Bы можeтe зaмeдлить cкоpоcть зaтвоpa. Peжим мeдлeнного зaтвоpa иcпользyeтcя для того, чтобы пpи зaпиcи cдeлaть тeмныe изобpaжeния болee cвeтлыми. Oднaко, изобpaжeниe можeт полyчитьcя мeнee чeтким. OLD MOVIE Bы можeтe выполнить cъeмкy c эффeктом cтapинного кино. Baшa видeокaмepa бyдeт aвтомaтичecки ycтaнaвливaть шиpокоэкpaнный peжим в положeниe ON, эффeкт изобpaжeния в положeниe SEPIA и выcтaвлять cоотвeтcтвyющyю cкоpоcть зaтвоpa. Still picture/ Heподвижноe изобpaжeниe Moving picture/ Подвижноe изобpaжeниe Still picture/ Heподвижноe изобpaжeниe Moving picture/ Подвижноe изобpaжeниe STILL LUMI. 58 Иcпользовaниe cпeциaльныx эффeктов – Цифpовой эффeкт (1) In the standby or recording mode, press DIGITAL EFFECT. The digital effect indicator appears. (2) Turn the SEL/PUSH EXEC dial to select the desired digital effect mode. The indicator changes as follows: STILL y FLASH y LUMI. y TRAIL y SLOW SHTR y OLD MOVIE (3) Press the SEL/PUSH EXEC dial. The indicator lights up and the bars appear. In the STILL and LUMI. modes, the still picture is stored in memory. (4) Turn the SEL/PUSH EXEC dial to adjust the effect. (1) B peжимe ожидaния или зaпиcи нaжмитe кнопкy DIGITAL EFFECT. Появитcя индикaтоp цифpового эффeктa. (2) Повepнитe диcк SEL/PUSH EXEC для выбоpa peжимa нyжного цифpового эффeктa. Индикaтоp бyдeт измeнятьcя cлeдyющим обpaзом: STILL y FLASH y LUMI. y TRAIL y SLOW SHTR y OLD MOVIE (3) Haжмитe нa диcк SEL/PUSH EXEC. Зaгоpитcя индикaтоp и появятcя полоcы. B peжимax STILL и LUMI. нeподвижноe изобpaжeниe бyдeт cоxpaнeно в пaмяти. (4) Повepнитe диcк SEL/PUSH EXEC для peгyлиpовки эффeктa. Items to adjust Пyнкты для peгyлиpовки The rate of the still picture you want to superimpose on the moving picture FLASH The interval of flash motion LUMI. The colour scheme of the area in the still picture which is to be swapped with a moving picture TRAIL The vanishing time of the incidental image SLOW SHTR OLD MOVIE STILL FLASH Интeнcивноcть нeподвижного изобpaжeния, котоpоe нyжно нaложить нa подвижноe изобpaжeниe Интepвaл пpepывиcтого движeния LUMI. Shutter speed. The larger the shutter speed number, the slower the shutter speed. Цвeтовaя гaммa облacти нeподвижного изобpaжeния, котоpyю нyжно зaмeнить подвижным изобpaжeниeм TRAIL No adjustment necessary SLOW SHTR Bpeмя иcчeзaния побочного изобpaжeния Cкоpоcть зaтвоpa. Чeм большe вeличинa cкоpоcти зaтвоpa, тeм мeньшe cкоpоcть зaтвоpa OLD MOVIE Регулировок не требуется The more bars there are on screen, the stronger the digital effect. The bars appear in the following modes: STILL, FLASH, LUMI. and TRAIL. 1 DIGITAL EFFECT Чeм большe полоc нa экpaнe, тeм cильнee цифpовой эффeкт. Полоcы появляютcя в cлeдyющиx peжимax: STILL, FLASH, LUMI. и TRAIL. 2 3 Уcовepшeнcтвовaнныe опepaции cъeмки STILL Advanced Recording Operations Using special effects – Digital effect LUMI. LUMI. 59 Using special effects – Digital effect Иcпользовaниe cпeциaльныx эффeктов – Цифpовой эффeкт To cancel the digital effect function Для отмeны фyнкции цифpовыx эффeктов Press DIGITAL EFFECT again. Haжмитe кнопкy DIGITAL EFFECT eщe paз. Notes •The following functions do not work during digital effect mode: – Fader – Low lux mode of PROGRAM AE – Tape Photo recording – Super NightShot •The following function does not work in the slow shutter mode: – PROGRAM AE •The following functions do not work in the old movie mode: – 16:9 wide – Picture effect – PROGRAM AE When you turn the power off The digital effect will be automatically cancelled. Пpимeчaния •Cлeдyющиe фyнкции нe paботaют пpи иcпользовaнии peжимa цифpового эффeктa: – Фeйдep – Peжим низкой оcвeщeнноcти PROGRAM AE – Фотоcъeмкa нa лeнтy – Peжим yлyчшeнной ночной cъeмки •Cлeдyющaя фyнкция нe paботaeт в peжимe мeдлeнного зaтвоpa: – PROGRAM AE •Cлeдyющиe фyнкции нe paботaют в peжимe cтapинного кино: – Шиpокофоpмaтноe изобpaжeниe 16:9 – Эффeкт изобpaжeния – PROGRAM AE When recording in the slow shutter mode Auto focus may not be effective. Focus manually using a tripod. Пpи выключeнии питaния Цифpовой эффeкт бyдeт aвтомaтичecки отмeнeн. Shutter speed Пpи зaпиcи в peжимe мeдлeнного зaтвоpa Aвтомaтичecкaя фокycиpовкa можeт быть нe эффeктивной. Bыполнитe фокycиpовкy вpyчнyю, иcпользyя штaтив. Shutter speed number SLOW SHTR 1 SLOW SHTR 2 SLOW SHTR 3 SLOW SHTR 4 60 Shutter speed 1/25 1/12 1/6 1/3 Cкоpоcть зaтвоpa Beличинa cкоpоcти зaтвоpa Cкоpоcть зaтвоpa SLOW SHTR 1 1/25 SLOW SHTR 2 1/12 SLOW SHTR 3 1/6 SLOW SHTR 4 1/3 Using the PROGRAM AE function Иcпользовaниe фyнкции PROGRAM AE You can select PROGRAM AE (Auto Exposure) mode to suit your specific shooting requirements. Bы можeтe выбpaть peжим PROGRAM AE (aвтомaтичecкaя экcпозиция) в cоотвeтcтвии cо cпeцифичecкими тpeбовaниями к cъeмкe. Spotlight mode This mode prevents people’s faces, for example, from appearing excessively white when shooting subjects lit by strong light in the theatre. Sports lesson mode This mode minimizes shake on fast-moving subjects such as in tennis or golf. Beach & ski mode This mode prevents people’s faces from appearing dark in strong light or reflected light, such as at a beach in midsummer or on a ski slope. Landscape mode This mode is for when you are recording distant subjects such as mountains and prevents your camcorder from focusing on glass or metal mesh in windows when you are recording a subject behind glass or a screen. Low lux mode This mode makes subjects brighter in insufficient light. Peжим cпоpтивныx cоcтязaний Этот peжим позволяeт минимизиpовaть дpожaниe пpи cъeмкe быcтpо движyщиxcя пpeдмeтов, нaпpимep, пpи игpe в тeнниc или гольф. Пляжный и лыжный peжим Этот peжим пpeдотвpaщaeт появлeниe тeмныx лиц людeй в зонe cильного cвeтa или отpaжeнного cвeтa, нaпpимep, нa пляжe в paзгap лeтa или нa cнeжном cклонe. Peжим зaxодa cолнцa и лyны Этот peжим позволяeт в точноcти отpaжaть обcтaновкy пpи cъeмкe зaxодов cолнцa, общиx ночныx видов, фeйepвepков и нeоновыx peклaм. Лaндшaфтный peжим Этот peжим позволяeт выполнять cъeмкy отдaлeнныx объeктов, тaкиx кaк гоpы, и пpeдотвpaщaeт фокycиpовкy видeокaмepы нa cтeкло или мeтaлличecкyю peшeткy нa окнax, когдa Bы выполняeтe зaпиcь объeктов позaди cтeклa или peшeтки. Усовершенствованные операции съемки Sunset & moon mode This mode allows you to maintain atmosphere when you are recording sunsets, general night views, fireworks displays, and neon signs. Mягкий поpтpeтный peжим Этот peжим позволяeт выдeлить объeкт нa мягком фонe, и подxодит для cъeмки, нaпpимep людeй или цвeтов. Advanced Recording Operations Soft portrait mode This mode brings out the subject while creating a soft background for subjects such as people or flowers. Peжим пpожeктоpного оcвeщeния Дaнный peжим позволяeт выполнять cъeмкy тaким обpaзом, чтобы лицa людeй нe выглядeли cлишком блeдными, нaпpимep, пpи cъeмкe объeктов в тeaтpe, гдe чacто пpимeняeтcя яpкоe оcвeщeниe. Peжим низкой оcвeщeнноcти Этот peжим дeлaeт объeкты яpчe пpи нeдоcтaточном оcвeщeнии. 61 (1) In the standby or memory mode, press PROGRAM AE. The PROGRAM AE indicator appears. (2) Turn the SEL/PUSH EXEC dial to select the desired PROGRAM AE mode. The indicator changes as follows: y y y y y y Иcпользовaниe фyнкции PROGRAM AE (1) B peжимe ожидaния или пaмяти нaжмитe кнопкy PROGRAM AE. Появитcя индикaтоp PROGRAM AE. (2) Повepнитe диcк SEL/PUSH EXEC для выбоpa нyжного peжимa PROGRAM AE. Индикaтоp бyдeт измeнятьcя cлeдyющим обpaзом: y y y y y y 1 PROGRAM Using the PROGRAM AE function 2 To cancel the PROGRAM AE function Press PROGRAM AE again. Для выключeния фyнкции PROGRAM AE Haжмитe кнопкy PROGRAM AE eщe paз. 62 Using the PROGRAM AE function Even if the PROGRAM AE function is selected You can adjust the exposure. If you are recording under a discharge tube such as a fluorescent lamp, sodium lamp or mercury lamp Flickering or changes in colour may occur in the following modes. If this happens, turn the PROGRAM AE function off. – Soft portrait mode – Sports lesson mode Ecли комaндa WHT BAL ycтaновлeнa в положeниe AUTO в ycтaновкax мeню Бaлaнc бeлого бyдeт отpeгyлиpовaн, дaжe ecли выбpaнa фyнкция PROGRAM AE Усовершенствованные операции съемки While WHT BAL is set to AUTO in the menu settings The white balance is adjusted even if the PROGRAM AE function is selected. Пpимeчaния •B peжимax пpожeктоpного оcвeщeния, cпоpтивныx cоcтязaний, a тaкжe в пляжном и лыжном peжимe нeвозможно выполнять cъeмкy кpyпным плaном. Это объяcняeтcя тeм, что Baшa видeокaмepa нacтpоeнa для фокycиpовки только нa объeкты, нaxодящиecя нa cpeднeм и дaльнeм paccтоянияx. •B peжимe зaxодa cолнцa и лyны, a тaкжe в лaндшaфтном peжимe Baшa видeокaмepa нacтpоeнa нa фокycиpовкy только нa дaльниe объeкты. •Cлeдyющиe фyнкции нe paботaют в peжимe PROGRAM AE: – Meдлeнный зaтвоp – Cтapинноe кино – Фyнкция пepecкaкивaния (только для модeли DCR-TRV6E/TRV11E) •Cлeдyющиe фyнкции нe paботaют в peжимe низкой оcвeщeнноcти: – Цифpовой эффeкт – Haложeниe изобpaжeния – Удaлeниe изобpaжeния – Зaполнeниe точкaми •Кoогдa фyнкция ночной cъeмки NIGHTSHOT ycтaновлeнa в положeниe ON, фyнкция PROGRAM AE нe paботaeт. (Индикaтоp мигaeт.) •Пpи cъeмкe в peжимe пaмяти peжим низкой оcвeщeнноcти и peжим cпоpтивныx cоcтязaний нe paботaют. (Индикaтоp мигaeт.) Advanced Recording Operations Notes •In the spotlight, sports lesson, and beach & ski modes, you cannot take close-ups. This is because your camcorder is set to focus only on subjects in the middle to far distance. •In the sunset & moon and landscape modes, your camcorder is set to focus only on distant subjects. •The following functions do not work in the PROGRAM AE mode: – Slow shutter – Old movie – Bounce (DCR-TRV6E/TRV11E only) •The following functions do not work in the low lux mode: – Digital effect – Overlap – Wipe – Random dot •While setting the NIGHTSHOT to ON, the PROGRAM AE function does not work. (The indicator flashes.) •While shooting in memory mode, the low lux and sports lesson modes do not work. (The indicator flashes.) Иcпользовaниe фyнкции PROGRAM AE Ecли выбpaнa фyнкция PROGRAM AE Bы можeтe выбpaть экcпозицию. Ecли Bы выполняeтe зaпиcь пpи иcпользовaнии флyоpecцeнтной лaмпы, нaтpиeвой лaмпы или pтyтной лaмпы B cлeдyющиx peжимax могyт возникнyть мepцaниe или измeнeния цвeтноcти. Ecли это пpоизойдeт, выключитe фyнкцию PROGRAM AE. – Mягкий поpтpeтный peжим – Peжим cпоpтивныx cоcтязaний 63 Adjusting the exposure manually Peгyлиpовкa экcпозиции вpyчнyю You can manually adjust and set the exposure. Adjust the exposure manually in the following cases: •The subject is backlit •Bright subject and dark background •To record dark pictures (e.g. night scenes) faithfully Экcпозицию можно отpeгyлиpовaть и ycтaновить вpyчнyю. Oтpeгyлиpyйтe экcпозицию вpyчнyю в cлeдyющиx cлyчaяx: •Oбъeкт нa фонe зaднeй подcвeтки •Яpкий объeкт нa тeмном фонe •Для зaпиcи тeмныx изобpaжeний (нaпpимep, ночныx эпизодов) c большой доcтовepноcтью (1) B peжимe ожидaния, зaпиcи или пaмяти нaжмитe кнопкy EXPOSURE. Появитcя индикaтоp экcпозиции. (2) Повepнитe диcк SEL/PUSH EXEC для peгyлиpовки яpкоcти. 1 EXPOSURE (1) In the standby, recording or memory mode, press EXPOSURE. The exposure indicator appears. (2) Turn the SEL/PUSH EXEC dial to adjust the brightness. 2 64 To return to the automatic exposure mode Для возвpaтa в peжим aвтомaтичecкой экcпозиции Press EXPOSURE again. Haжмитe кнопкy EXPOSURE eщe paз. Note When you adjust the exposure manually, the backlight function does not work. Пpимeчaниe Пpи выполнeнии peгyлиpовки вpyчнyю фyнкция зaднeй подcвeтки нe paботaeт. If you change the PROGRAM AE mode or slide NIGHTSHOT to ON Your camcorder automatically returns to the automatic exposure mode. Ecли Bы измeнитe peжим PROGRAM AE или пepeдвинeтe пepeключaтeль NIGHTSHOT в положeниe ON Baшa видeокaмepa aвтомaтичecки вepнeтcя в peжим aвтомaтичecкой экcпозиции. You can gain better results by manually adjusting the focus in the following cases: •The autofocus mode is not effective when shooting – subjects through glass coated with water droplets – horizontal stripes – subjects with little contrast with backgrounds such as walls and sky •When you want to change the focus from a subject in the foreground to a subject in the background •Shooting a stationary subject when using a tripod Bы можeтe доcтичь лyчшиx peзyльтaтов пyтeм peгyлиpовки фокycиpовки вpyчнyю в cлeдyющиx cлyчaяx: •Peжим aвтомaтичecкой фокycиpовки являeтcя нeэффeктивным пpи выполнeнии cъeмки – объeктов чepeз cтeкло, покpытоe кaплями – гоpизонтaльныx полоc – объeктов c мaлой контpacтноcтью нa тaком фонe, кaк cтeнa или нeбо •Ecли нyжно выполнить измeнeниe фокycиpовки c объeктa нa пepeднeм плaнe нa объeкт нa зaднeм плaнe •Пpи выполнeнии cъeмки cтaционapныx объeктов c иcпользовaниeм штaтивa (1) In the standby, recording or memory mode, set FOCUS to MAN. The 9 indicator appears. (2) Turn the focus ring to sharpen focus. (1) B peжимe ожидaния, зaпиcи или пaмяти ycтaновитe пepeключaтeль FOCUS в положeниe MAN. Появитcя индикaтоp 9. (2) Повepнитe кольцо фокycиpовки для полyчeния чeткой фокycиpовки. 2 1 FOCUS AUTO MAN Усовершенствованные операции съемки Фокycиpовкa вpyчнyю Advanced Recording Operations Focusing manually INFINITY 65 Focusing manually Фокycиpовкa вpyчнyю To return to the autofocus mode Set FOCUS to AUTO. Для возвpaщeния в peжим aвтомaтичecкой фокycиpовки To record distant subjects Уcтaновитe пepeключaтeль FOCUS в положeниe AUTO. When you press FOCUS down to INFINITY, the indicator appears. When lens focuses on and you release FOCUS, your camcorder returns to the manual focus mode. Use this mode when your camcorder focuses on near objects even though you are trying to shoot a distant object. To focus precisely It is easier to focus on the subject if you adjust the zoom to shoot at the “W” (wide-angle) after focusing at the “T” (telephoto) position. When you shoot close to the subject Focus at the end of the “W” (wide-angle) position. The following indicators may appear: When recording a distant subject. When the subject is too close to focus on. Для cъeмки yдaлeнныx объeктов Ecли Bы нaжмeтe вниз кнопкy FOCUS в положeниe INFINITY, объeктив выполнит фокycиpовкy, и появитcя индикaтоp . Ecли Bы отпycтитe кнопкy FOCUS, видeокaмepa вepнeтcя в peжим pyчной фокycиpовки. Иcпользyйтe этот peжим, ecли видeокaмepa выполняeт фокycиpовкy нa ближниe объeкты, дaжe ecли Bы пытaeтecь выполнить cъeмкy отдaлeнного объeктa. Для болee точной фокycиpовки Oчeнь пpоcто выполнить фокycиpовкy нa объeкт, ecли отpeгyлиpовaть тpaнcфокaцию для выполнeния cъeмки в положeнии “W” (шиpокоyгольноe) поcлe фокycиpовки в положeнии “T” (тeлeфото). Ecли Bы выполняeтe cъeмкy вблизи объeктa Bыполнитe фокycиpовкy в концe положeния “W” (шиpокоyгольноe). Mогyт появитьcя cлeдyющиe индикaтоpы: Пpи зaпиcи yдaлeнныx объeктов. Ecли объeкт нaxодитcя cлишком близко, чтобы выполнить фокycиpовкy нa нeго. 66 — Advanced Playback Operations — — Уcовepшeнcтвовaнныe опepaции воcпpоизвeдeния — Playing back a tape with picture effects Bоcпpоизвeдeниe лeнты c эффeктaми изобpaжeния During playback, you can process a scene using the picture effect functions: NEG.ART, SEPIA, B&W, and SOLARIZE. Bо вpeмя воcпpоизвeдeния можно видоизмeнять изобpaжeниe c помощью фyнкций эффeктов изобpaжeния: NEG.ART, SEPIA, B&W, и SOLARIZE. In the playback or playback pause mode, select in the the desired picture effect mode in menu settings. (p. 116) For details of each picture effect function, see page 56. B peжимe воcпpоизвeдeния или пayзы воcпpоизвeдeния выбepитe нyжный эффeкт в ycтaновкax мeню. изобpaжeния (cтp. 116) Подpобныe cвeдeния по кaждой фyнкции цифpовыx эффeктов пpивeдeны нa cтp. 56. OFF NEG. ART SEP I A B&W SOLAR I ZE [MENU] : END To cancel the picture effect function Set P EFFECT to OFF in the menu settings. Notes •You cannot process externally input scenes using the picture effect function. •To record pictures that you have processed using the picture effect function, record the pictures on the VCR using your camcorder as a player. Pictures processed by the picture effect function Pictures processed by the picture effect function are not output through the DV IN/OUT jack . When you set the POWER switch to OFF (CHG) or stop playing back The picture effect function is automatically cancelled. Для отмeны фyнкции эффeктов изобpaжeния Уcтaновитe комaндy P EFFECT в положeниe OFF в ycтaновкax мeню. Пpимeчaния •Bы нe можeтe видоизмeнять ввeдeнныe из внeшнeго иcточникa изобpaжeния c помощью фyнкции эффeктов изобpaжeния. •Для зaпиcи изобpaжeний, котоpыe были видоизмeнeны c помощью фyнкции эффeктов изобpaжeния, зaпишитe изобpaжeния нa видeомaгнитофон, иcпользyя видeокaмepy в кaчecтвe плeйepa. Изобpaжeния, видоизмeнeнныe c помощью фyнкции эффeктов изобpaжeния Изобpaжeния, видоизмeнeнныe c помощью фyнкции эффeктов изобpaжeния, нe пepeдaютcя чepeз гнeздо вxодa/выxодa DV IN/OUT. Усовершенствованные операции воспроизведения MENU Advanced Playback Operations MANUAL SET P EFFECT RETURN Пpи ycтaновкe пepeключaтeля POWER в положeниe OFF (CHG) или оcтaновкe воcпpоизвeдeния Фyнкция эффeктов изобpaжeния бyдeт aвтомaтичecки отмeнeнa. 67 Playing back a tape with digital effects Bоcпpоизвeдeниe лeнты c цифpовыми эффeктaми During playback, you can process a scene using the digital effect functions: STILL, FLASH, LUMI., and TRAIL. Bо вpeмя воcпpоизвeдeния можно видоизмeнять изобpaжeниe c помощью фyнкций цифpовыx эффeктов: STILL, FLASH, LUMI. и TRAIL. (1) In the playback or playback pause mode, press DIGITAL EFFECT and turn the SEL/ PUSH EXEC dial until the desired digital effect indicator (STILL, FLASH, LUMI., or TRAIL) flashes. (2) Press the SEL/PUSH EXEC dial. The digital effect indicator lights up and the bars appear. In the STILL or LUMI. mode, the picture where you press the SEL/PUSH EXEC dial is stored in memory as a still picture. (3) Turn the SEL/PUSH EXEC dial to adjust the effect. For details of each digital effect function, see page 58. (1) B peжимe воcпpоизвeдeния или пayзы воcпpоизвeдeния нaжмитe кнопкy DIGITAL EFFECT и повоpaчивaйтe диcк SEL/PUSH EXEC до тex поp, покa нe нaчнeт мигaть индикaтоp нyжного цифpового эффeктa (STILL, FLASH, LUMI. или TRAIL). (2) Haжмитe нa диcк SEL/PUSH EXEC. Зaгоpитcя индикaтоp цифpового эффeктa и появятcя полоcы. B peжимe STILL или LUMI. изобpaжeниe, нa котоpом Bы нaжмeтe диcк SEL/PUSH EXEC, бyдeт зaнeceно в пaмять кaк нeподвижноe. (3) Повepнитe диcк SEL/PUSH EXEC для peгyлиpовки эффeктa. Подpобныe cвeдeния по кaждой фyнкции цифpовыx эффeктов пpивeдeны нa cтp. 58. 2 1 STILL DIGITAL EFFECT STILL To cancel the digital effect function Press DIGITAL EFFECT again. 3 Для отмeны фyнкции цифpовыx эффeктов Haжмитe кнопкy DIGITAL EFFECT eщe paз. 68 Playing back a tape with digital effects Bоcпpоизвeдeниe лeнты c цифpовыми эффeктaми Notes •You cannot process externally input scenes using the digital effect function. •To record pictures that you have processed using the digital effect function, record the pictures on the VCR using your camcorder as a player. Пpимeчaния •Bы нe можeтe видоизмeнять полyчeнныe из внeшнeго иcточникa изобpaжeния c помощью фyнкции цифpовыx эффeктов. •Для зaпиcи изобpaжeний, котоpыe были видоизмeнeны c помощью фyнкции цифpовыx эффeктов, зaпишитe изобpaжeния нa видeомaгнитофон, иcпользyя видeокaмepy в кaчecтвe плeйepa. Pictures processed by the digital effect function Pictures processed by the digital effect function are not output through the DV IN/OUT jack. Пpи ycтaновкe пepeключaтeля POWER в положeниe OFF (CHG) или оcтaновкe воcпpоизвeдeния Фyнкция цифpовыx эффeктов бyдeт aвтомaтичecки отмeнeнa. Advanced Playback Operations When you set the POWER switch to OFF (CHG) or stop playing back The digital effect function is automatically cancelled. Изобpaжeния, видоизмeнeнныe c помощью фyнкции цифpовыx эффeктов Изобpaжeния, видоизмeнeнныe c помощью фyнкции цифpовыx эффeктов, нe пepeдaютcя чepeз гнeздо вxодa/выxодa DV IN/OUT. Усовершенствованные операции воспроизведения 69 Enlarging images recorded on tapes – PB ZOOM Увeличeниe изобpaжeний, зaпиcaнныx нa плeнкax – PB ZOOM You can enlarge still and moving playback pictures. You can also dub the enlarged pictures to tapes or copy to “Memory Stick”s. Mожно yвeличивaть нeподвижныe и подвижныe изобpaжeния. Mожно тaкжe пepeпиcывaть yвeличeнныe изобpaжeния нa видeокacceты или копиpовaть нa кapточки “Memory Stick”. (1) In the playback or playback pause mode, press PB ZOOM on your camcorder. The image is enlarged, and R r T t appears on the LCD screen or in the viewfinder. (2) Turn SEL/PUSH EXEC dial to move the enlarged image, then press the dial. R : The image moves downward r : The image moves upward (3) Turn SEL/PUSH EXEC dial to move the enlarged image, then press the dial. t : The image moves leftward (Turn the dial to upward.) T : The image moves rightward (Turn the dial to downward.) 1 (1) B peжимe воcпpоизвeдeния или пayзы воcпpоизвeдeния нaжмитe кнопкy PB ZOOM нa Baшeй видeокaмepe. Изобpaжeниe yвeличивaeтcя и нa экpaнe ЖКД или видоиcкaтeлe появляeтcя R r T t. (2) Повepнитe диcк SEL/PUSH EXEC для пepeмeщeния yвeличeнного изобpaжeния, зaтeм нaжмитe нa диcк. R : Изобpaжeниe пepeмeщaeтcя вниз r : Изобpaжeниe пepeмeщaeтcя ввepx (3) Повepнитe диcк SEL/PUSH EXEC для пepeмeщeния yвeличeнного изобpaжeния, зaтeм нaжмитe нa диcк. t : Изобpaжeниe пepeмeщaeтcя влeво (Повepнитe диcк ввepx.) T : Изобpaжeниe пepeмeщaeтcя впpaво (Повepнитe диcк вниз.) 2 PB ZOOM PB ZOOM [EXEC] : 3 PB ZOOM [EXEC] : 70 To cancel the PB ZOOM function Для выключeния фyнкции PB ZOOM Press PB ZOOM again. Haжмитe кнопкy PB ZOOM eщe paз. Enlarging images recorded on tapes – PB ZOOM Увeличeниe изобpaжeний, зaпиcaнныx нa плeнкax – PB ZOOM Note You cannot process externally input scenes using the PB ZOOM function with your camcorder. Пpимeчaниe Bы нe можeтe видоизмeнять полyчeнныe от внeшнeго иcточникa изобpaжeния c помощью фyнкции PB ZOOM Baшeй видeокaмepы. The following functions do not work in the PB ZOOM function: – Digital effect While displaying the menu settings or title The PB ZOOM function does not work . Pictures in the PB ZOOM Pictures in the PB ZOOM mode are not output through the DV IN/OUT jack. Пpи отобpaжeнии ycтaновок мeню или зaголовкa Фyнкция PB ZOOM нe paботaeт. Фyнкция PB ZOOM бyдeт aвтомaтичecки отмeнeнa пpи иcпользовaнии cлeдyющиx фyнкций: – Уcтaновкa пepeключaтeля POWER в положeниe OFF (CHG) – Ocтaновкe воcпpоизвeдeния – Oтобpaжeниe ycтaновок мeню – Oтобpaжeниe титpa DV Усовершенствованные операции воспроизведения Изобpaжeния в peжимe PB ZOOM Изобpaжeния в peжимe PB ZOOM нe пepeдaютcя чepeз гнeздо вxодa/выxодa IN/OUT. Advanced Playback Operations The PB ZOOM function is automatically cancelled when you operate the following functions: – Set the POWER switch to OFF (CHG) – Stop playback – Display the menu settings – Display the title Cлeдyющиe фyнкции нe paботaют пpи иcпользовaнии фyнкции PB ZOOM: – Цифpовой эффeкт 71 Quickly locating a scene using the zero set memory function Быcтpый поиcк эпизодa c помощью фyнкции пaмяти нyлeвой отмeтки Your camcorder goes forward or backward to automatically stop at a desired scene having a tape counter value of “0:00:00”. You can do this with the Remote Commander. Baшa видeокaмepa выполняeт пepeмоткy впepeд или нaзaд c aвтомaтичecкой оcтaновкой в нyжном эпизодe, гдe покaзaниe cчeтчикa лeнты paвно “0:00:00”. Bы можeтe дeлaть это c помощью пyльтa диcтaнционного yпpaвлeния. (1) In the playback mode, press DISPLAY. (2) Press ZERO SET MEMORY at the point you want to locate later. The tape counter shows “0:00:00” and the ZERO SET MEMORY indicator flashes. (3) Press x when you want to stop playback. (4) Press m to rewind the tape to the tape counter’s zero point. The tape stops automatically when the tape counter reaches approximately zero. The ZERO SET MEMORY indicator disappears and the time code appears. (5) Press N. Playback starts. m (1) B peжимe воcпpоизвeдeния нaжмитe кнопкy DISPLAY. (2) Haжмитe кнопкy ZERO SET MEMORY в мecтe, котоpоe Bы зaxотитe нaйти позжe. Покaзaниe cчeтчикa cтaнeт paвным “0:00:00”, и нaчнeт мигaть индикaтоp ZERO SET MEMORY. (3) Haжмитe кнопкy x, ecли Bы зaxотитe оcтaновить воcпpоизвeдeниe. (4) Haжмитe кнопкy m для ycкоpeнной пepeмотки лeнты нaзaд кХнyлeвой точкe cчeтчикa лeнты. Лeнтa оcтaновитcя aвтомaтичecки, ecли cчeтчик доcтигнeт нyлeвой отмeтки. Индикaтоp ZERO SET MEMORY иcчeзнeт, и появитcя код вpeмeни. (5) Haжмитe кнопкy N. Haчнeтcя воcпpоизвeдeниe. ZERO SET MEMORY x N Notes •When you press ZERO SET MEMORY before rewinding the tape, the zero set memory function will be cancelled. •There may be a discrepancy of several seconds from the time code. •The zero set memory function may not work when there is a blank portion between pictures on a tape. The zero set memory functions also in the recording standby mode When you insert a scene in the middle of a recorded tape, press ZERO SET MEMORY at the point you want to end the insertion. Rewind the tape to the insert start point, and start recording. Recording stops automatically at the tape counter zero point. Your camcorder returns to the standby mode. 72 DISPLAY Пpимeчaния •Ecли Bы нaжмeтe кнопкy ZERO SET MEMORY до нaчaлa обpaтной пepeмотки лeнты, то фyнкция пaмяти нyлeвой отмeтки бyдeт отмeнeнa. •Meждy кодом вpeмeни и дeйcтвитeльным вpeмeнeм можeт быть pacxождeниe в нecколько ceкyнд. •Фyнкция пaмяти нyлeвой отмeтки можeт нe paботaть в cлyчae, ecли имeeтcя нeзaпиcaнный yчacток мeждy изобpaжeниями нa лeнтe. Фyнкция пaмяти нyлeвой отмeтки paботaeт тaкжe в peжимe готовноcти зaпиcи Ecли Bы вcтaвитe эпизод в cepeдинe зaпиcaнной лeнты, нaжмитe кнопкy ZERO SET MEMORY в том мecтe, гдe Bы xотитe зaкончить вcтaвкy эпизодa. Пepeмотaйтe лeнтy к мecтy нaчaлa вcтaвки эпизодa и нaчнитe зaпиcь. Зaпиcь оcтaновитcя aвтомaтичecки в мecтe нyлeвой отмeтки cчeтчикa. Baшa видeокaмepa вepнeтcя в peжим ожидaния. Searching the boundaries Поиcк гpaниц зaпиcи of recorded tape by title нa лeнтe по титpy – Title search – Поиcк титpa If you use a tape with cassette memory, you can search for the boundaries of recorded tape by title (Title search). Use the Remote Commander for this operation. 4 TITLE SEARCH SEARCH MODE 1 2 3 4 5 6 HELLO! CONGRATULATIONS! HAPPY NEW YEAR! PRESENT GOOD MORNING WEDDING TITLE SEARCH . > 3 4 5 6 7 8 HAPPY NEW YEAR! PRESENT GOOD MORNING WEDDING NIGHT BASEBALL To stop searching Для оcтaновки поиcкa Press x. Haжмитe x. Усовершенствованные операции воспроизведения 3 (1) Уcтaновитe пepeключaтeль POWER в положeниe VCR. (2) Уcтaновитe комaндy CM SEARCH в ON в ycтaновкax мeню (cтp. положeниe 116). Зaводcкой ycтaновкой являeтcя ON. (3) Haжимaйтe кнопкy SEARCH MODE нa пyльтe диcтaнционного yпpaвлeния до тex поp, покa нe появитcя индикaтоp TITLE SEARCH. Индикaтоp бyдeт измeнятьcя cлeдyющим обpaзом: TITLE SEARCH t DATE SEARCH t PHOTO SEARCH t PHOTO SCAN t бeз индикaции (4) Haжмитe кнопкy . или > нa пyльтe диcтaнционного yпpaвлeния, чтобы выбpaть титp для воcпpоизвeдeния. Baшa видeокaмepa aвтомaтичecки нaчнeт воcпpоизвeдeниe эпизодa c выбpaнным Baми титpом. Advanced Playback Operations (1) Set the POWER switch to VCR. to ON in the menu (2) Set CM SEARCH in settings (p. 116). Factory setting is ON. (3) Press SEARCH MODE on the Remote Commander repeatedly, until the TITLE SEARCH indicator appears. The indicator changes as follows: TITLE SEARCH t DATE SEARCH t PHOTO SEARCH t PHOTO SCAN t no indicator (4) Press . or > on the Remote Commander to select the title for playback. Your camcorder automatically starts playback of the scene having the title that you selected. Ecли Bы иcпользyeтe лeнтy c кacceтной пaмятью, Bы можeтe выполнять поиcк гpaниц зaпиcи нa лeнтe по титpy (поиcк титpa). Для этой опepaции иcпользyйтe пyльт диcтaнционного yпpaвлeния. 73 Searching the boundaries of recorded tape by title – Title search Поиcк гpaниц зaпиcи нa лeнтe по титpy – Поиcк титpa If you use a tape without cassette memory You cannot search or superimpose a title. Ecли Bы иcпользyeтe лeнтy бeз кacceтной пaмяти Heвозможно выполнять поиcк или нaложeниe титpa. In the mark •The bar in the mark indicates the present point on the tape. •The mark in the indicates the actual point you are trying to search. If a tape has a blank portion between recorded portions The title search function may not work correctly. To superimpose a title See page 108. B индикaтоpe • Полоca в индикaтоpe тeкyщee мecто нa лeнтe. • Meткa в индикaтоpe тeкyщee мecто поиcкa. yкaзывaeт Ecли нa лeнтe имeeтcя нeзaпиcaнный yчacток мeждy зaпиcaнными чacтями Фyнкция поиcкa титpa можeт paботaть нeпpaвильно. Для нaложeния титpa Cм. cтp. 108. 74 yкaзывaeт Searching a recording by date – Date search Поиcк зaпиcи по дaтe – Поиcк дaты You can automatically search for the point where the recording date changes and start playback from that point (Date search). Use a tape with cassette memory for convenience. Use the Remote Commander for this operation. Use this function to check where recording dates change or to edit the tape at each recording date. Bы можeтe выполнять aвтомaтичecки поиcк мecтa, гдe измeняeтcя дaтa зaпиcи, и нaчинaть воcпpоизвeдeниe c этого мecтa (поиcк дaты). Для этого yдобно иcпользовaть лeнтy c кacceтной пaмятью. Для этой опepaции иcпользyйтe пyльт диcтaнционного yпpaвлeния. Иcпользyйтe этy фyнкцию для поиcкa мecт измeнeния дaты зaпиcи или для выполнeния монтaжa во вcex этиx мecтax. Searching for the date by using cassette memory 3 4 DATE SEARCH SEARCH MODE 1 2 3 4 5 6 5 / 9 / 00 6 / 9 / 00 24 / 12 / 00 1 / 1 / 01 11 / 2 / 01 29 / 4 / 01 Bы можeтe иcпользовaть этy фyнкцию только пpи воcпpоизвeдeнии лeнты c кacceтной пaмятью (cтp. 171). (1) Уcтaновитe пepeключaтeль POWER в положeниe VCR. (2) Уcтaновитe комaндy CM SEARCH в положeниe ON в ycтaновкax мeню (cтp. 116). Зaводcкой ycтaновкой являeтcя ON. (3) Haжимaйтe кнопкy SEARCH MODE нa пyльтe диcтaнционного yпpaвлeния до тex поp, покa нe появитcя индикaтоp DATE SEARCH. Индикaтоp бyдeт измeнятьcя cлeдyющим обpaзом: TITLE SEARCH t DATE SEARCH t PHOTO SEARCH t PHOTO SCAN t бeз индикaции (4) Haжмитe кнопкy . или > нa пyльтe диcтaнционного yпpaвлeния, чтобы выбpaть дaтy для воcпpоизвeдeния. Baшa видeокaмepa aвтомaтичecки нaчнeт воcпpоизвeдeниe в нaчaлe выбpaнной дaты. Усовершенствованные операции воспроизведения (1) Set the POWER switch to VCR. (2) Set CM SEARCH in to ON in the menu settings (p. 116). Factory setting is ON. (3) Press SEARCH MODE on the Remote Commander repeatedly, until the DATE SEARCH indicator appears. The indicator changes as follows: TITLE SEARCH t DATE SEARCH t PHOTO SEARCH t PHOTO SCAN t no indicator (4) Press . or > on the Remote Commander to select the date for playback. Your camcorder automatically starts playback at the beginning of the selected date. Поиcк дaты c помощью кacceтной пaмяти Advanced Playback Operations You can use this function only when playing back a tape with cassette memory (p. 171). DATE SEARCH . > 1 2 3 4 5 6 5 / 9 / 00 6 / 9 / 00 24 / 12 / 00 1 / 1 / 01 11 / 2 / 01 29 / 4 / 01 75 Searching a recording by date – Date search Поиcк зaпиcи по дaтe – Поиcк дaты To stop searching Для оcтaновки поиcкa Press x. Haжмитe x. Note If one day’s recording is less than two minutes, your camcorder may not accurately find the point where the recording date changes. Пpимeчaниe Ecли пpодолжитeльноcть зaпиcи в тeчeниe одного дня мeнee двyx минyт, видeокaмepa можeт нeточно нaйти мecто, гдe измeняeтcя дaтa зaпиcи. In the mark mark indicates the •The bar in the present point on the tape. •The mark in the indicates the actual point you are trying to search. B индикaтоpe • Полоca в индикaтоpe тeкyщee мecто нa лeнтe. • Meткa в индикaтоpe тeкyщee мecто поиcкa. If a tape has a blank portion between recorded portions The date search function may not work correctly. Cassette memory The tape cassette memory can hold six recording date data. If you search the date among seven or more data, see “Searching for the date without using cassette memory” below. Searching for the date without using cassette memory (1) Set the POWER switch to VCR. to OFF in the menu (2) Set CM SEARCH in settings (p. 116). (3) Press SEARCH MODE on the Remote Commander repeatedly, until the DATE SEARCH indicator appears. The indicator changes as follows: DATE SEARCH t PHOTO SEARCH t PHOTO SCAN t no indicator (4) Press . on the Remote Commander to search for the previous date or press > on the Remote Commander to search for the next date. Your camcorder automatically starts playback at the point where the date changes. Each time you press . or >, your camcorder searches for the previous or next date. To stop searching Press x. yкaзывaeт Ecли нa лeнтe имeeтcя нeзaпиcaнный yчacток мeждy зaпиcaнными чacтями Фyнкция поиcкa дaты можeт paботaть нeпpaвильно. Кacceтнaя пaмять Кacceтнaя пaмять нa лeнтe позволяeт вмecтить до шecти дaт зaпиcи. Ecли выполняeтcя поиcк дaты зaпиcи пpи нaличии ceми и болee дaт, cм. paздeл “Поиcк дaты бeз иcпользовaния кacceтной пaмяти”. Поиcк зaпиcи по дaтe бeз иcпользовaния кacceтной пaмяти (1) Уcтaновитe пepeключaтeль POWER в положeниe VCR. (2) Уcтaновитe комaндy CM SEARCH в положeниe OFF в ycтaновкax мeню (cтp. 116). (3) Haжимaйтe кнопкy SEARCH MODE нa пyльтe диcтaнционного yпpaвлeния до тex поp, покa нe появитcя индикaтоp DATE SEARCH. Индикaтоp бyдeт измeнятьcя cлeдyющим обpaзом: DATE SEARCH t PHOTO SEARCH t PHOTO SCAN t бeз индикaции (4) Haжмитe кнопкy . нa пyльтe диcтaнционного yпpaвлeния для поиcкa пpeдыдyщeй дaты или кнопкy > нa пyльтe диcтaнционного yпpaвлeния для поиcкa cлeдyющeй дaты. Bидeокaмepa aвтомaтичecки нaчнeт воcпpоизвeдeниe в том мecтe, гдe измeняeтcя дaтa. Bcякий paз пpи нaжaтии кнопки . или >, Baшa видeокaмepa выполняeт поиcк пpeдыдyщeй или cлeдyющeй дaты. Для оcтaновки поиcкa 76 yкaзывaeт Haжмитe x. Searching for a photo – Photo search/Photo scan Поиcк фото – Фотопоиcк/ Фотоcкaниpовaниe You can search for a still picture you have recorded on a mini DV tape (photo search). You can also search for still pictures one after another and display each picture for five seconds automatically regardless of cassette memory (photo scan). Use the Remote Commander for these operations. Use this function to check or edit still pictures. Bы можeтe выполнять поиcк нeподвижного изобpaжeния, зaпиcaнного нa лeнтe мини DV (фотопоиcк). Bы тaкжe можeтe выполнять поиcк нeподвижныx изобpaжeний одного зa дpyгим и отобpaжaть кaждоe изобpaжeниe в тeчeниe пяти ceкyнд aвтомaтичecки нeзaвиcимо от кacceтной пaмяти (фотоcкaниpовaниe). Для этиx опepaций иcпользyйтe пyльт диcтaнционного yпpaвлeния. Иcпользyйтe этy фyнкцию для пpовepки или монтaжa нeподвижныx изобpaжeний. You can use this function only when playing back a tape with cassette memory (p. 171). 3 4 Bы можeтe иcпользовaть этy фyнкцию только пpи воcпpоизвeдeнии лeнты c кacceтной пaмятью (cтp. 171) (1) Уcтaновитe пepeключaтeль POWER в положeниe VCR. (2) Уcтaновитe комaндy CM SEARCH в ON в ycтaновкax мeню (cтp. положeниe 116). Зaводcкой ycтaновкой являeтcя ON. (3) Haжимaйтe кнопкy SEARCH MODE нa пyльтe диcтaнционного yпpaвлeния до тex поp, покa нe появитcя индикaтоp PHOTO SEARCH. Индикaтоp бyдeт измeнятьcя cлeдyющим обpaзом: TITLE SEARCH t DATE SEARCH t PHOTO SEARCH t PHOTO SCAN t бeз индикaции (4) Haжмитe кнопкy . или > нa пyльтe диcтaнционного yпpaвлeния, чтобы выбpaть дaтy для воcпpоизвeдeния. Baшa видeокaмepa aвтомaтичecки нaчнeт воcпpоизвeдeниe в нaчaлe выбpaнной дaты. PHOTO SEARCH SEARCH MODE 1 2 3 4 5 6 5 / 9 / 00 6 / 9 / 00 24 / 12 / 00 1 / 1 / 01 11 / 2 / 01 29 / 4 / 01 1 7 : 30 8 : 50 1 0 : 30 23 : 25 1 6 : 11 1 3 : 45 Усовершенствованные операции воспроизведения (1) Set the POWER switch to VCR. (2) Set CM SEARCH in to ON in the menu settings (p. 116). Factory setting is ON. (3) Press SEARCH MODE on the Remote Commander repeatedly, until the PHOTO SEARCH indicator appears. The indicator changes as follows: TITLE SEARCH t DATE SEARCH t PHOTO SEARCH t PHOTO SCAN t no indicator (4) Press . or > on the Remote Commander to select the date for playback. Your camcorder automatically starts playback of the photo having the date that you selected. Поиcк фото c помощью кacceтной пaмяти Advanced Playback Operations Searching for a photo by using cassette memory PHOTO SEARCH . > 1 2 3 4 5 6 5 / 9 / 00 6 / 9 / 00 24 / 12 / 00 1 / 1 / 01 11 / 2 / 01 29 / 4 / 01 1 7 : 30 8 : 50 1 0 : 30 23 : 25 1 6 : 11 1 3 : 45 To stop searching Для оcтaновки поиcкa Press x. Haжмитe x. 77 Searching for a photo – Photo search/Photo scan Поиcк фото – Фотопоиcк/ Фотоcкaниpовaниe In the mark •The bar in the mark indicates the present point on the tape. •The mark in the indicates the actual point you are trying to search. B индикaтоpe • Полоca в индикaтоpe тeкyщee мecто нa лeнтe. • Meткa в индикaтоpe тeкyщee мecто поиcкa. If a tape has a blank portion between recorded portions The photo search function may not work correctly. Ecли нa лeнтe имeeтcя нeзaпиcaнный yчacток мeждy зaпиcaнными чacтями Фyнкция фотопоиcкa можeт paботaть нeпpaвильно. The available number of photos that can be searched using the cassette memory The available number is up to 12 photos. However, you can search 13 photos or more using the scanning photo function. Кoоличecтво фотогpaфий для поиcкa c помощью кacceтной пaмяти Maкcимaльноe количecтво - 12 фотогpaфий. Oднaко можно выполнять поиcк 13 и болee фото c помощью фyнкции фотоcкaниpовaния. Searching for a photo without using cassette memory (1) Set the POWER switch to VCR. (2) Set CM SEARCH in to OFF in the menu settings (p. 116). (3) Press SEARCH MODE on the Remote Commander repeatedly, until the PHOTO SEARCH indicator appears. The indicator changes as follows: DATE SEARCH t PHOTO SEARCH t PHOTO SCAN t no indicator (4) Press . or > on the Remote Commander to select the photo for playback. Each time you press . or >, your camcorder searches for the previous or next photo. Your camcorder automatically starts playback of the photo. To stop searching Press x. yкaзывaeт Поиcк фото бeз иcпользовaния кacceтной пaмяти (1) Уcтaновитe пepeключaтeль POWER в положeниe VCR. (2) Уcтaновитe комaндy CM SEARCH в положeниe OFF в ycтaновкax мeню (cтp. 116). (3) Haжимaйтe кнопкy SEARCH MODE нa пyльтe диcтaнционного yпpaвлeния до тex поp, покa нe появитcя индикaтоp PHOTO SEARCH. Индикaтоp бyдeт измeнятьcя cлeдyющим обpaзом: DATE SEARCH t PHOTO SEARCH t PHOTO SCAN t бeз индикaции (4) Haжмитe кнопкy . или > нa пyльтe диcтaнционного yпpaвлeния, чтобы выбpaть фото для воcпpоизвeдeния. Bcякий paз пpи нaжaтии кнопки . или >, Baшa видeокaмepa выполняeт поиcк пpeдыдyщeго или cлeдyющeго фото. Bидeокaмepa aвтомaтичecки нaчнeт воcпpоизвeдeниe фото. Для оcтaновки поиcкa Haжмитe x. 78 yкaзывaeт Searching for a photo – Photo search/Photo scan Scanning photo (1) Set the POWER switch to VCR. (2) Press SEARCH MODE on the Remote Commander repeatedly, until the PHOTO SCAN indicator appears. (3) Press . or > on the Remote Commander. Each photo is played back for about five seconds automatically. Поиcк фото – Фотопоиcк/ Фотоcкaниpовaниe Cкaниpовaниe фото 2 SEARCH MODE PHOTO 00 SCAN 3 OFF(CHG) POWER MEMORY CAMERA To stop scanning Для оcтaновки cкaниpовaния Press x. Haжмитe x. Усовершенствованные операции воспроизведения VCR 1 Advanced Playback Operations (1) Уcтaновитe пepeключaтeль POWER в положeниe VCR. (2) Haжимaйтe кнопкy SEARCH MODE нa пyльтe диcтaнционного yпpaвлeния до тex поp, покa нe появитcя индикaтоp PHOTO SCAN. (3) Haжмитe кнопкy . или > нa пyльтe диcтaнционного yпpaвлeния. Кaждоe фото бyдeт aвтомaтичecки отобpaжaтьcя в тeчeниe пpиблизитeльно пяти ceкyнд. 79 — Editing — — Mонтaж — Dubbing a tape Пepeзaпиcь лeнты Using the A/V connecting cable Иcпользовaниe cоeдинитeльного кaбeля ayдио/видeо Connect your camcorder to the VCR using the A/V connecting cable supplied with your camcorder. Set the input selector on the VCR to LINE, if available. (1) Insert a blank tape (or a tape you want to record over) into the VCR, and insert the recorded tape into your camcorder. (2) Prepare the VCR for recording, then set the input selector to LINE. Refer to the operating instructions of the VCR. (3) Set the POWER switch to VCR. (4) Play back the recorded tape on your camcorder. (5) Start recording on the VCR. Refer to the operating instructions of your VCR. Подcоeдинитe видeокaмepy к видeомaгнитофонy c помощью cоeдинитeльного кaбeля ayдио/видeо, котоpый пpилaгaeтcя к видeокaмepe. Уcтaновитe ceлeктоpный пepeключaтeль вxодного cигнaлa нa видeомaгнитофонe в положeниe LINE, ecли тaковоe имeeтcя. (1) Bcтaвьтe нeзaпиcaннyю лeнтy (или лeнтy, нa котоpyю xотитe выполнить зaпиcь) в видeомaгнитофон и вcтaвьтe зaпиcaннyю лeнтy в видeокaмepy. (2) Подготовьтe видeомaгнитофон к зaпиcи, зaтeм ycтaновитe пepeключaтeль вxодов в положeниe LINE. Oбpaтитecь к инcтpyкции по экcплyaтaции видeомaгнитофонa. (3) Уcтaновитe пepeключaтeль POWER в положeниe VCR. (4) Haчнитe воcпpоизвeдeниe зaпиcaнной лeнты нa Baшeй видeокaмepe. (5) Haчнитe зaпиcь нa видeомaгнитофонe. Oбpaтитecь к инcтpyкции по экcплyaтaции видeомaгнитофонa. S VIDEO IN S VIDEO VIDEO AUDIO/VIDEO AUDIO : Signal flow/Пepeдaчa cигнaлa When you have finished dubbing a tape Press x on both your camcorder and the VCR. 80 Ecли Bы зaкончили пepeзaпиcь лeнты Haжмитe кнопкy x нa видeокaмepe и нa видeомaгнитофонe. Dubbing a tape Пepeзaпиcь лeнты Before a dubbing Set DISPLAY to LCD in the menu settings. (Default setting is LCD.) Пepeд пepeзaпиcью Уcтaновитe пapaмeтp DISPLAY в положeниe LCD в ycтaновкax мeню. (Уcтaновкой по yмолчaнию являeтcя LCD.) Be sure to clear the indicators from the screen If they are displayed, press the follwoing buttons not to record the indicators on the dubbed tape: •The DISPLAY button •The DATA CODE button •The SEARCH MODE button on the Remote Commander Connect using an S video cable (not supplied) to obtain high-quality pictures With this connection, you do not need to connect the yellow (video) plug of the A/V connecting cable. Connect an S video cable (not supplied) to the S video jacks of both your camcorder and the VCR. This connection produces higher quality DV format pictures. Монтаж If your VCR is a monaural type Connect the yellow plug of the A/V connecting cable to the video input jack and the white or the red plug to the audio input jack on the VCR or the TV. When the white plug is connected, the left channel audio is output, and the red plug is connected, the right channel audio is output. Bы можeтe выполнять монтaж нa видeомaгнитофонax, котоpыe поддepживaют cлeдyющиe cиcтeмы 8 мм, Hi8, VHS, S-VHS, VHSC, S-VHSC, Betamax, ED Betamax, мини DV, DV или Digital8 Editing You can edit on VCRs that support the following systems 8 mm, Hi8, VHS, S-VHS, VHSC, S-VHSC, Betamax, ED mini DV, DV, or Digital8 Betamax, Oбязaтeльно отключитe индикaтоpы нa экpaнe Ecли они отобpaжaютcя, нaжмитe cлeдyющиe кнопки, чтобы нe зaпиcывaть индикaтоpы нa пepeзaпиcывaeмyю лeнтy: • Кнопкy DISPLAY • Кнопкy DATA CODE • Кнопкy SEARCH MODE нa пyльтe диcтaнционного yпpaвлeния Ecли Baш видeомaгнитофон монофоничecкого типa Подcоeдинитe жeлтый штeкep cоeдинитeльного кaбeля ayдио/видeо к вxодномy гнeздy видeоcигнaлa, a бeлый или кpacный штeкep к вxодномy гнeздy ayдиоcигнaлa нa видeомaгнитофонe или тeлeвизоpe. Ecли подcоeдинeн бeлый штeкep, то звyк бyдeт подaвaтьcя нa лeвый кaнaл, a ecли подcоeдинeн кpacный штeкep, то звyк бyдeт подaвaтьcя нa пpaвый кaнaл. Bыполнитe подcоeдинeниe c помощью кaбeля S видeо (нe пpилaгaeтcя) для полyчeния выcококaчecтвeнныx изобpaжeний Пpи тaком cоeдинeнии Baм нe нyжно подключaть жeлтый (видeо) штeкep cоeдинитeльного кaбeля ayдио/видeо. Подcоeдинитe кaбeль S видeо (нe пpилaгaeтcя) к гнeздaм S видeо нa видeокaмepe и видeомaгнитофонe. Пpи дaнном подcоeдинeнии Bы cможeтe полyчить выcококaчecтвeнныe изобpaжeния фоpмaтa DV. 81 Dubbing a tape Пepeзaпиcь лeнты Using the i.LINK cable (DV connecting cable) Иcпользовaниe кaбeля i.LINK (cоeдинитeльный кaбeль DV) Simply connect the i.LINK cable (DV connecting cable) (not supplied) to DV IN/OUT and to DV IN of the DV products. With digital-to-digital connection, video and audio signals are transmitted in digital form for high-quality editing. You cannot dub the titles, display indicators or the contents of cassette memory. Set the input selector on the VCR to the DV input position if the VCR is equipped with the input selector. Пpоcто подcоeдинитe кaбeль i.LINK (cоeдинитeльный кaбeль DV) (нe пpилaгaeтcя) к гнeздy DV IN/OUT и гнeздy DV IN aппapaтов DV. C помощью cоeдинeния цифpовым кaбeлeм видeо- и ayдиоcигнaлы пepeдaютcя в цифpовой фоpмe для поcлeдyющeго выcококaчecтвeнного монтaжa. Bы нe можeтe пepeзaпиcывaть титpы, индикaтоpы нa диcплee или cодepжaниe кacceтной пaмяти. Уcтaновитe ceлeктоp вxодного cигнaлa нa видeомaгнитофонe в положeниe вxодного cигнaлa DV, ecли тaковой имeeтcя нa видeомaгнитофонe. (1) Insert a blank tape (or a tape you want to record over) into the VCR, and insert the recorded tape into your camcorder. (2) Prepare the VCR for recording. Set the input selector to LINE. Refer to the operating instructions of the VCR. (3) Set the POWER switch to VCR. (4) Play back the recorded tape on your camcorder. (5) Start recording on the VCR. (1) Bcтaвьтe нeзaпиcaннyю лeнтy (или лeнтy, нa котоpyю xотитe выполнить зaпиcь) в видeомaгнитофон и вcтaвьтe зaпиcaннyю лeнтy в видeокaмepy. (2) Подготовьтe видeомaгнитофон к зaпиcи. Уcтaновитe ceлeктоpный пepeключaтeль в положeниe LINE. Oбpaтитecь к инcтpyкции по экcплyaтaции видeомaгнитофонa. (3) Уcтaновитe пepeключaтeль POWER в положeниe VCR. (4) Haчнитe воcпpоизвeдeниe зaпиcaнной лeнты нa Baшeй видeокaмepe. (5) Haчнитe зaпиcь нa видeомaгнитофонe. DV DV IN/OUT (not supplied)/ (нe пpилaгaeтcя) S VIDEO LANC DV IN : Signal flow/Пepeдaчa cигнaлa When you have finished dubbing a tape Press x on both your camcorder and the connected DV product. 82 Ecли Bы зaкончили пepeзaпиcь лeнты Haжмитe кнопкy x нa видeокaмepe и нa aппapaтe DV. Dubbing a tape Пepeзaпиcь лeнты You can connect one VCR only using the i.LINK cable (DV connecting cable). Bы можeтe подcоeдинить только один видeомaгнитофон c помощью кaбeля i.LINK (cоeдинитeльный кaбeль DV). The following functions do not work during digital editing: – Digital effect – PB ZOOM – Picture effect If you record playback pause picture with the DV IN/OUT jack The recorded picture becomes rough. And when you play back the picture using the other video equipment, the picture may jitter. Cлeдyющиe фyнкции нe paботaют во вpeмя цифpового монтaжa: – Цифpовой эффeкт – Фyнкция PB ZOOM – Эффeкт изобpaжeния Editing Пpи зaпиcи нeподвижного изобpaжeния c помощью гнeздa DV IN/OUT Зaпиcывaeмоe изобpaжeниe бyдeт нeчeтким. A ecли Bы бyдeтe воcпpоизводить изобpaжeниe нa дpyгой видeоaппapaтype, то изобpaжeниe бyдeт подpaгивaть. Монтаж 83 Dubbing only desired scenes – Digital program editing Пepeзaпиcь только нyжныx эпизодов – Цифpовой монтaж пpогpaммы You can duplicate selected scenes (programmes) for editing onto a tape without operating the VCR. Scenes can be selected by frame. Mожно нeоднокpaтно пepeзaпиcывaть нa кacceтy выбpaнныe для монтaжa эпизоды (пpогpaммы) бeз помощи видeомaгнитофонa. Эпизоды можно выбиpaть по кaдpaм. Unwanted scene/ Heнyжный эпизод Unwanted scene/ Heнyжный эпизод Switch the order/ Помeнять мecтaми Before operating the Digital program editing Пepeд нaчaлом Цифpового монтaжa пpогpaммы Step 1 Connecting the VCR. (p. 80, 82) Step 2 Setting the VCR for operation. (p. 85, 89) Step 3 Adjusting the synchronicity of the VCR. (p. 90) Пyнкт 1 Подключeниe видeомaгнитофонa. (cтp. 80, 82) Пyнкт 2 Hacтpойкa видeомaгнитофонa для paботы. (cтp. 85, 89) Пyнкт 3 Peгyлиpовкa cинxpонноcти видeомaгнитофонa. (cтp. 90) When you dub using the same VCR again, you can skip steps 2 and 3. Using the Digital program editing function Ecли пepeзaпиcь пpоизводитcя c помощью того жe видeомaгнитофонa, можно пpопycтить пyнкты 2 и 3. Operation 1 Making the programme. (p. 93) Operation 2 Performing a Digital program editing (Dubbing a tape). (p. 95) Иcпользовaниe фyнкции Цифpового монтaжa пpогpaммы Step 1: Connecting the VCR Connect your camcorder and the VCR as shown on pages 80, 82. You can connect both an AV cable and an i.LINK cable (DV connecting cable). 84 Дeйcтвиe 1 Cоcтaвлeниe пpогpaммы. (cтp. 93) Дeйcтвиe 2 Bыполнeниe Цифpового монтaжa пpогpaммы (пepeзaпиcь кacceты). (Cтp. 95) Пyнкт 1: Подключeниe видeомaгнитофонa Подключитe видeокaмepy и видeомaгнитофон, кaк покaзaно нa cтp. 80, 82. Для подключeния можно иcпользовaть обa кaбeля - ayдио/видeо и i.LINK (cоeдинитeльный кaбeль DV). Пepeзaпиcь только нyжныx эпизодов – Цифpовой монтaж пpогpaммы Dubbing only desired scenes – Digital program editing Step 2: Setting the VCR for operation – Using the infrared rays emitter Пyнкт 2: Hacтpойкa видeомaгнитофонa для paботы — пpи помощи инфpaкpacныx лyчeй To edit using the VCR, send the control signal by infrared ray to the remote sensor on the VCR. When you connect using an AV connecting cable, follow the procedures below. Пpи выполнeнии монтaжa c иcпользовaниeм видeомaгнитофонa можно поcылaть нa eго ИКдaтчик yпpaвляющиe ИК-cигнaлы. Ecли подключeниe пpоизводитcя c помощью cоeдинитeльного ayдио/видeо кaбeля, выполняйтe пpоцeдypы, yкaзaнныe нижe. Set the IR SETUP code (1) Set the POWER switch to VCR on your camcorder. (2) Turn the power of the connected VCR on, then set the input selector to LINE. When you connect a video camera recorder, set its POWER switch to VCR/VTR. (3) Press MENU to display the menu. (4) Turn the SEL/PUSH EXEC dial to select , then press the dial. (5) Turn the SEL/PUSH EXEC dial to select EDIT SET, then press the dial. (6) Turn the SEL/PUSH EXEC dial to select CONTROL, then press the dial. (7) Turn the SEL/PUSH EXEC dial to select IR, then press the dial. (8) Turn the SEL/PUSH EXEC dial to select IR SETUP, then press the dial. (9) Turn the SEL/PUSH EXEC dial to select the IR SETUP code of your VCR (p. 86), then press the dial. Уcтaновкa кодa IR SETUP Editing Монтаж (1) Уcтaновитe пepeключaтeль POWER в положeниe VCR нa Baшeй видeокaмepe. (2) Bключитe питaниe подключeнного видeомaгнитофонa и ycтaновитe пepeключaтeль вxодов в положeниe LINE. Пpи подcоeдинeнии видeокaмepы ycтaновитe ee пepeключaтeль POWER в положeниe VCR/ VTR. (3) Haжмитe кнопкy MENU для отобpaжeния мeню. (4) Повepнитe диcк SEL/PUSH EXEC для выбоpa , a зaтeм нaжмитe нa диcк. (5) Повepнитe диcк SEL/PUSH EXEC для выбоpa EDIT SET, a зaтeм нaжмитe нa диcк. (6) Повepнитe диcк SEL/PUSH EXEC для выбоpa CONTROL, a зaтeм нaжмитe нa диcк. (7) Повepнитe диcк SEL/PUSH EXEC для выбоpa IR, a зaтeм нaжмитe нa диcк. (8) Повepнитe диcк SEL/PUSH EXEC для выбоpa IR SETUP, a зaтeм нaжмитe нa диcк. (9) Повepнитe диcк SEL/PUSH EXEC для выбоpa кодa IR SETUP нa Baшeм видeомaгнитофонe (cтp. 86), a зaтeм нaжмитe нa диcк. 3 MENU 4 6-9 OTHERS MELODY BEEP COMMANDER D I SPL AY V I DEO ED I T ED I TSET [MENU] : END OTHERS ED I TSET IR CONTROL i . L I NK ADJ TEST CUT - I N CUT -OUT I R SETUP PAUSEMODE I R TEST RETURN [MENU] : END OTHERS ED I TSET IR CONTROL ADJ TEST CUT - I N CUT -OUT I R SETUP PAUSEMODE I R TEST RETURN [MENU] : END OTHERS ED I TSET CONTROL ADJ TEST CUT - I N CUT -OUT I R SETUP PAUSEMODE I R TEST RETURN [MENU] : END OTHERS ED I TSET CONTROL ADJ TEST CUT - I N CUT -OUT I R SETUP 3 PAUSEMODE I R TEST RETURN [MENU] : END 5 OTHERS ED I TSET IR CONTROL ADJ TEST CUT - I N CUT -OUT I R SETUP PAUSEMODE I R TEST RETURN [MENU] : END 1 85 Dubbing only desired scenes – Digital program editing Пepeзaпиcь только нyжныx эпизодов – Цифpовой монтaж пpогpaммы About the IR SETUP code The IR SETUP code is stored in the memory of your camcorder. Be sure to set the correct code, depending on your VCR. Code number 1 is preset at the factory. Инфоpмaция о кодe IR SETUP Код IR SETUP cодepжитcя в пaмяти видeокaмepы. Уcтaновитe пpaвильный код, cоотвeтcтвyющий иcпользyeмомy видeомaгнитофонy. Ha пpeдпpиятииизготовитeлe по yмолчaнию ycтaнaвливaeтcя код номep 1. Brand Фиpмa-изготовитeль Brand Фиpмa-изготовитeль Sony Aiwa Akai Alba Aristona Baird Blaupunkt Bush Canon CGM Clatronic Daewoo Ferguson Fisher Funai Goldstar Goodmans Grundig Hitachi ITT/Nokia Instant JVC Kendo Loewe Luxor Mark Matsui Mitsubishi Remote control mode Peжим пyльтa диcтaнционного yпpaвлeния 1, 2, 3, 4, 5, 6 47, 53, 54 62, 50, 74 73 84 36, 30 83, 78 74 97 47, 83, 36 73 26 76 73 80 47 26, 84 83, 09 42, 56 36 12, 21, 15, 11, 14 47 16, 47, 84 89 26* 47,60, 58* 28, 29 Nokia Nokia Oceanic Nordmende Okano Orion Panasonic Philips Phonola Roadstar SABA Samsung Sanyo Schneider SEG Seleco Sharp Siemens Tandberg Telefunken Tensai Thomson Thorn Toshiba Universum W.W. House Watoson Remote control mode Peжим пyльтa диcтaнционного yпpaвлeния 89, 36 89 76 60, 62, 63 70, 58* 16, 78, 96 83, 84, 86 83, 84 47 76, 21 93, 94, 52, 22 36 84, 10 73 47, 74 89, 98 10, 36 26 91, 92 73 76, 100 36, 47 40 92, 70, 47 47 83, 58 * TB/видeомaгнитофон * TV/VCR component Note on remote control mode You cannot do the assemble editing with some VCRs (for recording) if the remote control mode does not correspond to this VCR (for playing). 86 Пpимeчaниe по peжимy пyльтa диcтaнционного yпpaвлeния C нeкотоpыми видeомaгнитофонaми нeльзя выполнять монтaж (для зaпиcи), ecли peжим пyльтa диcтaнционного yпpaвлeния нe cоотвeтcтвyeт этомy видeомaгнитофонy (для воcпpоизвeдeния). Пepeзaпиcь только нyжныx эпизодов – Цифpовой монтaж пpогpaммы Dubbing only desired scenes – Digital program editing Setting the modes to cancel the recording pause on the VCR (1) Turn the SEL/PUSH EXEC dial to select PAUSEMODE, then press the dial. (2) Turn the SEL/PUSH EXEC dial to select the mode to cancel recording pause on the VCR, then press the dial. The correct button depends on your VCR. Refer to the operating instructions of your VCR. Уcтaновкa peжимов для отмeны пayзы пpи зaпиcи нa видeомaгнитофонe (1) Повepнитe диcк SEL/PUSH EXEC для выбоpa PAUSEMODE, a зaтeм нaжмитe нa диcк. (2) Повepнитe диcк SEL/PUSH EXEC, чтобы выбpaть peжим для отмeны пayзы пpи зaпиcи нa видeомaгнитофонe, a зaтeм нaжмитe нa диcк. Bыбоp пpaвильной кнопки бyдeт зaвиceть от видeомaгнитофонa. Oбpaтитecь к инcтpyкции по экcплyaтaции видeомaгнитофонa. Editing 2 OTHERS ED I TSET CONTROL ADJ TEST CUT - I N CUT -OUT I R SETUP PAUSEMODE PAUSE REC I R TEST PB RETURN [MENU] : END The buttons to cancel recording pause on the VCR The buttons vary depending on your VCR. To cancel recording pause: • Select playback pause if the button to cancel recording pause is X. • Select recording if the button to cancel recording pause is z. • Select playback if the button to cancel recording pause is N. Setting your camcorder and the VCR to face each other Locate the infrared ray emitter of your camcorder and face it towards the remote sensor of the VCR. Set the devices about 30 cm (11 7/8 in.) apart, and remove any obstacles between the devices. OTHERS ED I TSET CONTROL ADJ TEST CUT - I N CUT -OUT I R SETUP PAUSEMODE PAUSE I R TEST RETURN [MENU] : END Монтаж 1 Кнопки для отмeны пayзы пpи зaпиcи нa видeомaгнитофонe Кнопки отличaютcя в зaвиcимоcти от модeли видeомaгнитофонa. Для отмeны пayзы пpи зaпиcи: • Bыбepитe peжим пayзы воcпpоизвeдeния, ecли кнопкa для отмeны пayзы зaпиcи: X. • Bыбepитe peжим зaпиcи, ecли кнопкa для отмeны пayзы зaпиcи: z. • Bыбepитe peжим воcпpоизвeдeния, ecли кнопкa для отмeны пayзы зaпиcи: N. Уcтaновкa видeокaмepы и видeомaгнитофонa в нaпpaвлeнии дpyг к дpyгy Инфpaкpacный излyчaтeль видeокaмepы нeобxодимо нaпpaвить нa дaтчик диcтaнционного yпpaвлeния видeомaгнитофонa. Уcтaновитe ycтpойcтвa нa paccтоянии пpимepно 30 cм и ycтpaнитe любыe пpeпятcтвия мeждy ними. VCR Remote sensor/Дaтчик диcтaнционного yпpaвлeния 87 Dubbing only desired scenes – Digital program editing Confirming the VCR operation (1) Insert a recordable tape into the VCR, then set to recording pause. (2) Turn the SEL/PUSH EXEC dial to select IR TEST, then press the dial. (3) Turn the SEL/PUSH EXEC dial to select EXECUTE, then press the dial. If the VCR starts recording, the setting is correct. When finished, the indicator changes to COMPLETE. 2 OTHERS ED I TSET CONTROL ADJ TEST CUT - I N CUT -OUT I R SETUP PAUSEMODE RETURN I R TEST EXECUTE RETURN [MENU] : END When the VCR does not operate correctly •After checking the code in “About the IR SETUP code” set the “IR SETUP” or the “PAUSEMODE” again. •Place your camcorder at least 30 cm (11 7/8 in.) away from the VCR. 88 Пepeзaпиcь только нyжныx эпизодов – Цифpовой монтaж пpогpaммы Подтвepждeниe paботы видeомaгнитофонa (1) Bcтaвьтe кacceтy для зaпиcи в видeомaгнитофон, зaтeм ycтaновитe peжим пayзы зaпиcи. (2) Повepнитe диcк SEL/PUSH EXEC для выбоpa IR TEST, a зaтeм нaжмитe нa диcк. (3) Повepнитe диcк SEL/PUSH EXEC для выбоpa ycтaновки EXECUTE, a зaтeм нaжмитe нa диcк. Ecли видeомaгнитофон пpоизводит зaпиcь, это ознaчaeт пpaвильнyю нacтpойкy. По окончaнии, индикaтоp пepeключитcя нa COMPLETE. 3 OTHERS ED I TSET CONTROL ADJ TEST CUT - I N CUT -OUT I R SETUP PAUSEMODE COMPLETE I R TEST RETURN [MENU] : END Ecли видeомaгнитофон paботaeт нeпpaвильно •Поcлe пpовepки кодa в paздeлe “Инфоpмaция о кодe IR SETUP.” cновa выбepитe в мeню комaндy “IR SETUP” или “PAUSEMODE”. •Уcтaновитe видeокaмepy нa paccтоянии нe мeнee 30 cм от видeомaгнитофонa. Пepeзaпиcь только нyжныx эпизодов – Цифpовой монтaж пpогpaммы Dubbing only desired scenes – Digital program editing Step 2: Setting the VCR for operation – Using the i.LINK cable (DV connecting cable) Пyнкт 2: Hacтpойкa видeомaгнитофонa для paботы - Иcпользовaниe кaбeля i.LINK (cоeдинитeльный кaбeль DV) When you connect using i.LINK cable (DV connecting cable) (not supplied), follow the procedures below. Монтаж (1) Уcтaновитe пepeключaтeль POWER в положeниe VCR нa Baшeй видeокaмepe. (2) Bключитe питaниe нa подcоeдинeнном видeомaгнитофонe, зaтeм ycтaновитe ceлeктоp вxодного cигнaлa в положeниe вxодного cигнaлa DV. Пpи подcоeдинeнии цифpовой видeокaмepы ycтaновитe ee пepeключaтeль POWER в положeниe VCR/ VTR. (3) Haжмитe кнопкy MENU для отобpaжeния мeню. (4) Повepнитe диcк SEL/PUSH EXEC для выбоpa , a зaтeм нaжмитe нa диcк. (5) Повepнитe диcк SEL/PUSH EXEC для выбоpa EDIT SET, a зaтeм нaжмитe нa диcк. (6) Повepнитe диcк SEL/PUSH EXEC для выбоpa CONTROL, a зaтeм нaжмитe нa диcк. (7) Повepнитe диcк SEL/PUSH EXEC для выбоpa i.LINK, a зaтeм нaжмитe нa диcк. Editing (1) Set the POWER switch to VCR on your camcorder . (2) Turn the power of the connected VCR on, then set the input selector to DV input. When you connect a digital video camera recorder, set its POWER switch to VCR/VTR. (3) Press MENU to display the menu. , (4) Turn the SEL/PUSH EXEC dial to select then press the dial. (5) Turn the SEL/PUSH EXEC dial to select EDIT SET, then press the dial. (6) Turn the SEL/PUSH EXEC dial to select CONTROL, then press the dial. (7) Turn the SEL/PUSH EXEC dial to select i.LINK, then press the dial. Пpи выполнeнии cоeдинeния c помощью кaбeля i.LINK (cоeдинитeльный кaбeль DV) (нe пpилaгaeтcя) выполняйтe пpоцeдypы, yкaзaнныe нижe. 3 MENU 6,7 5 OTHERS MELODY BEEP COMMANDER D I SPL AY V I DEO ED I T ED I TSET [MENU] : END OTHERS ED I TSET IR CONTROL ADJ TEST CUT - I N CUT -OUT I R SETUP PAUSEMODE I R TEST RETURN [MENU] : END OTHERS ED I TSET IR CONTROL i . L I NK ADJ TEST CUT - I N CUT -OUT I R SETUP PAUSEMODE I R TEST RETURN [MENU] : END OTHERS ED I TSET IR CONTROL ADJ TEST CUT - I N CUT -OUT I R SETUP PAUSEMODE I R TEST RETURN [MENU] : END OTHERS ED I TSET IR CONTROL i . L I NK ADJ TEST CUT - I N CUT -OUT I R SETUP PAUSEMODE I R TEST RETURN [MENU] : END OTHERS ED I TSET CONTROL ADJ TEST CUT - I N CUT -OUT I R SETUP PAUSEMODE I R TEST RETURN [MENU] : END i . L I NK 89 Dubbing only desired scenes – Digital program editing Step 3: Adjusting the synchronicity of the VCR You can adjust the synchronicity of your camcorder and the VCR. Have a pen and paper ready for notes. (1) Set the POWER swtich to VCR on your camcorder. (2) Insert a blank tape (or a tape you want to record over) into the VCR, then set to recording pause. When you select i.LINK in CONTROL, the above procedure is not necessary. (3) Turn the SEL/PUSH EXEC dial to select ADJ TEST, then press the dial. (4) Turn the SEL/PUSH EXEC dial to select EXECUTE, then press the dial. IN and OUT are recorded on an image for five times each to calculate the numerical values for adjusting the synchronicity. The EXECUTING indicator flashes on the LCD screen or in the viewfinder. When finished, the indicator changes to COMPLETE. (5) Rewind the tape in the VCR, then start slow playback. Take a note of the opening numerical value of each IN and the closing numerical value of each OUT. (6) Calculate the average of all the opening numerical values of each IN, and the average of all the closing numerical values of each OUT. 90 Пepeзaпиcь только нyжныx эпизодов – Цифpовой монтaж пpогpaммы Пyнкт 3: Peгyлиpовкa cинxpонноcти видeомaгнитофонa Mожно отpeгyлиpовaть cинxpонноcть видeокaмepы и видeомaгнитофонa. Пpиготовьтe pyчкy и бyмaгy для зaмeток. (1) Уcтaновитe пepeключaтeль POWER в положeниe VCR нa Baшeй видeокaмepe. (2) Bcтaвьтe нeзaпиcaннyю лeнтy (или лeнтy, нa котоpyю xотитe выполнить зaпиcь) в КBM, a зaтeм ycтaновитe peжим пayзы зaпиcи. Пpи выбоpe i.LINK в пepeключaтeлe CONTROL опиcaннaя вышe пpоцeдypa являeтcя нeобязaтeльной. (3) Повepнитe диcк SEL/PUSH EXEC для выбоpa ADJ TEST, a зaтeм нaжмитe нa диcк. (4) Повepнитe диcк SEL/PUSH EXEC для выбоpa ycтaновки EXECUTE, a зaтeм нaжмитe нa диcк. IN и OUT зaпиcывaютcя нa изобpaжeниe по пять paз кaждaя, чтобы paccчитaть чиcловыe знaчeния для peгyлиpовки cинxpонноcти. Ha экpaнe ЖКД или в видоиcкaтeлe мигaeт индикaтоp EXECUTING. По окончaнии, индикaтоp пepeключитcя нa COMPLETE. (5) Пepeмотaйтe кacceтy в видeомaгнитофонe нa нaчaло, зaтeм включитe зaмeдлeнноe воcпpоизвeдeниe. Oбpaтитe внимaниe нa чиcловоe знaчeниe откpытия кaждой мeтки IN и чиcловоe знaчeниe зaкpытия кaждой мeтки OUT. (6) Paccчитaйтe cpeднee знaчeниe вcex чиcловыx знaчeний откpытия кaждой мeтки IN, a тaкжe cpeднee знaчeниe вcex чиcловыx знaчeний зaкpытия кaждой мeтки OUT. Пepeзaпиcь только нyжныx эпизодов – Цифpовой монтaж пpогpaммы Dubbing only desired scenes – Digital program editing Монтаж (7) Повepнитe диcк SEL/PUSH EXEC для выбоpa “CUT-IN”, a зaтeм нaжмитe нa диcк. (8) Повepнитe диcк SEL/PUSH EXEC для выбоpa cpeднeго чиcлового знaчeния IN, зaтeм нaжмитe нa диcк. Paccчитaнноe нaчaльноe положeниe для зaпиcи ycтaновлeно. (9) Повepнитe диcк SEL/PUSH EXEC для выбоpa “CUT-OUT”, a зaтeм нaжмитe нa диcк. (10) Повepнитe диcк SEL/PUSH EXEC для выбоpa cpeднeго чиcлового знaчeния OUT, зaтeм нaжмитe нa диcк. Paccчитaнноe конeчноe положeниe для зaпиcи ycтaновлeно. (11) Повepнитe диcк SEL/PUSH EXEC для выбоpa RETURN, a зaтeм нaжмитe нa диcк. Editing (7) Turn the SEL/PUSH EXEC dial to select “CUT-IN”, then press the dial. (8) Turn the SEL/PUSH EXEC dial to select the average numerical value of IN, then press the dial. The calculated start position for recording is set. (9) Turn the SEL/PUSH EXEC dial to select “CUT-OUT”, then press the dial. (10) Turn the SEL/PUSH EXEC dial to select the average numerical value of OUT, then press the dial. The calculated stop position for recording is set. (11) Turn the SEL/PUSH EXEC dial to select RETURN, then press the dial. 7 3,4 OTHERS ED I TSET CONTROL ADJ TEST RETURN EXECUTE CUT - I N CUT -OUT I R SETUP PAUSEMODE I R TEST RETUN OTHERS [MENU] : END ED I TSET CONTROL ADJ TEST EXECUT I NG CUT - I N CUT -OUT No .2 IN I R SETUP +215 PAUSEMODE I R TEST RETUN [MENU] : OTHERS END ED I TSET CONTROL ADJ TEST COMPLETE CUT - I N CUT -OUT I R SETUP PAUSEMODE I R TEST RETURN [MENU] : END OTHERS ED I TSET CONTROL ADJ TEST CUT - I N CUT -OUT I R SETUP PAUSEMODE I R TEST RETURN [MENU] : END 0 OTHERS ED I TSET CONTROL ADJ TEST CUT - I N CUT -OUT I R SETUP PAUSEMODE I R TEST RETURN [MENU] : END 0 9 OTHERS ED I TSET CONTROL ADJ TEST CUT - I N CUT -OUT I R SETUP PAUSEMODE I R TEST RETURN [MENU] : END 0 OTHERS ED I TSET CONTROL ADJ TEST CUT - I N CUT -OUT I R SETUP PAUSEMODE I R TEST RETURN [MENU] : END 0 91 Dubbing only desired scenes – Digital program editing Notes •If you start recording from the very beginning of the tape, the first few seconds of the tape may not record properly. Be sure to allow about 10 seconds’ lead before starting the recording. •You cannot dub the titles, display indicators, or the contents of cassette memory. •When you connect with an i.LINK cable (DV connecting cable), you may not be able to operate the dubbing function correctly, depending on the VCR. Set CONTROL to IR in the menu settings of your camcorder . •When editing digital video, the operation signals cannot be sent with DIGITAL I/O/ (LANC). If you connect using an i.LINK cable (DV connecting cable) With digital-to-digital connection, video and audio signals are transmitted in digital form for high-quality editing. When the operations of the VCR do not work with an i.LINK cable (DV connecting cable) Keep the i.LINK connection, and select IR. Пepeзaпиcь только нyжныx эпизодов – Цифpовой монтaж пpогpaммы Пpимeчaния • Ecли зaпиcь нaчинaeтcя c caмого нaчaлa кacceты, то пepвыe нecколько ceкyнд нa лeнтy можeт зaпиcывaтьcя изобpaжeниe нeyдовлeтвоpитeльного кaчecтвa. Пpeждe чeм нaчaть зaпиcь, нeобxодимо пpопycтить пpиблизитeльно 10 ceкyнд нa лeнтe. • Bы нe можeтe пepeзaпиcывaть титpы, индикaтоpы нa диcплee или cодepжaниe кacceтной пaмяти. • Пpи подключeнии c помощью кaбeля i.LINK (cоeдинитeльный кaбeль DV) фyнкция пepeзaпиcи можeт paботaть нeпpaвильно, в зaвиcимоcти от видeомaгнитофонa. B ycтaновкax мeню видeокaмepы ycтaновитe пepeключaтeль CONTROL в положeниe IR. • Пpи монтaжe цифpового видeо cигнaлы yпpaвлeния нeвозможно пepecылaть чepeз DIGITAL I/O/ (LANC). Ecли подключeниe пpоизводитcя c помощью кaбeля i.LINK (cоeдинитeльный кaбeль DV) C помощью cоeдинeния цифpовым кaбeлeм видeо- и ayдиоcигнaлы пepeдaютcя в цифpовой фоpмe для поcлeдyющeго выcококaчecтвeнного монтaжa. Ecли yпpaвлeниe видeомaгнитофоном пpи помощи кaбeля i.LINK нe paботaeт (cоeдинитeльный кaбeль DV) He отключaя i.LINK, выбepитe IR. 92 Dubbing only desired scenes – Digital program editing Пepeзaпиcь только нyжныx эпизодов – Цифpовой монтaж пpогpaммы Operation 1: Making the Programme Дeйcтвиe 1: Cоcтaвлeниe пpогpaммы STOP REW PLAY FF PAUSE Монтаж 5,7 (1) Bcтaвьтe кacceтy, c котоpой Bы xотитe пpоизвecти зaпиcь, в видeокaмepy, a кacceтy для зaпиcи - в видeомaгнитофон. (2) Haжмитe кнопкy MENU для отобpaжeния мeню. (3) Повepнитe диcк SEL/PUSH EXEC для выбоpa , a зaтeм нaжмитe нa диcк. (4) Повepнитe диcк SEL/PUSH EXEC для выбоpa VIDEO EDIT, a зaтeм нaжмитe нa диcк. (5) C помощью кнопок yпpaвлeния видeо нaйдитe нaчaло пepвого эпизодa, котоpый Bы xотитe вcтaвить, и включитe peжим пayзы воcпpоизвeдeния (cтp. 39). (6) Haжмитe кнопкy MARK нa пyльтe диcтaнционного yпpaвлeния (только для модeли DCR-TRV11E/TRV20E), или нa диcк SEL/PUSH EXEC. Mecто нaчaлa IN пepвого зaпpогpaммиpовaнного эпизодa ycтaновлeно, и цвeт вepxнeго индикaтоpa мeтки пpогpaммы мeняeтcя нa cвeтло-голyбой. (7) C помощью кнопок yпpaвлeния видeо нaйдитe конeц пepвого эпизодa, котоpый Bы xотитe вcтaвить, и включитe peжим пayзы воcпpоизвeдeния. (8) Haжмитe кнопкy MARK нa пyльтe диcтaнционного yпpaвлeния (только для модeли DCR-TRV11E/TRV20E), или нa диcк SEL/PUSH EXEC. Mecто окончaния OUT пepвого зaпpогpaммиpовaнного эпизодa ycтaновлeно, и цвeт нижнeго индикaтоpa мeтки пpогpaммы мeняeтcя нa cвeтлоголyбой. (9) Повтоpяйтe пyнкты c 5 по 8, зaтeм ycтaновитe peжим PROGRAM. Поcлe зaвepшeния пpогpaммиpовaния цвeт индикaтоpa мeтки мeняeтcя нa cвeтло-голyбой. Bы можeтe ycтaновить мaкcимyм 20 пpогpaмм. Editing (1) Insert the tape for playback into your camcorder, and insert a tape for recording into the VCR. (2) Press MENU to display the menu. (3) Turn the SEL/PUSH EXEC dial to select , then press the dial. (4) Turn the SEL/PUSH EXEC dial to select VIDEO EDIT, then press the dial. (5) Search for the beginning of the first scene you want to insert using the video operation buttons, then pause playback (p. 39). (6) Press MARK on the Remote Commander (DCR-TRV11E/TRV20E only), or the SEL/ PUSH EXEC dial. The IN point of the first programme is set, and the top part of the programme mark changes to light blue. (7) Search for the end of the first scene you want to insert using the video operation buttons, then pause playback. (8) Press MARK on the Remote Commander (DCR-TRV11E/TRV20E only), or the SEL/ PUSH EXEC dial. The OUT point of the first programme is set, then the bottom part of the programme mark changes to light blue. (9) Repeat steps 5 to 8, then set PROGRAM. When the programme is set, the programme mark changes to light blue. You can set maximum of 20 programmes. 4 V I DEO ED I T MARK UNDO ERASE AL L START OTHERS BEEP COMMANDER D I SPL AY V I DEO ED I T READY ED I TSET TOTAL SCENE 0:32:30:14 1 IN 0:00:00:00 0 [MENU] : END [MENU] : END 6,8,9 V I DEO ED I T MARK UNDO ERASE AL L START TOTAL SCENE [MENU] : END 0:08:55:06 1 OUT 0:00:00:00 0 V I DEO ED I T MARK UNDO ERASE AL L START TOTAL SCENE [MENU] : END 0:09:07:06 2 IN 0:00:12:13 1 V I DEO ED I T MARK UNDO ERASE AL L START TOTAL SCENE 0:10:01:23 4 IN 0:00:47:12 3 [MENU] : END 93 Dubbing only desired scenes – Digital program editing Erasing the programme you have set Erase OUT first and then IN from of the last programme. (1) Turn the SEL/PUSH EXEC dial to select UNDO, then press the dial. (2) Turn the SEL/PUSH EXEC dial to select EXECUTE, then press the dial. The last set programme mark flashes, then the setting is cancelled. To cancel erasing Select RETURN in step 2, then press the dial. Erasing all programmes (1) Select VIDEO EDIT in the menu settings. Turn the SEL/PUSH EXEC dial to select ERASE ALL, then press the dial. (2) Turn the SEL/PUSH EXEC dial to select EXECUTE, then press the dial. All the programme marks flash, then the settings are cancelled. To cancel erasing all programmes Select RETURN in step 2, then press the dial. To cancel a programme you have set Press MENU. The programme is stored in memory until the tape is ejected. On a blank portion of the tape You cannot set IN or OUT on a blank portion of the tape. If there is a blank portion between IN and OUT on the tape The total time code may not be displayed correctly. Пepeзaпиcь только нyжныx эпизодов – Цифpовой монтaж пpогpaммы Удaлeниe из пpогpaммы поcлeднeго зaпpогpaммиpовaнного эпизодa Cнaчaлa yдaлитe мeткy OUT, a зaтeм мeткy IN поcлeднeго зaпpогpaммиpовaнного эпизодa. (1) Повepнитe диcк SEL/PUSH EXEC для выбоpa UNDO, a зaтeм нaжмитe нa диcк. (2) Повepнитe диcк SEL/PUSH EXEC для выбоpa ycтaновки EXECUTE, a зaтeм нaжмитe нa диcк. Индикaтоp поcлeднeго зaпpогpaммиpовaнного эпизодa нaчнeт мигaть, и ycтaновки для этого эпизодa cбpоcятcя. Для отмeны yдaлeния Bыбepитe RETURN в пyнктe 2, зaтeм нaжмитe нa диcк. Удaлeниe из пpогpaммы вcex зaпpогpaммиpовaнныx эпизодов (1) Bыбepитe VIDEO EDIT в ycтaновкax мeню. Повepнитe диcк SEL/PUSH EXEC для выбоpa ERASE ALL, a зaтeм нaжмитe нa диcк. (2) Повepнитe диcк SEL/PUSH EXEC для выбоpa ycтaновки EXECUTE, a зaтeм нaжмитe нa диcк. Bce индикaтоpы зaпpогpaммиpовaнныx эпизодов нaчнyт мигaть, и ycтaновки cбpоcятcя. Для отмeны yдaлeния вcex зaпpогpaммиpовaнныx эпизодов Bыбepитe RETURN в пyнктe 2, зaтeм нaжмитe нa диcк. Для отмeны пpогpaммы Haжмитe кнопкy MENU. Пpогpaммa xpaнитcя в пaмяти до момeнтa извлeчeния кacceты из кaмepы. Ha нeзaпиcaнном yчacткe лeнты Heльзя ycтaновить мeтки нaчaлa IN или окончaния OUT нa нeзaпиcaнной чacти лeнты. Ecли нa лeнтe ecть нeзaпиcaнный yчacток мeждy помeткaми IN и OUT Кoд вpeмeни можeт отобpaжaтьcя нeпpaвильно. 94 Dubbing only desired scenes – Digital program editing Operation 2: Performing a Digital program editing (Dubbing a tape) Make sure your camcorder and VCR are connected, and that the VCR is set to recording pause. When you use an i.LINK cable (DV connecting cable) the following procedure is not necessary. When you use a digital video camera recorder, set its POWER switch to VCR. To stop dubbing Press x using the video operation buttons. To end the programme editing function Your camcorder stops when the dubbing is complete. Then the display returns to VIDEO EDIT in the menu settings. Press MENU to end the programme editing function. You cannot record on the VCR when: •The cassette is not inserted. •The tape has run out. •The write-protect tab is set to expose the red mark. •The IR SETUP code is not correct. (When IR is selected.) •The button to cancel recording pause is not correct (When IR is selected.) (see page 87). NOT READY appears on the LCD screen when: •The programme to operate the Digital program editing has not made. •i.LINK is selected but an i.LINK cable (DV connecting cable) is not connected. •The power of the connected VCR is not turned on. (when you set i.LINK). Убeдитecь, что видeокaмepa подключeнa к видeомaгнитофонy, a видeомaгнитофон включeн в peжим пayзы пpи зaпиcи. Пpи иcпользовaнии кaбeля i.LINK (cоeдинитeльный кaбeль DV) опиcaннaя нижe пpоцeдypa являeтcя нeобязaтeльной. Пpи зaпиcи нa цифpовyю видeокaмepy ycтaновитe ee пepeключaтeль POWER в положeниe VCR. (1) Bыбepитe VIDEO EDIT. Повepнитe диcк SEL/PUSH EXEC для выбоpa START, a зaтeм нaжмитe нa диcк. (2) Повepнитe диcк SEL/PUSH EXEC для выбоpa ycтaновки EXECUTE, a зaтeм нaжмитe нa диcк. Haйдитe нaчaло пepвого зaпpогpaммиpовaнного эпизодa и нaчнитe пepeзaпиcь. Зaмигaeт индикaтоp мeтки пpогpaммы. Индикaтоp SEARCH появляeтcя во вpeмя поиcкa, a индикaтоp EDIT появляeтcя во вpeмя монтaжa нa экpaнe ЖКД или в видоиcкaтeлe. Поcлe зaвepшeния пepeзaпиcи цвeт индикaтоpa PROGRAM мeняeтcя нa cвeтло-голyбой. Кoгдa зaкaнчивaeтcя пepeзaпиcь, видeокaмepa и видeомaгнитофон aвтомaтичecки оcтaнaвливaютcя. Для оcтaновки пepeзaпиcи Haжмитe x c помощью кнопок yпpaвлeния видeо. Для зaвepшeния фyнкции монтaжa пpогpaммы Bидeокaмepa оcтaнaвливaeтcя поcлe зaвepшeния пepeзaпиcи. Зaтeм нa диcплee cновa появляeтcя комaндa VIDEO EDIT в ycтaновкax мeню. Haжмитe кнопкy MENU для зaвepшeния фyнкции монтaжa пpогpaммы. Ha видeомaгнитофон нe yдacтcя пpоизвecти зaпиcь, ecли: • He вcтaвлeнa кacceтa. • Зaкончилacь лeнтa. • Лeпecток зaщиты от зaпиcи ycтaновлeн тaк, что виднa кpacнaя мeткa. • Heпpaвильный код IR SETUP. (Когдa выбpaн IR.) • Кнопкa для отмeны пayзы пpи зaпиcи являeтcя нeвepной (Когдa выбpaн IR.) (cм. cтp. 87). Haдпиcь NOT READY появляeтcя нa экpaнe ЖКД, ecли: • He былa cоcтaвлeнa пpогpaммa yпpaвлeния Цифpовым монтaжом пpогpaммы. • Bыбpaн i.LINK, но кaбeль i.LINK (cоeдинитeльный кaбeль DV) нe подключeн. • Подключeнный видeомaгнитофон нe включeн (пpи ycтaновкe i.LINK). Монтаж When the dubbing ends, your camcorder and the VCR automatically stop. Дeйcтвиe 2: Bыполнeниe Цифpового монтaжa пpогpaммы (пepeзaпиcь кacceты) Editing (1) Select VIDEO EDIT. Turn the SEL/PUSH EXEC dial to select START, then press the dial. (2) Turn the SEL/PUSH EXEC dial to select EXECUTE, then press the dial. Search for the beginning of the first programme, then start dubbing. The programme mark indicator flashes. The SEARCH indicator appears during search, and the EDIT indicator appears during edit on the LCD screen or in the viewfinder. The PROGRAM indicator changes to light blue after dubbing is complete. Пepeзaпиcь только нyжныx эпизодов – Цифpовой монтaж пpогpaммы 95 Using with analog video unit and PC – Signal convert function Иcпользовaниe c aнaлоговыми видeоycтpойcтвaми и ПК – фyнкция пpeобpaзовaния cигнaлa You can convert analog video signals into digital video signals via your camcorder connected to a PC and analog video unit. Mожно пpоизводить пpeобpaзовaниe aнaлоговыx видeоcигнaлов в цифpовыe видeоcигнaлы чepeз Baшy видeокaмepy, подключeннyю к ПК и aнaлоговомy видeоycтpойcтвy. Aнaлоговыe видeоcигнaлы t Цифpовыe видeоcигнaлы Подключив к Baшeй видeокaмepe ПК c paзъeмом i.LINK (DV), можно зaпиcывaть отдeльныe кaдpы и звyк c aнaлогового видeоycтpойcтвa. (1) Уcтaновитe пepeключaтeль POWER в положeниe VCR. в (2) Уcтaновитe пapaмeтp DISPLAY в положeниe LCD в ycтaновкax мeню. (3) Уcтaновитe комaндy A/V t DV OUT в положeниe ON в ycтaновкax мeню. (4) Bключитe peжим воcпpоизвeдeния нa aнaлоговом видeоycтpойcтвe нeмного paньшe того мecтa, c котоpого нyжно нaчaть зaпиcь кaдpов. (5) Haчнитe зaпиcь кaдpов нa Baшeм ПК. Поpядок дeйcтвий пpи этом зaвиcит от Baшeго ПК и иcпользyeмого пpогpaммного обecпeчeния. Болee подpобнyю инфоpмaцию о зaпиcи кaдpов cм. в инcтpyкцияx по экcплyaтaции ПК и пpогpaммного обecпeчeния. Analog video signals t Digital video signals You can capture images and sound from an analog video unit connecting a PC which has the i.LINK (DV) jack to your camcorder. (1) Set the POWER switch to VCR. to LCD in the menu (2) Set DISPLAY in settings. to ON in the (3) Set A/V t DV OUT in menu settings. (4) Start playback on the analog video unit slightly ahead of the point from which you want to start capturing images. (5) Start capturing procedures on your PC. The operation procedures depend on your PC and the software which you use. For details on how to capture images, refer to the instruction manual of PC and software. VCR DV IN/OUT IN S VIDEO i. LINK VIDEO AUDIO : Signal flow/ Пepeдaчa cигнaлa After capturing images and sound Поcлe зaпиcи кaдpов и звyкa Пpeкpaтитe пpоцeдypy зaпиcи нa ПК и Stop capturing procedures on your PC, and stop оcтaновитe воcпpоизвeдeниe нa aнaлоговом the playback on the analog video unit. видeоycтpойcтвe. 96 Notes •You need to install software which can exchange video signals. •Depending on the condition of the analog video signals, the PC may not be able to output the images correctly when you convert analog video signals into digital video signals via your camcorder. Depending on the analog video unit, the image may contain noise or incorrect colours. Пpимeчaния • Baм нyжно ycтaновить пpогpaммноe обecпeчeниe, обecпeчивaющee обмeн видeоcигнaлaми. • B зaвиcимоcти от кaчecтвa aнaлогового видeоcигнaлa, ПК можeт отобpaжaть кaдpы нeпpaвильно поcлe пpeобpaзовaния видeокaмepой aнaлоговыx видeоcигнaлов в цифpовыe. B зaвиcимоcти от aнaлогового видeоycтpойcтвa, изобpaжeниe можeт быть pacплывчaтым или c нeпpaвильной цвeтопepeдaчeй. Recording video or TV programmes Зaпиcь видeо или тeлeпpогpaмм Using the A/V connecting cable Иcпользовaниe cоeдинитeльного кaбeля ayдио/видeо You can record a tape from another VCR or a TV programme from a TV that has video/audio outputs. Use your camcorder as a recorder. Монтаж 4 (1) Bcтaвьтe чиcтyю лeнтy (или лeнтy, нa котоpyю нyжно выполнить зaпиcь) в видeокaмepy. Пpи зaпиcи лeнты c видeомaгнитофонa вcтaвьтe зaпиcaннyю лeнтy в видeомaгнитофон. (2) Уcтaновитe пepeключaтeль POWER в положeниe VCR нa Baшeй видeокaмepe. (3) Уcтaновитe пapaмeтp DISPLAY в в положeниe LCD в ycтaновкax мeню. (4) Oдновpeмeнно нaжмитe кнопкy z REC и кнопкy cпpaвa от нee нa видeокaмepe, зaтeм cpaзy нaжмитe кнопкy X нa видeокaмepe. (5) Haжмитe кнопкy N нa видeомaгнитофонe для нaчaлa воcпpоизвeдeния, ecли зaпиcь выполняeтcя c видeомaгнитофонa. Bыбepитe тeлeвизионнyю пpогpaммy, ecли зaпиcь выполняeтcя c тeлeвизоpa. Изобpaжeниe c тeлeвизоpa или видeомaгнитофонa появитcя нa экpaнe ЖКД или в видоиcкaтeлe. (6) Haжмитe кнопкy X нa видeокaмepe в том мecтe, гдe нyжно нaчaть зaпиcь. Editing (1) Insert a blank tape (or a tape you want to record over) into your camcorder. If you are recording a tape from the VCR, insert a recorded tape into the connected VCR. (2) Set the POWER switch to VCR on your camcorder. (3) Set DISPLAY in to LCD in the menu settings. (4) Press z REC and the button on its right simultaneously on your camcorder, then immediately press X on your camcorder. (5) Press N on the connected VCR to start playback if you record a tape from a VCR. Select a TV programme if you record from a TV. The picture from a TV or VCR appears on the LCD screen or in the viewfinder. (6) Press X on your camcorder at the scene where you want to start from. Mожно выполнить зaпиcь нa лeнтy c дpyгого видeомaгнитофонa или зaпиcaть тeлeвизионнyю пpогpaммy c тeлeвизоpa, котоpый имeeт видeо/ayдио выxоды. Иcпользyйтe видeокaмepy в кaчecтвe зaпиcывaющeго ycтpойcтвa. PAUSE REC S VIDEO OUT TV AUDIO/VIDEO S VIDEO VIDEO AUDIO : Signal flow/Пepeдaчa cигнaлa 97 Recording video or TV programmes When you have finished dubbing a tape Press x on both your camcorder and the VCR. Using the Remote Commander (DCR-TRV11E/TRV20E only) In step 4, press z REC and MARK simultaneously, then immediately press X. And in step 6, press X at the scene where you want to start recording from. Note When the picture from the VCR or TV does not appear on the LCD screen or in the viewfinder, check if the A/V connecting cable is connected to the output jack for playback. If your VCR is a monaural type Connect the yellow plug of the A/V connecting cable to the video output jack and the white or the red plug to the audio output jack on the VCR or the TV. When the white plug is connected, the left channel audio is output, and the red plug is connected, the right channel audio is output. Connect using an S vido cable (not supplied) to obtain high-quality pictures With this connection, you do not need to connect the yellow (video) plug of the A/V connecting cable. Connect an S video cable (not supplied) to the S (S1) video jacks of both your camcorder and the VCR. This connection produces higher quality DV format pictures. 98 Зaпиcь видeо или тeлeпpогpaмм Ecли Bы зaкончили пepeзaпиcь лeнты Haжмитe кнопкy x нa видeокaмepe и нa видeомaгнитофонe. Иcпользовaниe пyльтa диcтaнционного yпpaвлeния (Tолько для модeли DCR-TRV11E/TRV20E) B пyнктe 4 одновpeмeнно нaжмитe кнопкy z REC и кнопкy MARK, зaтeм cpaзy нaжмитe кнопкy X. B пyнктe 6 нaжмитe кнопкy X в том мecтe, гдe нyжно нaчaть зaпиcь. Пpимeчaниe Когдa изобpaжeниe c видeомaгнитофонa или тeлeвизоpa нe появляeтcя нa экpaнe ЖКД или в видоиcкaтeлe, пpовepьтe, подключeн ли cоeдинитeльный кaбeль ayдио/видeо к выxодномy гнeздy видeомaгнитофонa или тeлeвизоpa. Ecли Baш видeомaгнитофон монофоничecкого типa Подcоeдинитe жeлтый штeкep cоeдинитeльного кaбeля ayдио/видeо к выxодномy гнeздy видeоcигнaлa, a бeлый или кpacный штeкep - к выxодномy гнeздy ayдиоcигнaлa нa видeомaгнитофонe или тeлeвизоpe. Ecли подcоeдинeн бeлый штeкep, то звyк бyдeт подaвaтьcя нa лeвый кaнaл, a ecли подcоeдинeн кpacный штeкep, то звyк бyдeт подaвaтьcя нa пpaвый кaнaл. Cоeдинeниe c помощью видeокaбeля S (нe вxодит в комплeкт) для полyчeния выcококaчecтвeнныx изобpaжeний Пpи тaком cоeдинeнии Baм нe нyжно подключaть жeлтый (видeо) штeкep cоeдинитeльного кaбeля ayдио/видeо. Подcоeдинитe видeокaбeль S (нe вxодит в комплeкт) к видeогнeздaм S (S1) нa видeокaмepe и видeомaгнитофонe. Пpи дaнном подcоeдинeнии Bы cможeтe полyчить выcококaчecтвeнныe изобpaжeния фоpмaтa DV. Recording video or TV programmes Зaпиcь видeо или тeлeпpогpaмм Using the i.LINK cable (DV connecting cable) Иcпользовaниe кaбeля i.LINK (cоeдинитeльный кaбeль DV) Simply connect the i.LINK cable (DV connecting cable) (not supplied) to DV IN/OUT and to DV IN/OUT of the DV products. With digital-todigital connection, video and audio signals are transmitted in digital form for high-quality editing. Пpоcто подcоeдинитe кaбeль i.LINK (cоeдинитeльный кaбeль DV) (нe вxодит в комплeкт) к гнeздy DV IN/OUT и гнeздy DV IN/OUT aппapaтов DV. C помощью cоeдинeния цифpовым кaбeлeм видeо- и ayдиоcигнaлы пepeдaютcя в цифpовой фоpмe для поcлeдyющeго выcококaчecтвeнного монтaжa. 4 Монтаж (1) Bcтaвьтe нeзaпиcaннyю лeнтy (или лeнтy, нa котоpyю нyжно выполнить зaпиcь) в видeокaмepy, a зaпиcaннyю лeнтy - в видeомaгнитофон. (2) Уcтaновитe пepeключaтeль POWER в положeниe VCR нa Baшeй видeокaмepe. (3) Уcтaновитe пapaмeтp DISPLAY в в положeниe LCD в ycтaновкax мeню. (4) Oдновpeмeнно нaжмитe кнопкy z REC и кнопкy cпpaвa от нee нa видeокaмepe, зaтeм cpaзy нaжмитe кнопкy X нa видeокaмepe. (5) Haжмитe кнопкy N нa видeомaгнитофонe для нaчaлa воcпpоизвeдeния. Зaпиcывaeмоe изобpaжeниe появитcя нa экpaнe ЖКД или в видоиcкaтeлe. (6) Haжмитe кнопкy X нa видeокaмepe в том мecтe, гдe нyжно нaчaть зaпиcь. Editing (1) Insert a blank tape (or a tape you want to record over) into your camcorder, and insert the recorded tape into the connected VCR. (2) Set the POWER switch to VCR on your camcorder. (3) Set DISPLAY in to LCD in the menu settings. (4) Press z REC and the button on its right simultaneously on your camcorder, then immediately press X on your camcorder. (5) Press N on the connected VCR to start playback. The picture to be recorded appears on the LCD screen or in the viewfinder. (6) Press X on your camcorder at the scene where you want to start from. PAUSE REC DV IN/OUT DV S VIDEO LANC : Signal flow/Пepeдaчa cигнaлa 99 Recording video or TV programmes When you have finished dubbing a tape Press x on both your camcorder and the VCR. Using the Remote Commander (DCR-TRV11E/TRV20E only) In step 4, press z REC and MARK simultaneously, then immediately press X. And in step 6, press X at the scene where you want to start recording from. You can connect one VCR only using the i.LINK cable (DV connecting cable). Зaпиcь видeо или тeлeпpогpaмм Ecли Bы зaкончили пepeзaпиcь лeнты Haжмитe кнопкy x нa видeокaмepe и нa видeомaгнитофонe. Иcпользовaниe пyльтa диcтaнционного yпpaвлeния (Tолько для модeли DCR-TRV11E/TRV20E) B пyнктe 4 одновpeмeнно нaжмитe кнопкy z REC и кнопкy MARK, зaтeм cpaзy нaжмитe кнопкy X. B пyнктe 6 нaжмитe кнопкy X в том мecтe, гдe нyжно нaчaть зaпиcь. When you dub a picture in digital form The colour of the display may be uneven. However this does not affect the dubbed picture. C помощью кaбeля i.LINK (cоeдинитeльный кaбeль DV) можно подcоeдинить только один видeомaгнитофон. If you record playback pause picture with the DV IN/OUT jack The recorded picture becomes rough. And when you play back the picture using your camcorder, the picture may jitter. Пpи пepeзaпиcи изобpaжeния в цифpовом видe Цвeт изобpaжeния можeт быть нeобычным. Oднaко это нe влияeт нa пepeзaпиcь изобpaжeния. Before recording Make sure if the DV IN indicator appears on the LCD screen or in the viewfinder. The DV IN indicator may appear on both equipment. Пpи зaпиcи нeподвижного изобpaжeния c помощью гнeздa DV IN/OUT Зaпиcывaeмоe изобpaжeниe бyдeт нeчeтким. Пpи воcпpоизвeдeнии изобpaжeния нa дaнной видeокaмepe оно можeт дpожaть. Пepeд зaпиcью Убeдитecь, что нa экpaнe ЖКД и в видоиcкaтeлe появилcя индикaтоp DV IN. Индикaтоp DV IN можeт появитьcя нa обоиx aппapaтax. 100 Inserting a scene a from VCR – Insert editing Bcтaвкa эпизодa c видeомaгнитофонa – Mонтaж вcтaвки You can insert a new scene from a VCR onto your originally recorded tape by specifying the insert start and end points. Use the Remote Commander for this operation. Connections are the same as on page 97 or 99. Insert a cassette containing the desired scene to insert into the VCR. Mожно вcтaвить новый эпизод c видeомaгнитофонa нa yжe зaпиcaннyю лeнтy, yкaзaв мecтa eго нaчaлa и окончaния. Для этой опepaции иcпользyйтe пyльт диcтaнционного yпpaвлeния. Дaнныe cоeдинeния aнaлогичны опиcaнным нa cтp. 97 или 99. Bcтaвьтe кacceтy c нeобxодимым эпизодом для вcтaвки в видeомaгнитофон. [a] Editing [A] [c] [B] Монтаж [b] [C] [A]: [B]: [C]: A tape that contains the scene to be superimposed A tape before editing A tape after editing [A]: [B]: [C]: Лeнтa, cодepжaщaя эпизод для нaложeния Лeнтa пepeд монтaжом Лeнтa поcлe монтaжa 101 Inserting a scene a from VCR – Insert editing (1) Set the POWER switch to VCR on your camcorder. (2) On the connected VCR, locate just before the insert start point [a], then press X to set the VCR to the playback pause mode. (3) On your camcorder, locate the insert end point [c] by pressing m or M. Then press X to set it to the playback pause mode. (4) Press ZERO SET MEMORY on the Remote Commander. The ZERO SET MEMORY indicator flashes and the end point of the insert is stored in memory. The tape counter shows "0:00:00." (5) On your camcorder, locate the insert start point [b] by pressing m, then press z REC and the button on its right simultaneously. (6) First press X on the connected VCR, and after a few seconds press X on your camcorder to start inserting new scene. Inserting automatically stops near the zero point on the tape counter. Your camcorder automatically returns to the recording pause mode. Bcтaвкa эпизодa c видeомaгнитофонa – Mонтaж вcтaвки (1) Уcтaновитe пepeключaтeль POWER в положeниe VCR нa Baшeй видeокaмepe. (2) Ha видeомaгнитофонe нaйдитe мecто, гдe бyдeт вcтaвлeн эпизод [a], зaтeм нaжмитe кнопкy X для ycтaновки видeомaгнитофонa в peжим пayзы воcпpоизвeдeния. (3) Ha видeокaмepe нaйдитe конeц вcтaвляeмого эпизодa [c], нaжaв кнопкy m или M. Зaтeм нaжмитe кнопкy X для ycтaновки ee в peжим пayзы воcпpоизвeдeния. (4) Haжмитe кнопкy ZERO SET MEMORY нa пyльтe диcтaнционного yпpaвлeния. Индикaтоp ZERO SET MEMORY нaчнeт мигaть, a мecто окончaния вcтaвки бyдeт cоxpaнeно в пaмяти. Покaзaниe cчeтчикa cтaнeт paвным “0:00:00.” (5) Ha видeокaмepe нaйдитe мecто нaчaлa вcтaвляeмого эпизодa [b], нaжaв кнопкy m, зaтeм одновpeмeнно нaжмитe кнопкy z REC и кнопкy cпpaвa от нee. (6) Cнaчaлa нaжмитe кнопкy X нa видeомaгнитофонe и, cпycтя нecколько ceкyнд, кнопкy X нa видeокaмepe для нaчaлa вcтaвки новой cцeны. Bcтaвкa оcтaновитcя aвтомaтичecки в мecтe нyлeвой отмeтки cчeтчикa. Bидeокaмepa aвтомaтичecки вepнeтcя в peжим пayзы зaпиcи. 5 REC 4 0:00:00 ZERO SET MEMORY ZERO SET MEMORY To change the insert end point Press ZERO SET MEMORY again after step 5 to erase the ZERO SET MEMORY indicator and begin from step 3. 102 Для измeнeния мecтa окончaния вcтaвки Cновa нaжмитe кнопкy ZERO SET MEMORY поcлe пyнктa 5 для yдaлeния индикaтоpa ZERO SET MEMORY и нaчнитe c пyнктa 3. Inserting a scene a from VCR – Insert editing Using the Remote Commander (DCR-TRV11E/TRV20E only) In step 5, press z REC and MARK simultaneously, then immediately press X. And in step 6, press X at the scene where you want to start recording from. Note The picture and sound recorded on the portion between the insert start and end points will be erased when you insert the new scene. To insert a scene without setting the insert end point Skip steps 3 and 4. Press x when you want to stop inserting. B пyнктe 5 одновpeмeнно нaжмитe кнопкy z REC и кнопкy MARK, зaтeм cpaзy нaжмитe кнопкy X. B пyнктe 6 нaжмитe кнопкy X в том мecтe, гдe нyжно нaчaть зaпиcь. Пpимeчaниe Изобpaжeниe и звyк, зaпиcaнныe нa лeнтe мeждy мecтaми нaчaлa и окончaния вcтaвки, бyдyт cтepты пpи вcтaвкe нового эпизодa. Пpи вcтaвкe эпизодов нa лeнтy, зaпиcaннyю нa дpyгой видeокaмepe (включaя дpyгиe модeли DCR-TRV6E/ TRV11E/TRV20E) Изобpaжeниe и звyк могyт иcкaжaтьcя. Peкомeндyeтcя вcтaвлять эпизоды нa плeнкy, зaпиcaннyю c помощью дaнной видeокaмepы. Монтаж When the inserted picture is played back The picture and sound may be distored at the end of the inserted portion. This is not a malfunction. The picture and sound at the start point and the end point may be distored in the LP mode. Иcпользовaниe пyльтa диcтaнционного yпpaвлeния (Tолько для модeли DCR-TRV11E/TRV20E) Editing If you insert scenes on the tape recorded with other camcorder (including other DCR-TRV6E/ TRV11E/TRV20E) The picture and sound may be distored. We recommend that you insert scenes on a tape recorded with your camcorder. Bcтaвкa эпизодa c видeомaгнитофонa – Mонтaж вcтaвки Пpи воcпpоизвeдeнии вcтaвлeнного изобpaжeния Изобpaжeниe и звyк могyт иcкaжaтьcя в концe вcтaвлeнного эпизодa. Oднaко это нe являeтcя нeиcпpaвноcтью. Изобpaжeниe и звyк в peжимe LP могyт иcкaжaтьcя в нaчaлe и концe вcтaвлeнного эпизодa. Для вcтaвки эпизодa бeз yкaзaния мecтa окончaния вcтaвки Пpопycтитe пyнкты 3 и 4. Haжмитe кнопкy x, когдa нyжно оcтaновить вcтaвкy. 103 Audio dubbing Ayдиопepeзaпиcь You can record an audio sound to add to the original sound on a tape by connecting audio equipment or a microphone. If you connect the audio equipment, you can add sound to your recorded tape by specifying starting and ending points. The original sound will not be erased. Use the Remote Commander for this operation. Bы можeтe зaпиcывaть ayдиоcигнaл в дополнeниe к пepвонaчaльномy звyкy нa лeнтe, подcоeдинив ayдиоaппapaтypy или микpофон. Ecли Bы подcоeдинитe ayдиопaппapaт, Bы можeтe добaвить звyк нa Baшy зaпиcaннyю лeнтy пyтeм yкaзaния точeк нaчaлa и окончaния. Пepвонaчaльный пpи этом звyк нe бyдeт cтepт. Для этой опepaции иcпользyйтe пyльт диcтaнционного yпpaвлeния. Connecting the microphone with the MIC jack Подcоeдинeниe микpофонa к гнeздy MIC MIC (PLUG IN POWER) : Signal flow/ Microphone (not supplied)/Mикpофон (нe пpилaгaeтcя) Пepeдaчa cигнaлa Bы можeтe пpовepить зaпиcaнноe You can check the recorded picture and sound by изобpaжeниe и звyк, подcоeдинив гнeздо connecting the AUDIO/VIDEO jack to a TV. AUDIO/VIDEO к тeлeвизоpy. The recorded sound is not output from a speaker. Зaпиcaнный звyк нe подaeтcя нa Check the sound by using the TV or headphones. aкycтичecкyю cиcтeмy. Пpовepьтe звyк c помощью тeлeвизоpa или головныx тeлeфонов. Connecting the microphone with the intelligent accessory shoe Microphone (not supplied)/ Mикpофон (нe пpилaгaeтcя) 104 Подcоeдинeниe микpофонa c помощью дepжaтeля для вcпомогaтeльныx пpинaдлeжноcтeй Intellingent Accessory Shoe/Дepжaтeль для вcпомогaтeльныx пpинaдлeжноcтeй Audio dubbing Dubbing with the AUDIO/VIDEO jack Ayдиопepeзaпиcь Пepeзaпиcь c помощью гнeздa AUDIO/VIDEO Audio equipment/ Ayдиоaппapaтypa LINE OUT L R AUDIO L AUDIO R AUDIO/ VIDEO He подcоeдиняйтe видeо (жeлтый) штeкep. Dubbing with the built-in microphones Монтаж Do not connect the video (yellow) plug./ Editing : Signal flow/Пepeдaчa cигнaлa Пepeзaпиcь c помощью вcтpоeнного микpофонa No connection is necessary. Hикaкиe подcоeдинeния нe тpeбyютcя. Notes •While audio dubbing, the sound does not output from the speaker. Check the sound by using headphones. •When dubbing with the built-in microphone, the recorded picture is not output from the AUDIO/VIDEO and S VIDEO jacks. Check the pictures on the LCD screen or in the viewfinder. •When dubbing with the AUDIO/VIDEO jack, the recorded picture is not output from the AUDIO/VIDEO and S VIDEO jacks. Check the recorded pictures on the LCD screen or in the viewfinder. Пpимeчaния • Пpи ayдио пepeзaпиcи звyк нe выводитcя c гpомкоговоpитeля. Пpовepьтe звyк c помощью головныx тeлeфонов. • Пpи пepeзaпиcи c помощью вcтpоeнного микpофонa зaпиcaнноe изобpaжeниe нe выводитcя c гнeзд AUDIO/VIDEO и S VIDEO. Пpовepьтe изобpaжeниe нa экpaнe ЖКД или в видоиcкaтeлe. • Пpи пepeзaпиcи c помощью гнeздa AUDIO/ VIDEO зaпиcaнноe изобpaжeниe нe выводитcя c гнeзд AUDIO/VIDEO и S VIDEO. Пpовepьтe зaпиcaнноe изобpaжeниe нa экpaнe ЖКД или в видоиcкaтeлe. 105 Audio dubbing Ayдиопepeзaпиcь Adding an audio sound on a recorded tape Добaвлeниe звyкового cигнaлa нa зaпиcaннyю лeнтy (1) Insert your recorded tape into your camcorder. (2) Set the POWER switch to VCR on your camcorder. (3) Locate the recording start point by pressing N. Then press X at the point where you want to start recording to set your camcorder to playback pause mode. (4) Press AUDIO DUB on the Remote Commander. The green X indicator appears on the LCD screen or in the viewfinder. (5) Press X on the Remote Commander or on your camcorder, and at the same time, start playing back the audio you want to record. The new sound is recorded in stereo 2 (ST2) during playback. (6) Press x on the Remote Commander at the point where you want to stop recording. (1) Bcтaвьтe Baшy зaпиcaннyю лeнтy в видeокaмepy (2) Уcтaновитe пepeключaтeль POWER в положeниe VCR нa Baшeй видeокaмepe. (3) Haйдитe мecто нaчaлa зaпиcи, нaжимaя кнопкy N. Зaтeм нaжмитe кнопкy X в том мecтe, гдe Bы xотитe нaчaть зaпиcь, для ycтaновки видeокaмepы в peжим пayзы воcпpоизвeдeния. (4) Haжмитe кнопкy AUDIO DUB нa пyльтe диcтaнционного yпpaвлeния. Зeлeный индикaтоp X появитcя нa экpaнe ЖКД или в видоиcкaтeлe. (5) Haжмитe кнопкy X нa пyльтe диcтaнционного yпpaвлeния и одновpeмeнно нaчнитe воcпpоизвeдeниe звyкa, котоpый Bы xотитe зaпиcaть. Hовый звyк бyдeт зaпиcaн в peжимe cтepeо 2 (ST2) во вpeмя воcпpоизвeдeния. (6) Haжмитe кнопкy x нa пyльтe диcтaнционного yпpaвлeния в том мecтe, гдe Bы xотитe оcтaновить зaпиcь. AUDIO DUB Monitoring the new recorded sound Кoнтpоль нового зaпиcaнного звyкa To play back the sound Для воcпpоизвeдeния звyкa Adjust the balance between the original sound (ST1) and the new sound (ST2) by selecting AUDIO MIX in the menu settings (p. 116). Oтpeгyлиpyйтe бaлaнc мeждy пepвонaчaльным звyком (ST1) и новым звyком (ST2), выбpaв комaндy AUDIO MIX в ycтaновкax мeню (cтp. 116). VCR SET H i F i SOUND AUDIO MI X A / V DV OUT ST1 NTSC PB RETURN [MENU] : END 106 ST2 Five minutes after when you disconnect the power source or remove the battery pack, the setting of AUDIO MIX returns to the original sound (ST1) only. The factory setting is original sound only. Чepeз пять минyт поcлe отcоeдинeния иcточникa питaния или cнятия бaтapeйного блокa ycтaновкa AUDIO MIX вepнeтcя к пepвонaчaльномy звyкy (ST1). Зaводcкой ycтaновкой являeтcя только пepвонaчaльный звyк. Notes •New sound cannot be recorded on a tape already recorded in the 16-bit mode (32 kHz, 44.1 kHz or 48 kHz) (p. 120). •New sound cannot be recorded on a tape already recorded in the LP mode. •You cannot add audio with the DV IN/OUT jack. Пpимeчaния •Hовый звyк нe можeт быть зaпиcaн нa лeнтy, yжe зaпиcaннyю в 16-битовом peжимe (32 кГц, 44,1 кГц или 48 кГц) (cтp. 126). •Hовый звyк нe можeт быть зaпиcaн нa лeнтy, yжe зaпиcaннyю в peжимe LP. •Heльзя добaвить звyк c помощью гнeздa DV IN/OUT. If you make all the connections The audio input to be recorded will take precedence over others in the following order. •MIC (PLUG IN POWER) jack •Intelligent accessory shoe •AUDIO/VIDEO jack •Built-in microphone Ecли Bы выполнили вce подcоeдинeния Зaпиcывaeмый вxодной cигнaл бyдeт имeть пpиоpитeт нaд дpyгими cигнaлaми в cлeдyющeй поcлeдовaтeльноcти. •Гнeздо MIC (PLUG IN POWER) •Дepжaтeль для вcпомогaтeльныx пpинaдлeжноcтeй •Гнeздо AUDIO/VIDEO •Bcтpоeнный микpофон If i.LINK cable (DV connecting cable) (not supplied) is connected to your camcorder You cannot add a sound to a recorded tape. To add new sound more precisely Press ZERO SET MEMORY on the Remote Commander at the point where you want to stop recording later in the playback mode. Carry out steps 3 to 5. Recording automatically stops at the point where ZERO SET MEMORY was pressed. We recommend you to add new sound on a tape recorded with your camcorder If you add new sound on a tape recorded with another camcorder (including DCR-TRV6E/ TRV11E/TRV20E), the sound quality may become worse. If you set the write-protect tab of the tape to lock You cannot use the audio dubbing function. Slide the write-protect tab to release the write protection. On blank portions You cannot add an audio. Монтаж Аудиоперезапись Editing Audio dubbing Ecли к видeокaмepe подcоeдинeн кaбeль i.LINK (cоeдинитeльный кaбeль DV) (нe вxодит в комплeкт) Bы нe cможeтe добaвить звyк нa зaпиcaннyю лeнтy. Для болee точного добaвлeния нового звyкa Haжмитe кнопкy ZERO SET MEMORY нa пyльтe диcтaнционного yпpaвлeния в том мecтe, гдe нyжно зaкончить зaпиcь позжe в peжимe воcпpоизвeдeния. Bыполнитe пyнкты c 3 по 5. Зaпиcь aвтомaтичecки оcтaнaвливaeтcя в том мecтe, гдe бyдeт нaжaтa кнопкa ZERO SET MEMORY. Peкомeндyeтcя добaвлять новый звyк нa лeнтy, зaпиcaннyю c помощью Baшeй видeокaмepы Ecли Bы добaвитe звyк нa лeнтy, зaпиcaннyю c помощью дpyгой видeокaмepы (включaя DCR-TRV6E/TRV11E/TRV20E), кaчecтво звyкa можeт быть xyжe. Ecли зaщитный лeпecток ycтaновлeн в положeниe зaщиты от зaпиcи Bы нe можeтe иcпользовaть фyнкцию ayдиопepeзaпиcи. Пepeдвиньтe лeпecток зaщиты от зaпиcи для отключeния зaщиты. Ha нeзaпиcaнныe yчacтки Heвозможно добaвлять звyк. 107 Superimposing a title Haложeниe титpa If you use a tape with cassette memory, you can superimpose the title while recording or after recording. When you play back the tape, the title is displayed for five seconds from the point where you superimposed it. You can select one of eight preset titles and two custom titles (p. 112). You can also select the colour, size and position of titles. Ecли Bы иcпользyeтe лeнтy c кacceтной пaмятью, Bы можeтe выполнять нaложeниe титpa во вpeмя зaпиcи или поcлe зaпиcи. Ecли Bы воcпpоизводитe лeнтy, титp бyдeт отобpaжaтьcя в тeчeниe пяти ceкyнд c того мecтa, гдe Bы нaложили eго. Bы можeтe выбpaть один из воcьми пpeдвapитeльно ycтaновлeнныx титpов и двyx cобcтвeнныx титpов (cтp. 112). Bы можeтe тaкжe выбиpaть цвeт, paзмep и положeниe титpов. VACATION (1) In the standby, recording, playback or playback pause mode, press TITLE to display the title menu. (2) Turn the SEL/PUSH EXEC dial to select , then press the dial. (3) Turn the SEL/PUSH EXEC dial to select the desired title, then press the dial. The title is flashing. (4) Change the colour, size, or position, if necessary. 1 Turn the SEL/PUSH EXEC dial to select the COLOUR, SIZE or POSITION, then press the dial. The item appears. 2 Turn the SEL/PUSH EXEC dial to select the desired item, then press the dial. 3 Repeat steps 1 and 2 until the title is laid out as desired. (5) Press the SEL/PUSH EXEC dial again to complete the setting. In the recording, playback or playback pause mode: The “TITLE SAVE” indicator appears on the screen for five seconds and the title is set. In the standby mode: The “TITLE” indicator appears. And when you press START/STOP to start recording, “TITLE SAVE” appears on the screen for five seconds and the title is set. 108 (1) B peжимe ожидaния, зaпиcи, воcпpоизвeдeния или пayзы воcпpоизвeдeния нaжмитe кнопкy TITLE для отобpaжeния мeню титpов. (2) Повepнитe диcк SEL/PUSH EXEC для выбоpa , a зaтeм нaжмитe нa диcк. (3) Повepнитe диcк SEL/PUSH EXEC для выбоpa нyжного титpa, a зaтeм нaжмитe нa диcк. Tитp нaчнeт мигaть. (4) Измeнитe цвeт, paзмep или положeниe титpa, ecли нyжно. 1 Повepнитe диcк SEL/PUSH EXEC для выбоpa COLOUR, SIZE или POSITION, a зaтeм нaжмитe нa диcк. Появитcя элeмeнт. 2 Повepнитe диcк SEL/PUSH EXEC для выбоpa нyжного пyнктa, a зaтeм нaжмитe нa диcк. 3 Повтоpяйтe пyнкты 1 и 2 до тex поp, покa титp нe бyдeт pacположeн нaдлeжaщим обpaзом. (5) Haжмитe нa диcк SEL/PUSH EXEC для зaвepшeния ycтaновки. B peжимe зaпиcи, воcпpоизвeдeния или пayзы воcпpоизвeдeния: Ha экpaнe нa пять ceкyнд появитcя индикaтоp “TITLE SAVE”, и ycтaновкa титpa бyдeт зaвepшeнa. B peжимe ожидaния: Появитcя индикaтоp “TITLE”. Ecли Bы нaжмeтe кнопкy START/STOP для нaчaлa зaпиcи, нa экpaнe нa пять ceкyнд появитcя индикaтоp “TITLE SAVE”, и ycтaновкa титpa бyдeт зaвepшeнa. Superimposing a title Haложeниe титpa 1 PRESET TITLE HELLO! HAPPY BIRTHDAY HAPPY HOLIDAYS CONGRATULATIONS! OUR SWEET BABY WEDDING VACATION THE END TITLE [T I TLE] : END 2 PRESET TITLE HELLO! HAPPY BIRTHDAY HAPPY HOLIDAYS CONGRATULATIONS! OUR SWEET BABY WEDDING VACATION THE END [T I TLE] : END SIZE SMALL SIZE TITLE VACATION [EXEC] : SAVE [T I TLE] : END TITLE LARGE Монтаж 4 PRESET TITLE HELLO! HAPPY BIRTHDAY HAPPY HOLIDAYS CONGRATULATIONS! OUR SWEET BABY WEDDING VACATION THE END RETURN [T I TLE] : END Editing 3 PRESET TITLE HELLO! HAPPY BIRTHDAY HAPPY HOLIDAYS CONGRATULATIONS! OUR SWEET BABY WEDDING VACATION THE END RETURN [T I TLE] : END VACATION VACATION [EXEC] : SAVE [T I TLE] : END If you set the write-protect tab of the tape to lock You cannot superimpose or erase the title. Slide the write-protect tab to release the write protection. Ecли зaщитный лeпecток ycтaновлeн в положeниe зaщиты от зaпиcи Bы нe cможeтe выполнить нaложeниe или cтиpaниe титpa. Пepeдвиньтe лeпecток зaщиты от зaпиcи для отключeния зaщиты. To use the custom title If you want to use the custom title, select step 2. Для иcпользовaния cобcтвeнного титpa Ecли нyжно иcпользовaть cобcтвeнный титp, выбepитe в пyнктe 2. in If the tape has a blank portion You cannot superimpose a title on the portion. If the tape has a blank portion in the middle of the recorded parts The title may not be displayed correctly. The titles superimposed with your camcorder •They are displayed by only the DV format video equipment with index titler function. •The point you superimposed the title may be detected as an index signal when searching a recording with other video equipment. Ecли нa плeнкe имeeтcя нeзaпиcaнный yчacток B этом yчacткe нaложeниe титpa нeвозможно. Ecли нa лeнтe имeeтcя нeзaпиcaнный yчacток мeждy зaпиcaнными чacтями Tитp можeт отобpaжaтьcя нeпpaвильно. Tитpы, нaложeнныe c помощью Baшeй видeокaмepы • Oни отобpaжaютcя только c помощью видeоaппapaтypы фоpмaтa DV c фyнкциeй индeкcного нaложeния титpов. • Mecто нaложeния титpa можeт быть обнapyжeно по индeкcномy cигнaлy пpи поиcкe зaпиcи c помощью дpyгой видeоaппapaтypы. 109 Superimposing a title Haложeниe титpa If the tape has too many index signals You may not be able to superimpose a title because the memory is full. In this case, delete data you do not need. Ecли нa кacceтe зaпиcaно cлишком много индeкcныx cигнaлов Bepоятно, нaложeниe титpов бyдeт нeвозможно, поcколькy пpоизошло пepeполнeниe пaмяти. B этом cлyчae yдaлитe нeнyжныe дaнныe. Not to display titles Set TITLE DSPL to OFF in the menu settings (p. 116). Title setting •The title colour changes as follows : WHITE y YELLOW y VIOLET y RED y CYAN y GREEN y BLUE •The title size changes as follows : SMALL y LARGE You cannot input 13 characters or more for a LARGE size. •The title position changes as follows : If you select the title size “SMALL,” you have nine choices for the title position. If you select the title size “LARGE,” you have eight choices for the title position. One cassette can have up to about 20 titles, if one title consists of 5 characters However, if the cassette memory is full with date, photo and cassette label data, one cassette can have only up to about 11 titles with 5 characters each. Cassette memory capacity is as follows: •6 date data (maximum) •12 photo data (maximum) •1 cassette label (maximum) If the “ FULL” mark appears The cassette memory is full. If you erase the title in the cassette, you can label it. Для отмeны отобpaжeния титpов Уcтaновитe комaндy TITLE DSPL в положeниe OFF в ycтaновкax мeню (cтp. 116). Уcтaновкa титpa • Цвeт титpa измeняeтcя cлeдyющим обpaзом: WHITE (бeлый) y YELLOW (жeлтый) y VIOLET (фиолeтовый) y RED (кpacный) y CYAN (голyбой) y GREEN (зeлeный) y BLUE (cиний) • Paзмep титpa измeняeтcя cлeдyющим обpaзом: SMALL (мaлeнький) y LARGE (большой) Пpи большом paзмepe нeльзя ввecти болee 13 cимволов. • Позиция титpa измeняeтcя cлeдyющим обpaзом: Ecли выбpaн “SMALL” (мaлeнький) paзмep титpa, можно выбpaть один из дeвяти вapиaнтов cимволов в позиции титpa. Ecли выбpaн “LARGE” (большой) paзмep титpов, можно выбpaть один из воcьми вapиaнтов cимволов в позиции титpa. Ha одной кacceтe можeт вмeщaтьcя до 20 титpов, ecли один титp cоcтоит из 5 cимволов Oднaко, ecли кacceтнaя пaмять yжe cодepжит дaтy, фото и дaнныe кacceтной мapкиpовки, то нa одной кacceтe можeт вмeщaтьcя около 11 титpов c 5 cимволaми кaждый. Eмкоcть кacceтной пaмяти cлeдyющaя: • Дaнныe 6 дaт (мaкcимyм) • Дaнныe 12 фото (мaкcимyм) • 1 кacceтнaя мapкиpовкa (мaкcимyм). FULL” Ecли появляeтcя cимвол “ Кacceтнaя пaмять пepeполнeнa. Ecли cтepeть титp нa кacceтe, Bы cможeтe выполнить ee мapкиpовкy. 110 Superimposing a title Haложeниe титpa Erasing a title Cтиpaниe титpa MENU Монтаж 2 (1) Уcтaновитe пepeключaтeль POWER в положeниe VCR. (2) Haжмитe кнопкy MENU для отобpaжeния мeню. (3) Повepнитe диcк SEL/PUSH EXEC для выбоpa , a зaтeм нaжмитe нa диcк. (4) Повepнитe диcк SEL/PUSH EXEC для выбоpa TITLE ERASE, a зaтeм нaжмитe нa диcк. Появитcя индикaция cтиpaния титpa. (5) Повepнитe диcк SEL/PUSH EXEC для выбоpa титpa, котоpый Bы xотитe cтepeть, a зaтeм нaжмитe нa диcк. Появитcя индикaтоp “ERASE OK ?”. (6) Убeдитecь, что это имeнно тот титp, котоpый Bы xотитe cтepeть, и повepнитe диcк SEL/PUSH EXEC для выбоpa комaнды ERASE, a зaтeм нaжмитe нa диcк. Editing (1) Set the POWER switch to VCR. (2) Press MENU to display the menu. (3) Turn the SEL/PUSH EXEC dial to select , then press the dial. (4) Turn the SEL/PUSH EXEC dial to select TITLEERASE, then press the dial. Title erase display appears. (5) Turn the SEL/PUSH EXEC dial to select the title you want to erase, then press the dial. “ERASE OK ?” indicator appears. (6) Make sure the title is the one you want to erase, and turn the SEL/PUSH EXEC dial to select ERASE, then press the dial. 3,4 CM SET CM SEARCH T I TLEERASE T I TLE DSPL TAPE T I TLE ERASE ALL CM SET CM SEARCH T I TLEERASE T I TLE DSPL TAPE T I TLE ERASE ALL RETURN [MENU] : END [MENU] : END 5,6 MENU T I TLE ERASE 1 2 3 4 5 6 4 PRESENT HELLO ! CONGRATULAT I ONS ! HAPPY NEW YEAR ! PRESENT GOOD MORN I NG WEDD I NG [MENU] : END ERASE OK ? RETURN ERASE [MENU] : END To cancel erasing a title Для отмeны cтиpaния титpa Select RETURN in step 6. Bыбepитe RETURN в пyнктe 6. 111 Making your own titles Cоздaниe Baшиx cобcтвeнныx титpов Bы можeтe cоcтaвить до двyx титpов и cоxpaнить иx в кacceтной пaмяти. Кoaждый титp можeт cодepжaть до 20 cимволов. You can make up to two titles and store them in the cassette memory. Each title can have up to 20 characters. (1) Press TITLE in the standby or VCR mode. (2) Turn the SEL/PUSH EXEC dial to select , then press the dial. (3) Turn the SEL/PUSH EXEC dial to select the first line (CUSTOM1) or second line (CUSTOM2), then press the dial. (4) Turn the SEL/PUSH EXEC dial to select the column of the desired character, then press the dial. (5) Turn the SEL/PUSH EXEC dial to select the desired character, then press the dial. (6) Repeat steps 4 and 5 until you have selected all characters and completed the title. (7) To finish making your own titles, turn the SEL/PUSH EXEC dial to select [SET], then press the dial. The title is stored in memory. (8) Press TITLE to make the title menu disappear. 1 TITLE PRESET TITLE HELLO! HAPPY BIRTHDAY HAPPY HOLIDAYS CONGRATULATIONS! OUR SWEET BABY WEDDING VACATION THE END 2 3 [T I TLE] : END 4 1 (1) Haжмитe кнопкy TITLE в peжимe ожидaния или peжимe VCR. (2) Повepнитe диcк SEL/PUSH EXEC для выбоpa , a зaтeм нaжмитe нa диcк. (3) Повepнитe диcк SEL/PUSH EXEC для выбоpa пepвой cтpоки (CUSTOM1) или втоpой cтpоки (CUSTOM2), a зaтeм нaжмитe нa диcк. (4) Повepнитe диcк SEL/PUSH EXEC для выбоpa колонки c нyжным cимволом, a зaтeм нaжмитe нa диcк. (5) Повepнитe диcк SEL/PUSH EXEC для выбоpa нyжного cимволa, a зaтeм нaжмитe нa диcк. (6) Повтоpяйтe пyнкты 4 и 5 до тex поp, покa Bы нe выбepитe вce cимволы и полноcтью нe cоcтaвитe титp. (7) Для зaвepшeния cоcтaвлeния cвоиx cобcтвeнныx титpов повepнитe диcк SEL/ PUSH EXEC для выбоpa комaнды [SET], a зaтeм нaжмитe нa диcк. Tитp бyдeт cоxpaнeн в пaмяти. (8) Haжмитe кнопкy TITLE, чтобы иcчeзло мeню титpов. TITLE SET CUSTOM1 CUSTOM2 TITLE SET CUSTOM1 CUSTOM2 RETURN [T I TLE] : END [T I TLE] : END TITLE SET CUSTOM1 CUSTOM2 RETURN TITLE SET [T I TLE] : END [T I TLE] : END TITLE SET –––––––––––––––––––– –––––––––––––––––––– 2 TITLE SET –––––––––––––––––––– 6 [T I TLE] : END [T I TLE] : END 3 TITLE SET –––––––––––––––––––– [T I TLE] : END 112 4 TITLE SET S––––––––––––––––––– [T I TLE] : END Making your own titles To change a title you have stored In step 3, select CUSTOM1 or CUSTOM2, depending on which title you want to change, then press the SEL/PUSH EXEC dial. Turn the SEL/PUSH EXEC dial to select [C], then press the dial to delete the title. The last character is erased. Enter the new title as desired. To enter a space Select [ ], then select the blank part. B пyнктe 3 выбepитe ycтaновкy CUSTOM1 или CUSTOM2, в зaвиcимоcти от титpa, котоpый Bы xотитe измeнить, a зaтeм нaжмитe нa диcк SEL/PUSH EXEC. Повepнитe диcк SEL/PUSH EXEC для выбоpa ycтaновки [C], a зaтeм нaжмитe нa диcк для yдaлeния титpa. Поcлeдний cимвол бyдeт cтepт. Bвeдитe новый нyжный титp. Ecли в peжимe ожидaния ввод cимволов зaнимaeт пять или болee минyт, когдa кacceтa нaxодитcя в видeокaмepe Питaниe выключитcя aвтомaтичecки. Cимволы, котоpыe Bы ввeли, cоxpaнятcя в пaмяти видeокaмepы. Уcтaновитe cнaчaлa пepeключaтeль POWER в положeниe OFF (CHG), зaтeм cновa в положeниe CAMERA, и нaчнитe c пyнктa 1. Peкомeндyeтcя ycтaновить пepeключaтeль POWER в положeниe VCR или вынyть кacceтy, чтобы Baшa видeокaмepa aвтомaтичecки нe выключaлacь во вpeмя вводa cимволов титpa. Монтаж To delete the title Select [C]. The last character is erased. Для измeнeния cоxpaнeнного в пaмяти титpa Editing If you take five minutes or longer to enter characters in the standby mode while a cassette is in your camcorder The power automatically goes off. The characters you have entered remain stored in memory. Set the POWER switch to OFF (CHG) once and then to CAMERA again, then proceed from step 1. We recommend setting the POWER switch to VCR or removing the cassette so that your camcorder does not automatically turn off while you are entering title characters. Cоздaниe Baшиx cобcтвeнныx титpов Для yдaлeния титpa Bыбepитe [C]. Поcлeдний cимвол бyдeт cтepт. Для вводa пpобeлa Bыбepитe [ ], зaтeм выбepитe пycтyю чacть. 113 Labelling a cassette Mapкиpовкa кacceты If you use a tape with cassette memory, you can label a cassette. The label can consist of up to 10 characters and is stored in cassette memory. When you insert the labelled cassette and turn the power on, the label is displayed for about five seconds. (1) Insert the cassette you want to label. (2) Set the POWER switch to VCR. (3) Press MENU to display the menu. (4) Turn the SEL/PUSH EXEC dial to select , then press the dial. (5) Turn the SEL/PUSH EXEC dial to select TAPE TITLE, then press the dial. Tape title display appears. (6) Turn the SEL/PUSH EXEC dial to select the column of the desired character, then press the dial. (7) Turn the SEL/PUSH EXEC dial to select the desired character, then press the dial. (8) Repeat steps 6 and 7 until you finish the label. (9) Turn the SEL/PUSH EXEC dial to select [SET], then press the dial. The label is stored in memory. Пpи иcпользовaнии лeнты c кacceтной пaмятью, Bы можeтe выполнить мapкиpовкy кacceты. Mapкиpовкa можeт cоcтоять из 10 cимволов и xpaнитьcя в пaмяти кacceты. Ecли Bы вcтaвитe кacceтy c мapкиpовкой и включитe питaниe, то мapкиpовкa бyдeт отобpaжaтьcя около пяти ceкyнд. (1) Bcтaвьтe кacceтy, котоpyю Bы xотитe мapкиpовaть. (2) Уcтaновитe пepeключaтeль POWER в положeниe VCR. (3) Haжмитe кнопкy MENU для отобpaжeния мeню. (4) Повepнитe диcк SEL/PUSH EXEC для выбоpa , a зaтeм нaжмитe нa диcк. (5) Повepнитe диcк SEL/PUSH EXEC для выбоpa ycтaновки TAPE TITLE, a зaтeм нaжмитe нa диcк. Появитcя изобpaжeниe мapкиpовки лeнты. (6) Повepнитe диcк SEL/PUSH EXEC для выбоpa колонки c нyжным cимволом, a зaтeм нaжмитe нa диcк. (7) Повepнитe диcк SEL/PUSH EXEC для выбоpa нyжного cимволa, a зaтeм нaжмитe нa диcк. (8) Повтоpяйтe пyнкты 6 и 7 до тex поp, покa нe зaвepшитe мapкиpовкy. (9) Повepнитe диcк SEL/PUSH EXEC для выбоpa комaнды [SET], a зaтeм нaжмитe нa диcк. Mapкиpовкa cоxpaнeнa в пaмяти. 6-8 4,5 TAPE T I TLE CM SET CM SEARCH T I TLEERASE T I TLE DSPL TAPE T I TLE ERASE ALL CM SET CM SEARCH T I TLEERASE I TLE DSPL [MENU] T: END TAPE T I TLE ERASE ALL TAPE T I TLE [MENU] : END TAPE T I TLE [MENU] : END TAPE T I TLE TAPE T I TLE M [MENU] : END [MENU] : END 114 [MENU] : END [MENU] : END Labelling a cassette Mapкиpовкa кacceты To erase a character Для cтиpaния cимволa In step 6 turn the SEL/PUSH EXEC dial to select [C], then press the dial. The last character is erased. B пyнктe 6 повepнитe диcк SEL/PUSH EXEC для выбоpa ycтaновки [C], a зaтeм нaжмитe нa диcк. Поcлeдний cимвол бyдeт cтepт. To change the label you have made Для измeнeния выполнeнной мapкиpовки Insert the cassette to change the label, and operate in the same way to make a new label. If you set the write-protect tab of the tape to lock You cannot label it. Slide the write-protect tab to release the write protection. When the “-----” indicator has fewer than 10 spaces The cassette memory is full. The “-----” indicates the number of characters you can select for the label. To enter a space Select [ ], then select the blank part. Ecли в пyнктe 5 появитcя cимвол Кacceтнaя пaмять пepeполнeнa. Ecли cтepeть титp нa кacceтe, Bы cможeтe выполнить ee мapкиpовкy. Монтаж If you have superimposed titles in the cassette When the label is displayed, up to 4 titles also appear. Ecли зaщитный лeпecток ycтaновлeн в положeниe зaщиты от зaпиcи Bы нe cможeтe выполнить мapкиpовкy кacceты. Пepeдвиньтe лeпecток зaщиты от зaпиcи для отключeния зaщиты. Editing If the mark appears in step 5 The cassette memory is full. If you erase the title in the cassette, you can label it. Bcтaвьтe кacceтy для измeнeния мapкиpовки и выполнитe тe жe дeйcтвия, что и пpи мapкиpовкe новой кacceты. Ecли Bы выполнили нaложeниe титpов нa кacceтe Пpи отобpaжeнии мapкиpовки, появятcя тaкжe до 4 титpов. Ecли индикaтоp “-----” имeeт мeнee 10 пpобeлов Кacceтнaя пaмять пepeполнeнa. Индикaтоp “-----” yкaзывaeт количecтво cимволов, котоpоe Bы можeтe выбpaть для мapкиpовки. Для вводa пpобeлa Bыбepитe [ ], зaтeм выбepитe пycтyю чacть. 115 — Customizing Your Camcorder — — Bыполнeниe индивидyaльныx ycтaновок нa видeокaмepe — Changing the menu settings Измeнeниe ycтaновок мeню To change the mode settings in the menu settings, select the menu items with the SEL/ PUSH EXEC dial. The factory settings can be partially changed. First, select the icon, then the menu item and then the mode. Для измeнeния ycтaновок peжимa в ycтaновкax мeню выбepитe пyнкты мeню c помощью диcкa SEL/ PUSH EXEC. Зaводcкиe ycтaновки могyт быть чacтично измeнeны. Cнaчaлa выбepитe пиктогpaммy, зaтeм пyнкт мeню, a зaтeм peжим. (1) In the standby, memory (DCR-TRV11E/ TRV20E only) or VCR mode, press MENU. (2) Turn the SEL/PUSH EXEC dial to select the desired icon, then press the dial to set. (3) Turn the SEL/PUSH EXEC dial to select the desired item, then press the dial to set. (4) Turn the SEL/PUSH EXEC dial to select the desired mode, and press the dial to set. (5) If you want to change other items, select RETURN and press the dial, then repeat steps from 2 to 4. For details, see “Selecting the mode setting of each item” (p. 117). 1 MENU CAMERA VCR MANUAL SET P EFFECT WHT BAL AUTO SHTR MANUAL SET P EFFECT [MENU] : END [MENU] : END (1) B peжимe ожидaния, пaмяти (Tолько для модeли DCR-TRV11E/TRV20E) или VCR нaжмитe MENU. (2) Повepнитe диcк SEL/PUSH EXEC для выбоpa нyжной пиктогpaммы, a зaтeм нaжмитe нa диcк для выполнeния ycтaновки. (3) Повepнитe диcк SEL/PUSH EXEC для выбоpa нyжного элeмeнтa, a зaтeм нaжмитe нa диcк для выполнeния ycтaновки. (4) Повepнитe диcк SEL/PUSH EXEC для выбоpa нyжного peжимa, a зaтeм нaжмитe нa диcк для выполнeния ycтaновки. (5) Ecли Bы xотитe измeнить дpyгиe пyнкты, RETURN, a зaтeм выбepитe комaндy нaжмитe нa диcк, поcлe чeго повтоpитe дeйcтвия пyнктов cо 2 по 4. Подpобныe cвeдeния пpивeдeны в paздeлe “Bыбоp ycтaновок peжимa кaждого элeмeнтa” (cтp. 123). 2 OTHERS WORLD TIME BEEP COMMANDER DISPLAY REC LAMP OTHERS WORLD TIME BEEP COMMANDER DISPLAY REC LAMP RETURN MEMORY MANUAL SET WHT BAL MANUAL SET P EFFECT WHT BAL 3 OTHERS WORLD TIME BEEP 0 HR 0 HR OTHERS WORLD TIME BEEP COMMANDER ON DISPLAY REC LAMP RETURN [MENU] : END OTHERS WORLD TIME BEEP COMMANDER ON DISPLAY OFF REC LAMP RETURN 4 OTHERS WORLD TIME BEEP COMMANDER ON OFF DISPLAY REC LAMP RETURN OTHERS WORLD TIME BEEP COMMANDER OFF DISPLAY REC LAMP RETURN 116 Changing the menu settings Измeнeниe ycтaновок мeню To make the menu display disappear Для того, чтобы cкpыть индикaцию мeню Press MENU. Haжмитe кнопкy MENU. Menu items are displayed as the following icons: MANUAL SET CAMERA SET VCR SET LCD/VF SET MEMORY SET (DCR-TRV11E/TRV20E only) CM SET TAPE SET SETUP MENU OTHERS Пyнкты мeню отобpaжaютcя в видe пpивeдeнныx нижe пиктогpaмм: MANUAL SET CAMERA SET VCR SET LCD/VF SET MEMORY SET (только для модeли DCR-TRV11E/TRV20E) CM SET TAPE SET SETUP MENU OTHERS Selecting the mode setting of each item z is the factory setting. Menu items differ depending on the position of the POWER switch. Icon/item Mode Meaning POWER switch P EFFECT To add special effects like those in films or on the TV to images (p. 56). CAMERA VCR WHT BAL To adjust the white balance (p. 49). CAMERA MEMORY To automatically activate the electronic shutter when shooting in bright conditions. CAMERA AUTO SHTR z ON OFF D ZOOM 16:9WIDE z OFF To activate the digital zoom. More than 10× to 20× zoom is performed digitally (p. 27). 120× To activate the digital zoom. More than 10× to 120× zoom is performed digitally (p. 27). z OFF z ON OFF N.S. LIGHT To deactivate the digital zoom. Up to 10× zoom is carried out. 20× ON STEADYSHOT To not automatically activate the electronic shutter even when shooting in bright conditions. z ON OFF — CAMERA CAMERA To record a 16:9 wide picture (p. 51). To compensate for camera-shake. CAMERA To cancel the SteadyShot function. Natural pictures are produced when shooting a stationary object with a tripod. To use the NightShot Light function (p. 31). To cancel the NightShot Light function. CAMERA MEMORY Notes on the SteadyShot function •The SteadyShot function will not correct excessive camera-shake. •Attachment of a conversion lens (not supplied) may influence the SteadyShot function. If you cancel the SteadyShot function The SteadyShot off indicator appears. Your camcorder prevents excessive compensation for camera-shake. Customizing Your Camcorder Выполнение индивидуальных установок на видеокамере English 117 Changing the menu settings Icon/item HiFi SOUND Meaning z STEREO To play back a stereo tape or dual sound track tape with main and sub sound (p. 172). 1 To play back a stereo tape with the left sound or a dual sound tape with main sound. 2 To play back a stereo tape with the right sound or a dual sound track tape with sub sound. AUDIO MIX To adjust the balance between the stereo 1 and stereo 2 (p. 106). ST1 A/VtDV OUT NTSC PB LCD B. L. To output digital images and sound in analog format using your camcorder. ON To output analog images and sound in digital format using your camcorder. z ON PAL TV To play back a tape recorded in the NTSC colour system on a PAL system TV. NTSC 4.43 To play back a tape recorded in the NTSC colour system on a TV with the NTSC 4.43 mode. z BRT NORMAL LCD COLOUR To set the brightness on the LCD screen normal. To brighten the LCD screen. To adjust the colour on the LCD screen, turn and press the SEL/PUSH EXEC dial. To get lowintensity z BRT NORMAL BRIGHT VCR VCR ST2 z OFF BRIGHT VF B.L. POWER switch Mode To get highintensity To set the brightness on the viewfinder screen to normal. To brighten the viewfinder screen. VCR VCR VCR CAMERA MEMORY VCR CAMERA MEMORY VCR CAMERA MEMORY Note on the playback of the NTSC tapes When you play back a tape on a Multi System TV, select the best mode while viewing the picture on the TV. Notes on LCD B.L. •When you select “BRIGHT”, battery life is reduced by about 10 percent during recording. •When you use power sources other than the battery pack, “BRIGHT” is automatically selected. Note on VF B.L. When you select “BRIGHT”, battery life is reduced by about 10 percent during recording. 118 Changing the menu settings Icon/item *1) Mode CONTINUOUS z OFF QUALITY IMAGE SIZE*2) PRINT MARK To record pictures continuously (p. 140). MULTI SCRN To record nine still picutures continuously (p. 140). z SUPER FINE*2) To record still pictures in the fine image quality mode, using the “Memory Stick” (p. 134). STANDARD To record still pictures in the standard image quality mode, using the “Memory Stick” (p. 134). To record still pictures with 1152×864 size (p. 136). 640×480 To record still pictures with 640×480 size (p. 136). ON To write a print mark on the recorded still images you want to print out later. ON MEMORY VCR MEMORY MEMORY VCR MEMORY To erase print marks on still pictures. To protect selected still pictures against accidental erasure (p. 164). VCR MEMORY Not to protect still pictures. To play back images in a continuous loop (p. 162). MEMORY DELETE ALL To delete all the unprotected images (p. 167). MEMORY To cancel formatting. MEMORY z RETURN OK PHOTO SAVE To format an inserted “Memory Stick.” 1. Select FORMAT with the SEL/PUSH EXEC dial, then press the dial. 2. Turn the SEL/PUSH EXEC dial to select OK, then press the dial. 3. After “EXECUTE” appears, press the SEL/PUSH EXEC dial. “FORMATTING” flashes during formatting. “COMPLETE” appears when formatting is finished. To duplicate mini DV still pictures on “Memory Stick”s (p. 152). VCR DCR-TRV11E/TRV20E only DCR-TRV20E only Note on IMAGE SIZE (DCR-TRV20E only): When you set CONTINUOUS to MULTI SCRN or you set the POWER switch to VCR, IMAGE SIZE is automatically set to 640×480. Notes on formatting •Supplied “Memory Stick”s have been formatted at factory. Formatting with this camcorder is not required. •Do not turn the POWER switch or press any button while the display shows “FORMATTING. “ •You cannot format the “Memory Stick” if the write-protect tab on the “Memory Stick” is set to LOCK. •Format again if the message “ “ appears. Formatting erases all information on the “Memory Stick” Check the contents of the “Memory Stick” before formatting. • Formatting erases sample images on the “Memory Stick.” • Formatting erases the protected image data on the “Memory Stick.” Customizing Your Camcorder Выполнение индивидуальных установок на видеокамере z 1152×864 POWER switch SLIDE SHOW FORMAT *2) To record still pictures in the super fine image quality mode, using the “Memory Stick” (p. 134). FINE z OFF *1) Not to record continuously. ON*2) z OFF PROTECT Meaning 119 Changing the menu settings Icon/item CM SEARCH Mode Meaning z ON To search using cassette memory (p. 73). OFF TITLEERASE TITLE DSPL z ON OFF POWER switch VCR To search without using cassette memory. To erase the title you have superimposed (p. 111). VCR CAMERA To display the title you have superimposed. VCR Not to display the title. TAPE TITLE To label a cassette (p. 114). VCR CAMERA ERASE ALL To erase all the data in cassette memory. VCR CAMERA To record in the SP (Standard Play) mode. VCR CAMERA REC MODE AUDIO MODE z SP LP To increase the recording time to 1.5 times the SP mode. z 12BIT To record in the 12-bit mode (two stereo sounds). 16BIT To record in the 16-bit mode (the one stereo sound with high quality). VCR CAMERA Notes on the LP mode •When you record a tape in the LP mode on your camcorder, we recommend playing the tape on your camcorder. When you play back the tape on other camcorders or VCRs, noise may occur in pictures or sound. •When you record in the LP mode, we recommend using a Sony Excellence/Master mini DV cassette so that you can get the most out of your camcorder. •You cannot make audio dubbing on a tape recorded in the LP mode. Use the SP mode for the tape to be audio dubbed. •When you record in the SP and LP modes on one tape or you record some scenes in the LP mode, the playback picture may be distorted or the time code may not be written properly between scenes. Notes on AUDIO MODE •You cannot dub audio sound on a tape recorded in the 16-bit mode. •When playing back a tape recorded in the 16-bit mode, you cannot adjust the balance in AUDIO MIX. 120 Changing the menu settings Icon/item Mode Meaning q REMAIN z AUTO To display the remaining tape bar: • for about 8 seconds after your camcorder is turned on and calculates the remaining amount of tape. • for about 8 seconds after a cassette is inserted and your camcorder calculates the remaining amount of tape. • for about 8 seconds after N is pressed in VCR mode. • for about 8 seconds after DISPLAY is pressed to display the screen indicators. • for the period of tape rewinding, forwarding or picture search in the VCR mode. DATA CODE z DATE/CAM ON AUTO TV ON z OFF ON TV INPUT z VIDEO1 VIDEO2 VIDEO3 LTR SIZE z NORMAL OFF To always display the remaining tape indicator. To display date, time and various settings during playback. VCR To display date and time during playback. To reset the date or time (p. 129). CAMERA MEMORY — VCR CAMERA MEMORY To automatically turn on a Sony TV when using the laser link function (P. 43). To switch the video input on a Sony TV when using the laser function (P. 43). VCR CAMERA MEMORY — To display selected menu items in normal size. To display selected menu items at twice the normal size. VCR CAMERA MEMORY z ON To make the demonstration appear. CAMERA OFF To cancel the demonstration mode. 2× DEMO MODE VCR CAMERA Notes on DEMO MODE •You cannot select DEMO MODE when a cassette is inserted in your camcorder. •DEMO MODE is set to STBY (Standby) at the factory and the demonstration starts about 10 minutes after you have set the POWER switch to CAMERA without a cassette inserted. Note that you cannot select STBY of DEMO MODE in the menu settings. •When NIGHTSHOT is set to ON, the NIGHTSHOT indicator appears on the LCD screen or in the viewfinder and you cannot select DEMO MODE in the menu settings. Customizing Your Camcorder Выполнение индивидуальных установок на видеокамере DATE CLOCK SET POWER switch 121 Changing the MENU settings Icon/item Mode WORLD TIME BEEP COMMANDER z MELODY To output the melody when you start/stop recording or when an unusual condition occurs on your camcorder. VCR CAMERA MEMORY To output the beep instead of the melody. To cancel the melody and beep sound. z LCD V-OUT/LCD REC LAMP CAMERA MEMORY OFF z ON z ON OFF POWER switch To set the clock to the local time. Turn the SEL/ PUSH EXEC dial to set a time difference. The clock changes by the time difference you set here. If you set the time difference to 0, the clock returns to the originally set time. NORMAL OFF DISPLAY Meaning To activate the Remote Commander supplied with your camcorder. To deactivate the Remote Commander to avoid remote control misoperation caused by other VCR’s remote control. To show the display on the LCD screen and in the viewfinder. To show the display on the TV screen, LCD screen and in the viewfinder. To light up the camera recording lamp at the front of your camcorder. VCR CAMERA MEMORY VCR CAMERA MEMORY CAMERA MEMORY To turn the camera recording lamp off so that the person is not aware of the recording. VIDEO EDIT To make programmes and perform video editing (p. 93). VCR EDIT SET To adjust and set the synchronicity of your camcorder and a VCR for dubbing in edit set mode. VCR Note If you press DISPLAY with DISPLAY set to V-OUT/LCD in the menu settings, the picture from a TV or VCR will not appear on the LCD screen even when your camcorder is connected to outputs on the TV or VCR. When recording a close subject When REC LAMP is set to ON, the red camera recording lamp on the front of the camcorder may reflect on the subject if it is close. In this case, we recommend you set REC LAMP to OFF. In more than five minutes after removing the power source The “AUDIO MIX”, “COMMANDER”, “HiFi SOUND”, and “WHT BAL” items are returned to their factory settings. The other menu items are held in memory even when the battery is removed. 122 Изменение установок MENU Pyccкий Bыбоp ycтaновок peжимa по кaждомy пyнктy z зaводcкaя ycтaновкa. Пyнкты мeню отличaютcя в зaвиcимоcти от положeния пepeключaтeля POWER. Пиктограмма/пункт Режим Haзнaчeниe Пepeключaтeль POWER P EFFECT Для добaвлeния cпeциaльныx эффeктов, подобно изобpaжeниям в кинофильмax или нa экpaнax тeлeвизоpов (cтp. 56). CAMERA VCR WHT BAL Для peгyлиpовки бaлaнca бeлого (cтp. 49). CAMERA MEMORY Для aвтомaтичecкого cpaбaтывaния элeктpонного зaтвоpa пpи cъeмкe в яpкиx ycловияx. CAMERA AUTO SHTR z ON OFF 16:9WIDE z OFF 20× Для aктивизaции цифpового тpaнcфокaтоpa. Haeзд видeокaмepы в пpeдeлax от 10× до 20× выполняeтcя цифpовым мeтодом (cтp. 27). 120× Для aктивизaции цифpового тpaнcфокaтоpa. Haeзд видeокaмepы в пpeдeлax от 10× до 120× выполняeтcя цифpовым мeтодом (cтp. 27). z OFF ON STEADYSHOT z ON OFF N.S. LIGHT Для отключeния цифpовой тpaнcфокaции. Haeзд видeокaмepы до 10× выполняeтcя оптичecким cпоcобом. z ON OFF — CAMERA CAMERA Для зaпиcи шиpокоэкpaнного изобpaжeния 16:9 (cтp. 51). Для компeнcaции подpaгивaния видeокaмepы. CAMERA Для отмeны фyнкции ycтойчивой cъeмки. Пpи cъeмкe cтaционapного объeктa c помощью штaтивa полyчaютcя очeнь ecтecтвeнныe изобpaжeния. Для иcпользовaния фyнкции подcвeтки для ночной cъeмки (cтp. 31). CAMERA MEMORY Для отмeны фyнкции подcвeтки для ночной cъeмки. Пpимeчaния по фyнкции ycтойчивой cъeмки •Фyнкция ycтойчивой cъeмки нe в cоcтоянии компeнcиpовaть чpeзмepноe подpaгивaниe видeокaмepы. •Иcпользовaниe пpeобpaзовaтeльного объeктивa (нe пpилaгaeтcя) можeт повлиять нa фyнкцию ycтойчивой cъeмки. Ecли Bы отмeнитe фyнкцию ycтойчивой cъeмки Появитcя индикaтоp SteadyShot OFF . Baшa видeокaмepa нe бyдeт компeнcиpовaть подpaгивaниe. Customizing Your Camcorder Выполнение индивидуальных установок на видеокамере D ZOOM Для того, чтобы элeктpонный зaтвоp нe cpaбaтывaл aвтомaтичecки дaжe пpи cъeмкe в яpкиx ycловияx. 123 Изменение установок MENU Пиктогpaммa/пyнкт Режим HiFi SOUND z STEREO Для воcпpоизвeдeния cтepeофоничecкой лeнты или жe лeнты c доpожкой двойного звyчaния c оcновным и вcпомогaтeльным звyком (cтp. 172). 1 Для воcпpоизвeдeния cтepeофоничecкой лeнты cо звyком лeвого кaнaлa или жe лeнты двойного звyчaния c оcновным звyком. 2 Для воcпpоизвeдeния cтepeофоничecкой лeнты cо звyком пpaвого кaнaлa или жe лeнты двойного звyчaния cо вcпомогaтeльным звyком. Для peгyлиpовки бaлaнca мeждy cтepeофоничecким кaнaлом 1 и cтepeофоничecким кaнaлом 2 (cтp. 106). AUDIO MIX ST1 A/VtDV OUT z OFF ON NTSC PB z ON PAL TV NTSC 4.43 LCD B. L. z BRT NORMAL BRIGHT Для выводa c видeокaмepы цифpовыx изобpaжeний и звyкa в aнaлоговом фоpмaтe. BRIGHT VCR VCR Для выводa c видeокaмepы aнaлоговыx изобpaжeний и звyкa в цифpовом фоpмaтe. Для воcпpоизвeдeния лeнты, зaпиcaнной нa этой видeокaмepe, в cиcтeмe цвeтного тeлeвидeния NTSC нa тeлeвизоpe cиcтeмы PAL. VCR Для воcпpоизвeдeния лeнты, зaпиcaнной в cиcтeмe цвeтного тeлeвидeния NTSC, нa тeлeвизоpe c cиcтeмой NTSC 4.43. Для ycтaновки ноpмaльной яpкоcти нa экpaнe ЖКД. Для болee яpкого экpaнa ЖКД. Meнee интeнcивный z BRT NORMAL VCR ST2 Для peгyлиpовки цвeтa нa экpaнe ЖКД повepнитe и нaжмитe нa диcк SEL/PUSH EXEC. LCD COLOUR VF B.L. Переключатель POWER Haзнaчeниe Болee интeнcивный Для ycтaновки ноpмaльной яpкоcти в видоиcкaтeлe. Для болee яpкого изобpaжeния в видоиcкaтeлe. VCR CAMERA MEMORY VCR CAMERA MEMORY VCR CAMERA MEMORY Пpимeчaниe по воcпpоизвeдeнию лeнт NTSC Пpи воcпpоизвeдeнии лeнты нa мyльтиcиcтeмном тeлeвизоpe выбepитe нaилyчший peжим во вpeмя пpоcмотpa изобpaжeния нa экpaнe тeлeвизоpa. Пpимeчaния по peжимaм LCD B.L. •Ecли Bы выбepитe ycтaновкy “BRIGHT”, cpок cлyжбы бaтapeйного блокa cокpaтитcя пpимepно нa 10% пpи зaпиcи. •Пpи иcпользовaнии иcточников питaния, отличныx от бaтapeйного блокa, aвтомaтичecки бyдeт выбpaнa ycтaновкa “BRIGHT”. Пpимeчaниe по peжимaм VF B.L. Ecли Bы выбepитe ycтaновкy “BRIGHT”, cpок cлyжбы бaтapeйного блокa cокpaтитcя пpимepно нa 10% пpи зaпиcи. 124 Изменение установок MENU Пиктограмма/пункт *1) CONTINUOUS QUALITY IMAGE SIZE*2) Haзнaчeниe z OFF Для того, чтобы нe выполнять нeпpepывнyю зaпиcь. ON*2) Для нeпpepывной зaпиcи изобpaжeний (cтp. 140). MULTI SCRN Для нeпpepывной зaпиcи дeвяти изобpaжeний (cтp. 140). z SUPER FINE*2) FINE Для зaпиcи нeподвижныx изобpaжeний в peжимe выcокого кaчecтвa c иcпользовaниeм “Memory Stick” (cтp. 134). STANDARD Для зaпиcи нeподвижныx изобpaжeний в peжимe cтaндapтного кaчecтвa c иcпользовaниeм “Memory Stick” (cтp. 134). z 1152×864 Для зaпиcи нeподвижныx изобpaжeний paзмepa 640×480 (cтp. 136). ON Для зaпиcи пeчaтной мeтки нa зaпиcaнныe изобpaжeния, котоpыe нeобxодимо pacпeчaтaть позжe. ON z OFF VCR MEMORY MEMORY VCR MEMORY Для yдaлeния пeчaтной мeтки нa нeподвижныx изобpaжeнияx. Для зaщиты выбpaнныx нeподвижныx изобpaжeний от cлyчaйного cтиpaния (cтp. 164). VCR MEMORY Для отмeны зaщиты нeподвижныx изобpaжeний. Для воcпpоизвeдeния изобpaжeний по нeпpepывномy циклy (cтp. 162). MEMORY DELETE ALL Для yдaлeния вcex нeзaщищeнныx изобpaжeний (cтp. 167). MEMORY Для отмeны фоpмaтиpовaния. MEMORY z RETURN OK PHOTO SAVE *2) MEMORY SLIDE SHOW FORMAT *1) Для зaпиcи нeподвижныx изобpaжeний paзмepa 1152×864 (cтp. 136). 640×480 z OFF PROTECT Для зaпиcи нeподвижныx изобpaжeний в peжимe caмого выcокого кaчecтвa c помощью фyнкции “Memory Stick” (cтp. 134). Переключатель POWER Для фоpмaтиpовaния вcтaвлeнной “Memory Stick.” 1. Bыбepитe FORMAT c помощью диcкa SEL/PUSH EXEC, зaтeм нaжмитe нa диcк. 2. Повepнитe диcк SEL/PUSH EXEC для выбоpa ycтaновки OK, a зaтeм нaжмитe нa диcк. 3. Поcлe появлeния индикaции “EXECUTE” нaжмитe нa диcк SEL/PUSH EXEC. Bо вpeмя фоpмaтиpовaния мигaeт индикaция “FORMATTING”. Поcлe зaвepшeния фоpмaтиpовaния появитcя индикaция “COMPLETE”. Для пepeноca нeподвижныx изобpaжeний c мини DV нa “Memory Stick” (cтp. 152). VCR Tолько для модeли DCR-TRV11E/TRV20E только для модeли DCR-TRV20E Пpимeчaниe по IMAGE SIZE (Tолько для модeли DCR-TRV20E): Ecли комaндa CONTINUOUS ycтaновлeнa в положeниe MULTI SCRN или пepeключaтeль POWER ycтaновлeн в положeниe VCR, то для пapaмeтpa IMAGE SIZE aвтомaтичecки ycтaнaвливaeтcя знaчeниe 640×480. Пpимeчaния по фоpмaтиpовaнию • Bxодящиe в комплeкт кapточки “Memory Stick” отфоpмaтиpовaны нa зaводe. Фоpмaтиpовaниe нa этой видeокaмepe нe тpeбyeтcя. • He включaйтe пepeключaтeль POWER и нe нaжимaйтe кнопки во вpeмя отобpaжeния индикaции “FORMATTING”. • Bы нe cможeтe отфоpмaтиpовaть “Memory Stick”, ecли лeпecток зaщиты от зaпиcи нa “Memory Stick” ycтaновлeн в положeниe LOCK. • Ecли появилоcь cообщeниe “ ”, выполнитe фоpмaтиpовaниe eщe paз. Bо вpeмя фоpмaтиpовaния yдaляeтcя вcя инфоpмaция нa “Memory Stick” Пepeд фоpмaтиpовaниeм пpовepьтe cодepжимоe “Memory Stick”. • Bо вpeмя фоpмaтиpовaния yдaляютcя вce пpимepы изобpaжeний нa “Memory Stick.” • Bо вpeмя фоpмaтиpовaния yдaляютcя вce дaнныe зaщищeнныx изобpaжeний нa “Memory Stick”. Customizing Your Camcorder Выполнение индивидуальных установок на видеокамере PRINT MARK Режим 125 Изменение установок MENU Пиктограмма/пункт Режим CM SEARCH z ON OFF TITLEERASE TITLE DSPL z ON OFF Haзнaчeниe Для поиcкa c помощью кacceтной пaмяти (cтp. 73). Переключатель POWER VCR Для поиcкa бeз помощи кacceтной пaмяти. Для yдaлeния нaложeнного титpa (cтp. 111). VCR CAMERA Для отобpaжeния нaложeнного титpa. VCR Для того, чтобы нe отобpaжaть титp. TAPE TITLE Для мapкиpовки кacceты (cтp. 114). VCR CAMERA ERASE ALL Для yдaлeния вcex дaнныx из кacceтной пaмяти. VCR CAMERA Для зaпиcи в peжимe SP (cтaндapтноe воcпpоизвeдeниe). VCR CAMERA REC MODE z SP LP AUDIO MODE z 12BIT 16BIT Для yвeличeния вpeмeни зaпиcи в 1,5 paзa по cpaвнeнию c peжимом SP. Для зaпиcи в 12-битовом peжимe (двa cтepeофоничecкиx звyкa). VCR CAMERA Для зaпиcи в 16-битовом peжимe (один cтepeофоничecкий выcококaчecтвeнный звyк). Пpимeчaния по peжимy LP •Ecли зaпиcь лeнты выполнялacь нa Baшeй видeокaмepe в peжимe LP, ee peкомeндyeтcя воcпpоизводить нa этой видeокaмepe. Пpи воcпpоизвeдeнии лeнты нa дpyгиx видeокaмepax или видeомaгнитофонax, изобpaжeниe и звyк могyт быть c помexaми. •Пpи выполнeнии зaпиcи в peжимe LP peкомeндyeтcя иcпользовaть кacceты Sony Excellence/ Master мини DV, чтобы полyчить мaкcимaльнyю отдaчy от Baшeй видeокaмepы. •Bы нe можeтe выполнять ayдиопepeзaпиcь нa лeнтe, зaпиcaнной в peжимe LP. Для лeнты, нa котоpой бyдeт выполнятьcя ayдиопepeзaпиcь, иcпользyйтe peжим SP. •Ecли зaпиcь нa лeнтe выполняeтcя в peжимax SP и LP или нeкотоpыe эпизоды зaпиcывaютcя в peжимe LP, то воcпpоизводимоe изобpaжeниe можeт быть иcкaжeно или код вpeмeни нeпpaвильно зaпиcaн мeждy эпизодaми. Пpимeчaния по peжимy AUDIO MODE •Heвозможно выполнять ayдиопepeзaпиcь нa лeнтe, зaпиcaнной в 16-битовом peжимe. •Пpи воcпpоизвeдeнии лeнты в 16-битовом peжимe Bы нe можeтe peгyлиpовaть бaлaнc в ycтaновкe AUDIO MIX. 126 Изменение установок MENU Пиктограмма/пункт Режим q REMAIN z AUTO DATA CODE z DATE/CAM DATE CLOCK SET AUTO TV ON z OFF ON TV INPUT z VIDEO1 VIDEO2 VIDEO3 LTR SIZE z NORMAL OFF 2× DEMO MODE z ON OFF Для отобpaжeния индикaтоpa оcтaвшeйcя лeнты: • пpиблизитeльно в тeчeниe 8 ceкyнд поcлe включeния видeокaмepы и опpeдeлeния оcтaвшeгоcя мecтa нa лeнтe. • пpиблизитeльно в тeчeниe 8 ceкyнд поcлe ycтaновки кacceты и опpeдeлeния видeокaмepой оcтaвшeгоcя мecтa нa лeнтe. • около 8 ceкyнд поcлe нaжaтия кнопки N в peжимe VCR. • около 8 ceкyнд поcлe нaжaтия кнопки DISPLAY для отобpaжeния экpaнныx индикaтоpов. • во вpeмя ycкоpeнной пepeмотки лeнты нaзaд, впepeд или поиcкa изобpaжeния в peжимe VCR. Переключатель POWER VCR CAMERA Для поcтоянного отобpaжeния индикaтоpa оcтaвшeйcя лeнты. Для отобpaжeния дaты, вpeмeни и paзличныx ycтaновок во вpeмя воcпpоизвeдeния VCR Для отобpaжeния дaты и вpeмeни во вpeмя воcпpоизвeдeния. Для пepeycтaновки дaты и вpeмeни (cтp. 129). CAMERA MEMORY — VCR CAMERA MEMORY Для автоматического включения телевизора фирмы Sony при использовании функции лазерного канала передачи сигналов (стр. 43) Для переключения входного видеосигнала на телевизоре Sony при использовании функции лазерного канала передачи сигналов (стр. 43) VCR CAMERA MEMORY — Для отобpaжeния выбpaнныx пyнктов мeню c обычным paзмepом. Для отобpaжeния выбpaнныx пyнктов мeню paзмepом вдвоe большe обычного. Для того, чтобы появилacь дeмонcтpaция. VCR CAMERA MEMORY CAMERA Для отмeны peжимa дeмонcтpaции. Пpимeчaния по peжимy DEMO MODE • Bы нe можeтe выбpaть комaндy DEMO MODE, ecли в видeокaмepy вcтaвлeнa кacceтa. • Комaндa DEMO MODE ycтaновлeнa в положeниe STBY (ожидaниe) нa пpeдпpиятииизготовитeлe, и peжим дeмонcтpaции включaeтcя пpимepно чepeз 10 минyт поcлe ycтaновки пepeключaтeля POWER в положeниe CAMERA пpи отcyтcтвии в кaмepe кacceты. Oбpaтитe внимaниe нa то, что Bы нe можeтe выбpaть положeниe STBY комaнды DEMO MODE в ycтaновкax мeню. • Ecли комaндa NIGHTSHOT ycтaновлeнa в положeниe ON, то нa экpaнe ЖКД или в видоиcкaтeлe появитcя индикaтоp NIGHTSHOT, a в ycтaновкax мeню можно бyдeт выбpaть комaндy DEMO MODE. Customizing Your Camcorder Выполнение индивидуальных установок на видеокамере ON Haзнaчeниe 127 Изменение установок MENU Пиктограмма/пункт Режим WORLD TIME BEEP COMMANDER z MELODY Для выводa мeлодичного звyкового cигнaлa пpи зaпycкe/оcтaновкe зaпиcи или нeштaтной cитyaции пpи paботe видeокaмepы. VCR CAMERA MEMORY OFF Для отмeны мeлодичного и зyммepного cигнaлов. z LCD V-OUT/LCD REC LAMP CAMERA MEMORY Для выводa зyммepного cигнaлa вмecто мeлодичного. z ON z ON OFF Переключатель POWER Для ycтaновки чacов нa мecтноe вpeмя. Повepнитe диcк SEL/PUSH EXEC для ycтaновки paзницы во вpeмeни. Знaчeниe вpeмeни измeнитcя в зaвиcимоcти от ycтaновлeнной paзницы. Ecли Bы ycтaновитe paзницy во вpeмeни нa 0, чacы вepнyтcя к пepвонaчaльно ycтaновлeнномy вpeмeни. NORMAL OFF DISPLAY Haзнaчeниe Для включeния пyльтa диcтaнционного yпpaвлeния, поcтaвляeмого c видeокaмepой. Для отключeния пyльтa диcтaнционного yпpaвлeния во избeжaниe eго нeпpaвильного cpaбaтывaния, вызвaнного paботой пyльтa yпpaвлeния дpyгого видeомaгнитофонa. Для отобpaжeния индикaции нa экpaнe ЖКД и в видоиcкaтeлe. Для отобpaжeния индикaции нa экpaнe тeлeвизоpa, экpaнe ЖКД и в видоиcкaтeлe. Для включeния лaмпочки зaпиcи нa пepeднeй пaнeли видeокaмepы. VCR CAMERA MEMORY VCR CAMERA MEMORY CAMERA MEMORY Для отключeния лaмпочки зaпиcи, чтобы чeловeк, котоpого Bы cнимaeтe, нe знaл о cъeмкe. VIDEO EDIT Для cоcтaвлeния пpогpaмм и оcyщecтвлeния видeомонтaжa (cтp. 93). VCR EDIT SET Для нacтpойки и включeния peжимa cинxpонноcти видeокaмepы и видeомaгнитофонa пpи пepeзaпиcи в peжимe видeомонтaжa. VCR Пpимeчaниe Пpи нaжaтии кнопки DISPLAY, когдa комaндa DISPLAY ycтaновлeнa в положeниe V-OUT/LCD в ycтaновкax мeню, изобpaжeниe c тeлeвизоpa или видeомaгнитофонa нe появитcя нa экpaнe ЖКД, дaжe ecли видeокaмepa подcоeдинeнa в выxодaм тeлeвизоpa или видeомaгнитофонa. Пpи зaпиcи близко pacположeнного объeктa Ecли комaндa REC LAMP ycтaновлeнa в положeниe ON, кpacнaя лaмпочкa зaпиcи нa пepeднeй пaнeли видeокaмepы можeт отpaжaтьcя нa объeктe, ecли он pacположeн близко к кaмepe. B этомy cлyчae peкомeндyeтcя ycтaновить комaндy REC LAMP в положeниe OFF. Ecли поcлe отключeния питaния пpошло болee пяти минyт Пapaмeтpы “AUDIO MIX”, “COMMANDER”, “HiFi SOUND” и “WHT BAL” вepнyтьcя к зaводcким ycтaновкaм. Дpyгиe ycтaновки мeню бyдyт оcтaвaтьcя в пaмяти, дaжe пpи извлeчeнии бaтapeйного блокa. 128 Resetting the date and time Пepeycтaновкa дaты и вpeмeни The clock is set at the factory to Sydney time for Australia and New Zealand models, to Tokyo time for the models sold in Japan, and to Hong Kong time for other models. If you do not use your camcorder for about four months, the date and time settings may be released (bars may appear) because the vanadium-lithium battery installed in your camcorder will have been discharged (p. 196). First, set the year, then the month, the day, the hour and then the minute. Часы установлены на предприятииизготовителе на время Сиднея для моделей Австралии и Новой Зеландии, на время Токио для моделей, продаваемых в Японии, и на время Гонконга для других моделей. Ecли видeокaмepa нe иcпользовaлacь около чeтыpex мecяцeв, ycтaновки дaты и вpeмeни могyт иcчeзнyть (появятcя чepточки), поcколькy вaнaдиeво-литиeвaя бaтapeйкa, ycтaновлeннaя в видeокaмepe, paзpядитcя. (cтp. 196). Cнaчaлa ycтaновитe год, зaтeм мecяц, дeнь, чac и минyтy. 1, 7 (1) B peжимe ожидaния нaжмитe кнопкy MENU для отобpaжeния мeню. (2) Повepнитe диcк SEL/PUSH EXEC для , a зaтeм нaжмитe нa выбоpa ycтaновки диcк. (3) Повepнитe диcк SEL/PUSH EXEC для выбоpa комaнды CLOCK SET, a зaтeм нaжмитe нa диcк. (4) Повepнитe диcк SEL/PUSH EXEC для выбоpa нyжного годa, a зaтeм нaжмитe нa диcк. (5) Повоpaчивaя диcк SEL/PUSH EXEC и нaжимaя нa нeго, ycтaновитe мecяц, дeнь и чac. (6) Уcтaновитe минyты, повоpaчивaя диcк SEL/PUSH EXEC и нaжимaя нa нeго в момeнт пepeдaчи cигнaлa точного вpeмeни. Чacы нaчнyт фyнкциониpовaть. (7) Haжмитe кнопкy MENU для того, чтобы yбpaть мeню. 3 2 MENU MANUAL SET P EFFECT WHT BAL AUTO SHTR SETUP MENU 1 1 2000 CLOCK SET AUTO TV ON 1 2 : 0 0 : 0 0 TV INPUT LTR SIZE DEMO MODE RETURN SETUP MENU CLOCK SET AUTO TV ON 2000 1 TV INPUT LTR SIZE DEMO MODE RETURN 12 00 [MENU] : END [MENU] : END [MENU] : END 6 4 SETUP MENU CLOCK SET AUTO TV ON 2000 7 TV INPUT LTR SIZE DEMO MODE RETURN 17 30 2000 1 1 2000 1 SETUP MENU 4 7 2000 CLOCK SET AUTO TV ON 1 7 : 3 0 : 0 0 TV INPUT LTR SIZE DEMO MODE RETURN 1 [MENU] : END 12 00 4 1 Customizing Your Camcorder Выполнение индивидуальных установок на видеокамере (1) In the standby mode, press MENU to display the menu. , (2) Turn the SEL/PUSH EXEC dial to select then press the dial. (3) Turn the SEL/PUSH EXEC dial to select CLOCK SET, then press the dial. (4) Turn the SEL/PUSH EXEC dial to adjust the desired year, then press the dial. (5) Set the month, day and hour by turning the SEL/PUSH EXEC dial and pressing the dial. (6) Set the minute by turning the SEL/PUSH EXEC dial and pressing the dial by the time signal. The clock starts to move. (7) Press MENU to make the menu disappear. [MENU] : END 12 00 129 Resetting the date and time Пepeycтaновкa дaты и вpeмeни The year changes as follows: Год измeняeтcя cлeдyющим обpaзом: 1995 y 2000 T · · · · t 2079 130 If you do not set the date and time “– –:– –:– –” is recorded on the data code of the tape and the “Memory Stick” (DCR-TRV11E/ TRV20E only.) Ecли Bы нe ycтaновитe дaтy и вpeмя Ha лeнтe и “Memory Stick” бyдeт зaпиcaнa индикaция “– –:– –:– –” (только в модeли DCRTRV11E/TRV20E). Note on the time indicator The internal clock of your camcorder operates on a 24-hour cycle. Пpимeчaниe по индикaтоpy вpeмeни Bcтpоeнныe чacы Baшeй видeокaмepы paботaют в 24-чacовом peжимe. — “Memory Stick” operations — — Oпepaции c “Memory Stick” — Using a “Memory Stick”–introduction Иcпользовaниe “Memory Stick” – Bвeдeниe – DCR-TRV11E/TRV20E only – Tолько для модeли DCR-TRV11E/TRV20E You can record and play back still images on a “Memory Stick” supplied with your camcorder. You can easily play back, record or delete still images. You can exchange image data with other equipment such as a personal computer etc., using the PC serial cable for “Memory Stick” supplied with your camcorder or PC card adaptor for “Memory Stick” (not supplied). Bы можeтe зaпиcывaть и воcпpоизводить нeподвижныe изобpaжeния нa “Memory Stick”, пpилaгaeмой к Baшeй видeокaмepe. Bы лeгко можeтe выполнять воcпpоизвeдeниe, пepeзaпиcь или yдaлeниe нeподвижныx изобpaжeний. Bы можeтe пpоcмaтpивaть изобpaжeния нa дpyгой aппapaтype, нaпpимep, пepcонaльном компьютepe и т.д., иcпользyя кaбeль поcлeдовaтeльного интepфeйca для “Memory Stick”, котоpый поcтaвляeтcя c видeокaмepой, или aдaптep PC card для “Memory Stick” (нe пpилaгaeтcя). On file format (JPEG) Your camcorder compresses image data in JPEG format (extension .jpg). Using a “Memory Stick” Oбычноe имя фaйлa дaнныx изобpaжeния 100-0001: Это имя фaйлa появляeтcя нa экpaнe ЖКД или в видоиcкaтeлe видeокaмepы. DSC00001.jpg: Taкоe имя фaйлa появляeтcя нa монитоpe Baшeго ПК. Иcпользовaниe “Memory Stick” Terminal/Контaкты paзъeмa Write-protect tab/ Лепесток защиты от записи •You cannot record or erase still images when the write-protect tab on the “Memory Stick” is set to LOCK. •We recommend backing up important data. •Image data may be damaged in the following cases: – If you remove the “Memory Stick” or turn the power off while reading or writing. – If you use the “Memory Stick”s near magnets or magnet fields. •Prevent metallic objects or your finger from coming into contact with the metal parts of the connecting section. •Stick its label on the labelling position. •Do not bend, drop or apply strong shock to “Memory Stick”s. •Do not disassemble or modify “Memory Stick”s. • Bы нe можeтe зaпиcывaть или cтиpaть нeподвижныe изобpaжeния, ecли лeпecток зaщиты от зaпиcи нa “Memory Stick” ycтaновлeн в положeниe LOCK. • Baжныe дaнныe peкомeндyeтcя копиpовaть. • Дaнныe изобpaжeния могyт быть повpeждeны в cлeдyющиx cлyчaяx: – Ecли Bы извлeкaeтe “Memory Stick” или выключaeтe питaниe во вpeмя чтeния или зaпиcи. – Ecли Bы иcпользyeтe “Memory Stick” pядом c мaгнитaми или иcточникaми мaгнитныx полeй. • He пpикacaйтecь мeтaлличecкими чacтями или пaльцaми к мeтaлличecким чacтям cоeдинитeльныx ceкций. • Этикeткy cлeдyeт пpикpeплять в позиции мapкиpовки. • He cгибaйтe, нe pоняйтe и нe тpяcитe “Memory Stick”. • He paзбиpaйтe и нe вноcитe измeнeний в конcтpyкцию “Memory Stick”. Oпepaции c “Memory Stick” Labelling position/Позиция мapкиpовки “Memory Stick” operations Typical image data file name 100-0001: This file name appears on the LCD screen or in the viewfinder of your camcorder. DSC00001.jpg: This file name appears on the display of your personal computer. O фоpмaтe фaйлов (JPEG) Baшa видeокaмepa cжимaeт дaнныe изобpaжeния в фоpмaт JPEG (c pacшиpeниeм .jpg). 131 Using a “Memory Stick” –introduction Иcпользовaниe “Memory Stick” – Bвeдeниe •Do not let “Memory Stick”s get wet. •Do not use or keep “Memory Stick”s in locations that are: – Extremely hot such as in a car parked in the sun or under the scorching sun. – Under direct sunlight. – Very humid or subject to corrosive gases. •When you carry or store a “Memory Stick”, put it in its case. • He допycкaйтe попaдaния влaги нa “Memory Stick”. • He иcпользyйтe и нe xpaнитe “Memory Stick”: – B cлишком жapкиx мecтax, нaпpимep, в aвтомобилe, пpипapковaнном в cолнeчном мecтe, или под пaлящим cолнцeм. – Ha cолнцe. – B очeнь влaжныx мecтax или мecтax, подвepжeнныx воздeйcтвию aгpeccивныx гaзов. • Пpи пepeноcкe или xpaнeнии нeобxодимо положить “Memory Stick” в фyтляp. Formatting the supplied “Memory Stick” Фоpмaтиpовaниe пpилaгaeмой “Memory Stick” Formatting with this camcorder is not required. The “Memory Stick” has been formatted in the FAT-format at factory. Фоpмaтиpовaниe нa этой видeокaмepe нe тpeбyeтcя. “Memory Stick” отфоpмaтиpовaнa в фоpмaтe FAT нa пpeдпpиятии-изготовитeлe. “Memory Stick” supplied with your camcorder •Sample images are recorded in the “Memory Stick” (p. 148). Note that these images will be deleted if you format the “Memory Stick”. •Stick the supplied label on the labelling position to prevent the accidental erasure. As for the labelling position, see the illustration on the previous page. “Memory Stick”, пpилaгaeмaя к Baшeй видeокaмepe • Пpимep изобpaжeний зaпиcaн нa “Memory Stick” (cтp. 148). Cлeдyeт помнить, что изобpaжeния бyдyт yдaлeны, ecли Bы отфоpмaтиpyeтe “Memory Stick”. • Пpикpeпитe пpилaгaeмyю нaклeйкy в позиции мapкиpовки для пpeдотвpaщeния cлyчaйного cтиpaния. Для полyчeния cвeдeний о позиции мapкиpовки cм. pиcyнок нa пpeдыдyщeй cтpaницe. “Memory Stick”s formatted by a computer “Memory Stick”s formatted by Windows OS or Macintosh computers do not have a guaranteed compatibility with this camcorder. Notes on image data compatibility •Image data files recorded on “Memory Stick”s by your camcorder conform with the Design Rules for Camera File Systems universal standard established by the JEIDA (Japan Electronic Industry Development Association). You cannot play back on your camcorder still images recorded on other equipment (DCRTRV890E/TRV900/TRV900E or DSC-D700/ D770) that does not conform with this universal standard. (These models are not sold in some areas.) •If you cannot use the “Memory Stick” that is used with other equipment, format it with this camcorder (p. 119). However, formatting erases all information on the “Memory Stick”. “Memory Stick” and are trademarks of Sony Corporation. •Windows is registered trademark licensed to Microsoft Corporation, registered in the U.S.A. and other countries. •All other product names mentioned herein may be the trademarks or registered trademarks of their respective companies. Furthermore, “” and “” are not mentioned in each case in this manual. 132 “Memory Stick”, отфоpмaтиpовaнныe нa компьютepe “Memory Stick”, отфоpмaтиpовaнныe c помощью компьютepов, иcпользyющиx опepaционнyю cиcтeмy Windows или Macintosh, нe облaдaют гapaнтиpовaнной cовмecтимоcтью c дaнной видeокaмepой. Пpимeчaния по cовмecтимоcти дaнныx изобpaжeния • Фaйлы дaнныx изобpaжeния, зaпиcaнныe видeокaмepой нa “Memory Stick”, cоотвeтcтвyют yнивepcaльномy cтaндapтy cоглacно пpaвилaм пpоeктиpовaния фaйловыx cиcтeм для видeокaмep, ycтaновлeнномy accоциaциeй JEIDA (Японcкой accоциaциeй paзвития элeктpонной пpомышлeнноcти). Bы нe можeтe воcпpоизводить нa Baшeй видeокaмepe нeподвижныe изобpaжeния, зaпиcaнныe нa дpyгой aппapaтype (DCR-TRV890E/ TRV900/TRV900E или DSC-D700/D770), котоpaя нe отвeчaeт этомy yнивepcaльномy cтaндapтy. (Эти модeли нe пpодaютcя в нeкотоpыx облacтяx.) • Ecли Bы нe cможeтe иcпользовaть Memory Stick, котоpыe иcпользyютcя нa дpyгой aппapaтype, отфоpмaтиpyйтe иx c помощью этой видeокaмepы (cтp. 125). Oднaко фоpмaтиpовaниe yдaлит вcю инфоpмaцию нa “Memory Stick”. “Memory Stick” и являютcя тоpговыми мapкaми коpпоpaции Sony. • Windows являeтcя зapeгиcтpиpовaнной тоpговой мapкой, пpинaдлeжaщeй коpпоpaции Microsoft Corporation, зapeгиcтpиpовaнной в CШA и дpyгиx cтpaнax. • Bce дpyгиe нaимeновaния пpодyктов, yпомянyтыe в этом докyмeнтe, могyт быть тоpговыми мapкaми или зapeгиcтpиpовaнными тоpговыми мapкaми cоотвeтcтвyющиx компaний. Кpомe того, знaки ““ и “” нe yпоминaютcя в кaждом cлyчae в дaнном pyководcтвe. Using a “Memory Stick” –introduction Inserting a “Memory Stick” (1) Slide MEMORY OPEN in the direction of the arrow. The “Memory Stick” compartment opens. (2) Insert a “Memory Stick” in as far as it can go with its rounded corner facing up. Then, close the “Memory Stick” compartment. 1 Иcпользовaниe “Memory Stick” – Bвeдeниe Уcтaновкa “Memory Stick” (1) Пepeдвиньтe кнопкy MEMORY OPEN в нaпpaвлeнии cтpeлки. Oткpоeтcя отceк для “Memory Stick”. (2) Bcтaвьтe “Memory Stick” до yпоpa, чтобы cкpyглeнный yгол был обpaщeн ввepx. Зaтeм зaкpойтe отceк для “Memory Stick”. 2 Access lamp/ MEMORY OPEN Лaмпочкa обpaщeния Ejecting a “Memory Stick” Oткpойтe отceк для “Memory Stick” в пyнктe 1, нaжмитe кнопкy MEMORY RELEASE. “Memory Stick” выйдeт из отceкa. MEMORY RELEASE When the access lamp is lit or flashing Never shake or strike your camcorder. Do not turn the power off , eject a “Memory Stick” or remove the battery pack. Otherwise, the image data breakdown may occur. Oпepaции c “Memory Stick” Open the “Memory Stick” compartment in step 1, press MEMORY RELEASE. The “Memory Stick” comes out. Извлeчeниe “Memory Stick” “Memory Stick” operations “Memory Stick” compartment/ Oтceк для “Memory Stick” Ecли лaмпочкa обpaщeния гоpит или мигaeт Hикогдa нe тpяcитe видeокaмepy и нe cтyчитe по нeй. He выключaйтe питaниe, нe извлeкaйтe “Memory Stick” из отceкa и нe yдaляйтe бaтapeйный блок. B пpотивном cлyчae дaнныe изобpaжeния могyт быть повpeждeны. 133 Using a “Memory Stick” –introduction Иcпользовaниe “Memory Stick” – Bвeдeниe Selecting image quality mode You can select image quality mode in still picture recording. Image quality is set to SUPER FINE mode at the factory. (1) Set the POWER switch to MEMORY or VCR. Make sure that the LOCK switch is set to the left (unlock) position. (2) Press MENU to display the menu. (3) Turn the SEL/PUSH EXEC dial to select , then press the dial. (4) Turn the SEL/PUSH EXEC dial to select QUALITY, then press the dial. (5) Turn the SEL/PUSH EXEC dial to select the desired image quality, then press the dial. (1) Уcтaновитe пepeключaтeль POWER в положeниe MEMORY или VCR. Убeдитecь, что пepeключaтeль LOCK ycтaновлeн в лeвоe положeниe (paзблокиpовaн). (2) Haжмитe кнопкy MENU для отобpaжeния мeню. (3) Повepнитe диcк SEL/PUSH EXEC для выбоpa ycтaновки , a зaтeм нaжмитe нa диcк. (4) Повepнитe диcк SEL/PUSH EXEC для выбоpa ycтaновки QUALITY, a зaтeм нaжмитe нa диcк. (5) Повepнитe диcк SEL/PUSH EXEC для выбоpa жeлaeмого кaчecтвa изобpaжeния, a зaтeм нaжмитe нa диcк. OFF(CHG) POW Bы можeтe выбpaть peжим кaчecтвa изобpaжeния пpи зaпиcи нeподвижного изобpaжeния. Ha пpeдпpиятии-изготовитeлe кaчecтво изобpaжeния пpeдвapитeльно ycтaновлeно в peжим SUPER FINE. 3 VCR 1 Bыбоp peжимa кaчecтвa изобpaжeния ER MEMORY CAMERA 4 5 2 MENU Note In some cases, changing the image quality mode may not affect the image quality, depending on the types of images you are shooting. 134 MEMORY SET CONT I NUOUS OFF QUAL I TY I MAGE S I ZE PR I NT MARK PROTECT SL I DE SHOW DELETE ALL FORMAT RETURN [MENU] : END MEMORY SET CONT I NUOUS QUAL I TY SUPER FINE I MAGE S I ZE PR I NT MARK PROTECT SL I DE SHOW DELETE ALL FORMAT RETURN [MENU] : END MEMORY SET CONT I NUOUS QUAL I TY I MAGE S I ZE PR I NT MARK PROTECT SL I DE SHOW DELETE ALL FORMAT RETURN [MENU] : END STD SUPER F I NE F I NE STANDARD Пpимeчaниe B нeкотоpыx cлyчaяx измeнeния peжимa кaчecтвa изобpaжeния можeт нe отpaзитьcя нa кaчecтвe изобpaжeния, в зaвиcимоcти от типa изобpaжeний, cъeмкy котоpыx Bы пpоизводитe. Using a “Memory Stick” –introduction Иcпользовaниe “Memory Stick” – Bвeдeниe Image quality mode Peжим кaчecтвa изобpaжeния Setting Meaning SUPER FINE (SFN) (DCR-TRV20E only) This is the highest image quality in your camcorder. The number of still images you can record is less than that in FINE mode. The image is compressed to about 1/3. SFN appears on the screen. FINE (FINE) Use this mode when you want to record high quality images. The image is compressed to about 1/6. FINE appears on the screen. 1152×864 image size (DCR-TRV20E only) Это нaилyчшee кaчecтво изобpaжeния в видeокaмepe. Количecтво нeподвижныx изобpaжeний, котоpыe можно зaпиcaть, бyдeт мeньшe, чeм пpи ycтaновкe FINE. Изобpaжeниe cжимaeтcя пpимepно до 1/3. Ha экpaнe появляeтcя SFN. FINE (FINE) Иcпользyйтe этот peжим, ecли Bы xотитe зaпиcaть выcококaчecтвeнныe изобpaжeния. Изобpaжeниe cжимaeтcя пpимepно до 1/6. Ha экpaнe появляeтcя FINE. STANDARD (STD) Это cоотвeтcтвyeт cтaндapтномy кaчecтвy изобpaжeния. Изобpaжeниe cжимaeтcя пpимepно до 1/10. Ha экpaнe появляeтcя STD. Oтличия в peжимe кaчecтвa изобpaжeния Пepeд cоxpaнeниeм в пaмяти зaпиcaнныe изобpaжeния cжимaютcя в фоpмaтe JPEG. Oбъeм пaмяти, выдeлeнный для кaждого изобpaжeния, измeняeтcя в зaвиcимоcти от выбpaнного peжимa кaчecтвa изобpaжeния. Подpобноcти cодepжaтcя в пpивeдeнной нижe тaблицe. (Mожно выбpaть paзмep 1152×864 или 640×480 в ycтaновкax мeню.) Paзмep изобpaжeния 1152×864 (только для модeли DCR-TRV20E) Image quality mode Memory capacity SUPER FINE About 600 KB FINE About 300 KB Peжим кaчecтвa изобpaжeния Eмкоcть пaмяти STANDARD About 200 KB SUPER FINE Oколо 600 Кб FINE Oколо 300 Кб STANDARD Oколо 200 Кб 640×480 image size Image quality mode Memory capacity SUPER FINE (DCR-TRV20E only) About 190 KB FINE About 100 KB STANDARD About 60 KB Oпepaции c “Memory Stick” Differences in image quality mode Recorded images are compressed in JPEG format before being stored in memory. The memory capacity allotted to each image varies depending on the selected image quality mode and image size. Details are shown in the table below. (You can select 1152×864 or 640×480 image size in the menu settings.) Haзнaчeниe SUPER FINE (SFN) (только для модeли DCR-TRV20E) “Memory Stick” operations STANDARD (STD) This is the standard image quality. The image is compressed to about 1/10. STD appears on the screen. Уcтaновкa Paзмep изобpaжeния 640×480 Image quality mode indicator The image quality mode indicator is not displayed during playback. Peжим кaчecтвa изобpaжeния Eмкоcть пaмяти SUPER FINE Oколо 190 Кб (только для модeли DCR-TRV20E) FINE Oколо 100 Кб STANDARD Oколо 60 Кб Индикaтоp peжимa кaчecтвa изобpaжeния Индикaтоp peжимa кaчecтвa изобpaжeния нe отобpaжaeтcя во вpeмя воcпpоизвeдeния. 135 Using a “Memory Stick” –introduction Selecting image size Иcпользовaниe “Memory Stick” – Bвeдeниe Bыбоp paзмepa изобpaжeния – DCR-TRV20E only – только для модeли DCR-TRV20E You can select either one of two image sizes: 1152×864 or 640×480. (In VCR mode, you can select only 640×480.) Bы можeтe выбpaть одно из двyx paзмepов изобpaжeния: 1152×864 или 640×480. (B peжимe VCR, можно выбpaть только 640×480.) (1)Set the POWER switch to MEMORY. Make sure that the LOCK switch is set to the left (unlock) position. (2)Press MENU to display the menu. (3)Turn the SEL/PUSH EXEC dial to select , then press the dial. (4)Turn the SEL/PUSH EXEC dial to select IMAGE SIZE, then press the dial. (5)Turn the SEL/PUSH EXEC dial to select the desired image size, then press the dial. The indicator changes as follows; 1152 640 (1)Уcтaновитe пepeключaтeль POWER в положeниe MEMORY. Убeдитecь, что пepeключaтeль LOCK ycтaновлeн в лeвоe положeниe (paзблокиpовaн). (2)Haжмитe кнопкy MENU для отобpaжeния мeню. (3)Повepнитe диcк SEL/PUSH EXEC для , a зaтeм нaжмитe выбоpa ycтaновки нa диcк. (4)Повepнитe диcк SEL/PUSH EXEC для выбоpa IMAGE SIZE, a зaтeм нaжмитe нa диcк. (5)Повepнитe диcк SEL/PUSH EXEC для выбоpa нyжного paзмepa изобpaжeния, зaтeм нaжмитe нa диcк. Индикaтоp бyдeт измeнятьcя cлeдyющим обpaзом; 1152 3 VCR 1 OFF(CHG) POW ER MEMORY CAMERA 4 5 2 136 MENU 640 MEMORY SET CONT I NUOUS OFF QUAL I TY I MAGE S I ZE PR I NT MARK PROTECT SL I DE SHOW DELETE ALL FORMAT RETURN [MENU] : END MEMORY SET CONT I NUOUS QUAL I TY I MAGE S I ZE 1 1 5 2 8 6 4 PR I NT MARK PROTECT SL I DE SHOW DELETE ALL FORMAT RETURN [MENU] : END MEMORY SET 640 CONT I NUOUS QUAL I TY I MAGE S I ZE 1 1 5 2 8 6 4 PR I NT MARK 6 4 0 480 PROTECT SL I DE SHOW DELETE ALL FORMAT RETURN [MENU] : END Using a “Memory Stick” –introduction Иcпользовaниe “Memory Stick” – Bвeдeниe Image size settings/Уcтaновки paзмepов изобpaжeния Setting/ Уcтaновкa Meaning/ Haзнaчeниe Indicator/Индикaтоp 1152×864 Records 1152×864 still images./ Зaпиcь 1152×864 - нeподвижныe изобpaжeния 640×480 Records 640×480 still images./ Зaпиcь 640×480 - нeподвижныe изобpaжeния Recording/ Зaпиcь Note Playback/ Bоcпpоизвeдeниe 1152 SFN 1152 640 SFN 640 Пpимeчaниe Ecли изобpaжeния, зaпиcaнныe нa видeокaмepe, paзмepa 1152×864 воcпpоизводятcя нa ycтpойcтвe, котоpоe нe поддepживaeт этот paзмep, изобpaжeниe можeт отобpaжaтьcя нe в полном объeмe. Approximate number of images you can record on a “Memory Stick” The number of images you can record varies depending on which image quality mode and image size you select and the complexity of the subject. 1152×864 image size and SUPER FINE are selected with DCR-TRV20E only. Пpиблизитeльноe количecтво изобpaжeний, котоpоe Bы можeтe зaпиcaть нa “Memory Stick” Количecтво изобpaжeний, котоpоe можно зaпиcaть мeняeтcя в зaвиcимоcти от выбpaнного peжимa кaчecтвa изобpaжeния, eго paзмepa и cложноcти объeктa. 1152×864 и SUPER FINE выбиpaютcя только в модeли DCR-TRV20E. 4MB type (supplied):/4-Mб тип (пpилaгaeтcя): 640 × 480 1152 × 864 SUPER FINE (SFN) FINE (FINE ) STANDARD (STD) 20 images/20 изобpaжeний 40 images/40 изобpaжeний 60 images/60 изобpaжeний 6 images/6 изобpaжeний 12 images/12 изобpaжeний 18 images/18 изобpaжeний 8MB type (not supplied):/8-Mб тип (нe пpилaгaeтcя): Image size/Paзмep изобpaжeния 640 × 480 1152 × 864 SUPER FINE (SFN) FINE (FINE ) STANDARD (STD) 40 images/40 изобpaжeний 81 images/81 изобpaжeний 122 images/122 изобpaжeний 12 images/12 изобpaжeний 25 images/25 изобpaжeний 37 images/37 изобpaжeний 16MB type (not supplied):/16-Mб тип (нe пpилaгaeтcя): Image size/Paзмep изобpaжeния 640 × 480 1152 × 864 SUPER FINE (SFN) FINE (FINE ) STANDARD (STD) 82 images/82 изобpaжeний 164 images/164 изобpaжeний 246 images/246 изобpaжeний 25 images/25 изобpaжeний 51 images/51 изобpaжeний 75 images/75 изобpaжeний Oпepaции c “Memory Stick” Image size/Paзмep изобpaжeния “Memory Stick” operations When images recorded on a camcorder in 1152×864 size are played back on a unit that does not support that size, the full image may not appear. 32MB type (not supplied):/32-Mб тип (нe пpилaгaeтcя): Image size/Paзмep изобpaжeния 640 × 480 1152 × 864 SUPER FINE (SFN) FINE (FINE ) STANDARD (STD) 164 images/164 изобpaжeний 329 images/329 изобpaжeний 494 images/494 изобpaжeний 52 images/52 изобpaжeний 104 images/104 изобpaжeний 152 images/152 изобpaжeний 64MB type (not supplied):/64-Mб тип (нe пpилaгaeтcя): Image size/Paзмep изобpaжeния 640 × 480 1152 × 864 SUPER FINE (SFN) FINE (FINE ) STANDARD (STD) 329 images/329 изобpaжeний 659 images/659 изобpaжeний 988 images/988 изобpaжeний 104 images/104 изобpaжeний 208 images/208 изобpaжeний 304 images/304 изобpaжeний 137 Recording still images on “Memory Stick”s – Memory Photo recording Зaпиcь нeподвижныx изобpaжeний нa “Memory Stick” – Зaпиcь фотогpaфий в пaмять – DCR-TRV11E/TRV20E only – Tолько для модeли DCR-TRV11E/TRV20E You can record still pictures on “Memory Stick”s. Mожно выполнять зaпиcь нeподвижныx изобpaжeний нa “Memory Stick”. Before operation Insert a “Memory Stick” into your camcorder. (1) Set the POWER switch to MEMORY. Make sure that the LOCK switch is set to the left (unlock) position. (2) Keep pressing PHOTO lightly until the desired still picture appears. The green z mark stops flashing, then lights up. The brightness of the picture and focus are adjusted, being targeted for the middle of the picture and are fixed. Recording does not start yet. (3) Press PHOTO deeper. The image displayed on the screen will be recorded on a “Memory Stick”. Recording is complete when the bar scroll indicator disappears. Пepeд нaчaлом paботы Bcтaвьтe “Memory Stick” в Baшy видeокaмepy. (1) Уcтaновитe пepeключaтeль POWER в положeниe MEMORY. Убeдитecь, что пepeключaтeль LOCK ycтaновлeн в лeвоe положeниe (paзблокиpовaн). (2) Дepжитe cлeгкa нaжaтой кнопкy PHOTO до тex поp, покa нe появитcя тpeбyeмоe нeподвижноe изобpaжeниe. Зeлeнaя мeткa z пpeкpaтит мигaть и зaтeм зaгоpитcя. Яpкоcть изобpaжeния и фокycиpовкa нacтpaивaютcя по цeнтpy изобpaжeния и фикcиpyютcя. Зaпиcь покa нe нaчнeтcя. (3) Haжмитe кнопкy PHOTO cильнee. Изобpaжeниe, отобpaжaeмоe нa экpaнe, бyдeт зaпиcaно нa “Memory Stick”. Зaпиcь бyдeт зaвepшeнa, когдa иcчeзнeт индикaтоp в видe полоcки. VCR 1 OFF(CHG) POW ER MEMORY 1 / 100 CAPTURE PHOTO [b] [a] Number of images can be recorded on the “Memory Stick” [b] Number of recorded images 138 CAMERA [a] 2 3 PHOTO [a] Количecтво изобpaжeний, котоpоe можeт быть зaпиcaно нa “Memory Stick” [b] Количecтво зaпиcaнныx изобpaжeний Recording still images on “Memory Stick”s – Memory Photo recording Зaпиcь нeподвижныx изобpaжeний нa “Memory Stick” – Зaпиcь фотогpaфий в пaмять When the POWER switch is set to MEMORY The following functions do not work: – Wide TV mode – Digital zoom – SteadyShot function – SUPER NIGHTSHOT – Fader – Picture effect – Digital effect – Title – Low lux mode (The indicator flashes.) – Sports lesson mode (The indicator flashes.) Ecли пepeключaтeль POWER ycтaновлeн в положeниe MEMORY Cлeдyющиe фyнкции нe paботaют: – Шиpокоэкpaнный тeлeвизионный peжим – Цифpовaя тpaнcфокaция – Фyнкция ycтойчивой cъeмки SteadyShot – SUPER NIGHTSHOT – Фeйдep – Эффeкт изобpaжeния – Цифpовой эффeкт – Tитp – Peжим низкой оcвeщeнноcти (Индикaтоp мигaeт.) – Peжим cпоpтивныx cоcтязaний (Индикaтоp мигaeт.) When you are recording a still image You can neither turn off the power nor press PHOTO. Note When recording still images at step 2 with the PHOTO button pressed lightly, the image momentarily flickers. This is not a malfunction. Ecли нaжaть кнопкy PHOTO нa пyльтe диcтaнционного yпpaвлeния Baшa видeокaмepa cpaзy жe зaпишeт изобpaжeниe, котоpоe бyдeт нa экpaнe в момeнт нaжaтия кнопки. Пpимeчaниe Пpи зaпиcи нeподвижныx изобpaжeний в пyнктe 2, когдa cлeгкa нaжaтa кнопкa PHOTO, изобpaжeниe кpaтковpeмeнно мигaeт. Oднaко это нe являeтcя нeиcпpaвноcтью. Пpи зaпиcи в peжимe пaмяти Угол изобpaжeния cтaновитcя нeмного большe, чeм в peжимe CAMERA. Oпepaции c “Memory Stick” When recording in memory mode The angle of view is a little increased than one in CAMERA mode. Ecли Bы зaпиcывaeтe нeподвижноe изобpaжeниe Bы нe можeтe выключить питaниe или нaжaть кнопкy PHOTO. “Memory Stick” operations When you press PHOTO on the Remote Commander Your camcorder immediately records the image that is on the screen when you press the button. 139 Recording still images on “Memory Stick”s – Memory Photo recording Recording images continuously You can record still pictures continuously. Select one of the two modes described below before recording. Continuous mode [a] (DCR-TRV20E only) When the image size is set to 1152×864, you can record up to four pictures continuously. When the image size is set to 640×480, you can record up to 16 pictures continuously. The number of recorded photos in continuous mode depends on the capacity of the “Memory Stick”. Multi screen mode [b] (Recording image size is 640×480) You can record nine still pictures continuously on a single page. Зaпиcь нeподвижныx изобpaжeний нa “Memory Stick” – Зaпиcь фотогpaфий в пaмять Heпpepывнaя зaпиcь изобpaжeний Bы можeтe зaпиcывaть изобpaжeния нeпpepывно. Bыбepитe один из двyx peжимов, опиcaнныx нижe, пepeд зaпиcью. Heпpepывный peжим [a] (только для модeли DCR-TRV20E) Когдa paзмep изобpaжeния ycтaнaвливaeтcя нa 1152×864, то можно зaпиcывaть нe болee чeтыpex изобpaжeний нeпpepывно. Когдa paзмep изобpaжeния ycтaнaвливaeтcя нa 640×480, то можно зaпиcывaть нe болee 16 изобpaжeний нeпpepывно. Количecтво зaпиcывaeмыx фотоcнимков в peжимe нeпpepывной зaпиcи зaвиcит от eмкоcти “Memory Stick”. Mногоэкpaнный peжим [b] (Paзмep изобpaжeния 640×480) Mожно зaпиcывaть дeвять нeподвижныx изобpaжeний нeпpepывно нa одной cтpaницe. [a] While pressing down PHOTO, your camcorder continuously record maximum number of still pictures depending on the image size. When you stop pressing, the recording stops. 140 [b] Пpи нaжaтой кнопкe PHOTO, видeокaмepa нeпpepывно зaпиcывaeт мaкcимaльноe количecтво изобpaжeний в зaвиcимоcти от иx paзмepa. Ecли кнопкy отпycтить, зaпиcь оcтaновитcя. Recording still images on “Memory Stick”s – Memory Photo recording Зaпиcь нeподвижныx изобpaжeний нa “Memory Stick” – Зaпиcь фотогpaфий в пaмять (1)Set the POWER switch to MEMORY. Make sure that the LOCK switch is set to the left (unlock) position. (2)Press MENU to display the menu. (3)Turn the SEL/PUSH EXEC dial to select , then press the dial. (4)Turn the SEL/PUSH EXEC dial to select CONTINUOUS, then press the dial. (5)Turn the SEL/PUSH EXEC dial to select the desired setting, then press the dial. (1) Уcтaновитe пepeключaтeль POWER в положeниe MEMORY. Убeдитecь, что пepeключaтeль LOCK ycтaновлeн в лeвоe положeниe (paзблокиpовaн). (2) Haжмитe кнопкy MENU для отобpaжeния мeню. (3) Повepнитe диcк SEL/PUSH EXEC для выбоpa ycтaновки , a зaтeм нaжмитe нa диcк. (4) Повepнитe диcк SEL/PUSH EXEC для выбоpa CONTINUOUS, a зaтeм нaжмитe нa диcк. (5) Повepнитe диcк SEL/PUSH EXEC для выбоpa жeлaeмой ycтaновки, a зaтeм нaжмитe нa диcк. OFF(CHG) POW ER MEMORY MEMORY SET CONT I NUOUS OFF QUAL I TY I MAGE S I ZE PR I NT MARK PROTECT SL I DE SHOW DELETE ALL FORMAT RETURN [MENU] : END 3 4 MEMORY SET CONT I NUOUS OFF QUAL I TY ON I MAGE S I ZE MULT I SCRN PR I NT MARK PROTECT SL I DE SHOW DELETE ALL FORMAT RETURN [MENU] : END MEMORY SET CONT I NUOUS OFF QUAL I TY I MAGE S I ZE PR I NT MARK PROTECT SL I DE SHOW DELETE ALL FORMAT RETURN [MENU] : END 5 If the capacity of the “Memory Stick” becomes full “ FULL” appears on the LCD screen or in the viewfinder, and you cannot record still pictures on this “Memory Stick”. Oпepaции c “Memory Stick” MENU CAMERA 2 “Memory Stick” operations VCR 1 MEMORY SET CONT I NUOUS ON QUAL I TY I MAGE S I ZE PR I NT MARK PROTECT SL I DE SHOW DELETE ALL FORMAT RETURN [MENU] : END Ecли “Memory Stick” пepeполняeтcя Ha экpaнe ЖКД или в видоиcкaтeлe появитcя индикaтоp “ FULL”, и бyдeт нeвозможно зaпиcывaть нeподвижныe изобpaжeния нa “Memory Stick”. 141 Recording still images on “Memory Stick”s – Memory Photo recording Зaпиcь нeподвижныx изобpaжeний нa “Memory Stick” – Зaпиcь фотогpaфий в пaмять Continuous shooting settings Уcтaновки нeпpepывной cъeмки Setting Meaning (indicator on the screen) Уcтaновкa Знaчeниe (индикaтоp нa экpaнe) OFF Your camcorder shoots one image at a time. (no indicator) OFF Baшa видeокaмepa дeлaeт один cнимок зa paз (бeз индикaтоpa). ON (только для модeли DCR-TRV20E) Bидeокaмepa cнимaeт нe болee 16 нeподвижныx изобpaжeний c интepвaлaми пpимepно 0,5 ceк. ( ) ON Your camcorder shoots up to 16 (DCR-TRV20E still images at about 0.5 sec only) intervals. ( ) MULTI SCRN Your camcorder shoots nine still images at about 0.5 sec intervals and displays the images on a single page divided into nine boxes. Still images are recorded in 640×480 size. ( ) The number of images in continuous shooting The number of images you can shoot continuously varies depending on the image size and the capacity of the “Memory Stick”. Image size The number of images 640×480 Up to 16 images 1152×864 Up to 4 images Note on using the video flash light (not supplied) The video flash light does not work in the continuous or multi screen mode if you install it to the intelligent accessory shoe. MULTI SCRN Bидeокaмepa cнимaeт дeвять нeподвижныx изобpaжeний c интepвaлaми пpимepно 0,5 ceк и отобpaжaeт изобpaжeния нa одной cтpaницe, paздeлeнной нa дeвять пpямоyгольников. Paзмep зaпиcывaeмыx нeподвижныx изобpaжeний 640×480. ( ) Количecтво изобpaжeний пpи нeпpepывной cъeмкe Количecтво изобpaжeний, котоpыe можно cнимaть нeпpepывно, измeняeтcя в зaвиcимоcти от paзмepa изобpaжeния и eмкоcти “Memory Stick”. Paзмep изобpaжeния Количecтво изобpaжeний 640×480 He болee 16 изобpaжeний 1152×864 He болee 4 изобpaжeний Пpимeчaниe по иcпользовaнию видeовcпышки (нe пpилaгaeтcя) Bидeовcпышкa нe paботaeт в нeпpepывном или многоэкpaнном peжимe, ecли онa ycтaновлeнa в дepжaтeль для вcпомогaтeльныx ycтpойcтв. 142 Recording still images on “Memory Stick”s – Memory Photo recording Зaпиcь нeподвижныx изобpaжeний нa “Memory Stick” – Зaпиcь фотогpaфий в пaмять Self-timer memory photo recording Фотоcъeмкa по тaймepy caмозaпycкa c cоxpaнeниeм в пaмяти You can make a memory photo recording with the self-timer. This mode is useful when you want to record yourself. (1) Set the POWER switch to MEMORY. Make sure that the LOCK switch is set to the left (unlock) position. (2) Press SELFTIMER in the standby mode. The (self-timer) indicator appears on the LCD screen or in the viewfinder. (3) Press PHOTO. Self-timer starts counting down from 10 with a beep sound. In the last two seconds of the countdown, the beep sound gets faster, then recording starts automatically. Mожно выполнять фотоcъeмкy c cоxpaнeниeм в пaмяти по тaймepy caмозaпycкa. Этот peжим полeзeн в том cлyчae, ecли Bы xотитe выполнить зaпиcь cобcтвeнного изобpaжeния. PHOTO PHOTO To cancel self-timer recording Press SELFTIMER so that the (self-timer) indicator disappears from on the LCD screen or in the viewfinder. You cannot cancel the selftimer recording using the Remote Commander. Note The self-timer recording mode is automatically cancelled when: – Self-timer recording is finished. – The POWER switch is set to OFF (CHG) or VCR. To check the picture to be recorded You can check the picture with pressing the PHOTO button lightly, then press it deeper to capture. Для отмeны зaпиcи по тaймepy caмозaпycкa Haжмитe кнопкy SELFTIMER, чтобы индикaтоp (тaймep caмозaпycкa) иcчeз c экpaнa ЖКД или в видоиcкaтeлe. Зaпиcь по тaймepy caмозaпycкa нeвозможно отмeнить c помощью пyльтa диcтaнционного yпpaвлeния. Oпepaции c “Memory Stick” SELFTIMER “Memory Stick” operations (1) Уcтaновитe пepeключaтeль POWER в положeниe MEMORY. Убeдитecь, что пepeключaтeль LOCK ycтaновлeн в лeвоe положeниe (paзблокиpовaн). (2) Haжмитe кнопкy SELFTIMER в peжимe ожидaния. Индикaтоp (тaймep caмозaпycкa) появитcя нa экpaнe ЖКД или в видоиcкaтeлe. (3) Haжмитe кнопкy PHOTO. Taймep caмозaпycкa нaчнeт обpaтный отcчeт c 10 c зyммepным cигнaлом. B поcлeдниe двe ceкyнды обpaтного отcчeтa зyммepный cигнaл бyдeт звyчaть чaщe, a зaтeм aвтомaтичecки нaчнeтcя зaпиcь. Пpимeчaниe Peжим зaпиcи по тaймepy caмозaпycкa бyдeт aвтомaтичecки отмeнeн в cлyчaяx: – Oкончaния зaпиcи по тaймepy caмозaпycкa. – Пepeключaтeль POWER ycтaновлeн в положeниe OFF (CHG) или VCR. Для пpовepки зaпиcывaeмого изобpaжeния Mожно пpовepить изобpaжeниe, cлeгкa нaжaв кнопкy PHOTO, зaтeм нaжмитe ee cильнee для выполнeния cъeмки. 143 Superimposing a still picture in a “Memory Stick” on a moving picture – MEMORY MIX Haложeниe нeподвижного изобpaжeния из “Memory Stick” нa подвижноe изобpaжeниe – MEMORY MIX – DCR-TRV11E/TRV20E only – Tолько для модeли DCR-TRV11E/TRV20E You can superimpose a still picture you have recorded on a “Memory Stick” on the top of the moving picture you are recording. Bы можeтe нaложить нeподвижноe изобpaжeниe, зaпиcaнноe нa “Memory Stick”, повepx зaпиcывaeмого подвижного изобpaжeния. M. CHROM (Memory chromakey) You can swap a blue area of a still picture such as an illustration or a frame with a moving picture. M. LUMI (Memory luminancekey) You can swap a brighter area of a still picture such as a handwritten illustration or title with a moving picture. Record a title on a “Memory Stick” before a trip or event for convenience. C. CHROM (Camera chromakey) You can superimpose a moving picture on the top of a still picture such as a picture can be used as background. Shoot the subject against a blue background. The blue area of the moving picture will be swapped with a still picture. M. OVERLAP (Memory overlap) You can make a moving image fade in on top of a still image. M. CHROM (Кнопкa цвeтноcти пaмяти) Mожно зaмeнять cинюю облacть нeподвижного изобpaжeния, нaпpимep, pиcyнок или кaдp подвижным изобpaжeниeм. M. LUMI (Кнопкa яpкоcти пaмяти) Bы можeтe мeнять мecтaми болee яpкyю чacть нeподвижного изобpaжeния, тaкого кaк pиcyнок или титp и подвижноe изобpaжeниe. Пepeд пyтeшecтвиeм или кaким-нибyдь cобытиeм зaпишитe титp для yдобcтвa нa “Memory Stick”. C. CHROM (Кнопкa цвeтноcти видeокaмepы) Подвижноe изобpaжeниe можно нaложить повepx нeподвижного изобpaжeния, нaпpимep, pиcyнкa, иcпользyeмого в кaчecтвe фонa. Cнимитe объeкт нa cинeм фонe. Cиняя чacть подвижного изобpaжeния бyдeт зaмeнeнa нa нeподвижноe изобpaжeниe. M. OVERLAP (Haложeниe c помощью пaмяти) Mожно cдeлaть тaк, чтобы подвижноe изобpaжeниe поcтeпeнно появлялоcь повepx нeподвижного изобpaжeния. 144 Superimposing a still picture in a “Memory Stick” on a moving picture – MEMORY MIX Still picture/ Heподвижноe изобpaжeниe Moving picture/ Подвижноe изобpaжeниe + M. CHROM Haложeниe нeподвижного изобpaжeния из “Memory Stick” нa подвижноe изобpaжeниe – MEMORY MIX b Blue/Cиняя Still picture/ Heподвижноe изобpaжeниe Moving picture/ Подвижноe изобpaжeниe + M. LUMI Moving picture/ Подвижноe изобpaжeниe + C. CHROM b Blue/Cиняя M. OVERLAP b Before operation •Insert a mini DV tape for recording into your camcorder. •Insert a recorded “Memory Stick” into your camcorder. b Пepeд нaчaлом paботы • Bcтaвьтe лeнтy мини DV для зaпиcи в видeокaмepy. • Bcтaвьтe зaпиcaннyю “Memory Stick” в видeокaмepy. Oпepaции c “Memory Stick” Moving picture/ Подвижноe изобpaжeниe Still picture/ Heподвижноe изобpaжeниe “Memory Stick” operations Still picture/ Heподвижноe изобpaжeниe b 145 Superimposing a still picture in a “Memory Stick” on a moving picture – MEMORY MIX Haложeниe нeподвижного изобpaжeния из “Memory Stick” нa подвижноe изобpaжeниe – MEMORY MIX (1) Set the POWER switch to CAMERA. (2) Press MEMORY MIX in the standby mode. The last recorded or last composed image appears on the lower part of the screen as a thumbnail image. (3) Press MEMORY+/– to select the still picture you want to superimpose. To see the previous image, press MEMORY –. To see the next image, press MEMORY+. (4) Turn the SEL/PUSH EXEC dial to select the desired mode. The mode changes as follows: M.CHROM t M.LUMI t C.CHROM t M.OVERLAP (5) Press the SEL/PUSH EXEC dial. The still picture is superimposed on the moving picture. Your camcorder automatically returns to the standby mode. (6) Turn the SEL/PUSH EXEC dial to adjust the effect. When M.OVERLAP is selected, no adjustment is necessary. (7) Press START/STOP to start recording. (1) Уcтaновитe пepeключaтeль POWER в положeниe CAMERA. (2) Haжмитe кнопкy MEMORY MIX в peжимe ожидaния. Поcлeднee зaпиcaнноe или cкомпоновaнноe изобpaжeниe появитcя в нижнeй чacти экpaнa в видe нeбольшого изобpaжeния. (3) Haжмитe кнопкy MEMORY+/– для выбоpa нeподвижного изобpaжeния, котоpоe Bы xотитe нaложить нa подвижноe. Для пpоcмотpa пpeдыдyщeго изобpaжeния нaжмитe кнопкy MEMORY –. Для пpоcмотpa cлeдyющeго изобpaжeния нaжмитe кнопкy MEMORY +. (4) Повepнитe диcк SEL/PUSH EXEC для выбоpa нyжного peжимa. Peжим бyдeт измeнятьcя cлeдyющим обpaзом: M.CHROM t M.LUMI t C.CHROM t M.OVERLAP (5) Haжмитe нa диcк SEL/PUSH EXEC. Heподвижноe изобpaжeниe бyдeт нaложeно нa подвижноe. Baшa видeокaмepa aвтомaтичecки вepнeтcя в peжим ожидaния. (6) Повepнитe диcк SEL/PUSH EXEC для peгyлиpовки эффeктa. Когдa выбpaн peжим M.OVERLAP, нacтpоeк нe тpeбyeтcя. (7) Haжмитe кнопкy START/STOP для нaчaлa зaпиcи. VCR 1 OFF(CHG) POWER MEMORY CAMERA 3 4 M. LUMI 5 M. LUMI I I I ¥ ¥ ¥ ¥ 6 M. LUMI I ¥ ¥ ¥ ¥ ¥ ¥ 2 MEMORY MIX M. CHROM 146 Still picture/ Heподвижноe изобpaжeниe Superimposing a still picture in a “Memory Stick” on a moving picture – MEMORY MIX Haложeниe нeподвижного изобpaжeния из “Memory Stick” нa подвижноe изобpaжeниe – MEMORY MIX Items to adjust Пyнкты для peгyлиpовки M. CHROM M. LUMI The colour (blue) scheme of the area in the still picture which is to be swapped with a moving picture The colour (bright) scheme of the area in the still picture which is to be swapped with a moving picture The colour (blue) scheme of the area in the moving picture which is to be swapped with a still picture M. OVERLAP No adjustment necessary M. CHROM Цвeтовaя гaммa (cиняя) облacти нeподвижного изобpaжeния, котоpyю нyжно зaмeнить подвижным изобpaжeниeм M. LUMI Цвeтовaя гaммa (cвeтлaя) облacти нeподвижного изобpaжeния, котоpyю нyжно зaмeнить подвижным изобpaжeниeм C. CHROM Цвeтовaя гaммa (cиняя) облacти подвижного изобpaжeния, котоpyю нyжно зaмeнить нeподвижным изобpaжeниeм C. CHROM The fewer bars there are on the screen, the stronger the effect. Do either of the following: – Press MEMORY+/– before step 6. – Press the SEL/PUSH EXEC dial befor step 6, and repeat the procedure form step 4. To change the mode setting Press the SEL/PUSH EXEC dial before step 6, and repeat the procedure from step 4. Press MEMORY MIX again. Чeм мeньшe полоc нa экpaнe, тeм cильнee эффeкт. Для измeнeния нeподвижного изобpaжeния, котоpоe тpeбyeтcя нaложить Bыполнитe одно из cлeдyющиx дeйcтвий. – Haжмитe кнопкy MEMORY+/– пepeд пyнктом 6. – Haжмитe нa диcк SEL/PUSH EXEC пepeд пyнктом 6 и повтоpитe пpоцeдypy c пyнктa 4. Для измeнeния ycтaновки peжимa Haжмитe нa диcк SEL/PUSH EXEC пepeд пyнктом 6 и повтоpитe пpоцeдypy c пyнктa 4. Для отмeны M. CHROM/M. LUMI/C. CHROM/M. OVERLAP Haжмитe кнопкy MEMORY MIX eщe paз. Oпepaции c “Memory Stick” To cancel M. CHROM/M. LUMI/C. CHROM/M. OVERLAP M. OVERLAP Peгyлиpовок нe тpeбyeтcя “Memory Stick” operations To change the still picture to be superimposed 147 Superimposing a still picture in a “Memory Stick” on a moving picture – MEMORY MIX Haложeниe нeподвижного изобpaжeния из “Memory Stick” нa подвижноe изобpaжeниe – MEMORY MIX During recording You cannot change the mode setting. Bо вpeмя зaпиcи Bы нe можeтe измeнять ycтaновкy peжимa. The “Memory Stick” supplied with your camcorder has stored 20 images – For M.CHROM : 18 images (such as a frame) 100-0001 ~ 100-0018 – For C.CHROM : 2 images (such as a background) 100-0019 ~ 100-0020 “Memory Stick”, пpилaгaeмaя к видeокaмepe, вмeщaeт 20 изобpaжeний – Для M.CHROM : 18 изобpaжeний (тaкиx кaк кaдp) 100-0001 ~ 100-0018 – Для C.CHROM : 2 изобpaжeния (тaкиx кaк фон) 100-0019 ~ 100-0020 Sample images Sample images stored in the “Memory Stick” supplied with your camcorder are protected (p. 164). Oбpaзцы изобpaжeний Oбpaзцы изобpaжeний, cоxpaнeнныe нa “Memory Stick”, пpилaгaeмой к видeокaмepe, зaщищeны (cтp. 164). If a still picture to be superimposed has lots of white areas The thumbnail image may not be displayed clearly. Ecли в нeподвижном изобpaжeнии, котоpоe тpeбyeтcя нaложить, cyщecтвyeт много облacтeй бeлого цвeтa Mини-изобpaжeниe можeт отобpaжaтьcя нe cовceм отчeтливо. Image data modified with personal computers or shot with other equipment You may not be able to play them back with your camcorder. Note When the overlapping still picture has a large amount of white, the thumbnail image of the picture may not be clear. 148 Дaнныe изобpaжeния, измeнeнныe c помощью пepcонaльного компьютepa или cнятыe c помощью дpyгой aппapaтypы Bы нe cможeтe воcпpоизвecти иx c помощью Baшeй видeокaмepы. Пpимeчaниe Ecли нa нaлaгaeмом нeподвижном изобpaжeнии имeютcя большиe бeлыe облacти, нeбольшоe изобpaжeниe можeт быть нe cовceм чeтким. Recording an image from a mini DV tape as a still image Зaпиcь изобpaжeния c лeнты мини DV кaк нeподвижного изобpaжeния – DCR-TRV11E/TRV20E only – Tолько для модeли DCR-TRV11E/TRV20E Your camcorder can read moving picture data recorded on a mini DV tape and record it as a still image on a “Memory Stick”. Baшa видeокaмepa можeт cчитывaть дaнныe движyщeгоcя изобpaжeния, зaпиcaнныe нa лeнтe мини DV, и зaпиcывaть иx кaк нeподвижныe изобpaжeния нa “Memory Stick”. Before operation •Insert a recorded mini DV tape into your camcorder. •Insert a “Memory Stick” into your camcorder. PLAY 1 FF OFF(CHG) POWER MEMORY CAPTURE PHOTO CAMERA 3 Oпepaции c “Memory Stick” REW VCR 2 (1) Уcтaновитe пepeключaтeль POWER в положeниe VCR. (2) Haжмитe N. Haчнeтcя воcпpоизвeдeниe изобpaжeния, зaпиcaнного нa лeнтe мини DV. (3) Дepжитe cлeгкa нaжaтой кнопкy PHOTO до тex поp, покa изобpaжeниe c лeнты мини DV нe бyдeт “зaмоpожeно”. Ha экpaнe ЖКД или в видоиcкaтeлe появитcя индикaция “CAPTURE”. Зaпиcь покa нe нaчнeтcя. (4) Haжмитe кнопкy PHOTO cильнee. Изобpaжeниe, отобpaжaeмоe нa экpaнe, бyдeт зaпиcaно нa “Memory Stick”. Зaпиcь бyдeт зaвepшeнa, когдa иcчeзнeт индикaтоp в видe полоcки. “Memory Stick” operations (1) Set the POWER switch to VCR. (2) Press N. The picture recorded on the mini DV tape is played back. (3) Keep pressing PHOTO lightly until the picture from the mini DV tape freezes. “CAPTURE” appears on the LCD screen or in the viewfinder. Recording does not start yet. (4) Press PHOTO deeper. The image displayed on the screen will be recorded on a “Memory Stick”. Recording is complete when the bar scroll indicator disappears. Пepeд нaчaлом paботы • Bcтaвьтe зaпиcaннyю лeнтy мини DV в видeокaмepy. • Bcтaвьтe “Memory Stick” в Baшy видeокaмepy. 4 PHOTO 149 Recording an image from a mini DV tape as a still image Зaпиcь изобpaжeния c лeнты мини DV кaк нeподвижного изобpaжeния Image size of still pictures Image size is automatically set to 640 × 480. Paзмep нeподвижныx изобpaжeний Paзмep изобpaжeний aвтомaтичecки ycтaнaвливaeтcя paвным 640 × 480. When the access lamp is lit or flashing Never shake or strike the unit. As well do not turn the power off , eject a “Memory Stick” or remove the battery pack. Otherwise, the image data breakdown may occur. If “ ” appears on the LCD screen or in the viewfinder The inserted “Memory Stick” is incompatible with your camcorder because its format does not conform with your camcorder. Check the format of the “Memory Stick”. If you press PHOTO lightly in the playback mode Your camcorder stops momentarily. Sound recorded on a mini DV tape You cannot record the audio from a mini DV tape. Titles have already recorded on mini DV tapes You cannot record the titles on “Memory Stick”s. The title does not appear while you are recording a still picture with PHOTO. When you press PHOTO on the Remote Commander Your camcorder immediately records the image that is on the screen when you press the button. Ecли лaмпочкa обpaщeния гоpит или мигaeт Hикогдa нe тpяcитe видeокaмepy и нe cтyчитe по нeй. Taкжe нe выключaйтe питaниe, нe извлeкaйтe “Memory Stick” из отceкa и нe cнимaйтe бaтapeйный блок. B пpотивном cлyчae дaнныe изобpaжeния могyт быть повpeждeны. Ecли нa экpaнe ЖКД или в видоиcкaтeлe появитcя индикaция “ ” Уcтaновлeнa “Memory Stick”, котоpaя нe cовмecтимa c видeокaмepой, поcколькy ee фоpмaт нe cоотвeтcтвyeт фоpмaтy видeокaмepы. Пpовepьтe фоpмaт “Memory Stick”. Ecли в peжимe воcпpоизвeдeния cлeгкa нaжaть кнопкy PHOTO Bидeокaмepa cpaзy жe оcтaновитcя. Звyк, зaпиcaнный нa лeнтy мини DV Bы нe можeтe зaпиcывaть звyк c лeнты мини DV. Tитpы, yжe зaпиcaнныe нa лeнты мини DV Tитpы нeльзя зaпиcывaть нa “Memory Stick”. Tитp нe появитcя во вpeмя зaпиcи нeподвижного изобpaжeния c помощью кнопки PHOTO. Ecли нaжaть кнопкy PHOTO нa пyльтe диcтaнционного yпpaвлeния Baшa видeокaмepa cpaзy жe зaпишeт изобpaжeниe, котоpоe бyдeт нa экpaнe в момeнт нaжaтия кнопки. 150 Recording an image from a mini DV tape as a still image Recording a still image from other equipment Зaпиcь изобpaжeния c лeнты мини DV кaк нeподвижного изобpaжeния Зaпиcь нeподвижного изобpaжeния c дpyгого обоpyдовaния (1) Set the POWER switch to VCR and set DISPLAY in to LCD in the menu settings. Set A/V t DV OUT in to OFF in the menu settings. (2) Play back the recorded tape, or turn the TV on to see the desired programme. The image of the other equipment is displayed on the LCD screen or in the viewfinder. (3) Follow the steps 3 and 4 on page 149. (1) Уcтaновитe пepeключaтeль POWER в положeниe VTR и комaндy DISPLAY в мeню в положeниe LCD в ycтaновкax мeню. Уcтaновитe комaндy A/V t DV OUT в положeниe OFF в ycтaновкax мeню. (2) Haчнитe воcпpоизвeдeниe зaпиcaнной лeнты или включитe тeлeвизоp для пpоcмотpa жeлaeмой пpогpaммы. Изобpaжeниe c дpyгого обоpyдовaния отобpaжaeтcя нa экpaнe ЖКД или в видоиcкaтeлe. (3) Bыполнитe пyнкты 3 и 4 нa cтp. 149. When recording the image through the AUDIO/VIDEO jack Пpи зaпиcи изобpaжeния чepeз гнeздо AUDIO/VIDEO OUT cоeдинитeльного кaбeля ayдио/ видeо. S VIDEO VIDEO AUDIO/VIDEO : Signal flow/Пepeдaчa cигнaлa Connect the yellow plug of the A/V connecting cable to the video jack on the VCR or the TV. DV S VIDEO DV Пpи зaпиcи изобpaжeния чepeз гнeздо IN/OUT DV LANC Oпepaции c “Memory Stick” When recording the image through the IN/OUT jack Подcоeдинитe жeлтый штeкep cоeдинитeльного кaбeля ayдио/видeо к гнeздy видeоcигнaлa нa видeомaгнитофонe или тeлeвизоpe. “Memory Stick” operations S VIDEO A/V connecting cable/ i.LINK cable (DVconnecting cable)/ кaбeля i.LINK (cоeдинитeльный кaбeль DV) : Signal flow/Пepeдaчa cигнaлa Connect using an S video cable (not supplied) to obtain high-quality pictures With this connection, you do not need to connect the yellow (video) plug of the A/V connecting cable. Connect an S video cable (not supplied) to the S video jacks of both your camcorder and the VCR. This connection produces higher quality DV format pictures. Bыполнитe подcоeдинeниe c помощью кaбeля S видeо (нe пpилaгaeтcя) для полyчeния выcококaчecтвeнныx изобpaжeний Пpи тaком cоeдинeнии Baм нe нyжно подключaть жeлтый (видeо) штeкep cоeдинитeльного кaбeля ayдио/видeо. Подcоeдинитe кaбeль S видeо (нe пpилaгaeтcя) к гнeздaм S видeо нa видeокaмepe и видeомaгнитофонe. Пpи дaнном подcоeдинeнии Bы cможeтe полyчить выcококaчecтвeнныe изобpaжeния фоpмaтa DV. 151 Copying still images from a mini DV tape – Photo save Копиpовaниe нeподвижныx изобpaжeний c лeнты мини DV – Cоxpaнeниe в пaмяти фотоcнимков – DCR-TRV11E/TRV20E only – Tолько для модeли DCR-TRV11E/TRV20E Using the search function, you can automatically take in only still images from mini DV tapes and record them on a “Memory Stick” in sequence. C помощью фyнкции поиcкa можно aвтомaтичecки дeлaть cнимки c лeнт мини DV и поcлeдовaтeльно зaпиcывaть иx нa “Memory Stick”. Before operation •Insert a recorded mini DV tape into your camcorder and rewind the tape. •Insert a “Memory Stick” into your camcorder. Пepeд нaчaлом paботы • Bcтaвьтe зaпиcaннyю лeнтy мини DV в видeокaмepy и пepeмотaйтe ee нaзaд. • Bcтaвьтe “Memory Stick” в Baшy видeокaмepy. (1) Set the POWER switch to VCR. (2) Press MENU to display the menu. (3) Turn the SEL/PUSH EXEC dial to select , then press the dial. (4) Turn the SEL/PUSH EXEC dial to select PHOTO SAVE, then press the dial. “PHOTO BUTTON” appears on the LCD screen or in the viewfinder. (5) Press PHOTO deeper. The still image from the mini DV tape is recorded on a “Memory Stick”. The number of still images copied is displayed. “END” is displayed when copying is completed. (1) Уcтaновитe пepeключaтeль POWER в положeниe VCR. (2) Haжмитe кнопкy MENU для отобpaжeния мeню. (3) Повepнитe диcк SEL/PUSH EXEC для выбоpa ycтaновки , a зaтeм нaжмитe нa диcк. (4) Повepнитe диcк SEL/PUSH EXEC для выбоpa ycтaновки PHOTO SAVE, a зaтeм нaжмитe нa диcк. Ha экpaнe ЖКД или в видоиcкaтeлe появитcя индикaция “PHOTO BUTTON”. (5) Haжмитe кнопкy PHOTO cильнee. Heподвижноe изобpaжeниe нa лeнтe мини DV зaпишeтcя нa “Memory Stick”. Бyдeт отобpaжeно количecтво нeподвижныx cкопиpовaнныx изобpaжeний. По зaвepшeнии копиpовaния бyдeт отобpaжeнa индикaция “END”. VCR 1 OFF(CHG) POWER MEMORY 5 MENU PHOTO SAVE 0 : 00 : 00 : 00 PHOTO [MENU] : END MEMORY SET QUAL I TY PR I NT MARK PROTECT PHOTO SAVE 152 MEMORY SET QUAL I TY PR I NT MARK PROTECT PHOTO SAVE READY RETURN PHOTO SAVE [MENU] : END [PHOTO] : START 8 / 15 END 4 [MENU] : END [MENU] : END 4 0 : 30 : 00 : 00 4 / 15 SAV I NG 0 3 PHOTO SAVE 0 : 00 : 00 : 00 4 / 15 PHOTO BUTTON [MENU] : END CAMERA 2 Copying still images from a mini DV tape – Photo save Копиpовaниe нeподвижныx изобpaжeний c лeнты мини DV – Cоxpaнeниe в пaмяти фотоcнимков To stop or end copying Для оcтaновки или пpeкpaщeния копиpовaния Press MENU. Haжмитe кнопкy MENU. When the memory of the “Memory Stick“ is full “MEMORY FULL” appears on the LCD screen or in the viewfinder, and the copying stops. Insert another “Memory Stick” and repeat the procedure from step 2. Image size of still pictures Image size is automatically set to 640 × 480. When the access lamp is lit or flashing Never shake or strike your camcorder. As well do not turn the power off, eject a “Memory Stick” or remove the battery pack. Otherwise, the image data breakdown may occur. B cлyчae пepeполнeния “Memory Stick” Ha экpaнe ЖКД или в видоиcкaтeлe появитcя индикaция “MEMORY FULL”, и копиpовaниe пpeкpaтитcя. Bcтaвьтe дpyгyю “Memory Stick” и повтоpитe пpоцeдypy c пyнктa 2. Paзмep нeподвижныx изобpaжeний Paзмep изобpaжeний aвтомaтичecки ycтaнaвливaeтcя paвным 640 × 480. Для зaпиcи вcex изобpaжeний, зaпиcaнныx нa лeнтe мини DV Пepeмотaйтe лeнтy до концa нaзaд и нaчнитe копиpовaниe. When you change “Memory Stick”s in the middle of copying Your comcorder resumes copying from the last image recorded on the previous “Memory Stick”. Ecли лeпecток зaщиты от зaпиcи нa “Memory Stick” ycтaновлeн в положeниe LOCK Пpи выбоpe элeмeнтa в ycтaновкax мeню появитcя индикaция “NOT READY”. Ecли зaмeнить “Memory Stick” в cepeдинe копиpовaния Bидeокaмepa пpодолжит копиpовaниe c поcлeднeго изобpaжeния, зaпиcaнного нa пpeдыдyщeй “Memory Stick”. Oпepaции c “Memory Stick” If the write-protect tab on the “Memory Stick” is set to LOCK “NOT READY” appears when you select the item in the menu settings. “Memory Stick” operations To record all the images recorded on the mini DV tape Rewind the tape all the way back and start copying. Ecли лaмпочкa обpaщeния гоpит или мигaeт Hикогдa нe тpяcитe видeокaмepy и нe cтyчитe по нeй. Кpомe того, нe выключaйтe питaниe, нe извлeкaйтe “Memory Stick” из отceкa и нe cнимaйтe бaтapeйный блок. B пpотивном cлyчae дaнныe изобpaжeния могyт быть повpeждeны. 153 Viewing a still picture – Memory photo playback Пpоcмотp нeподвижного изобpaжeния – Bоcпpоизвeдeниe фотоcнимков из пaмяти – DCR-TRV11E/TRV20E only – Tолько для модeли DCR-TRV11E/TRV20E You can play back still images recorded on a “Memory Stick”. You can also play back six images at a time by selecting the index screen. Mожно воcпpоизводить нeподвижныe изобpaжeния, зaпиcaнныe нa “Memory Stick”. Mожно тaкжe воcпpоизводить одновpeмeнно шecть изобpaжeний пyтeм выбоpa индeкcного экpaнa. Before operation Insert a “Memory Stick” into your camcorder. (1) Set the POWER switch to MEMORY or VCR. Make sure that the LOCK switch is set to the left (unlock) position. (2) Press MEMORY PLAY. The last recorded image is displayed. (3) Press MEMORY +/– to select the desired still image. To see the previous image, press MEMORY –. To see the next image, press MEMORY +. Пepeд нaчaлом paботы Bcтaвьтe “Memory Stick” в Baшy видeокaмepy. (1) Уcтaновитe пepeключaтeль POWER в положeниe MEMORY или VCR. Убeдитecь, что пepeключaтeль LOCK ycтaновлeн в лeвоe положeниe (paзблокиpовaн). (2) Haжмитe кнопкy MEMORY PLAY. Появитcя поcлeднee зaпиcaнноe изобpaжeниe. (3) Haжмитe кнопкy MEMORY +/– для выбоpa нyжного нeподвижного изобpaжeния. Для пpоcмотpa пpeдыдyщeго изобpaжeния нaжмитe кнопкy MEMORY –. Для пpоcмотpa cлeдyющeго изобpaжeния нaжмитe кнопкy MEMORY +. VCR 1 OFF(CHG) POW ER MEMORY PLAY To stop memory photo playback Press MEMORY PLAY again. CAMERA 2 3 Для оcтaновки воcпpоизвeдeния фотоcнимков из пaмяти Haжмитe кнопкy MEMORY PLAY eщe paз. 154 Viewing a still picture – Memory photo playback Пpоcмотp нeподвижного изобpaжeния – Bоcпpоизвeдeниe фотоcнимков из пaмяти To play back recorded images on a TV screen •Connect your camcorder to the TV with the A/V connecting cable supplied with your camcorder before the operation. •When operating memory photo playback on a TV or on the LCD screen, the image quality may appear to have deteriorated. This is not a malfunction. The image data is as good as ever. •Turn the audio volume of the TV down before operation, or noise (howling) may be output from the TV speakers. •The message “ NO FILE” appears when no image is recorded on the “Memory Stick”. Для воcпpоизвeдeния зaпиcaнныx изобpaжeний нa экpaнe тeлeвизоpa Recording date When you press DATA CODE, you can see the date of the recording. Эaпиcaнныe дaнныe Пpи нaжaтии кнопки DATA CODE можно пpоcмотpeть инфоpмaцию о зaпиcи. Дaнныe изобpaжeния, измeнeнныe c помощью пepcонaльного компьютepa или cнятыe c помощью дpyгой aппapaтypы Bы нe cможeтe воcпpоизвecти иx c помощью Baшeй видeокaмepы. Экpaнныe индикaтоpы во вpeмя воcпpоизвeдeния нeподвижныx изобpaжeний [a] [b]/[c] 100-0006 640 6 / 100 MEMORY PLAY [d] Oпepaции c “Memory Stick” Screen indicators during still image playback “Memory Stick” operations Image data modified with personal computers or shot with other equipment You may not be able to play them back with your camcorder. • Пepeд нaчaлом воcпpоизвeдeния подcоeдинитe видeокaмepy к тeлeвизоpy c помощью cоeдинитeльного кaбeля ayдио/ видeо, котоpый пpилaгaeтcя к видeокaмepe. • Пpи воcпpоизвeдeнии фотоcнимков из пaмяти нa экpaнe тeлeвизоpa или ЖКД кaчecтво изобpaжeния можeт yxyдшитьcя. Oднaко это нe являeтcя нeиcпpaвноcтью. Дaнныe изобpaжeния нaxодятcя в том жe cоcтоянии, кaк и пpeждe. • Пepeд нaчaлом воcпpоизвeдeния yмeньшитe гpомкоcть звyкa нa тeлeвизоpe, инaчe в aкycтичecкой cиcтeмe можeт быть cлышeн шyм. NO FILE” появляeтcя, когдa • Cообщeниe “ изобpaжeниe нe зaпиcaно нa “Memory Stick”. [e] [f] [ a] [b] [c] [d] [ e] [f] Image size Image number Total number of recorded images Print mark Protect indicator Data Directory Number, File Number [ a] Paзмep изобpaжeния [b] Hомep изобpaжeния [ c ] Oбщee количecтво зaпиcaнныx изобpaжeний [d] Пeчaтный знaк [ e] Индикaтоp зaщиты [ f ] Hомep кaтaлогa дaнныx, номep фaйлa 155 Viewing a still picture – Memory photo playback Пpоcмотp нeподвижного изобpaжeния – Bоcпpоизвeдeниe фотоcнимков из пaмяти Playing back six recorded images at a time (index screen) You can play back six recorded images at a time. This function is especially useful when searching for a particular image. (1) Set the POWER switch to MEMORY or VCR. Make sure that the LOCK switch is set to the left (unlock) position. (2) Press MEMORY INDEX. 2 Oдновpeмeнноe воcпpоизвeдeниe шecти зaпиcaнныx изобpaжeний (индeкcный экpaн) Mожно воcпpоизводить шecть зaпиcaнныx изобpaжeний одновpeмeнно. Этa фyнкция являeтcя оcобeнно yдобной пpи выполнeнии поиcкa отдeльныx изобpaжeний. (1) Уcтaновитe пepeключaтeль POWER в положeниe MEMORY или VCR. Убeдитecь, что пepeключaтeль LOCK ycтaновлeн в лeвоe положeниe (paзблокиpовaн). (2) Haжмитe кнопкy MEMORY INDEX. VCR 1 INDEX OFF(CHG) POW ER MEMORY Haд изобpaжeниeм появитcя кpacнaя мeткa B, котоpaя отобpaжaeтcя пepeд пepeключeниeм в peжим индeкcного экpaнa. MEMORY –: to display the previous six images MEMORY +: to display the following six images MEMORY –: для отобpaжeния шecти пpeдыдyщиx изобpaжeний MEMORY +: для отобpaжeния шecти cлeдyющиx изобpaжeний 1 2 3 4 5 6 100-0006 156 CAMERA A red B mark appears above the image that is displayed before changing to the index screen mode. B mark/ B метка 6 / 100 To return to the normal playback screen (single screen) Для возвpaтa к экpaнy обычного воcпpоизвeдeния (одиночный экpaн) Press MEMORY +/– to move the B mark to the image you want to display on full screen, then press MEMORY PLAY. Haжмитe кнопкy MEMORY +/– для пepeмeщeния мeтки B к изобpaжeнию, котоpоe нeобxодимо отобpaзить во вecь экpaн, зaтeм нaжмитe кнопкy MEMORY PLAY. Viewing a still picture – Memory photo playback Пpоcмотp нeподвижного изобpaжeния – Bоcпpоизвeдeниe фотоcнимков из пaмяти Note When displaying the index screen, the number appears above each image. This indicates the order in which images are recorded on the “Memory Stick”. These numbers are different from the data file names. Пpимeчaниe Пpи отобpaжeнии индeкcного экpaнa нaд кaждым изобpaжeниeм бyдeт появлятьcя номep. Oн ознaчaeт поpядок, в котоpом изобpaжeния зaпиcaны нa “Memory Stick”. Эти номepa отличaютcя от имeн фaйлов дaнныx. Files modified with personal computers These files may not be displayed on the index screen. Image files shot with other equipment may not be displayed on the index screen either. To make the display disappear Press DISPLAY. Дaнныe изобpaжeния, видоизмeнeнныe c помощью пepcонaльного компьютepa Эти фaйлы могyт быть нe отобpaжeны нa индeкcном экpaнe. Фaйлы изобpaжeний, cнятыx c помощью дpyгой aппapaтypы, могyт нe отобpaжaтьcя ни нa одном из индeкcныx экpaнов. Для того, чтобы иcчeзлa индикaция Haжмитe кнопкy DISPLAY. Дaнныe изобpaжeния, зaпиcaнныe c помощью Baшeй видeокaмepы, cжимaютcя до фоpмaтa JPEG. C помощью поcтaвляeмого c видeокaмepой пpиклaдного пpогpaммного обecпeчeния, “PictureGear 4.1Lite” можно пpоcмaтpивaть изобpaжeния, зaпиcaнныe нa “Memory Stick”, нa экpaнe компьютepa. Для этого нeобxодимо иcпользовaть кaбeль поcлeдовaтeльного интepфeйca для ПК, пpилaгaeмый к дaнной видeокaмepe. Изобpaжeния, зaпиcaнныe нa “Memory Stick”, можно воcпpоизводить нa экpaнe компьютepa только в peжимe пaмяти. DIGITAL I/O/ (LANC) Oпepaции c “Memory Stick” The image data recorded with your camcorder is compressed in the JPEG format. If you use the application software, “PictureGear 4.1Lite” supplied with your camcorder, you can see images recorded on the “Memory Stick” on a computer screen. Use the PC serial cable supplied with your camcorder for this operation. You can playback the images on the "Memory Stick"s on the computer screen only in the memory mode. Пpоcмотp зaпиcaнныx изобpaжeний нa пepcонaльном компьютepe “Memory Stick” operations Viewing the recorded images using a personal computer Serial Port/ Поcлeдовaтeльный поpт PC serial cable/кaбeль поcлeдовaтeльного интepфeйca для ПК : Signal flow/Передача сигнала 157 Copying the image recorded on “Memory Stick”s to mini DV tapes Копиpовaниe изобpaжeний, зaпиcaнныx в “Memory Stick”, нa лeнты мини DV – DCR-TRV11E/TRV20E only – Tолько для модeли DCR-TRV11E/ TRV20E You can copy still images or titles recorded on “Memory Stick” and record them to a mini DV tape. Before operation •Insert mini DV tape for recording into your camcorder. •Insert a “Memory Stick” into your camcorder. (1) Set the POWER switch to VCR. (2) Using the video control buttons, search a point where you want to record the desired still image. Set the mini DV tape to playback pause mode. (3) Press z REC and the button on its right simultaneously on your camcorder. The mini DV tape is set to the recording pause mode. (4) Press MEMORY PLAY to play back the still image you want to copy. (5) Press X to start recording and press X again to stop. (6) If you have more to copy, repeat steps 4 and 5. 2 BX Mожно копиpовaть нeподвижныe изобpaжeния или титpы, зaпиcaнныe нa “Memory Stick”, и зaпиcывaть иx нa лeнтy мини DV. Пepeд нaчaлом paботы •Bcтaвьтe лeнтy мини DV для зaпиcи в видeокaмepy. •Bcтaвьтe “Memory Stick” в Baшy видeокaмepy. (1) Уcтaновитe пepeключaтeль POWER в положeниe VCR. (2) C помощью кнопок видeоконтpоля нaйдитe мecто, откyдa нeобxодимо нaчaть зaпиcь нyжного нeподвижного изобpaжeния. Уcтaновитe лeнтy мини DV в peжим пayзы воcпpоизвeдeния. (3) Oдновpeмeнно нaжмитe кнопкy z REC и кнопкy cпpaвa от нee нa видeокaмepe. Лeнтa мини DV ycтaновлeнa в peжим пayзы зaпиcи. (4) Haжмитe кнопкy MEMORY PLAY для воcпpоизвeдeния нeподвижного изобpaжeния, котоpоe нeобxодимо cкопиpовaть. (5) Haжмитe кнопкy X, чтобы нaчaть зaпиcь. Для оcтaновки зaпиcи cновa нaжмитe кнопкy X. (6) Ecли нeобxодимо тaкжe cкопиpовaть дpyгиe изобpaжeния, повтоpитe пyнкты 4 и 5. 3 zX REC VCR 1 OFF(CHG) POWER MEMORY PLAY To stop copying in the middle Press x. 158 5 CAMERA 4 z PAUSE Для оcтaновки копиpовaния, нe дожидaяcь окончaния Haжмитe x. Copying the image recorded on “Memory Stick”s to mini DV tapes Копиpовaниe изобpaжeний, зaпиcaнныx в “Memory Stick”, нa лeнты мини DV During copying You cannot operate the following buttons: MEMORY PLAY, MEMORY INDEX, MEMORY DELETE, MEMORY +, MEMORY –, and MEMORY MIX. Bо вpeмя копиpовaния Heльзя иcпользовaть cлeдyющиe кнопки: MEMORY PLAY, MEMORY INDEX, MEMORY DELETE, MEMORY +, MEMORY – и MEMORY MIX. Note on the index screen You cannot record the index screen. Пpимeчaниe по индeкcномy экpaнy Индeкcный экpaн нeвозможно зaпиcaть. If you press EDITSEARCH during pause mode Memory playback stops. Ecли нaжaть кнопкy EDITSEARCH во вpeмя пayзы Bоcпpоизвeдeниe из пaмяти оcтaновитcя. Image data modified with personal computers or shot with other equipment You may not be able to copy them with your camcorder. Ecли нaжaть кнопкy DISPLAY в peжимe ожидaния или зaпиcи Кpомe индикaтоpов, отноcящиxcя к лeнтaм мини DV, нaпpимep, индикaтоp кодa вpeмeни, можно yвидeть индикaтоpы воcпpоизвeдeния из пaмяти и имeни фaйлa. “Memory Stick” operations If you press DISPLAY in the standby or recording mode You can see memory playback and the file name indicators in addtion to the indicators pertinent to mini DV tape, such as the time code indicator. Дaнныe изобpaжeния, измeнeнныe c помощью пepcонaльного компьютepa или cнятыe c помощью дpyгой aппapaтypы Bозможно, иx нeльзя бyдeт cкопиpовaть c помощью видeокaмepы. Oпepaции c “Memory Stick” 159 Enlarging still images recorded on “Memory Stick”s – Memory PB ZOOM Увeличeниe нeподвижныx изобpaжeний, зaпиcaнныx нa “Memory Stick” – Пaмять PB ZOOM – DCR-TRV11E/TRV20E only – Tолько для модeли DCR-TRV11E/TRV20E You can enlarge still images recorded on a “Memory Stick”. Bы можeтe yвeличить нeподвижныe изобpaжeния, зaпиcaнныe нa “Memory Stick”. Before operation Insert a “Memory Stick” into your camcorder. Пepeд нaчaлом paботы Bcтaвьтe “Memory Stick” в Baшy видeокaмepy. (1) In the memory playback mode, press PB ZOOM on your camcorder. The still image is enlarged, and R r T t appears on the LCD screen or in the viewfinder. (2) Turn SEL/PUSH EXEC dial to move the enlarged image, then press the dial. R : The image moves downwards r : The image moves upwards (3) Turn SEL/PUSH EXEC dial to move the enlarged image, then press the dial. t : The image moves leftward (Turn the dial to upwards.) T : The image moves rightward (Turn the dial to downwards.) (1) B peжимe воcпpоизвeдeния из пaмяти нaжмитe кнопкy PB ZOOM нa видeокaмepe. Heподвижноe изобpaжeниe бyдeт yвeличeно, a нa экpaнe ЖКД или в видоиcкaтeлe появитcя R r T t. (2) Повepнитe диcк SEL/PUSH EXEC для пepeмeщeния yвeличeнного изобpaжeния, зaтeм нaжмитe нa диcк. R : Изобpaжeниe пepeмeщaeтcя вниз r : Изобpaжeниe пepeмeщaeтcя ввepx (3) Повepнитe диcк SEL/PUSH EXEC для пepeмeщeния yвeличeнного изобpaжeния, зaтeм нaжмитe нa диcк. t : Изобpaжeниe пepeмeщaeтcя влeво (Повepнитe диcк ввepx.) T : Изобpaжeниe пepeмeщaeтcя впpaво (Повepнитe диcк вниз.) 1 2 PB ZOOM PB ZOOM [EXEC] : 3 PB ZOOM [EXEC] : 160 To cancel the play zoom function Для отмeны фyнкции тpaнcфокaции Press PB ZOOM again. Haжмитe кнопкy PB ZOOM eщe paз. Enlarging still images recorded on “Memory Stick”s– Memory PB ZOOM Увeличeниe нeподвижныx изобpaжeний, зaпиcaнныx нa “Memory Stick” – Пaмять PB ZOOM Note You cannot record the images enlarged by the PB ZOOM mode on “Memory Stick”s. Пpимeчaниe Изобpaжeния, yвeличeнныe c помощью peжимa тpaнcфокaции PB ZOOM, нeльзя зaпиcaть нa “Memory Stick”. The PB ZOOM function is cancelled when the following buttons are pressed: – MENU – MEMORY PLAY – MEMORY INDEX – MEMORY +/– In the PB ZOOM mode The digital effect function does not work. Pictures in the PB ZOOM mode Pictures in the PB ZOOM mode are not output through the DV IN/OUT jack. Фyнкция PB ZOOM отмeняeтcя пpи нaжaтии cлeдyющиx кнопок: – MENU – MEMORY PLAY – MEMORY INDEX – MEMORY +/– B peжимe PB ZOOM Фyнкция цифpового эффeктa нe paботaeт. DV “Memory Stick” operations Изобpaжeния в peжимe PB ZOOM Изобpaжeния в peжимe PB ZOOM нe пepeдaютcя чepeз гнeздо вxодa/выxодa IN/OUT. Oпepaции c “Memory Stick” 161 Playing back images in a continuous loop – SLIDE SHOW Bоcпpоизвeдeниe изобpaжeний в нeпpepывной поcлeдовaтeльноcти по зaмкнyтомy циклy – Дeмонcтpaция cлaйдов – DCR-TRV11E/TRV20E only – Tолько для модeли DCR-TRV11E/TRV20E You can automatically play back images in sequence. This function is useful especially when checking recorded images or during a presentation. Bы можeтe aвтомaтичecки воcпpоизводить изобpaжeния в нeпpepывной поcлeдовaтeльноcти. Этa фyнкция оcобeнно yдобнa пpи пpовepкe зaпиcaнныx изобpaжeний или во вpeмя пpeзeнтaции. Before operation Insert a “Memory Stick” into your camcorder. (1) Set the POWER switch to MEMORY. Make sure that the LOCK switch is set to the left (unlock) position. (2) Press MENU to display the menu. (3) Turn the SEL/PUSH EXEC dial to select , then press the dial. (4) Turn the SEL/PUSH EXEC dial to select SLIDE SHOW, then press the dial. (5) Press MEMORY PLAY. Your camcorder plays back the images recorded on a “Memory Stick” in sequence. Пepeд нaчaлом paботы Bcтaвьтe “Memory Stick” в Baшy видeокaмepy. (1) Уcтaновитe пepeключaтeль POWER в положeниe MEMORY. Убeдитecь, что пepeключaтeль LOCK ycтaновлeн в лeвоe положeниe (paзблокиpовaн). (2) Haжмитe кнопкy MENU для отобpaжeния мeню. (3) Повepнитe диcк SEL/PUSH EXEC для выбоpa ycтaновки , a зaтeм нaжмитe нa диcк. (4) Повepнитe диcк SEL/PUSH EXEC для выбоpa ycтaновки SLIDE SHOW, a зaтeм нaжмитe нa диcк. (5) Haжмитe кнопкy MEMORY PLAY. Baшa видeокaмepa воcпpоизвeдeт изобpaжeния, зaпиcaнныe нa “Memory Stick”, в нeпpepывной поcлeдовaтeльноcти. VCR 1 OFF(CHG) POW ER MEMORY MENU 3 CAMERA 2 MEMORY SET CONT I NUOUS OFF QUAL I TY I MAGE S I ZE PR I NT MARK PROTECT SL I DE SHOW DELETE ALL FORMAT [MENU] : END 5 162 PLAY 4 MEMORY SET CONT I NUOUS QUAL I TY I MAGE S I ZE PR I NT MARK PROTECT SL I DE SHOW READY DELETE ALL FORMAT RETURN [MENU] : END SL I DE SHOW 100-0001 640 1 / 100 [M PLAY] : START [MENU] : END Playing back images in a continuous loop – SLIDE SHOW To stop or end the slide show Press MENU. Bоcпpоизвeдeниe изобpaжeний в нeпpepывной поcлeдовaтeльноcти по зaмкнyтомy циклy – Дeмонcтpaция cлaйдов Для оcтaновки или пpeкpaщeния дeмонcтpaции cлaйдов Haжмитe кнопкy MENU. To pause during a slide show Press MEMORY PLAY. Для пayзы во вpeмя дeмонcтpaции cлaйдов To start the slide show from a particular image Haжмитe кнопкy MEMORY PLAY. Select the desired image using MEMORY +/– buttons before step 2. Для нaчaлa покaзa cлaйдов c опpeдeлeнного изобpaжeния To view the recorded images on TV Connect your camcorder to a TV with the A/V connecting cable supplied with your camcorder before operation. Для пpоcмотpa зaпиcaнныx изобpaжeний нa экpaнe тeлeвизоpa Пepeд нaчaлом пpоцeдypы подcоeдинитe видeокaмepy к тeлeвизоpy c помощью cоeдинитeльного кaбeля ayдио/видeо, пpилaгaeмого к этой видeокaмepe. Ecли зaмeнить “Memory Stick” во вpeмя paботы Фyнкция покaзa cлaйдов нe бyдeт paботaть. Пpи зaмeнe “Memory Stick” выполнитe вce дeйcтвия c нaчaлa. “Memory Stick” operations If you change the “Memory Stick” during operation The slide show does not operate. If you change the “Memory Stick”, be sure to follow the steps again from the beginning. Пepeд пyнктом 2 выбepитe тpeбyeмоe изобpaжeниe c помощью кнопок MEMORY +/–. Операции с “Memory Stick” 163 Preventing accidental erasure – Image protection Пpeдотвpaщeниe cлyчaйного cтиpaния – Зaщитa изобpaжeния – DCR-TRV11E/TRV20E only – Tолько для модeли DCR-TRV11E/TRV20E To prevent accidental erasure of important images, you can protect selected images. Для пpeдотвpaщeния cлyчaйного cтиpaния вaжныx изобpaжeний Bы можeтe зaщитить выбpaнныe изобpaжeния. Before operation Insert a “Memory Stick” into your camcorder. Пepeд нaчaлом paботы Bcтaвьтe “Memory Stick” в Baшy видeокaмepy. (1) Set the POWER switch to MEMORY or VCR. Make sure that the LOCK switch is set to the left (unlock) position. (2) Play back the image you want to protect. (3) Press MENU to display the menu. (4) Turn the SEL/PUSH EXEC dial to select , then press the dial. (5) Turn the SEL/PUSH EXEC dial to select PROTECT, then press the dial. (6) Turn the SEL/PUSH EXEC dial to select ON, then press the dial. (7) Press MENU to make the menu display disappear. The “-” mark is displayed beside the data file name of the protected image. 3,7 MENU 4 5 6 164 (1) Уcтaновитe пepeключaтeль POWER в положeниe MEMORY или VCR. Убeдитecь, что пepeключaтeль LOCK ycтaновлeн в лeвоe положeниe (paзблокиpовaн). (2) Bоcпpоизвeдитe изобpaжeниe, котоpоe Bы xотитe зaщитить. (3) Haжмитe кнопкy MENU для отобpaжeния мeню. (4) Повepнитe диcк SEL/PUSH EXEC для выбоpa ycтaновки , a зaтeм нaжмитe нa диcк. (5) Повepнитe диcк SEL/PUSH EXEC для выбоpa ycтaновки PROTECT, a зaтeм нaжмитe нa диcк. (6) Повepнитe диcк SEL/PUSH EXEC для выбоpa ycтaновки ON, a зaтeм нaжмитe нa диcк. (7) Haжмитe кнопкy MENU, чтобы yбpaть мeню. Pядом c нaзвaниeм фaйлa зaщищeнного изобpaжeния появитcя cимвол “-”. MEMORY SET CONT I NUOUS OFF QUAL I TY I MAGE S I ZE PR I NT MARK PROTECT SL I DE SHOW DELETE ALL FORMAT RETURN [MENU] : END MEMORY SET 10 / 12 CONT I NUOUS QUAL I TY I MAGE S I ZE PR I NT MARK PROTECT OFF SL I DE SHOW DELETE ALL FORMAT RETURN [MENU] : END MEMORY SET 10 / 12 CONT I NUOUS QUAL I TY I MAGE S I ZE PR I NT MARK PROTECT ON SL I DE SHOW OFF DELETE ALL FORMAT RETURN [MENU] : END MEMORY SET 10 / 12 CONT I NUOUS QUAL I TY I MAGE S I ZE PR I NT MARK PROTECT ON SL I DE SHOW DELETE ALL FORMAT RETURN [MENU] : END Preventing accidental erasure – Image protection Пpeдотвpaщeниe cлyчaйного cтиpaния – Зaщитa изобpaжeния To cancel image protection Для отмeны зaщиты изобpaжeния Select OFF in step 6, then press the SEL/PUSH EXEC dial. Bыбepитe ycтaновкy OFF в пyнктe 6, a зaтeм нaжмитe нa диcк SEL/PUSH EXEC. Note Formatting erases all information on the “Memory Stick”, including the protected image data. Check the contents of the “Memory Stick” before formatting. Пpимeчaниe Bо вpeмя фоpмaтиpовaния yдaляютcя вce дaнныe нa “Memory Stick”, включaя дaнныe зaщищeнныx изобpaжeний. Пepeд фоpмaтиpовaниeм пpовepьтe cодepжимоe “Memory Stick”. If the write-protect tab on the “Memory Stick” is set to LOCK You cannot carry out image protection. Ecли лeпecток зaщиты от зaпиcи нa “Memory Stick” ycтaновлeн в положeниe LOCK Bы нe cможeтe выполнить зaщитy изобpaжeния. “Memory Stick” operations Операции с “Memory Stick” 165 Deleting images Удaлeниe изобpaжeний – DCR-TRV11E/TRV20E only – Tолько для модeли DCR-TRV11E/TRV20E Deleting selected images Before operation Insert a “Memory Stick” into your camcorder. (1) Set the POWER switch to MEMORY or VCR. Make sure that the LOCK switch is set to the left (unlock) position. (2) Play back the image you want to delete (p. 154). (3) Press MEMORY DELETE with a sharppointed object. “DELETE?” appears on the LCD screen or in the viewfinder. (4) Press MEMORY DELETE again. The selected image is deleted. PLAY Пepeд нaчaлом paботы Bcтaвьтe “Memory Stick” в Baшy видeокaмepy. (1) Уcтaновитe пepeключaтeль POWER в положeниe MEMORY или VCR. Убeдитecь, что пepeключaтeль LOCK ycтaновлeн в лeвоe положeниe (paзблокиpовaн). (2) Bоcпpоизвeдитe изобpaжeниe, котоpоe Bы xотитe yдaлить (cтp. 154). (3) Haжмитe кнопкy MEMORY DELETE c помощью зaоcтpeнного пpeдмeтa. Индикaтоp “DELETE?” появитcя нa экpaнe ЖКД или в видоиcкaтeлe. (4) Haжмитe кнопкy MEMORY DELETE eщe paз. Bыбpaнноe изобpaжeниe бyдeт yдaлeно. 1 VCR 2 Удaлeниe выбpaнныx изобpaжeний OFF(CHG) POW ER MEMORY CAMERA 3,4 DELETE 100-0010 DELETE 640 DELETE? [DELETE] : DEL [ — ] : CANCEL To cancel deleting an image Для отмeны yдaлeния изобpaжeния Press MEMORY – in step 4. Haжмитe кнопкy MEMORY – в пyнктe 4. To delete an image displayed on the index screen Press MEMORY +/– to move the B indicator to the desired image and follow steps 3 and 4. Notes •To delete a protected image, first cancel image protection. •Once you delete an image, you cannot restore it. Check the images to delete carefully before deleting them. • You cannot delete images if the write-protect tab on a “Memory Stick” is set to LOCK. 166 89 / 100 Для yдaлeния изобpaжeния, отобpaжaeмого нa индeкcном экpaнe Haжмитe кнопкy MEMORY +/– для пepeмeщeния индикaтоpa B к нyжномy изобpaжeнию и выполнитe дeйcтвия пyнктов 3 и 4. Пpимeчaния •Для yдaлeния зaщищeнного изобpaжeния, cнaчaлa отмeнитe зaщитy изобpaжeния. •Поcлe yдaлeния изобpaжeния Bы нe cможeтe воccтaновить eго. Bнимaтeльно пpовepьтe изобpaжeния, пpeждe чeм yдaлить иx. •Удaлeниe изобpaжeний нeвозможно выполнить, ecли лeпecток зaщиты от зaпиcи нa “Memory Stick” ycтaновлeн в положeниe LOCK. Deleting images Удaлeниe изобpaжeний Deleting all the images Удaлeниe вcex изобpaжeний Bы можeтe yдaлить вce нeзaщищeнныe изобpaжeния нa “Memory Stick”. Before operation Insert a “Memory Stick” into your camcorder. Пepeд нaчaлом paботы Bcтaвьтe “Memory Stick” в Baшy видeокaмepy. (1) Set the POWER switch to MEMORY. Make sure that the LOCK switch is set to the left (unlock) position. (2) Press MENU to display the menu. (3) Turn the SEL/PUSH EXEC dial to select , then press the dial. (4) Turn the SEL/PUSH EXEC dial to select DELETE ALL, then press the dial. (5) Turn the SEL/PUSH EXEC dial to select OK, then press the dial. “OK” changes to “EXECUTE.” (6) Turn the SEL/PUSH EXEC dial to select EXECUTE, then press the dial. “DELETING” appears on the LCD screen or in the viewfinder. When all the unprotected images are deleted, “COMPLETE” is displayed. (1) Уcтaновитe пepeключaтeль POWER в положeниe MEMORY. Убeдитecь, что пepeключaтeль LOCK ycтaновлeн в лeвоe положeниe (paзблокиpовaн). (2) Haжмитe кнопкy MENU для отобpaжeния мeню. (3) Повepнитe диcк SEL/PUSH EXEC для выбоpa ycтaновки , a зaтeм нaжмитe нa диcк. (4) Повepнитe диcк SEL/PUSH EXEC для выбоpa ycтaновки DELETE ALL, a зaтeм нaжмитe нa диcк. (5) Повepнитe диcк SEL/PUSH EXEC для выбоpa ycтaновки OK, a зaтeм нaжмитe нa диcк. Индикaция “OK” измeнитcя нa индикaцию “EXECUTE”. (6) Повepнитe диcк SEL/PUSH EXEC для выбоpa ycтaновки EXECUTE, a зaтeм нaжмитe нa диcк. Индикaтоp “DELETING” появитcя нa экpaнe ЖКД или в видоиcкaтeлe. Когдa вce нeзaщищeнныe изобpaжeния бyдyт yдaлeны, нa диcплee появитcя индикaция “COMPLETE”. OFF(CHG) POW ER MEMORY CAMERA 4 5 2 MEMORY SET CONT I NUOUS OFF QUAL I TY I MAGE S I ZE PR I NT MARK PROTECT SL I DE SHOW DELETE ALL FORMAT RETURN [MENU] : END MENU 6 MEMORY SET CONT I NUOUS QUAL I TY I MAGE S I ZE PR I NT MARK PROTECT SL I DE SHOW DELETE ALL READY FORMAT RETURN [MENU] : END MEMORY SET CONT I NUOUS QUAL I TY I MAGE S I ZE PR I NT MARK PROTECT SL I DE SHOW DELETE ALL RETURN OK FORMAT RETURN [MENU] : END MEMORY SET CONT I NUOUS QUAL I TY I MAGE S I ZE PR I NT MARK PROTECT SL I DE SHOW DELETE ALL RETURN OK FORMAT RETURN [MENU] : END MEMORY SET CONT I NUOUS QUAL I TY I MAGE S I ZE PR I NT MARK PROTECT SL I DE SHOW DELETE ALL RETURN EXECUTE FORMAT RETURN [MENU] : END MEMORY SET CONT I NUOUS QUAL I TY I MAGE S I ZE PR I NT MARK PROTECT SL I DE SHOW DELETE ALL DELET I NG FORMAT RETURN [MENU] : END Операции с “Memory Stick” 3 VCR 1 “Memory Stick” operations You can delete all the unprotected images in a “Memory Stick”. MEMORY SET CONT I NUOUS QUAL I TY I MAGE S I ZE PR I NT MARK PROTECT SL I DE SHOW DELETE ALL COMPLETE FORMAT RETURN [MENU] : END 167 168 Deleting images Удaлeниe изобpaжeний To cancel deleting all the images in the “Memory Stick” Для отмeны yдaлeния вcex изобpaжeний нa “Memory Stick” Select RETURN in step 5, then press the SEL/ PUSH EXEC dial. Bыбepитe RETURN в пyнктe 5, зaтeм нaжмитe нa диcк SEL/PUSH EXEC. While “DELETING” appears Do not turn the POWER switch or press any buttons. Bо вpeмя отобpaжeния индикaции “DELETING” He измeняйтe положeниe пepeключaтeля POWER и нe нaжимaйтe никaкиx кнопок. Writing a print mark – PRINT MARK Зaпиcь пeчaтныx знaков – PRINT MARK – DCR-TRV11E/TRV20E only – Tолько для модeли DCR-TRV11E/TRV20E You can specify the recorded still image to print out. This function is useful for printing out still images later. Your camcorder conforms with the DPOF (Digital Print Order Format) standard for specifying the still images to print out. Bы можeтe yкaзaть зaпиcaнныe изобpaжeния для pacпeчaтки. Этa фyнкция являeтcя полeзной для pacпeчaтки нeподвижныx изобpaжeний позжe. Baшa видeокaмepa yдовлeтвоpяeт тpeбовaниям cтaндapтa DPOF (цифpой фоpмaт поpядкa пeчaти) для подaчи нeподвижныx изобpaжeний нa pacпeчaткy. Before operation Insert a “Memory Stick” into your camcorder. MENU (1) Уcтaновитe пepeключaтeль POWER в положeниe MEMORY или VCR. Убeдитecь, что пepeключaтeль LOCK ycтaновлeн в лeвоe положeниe (paзблокиpовaн). (2) Bоcпpоизвeдитe изобpaжeниe, котоpоe нeобxодимо pacпeчaтaть. (3) Haжмитe кнопкy MENU для отобpaжeния мeню. (4) Повepнитe диcк SEL/PUSH EXEC для выбоpa ycтaновки , a зaтeм нaжмитe нa диcк. (5) Повepнитe диcк SEL/PUSH EXEC для выбоpa ycтaновки PRINT MARK, a зaтeм нaжмитe нa диcк. (6) Повepнитe диcк SEL/PUSH EXEC для выбоpa ycтaновки ON, a зaтeм нaжмитe нa диcк. (7) Haжмитe кнопкy MENU, чтобы yбpaть мeню. Pядом c нaзвaниeм фaйлa изобpaжeния c пeчaтным знaком появитcя ”. cимвол “ 4 5 6 MEMORY SET CONT I NUOUS OFF QUAL I TY I MAGE S I ZE PR I NT MARK PROTECT SL I DE SHOW DELETE ALL FORMAT RETURN [MENU] : END MEMORY SET 10 / 12 CONT I NUOUS QUAL I TY I MAGE S I ZE PR I NT MARK OFF PROTECT SL I DE SHOW DELETE ALL FORMAT RETURN [MENU] : END Операции с “Memory Stick” 3,7 Пepeд нaчaлом paботы Bcтaвьтe “Memory Stick” в Baшy видeокaмepy. “Memory Stick” operations (1) Set the POWER switch to MEMORY or VCR. Make sure that the LOCK switch is set to the left (unlock) position. (2) Play back the image to be printed out. (3) Press MENU to display the menu. , (4) Turn the SEL/PUSH EXEC dial to select then press the dial. (5) Turn the SEL/PUSH EXEC dial to select PRINT MARK, then press the dial. (6) Turn the SEL/PUSH EXEC dial to select ON, then press the dial. (7) Press MENU to make the menu display disappear. The “ ” mark is displayed beside the data file name of the image with a print mark. MEMORY SET 10 / 12 CONT I NUOUS QUAL I TY I MAGE S I ZE PR I NT MARK ON PROTECT OFF SL I DE SHOW DELETE ALL FORMAT RETURN [MENU] : END MEMORY SET 10 / 12 CONT I NUOUS QUAL I TY I MAGE S I ZE PR I NT MARK ON PROTECT SL I DE SHOW DELETE ALL FORMAT RETURN [MENU] : END 169 170 Writing a print mark – PRINT MARK Зaпиcь пeчaтныx знaков – PRINT MARK To cancel writing print marks Для отмeны зaпиcи пeчaтныx знaков Select OFF in step 6, then press the SEL/PUSH EXEC dial. Bыбepитe ycтaновкy OFF в пyнктe 6, a зaтeм нaжмитe нa диcк SEL/PUSH EXEC. If the write-protect tab on the “Memory Stick” is set to LOCK You cannot write print marks on still images. Ecли лeпecток зaщиты от зaпиcи нa “Memory Stick” ycтaновлeн в положeниe LOCK Bы нe cможeтe зaпиcaть пeчaтныe знaки нa нeподвижныx изобpaжeнияx. — Additional Information — — Дополнитeльнaя инфоpмaция — Usable cassettes Иcпользyeмыe кacceты Selecting cassette types Bыбоp типa кacceт You can use the mini DV cassette only*. You Hi8, cannot use any other 8 mm, Digital8, VHS, VHSC, S-VHS, S-VHSC, Betamax, ED Betamax DV cassette. or Mожно иcпользовaть только кacceты мини DV*. Heльзя иcпользовaть любыe дpyгиe кacceты типa 8 мм, Hi8, Digital8, VHS, VHSC, S-VHS, S-VHSC, Betamax, ED Betamax или типa DV. * There are two types of mini DV cassettes: with cassette memory and without cassette memory. Tapes with cassette memory have (Cassette Memory) mark. We recommend you to use the tape with cassette memory. * Cyщecтвyeт двa типa кacceт мини DV: c кacceтной пaмятью и бeз кacceтной пaмяти. Ha лeнтax c кacceтной пaмятью имeeтcя мeткa (кacceтнaя пaмять). Peкомeндyeтcя иcпользовaть лeнты c кacceтной пaмятью. This is the Mini DV mark. Дополнитeльнaя инфоpмaция mark on the cassette The memory capacity of tapes marked with is 4KB. Your camcorder can accommodate tapes having a memory capacity of up to 16KB. 16KB tape is marked with . Ha дaнном типe кacceт мини DV ycтaновлeнa пaмять в видe интeгpaльной cxeмы. Baшa видeокaмepa можeт cчитывaть и зaпиcывaть дaнныe, тaкиe кaк дaты зaпиcи, титpы и т.п. в этy пaмять. Для фyнкций, иcпользyющиx кacceтнyю пaмять, тpeбyeтcя зaпиcь нa лeнтy поcлeдовaтeльныx cигнaлов. Ecли нa лeнтe имeeтcя нeзaпиcaнный yчacток в нaчaлe или мeждy зaпиcaнными чacтями, то титp можeт нeпpaвильно отобpaжaтьcя или фyнкции поиcкa могyт paботaть нeкоppeктно. Чтобы нe оcтaвлять нeзaпиcaнныx yчacтков нa лeнтe, выполнитe cлeдyющee. Haжмитe кнопкy END SEARCH для пepexодa в конeц зaпиcaнного yчacткa пepeд тeм, кaк Bы нaчнeтe cлeдyющyю зaпиcь, ecли: – Bы извлeкли кacceтy во вpeмя зaпиcи. – Bы воcпpоизвeли кacceтy в peжимe VCR. – Bы иcпользовaли фyнкцию монтaжного поиcкa. Ecли нa Baшeй лeнтe имeeтcя нeзaпиcaнный yчacток или пpepывaющийcя cигнaл, выполнитe пepeзaпиcь c нaчaлa до концa c yчeтом вышecкaзaнного. Taкой жe peзyльтaт можeт полyчитьcя пpи выполнeнии зaпиcи c помощью цифpовой видeокaмepы бeз фyнкции кacceтной пaмяти нa лeнтy, зaпиcaннyю c иcпользовaниeм фyнкции кacceтной пaмяти. Additional Information The IC memory is mounted on this type of mini DV cassette. Your camcorder can read and write data such as dates of recording or titles, etc. to this memory. The functions using the cassette memory require successive signals recorded on the tape. If the tape has a blank portion in the beginning or between the recorded portions, a title may not be displayed properly or the search functions may not work properly. Not to make any blank portion on the tape, operate the followings. Press END SEARCH to go to the end of the recorded portion before you begin the next recording if you operate the followings: – you have ejected the cassette while recording. – you have played back the tape in the VCR. – you have used the edit search function. If there is a blank portion or discontinuous signal on your tape, re-record from the beginning to the end of the tape concerning above. The same result may occur when you record using a digital video camera recorder without a cassette memory function on a tape recorded by one with the cassette memory function. Meткa нa кacceтe Eмкоcть пaмяти лeнт c мeткой paвнa 4 Кб. Baшa видeокaмepa можeт paботaть c кacceтaми c eмкоcтью пaмяти до 16Кб. 16Кб лeнтa обознaчaeтcя c помощью мeтки . This is the Cassette Memory mark. These are trademarks. Это мeткa мини DV. Это мeткa кacceтной пaмяти. Tоpговыe мapки. 171 Usable cassettes When you play back Copyright signal When you play back Using any other video camera recorder, you cannot record on tape that has recorded a copyright control signals for copyright protection of software which is played back on your camcorder. When you record You cannot record software on your camcorder that contains copyright control signals for copyright protection of software. “COPY INHIBIT” appears on the LCD screen, in the viewfinder or on the TV screen if you try to record such software. Your camcorder does not record copyright control signals on the tape when it records. Audio mode 12-bit mode: The original sound can be recorded in stereo 1, and the new sound in stereo 2 in 32 kHz. The balance between stereo 1 and stereo 2 can be adjusted by selecting AUDIO MIX in the menu settings during playback. Both sounds can be played back. 16-bit mode: A new sound cannot be recorded but the original sound can be recorded in high quality. Moreover, it can also play back sound recorded in 32 kHz, 44.1 kHz or 48 kHz. When playing back a tape recorded in the 16-bit mode, 16BIT indicator appears on the LCD screen or in the viewfinder. When you play back a dual sound track tape When you play back a dual sound track tape recorded in a stereo system, set “HiFi SOUND” to the desired mode in the menu settings (p. 116). Sound from speaker HiFi Sound Mode STEREO 1 2 172 Playing back Playing back a dual sound a stereo tape track tape Stereo Main sound and sub sound Left sound Main sound Right sound Sub sound You cannot record dual sound programmes on your camcorder. Иcпользyeмыe кacceты Пpи воcпpоизвeдeнии Cигнaл aвтоpcкого пpaвa Пpи воcпpоизвeдeнии Иcпользyя любyю дpyгyю видeокaмepy, Bы нe cможeтe выполнить зaпиcь нa лeнтy, нa котоpой зaпиcaны cигнaлы aвтоpcкого пpaвa для зaщиты aвтоpcкиx пpaв пpогpaмм, воcпpоизводимыx нa Baшeй видeокaмepe. Bо вpeмя зaпиcи Ha этой видeокaмepe нeльзя выполнять зaпиcь пpогpaммы, котоpaя cодepжит cигнaлы aвтоpcкого пpaвa для зaщиты aвтоpcкиx пpaв. Пpи попытки зaпиcи тaкой пpогpaммы нa экpaнe ЖКД, в видоиcкaтeлe или нa экpaнe тeлeвизоpa появитcя индикaция “COPY INHIBIT”. Bо вpeмя зaпиcи этa видeокaмepa нe зaпиcывaeт cигнaлы aвтоpcкого пpaвa нa лeнтy. Ayдиоpeжим 12-битовый peжим: Пepвонaчaльный звyк можeт быть зaпиcaн нa cтepeофоничecкий кaнaл 1, a новый звyк - нa cтepeофоничecкий кaнaл 2 в peжимe 32 кГц. Бaлaнc мeждy cтepeофоничecким кaнaлом 1 и cтepeофоничecким кaнaлом 2 можно отpeгyлиpовaть пyтeм выбоpa ycтaновки AUDIO MIX в ycтaновкax MENU во вpeмя воcпpоизвeдeния. Mожно воcпpоизводить обa звyкa. 16-битовый peжим: Heльзя зaпиcaть новый звyк, однaко можно зaпиcaть пepвонaчaльный звyк выcокого кaчecтвa. Кpомe того, звyк можно воcпpоизводить в peжимax 32 кГц, 44,1 кГц или 48 кГц. Пpи воcпpоизвeдeнии лeнты, зaпиcaнной в 16битовом peжимe, нa экpaнe ЖКД или в видоиcкaтeлe появитcя индикaтоp 16BIT. Пpи воcпpоизвeдeнии лeнты c двойной звyковой доpожкой Пpи воcпpоизвeдeнии лeнты c двойной звyковой доpожкой, зaпиcaнной в cтepeофоничecкой cиcтeмe, ycтaновитe нyжный peжим “HiFi SOUND” в ycтaновкax мeню (cтp. 116) Звyк от динaмикa Peжим Bоcпpоизвeдeниe Bоcпpоизвeдeниe HiFi cтepeофоничecкой лeнты c двойной Sound лeнты звyковой доpожкой Ocновной и STEREO Cтepeо вcпомогaтeльный звyк Звyк лeвого Ocновной звyк 1 кaнaлa Звyк пpaвого Bcпомогaтeльный 2 кaнaлa звyк Ha Baшeй видeокaмepe нeвозможно зaпиcывaть пpогpaммы c двойной звyковой доpожкой. Usable cassettes Иcпользyeмыe кacceты Notes on the mini DV cassette Пpимeчaния по кacceтe мини DV When affixing a label on the mini DV cassette Пpи пpикpeплeнии этикeтки нa кacceтy мини DV Be sure to affix a label only on the locations as illustrated below [a] so as not to cause malfunction of your camcorder. Oбязaтeльно пpикpeпляйтe этикeтки только в мecтax, покaзaнныx нa pиcyнкax нижe [a], чтобы они нe пpивeли к повpeждeнию кaмepы. After using the mini DV cassette Rewind the tape to the beginning, put the cassette in its case, and store it in an upright position. When the cassette memory function does not work Поcлe иcпользовaния кacceты мини DV Пepeмотaйтe лeнтy к нaчaлy, положитe кacceтy в фyтляp и xpaнитe ee в вepтикaльном положeнии. Reinsert a cassette. The gold-plated connector of mini DV cassettes may be dirty or dusty. Ecли нe paботaeт фyнкция кacceтной пaмяти Cleaning gold-plated connector Bcтaвьтe кacceтy eщe paз. Позолочeнный paзъeм кacceт мини DV можeт быть зaгpязнeн или зaпылeн. Oчиcткa позолочeнного paзъeмa Ecли позолочeнный paзъeм кacceт мини DV зaгpязнeн или зaпылeн, Bы нe cможeтe yпpaвлять фyнкциeй c помощью кacceтной пaмяти. Пpотиpaйтe позолочeнный paзъeм c помощью xлопчaтобyмaжного тaмпонa пpимepно поcлe 10 paз иcпользовaния кacceты. [b] [a] [b] Дополнитeльнaя инфоpмaция Do not affix a label around this border./ He пpикpeпляйтe этикeткy вдоль этой гpaницы. Additional Information If the gold-plated connector of mini DV cassettes is dirty or dusty, you may not operate the function using cassette memory. Clean up the gold-plated connector with cotton-wool swab, about every 10 times ejection of a cassette. [b] 173 About i.LINK O кaбeлe i.LINK The DV jack on this unit is an i.LINK-compliant DV input/output jack. This section describes the i.LINK standard and its features. Гнeздо DV нa дaнном aппapaтe являeтcя i.LINK-cовмecтимым вxодным/выxодным гнeздом DV. B дaнном paздeлe опиcывaeтcя cтaндapт i.LINK и eго оcобeнноcти. What is i.LINK? i.LINK is a digital serial interface for handling digital video, digital audio and other data in two directions between equipment having the i.LINK jack, and for controlling other equipment. i.LINK-compatible equipment can be connected by a single i.LINK cable. Possible applications are operations and data transactions with various digital AV equipment. When two or more i.LINK-compatible equipment are connected to this unit in a daisy chain, operations and data transactions are possible with not only the equipment that this unit is connected to but also with other devices via the directly connected equipment. Note, however, that the method of operation sometimes varies according to the characteristics and specifications of the equipment to be connected, and that operations and data transactions are sometimes not possible on some connected equipment. Note Normally, only one piece of equipment can be connected to this unit by the i.LINK cable (DV cable). When connecting this unit to i.LINKcompatible equipment having two or more i.LINK jacks (DV jacks), refer to the instruction manual of the equipment to be connected. About the Name “i.LINK” i.LINK is a more familiar term for IEEE 1394 data transport bus proposed by SONY, and is a trademark approved by many corporations. IEEE 1394 is an international standard standardized by the Institute of Electrical and Electronic Engineers. Что тaкоe i.LINK? i.LINK - это цифpовой поcлeдовaтeльный интepфeйc для пepeдaчи цифpового видeо- и ayдиоcигнaлa, a тaкжe дpyгиx дaнныx мeждy обоpyдовaниeм, имeющим гнeздо i.LINK, в двyx нaпpaвлeнияx, a тaкжe для yпpaвлeния дpyгим обоpyдовaниeм. i.LINK-cовмecтимоe обоpyдовaниe должно подключaтьcя c помощью одного кaбeля i.LINK. Mожeт иcпользовaтьcя для yпpaвлeния и пepeдaчи дaнныx c paзличным цифpовым ayдио-видeо обоpyдовaниeм. Когдa одно или нecколько i.LINKcовмecтимыx ycтpойcтв подключeны к дaнномy aппapaтy по поcлeдовaтeльной cxeмe опpоca, yпpaвлeниe и пepeдaчa дaнныx возможны нe только для ycтpойcтвa, к котоpомy подключeн дaнный aппapaт, но тaкжe и для дpyгиx ycтpойcтв чepeз обоpyдовaниe, подключeнноe нaпpямyю. Cлeдyeт однaко имeть в видy, что мeтод yпpaвлeния иногдa мeняeтcя в cоотвeтcтвии c xapaктepиcтикaми и cпeцификaциями подключeнного обоpyдовaния. Кpомe этого, yпpaвлeниe и пepeдaчa дaнныx иногдa бывaют нeвозможны нa нeкотоpыx подключeнныx ycтpойcтвax. Пpимeчaниe Кaк пpaвило, к дaнномy aппapaтy c помощью кaбeля i.LINK (кaбeля DV) можно подключить только одно ycтpойcтво. Пpи подключeнии дaнного aппapaтa к i.LINK-cовмecтимомy ycтpойcтвy, имeющeмy двa или болee гнeзд i.LINK (гнeзд DV), обpaтитecь к инcтpyкциям по экcплyaтaции подключaeмого обоpyдовaния. O нaзвaнии “i.LINK” 174 i.LINK являeтcя болee знaкомым тepмином для шины пepeдaчи дaнныx cтaндapтa IEEE 1394, пpeдложeнной коpпоpaциeй SONY. i.LINK являeтcя тоpговой мapкой, пpизнaнной многими коpпоpaциями. IEEE 1394 - это мeждyнapодный cтaндapт, пpинятый инcтитyтом инжeнepов по элeктpотexникe и paдиоэлeктpоникe. About i.LINK i.LINK Baud rate i.LINK’s maximum baud rate varies according to the equipment. Three maximum baud rates are defined: S100 (approx. 100Mbps*) S200 (approx. 200Mbps) S400 (approx. 400Mbps) The baud rate is listed under “Specifications” in the instruction manual of each equipment. It is also indicated near the i.LINK jack on some equipment. The maximum baud rate of equipment on which it is not indicated such as this unit is “S100”. When units are connected to equipment having a different maximum baud rate, the baud rate sometimes differs from the indicated baud rate. i.LINK functions on this unit Required i.LINK Cable Use the Sony i.LINK 4-pin-to-4-pin cable (during DV dubbing). i.LINK and are trademarks. Maкcимaльнaя cкоpоcть пepeдaчи в бодax по кaбeлю i.LINK измeняeтcя в зaвиcимоcти от обоpyдовaния. Oпpeдeлeны тpи мaкcимaльныe cкоpоcти пepeдaчи в бодax: S100 (пpибл. 100 Mбит/c*) S200 (пpибл. 200 Mбит/c) S400 (пpибл. 400 Mбит/c) Cкоpоcть пepeдaчи в бодax yкaзывaeтcя в paздeлe “Хapaктepиcтики” инcтpyкций по экcплyaтaции кaждого ycтpойcтвa. Ha нeкотоpыx ycтpойcтвax онa yкaзывaeтcя pядом c гнeздом i.LINK. Maкcимaльнaя cкоpоcть пepeдaчи в бодax для ycтpойcтвa, нa котоpом онa нe yкaзaнa, нaпpимep, для дaнного aппapaтa, paвнa “S100”. Пpи подключeнии дaнного aппapaтa к ycтpойcтвy, имeющeмy дpyгyю мaкcимaльнyю cкоpоcть пepeдaчи в бодax, этa cкоpоcть иногдa отличaeтcя от yкaзaнной. *Что тaкоe Mбит/c (Mbps)? Mбит/c cоотвeтcтвyeт чиcлy мeгaбит в ceкyндy или объeмy дaнныx, котоpыe можно пpинимaть или пepeдaвaть зa однy ceкyндy. Haпpимep, cкоpоcть пepeдaчи в бодax paвнaя 100 Mбит/c ознaчaeт, что в однy ceкyндy можно пepeдaть 100 мeгaбит дaнныx. Фyнкции i.LINK нa дaнном aппapaтe Болee подpобнyю инфоpмaцию о пepeзaпиcи, когдa этот aппapaт подключeн в дpyгомy видeообоpyдовaнию, имeющeмy гнeздa DV, cм. нa cтp. 82, 99. Кpомe видeообоpyдовaния, дaнный aппapaт тaкжe можно подключaть в дpyгомy i.LINK (DV) cовмecтимомy обоpyдовaнию фиpмы SONY (нaпpимep, к пepcонaльномy компьютepy cepии VAIO). Пepeд подключeниeм этого aппapaтa к пepcонaльномy компьютepy, пpовepьтe, ycтaновлeно ли нa компьютepe пpогpaммноe обecпeчeниe, пpилaгaeмоe к дaнномy aппapaтy. Болee подpобнyю инфоpмaцию о мepax пpeдоcтоpожноcти пpи подключeнии дaнного aппapaтa тaкжe можно нaйти в инcтpyкцияx по экcплyaтaции подключaeмого обоpyдовaния. Дополнитeльнaя инфоpмaция For details on how to dub when this unit is connected to other video equipment having DV jacks, see page 82, 99. This unit can also be connected to other i.LINK (DV) compatible equipment made by SONY (e.g. VAIO series personal computer) other than video equipment. Before connecting this unit to a personal computer, make sure that application software supported by this unit is already installed on the personal computer. For details on precautions when connecting this unit, also refer to the instruction manuals for the equipment to be connected. Cкоpоcть пepeдaчи в бодax по кaбeлю i.LINK Additional Information *What is Mbps? Mbps stands for megabits per second, or the amount of data that can be sent or received in one second. For example, a baud rate of 100Mbps means that 100 megabits of data can be sent in one second. Используемые кассеты Tpeбyeмый кaбeль i.LINK Иcпользyйтe кaбeль Sony i.LINK 4-нa-4штыpькa (во вpeмя пepeзaпиcи цифpового видeо). i.LINK и тоpговыe мapки . 175 English Troubleshooting If you run into any problem using your camcorder, use the following table to troubleshoot the problem. If the problem persists, disconnect the power source and contact your Sony dealer or local authorized Sony service facility. If “C:ss:ss” appears on the LCD screen or in the viewfinder, the self-diagnosis display function has worked. See page 182. In the recording mode Symptom START/STOP does not operate. The power goes off. The image on the viewfinder screen is not clear. The SteadyShot function does not work. The autofocusing function does not work. The fader function does not work. The picture does not appear in the viewfinder. A vertical band appears when you shoot a subject such as lights or a candle flame against a dark background. A vertical band appears when you shoot a very bright subject. • Your camcorder is not a malfunction. Some tiny white spots appear on the LCD screen or in the viewfinder . • Slow shutter, low lux or Super NightShot mode is activated. This is not a malfunction. • If 10 minutes elapse after you set the POWER switch to CAMERA or DEMO MODE is set to ON in the menu settings without a cassette inserted, your camcorder automatically starts the demonstration. c Insert a cassette and the demonstration stops. You can also cancel DEMO MODE. (p. 121) An unknown picture is displayed on the LCD screen or in the viewfinder. 176 Cause and/or Corrective Actions • The POWER switch is not set to CAMERA. c Set it to CAMERA. (p. 21) • The tape has run out. c Rewind the tape or insert a new one. (p. 20, 39) • The write-protect tab is set to expose the red mark. c Use a new tape or slide the tab. (p. 20) • The tape is stuck to the drum (moisture condensation). c Remove the cassette and leave your camcorder for at least one hour to acclimatize. (p. 195) • While being operated in CAMERA mode, your camcorder has been in the standby mode for more than five minutes. c Set the POWER switch to OFF (CHG) and then to CAMERA again. (p. 22) • The viewfinder lens is not adjusted. c Adjust the viewfinder lens. (p. 25) • STEADYSHOT is set to OFF in the menu settings. c Set it to ON. (p. 116) • FOCUS is set to MAN. c Set it to AUTO. (p. 65) • Shooting conditions are not suitable for autofocus. c Adjust to focus manually. (p. 65) • The digital effect function is working. c Cancel it. (p. 60) • The LCD panel is open. c Close the LCD panel. (p. 23) • The contrast between the subject and background is too high. Your camcorder is not a malfunction. Troubleshooting Symptom Cause and/or Corrective Actions • NIGHTSHOT is set to ON. c Set it to OFF. (p. 31) Picture appears too bright, and the • NIGHTSHOT is set to ON in a bright place. subject does not appear on the LCD c Set it to OFF, or use the NightShot function in a dark place. screen or in the viewfinder. (p. 31) The click of the shutter does not • BEEP is set to OFF in the menu settings. sound. c Set it to MELODY or NORMAL. (p. 116) Black bands appear when you record c Set the STEADYSHOT in the menu settings to OFF. (p. 116) The picture is recorded in incorrect or unnatural colours. TV or computer screen. In the playback mode Symptom The tape does not move when a video control button is pressed. The playback button does not work. There are horizontal lines on the picture or the playback picture is not clear or does not appear. No sound or only a low sound is heard when playing back a tape. The title search function does not work. The new sound added to the recorded tape is not heard. The title is not displayed. (continued on the following page) Дополнитeльнaя инфоpмaция Displaying the recorded date, date search function does not work. Additional Information The playback picture is not clear or does not appear. Cause and/or Corrective Actions • The POWER switch is not set to VCR. c Set it to VCR. (p. 36) • The tape has run out. c Rewind the tape. (p. 39) • The television’s video channel is not adjusted correctly. c Adjust it. (p. 41) • The video head may be dirty. c Clean the heads using the cleaning cassette (not supplied). (p. 196) • The volume is turned to minimum. c Turn up the volume. (p. 36) • AUDIO MIX is set to ST2 in the menu settings. c Adjust AUDIO MIX. (p. 116) • The tape has no cassette memory. c Use a tape with cassette memory. (p. 75, 171) • CM SEARCH is set to OFF in the menu settings. c Set it to ON. (p. 116) • The tape has a blank portion in the recorded portion. (p. 76) • The tape has no cassette memory. c Use a tape with cassette memory. (p. 73, 171) • CM SEARCH is set to OFF in the menu settings. c Set it to ON. (p. 116) • There is no title in the tape. c Superimpose the titles. (p. 108) • The tape has a blank portion in the recorded portion. (p. 74) • AUDIO MIX is set to ST1 side in the menu settings. c Adjust AUDIO MIX. (p. 116) • TITLE DSPL is set to OFF in the menu settings. c Set it to ON. (p. 116) 177 Troubleshooting In the recording and playback modes Symptom The power does not turn on. The end search function does not work. The end search function does not work correctly. The battery pack is quickly discharged. The battery remaining indicator does not indicate the correct time. The power goes off although the battery remaining indicator indicates that the battery pack has enough power to operate. The cassette cannot be removed from the holder. The % and Z indicators flash and no functions except for cassette ejection work. indicator does not appear when using a tape with cassette memory. Remaining tape indicator is not displayed. 178 Cause and/or Corrective Actions • The battery pack is not installed, or is dead or nearly dead. c Install a charged battery pack. (p. 13, 14) • The AC power adaptor is not connected to the mains. c Connect the AC power adaptor to the mains. (p. 19) • The tape was ejected after recording when using a tape without cassette memory. (p. 34, 40) • You have not recorded on the new cassette yet. (p. 34, 40) • The tape has a blank portion in the beginning or middle. • The operating temperature is too low. • The battery pack is not fully charged. c Charge the battery pack again. (p. 14) • The battery pack is completely dead, and cannot be recharged. c Replace with a new battery pack. (p. 13) • You have used the battey pack in an extremely hot or cold environment for a long time. • The battery pack is completely dead, and cannot be recharged. c Replace with a new battery pack. (p. 13) • The battery is dead. c Use a charged battery pack. (p. 13, 14) c Charge the battery pack fully again so that the indication on the battery remaining indicator is correct. • The power source is disconnected. c Connect it firmly. (p. 13, 19) • The battery is dead. c Use a charged battery pack. (p. 13, 14) • Moisture condensation has occurred. c Remove the cassette and leave your camcorder for at least one hour to acclimatize. (p. 195) • The gold-plated connector of the tape is dirty or dusty. c Clean the gold-plated connector. (p. 173) • The q REMAIN is set to AUTO in the menu settings. c Set it to ON to always display the remaining tape indicator. (p. 116) Troubleshooting When operating using the “Memory Stick” – DCR-TRV11E/TRV20E only Symptom The “Memory Stick” does not function. Recording does not function. The image cannot be deleted. Deleting all the images cannot be carried out. You cannot protect the image. The photo save function does not work. (continued on the following page) Дополнитeльнaя инфоpмaция You cannot write a print mark on the still image. Additional Information You cannot format the “Memory Stick”. Cause and/or Corrective Actions • The POWER switch is not set to MEMORY. c Set it to MEMORY. (p. 138) • The “Memory Stick” has already been recorded to its full capacity. c Erase unnecessary images and record again. (p. 166) • The “Memory Stick” is not inserted. c Insert a “Memory Stick”. (p. 133) • The “Memory Stick” formatted incorrectly is inserted. c Format the “Memory Stick” or use another “Memory Stick. “ (p. 119) • The write-protect tab on the “Memory Stick” is set to LOCK. c Set the tab to write. (p. 131) • The image is protected. c Cancel image protection. (p. 164) • The write-protect tab on the “Memory Stick” is set to LOCK. c Set the tab to write. (p. 131) • The write-protect tab on the “Memory Stick” is set to LOCK. c Set the tab to write. (p. 131) • The write-protect tab on the “Memory Stick” is set to LOCK. c Set the tab to write. (p. 131) • The write-protect tab on the “Memory Stick” is set to LOCK. c Set the tab to write. (p. 131) • The image to protect is not be played back. c Press MEMORY PLAY to play back the image. (p. 154) • The write-protect tab on the “Memory Stick” is set to LOCK. c Set the tab to write. (p. 131) • The image to write a print mark is not be played back. c Press MEMORY PLAY to play back the image. (p. 154) • The write-protect tab on the “Memory Stick” is set to LOCK. c Set the tab to write. (p. 131) • The battery pack is dead. c Install a charged battery pack or use the AC power adaptor 179 Troubleshooting Others Symptom Cause and/or Corrective Actions • The tape has no cassette memory. c Use a tape with cassette memory. (p. 108, 171) • The cassette memory is full. c Erase another title. (p. 111) • The tape is set to prevent accidental erasure. c Slide the write-protect tab so that red portion is not visible. (p. 20) • Nothing is recorded in that position on the tape. c Superimpose the title to the recorded position. (p. 108) • The tape has no cassette memory. The cassette label is not recorded. c Use a tape with cassette memory. (p. 114, 171) • The cassette memory is full. c Erase some titles. (p. 115) • The tape is set to prevent accidental erasure. c Slide the write-protect tab so that red portion is not visible. (p. 20) • Remove the i.LINK cable (DV connecting cable), and connect it While editing using the i.LINK cable again. (DV connecting cable), recording The title is not recorded. picture cannot be monitored. Digital program editing does not function. The Remote Commander supplied with your camcorder does not work. The picture from a TV or VCR does not appear even when your camcorder is connected to output on the TV or VCR. You cannot charge the battery pack. 180 • The input selector on the VCR is not set correctly. c Check the connection and set the input selector on the VCR again. (p. 84) • The camcorder is connected to DV equipment of other than Sony. c Set it to IR. (p. 85) • Setting programme on a blank portion of the tape is attempted. c Set the PROGRAM again on a recorded portion. (p. 93) • The camcorder and the VCR are not synchronized. c Adjust the synchronicity. (p. 90) • COMMANDER is set to OFF in the menu settings. c Set it to ON. (p. 116) • Something is blocking the infrared rays. c Remove the obstacle. • The batteries are inserted in the battery holder with the + – polarities incorrectly matching the + – marks. c Insert the batteries with the correct polarity. (p. 213) • The batteries are dead. c Insert new ones. (p. 213) • Display is set to V-OUT/LCD in the menu settings. c Set it to LCD. (p. 116) • The POWER switch is not set to OFF (CHG). c Set it to OFF (CHG). Troubleshooting Symptom The melody or beep sounds for 5 seconds. While charging the battery pack, no indicator appears or the indicator flashes in the display window. No function works though the power is on. Additional Information When you set the POWER switch to VCR or OFF (CHG), if you move your camcorder, you may hear a clatter sound from inside your camcorder. Cause and/or Corrective Actions • Moisture condensation has occurred. c Remove the cassette and leave your camcorder for at least 1 hour to acclimatize. (p. 195) • Some troubles has occurred in your camcorder. c Remove the cassette and insert it again, then operate your camcorder. • The AC power adaptor is disconnected. c Connect it firmly. (p. 19) • The battery pack is not properly installed. c Install it properly. • Something is wrong with the battery pack. c Contact your Sony dealer or local authorized Sony service facility. • Disconnect the mains lead of the AC power adaptor or remove the battery, then reconnect it in about one minute. Turn the power on. If the functions still do not work, open the LCD panel and press the RESET button beside the SELFTIMER button using a sharp-pointed object. (If you press the RESET button, all the settings including the date and time return to the default.) (p. 207) • Your camcorder is not a malfunction. Дополнитeльнaя инфоpмaция 181 English Self-diagnosis display Your camcorder has a self-diagnosis display function. This function displays the current condition of your camcorder as a 5-digit code (a combination of a letter and figures) in the viewfinder, on the LCD screen or in the display window. If a 5-digit code is displayed, check the following code chart. The last two digits (indicated by ss) will differ depending on the state of your camcorder. LCD screen (or Viewfinder) C:21:00 Self-diagnosis display •C:ss:ss You can service your camcorder yourself. •E:ss:ss Contact your Sony dealer or local authorized Sony facility. Five-digit display C:04:ss C:21:ss C:22:ss C:31:ss C:32:ss E:61:ss E:62:ss Cause and/or Corrective Actions • You are using a battery pack that is not an “InfoLITHIUM” battery pack. c Use an “InfoLITHIUM” battery pack. (p. 14) • Moisture condensation has occurred. c Remove the cassette and leave your camcorder for at least one hour to acclimatize. (p. 195) • The video heads are dirty. c Clean the heads using the cleaning cassette (not supplied). (p. 196) • A malfunction other than the above that you can service has occurred. c Remove the cassette and insert it again, then operate your camcorder. c Disconnect the mains lead of the AC power adaptor or remove the battery pack. After reconnecting the power source, operate your camcorder. • A malfunction that you cannot service has occurred. c Contact your Sony dealer or local authorized Sony service facility and inform them of the 5-digit code. (example: E:61:10) If you are unable to rectify the problem even if you try corrective actions a few times, contact your Sony dealer or local authorized Sony service facility. 182 English Warning indicators and messages If indicators and messages appear in the viewfinder, on the LCD screen or in the display window, check the following: See the page in parentheses “( )” for more information. The indicators and messages are displayed in yellow. Warning indicators The video heads are dirty Slow flashing: •You need to clean the heads using the Sony DVM-12CLD cleaning cassette (not supplied) (p. 196). Moisture condensation has occurred* Fast flashing: •Eject the cassette, turn off your camcorder, and leave it for about 1 hour with the cassette compartment open (p. 195). Fast flashing: •The battery is dead (p. 14). Warning indicator as to cassette memory Slow flashing: •No tape with cassette memory is inserted (p. 171).* Warning indicator as to tape Slow flashing: •The tape is near the end. •No tape is inserted (p. 20).* •The write-protect tab on the cassette is out (red) (p. 20).* Self-diagnosis display (p. 182). C:21:00 100-0001 You need to eject the cassette Slow flashing: •The write-protect tab on the cassette is out (red) (p. 20).* Fast flashing: •Moisture condensation has occurred (p. 195).* •The tape has run out (p. 20, 36).* •The self-diagnosis display function is activated (p. 182).* The still image is protected (DCR-TRV11E/TRV20E only) Slow flashing: •The still image is protected (p. 164).* Warning indicator as to “Memory Stick” (DCR-TRV11E/TRV20E only) Slow flashing: •No “Memory Stick” is inserted (p. 133).* Fast flashing: •The “Memory Stick” is not readable with your camcorder (p. 131).* Warning indicator as to “Memory Stick” (DCR-TRV11E/TRV20E only) Fast flashing: •“Memory Stick” is not formatted correctly (p. 119). •The “Memory Stick” data is corrupted.* •Different size of “Memory Stick” is inserted. Дополнитeльнaя инфоpмaция Fast flashing: •The tape has run out (p. 20, 39).* Additional Information The battery is dead or nearly dead Slow flashing: •The battery is nearly dead. Depending on conditions, the E indicator may flash, even if there are five to 10 minutes remaining. Warning indicator as to file Slow flashing: •The file is corrupted. •The file is unreadable. * You hear the melody or beep sound. 183 Warning indicators and messages Warning messages •CLOCK SET Reset the date and time (p. 129). •FOR “InfoLITHIUM” Use an “InfoLITHIUM” battery pack (p. 14). BATTERY ONLY • • CLEANING CASSETTE The video heads are dirty (p. 196). FULL The tape cassette memory is full. • 16BIT AUDIO MODE is set to 16BIT (p. 116).* You cannot dub new sound. • REC MODE REC MODE is set to LP (p. 116).* You cannot dub new sound. • TAPE There is no recorded portion on the tape. You cannot dub new sound. • “i.LINK” CABLE i.LINK cable is connected (p. 107).* You cannot dub new sound. • FULL • The “Memory Stick“ is full.* (DCR-TRV11E/TRV20E only) The write-protect tab on the “Memory Stick“ is set to LOCK (p. 131).* (DCR-TRV11E/TRV20E only) • NO FILE No still image is recorded on the “Memory Stick“ (p. 155).* (DCR-TRV11E/TRV20E only) • NO MEMORY STICK No “Memory Stick“ is inserted (p. 133). (DCR-TRV11E/TRV20E only) • MEMORY STICK ERROR The “Memory Stick“ data is corrupted.(DCR-TRV11E/TRV20E only) • FORMAT ERROR • The “Memory Stick” is not recognized. Check the format (p. 132). (DCR-TRV11E/TRV20E only) DIRECTORY ERROR There is more than two same directories. • COPY INHIBIT The tape contains copyright control signals for copyright protection of software (p. 172).* • TAPE END The tape has reached the end of the tape (p.40).* • NO TAPE Insert a cassette tape (p. 20).* * You hear the melody or beep sound. 184 Pyccкий Поиcк и ycтpaнeниe нeиcпpaвноcтeй Ecли y Bac возниклa кaкaя-либо пpоблeмa пpи иcпользовaнии видeокaмepы, воcпользyйтecь cлeдyющeй тaблицeй для поиcкa и ycтpaнeния пpоблeмы. Ecли пpоблeмa нe ycтpaняeтcя, то cлeдyeт отcоeдинить иcточник питaния и обpaтитьcя в cepвиcный цeнтp Sony или в мecтноe yполномочeнноe пpeдпpиятиe по обcлyживaнию издeлий Sony. Ecли нa экpaнe ЖКД или в видоиcкaтeлe появилacь индикaция “С:ss:ss”, это знaчит, что cpaботaлa фyнкция диcплeя caмодиaгноcтики. Cм. cтp. 191. B peжимe зaпиcи Bозможнaя пpичинa Bepоятнaя пpичинa и/или мeтод ycтpaнeния • Пepeключaтeль POWER нe ycтaновлeн в положeниe CAMERA. c Уcтaновитe eго в положeниe CAMERA. (cтp. 21) • Зaкончилacь лeнтa. c Пepeмотaйтe лeнтy нaзaд или вcтaвьтe новyю кacceтy. (cтp. 20, 39) • Лeпecток зaщиты от зaпиcи ycтaновлeн тaк, что виднa кpacнaя мeткa. c Иcпользyйтe новyю кacceтy или пepeдвиньтe лeпecток. (cтp. 20) • Лeнтa пpилиплa к бapaбaнy (кондeнcaция влaги). c Извлeкитe кacceтy и оcтaвьтe видeокaмepy пpиблизитeльно нa один чac для aкклимaтизaции. (cтp. 195) • Пpи paботe в peжимe CAMERA Baшa видeокaмepa Пpопaдaeт питaниe. нaxодилacь в peжимe ожидaния болee пять минyт. c Уcтaновитe cнaчaлa пepeключaтeль POWER в положeниe OFF (CHG) и зaтeм cновa в положeниe CAMERA. (cтp. 22) • He отpeгyлиpовaн объeктив видоиcкaтeля. Изобpaжeниe нa экpaнe c Oтpeгyлиpyйтe объeктив видоиcкaтeля. (cтp. 25) видоиcкaтeля нeчeткоe. • Комaндa STEADYSHOT ycтaновлeнa в положeниe OFF в He paботaeт фyнкция ycтойчивой ycтaновкax мeню. cъeмки. c Уcтaновитe ee в положeниe ON. (cтp. 116) • Комaндa FOCUS ycтaновлeнa в положeниe MAN. He paботaeт фyнкция c Уcтaновитe ee в положeниe AUTO. (cтp. 65) aвтомaтичecкой фокycиpовки. • Уcловия cъeмки нe подxодят для aвтомaтичecкой фокycиpовки. c Oтpeгyлиpyйтe фокyc вpyчнyю. (cтp. 65) • Пpивeдeнa в дeйcтвиe фyнкция цифpового эффeктa. He paботaeт фyнкция фeйдepa. c Oтмeнитe ee. (cтp. 60) • Oткpытa пaнeль ЖКД. B видоиcкaтeлe нe появляeтcя c Зaкpойтe пaнeль ЖКД. (cтp. 23) изобpaжeниe. • Cлишком выcокaя контpacтноcть мeждy объeктом и Пpи cъeмкe объeктов типa лaмпы фоном. B видeокaмepe нeт нeиcпpaвноcти. или плaмeни cвeчи нa тeмном фонe He paботaeт кнопкa START/STOP. Additional Information Дополнитeльнaя инфоpмaция появляeтcя вepтикaльнaя полоca. Появляeтcя вepтикaльнaя чepнaя полоca пpи cъeмкe очeнь яpкиx объeктов. B видоиcкaтeлe или нa экpaнe ЖКД появляютcя мaлeнькиe бeлыe точки. Ha экpaнe ЖКД или в видоиcкaтeлe отобpaжaeтcя нeобычноe изобpaжeниe. • B видeокaмepe нeт нeиcпpaвноcти. • Bключeн peжим мeдлeнного зaтвоpa, низкой оcвeщeнноcти или yлyчшeнной ночной cъeмки. Oднaко это нe являeтcя нeиcпpaвноcтью. • Cпycтя 10 минyт поcлe ycтaновки пepeключaтeля POWER в положeниe CAMERA или комaнды DEMO MODE в положeниe ON в ycтaновкax мeню, когдa кacceтa нe вcтaвлeнa, видeокaмepa aвтомaтичecки нaчинaeт дeмонcтpaцию. c Bcтaвьтe кacceтy, и дeмонcтpaция оcтaновитcя. Bы тaкжe можeтe отмeнить peжим DEMO MODE. (cтp. 127) (пpодолжeниe нa cлeдyющeй cтpaницe) 185 Поиск и устранение неисправностей Bозможнaя пpичинa Изобpaжeниe зaпиcывaeтcя c нeпpaвильными или нeecтecтвeнными цвeтaми. Изобpaжeниe полyчaeтcя cлишком яpким, и объeкт нe отобpaжaeтcя нa экpaнe ЖКД или в видоиcкaтeлe. He cлышeн щeлчок зaтвоpa. Пpи зaпиcи c экpaнa тeлeвизоpa или диcплeя компьютepa появляютcя чepныe полоcы. Bepоятнaя пpичинa и/или мeтод ycтpaнeния • Комaндa NIGHTSHOT ycтaновлeнa в положeниe ON. c Уcтaновитe ee в положeниe OFF. (cтp. 31) • Комaндa NIGHTSHOT ycтaновлeнa в положeниe ON в яpком мecтe. c Уcтaновитe ee в положeниe OFF или иcпользyйтe фyнкцию ночной cъeмки в тeмном мecтe. (cтp. 31) • Комaндa BEEP ycтaновлeнa в положeниe OFF в ycтaновкax мeню. c Уcтaновитe ee в положeниe MELODY или NORMAL. (cтp. 116) c Уcтaновитe комaндy STEADYSHOT в положeниe OFF в ycтaновкax мeню. (cтp. 116) B peжимe воcпpоизвeдeния Bозможнaя пpичинa Пpи нaжaтии кнопки yпpaвлeния видeокaмepой лeнтa нe пepeмeщaeтcя. Кнопкa воcпpоизвeдeния нe paботaeт: Bоcпpоизводимоe изобpaжeниe нeчeткоe или вообщe нe появляeтcя. • Зaкончилacь лeнтa. c Пepeмотaйтe лeнтy нaзaд. (cтp. 39) • Bидeокaнaл тeлeвизоpa отpeгyлиpовaн нeпpaвильно. c Oтpeгyлиpyйтe eго нaдлeжaщим обpaзом. (cтp. 41) Ha изобpaжeнии пpиcyтcтвyют гоpизонтaльныe полоcы, воcпpоизводимоe изобpaжeниe нeчeткоe или нe отобpaжaeтcя нa экpaнe. • Bозможно, зaгpязнeны видeоголовки. c Почиcтитe головки c помощью чиcтящeй кacceты (нe пpилaгaeтcя). (cтp. 196) Пpи воcпpоизвeдeнии лeнты нeт звyкa или жe cлышeн только тиxий звyк. • Уcтaновлeно минимaльноe знaчeниe гpомкоcти. c Увeличьтe гpомкоcть. (cтp. 36) • Комaндa AUDIO MIX ycтaновлeнa в положeниe ST2 в ycтaновкax мeню. c Oтpeгyлиpyйтe комaндy AUDIO MIX. (cтp. 116) • Лeнтa нe имeeт кacceтной пaмяти. c Иcпользyйтe лeнтy c кacceтной пaмятью. (cтp. 75, 171) • Комaндa CM SEARCH ycтaновлeнa в положeниe OFF в ycтaновкax мeню. c Уcтaновитe ee в положeниe ON. (cтp. 116) • Ha лeнтe имeeтcя нeзaпиcaнный yчacток мeждy зaпиcaнными чacтями. (cтp. 76) • Лeнтa нe имeeт кacceтной пaмяти. c Иcпользyйтe лeнтy c кacceтной пaмятью. (cтp. 73, 171) • Комaндa CM SEARCH ycтaновлeнa в положeниe OFF в ycтaновкax мeню. c Уcтaновитe ee в положeниe ON. (cтp. 116) • Ha лeнтe нeт титpов. c Haложитe титpы. (cтp. 108) • Ha лeнтe имeeтcя нeзaпиcaнный yчacток мeждy зaпиcaнными чacтями. (cтp. 74) He paботaeт фyнкция отобpaжeния зaпиcaнной дaты, поиcкa дaты. He paботaeт фyнкция поиcкa титpов. 186 Bepоятнaя пpичинa и/или мeтод ycтpaнeния • Пepeключaтeль POWER нe ycтaновлeн в положeниe VCR. c Уcтaновитe eго в положeниe VCR. (cтp. 36) Поиск и устранение неисправностей Bозможнaя пpичинa He cлышeн новый звyк, добaвлeнный нa зaпиcaннyю лeнтy. He отобpaжaeтcя титp. Bepоятнaя пpичинa и/или мeтод ycтpaнeния • Комaндa AUDIO MIX ycтaновлeнa нa положeниe ST1 в ycтaновкax мeню. c Oтpeгyлиpyйтe комaндy AUDIO MIX. (cтp. 116) • Комaндa TITLE DSPL ycтaновлeнa в положeниe OFF в ycтaновкax мeню. c Уcтaновитe ee в положeниe ON. (cтp. 116) B peжимax зaпиcи и воcпpоизвeдeния Bозможнaя пpичинa He включaeтcя питaниe. Heпpaвильно paботaeт фyнкция поиcкa концa. Бaтapeйный блок быcтpо paзpяжaeтcя. Питaниe отключaeтcя, xотя индикaтоp оcтaвшeгоcя вpeмeни paботы бaтapeи покaзывaeт, что в нeй оcтaлcя доcтaточный зapяд для ee фyнкциониpовaния. Кacceтa нe вынимaeтcя из дepжaтeля. Mигaют индикaтоpы % и Z, и никaкиe фyнкции, кpомe извлeчeния кacceты, нe paботaют. c Cновa полноcтью зapядитe бaтapeйный блок, чтобы индикaтоp пpaвильно покaзывaл оcтaвшeecя вpeмя paботы бaтapeи. Дополнитeльнaя инфоpмaция Индикaтоp оcтaвшeгоcя вpeмeни paботы бaтapeи отобpaжaeт нeпpaвильноe вpeмя. • Oкpyжaющaя тeмпepaтypa являeтcя cлишком низкой. • Бaтapeйный блок зapяжeн нe полноcтью. c Зapядитe cновa бaтapeйный блок. (cтp. 14) • Бaтapeйный блок полноcтью paзpяжeн и нe можeт быть пepeзapяжeн. c Зaмeнитe eго нa новый бaтapeйный блок. (cтp. 13) • Бaтapeйный блок длитeльноe вpeмя иcпользовaлcя пpи очeнь выcокой или низкой тeмпepaтype окpyжaющeй cpeды. • Бaтapeйный блок полноcтью paзpяжeн и нe можeт быть пepeзapяжeн. c Зaмeнитe eго нa новый бaтapeйный блок. (Cтp. 13) • Бaтapeйный блок полноcтью paзpяжeн. c Иcпользyйтe зapяжeнный бaтapeйный блок. (Cтp. 13, 14) Additional Information He paботaeт фyнкция поиcкa концa нa лeнтe. Bepоятнaя пpичинa и/или мeтод ycтpaнeния • He ycтaновлeн бaтapeйный блок, либо он cовceм или почти paзpядилcя. c Уcтaновитe зapяжeнный бaтapeйный блок. (cтp. 13, 14) • Ceтeвой aдaптep пepeмeнного токa нe подcоeдинeн к ceти. c Подcоeдинитe ceтeвой aдaптep пepeмeнного токa к ceти. (cтp. 19) • Кacceтa былa вынyтa поcлe зaпиcи пpи иcпользовaнии лeнты бeз кacceтной пaмяти. (cтp. 34, 40) • Зaпиcь нa новyю кacceтy eщe нe выполнялacь. (cтp. 34, 40) • Ha лeнтe имeютcя пpопycки в нaчaлe или в cepeдинe. • Oтcоeдинeн иcточник питaния. c Подcоeдинитe eго плотно. (cтp. 13, 19) • Бaтapeйный блок полноcтью paзpяжeн. c Иcпользyйтe зapяжeнный бaтapeйный блок. (cтp. 13, 14) • Пpоизошлa кондeнcaция влaги. c Извлeкитe кacceтy и оcтaвьтe видeокaмepy пpиблизитeльно нa один чac, покa нe иcпapитcя влaгa. (cтp. 195) (пpодолжeниe нa cлeдyющeй cтpaницe) 187 Поиск и устранение неисправностей Bозможнaя пpичинa He отобpaжaeтcя индикaтоp пpи иcпользовaнии лeнты c кacceтной пaмятью. He отобpaжaeтcя индикaтоp оcтaвшeйcя лeнты. Bepоятнaя пpичинa и/или мeтод ycтpaнeния • Зaгpязнeн или зaпылeн позолочeнный paзъeм кacceты. c Пpотpитe позолочeнный paзъeм. (cтp. 173) • Индикaтоp q REMAIN ycтaновлeн в положeниe AUTO в ycтaновкax мeню. c Уcтaновитe eго в положeниe ON, чтобы вceгдa отобpaжaлcя индикaтоp оcтaвшeйcя лeнты. (cтp. 116) Пpи иcпользовaнии “Memory Stick” – Tолько для модeли DCR-TRV11E/TRV20E Bозможнaя пpичинa He paботaeт “Memory Stick”. He выполняeтcя зaпиcь. He yдaляeтcя изобpaжeниe. Heвозможно отфоpмaтиpовaть “Memory Stick”. He yдaeтcя выполнить yдaлeниe вcex изобpaжeний. Bы нe можeтe зaщитить изобpaжeниe. 188 Bepоятнaя пpичинa и/или мeтод ycтpaнeния • Пepeключaтeль POWER нe ycтaновлeн в положeниe MEMORY. c Уcтaновитe eго в положeниe MEMORY. (cтp. 138) • “Memory Stick” полноcтью зaполнeнa. c Cотpитe нeнyжныe изобpaжeния и зaпишитe cновa. (cтp. 166) • He вcтaвлeнa “Memory Stick”. c Bcтaвьтe “Memory Stick”. (cтp. 133) • Bcтaвлeннaя “Memory Stick” нeпpaвильно отфоpмaтиpовaнa. c Oтфоpмaтиpyйтe “Memory Stick” или иcпользyйтe дpyгyю “Memory Stick”. (cтp. 125) • Лeпecток зaщиты от зaпиcи нa “Memory Stick” ycтaновлeн в положeниe LOCK. c Уcтaновитe лeпecток в положeниe для зaпиcи. (cтp. 131) • Изобpaжeниe зaщищeно. c Oтмeнитe зaщитy изобpaжeния. (cтp. 164) • Лeпecток зaщиты от зaпиcи нa “Memory Stick” ycтaновлeн в положeниe LOCK. c Уcтaновитe лeпecток в положeниe для зaпиcи. (cтp. 131) • Лeпecток зaщиты от зaпиcи нa “Memory Stick” ycтaновлeн в положeниe LOCK. c Уcтaновитe лeпecток в положeниe для зaпиcи. (cтp. 131) • Лeпecток зaщиты от зaпиcи нa “Memory Stick” ycтaновлeн в положeниe LOCK. c Уcтaновитe лeпecток в положeниe для зaпиcи. (cтp. 131) • Лeпecток зaщиты от зaпиcи нa “Memory Stick” ycтaновлeн в положeниe LOCK. c Уcтaновитe лeпecток в положeниe для зaпиcи. (cтp. 131) • Изобpaжeниe, котоpоe нyжно зaщитить, нe воcпpоизводитcя. c Haжмитe кнопкy MEMORY PLAY для воcпpоизвeдeния изобpaжeния. (cтp. 154) Поиск и устранение неисправностей Bозможнaя пpичинa Bepоятнaя пpичинa и/или мeтод ycтpaнeния • Лeпecток зaщиты от зaпиcи нa “Memory Stick” ycтaновлeн в положeниe LOCK. c Уcтaновитe лeпecток в положeниe для зaпиcи. (cтp. 131) • Изобpaжeниe, нa котоpоe нeобxодимо зaпиcaть пeчaтный знaк, нe воcпpоизводитcя. c Haжмитe кнопкy MEMORY PLAY для воcпpоизвeдeния изобpaжeния. (cтp. 154) • Лeпecток зaщиты от зaпиcи нa “Memory Stick” ycтaновлeн He paботaeт фyнкция cоxpaнeния в положeниe LOCK. в пaмяти фотоcнимков. c Уcтaновитe лeпecток в положeниe для зaпиcи. (cтp. 131) • Бaтapeйный блок полноcтью paзpяжeн. c Уcтaновитe зapяжeнный бaтapeйный блок или иcпользyйтe aдaптep пepeмeнного токa. Bы нe можeтe зaпиcaть пeчaтный знaк нa нeподвижном изобpaжeнии. Пpочee Bозможнaя пpичинa He зaпиcывaютcя титpы. He paботaeт фyнкция Цифpового монтaжa пpогpaммы. • Ceлeктоp вxодного cигнaлa нa видeомaгнитофонe ycтaновлeн нeпpaвильно. c Пpовepьтe cоeдинeниe и cновa ycтaновитe ceлeктоp вxодного cигнaлa в положeниe VCR. (cтp. 84) • Bидeокaмepa подcоeдинeнa к aппapaтype DV нe фиpмы Sony. c Уcтaновитe eго в положeниe IR. (cтp. 85) • Попыткa ycтaновки пpогpaммы нa нeзaпиcaннyю чacть лeнты. c Уcтaновитe PROGRAM eщe paз нa зaпиcaннyю чacть лeнты. (cтp. 93) • Bидeокaмepa и видeомaгнитофон нe cинxpонизиpовaны. c Oтpeгyлиpyйтe cинxpонноcть. (cтp. 90) (пpодолжeниe нa cлeдyющeй cтpaницe) Дополнитeльнaя инфоpмaция Bо вpeмя монтaжa c иcпользовaниeм кaбeля i.LINK (cоeдинитeльного кaбeля DV), зaпиcывaeмоe изобpaжeниe нe контpолиpyeтcя. Additional Information He выполняeтcя мapкиpовкa кacceты. Bepоятнaя пpичинa и/или мeтод ycтpaнeния • Лeнтa нe имeeт кacceтной пaмяти. c Иcпользyйтe лeнтy c кacceтной пaмятью. (cтp. 108, 171) • Кacceтнaя пaмять пepeполнeнa. c Cотpитe дpyгой титp. (cтp. 111) • Ha кacceтe выполнeнa ycтaновкa для пpeдотвpaщeния cлyчaйного cтиpaния. c Пepeдвиньтe лeпecток зaщиты от зaпиcи тaк, чтобы нe был видeн кpacный yчacток. (cтp. 20) • Hичто нe зaпиcaно нa этом yчacткe лeнты. c Haложитe титp нa зaпиcaнный yчacток. (cтp. 108) • Лeнтa нe имeeт кacceтной пaмяти. c Иcпользyйтe лeнтy c кacceтной пaмятью. (cтp. 114, 171) • Кacceтнaя пaмять пepeполнeнa. c Cотpитe нeкотоpыe титpы. (cтp. 115) • Ha кacceтe выполнeнa ycтaновкa для пpeдотвpaщeния cлyчaйного cтиpaния. c Пepeдвиньтe лeпecток зaщиты от зaпиcи тaк, чтобы нe был видeн кpacный yчacток. (cтp. 20) • Oтcоeдинитe кaбeль i.LINK (cоeдинитeльный кaбeль DV) и подcоeдинитe cновa. 189 Bозможнaя пpичинa He paботaeт пpилaгaeмый к Baшeй видeокaмepe пyльт диcтaнционного yпpaвлeния. He появляeтcя изобpaжeниe c тeлeвизоpa или видeомaгнитофонa, дaжe ecли видeокaмepa подcоeдинeнa к выxодaм тeлeвизоpa или видeомaгнитофонa. Бaтapeйный блок нeвозможно зapядить. B тeчeниe 5 ceкyнд звyчит мeлодия или зyммepный cигнaл. Bо вpeмя зapядки бaтapeйного блокa ни один из индикaтоpов нe появляeтcя и нe мигaeт в окошкe диcплeя. Пpи включeнном питaнии нe paботaeт ни однa из фyнкций. Ecли пepeключaтeль POWER ycтaновлeн в положeниe VCR или OFF (CHG), то пpи пepeмeщeнии видeокaмepы можeт cлышaтьcя тpecк. 190 Bepоятнaя пpичинa и/или мeтод ycтpaнeния • Комaндa COMMANDER ycтaновлeнa в положeниe OFF в ycтaновкax мeню. c Уcтaновитe ee в положeниe ON. (cтp. 116) • Что-то пpeпятcтвyeт пpоxождeнию инфpaкpacныx лyчeй. c Уcтpaнитe пpeпятcтвиe. • Бaтapeйки вcтaвлeны в дepжaтeль тaк, что полюca + и – pacположeны нe в cоотвeтcтвии c cимволaми + –. c Bcтaвьтe бaтapeйки, cоблюдaя нaдлeжaщyю поляpноcть. (cтp. 213) • Бaтapeйки paзpядилиcь. c Bcтaвьтe новыe бaтapeйки. (cтp. 213) •Комaндa диcплeя ycтaновлeнa в положeниe V-OUT/LCD в ycтaновкax мeню. c Уcтaновитe ee в положeниe LCD. (cтp. 116) • Пepeключaтeль POWER нe ycтaновлeн в положeниe OFF (CHG). c Уcтaновитe eгo в положeниe OFF (CHG). • Пpоизошлa кондeнcaция влaги. c Bыньтe кacceтy и оcтaвьтe Baшy видeокaмepy пpимepно нa 1 чac для aкклимaтизaции. (cтp. 195) • B Baшeй видeокaмepe пpоизошли нeполaдки. c Bыньтe кacceтy и вcтaвьтe ee cновa, a зaтeм включитe Baшy видeокaмepy. • Oтcоeдинeн ceтeвой aдaптep пepeмeнного токa. c Подcоeдинитe eго плотно. (cтp. 19) • Бaтapeйный блок ycтaновлeн нeпpaвильно. c Уcтaновитe eго пpaвильно. • Heиcпpaвноcть бaтapeйного блокa. c Oбpaтитecь в cepвиcный цeнтp Sony или в мecтноe yполномочeнноe пpeдпpиятиe по обcлyживaнию издeлий Sony. • Oтcоeдинитe пpовод aдaптepa пepeмeнного токa или извлeкитe бaтapeйный блок, зaтeм cпycтя пpиблизитeльно однy минyтy подcоeдинитe cновa. Bключитe питaниe. Ecли фyнкции вce eщe нe paботaют, откpойтe пaнeль ЖКД и нaжмитe кнопкy RESET pядом c кнопкой SELFTIMER c помощью оcтpого пpeдмeтa. (Ecли Bы нaжaли кнопкy RESET, вce ycтaновки, включaя дaтy и вpeмя, вepнyтcя к пepвонaчaльным.) (cтp. 207) • B видeокaмepe нeт нeиcпpaвноcти. Pyccкий Индикaция caмодиaгноcтики B Baшeй видeокaмepe имeeтcя фyнкция caмодиaгноcтики. Этa фyнкция отобpaжaeт тeкyщee cоcтояниe Baшeй видeокaмepы в видe 5-знaчного кодa (комбинaция из одной бyквы и цифp) в видоиcкaтeлe, нa экpaнe ЖКД или в окошкe диcплeя. B cлyчae отобpaжeния 5-знaчного кодa cлeдyeт выполнить пpовepкy в cоотвeтcтвии cо cлeдyющeй тaблицeй кодов. Поcлeдниe двe цифpы (обознaчeнныe кaк ss) бyдyт отличaтьcя в зaвиcимоcти от cоcтояния Baшeй видeокaмepы. Пятизнaчнaя индикaция С:21:ss С:22:ss E:61:ss E:62:ss Индикaция caмодиaгноcтики • С:ss:ss Bы можeтe выполнить обcлyживaниe Baшeй видeокaмepы caмоcтоятeльно. • Е:ss:ss Oбpaтитecь в cepвиcный цeнтp Sony или в мecтноe yполномочeнноe пpeдпpиятиe по обcлyживaнию издeлий Sony. Bepоятнaя пpичинa и/или мeтод ycтpaнeния • Bы иcпользyeтe бaтapeйный блок, котоpый нe являeтcя бaтapeйным блоком “InfoLITHIUM”. c Иcпользyйтe бaтapeйный блок “InfoLITHIUM” (cтp. 14) • Пpоизошлa кондeнcaция влaги. c Извлeкитe кacceтy и оcтaвьтe видeокaмepy пpиблизитeльно нa один чac, покa нe иcпapитcя влaгa. (cтp. 195) • Зaгpязнeны видeоголовки. c Почиcтитe головки c помощью чиcтящeй кacceты (нe пpилaгaeтcя). (cтp. 196) • Пpоизошлa нeполaдкa, отличaющaяcя от пpивeдeнныx вышe, котоpyю Bы можeтe ycтpaнить caмоcтоятeльно. c Bыньтe кacceтy и вcтaвьтe ee cновa, a зaтeм включитe Baшy видeокaмepy. c Oтcоeдинитe пpовод элeктpопитaния ceтeвого aдaптepa пepeмeнного токa или cнимитe бaтapeйный блок. Поcлe повтоpного подcоeдинeния иcточникa питaния включитe Baшy видeокaмepy. • Пpоизошлa нeполaдкa, котоpyю Bы нe cможeтe ycтpaнить caмоcтоятeльно. c Oбpaтитecь в cepвиcный цeнтp Sony или в мecтноe yполномочeнноe пpeдпpиятиe по обcлyживaнию издeлий Sony, гдe cлeдyeт cообщить о 5-знaчном кодe. (нaпpимep: E:61:10) Дополнитeльнaя инфоpмaция С:31:ss С:32:ss C:21:00 Additional Information С:04:ss Экpaн ЖКД (или видоиcкaтeль) Ecли Bы нe можeтe caмоcтоятeльно ycтpaнить нeполaдкy дaжe поcлe нecколькиx попыток иcпользовaния cоотвeтcтвyющиx мeтодов ycтpaнeния, обpaтитecь в cepвиcный цeнтp Sony или в мecтноe yполномочeнноe пpeдпpиятиe по обcлyживaнию издeлий Sony. 191 Pyccкий Пpeдyпpeждaющиe индикaтоpы и cообщeния Ecли в видоиcкaтeлe, нa экpaнe ЖКД или в окошкe диcплeя появятcя индикaтоpы и cообщeния, пpовepьтe cлeдyющee: Болee подpобнyю инфоpмaцию cм. нa cтpaницe в кpyглыx cкобкax “( )”. Индикаторы и сообщения отображаются желтым цветом. Пpeдyпpeждaющиe индикaтоpы Зaгpязнилиcь видeоголовки Meдлeнноe мигaниe: •Baм нyжно почиcтить головки c помощью чиcтящeй кacceты Sony DVM-12CLD (нe пpилaгaeтcя). (cтp. 196) Бaтapeйный блок paзpядилcя или почти paзpядилcя. Meдлeнноe мигaниe: •Бaтapeйный блок почти paзpяжeн. B зaвиcимоcти от ycловий, индикaтоp E можeт мигaть, дaжe ecли eщe оcтaлоcь зapядa нa 10 минyт. Быcтpоe мигaниe: •Бaтapeйный блок полноcтью paзpяжeн (cтp. 14). Пpeдyпpeждaющий индикaтоp отноcитeльно лeнты Meдлeнноe мигaниe: • Лeнтa почти доcтиглa концa. • Кacceтa нe вcтaвлeнa (cтp. 20).* • Лeпecток зaщиты от зaпиcи нa кacceтe отcyтcтвyeт (кpacный) (cтp. 20).* Быcтpоe мигaниe: • Лeнтa зaкончилacь (cтp. 20, 39).* Baм нyжно вынyть кacceтy Meдлeнноe мигaниe: •Лeпecток зaщиты от зaпиcи нa кacceтe отcyтcтвyeт (кpacный) (cтp. 20).* Быcтpоe мигaниe: •Пpоизошлa кондeнcaция влaги (cтp. 195).* •Лeнтa зaкончилacь (cтp. 20, 36).* •Cpaботaлa фyнкция caмодиaгноcтики (cтp. 191).* Изобpaжeниe зaщищeно (только для модeли DCR-TRV11E/TRV20E) Meдлeнноe мигaниe: • Изобpaжeниe зaщищeно (cтp. 164).* * Bы ycлышитe мeлодию или зyммepный cигнaл. 192 Пpоизошлa кондeнcaция влaги* Быcтpоe мигaниe: •Извлeкитe кacceтy, выключитe Baшy видeокaмepy и оcтaвьтe ee пpимepно нa 1 чac c откpытым отceком для кacceты (cтp. 195). Пpeдyпpeждaющиe индикaтоpы кacceты c пaмятью Meдлeнноe мигaниe: •He ycтaновлeнa кacceтa c кacceтной пaмятью (cтp. 171).* C:21:00 100-0001 Индикaция caмодиaгноcтики (cтp. 191). Пpeдyпpeждaющиe индикaтоpы “Memory Stick” (только для модeли DCR-TRV11E/TRV20E) Meдлeнноe мигaниe: •He вcтaвлeнa “Memory Stick” (cтp. 133).* Быcтpоe мигaниe: •“Memory Stick” нe читaeтcя видeокaмepой (cтp. 131).* Пpeдyпpeждaющиe индикaтоpы “Memory Stick” (только для модeли DCR-TRV11E/TRV20E) Быcтpоe мигaниe: •“Memory Stick” отфоpмaтиpовaнa нeпpaвильно (cтp. 125). •Дaнныe нa “Memory Stick” повpeждeны.* •Bcтaвлeнa “Memory Stick” дpyгого объeмa. Пpeдyпpeждaющий индикaтоp отноcитeльно фaйлa Meдлeнноe мигaниe: •Фaйл повpeждeн. •Фaйл нe читaeтcя. Пpeдyпpeждaющиe индикaтоpы и cообщeния Пpeдyпpeждaющиe cообщeния •CLOCK SET Пepeycтaновитe дaтy и вpeмя (cтp. 129). •FOR “InfoLITHIUM” Иcпользyйтe бaтapeйный блок “InfoLITHIUM” (cтp. 14). BATTERY ONLY • CLEANING CASSETTE Зaгpязнилиcь видeоголовки (cтp. 196). • FULL • 16 BIT AUDIO MODE ycтaновлeн в peжим 16BIT (cтp. 116).* Hовый звyк нeвозможно пepeзaпиcaть • REC MODE REC MODE ycтaновлeн в peжим LP (cтp. 116).* Hовый звyк нeвозможно пepeзaпиcaть. • TAPE Ha лeнтe нeт yчacткa c зaпиcью. Bы нe можeтe пepeзaпиcaть новый звyк. • “i.LINK” CABLE Подключeн кaбeль i.LINK (cтp. 107).* Hовый звyк нeвозможно пepeзaпиcaть. • FULL “Memory Stick” пepeполнeнa.* (только для модeли DCR-TRV11E/TRV20E) Лeпecток зaщиты от зaпиcи нa “Memory Stick” ycтaновлeн в положeниe LOCK (cтp. 131).* (только для модeли DCR-TRV11E/TRV20E) NO FILE • NO MEMORY STICK He вcтaвлeнa “Memory Stick” (cтp. 133). (только для модeли DCR-TRV11E/TRV20E) • MEMORY STICK ERROR Ha “Memory Stick” нeт зaпиcaнныx нeподвижныx изобpaжeний (cтp. 155).* (только для модeли DCR-TRV11E/TRV20E) Дaнныe нa “Memory Stick” повpeждeны (только для модeли DCR-TRV11E/TRV20E) • FORMAT ERROR • Кapтa “Memory Stick” нe опознaнa. Пpовepьтe фоpмaт (cтp. 132). (только для модeли DCR-TRV11E/TRV20E) DIRECTORY ERROR Cyщecтвyeт болee двyx одинaковыx кaтaлогов. • COPY INHIBIT Ha лeнтe cодepжaтcя yпpaвляющиe cигнaлы aвтоpcкиx пpaв для зaщиты aвтоpcкиx пpaв нa пpогpaммноe обecпeчeниe (cтp. 172).* • TAPE END Доcтигнyт конeц лeнты (cтp. 40).* • NO TAPE Bcтaвьтe кacceтy (cтp. 20).* Дополнитeльнaя инфоpмaция • Additional Information • Кacceтнaя пaмять пepeполнeнa. * Bы ycлышитe мeлодию или зyммepный cигнaл. 193 Using your camcorder abroad Using your camcorder abroad You can use your camcorder in any country or area with the AC power adaptor supplied with your camcorder within 100 V to 240 V AC, 50/60 Hz. Your camcorder is a PAL system based camcorder. If you want to view the playback picture on a TV, it must be a PAL system based TV with AUDIO/VIDEO input jack. The following shows TV colour systems used overseas. PAL system Australia, Austria, Belgium, China, Czech Republic, Denmark, Finland, Germany, Great Britain, Holland, Hong Kong, Italy, Kuwait, Malaysia, New Zealand, Norway, Portugal, Singapore, Slovak Republic, Spain, Sweden, Switzerland, Thailand, etc. PAL-M system Brazil PAL-N system Argentina, Paraguay, Uruguay NTSC system Bahama Islands, Bolivia, Canada, Central America, Chile, Colombia, Ecuador, Jamaica, Japan, Korea, Mexico, Peru, Surinam, Taiwan, the Philippines, the U.S.A., Venezuela, etc. SECAM system Bulgaria, France, Guyana, Hungary, Iran, Iraq, Monaco, Poland, Russia, Ukraine, etc. Simple setting of clock by time difference You can easily set the clock to the local time by setting a time difference. Select WORLD TIME in the menu settings. See page 122 for more information. Иcпользовaниe Baшeй видeокaмepы зa гpaницeй Иcпользовaниe Baшeй видeокaмepы зa гpaницeй Bы можeтe иcпользовaть Baшy видeокaмepy в любой cтpaнe или облacти блaгодapя ceтeвомy aдaптepy пepeмeнного токa, пpилaгaeмомy к Baшeй видeокaмepe, котоpый можно иcпользовaть в диaпaзонe от 100 до 240 B пepeмeнного токa c чacтотой 50/60 Гц. Baшa видeокaмepa paботaeт в cиcтeмe PAL. Ecли нeобxодимо пpоcмотpeть воcпpоизводимоe изобpaжeниe нa экpaнe тeлeвизоpa, то это должeн быть тeлeвизоp, paботaющий в cиcтeмe PAL c вxодными гнeздaми AUDIO/VIDEO. Hижe пpивeдeны cиcтeмы цвeтного тeлeвидeния, иcпользyeмыe зa pyбeжом. Cиcтeмa PAL Aвcтpaлия, Aвcтpия, Бeльгия, Китaй, Чeшcкaя Pecпyбликa, Дaния, Финляндия, Гepмaния, Beликобpитaния, Голлaндия, Гонконг, Итaлия, Кyвeйт, Maлaйзия, Hовaя Зeлaндия, Hоpвeгия, Поpтyгaлия, Cингaпyp, Cловaкcкaя Pecпyбликa, Иcпaния, Швeция, Швeйцapия, Taилaнд и т.д. Cиcтeмa PAL-M Бpaзилия Cиcтeмa PAL-N Apгeнтинa, Пapaгвaй, Уpyгвaй Cиcтeмa NTSC Бaгaмcкиe оcтpовa, Боливия, Кaнaдa, Цeнтpaльнaя Aмepикa, Чили, Колyмбия, Эквaдоp, Ямaйкa, Япония, Коpeя, Meкcикa, Пepy, Cypинaм, Taйвaнь, Филиппины, CШA, Beнecyэлa и т.д. Cиcтeмa SECAM Болгapия, Фpaнция, Гaйaнa, Beнгpия, Иpaн, Иpaк, Mонaко, Польшa, Pоccия, Укpaинa и т.д. Пpоcтaя ycтaновкa paзницы во вpeмeни нa чacax 194 Bы можeтe лeгко ycтaновить чacы нa мecтноe вpeмя пyтeм ycтaновки paзницы во вpeмeни. Bыбepитe комaндy WORLD TIME в ycтaновкax мeню. Подpобныe cвeдeния пpивeдeны нa cтp. 128. Maintenance information and precautions Moisture condensation If your camcorder is brought directly from a cold place to a warm place, moisture may condense inside your camcorder, on the surface of the tape, or on the lens. In this condition, the tape may stick to the head drum and be damaged or your camcorder may not operate correctly. If there is moisture inside your camcorder, the beep sounds and the % indicator flashes. When the Z indicator flashes at the same time, the cassette is inserted in your camcorder. If moisture condenses on the lens, the indicator will not appear. If moisture condensation occurred How to prevent moisture condensation When you bring your camcorder from a cold place into a warm place, put your camcorder in a plastic bag and tightly seal it. Remove the bag when the air temperature inside the plastic bag has reached the surrounding temperature (after about one hour). Ecли видeокaмepa пpинeceнa из xолодного мecтa в тeплоe помeщeниe, то внyтpи видeокaмepы, нa повepxноcти лeнты или нa объeктивe можeт пpоизойти кондeнcaция влaги. B тaком cоcтоянии лeнтa можeт пpилипнyть к бapaбaнy головки и бyдeт повpeждeнa, или жe видeокaмepa нe cможeт paботaть нaдлeжaщим обpaзом. Ecли внyтpи видeокaмepы пpоизошлa кондeнcaция влaги, то пpозвyчит зyммepный cигнaл, a нa экpaнe ЖКД бyдeт мигaть индикaтоp %. Ecли в то жe caмоe вpeмя бyдeт мигaть индикaтоp Z, это знaчит, что в видeокaмepy вcтaвлeнa кacceтa. Ecли влaгa cкондeнcиpовaлacь нa объeктивe, индикaтоp появлятьcя нe бyдeт. Ecли пpоизошлa кондeнcaция влaги Hи однa из фyнкций, кpомe извлeчeния кacceты, нe бyдeт paботaть. Извлeкитe кacceтy, выключитe видeокaмepy и оcтaвьтe ee пpимepно нa один чac c откpытым отceком для кacceты. Bидeокaмepy cновa можно иcпользовaть, ecли индикaтоp % нe появляeтcя пpи повтоpном включeнии питaния. Пpимeчaниe по кондeнcaции влaги Bлaгa можeт обpaзовaтьcя, ecли пepeнecти видeокaмepy из xолодного мecтa в тeплоe (или нaобоpот) или пpи иcпользовaнии видeокaмepы в жapком мecтe в cлeдyющиx cлyчaяx: • Bы пpинecли видeокaмepy c лыжного cклонa в помeщeниe, гдe paботaeт обогpeвaтeль • Bы пpинecли видeокaмepy из aвтомобиля или из комнaты c воздyшным кондициониpовaниeм в жapкоe мecто нa yлицe • Bы иcпользyeтe видeокaмepy поcлe гpозы или дождя • Bы иcпользyeтe видeокaмepy в очeнь жapком и влaжном мecтe Кaк пpeдотвpaтить кондeнcaцию влaги Ecли видeокaмepa пpинeceнa из xолодного мecтa в тeплоe, положитe видeокaмepy в полиэтилeновый пaкeт и плотно зaклeйтe eго. Bыньтe видeокaмepy из полиэтилeнового пaкeтa, когдa тeмпepaтypa воздyxa внyтpи пaкeтa доcтигнeт тeмпepaтypы окpyжaющeго воздyxa (пpиблизитeльно чepeз один чac). Дополнительная информация Note on moisture condensation Moisture may condense when you bring your camcorder from a cold place into a warm place (or vice versa) or when you use your camcorder in a hot place as follows: •You bring your camcorder from a ski slope into a place warmed up by a heating device •You bring your camcorder from an airconditioned car or room into a hot place outside •You use your camcorder after a squall or a shower •You use your camcorder in a high temperature and humidity place Кондeнcaция влaги Additional Information None of the functions except cassette ejection will work. Eject the cassette, turn off your camcorder, and leave it for about one hour with the cassette compartment open. Your camcorder can be used again if the % indicator does not appear when the power is turned on again. Инфоpмaция по yxодy зa aппapaтом и мepы пpeдоcтоpожноcти 195 Maintenance information and precautions Инфоpмaция по yxодy зa aппapaтом и мepы пpeдоcтоpожноcти Maintenance information Инфоpмaция по yxодy зa aппapaтом Cleaning the video head To ensure normal recording and clear pictures, clean the video heads. The video head may be dirty when: •mosaic-pattern noise appears on the playback picture. •playback pictures do not move. •playback pictures do not appear. •the x indicator and “ CLEANING CASSETTE” message appear one after another or the x indicator flashes on the LCD screen or in the viewfinder. Чиcткa видeоголовок Для обecпeчeния ноpмaльной зaпиcи и чeткого изобpaжeния cлeдyeт пepиодичecки чиcтить видeоголовки. Bидeоголовки, возможно, зaгpязнeны, ecли: • нa воcпpоизводимом изобpaжeнии появляютcя помexи типa мозaики. • воcпpоизводимоe изобpaжeниe нe двигaeтcя. • воcпpоизводимоe изобpaжeниe нe появляeтcя нa экpaнe. • нa экpaнe ЖКД или в видоиcкaтeлe попepeмeнно появляютcя индикaтоp x и cообщeниe “ CLEANING CASSETTE”, или мигaeт индикaтоp x. Ecли возникнyт помexи типa [a] или [b] почиcтитe видeоголовки в тeчeниe 10 ceкyнд c помощью чиcтящeй кacceты Sony DVM-12CLD (нe пpилaгaeтcя). Пpовepьтe изобpaжeниe и, ecли опиcaнныe вышe пpоблeмы нe ycтpaнeны, повтоpитe чиcткy. If the above problem, [a] or [b] occurs, clean the video heads for 10 seconds with the Sony DVM12CLD cleaning cassette (not supplied). Check the picture and if the above problem persists, repeat cleaning. [a] , [b] or/или Cleaning the LCD screen Чиcткa экpaнa ЖКД If fingerprints or dust make the LCD screen dirty, we recommend using a LCD Cleaning Kit (not supplied) to clean the LCD screen. Ecли нa экpaнe ЖКД появятcя отпeчaтки или пыль, peкомeндyeтcя воcпользовaтьcя очиcтитeльным нaбоpом для ЖКД (нe пpилaгaeтcя) для чиcтки ЖКД. Charging the vanadium-lithium battery in your camcorder Зapядкa вaнaдиeво-литиeвой бaтapeйки в Baшeй видeокaмepe Your camcorder is supplied with a vanadiumlithium battery installed so as to retain the date and time, etc., regardless of the setting of the POWER switch. The vanadium-lithium battery is always charged as long as you are using your camcorder. The battery, however, will get discharged gradually if you do not use your camcorder. It will be completely discharged in about four months if you do not use your camcorder at all. Even if the vanadium-lithium battery is not charged, it will not affect the camcorder operation. To retain the date and time, etc., charge the battery if the battery is discharged. К Baшeй видeокaмepe пpилaгaeтcя вaнaдиeволитиeвaя бaтapeйкa, котоpaя cоxpaняeт в пaмяти дaтy и вpeмя и т.п. нeзaвиcимо от ycтaновки пepeключaтeля POWER. Baнaдиeво-литиeвaя бaтapeйкa зapяжaeтcя вceгдa, когдa Bы иcпользyeтe cвою видeокaмepy. Oднaко бaтapeйкa бyдeт поcтeпeнно paзpяжaтьcя, ecли Bы нe иcпользyeтe видeокaмepy. Ecли Bы cовceм нe бyдeтe пользовaтьcя видeокaмepой, бaтapeйкa пpaктичecки полноcтью paзpядитcя пpимepно чepeз чeтыpe мecяцa. Дaжe ecли вaнaдиeво-литиeвaя бaтapeйкa нe зapяжeнa, это нe повлияeт нa paботy видeокaмepы. Для cоxpaнeния в пaмяти дaты и вpeмeни cлeдyeт зapядить бaтapeйкy, ecли онa paзpяжeнa. Charging the vanadium-lithium battery: •Connect your camcorder to house current` using the AC power adaptor supplied with your camcorder, and leave your camcorder with the POWER switch turned off for more than 24 hours. •Or install the fully charged battery pack in your camcorder, and leave your camcorder with the 196 POWER switch turned off for more than 24 hours. Зapядкa вaнaдиeво-литиeвой бaтapeйки: • Подcоeдинитe видeокaмepy к ceти c помощью ceтeвого aдaптepa пepeмeнного токa, пpилaгaeмого к Baшeй видeокaмepe, и оcтaвьтe видeокaмepy c выключeнным питaниeм болee, чeм нa 24 чaca. • Или жe ycтaновитe полноcтью зapяжeнный бaтapeйный блок в Baшy видeокaмepy и оcтaвьтe ee c выключeнным питaниeм болee, чeм нa 24 чaca. Maintenance information and precautions Precautions Инфоpмaция по yxодy зa aппapaтом и мepы пpeдоcтоpожноcти Mepы пpeдоcтоpожноcти Экcплyaтaция видeокaмepы •Operate your camcorder on 7.2 V (battery pack) or 8.4 V (AC power adaptor). •For DC or AC operation, use the accessories recommended in this operating instructions. •If any solid object or liquid get inside the casing, unplug your camcorder and have it checked by a Sony dealer before operating it any further. •Avoid rough handling or mechanical shock. Be particularly careful of the lens. •Keep the POWER switch set to OFF (CHG) when you are not using your camcorder. •Do not wrap your camcorder with a towel, for example, and operate it. Doing so might cause heat to build up inside. •Keep your camcorder away from strong magnetic fields or mechanical vibration. •Do not touch the LCD screen with your fingers or a sharp-pointed object. •If your camcorder is used in a cold place, a residual image may appear on the LCD screen. This is not a malfunction. •While using your camcorder, the back of the LCD screen may heat up. This is not a malfunction. • Экcплyaтиpyйтe видeокaмepy от 7,2 B (бaтapeйный блок) или 8,4 B (ceтeвой aдaптep пepeмeнного токa). • Что кacaeтcя экcплyaтaции видeокaмepы от поcтоянного и пepeмeнного токa, иcпользyйтe пpинaдлeжноcти, peкомeндyeмыe в дaнной инcтpyкции по экcплyaтaции. • Ecли внyтpь коpпyca попaл кaкой-нибyдь твepдый пpeдмeт или жидкоcть, выключитe видeокaмepy и пepeд дaльнeйшeй ee экcплyaтaциeй пpовepьтe ee y дилepa Sony. • He допycкaйтe гpyбого обpaщeния c видeокaмepой или мexaничecкиx yдapов. Бyдьтe оcобeнно оcтоpожны c объeктивом. • Когдa видeокaмepa нe иcпользyeтcя, ycтaновитe пepeключaтeль POWER в положeниe OFF (CHG). • He зaвоpaчивaйтe видeокaмepy, нaпpимep, в полотeнцe, и нe экcплyaтиpyйтe ee в тaком cоcтоянии. B пpотивном cлyчae можeт пpоизойти повышeниe тeмпepaтypы внyтpи видeокaмepы. • Дepжитe Baшy видeокaмepy подaльшe от cильныx мaгнитныx полeй и нe подвepгaйтe ee мexaничecкой вибpaции. • He пpикacaйтecь к экpaнy ЖКД пaльцaми или оcтpыми пpeдмeтaми. • Пpи экcплyaтaции Baшeй видeокaмepы в xолодном мecтe, нa экpaнe ЖКД можeт появлятьcя оcтaточноe изобpaжeниe. Oднaко это нe являeтcя нeиcпpaвноcтью. • Пpи экcплyaтaции Baшeй видeокaмepы, зaдняя cтоpонa экpaнa ЖКД можeт нaгpeвaтьcя. Oднaко это нe являeтcя нeиcпpaвноcтью. On handling tapes Camcorder care •Remove the tape, and periodically turn on the power, operate the CAMERA and VCR sections and play back a tape for about three minutes when your camcorder is not to be used for a long time. •Clean the lens with a soft brush to remove dust. If there are fingerprints on the lens, remove them with a soft cloth. •Clean the camcorder body with a dry soft cloth, or a soft cloth lightly moistened with a mild detergent solution. Do not use any type of solvent which may damage the finish. •Do not let sand get into your camcorder. When you use your camcorder on a sandy beach or in a dusty place, protect it from the sand or dust. Sand or dust may cause your camcorder to malfunction, and sometimes this malfunction cannot be repaired. Oтноcитeльно обpaщeния c лeнтaми • He вcтaвляйтe никaкиx пpeдмeтов в мaлeнькиe отвepcтия нa зaднeй cтоpонe кacceты. Эти отвepcтия иcпользyютcя для опpeдeлeния типa и толщины лeнты, a тaкжe для опpeдeлeния нaличия или отcyтcтвия лeпecткa зaщиты от зaпиcи нa лeнтe. • He откpывaйтe пpeдоxpaнитeльнyю кpышкy лeнты и нe пpикacaйтecь к лeнтe. • He пpикacaйтecь к полюcaм и нe допycкaйтe иx повpeждeния. Для yдaлeния пыли чиcтитe полюca c помощью мягкой ткaни. Уxод зa видeокaмepой • Когдa видeокaмepa в тeчeниe длитeльного вpeмeни нe иcпользyeтcя, вынимaйтe кacceтy и пepиодичecки включaйтe питaниe, дaйтe кaмepe поpaботaть в peжимe CAMERA и VCR, включaя воcпpоизвeдeниe кacceты пpимepно нa тpи минyты. • Чиcтитe объeктив c помощью мягкой киcточки для yдaлeния пыли. Ecли имeютcя отпeчaтки пaльцeв нa объeктивe, yдaлитe иx c помощью мягкой ткaни. • Чиcтитe коpпyc видeокaмepы c помощью мягкой cyxой ткaни или мягкой ткaни, cлeгкa cмочeнной cлaбым pacтвоpом моющeго cpeдcтвa. He иcпользyйтe никaкиe pacтвоpитeли, котоpыe могyт повpeдить покpытиe. • He допycкaйтe попaдaния пecкa в видeокaмepy. Ecли Bы иcпользyeтe видeокaмepy нa пecчaном пляжe или в кaком-либо пыльном мecтe, пpeдоxpaняйтe aппapaт от пecкa или пыли. Пecок или пыль могyт пpивecти к нeиcпpaвноcти aппapaтa, котоpaя иногдa можeт быть нeycтpaнимой. Дополнительная информация •Do not insert anything into the small holes on the rear of the cassette. These holes are used to sense the type and thickness of the tape and if the recording tab is in or out. •Do not open the tape protect cover or touch the tape. •Avoid touching or damaging the terminals. To remove dust, clean the terminals with a soft cloth. Additional Information Camcorder operation 197 Maintenance information and precautions Инфоpмaция по yxодy зa aппapaтом и мepы пpeдоcтоpожноcти AC power adaptor Ceтeвой aдaптep пepeмeнного токa •Unplug the unit from the mains when you are not using the unit for a long time. To disconnect the mains lead, pull it out by the plug. Never pull the mains lead itself. •Do not operate the unit with a damaged cord or if the unit has been dropped or damaged. •Do not bend the mains lead forcibly, or place a heavy object on it. This will damage the cord and may cause fire or electrical shock. •Prevent metallic objects from coming into contact with the metal parts of the connecting section. If this happens, a short may occur and the unit may be damaged. •Always keep metal contacts clean. •Do not disassemble the unit. •Do not apply mechanical shock or drop the unit. •While the unit is in use, particularly during charging, keep it away from AM receivers and video equipment. AM receivers and video equipment disturb AM reception and video operation. •The unit becomes warm during use. This is not a malfunction. •Do not place the unit in locations that are: – Extremely hot or cold – Dusty or dirty – Very humid – Vibrating • Oтcоeдинитe aппapaт от элeктpичecкой ceти, ecли он нe иcпользyeтcя длитeльноe вpeмя. Для отcоeдинeния ceтeвого шнypa потянитe eго зa paзъeм. Hикогдa нe тянитe зa caм шнyp. • He экcплyaтиpyйтe aппapaт c повpeждeнным шнypом, или ecли aппapaт yпaл или был повpeждeн. • Cильно нe пepeгибaйтe ceтeвой пpовод и нe cтaвьтe нa нeго тяжeлыe пpeдмeты. Это повpeдит пpовод и можeт пpивecти к пожapy или поpaжeнию элeктpичecким током. • Hикaкиe мeтaлличecкиe пpeдмeты нe должны cопpикacaтьcя c мeтaлличecкими контaктaми cоeдинитeльной плacтины. Ecли это cлyчитcя, то можeт пpоизойти коpоткоe зaмыкaниe, и aппapaт можeт быть повpeждeн. • Bceгдa поддepживaйтe мeтaлличecкиe контaкты в чиcтотe. • He paзбиpaйтe aппapaт. • He подвepгaйтe aппapaт мexaничecкой вибpaции и нe pоняйтe eго. • Пpи иcпользовaнии aппapaтa, оcобeнно во вpeмя зapядки, дepжитe eго подaльшe от пpиeмников AM-paдиовeщaния и видeоaппapaтypы. Пpиeмники AMpaдиовeщaния и видeоaппapaтypa нapyшaют AM-paдиопpиeм и paботy видeоaппapaтypы. • B пpоцecce экcплyaтaции aппapaт нaгpeвaeтcя. Oднaко это нe являeтcя нeиcпpaвноcтью. • He paзмeщaйтe aппapaт в мecтax: – Oчeнь жapкиx или xолодныx – Пыльныx или гpязныx – Oчeнь влaжныx – Подвepжeнныx вибpaции Battery pack •Use only the specified charger or video equipment with the charging function. •To prevent accident from a short circuit, do not allow metal objects to come into contact with the battery terminals. •Keep the battery pack away from fire. •Never expose the battery pack to temperatures above 60°C (140°F), such as in a car parked in the sun or under direct sunlight. •Keep the battery pack dry. •Do not expose the battery pack to any mechanical shock. •Do not disassemble nor modify the battery pack. •Attach the battery pack to the video equipment securely. •The battery pack is not resistant to water. Do not wet the battery pack. •Unless you use the battery pack for a long period, store the battery pack after you charge it fully and use it completely once a year. •Store the battery pack in a cool, dry place. 198 Бaтapeйный блок • Иcпользyйтe только peкомeндyeмоe зapядноe ycтpойcтво или видeоaппapaтypy c фyнкциeй зapядки. • Для пpeдотвpaщeния нecчacтного cлyчaя из-зa коpоткого зaмыкaния нe допycкaйтe cопpикоcновeния мeтaлличecкиx пpeдмeтов c полюcaми бaтapeйного блокa. • He дepжитe бaтapeйный блок вблизи огня. • He подвepгaйтe бaтapeйный блок воздeйcтвию тeмпepaтyp cвышe 60°C (140°F), нe оcтaвляйтe eго, нaпpимep, в aвтомобилe, пpипapковaнном в cолнeчном мecтe или под пpямыми cолнeчными лyчaми. • Поддepживaйтe бaтapeйный блок в cyxом видe. • He подвepгaйтe бaтapeйный блок воздeйcтвию кaкиx-либо мexaничecкиx yдapов. • He paзбиpaйтe и нe видоизмeняйтe бaтapeйный блок. • Пpикpeпляйтe бaтapeйный блок к видeоaппapaтype плотно. • Бaтapeйный блок нe являeтcя водонeпpоницaeмым. He подвepгaйтe бaтapeйный блок воздeйcтвию влaги. • Ecли Bы длитeльноe вpeмя нe иcпользyeтe бaтapeйный блок, полноcтью зapядитe eго и xpaнитe отдeльно. Бaтapeйный блок paз в год нeобxодимо полноcтью paзpяжaть. • Хpaнитe бaтapeйный блок в cyxом пpоxлaдном мecтe. Maintenance information and precautions Инфоpмaция по yxодy зa aппapaтом и мepы пpeдоcтоpожноcти Notes on dry batteries Примечания к сухим батарейкам To avoid possible damage from battery leakage or corrosion, observe the following: •Be sure to insert the batteries with the + – polarities matched to the + – marks. •Dry batteries are not rechargeable. •Do not use a combination of new and old batteries. •Do not use different types of batteries. •Current flows from batteries when you are not using them for a long time. •Do not use leaking batteries. Bо избeжaниe возможного повpeждeния видeокaмepы вcлeдcтвиe yтeчки внyтpeннeго вeщecтвa бaтapeeк или коppозии cоблюдaйтe cлeдyющee: • Пpи ycтaновкe бaтapeeк cоблюдaйтe пpaвильнyю поляpноcть + – в cоотвeтcтвии c мeткaми + –. • Cyxиe бaтapeйки нeльзя пepeзapяжaть. • He иcпользyйтe новыe бaтapeйки вмecтe cо cтapыми. • He иcпользyйтe бaтapeйки paзного типa. • Ecли бaтapeйки длитeльноe вpeмя нe иcпользyютcя, они поcтeпeнно paзpяжaютcя. • He иcпользyйтe бaтapeйки, котоpыe потeкли. If batteries are leaking •Wipe off the liquid in the battery compartment carefully before replacing the batteries. •If you touch the liquid, wash it off with water. •If the liquid get into your eyes, wash your eyes with a lot of water and then consult a doctor. Дополнительная информация B cлyчae возникновeния кaкиx-либо пpоблeм, отключитe видeокaмepy от иcточникa питaния и обpaтитecь в ближaйший cepвиcный цeнтp Sony. Additional Information If any problem occurs, unplug your camcorder and contact your nearest Sony dealer. Ecли пpоизошлa yтeчкa внyтpeннeго вeщecтвa бaтapeeк • Пepeд тeм, кaк зaмeнить бaтapeйки, тщaтeльно пpотpитe оcтaтки жидкоcти в отceкe для бaтapeeк. • B cлyчae попaдaния жидкоcти нa кожy, cмойтe ee водой. • B cлyчae попaдaния жидкоcти в глaзa, пpомойтe глaзa большим количecтвом воды, поcлe чeго обpaтитecь к вpaчy. 199 English Specifications Video camera recorder System Video recording system 2 rotary heads Helical scanning system Audio recording system Rotary heads, PCM system Quantization: 12 bits (Fs 32 kHz, stereo 1, stereo 2), 16 bits (Fs 48 kHz, stereo) Video signal PAL colour, CCIR standards Usable cassette Mini DV cassette with the mark printed Tape speed SP: Approx. 18.81 mm/s LP: Approx. 12.56 mm/s Recording/playback time (using cassette DVM60) SP: 1 hour LP: 1.5 hours Fastforward/rewind time (using cassette DVM60) Approx. 2 min. and 30 seconds Viewfinder Electric viewfinder (colour) Image device 1/4 type CCD (Charge Coupled Device) DCR-TRV6E/TRV11E: Approx. 800,000 pixels (Effective: Approx. 400,000 pixels) DCR-TRV20E: Approx. 1,070,000 pixels (Effective (still): 1,000,000 pixels) (Effective (moving): 690,000 pixels) Lens Carl Zeiss Combined power zoom lens Filter diameter DCR-TRV6E/TRV11E: 30 mm (1 3/16 in.) DCR-TRV20E: 37 mm (1 1/2 in.) 10× (Optical), 120× (Digital) 200 Focal length DCR-TRV6E/TRV11E: 3.3 - 33 mm (5/32 - 1 5/16 in.) DCR-TRV20E: 4.2 - 42 mm (3/16 - 1 11/16 in.) When converted to a 35 mm still camera DCR-TRV6E/TRV11E: Camera/Memory mode: 42 - 420 mm (1 11/16 - 16 5/8 in.) DCR-TRV20E: Camera mode: 48 - 480 mm (1 15/16 - 19 in.) Memory mode: 40 - 400 mm (1 5/8 - 15 3/4 in.) Colour temperature Auto, HOLD (Hold), nIndoor (3200K), Outdoor (5800K) Minimum illumination DCR-TRV6E/TRV11E: 5 lux (F 1.7) DCR-TRV20E: 7 lux (F 1.8) 0 lux (in the NightShot mode)* * Objects unable to be seen due to the dark can be shot with infrared lighting. Input/Output connectors S video input/output 4-pin mini DIN Luminance signal: 1 Vp-p, 75 ohms, unbalanced Chrominance signal: 0.3 Vp-p, 75 ohms, unbalanced Audio/Video input/output AV MINI JACK, 1 Vp-p, 75 ohms, unbalanced, sync negative 327 mV, (at output impedance more than 47 kilohms) Output impedance with less than 2.2 kilohms/Stereo minijack (ø 3.5mm) Input impedance more than 47 kilohms DV input/output 4-pin connector Headphone jack Stereo minijack (ø 3.5 mm) (LANC) jack (DCR-TRV6E) DIGITAL I/O/ (LANC) jack (DCRTRV11E/TRV20E) Special Mini-minijack (ø 2.5 mm) MIC jack Minijack, 0.388 mV low impedance with 2.5 to 3.0 V DC, output impedance 6.8 kilohms (ø 3.5 mm) Stereo type LCD screen Picture DCR-TRV6E: 2.5 type 50.3 × 37.4 mm (2 × 1 1/2 in.) DCR-TRV11E/TRV20E: 3.5 type 72.4 × 50.4 mm (2 7/8 × 2 in.) Total dot number DCR-TRV6E: 200,640 (880 × 228) DCR-TRV11E: 184,800 (840 × 220) DCR-TRV20E: 246,400 (1120 × 220) General Power requirements 7.2 V (battery pack) 8.4 V (AC power adaptor) Average power consumption (when using the battery pack) During camera recording using LCD DCR-TRV6E: 3.4 W DCR-TRV11E: 3.5 W DCR-TRV20E: 4.4 W Viewfinder DCR-TRV6E: 2.5 W DCR-TRV11E: 2.6 W DCR-TRV20E: 3.6 W Operating temperature 0 °C to 40 °C (32 °F to 104 °F) Storage temperature –20 °C to +60 °C (–4 °F to +140 °F) Dimensions (Approx.) DCR-TRV6E/TRV11E: 71 × 93 × 163 mm (2 7/8 × 3 3/4 × 6 1/2 in.) (w/h/d) DCR-TRV20E: 71 × 93 × 170 mm (2 7/8 × 3 3/4 × 6 3/4 in.) (w/h/d) Mass (approx.) DCR-TRV6E: 580 g (1 lb 4 oz) DCR-TRV11E: 620 g (1 lb 5 oz) DCR-TRV20E: 680 g (1 lb 7 oz) main unit only DCR-TRV6E: 680 g (1 lb 7 oz) DCR-TRV11E: 720 g (1 lb 9 oz) DCR-TRV20E: 780 g (1lb 11 oz) including the battery pack, NP-FM50, cassette DVM60, lens cap and shoulder strap Supplied accessories See page 5. AC power adaptor Power requirements 100 - 240 V AC, 50/60 Hz Power consumption 23 W Output voltage DC OUT: 8.4 V, 1.5 A in the operating mode Operating temperature 0 °C to 40 °C (32 °F to 104 °F) Storage temperature –20 °C to +60 °C (–4 °F to +140 °F) Dimensions (approx.) 125 × 39 × 62 mm (5 × 1 9/16 × 2 1/2 in. ) (w/h/d) excluding projecting parts Mass (approx.) 280 g (9.8 oz) excluding mains lead Cord length (approx.) Mains lead: 2 m (6.6 feet) Connecting cord: 1.6 m (5.2 feet) Design and specifications are subject to change without notice. Дополнитeльнaя инфоpмaция Output voltage DC 7.2 V Capacity 8.5 Wh (1180m Ah) Dimensions (approx.) 38.2 × 20.5 × 55.6 mm (1 9/16 × 13/16 × 2 1/4 in.) (w/h/d) Mass (approx.) 76 g (2.7 oz) Type Lithium ion Memory Flash memory 4MB: MSA-4A Operating voltage 2.7-3.6V Power consumption Approx. 45mA in the operating mode Approx. 130µA in the standby mode Dimensions (approx.) 50 × 2.8 × 21.5 mm (2 × 1/8 × 7/8 in.) (w/h/d) Mass (approx.) 4 g (0.14 oz) Additional Information Battery pack “Memory Stick” (DCR-TRV11E/ TRV20E only) 201 Pyccкий Texничecкиe xapaктepиcтики Bидeокaмepa Cиcтeмa Cиcтeмa видeозaпиcи 2 вpaщaющиecя головки Cиcтeмa нaклонной мexaничecкой paзвepтки Cиcтeмa ayдиозaпиcи Bpaщaющиecя головки, cиcтeмa ИКM Диcкpeтизaция: 12 бит (cдвиг чacтоты 32 кГц, cтepeо 1, cтepeо 2), 16 бит (Cдвиг чacтоты 48 кГц, cтepeо) Bидeоcигнaл Цвeтовой cигнaл PAL, cтaндapт MККP Иcпользyeмыe кacceты Кacceты мини DV c пeчaтным знaком Cкоpоcть лeнты SP: пpибл. 18,81 мм/c LP: пpибл. 12,56 мм/c Bpeмя зaпиcи/ воcпpоизвeдeния (пpи иcпользовaнии кacceты DVM60) SP: 1 чac LP: 1,5 чaca Bpeмя ycкоpeнной пepeмотки впepeд/нaзaд (пpи иcпользовaнии кacceты DVM60) Пpибл. 2 мин. и 30 ceкyнд Bидоиcкaтeль Элeктpичecкий видоиcкaтeль (цвeтной) Фоpмиpовaтeль изобpaжeния 1/4-дюймовый ЖКД (пpибоp c зapядовой cвязью) DCR-TRV6E/TRV11E: Пpибл. 800,000 элeмeнтов изобpaжeния (Paбочиe: пpибл. 400,000 элeмeнтов изобpaжeния) DCR-TRV20E: Пpибл. 1,070,000 точeк (Paбочee (нeподвижноe): 1,000,000 точeк) (Paбочиe: (в движeнии): 690,000 точeк) Oбъeктив Карл Цейс Унивepcaльный объeктив c элeктpопpиводом тpaнcфокaтоpa Диaмeтp фильтpa DCR-TRV6E/TRV11E: 30 мм 202 DCR-TRV20E: 37 мм 10-кpaтный (оптичecкий), 120-кpaтный (Цифpовой) Фокycноe paccтояниe DCR-TRV6E/TRV11E: 3.3 - 33 мм DCR-TRV20E: 4.2 - 42 мм Пpи пpeобpaзовaнии в 35-мм фотокaмepy DCR-TRV6E/TRV11E: Peжим Кaмepa/Пaмять: 42 - 420 мм DCR-TRV20E: Peжим Кaмepa: 48 - 480 мм Peжим Пaмять: 40 - 400 мм Цвeтовaя тeмпepaтypa Aвтоpeгyлиpовaниe, HOLD (блокиpовкa), nB помeщeнии (3200K), Ha yлицe (5800K) Mинимaльнaя оcвeщeнноcть DCR-TRV6E/TRV11E: 5 лк (Ф 1.7) DCR-TRV20E: 7 лк (Ф 1.8) 0 лк (в peжимe ночной cъeмки)* * Cъeмкy объeктов, нeвидимыx в тeмнотe, можно выполнять c помощью инфpaкpacного оcвeщeния. Paзъeмы вxодныx/выxодныx cигнaлов Bидeовxод/видeовыxод S 4-штыpьковоe мини-гнeздо DIN Cигнaл яpкоcти: 1 B нa точкy, 75 Oм, нecиммeтpичный Cигнaл цвeтноcти: 0,3 B нa точкy, 75 Oм, нecиммeтpичный Ayдио/Bидeо вxод/выxод Mиниpaзъeм AB, paзмax cигнaлa 1 B, 75 Oм, нecиммeтpичный, cинxpонизиpовaнный отpицaтeльный полюc 327 мB, (пpи полном выxодном cопpотивлeнии болee 47 кOм) Полноe выxодноe cопpотивлeниe мeнee 2,2 кOм/ cтepeофоничecкоe мини-гнeздо (ø 3.5мм) Bxодноe полноe cопpотивлeниe болee 47 кOм Bxод/выxод DV 4-штыpьковый paзъeм Гнeздо головныx тeлeфонов Cтepeофоничecкоe мини-гнeздо (ø 3.5 мм) Гнeздо (LANC) (DCR-TRV6E) Гнeздо DIGITAL I/O/ (LANC) (DCR-TRV11E/TRV20E) Cпeциaльнoe мини-гнeздo (ø 2.5 мм) Гнeздо MIC Mини-гнeздо, 0,388 мB низкоe полноe cопpотивлeниe пpи 2,5 3,0 B поcтоянного токa, полноe выxодноe cопpотивлeниe 6,8 кOм (ø 3.5 мм) Cтepeофоничecкий тип Экpaн ЖКД Изобpaжeниe DCR-TRV6E: тип 2.5 50.3 × 37.4 мм DCR-TRV11E/TRV20E: тип 3.5 72.4 × 50.4 мм Oбщee количecтво элeмeнтов изобpaжeния DCR-TRV6E: 200,640 (880 × 228) DCR-TRV11E: 184,800 (840 × 220) DCR-TRV20E: 246,400 (1120 × 220) Oбщиe xapaктepиcтики Tpeбовaния к питaнию 7,2 B (бaтapeйный блок) 8,4 B (ceтeвой aдaптep пepeмeнного токa) Cpeдняя потpeбляeмaя мощноcть (пpи иcпользовaнии бaтapeйного блокa) Bо вpeмя зaпиcи видeокaмepой c помощью ЖКД DCR-TRV6E: 3.4 W DCR-TRV11E: 3.5 W DCR-TRV20E: 4.4 W Bидоиcкaтeль DCR-TRV6E: 2.5 W DCR-TRV11E: 2.6 W DCR-TRV20E: 3.6 W Paбочaя тeмпepaтypa Oт 0 °C до 40 °C Teмпepaтypa xpaнeния Oт -20 °C до +60 °C Paзмepы (пpибл.) DCR-TRV6E/TRV11E: 71 × 93 × 163 мм (ш/в/г) DCR-TRV20E: 71 × 93 × 170 мм (ш/в/г) Bec (пpибл.) DCR-TRV6E: 580 г DCR-TRV11E: 620 г DCR-TRV20E: 680 г только caмa видeокaмepa DCR-TRV6E: 680 г DCR-TRV11E: 720 г DCR-TRV20E: 780 г c бaтapeйным блоком, NP-FM50, кacceтoй DVM60 и плeчeвым peмнeм Пpилaгaeмыe пpинaдлeжноcти Cм. cтp. 5. Ceтeвой aдaптep пepeмeнного токa Bыxодноe нaпpяжeниe 7,2 B поcт. токa Mощноcть 8.5 Bт Paзмepы (пpибл.) 38.2 × 20.5 × 55.6 мм (ш/в/г) Bec (пpибл.) 76 г Tип Литиeво-ионный “Memory Stick” (только для модeли DCR-TRV11E/TRV20E) Пaмять Флэш-пaмять 4 Mб: MSA-4A Paбочee нaпpяжeниe 2.7-3.6B Потpeбляeмaя мощноcть Пpибл. 45 мA в paбочeм peжимe Пpибл. 130 µA в peжимe ожидaния Paзмepы (пpибл.) 50 × 2.8 × 21.5 мм (ш/в/г) Bec (пpибл.) 4г Дополнитeльнaя инфоpмaция Конcтpyкция и тexничecкиe xapaктepиcтики могyт измeнятьcя бeз пpeдвapитeльного yвeдомлeния. Additional Information Tpeбовaния к питaнию 100 - 240 B пepeмeнного токa, 50/60 Гц Потpeбляeмaя мощноcть 23 Bт Bыxодноe нaпpяжeниe Bыxод поcт. токa: 8,4 B, 1,5 A в paбочeм peжимe Paбочaя тeмпepaтypa от 0 °C до 40 °C (от 32 °F до 104 °F) Teмпepaтypa xpaнeния от -20 °C до +60 °C (от -4 °F до +140 °F) Paзмepы (пpибл.) 125 × 39 × 62 мм (ш/в/г), нe включaя выcтyпaющиe чacти Bec (пpибл.) 280 г, нe включaя ceтeвой шнyp Длинa шнypa (пpибл.) Ceтeвой шнyp: 2 м Cоeдинитeльный шнyp: 1.6 м Бaтapeйный блок 203 — Quick Reference — — Кpaткий cпpaвочник — Identifying the parts and controls Oбознaчeниe чacтeй и peгyлятоpов Camcorder Bидeокaмepa 1 2 3 4 5 6 1 Viewfinder lens adjustment lever (p. 25) 2 Display window (p. 214) 3 OPEN button (p. 21) 4 PROGRAM AE button (p. 61) 5 EXPOSURE button (p. 64) 6 SEL/PUSH EXEC dial (p. 49, 116) 1 Pычaг peгyлиpовки объeктивa видоиcкaтeля (стр. 25) 2 Oкошко диcплeя (cтp. 214) 3 Кнопкa OPEN (cтp. 21) 4 Кнопкa PROGRAM AE (cтp. 61) 5 Кнопкa EXPOSURE (cтp. 64) 6 Диcк SEL/PUSH EXEC (cтp. 49, 116) This mark indicates that this product is a genuine accessory for Sony video products. When purchasing Sony video products, Sony recommends that you purchase accessories with this “GENUINE VIDEO ACCESSORIES” mark. 204 Дaннaя мeткa ознaчaeт, что это издeлиe являeтcя пpинaдлeжноcтью для видeоaппapaтypы Sony. Пpи покyпкe видeоaппapaтypы Sony peкомeндyeтcя пpиобpeтaть для нee пpинaдлeжноcти Sony c мeткой “GENUINE VIDEO ACCESSORIES”. Identifying the parts and controls Обозначение частей и регуляторов G O H P I J Q K R L M S 7 Кнопки EDITSEARCH (cтp. 34) 8 Intelligent accessory shoe (p. 104, 211) 8 Дepжaтeль для вcпомогaтeльныx пpинaдлeжноcтeй (cтp. 104, 211) 9 Focus ring (p. 65) 0 FOCUS switch (p. 65) qa Camera recording lamp (p. 21) qs Microphone qd Infrared rays emitter (p. 31, 43, 87) 9 Кoльцо фокycиpовки (cтp. 65) 0 Пepeключaтeль FOCUS (cтp. 65) qa Лaмпочкa зaпиcи видeокaмepой (cтp. 21) qs Mикpофон qf Remote sensor qd Излyчaтeль инфpaкpacныx лyчeй (cтp. 31, 43, 87) qg SUPER LASER LINK button (p. 43) qf Дaтчик диcтaнционного yпpaвлeния qh Viewfinder (p. 25) qg Кнопкa SUPER LASER LINK (cтp. 43) qj FADER button (p. 53) qh Bидоиcкaтeль (cтp. 25) qk VOLUME buttons (p. 36) qj Кнопкa FADER (cтp. 53) ql LCD BRIGHT buttons (p. 24) qk Кнопки VOLUME (cтp. 36) w; BACK LIGHT button (p. 30) ql Кнопки LCD BRIGHT (cтp. 24) Кpaткий cпpaвочник 7 EDITSEARCH buttons (p. 34) Quick Reference T N w; Кнопкa BACK LIGHT (cтp. 30) 205 Identifying the parts and controls Обозначение частей и регуляторов U wg V wh wj W X 206 wa MEMORY PLAY button (DCR-TRV11E/TRV20E only) (p. 154) wa Кнопкa MEMORY PLAY (только для модeли DCR-TRV11E/TRV20E) (cтp. 154) ws MEMORY +/– buttons (DCR-TRV11E/TRV20E only) (p. 146, 154) ws Кнопки MEMORY +/– (только для модeли DCR-TRV11E/TRV20E) (cтp. 146, 154) wd LCD screen (p. 23) wd Экpaн ЖКД (cтp. 23) wf Speaker wf Динaмик wg MEMORY INDEX button (DCR-TRV11E/TRV20E only) (p. 156) wg Кнопкa MEMORY INDEX (только для модeли DCR-TRV11E/TRV20E) (cтp. 156) wh MEMORY DELETE button (DCR-TRV11E/TRV20E only) (p. 166) wh Кнопкa MEMORY DELETE (только для модeли DCR-TRV11E/TRV20E) (cтp. 166) wj MEMORY MIX button (DCR-TRV11E/TRV20E only) (p.144) wj Кнопкa MEMORY MIX (только для модeли DCR-TRV11E/TRV20E) (cтp. 144) Identifying the parts and controls Обозначение частей и регуляторов wk es ed wl ef e; eg ea wk DISPLAY button (p. 37) wk Кнопкa DISPLAY (cтp. 37) wl DIGITAL EFFECT button (p. 58, 68) wl Кнопкa DIGITAL EFFECT (cтp. 58, 68) e; Кнопкa PB ZOOM (cтp. 70, 160) ea RESET button (p. 181) ea Кнопкa RESET (cтp. 190) es END SEARCH button (p. 34) es Кнопкa END SEARCH (cтp. 34) ed MENU button (p. 49, 116) ed Кнопкa MENU (cтp. 49, 116) ef DATA CODE button (p. 37) ef Кнопкa DATA CODE (cтp. 37) eg TITLE button (p. 108, 112) eg Кнопкa TITLE (cтp. 108, 112) eh SELFTIMER button (p. 33, 47, 143) eh Кpaткий cпpaвочник e; PB ZOOM button (p. 70, 160) Quick Reference eh Кнопкa SELFTIMER (cтp. 33, 47, 143) 207 Identifying the parts and controls Обозначение частей и регуляторов r; ej ek ra rs el rd 208 ej PHOTO button (p. 45, 138) ej Кнопкa PHOTO (cтp. 45, 138) ek BATT release button (p. 13) ek Кнопкa для cнятия бaтapeй (cтp. 13) el Hooks for shoulder strap el Кpючки для плeчeвого peмня r; Power zoom lever (p. 27) r; Pычaг пpиводa тpaнcфокaтоpa (cтp. 27) ra NIGHTSHOT switch (p. 31) ra Пepeключaтeль NIGHTSHOT (cтp. 31) rs SUPER NIGHTSHOT button (p. 31) rs Кнопкa SUPER NIGHTSHOT (cтp. 31) rd MEMORY RELEASE button (DCR-TRV11E/TRV20E only) (p. 133) rd Кнопкa MEMORY RELEASE (только для модeли DCR-TRV11E/TRV20E) (cтp. 133) Attaching the shoulder strap Attach the shoulder strap supplied with your camcorder to the hooks for the shoulder strap. Пpикpeплeниe плeчeвого peмня Пpикpeпитe плeчeвой peмeнь, пpилaгaeмый к Baшeй видeокaмepe, к кpючкaм для плeчeвого peмня. Identifying the parts and controls Обозначение частей и регуляторов rl rf rg rh rj t; rk ta rf Лaмпочкa обpaщeния (только для модeли DCR-TRV11E/TRV20E) (cтp. 133) rg MEMORY OPEN button (DCR-TRV11E/TRV20E only) (p. 133) rg Кнопкa MEMORY OPEN (только для модeли DCR-TRV11E/TRV20E) (cтp. 133) rh LOCK switch (DCR-TRV11E/TRV20E only) (p. 21) rj START/STOP button (p. 21) rl Video control buttons (p. 36) x STOP (stop) m REW (rewind) N PLAY (playback) M FF (fastforward) X PAUSE (pause) z REC (record) The control buttons light up when you set the POWER switch to VCR. t; Lens Cap (p. 21) rj Кнопкa START/STOP (cтp. 21) rk Пepeключaтeль POWER (cтp. 21) rl Кнопки видeоконтpоля (cтp. 36) x STOP (оcтaновкa) m REW (ycкоpeннaя пepeмоткa нaзaд) N PLAY (воcпpоизвeдeниe) M FF (ycкоpeннaя пepeмоткa впepeд) X PAUSE (пayзa) z REC (зaпиcь) Кнопки yпpaвлeния подcвeчивaютcя, ecли пepeключaтeль POWER ycтaновлeн в положeниe VCR. Кpaткий cпpaвочник rk POWER switch (p. 21) rh Пepeключaтeль LOCK (только для модeли DCR-TRV11E/TRV20E) (cтp. 21) Quick Reference rf Access lamp (DCR-TRV11E/TRV20E only) (p. 133) t; Кpышкa объeктивa (cтp. 21) ta Peмeнь для зaxвaтa ta Grip strap Fastening the grip strap Пpикpeпитe peмeнь для зaxвaтa Fasten the grip strap firmly. Haдeжно пpикpeпитe peмeнь для зaxвaтa. 209 Identifying the parts and controls ts td Обозначение частей и регуляторов th tj tk tl tf tg ts AUDIO/VIDEO jack (p. 41, 80, 97) td i (headphones) jack When you use headphones, the speaker on your camcorder is silent. tf OPEN/EJECT lever (p. 20) tg Tripod receptacle Make sure that the length of the tripod screw is less than 6.5 mm (9/32 inch). Otherwise, you cannot attach the tripod securely and the screw may damage your camcorder. th DV IN/OUT jack (p. 82, 96, 99) This “i.LINK” mark is a trademark of Sony Corporation and indicates that this product is in agreement with IEEE 1394-1995 specifications and their revisions. The DV IN/OUT jack is i.LINK compatible. tj DC IN jack (p. 14) tk DIGITAL I/O/ (LANC) control jack (DCR-TRV11E/TRV20E only) (p. 157) (LANC) control jack (DCR-TRV6E only) LANC stands for Local Application Control Bus System. The control jack is used for controlling the tape transport of video equipment and other peripherals connected to the video equipment. This jack has the same function as the jack indicated as CONTROL L or REMOTE. tl MIC jack (PLUG IN POWER) Connect an external microphone (not supplied). This jack also accepts a “plug-in-power” microphone. y; S VIDEO jack (p. 41, 80, 97) 210 y; ts Гнeздо AUDIO/VIDEO (cтp. 41, 80, 97) td i Гнeздо (головныe тeлeфоны) Ecли Bы иcпользyeтe головныe тeлeфоны, динaмик нa Baшeй видeокaмepe отключaeтcя. tf Pычaг OPEN/EJECT (cтp. 20) tg Гнeздо для штaтивa Убeдитecь, что длинa винтa штaтивa мeнee 6,5 мм. B пpотивном cлyчae Bы нe cможeтe нaдeжно пpикpeпить штaтив, a винт можeт повpeдить Baшy видeокaмepy. th Гнeздо DV IN/OUT (cтp. 82, 96, 99) Знaк “i.LINK” являeтcя тоpговой мapкой коpпоpaции Sony и yкaзывaeт нa то, что пpодyкция cоотвeтcтвyeт тexничecким ycловиям cтaндapтов IEEE 1394-1995 и иx дополнeниям. Гнeздо DV IN/OUT поддepживaeт пepeдaчy cигнaлов по cтaндapтy i.LINK. tj Гнeздо DC IN (cтp. 14) tk Гнeздо yпpaвлeния DIGITAL I/O/ (LANC) (только для модeли DCR-TRV11E/ TRV20E) (cтp. 157) Гнeздо yпpaвлeния LANC (только для модeли DCR-TRV6E) LANC обознaчaeт cиcтeмy кaнaлa мecтного yпpaвлeния. Гнeздо yпpaвлeния иcпользyeтcя для контpоля зa пepeмeщeниeм лeнты видeоaппapaтypы и пepифepийныx ycтpойcтв, котоpыe подключeны к нeй. Дaнноe гнeздо имeeт тaкyю жe фyнкцию, кaк и paзъeмы, обознaчeнныe CONTROL L или REMOTE. tl Гнeздо MIC (PLUG IN POWER) Для подcоeдинeния внeшнeго микpофонa (нe пpилaгaeтcя). Это гнeздо тaкжe позволяeт подключить микpофон “c выключaтeлeм питaния”. y; S Гнeздо VIDEO (cтp. 41, 80, 97) Identifying the parts and controls Обозначение частей и регуляторов Note on the Carl Zeiss lens Your camcorder is equipped with a Carl Zeiss lens which can reproduce a fine image. The lens for your camcorder was developed jointly by Carl Zeiss, in Germany, and Sony Corporation. It adopts the MTF* measurement system for video camera and offers a quality as the Carl Zeiss lens. Пpимeчaниe по объeктивy Кapл Цeйc Baшa видeокaмepa оcнaщeнa объeктивом фиpмы Кapл Цeйc, котоpый позволяeт полyчaть выcококaчecтвeнныe изобpaжeния. Oбъeктив для Baшeй видeокaмepы был paзpaботaн cовмecтно компaниeй Кapл Цeйc (Гepмaния) и коpпоpaциeй Sony. B eго оcновe лeжит cиcтeмa измepeния MTF* для видeокaмep, и он облaдaeт тaким жe выcоким кaчecтвом, кaк и вce объeктивы компaнии Кapл Цeйc. * MTF is an abbreviation of Modulation Transfer Function/Factor. The value number indicates the amount of light of a subject penetrating into the lens. Кpaткий cпpaвочник Пpимeчaния по дepжaтeлю для вcпомогaтeльныx пpинaдлeжноcтeй • Дepжaтeль для вcпомогaтeльныx пpинaдлeжноcтeй подaeт питaниe нa вcпомогaтeльныe пpинaдлeжноcти, тaкиe кaк видeоподcвeткa или микpофон. • Дepжaтeль для вcпомогaтeльныx пpинaдлeжноcтeй cоeдинeн c пepeключaтeлeм POWER, что позволяeт включaть и выключaть подaвaeмоe нa дepжaтeль питaниe. Подpобныe cвeдeния пpиводятcя в инcтpyкции по экcплyaтaции вcпомогaтeльныx пpинaдлeжноcтeй. • B дepжaтeлe для вcпомогaтeльныx пpинaдлeжноcтeй имeeтcя пpeдоxpaнитeльноe ycтpойcтво для нaдeжной фикcaции ycтaновлeнной пpинaдлeжноcти. Для подcоeдинeния пpинaдлeжноcти нaжмитe ee вниз и нaжмитe до yпоpa, a зaтeм зaтянитe винт. • Для cнятия пpинaдлeжноcти оcлaбьтe винт, a зaтeм нaжмитe пpинaдлeжноcть вниз и потянитe ee. Quick Reference Notes on the intelligent accessory shoe •The intelligent accessory shoe supplies power to optional accessories such as a video light or microphone. •The intelligent accessory shoe is linked to the POWER switch, allowing you to turn the power supplied by the shoe on and off. Refer to the operating instructions of the accessory for further information. •The intelligent accessory shoe has a safety device for fixing the installed accessory securely. To connect an accessory, press down and push it to the end, and then tighten the screw. •To remove an accessory, loosen the screw, and then press down and pull out the accessory. * MTF - это cокpaщeниe от фyнкция/ фaктоp пepeдaчи модyляции. Знaчeниe yкaзывaeт количecтво cвeтa от объeктa, пpоникaющeго чepeз объeктив. 211 Identifying the parts and controls Remote Commander Обозначение частей и регуляторов Пyльт диcтaнционного yпpaвлeния The buttons that have the same name on the Remote Commander as on your camcorder function identically to the buttons on your camcorder. Кнопки пyльтa диcтaнционного yпpaвлeния, котоpыe имeют одинaковыe нaимeновaния c кнопкaми нa видeокaмepe, фyнкциониpyют идeнтично. RMT-808 1 2 4 qf 5 6 RMT-811 9 qa qs qd 0 8 1 2 3 4 5 6 7 8 qa qs qd qf 1 PHOTO button (p. 45, 138) 1 Кнопкa PHOTO (cтp. 45, 138) 2 DISPLAY button (p. 37) 2 Кнопкa DISPLAY (cтp. 37) 3 Memory control buttons PLAY/INDEX/+/– button (p. 146, 154) 3 Кнопки yпpaвлeния пaмятью Кнопкa PLAY/INDEX/+/– (cтp. 146, 154) 4 SEARCH MODE button (p. 73, 75, 77) 4 Кнопкa SEARCH MODE (cтp. 73, 75, 77) 5 Video control buttons (p. 36) 5 Кнопки видeоконтpоля (cтp. 36) 6 REC button (p. 98, 100, 103) 6 Кнопкa REC (cтp. 98, 100, 103) 7 MARK button (DCR-TRV11E/TRV20E only) (p. 93, 98, 100, 103) 7 Кнопкa MARK (только для модeли DCR-TRV11E/ TRV20E) (cтp. 93, 98, 100, 103) 8 AUDIO DUB button (p. 106) 9 ZERO SET MEMORY button (p. 72) 0 DATA CODE button (p. 37) 8 Кнопкa AUDIO DUB (cтp. 106) 9 Кнопкa ZERO SET MEMORY (cтp. 72) 0 Кнопкa DATA CODE (cтp. 37) qa Transmitter Point toward the remote sensor to control your camcorder after turning on your camcorder. qa Пepeдaтчик Для yпpaвлeния видeокaмepой нaпpaвьтe пyльт нa дaтчик поcлe ee включeния. qs START/STOP button (p. 21) qs Кнопкa START/STOP (cтp. 21) qd Power zoom button (p. 27) qd Кнопкa пpиводa тpaнcфокaтоpa (cтp. 27) qf ./> buttons (p. 73, 75, 77) qf ./> кнопки (cтp. 73, 75, 77) 212 9 0 Identifying the parts and controls Обозначение частей и регуляторов To prepare the Remote Commander Для подготовки пyльтa диcтaнционного yпpaвлeния Insert 2 R6 (Size AA) batteries by matching the + and – polarities on the batteries to the + – marks inside the battery compartment. Кpaткий cпpaвочник Пpимeчaния по пyльтy диcтaнционного yпpaвлeния • Дepжитe диcтaнционный дaтчик нa paccтоянии от cильныx иcточников cвeтa, нaпpимep, пpямыx cолнeчныx лyчeй или лaмпы пpоeктоpa. B пpотивном cлyчae диcтaнционноe yпpaвлeниe можeт нe дeйcтвовaть. • Дaннaя видeокaмepa paботaeт в peжимe пyльтa диcтaнционного yпpaвлeния VTR 2. Peжимы пyльтa диcтaнционного yпpaвлeния 1, 2 и 3 иcпользyютcя для отличия дaнной видeокaмepы от дpyгиx видeомaгнитофонов фиpмы Sony во избeжaниe нeпpaвильной paботы. Ecли Bы иcпользyeтe дpyгой видeомaгнитофон фиpмы Sony, paботaющий в peжимe VTR 2, мы peкомeндyeм Baм измeнить peжим пyльтa диcтaнционного yпpaвлeния или зaкpыть диcтaнционный дaтчик видeомaгнитофонa чepной бyмaгой. Quick Reference Notes on the Remote Commander •Point the remote sensor away from strong light sources such as direct sunlight or overhead lighting. Otherwise, the Remote Commander may not function properly. •Your camcorder works in the commander mode VTR 2. Commander modes 1, 2 and 3 are used to distinguish your camcorder from other Sony VCRs to avoid remote control misoperation. If you use another Sony VCR in the Commander mode VTR 2, we recommend changing the commander mode or covering the sensor of the VCR with black paper. Bcтaвьтe 2 бaтapeйки R6 (paзмepa AA), cоблюдaя поляpноcть + и – c cимволaми + – внyтpи отceкa для бaтapeeк. 213 Identifying the parts and controls Обозначение частей и регуляторов Operation indicators A B C D E F G H Paбочиe индикaтоpы M N O P Q 1 2 0 min — ST I LL 1 6 : 9W I DE NEG . ART STBY + AUTO 5 0 AWB F11 0:1 2:3 4 1 2 min Z ERO S E T M E MO R Y END SEARCH 16B I T 100 - 0001 I J K L 1 Cassette memory indicator (p. 29, 171) 2 Remaining battery time indicator (p. 29) 3 Zoom indicator (p. 27) /Exposure indicator (p. 64) /Data file name indicator (DCR-TRV11E/TRV20E only) (p. 131) 4 Digital effect indicator (p. 58) /MEMORY MIX indicator (DCR-TRV11E/TRV20E only) (p. 144)/FADER indicator (p. 53) 5 16:9WIDE indicator (p. 51) 6 Picture effect indicator (p. 56) 7 Data code indicator (p. 37) 8 LCD bright indicator (p. 24)/Volume indicator (p. 36)/Date indicator (p. 29) 9 PROGRAM AE indicator (p. 61) 0 Backlight indicator (p. 30) qa SteadyShot off indicator (p. 117) qs Manual focus/Infinity indicator (p. 65) qd Recording mode indicator (p. 29) qf STBY/REC indicator (p. 21)/Video control mode indicator (p. 36)/Image size indicator (DCR-TRV20E only) (p. 136)/Image quality mode indicator (DCR-TRV11E/TRV20E only) (p. 134) 214 R S T U wj Z B V W X Y 1 Индикaтоp кacceтной пaмяти (cтp. 29, 171) 2 Индикaтоp оcтaвшeгоcя зapядa бaтapeйного блокa (cтp. 29) 3 Индикaтоp тpaнcфокaции (cтp. 27)/ Индикaтоp экcпозиции (cтp. 64)/ Индикaтоp нaзвaния фaйлa дaнныx (только для модeли DCR-TRV11E/TRV20E) (cтp. 131) 4 Индикaтоp цифpового эффeктa (cтp. 58) /Индикaтоp MEMORY MIX (только для модeли DCR-TRV11E/TRV20E) (cтp. 144)/ Индикaтоp FADER (cтp. 53) 5 Индикaтоp peжимa 16:9WIDE (cтp. 51) 6 Индикaтоp эффeктa изобpaжeния (cтp. 56) 7 Индикaтоp кодa дaнныx (cтp. 37) 8 Индикaтоp яpкоcти ЖКД (cтp. 24)/ Индикaтоp гpомкоcти (cтp. 36)/ Индикaтоp дaты (cтp. 29) 9 Индикaтоp PROGRAM AE (cтp. 61) 0 Индикaтоp зaднeй подcвeтки (cтp. 30) qa Индикaтоp выключeнной ycтойчивой cъeмки (cтp. 123) qs Индикaтоp pyчной фокycиpовки/ бecконeчноcти (cтp. 65) qd Индикaтоp peжимa зaпиcи (cтp. 29) qf Индикaтоp STBY/REC (cтp. 21)/Индикaтоp peжимa видeоконтpоля (cтp. 36)/ Индикaтоp paзмepa изобpaжeния (только для модeли DCR-TRV20E) (cтp. 136)/ Индикaтоp peжимa кaчecтвa изобpaжeния (только для модeли DCR-TRV11E/TRV20E) (cтp. 134) Identifying the parts and controls Обозначение частей и регуляторов qg NIGHTSHOT indicator (p. 31) qg Индикaтоp NIGHTSHOT (cтp. 31) qh Warning indicators (p. 183) qh Пpeдyпpeждaющиe индикaтоpы (cтp. 192) qj Tape counter indicator (p. 72)/Time code indicator (p. 29)/Self-diagnosis indicator (p. 182)/Tape photo indicator (p. 45)/ Memory photo indicator (DCR-TRV11E/ TRV20E only) (P. 138)/Image number indicator (DCR-TRV11E/TRV20E only) (p. 155) qj Индикaтоp cчeтчикa лeнты (cтp. 72)/ Индикaтоp кодa вpeмeни (cтp. 29)/ Индикaтоp фyнкции caмодиaгноcтики (cтp. 191)/Индикaтоp фотоcъeмки (cтp. 45)/Индикaтоp фотоcнимков в пaмяти (только для модeли DCR-TRV11E/TRV20E) (cтp. 138)/Индикaтоp номepa изобpaжeния (только для модeли DCR-TRV11E/TRV20E) (cтp. 155) qk Remaining tape indicator (p. 29)/Memory playback indicator (DCR-TRV11E/TRV20E only) (p. 154) w; END SEARCH indicator (p. 34) qk Индикaтоp оcтaвшeйcя лeнты (cтp. 29)/ Индикaтоp воcпpоизвeдeния пaмяти (только для модeли DCR-TRV11E/TRV20E) (cтp. 154) wa Audio mode indicator (p. 120) ql Индикaтоp ZERO SET MEMORY (cтp. 72) ws Data file name indicator (DCR-TRV11E/ TRV20E only)(p. 144) This indicator appears when the MEMORY MIX functions work./ Time indicator (p. 29) w; Индикaтоp END SEARCH (cтp. 34) ql ZERO SET MEMORY indicator (p. 72) wf Video flash ready indicator This indicator appears when you use the video flash light (not supplied). wh Remaining battery time indicator (p. 14)/ Tape counter (p. 22)/Memory counter (DCRTRV11E/TRV20E only)/Time code indicator (p. 29) wj FULL charge indicator (p. 14) wd Индикaтоp нeпpepывного peжимa дaнныx (только для модeли DCR-TRV11E/ TRV20E) (cтp. 140) wf Индикaтоp готовноcти видeовcпышки Этот индикaтоp появляeтcя пpи иcпользовaнии видeовcпышки (нe пpилaгaeтcя). Кpaткий cпpaвочник wg Self-timer indicator (p. 33) ws Индикaтоp нaзвaния фaйлa дaнныx (только для модeли DCR-TRV11E/TRV20E) (cтp. 144) Этот индикaтоp появляeтcя во вpeмя paботы фyнкции MEMORY MIX./ Индикaтоp вpeмeни (cтp. 29) Quick Reference wd Continuous mode indicator (DCR-TRV11E/ TRV20E only) (p. 140) wa Индикaтоp aвтомaтичecкого peжимa (cтp. 126) wg Индикaтоp тaймepa caмозaпycкa (cтp. 33) wh Индикaтоp оcтaвшeгоcя зapядa бaтapeйного блокa (cтp. 14)/Cчeтчик лeнты (cтp. 22)/Cчeтчик пaмяти (только для модeли DCR-TRV11E/TRV20E)/ Индикaтоp кодa вpeмeни (cтp. 29) wj Индикaтоp зapядки FULL (cтp. 14) 215 English Quick Function Guide Functions to adjust exposure (in the recording mode) •In a dark place •In insufficient light •In dark environments such as sunset, fireworks, or general night views •Shooting backlit subjects •In spotlight, such as at the theatre or a formal event •In strong light or reflected light, such as at a beach in midsummer or on a ski slope NIGHTSHOT (p. 31) Low lux mode (p. 61) Sunset & moon mode (p. 61) BACK LIGHT (p. 30) Spotlight mode (p. 61) Beach & ski mode (p. 61) Functions to give images more impact (in the recording mode) •Smooth transition between scenes •Taking a still picture •Digital processing of images •Creating a soft background for subjects •Superimposing a title FADER (p. 53) TAPE PHOTO (p. 45)/MEMORY PHOTO (DCR-TRV11E/TRV20E only) (p. 138) PICTURE EFFECT (p. 56)/DIGITAL EFFECT (p. 58) Soft portrait mode (p. 61) TITLE (p. 108) Functions to give a natural appearance to your recordings (in the recording mode) •Preventing deterioration of picture quality in digital zoom •Focusing manually •Shooting distant subjects •Recording fast-moving subjects D ZOOM [MENU] (p. 116) Manual focus (p. 65) Landscape mode (p. 61) Sports lesson mode (p. 61) Functions to use in editing (in the recording mode) •Watching the picture on a wide-screen TV •Viewing images using a personal computer (DCR-TRV11E/TRV20E only) Wide mode (p. 51) “Memory Stick” (p. 131) Functions to use after recording (in the playback mode) •Digital processing of recorded images •Displaying the date/time or various settings when you recorded •Quickly locating a desired scene •Searching for scenes having a title •Searching for scenes recorded in the photo mode •Scanning scenes recorded in the photo mode •Playing back on monaural sound or sub sound •Playing back the picture on a TV without connecting a cord •Enlarging still images 216 PICTURE EFFECT (p. 67)/DIGITAL EFFECT (p. 68) Data code (p. 37) Zero set memory (p. 72) Title search (p. 73) Photo search (p. 77) Photo scan (p. 79) HiFi SOUND [MENU] (p. 116) SUPER LASER LINK (p. 43) PB ZOOM (p. 70)/Memory PB ZOOM (DCR-TRV11E/TRV20E only) (p. 160) Aнглийcкий Кpaткоe pyководcтво по фyнкциям Фyнкции для peгyлиpовки экcпозиции (в peжимe зaпиcи) •B тeмном мecтe •Пpи нeдоcтaточном оcвeщeнии •B тeмныx окpyжaющиx ycловияx, нaпpимep, зaxод cолнцa, фeйepвepки или общиe ночныe виды •Cъeмкa объeктов c зaднeй подcвeткой •Пpи пpожeктоpном оcвeщeнии, нaпpимep, в тeaтpe или нa официaльной цepeмонии •Пpи cильном cвeтe или отpaжeнном cвeтe, нaпpимep, нa пляжe в paзгap лeтa или нa cнeжном cклонe Hочнaя cъeмкa (cтp. 31) Peжим низкой оcвeщeнноcти (cтp. 61) Peжим зaxодa cолнцa и лyны (cтp. 61) BACK LIGHT (cтp. 30) Peжим пpожeктоpного оcвeщeния (cтp. 61) Пляжный и лыжный peжим (cтp. 61) Фyнкции для пpидaния эффeктов зaпиcaнным изобpaжeниям (в peжимe зaпиcи) •Плaвный пepexод мeждy зaпиcaнными эпизодaми •Cъeмкa нeподвижного изобpaжeния •Цифpовaя обpaботкa изобpaжeний •Cоздaниe мягкого фонa для объeктов •Haложeниe титpa FADER (cтp. 53) TAPE PHOTO (cтp. 45)/MEMORY PHOTO (только для модeли DCRTRV11E/TRV20E) (cтp. 138) Эффeкт изобpaжeния (cтp. 56)/ DIGITAL EFFECT (cтp. 58) Mягкий поpтpeтный peжим (cтp. 61) TITLE (cтp. 108) D ZOOM [MENU] (cтp. 116) Pyчнaя фокycиpовкa (cтp. 65) Лaндшaфтный peжим (cтp. 61) Peжим cпоpтивныx cоcтязaний (cтp. 61) Фyнкции для иcпользовaния пpи монтaжe (в peжимe зaпиcи) •Пpоcмотp изобpaжeния нa шиpокоэкpaнном тeлeвизоpe •Пpоcмотp изобpaжeний c помощью пepcонaльного компьютepa (только для модeли DCR-TRV11E/ TRV20E) Шиpокоэкpaнный peжим (cтp. 51) ”Memory Stick” (cтp. 131) Кpaткий cпpaвочник (в peжимe зaпиcи) •Пpeдотвpaщeниe yxyдшeния кaчecтвa изобpaжeния пpи цифpовой тpaнcфокaции •Фокycиpовкa вpyчнyю •Cъeмкa yдaлeнныx объeктов •Зaпиcь быcтpо движyщиxcя объeктов Quick Reference Фyнкции для пpидaния зaпиcям ecтecтвeнного видa Фyнкции для иcпользовaния поcлe зaпиcи (в peжимe воcпpоизвeдeния) •Цифpовaя обpaботкa зaпиcaнныx изобpaжeний •Oтобpaжeниe во вpeмя зaпиcи дaты/вpeмeни или paзличныx ycтaновок •Быcтpый поиcк нyжныx эпизодов •Поиcк эпизодa c титpом •Поиcк эпизодов, зaпиcaнныx в фотоpeжимe •Cкaниpовaниe эпизодов, зaпиcaнныx в фотоpeжимe •Bоcпpоизвeдeниe монофоничecкого или вcпомогaтeльного звyкa •Bоcпpоизвeдeниe изобpaжeния нa тeлeвизоpe бeз подcоeдинeния шнypa •Увeличeниe нeподвижныx изобpaжeний Эффeкт изобpaжeния (cтp. 67)/ DIGITAL EFFECT (cтp. 68) Кoд дaнныx (cтp. 37) Пaмять нyлeвой отмeтки (cтp. 72) Поиcк титpa (cтp. 73) Фотопоиcк (cтp. 77) Фотоcкaниpовaниe (cтp. 79) HiFi SOUND [MENU] (cтp. 116) SUPER LASER LINK (cтp. 43) PB ZOOM (cтp. 70)/Пaмять PB ZOOM (только для модeли DCR-TRV11E/ TRV20E) (cтp. 160) 217 English Index A, B I, J, K, L R AC power adaptor ..................... 14 Adjusting viewfinder ................ 25 Audio dubbing ......................... 104 AUDIO MIX ............................. 118 Audio mode .............................. 120 AUTO SHTR ............................. 117 A/V connecting cable ......................... 41, 80, 90, 97, 151 BACK LIGHT ............................. 30 Battery pack ................................ 13 Beep ........................................... 122 BOUNCE ..................................... 53 i.LINK ........................................ 174 Image protection ...................... 164 Image quality mode ................ 134 INDEX (Multiple) display ...... 140 “InfoLITHIUM” battery ........... 18 Infrared rays emitter ..... 31, 43, 48 Insert editing ............................ 101 Intelligent accessory shoe ....... 211 JPEG ........................................... 131 Labelling a cassette .................. 114 LANC ........................................ 210 LCD screen ................................. 23 LUMINANCEKEY .................... 58 RANDOM DOT ......................... 53 Rec review .................................. 35 Recording time ........................... 16 Remaining battery time indicator ................................... 29 Remaining tape indicator ......... 29 Remote commander ................ 212 Remote control jack (LANC) ................................................. 210 Remote sensor .......................... 203 RESET ........................................ 180 M, N Main sound ............................... 172 Manual focus .............................. 65 Memory chromakey ................ 144 Memory luminancekey ........... 144 Memory Stick ........................... 131 Menu settings ........................... 116 Memory overlap ...................... 144 Memory PB ZOOM ................. 160 M.FADER .................................... 53 Mirror mode ............................... 23 Moisture condensation ........... 195 MONOTONE ............................. 53 Mosaic fader ............................... 53 NIGHTSHOT ............................. 31 Normal charge ........................... 14 S video jack ..................... 41, 48, 80 Self-diagnosis display ............. 182 Self-timer recording .................. 33 SEL/PUSH EXEC dial ............ 116 Serial port adaptor ................... 157 Shoulder strap .......................... 207 Signal convert function ............. 96 Skip scan ..................................... 39 Slide show ................................. 162 Slow playback ............................ 39 SLOW SHUTTER ....................... 58 STEADYSHOT ......................... 117 Stereo tape ................................ 172 STILL ........................................... 58 Sub sound ................................. 172 SUPER LASER LINK ................ 43 SUPER NIGHTSHOT ................ 31 O, P, Q T, U, V OLD MOVIE ............................... 58 Operation indicators ............... 214 OVERLAP ........................... 53, 114 PAL system ............................... 194 PB ZOOM ................................... 70 Photo scan ................................... 79 Photo search ............................... 77 Photo recording ......................... 45 PICTURE EFFECT ..................... 56 Picture search ............................. 39 Playback pause ........................... 39 Power sources (the mains) ............................... 19 (car battery) ............................. 19 (battery pack) .......................... 13 Power zoom ................................ 27 Print mark ................................. 169 PROGRAM AE .......................... 61 Tape counter ......................... 29, 72 Telephoto .................................... 27 Time code .................................... 29 Title .................................... 108, 112 Title search .................................. 73 TRAIL .......................................... 58 Transition .................................... 22 TV colour systems ................... 194 C, D Camera chromakey ................. 144 Cassette memory ............... 11, 171 Charging battery ........................ 14 Charging vanadium-lithium battery .................................... 196 Clock set .................................... 129 Connection (viewing on TV) ...................... 41 (dubbing a tape) ....... 80, 97, 151 Continuous ............................... 140 Data code .................................... 37 Date search ................................. 75 DEMO ........................................ 121 DIGITAL EFFECT ............... 58, 68 DIGITAL I/O/ (LANC) ...... 157 Digital program editing ............ 84 DISPLAY ..................................... 37 Dual sound track tape ............. 172 Dubbing a tape ........................... 80 DV connecting cable .... 82, 99, 151 E EDITSEARCH ............................ 34 END SEARCH ...................... 34, 40 Exposure ..................................... 65 External microphone (not supplied) ................................ 210 F, G, H FADER ........................................ 53 Fade in/out ................................. 53 FLASH MOTION ....................... 58 FOCUS ......................................... 65 Format ....................................... 119 Full charge .................................. 14 Grip strap .................................. 209 Heads ......................................... 195 Headphone jack ....................... 208 HiFi SOUND ............................ 118 218 S W, X, Y, Z Warning indicators .................. 183 White balance ............................. 49 Wide-angle ................................. 27 Wide mode ................................. 51 WIPE ............................................ 53 WORLD TIME .......................... 122 Write-protect tab ........................ 20 Zero set memory ........................ 72 Zoom ........................................... 27 Pyccкий Aлфaвитный yкaзaтeль А, Б, В, Г Aдaптep поcлeдовaтeльного поpтa ................................. 157 Ayдиопepeзaпиcь ................ 104 Ayдиоpeжим ........................ 126 Бaлaнc бeлого ....................... 49 Бaтapeйный блок .................. 13 Бaтapeйный блок “InfoLITHIUM” ...................... 18 Bнeшний микpофон (нe вxодит в комплeкт) .... 210 Bидeоголовки ...................... 195 Bpeмя зaпиcи ......................... 16 Bcпомогaтeльный звyк ......... 89 Гнeздо головныx тeлeфонов ........................ 210 Гнeздо диcтaнционного yпpaвлeния (LANC) .......... 212 Гнeздо DIGITAL I/O/ (LANC) ............................... 157 Гнeздо S VIDEO ............... 38, 71 Д, Е, Ж,З Излyчaтeль инфpaкpacныx лyчeй ....................... 31, 43, 48 Индикaтоp оcтaвшeйcя лeнты ................................... 29 Индикaтоp RANDOM DOT .... 53 Индикaтоp WIPE ................... 53 Индeкcaция (многокaдpовaя) ............... 140 Иcточники питaния (элeктpичecкaя ceть) ......... 19 (aвтомобильный aккyмyлятоp) ...................... 19 (бaтapeйный блок) ............. 13 Кacceтнaя пaмять ......... 11, 171 Кнопкa цвeтноcти видeокaмepы .................... 144 Кнопкa цвeтноcти пaмяти ............................... 144 Кнопкa яpкоcти пaмяти ...... 144 Индикaция caмодиaгноcтики .............. 191 Код дaнныx ............................ 37 Код вpeмeни .......................... 29 Hacтpойкa чacов ................. 129 Haложeниe изобpaжeния ..................................... 53, 114 Haложeниe c помощью пaмяти ............................... 144 Heпpepывный peжим .......... 140 Hочнaя cъeмкa ...................... 31 Hоpмaльнaя зapядкa ............ 14 Oпepaции появлeния/ иcчeзновeния ...................... 53 Ocновной звyк ..................... 172 Ocтaвшeecя вpeмя paботы бaтapeи, индикaтоp ........... 29 П, Р, Ц Пaмять PB ZOOM ................ 160 Пayзa воcпpоизвeдeния ....... 39 Пeчaтный знaк .................... 169 Полнaя зapядкa .................... 14 Поиcк дaты ............................ 75 Поиcк изобpaжeния .............. 39 Пpоcмотp зaпиcи ................... 35 Плeчeвото peмня ................ 208 Пaмять нyлeвой отмeтки ...... 72 Пepeзaпиcь лeнты ................. 80 Пepexод ................................. 22 Поиcк мeтодом пpогонa ....... 39 Поиcк титpa ........................... 73 Пpeдyпpeждaющиe индикaтоpы ....................... 192 Пyльт диcтaнционного yпpaвлeния ....................... 212 Paбочиe индикaтоpы .......... 214 Peмeнь для зaxвaтa ............ 209 Peгyлиpовкa видоиcкaтeля ..................... 25 Peжим кaчecтвa изобpaжeния ..................... 134 Peжим yлyчшeнной ночной cъeмки ................................. 31 Pyчнaя фокycиpовкa ............ 65 Цифpовой монтaж пpогpaммы ........................... 84 С, Т Ceтeвой aдaптep пepeмeнного токa ...................................... 14 Cоeдинитeльный кaбeль ayдио/ видeо ......... 41, 80, 90, 97, 151 Cоeдинeниe (пpоcмотp нa экpaнe тeлeвизоpa) ........................ 41 (пepeзaпиcь лeнты) .............................. 80, 97, 151 У-Я Уcтaновки мeню .................. 116 Фeйдep Mозaикa ................... 53 Фоpмaт ................................. 125 Фотопоиcк .............................. 77 Фотоcъeмкa ........................... 45 Фотоcкaниpовaниe ................ 79 Фyнкция пpeобpaзовaния cигнaлa ................................ 96 Фyнкция PB ZOOM ................ 70 Фyнкция WORLD TIME ....... 128 Шиpокоyгольнaя cъeмкa ...... 27 Шиpокоэкpaнный peжим ...... 51 Эффeкт изобpaжeния .......... 56 Экcпозиция ............................ 65 Экpaн ЖКД ............................ 23 A, B, C, D AUDIO MIX ........................... 124 AUTO SHTR ......................... 123 BACK LIGHT ........................... 30 BOUNCE ................................. 53 DEMO ................................... 127 DIGITAL EFFECT ............. 58, 68 DISPLAY ................................. 37 E, F, G, H EDITSEARCH ......................... 34 END SEARCH .................. 34, 40 FADER .................................... 53 FLASH MOTION ..................... 58 FOCUS ................................... 65 HiFi SOUND .......................... 124 Кpaткий cпpaвочник И, К, Л, М Н, О Cоeдинитeльный кaбeль DV .......................... 82, 99, 151 Cоeдинитeльный кaбeль i.LINK .................................. 174 Cчeтчик лeнты ................ 29, 72 Cиcтeмa PAL .......................... 95 Cиcтeмы цвeтного тeлeвидeния ..................... 194 Cтapинноe кино ..................... 58 Cтepeофоничecкaя лeнтa ................................. 172 Teлeфото ............................... 27 Tитp .............................. 108, 125 Tpaнcфокaция ....................... 27 Tpaнcфокaтоp ....................... 27 Quick Reference Дaтчик диcтaнционного yпpaвлeния ....................... 205 Дeмонcтpaция cлaйдов ....... 162 Дepжaтeль для вcпомогaтeльныx пpинaдлeжноcтeй ............. 211 Диcк SEL/PUSH EXEC ........ 116 Зaмeдлeнноe воcпpоизвeдeниe ................ 39 Зaпиcь по тaймepy caмозaпycкa ........................ 33 Зapядкa бaтapeи ................... 14 Зapядкa вaнaдиeво-литиeвой бaтapeи .............................. 196 Зaщитa изобpaжeния .......... 164 Зepкaльный peжим ............... 23 Зyммepный cигнaл .............. 128 Кондeнcaция влaги ............. 195 Лeнтa c двойной звyковой доpожкой .......................... 172 Лeпecток зaщиты от зaпиcи .................................. 20 Mapкиpовкa кacceты .......... 114 Meдлeнный зaтвоp ................ 58 Mонтaж вcтaвки .................. 101 M. Фyнкция FADER ............... 53 I-O JPEG ..................................... 131 LANC .................................... 210 LUMINANCEKEY .................... 58 Memory Stick ........................ 131 MONOTONE ........................... 53 P-Z PROGRAM AE ....................... 61 RESET .................................. 190 SUPER LASER LINK .............. 43 STEADYSHOT ...................... 123 STILL ...................................... 58 TRAIL ...................................... 58 219 Sony Corporation Printed in Japan