1
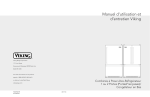
Viking Use & Care Manual
Viking Range Corporation
111 Front Street
Greenwood, Mississippi 38930 USA
(662) 455-1200
For product information,
call 1-888-VIKING1 (845-4641)
Professional Freestanding French Door
Bottom-Mount Refrigerator/Freezer
with Dispenser
or visit the Viking Web site at
vikingrange.com
F20711B EN
W10345054
(081511)
Congratulations
Congratulations and welcome to the elite world of Viking ownership.
We hope you will enjoy and appreciate the care and attention we have
put into every detail of your new, state-of-the-art refrigerator.
Your Viking appliance is designed to offer years of reliable service. This
Use and Care Guide will provide you with the information you need to
become familiar with your refrigerator’s care and operation.
Your complete satisfaction is our ultimate goal. If you have any
questions or comments about this product, please contact the dealer
from whom you purchased it, or contact our Consumer Support Center
at 1-888-VIKING1.
We appreciate your choice of a Viking refrigerator and hope that you
will again select our products for your other major appliance needs.
For more information about the complete and growing selection
of Viking products, contact your dealer or visit us online at
vikingrange.com
Table of Contents
Getting Started
Refrigerator Safety ____________________________________________4
Important Safety Instructions ___________________________________5
Proper Disposal (of old refrigerator) _____________________________6
Using the Controls ____________________________________________7
Product Controls
Temperature Controls _________________________________________8
Adjusting Controls ____________________________________________9
Options ____________________________________________________10
User Settings________________________________________________12
Operation
Opening & Closing Doors ____________________________________15
Ice Maker & Ice Storage Bin __________________________________15
Water & Ice Dispenser _______________________________________17
Water Filtration System_______________________________________19
Water Filter _________________________________________________21
Water Filter Certifications_____________________________________23
Product Care
Cleaning ___________________________________________________24
Changing the Light Bulb _____________________________________25
Troubleshooting _____________________________________________26
Service Information __________________________________________32
Warranty ___________________________________________________33
2
3
Getting Started
Your safety and the safety of others are very important.
We have provided many important safety messages in this manual and
on your appliance. Always read and obey all safety messages.
This is the safety alert symbol.
This symbol alerts you to potential hazards that can
kill or hurt you and others.
All safety messages will follow the safety alert
symbol and either the word “DANGER” or “WARNING.”
DANGER
You can be killed or seriously injured if you don't immediately follow
instructions.
WARNING
Important Safety Instructions
WARNING: To reduce the risk of fire, electric shock, or injury when
using your refrigerator, follow these basic precautions:
•
•
•
•
•
•
•
•
•
Plug into a grounded 3-prong outlet.
DO NOT remove ground prong.
DO NOT use an adapter.
DO NOT use an extension cord.
Disconnect power before servicing.
Replace all parts and panels before operating.
Remove doors from your old refrigerator.
Use nonflammable cleaner.
Keep flammable materials and vapors, such as gasoline, away from
refrigerator.
• Use two or more people to move and install refrigerator.
• Disconnect power before installing ice maker (on ice maker kit ready
models only).
• Use a sturdy glass when dispensing ice (on some models).
SAVE THESE INSTRUCTIONS
You can be killed or seriously injured if you don't follow
instructions.
All safety messages will tell you what the potential hazard is, tell you how
to reduce the chance of injury, and tell you what can happen if the
instructions are not followed.
4
5
Getting Started
Refrigerator Safety
Getting Started
Proper Disposal
(of old refrigerator)
WARNING
Suffocation Hazard
Remove doors from your old refrigerator.
Failure to do so can result in death or brain damage.
Before You Throw Away Your Old Refrigerator or
Freezer:
• Take off the doors.
• Leave the shelves in place so that children may not easily climb
inside.
• The control panel is located on the front of the ice and water
dispenser.
• To access the main control menu, press any of the four touch pads
located on either side of the display. Then, touch the pad next to the
desired option or user setting to access the various features.
Note: Press only the touch pads next to your selection on the display
screen, not the selection itself.
IMPORTANT: Wait 24 hours for your refrigerator to cool completely
before adding food. If you add food before the refrigerator has cooled
completely, your food may spoil.
Note: Adjusting the refrigerator and freezer temperature controls to
a colder than recommended setting will not cool the compartments
any faster.
• The recommended settings should be correct for normal
household refrigerator use. The controls are set correctly when milk
or juice is as cold as you like and when ice cream is firm.
• If the temperature is too warm or too cold in the refrigerator or
freezer, first check the air vents to be sure they are not blocked
before adjusting the controls.
A
A
A. Touch pads
6
7
Product Controls
IMPORTANT:
Child entrapment and suffocation are not problems of the past. Junked
or abandoned refrigerators are still dangerous—even if they will sit for
“just a few days”. If you are getting rid of your old refrigerator, please
follow these instructions to help prevent accidents.
Using the Controls
Adjusting Controls
For your convenience, your temperature controls are preset at the
factory. When you first install your refrigerator, make sure the controls
are still set to the recommended set points.
Adjusting Controls
• Press the touch pad next to “FRESH FOOD TEMP” on the main
menu to display the current set point of the compartment. Press the
touch pad next to “WARMER” or “COLDER” to adjust the set point
to the recommended 38°F. Press the touch pad next to “DONE” to
lock in the setting.
• Press the touch pad next to “FREEZER TEMP” on the main menu to
display the current set point of the compartment. Press the touch
pad next to “WARMER” or “COLDER” to adjust the set point to the
recommended 0°F. Press the touch pad next to “DONE” to lock in
the setting.
To Turn Cooling Off/On:
Cooling Off controls all cooling functions, the control panel and the
dispenser. It does not disconnect power to the refrigerator.
• Press and hold the “COOLING OFF” touch pad for three seconds.
The LED will light up to indicate that cooling is OFF. Neither
compartment will cool.
• Press the “COOLING OFF” touch pad again to turn “ON” the
cooling. The LED will turn off.
8
The Fresh Food Temp control adjusts the refrigerator compartment
temperature. The Freezer Temp control adjusts the freezer
compartment temperature.
If you need to adjust the temperature in either the refrigerator or
freezer compartment, use the settings listed in the chart as a guide.
To Adjust Set Point Temperatures:
The display will show the set point for approximately three seconds.
• Press the touch pad next to “WARMER” or “COLDER” to adjust the
set point to the desired temperature. Then, press the touch pad next
to “DONE” to lock in the new set point temperature.
Note: Except when first turning on the refrigerator, DO NOT adjust
either temperature control more than one setting at a time. Wait 24
hours for the temperature to stabilize between adjustments.
Temperature Adjustment Chart
Condition/Reason
Adjustment
Refrigerator too warm
Fresh Food Control
1° lower
Freezer too warm/too little ice
Freezer Control
1° lower
Refrigerator too cold
Fresh Food Control
1° higher
Freezer too cold
Freezer Control
1° higher
9
Product Controls
Product Controls
Temperature Controls
Options
Options
Door Alarm
Max Cool
The Door Alarm feature sounds an audible alarm every few seconds
when either refrigerator door has been left open for three continuous
minutes. The alarm will sound until the door is closed or Door Alarm is
turned off.
The Max Cool feature assists with periods of high refrigerator or
freezer use, full grocery loads, or temporarily warm room temperatures
by lowering the freezer and refrigerator to the minimum temperatures.
Humidity Control
The Humidity Control feature turns on a heater to help reduce
moisture on the door hinge seal. Use in humid environments or when
you notice moisture on the door hinge seal. The refrigerator uses more
energy when Humidity Control is on.
1. On the main menu, press the touch pad next to “OPTIONS”.
2. In each of the following screens, continue to press the touch pad
next to “MORE OPTIONS” until “MAX COOL IS OFF” appears on
the display.
3. Press the touch pad next to “MAX COOL IS OFF” to switch
between ON and OFF. Press the touch pad next to “DONE” to lock
in the desired setting and return to the main menu.
Note: The Max Cool feature will automatically shut off in approximately
two hours.
Sabbath Mode
1. On the main menu, press the touch pad next to “OPTIONS”.
2. Press the touch pad next to “HUMID CTRL IS ON” to switch
between ON and OFF. Press the touch pad next to “Done” to lock
in the desired setting and return to the main menu.
Vacation Mode
The Vacation Mode feature decreases the number of automatic defrost
cycles. Once set, Vacation Mode will remain on until a door is opened
or the feature is turned “OFF” on the control panel.
Note: Door openings are ignored for the first hour after Vacation
Mode is activated.
1. On the main menu, press the touch pad next to “OPTIONS”.
2. In each of the following screens, continue to press the touch pad
next to “MORE OPTIONS” until “VAC. MODE IS OFF” appears on
the display.
3. Press the touch pad next to “VAC. MODE IS OFF” to switch
between ON and OFF. Press the touch pad next to “DONE” to lock
in the desired setting and return to the main menu.
The Sabbath Mode feature turns off all lights, disables the water and
ice dispenser, disables all alarms and tones, disables the automatic
defrost feature and disables the control panel.
While the refrigerator is operating in Sabbath Mode, any touch of the
control panel will display the Sabbath Mode control which will allow
you to turn OFF the Sabbath Mode feature.
Turn Sabbath Mode on:
1. On the main menu, press the touch pad next to “OPTIONS”.
2. In each of the following screens, continue to press the touch pad
next to “MORE OPTIONS” until “SABBATH IS OFF” appears on
the display.
3. Press the touch pad next to “SABBATH IS OFF” to switch between
ON and OFF. Press the touch pad next to “DONE” to lock in the
desired setting and return to the main menu.
Temp Alarm
The Temp Alarm feature alerts you if the temperature exceeds normal
operating temperatures, for an hour or longer, in either or both the
refrigerator and freezer compartments. An audible alarm will sound
repeatedly and the highest temperature reached in each compartment
will be displayed.
Note: Touch any pad on the control panel to turn off the audible
alarm. Temp Alarm will automatically reset once the warm condition
has been corrected for 30 minutes.
10
11
Product Controls
Product Controls
1. On the main menu, press the touch pad next to “OPTIONS”.
2. Press the touch pad next to “DOOR ALARM IS ON” to switch
between ON and OFF. Press the touch pad next to “DONE” to lock
in the desired setting and return to the main menu.
Options
User Settings
Temp Alarm (cont.)
1. On the main menu, press the touch pad next to “OPTIONS”.
2. In each of the following screens, continue to press the touch pad
next to “MORE OPTIONS” until “TEMP ALARM IS OFF” appears on
the display.
3. Press the touch pad next to “TEMP ALARM IS OFF” to switch
between ON and OFF. Press the touch pad next to “DONE” to lock
in the desired setting and return to the main menu.
Display Brightness
See “Water Filtration System” section.
1. On the main menu, press the touch pad next to “USER SETTINGS”.
2. In each of the following screens, continue to press the touch pad
next to “MORE SETTINGS” until “DISPLAY BRIGHTNESS” appears
on the display.
3. Press the touch pad next to “LIGHTER” or “DARKER” to adjust the
setting between 1 (darkest) and 5 (lightest). Press the touch pad
next to “DONE” to lock in the desired setting and return to the
main menu.
Adjust Light Sensor
User Settings
The control center allows you to set user preferences, if desired.
Language
The Language preference allows you to change the control panel
display to English, French or Spanish.
1. On the main menu, press the touch pad next to “USER SETTINGS”.
2. Press the touch pad next to “SELECT LANGUAGE”.
3. Press the touch pad next to either “METTRE EN FRANÇAIS” or
“CAMBIAR EN ESPAÑOL.” Press the touch pad next to “CONFIRM”
to lock in the setting and return to the main menu.
Temperature Display
The temperature display preference allows you to change the
control panel display from degrees Fahrenheit to degrees Celsius.
1. On the main menu, press the touch pad next to “USER SETTINGS”.
2. Press the touch pad next to “FAHRENHEIT IS ON” to switch
between Fahrenheit and Celsius. Press the touch pad next to
“DONE” to lock in the desired setting and return to the main menu.
12
The Adjust Light Sensor preference allows you to adjust the level at
which the Light Sensor will detect darkness and activate the Auto On
mode for the dispenser light.
1. On the main menu, press the touch pad next to “USER SETTINGS”.
2. In each of the following screens, continue to press the touch pad
next to “MORE SETTINGS” until “ADJUST LIGHT SENSOR”
appears on the display.
3. Press the touch pad next to “LIGHTER” or “DARKER” to adjust the
setting between 1 (darkest) and 9 (lightest). Press the touch pad
next to “DONE” to lock in the desired setting.
Alarm Sound
The Alarm Sound preference allows you to turn off any audible alarms
(door open, too warm etc.) when quick and simple remedies are not
possible. It will not disable alarm features or visual displays.
1. On the main menu, press the touch pad next to “USER SETTINGS”.
2. In each of the following screens, continue to press the touch pad
next to “MORE SETTINGS” until “ALRM SOUND IS ON” appears
on the display.
3. Press the touch pad next to “ALRM SOUND IS ON” to switch
between ON and OFF. Press the touch pad next to “DONE” to lock
in the desired setting and return to the main menu.
13
Product Controls
Product Controls
Replace H2O Water Filter
The Display Brightness preference adjusts the backlight level of
the control panel.
User Settings
Opening & Closing Doors
Moisture Adjustable Produce Drawer
There are two refrigerator compartment doors. The doors can be
opened and closed either separately or together. There is a
vertically-hinged seal on the left refrigerator door.
You can control the amount of humidity in the moisture adjustable
produce drawer. Adjust the control to any setting between LOW and
HIGH. LOW (open) for best storage of fruits and vegetables with skins.
HIGH (closed) for best storage of fresh, leafy vegetables.
Product Controls
MeatSavor™/Produce Drawer
The MeatSavor™ drawer is a full-width drawer with adjustable
temperature control. This drawer can be used for large party trays, deli
items, beverages or miscellaneous items. There is a divider to organize
the drawer into sections if desired.
• When the left side door is opened,
the hinged seal automatically folds
inward so that it is out of the way.
• When both doors are closed, the
hinged seal automatically forms a
seal between the two doors.
A
MeatSavor Control
The control, located on the right of the drawer, regulates the air
temperature inside the drawer. Set control to “COLD” to provide
normal refrigerator temperature. Use the COLDEST setting for meats
or other deli items.
• Cold air directed to the MeatSavor™ can decrease refrigerator
temperature. Refrigerator control may need to be adjusted.
• DO NOT place leafy vegetables in the MeatSavor™ drawer. Colder
temperatures could damage leafy produce.
To Install:
• Push metal glide rails to the back of the refrigerator. Place drawer
onto rails and slide drawer back until it falls into place.
Ice Maker & Ice Storage Bin
Alarm Sound
The ice maker and storage bin are located in the upper left-hand side
of the refrigerator compartment.
Turning the Ice Maker On/Off
The On/Off switch is located on the ice maker.
To turn on the ice maker, press the switch to the “ON” position.
To Remove Divider:
• Pull drawer completely out and raise the front of the divider to
unhook it from rear wall of the drawer and lift it out.
To Install Divider:
• Hook back of divider over rear wall of drawer and lower into place.
14
To manually turn off the ice maker, press the switch to the “OFF”
position.
Note: Your ice maker has an automatic shutoff. The ice maker sensors
will automatically stop ice production, but the control will remain in the
ON position.
15
Operation
To Remove:
• Lift lid. Pull drawer out to full extension. Tilt the drawer front up and
pull straight out.
A. Hinged seal
Ice Maker & Ice Storage Bin
(cont.)
Removing and Replacing Ice Storage Bin
To Remove the Ice Storage Bin:
1. Hold the base of the storage bin and press the release button on
the lower right.
2. Pull the storage bin out until resistance is felt. Lift up the front of the
ice bin and remove.
3. Press the switch to the “OFF” position.
To Replace the Ice Storage Bin:
IMPORTANT: It may be necessary to turn the auger driver, behind the
ice bin, counterclockwise to properly align the ice bin with the auger
driver. The ice storage bin must be locked in place for proper ice
dispensing.
A
1. Press the switch to the “ON” position.
2. Slide the ice bin into the guide rails located
on either side of the enclosure.
3. Push the ice bin in until resistance is felt.
Raise the front slightly and push the ice bin
in until an audible “click” is heard.
Water & Ice Dispenser
IMPORTANT:
• After connecting the refrigerator to a water source, flush the water
system. Press the “WATER” touch pad on the control panel. Use a
sturdy container to depress and hold the dispenser lever for five
seconds, then release it for five seconds. Repeat until water begins
to flow. Once water begins to flow, continue depressing and
releasing the dispenser lever (five seconds on, five seconds off) for an
additional five minutes until a total of 4 gal. (15L) has been
dispensed. This will flush air from the filter and water dispensing
system. Additional flushing may be required in some households. As
air is cleared from the system, water may spurt out of the dispenser.
Note: After five minutes of continuous dispensing, the dispenser will
stop dispensing water to avoid flooding. To continue dispensing,
remove the container and press the dispensing lever again.
• Allow 24 hours for the refrigerator to cool down and chill water.
Dispense enough water every week to maintain a fresh supply.
• Allow 24 hours to produce the first batch of ice. Discard the first
three batches of ice produced.
WARNING
Cut Hazard
Use a sturdy glass when dispensing ice.
Remember
• The quality of your ice will be only as good as the quality of the
water supplied to the ice maker. AVOID connecting the ice maker to
a softened water supply. Water softener chemicals (such as salt) can
damage parts of the ice maker and lead to poor quality ice. If a
softened water supply cannot be avoided, make sure the water
softener is operating properly and is well maintained.
• DO NOT use anything sharp to break up the ice in the bin. This
can cause damage to the ice bin and dispenser mechanism.
• DO NOT store anything on top of the ice maker or in the ice
storage bin.
16
Failure to do so can result in cuts.
Dispense Ice and Water
• The dispenser will dispense either water or cubed ice.
• The EASY FILL control allows you to fill containers that will not fit
within the dispenser area, such as sport bottles.
17
Operation
Operation
B
Ice Production Rate
A. ON position
• Allow 24 hours to produce the first batch of
B. Auger driver
ice. Discard the first three batches of ice
produced.
• The ice maker should produce approximately 8 to 12 batches of ice
in a 24-hour period.
• To increase ice production, lower the freezer and refrigerator
temperature. See “Using the Controls.” Wait 24 hours between
adjustments.
Water & Ice Dispenser
(cont.)
Dispense Ice and Water (cont.)
1. Select either water or cubed ice by touching “WATER” or “ICE” on
the control panel. The light above the control indicates your
selection.
Water & Ice Dispenser
(cont.)
To Lock and Unlock Dispenser:
Press and hold the “LOCKED” touch pad for three
seconds to lock the dispenser. The indicator light will
illuminate when Lock is on.
Press and hold the “LOCKED” touch pad again for three
seconds to unlock dispenser. The indicator light will turn OFF.
Water Filtration System
2. Press a sturdy container against the dispenser lever.
IMPORTANT: You do not need to apply a lot of pressure to the
lever in order to activate the dispenser. Pressing hard will not make
the water or ice dispense faster or in greater quantities.
3. Remove the container to stop dispensing.
The water filter is located in the upper right-hand corner of the
refrigerator compartment.
Note: DO NOT use with water that is microbiologically unsafe or of
unknown quality without adequate disinfection before or after the system.
Systems certified for cyst reduction may be used on disinfected waters that
may contain filterable cysts.
Dispenser Light
Auto: The light sensor monitors the light level in the room. The
dispenser light will illuminate at half-power when the light level is low.
To activate the Auto option press the “LIGHT” touch pad. The Auto
indicator light will illuminate.
On: For continuous light, press the “LIGHT” touch pad a second time.
The ON indicator light will illuminate.
Off: To turn the dispenser light OFF, press the “LIGHT” touch pad a
third time.
Dispenser Lock
The dispenser can be locked for easy cleaning or to avoid
unintentional dispensing by small children and pets.
Water Filter Status
The control panel will remind you when it is time to order and replace
your water filter by displaying a message when you dispense water.
ORDER WATER FILTER means it is almost time to change the water
filter and REPLACE WATER FILTER means a new water filter should be
installed. It is recommended that you replace the water filter when you
see the REPLACE WATER FILTER message OR earlier if the flow of
water to your water dispenser or ice maker decreases noticeably.
Reset Water Filter Status
After replacing the water filter, you must reset the water filter
status to turn off the message.
1. On main menu, press the touch pad next to “OPTIONS”.
2. In each of the following screens, continue to press the touch pad
next to “MORE OPTIONS” until you reach the “REPLACE FILTER”
screen.
3. Press the touch pad next to “YES” to reset the water filter status.
Press the touch pad next to “NO” if you do not wish to reset the
water filter status.
Note: The dispenser lock does not shut off power to the product, to
the ice maker, or to the dispenser light. It just deactivates the
dispenser lever.
18
19
Operation
Operation
• The dispenser lights are LEDs which should
not need to be changed.
• When you use the dispenser, the lever will
automatically turn the light on. If you want
the light to be on continuously, you may
choose either ON or AUTO.
Water Filtration System
(cont.)
Replacing the Water Filter
Replacement water filters are available through your local Viking Range
Dealer. You may also order filters by calling 1-888-845-4641 or online
at vikingrange.com
IMPORTANT: Air trapped in the water system may cause water and
filter to eject. Always dispense water for at least 2 minutes before
removing the filter or blue bypass cap.
1. Turn filter counterclockwise to remove.
2. Remove sealing label from replacement filter and insert the filter
end into the filter head.
3. Turn the filter clockwise until it stops. Snap the filter cover closed.
Note: The dispenser feature may be used without a water filter
installed. Your water will not be filtered. If this option is chosen,
replace the filter with the blue bypass cap.
Refrigerator Water Filter
Specifications
Service Flow Rate (Maximum) .................................0.78 GPM
.................................................................................(2.9 L/min)
Rated Service Life RWFFR (750 gal. Max) ...............750 gal./2838 liters
Maximum Operating Temperature..........................100°F/38°C
Minimum Pressure Requirement .............................35 psi/241 kPA
Minimum Operating Temperature...........................33°F/1°C
Maximum Operating Pressure.................................120 psi/827 kPA
20
Tested and certified by NSF International against ANSI/NSF Standards
42 & 53 in models RWFFR for the reduction of:
Standard No. 42
Standard No. 53
Aesthetic Effects:
Health Effects:
Taste and Odor Reduction
Chemical Reduction Unit
Chlorine Taste & Odor
Lead, Atrazine, Lindane,
Mechanical Filtration Unit
Benzene, Carbofuran,
Particulate Reduction Class I
p-Dichlorobenzene, Mercury, &
Toxaphene Reduction
Mechanical Filtration Unit
Cyst, Turbidity & Asbestos
Reduction
General Use Conditions
Read this Performance Data Sheet and compare the capabilities of this
refrigerator with your actual water treatment needs. DO NOT use this
product where water is microbiologically unsafe or of unknown quality
without adequate disinfection before or after the system. System
certified for cyst reduction may be used on disinfected water that may
contain filterable cysts. USE ONLY WITH COLD WATER SUPPLY.
CHECK FOR COMPLIANCE WITH THE STATE AND LOCAL
LAWS AND REGULATIONS.
The retractable water filtration system uses a RWFFR replacement
cartridge. Timely replacement of filter cartridge is essential for
performance satisfaction from this filtration system. Please refer
to the applicable section of your Use & Care Guide for general
operation, maintenance requirements and troubleshooting.
This system has been tested according to ANSI/NSF 42 and 53 for
reduction of the substance listed above. The concentration of the
indicated substances in water entering the system was reduced to a
concentration less than or equal to the permissible limit for water
leaving the system, as specified in ANSI/NSF 42 and 53.
21
Operation
Operation
Cartridge Model RWFFR
Water Filter
Water Filter Certifications
Water Filter
Min.
Required
Reduction
State of California
Department of Health Services
Water Treatment Device
Certificate Number
06 - 1790
50%
Date Issued: June 1, 2006
Standard No. 42: Aesthetic Effects
Parameter USEPA
MCL
Influent
Influent
Challenge
Concentration Average
Chlorine
—
2.0 mg/L
+ 10%
T&O
—
—
Particulate**
—
Effluent
Avg.
% Reduction
Max.
Avg.
Min.
0.06
1.88 mg/L <0.051363
mg/L
mg/L >97.26% 96.84%
—
—
at least 10,000 57,000,000
particles/ml
#/ml
30,583
#/ml
—
—
—
69,000 99.52% 98.94%
#/ml
—
85%
Standard No. 53: Health Effects
Parameter USEPA
MCL
Turbidity
Cysts
Effluent
Avg.
Max.
% Reduction
Avg.
Min.
1NTU** 11 + 1 NTU*** 10.7 NTU .031 NTU 0.49 NTU 97.09% 95.20%
99.5%
Red
Minimum
50,000/L
166,500
#/L
L <1 #/L
<1 #/L
Min.
Required
Reduction
0.5NTU
>99.99% >99.99% >99.95%
The water treatment device(s) listed on this certificate have met the testing requirements
pursuant to Section 116830 of the Health and Safety Code for the following health related
contaminants:
Microbiological Contaminants and Turbidity
Cysts
Turbidity
0.015
mg/L
0.15 mg/L
+ 10%
0.153
mg/L
<0.001
mg/L
<0.001 >99.35% >99.29% 0.10 mg/L
mg/L
Lead at
pH 8.5
0.015
mg/L
0.15 mg/L
+ 10%
0.150
mg/L
<0.001
mg/L
<0.001
mg/L >99.33% >99.29% 0.10 mg/L
Rated Service Capacity: 750 gal.
Mercury at
pH 6.5
0.002
mg/L
0.06 mg/L
+ 10%
0.006
mg/L
<0.003
mg/L
<0.005
mg/L
Mercury at
pH 8.5
0.002
mg/L
0.06 mg/L
+ 10%
0.006
mg/L
<0.008
mg/L
Atrazine
0.003
mg/L
0.09 mg/L
+ 10%
0.009
mg/L
Benzene
0.005
mg/L
0.15 mg/L
+ 10%
Carbofuran
0.04
mg/L
107 108 fibers/
99% L; fibers >10 155 MF/L <1 MF/L
Red micrometers in
length
<1 MF/L >99.99% >99.99%
99%
95.70% 90.91%
0.002
mg/L
<0.015
mg/L
86.22% 75.93%
0.002
mg/L
<0.002
mg/L
<0.002
mg/L
76.99% 75.31%
0.003
mg/L
0.014
mg/L
<0.006
mg/L
<0.011
mg/L
95.71% 92.14%
0.005
mg/L
0.08 mg/L
+ 10%
0.081
mg/L
<0.001
mg/L
<0.001
mg/L
98.74% 98.46% 0.04 mg/L
p-Dichlorob- 0.075
enzene
mg/L
0.225 mg/L
+ 10%
0.208
mg/L
<0.005
mg/L
<0.005
mg/L
99.76% 99.74%
0.075
mg/L
0.0002
mg/L
0.002 mg/L
+ 10%
0.002
mg/L
<0.000
mg/L
<0.001
mg/L
98.72% 96.50%
0.0002
mg/L
Toxaphene 0.003
mg/L
0.15 mg/L
+ 10%
0.015
mg/L
<0.001
mg/L
<0.001
mg/L
92.97% 91.67%
0.003
mg/L
Lindane
Inorganic/Radiological Contaminants
Asbestos
Lead
Mercury
Rated Service Flow: 0.78 gpm
Conditions of Certification:
Do not use with water that is microbiologically unsafe or with water of unknown quality
without adequate disinfection before or after the system. Systems certified for cyst
reduction may be used on disinfected waters that may contain filterable cysts.
*Tested using a flow rate of 0.78 gpm; pressure of 60psig; pH of 7.5 + 0.5; temp of
68˚ + 5˚F (20˚ + 3˚C).
**Measurement in Particles/ml. Particles used were 0.5 - 1 microns
***NTU - Nephelometric Turbidity Units
22
23
Operation
Lead at
pH 6.5
Organic Contaminants
Atrazine
Lindane
Benzene
Carbofuran
p-dichlorobenzene
Toxaphene
Asbestos
Operation
Influent
Influent
Challenge Average
Concentration
Trademark /Model Designation
Replacement Elements
RWFFR-750
RWFFR
Manufacturer: CUNO, Incorporated, a 3M Company
Cleaning
Changing the Light Bulb
Both the refrigerator and freezer sections defrost automatically. However,
clean both sections about once a month to avoid buildup of odors. Wipe
up spills immediately.
IMPORTANT: Because air circulates between both sections, any odors
formed in one section will transfer to the other. You must thoroughly
clean both sections to eliminate odors. To avoid odor transfer and drying
out of food, wrap or cover foods tightly.
WARNING
Note: Not all appliance bulbs will fit your refrigerator. Be sure to
replace the bulb with an appliance bulb of the same size, shape, and
wattage (no greater than 40 watts).
1. Unplug refrigerator or disconnect power.
2. Remove the light shield, if necessary.
• Top of the refrigerator compartment—squeeze both sides of the
light shield while pulling downward to remove.
• Beneath ice storage enclosure—press along upper edge of light
shield and roll light shield forward to remove.
Explosion Hazard
Use nonflammable cleaner.
Failure to do so can result in death, explosion, or fire.
To Clean Your Refrigerator:
Note: DO NOT use abrasive or harsh cleaners such as window sprays,
scouring cleansers, flammable fluids, cleaning waxes, concentrated
detergents, bleaches or cleansers containing petroleum products on
plastic parts, interior and door liners or gaskets. DO NOT use paper
towels, scouring pads, or other harsh cleaning tools.
Note: To avoid damaging the light shield, do not force the shield
beyond the locking point.
5. Plug in refrigerator or reconnect power.
If you need to clean the condenser:
• Remove the base grille.
• Use a vacuum cleaner with a soft brush to clean the grille, the open
areas behind the grille and the front surface area of the condenser.
• Replace the base grille when finished.
Product Care
Product Care
1. Unplug refrigerator or disconnect power.
2. Hand wash, rinse, and dry removable parts and interior surfaces
thoroughly. Use a clean sponge or soft cloth and a mild detergent in
warm water.
3. Wash stainless steel and painted metal exteriors with a clean sponge or
soft cloth and a mild detergent in warm water.
4. There is no need for routine condenser cleaning in normal home
operating environments. If the environment is particularly greasy or
dusty, or there is significant pet traffic in the home, the condenser
should be cleaned every 2 to 3 months to ensure maximum efficiency.
3. Replace burned-out bulb(s) with appliance light bulb(s) no greater
than 40 watts.
4. Replace the light shield(s) by inserting the tabs on the shield into
the liner holes and snap into place.
5. Plug in refrigerator or reconnect power.
24
25
Troubleshooting
Troubleshooting
WARNING
(cont.)
Refrigerator Operation
Problem
Cause
Solution
The refrigerator
seems noisy
Refrigerator noise has been
reduced over the years.
Due to this reduction, you
may hear intermittent
noises from your new
refrigerator that you did
not notice from your old
model. Listed on the right
are some normal sounds
with explanations.
Buzzing—heard when the
water valve opens to fill the
ice maker
Pulsating—fans/compressor
adjusting to optimize
performance
Hissing/Rattling—flow of
refrigerant, movement of
water lines, or from items
placed on top of the
refrigerator
Sizzling/Gurgling—water
dripping on the heater
during defrost cycle
Popping—contraction/
expansion of inside walls,
especially during initial
cool-down
Water running—may be
heard when water melts
during the defrost cycle
and runs into the drain pan
Creaking/Cracking—occurs
as ice is being ejected from
the ice maker mold.
The doors
will not close
completely
Door blocked open?
Move food packages away
from door.
Push bin or shelf back in
the correct position.
The doors are
difficult to open
Gaskets dirty or sticky?
Electrical Shock Hazard
Plug into a grounded 3 prong outlet.
Do not remove ground prong.
Do not use an adapter.
Do not use an extension cord.
Failure to follow these instructions can result in death,
fire, or electrical shock.
Refrigerator Operation
Problem
Cause
Solution
The refrigerator
will not operate
Power cord unplugged?
Plug into a grounded
3-prong outlet.
Plug in a lamp to see if the
outlet is working.
Replace the fuse or reset
the circuit breaker. If the
problem continues, call an
electrician.
Make sure the refrigerator
controls are on. See “Using
the Controls”.
Allow 24 hours following
installation for the
refrigerator to cool
completely.
Note: Adjusting the
temperature controls to
coldest setting will not cool
either compartment more
quickly.
Is outlet working?
Household fuse blown or
circuit breaker tripped?
Are controls on?
New installation?
Normal operation
26
Your new refrigerator may
run longer than your old one
due to its high-efficiency
compressor and fans. The
refrigerator may run even
longer if the room is warm, a
large food load is added,
doors are opened often, or
if the doors have been left
open.
Clean gaskets and contact
surfaces with mild soap
and warm water. Rinse and
dry with soft cloth.
WARNING
Explosion Hazard
Use nonflammable cleaner.
Failure to do so can result in death, explosion, or fire.
27
Product Care
Product Care
The motor seems
to run too much
Bin or shelf in the way?
Troubleshooting
(cont.)
Troubleshooting
(cont.)
Ice and Water
Temperature and Moisture
Problem
Cause
Solution
Problem
Cause
Solution
Temperature is
too warm
New installation?
Allow 24 hours following
installation for the
refrigerator to cool
completely.
Allows warm air to enter
refrigerator. Minimize door
openings and keep doors
fully closed.
Allow several hours for
refrigerator to return to
normal temperature.
Adjust the controls a setting
colder. Check temperature in
24 hours. See “Using the
Controls”.
The ice maker is
not producing
ice or not
enough ice
Refrigerator connected to a
water supply and the supply
shutoff valve turned on?
Kink in the water source
line?
Connect refrigerator to
water supply and turn water
shutoff valve fully open.
A kink in the line can reduce
water flow. Straighten the
water source line.
Make sure wire shutoff arm
or switch (depending on
model) is in the ON position.
Wait 24 hours after ice maker
installation for ice production
to begin. Wait 72 hours for
full ice production.
Firmly close the freezer
compartment door. If the
freezer compartment door
will not close all the way, see
“The doors will not close
completely”.
Allow 24 hours for ice maker
to produce more ice.
Remove ice from the ejector
arm with a plastic utensil.
Remove filter and operate
ice maker. If ice volume
improves, then the filter may
be clogged or incorrectly
installed. Replace filter or
reinstall it correctly.
This can decrease water
pressure. See “Water Supply
Requirements”.
Door(s) opened often or left
open?
Large load of food added?
Controls set correctly for the
surrounding conditions?
There is interior
moisture buildup
Note: Some
moisture buildup
is normal.
High humidity?
Door(s) left open?
Ice maker turned on?
New installation?
Freezer door closed
completely?
Large amount of ice recently
removed?
Ice cube jammed in the ice
maker ejector arm?
Water filter installed on the
refrigerator?
Minimize door openings and
keep door(s) fully closed.
Keep door(s) fully closed.
Reverse osmosis water
filtration system connected
to your cold water supply?
The ice cubes are
hollow or small
Note: This is an
indication of low
water pressure.
Water shutoff valve not fully
open?
Kink in the water source line?
Reverse osmosis water
filtration system connected
to your cold water supply?
28
29
Product Care
Product Care
Water filter installed on the
refrigerator?
Turn the water shutoff valve
fully open.
A kink in the line can reduce
water flow. Straighten the
water source line.
Remove filter and operate
ice maker. If ice quality
improves, then the filter may
be clogged or incorrectly
installed. Replace filter or
reinstall it correctly.
This can decrease water
pressure. See “Water Supply
Requirements”.
Troubleshooting
(cont.)
WARNING
Troubleshooting
(cont.)
Ice and Water
Problem
Cause
Solution
The water and
ice dispenser will
not operate
properly
Water filter installed on the
refrigerator?
Remove filter and operate
dispenser. If water flow
increases, the filter may be
clogged or incorrectly
installed. Replace filter or
reinstall it correctly.
Close the door firmly. If it
does not close completely,
see “The doors will not
close completely”.
Make sure the water
dispenser wire/tube
assembly has been properly
reconnected at the bottom
of the refrigerator door. See
“Refrigerator Doors and
Drawer”.
This can decrease water
pressure. See “Water Supply
Requirements”.
Cut Hazard
Refrigerator door closed
completely?
Use a sturdy glass when dispensing ice.
Failure to do so can result in cuts.
Recently removed the
doors?
Ice and Water
Problem
Cause
Solution
Off-taste, odor or
gray color in the
ice
New plumbing connections?
New plumbing connections
can cause discolored or offflavored ice.
Discard ice. Wash ice bin.
Allow 24 hours for ice maker
to make new ice.
Use airtight, moisture proof
packaging to store food.
A water filter may need to
be installed to remove the
minerals.
Gray or dark discoloration in
ice indicates that the water
filtration system needs
additional flushing. Flush the
water system before using a
new water filter. Replace
water filter when indicated.
See “Water Filtration
System”.
Ice stored too long?
Odor transfer from food?
Are there minerals (such as
sulfur) in the water?
Water filter installed on the
refrigerator?
Refrigerator connected to a
water supply and the supply
shutoff valve turned on?
Kink in the water source
line?
New installation?
Is the water pressure at least
35 psi (241 kPa)?
30
Connect refrigerator to
water supply and turn water
shutoff valve fully open.
Straighten the water source
line.
Flush and fill the water
system. See “Water and Ice
Dispenser”.
The water pressure to the
home determines the flow
from the dispenser. See
“Water Supply Requirements”.
Water is leaking
from the
dispenser system
Note: One or
two drops of
water after
dispensing is
normal.
Glass not being held under
the dispenser long enough?
Water from the
dispenser is warm
Note: Water from
the dispenser is
only chilled to
50°F (10°C).
New installation?
New installation?
Recently changed water
filter?
Water on the floor near the
base grille?
Recently dispensed large
amount of water?
Water not been recently
dispensed?
Refrigerator connected to a
cold water pipe?
31
Hold the glass under the
dispenser two to three
seconds after releasing the
dispenser lever.
Flush the water system. See
“Water and Ice Dispenser”.
Flush the water system. See
“Water and Ice Dispenser”.
Make sure the water
dispenser tube connections
are fully tightened. See
“Refrigerator Doors and
Drawer”.
Allow 24 hours after
installation for the water
supply to cool completely.
Allow 24 hours for water
supply to cool completely.
The first glass of water may
not be cool. Discard the first
glass of water.
Make sure the refrigerator is
connected to a cold water
pipe. See “Water Supply
Requirements”.
Product Care
Product Care
The water and
ice dispenser will
not operate
properly
Reverse osmosis water
filtration system connected
to your cold water supply?
Service Information
Warranty
If service is required after checking the troubleshooting guide,
call your Viking dealer or authorized service agency. The
name of the authorized service agency can be obtained from
the dealer or distributor in your area.
FREESTANDING FRENCH DOOR BOTTOM MOUNT REFRIGERATOR/FREEZER WITH DISPENSER WARRANTY
THREE YEAR FULL WARRANTY
Freestanding french door bottom mount refrigerator/freezers and all of their component parts, except as
detailed below*†, are warranted to be free from defective materials or workmanship in normal residential
use for a period of three (3) years from the date of original retail purchase or closing date for new construction,
whichever period is longer. Viking Range Corporation, warrantor, agrees to repair or replace, at its option,
any part which fails or is found to be defective during the warranty period.
When you make a service call, be sure to have the following
information handy:
• Model Number
• Serial Number
• Date of Purchase
• Name of dealer from whom purchased
Be ready to clearly describe the problem that you are having
with your Viking refrigerator.
If you are unable to obtain the name of an authorized service
agency, or if you continue to have service problems, contact
Viking Range Corporation at (888) 845-4641 or write to:
VIKING RANGE CORPORATION
PREFERRED SERVICE
1803 Hwy 82W
Greenwood, Mississippi 38930 USA
Record the following information indicated below. You will
need it if service is ever required.
The serial number and model numbers for your refrigerator
are located on the upper wall, behind the lighting.
Model No. ____________________ Serial No. ________________
Date of Purchase __________ Date Installed ________________
Dealer’s Name __________________________________________
Address ________________________________________________
_______________________________________________________
If service requires installation of parts, use only authorized
parts to insure protection under the warranty.
*FULL NINETY (90) DAY COSMETIC WARRANTY: Product is warranted to be free from
cosmetic defects in materials or workmanship (such as scratches on stainless steel,
paint/porcelain blemishes, etc.) for a period of ninety (90) days from the date of original retail
purchase or closing date for new construction, whichever period is longer. Any defects must be
reported to the selling dealer within ninety (90) days from date of original retail purchase.
Viking Range Corporation uses high quality processes and materials available to produce all
color finishes. However, slight color variation may be noticed because of the inherent
differences in painted parts and porcelain parts as well as differences in kitchen lighting,
product locations, and other factors. Therefore, this warranty does not apply to color variation
attributable to such factors.
†FULL NINETY (90) DAY WARRANTY IN "RESIDENTIAL PLUS" APPLICATIONS: This full
warranty applies to applications where use of the product extends beyond normal residential
use, but the warranty period for products used in such applications is ninety (90) days.
Examples of applications covered by this warranty are bed and breakfasts, fire stations, private
clubs, churches, yachts, etc. Under this "Residential Plus" warranty, the product, its components
and accessories are warranted to be free from defective material or workmanship for a period
of ninety (90) days from the date of original retail purchase. This warranty excludes use of the
product in all commercial locations such as restaurants, food service locations and institutional
food service locations.
SIX YEAR FULL WARRANTY ON SEALED REFRIGERATION PARTS AS LISTED
Any sealed refrigeration system component, as listed below, is warranted to be free from defective
materials or workmanship in normal household use during the fourth through the sixth year from the date
of original retail purchase. Viking Range Corporation, warrantor, agrees to repair or replace, at its option,
any part which fails or is found to be defective during the warranty period.
Sealed Refrigeration System Components: Compressor, Evaporator, Condenser, Connecting Tubing,
Dryer/Strainer
TWELVE YEAR LIMITED WARRANTY ON SEALED REFRIGERATION PARTS AS LISTED
Any sealed refrigeration system component, as listed above, which fails due to defective materials or
workmanship in normal household use during the seventh through the twelfth year from the date of
original retail purchase will be repaired or replaced, free of charge for the part itself, with the owner
paying all other costs, including labor.
TERMS AND CONDITIONS
This warranty extends to the original purchaser of the product warranted hereunder and to each transferee
owner of the product during the term of the warranty and applies to products purchased and located in
the United States and Canada. Products must be purchased in the country where service is requested. If
the product or one of its component parts contains a defect or malfunction during the full warranty period
after a reasonable number of attempts by the warrantor to remedy the defect or malfunction, the owner is
entitled to either a refund or replacement of the product or its component part or parts. Replacement of a
component part includes its free installation, except as specified under the limited warranty. Under the
terms of this warranty, service must be performed by a factory authorized Viking Range Corporation
service agent or representative. Service will be provided during normal business hours, and labor
performed at overtime or premium rates shall not be covered by this warranty.
Owner shall be responsible for proper installation, providing reasonable and necessary maintenance,
providing proof of purchase upon request, and making the appliance reasonably accessible for service.
The return of the Owner Registration Card is not a condition of warranty coverage. You should, however,
return the Owner Registration Card so that Viking Range Corporation can contact you should any question
of safety arise which could affect you.
This warranty gives you specific legal rights, and you may also have other rights which may vary from
jurisdiction to jurisdiction.
WHAT IS NOT COVERED BY THIS WARRANTY: This warranty shall not apply to damage resulting from
abuse, failure to provide reasonable and necessary maintenance, accident, delivery, negligence, natural
disaster, loss of electrical power to the product for any reason, alteration, outdoor use, improper installation,
improper operation, or repair or service of the product by anyone other than an authorized Viking Range
Corporation service agency or representative. This warranty does not apply to commercial usage.
Keep this manual with your refrigerator for future
reference.
32
33
Warranty
Notes
(cont.)
LIMITATION OF REMEDIES AND DURATION OF IMPLIED WARRANTY
OWNER’S SOLE AND EXCLUSIVE REMEDY FOR A CLAIM OF ANY KIND WITH RESPECT TO THIS
PRODUCT SHALL BE THE REMEDIES SET FORTH ABOVE.VIKING IS NOT RESPONSIBLE FOR
CONSEQUENTIAL OR INCIDENTAL DAMAGE, INCLUDING BUT NOT LIMITED TO FOOD OR
MEDICINE LOSS, DUE TO PRODUCT FAILURE, WHETHER ARISING OUT OF BREACH OF
WARRANTY, BREACH OF CONTRACT OR OTHERWISE. Some jurisdictions do not allow the exclusion or
limitation of incidental or consequential damages, so the above limitation or exclusions may not apply to
you. ANY IMPLIED WARRANTIES OF MERCHANTABILITY OR FITNESS FOR A PARTICULAR PURPOSE
APPLICABLE TO THIS PRODUCT ARE LIMITED IN DURATION TO THE PERIOD OF COVERAGE OF
THE APPLICABLE EXPRESS WRITTEN LIMITED WARRANTIES SET FORTH ABOVE. Some states do not
allow limitations on how long an implied warranty lasts, so the above limitation may not apply to you.
WARRANTY SERVICE
To obtain warranty service, contact an authorized Viking Range Corporation service agent, or Viking Range
Corporation, 111 Front Street, Greenwood, Mississippi 38930, (888) 845-4641. Provide model and serial
number and date of original purchase or closing date for a new construction. For the name of your nearest
authorized Viking Range Corporation service agency, call Viking Range Corporation.
IMPORTANT: Retain proof of original purchase to establish warranty period.
_____________________________________________________________________________________________________
_____________________________________________________________________________________________________
_____________________________________________________________________________________________________
_____________________________________________________________________________________________________
_____________________________________________________________________________________________________
Specifications subject to change without notice.
_____________________________________________________________________________________________________
_____________________________________________________________________________________________________
_____________________________________________________________________________________________________
_____________________________________________________________________________________________________
_____________________________________________________________________________________________________
_____________________________________________________________________________________________________
_____________________________________________________________________________________________________
_____________________________________________________________________________________________________
_____________________________________________________________________________________________________
_____________________________________________________________________________________________________
_____________________________________________________________________________________________________
_____________________________________________________________________________________________________
_____________________________________________________________________________________________________
34
35