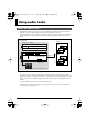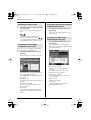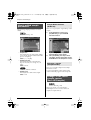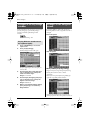
1
03896645
’06-5-5N
転載することを禁じます。
© 2005 ローランド株式会社 本書の一部、もしくは全部を無断で複写・
202
→ Fantom-X をアップデートする必要はありません。
『主な特
長』(P.13)からお読みください。
Fantom-X(本体)をお買いあげのお客様
→ 最初に Fantom-X をアップデートします。
『パッケージの
内容を確認する』(P.9)からお読みください。
Guide to the Added Functionality
「FANTOM-X Audio Track Expansion Kit」
(アップデート・
カード)をお買いあげのお客様
201a
Before using this unit, carefully read the sections entitled:
“USING THE UNIT SAFELY” and “IMPORTANT NOTES” (p. 3; p.
4). These sections provide important information concerning the
proper operation of the unit. Additionally, in order to feel assured
that you have gained a good grasp of every feature provided by
your new unit, this guide should be read in its entirety. This guide
should be saved and kept on hand as a convenient reference.
Guide to the Added Functionality/追加機能マニュアル
This guide applies to the Fantom-X6, the Fantom-X7, the
Fantom-X8 (this guide uses the term “Fantom-X” to indicate
all these three models), and FANTOM-X Audio Track
Expansion Kit.
Customers who purchased the “FANTOM-X Audio Track
Expansion Kit” (update card):
You must first update your Fantom-X. Begin reading from
“Check the contents of the package” (p. 8).
Customers who purchased the Fantom-X
(synthesizer workstation):
You don’t need to update your Fantom-X. Begin reading from
“Main features” (p. 12).
202
Copyright © 2005 ROLAND CORPORATION
All rights reserved. No part of this publication may be reproduced in
any form without the written permission of ROLAND CORPORATION.
03896645
’06-5-5N
この機器を正しくお使いいただくために、 ご使用前に「安全上のご注
意」(P.4)と「使用上のご注意」(P.5)をよくお読みください。また、
この機器の優れた機能を十分ご理解いただくためにも、 追加機能マ
ニュアル をよくお読みください。追加機能マニュアルは必要なときに
すぐに見ることができるよう、 手元に置いてください。
この追加機能マニュアルは Fantom-X6、Fantom-X7、Fantom-X8(マ
ニュアル内では、「 Fantom-X」と表記されています)
、および
FANTOM-X Audio Track Expansion Kit に共通のマニュアルです。
201a
追加機能マニュアル
URUGUAY
Zeelandia Music Center Inc.
Orionweg 30
Curacao, Netherland Antilles
TEL:(305)5926866
Todo Musica S.A.
Francisco Acuna de Figueroa
1771
C.P.: 11.800
Montevideo, URUGUAY
TEL: (02) 924-2335
POLAND
MX MUSIC SP.Z.O.O.
UL. Gibraltarska 4.
PL-03664 Warszawa POLAND
TEL: (022) 679 44 19
EASA HUSAIN AL-YOUSIFI
& SONS CO.
Abdullah Salem Street,
Safat, KUWAIT
TEL: 243-6399
PORTUGAL
LEBANON
Roland Iberia, S.L.
Portugal Office
Cais das Pedras, 8/9-1 Dto
4050-465, Porto, PORTUGAL
TEL: 22 608 00 60
Chahine S.A.L.
Gerge Zeidan St., Chahine
Bldg., Achrafieh, P.O.Box: 165857
Beirut, LEBANON
TEL: (01) 20-1441
HONG KONG
Tom Lee Music Co., Ltd.
Service Division
22-32 Pun Shan Street, Tsuen
Wan, New Territories,
HONG KONG
TEL: 2415 0911
Parsons Music Ltd.
8th Floor, Railway Plaza, 39
Chatham Road South, T.S.T,
Kowloon, HONG KONG
TEL: 2333 1863
INDIA
Rivera Digitec (India) Pvt. Ltd.
409, Nirman Kendra
Mahalaxmi Flats Compound
Off. Dr. Edwin Moses Road,
Mumbai-400011, INDIA
TEL: (022) 2493 9051
INDONESIA
PT Citra IntiRama
J1. Cideng Timur No. 15J-150
Jakarta Pusat
INDONESIA
TEL: (021) 6324170
KOREA
Cosmos Corporation
1461-9, Seocho-Dong,
Seocho Ku, Seoul, KOREA
TEL: (02) 3486-8855
MALAYSIA
Roland Asia Pacific Sdn. Bhd.
45-1, Block C2, Jalan PJU 1/39,
Dataran Prima, 47301 Petaling
Jaya, Selangor, MALAYSIA
TEL: (03) 7805-3263
PHILIPPINES
G.A. Yupangco & Co. Inc.
339 Gil J. Puyat Avenue
Makati, Metro Manila 1200,
PHILIPPINES
TEL: (02) 899 9801
AUSTRALIA/
NEW ZEALAND
Roland Corporation
Australia Pty.,Ltd.
38 Campbell Avenue
Dee Why West. NSW 2099
AUSTRALIA
For Australia
Tel: (02) 9982 8266
For New Zealand
Tel: (09) 3098 715
CENTRAL/LATIN
AMERICA
ARGENTINA
Casa Instrumental
Calzada Roosevelt 34-01,zona 11
Ciudad de Guatemala
Guatemala
TEL:(502) 599-2888
HONDURAS
Almacen Pajaro Azul S.A. de C.V.
BO.Paz Barahona
3 Ave.11 Calle S.O
San Pedro Sula, Honduras
TEL: (504) 553-2029
MARTINIQUE
Musique & Son
Z.I.Les Mangle
97232 Le Lamantin
Martinique F.W.I.
TEL: 596 596 426860
Gigamusic SARL
10 Rte De La Folie
97200 Fort De France
Martinique F.W.I.
TEL: 596 596 715222
MEXICO
Instrumentos Musicales S.A.
Av.Santa Fe 2055
(1123) Buenos Aires
ARGENTINA
TEL: (011) 4508-2700
Casa Veerkamp, s.a. de c.v.
Av. Toluca No. 323, Col. Olivar
de los Padres 01780 Mexico
D.F. MEXICO
TEL: (55) 5668-6699
BARBADOS
NICARAGUA
A&B Music Supplies LTD
12 Webster Industrial Park
Wildey, St.Michael, Barbados
TEL: (246)430-1100
BRAZIL
Roland Brasil Ltda.
Rua San Jose, 780 Sala B
Parque Industrial San Jose
Cotia - Sao Paulo - SP, BRAZIL
TEL: (011) 4615 5666
CHILE
Comercial Fancy II S.A.
Rut.: 96.919.420-1
Nataniel Cox #739, 4th Floor
Santiago - Centro, CHILE
TEL: (02) 688-9540
COLOMBIA
Centro Musical Ltda.
Cra 43 B No 25 A 41 Bododega 9
Medellin, Colombia
TEL: (574)3812529
Bansbach Instrumentos
Musicales Nicaragua
Altamira D'Este Calle Principal
de la Farmacia 5ta.Avenida
1 Cuadra al Lago.#503
Managua, Nicaragua
TEL: (505)277-2557
PANAMA
SUPRO MUNDIAL, S.A.
Boulevard Andrews, Albrook,
Panama City, REP. DE
PANAMA
TEL: 315-0101
PARAGUAY
Distribuidora De
Instrumentos Musicales
J.E. Olear y ESQ. Manduvira
Asuncion PARAGUAY
TEL: (595) 21 492147
PERU
Audionet
Distribuciones Musicales SAC
Juan Fanning 530
Miraflores
Lima - Peru
TEL: (511) 4461388
Roland Elektronische
Musikinstrumente HmbH.
Austrian Office
Eduard-Bodem-Gasse 8,
A-6020 Innsbruck, AUSTRIA
TEL: (0512) 26 44 260
BELGIUM/FRANCE/
HOLLAND/
LUXEMBOURG
Roland Central Europe N.V.
Houtstraat 3, B-2260, Oevel
(Westerlo) BELGIUM
TEL: (014) 575811
CZECH REP.
K-AUDIO
Kardasovska 626.
CZ-198 00 Praha 9,
CZECH REP.
TEL: (2) 666 10529
DENMARK
Roland Scandinavia A/S
Nordhavnsvej 7, Postbox 880,
DK-2100 Copenhagen
DENMARK
TEL: 3916 6200
FINLAND
Roland Scandinavia As, Filial
Finland
Elannontie 5
FIN-01510 Vantaa, FINLAND
TEL: (0)9 68 24 020
GERMANY
Roland Elektronische
Musikinstrumente HmbH.
Oststrasse 96, 22844
Norderstedt, GERMANY
TEL: (040) 52 60090
GREECE/CYPRUS
STOLLAS S.A.
Music Sound Light
155, New National Road
Patras 26442, GREECE
TEL: 2610 435400
HUNGARY
Roland East Europe Ltd.
Warehouse Area ‘DEPO’ Pf.83
H-2046 Torokbalint,
HUNGARY
TEL: (23) 511011
IRELAND
Roland Ireland
G2 Calmount Park, Calmount
Avenue, Dublin 12
Republic of IRELAND
TEL: (01) 4294444
ITALY
RUSSIA
QATAR
MuTek
Dorozhnaya ul.3,korp.6
117 545 Moscow, RUSSIA
TEL: (095) 981-4967
Al Emadi Co. (Badie Studio &
Stores)
P.O. Box 62, Doha, QATAR
TEL: 4423-554
SPAIN
Roland Iberia, S.L.
Paseo García Faria, 33-35
08005 Barcelona SPAIN
TEL: 93 493 91 00
SAUDI ARABIA
SWEDEN
Roland Scandinavia A/S
SWEDISH SALES OFFICE
Danvik Center 28, 2 tr.
S-131 30 Nacka SWEDEN
TEL: (0)8 702 00 20
aDawliah Universal
Electronics APL
Corniche Road, Aldossary
Bldg., 1st Floor, Alkhobar,
SAUDI ARABIA
P.O.Box 2154, Alkhobar 31952
SAUDI ARABIA
TEL: (03) 898 2081
SYRIA
SWITZERLAND
Technical Light & Sound
Center
Rawda, Abdul Qader Jazairi St.
Bldg. No. 21, P.O.BOX 13520,
Damascus, SYRIA
TEL: (011) 223-5384
Roland (Switzerland) AG
Landstrasse 5, Postfach,
CH-4452 Itingen,
SWITZERLAND
TEL: (061) 927-8383
UKRAINE
TURKEY
TIC-TAC
Mira Str. 19/108
P.O. Box 180
295400 Munkachevo,
UKRAINE
TEL: (03131) 414-40
ZUHAL DIS TICARET A.S.
Galip Dede Cad. No.37
Beyoglu - Istanbul / TURKEY
TEL: (0212) 249 85 10
U.A.E.
UNITED KINGDOM
Roland (U.K.) Ltd.
Atlantic Close, Swansea
Enterprise Park, SWANSEA
SA7 9FJ,
UNITED KINGDOM
TEL: (01792) 702701
Zak Electronics & Musical
Instruments Co. L.L.C.
Zabeel Road, Al Sherooq Bldg.,
No. 14, Grand Floor, Dubai,
U.A.E.
TEL: (04) 3360715
NORTH AMERICA
MIDDLE EAST
CANADA
BAHRAIN
Moon Stores
No.16, Bab Al Bahrain Avenue,
P.O.Box 247, Manama 304,
State of BAHRAIN
TEL: 17 211 005
IRAN
Roland Canada Ltd.
(Head Office)
5480 Parkwood Way
Richmond B. C., V6V 2M4
CANADA
TEL: (604) 270 6626
MOCO INC.
No.41 Nike St., Dr.Shariyati Ave.,
Roberoye Cerahe Mirdamad
Tehran, IRAN
TEL: (021) 285-4169
Roland Canada Ltd.
(Toronto Office)
170 Admiral Boulevard
Mississauga On L5T 2N6
CANADA
TEL: (905) 362 9707
ISRAEL
U. S. A.
Halilit P. Greenspoon & Sons
Ltd.
8 Retzif Ha'aliya Hashnya St.
Tel-Aviv-Yafo ISRAEL
TEL: (03) 6823666
Roland Corporation U.S.
5100 S. Eastern Avenue
Los Angeles, CA 90040-2938,
U. S. A.
TEL: (323) 890 3700
Roland Italy S. p. A.
Viale delle Industrie 8,
20020 Arese, Milano, ITALY
TEL: (02) 937-78300
As of April 1, 2006 (ROLAND)
ローランド製品全般に関するお問い合わせ先
Roland Shanghai Electronics
Co.,Ltd.
(BEIJING OFFICE)
10F. No.18 3 Section Anhuaxili
Chaoyang District Beijing
100011 CHINA
TEL: (010) 6426-5050
AUSTRALIA/
NEW ZEALAND
GUATEMALA
AUSTRIA
デジタル・ピアノ、シンセサイザー、デジタル・レコーダー、BOSSエフェクターなど
Roland Shanghai Electronics
Co.,Ltd.
5F. No.1500 Pingliang Road
Shanghai 200090, CHINA
TEL: (021) 5580-0800
OMNI MUSIC
75 Avenida Norte y Final
Alameda Juan Pablo II,
Edificio No.4010 San Salvador,
EL SALVADOR
TEL: 262-0788
050-3101-2555
CHINA
EL SALVADOR
TALENTZ CENTRE L.L.C.
Malatan House No.1
Al Noor Street, Ruwi
SULTANATE OF OMAN
TEL: 2478 3443
お客様相談センター
SAIGON MUSIC
DISTRIBUTOR
(TAN DINH MUSIC)
138 Tran Quang Khai Street
Dist. 1, Ho Chi Minh City
VIETNAM
TEL: (08) 848-4068
OMAN
FBS LINES
Piata Libertatii 1,
535500 Gheorgheni,
ROMANIA
TEL: (266) 364 609
コンピューター・ミュージック関連製品に関するお問い合わせ先
VIETNAM
EUROPE
ROMANIA
オーディオ&MIDIインターフェース、DTM音源モジュール、DTMソフトウェアなど
Mas Musika
Rumichaca 822 y Zaruma
Guayaquil - Ecuador
TEL:(593-4)2302364
050-3101-2570
ECUADOR
Theera Music Co. , Ltd.
330 Soi Verng NakornKasem,
New Road, Sumpantawongse,
Bangkok 10100, THAILAND
TEL: (02) 224-8821
Instrumentos Musicales
Allegro,C.A.
Av.las industrias edf.Guitar
import
#7 zona Industrial de Turumo
Caracas, Venezuela
TEL: (212) 244-1122
DTMホットライン
THAILAND
VENEZUELA
電話受付時間: 午前10時∼午後5時(日曜および弊社規定の休日を除く)
Instrumentos Fernando Giraldez
Calle Proyecto Central No.3
Ens.La Esperilla
Santo Domingo,
Dominican Republic
TEL:(809) 683 0305
※IP電話からおかけになって繋がらない場合には、お手数ですが、電話番号の前に“0000”
(ゼロ4回)をつけてNTTの一般回線からおかけいただくか、携帯電話をご利用ください。
DOMINICAN REPUBLIC
※上記窓口の名称、電話番号等は、予告なく変更することがありますのでご了承ください。
TAIWAN
ROLAND TAIWAN
ENTERPRISE CO., LTD.
Room 5, 9fl. No. 112 Chung
Shan N.Road Sec.2, Taipei,
TAIWAN, R.O.C.
TEL: (02) 2561 3339
KUWAIT
修理に関するお問い合わせ先
CURACAO
Penguin Electronics (Pvt) Ltd.
115, Maya Avenue,
Colombo 06, SRI LANKA
TEL: (11) 2552376
商品をお求めの販売店か、保証書封筒裏面にある「修理の窓口」
(サービスの窓口)に記載のサービスステーションへご相談ください。
ASIA
SRI LANKA
最新サポート情報
Paul Bothner(PTY)Ltd.
Royal Cape Park, Unit 24
Londonderry Road, Ottery 7800
Cape Town, SOUTH AFRICA
TEL: (021) 799 4900
MUSIC HOUSE CO. LTD.
FREDDY FOR MUSIC
P. O. Box 922846
Amman 11192 JORDAN
TEL: (06) 5692696
http://www.roland.co.jp/cs/
T.O.M.S. Sound & Music
(Pty)Ltd.
11 Melle St., Braamfontein,
Johannesbourg,
SOUTH AFRICA
TEL: (011) 403 4105
FAX: (011) 403 1234
JORDAN
Roland Scandinavia Avd.
Kontor Norge
Lilleakerveien 2 Postboks 95
Lilleaker N-0216 Oslo
NORWAY
TEL: 2273 0074
ローランド・サポート
SOUTH AFRICA
NORWAY
AMR Ltd
Ground Floor
Maritime Plaza
Barataria Trinidad W.I.
TEL: (868) 638 6385
よくある質問への回答、各種ソフトウェアのダウンロード、最新の動作確認情報など
Maison FO - YAM Marcel
25 Rue Jules Hermann,
Chaudron - BP79 97 491
Ste Clotilde Cedex,
REUNION ISLAND
TEL: (0262) 218-429
TRINIDAD
JUAN Bansbach Instrumentos
Musicales
Ave.1. Calle 11, Apartado 10237,
San Jose, COSTA RICA
TEL: 258-0211
http://www.roland.co.jp/
REUNION
COSTA RICA
SWEE LEE MUSIC
COMPANY PTE. LTD.
150 Sims Drive,
SINGAPORE 387381
TEL: 6846-3676
ローランド・ホームページ
Al Fanny Trading Office
9, EBN Hagar A1 Askalany
Street,
ARD E1 Golf, Heliopolis,
Cairo 11341, EGYPT
TEL: 20-2-417-1828
SINGAPORE
製品情報やイベント/キャンペーン情報など
AFRICA
EGYPT
When you need repair service, call your nearest Roland Service Center or authorized Roland
distributor in your country as shown below.
’06. 04.01 現在
Information
Fantom-X-V2_e.book 3 ページ 2006年4月13日 木曜日 午後5時24分
USING THE UNIT SAFELY
The
symbol alerts the user to important instructions
or warnings.The specific meaning of the symbol is
determined by the design contained within the
triangle. In the case of the symbol at left, it is used for
general cautions, warnings, or alerts to danger.
Used for instructions intended to alert
the user to the risk of death or severe
injury should the unit be used
improperly.
Used for instructions intended to alert
the user to the risk of injury or material
damage should the unit be used
improperly.
* Material damage refers
other adverse effects
respect to the home
furnishings, as well
animals or pets.
The
symbol alerts the user to items that must never
be carried out (are forbidden). The specific thing that
must not be done is indicated by the design contained
within the circle. In the case of the symbol at left, it
means that the unit must never be disassembled.
to damage or
caused with
and all its
to domestic
001
• Before using this unit, make sure to
read the instructions below, and the
Guide to the Added Functionality.
..................................................................................................
002a
• Do not open or perform any internal
modifications on the unit.
..................................................................................................
003
• Do not attempt to repair the unit, or
replace parts within it (except when
this guide provides specific instructions directing you to do so). Refer all
servicing to your retailer, the nearest
Roland Service Center, or an authorized Roland distributor, as listed on
the “Information” page.
..................................................................................................
004
• Never use or store the unit in places
that are:
• Subject to temperature extremes
(e.g., direct sunlight in an enclosed
vehicle, near a heating duct, on top
of heat-generating equipment); or
are
• Damp (e.g., baths, washrooms, on
wet floors); or are
• Humid; or are
• Exposed to rain; or are
• Dusty; or are
• Subject to high levels of vibration.
The ● symbol alerts the user to things that must be
carried out. The specific thing that must be done is
indicated by the design contained within the circle. In
the case of the symbol at left, it means that the powercord plug must be unplugged from the outlet.
011
• Do not allow any objects (e.g.,
flammable material, coins, pins); or
liquids of any kind (water, soft drinks,
etc.) to penetrate the unit.
..................................................................................................
013
• In households with small children, an
adult should provide supervision
until the child is capable of following
all the rules essential for the safe
operation of the unit.
..................................................................................................
014
• Protect the unit from strong impact.
(Do not drop it!)
..................................................................................................
023
• DO NOT play a CD-ROM disc on a
conventional audio CD player. The
resulting sound may be of a level that
could cause permanent hearing loss. Damage
to speakers or other system components may
result.
..................................................................................................
106
• Never climb on top of, nor place heavy
objects on the unit.
..................................................................................................
..................................................................................................
3
Fantom-X-V2_e.book 4 ページ 2006年4月13日 木曜日 午後5時24分
Important Notes
291a
In addition to the items listed under “USING THE UNIT SAFELY” on page 3, please read and
observe the following:
Placement
Handling CD-ROMs
354a
801
• Do not expose the unit to direct sunlight,
place it near devices that radiate heat, leave it
inside an enclosed vehicle, or otherwise
subject it to temperature extremes. Excessive
heat can deform or discolor the unit.
• Avoid touching or scratching the shiny
underside (encoded surface) of the disc.
Damaged or dirty CD-ROM discs may not be
read properly. Keep your discs clean using a
commercially available CD cleaner.
Before Using Cards
Other Notes
Using DATA Cards
* All product names mentioned in this document are trademarks or registered trademarks of their respective owners.
220
704
• Insert the CompactFlash card correctly into
the PC card adapter, and insert it all the way
into the PC card slot.
fig.M512-Insert
234
* CompactFlash and
are trademarks
of SanDisk Corporation and licensed by
CompactFlash association.
962b
* In the interest of product improvement,
the specifications and/or contents of this
package are subject to change without
prior notice.
705
• Never touch the terminals of the CompactFlash and PC card adapter. Also, avoid
getting the terminals dirty.
* In this guide, we use the term “Owner's
Manual” for you to refer to the “FantomX Owner's Manual”.
4
Fantom-X-V2_e.book 5 ページ 2006年4月13日 木曜日 午後5時24分
Contents
Check the contents of the package ...................................................... 8
Updating the Fantom-X .......................................................................... 9
What is the FANTOM-X Audio Track Expansion Kit? ......................................... 9
Items required for performing the update.............................................................. 9
Cautions when performing the update (Important) ...................................... 9
Update procedure.............................................................................................. 10
Verifying the update ......................................................................................... 11
Main features ........................................................................................ 12
Using audio tracks ............................................................................... 13
What are audio tracks?............................................................................................. 13
To access the Audio Track Edit screen ........................................................... 14
To access the Audio Track Mixer screen ........................................................ 14
Items in the Audio Track Edit screen..................................................................... 15
Editing audio tracks (Audio Track Edit screen)................................................... 16
Moving a sample event (Move) ....................................................................... 16
Selecting and auditioning a sample event (Preview) ................................... 16
Using the pads to mute audio tracks (Mute/Solo) ....................................... 16
Viewing a list of markers (Marker List) ......................................................... 17
Opening the Loop/Locate window (Loop/Locate) ..................................... 17
Inserting a sample event at a specified location (Insert).............................. 17
Deleting the selected sample event from an audio track (Delete) .............. 18
Copying a sample event (Copy) ...................................................................... 18
Unloading a sample (Unload Sample)............................................................ 18
Combining the contents of the tracks into one audio track (Mixdown).... 18
Erasing audio tracks (Clear)............................................................................. 19
Naming an audio track (Track Name)............................................................ 20
Switching the display mode............................................................................. 20
Zooming In and Zooming Out in the display ............................................... 20
Editing MIDI tracks ........................................................................................... 20
Items in the Audio Track Mixer screen ................................................................. 21
Controlling the audio tracks (Audio Track Mixer screen).................................. 22
Controlling the audio track settings ............................................................... 22
Using the knobs to control the mixer.............................................................. 23
Opening the Loop/Locate window (Loop/Locate) ..................................... 23
Using the pads to mute audio tracks (Mute) ................................................. 23
Recording an audio track......................................................................................... 24
Recording an audio track (SOLO/RE-SAMPLING)..................................... 24
Combining multiple audio tracks into one track (AUDIO MERGE) ................ 25
Saving your audio tracks ......................................................................................... 26
5
Fantom-X-V2_e.book 6 ページ 2006年4月13日 木曜日 午後5時24分
Contents
Using the Skip Back Sampling function............................................. 27
What is Skip Back Sampling?.................................................................................. 27
Using Skip Back Sampling....................................................................................... 27
Editing the data created by Skip Back Sampling ................................................. 28
Isolating the desired portion of the sampled data (Start Beat/End Beat)........ 28
Cancelling the sample (Skip Back Cancel) ..................................................... 28
Assigning the sampled waveform to the keyboard or a pad
(Assign to Keyboard/Pad) ............................................................................... 28
Assigning the sampled waveform to an audio track
(Assign to Audio Track) ................................................................................... 29
Multisample editing functions............................................................. 30
Creating a multisample............................................................................................ 30
Creating a multisample in the Patch Edit screen .......................................... 31
Creating a multisample in the Create Multisample screen ......................... 31
Editing a multisample .............................................................................................. 33
About the Multisample Edit screen ................................................................ 33
Selecting the notes to edit ................................................................................. 34
Changing the multisample assigned to a tone (List) .................................... 34
Erasing the data from the selected region of notes (Erase).......................... 34
Assigning a sample to the selected region (Assign) ..................................... 34
Copying a sample from a key to another key (Copy) .................................. 35
Opening the Tone Switch/Select window (Tone Sw/Sel) .......................... 35
Moving the split point (Split Point) ................................................................ 35
Returning a multisample to the last-written state (Reload) ........................ 36
Erasing all notes (Erase All) ............................................................................. 36
Replacing the sample of the current zone (Sample Select) .......................... 36
Specify the original key (Org Key) of the sample ......................................... 37
Sorting samples in the order of their original key (Sort) ............................. 37
Moving all samples to left or right (Shift) ...................................................... 37
Moving the data of the current zone to left or right (Move) ....................... 37
Saving a multisample ............................................................................................... 38
Sample-related changes ...................................................................... 39
Extended patch groups ............................................................................................ 39
Saving a sample auto patch.............................................................................. 39
Bank Select and Program Change Correspondence Chart .......................... 39
Newly added sample parameters .......................................................................... 40
Sample BPM calculator (BPM Calc) ................................................................ 40
Selecting a sample (Sample Number)............................................................. 40
Changes in the saved sample content (Save All Samples).................................. 40
Changes in the Patch/Rhythm Edit screen ........................................ 41
Newly added Patch Overview screen ................................................................... 41
6
Fantom-X-V2_e.book 7 ページ 2006年4月13日 木曜日 午後5時24分
Contents
Changes due to the upgraded editor software .................................. 42
Newly added PC mode screen................................................................................ 42
Cautions when using S-700 series sounds with the Fantom-X .......................... 42
Before you connect the Fantom-X to your computer ................................... 42
Importing patches and rhythm sets ....................................................................... 43
Fantom-X Editor System Requirements ................................................................ 45
System Requirements (Windows) ................................................................... 45
System Requirements (Mac OS) ...................................................................... 45
About the included USB MIDI driver.................................................................... 45
Other changes ...................................................................................... 46
Changes in the Patch Edit screen............................................................................ 46
Changes in the Performance Mixer screen............................................................ 47
Changes in the Performance Layer screen ............................................................ 47
Newly added Layer List window ................................................................... 47
Changes in the Key Range window ....................................................................... 48
Playing different sounds across the keyboard (Split)................................... 48
Changes in the Song Edit screen............................................................................. 48
Changes in the Song List screen ............................................................................. 49
Deleting a Song .................................................................................................. 49
Using the pads for realtime erase........................................................................... 49
CC Filter added to the Microscope......................................................................... 50
Improved functionality for step recording ........................................................... 50
Changes in the demo song loaded when you start up the Fantom-X............... 50
Improved functionality in Live Setting ................................................................. 51
Registering a song file in a Live Setting ......................................................... 51
Recalling a song file you registered ................................................................ 52
Switching the font.............................................................................................. 52
Removing the text.............................................................................................. 52
Improvements in Arpeggio functionality ............................................................. 52
Using the pads to switch arpeggio styles....................................................... 52
Changing the arpeggio styles assigned to the pads ..................................... 53
Improvements in Chord Memory functionality................................................... 53
Using the pads to switch chord forms............................................................ 53
Changing the chord forms assigned to the pads........................................... 54
Changes in the librarian........................................................................................... 54
New shortcut from the Input Setting screen to MFX Edit .................................. 55
New parameters available for the assignable switches....................................... 55
Newly added DIMM check function ..................................................................... 56
Index ...................................................................................................... 57
7
Fantom-X-V2_e.book 8 ページ 2006年4月13日 木曜日 午後5時24分
Check the contents of the package
This package contains the following items. As soon as you open the package, please make
sure that all items are present. You may wish to check off (
item. If anything is missing, please contact your dealer.
) each box as you verify each
* This page is for verifying the contents of the FANTOM-X Audio Track Expansion Kit (update
card). If you purchased the Fantom-X (synthesizer workstation), please begin reading from “Main
features” (p. 12).
FANTOM-X Audio Track Expansion Kit CompactFlash card
For the update procedure, refer to “Updating the Fantom-X” (p. 9).
PC card adapter
This is an adapter for inserting the “FANTOM-X Audio Track Expansion Kit”
CompactFlash card into the Fantom-X synthesizer.
CD-ROM (Editor)
Fantom-X Sound List (Leaflet)
Guide to the Added Functionality (this document)
This is the document you are reading. It explains the functionality added by the FANTOMX Audio Track Expansion.
Sticker
8
Fantom-X-V2_e.book 9 ページ 2006年4月13日 木曜日 午後5時24分
Updating the Fantom-X
What is the FANTOM-X Audio Track Expansion Kit?
The FANTOM-X Audio Track Expansion Kit consists of a CompactFlash card containing an
upgrade program that adds audio tracks to your Fantom-X and enhances the multisample
functionality, together with a PC card adapter for inserting this card into your Fantom-X.
Once you perform the update procedure, the Fantom-X will always start up with the added
FANTOM-X Audio Track Expansion functionality.
Keep this product in a safe place after you have completed the upgrade.
Items required for performing the update
• “FANTOM-X Audio Track Expansion Kit” CompactFlash card and PC card adapter
(hereafter referred to as “this product”)
• Fantom-X6/X7/X8 synthesizer workstation
Use only the CompactFlash card and PC card adapter included with this product.
Cautions when performing the update (Important)
● Never use this product with any device other than the Fantom-X. Doing so may damage
the data or system of this product or of the other device.
● Do not turn off the power while the update is in progress. Doing so may render the
Fantom-X incapable of starting up correctly.
● As a precaution, we recommend that you back up your user data before you begin.
(Owner’s Manual; p. 235)
● Do not format this product on the Fantom-X or on any other device.
● Please note that once you have completed the update using this product, it will not be
possible to return the Fantom-X to its prior version.
● Once you have completed the update, do not insert this product into the Fantom-X.
The files contained in this product may not be reproduced, modified, or included in
any magazine or commercial product without the permission of Roland Corporation.
9
Fantom-X-V2_e.book 10 ページ 2006年4月13日 木曜日 午後5時24分
Updating the Fantom-X
Update procedure
1.
Insert the “FANTOM-X Audio Track Expansion Kit” CompactFlash card into the PC
card adapter.
2.
Make sure that your Fantom-X is switched OFF.
3.
Insert the PC card adapter (see step 1) into the Fantom-X.
4.
Switch ON the power on your Fantom-X.
fig.05-01
PC Card Adapter
CompactFlash
After the opening movie is displayed, a caution regarding the update procedure will
appear.
* If the screen shown below does not appear, switch off the Fantom-X’s power, and repeat the operation
from step 1.
fig.05-02_40
5.
Read the warning, and if you wish to proceed, press [F7 (OK)].
* If you wish to abort the update procedure at this point, press [F1 (EXIT)], turn off the power, and
remove the PC card.
A screen will ask you for confirmation.
fig.05-03_40
10
Fantom-X-V2_e.book 11 ページ 2006年4月13日 木曜日 午後5時24分
Updating the Fantom-X
6.
Press [F8 (UPDATE)] to execute the update.
* If you wish to abort the update procedure at this point, press [F1 (EXIT)], turn off the power, and
remove the PC card.
* Do not turn off the power while the update is in progress.
* The update will require approximately two minutes for completion.
7.
When the process has been completed, the following screen will appear.
Turn off the power of the Fantom-X and remove the PC card.
fig.05-04_40
This completes the update.
The next time you turn on the power, the FANTOM-X Audio Track Expansion will start up.
Keep this product in a safe place after you have completed the upgrade.
Verifying the update
1.
Press [MENU] to access the Menu window.
2.
Use
to choose “System,” and then press [ENTER].
The System Setup screen will appear.
3.
Press [F4 (Info)].
The System Information screen will appear.
4.
Use [F1 (⇑)][F2 (⇓)] to choose the “Version Info” tab.
Verify that the version indication in the lower right of the Version Info screen reads
“Version 2.**” (2.00 or higher).
11
Fantom-X-V2_e.book 12 ページ 2006年4月13日 木曜日 午後5時24分
Main features
The Fantom-X Audio Track Expansion adds audio tracks, providing a significant leap in
music-making power. With its comprehensive unification of synth, sampler, and audio
functionality, the Fantom-X is reborn as an even more powerful music workstation.
Audio tracks (p. 13)
Eight dedicated audio tracks (stereo) have been added to the sequencer of the Fantom-X
series. This lets you use recorded or imported audio phrases directly in your songs.
In addition to the ability to play back a sample from midway (not just from its beginning),
each track provides a Timestretch function which allows the audio to follow tempo changes.
Sample Auto Patch function (p. 39)
As with patches and rhythm sets, you can now easily select samples from the patch list
as well. New sample parameters have also been added, making it much easier to handle
samples.
Multisample editing (p. 30)
The new Multisample Edit screen lets you easily create and edit multisamples.
Sample Editor, Multisample Editor, and S-700 series sample
converter (p. 42)
The included editors have been significantly expanded.
You can now use your computer to directly edit samples and multisamples inside the
Fantom-X.
In addition, you can now load S-700 series data.
New patches
* 128 new patches have been added.
Many other functions have been added, making the Fantom-X even more powerful and
easier to use. In order to take full advantage of its dramatically enhanced functionality,
please read this guide carefully.
12
Fantom-X-V2_e.book 13 ページ 2006年4月13日 木曜日 午後5時24分
Using audio tracks
What are audio tracks?
Eight dedicated audio tracks (stereo) have been added to the sequencer of the Fantom-X series.
This lets you use recorded or imported audio phrases directly in your songs.
The audio tracks are “time-stretched” so that they will stay in synchronization even if the tempo
changes during the song. The audio tracks can also be played back from midway through an
event.
fig.02-01.e
Song structure
Sample
MIDI Tracks (.SVQ)
USER
1
U2000
16
U0002
U0001
AUDIO Tracks (.SVA)
1
2
Up to 256 events can
be placed in a track.
Referenced
CARD
C7000
C0002
8
C0001
Setup Mixer
sample event
Track settings are stored at the beginning of the song.
An audio track in a song does not directly record samples. Instead, the audio track contains
references to samples, and plays the samples via these references. In other words, the audio track
merely contains data (a “sample event”) that says “play User (or Card) sample number ‘x’ at this
point,” and even if you delete the sample event from an audio track, the sample data itself will
remain.
Up to 256 sample events can be placed on each audio track.
* Each audio track can play only one sample at a time. If you place sample events on a track so that they
overlap, the later event will be heard.
13
Fantom-X-V2_e.book 14 ページ 2006年4月13日 木曜日 午後5時24分
Using audio tracks
You will use the following two screens to edit
audio tracks.
• Audio Track Edit screen
Here you can edit each audio track.
• Audio Track Mixer screen
In this screen you can adjust the mixing of
the audio tracks, such as their level and
pan.
To access the Audio Track Mixer
screen
1.
With the Audio Track Edit screen
displayed, press [F1 (Audio Mixer)].
The Audio Track Mixer screen will appear.
fig.02-04_40
In order to play back an audio track, the
song must be loaded into the temporary
area (Owner's Manual; p. 177). Audio
tracks will not play back when using the
Quick Play function (Owner's Manual; p.
164) or Chain Play function (Owner's
Manual; p. 165).
2.
Patterns (Owner's Manual; p. 31) do not
have audio tracks.
Press [F6] to switch the Audio Track
Mixer screens.
fig.02-10_40
To access the Audio Track Edit
screen
1.
Press [SONG EDIT].
2.
Press [F3 (Audio Track)].
The Audio Track Edit screen will appear.
fig.02-03_40
“Items in the Audio Track Mixer screen”
(p. 21)
“Items in the Audio Track Edit screen” (p.
15)
14
Fantom-X-V2_e.book 15 ページ 2006年4月13日 木曜日 午後5時24分
Using audio tracks
Items in the Audio Track Edit screen
fig.02-11.e
Audio Track Edit Screen
2
3
1
If you hold down [SHIFT]
4
5
6
7
9
8
10 11 12 13 14 15 16 17
18 19 20
21 22
23
1.
Indicates the name of the currently selected
song, the measure location, and the status
of the sequencer.
2.
Indicates the current location of the audio
track.
3.
Audio level meter.
14. Opens the Loop/Locate window (p. 17).
4.
Indicates the song’s time signature, tempo,
and loop play on/off status.
15. Inserts a sample event at the specified
location (p. 17).
5.
Indicates the currently selected audio
track.
16. Deletes the selected sample event (p. 18).
6.
Indicates the current location.
7.
Indicates the name, contents, and markers
of audio tracks.
If the audio file referenced by the selected
sample event has not been loaded, the file
name is displayed in the sample event.
8.
9.
Shows details of the currently selected event.
If this indicates “unload,” the audio file
referenced by the selected sample event
has not been loaded.
11. Displays the Audio Track Edit screen
(p. 14).
12. Lets you use the pads to mute audio tracks
(p. 16).
13. Displays the marker list (p. 17).
17. Copies the sample event (p. 18).
18. Combines the contents of the tracks into a
single audio track (p. 18).
19. Erases audio tracks (p. 19).
20. Names an audio track (p. 20).
21. Unloads the sample (p. 18).
22. Switches the display mode (p. 20).
23. Zooms in/out in the display (p. 20).
Indicates the order of the currently selected
sample event within all events of the
currently selected audio track.
If there are overlapping events at the same
time location, this is indicated by a red
frame, and the later event will be given
priority for playing.
10. Displays the Audio Track Mixer screen
(p. 14).
15
Fantom-X-V2_e.book 16 ページ 2006年4月13日 木曜日 午後5時24分
Using audio tracks
Editing audio tracks
(Audio Track Edit screen)
Moving a sample event (Move)
Selecting and auditioning a
sample event (Preview)
1.
Use
2.
Press [ENTER].
The sample in the track you selected in
step 1 that is closest to the current location
will be selected.
While the play is stopped, you can audition
(preview) the sample by continuing to hold
down [ENTER].
Here’s how to move the currently selected
sample event to another track or location.
1.
Use [CURSOR] to select the sample
event you want to move.
2.
Press [SHIFT].
The selected event is displayed in orange.
The cursor will change shape as follows.
fig.02-14
to select a track.
Using the pads to mute audio
tracks (Mute/Solo)
You can use the pads to switch muting on/off
for the audio tracks.
Pad numbers 1–8 correspond to audio track
numbers 1–8.
1.
3.
While continuing to hold down [SHIFT],
press
or
.
Move the sample event to the desired
track.
4.
While continuing to hold down [SHIFT],
use the following buttons to move the
sample event to the desired location.
• [INC][DEC]
Move the sample event in steps of one tick.
•
Move the sample event in steps of one
measure.
• VALUE dial
Move the sample event in steps of 16th
note (120 ticks).
16
Press [F3 (Mute/Solo)].
The Muting Audio Tracks with Dynamic
Pads window will open.
In this state, the pads will function as mute
on/off buttons. Each time you press a pad,
muting will be enabled or disabled.
• Pad blinking: muted
• Pad lit:
un-muted
You can “solo” tracks 1–8 by pressing pads
9–16.
You can press [F6 (All Mute)] to mute all
audio tracks. Press [F7 (All Play)] to unmute all audio tracks.
Fantom-X-V2_e.book 17 ページ 2006年4月13日 木曜日 午後5時24分
Using audio tracks
2.
Viewing a list of markers
(Marker List)
You can assign markers to desired measures
within a song. This gives you a visual indication
of the structure of your song, and is a real
convenience when editing audio tracks since
you can move rapidly to a desired marker.
Here’s how you can view a list of the markers in
the song, and edit the markers.
Press [F8 (Close)] to close the window.
You can press pads 1–16 to jump to the
marker of the corresponding number.
Opening the Loop/Locate window
(Loop/Locate)
1.
Press [F5 (Loop/Locate)].
The Loop/Locate window will appear.
* For details on operations in the Loop/Locate
window, refer to p. 179 of the owner’s manual.
fig.02-09_40
Inserting a sample event at a
specified location (Insert)
1.
1.
Use
to select the audio track into
which you want to insert a sample event.
2.
Specify the location at which you want
to insert a sample event.
Press [F4 (Marker List)].
The buttons have the following functions.
• [RESET]
Moves the current location to the beginning
of the song.
• [INC][DEC]
Move the current location in steps of one tick.
• [BWD][FWD]
Move the current location in steps of one
measure.
• VALUE dial
Moves the current location in steps of 1
beat.
The Edit Marker List window will appear.
The buttons have the following functions.
• VALUE dial, [INC][DEC],
Select a marker within the list. The current
location will jump accordingly.
• [F5 (Set)]
Adds a marker at the beginning of the
current measure.
• [F6 (Clear)]
Deletes the selected marker.
• [F7 (Name)]
Assigns a name to the currently selected
marker. Choose a name from the displayed
list, and press [F7 (Name)] to finalize your
choice.
fig.02-13_40
3.
Press [F6 (Insert)].
The Sample Select screen will appear.
4.
Select the sample event that you want to
insert, and press [F8 (Select)].
The sample event will be inserted at the
location you specified.
If inserting the sample event would exceed
the current length of the song, a screen will
ask you whether you really want to extend
the length of the song.
When you press [F8 (Exec)], the song will
automatically be lengthened as necessary to
accommodate the newly inserted sample event.
17
Fantom-X-V2_e.book 18 ページ 2006年4月13日 木曜日 午後5時24分
Using audio tracks
Deleting the selected sample
event from an audio track (Delete)
1.
Use [CURSOR] to select the sample
event that you want to delete from an
audio track.
2.
Press [F7 (Delete)].
The selected sample event will be deleted
from the track.
* This merely deletes the sample event; the
sample data itself will remain in the sample list.
Combining the contents of the
tracks into one audio track
(Mixdown)
This operation lets you specify a region, then
have the performance of all audio tracks and
MIDI tracks in that region be combined into a
single track.
After creating a sample in this way, you can
save it on your computer as the audio data for a
single song.
1.
Copying a sample event (Copy)
The [REC] indicator will blink, and the
Mixdown Standby window will appear.
Here’s how to copy the currently selected
sample event.
1.
Use [CURSOR] to select the sample
event that you want to copy.
2.
Press [F8 (Copy)].
The currently selected sample event will be
copied to a location immediately following
itself.
If copying the sample event would make
the track exceed the current length of the
song, a screen will ask you whether you
really want to extend the length of the
song.
When you press [F8 (Exec)], the song will
automatically be lengthened as necessary
to accommodate the newly copied sample
event.
Unloading a sample
(Unload Sample)
This operation deletes the currently selected
sample event and also unloads it from the
sample list.
1.
Hold down [SHIFT] and press [F5
(Unload Sample)].
A message will ask you for confirmation.
2.
Press [F8 (Exec)] to execute.
* If you decide to cancel, press [F7 (Cancel)].
18
Hold down [SHIFT] and press [F1
(Mixdown)].
2.
In the Mixdown Standby window,
specify the region that you want to mix
down.
Use [CURSOR] to move the cursor to each
parameter, and turn the VALUE dial or use
[INC][DEC] to set the value.
fig.02-xx_40
• Start Point
Specify the measure at which the mixdown
is to start.
• End Point
Specify the measure at which the mixdown
is to end.
Fantom-X-V2_e.book 19 ページ 2006年4月13日 木曜日 午後5時24分
Using audio tracks
3.
Press [PLAY] or [F8 (Start)].
The Mixdown Standby window will close,
and [REC] indicator will change from
blinking to lit, and the mixdown will
begin.
When the mixdown begins, the Mixdown
window will appear.
fig.02-xx_40
Erasing audio tracks (Clear)
1.
Hold down [SHIFT] and press [F2
(Clear)].
The Audio Track Clear Menu window
appears.
fig.02-xx_40
To close the Mixdown window, press [F8
(Close)] or [PLAY]. To open it again, press
[PLAY].
4.
The mixdown will end automatically.
The [REC] indicator will go out.
* You can also press [STOP] to stop before you
reach the end.
5.
2.
The Mixdown Sample Assign window
will open.
Turn the VALUE dial, or press [INC]
[DEC] to select the menu.
• Clear All
All audio tracks will be erased.
(The track names and setup data will also
revert to their default settings.)
• Clear Track
The selected audio track will be erased.
(The track name and setup data will also
revert to its default settings.)
fig.02-xx_40
3.
Press [F8 (Select)].
A message will ask you for confirmation.
4.
Use [RESET][BWD][FWD] or [CURSOR] to
specify the location at which the sample
event will be assigned.
6.
Press [F8 (Exec)].
* If you decide to cancel, press [F7 (Cancel)].
* This operation will not change the length of the
song.
Press [F8 (Assign)] to assign the sample
event to the audio track.
A sample event that plays the mixed-down
sample will be assigned to the audio track,
and you will return to the previous screen.
• If you press [F6 (Unload)], the samples you
just mixed down will be deleted
(unloaded). A message will ask you for
confirmation; press [F8 (Exec)] to confirm.
• If you want to neither assign nor unload
the sample, press [F7 (Cancel)].
* Even if you cancel, the mixed-down sample
data itself will remain in the sample list.
19
Fantom-X-V2_e.book 20 ページ 2006年4月13日 木曜日 午後5時24分
Using audio tracks
• Overview Mode
Displays the contents of the song in a
“condensed” form that lets you view all of
the audio tracks. This is a convenient way
to view the overall structure of the song.
Naming an audio track
(Track Name)
Here’s how to assign a name to an audio track
(you can use up to twelve characters).
1.
Use
to select the audio track
that you want to name.
2.
Hold down [SHIFT] and press [F3 (Track
Name)].
fig.02-07_40
The Audio Track Name screen will appear.
3.
Assign the desired name.
* For details on how to assign a name, refer to
“Assigning a name” (Owner’s Manual; p. 36).
4.
Press [F8 (Write)] to confirm the name.
Switching the display mode
By holding down [SHIFT] and pressing [F6]
you can cycle through the following three
display modes.
• Wave Mode
Displays the waveform of the sample.
Zooming In and Zooming Out in
the display
1.
Hold down [SHIFT] and press [F7 (Zoom
⇐)] (reduce) / [F8 (Zoom ⇒)] (magnify).
You can zoom in/out to display between
two and thirty-two measures in the screen.
fig.02-05_40
Editing MIDI tracks
• Number Mode
Displays the sample numbers.
fig.02-06_40
20
When you execute one of the MIDI track edit
operations (Owner's Manual; p. 180) listed
below, the audio tracks will also be edited at the
same time.
• Delete (Owner's Manual; p. 184)
If you've selected Track/Pattern ALL
• Copy (Owner's Manual; p. 184)
If you've selected Src Track/Pattern ALL
Dst Track/Pattern ALL
• Insert (Insert measure) (Owner's Manual;
p. 185)
If you've selected Track/Pattern ALL.
* When editing an audio track in the Audio
Track Edit screen, the “Undo/Redo” of the
Menu window is not available.
Fantom-X-V2_e.book 21 ページ 2006年4月13日 木曜日 午後5時24分
Using audio tracks
Items in the Audio Track Mixer screen
fig.02-12
Audio Track Mixer1 Screen
2
Audio Track Mixer2 Screen
1
2
3
5
4
1
3
5
4
7
6
8
9
10 11
12 13
14
7
6
8
9
10 11
12 13
14
1.
Indicates the name of the currently selected
song, the measure location, and the status
of the sequencer.
11. Lets you use the pads to mute audio tracks
(p. 16).
2.
Indicates the on/off status of the multieffects (MFX 1–3), chorus (CHO), reverb
(REV), and mastering effect (MASTER).
13. Switches the Audio Track Mixer screens.
3.
Indicates the song’s time signature, tempo,
and loop play on/off status.
4.
Indicates the number of the currently
selected audio track.
5.
Indicates the name and value of the
currently selected parameter.
6.
Shows the parameters that can be
controlled for each audio track.
7.
Audio level meters.
8.
Displays a simplified view of the Audio
Track Edit screen.
9.
Displays the Audio Track Mixer screen
(p. 14).
12. Displays the Loop/Locate window (p. 17).
14. Selects the four audio tracks that will be
controlled by the Realtime Control knobs
(p. 23).
10. Displays the Audio Track Edit screen
(p. 14).
21
Fantom-X-V2_e.book 22 ページ 2006年4月13日 木曜日 午後5時24分
Using audio tracks
Audio Track Mixer 1 Screen
Controlling the audio tracks
(Audio Track Mixer screen)
It's convenient to use the Audio Track Mixer
screen when you want to adjust mixing
parameters, such as the level and pan of the
eight audio tracks.
Controlling the audio track settings
1.
Access the Audio Track Mixer 1 or 2
screen.
2.
Use
to move the cursor to the
parameter you want to edit.
3.
Use
to move the cursor to the
audio track you want to edit.
Indication
in the Mixer screen
Level
Pan
Rev
fig.02-21.e
Current
track
Indicates the name and value
of the parameter where the
cursor is located.
Turn the VALUE dial or use [INC][DEC]
to adjust the value.
The green frame that encloses four tracks
corresponds to the parameters controlled
by the four REALTIME CONTROL knobs
(p. 23).
22
Track Level
Adjusts the volume of each audio
track. This is used mainly to set the
volume balance between audio
tracks.
Value: 0–127
Track Pan
Adjusts the pan of each audio track.
“L64” is far left, “0” is center, and
“63R” is far right.
Value: L64–0–63R
Track Reverb Send Level
Adjusts the amount of signal sent
from each audio track to the reverb.
Value: 0–127
Cho
Track Chorus Send Level
Adjusts the amount of signal sent
from each audio track to the chorus.
Value: 0–127
S
Solo Switch
Plays only the specified audio track.
Value: ON, OFF
Mute Switch
Mutes (silences) the specified audio
track.
Value: ON, OFF
M
4.
Parameter
Fantom-X-V2_e.book 23 ページ 2006年4月13日 木曜日 午後5時24分
Using audio tracks
Audio Track Mixer 2 Screen
Indication
in the Mixer screen
S
M
Output
Assign
Key
Parameter
Solo Switch
Plays only the specified audio track.
Value: ON, OFF
Mute Switch
Mutes (silences) the specified audio
track.
Value: ON, OFF
Output Assign
Specifies how the direct sound from
each audio track will be output.
Value
MFX 1–3: The sound will be routed through the multieffect and output in stereo. You can also apply
chorus or reverb to the
sound that has passed
through the multi-effect.
A, B:
The sound will be output in stereo from the
OUTPUT A (MIX) jacks
or OUTPUT B jacks
without passing
through a multi-effect.
MON:
The sound will be output in stereo from the
OUTPUT A (MIX) jacks
without passing
through a multi-effect.
Use this setting if you
want only to hear the
sound without resampling or recording it.
Audio Track Key Shift
Adjusts the pitch of each track in
semitone steps (+/-2 octaves).
Value: -24– +24
Using the knobs to control the
mixer
In the Audio Track Mixer screen, you can use
[F7(⇐)] [F8 (⇒)] to select the four audio tracks
that will be controlled by the REALTIME
CONTROL knobs. The currently selected audio
tracks are indicated by a light green frame
around them. Use
to select the
parameter that you want to control.
fig.02-20.e
Opening the Loop/Locate window
(Loop/Locate)
Owner’s Manual; p. 179
Using the pads to mute audio
tracks (Mute)
p. 16
23
Fantom-X-V2_e.book 24 ページ 2006年4月13日 木曜日 午後5時24分
Using audio tracks
• AUDIO MERGE
Multiple audio tracks will be combined
into one audio track. For details, refer to
“Combining multiple audio tracks into one
track (AUDIO MERGE)” (p. 25).
Recording an audio track
Owner’s Manual; p. 168
3.
Recording an audio track
(SOLO/RE-SAMPLING)
Here’s how to record the input from an AUDIO
INPUT jack or from the internal sound
generator.
1.
Use the Audio Rec Count In (Audio
Recording Count In) field to specify how
you want recording to start.
Use [CURSOR] to move the cursor to
Audio Rec Count In, and turn the VALUE
dial or use [INC][DEC] to choose the
desired setting.
fig.02-26_40
In the Audio Track Edit screen, press
[REC].
The [REC] indicator will blink, and the
Audio Rec Standby window will appear.
2.
• OFF
Recording will start the moment you press
[PLAY].
• 1 MEAS
When you press [PLAY], there will be a
count-in (playback) beginning one
measure before the recording start point.
Recording will start when you reach the
recording start point.
• 2 MEAS
When you press [PLAY], there will be a
count-in (playback) beginning two
measures before the recording start point.
Recording will start when you reach the
recording start point.
Use the Audio Rec Mode (Audio
Recording Mode) field to select the
recording method you want to use.
Use [CURSOR] to move the cursor to
Audio Rec Mode, and turn the VALUE dial
or use [INC][DEC] to select the desired
recording mode.
fig.02-25_40
• SOLO
The internal sound generator will play as
usual, and only the sound from the
external audio input will be recorded.
* You won’t be able to apply effects to the
external audio input.
• RE-SAMPLING
The sound from the internal sound
generator (including the audio tracks) will
be recorded. The external audio input will
not be heard.
* The volume of a resampled phrase may be less
than the original volume of the phrase. As
necessary, use Normalize (Owner’s Manual; p.
156) to raise the volume.
* Audio tracks whose Audio Track Output
Assign (p. 23) parameter is set to MON
(Monitor) will not be recorded.
24
4.
When you’ve chosen the desired setting
in the Audio Rec Standby window, press
[PLAY] or [F8 (Start)].
The Audio Rec Standby window will close,
the [REC] indicator will change from
blinking to steadily lit, and recording will
start.
When recording starts, the Audio
Recording window will appear.
fig.02-28_40
To close the Audio Recording window,
press [F8 (Close)] or [PLAY]. To open it
once again, press [PLAY].
Fantom-X-V2_e.book 25 ページ 2006年4月13日 木曜日 午後5時24分
Using audio tracks
5.
When you’ve finished recording, press
[STOP].
The [REC] indicator will go dark.
6.
The Audio Rec Sample Assign window
will open.
fig.02-29_40
Use [RESET][BWD][FWD] or [CURSOR] to
specify the location to which the sample
event is to be assigned.
7.
Press [F8 (Assign)] to assign the sample
event to the audio track.
A sample event that plays the recorded
sample will be assigned to the audio track,
and you will return to the previous screen.
• If you press [F6 (Unload)], the samples you
just recorded will be deleted (unloaded). A
message will ask you for confirmation;
press [F8 (Exec)] to confirm.
• If you want to neither assign nor unload
the sample, press [F7 (Cancel)].
* Even if you cancel, the recorded sample data
itself will remain in the sample list.
Combining multiple audio
tracks into one track
(AUDIO MERGE)
A maximum of eight tracks are available for
you to use. By combining (merging) several
audio tracks, you can free up audio tracks for
other uses.
When you record using AUDIO MERGE, all
MIDI tracks will automatically be muted, and
the audio tracks will be recorded according to
their current Mute/Solo settings.
1.
In the Audio Track Edit screen, mute
any audio tracks that you don’t want to
merge.
2.
Press [REC].
The [REC] indicator will blink, and the
Audio Rec Standby window will appear.
3.
In the Audio Rec Mode (Audio
Recording Mode) field, choose “AUDIO
MERGE.”
Use [CURSOR] to move the cursor, and
turn the VALUE dial or use [INC][DEC] to
make the setting.
fig.02-27_40
4.
In the Audio Rec Count In (Audio
Recording Count In) field, specify how
you want recording to start.
Refer to step 3 of “Recording an audio
track (SOLO/RE-SAMPLING)” (p. 24).
5.
When you’ve finished making settings
in the Audio Rec Standby window, press
[PLAY] or [F8 (Start)].
The Audio Rec Standby window will close,
the [REC] indicator will change from
blinking to steadily lit, and recording will
start.
25
Fantom-X-V2_e.book 26 ページ 2006年4月13日 木曜日 午後5時24分
Using audio tracks
When recording starts, the Audio
Recording window will appear.
fig.02-28_40
To close the Audio Recording window,
press [F8 (Close)] or [PLAY]. To open it
once again, press [PLAY].
6.
Saving your audio tracks
When you save a song that contains audio
tracks, the audio track data is automatically
saved in a file with a filename extension of
“.SVA” and the same name as the song,
together with the identically named “.SVQ”
data file.
When you’ve finished recording, press
[STOP].
The [REC] indicator will go dark.
7.
The Audio Rec Sample Assign window
will open.
fig.02-31_40
Owner’s Manual; p. 223
fig.02-02
(User, Card)
ROLAND
PNL
SEQ
SNG (.SVQ, .SVA)
SMPL
SND
TMP
AUDIO_IMPORT
BMP
PATCH_IMPORT
TEXT
The location at which the recorded sample
event is to be assigned will blink.
Use [RESET][BWD][FWD] or [CURSOR] to
specify the location at which you want to
assign the sample event.
8.
Press [F8 (Assign)] to assign the sample
event to the audio track.
A sample event that plays the recorded
sample will be assigned to the audio track,
and you will return to the previous screen.
• If you press [F6 (Unload)], the samples you
just recorded will be deleted (unloaded). A
message will ask you for confirmation;
press [F8 (Exec)] to confirm.
• If you want to neither assign nor unload
the sample, press [F7 (Cancel)].
* Even if you cancel, the recorded sample data
itself will remain in the sample list.
26
System Setup (Owner’s Manual; p. 198) includes
the following audio tracks’ parameters.
•
•
•
•
Level
Pan
Reverb Send
Chorus Send
• Output Assign
• Mute/Solo
• Key Shift
* Changes in the parameter value are not
recorded.
“Deleting a Song” (p. 49)
Fantom-X-V2_e.book 27 ページ 2006年4月13日 木曜日 午後5時24分
Using the Skip Back Sampling function
What is Skip Back
Sampling?
Skip Back Sampling is a function that lets you
sample what were playing immediately prior to
that point, even if you were not recording.
When you press the SKIP BACK SAMPLING
button, the performance that you were playing
for a certain length of time before that moment
will be sampled.
This is extremely convenient if you’ve been
playing a phrase repeatedly, and want to
sample it only after you’ve managed to play it
correctly.
The FANTOM-X Audio Track Expansion makes
it easier to handle the sample data created by
Skip Back Sampling.
Using Skip Back
Sampling
1.
Perform on the Fantom-X’s keyboard
and/or pads, or connect an instrument
or other device to the AUDIO IN jacks or
DIGITAL IN, and input sound or phrases.
2.
Press [SKIP BACK SAMPLING].
The following screen will appear, and Skip
Back Sampling will be carried out.
fig.08-01_40
Owner’s Manual; p. 145
When Skip Back Sampling has been
completed, the Skip Back Preview screen
will appear.
fig.08-02_40
27
Fantom-X-V2_e.book 28 ページ 2006年4月13日 木曜日 午後5時24分
Using the Skip Back Sampling function
Editing the data created
by Skip Back Sampling
In the Skip Back Preview screen, you can isolate
just the desired portion of the sample, and
assign it to the keyboard or to an audio track.
Isolating the desired portion of
the sampled data
(Start Beat/End Beat)
1.
In the Skip Back Preview screen, use
[F1]–[F4] to isolate the desired portion
of the sample.
The buttons have the following functions.
• [F1 (⇐)]/[F2 (⇒)] (Start Beat)
Move the start point of the sample forward
or backward in steps of one beat. (When
you move the Start point, the End point
will also move in tandem.)
• [F3 (⇐)]/[F4 (⇒)] (End Beat)
Move the end point of the sample forward
or backward in steps of one beat.
Cancelling the sample
(Skip Back Cancel)
1.
In the Skip Back Preview screen, press
[F5 (SkipBkCancel)].
A message will ask you for confirmation.
2.
Press [F8 (Exec)].
The sampled waveform will be erased
(unloaded) from memory, and you will
return to the previous screen.
If you decide to cancel, press [F7 (Cancel)].
28
Assigning the sampled waveform
to the keyboard or a pad
(Assign to Keyboard/Pad)
1.
In the Skip Back Preview screen, press
[F6 (Assign KB/Pad)].
The Assign to Kbd/Pad window will
appear.
fig.08-03_40
• To assign the sample to the keyboard
Press [F6 (Assign to Kbd)].
For the subsequent steps, refer to p. 152 of
the owner’s manual.
• To assign the sample to a pad
Press [F7 (Assign to Pad)].
For the subsequent steps, refer to p. 151 of
the owner’s manual.
If you decide to cancel, press [F8 (Cancel)].
Fantom-X-V2_e.book 29 ページ 2006年4月13日 木曜日 午後5時24分
Using the Skip Back Sampling function
Assigning the sampled waveform
to an audio track
(Assign to Audio Track)
1.
In the Skip Back Preview screen, press
[F7 (Assign Audio)].
The Audio Track Edit screen will appear,
and the Skip Back Sample Assign window
will open.
fig.08-04_40
Use [RESET][BWD][FWD] or [CURSOR] to
specify the location at which the sample is
to be assigned.
2.
Press [F8 (Assign)] to assign the sample
to a track.
3.
Press [F8 (Exec)].
The recorded sample data will be assigned
to the selected track, and you will return to
the previous screen.
If you decide to cancel, press [F7 (Cancel)].
29
Fantom-X-V2_e.book 30 ページ 2006年4月13日 木曜日 午後5時24分
Multisample editing functions
Owner’s Manual; p. 153
The FANTOM-X Audio Track Expansion adds a Multisample Edit screen that makes it easy to
create and edit multisamples.
Creating a multisample
A “multisample” is a set of different samples assigned to the notes of the keyboard. One
multisample can split up to 128 samples across the keyboard. You can store 128 multisamples in
user memory, and another 128 multisamples in a memory card.
* In order to hear a multisample, you must assign it to a patch.
fig.04-06.e
How patches, multisamples, and samples are related
Patch
TONE
Reference
1
2
3
4
Multisample
Sample
USER
USER
Multisample
Multisample
0
1
USER128
U2000
USER001
Note number 0–127
2
U0002
127
Reference
U0001
Sample
number
CARD
CARD
Multisample
Multisample
0
1
CARD128
C7000
CARD001
Note number 0–127
2
C0002
127
Reference
C0001
Sample
number
User multisamples consist only of user samples, and card multisamples consist only of samples
on the card.
30
Fantom-X-V2_e.book 31 ページ 2006年4月13日 木曜日 午後5時24分
Multisample editing functions
Creating a multisample in the
Patch Edit screen
Creating a multisample in the
Create Multisample screen
1.
You should start by initializing the patch
settings. (Owner’s Manual; p. 57)
1.
Press [PATCH/RHYTHM] to get the
Patch Play screen.
Press [F5 (Mark Set)] to assign a check
mark (✔) to the desired sample or samples.
You can press [F4 (Mark Clear)] to remove
the check mark.
You can press [F8 (Preview)] to audition
the sample.
If the total number of marks exceeds 128,
the multisample will be created using the
first 128 samples, starting with the lowestnumbered sample.
* You cannot create a multisample that uses
samples belonging to different groups.
You can’t create a multisample if the patch
type is “Rhythm.”
2.
Press [PATCH EDIT].
3.
Press [F6 (Pro Edit)].
4.
Press [F1 (⇑)] or [F2 (⇓)] to select
“Wave.”
5.
Set the parameters as follows to assign
the multisample to the desired Tone 1–
4.
The Patch Edit screen will appear.
• Wave Group: MSAM (Multisample
waveforms)
• Wave Bank: USER or CARD
• Wave No. L (Mono):Multisample number
* For details on making this setting, refer to
“How to Make Patch Settings” (Owner’s
Manual; p. 56).
* If you want to use a stereo multisample, specify
the same number for L and R.
6.
2.
Press [F7 (Load Utility)], and then press
[F3 (Create Multi-Sample)].
The Create Multisample screen will
appear.
fig.04-10_40
Press [F4 (Multisample Edit)].
The Multisample Edit screen will appear.
* For details on editing, refer to “Editing a
multisample” (p. 35).
7.
Press [SAMPLE LIST] to get the Sample
List screen, and select the sample(s) of
which you want the multisample to
consist.
Save the multisample.
3.
Assign a name.
* For details on how to assign a name, refer to
“Assigning a Name” (Owner’s Manual; p. 36).
* For details on how to save, refer to “Saving a
multisample” (p. 40).
8.
Save the patch.
* For details on how to save the patch, refer to
“Saving Patches You’ve Created (Write)”
(Owner’s Manual; p. 59).
31
Fantom-X-V2_e.book 32 ページ 2006年4月13日 木曜日 午後5時24分
Multisample editing functions
4.
When you’ve finished inputting the
name, press [F8 (Write)].
8.
A screen will appear, allowing you to
select the write destination.
fig.04-13_40
When the multisample has been written, the
Assign to Keyboard window will appear.
fig.04-11_40
5.
Turn the VALUE dial or use [INC][DEC]
to select the write destination.
Multisamples consisting of user samples
will be written to User memory, and
multisamples consisting of card samples
will be written to Card memory.
6.
* If you’re in Performance mode, a screen will
appear, allowing you to select the Part to which
the multisample is to be assigned. Use
or
to select a part, and then press [F8
(Select)].
Press [F8 (Write)].
A message will ask you to confirm the
Write operation.
fig.04-12_40
9.
Press [F8 (Exec)].
A screen will ask you for confirmation.
If you decide to cancel, press [F7 (Cancel)].
10. Press [F8 (Exec)] once again.
Never turn off the power while data is
being written.
11. The Multisample Edit screen will appear.
* For details on editing, refer to “Editing a
multisample” (p. 35).
fig.04-14_40
7.
If you are sure you want to write the
multisample, press [F8 (Exec)].
Never turn off the power while data is
being written.
12. Save the multisample.
* For details on how to save, refer to “Saving a
multisample” (p. 40).
13. Save the patch.
* For details on how to save a patch, refer to
“Saving Patches You’ve Created (Write)”
(Owner’s Manual; p. 59).
32
Fantom-X-V2_e.book 33 ページ 2006年4月13日 木曜日 午後5時24分
Multisample editing functions
Editing a multisample
About the Multisample Edit screen
fig.04-20.e
Multisample Edit Screen
1
If you hold down [SHIFT]
3
2
4
5
6
7
8
9
10 11 12
13
14 15 16 17
18
19
2.
Shows the name of the multisample.
11. Specifies the original key of the sample
(p. 37).
3.
Indicates whether the multisample has
been edited.
12. Opens the Tone Switch/Select window
(p. 35).
4.
Shows information about the current note.
13. Moves the split point (p. 35).
5.
Indicates the original key of the sample.
6.
Shows a list of the samples assigned to the
multisample.
14. Returns a multisample to the last-written
state (p. 36).
7.
Changes the multisample assigned to a
tone (p. 34)/
16. Assigns a sample to the current zone
(p. 36).
8.
Erases the data from the selected region of
notes (p. 34).
17. Sorts samples in a multisample in the order
of their original key (p. 37).
9.
Assigns a sample to the selected region
(p. 34).
18. Moves all samples to left or right (p. 37)
1.
Shows information about the patch.
10. Copies a sample from a key to another key
(p. 35).
15. Erases all notes (p. 36).
19. Moves the data of the current zone to left
or right (p. 37).
33
Fantom-X-V2_e.book 34 ページ 2006年4月13日 木曜日 午後5時24分
Multisample editing functions
Selecting the notes to edit
1.
Press the keyboard to select the sample
you want to edit.
Erasing the data from the selected
region of notes (Erase)
1.
You can select a region by pressing two
notes.
In the Multisample Edit screen, press
[F2 (Erase)].
The data for the selected region of notes
will be erased.
You can also make your selection by
turning the VALUE dial, by using
,
or by using [INC][DEC]. In this case, hold
down [SHIFT] to select a region of notes.
Changing the multisample
assigned to a tone (List)
Here’s how you can change the multisample
that’s assigned to the current tone.
1.
Assigning a sample to the
selected region (Assign)
1.
In the Multisample Edit screen, press
[F3 (Assign)].
The Sample Select screen will appear,
allowing you to assign the selected sample
to the selected region.
fig.04-26_40
In the Multisample Edit screen, press
[F1 (List)].
The Multisample List window will open.
fig.04-25_40
The buttons have the following functions.
• Value,
, [INC][DEC]
Change the number of the multisample to
be assigned.
• [F2 (⇑)]/[F3 (⇓)]
Change the group of the multisample to be
assigned.
• [F7 (Cancel)] or [EXIT]
Cancel the operation and return to the
previous screen.
• [F8 (Select)]
Assigns the selected multisample to the
current tone, and return to the previous
screen.
34
The buttons have the following functions.
• [F2 (User)] [F3 (Card)]
Select the group of the sample to be
assigned.
You will see only the groups of the
samples that can be selected.
• [F6 (Cancel)] or [EXIT]
Cancel the operation and return to the
previous screen.
• [F7 (Preview)]
Auditions the sample.
• [F8 (Select)]
Selects the sample and return to the
Multisample Edit screen.
Fantom-X-V2_e.book 35 ページ 2006年4月13日 木曜日 午後5時24分
Multisample editing functions
Copying a sample from a key to
another key (Copy)
Here’s how the sample assigned to a note can
be copied to a different note of the keyboard.
1.
In the Multisample Edit screen, press
the key to which the copy-source
sample is assigned.
Opening the Tone Switch/Select
window (Tone Sw/Sel)
1.
In the Multisample Edit screen, press
[F6 (Tone Sw/Sel)].
The Tone Switch/Select window will open.
fig.04-29_40
You can also select the note by using
VALUE,
, or [INC][DEC].
The Sample Data area shows information
about the sample assigned to the current
note.
fig.04-27_40
This is the same as when you press [F5
(Tone Sw/Sel)] in the Patch Play screen.
2.
Press [EXIT] to close the window.
Moving the split point (Split Point)
2.
Press [F4 (Copy)] so it lights in red.
3.
Press the copy-destination key.
If you specify a region by pressing more
than one key, the data will be copied to the
region between the lowest and highest
keys you press.
4.
The “Split Point” is the boundary between
zones (p. 36).
1.
In the Multisample Edit screen, press
[F7 (Split⇐)][F8 (Split⇒)].
The split point of the selected sample and
the adjacent sample will move to left or
right.
Take your hand off the keyboard.
[F4 (Copy)] will go dark, and you will
return to the normal Multisample Edit
screen.
35
Fantom-X-V2_e.book 36 ページ 2006年4月13日 木曜日 午後5時24分
Multisample editing functions
Returning a multisample to the
last-written state (Reload)
Replacing the sample of the
current zone (Sample Select)
Here’s how you can return the currently edited
multisample to the state in which it was last
written.
A “zone” is a region to which the same sample
is assigned. Here's how to assign a sample to
the currently selected zone (the “current zone”).
1.
In the Multisample Edit screen, hold
down [SHIFT] and press [F1 (Reload)].
fig.04-30_40
2.
Press [F8 (Exec)].
A screen will ask you for confirmation.
If you decide to cancel, press [F7 (Cancel)].
Erasing all notes (Erase All)
Here’s how to erase all notes.
1.
In the Multisample Edit screen, hold
down [SHIFT] and press [F2 (Erase All)].
2.
Press [F8 (Exec)].
A screen will ask you for confirmation.
If you decide to cancel, press [F7 (Cancel)].
1.
In the Multisample Edit screen, hold
down [SHIFT] and press [F3 (Sample
Select)].
The Sample Select screen will appear,
allowing you to assign the selected sample
to the current zone.
fig.04-31_40
The buttons have the following functions.
• [F2 (User)][F3 (Card)]
You will see only the groups of samples
that can be selected.
• [F6 (Cancel)] or [EXIT]
Cancel the operation and return to the
previous screen.
• [F7 (Preview)]
Auditions the sample.
• [F8 (Select)]
Selects the sample and return to the
Multisample Edit screen.
36
Fantom-X-V2_e.book 37 ページ 2006年4月13日 木曜日 午後5時24分
Multisample editing functions
2.
Specify the original key (Org Key)
of the sample
Samples you record or import are set so that
they will play at their original pitch when you
press the C4 note.
In order to correctly match the key of the
sample to the keyboard, you must modify the
“original key” of the sample.
For example, if you sampled a sound whose
pitch was E4, you'll need to change its “original
key” setting to E4 so that it will play at its
original pitch when you press the E4 note of the
keyboard.
Similarly, when you execute Create
Multisample, you will need to specify the
original key of the samples that make up that
multisample, so that they are correct for the
keys to which they are assigned.
* A sample will not play more than two octaves
higher than its original key.
1.
In the Multisample Edit screen, press
[F5 (Org Key)].
The Original Key window will open.
fig.04-28_40
Save the sample whose original key you
changed.
* For details on saving a sample, refer to “Saving
a Sample” (Owner’s Manual; p. 159).
Sorting samples in the order of
their original key (Sort)
This operation reassigns all samples currently
assigned to the multisample, so that they are
placed in the order of their original key setting.
(This produces the same result as Create
Multisample.)
1.
In the Multisample Edit screen, hold
down [SHIFT] and press [F4 (Sort)].
2.
Press [F8 (Exec)].
A screen will ask you for confirmation.
If you decide to cancel, press [F7 (Cancel)].
Moving all samples to left or right
(Shift)
Here’s how all samples assigned to notes can be
shifted to the left or right.
1.
In the Multisample Edit screen, hold
down [SHIFT] and press [F5 (⇐)][F6
(⇒)].
Moving the data of the current
zone to left or right (Move)
Here’s how the sample of the current zone can
be moved to left or right.
The buttons have the following functions.
• Value, [INC][DEC]
Change the original key of the sample
assigned to the current note.
• [F7 (Preview)]
The sample will play at its current original
key while you continue holding down the
button.
• [F8 (Close)]
Closes the Original Key window.
• Keyboard
When you play the keyboard, the original
key of the sample assigned to the most
recently pressed note will be displayed.
1.
In the Multisample Edit screen, hold
down [SHIFT] and press [F7 (⇐)][F8
(⇒)].
37
Fantom-X-V2_e.book 38 ページ 2006年4月13日 木曜日 午後5時24分
Multisample editing functions
3.
Saving a multisample
Once you’ve edited a multisample, the word
“EDITED” appears beside the multisample
name.
Be aware that if you turn off the power or select
another screen when the “EDITED” indication
is shown, the changes you made to the
multisample will be lost.
When you’ve finished inputting a name,
press [F8 (Write)].
The Multisample Write window will
appear.
fig.04-34_40
fig.04-32
1.
In the Multisample Edit screen, press
[WRITE].
The Multisample Name screen will appear.
fig.04-33_40
4.
Turn the VALUE dial or use [INC][DEC]
or
to select the multisample
number of the write destination.
5.
Press [F8 (Write)].
A message will ask you to confirm the
Write operation.
6.
To write the data, press [F8 (Exec)].
If you decide to cancel, press [F7 (Cancel)].
The multisample will be written, and you
will return to the Multisample Edit screen.
Never turn off the power while data is
being written.
2.
Assign a name to the multisample.
* For details on how to assign a name, refer to
“Assigning a Name” (Owner’s Manual; p. 36).
38
Fantom-X-V2_e.book 39 ページ 2006年4月13日 木曜日 午後5時24分
Sample-related changes
Extended patch groups
You can now select samples (card/user) from
the patch list as well (Sample Auto Patch).
This allows you to play a sample in a pitched
manner just as you would play a normal patch.
fig.03-00
fig.03-01
* In the case of a stereo sample, choose the sample
number for the L channel. It will play as a
stereo patch. (If you choose the sample number
for the R channel, “---” will be indicated for it,
and it will not be playable.
Saving a sample auto patch
When you edit and save these patches, they will
be saved in the USER or CARD group in the
same way as conventional patches.
* Note that in this case, there will be no sound if
you unload (Owner's Manual; p. 147) the
sample.
* Unsaved samples will be lost when you turn off
the power. If you want to keep your sample,
press [WRITE] to save it (Owner's Manual; p.
159).
Bank Select and Program Change
Correspondence Chart
The following two groups have been added to
the patch groups. If there are samples in
memory, sample names will be displayed as
patch names.
Group
Number
PR-I
USAM
001–128
0001–
2000
CSAM
0001–
7000
Bank Select
MSB
LSB
87
72
64
0
:
14
15
65
0
:
53
54
Program
Number
1–128
1–128
1–80
1–128
1–88
User Sample (USAM): 1–2000
Samples in user memory can be used as
patches.
Card Sample (CSAM): 1–7000
Samples in the memory card can be used
as patches.
* If there are no samples in memory, this will
indicate “Empty.”
39
Fantom-X-V2_e.book 40 ページ 2006年4月13日 木曜日 午後5時24分
Sample-related changes
Newly added sample
parameters
The following sample parameters have been
added.
Sample BPM calculator
(BPM Calc)
Here’s how to specify the original tempo of the
sample.
1.
Owner’s Manual; p. 150
In the Sample Prm screen, press
[F6 (BPM Calc)] to open the BPM
Calculator window.
fig.03-02
fig.03-03_40
• Sample Gain
This adjusts the gain of the sample, letting
you boost the volume if it decreased in the
process of sampling.
Value: 0, +6, +12 [dB]
• Sample Fine Tune
This adjusts the pitch of the sample in
steps of one cent (over a range of +/-50
cents).
Value: -50–+50
1 cent = 1/100th of a semitone
• Sample Level
This adjusts the volume of the sample.
Value: 1–127
2.
Input the length (Measure) and time
signature (Beat) of the sample.
3.
Press [F8 (EXEC)]. The tempo will be
calculated, and the value will be input in
the BPM field of the Sample Prm screen.
Selecting a sample
(Sample Number)
Now you can switch samples in the Sample
Prm screen as well.
You can use [F1][F2] to select samples in the
order in which they appear in the sample list.
Changes in the saved
sample content
(Save All Samples)
Owner’s Manual; p. 200
When you execute “Save All Samples,”
multisamples are now saved as well as all
samples in sample memory.
40
Fantom-X-V2_e.book 41 ページ 2006年4月13日 木曜日 午後5時24分
Changes in the Patch/Rhythm Edit screen
The behavior that occurs when you press
[PATCH EDIT] has changed; the screen that
was formerly called the Zoom Edit screen
(Owner’s Manual; p. 57, p. 84) will now appear
first.
fig.05-01_40
Newly added Patch
Overview screen
You can now use the REALTIME CONTROL
knobs to edit a patch.
• Patch Edit
fig.05-03_40
In the Zoom Edit screen, you can press [F6 (Pro
Edit)] to access the Patch Edit screen (or
Rhythm Edit screen).
• Rhythm Tone Edit
fig.05-02_40
fig.05-04_40
1.
Press [PATCH EDIT].
2.
Press [F5] several times to display the
Patch Overview screen.
3.
Use [F1 (⇑)] or [F2 (⇓)] (
) to
select the parameter group that you
want to edit.
4.
Use the REALTIME CONTROL knobs to
edit the parameters.
If you're editing a rhythm set, you can
press a note on the keyboard to select the
rhythm tone you want to edit.
41
Fantom-X-V2_e.book 42 ページ 2006年4月13日 木曜日 午後5時24分
Changes due to the upgraded editor software
The included “Fantom-X Editor” software has
been upgraded, allowing you to use an editor
program to edit samples and multisamples.
Newly added PC mode
screen
In conjunction with the addition of the sample
editor, a PC mode screen has been added to the
Fantom-X.
When you start up the sample editor, the
Fantom-X will automatically enter PC mode,
and will be inoperable using its own controls.
This ensures that operations on your computer
and on the Fantom-X will not interfere with
each other.
fig.06-01_40
When you close the editor on your computer,
the Fantom-X will exit PC mode and return to
the normal screen.
The Fantom-X will also enter PC mode
when you execute a Write operation from
the librarian (p. 54).
When you must exit PC mode due to
unavoidable circumstances, such as when
your computer has frozen, you can do so
by pressing [F8 (EXIT)]. A screen will ask
you for confirmation. Press [F8 (OK)] to
force the Fantom-X to return to the normal
operation screen.
42
Cautions when using S700 series sounds with
the Fantom-X
The new editor adds a Fantom-X Sample
Converter, which converts S-700 series patches/
partials/samples into a form that can be read by
the Fantom-X. When loading S-700 series files
you converted using this converter from your
computer via USB into the Fantom-X, please be
aware of the following points.
Before you connect the Fantom-X
to your computer
In order for S-700 series sound data files
converted by Fantom-X Sample Converter to be
loaded from your computer via USB, the
Fantom-X must be in Storage mode. The power
will be turned off in the course of changing
System settings, so make sure that you save any
unsaved data before switching to Storage mode.
For details on how to make this change, refer to
“Switching the USB Mode and the MIDI Mode”
(p. 218) in the Owner’s Manual.
* You don’t need to perform this operation when
loading data from a card without using the
USB.
You must switch the USB mode (Storage
mode/MIDI mode) before you connect the
Fantom-X to your computer.
For details on using USB Storage mode, refer to
“Transferring Files to or from Your Computer
(Storage Mode)” (p. 219) in the Owner’s
Manual.
Fantom-X-V2_e.book 43 ページ 2006年4月13日 木曜日 午後5時24分
Changes due to the upgraded editor software
4.
Importing patches and
rhythm sets
The Fantom-X will check whether there are
any files that can be imported. If such files
are found, the User and/or Card icons will
appear.
Turn the VALUE dial or use [INC][DEC]
or
to choose whether you want
to import from User or from Card.
* If there is no data that can be imported, these
icons will not appear.
Here’s how patches, rhythm sets, multisamples,
and samples placed in the following directory
using Fantom-X Sample Converter can be
imported into the Fantom-X.
fig.06-05.e
(User, Card)
ROLAND
PNL
SEQ
SMPL
SND
5.
Press [F8 (⇒)].
6.
STEPS 2–4 will appear.
Turn the VALUE dial or use [INC][DEC]
or
to select the starting number of
the write destination for patch,
multisample, and rhythm set respectively.
(The user or card data will be overwritten
by the imported data.)
TMP
AUDIO_IMPORT
BMP
PATCH_IMPORT
(IMPORT.SVD etc.)
TEXT
* If you used Fantom-X Sample Converter only
to convert partials or samples, load them using
Import Audio. (Owner's Manual; p. 220)
* If this directory does not exist, use your
computer to create it.
1.
Press [MENU].
2.
Press
or
to select “Utility,” and
then press [ENTER].
The screen will indicate STEP 1.
If you specify a high number as the starting
number, the imported patches, rhythm
sets, and/or multisamples may exceed
their maximum numbers, making them
impossible to import the remains.
You can't change the write-destination
group (User/Card). It will be the same as
the loaded group.
The Utility Menu screen will appear.
fig.06-02_40
If there is no data to import, a screen like
the following will appear.
fig.06-03_40
3.
Press [F5 (Import Patch)].
The Import Patch/Rhythm screen will
appear.
* From this point onward, the screens are shown
in “wizard” format to guide you through the
process.
Sample data will be assigned automatically
to numbers at the write destination.
7.
Press [F8 (⇒)].
43
Fantom-X-V2_e.book 44 ページ 2006年4月13日 木曜日 午後5時24分
Changes due to the upgraded editor software
8.
STEP 5 will appear.
This screen shows details about the patch
being imported.
fig.06-04_40
10. When the import is completed, you are
asked whether you can delete the
source files located in the User or Card
PATCH_IMPORT directory.
Press [F8 (Exec)] to delete the files. (To
cancel, press [F7 (Cancel)].)
* It may take some time for files to be deleted.
If the Import was successful, there is
normally no need to keep the source file.
11. Press [F8 (OK)] to return to the normal
screen.
If you are satisfied with what the screen
shows, press [F6 (Exec)] to begin the
import.
9.
A screen like the following is shown
during the import.
fig.06-06_40
12. Save the sample.
Unlike patches, rhythm sets, and
multisamples, samples are not saved
automatically when the import procedure
finishes. You must save samples as
described in “Saving Samples (Save All
Samples)” (Owner's Manual; p. 200).
* In some cases, an imported patch, rhythm set,
or sample may sound differently than when
played back on the S-700 series.
Never turn off the power while data is
being imported.
If some of the data being imported is
missing, the error message “File Not
Found” will appear. In this case, delete all
of the files in the PATCH_IMPORT folder,
and use Fantom-X Sample Converter to
replace the data.
44
Fantom-X-V2_e.book 45 ページ 2006年4月13日 木曜日 午後5時24分
Changes due to the upgraded editor software
Fantom-X Editor System
Requirements
If you’re using Fantom-X Editor version 2.1 or
later, please refer to the following.
System Requirements (Windows)
•
Operating System
Microsoft® Windows® 2000 Professional
Microsoft® Windows® XP
System Requirements (Mac OS)
•
Operating System
Mac OS X 10.2 or later
•
CPU/Clock
PowerPC G4 867 MHz or higher
•
Memory (RAM)
384 MB or more
•
Hard Disk
140 MB or more
•
CD-ROM Drive
Built-in CD-ROM drive (IDE)
•
Display/Colors
800 x 600 or higher/32,000 colors or more
•
CPU/Clock:
Pentium®/Celeron® processor 800 MHz or
higher
•
Memory (RAM)
384 MB or more
•
Hard Disk
140 MB or more
*
Apple and Macintosh are registered trademark of
Apple Computer, Inc.
•
CD-ROM Drive
Built-in CD-ROM drive (IDE)
*
MacOS is a trademark of Apple Computer, Inc.
•
Display/Colors
800 x 600 or higher/65,536 colors (16 bit
High Color) or more
About the included USB
MIDI driver
204
*
Microsoft and Windows are registered
trademarks of Microsoft Corporation.
*
Windows® is known officially as: “Microsoft®
Windows® operating system.”
*
Pentium is a registered trademark of Intel
Corporation.
The USB driver included on the CD-ROM that
comes with this product can be used in MIDI
mode with the following operating systems.
Operating System
Windows XP/2000 or later
Windows 98/98SE/Me
Mac OS X
Mac OS 9
*
MIDI Mode
√
not supported
√
not supported
This may not work correctly with some types of
computer.
45
Fantom-X-V2_e.book 46 ページ 2006年4月13日 木曜日 午後5時24分
Other changes
Changes in the Patch Edit
screen
Due to the newly added Multisample Edit
screen, the following buttons in the Patch Edit
screen have changed.
• Newly added [F4 (Util Menu)]
The previous [F4 (Init)] and [F5 (Tone
Copy)] have been moved to a menu.
(Example)
When you have pressed [F4 (Util Menu)] to
open the Patch Utility Menu window
fig.07-23_40
The method for displaying the Patch Edit
screen has changed. For details, refer to
“Changes in the Patch/Rhythm Edit
screen” (p. 41).
Before the update (Patch Edit screen)
fig.07-20
Select the desired menu item, and press [F8
(Select)] to perform the same operation as
before.
After the update (Patch Edit screen)
fig.07-21
The same applies to the Rhythm Edit
screen.
Press [F4 (Util Menu)] to open the Rhythm
Utility Menu. Choose the desired menu
item, “Rhythm Set Initialize,” “Rhythm
Key Initialize” (initialize a specific key), or
“Rhythm Tone Copy,” and then press [F8
(Select)].
• Newly added [F5 (Multisample Edit)]
In the Patch Edit screen, [F5 (Multisample
Edit)] has been added to let you jump to
the Multisample Edit screen by pressing a
single button.
After the update (Zoom Edit screen)
fig.07-22
46
Fantom-X-V2_e.book 47 ページ 2006年4月13日 木曜日 午後5時24分
Other changes
Changes in the
Performance Mixer screen
Changes in the
Performance Layer screen
[F5]–[F8] buttons have been added to the screen
that appears when you press [SHIFT] in the
Performance Mixer screen.
[F5]–[F8] buttons have been added to the screen
that appears when you press [SHIFT] in the
Performance Layer screen.
After the update
After the update
fig.07-35
fig.07-36
These buttons have the following functions.
• [F5 (Loop/Locate)]
Displays the Loop/Locate window.
* For details, see p. 179 in the Owner's Manual.
• [F6 (Micro Edit)]
Displays the Microscope screen.
* For details, see p. 192 in the Owner's Manual.
• [F7 (Audio Mixer)]
Displays the Audio Track Mixer screen (p.
21).
• [F8 (Audio Edit)]
Displays the Audio Track Edit screen (p.
15).
Newly added Layer List window
In the Performance Layer screen, you can now
press [F6 (Layer List)] to open the Layer List
window and view a list of the sounds used in
each part.
47
Fantom-X-V2_e.book 48 ページ 2006年4月13日 木曜日 午後5時24分
Other changes
Changes in the Key Range
window
Changes in the Song Edit
screen
In the Performance Layer screen, you can press
[F3 (Key Range)] to open the Key Range
window and make split settings in this
window.
Due to the addition of the audio tracks, the
following buttons in the Song Edit screen have
changed.
Before the update
fig.07-25
Owner’s Manual; p. 102
Playing different sounds across
the keyboard (Split)
1.
Press [LAYER/SPLIT] to access the
Layer screen.
2.
Press [F3 (Key Range)].
The Key Range window will open.
fig.07-37_40
Use [F1 (⇑)][F2 (⇓]) to select the part you
want to edit.
3.
Hold down [F4 (Set Lower)] and play a
note on the keyboard to specify the
lowest note in the range.
Range: C-1–UPPER
4.
Hold down [F5 (Set Upper)] and play a
note on the keyboard to specify the
highest note in the range.
After the update
fig.07-26
Newly added [F4 (Song Utility)]
The previous [F3 (Song Clear)] and [F4 (Song
Name)] have been moved to a menu.
(Example)
When you have pressed [F4 (Song Utility)] to
open the Song Utility Menu window
fig.07-27_40
Range: LOWER–G9
5.
When you've finished making settings,
press [F8 (Close)] to close the Key
Range window.
Select the desired menu item, and press [F8
(Select)] to perform the same operation as before.
48
Fantom-X-V2_e.book 49 ページ 2006年4月13日 木曜日 午後5時24分
Other changes
Changes in the Song List
screen
Using the pads for
realtime erase
Due to the new addition of audio tracks, the contents
displayed in the Song List screen have changed.
Owner’s Manual; p. 177
fig.07-40_40
Owner’s Manual; p. 173
While realtime-recording a song, you can now
use the pads to erase data that you input from
the pads.
1.
Begin realtime recording (Owner’s
Manual; p. 170).
The Realtime Recording window will
appear.
fig.07-01_40
2.
Songs containing audio tracks are indicated by
the “AUDIO” symbol.
The “AUDIO” symbol is also shown in the
Save Song screen.
The Realtime Erase window will appear.
fig.07-02_40
3.
When you load a song that has this symbol, the
audio track data (.SVA) will also be loaded
automatically (p. 26).
* Samples will not be loaded automatically. You'll
need to use a command such as Load All Samples
(Owner's Manual; p. 202) to load them.
You can now delete a song from the Song List
screen.
In the Song List screen, select the song that
you want to delete, and press [F5 (Delete)].
A message will ask you for confirmation.
2.
Press [F8 (Exec)] to execute.
* If you decide to cancel, press [F7 (Cancel)].
When you delete a song from the song list, the
.SVA and .SVQ files will both be deleted
simultaneously.
* If you use your computer to delete files, you
must delete both the .SVA and the .SVQ files.
Erase the unwanted data.
• [F3 (Keyboard All)]
Erase all the data for the keyboard part for
as long as you hold down the button.
• [F6 (Pad All)]
Erases all the data for the pad part for as
long as you hold down the button.
• To erase notes of a specific key (pad);
Hold down that key (pad).
Data for that note will be erased for as long
as you hold down that key (pad).
• To erase notes of a specific key range;
Hold down the top and bottom keys of that
range. Data for that range will be erased
for as long as you hold down those keys.
Deleting a Song
1.
Press [F6 (Erase)].
4.
Press [F8 (Close)] to close the Realtime
Erase window.
You will return to the normal recording
state.
49
Fantom-X-V2_e.book 50 ページ 2006年4月13日 木曜日 午後5時24分
Other changes
CC Filter added to the
Microscope
You can now specify the controller numbers
that will be shown in the Microscope.
Improved functionality
for step recording
A function that enables you to remove a
previously input Tie has been added.
In the Step Rec (Note) screen, press [F6 (Untie)].
Owner’s Manual; p. 194
fig.07-03
Owner’s Manual; p. 174, step 7.
fig.07-04_40
1.
Access the View Select window.
2.
Press
or
Change.”
3.
Turn the VALUE dial or use [INC][DEC]
to specify the CC numbers you want to
see.
to choose “Control
If you select “ALL,” all messages will be
shown.
Changes in the demo song
loaded when you start up
the Fantom-X
Owner’s Manual; p. 42
Changes to the following song:
Song name: Start Chillin’
Copyright© Roland Coroporation
50
Fantom-X-V2_e.book 51 ページ 2006年4月13日 木曜日 午後5時24分
Other changes
5.
Improved functionality in
Live Setting
Press [F5 (Set Song)].
The Song Select screen will appear.
fig.07-39_40
Owner’s Manual; p. 42
Registering a song file in a Live
Setting
In addition to patches and performances, you
can now register song files to a live setting.
1.
Press [MENU].
2.
Turn the VALUE dial or use
or
to select “Live Setting Edit,” and then
press [ENTER].
* By pressing
or
in the above screen you
can specify the type of songs that will be
displayed. This lets you view only the desired
type of songs, making it easier to find the
desired file if there are several different types of
songs.
• VIEW ALL: show all songs
• SVQ ONLY: show only SVQ files
• SMF ONLY: show only Standard MIDI
Files
• MRC ONLY: show only MRC files
The Live Setting Edit screen will appear.
fig.07-05_40
6.
Press [F1 (User)] or [F2 (Card)] to select
the load destination, and press
or
to select the song.
7.
Press [F8 (Select)] to register the song
file.
If you decide to cancel, press [F7 (Cancel)].
You can also access the Live Setting Edit
screen by holding down [SHIFT] and
pressing [ENTER].
3.
Use
or
([F1 (⇑)] or [F2 (⇓)]) to
select the bank in which you want to
register the song file.
4.
Use
or
to select the number
(step) in which you want to register the
song file.
For example, if you registered the song to
number 02 of Bank 1, the screen will
indicate “Regist to 1-02.”
You can register the song file to any of the
sixteen steps. You will probably want to
make your registrations in the order of the
titles in your live stage set.
51
Fantom-X-V2_e.book 52 ページ 2006年4月13日 木曜日 午後5時24分
Other changes
Recalling a song file you
registered
Improvements in
Arpeggio functionality
You can recall a song in the same way that you
recall a patch or performance. (Owner's manual
p. 42)
When playing arpeggios, you can now use the
pads to switch arpeggio styles.
In the Live Setting Play screen, when you recall
a step for which a song has been registered, that
song will be loaded.
Using the pads to switch arpeggio
styles
Owner’s Manual; p. 128
Switching the font
Now you can switch the font of the Live Setting
screen.
1.
Hold down [SHIFT] and press
[ARPEGGIO].
A screen like the following will appear.
* If you’ve selected Performance mode,
“Performance” is indicated at the right of
“Arpeggio.”
In the Live Setting Edit screen, repeatedly press
[F4 (Font)] to switch the displayed font.
fig.07-10_40
Removing the text
Owner’s Manual; p. 42
Now you can delete the imported text
displayed as the bank information.
1.
In the Live Setting Edit screen, use
or
([F1 (⇑)] or [F2 (⇓)]) to select the
bank that you want to remove its text.
2.
Hold down [SHIFT] and press [F6
(Remove Text)].
2.
Press [F6 (Use Pad)].
fig.07-11_40
Now you can use the pads to switch
arpeggio styles.
You can also access the above screen by
pressing [PAD SETTING] to access the Pad
Setting screen, and then pressing [F2 (Arp)].
52
Fantom-X-V2_e.book 53 ページ 2006年4月13日 木曜日 午後5時24分
Other changes
Changing the arpeggio styles
assigned to the pads
1.
In the above window, use [CURSOR] to
move the cursor to “Style,” and turn the
VALUE dial or use [INC][DEC] to select
the desired style.
fig.07-41_40
Improvements in Chord
Memory functionality
When using chord memory, you can now use
the pads to switch chord forms.
Using the pads to switch chord
forms
Owner’s Manual; p. 133
1.
2.
3.
A screen like the following will appear.
* If you’ve selected Performance mode,
“Performance” is indicated at the right of
“Chord Form.”
Press [F8 (Store)].
The pads will blink.
Hold down [SHIFT] and press [Chord
Memory].
fig.07-15_40
Press one of the pads 1–16.
Press the pad to which you want to assign
the style you selected in step 1.
The style will be assigned to that pad.
2.
Press [F6 (Use Pad)].
fig.07-16_40
Now you can use the pads to switch chord
forms.
You can also access the above screen by
pressing [PAD SETTING] to access the Pad
Setting screen, and then pressing [F1 (Chord)].
53
Fantom-X-V2_e.book 54 ページ 2006年4月13日 木曜日 午後5時24分
Other changes
Changing the chord forms
assigned to the pads
1.
In the above window, use [CURSOR] to
move the cursor to “Chord Form,” and
turn the VALUE dial or use [INC][DEC]
to select the desired chord form.
fig.07-42_40
Changes in the librarian
Owner’s Manual; p. 236
When using the Fantom-X librarian, you no
longer need to manually select Librarian mode.
When Fantom-X Librarian begins to transmit
the data, the Fantom-X will automatically enter
PC mode, and will no longer respond to
operations performed on its control panel. This
ensures that operations on the Fantom-X will
not conflict with operations on your computer.
fig.06-01_40
2.
Press [F8 (Store)].
The pads will blink.
3.
Press one of the pads 1–16.
Press the pad to which you want to assign
the chord form you selected in step 1.
The chord form will be assigned to that
pad.
When you close the librarian on your computer,
the Fantom-X will automatically exit PC mode
and return to the normal operating screen.
When you must exit PC mode due to
unavoidable circumstances, such as when
your computer has frozen, you can do so
by pressing [F8 (EXIT)]. A screen will ask
you for confirmation, and you can press
[F8 (OK)] to force the Fantom-X to return
to its normal operating screen.
54
Fantom-X-V2_e.book 55 ページ 2006年4月13日 木曜日 午後5時24分
Other changes
New shortcut from the
Input Setting screen to
MFX Edit
In the Input Setting screen, [F6 (MFX Edit)] has
been added to let you jump to the MFX Edit
screen by pressing a single button.
New parameters
available for the
assignable switches
Several more choices have been added to the
functions that can be controlled by the
assignable switches 1 and 2.
The newly added parameters are listed below.
Owner’s Manual; p. 141
fig.07-28
Owner’s Manual; p. 125
• Master Key Shift Down
Shifts down the System parameter Master
Key Shift (Owner’s Manual; p. 230) in
semitone steps.
• Master Key Shift Up
Shifts up the System parameter Master Key
Shift (Owner’s Manual; p. 230) in semitone
steps.
• Scale Tune Switch
Switches the System parameter Scale Tune
Switch (Owner’s Manual; p. 232)
• CC01–CC31
Controller numbers 1–31
• CC33–CC95
Controller numbers 33–95
55
Fantom-X-V2_e.book 56 ページ 2006年4月13日 木曜日 午後5時24分
Other changes
Newly added DIMM
check function
When you power up the Fantom-X, it will
automatically check whether the DIMM
memory (Owner’s Manual; p. 242) is operating
correctly.
If the DIMM contacts are faulty, a screen like
the following will appear.
fig.07-32_40
If this occurs, turn off the power immediately,
and re-insert the DIMM memory correctly.
56
Fantom-X-V2_e.book 57 ページ 2006年4月13日 木曜日 午後5時24分
Index
A
D
Arpeggio .................................................... 52
Assign
Multisample ......................................... 34
Assignable Switch ...................................... 55
AUDIO MERGE ......................................... 25
Audio Track ............................................... 13
Display Mode ...................................... 20
Editing ................................................. 16
Erasing ................................................. 19
Merge .................................................. 25
MIDI track ........................................... 20
Mute .................................................... 16
Naming ................................................ 20
Recording ............................................ 24
Saving .................................................. 26
Settings ................................................ 22
Zooming In / Zooming Out ................. 20
Audio track
Combining ........................................... 18
Erasing ................................................. 19
Audio Track Edit Screen ...................... 14–16
Audio Track Mixer 1 Screen ....................... 22
Audio Track Mixer 2 Screen ....................... 23
Audio Track Mixer Screen .............. 14, 21–22
Delete .........................................................
Deleting
Song .....................................................
Demo song ..................................................
DIMM .........................................................
B
Bank Select ................................................. 39
BPM Calc
Sample ................................................. 40
C
Cancelling
Skip Back Sampling .............................
CC Filter
Microscope ..........................................
Chord Memory ..........................................
Clear ..........................................................
Copy ..........................................................
Multisample .........................................
Current Zone ..............................................
28
50
53
19
18
35
36
18
49
50
56
E
Erase
Multisample .........................................
Erase All .....................................................
Multisample .........................................
Erasing
Audio track ..........................................
Multisample .........................................
34
36
36
19
36
F
FANTOM-X Audio Track Expansion Kit ...... 9
Fantom-X Sample Converter ...................... 42
Font
Live Setting .......................................... 52
I
Import Patch/Rhythm ................................
Importing
Patch ....................................................
Input Setting Screen ....................................
Insert ..........................................................
43
43
55
17
K
Key Range Window .................................... 48
Knob
Mixer .................................................... 22
L
Layer List window ......................................
Librarian .....................................................
Live Setting .................................................
Loop/Locate ...............................................
Loop/Locate Window ................................
47
54
51
17
17
57
Fantom-X-V2_e.book 58 ページ 2006年4月13日 木曜日 午後5時24分
Index
M
R
Marker
Viewing a List ...................................... 17
Marker List ................................................ 17
MFX Edit Screen ......................................... 55
Mixdown .................................................... 18
Audio Track ......................................... 18
Mixer
Controling ........................................... 23
Move .................................................... 16, 37
Multisample
Create Multisample Screen .................. 31
Editing ................................................. 33
List ....................................................... 34
Move .................................................... 37
Original Key ........................................ 37
Patch Edit Screen ................................. 31
Reload .................................................. 36
Sample Select ....................................... 36
Saving .................................................. 38
Shift ..................................................... 37
Sort ...................................................... 37
Multisample Edit Screen ............................ 33
Multisample Editing .................................. 30
Mute
Audio Track ......................................... 16
Mute/Solo .................................................. 16
REALTIME CONTROL Knobs
Mixer ....................................................
Realtime Erase
Realtime Recording ..............................
Reload
Multisample .........................................
Rhythm Edit Screen ....................................
O
Org Key
Multisample ......................................... 37
P
Patch Edit Screen .................................. 41, 46
Patch Group ............................................... 39
Patch Overview Screen .............................. 41
PC Mode Screen ......................................... 42
Performance Layer Screen .......................... 47
Performance Mixer Screen ......................... 47
Preview ...................................................... 16
Pro Edit ...................................................... 41
Program Change ........................................ 39
58
22
49
36
41
S
S-700 Series .................................................
Sample
BPM ......................................................
Saving ..................................................
Selecting ...............................................
Unloading ............................................
Sample Auto Patch .....................................
Sample Event
Auditioning ..........................................
Copying ................................................
Deleting ................................................
Inserting ...............................................
Moving .................................................
Selecting ...............................................
sample event ...............................................
Sample Fine Tune .......................................
Sample Gain ...............................................
Sample Level ..............................................
Sample Number ..........................................
Sample Parameter .......................................
Sample Select ..............................................
Saving
Audio Track .........................................
Multisample .........................................
Sample Auto Patch ...............................
Shift
Multisample .........................................
Skip Back Sampling ....................................
Assign to Audio Track ..........................
Assign to Keyboard/Pad ......................
Cancelling ............................................
Editing ..................................................
Skip Back Cancel ..................................
Start Beat/End Beat ..............................
42
40
39
40
18
39
16
18
18
17
16
16
13
40
40
40
40
40
36
26
38
39
37
27
29
28
28
28
28
28
Fantom-X-V2_e.book 59 ページ 2006年4月13日 木曜日 午後5時24分
Index
SOLO/RE-SAMPLING ..............................
Song ...........................................................
Song Edit Screen ........................................
Song File
Live Setting ..........................................
Song List screen .........................................
Sort
Multisample .........................................
Split Point ..................................................
Multisample .........................................
Step Recording
UNTIE .................................................
24
49
48
51
49
37
35
35
50
T
Tone Sw/Sel ............................................... 35
Tone Switch/Select Window ...................... 35
Track Name ................................................ 20
U
Unload Sample ........................................... 18
UNTIE
Step Recording ..................................... 50
Updating ...................................................... 9
USB MIDI driver ........................................ 45
Z
Zone ........................................................... 36
Zooming In / Zooming Out ....................... 20
59
Fantom-X-V2_e.book 60 ページ 2006年4月13日 木曜日 午後5時24分
MEMO