1
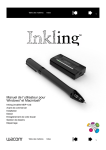
Contents
Index
1
User’s manual for
Windows & Macintosh
®
®
Inkling (model MDP-123)
Before you start
Setting up
Sketching
Saving your work
Sketch management
Troubleshooting
Contents
Index
1
Contents
Index
2
InklingTM
User’s Manual for Windows® & Macintosh®
Version 1.0, Rev K1010
Copyright © Wacom Co., Ltd., 2010
All rights reserved. No part of this manual may be reproduced except for your express personal use.
Wacom reserves the right to revise this publication without obligation to provide notification of such changes.
Wacom does its best to provide current and accurate information in this manual. However, Wacom reserves the right
to change any specifications and product configurations at its discretion, without prior notice and without obligation
to include such changes in this manual.
The above year indicates when this manual was prepared. However, the date of release to the users of the “manual”
is simultaneous with the introduction into the market of the applicable Wacom product.
Inkling is a trademark, and Wacom is a registered trademark of Wacom Co., Ltd.
Adobe, Photoshop, and Illustrator are either registered trademarks or trademarks of Adobe Systems Incorporated in
the United States and/or other countries. Microsoft, Windows, and Vista are either registered trademarks or
trademarks of Microsoft Corporation in the United States and/or other countries. Apple, the Apple logo, and
Macintosh are registered trademarks of Apple Computer, Inc., registered in the U.S. and other countries.
Any additional company and product names mentioned in this documentation may be trademarked and/or registered
as trademarks.
Mention of third-party products is for information purposes only and constitutes neither an endorsement nor a
recommendation. Wacom assumes no responsibility with regard to the performance or use of these products.
Contents
Index
2
Contents
Index
3
CONTENTS
About the manual
4
YOUR INKLING
Inkling digital pen
Inkling receiver
Inkling charging case
Battery and power management
Battery installation for pen
Receiver battery information
Charging batteries
Battery life information
Power saving features
Status lights
Replacing the pen cartridge
5
6
7
8
9
9
10
11
12
12
13
14
WORKING WITH INKLING
Preparing to sketch
Attaching the receiver to paper
Sketching
Holding the pen
Sketching with pressure and tilt
Adding layers
Changing pages
Viewing and uploading a sketch
15
16
17
18
18
19
19
19
20
INKLING SKETCH MANAGER
Installing the software
Working with the Sketch Manager
Toolbar options
Right-click options
Control buttons
21
21
22
23
23
24
Contents
Index
Identifying and opening a sketch file
Editing and working with layers
Saving a sketch
Converting a sketch file
Exporting layers
Sharing a sketch
Managing Inkling settings
Uninstalling the software
25
26
29
29
29
29
30
34
TROUBLESHOOTING
Test your Inkling
Troubleshooting tables
General problems
Technical support options
Obtaining software downloads
35
36
37
37
39
40
APPENDIX
Care for Inkling
Online mode
Product information
Available parts and accessories
Ordering parts and accessories
41
41
42
43
43
44
GLOSSARY
45
INDEX
46
3
Contents
Index
4
ABOUT THE MANUAL
This manual provides quick access to information about Inkling. The information is common to Windows
and Macintosh computers and Windows screen captures are shown, unless otherwise noted.
•
Go directly to contents or index topics by clicking on them.
•
Your Inkling is the introductory chapter. It describes the Inkling components and available features.
•
Working with Inkling will help you to understand how to create digital sketches with Inkling.
•
Use the Inkling Sketch Manager to work with your files and customize settings for Inkling.
•
See Troubleshooting for answers to most common questions.
•
The appendix provides information on product care, available parts and accessories, and more.
See the Important Product Information guide for Inkling (found in the same location as this manual, and
also accessed from the Inkling Sketch Manager HELP menu). It includes product safety precautions,
specifications, and your license and warranty.
Use the navigation controls to move through the manual.
Go to front page.
Contents
Go to table of contents.
Page back, or page forward.
Index
Go to index.
Go back to previous view.
topic
Go to topic.
Topic continued.
•
You can use your .pdf viewer zoom-in tool to increase the size of the manual on your display screen.
Most .pdf viewers include additional tools for using and printing the manual. See the viewer application
help for more information.
•
SMALL CAPITAL LETTERS are used to identify the names of keyboard keys, dialog boxes, and software
options.
•
The following information is not included with this product: information about your specific computer
hardware or operating system, or information about your application software. Your best source for this
information is the set of manuals and discs that came with your hardware, operating system, or
application.
Wacom’s philosophy is to continually improve all of its products. As a result, engineering changes and
improvements are made from time to time. Therefore, some changes, modifications, and improvements
may not be covered in this manual.
Contents
Index
4
Contents
Index
5
YOUR INKLING
Inkling can be used anywhere you might use a regular pencil, pen, and paper. As you sketch on any kind of
paper, Inkling digitally captures your sketches and saves them for uploading to your computer at a later
time.
Inkling consists of two basic elements: the Inkling digital pen and the Inkling receiver. The pen works with
the receiver to digitally capture your sketches. Together, the pen and receiver act like a portable digital
sketchbook.
Inkling saves your information in one place for quick access. Use the Inkling Sketch Manager to organize
and prepare your work for editing in vector- or raster-based applications.
Digitally capture your sketches.
Transfer your sketches for further editing.
The quickest way to learn about Inkling is to become familiar with its appearance and features.
Inkling digital pen
Inkling receiver
Inkling charging case
Battery and power management
Status lights
Replacing the pen cartridge
Contents
Index
5
Contents
Index
6
INKLING DIGITAL PEN
Use the digital pen to write and sketch on regular paper. See sketching. As you work, the Inkling receiver
digitally captures your sketches and saves them for uploading to your computer at a later time.
Charging contacts
See charging batteries.
Pen LED
See status lights.
Grip area
Battery compartment
See battery installation
for pen.
Pen tip cone
See holding the pen.
Replaceable cartridge (pen tip)
Uses standard Mini Ballpoint Ink refills.
See available parts and accessories.
Contents
Index
6
Contents
Index
7
INKLING RECEIVER
The receiver can digitally store hundreds of multiple-layer sketches that you create with the Inkling digital
pen. The receiver also functions as a standard USB flash drive. See working with Inkling.
Power button
Press to turn on or off. See also
power saving features.
New layer button
Press to create a new layer.
See adding layers.
Power, status, and new layer LEDs
See status lights.
USB port
See charging batteries and viewing
and uploading a sketch.
Sensor lens
As you sketch, keep a clear line of sight
between the lens and the pen tip cone.
See holding the pen.
Battery compartment
Located at back of unit.
See receiver battery information.
Receiver clip
(with new file button located beneath the clip)
A new sketch file is created when you open and close
the clip. See attaching the receiver to paper.
Reset button
Located on bottom of receiver. Use the end of a
paper clip or other pointed object to press
button. This returns the receiver to factory
default conditions.
Examples of when you may need to use the reset
button are described under general problems.
Contents
Index
7
Contents
Index
8
INKLING CHARGING CASE
Store your Inkling components within the charging case. The case is used to charge the pen and receiver.
Pen cartridges
USB cable
Connects the Inkling
receiver or charging case to
a USB port located directly
on your computer, or to a
powered USB hub.
Pen cartridge extractor
See replacing the pen cartridge.
Pen and receiver
USB port
Power input and data connection. See charging batteries
and viewing and uploading a sketch.
Pen charging status LED
See status lights.
Tip: You can work with sketch files when the Inkling
charging case is connected to your computer and the
receiver is located within the case.
Contents
Index
8
Contents
Index
9
BATTERY AND POWER MANAGEMENT
The Inkling digital pen uses a rechargeable Nickel Metal Hydride (Ni-MH) battery. The Inkling receiver uses
a rechargeable Lithium-Ion Polymer (Li-Ion Polymer) battery. The batteries have a long life span, but should
be replaced when they have exceeded their life span and no longer hold an adequate charge or cannot be
charged. See available parts and accessories.
Important: Be sure to use only the correct Wacom batteries specified for your product.
Many communities offer voluntary or mandatory recycling programs for batteries. Promptly recycle old
batteries. Recycle them properly by following all applicable laws, and in accordance with the safety
precautions listed within the Important Product Information guide, accessed from the Inkling Sketch
Manager HELP menu.
Keep batteries out of the reach of children.
Battery installation for pen
Receiver battery information
Charging batteries
Battery life information
Power saving features
BATTERY INSTALLATION FOR PEN
You will need to install the pen battery before using the pen.
To install or replace the pen battery:
1. Use your finger to flip open the pen
cap. Be careful not to over-extend the
cap when opening it.
2. If replacing, carefully remove the old
battery.
3. Insert the battery into the battery
compartment. The “+” terminal should
face outward toward the rear of the
pen.
4. Close the pen cap and press to snap it
into place.
Warnings: Choking hazard. Prevent children from swallowing the battery.
See the battery safety precautions listed within the Important Product Information guide, accessed from
the Inkling Sketch Manager HELP menu.
Contents
Index
9
Contents
Index
10
RECEIVER BATTERY INFORMATION
Your Inkling receiver comes with the battery pre-installed.
Important: Fully charge the receiver battery before using Inkling for the first time. See charging batteries.
Under normal conditions the rechargeable receiver battery will have a long life span. If the battery fails
unexpectedly or has outlived its useful life and must be replaced, please contact your local Wacom service
provider.
Warnings: Choking hazard. Prevent children from swallowing the battery.
See the battery safety precautions listed within the Important Product Information guide, accessed from
the Inkling Sketch Manager HELP menu.
Contents
Index
10
Contents
Index
11
CHARGING BATTERIES
Important: Before using Inkling for the first time, you should fully charge the pen and receiver batteries.
The pen and receiver can be charged separately, or together within the Inkling charging case. The receiver
can be charged independently of the charging case, and will charge whenever it is connected to your
computer or other powered USB source. When charging, the case or receiver can be connected to a
computer, powered USB hub, or AC adapter with USB connector.
To charge the pen and receiver batteries:
1. If charging through a computer, turn it on and wait until
the system has fully loaded.
2. Insert the pen and receiver into the charging case.
3. Attach the provided USB cable between the charging
case and a primary USB port located directly on your
computer, or other powered USB source.
•
The pen charging status LED will glow red to
indicate the case is connected to powered USB
source and the pen battery is charging.
•
The power LED on the receiver will glow red to
indicate the receiver battery is charging.
See also status lights.
4. Depending on the battery charge:
•
It may take approximately 2 hours for the pen
battery to fully charge. When fully charged, the pen
charging status LED glows green.
•
It may take approximately 3 hours for the receiver
battery to fully charge. When fully charged, the
power LED on the receiver glows green.
5. When charged:
•
Remove the pen from the case.
•
Remove the receiver from the case. The receiver
will turn off automatically when removed.
•
If you like, disconnect the case from your
computer.
Before removing the receiver from the charging case or
disconnecting the case from your computer, use the
SAFELY REMOVE HARDWARE (Windows) or EJECT
(Macintosh) system option.
Warning: See the battery safety
precautions listed within the Important
Product Information guide, accessed
from the Inkling Sketch Manager HELP
menu.
Note: To charge the receiver battery while you are sketching, connect the receiver to an AC adapter that
provides 500 mA USB power.
Contents
Index
11
Contents
Index
12
BATTERY LIFE INFORMATION
All batteries age over time and gradually lose their ability to hold a charge.
•
When you are done working, turn off the Inkling receiver to conserve battery power.
•
Always charge the receiver when the receiver power LED glows red. Always charge the pen when the
pen LED glows red. See charging batteries.
•
When a battery is no longer capable of holding an adequate charge, it should be replaced. See battery
installation for pen or receiver battery information.
•
The Inkling digital pen battery can be purchased from Wacom or is available at most major electronics
outlets. The Inkling receiver battery is a custom battery, and can only be replaced by Wacom.
See available parts and accessories.
Lithium-Ion Polymer (Li-Ion Polymer) and Nickel Metal Hydride (Ni-MH) batteries:
•
Battery life and performance is not improved by cycling (discharging and recharging).
•
Elevated temperatures can reduce the service life of batteries. For example, placing batteries near heat
sources or prolonged exposure to direct sunlight may shorten the battery life span.
•
Cool storage when not in use can slow the aging process of batteries.
Warning: See the battery safety precautions listed within the Important Product Information guide,
accessed from the Inkling Sketch Manager HELP menu.
POWER SAVING FEATURES
Inkling uses the below power saving features to conserve the battery charge levels:
Pen
Enters sleep mode after 30 seconds without use.
Receiver
Pen wakes as soon as you begin sketching.
Saves the last opened file and shuts down when any of the following occur:
•
30 minutes without pen activity
•
Battery is in low charge state for 10 minutes
•
Memory is full.
Contents
Index
12
Contents
Index
13
STATUS LIGHTS
LEDs indicate the operational status of your Inkling:
Pen LED
Receiver power LED
status is visible through
charging case top.
Power LED
Status LED
New layer LED
Pen charging status LED
INKLING DIGITAL PEN
LED INDICATIONS
Pen LED
Off: Pen not in use, in sleep mode, or battery has fully drained.
Green: Pen in use, battery charge okay.
Red: Low battery charge.
INKLING RECEIVER
LED INDICATIONS
Power LED
Off: Receiver is powered off, or battery has fully drained.
Blinking: During initial power-up, the power LED will blink until the receiver is
ready.
Green: Receiver is powered on and ready for use. When connected to USB
source, indicates battery is fully charged.
Red: Battery charge is low. When connected to a powered USB source,
indicates battery is charging.
Status LED
Off: Pen not in use or no pen reception.
Green: Pen in use and data reception is good.
New layer LED
Green (1 second duration):
Lights when new layer button is pressed. Indicates creation of new layer.
Lights when paper is clipped into receiver. Indicates creation of new sketch
file.
INKLING CHARGING CASE
LED INDICATIONS
Pen charging status LED
Off: Not connected to powered USB source or the pen is not in the charging
case. If both the pen and receiver are in the case and it is connected to a lowpower USB port (100 mA or less), they will not charge and the LED will be off.
Green: Pen fully charged.
Red: Pen charging.
Contents
Index
13
Contents
Index
14
REPLACING THE PEN CARTRIDGE
The pen cartridge will eventually run out of ink with normal use and need to be replaced. See available
parts and accessories.
Replacement cartridges
Pen cartridge extractor
1. Remove the pen cartridge by first placing the pen tip in the cartridge extractor. Lever the pen slightly to
one side. When you feel tension on the pen tip, lift the pen away from the charging case to remove the
pen cartridge. (You can also clasp the cartridge tip with a pair of tweezers and pull it out of the pen.)
2. Select a replacement cartridge. Remove the small end cap from the cartridge tip.
3. Slide the new cartridge straight into the barrel of the pen. Firmly push the cartridge until it stops.
Warning: Choking hazard. Prevent children from swallowing the pen cartridge. The cartridge may
accidentally be pulled out if children are biting on them.
Contents
Index
14
Contents
Index
15
WORKING WITH INKLING
Inkling gives you the power to create sketches on paper and digitally capture them at the same time.
You can use the Inkling Sketch Manager to view, organize, and prepare your sketches before exporting and
editing them in your favorite applications.
This chapter describes how to use Inkling. It includes information to help you work more comfortably, and
to better understand how Inkling interacts with your computer.
Preparing to sketch
Attaching the receiver to paper
Sketching
Adding layers
Changing pages
Viewing and uploading a sketch
Contents
Index
15
Contents
Index
16
PREPARING TO SKETCH
It is easy to create sketches with Inkling:
•
Start by attaching the receiver to paper.
•
Turn on the receiver. The power LED blinks briefly, then glows green when the receiver is ready.
•
Begin sketching with the pen.
•
Whenever you feel like adding layers to the sketch, press the new layer button (located on the receiver).
Continue to sketch, adding new layers as you desire.
•
To create a new sketch, remove the finished page from the receiver and add a new page. A new sketch
file is created each time you open and close the receiver clip. See changing pages.
•
When you are done sketching, turn off the receiver. Then connect the receiver to your computer in
preparation for viewing and uploading a sketch.
For best results, be sure to adjust the click threshold.
Tips:
•
Inkling can be used on most relatively smooth, flat surfaces. Use a gentle grip when working with the
pen.
•
As you draw, maintain a direct line of sight between the pen tip cone and receiver. Digital recording will
not occur if your fingertips, hand, or other object blocks the line of sight.
•
Inkling can be used in most environments. Although uncommon, an exceptionally noisy environment
may interfere with the ability of Inkling to accurately record your sketches.
•
If you are in a group setting where other people are using an Inkling, you can still sit beside each other
and not interfere with one another’s work.
Note regarding RSI: Wacom makes no representation, promise or guarantee that Wacom products will cure or
prevent, in whole or in part, mouse-induced repetitive stress symptoms, injuries or conditions.
Individual results may vary. Always obtain competent medical advice to determine the most appropriate
treatment for your specific situation.
Contents
Index
16
Contents
Index
17
ATTACHING THE RECEIVER TO PAPER
A new sketch file is created whenever the receiver clip is opened and then closed as you attach the Inkling
receiver to a sheet of paper. Attach the receiver to loose sheets, or to pages in a notebook or drawing pad.
The receiver can accept up to 10 pages (1 mm or 0.04 inch total thickness) at a time.
The Inkling default condition is for placement of the receiver at the top center of an A4/letter sized page in
portrait orientation. However, you can orient the receiver on any side of the paper, depending on your
preferred handedness or sketching style. See managing Inkling settings for details.
1. Squeeze the receiver clip
slightly and insert paper into
the opening. Release the
clip. Be sure to center the
receiver on the page edge.
2. Press the receiver power
button. Wait until the power
LED stops blinking and
glows green.
3. Begin sketching.
Receiver
There is a limited performance zone below the
receiver. Within this narrow zone the receiver
cannot reliably record your pen strokes.
Always write or sketch below this zone.
The limited performance zone is approximately
2.0 cm (0.8 inch) on A4/letter size paper. It may
vary slightly for larger or smaller paper sizes.
Paper
Tips:
• After you attach the receiver, leave it in place until you are done sketching. If you remove and then replace the
receiver, the new pen strokes you make on paper will be mis-aligned with the previous strokes when recorded in
digital form.
• When you change pages and the receiver is on, the new layer LED lights momentarily to indicate the creation of
a new sketch file.
Contents
Index
17
Contents
Index
18
SKETCHING
The Inkling digital pen is cordless and pressure sensitive. As you write and sketch on regular paper with
the pen, the Inkling receiver digitally captures your sketches and saves them for uploading to your
computer at a later time.
Holding the pen
Sketching with pressure and tilt
HOLDING THE PEN
Hold the pen at a comfortable angle like you would a normal pen or pencil.
Proper position shown, with fingers on the grip area
above the pen tip cone.
When sketching, always maintain a direct line of
sight between the pen tip cone and receiver.
Digital recording will not occur if your fingertips,
hand, or other object blocks the line of sight.
As you draw, apply pressure to the pen tip on
paper. The status LEDs on the pen and receiver
will glow green to indicate the pen strokes are
being recorded.
Tips:
• Remember that there is a limited performance zone below the receiver where the receiver cannot reliably record
your pen strokes. See attaching the receiver to paper.
• For optimum performance, avoid sketching on uneven surfaces.
• As you sketch, be sure your hand does not block the line of sight between the pen tip cone and receiver.
• You cannot record sketches when the Inkling receiver is connected to your computer.
Important: To maintain the battery charge and click threshold of your pen, place the pen in the charging
case or lay it flat on your desk when not in use. Do not place it in a container where it will rest on its tip.
Contents
Index
18
Contents
Index
19
SKETCHING WITH PRESSURE AND TILT
As you sketch on paper, Inkling will digitally capture the variations in pen tip pressure and tilt.
Tip: The receiver will automatically
turn itself off and save the currently
open file after 30 minutes without
pen activity. See also status lights.
If you make a mistake you can delete unwanted strokes in the Inkling Sketch Manager or export to another
application and make changes there.
Important: To maintain the battery charge and click threshold of your pen, place the pen in the charging
case or lay it flat on your desk when not in use. Do not place it in a container where it will rest on its tip.
ADDING LAYERS
As you write or sketch, press the new layer button (located on the receiver). The new layer LED glows
momentarily to indicate the creation of a new layer in your sketch. Continue to sketch, adding layers as
you desire.
•
Layers can be used to segment a sketch into discrete pieces.
•
Create many small “thinking” sketches on a single page by creating a new layer after you complete
each item.
•
When working on a larger sketch, create layers to simplify the editing process later, or to try different
approaches or styles in the same sketch.
•
Enhance your work flow by creating layered sketches ready for viewing and upload to your computer.
•
After uploading, use the Inkling Sketch Manager for editing and working with layers. Your layered
sketches (or individual layers) can be quickly saved to different formats, or exported to your favorite
applications for further editing.
Experiment. Discover how easy it is to create layers as you draw, and the many ways in which they can be
used.
CHANGING PAGES
Squeeze the receiver clip to open and remove the finished page. Add a new page and release the clip over
the paper. See attaching the receiver to paper. When you change pages, the new layer LED lights
momentarily to indicate the creation of a new sketch file.
Contents
Index
19
Contents
Index
20
VIEWING AND UPLOADING A SKETCH
After you have finished sketching, connect the Inkling receiver to your computer. Upload the files to your
computer for further editing.
1. Attach the small end of the provided USB cable to the
receiver. Connect the other end to a primary USB port
located directly on your computer, or to a powered
USB hub. The power LED will glow green or red,
depending on battery charge.
The Inkling Sketch Manager will open automatically.
The folder tree will show the MY SKETCHES folder,
located on the receiver. This is where your sketch files
are located.
2. Use the Inkling Sketch Manager to work with your
sketch files.
3. Move files from the Inkling receiver to your computer.
•
Drag file thumbnails to a folder tree location.
•
In the toolbar, choose FILE and select a SAVE
option.
•
Right-click on a thumbnail and choose the COPY
option.
TO...
Tip: You can also work with sketch
files when the Inkling charging case
is connected to your computer and
the receiver is located within the
case.
4. When you are done working, close the Sketch
Manager.
5. Before disconnecting the receiver, use the SAFELY
REMOVE HARDWARE (Windows) or EJECT (Macintosh)
system option. Then disconnect the receiver from
your computer. The receiver turns off automatically
when disconnected.
Contents
Index
20
Contents
Index
21
INKLING SKETCH MANAGER
The Inkling Sketch Manager is a software application that enables you to view and work with the sketch
files you create using Inkling.
This chapter describes how to use the Sketch Manager, and includes information about some of the more
difficult concepts.
Installing the software
Working with the Sketch Manager
Identifying and opening a sketch file
Editing and working with layers
Saving a sketch
Converting a sketch file
Exporting layers
Sharing a sketch
Managing Inkling settings
Uninstalling the software
INSTALLING THE SOFTWARE
Your product software is stored on the Inkling receiver.
To view and work with your sketches, you must install the Inkling software.
To install the software:
1. Using the provided USB cable, properly attach the Inkling receiver to your computer or to a powered
USB hub.
Note that you can also install the Inkling software while the Inkling charging case is connected to your
computer and the receiver is located within the case.
2. Open the receiver icon or folder that appears on your desktop.
3. Open the installation folder for your operating system, then double-click on SETUP.EXE (Windows) or
INKLING SKETCH MANAGER.PKG (Macintosh) to start the installer. Follow the prompts.
4. For best results, adjust the pen click threshold. If needed, review attaching the receiver to paper,
sketching, and viewing and uploading a sketch.
Notes:
You can view the user’s manual (this manual) or the Important Product Information guide before
installing your product. They are located within the installation folder.
If you delete the Inkling software from the receiver, you can always download the latest version from
the Wacom web site for your region.
After logging in you can customize your personal settings.
Contents
Index
21
Contents
Index
22
WORKING WITH THE SKETCH MANAGER
The Inkling Sketch Manager opens to the PREVIEWER when you connect the Inkling receiver to your
computer. You can also open the Sketch Manager by clicking on the Inkling icon. The icon will be located
on the Windows taskbar or Macintosh menu bar.
Use the PREVIEWER to quickly identify and select your sketches for further action.
•
Tool tips are available for most Sketch Manager controls. Position the screen cursor over an item and
let it rest there; in a few moments the tool tip will appear.
•
Your keyboard tab and arrow keys can be used to navigate some portions of the Sketch Manager.
Toolbar options
Control buttons
Folder tree
Navigate the tree to locate your
sketch files. See identifying and
opening a sketch file.
File thumbnails
Quickly preview your sketch files. Double-click on a
thumbnail to begin editing and working with layers.
You can also work with thumbnails using the toolbar
options, control buttons, or right-click options.
Contents
Index
22
Contents
Index
23
TOOLBAR OPTIONS
Within the Inkling Sketch Manager, use the upper toolbar to work with your files, change Inkling settings,
and view the user’s manual.
UPPER TOOLBAR OPTIONS
FILE
EDIT
VIEW
TOOLS (Windows)
SKETCH MANAGER
(Macintosh)
HELP
Access file commands, such as OPEN FILE, SAVE, EXPORT TO, and PRINT.
Access common editing commands.
Toggle the folder tree on or off and change how the sketch file is
previewed.
Select SETTINGS to work with your Inkling settings.
Select PREFERENCES... to work with your Inkling settings. Choose ABOUT
INKLING SKETCH MANAGER to view information about the Sketch Manager.
Choose to view the Inkling user’s manual, Important Product Information
guide, or information about the Sketch Manager (Windows).
RIGHT-CLICK OPTIONS
To display context-sensitive options, use your mouse or other input tool to right-click on sketch
thumbnails, layers, or the expanded file view. Right-click options are available in all Inkling Sketch
Manager views.
Right-click options may also be available for working with some Sketch Manager controls.
Contents
Index
23
Contents
Index
24
CONTROL BUTTONS
Use the Inkling Sketch Manager controls to operate the software and work with your files.
CONTROL BUTTON OPTIONS
Available options may vary, depending on the current Sketch Manager view.
Move back through folder tree navigation history.
Move forward through folder tree navigation history.
Zoom in.
Zoom out.
Rotate selected file counter-clockwise around virtual paper center.
Rotate selected file clockwise around virtual paper center.
Redo previous action.
Undo previous action.
Export selected file to Adobe® Illustrator®.
Export selected file to Adobe® Photoshop®.
Export selected file to Autodesk® SketchBook® Pro.
Export selected file to Autodesk® SketchBook® Designer.
Save file.
Save file to different name and/or format.
Note: The Inkling Sketch Manager will only show export buttons for those applications found on your
computer.
Contents
Index
24
Contents
Index
25
IDENTIFYING AND OPENING A SKETCH FILE
1. Within the Inkling Sketch
Manager, navigate the folder
tree to locate sketch files on the
Inkling receiver, or on your
computer.
•
New sketch files you have
created are saved to the MY
SKETCHES folder, located on
the receiver. They are sorted
by date.
•
You can browse all
directories listed in the tree
to locate and work with
sketch files in Inkling
readable format. Inkling
readable file formats
include: .wpi and .wac.
•
Individual files are not
shown within the tree.
When you click on a folder,
any files that can be read by
the Sketch Manager will
appear as thumbnails in the
PREVIEWER.
An icon is used to
indicate sketch files
having multiple layers.
Increases or decreases
thumbnail size.
2. Double-click on a thumbnail to
begin editing and working with
layers. All layers that were
defined as you made the sketch
are available within the open
document.
Note: MY SKETCHES is the flash drive section of the Inkling receiver, and can be used for saving music,
picture, and other data files. Other folders and files on the receiver are associated with the
operational and sketch management functions of the receiver. They should not be overwritten or
deleted.
Contents
Index
25
Contents
Index
26
EDITING AND WORKING WITH LAYERS
Sketches you create with the Inkling digital pen and receiver are composed of pen strokes, and can include
layers. See adding layers. Use the Inkling Sketch Manager EDITOR to fine-tune a sketch:
•
Delete pen strokes or layers. Create new layers by splitting or merging existing layers.
•
Save the modified sketch. Save as or export to another application for further editing.
•
For more information, visit the Inkling web site for your region.
Note: Some applications may take more or less advantage of the data and features within your Inkling
sketch files, depending on the application. See your application user’s manual for details on
working with layers.
Expanded view of selected file
layer(s).
• Work with the selected file layer(s)
using the LAYER MANAGER, toolbar
options, control buttons, or rightclick options.
• Use the scroll bar to view hidden
portions of the sketch.
• Use the left and right arrow
buttons to view other files in the
location folder without having to
return to thumbnails view.
• Click the Back button to return to
thumbnails view.
LAYER MANAGER
• Scroll to view the layers in your sketch.
• Click on a layer to see an expanded view.
Use SHIFT+click, CTRL+click (Windows), or
COMMAND+click (Macintosh) to view multiple layers.
• To activate a layer for editing, click to select it.
Multiple layers can be selected. For example, select
two or more layers before using the merge function.
• Click the “eye” icon next to the layer to toggle the
layer’s visibility.
• Use the control buttons to work with the selected
layer(s). See also exporting layers.
• Click the Undo button to return to the previous
condition. You can also select EDIT and UNDO.
LAYER MANAGER CONTROLS
Split selected layer(s).
Merge selected layers.
Only consecutive layers can
be merged.
Delete selected layer.
Contents
Index
26
Contents
Index
Use the SCRUBBER to isolate strokes
within the selected layer(s).
To isolate any combination of strokes,
move the left or right scrubber heads
along the bar.
As you move a scrubber head, the pen
strokes selected by that scrubber will
change color to indicate a grouping of
strokes. The number of strokes you
have selected are displayed in the
left (L) or right (R) strokes counter
boxes.
For example, when you click on the
split layers button the current layer will
be split at the position of the scrubber
heads. This enables you to isolate a
portion of your sketch into a layer for
further action.
Be sure to experiment with the
scrubber bar. It provides much
variation in the way you select strokes
within a layer.
Contents
27
Scrubber bar
A scrubber head is located at each end of
the bar.
Enter a numerical value into the left (L) or
right (R) STROKES COUNTER boxes to select
strokes.
Index
27
Contents
Index
28
Zoom in or out of PLAYER view.
Use the PLAYER toolbar controls to see
how your sketches were created.
Increase or decrease PLAYER speed.
Return to PREVIEWER screen.
PLAYER TOOLBAR CONTROLS
Go to first stroke.
Go to previous stroke from current playback location.
Play selected file, showing your pen strokes.
Note: Strokes may be shown on a stroke-by-stroke basis,
or combined and shown in small clusters, depending
on how the Inkling software interprets the sketch file.
Stop playback.
Go to next stroke from current playback location.
Go to last stroke.
Contents
Index
28
Contents
Index
29
SAVING A SKETCH
To save a sketch in Inkling compatible format, click on the Sketch Manager Save Document button.
Your files are saved to .wac format.
CONVERTING A SKETCH FILE
To convert your sketch or a selected sketch layer to a different file format, click on the Sketch Manager
Save Document As button. From the upper toolbar you can select FILE and SAVE DOCUMENT AS. Your files
are saved to .wac format.
You can also select FILE and SAVE DOCUMENT AS DIFFERENT FORMAT. A variety of file formats are supported,
including: .bmp, .jpeg, .pdf, .png, .svg, and .tiff.
EXPORTING LAYERS
Sketch files and file layers can be exported to Adobe Illustrator, Adobe Photoshop, and other popular
applications.
To export your sketches to another application for further editing, click the appropriate Sketch Manager
Export button option. From the upper toolbar you can also select FILE and choose an EXPORT TO option.
The Sketch Manager will open the selected export to application, along with your selected file and layer(s)
for editing within the application.
Note: All or some of the information contained within your sketch layers will be maintained, depending on
what makes the most sense for the export target application.
SHARING A SKETCH
To share a sketch in .pdf format with your colleagues, first select the sketch file you want to share.
•
Select a sketch by clicking on the desired PREVIEWER thumbnail.
•
You can also share a sketch that is displayed in the EDITOR.
From the upper toolbar select FILE and EMAIL. A new message window will open with the selected sketch
attached in .pdf format. Complete and send your message.
Note: The Inkling Sketch Manager can work with most Email applications, including:
Windows. Windows Mail, Microsoft Outlook, and other MAPI compliant applications.
Macintosh. Mail.
Contents
Index
29
Contents
Index
30
MANAGING INKLING SETTINGS
Use the Inkling Sketch Manager to change your Inkling settings. From the upper toolbar choose TOOLS and
SETTINGS (Windows) or SKETCH MANAGER and PREFERENCES... (Macintosh). Within the SETTINGS dialog
choose a tab and make your changes. Click APPLY or OK to save your changes. All options are available
from the PREVIEWER. The GENERAL options are also available when in EDITOR view.
SETTINGS TABS
MAPPING
Inkling automatically detects your pen strokes as you sketch. Inkling is
optimized for a page size of A4/letter, portrait orientation.
Choose the PAPER SIZE you typically use, and the ORIENTATION in which you
like to sketch. Then choose the position where you will clip the receiver
onto the page.
Supported paper sizes include:
•
A4, A5, A6, and A7
•
Letter, legal, and junior legal
(8.5 x 11, 8.5 x 14, and 8.0 x 5.0 inches, respectively)
Tip: If you sketch with the receiver in a different position, the digital sketch
file may appear rotated in the Sketch Manager. Use the Rotate controls to
adjust the sketch orientation.
Contents
Index
30
Contents
Index
31
SETTINGS TABS
PEN
Choose options in the PEN tab to define how the pen strokes you make on
paper will appear in digital form.
•
Choose the BALLPOINT DIAMETER of the cartridge that you will use in the
Inkling digital pen. This serves as a baseline ink width. Different ball
sizes affect the presentation of your strokes in digital form.
•
DEFAULT BRUSH SIZE sets the size of the pen stroke width in digital form,
and is based on the BALLPOINT DIAMETER.
•
DEFAULT BRUSH COLOR sets the color that your pen strokes will appear
when viewed on your computer’s display screen or monitor.
•
LAYER HIGHLIGHT sets the COLOR and WIDTH of the stroke lines in the
selected layer.
•
SCRUBBER’S COLOR enables you to define the highlight colors that are
used to isolate pen strokes within the Sketch Manager EDITOR.
Contents
Index
31
Contents
Index
32
SETTINGS TABS
CLICK THRESHOLD
Use this tab to calibrate your pen click threshold to the inking cartridge.
1. To adjust the click threshold, clip the Inkling receiver to a typical piece
of sketching paper and then connect the receiver to your computer
using the included USB cable or any other USB to USB Mini-B cable
(commonly available).
2. As soon as you connect the receiver to the computer, the pen will start
moving the screen cursor.
3. Find the area on your paper that moves the screen cursor within the
test area on this tab.
4. Then sketch a couple of typical lines in that area and compare them
with the digital lines in the test area on this tab.
5. If needed, use the slider to adjust the click threshold until the start and
end of the digital lines correspond to the start and end of the ink lines
on the paper.
Tips:
•
Wacom recommends you calibrate the click threshold before using a
new pen, and when switching to inking cartridges of a different brand
or ball size.
•
If you accidentally set the setting too soft for your pen, the tip will draw
even when it does not touch the paper. Use a mouse or trackpad to
change the click threshold slider to a harder setting and try again.
Sketching area
Contents
Index
32
Contents
Index
33
SETTINGS TABS
GENERAL
You can modify general Inkling settings.
•
SET DEFAULT LOCATION FOLDER allows you to change the location to
which the Inkling Sketch Manager automatically navigates when the
application is open and the receiver is not connected to your computer.
•
SET RECEIVER REAL TIME DOCK is used to set the local date and time of
the receiver. The receiver date and time are used in sketch file naming,
and can be useful when you want a time record associated with your
sketches.
Contents
Index
33
Contents
Index
34
UNINSTALLING THE SOFTWARE
If you previously installed the Inkling software and would like to remove it from your system, follow the
appropriate procedure below.
Windows 7 and Vista: Click on the Windows START button and choose CONTROL PANEL. In the CONTROL
PANEL window, click on UNINSTALL A PROGRAM. In the dialog box that appears, choose INKLING SKETCH
MANAGER. Click UNINSTALL and follow the prompts to remove the software. (If prompted, enter your
administrator login name and password.)
Windows XP or XP x64: Click START. In the start menu, select CONTROL PANEL. Then select ADD OR REMOVE
PROGRAMS. In the ADD OR REMOVE PROGRAMS window, choose INKLING SKETCH MANAGER and click on the
REMOVE button. Follow the prompts to remove the software.
Macintosh: From the GO menu, choose APPLICATIONS. Send the APPLICATIONS/WACOM folder to the trash to
completely uninstall the Inkling Sketch Manager software.
Contents
Index
34
Contents
Index
35
TROUBLESHOOTING
Most of the time Inkling will work flawlessly. But if you are having trouble, Wacom recommends you do the
following:
1. First perform the recommended action in any error message that may appear on your screen. If that
does not solve the problem, review the troubleshooting procedures in this chapter.
2. Look in the troubleshooting tables. Your problem may be described there and you can try the solution
offered.
3. Open the Inkling Read Me file and check for any information updates.
4. Test your Inkling.
5. If you are having a compatibility conflict between Inkling and a new hardware or software product, see
obtaining software downloads for information on downloading updated software. Wacom periodically
updates the software to maintain compatibility with new products.
6. Check the FAQs (Frequently Asked Questions) on the Wacom web site for your region.
7. If you have tried the suggestions in this manual and still cannot resolve the problem, then contact
Wacom for Technical Support. See technical support options and the Read Me file for information on
where to obtain support for your region.
Test your Inkling
Troubleshooting tables
Technical support options
Obtaining software downloads
Contents
Index
35
Contents
Index
36
TEST YOUR INKLING
1. Verify the pen and receiver are communicating. As you use the pen on paper, the pen LED and the
status LED on the receiver should both glow green to indicate correct functionality. See status lights.
If not, then check that you have turned the receiver on by pressing the power button. Go to the next
step.
2. Check the receiver.
•
If the power LED is red or off, charge the receiver battery. See charging batteries. For best results
when troubleshooting no power (LED does not light), properly connect the receiver to the system
USB port on your computer.
•
With the pen in use, the status LED located on the receiver should glow green. This indicates good
data reception between the pen and receiver.
•
Press the new layer button. The new layer LED should momentarily light green to indicate the
creation of a new layer. The LED should also light green whenever you clip a new sheet of paper
into the receiver.
3. Check the pen.
•
If the power LED is red, charge the pen battery. See charging batteries.
•
Press the pen tip against paper. The LED on the pen should glow green to indicate the pen is in use
and that the battery charge is okay.
4. Verify that you can upload files from the receiver to your computer. See viewing and uploading a
sketch.
5. Check the product in online mode.
•
Properly connect the receiver to your computer. If a receiver status LED does not illuminate, your
USB port may be disabled. Verify that you have connected Inkling to an active USB port. If you are
connecting to a powered USB hub, be sure the hub is properly connected to your computer and is
active.
•
Move your pen across the page. The screen cursor should move in the corresponding direction on
your monitor or display screen.
6. Check the charging case.
•
Insert the pen and receiver into the charging case. See charging batteries.
•
Properly connect the case to an active USB port on your computer. If connecting to a powered
USB hub, be sure the hub is properly connected to your computer and is active. For best results,
connect the case to the system USB port located on your computer.
•
The pen charging status LED should be green or red, depending on the pen battery charge.
See also status lights.
•
The receiver power LED should be red or green, depending on the receiver battery charge.
•
Determine if you can work with sketch files when the charging case is connected to your computer
and the receiver is located within the case.
7. If these tests fail, you may have a defective component. See technical support options.
Contents
Index
36
Contents
Index
37
TROUBLESHOOTING TABLES
If you encounter problems with Inkling, refer to the following tables. Your problem may be described here
and you can try the solution offered. Be sure to check the Read Me file for the latest information updates.
For additional information, visit Wacom’s web site at http://www.wacom.com/productsupport.
GENERAL PROBLEMS
The receiver power LED is red
or off.
The computer does not have
an available USB port.
The receiver battery does not
charge.
The receiver battery charge is low. Charge the battery. For best
results, properly connect the receiver to the system USB port on your
computer. See charging batteries.
Inkling requires that you connect to a primary USB port (located
directly on your computer) or to a powered USB hub. If not available
you will need to add a powered USB hub or USB card.
If you are connecting Inkling to a powered USB hub, be sure the hub is
properly connected to your computer and is active.
Verify that the USB cable is properly plugged into the receiver, and that
it is plugged directly into a powered USB port on your computer or a
powered USB hub.
Try charging the receiver within the charging case, or connecting to a
different powered USB port.
Receiver status LEDs are off.
An LED does not illuminate
when using the pen.
After connecting the receiver
or charging case to a USB
port, a message appears
indicating that the USB device
needs more power than is
available.
The battery charging process
seems to stop whenever the
computer enters sleep mode.
The receiver does not record
pen strokes.
Contents
The battery may need replacement. See receiver battery information.
Be sure the receiver is turned on. Press the receiver power button.
If the LED does not light, the battery may need to be charged.
See charging batteries.
Make sure the Inkling component is plugged into a primary USB port
on your computer or into a powered USB hub attached to your
computer.
As required, adjust your system power or energy saver settings so that
the computer does not enter sleep mode while Inkling components are
charging.
Be sure you are using the pen and receiver correctly. See preparing to
sketch.
Index
37
Contents
When working in online mode,
double-clicking is difficult.
The pen does not draw on
paper.
The pen writes on paper, but
does not seem to
communicate with the Inkling
receiver.
Sketches are not always
recorded, or some strokes are
missing.
Some strokes or portions of
strokes are missing from the
sketch closest to where the
receiver was located on the
paper.
The computer does not go to
sleep when working with
Inkling in online mode.
The computer does not
recognize the receiver.
All receiver LEDs are
constantly on or blinking, and
the receiver does not respond.
Receiver does not turn on,
even when connected to USB
source.
Receiver shuts down
unexpectedly.
Contents
Index
38
Be sure you are quickly tapping the paper twice in the same place with
the pen tip.
Windows: Try setting your system to launch programs with a single
click.
Change the pen cartridge. See replacing the pen cartridge.
Be sure there is a direct line of sight between the pen tip cone and the
receiver. When the pen is in use, a status LED should glow on both the
pen and receiver. Test your Inkling if not.
If necessary, adjust the pen click threshold.
The receiver needs a direct line of sight to the pen. Digital recording
will not occur if your fingertips or hand block the line of sight.
To correct this, ensure you are correctly holding the pen. You can also
change the placement where you are attaching the receiver to paper.
If necessary, adjust the pen click threshold.
There is a limited performance zone where the receiver cannot reliably
record your pen strokes. See attaching the receiver to paper.
Begin your sketches below this zone.
When you are not using the pen, move the pen away from receiver
proximity or Inkling may continue to send data, keeping the computer
awake.
Try connecting to a different USB port.
Reset the receiver to its factory default condition. Using the end of a
paper clip or other pointed object, press the reset button (located in the
small hole on the bottom of the receiver).
Reset the receiver. Press the reset button using the end of a paper clip
or other pointed object.
Reset the receiver. Press the reset button using the end of a paper clip
or other pointed object.
The receiver will save the last opened file and shut down when any of
the following occur:
•
30 minutes without pen activity
•
Battery is in low charge state for 10 minutes
•
Memory is full.
Index
38
Contents
Index
39
TECHNICAL SUPPORT OPTIONS
If you have a problem with Inkling, first check the installation guide to be sure Inkling is installed correctly.
Then review the troubleshooting procedures.
If you cannot find the answer in this manual, you may find updated information about your problem in the
appropriate Read Me file for your platform (located on the Inkling receiver). You can also check the product
FAQs (Frequently Asked Questions) on the Wacom web site for your region.
If you have an Internet connection you can download the latest software from the Wacom web site for your
region. See obtaining software downloads.
If you cannot solve the problem and you believe Inkling is not working properly, contact the Wacom
support staff for the area where your product was purchased. See the Inkling Read Me file, located on the
Inkling receiver, for contact information.
When you call, you should be at your computer with the following information available:
•
This manual.
•
Inkling component serial and model number.
•
Inkling Sketch Manager software version number.
•
The make and model of your computer, and operating system version number.
•
A list of peripheral devices attached to your computer.
•
If applicable, the software application and version you were using when the problem occurred.
•
The exact wording of any error message that appeared on your screen.
•
What happened and what you were doing when the problem occurred.
•
How you tried to solve the problem.
You can also contact the Wacom Customer Care Center by visiting the Wacom web site for your region and
completing an Email Inquiry form.
Contents
Index
39
Contents
Index
40
OBTAINING SOFTWARE DOWNLOADS
Wacom periodically updates the Inkling software to maintain compatibility with new products. If you are
having a compatibility problem between Inkling and a new hardware or software product, it may be helpful
to download the latest Inkling software (when available) from the Internet.
USA, Canada, Central and South America
Worldwide Web:
http://www.wacom.com/productsupport
Software updates
Europe, Middle East and Africa
Worldwide Web:
http://www.wacom.eu/downloads
Software updates
http://tablet.wacom.co.jp
Software updates (Japanese)
http://www.wacom-asia.com
Software updates (English)
http://www.wacom.com.cn
Software updates
(Simplified Chinese)
http://www.wacom.com.hk
Software updates
(Traditional Chinese)
http://www.wacomkorea.com
Software updates (Korean)
http://www.wacom.com.tw
Software updates
(Traditional Chinese)
Japan
Worldwide Web:
Asia Pacific (English)
Worldwide Web:
China
Worldwide Web:
Hong Kong
Worldwide Web:
Korea
Worldwide Web:
Taiwan
Worldwide Web:
Contents
Index
40
Contents
Index
41
APPENDIX
This section contains tips on caring for Inkling, instructions on how to use Inkling as a computer navigation
tool, and more.
Care for Inkling
Online mode
Product information
Available parts and accessories
Ordering parts and accessories
CARE FOR INKLING
Keep your Inkling components clean. Regular cleaning with a soft, damp (not wet) cloth will help to prolong
the life of your product. You can also slightly dampen the cloth using a very mild soap diluted with water.
Do not use volatile liquids, such as paint thinner or benzene, because they may damage the plastic
casings.
Keep your Inkling in a clean, dry place and avoid extremes in temperature. Room temperature is best.
Your Inkling digital pen and other components are not made to come apart, except as indicated within this
manual to change the batteries or pen cartridge. Twisting the pen body can break the pen. Taking apart
the product will void your warranty.
Important: Take care to never spill liquids onto your Inkling components. All components contain sensitive
electronic parts that will fail if liquids enter them.
Contents
Index
41
Contents
Index
42
ONLINE MODE
Whenever the Inkling receiver is properly connected to your computer, you can use the Inkling digital pen to
point, click, double-click, and navigate your computer.
1. Clip the receiver to the top center of a single or notepad sheet of paper.
2. Using the provided USB cable, properly connect the receiver to a
primary USB port located directly on your computer, or to a powered
USB hub.
If an autorun dialog opens, dismiss the dialog.
3. Hover the Inkling digital pen slightly over the paper to navigate your
computer. (If the pen is in sleep mode, first touch the pen tip to the
paper. This synchronizes the pen to the receiver.)
•
Tap once to click.
•
Tap twice to double-click.
4. When finished, disconnect the receiver from your computer. Before
disconnecting, use the SAFELY REMOVE HARDWARE (Windows) or EJECT
(Macintosh) system option. The receiver turns off automatically when
disconnected.
The cursor on your monitor or display screen
follows as you move the pen tip.
The active area beneath the receiver senses pen movement. This area is
12 x 19 cm (4.8 x 7.6 inches), and begins approximately 5 cm (2 inches)
below the receiver. You can only navigate when using the pen within the
receiver’s active area.
Tip: Leaving the Inkling digital pen within the receiver active area may
interfere with screen cursor positioning when using other pointing devices,
or may prevent your computer from going to sleep.
Contents
Index
42
Contents
Index
43
PRODUCT INFORMATION
To learn more about Inkling, visit the Wacom web site for your region:
USA, Canada, Central and South America
http://www.wacom.com/productinfo
Europe, Middle East and Africa
http://www.wacom.eu#
Japan
http://tablet.wacom.co.jp
Asia Pacific (English)
http://www.wacom-asia.com
China (Simplified Chinese)
http://www.wacom.com.cn
Hong Kong (Traditional Chinese)
http://www.wacom.com.hk
Korea
http://www.wacomkorea.com
Taiwan
http://www.wacom.com.tw
Thailand
http://www.wacom-thai.com
AVAILABLE PARTS AND ACCESSORIES
To purchase the following items, visit Wacom’s web site at http://www.WacomDirect.com (USA only).
See also ordering parts and accessories.
DESCRIPTION
PART NUMBER
Replacement cartridges, for pen
Mini Ballpoint Ink refill, 1 mm ballpoint, qty 4 (black ink)
ACK-20307
Mini Ballpoint Ink refill, 1 mm ballpoint, qty 12 (black ink)
ACK-20317
Pen battery, 1/3 length AAA, rechargeable (Nickel Metal Hydride)
ACK-40303
The following items can be replaced by contacting the Wacom support staff for the area where your
product was purchased.
DESCRIPTION
PART NUMBER
Inkling digital pen
BU-100
Inkling receiver
MDP-123/K
Inkling charging case
BU-200
USB cable (USB to USB Mini-B), 24.4 cm (10 inch)
STJ-A302
Receiver battery, rechargeable (Lithium-Ion Polymer)
ACK-40304
Contents
Index
43
Contents
Index
44
ORDERING PARTS AND ACCESSORIES
To purchase available parts and accessories, refer to the Inkling Read Me file and see who to call for your
region. You can also do the following:
•
In the USA or Canada, call 1.888.884.1870 (toll-free) or visit Wacom’s web site at
http://www.WacomDirect.com (USA only).
•
In Europe, call +49 (0)180.500.03.75 or send an Email to [email protected]. Or, visit
http://shop.wacom.eu. You can also contact your local dealer, distributor, or technical support using
the appropriate number for your region.
•
In Australia, Singapore, Taiwan and Korea, please visit: www.BuyWacom.com.au,
www.BuyWacom.com.sg, www.BuyWacom.com.tw and www.BuyWacom.co.kr, respectively.
•
In other countries, please contact your local dealer or distributor.
Not all parts and accessories are available in all regions.
Contents
Index
44
Contents
Index
45
GLOSSARY
Cartridge. The replaceable pen tip.
Click force. The amount of force you must apply to the pen tip for a click to occur.
Inkling digital pen. The Inkling digital pen is a cordless, pressure-sensitive drawing instrument that works
with the Inkling receiver.
Inkling receiver. The Inkling receiver works with the Inkling digital pen to digitally capture your sketches.
LED. Light Emitting Diode. LEDs are used to indicate the operational and battery charge status of Inkling.
MAPI. Messaging Application Programming Interface. A messaging architecture used by many Email
applications.
Online mode. An operational mode that enables you to use Inkling for navigation input.
Pressure sensitive. A quality of the Inkling digital pen that senses the amount of pressure being applied to
the pen tip.
Screen cursor. The pointer on the display screen. Screen cursors come in different shapes (such as an
I-beam, arrow, or box), depending on which application you are running.
Tilt sensitive. A quality of the Inkling digital pen that senses the amount of tilt between the pen and page.
USB. Universal Serial Bus. A hardware interface standard for connecting computer peripheral devices.
USB ports support hot-plugging, which allows you to disconnect a USB device without turning off your
computer.
Contents
Index
45
Contents
Index
46
INDEX
About the manual
Accessories and parts
available
ordering
Batteries
charging
installation for pen
life, information
management
receiver, information
Care, for Inkling
Cartridge, replacing
Charging case, features
Converting a sketch file
Drawing
preparing to
with pressure
with tilt
Editing, files
Exporting layers
Features, power saving
General problems, troubleshooting
Identifying a sketch
Information, product
Inkling
about
care
Sketch Manager
storing
testing
Layers
adding
creating
editing
exporting
working with
Contents
4
43
44
11
9
12
9
10
41
14
8
29
18
16
19
19
26
29
12
37
25
43
5
41
21
41
36
19
26
26
29
26
Index
LEDs, status
Manager, sketch
Managing settings
Online mode
Opening a sketch file
Ordering parts and accessories
Pages, changing
Paper, attaching receiver to
Parts and accessories
available
ordering
Pen
cartridge, replacing
features
holding
Power management
Power saving features
Pressure, sketching with
Product information
Receiver
attaching to paper
features
Saving a sketch
Selecting a sketch
Settings, managing
Sharing a sketch
Sketch Manager
control buttons
right-click options
toolbar options
working with
Sketches
creating layers
editing layers
exporting layers
file conversion
13
21
30
42
25
44
19
17
43
44
14
6
18
9
12
19
43
17
7
29
25
30
29
21
24
23
23
22
26
26
29
29
46
Contents
identifying
opening a file
saving
selecting
sharing
uploading
viewing
Sketching
preparing to
with pressure
with tilt
Software
downloads, obtaining
installing
uninstalling
Contents
Index
25
25
29
25
29
20
20
18
16
19
19
47
Status LEDs
Technical Support, contacting
Testing
Tilt, sketching with
Troubleshooting
general problems
tables
Uninstalling software
Uploading a sketch
Viewing a sketch
Wacom international offices
Working with Inkling
13
39
36
19
35
37
37
34
20
20
48
15
40
21
34
Index
47
Contents
Index
48
WACOM INTERNATIONAL OFFICES
WACOM TECHNOLOGY CORPORATION
WACOM EUROPE GMBH
1311 SE Cardinal Court
Europark Fichtenhain A9
Vancouver, WA 98683
47807 Krefeld
U.S.A.
Germany
Telephone: +1.360.896.9833
Internet: http://www.wacom.eu
Fax: +1.360.896.9724
WACOM CO., LTD.
JAPAN TABLET SALES DIVISION
WACOM CO., LTD.
ASIA PACIFIC DIVISION
Harmony Tower 18F, 1-32-2 Hon-Cho,
Harmony Tower 18F, 1-32-2 Hon Cho,
Nakano-Ku, Tokyo 164-0012
Nakano-Ku, Tokyo 164-0012
Japan
Japan
Internet: http://tablet.wacom.co.jp
Telephone: +81.3.5309.1513
Fax: +81.3.5309.1514
WACOM CHINA CORPORATION
WACOM KOREA CO., LTD.
Unit 2807, 28th Floor, SK Tower
#1211, 12F, KGIT Sangam Center,
No 6 Jia, Jianguomenwai Avenue,
1601 Sangam-dong, Mapo-gu, Seoul 121-913, Korea
Beijing, 100022, China
Telephone: +82.2.557.3894
Internet: http://www.wacom.com.cn
Fax: +82.2.557.3895
WACOM AUSTRALIA PTY. LTD.
WACOM SINGAPORE PTE. LTD.
Unit 8, Stage 1 Cumberland Green
5 Temasek Boulevard
2-8 South Street Rydalmere
#12-09 Suntec Tower Five
NSW 2116 Australia
Singapore 038985
Telephone: +61.2.9422.6700
Telephone: +65.6258.8640
Fax: +61.2.9420.2272
Fax: +65.6258.8697
WACOM TAIWAN INFORMATION CO., LTD.
WACOM HONG KONG LIMITED
Suite 605, 6th floor, No. 205 Tun-Hwa North Road
Room 2105, C C Wu Building
Taipei, 105 Taiwan
302-308 Hennessy Road
Telephone: +886.2.2712.2675
Wanchai, Hong Kong
Fax: +886.2.2712.9789
Telephone: +852.25739322
Fax: +852.25739500
Contents
Index
48