1
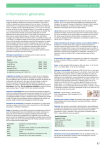
Installing and Using PPR
Installing and Using PPR
David Chappell
Copyright © 1995−−2004 Trinity College Computing Center
29 January 2004
Table of Contents
Installation
Obtaining the PPR Source Code
Unpacking, Compiling, and Installing PPR
Setting a Default Alert Destination
Filter Setup
Starting and Restarting the PPR Spooler
The Manual Way
The Automatic Way
PPR's User, Operator, and Administrator Interfaces
The Command Line Interface
The Web−Browse Interface
The Perl/Tk Interface
Adding Printers
Adding Printers to the Spooler
Making Groups of Printers
Adding PPR Printers to Samba
Adding PPR Printers to the PPR AppleTalk Server
PPR's LPD (RFC 1179) Server
Automatic Bin Selection
Submitting Jobs to PPR
Simple Examples
Choosing Options
Submitting Jobs Through Uprint
Submitting Jobs Using the Perl/Tk Interface
User Notification
Notifying X Windows Users
Notifying Samba Users
Notifying lprsrv Users
Queue Manipulation
Viewing the Queue
Canceling Jobs
Operator's Duties for the PPR Spooler
Deleting Jobs
Mounting Media
Stopping and Starting Printers
More On Mounting Media
Dealing With Printer Faults
Holding and Releasing Jobs
PostScript Errors and Arrested Jobs
Installing and Using PPR
1
Installing and Using PPR
Backing Up PPR's Data
Removing PPR
Replacing a Printer
Basic Queue Modifications
Changes for Samba
Sundry Notices
Copyright and Disclaimer
Trademark Acknowledgements
Other Acknowledgements
Abstract
This document is intended to help you to get PPR up and running as quicly as possible. It does not attempt to
describe all of PPR's features or theory of operation. More information can be found in PPR, a Print Spooler
for PostScript, the PPR Reference Manual, and the PPR Hackers Guide.
Installation
Obtaining the PPR Source Code
The PPR source code may be obtained by anonymous FTP from ftp://ppr−dist.trincoll.edu/pub/ppr/. If you
prefer to use HTTP, the URL is http://ppr−dist.trincoll.edu/pub/ppr/. The file size is about 4 megabytes.
Unpacking, Compiling, and Installing PPR
The PPR source code comes as a tar archive compressed with gzip. To unpack it use this command:
# gunzip −c ppr−X.XX.tar.gz | tar xvf −
Where X.XX is the PPR version number. This command will uncompress and unpack the source code and
deposit it in a directory called ppr−1.50 which it will create in the current directory.
Compiling and installing PPR consists of 4 basic steps:
1. Running the Configure script
2. Running make
3. Running make install
These steps are described in detail in the file INSTALL.txt which may be found in the top level source
code directory. There you will find list the of packages which it is required or recomended that you install
before building and runing PPR. That file also has and has notes about how PPR gets along with various
operating systems.
Setting a Default Alert Destination
When PPR detects that something is wrong with a printer, it can inform an operator by e−mail. The e−mail
address of the operator to be informed is specified for each individual printer. Also specified is how long a
problem must persist before the operator should be alerted. There are default settings which are copied into
the configuration of each newly created printer. As soon as you have installed the spooler you should set the
default alert settings which will be applied to new printers. You do it with a command like this one:
David Chappell
2
Installing and Using PPR
# ppad new alerts 5 mail [email protected]
After this command has been executed, then the configuration of each printer you add will be set so that on
every fifth printer fault a notice will be mailed to <[email protected]>.
Filter Setup
One of the last things make install does is run ppr−index filters The ppr−index filters command searches
for certain programs which it will be able to use to convert files you may want printed to PostScript. These
programs include Troff, TeX, DVIPS, the NetPBM utilities, and the Adobe Acrobat Reader. For those that are
found in the current path, PPR generates small shell scripts in /usr/lib/ppr/filters/. Later, PPR
calls these shell scripts to automatically convert input files to PostScript.
If you later add or remove programs which PPR uses or could use as filters, you should re−run ppr−index
filters.
Starting and Restarting the PPR Spooler
When you have finished running the spooler install script, you are ready to start the spooler daemons for the
first time.
The Manual Way
You can start it manually with the following commands:
# /usr/lib/ppr/bin/pprd
# /usr/lib/ppr/bin/papd
The first command starts the spooler daemon, the second starts the server for Macintosh clients. Any daemons
needed for AppleTalk should be started before starting papd. For example, if AppleTalk is provided be
Netatalk, you should start Netatalk's daemon atalkd before starting papd.
To shut them down, use these commands:
# /usr/lib/ppr/bin/papd −−stop
Sending SIGTERM to papd (PID=10163).
Waiting while papd shuts down....
Shutdown complete.
# /usr/lib/ppr/bin/pprd −−stop
Sending SIGTERM to pprd (PID=25524).
Waiting while pprd shuts down....
Shutdown complete.
You may of course use the kill command to kill the processes. If you do though, remember that it is important
to never kill papd with the command kill −9 or kill −KILL unless gentler means have already failed.
One reason this is important is because, depending on which AppleTalk implementation you are using, papd
may have to call shutdown code to remove the advertised names from the AppleTalk network. If killed by
SIGKILL, papd will be unable to call the shutdown code and the names will remain. You might then have to
stop and restart the AppleTalk protocol stack to get rid of them. Until you get rid of them, you will be unable
to restart papd and any Macintosh clients which attempt to print to the now dead names will probably crash.
Setting a Default Alert Destination
3
Installing and Using PPR
The Automatic Way
The above paragraphs describe how to start and stop the PPR daemons individually with simple Unix
commands. There are other, more automated ways to do it. For example, if your system uses a System V style
init, you can stop all of the PPR daemons and once by finding the init.d directory (which is in different
places in different operating systems) and running the ppr script which PPR installed there with the parameter
stop. The example below will work on most System V derived and recent Linux systems. Here we start and
then stop the PPR daemons:
# /etc/init.d/ppr start
Starting PPR daemons: pprd papd
# /etc/init.d/ppr stop
Stopping PPR daemons: pprd papd
PPR's User, Operator, and Administrator Interfaces
There are three principal ways of interacting with PPR. These are the command−line interface, the
web−browser interface, and the Perl/Tk interface.
The Command Line Interface
The command−line interface is the most complete. All of the other interfaces use the command−line interface
in the background. The principal commands are ppr, ppop, and ppad.
The ppr command is used to submit print jobs. It works much like lpr or lp. If a filename is specified on the
command line, it is printed, otherwise the data to be printed is ready from stdin. The −d is used to specify the
queue to which to submit the job. Other options are available to control such things as multiple copies,
duplexing, and user notification of the job's fate.
The ppop command is the command which users and operators use to control the spooler. All users can list
queues delete, move, hold, etc. their own jobs. Users who have been granted operator's rights can do the same
to anyone's job. They can also mount forms, start and stop printers, and perform similiar tasks that don't alter
the spooler configuration. A user can be granted operator access by adding his username to
/etc/ppr/acl/ppop.allow.
The ppop command is structured as a series of subcommands. For example, ppop list will list a queue while
ppop cancel will cancel a job.
The ppad command is the one which the system administrator uses to alter the spooler's configuration.
Ordinary users can use it to view but not alter the spooler configuration. Users who have been granted spooler
administrator access by adding their usernames to /etc/ppr/acl/ppad.allow can alter the spooler
configuration. For example, they can add and delete printers.
Like the ppop command, the ppad command is a container for many subcommands. For example, ppad
show will display the configuration of a printer while ppad comment will change its description.
This manual will provide many examples of the use of these commands. Complete explanations of all of their
options and subcommands can be found in their man pages.
The Automatic Way
4
Installing and Using PPR
The Web−Browse Interface
The web−browser interface is the second most complete. It provides a way to manage jobs and create, modify,
and delete print queues. It does not provide a way to submit jobs other than test pages. In a modern browser
such as Mozilla, the interface looks more like a modern GUI than a typical web−browser interface.
One reaches the web−browser interface by connecting to port 15010 on the print server. This is illustrated in
figure Figure 1 below.
Figure 1. Opening the PPRWeb−Browser Interface
The first page which one sees provides links to a number of things including PPR documentation and the PPR
web−browser interface. The web browser interface is shown in figure Figure 2 below.
Figure 2. PPR's Web Control Panel
The Web−Browse Interface
5
Installing and Using PPR
Some of the operations which you can perform using the web interface require authentication and
authorization. If you are running the web browser on a Linux system and connecting to the same system using
the address localhost, then PPR will be able to determine which user is on the other browser side of the
connection. Under any other circumstance, you will have to present a username and password.
The PPR web−browser interface will not accept your system password. It could only do so if you were to send
your password over the net where it would be succeptible to eavesdropping. Instead it uses what is known as
"digest" HTTP authentication. In this sceme, your browser proves to the server that you have told it your
password by treating it as a number and answering obscure questions about its mathmatical properties.
However, in order to participate in this game, the server needs to have your password encoded in a particular
way. The upshot is that you must use a special password setting program to set the password for the PPR
web−browser interface. Actually, the first time, a system administrator (root or someone listed in
/etc/ppr/acl/passwd.allow must do this for you, like this:
# ppr−passwd −−add jjones
All authenticated users have the same level of access as they would have at the command line. This means
that they can do things to their own jobs, but everthing else, such as the spooler configuration, is read−only
for them. A user can be granted a greater level of access by adding him to the access control lists for the ppop
and ppad commands as described above.
The Perl/Tk Interface
The Perl/Tk interface is the least mature. It currently provides a way to print files, view and manage queues,
view printer status, and start and stop printers. It does not provide any way to alter the spooler configuration.
There are also some gaps in the functions which it does provide.
Figure 3. The Perl/Tk Control Panel
The Perl/Tk Interface
6
Installing and Using PPR
Adding Printers
This section has several parts. This is because adding printers may be a multi−step process. For example, you
might add a printer to PPR, them make it a member of a PPR group, then tell Samba about it, then add it to the
printers shared by PPR's AppleTalk print server.
Adding Printers to the Spooler
Printers may be added without stopping the PPR spooler. A new printer queue is created using the command
ppad interface. This command sets the interface program and address for a printer queue. An interface is a
the program which PPR uses to communicate with the printer. A good example is the one called atalk. The
atalk interface allows PPR to print on Apple LaserWriters" and other printers which implement Apple's
Printer Access Protocol (PAP), such as many QMS and HP printers.
Interface may sometimes require the settings of options in addition to the address. In the sections below, a few
of the more often required options will be mentioned, but you may later wish to have a look at the
ppad−interfaces(8) manpage which is the definitive reference for interface programs and their options. It also
describes additional interface programs which are not mentioned here.
In the sections below we will discuss some of the more popular interface programs and explain how to use
them. We will show you how to use the ppad to create a new printer queue, choose an interface, and set other
options.
However, you may find it easier to use the web interface. PPR's web interface provides an add printer wizard
which will present you with a series of questions and then compose and execute the necessary ppad
commands. It will even show you the commands it executes in case you are curious or wish to incorporate
them into a script. An early screen of the Add Printer Wizard is shown in figure Figure 4. To reach the Add
Printer Wizard, go to the PPR Web Control Panel and click on the icon labeled "Add a Printer".
Figure 4. Choosing the Interface in the Add Printer Wizard
Adding Printers
7
Installing and Using PPR
Adding a Printer With an AppleTalk Interface
Before you can add an AppleTalk connected printer to PPR you must determine its complete AppleTalk
name. The complete AppleTalk name has three parts. The first is the printer's individual name, this is the
name you see in the Macintosh Chooser. The second part is the AppleTalk type which is almost certainly
LaserWriter. The third part is the AppleTalk zone which you can also find in the Chooser. HP printers
with Jetdirect cards will list their AppleTalk names and zones on the test page. Having determined this
informatoin we put it all together as part of the ppad interface command, like so:
# ppad interface myprn atalk "Joe's Mac Printer:LaserWriter@CC Zone"
Assuming it does not exist already, this command creates a new printer queue called myprn. Its AppleTalk
name, from the Chooser, is Joe's Mac Printer. The AppleTalk type is LaserWriter. The zone is CC
Zone. (If the printer queue did exist already, its configuration would be modified. This will be covered in a
later section.)
Hiding an AppleTalk Printer
You may wish to prevent Macintosh users from bypassing the PPR print queue and printing to the printer
directly as they could do if they could choose it in the Chooser. You can hinder them by hidding the printer
from the Chooser. PPR hides an AppleTalk printer from the chooser by changing its AppleTalk type. This
works because the Macintosh LaserWriter driver only lists network names with a type of LaserWriter. If
you ask PPR to hide a printer, then every time it sends a job to the printer it will check if it is hidden and hide
it if it is not. However, the AppleTalk type will revert to LaserWriter and the printer will thus become
unhidden every time the printer is turned off and back on again.
To instruct PPR to hide the printer, simply enter a string other than LaserWriter for the type part of the
address. Whenever PPR tries to send a job to the printer, it will first attempt to find it using the type you
specify. If that fails, PPR will try again using a type of LaserWriter. If the printer is found with a type of
LaserWriter (i.e., it isn't hidden), PPR will change the type to whatever you specified. For example, if we
wanted to hide a printer, we could enter its address using this command:
Adding Printers to the Spooler
8
Installing and Using PPR
# ppad interface myprn atalk "Joe's Mac Printer:LaserShared@CC Zone"
The exact type name you use to hide a printer matters little unless you want another spooler to be able to print
to it at the same time. In that case, you should use the same type name as that spooler will use. The type
ATTShared is compatible with the NCR server for Macintosh Clients. The name LaserShared is said to
be used by certain Apple spoolers. When the Windows NT spooler 'captures' a printer it changes the type
name of the printer to the computer name of the machine the NT spooler is running on. For example, if PPR is
sharing our example printer with an NT computer name ALICE which has captured it, this would be the
command to use:
# ppad interface myprn atalk "Joe's Mac Printer:ALICE@CC Zone"
Adding a TCP/IP Connected Printer
The interface tcpip can be used to print to TCP/IP connected printers using the SocketAPI and AppSocket
protocols. HP printers with JetDirect" cards implement SocketAPI. To set up an HP 4M+" we might use this
command:
# ppad interface my4m tcpip my4m.prn.trincoll.edu:9100
In this example, my4m is the name of the queue we are creating. my4m.prn.trincoll.edu is the DNS
name of the printer. We could have used the IP address instead if we had wished. The number 9100 is the
port that the tcpip interface should connect to. (On a JetDirect card port 9100 accepts a data stream in the
same format as the serial or parallel interface would want.)
We can also use this interface to print to Extended Systems Pocket Print Servers. These devices are small
boxes with an Ethernet port on one end and a parallel port connector on the other. In their default
configuration, they listen for SocketAPI connections on TCP port 9100. However, since the parallel port on
these print server is unidirectional, they can only convey data from the spooler to the printer and not from the
printer to the spooler. Therefore we must tell PPR not to expect to expect to receive any sort of data in reply
from the printer. Here are the commands:
# ppad interface qmsps410 tcpip qmsps410.prn.trincoll.edu:9100
# ppad feedback qmsps410 false
Setting feedback to false if the communications channel does not support two−way communication is
very important. If you fail to do so, PPR will almost certainly attempt operations, such as queries and
handshaking, which require two way communications. The result will be that the queue will get stuck, either
before printing anything, or after the first job has been printed. If this happens, you must forcibly halt the
queue, change the setting, and restart the queue, like this:
# ppop halt qmsps410
# ppad feedback qmsps410 false
# ppop start qmsps410
However, you should not get in the habit of setting feedback to false for no reason. Setups with
feedback set to false should be considered crippled. If a printer doesn't support two−way communication
with a given interface, such as tcpip, you should consider usinging a different interface, such as atalk.
Among the harmful effects of lack of two−way communication is that failure of the job due to PostScript
errors will not be detected.
Hiding an AppleTalk Printer
9
Installing and Using PPR
Using a Printer Connected to a Parallel or USB Port (Old Method)
PPR provides a simple (even simplistic) interface program which can be used to communicate with a printer
connected a port on the print server, such as a parallel or USB port. It is called simple. When printing
through a server port port one must be sure that the user ppr has permission to write to the port. This is one
way you could set it up a print queue for a parallel port:
# chown ppr /dev/lp0
# chmod 600 /dev/lp0
# ppad interface nearprn simple /dev/lp0
This interface program does not support bidirectional communication, so PPR will not detect PostScript errors
when printing through this interface. The default feedback setting for this interface program is false, so
there is no need to set it with ppad feed. The simple interface program is not able to read the printer status
lines of a parallel port. These status lines often convey valuable information such as that the printer is out of
paper. Due these limitations, you should use the simple interface to print to parallel and USB ports only if
the parallel and usblp interface programs won't work on your system.
Using a Printer Connected to a Parallel Port (New Method)
PPR also has an interface program designed especially for parallel ports. It is called parallel. When
printing through a parallel port we must be sure that the user ppr has permission to write to the port. This is
one way you could set it up:
# chown ppr /dev/lp0
# chmod 600 /dev/lp0
# ppad interface nearprn parallel /dev/lp0
The default for this interface is feedback false. If your printer and operating system support bidirectional
parallel port operation, then you should definitely inform PPR of the fact using a command like this one:
# ppad feedback nearprn true
If you do this, then PPR will be able to detect job failures due PostScript errors.
Using a Printer Connected to a USB Port (New Method)
PPR provides an interface for USB−connected printers. It is still experimental and its features subject to
change, so about all we can say about it is that you might set it up like this:
# chown ppr /dev/usb/lp0
# chmod 600 /dev/usb/lp0
# ppad interface nearprn usblp /dev/usb/lp0
Using a Printer Connected to a Serial Port
PPR has an interface called serial for sending jobs to printers connected to the print server's serial ports.
As with the parallel interface, you must set the file permissions on the device file in the /dev/ directory
so that the user ppr can write to the port. You will also want to set the baud rate:
# chown ppr /dev/tty0
# chmod 600 /dev/tty0
# ppad interface nearprn serial /dev/tty0
Using a Printer Connected to a Parallel or USB Port (Old Method)
10
Installing and Using PPR
# ppad options nearprn 'speed=9600 bits=8 parity=none'
This may well be the most difficult interface to set up because of the lack of standards for connecting printers
to RS−232 ports. The problem is that RS−232 was originally designed with but one purpose and that was to
connect a teletype machine to a modem. It says nothing about connecting printers to computers. Thus there is
a lack of consistency in the way RS−232 connection printers implement handshaking and flow control. To
describe the RS−232 interface, the construction of null modem cables, the use of breakout boxes for
troubleshooting and the quirks of the serial driver in varous Unix variants would require a document much
larger than this one and is a task to which the author of this document does not feel himself equal. Because of
the the potential complexity of serial connexions, this interface has many options, only three of which have
been hinted at in the example above. The remainder of the options are described in the ppad(8) manpage.
RS−232 ports are invariably bidirectional, so the default for feedback for this interface is true.
Adding Printers With Other Connexion Methods
To learn about the interfaces which support other means of connexion, refer to the ppad−interfaces(8)
manpage. The manpage also provides more details about the features and options of the interfaces described
above.
Selecting a PPD File
Once the printer has been added, you should choose a PPD file that accurately describes and inform PPR of
your choice. Likely you will choose one of the files in /usr/share/ppr/ppd/. The files in this directory
have descriptive names. A print queue's PPD filename is set with the ppad ppd command:
# ppad ppd myprn "QMS−PS 410"
Using the correct PPD file is very important since the wrong PPD file can prevent printer features such as
multiple input trays and duplexing from working. If you cannot find a PPD file which was designed for the
precise make and model of your printer, try to find one that is close. It is important not to use the PPD file for
a level 2 PostScript printer with a level 1 PostScript printer. Also, the PPD file should define the bins which
really exist on your printer and should have the correct code for selecting them. Finally, it is best that the font
list be correct. A font list which leaves some fonts out is probably better than one which names fonts the
printer does not have. Here are some PPD files you might try if you don't have anything closer:
Apple LaserWriter II NT
Personal LaserWriter 320
HP LaserJet IIISi PostScript
HP LaserJet 4Si 4SiMX PS 600dpi
HP LaserJet 4
HP LaserJet 4M DSC
HP LaserJet 4 Plus
HP LaserJet 4M Plus DSC
QMS−PS 410
QMS−PS 810
QMS−PS 820
If you choose either the HP LaserJet 4M DSC or HP LaserJet 4M Plus DSC PPD file you must
make sure your clients are using the vary same PPD file and not the one supplied by HP. If you forget, your
users won't be able to select bins correctly.
Using a Printer Connected to a Serial Port
11
Installing and Using PPR
If you can not find anything that is close, the printer manufacturer may be able to supply a suitable PPD file.
Very often it can be found on the Macintosh or MS−Windows driver diskettes which come with the printer. If
not, you may be able to obtain a suitable file from ftp://ftp.adobe.com/.
If you are really, abitious, you can obtain the PostScript Printer Description File Format Specification from
http://partners.adobe.com/asn/developer/PDFS/TN/5003.PPD_Spec_v4.3.pdf. That document, together with a
good printer manual, will give you the information you need to write your own PPD file or to modify an
existing one to work with your printer.
Any new PPD files should be converted to Unix line termination (FTP will do this for you if you transfer
them in ASCII mode). You may put new PPD files in a directory other than /usr/share/ppr/ppd/, as
long as you specify the path in the ppad ppd command. When PPR opens the PPD file, PPD file names
starting with / are used as is, others are looked up in the PPD file index created by ppr−index ppds.
Adding a Comment
It is recomended that you set the comment field in each printer's configuration. You set it like this:
# ppad comment myprn 'My very own printer, but you may use it'
Using Ghostscript with PPR
Using Ghostscript, a freely available PostScript interpreter, it is possible to print PostScript jobs on
non−PostScript printers. This is especially useful for driving inexpensive inkjet printers connected over
parallel or USB cables. Of course, large laser printers and network printers will also work. The only
requirement is that the communications path have sufficient bandwidth to quickly transfer the large bitmaps
produced by Ghostscript.
Previous versions of PPR had special printer interface wrapper programs which accepted PostScript from
PPR, processed it with Ghostscript, and sent the Ghostscript output to the printer by using one of the real
interface programs. However, these special interface wrapper programs are obsolete. We will describe only
the new mechanism here.
PPRassumes that you have installed Ghostscript and the Ghostscript printer drivers that you intend to use.
PPR can use any compiled−in Ghostscript driver as well as CUPS and IJS drivers including those from HP
and the Gimp Print project.
It is easiest to configure a printer queue to use Ghostscript is to use a special PPD file. These PPD files
describe the capabilities of the printer−Ghostscript−driver combination and have a special line begining with
*pprRIP: which tells PPR to use Ghostscript as the RIP (Raster Image Processor) and which driver and
options to select. For example, these commands will set up an Epson Stylus C62" attached to the first parallel
port:
# ppad interface color_inkjet /dev/lp0
# ppad ppd color_inkjet "Epson Stylus C62 Ghostscript"
Assuming you have the Gimp Print IJS drivers installed, that is all you have to do.
Here are the special PPD files supplied with PPR:
HP DeskJet 500 Ghostscript
Selecting a PPD File
12
Installing and Using PPR
HP DeskJet 550C Ghostscript
HP LaserJet III Ghostscript
Epson Stylus C62 Ghostscript
NEC Pinwriter 6 Ghostscript
If this selection seems a little limited, it is because these PPD files were built by hand for the printers which
PPR's author used. He hopes to include a broader selection in the future.
If you have CUPS installed, you can use its drivers for HP PCL, Epson−compatible dotmatrix, and Epson
Stylus printers simply by selecting the cooresponding PPD file as supplied with CUPS. These are the PPD
files supplied with CUPS version 1.1.16:
/usr/share/cups/model/deskjet.ppd
/usr/share/cups/model/deskjet2.ppd
/usr/share/cups/model/dymo.ppd
/usr/share/cups/model/epson24.ppd
/usr/share/cups/model/epson9.ppd
/usr/share/cups/model/laserjet.ppd
/usr/share/cups/model/okidat24.ppd
/usr/share/cups/model/okidata9.ppd
/usr/share/cups/model/stcolor.ppd
/usr/share/cups/model/stcolor2.ppd
/usr/share/cups/model/stphoto.ppd
/usr/share/cups/model/stphoto2.ppd
PPR understands the extra information in a CUPS−Ghostscript PPD file and can invoke the correct driver
without additional help. For example, if we want to drive a HP LaserJet 4" that doesn't have the PostScript
option installed, but does have a JetDirect card, we could set it up with these commands:
# ppad interface johnsprn tcpip johnsprn.prn.notacorp.com:9100
# ppad ppd johnsprn /usr/share/cups/model/laserjet.ppd
That really is all there is to it.
We absolutely must mention the Foomatic project. Foomatic is an effort to catalog as many printers and
Ghostscript drivers as possible in an XML database. This database is used to generate PPD file which, when
used together with a special Perl script that invokes Ghostscript, can support a huge list of printers.
Instructions for using Foomatic with PPR can be found at http://www.linuxprinting.org/ppr−doc.html.
Your final option for Ghostscript RIP support is to choose a generic PPD file such as HP LaserJet 4M
DSC and then use the ppad rip command to select the Ghostscript driver and options. For example:
# ppad ppd myprn "HP LaserJet 4M Plus DSC"
# ppad rip ppr−gs −sDEVICE=ljet4
You should refer to the ppad(8) manpage for a more complete discussion of ppad rip.
Viewing the Configuration
You may view a printer's configuration with the ppad show command, like this:
# ppad show chipmunk
Printer name: chipmunk
Comment: David Chappell's printer
Using Ghostscript with PPR
13
Installing and Using PPR
Interface: atalk
Address: "Mac Laser Printer :LaserWriter@MCEC"
Options:
JobBreak: signal (by default)
Feedback: yes (by default)
Codes: Binary (by default)
PPDFile: QMS−PS 800 II
Default Filter Options: level=1 colour=False resolution=300 freevm=402509
mfmode=CanonCX
Bins:
OutputOrder: ppd
Alert interval: 13 (send alert every 13 errors)
Alert method: mail
Alert address: [email protected]
Flags: no no (banners discouraged, trailers discouraged)
Charge: no charge
Switchset:
Some of these configuration options which you see in the ppad show output have already been explained, all
of them are described in the ppad(8) manpage.
Deleting a Printer
If a printer queue is no longer needed it may be deleted like this:
# ppad delete myprn
Making Groups of Printers
You may wish to form groups of printers. A group is assigned a name and member printers are specified. Jobs
may be submitted to the group and PPR will decide which printer the job will be printed on. It is simplest if all
the member printers are of the the same make and model, but PPR can often smooth over the differences,
especially when using automatic bin selection and reasonably good printer drivers such as LaserWriter 8. A
group is formed when the first member is assigned. Members are assigned to a group like this:
# ppad group add ourgroup myprn
# ppad group add ourgroup yourprn
Members may be removed from groups like this:
# ppad group remove ourgroup myprn
Removing all members from a group does not delete it. A group is deleted like this:
# ppad group delete ourgroup
Members may be added and removed even while jobs are being printed. If a printer is removed while it is
printing a job for that group, it will finish that job, but it will not print any more jobs for that group. If a
printer is added, it will be used as soon as it is idle and there is a job which needs a printer. If the group has no
members, its jobs will not be printed until members are added.
It is recomended that you set a group's comment field. The comment field is set in this manner:
# ppad group comment ourgroup 'The printers we share'
Viewing the Configuration
14
Installing and Using PPR
Each group has a parameter called Rotate. If Rotate is false, then when the time comes to print a job,
PPR uses the first idle printer, starting with the first member of the group. This will probably mean that the
printers at the begining of the group's members list will get used more often. If Rotate is set to true, PPR
will try to use the printers in round−robin fashion. Rotate is true by default, it may be set to false with
a command like this one:
# ppad group rotate ourgroup false
The configuration of a group may be viewed with the ppad group show command, like this:
# ppad group show ourgroup
Group name: ourgroup
Comment: A printer at random
Members: myprn, yourprn
Rotate: True
Default Filter Options:
Switchset:
Adding PPR Printers to Samba
If you are using the SMB server called Samba you can use it to share PPR printers. It is recomended that you
use Samba version 1.9.18 or later. For information about obtaining refer to http://www.samba.org/.
To share PPR printers through Samba, you must add a few lines to Samba's configuration file. Samba's
configuration file is often called /usr/local/samba/lib/smb.conf.
Somewhere after the section called [global] you should add two lines which read:
include = /usr/lib/ppr/lib/smb−protos.conf
include = /etc/ppr/smb−include.conf
After you have modified smb.conf, you should run ppr2samba which is a utility which creates the file
/etc/ppr/smb−include.conf. This file will contain a Samba share definition section for each printer
and group you have set up in PPR. You should re−run ppr2samba after every time you create or delete a
printer or group in PPR.
To allow guest users to have meaningful names in the queue listing and to delete their jobs, you should add
the Samba guest user to the access control file /etc/ppr/acl/pprprox.allow. All that is needed is a
line with the user name on it.
This procedure will share all PPR printers through Samba. If you want to exclude certain printers you should
refer to the ppr2samba(8) man page.
You should also refer to the ppr2samba(8) man page if you want to set up special features for public access
computers or if you want to set up Samba so it can offer printer drivers to Microsoft Windows 95
clients for automatic installation.
Adding PPR Printers to the PPR AppleTalk Server
Sharing a printer with Macintosh clients over AppleTalk is simple. Simply use a command like this:
# ppad addon myprn "My Printer"
Making Groups of Printers
15
Installing and Using PPR
To share a group, do this:
# ppad group addon ourgroup papname "Our Group"
If you can't see the new names in the chooser within a minute or so, make sure that papd is running. If it is, it
may not be able to automatically detect that the configuration has changed. Try doing this:
# /usr/lib/ppr/bin/papd −−reload
If that doesn't do the trick, you may find clues in /var/spool/ppr/logs/papd. You can use this
command to display the end of it:
# /usr/lib/ppr/bin/papd −−tail
This will display the last few lines of the file and then wait, displaying new lines as they are added.
PPR's LPD (RFC 1179) Server
An LPD server, called lprsrv is provided with PPR. This server conforms to the remote printing protocol
described in RFC 1179. When this server receives a job for a PPR printer, it invokes ppr and passes the file to
it. If PPR's LPD server receives a job for queue which is not defined in PPR, it passes the job to the system's
normal print spooler.
PPR's LPD server doesn't require much set up since it simply shares all of your PPR printers and all of the
native spooling system's printers.
Before using PPR's LPD server, it is necessary to disable any LPD server you are currently using. Once any
pre−existing LPD server is disabled, restart pprd so that it can start accepting connexions on port 515 and
launching lprsrv to handle them.
Automatic Bin Selection
You must decide if you want to use PPR's automatic bin selection features on a certain printer. If you do, you
must specify the names of the bins on the printer and the type of paper in each bin. If you do not tell PPR that
the printer has bins, PPR will ignore the subject. It will assume that the printer has the proper paper to print
any job you throw at it. If you tell PPR the name of each bin and the kind of paper, PPR will scrutenize each
job and print it only when the required paper is mounted on one of the bins.
The easiest way to tell PPR what bins the printer has is to instruct it to read the list from the PPD file. The
command to do this is:
# ppad bins ppd myprn
When this is done, you can view the list you got with the command ppad show:
# ppad show myprn
Printer name: myprn
Comment: My very own printer
Interface: atalk
Address: Keep Out:LaserWriter@Clubhouse
Options:
JobBreak: signal/pjl
Feedback: yes (by default)
Codes: Binary (by default)
Adding PPR Printers to the PPR AppleTalk Server
16
Installing and Using PPR
Alert interval: 5 (send alert every 5 errors)
Alert method: mail
Alert address: [email protected]
Flags: no no (banners discouraged, trailers discouraged)
Charge: none
PPDFile: HP LaserJet 4M DSC
Bins: Upper, Lower, MP, Envelope
OutputOrder: ppd
Default Filter Options: level=2 colour=False resolution=600 freevm=679680
mfmode=ljfour
Switchset:
You can then delete any bin names which represent hardware options you have not chosen to install:
# ppad bins delete myprn Envelope
# ppad bins delete myprn Lower
Submitting Jobs to PPR
All jobs enter PPR's queue through the program ppr. The Macintosh print server papd invokes ppr as do,
Samba and the LPR/LPD compatible server lprsrv.
Unix users invoke ppr (the program, not the spooler system) directly. To make this easier, /usr/bin/ppr
is a symbolic link to /usr/ppr/bin/ppr. For a complete description of ppr's options, see the ppr(1) man
page. A description of some of the more important ones follows.
Simple Examples
When invoking ppr, the −d switch may be used to specify the destination, that is, a printer or group of
printers. For example:
$ ppr −d myprn report1.ps
If ppr is invoked without specifying the name of a file to print, it reads the file from stdin. For example, we
can print a document using PPR on a remote system using this command:
$ cat report1.ps | rsh cberry 'ppr −d hisprn'
The first thing ppr does is analyze the input file to determine whether it is PostScript or not, and if not, what it
is. If it is not PostScript, ppr will attempt to convert it to PostScript before it is placed in the queue. For
example, ASCII text files can be printed:
$ ls −l /usr/bin | ppr −d myprn
Choosing Options
When submitting a job, you may want to specify additional options. These options can do things such as
select multiple copies, invoke printer features such as duplex, or select paper trays.
When submitting the job from the Unix shell, you just add the options to the ppr command line. When the job
arrives through a network server such as Samba, papd, or lprsrv it is more difficult to select options.
Automatic Bin Selection
17
Installing and Using PPR
The easiest thing to do in this latter case is to set a switchset. A switchset is a set of options associated with a
queue. This feature is described later in this section. The switchset method has the advantage that a switchset
established in this way applied to all jobs no matter how they arrive. This consistency can prevent confusion.
With some network servers there are additional ways to specify options which apply only to jobs submitted
through it. These methods will be described later in this section.
Duplex Options
The available duplexing options are many and somewhat confusing. Let us start with a simple one:
$ ppr −d myprn −−feature Duplex=DuplexNoTumble mydoc.ps
This instructs PPR to extract the code from the *Duplex DuplexNoTumble line in the PPD file and insert
it in the document setup section of mydoc.ps. Code inserted in this way will override pre−existing duplex
code in most cases.
Suppose though that you wish to allow users to continue to select the duplex mode, perhaps by using the
Macintosh driver LaserWriter 8 with an appropriate PPD file, but you wish to make duplex printing the
default. On some printers you can use the front panel to select duplex, but PPR wouldn't know you had done
this, it would believe the printer was operating in simplex mode, thus its printer accounting sheet counts
would be thrown off. Therefore, it would be better to invoke ppr like this:
$ ppr −d myprn −R duplex:duplex mydoc.ps
The option −R duplex:duplex instructs PPR to take note of comments within the PostScript which
indicate which duplex mode is being invoked. The second occurence of the word duplex, after the colon,
means to invoke ordinary duplex mode if no such comments are found.
Other Printer Options
In addition to duplexing, you can control any feature described in the printer's PPD file. You do this by using
the −−feature option with an appropriate value. The list of available feature depends on your printer, or
more precisely, on the PPD file which you have told PPR to use. To see the full list of printer features
described in the PPD file and the −−feature need to activate then, do this:
$ ppr −d myprn −−feature
PageSize
−−>Letter 8 1/2 x 11 in
Legal 8 1/2 x 14 in
A4 210 x 297 mm
Executive 7 1/4 x 10 1/2 in
Env Comm10 4 1/8 x 9 1/2 in
Env Monarch 3 7/8 x 7 1/2 in
Env DL 110 x 220 mm
−−feature
−−feature
−−feature
−−feature
−−feature
−−feature
−−feature
PageSize=Letter
PageSize=Legal
PageSize=A4
PageSize=Executive
PageSize=Comm10
PageSize=Monarch
PageSize=DL
PageRegion
−−>Letter 8 1/2 x 11 in
Legal 8 1/2 x 14 in
A4 210 x 297 mm
Executive 7 1/4 x 10 1/2 in
Env Comm10 4 1/8 x 9 1/2 in
Env Monarch 3 7/8 x 7 1/2 in
Env DL 110 x 220 mm
−−feature
−−feature
−−feature
−−feature
−−feature
−−feature
−−feature
PageRegion=Letter
PageRegion=Legal
PageRegion=A4
PageRegion=Executive
PageRegion=Comm10
PageRegion=Monarch
PageRegion=DL
Choosing Options
18
Installing and Using PPR
InputSlot
−−>Upper Tray
Lower Tray
Envelope Feeder
−−feature InputSlot=Upper
−−feature InputSlot=Lower
−−feature InputSlot=Envelope
Manual Feed
True
−−>False
−−feature ManualFeed=True
−−feature ManualFeed=False
Duplex
−−>None
Long Edge Binding
Short Edge Binding
−−feature Duplex=None
−−feature Duplex=DuplexNoTumble
−−feature Duplex=DuplexTumble
Output Bin
−−>Upper − Face Down
Lower − Face Up
−−feature OutputBin=Upper
−−feature OutputBin=Rear
Resolution Enhancement
−−>Printer Default
On
Off
−−feature Smoothing=PrinterDefault
−−feature Smoothing=True
−−feature Smoothing=False
As you can see, the list of possible settings is shown below each feature. The setting is described on the left
and the −−feature option needed to invoke it will be shown on the right. For example, we can see that in
order to print from the lower tray, we would use a command like this:
$ ppr −d myprn −−feature InputSlot=Lower mydoc.ps
Multiple Copy Options
PPR is capable of printing multiple copies of a job. It is also capable of printing collated copies. The number
of copies may be selected when ppr is invoked:
$ ppr −d myprn −n 3 mydoc.ps
This prints 3 copies of the file mydoc.ps. By default, PPR prints uncollated copies, that is, 3 copies of page
1, 3 copies of page 2, etc. In contrast, when printing collated copies, it prints 1 copy of page one, 1 copy of
page 2, on to the end of the document and then repeats until it has printed the required number of copies. We
can print collated copies with this command:
$ ppr −d myprn −n 3 −n collate mydoc.ps
When there is no charge for printing pages on a particular printer, if you do not use an −n switch, PPR does
not attempt to influence the number of copies to be printed. This means that if the document contains code to
invoke multiple copy features of the printer, PPR may not be able to correctly determine the number of pages
printed. Thus, the number of sheets quoted on the banner page and in the print log could be wrong. This
changes if you have specified an amount of money to be charged for each page which is printed on the printer
that is being used. If you have specified an amount, even $0.00, then the number of copies is forced to 1 if you
do not specify it.
You may wish to allow the number of copies desired to be specified in the document. If you invoke ppr with
the −R copies option, PPR will read any %%Requirement: comments which specify the number of
copies or collating mode and obey them. You might use this command:
$ ppr −d myprn −n 1 −n collate −R copies mydoc.ps
Other Printer Options
19
Installing and Using PPR
This command tells PPR to read the copies count in mydoc.ps, collate the copies even if mydoc.ps does
not request it, and to print 1 copy unless mydoc.ps contains a comment which specifies a different number
of copies. However, if there is no charge for printing on this printer and the −n 1 switch were absent and
mydoc.ps contained the PostScript code but not the comments for multiple copies it would achieve multiple
copies on the sly.
Using Option Switchsets
It is sometimes desirable to choose a set of options to be applied to all jobs entering a certain queue.
To set these options, use the ppad switchset command for a printer queue and the ppad group switchset
command for a group queue.
For example, imagine that we have a printer called mcec_1. We want to create two queues for it called
mcec_sim and mcec_dup. We want mcec_sim to print in simplex mode by default and mcec_dup to
print in duplex mode by default. First we create the groups mcec_sim and mcec dup each of which
contains the lone member mcec_1:
# ppad group add mcec_sim mcec_1
# ppad group add mcec_dup mcec_1
Now, jobs sent to either group will go to the same printer, but we will give each group a different set of
options:
# ppad group switchset mcec_sim −R duplex:simplex
# ppad group switchset mcec_dup −R duplex:duplex
Now, when a job is submitted to mcec_sim or mcec_dup, the the option −R duplex:simplex or −R
duplex:duplex to be inserted.
A switchset may be deleted by setting it to nothing. This command deletes the switchset for the printer
chipmunk:
# ppad switchset chipmunk
Options for Jobs Received through Samba
Since Samba allows the administrator to choose any desired print command when creating a queue in
smb.conf, it is possible to give a queue a special ppr command which includes the desired options.
However, this becomes clumsy if one is using ppr2samba to generate a smb−include.conf file to
include in smb.conf, so this method is not recomended. Use a switchset instead.
Options for Jobs Received through lprsrv
There is no way to specify ppr command line options in any of the lprsrv configuration files, so you must use
switchsets to force the use of options.
However, certain options, such as the number of copies, can be selected by the client and passed to lprsrv
using the RFC 1179 protocol. Some operating systems, such as OSF and SunOS/Solaris extend the protocol to
allow for furthur options. When lprsrv receives these options it attempts to convert them into appropriate ppr
command line options.
Multiple Copy Options
20
Installing and Using PPR
Submitting Jobs Through Uprint
If you have Unix users, they are probably accustomed to submitting jobs with lpr or lp. You may also find
that while some of your applications allow you to specify the command to be used for printing, others insist
on using lpr or lp. In these cases, you might want to try PPR's Uprint system.
Uprint is a set of programs which mimic lp, lpr, lpq, and lprm. You can rename the versions of these
programs that came with your system and replace them with the Uprint substitutes. When a Uprint substitute
program is used, if the requested print queue is one that belongs to the system spooler, the renamed origional
program will be invoked. If however the requested queue is a PPR queue, an appropriate command for ppr or
ppop will be created and run.
For instructions for setting up Uprint, see the UPRINT(8) man page.
Submitting Jobs Using the Perl/Tk Interface
Of course, looking up all of the options for the ppr can be tedious, especially if you want to invoke several
features simulaniously. If you are using X−Windows, is an easier way (or will be when it is finished). This
easier way is the ppr−panel command. If ppr−panel is invoked with a filename on the command line, it will
display a print dialog box, as seen in figure Figure 5.
Figure 5. Submitting a Job Using the Perl/Tk Interface
Notice the drop−down list by which one can select a destination print queue. If one wished to have a
particular print queue already selected when the dialog box opens, one could use the −d option, like this:
$ ppr −d myprn myfile.ps
User Notification
PPR is capable to notifying the user when the job is finished, is deleted before completion, or cannot be
completed for some reason. Since PPR can accept jobs from so many different sources, it needs to use many
methods to send messages to users. Each of the available methods is implemented by a small program called a
responder.
The ppr −m option selects the responder to be used to notify the user. The option −r sets the address to pass
to the responder program.
The default responder is called ``write''. It writes a message to the users terminal if he is logged in or sends
him an email messages if he is not. The default notification address is the name of the user who ran ppr.
Submitting Jobs Through Uprint
21
Installing and Using PPR
The default responder and address may be changed by setting the PPR_RESPONDER and
PPR_RESPONDER_ADDRESS environment variables respectively.
Notifying X Windows Users
X windows users may prefer to have a notification window pop up rather than have a message written so an
xterm. To enable this, put the following commands in .xsession or some other appropriate X startup file:
/usr/ppr/bin/ppr−xgrant
PPR_RESPONDER=xwin
PPR_RESPONDER_ADDRESS=$DISPLAY
export PPR_RESPONDER PPR_RESPONDER_ADDRESS
Naturally, these environment variables should be set before any X clients are started. That means that these
should be near the begining of .xsession.
Notifying Samba Users
There is a responder called ``samba'' which uses smbclient to send a message to the user. If you set up Samba
printing as described in this manual then the ``samba'' responder will be used automatically.
If the user must have the message receiver running to receive the message. In MS−Windows for Workgroups
and MS−Windows 95 the message receiver is a program called ``winpopup''.
Notifying lprsrv Users
The RFC 1179 protocol has provision for notifying users by email.
Queue Manipulation
Viewing the Queue
You may see what jobs are in the queue and what is happening to them by using the ppop list command:
$ ppop list chipmunk
Queue ID
For
Time
Pgs Status
−−−−−−−−−−−−−−−−−−−−−−−−−−−−−−−−−−−−−−−−−−−−−−−−−−−−−−−−−−−−−−−−−−−−−−−−−−−−
chipmunk−2715
John Smith
11:53AM 007 printing on chipmunk
14%, page 1
The above command only listed the jobs queued for a particular printer. In order to show all jobs for all
printers use this command:
$ ppop list all
Queue ID
For
Time
Pgs Status
−−−−−−−−−−−−−−−−−−−−−−−−−−−−−−−−−−−−−−−−−−−−−−−−−−−−−−−−−−−−−−−−−−−−−−−−−−−−
chipmunk−2715
John Smith
11:53AM 007 printing on chipmunk
14%, page 1
rat−2716
Pamela Andrews
11:55AM 007 printing on rat
14%, page
User Notification
22
Installing and Using PPR
Of course, you can also view the queue using the web interface. To view the queue for a specific printer or
group of printers, click on the printers icon in the PPR Web Control Panel and choose View Queue. To see all
jobs, click on the icon labeled "Show All Queues". A sample queue listing window is shown in figure
Figure 6.
Figure 6. Job Control
Or you might choose the Perl/Tk interface.
Figure 7. Viewing the Queue Using the Perl/Tk Interface
Canceling Jobs
If John Smith wants to delete his job should use this command:
$ ppop cancel chipmunk−2715
1 job was canceled.
He could have used another form of the command, a form which deletes all jobs which he has queued for
chipmunk:
Viewing the Queue
23
Installing and Using PPR
$ ppop cancel chipmunk
1 job was canceled.
Since on this occasion he had only one job, this command has the save effect as the first one.
If he were using the web interface, he could check the boxes next to the jobs he wishes the remove and then
press the Cancel at the bottom of the window.
Operator's Duties for the PPR Spooler
There are certain commands which can only be used by an operator. The users root and ppr are operators.
Any user whose name appears in the file /etc/ppr/acl/ppop.allow is an operator too.
Deleting Jobs
An operator has at his disposal an additional command for deleting jobs:
$ ppop purge chipmunk
This command will delete all jobs queue for the printer ``chipmunk'' no matter to whom they belong.
Mounting Media
If you have defined bins for a printer, before you can print on it you must indicate to PPR what kind of paper
is in each bin. To see what kinds of paper (media) are mounted on a printer, use use the ppop media
command:
# ppop media mrhp3si
Printer
Bin
Media
−−−−−−−−−−−−−−−−−−−−−−−−−−−−−−−−−−−−−−−−−−−−−−−−−−−−−−−−−−−−−−−
mrhp3si
Upper
letter
Lower
letter
Envelope
com10
To mount a different medium, use the ppop mount command:
# ppop mount mrhp3si Upper 3hole
You view the current contents of the list of known media types by issuing the command ppad media show
all.
Stopping and Starting Printers
You can determine a printer's status with the ppop status command:
# ppop status mrhp3si
Printer
Status
−−−−−−−−−−−−−−−−−−−−−−−−−−−−−−−−−−−−−−−−−−−−−−−−−−−−−−−−−−−−
mrhp3si
idle
We see that the printer is ``idle''. This means it is not printing right now but it is willing to begin printing.
When it is printing, the name of the job it is printing is indicated:
Canceling Jobs
24
Installing and Using PPR
# ppop status mrhp3si
Printer
Status
−−−−−−−−−−−−−−−−−−−−−−−−−−−−−−−−−−−−−−−−−−−−−−−−−−−−−−−−−−−−
mrhp3si
printing mrhp3si−3876
A printer is stopped with the ppop stop command:
# ppop stop mrhp3si
If the printer was idle, it is stopped immediately:
# ppop status mrhp3si
Printer
Status
−−−−−−−−−−−−−−−−−−−−−−−−−−−−−−−−−−−−−−−−−−−−−−−−−−−−−−−−−−−−
mrhp3si
idle
# ppop stop mrhp3si
# ppop status mrhp3si
Printer
Status
−−−−−−−−−−−−−−−−−−−−−−−−−−−−−−−−−−−−−−−−−−−−−−−−−−−−−−−−−−−−
mrhp3si
stopt
If the printer is in the middle of a job, it will be stopped when the job is done. Until it stops, ppop status
continues to display the name of the job being printed, but it also indicates that the printer is stopping:
# ppop status mrhp3si
Printer
Status
−−−−−−−−−−−−−−−−−−−−−−−−−−−−−−−−−−−−−−−−−−−−−−−−−−−−−−−−−−−−
mrhp3si
printing mrhp3si−3876
# ppop stop mrhp3si
# ppop status mrhp3si
Printer
Status
−−−−−−−−−−−−−−−−−−−−−−−−−−−−−−−−−−−−−−−−−−−−−−−−−−−−−−−−−−−−
mrhp3si
printing mrhp3si−3876 (stopping)
If you want to force a printer to stop immediately, you must use the ppop halt command:
# ppop halt mrhp3si
If the printer was printing a job, it stops in the middle of the job and the job is returned to the queue. If the job
was submitted to a group of printers, it will be printed on the next member of the group to become idle. This
means that the job may begin printing on another printer the moment you halt the printer on which it was
origionally printing.
If a printer is stopt or stopping, you can start it again with the ppop start command:
# ppop start mrhp3si
The ppop start command can also be used when a printer has stopt printing due to a fault. In that case, the
ppop start command will cause an immediate retry. Printer faults are discussed in section Section , Dealing
With Printer Faults .
If you would rather, you can use the web interface to check a printer's status and stop and start it. To do this,
click on the printer's icon in the PPR Control Panel and choose Printer Control. A window like that shown in
figure Figure 8 will appear.
Stopping and Starting Printers
25
Installing and Using PPR
Figure 8. Printer Status and Control
Now instead of using commands such as ppop stop and ppop start you can simply press the coresponding
buttons.
A third option is to use the Perl/Tk interface.
Figure 9. Printer Status as Displayed in the Perl/Tk Interface
More On Mounting Media
The information in this section only applies if you have set the printer up for media management as described
in section Section , Automatic Bin Selection .
Each job which enters the print queue requires one or more types of paper. Most jobs require only one. If the
required medium is not mounted, ppop list will indicate the types of media (generally various kinds of paper)
that the job requires. Here is an example:
$ ppop list chipmunk
Queue ID
For
Time
Pgs Status
−−−−−−−−−−−−−−−−−−−−−−−−−−−−−−−−−−−−−−−−−−−−−−−−−−−−−−−−−−−−−−−−−−
chipmunk−2353
chappell
02:59PM 034 printing on chipmunk
67%, page 29
chipmunk−2354
chappell
03:09PM 031 waiting for printer
chipmunk−2357
chappell
03:09PM 302 waiting for media
letterhead
More On Mounting Media
26
Installing and Using PPR
The safest way to change media is to stop the printer first. Obviously, it is best not to remove a paper tray
until the printer has stopped. For this reason, the ppop wstop command is provided. This command stops the
printer as soon as the current job is completed. The important point is that ppop wstop does not exit until the
printer has stopped. That means you can make a shell script like this one:
#!/bin/sh
# Mount letterhead in chipmunk's upper bin.
echo "Please wait while the printer stops..."
ppop wstop chipmunk
echo "Please put letterhead in chipmunk's upper bin."
echo "Press RETURN when you have done so."
read response
ppop mount chipmunk Upper letterhead
ppop start chipmunk
echo "Thank you."
Dealing With Printer Faults
After most printer faults, PPR will try again soon. You can use ppop status printer to check on the status of a
printer:
# ppop status chipmunk
Printer
Status
−−−−−−−−−−−−−−−−−−−−−−−−−−−−−−−−−−−−−−−−−−−−−−−−−−−−−−−−−−−−
chipmunk
fault, retry 5 in 70 seconds
You may ask PPR to try a printer again immediately with the ppop start command:
# ppop start chipmunk
Each time a printer fault occurs a message is appended to the printer's alerts file. (If the previous fault occured
more than one hour before, the alerts file is cleared first.) You may view a printer's alerts file at any time in
this manner:
# ppop alerts chipmunk
Subject: Faults on "chipmunk"
Fri Feb 18 11:02:18 1994
"Mac Laser Printer:LaserWriter@MCEC" not found.
Printer placed in auto−retry mode.
Fri Feb 18 11:02:56 1994
"Mac Laser Printer:LaserWriter@MCEC" not found.
Printer placed in auto−retry mode.
If chipmunk is a new printer, the problem may be that the printer was given a name which ends with a space.
If this is the case, PPR will not find it since it is looking for the printer without a space. We can either rename
the printer, removing the space, or we can tell PPR to look for it with a space. Here is the command to do the
latter:
# ppad interface chipmunk atalk "Mac Laser Printer :LaserWriter@MCEC"
# ppad start chipmunk
Dealing With Printer Faults
27
Installing and Using PPR
Holding and Releasing Jobs
If a job is in the queue but has not ues begun to print, it is possible to place it in the ``held'' state. You do this
with the ppop hold command, like this:
# ppop hold chipmunk−2532
While it is held, a job will remain in the queue but it will not be printed. The ``Status'' field in the ppop list
output will say ``held''. When you are ready to have it printed, you must use the command ppop release, like
this:
# ppop release chipmunk−2532
PostScript Errors and Arrested Jobs
If the printer reports a PostScript error while the job is printing, PPR will finish transmitting the job but when
it is done and would normally delete the job from the queue, it instead places the job in a special held state
called ``arrested''. The defective job is preserved so that an attempt may be made to discover the cause of the
PostScript error. For example, the following queue listing shows two arrested jobs:
Queue ID
For
Time
Pgs Status
−−−−−−−−−−−−−−−−−−−−−−−−−−−−−−−−−−−−−−−−−−−−−−−−−−−−−−−−−−−−−−−−−−−−−−−−−−−−
rat−2717
jandrews
12:10PM 001 arrested
(PostScript error)
rat−2718
Abraham Adams
12:10PM 007 printing on rat
14%, page 1
adshp4m−2719 jones
12:11PM 005 arrested
(PostScript error)
You may view the error message, along with any other output the print job returned over the interface, by
using the ppop log command. For instance, if the job adshp4m−2719 is arrested, you can view the log like
this:
# ppop log adshp4m−2719
%%[ Error: syntaxerror; OffendingCommand: −−nostringval−− ]%%
%%[ Flushing: rest of job (to end−of−file) will be ignored ]%%
In this case, the PostScript code was probably generated incorrectly, so all you can do is cancel the job. If you
think it might print on another printer, you can use the ppop move command to move it to another print queue
and then use the ppop release command to take it out of the arrested state, like this:
# ppop move adshp4m−2719 mylaser
# ppop release mylaser−2719
Notice that moving the job changed its name, so we had to use the new name in the second command. While
an arrested job can be deleted just like any other job, the administrators have a special command just for that
purpose:
# ppop clean rat adshp4m
2 jobs were canceled.
The command above will delete all arrested jobs in the queues rat and adshp4m. If we imagine that the
command above acted on the jobs shown in the queue listing at the start of this section, then it deleted the jobs
Holding and Releasing Jobs
28
Installing and Using PPR
adshp4m−2719 and rat−2717 but left the job rat−2718. The ppop clean command will only delete
arrested jobs.
We can also could have deleted all arrested jobs in the system:
# ppop clean all
2 jobs were canceled
If the printer does not have an interface which supports two way communication, then PostScript errors will
not be detected. The interface atalk is one that supports two way communication, the interface simple is
one that does not.
Backing Up PPR's Data
PPR stores its configuration entirely in /etc/ppr/. The PPR spooling system can be adequately rebuilt by
installing PPR from scratch and then restoring /etc/ppr/.
The directories /usr/lib/ppr/, and /usr/share/ppr/ contain only static data.
PPR stores temporary data (print jobs, client printing transfer files and such) in /var/spool/ppr. PPR
continually adds files to /var/spool/ppr/cache, but these will be replaced automatically, so it is not
essential that they be backed up. No files are added to /usr/lib/ppr/cache. PPR also writes into
/var/spool/ppr/logs/ and the subdirectories of /var/spool/ppr/printers/ but these are
throw away files. A possible exception is /var/spool/ppr/logs/printlog which you will want to
back up if it is important to you.
Removing PPR
Removing PPR is not difficult but if you aren't careful you may leave some of its hooks in the operating
system. In this section we describe the commands needed to remove PPR neatly. These commands are similar
to those used in the RPM pacakage. The commands you will use vary a bit from operating system to operating
system. In this section we will present typical commands.
First you should stop the spooler. Any easy way to do this is to use the Init script, like this:
# /etc/init.d/ppr stop
Next you should remove PPR's init scripts. These commands will work on most systems:
# rm /etc/rc?.d/[SK][0−9][0−9]ppr
# rm /etc/init.d/ppr
Of course, you may have to adjust them if your systems Init scripts are in differnt places.
and its Inetd or Xinetd configuration. For Xinetd, just delete the file, like this:
# rm /etc/xinetd.d/ppr
For Inetd you will have to edit /etc/inetd.conf to remove the lines for the PPR web−browser interface
and lpr/lpd server. Don't forget to send SIGHUP to Inetd or Xinetd when you are done. While you are at it,
you might as well remove your access rules from /etc/hosts.allow.
PostScript Errors and Arrested Jobs
29
Installing and Using PPR
Next you should unhook PPR's UPRINT system, putting the real versions of commands such as lpr and lpq
back where they were:
# /usr/lib/ppr/bin/uprint−newconf −−remove
Restoring original spooler program names:
Files for lp should be in their normal locations.
Removing symbolic link "/usr/bin/lp".
Moving "/usr/bin/real−lp" back to "/usr/bin/lp".
Removing symbolic link "/usr/bin/cancel".
Moving "/usr/bin/real−cancel" back to "/usr/bin/cancel".
Removing symbolic link "/usr/bin/lpstat".
Moving "/usr/bin/real−lpstat" back to "/usr/bin/lpstat".
Files for lpr should be in their normal locations.
Removing symbolic link "/usr/bin/lpr".
Moving "/usr/bin/real−lpr" back to "/usr/bin/lpr".
Removing symbolic link "/usr/bin/lprm".
Moving "/usr/bin/real−lprm" back to "/usr/bin/lprm".
Removing symbolic link "/usr/bin/lpq".
Moving "/usr/bin/real−lpq" back to "/usr/bin/lpq".
Done.
Next you should remove PPR's crontab file:
# crontab −u ppr −r
Next you can remove all of PPR's files (including configuration files) with these commands:
#
#
#
#
rm
rm
rm
rm
−r
−r
−r
−r
/usr/lib/ppr
/usr/share/ppr
/var/spool/ppr
/etc/ppr
Finally you should remove the users ppr and pprwww and the group ppr. Here are the commands for
Solaris or a typical Linux system:
# /usr/sbin/userdel ppr
# /usr/sbin/userdel pprwww
# /usr/sbin/groupdel ppr
Replacing a Printer
Printers are frequently replaced with newer models. What should the PPR operator do when this happens?
One solution is to create a whole new queue for the new printer. An alternative is to adjust the configuration
of the existing queue so that it points to the new printer. This latter method may minimize the disruption
experienced by the users of the printer.
To modify a queues configuration we can use either the ppad command or the web interface's Printer
Properties window.
Removing PPR
30
Installing and Using PPR
Basic Queue Modifications
In order to correctly modify a queue's configuration, it is necessary to understand its current configuration.
The current configuration may be viewed with the ppad show command, like this:
# ppad show sea305
Printer name: sea305
Comment: QMS−PS 410 in Seabury Room 305
Interface: serial
Address: "/dev/ttyS0"
Options: baud=9600 bits=8 parity=none
JobBreak: control−d (by default)
Feedback: yes (by default)
Codes: Clean8Bit (by default)
PPDFile: QMS−PS 410
Default Filter Options: level=1 colour=False resolution=300 freevm=336596
mfmode=CanonCX
Bins:
OutputOrder: PPD
Alert frequency: 7 (send alert every 7 errors)
Alert method: mail
Alert address: [email protected]
Flags: no no (banners discouraged, trailers discouraged)
Charge: no charge
Switchset:
If we were to use the web interface, we would see the same information presented in a series of tabbed pages,
as in figure Figure 10.
Figure 10. A Printer's Properties
Basic Queue Modifications
31
Installing and Using PPR
Notice that the printer in this example is currently a QMS−PS 410 connected through a serial port. We will
replace it with an HP 4M connected over the AppleTalk network. To do this, we must modify the settings of
the ``Interface'', ``Address'', ``Jobbreak'', ``PPD File'', and, if we want to do things right, ``Comment''. First,
we will set the new interface and address:
# ppad interface sea305 atalk "Seabury Room 305:LaserShared@Seabury Zone"
Notice that the AppleTalk address is enclosed in quotes. This is necessary because it contains spaces. Also,
notice that the device type portion of the AppleTalk address is ``LaserShared'' rather than ``LaserWriter''. This
causes PPR to `hide' the printer by automatically changing its device type from ``LaserWriter'' to ``Laser
Shared''; if you don't want this to happen, use ``LaserWriter'' instead of ``LaserShared''. Here is what the
configuration looks like now:
# ppad show sea305
Printer name: sea305
Comment: QMS−PS 410 in Seabury Room 305
Interface: atalk
Address: "Seabury Room 305:LaserShared@Seabury Zone"
Options:
JobBreak: signal (by default)
Feedback: yes (by default)
Codes: Binary (by default)
PPDFile: QMS−PS 410
Default Filter Options: level=1 colour=False resolution=300 freevm=336596
mfmode=CanonCX
Bins:
OutputOrder: PPD
Alert frequency: 7 (send alert every 7 errors)
Alert method: mail
Alert address: [email protected]
Flags: no no (banners discouraged, trailers discouraged)
Charge: no charge
Switchset:
Notice that changing the interface from serial to atalk automatically changed the jobbreak setting
from control−d to signal which is the the default for the atalk interface. This is fine, but since the
new printer is an HP 4M", we might want to use a Jobbreak setting of signal/pjl instead so that we can
get nifty messages on the printer's display panel. We can make the change with this command:
# ppad jobbreak sea305 signal/pjl
Next, we must change the PPD file:
# ppad ppd sea305 "HP LaserJet 4M DSC"
Finally, any good system administrator will change the comment:
# ppad comment sea305 "HP 4M in Seabury room 305"
This printer did not have bins defined for automatic bin selection but if it had had, we would have had to alter
the bin list to reflect the bins available on the new printer. The easiest way to do this would be to execute the
command:
# ppad bins ppd sea305
Basic Queue Modifications
32
Installing and Using PPR
This would add all possible bins for the new printer. After doing this it would have been necessary to use
ppad show sea305 to display the configuration and then use several commands along the lines of ppad bins
delete sea305 Envelope to delete optional bins that are not installed on the new printer and bins that were
present on the old printer but are not present on the new. Of course, once this is done, it is necessary to use the
ppop mount command to mount media on the new bins. But, as we said, this print queue does not have bins
defined, so we did not have to do any of this. Here we display the final configuration:
# ppad show sea305
Printer name: sea305
Comment: HP 4M in Seabury room 305
Interface: atalk
Address: "Seabury Room 305:LaserWriter@Seabury Zone"
Options:
JobBreak: signal/pjl
Feedback: yes (by default)
Codes: Binary (by default)
PPDFile: HP LaserJet 4M DSC
Default Filter Options: level=2 colour=False resolution=600 freevm=709584
mfmode=ljfour
Bins:
OutputOrder: PPD
Alert frequency: 7 (send alert every 7 errors)
Alert method: mail
Alert address: [email protected]
Flags: no no (banners discouraged, trailers discouraged)
Charge: no charge
Switchset:
Of course, if you are using the web interface you should go through the various tabs and make the changes
described above. You should then press Save. The ppad commands show above will then be generated and
executed automatically.
Changes for Samba
If you are using Samba, you should edit smb.conf and change the printer's comment, unless you are also
using ppr2samba, in which case you can simply run ppr2samba. If you are using the web interface, the
ppr2samba will be executed automatically when you press Save.
Sundry Notices
Copyright and Disclaimer
Most of the PPR distribution, including the documentation is licensed under the BSD license, the terms of
which are as follows:
Copyright 1995−−2003, Trinity College Computing Center, Hartford Connecticut, U.S.A. All rights reserved.
Redistribution and use in source and binary forms, with or without modification, are permitted provided that
the following conditions are met:
♦ Redistributions of source code must retain the above copyright notice, this list of conditions and the
following disclaimer.
Changes for Samba
33
Installing and Using PPR
♦ Redistributions in binary form must reproduce the above copyright notice, this list of conditions and
the following disclaimer in the documentation and/or other materials provided with the distribution.
THIS SOFTWARE IS PROVIDED BY THE COPYRIGHT HOLDERS AND CONTRIBUTORS "AS IS"
AND ANY EXPRESS OR IMPLIED WARRANTIES, INCLUDING, BUT NOT LIMITED TO, THE
IMPLIED WARRANTIES OF MERCHANTABILITY AND FITNESS FOR A PARTICULAR PURPOSE
ARE DISCLAIMED. IN NO EVENT SHALL THE COPYRIGHT HOLDERS OR CONTRIBUTORS BE
LIABLE FOR ANY DIRECT, INDIRECT, INCIDENTAL, SPECIAL, EXEMPLARY, OR
CONSEQUENTIAL DAMAGES (INCLUDING, BUT NOT LIMITED TO, PROCUREMENT OF
SUBSTITUTE GOODS OR SERVICES; LOSS OF USE, DATA, OR PROFITS; OR BUSINESS
INTERRUPTION) HOWEVER CAUSED AND ON ANY THEORY OF LIABILITY, WHETHER IN
CONTRACT, STRICT LIABILITY, OR TORT (INCLUDING NEGLIGENCE OR OTHERWISE)
ARISING IN ANY WAY OUT OF THE USE OF THIS SOFTWARE, EVEN IF ADVISED OF THE
POSSIBILITY OF SUCH DAMAGE.
Trademark Acknowledgements
Adobe and PostScript are trademarks of Adobe Systems Inc.
AT&T is a trademark of American Telephone and Telegraph Company.
Unix is a registered trademark in the United States and other countries, exclusively licensed through X/Open
Company, Ltd.
LX−80 is a trademark of Epson America, Inc. Epson is a registered trademark of Seiko Epson Corporation.
IBM and Proprinter are trademarks of International Business Machines Corporation.
Centronics is a registered trademark of Centronics Data Computer Corporation.
Apple, Mac, Macintosh, LaserWriter, AppleTalk, and TrueType are trademarks of Apple Computer, Inc.
Microsoft, LAN Manager, Microsoft Windows, Windows NT, Windows 95, and Windows 98 are trademarks
of Microsoft Corporation.
WordPerfect is a registered trademark of WordPerfect Corporation.
Pinwriter is a trademark of NEC Corporation.
QMS, QMS−PS, and QMS−PS 410 are registered trademarks of QMS, Inc.
HP, HP−GL, HP PCL, LaserJet, JetDirect, DeskWriter, and JetSend are registered trademarks of
Hewlett−Packard Company.
GIF is a trademark of CompuServe incorporated, an H&R Block Company.
Sun, Sun Microsystems, Solaris, and SunOS are trademarks or registered trademarks of Sun Microsystems,
Inc.
References to the University of California at Berkeley are for purposes of identification only, no endorsement
Copyright and Disclaimer
34
Installing and Using PPR
is implied.
OSF, DEC, and Digital Unix are trademarks of Digital Equipment Corporation.
TeX is a trademark of the American Mathematical Society.
METAFONT is a trademark of Addison−Wesley Publishing Company.
PocketPrintServer is a trademark of Extended Systems Incorporated.
Xerox is a trademark of Xerox Corporation.
Times is a trademark of Linotype AG and/or its subsidiaries.
Monotype and Bembo are trademarks of the Monotype Corporation plc.
Linux is a trademark of Linus Torvalds.
Ethernet is a registered trademark of Xerox Corporation.
Other Acknowledgements
PPR's N−Up dictionary is derived from the work of Don Markuson which he has placed in the public domain.
Some of PPR's TrueType to PostScrip type 3 font conversion code is derived from a program called ttf2ps
which L. S. Ng posted to the Usenet news group comp.sources.postscript.
The PPR distribution includes PPD files owned by Adobe Systems, Apple Computer, and Hewlett Packard.
On should read the license terms in the PPD files themselves as some of them are not licensed under the same
terms as PPR.
The PPR distribution contains procedure sets extracted form the output of Adobe and Apple PostScript
drivers. PPR inserts this extracted code into jobs created by these drivers in order to correct cases in which the
driver failed to include all of the necessary procedure sets.
The PPR code includes Rich Salz's wildmat() function which he has placed in the public domain.
PPR contains Alladin Enterprises' implementation of the MD5 algorithm described in RFC 1321.
The PPR distribution includes the IBM Courier typeface under the terms of the "IBM/MIT X Consortium
Courier Typefont agreement".
The PPR distribution contains Patrick Powell's snprintf() implementation.
Regular expression support is provided by the PCRE library package, which is open source software, written
by Philip Hazel, and copyright by the University of Cambridge, England. The latest version of PCRE may be
downloaded from ftp://ftp.csx.cam.ac.uk/pub/software/programming/pcre/, the homepage is at
http://www.pcre.org/.
Trademark Acknowledgements
35