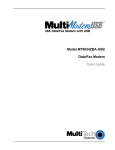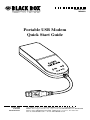
1
MARCH 2004
MD403A
Portable USB Modem
Quick Start Guide
CUSTOMER
SUPPORT
INFORMATION
Order toll-free in the U.S.: Call 877-877-BBOX (outside U.S. call 724-746-5500)
FREE technical support 24 hours a day, 7 days a week: Call 724-746-5500 or fax 724-746-0746
Mailing address: Black Box Corporation, 1000 Park Drive, Lawrence, PA 15055-1018
Web site: www.blackbox.com • E-mail: [email protected]
FCC AND IC RFI STATEMENTS
FEDERAL COMMUNICATIONS COMMISSION
AND
INDUSTRY CANADA
RADIO FREQUENCY INTERFERENCE STATEMENTS
Class B Digital Device. This equipment has been tested and found to comply with
the limits for a Class B computing device pursuant to Part 15 of the FCC Rules.
These limits are designed to provide reasonable protection against harmful
interference in a residential installation. However, there is no guarantee that
interference will not occur in a particular installation. This equipment generates,
uses, and can radiate radio frequency energy, and, if not installed and used in
accordance with the instructions, may cause harmful interference to radio
communications. If this equipment does cause harmful interference to radio or
telephone reception, which can be determined by turning the equipment off and
on, the user is encouraged to try to correct the interference by one of the following
measures:
• Reorient or relocate the receiving antenna.
• Increase the separation between the equipment and receiver.
• Connect the equipment into an outlet on a circuit different from that to which
the receiver is connected.
• Consult an experienced radio/TV technician for help.
Caution:
Changes or modifications not expressly approved by the party
responsible for compliance could void the user’s authority to operate
the equipment.
To meet FCC requirements, shielded cables and power cords are required to
connect this device to a personal computer or other Class B certified device.
This digital apparatus does not exceed the Class B limits for radio noise emission from digital
apparatus set out in the Radio Interference Regulation of Industry Canada.
Le présent appareil numérique n’émet pas de bruits radioélectriques dépassant les limites
applicables aux appareils numériques de classe B prescrites dans le Règlement sur le brouillage
radioélectrique publié par Industrie Canada.
1
PORTABLE USB MODEM QUICK START GUIDE
EMC, Safety and R&TTE Directive Compliance
The CE mark is affixed to this product to confirm compliance with the following
European Community Directives:
Council Directive 89/336/EEC of 3 May 1989 on the approximation of the laws of
Member States relating to electromagnetic compatibility.
and
Council Directive 73/23/EEC of 19 February 1973 on the harmonization of the
laws of Member States relating to electrical equipment designed for use within
certain voltage limits.
and
Council Directive 1999/5/EEC of 9 March 1999 on radio equipment and
telecommunications terminal equipment and the mutual recognition of their
conformity.
2
FCC REQUIREMENTS FOR TELEPHONE-LINE EQUIPMENT
FCC Requirements for
Telephone-Line Equipment
1. The Federal Communications Commission (FCC) has established rules which
permit this device to be directly connected to the telephone network with
standardized jacks. This equipment should not be used on party lines or coin
lines.
2. If this device is malfunctioning, it may also be causing harm to the telephone
network; this device should be disconnected until the source of the problem
can be determined and until the repair has been made. If this is not done, the
telephone company may temporarily disconnect service.
3. If you have problems with your telephone equipment after installing this
device, disconnect this device from the line to see if it is causing the problem.
If it is, contact your supplier or an authorized agent.
4. The telephone company may make changes in its technical operations and
procedures. If any such changes affect the compatibility or use of this device,
the telephone company is required to give adequate notice of the changes.
5. If the telephone company requests information on what equipment is
connected to their lines, inform them of:
a. The telephone number that this unit is connected to.
b. The ringer equivalence number.
c. The USOC jack required: RJ-11C.
d. The FCC registration number.
Items (b) and (d) can be found on the unit’s FCC label. The ringer
equivalence number (REN) is used to determine how many devices can be
connected to your telephone line. In most areas, the sum of the RENs of all
devices on any one line should not exceed five (5.0). If too many devices are
attached, they may not ring properly.
6. In the event of an equipment malfunction, all repairs should be performed by
your supplier or an authorized agent. It is the responsibility of users requiring
service to report the need for service to the supplier or to an authorized
agent.
3
PORTABLE USB MODEM QUICK START GUIDE
Certification Notice for
Equipment Used in Canada
The Industry Canada label identifies certified equipment. This certification means
that the equipment meets certain telecommunications-network protective,
operation, and safety requirements. Industry Canada does not guarantee the
equipment will operate to the user’s satisfaction.
Before installing this equipment, users should ensure that it is permissible to be
connected to the facilities of the local telecommunications company. The
equipment must also be installed using an acceptable method of connection. In
some cases, the company’s inside wiring associated with a single-line individual
service may be extended by means of a certified connector assembly (extension
cord). The customer should be aware that compliance with the above conditions
may not prevent degradation of service in some situations.
Repairs to certified equipment should be made by an authorized maintenance
facility—in this case, Black Box. Any repairs or alterations made by the user to this
equipment, or equipment malfunctions, may give the telecommunications
company cause to request the user to disconnect the equipment.
Users should ensure for their own protection that the electrical ground
connections of the power utility, telephone lines, and internal metallic water pipe
system, if present, are connected together. This precaution may be particularly
important in rural areas.
CAUTION
Users should not attempt to make such connections themselves, but
should contact the appropriate electric inspection authority, or
electrician, as appropriate.
The LOAD NUMBER (LN) assigned to each terminal device denotes the
percentage of the total load to be connected to a telephone loop which is used by
the device, to prevent overloading. The termination on a loop may consist of any
combination of devices, subject only to the requirement that the total of the load
numbers of all the devices does not exceed 100.
4
NOM STATEMENT
NORMAS OFICIALES MEXICANAS (NOM)
ELECTRICAL SAFETY STATEMENT
INSTRUCCIONES DE SEGURIDAD
1. Todas las instrucciones de seguridad y operación deberán ser leídas antes de
que el aparato eléctrico sea operado.
2. Las instrucciones de seguridad y operación deberán ser guardadas para
referencia futura.
3. Todas las advertencias en el aparato eléctrico y en sus instrucciones de
operación deben ser respetadas.
4. Todas las instrucciones de operación y uso deben ser seguidas.
5. El aparato eléctrico no deberá ser usado cerca del agua—por ejemplo, cerca
de la tina de baño, lavabo, sótano mojado o cerca de una alberca, etc..
6. El aparato eléctrico debe ser usado únicamente con carritos o pedestales que
sean recomendados por el fabricante.
7. El aparato eléctrico debe ser montado a la pared o al techo sólo como sea
recomendado por el fabricante.
8. Servicio—El usuario no debe intentar dar servicio al equipo eléctrico más allá
a lo descrito en las instrucciones de operación. Todo otro servicio deberá ser
referido a personal de servicio calificado.
9. El aparato eléctrico debe ser situado de tal manera que su posición no
interfiera su uso. La colocación del aparato eléctrico sobre una cama, sofá,
alfombra o superficie similar puede bloquea la ventilación, no se debe colocar
en libreros o gabinetes que impidan el flujo de aire por los orificios de
ventilación.
10. El equipo eléctrico deber ser situado fuera del alcance de fuentes de calor
como radiadores, registros de calor, estufas u otros aparatos (incluyendo
amplificadores) que producen calor.
11. El aparato eléctrico deberá ser connectado a una fuente de poder sólo del
tipo descrito en el instructivo de operación, o como se indique en el aparato.
5
PORTABLE USB MODEM QUICK START GUIDE
12. Precaución debe ser tomada de tal manera que la tierra fisica y la polarización
del equipo no sea eliminada.
13. Los cables de la fuente de poder deben ser guiados de tal manera que no
sean pisados ni pellizcados por objetos colocados sobre o contra ellos,
poniendo particular atención a los contactos y receptáculos donde salen del
aparato.
14. El equipo eléctrico debe ser limpiado únicamente de acuerdo a las
recomendaciones del fabricante.
15. En caso de existir, una antena externa deberá ser localizada lejos de las lineas
de energia.
16. El cable de corriente deberá ser desconectado del cuando el equipo no sea
usado por un largo periodo de tiempo.
17. Cuidado debe ser tomado de tal manera que objectos liquidos no sean
derramados sobre la cubierta u orificios de ventilación.
18. Servicio por personal calificado deberá ser provisto cuando:
A: El cable de poder o el contacto ha sido dañado; u
B: Objectos han caído o líquido ha sido derramado dentro del aparato; o
C: El aparato ha sido expuesto a la lluvia; o
D: El aparato parece no operar normalmente o muestra un cambio en su
desempeño; o
E: El aparato ha sido tirado o su cubierta ha sido dañada.
6
PATENTS/SAFETY WARNINGS
Patents
This product is covered by one or more of the following U.S. Patent Numbers:
5.301.274; 5.309.562; 5.355.365; 5.355.653; 5.452.289; 5.453.986. Other Patents
Pending.
Safety Warnings
1. Never install telephone wiring during a lightning storm.
2. Never install a telephone jack in wet locations unless the jack is specifically
designed for wet locations.
3. This product is to be used with UL® and cUL listed PCs.
4. Never touch uninsulated telephone wires or terminals unless the telephone
line has been disconnected at the network interface.
5. Use caution when installing or modifying telephone lines.
6. Avoid using a telephone (other than a cordless type) during an electrical
storm. There may be a remote risk of electrical shock from lightning.
7. Do not use a telephone in the vicinity of a gas leak.
8. To reduce the risk of fire, use only 26 AWG telecommunication line cord.
7
PORTABLE USB MODEM QUICK START GUIDE
TRADEMARKS USED IN THIS MANUAL
MNP is a registered trademark of Microcom Systems Incorporated.
UL is a registered trademark of Underwriters’ Laboratories Incorporated.
Microsoft and Windows are registered trademarks or trademarks of Microsoft
Corporation in the United States and/or other countries.
Any other trademarks mentioned in this manual are acknowledged to be the property of the
trademark owners.
8
CONTENTS
Contents
Chapter
Page
1. Specifications . . . . . . . . . . . . . . . . . . . . . . . . . . . . . . . . . . . . . . . . . . . . . . . . . . . 10
2. Introduction. . . . . . . . . . . . . . . . . . . . . . . . . . . . . . . . . . . . . . . . . . . . . . . . . . . . 13
2.1 Overview . . . . . . . . . . . . . . . . . . . . . . . . . . . . . . . . . . . . . . . . . . . . . . . . . . . . 13
2.2 What the Package Includes . . . . . . . . . . . . . . . . . . . . . . . . . . . . . . . . . . . . . 13
3. Installation . . . . . . . . . . . . . . . . . . . . . . . . . . . . . . . . . . . . . . . . . . . . . . . . . . . . . 14
3.1 Step 1: Connecting the Modem to Your System . . . . . . . . . . . . . . . . . . . . 14
3.1.1 USB Connection . . . . . . . . . . . . . . . . . . . . . . . . . . . . . . . . . . . . . . . . . . 14
3.1.2 Line Connection . . . . . . . . . . . . . . . . . . . . . . . . . . . . . . . . . . . . . . . . . . 14
3.2 Step 2: Installing the Modem . . . . . . . . . . . . . . . . . . . . . . . . . . . . . . . . . . . 14
3.2.1 Installation in Windows 2000 . . . . . . . . . . . . . . . . . . . . . . . . . . . . . . . . 14
3.2.2 Installation in Windows Me . . . . . . . . . . . . . . . . . . . . . . . . . . . . . . . . . 15
3.2.3 Installation in Windows 98 . . . . . . . . . . . . . . . . . . . . . . . . . . . . . . . . . . 17
3.3 Step 3: Country Configuration with Global Wizard . . . . . . . . . . . . . . . . . 18
9
PORTABLE USB MODEM QUICK START GUIDE
1. Specifications
Client-to-Server Data Rates: V.90 or K56flex speeds when accessing an ISP type
V.90 or K56flex server (actual speed depends on server capabilities/line
conditions)
Client-to-Client Data Rates: 33,600, 31,200, 28,800, 26,400, 24,000, 21,600, 19,200,
16,800, 14,400, 12,000, 9600, 7200, 4800, 2400, 300 bps
Fax Data Rates: 14,400, 12,000, 9600, 7200, 4800, 2400, 300 bps
Data Format: Serial, binary, asynchronous
Modem Compatibility: ITU V.90, K56flex; ITU-T V.34 enhanced, V.34, V.32terbo,
V.32bis, V.32, V.22bis, V.22; Bell 212A and 103/113; ITU-T V.29, V.42, V.42bis;
ITU-T V.21 and V.23 in international versions
Fax Compatibility: ITU-T Group 3, Class 1 and 2, T.4, T.30, V.21, V.27ter, V.29,
V.17, and TIA/EIA TR29.2
Error Correction: ITU-T V.42 (LAP-M or MNP® 3–4)
Data Compression: ITU-T V.42bis (4:1 throughput), MNP 5 (2:1 throughput)
Flow Control: X-ON/X-OFF (software), RTS/CTS (hardware)
Intelligent Features: Plug and play; fully AT command compatible; autodial, redial,
repeat dial; pulse or tone dial; dial pauses; auto answer; caller ID; EIA extended
automode; adaptive line probing; automatic symbol and carrier frequency during
startup, retrain, and rate negotiation; call status display, auto-parity and data rate
selections; keyboard-controlled modem options; non-volatile memory; on-screen
displays for modem option parameters; command lines of up to 40 characters
each; help menus; remote configuration
Command Buffer: 40 characters
Data Modulation: FSK at 300 bps, PSK at 1200 bps, QAM at 2400, 4800, and 9600
bps (non-trellis), QAM with trellis-coded modulation (TCM) at 9600, 12,000,
14,400, 16,800, 19,200, 21,600, 24,000, 26,400, 28,800, 31,200, 33,600, and
56,000 bps
Fax Modulation: V.21 CH2 FSK at 300 bps (half-duplex); V.27ter DPSK at 4800 and
2400 bps; V.29 QAM at 9600 and 7200 bps; V.17TCM at 14,400, 12,000, 9600, and
7200 bps
10
CHAPTER 1: Specifications
Carrier Frequencies ITU-T V.34: 1600, 1646, 1680, 1800, 1829, 1867, 1920, 1959,
2000 Hz
Carrier Frequencies ITU-T V.32bis/V.32: 1800 Hz
Carrier Frequencies V.22bis/V.22 or Bell 212A Standard (2400 and 1200 bps):
Transmit originate: 1200 Hz; Transmit answer: 2400 Hz; Receive originate:
2400 Hz; Receive answer: 1200 Hz
Carrier Frequencies ITU-T V.23 (1200 bps): Transmit originate: 390 Hz mark,
450 Hz space; Receive originate: 1300 Hz mark, 2100 Hz space; Transmit answer:
1300 Hz mark, 2100 Hz space; Receive answer: 390 Hz mark, 450 Hz space
Carrier Frequencies ITU-T V.21 (0 to 300 bps): Transmit originate: 980 Hz mark,
1180 Hz space; Receive originate: 1650 Hz mark, 1850 Hz space; Transmit answer:
1650 Hz mark, 1850 Hz space; Receive answer: 980 Hz mark, 1180 Hz space
Carrier Frequencies Bell 103/113 (0 to 300 bps): Transmit originate: 1270 Hz
mark, 1070 Hz space; Receive originate: 2225 Hz mark, 2025 Hz space; Transmit
answer: 2225 Hz mark, 2025 Hz space; Receive answer: 1270 Hz mark, 1070 Hz
space
Fax Carrier Frequencies: V.21 Ch2 (half-duplex): 1650 Hz mark, 1850 Hz space
for transmit originate; 1650 Hz mark, 1860 Hz space for transmit answer; V.27ter:
1800 Hz originate/answer; V.29 QAM: 1800 Hz originate/answer; V.17 TCM:
1800 Hz originate/answer
Transmit Level: -11 dBm (dial-up)
Frequency Stability: ±0.01%
Receiver Sensitivity: -43 dBm under worst-case conditions
AGC Dynamic Range: 43 dB
Connectors: (1) USB connector; (1) RJ-11 phone jack
Cables: (1) RJ-11 phone cable
NOTE
Any cables connected to the computer should be shielded to reduce
interference.
Diagnostics: Power-on self-test, local analog loop, local digital loop, remote digital
loop
11
PORTABLE USB MODEM QUICK START GUIDE
Indicators: LEDs for Data, Carrier Detect, Off-Hook, Terminal Ready
Temperature Tolerance: 32 to 120°F (0 to 50°C)
Humidity: 20 to 90%, noncondensing
Size: 1"H x 1.25"W x 3.1"D (2.5 x 3.2 x 7.9 cm)
Weight: 2.2 oz. (62 g)
12
CHAPTER 2: Introduction
2. Introduction
2.1 Overview
The Portable USB Modem is a V.90 plug-and-play data/fax modem that transmits
56 kbps downstream and 33.6 kbps upstream. You can automatically configure it
for operation in nearly any country’s phone system via the proprietary Global
Wizard. A detailed users’ manual is provided on CD-ROM with your unit.
This Quick Start Guide will help you unpack and install your Portable USB
Modem.
2.2 What the Package Includes
Your package should contain the following items.
• Portable USB Modem
• (1) CD-ROM
• (1) RJ-11 telephone cable
• This Quick Start Guide
If anything is missing or damaged, contact Black Box Technical Support at
724-746-5500.
13
PORTABLE USB MODEM QUICK START GUIDE
3. Installation
3.1 Step 1: Connecting the Modem to Your System
3.1.1 USB CONNECTION
Plug the USB cable connector on the Portable USB Modem into a USB port
connector on your computer.
3.1.2 LINE CONNECTION
Plug one end of the phone cable into the Portable USB Modem’s LINE jack and
the other end into a phone line wall jack.
NOTE
The Federal Communications Commission (FCC) and Industry Canada
impose certain restrictions on equipment connected to public telephone
systems. See pages 1–3 for more information.
3.2 Step 2: Installing the Modem
The Portable USB Modem is compatible with Windows® 2000, Windows Me, and
Windows 98.
3.2.1 INSTALLATION IN WINDOWS 2000
1. Power up your Windows 2000 system.
2. If you have not already done so, connect a) the modem to your computer’s
USB port and b) the telephone line to your modem and a telephone wall
jack.
3. Windows will detect that the new modem is present and indicate that it’s in
the process of installing. The Welcome screen of the Found New Hardware
Wizard appears first. Click Next >.
4. The Install Hardware Device Drivers screen appears, indicating that the
wizard will install the hardware device drivers. Verify that “Search for a
suitable driver for my device (recommended)” is selected, and click Next >.
14
CHAPTER 3: Installation
5. The Locate Driver Files screen appears and asks where you want Windows to
search for driver files.
Verify that the “Specify a location” option is the only one selected, place the
Modem Installation CD into your CD drive, and click Next >.
6. The next screen will say “Insert the manufacturer’s installation disk into the
drive selected and then click OK.”
Click on the Browse button. When prompted to insert a disk into drive A:\,
click Cancel. Navigate to your computer’s CD drive.
Select the folder DRIVERS\WIN 2000.
Select the file mdmbbusb.inf and click Open.
7. The Driver Files Search Results screen appears, indicating that Windows has
found the proper driver from the Modem Installation CD. Click Next > to
install the selected driver.
8. The Digital Signature Not Found dialog box is displayed. Click Yes to
continue with the installation.
NOTE
This Microsoft® operating system searches for a digital signature when
you install any new hardware. If a “Digital Signature Not Found” screen
appears, simply click the “Yes” button to continue installation. Not
having a digital signature does not affect product performance in any
way.
9. A Copying Files screen appears briefly. After the files have been copied to
your PC, a Found New Hardware Wizard screen appears and tells you that
Windows has finished installing the driver. Click Finish to complete the
installation and exit the wizard.
3.2.2 INSTALLATION IN WINDOWS ME
The Portable USB Modem driver files for Windows Me are installed in two groups,
as described below. The installation wizard begins by installing certain driver files.
At that point, Windows Me detects the modem as a new device. Then the
installation wizard runs again to install the remaining driver files.
1. Power up your Windows Me computer.
2. Connect the Portable USB Modem to your computer’s USB port. Then
connect one end of the provided telephone line cord to your Portable USB
Modem and the other end to a telephone wall jack.
15
PORTABLE USB MODEM QUICK START GUIDE
3. Windows Me will detect that the new modem is present and launch the Add
New Hardware Wizard.
Place the Portable USB Modem Installation CD into the CD drive of your PC.
The first Add New Hardware Wizard screen will appear with the message,
“What would you like to do?”
Choose “Specify the location of the driver (Advanced)” and click Next>.
4. At the Add New Hardware Wizard “Windows will search for new drivers…”
screen, uncheck the “Removable Media” button (if necessary) and check
“Specify a location.”
5. Click the “Browse” button and navigate to the “Windows Me” subfolder of the
“Drivers” folder on the Portable USB Modem Installation CD. Then click
OK. Click Cancel if it prompts you for a floppy disk.
6. The Add New Hardware Wizard “Windows driver file search…” screen
appears. Click Next>.
7. Transient progress screens will appear while files are being copied. After the
files have been copied to your PC, an Add New Hardware Wizard screen will
appear, indicating that Windows has finished installing the first of two drivers.
Click Finish to complete the installation of this first driver. The wizard will
close.
8. Windows Me will now detect an “Unknown Device” and begin another Add
New Hardware Wizard, again asking “What would you like to do?”
Choose “Specify the location of the driver (Advanced),” and click Next>.
9. At the next screen (the Add New Hardware Wizard “Windows will search for
new drivers…” screen), uncheck the “Removable Media” button (if necessary)
and check “Specify a location.” Click Next>.
10. Transient screens will appear while files are being copied. The Add New
Hardware Wizard “Windows driver file search…” screen will appear. Click
Next>.
11. After files have been copied, a completion screen will appear.
Click Finish to complete the installation of the second driver. The wizard will
close.
12. Remove the Portable USB Modem Installation CD from the computer’s CD
drive.
16
CHAPTER 3: Installation
3.2.3 INSTALLATION IN WINDOWS 98
1. Power up your Windows 98 system.
2. If you have not already done so, connect a) the modem to your computer’s
USB port and b) the telephone line to your modem and a telephone wall
jack.
3. Windows will detect that the new modem is present and launch the Add New
Hardware Wizard. The first screen indicates that the wizard will search for a
USB driver.
4. Place the Modem Installation CD into your CD drive and click Next > to
proceed with the installation.
5. The Add New Hardware Wizard dialog box appears with the message “What
do you want Windows to do?” Verify that the “Search for the best driver for
your device (recommended)” option is selected and click Next >.
6. The Add New Hardware Wizard dialog box appears with the message
“Windows will search for a new driver…” Verify that the “CD-ROM drive”
option is selected and click Next >.
7. The Add New Hardware Wizard dialog box indicates that Windows has found
an updated driver for this device. Verify that the “Updated driver
(recommended)” option is selected and click Next >.
8. The Add New Hardware Wizard dialog box indicates that Windows will select
the proper driver from the Installation CD and verify the information. Click
Next > to install the selected driver.
9. After the files have been copied to your PC, an Add New Hardware Wizard
screen appears. It tells you that Windows has finished installing the driver.
Click Finish to complete the installation and exit the wizard. The TR LED on
your modem will light when the installation is complete. Remove the
Installation CD from the computer.
17
PORTABLE USB MODEM QUICK START GUIDE
3.3 Step 3: Country Configuration with Global Wizard
You can configure the modem either manually using AT commands (see the users’
guide on the included CD-ROM), or with the Global Wizard, as described below.
The Global Wizard configuration utility is recommended for computers running
Windows 98, Me, or 2000. The Global Wizard can configure your modem for a
specific country with just a few mouse clicks.
1. Insert the Modem Installation CD into the CD-ROM drive. The Autorun
dialog box appears.
2. Click Initial Setup and Country Selection. The Global Wizard dialog box
appears. Click Next >.
3. View the Global Wizard as it searches for your modem and identifies it. Click
Next >.
4. Select the country in which the modem will be used, then click Next >.
5. Review your choice of country. If it is correct, click Next > to configure the
modem.
6. When Global Wizard announces that the parameters have been set, click
Finish to exit.
18
© Copyright 2004. Black Box Corporation. All rights reserved.
1000 Park Drive
•
Lawrence, PA 15055-1018
•
724-746-5500
•
Fax 724-746-0746