1
Red Hat Enterprise Linux 6
Security-Enhanced Linux
User Guide
Edition 6
Barbora Ančincová
Red Hat Enterprise Linux 6 Security-Enhanced Linux
User Guide
Edition 6
Barbo ra Ančinco vá
Red Hat Custo mer Co ntent Services
bancinco @redhat.co m
Legal Notice
Co pyright © 20 12 Red Hat, Inc.
This do cument is licensed by Red Hat under the Creative Co mmo ns Attributio n-ShareAlike 3.0
Unpo rted License. If yo u distribute this do cument, o r a mo dified versio n o f it, yo u must pro vide
attributio n to Red Hat, Inc. and pro vide a link to the o riginal. If the do cument is mo dified, all Red
Hat trademarks must be remo ved.
Red Hat, as the licenso r o f this do cument, waives the right to enfo rce, and agrees no t to assert,
Sectio n 4 d o f CC-BY-SA to the fullest extent permitted by applicable law.
Red Hat, Red Hat Enterprise Linux, the Shado wman lo go , JBo ss, MetaMatrix, Fedo ra, the Infinity
Lo go , and RHCE are trademarks o f Red Hat, Inc., registered in the United States and o ther
co untries.
Linux ® is the registered trademark o f Linus To rvalds in the United States and o ther co untries.
Java ® is a registered trademark o f Oracle and/o r its affiliates.
XFS ® is a trademark o f Silico n Graphics Internatio nal Co rp. o r its subsidiaries in the United
States and/o r o ther co untries.
MySQL ® is a registered trademark o f MySQL AB in the United States, the Euro pean Unio n and
o ther co untries.
No de.js ® is an o fficial trademark o f Jo yent. Red Hat So ftware Co llectio ns is no t fo rmally
related to o r endo rsed by the o fficial Jo yent No de.js o pen so urce o r co mmercial pro ject.
The OpenStack ® Wo rd Mark and OpenStack Lo go are either registered trademarks/service
marks o r trademarks/service marks o f the OpenStack Fo undatio n, in the United States and o ther
co untries and are used with the OpenStack Fo undatio n's permissio n. We are no t affiliated with,
endo rsed o r spo nso red by the OpenStack Fo undatio n, o r the OpenStack co mmunity.
All o ther trademarks are the pro perty o f their respective o wners.
Abstract
This guide assists users and administrato rs in managing and using Security-Enhanced Linux.
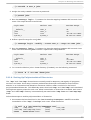
T able of Cont ent s
T able of Contents
.Preface
. . . . . . . . . . . . . . . . . . . . . . . . . . . . . . . . . . . . . . . . . . . . . . . . . . . . . . . . . . . . . . . . . . . . . . . . . . . . . . . . . . . . 4. . . . . . . . . .
1. Do c ument Co nventio ns
4
1.1. Typ o g rap hic Co nventio ns
4
1.2. Pull-q uo te Co nventio ns
5
1.3. No tes and Warning s
6
2 . We Need Feed b ac k!
6
. .hapt
C
. . . .er
. .1. .. T. rademark
. . . . . . . . .Informat
. . . . . . . ion
. . . . . . . . . . . . . . . . . . . . . . . . . . . . . . . . . . . . . . . . . . . . . . . . . . . . . . . . . . 8. . . . . . . . . .
. .hapt
C
. . . .er
. .2. .. Int
. . .roduct
. . . . . .ion
. . . . . . . . . . . . . . . . . . . . . . . . . . . . . . . . . . . . . . . . . . . . . . . . . . . . . . . . . . . . . . . . . . 9. . . . . . . . . .
2 .1. Benefits o f running SELinux
10
2 .2. Examp les
10
2 .3. SELinux Arc hitec ture
11
2 .4. SELinux Mo d es
11
. .hapt
C
. . . .er
. .3.
. .SELinux
. . . . . . . .Cont
. . . .ext
. . .s. . . . . . . . . . . . . . . . . . . . . . . . . . . . . . . . . . . . . . . . . . . . . . . . . . . . . . . . . . . 1. 3. . . . . . . . . .
3 .1. Do main Trans itio ns
14
3 .2. SELinux Co ntexts fo r Pro c es s es
15
3 .3. SELinux Co ntexts fo r Us ers
16
. .hapt
C
. . . .er
. .4. .. T. arget
. . . . . ed
. . .Policy
. . . . . . . . . . . . . . . . . . . . . . . . . . . . . . . . . . . . . . . . . . . . . . . . . . . . . . . . . . . . . . . . .1. 7. . . . . . . . . .
4 .1. Co nfined Pro c es s es
17
4 .2. Unc o nfined Pro c es s es
19
4 .3. Co nfined and Unc o nfined Us ers
22
. .hapt
C
. . . .er
. .5.
. .Working
. . . . . . . wit
. . . h. .SELinux
. . . . . . . . . . . . . . . . . . . . . . . . . . . . . . . . . . . . . . . . . . . . . . . . . . . . . . . . . . . . . . 2. 5. . . . . . . . . .
5 .1. SELinux Pac kag es
25
5 .2. Whic h Lo g File is Us ed
26
5 .3. Main Co nfig uratio n File
26
5 .4. Enab ling and Dis ab ling SELinux
27
5 .4.1. Enab ling SELinux
28
5 .4.2. Dis ab ling SELinux
30
5 .5. Bo o leans
30
5 .5.1. Lis ting Bo o leans
30
5 .5.2. Co nfig uring Bo o leans
31
5 .6 . SELinux Co ntexts – Lab eling Files
5 .6 .1. Temp o rary Chang es : c hc o n
Q uic k Referenc e
5 .6 .2. Pers is tent Chang es : s emanag e fc o ntext
Q uic k Referenc e
5 .7. The file_t and d efault_t Typ es
5 .8 . Mo unting File Sys tems
5 .8 .1. Co ntext Mo unts
5 .8 .2. Chang ing the Default Co ntext
5 .8 .3. Mo unting an NFS Vo lume
5 .8 .4. Multip le NFS Mo unts
5 .8 .5. Making Co ntext Mo unts Pers is tent
5 .9 . Maintaining SELinux Lab els
5 .9 .1. Co p ying Files and Direc to ries
C o p ying Witho ut Pres erving SELinux Co ntexts
P res erving SELinux Co ntexts When Co p ying
C o p ying and Chang ing the Co ntext
C o p ying a File O ver an Exis ting File
32
32
32
34
35
37
38
38
39
39
40
40
41
41
41
42
42
42
1
Red Hat Ent erprise Linux 6 Securit y- Enhanced Linux
5 .9 .2. Mo ving Files and Direc to ries
43
5 .9 .3. Chec king the Default SELinux Co ntext
44
5 .9 .4. Arc hiving Files with tar
45
.9 .5. Arc hiving Files with s tar
5
5 .10 . Info rmatio n G athering To o ls
46
47
a vc s tat
s einfo
s es earc h
5 .11. Multi-Level Sec urity (MLS)
5 .11.1. MLS and Sys tem Privileg es
5 .11.2. Enab ling MLS in SELinux
5 .11.3. Creating a Us er With a Sp ec ific MLS Rang e
5 .11.4. Setting Up Po lyins tantiated Direc to ries
47
47
48
49
51
51
52
53
. .hapt
C
. . . .er
. .6. .. Confining
. . . . . . . . . Users
. . . . . . . . . . . . . . . . . . . . . . . . . . . . . . . . . . . . . . . . . . . . . . . . . . . . . . . . . . . . . . . . . 55
...........
6 .1. Linux and SELinux Us er Map p ing s
55
6 .2. Co nfining New Linux Us ers : us erad d
55
6 .3. Co nfining Exis ting Linux Us ers : s emanag e lo g in
56
6 .4. Chang ing the Default Map p ing
6 .5. xg ues t: Kio s k Mo d e
6 .6 . Bo o leans fo r Us ers Exec uting Ap p lic atio ns
58
58
59
g ues t_t
xg ues t_t
59
59
u s er_t
s taff_t
59
59
. .hapt
C
. . . .er
. .7. .. sVirt
. . . . . . . . . . . . . . . . . . . . . . . . . . . . . . . . . . . . . . . . . . . . . . . . . . . . . . . . . . . . . . . . . . . . . . . . . .6. 1. . . . . . . . . .
N o n-Virtualiz ed Enviro nment
61
V irtualiz ed Enviro nment
7 .1. Sec urity and Virtualiz atio n
7 .2. s Virt Lab eling
61
62
63
. .hapt
C
. . . .er
. .8. .. T. roubleshoot
. . . . . . . . . . . ing
. . . . . . . . . . . . . . . . . . . . . . . . . . . . . . . . . . . . . . . . . . . . . . . . . . . . . . . . . . . . . .6. 4. . . . . . . . . .
8 .1. What Hap p ens when Ac c es s is Denied
64
8 .2. To p Three Caus es o f Pro b lems
8 .2.1. Lab eling Pro b lems
.2.1.1. What is the Co rrec t Co ntext?
8
8 .2.2. Ho w are Co nfined Servic es Running ?
65
66
P o rt Numb ers
8 .2.3. Evo lving Rules and Bro ken Ap p lic atio ns
.3. Fixing Pro b lems
8
66
67
67
8 .3.1. Linux Permis s io ns
8 .3.2. Po s s ib le Caus es o f Silent Denials
68
68
8 .3.3. Manual Pag es fo r Servic es
8 .3.4. Permis s ive Do mains
69
69
8 .3.4.1. Making a Do main Permis s ive
8 .3.4.2. Denials fo r Permis s ive Do mains
2
65
65
70
70
8 .3.5. Searc hing Fo r and Viewing Denials
a us earc h
71
71
a urep o rt
s ealert
8 .3.6 . Raw Aud it Mes s ag es
71
72
73
8 .3.7. s ealert Mes s ag es
8 .3.8 . Allo wing Ac c es s : aud it2allo w
74
76
T able of Cont ent s
8 .3.8 . Allo wing Ac c es s : aud it2allo w
76
. .hapt
C
. . . .er
. .9. .. Furt
. . . .her
. . . Informat
. . . . . . . .ion
. . . . . . . . . . . . . . . . . . . . . . . . . . . . . . . . . . . . . . . . . . . . . . . . . . . . . . . . . . .7. 9. . . . . . . . . .
9 .1. Co ntrib uto rs
79
9 .2. O ther Res o urc es
T he Natio nal Sec urity Ag enc y (NSA)
79
79
T res ys Tec hno lo g y
S ELinux News
S ELinux Pro jec t Wiki
79
79
80
Fed o ra
T he UnO ffic ial SELinux FAQ
80
80
IRC
80
. . . . . . . . .Hist
Revision
. . . ory
. . . . . . . . . . . . . . . . . . . . . . . . . . . . . . . . . . . . . . . . . . . . . . . . . . . . . . . . . . . . . . . . . . . . . . . .8. 1. . . . . . . . . .
3
Red Hat Ent erprise Linux 6 Securit y- Enhanced Linux
Preface
The Red Hat Enterprise Linux 6 SELinux User Guide is for people with minimal or no experience with
SELinux. Although system administration experience is not necessary, content in this guide is written
for system administration tasks. This guide provides an introduction to fundamental concepts and
practical applications of SELinux. After reading this guide you should have an intermediate
understanding of SELinux.
Thank you to everyone who offered encouragement, help, and testing - it is most appreciated. Very
special thanks to:
D ominick Grift, Stephen Smalley, and Russell Coker for their contributions, help, and patience.
1. Document Convent ions
This manual uses several conventions to highlight certain words and phrases and draw attention to
specific pieces of information.
1.1. T ypographic Convent ions
Four typographic conventions are used to call attention to specific words and phrases. These
conventions, and the circumstances they apply to, are as follows.
Mo no -spaced Bo l d
Used to highlight system input, including shell commands, file names and paths. Also used to
highlight keys and key combinations. For example:
To see the contents of the file my_next_bestsel l i ng _no vel in your current
working directory, enter the cat my_next_bestsel l i ng _no vel command at the
shell prompt and press Enter to execute the command.
The above includes a file name, a shell command and a key, all presented in mono-spaced bold and
all distinguishable thanks to context.
Key combinations can be distinguished from an individual key by the plus sign that connects each
part of a key combination. For example:
Press Enter to execute the command.
Press C trl +Al t+F2 to switch to a virtual terminal.
The first example highlights a particular key to press. The second example highlights a key
combination: a set of three keys pressed simultaneously.
If source code is discussed, class names, methods, functions, variable names and returned values
mentioned within a paragraph will be presented as above, in mo no -spaced bo l d . For example:
File-related classes include fi l esystem for file systems, fi l e for files, and d i r for
directories. Each class has its own associated set of permissions.
Pro p o rt io n al B o ld
This denotes words or phrases encountered on a system, including application names; dialog-box
text; labeled buttons; check-box and radio-button labels; menu titles and submenu titles. For
example:
4
Preface
Choose Syst em → Pref eren ces → Mo u se from the main menu bar to launch
Mo u se Pref eren ces. In the Butto ns tab, select the Left-hand ed mo use check
box and click C l o se to switch the primary mouse button from the left to the right
(making the mouse suitable for use in the left hand).
To insert a special character into a g ed it file, choose Ap p licat io n s →
Accesso ries → C h aract er Map from the main menu bar. Next, choose Search →
Fin d … from the C h aract er Map menu bar, type the name of the character in the
Search field and click Next. The character you sought will be highlighted in the
C haracter T abl e. D ouble-click this highlighted character to place it in the T ext
to co py field and then click the C o py button. Now switch back to your document
and choose Ed it → Past e from the g ed it menu bar.
The above text includes application names; system-wide menu names and items; application-specific
menu names; and buttons and text found within a GUI interface, all presented in proportional bold
and all distinguishable by context.
Mono-spaced Bold Italic or Proportional Bold Italic
Whether mono-spaced bold or proportional bold, the addition of italics indicates replaceable or
variable text. Italics denotes text you do not input literally or displayed text that changes depending
on circumstance. For example:
To connect to a remote machine using ssh, type ssh username@ domain.name at a
shell prompt. If the remote machine is exampl e. co m and your username on that
machine is john, type ssh jo hn@ exampl e. co m.
The mo unt -o remo unt file-system command remounts the named file system.
For example, to remount the /ho me file system, the command is mo unt -o remo unt
/ho me.
To see the version of a currently installed package, use the rpm -q package
command. It will return a result as follows: package-version-release.
Note the words in bold italics above: username, domain.name, file-system, package, version and
release. Each word is a placeholder, either for text you enter when issuing a command or for text
displayed by the system.
Aside from standard usage for presenting the title of a work, italics denotes the first use of a new and
important term. For example:
Publican is a DocBook publishing system.
1.2. Pull-quot e Convent ions
Terminal output and source code listings are set off visually from the surrounding text.
Output sent to a terminal is set in mo no -spaced ro man and presented thus:
books
books_tests
Desktop
Desktop1
documentation drafts mss
downloads
images notes
photos
scripts
stuff
svgs
svn
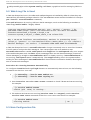
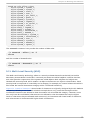
Source-code listings are also set in mo no -spaced ro man but add syntax highlighting as follows:
static int kvm_vm_ioctl_deassign_device(struct kvm *kvm,
struct kvm_assigned_pci_dev *assigned_dev)
{
int r = 0;
5
Red Hat Ent erprise Linux 6 Securit y- Enhanced Linux
struct kvm_assigned_dev_kernel *match;
mutex_lock(& kvm->lock);
match = kvm_find_assigned_dev(& kvm->arch.assigned_dev_head,
assigned_dev->assigned_dev_id);
if (!match) {
printk(KERN_INFO "%s: device hasn't been assigned
before, "
"so cannot be deassigned\n", __func__);
r = -EINVAL;
goto out;
}
kvm_deassign_device(kvm, match);
kvm_free_assigned_device(kvm, match);
o ut:
mutex_unlock(& kvm->lock);
return r;
}
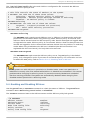
1.3. Not es and Warnings
Finally, we use three visual styles to draw attention to information that might otherwise be overlooked.
Note
Notes are tips, shortcuts or alternative approaches to the task at hand. Ignoring a note should
have no negative consequences, but you might miss out on a trick that makes your life easier.
Important
Important boxes detail things that are easily missed: configuration changes that only apply to
the current session, or services that need restarting before an update will apply. Ignoring a
box labeled “ Important” will not cause data loss but may cause irritation and frustration.
Warning
Warnings should not be ignored. Ignoring warnings will most likely cause data loss.
2. We Need Feedback!
If you find a typographical error in this manual, or if you have thought of a way to make this manual
better, we would love to hear from you! Please submit a report in Bugzilla: http://bugzilla.redhat.com/
against the product R ed H at En t erp rise Lin u x.
6
Preface
When submitting a bug report, be sure to mention the manual's identifier: doc-SELinux_User_Guide
and version number: 6 .
If you have a suggestion for improving the documentation, try to be as specific as possible when
describing it. If you have found an error, please include the section number and some of the
surrounding text so we can find it easily.
7
Red Hat Ent erprise Linux 6 Securit y- Enhanced Linux
Chapter 1. Trademark Information
Linux is the registered trademark of Linus Torvalds in the U.S. and other countries.
UNIX is a registered trademark of The Open Group.
Type Enforcement is a trademark of Secure Computing, LLC, a wholly owned subsidiary of McAfee,
Inc., registered in the U.S. and in other countries. Neither McAfee nor Secure Computing, LLC, has
consented to the use or reference to this trademark by the author outside of this guide.
Apache is a trademark of The Apache Software Foundation.
MySQL is a trademark or registered trademark of MySQL AB in the U.S. and other countries.
Other products mentioned may be trademarks of their respective corporations.
8
Chapt er 2 . Int roduct ion
Chapter 2. Introduction
Security-Enhanced Linux (SELinux) is an implementation of a mandatory access control mechanism in
the Linux kernel, checking for allowed operations after standard discretionary access controls are
checked. It was created by the National Security Agency and can enforce rules on files and
processes in a Linux system, and on their actions, based on defined policies.
When using SELinux, files, including directories and devices, are referred to as objects. Processes,
such as a user running a command or the Mozilla Firefox application, are referred to as subjects.
Most operating systems use a D iscretionary Access Control (D AC) system that controls how subjects
interact with objects, and how subjects interact with each other. On operating systems using D AC,
users control the permissions of files (objects) that they own. For example, on Linux operating
systems, users could make their home directories world-readable, giving users and processes
(subjects) access to potentially sensitive information, with no further protection over this unwanted
action.
Relying on D AC mechanisms alone is fundamentally inadequate for strong system security. D AC
access decisions are only based on user identity and ownership, ignoring other security-relevant
information such as the role of the user, the function and trustworthiness of the program, and the
sensitivity and integrity of the data. Each user typically has complete discretion over their files,
making it difficult to enforce a system-wide security policy. Furthermore, every program run by a user
inherits all of the permissions granted to the user and is free to change access to the user's files, so
minimal protection is provided against malicious software. Many system services and privileged
programs run with coarse-grained privileges that far exceed their requirements, so that a flaw in any
one of these programs could be exploited to obtain further system access. [1]
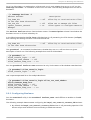
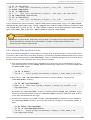
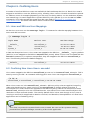
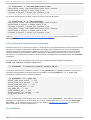
The following is an example of permissions used on Linux operating systems that do not run
Security-Enhanced Linux (SELinux). The permissions and output in these examples may differ
slightly from your system. Use the l s -l command to view file permissions:
~]$ l s -l fi l e1
-rwxrw-r-- 1 user1 group1 0 2009-08-30 11:03 file1
In this example, the first three permission bits, rwx, control the access the Linux user1 user (in this
case, the owner) has to fi l e1. The next three permission bits, rw-, control the access the Linux
g ro up1 group has to fi l e1. The last three permission bits, r--, control the access everyone else
has to fi l e1, which includes all users and processes.
Security-Enhanced Linux (SELinux) adds Mandatory Access Control (MAC) to the Linux kernel, and
is enabled by default in Red Hat Enterprise Linux. A general purpose MAC architecture needs the
ability to enforce an administratively-set security policy over all processes and files in the system,
basing decisions on labels containing a variety of security-relevant information. When properly
implemented, it enables a system to adequately defend itself and offers critical support for application
security by protecting against the tampering with, and bypassing of, secured applications. MAC
provides strong separation of applications that permits the safe execution of untrustworthy
applications. Its ability to limit the privileges associated with executing processes limits the scope of
potential damage that can result from the exploitation of vulnerabilities in applications and system
services. MAC enables information to be protected from legitimate users with limited authorization as
well as from authorized users who have unwittingly executed malicious applications. [2]
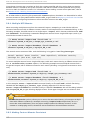
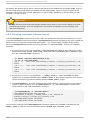
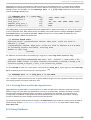
The following is an example of the labels containing security-relevant information that are used on
processes, Linux users, and files, on Linux operating systems that run SELinux. This information is
called the SELinux context, and is viewed using the l s -Z command:
9
Red Hat Ent erprise Linux 6 Securit y- Enhanced Linux
~]$ l s -Z fi l e1
-rwxrw-r-- user1 group1 unconfined_u:object_r:user_home_t:s0
file1
In this example, SELinux provides a user (unco nfi ned _u), a role (o bject_r), a type
(user_ho me_t), and a level (s0 ). This information is used to make access control decisions. With
D AC, access is controlled based only on Linux user and group ID s. It is important to remember that
SELinux policy rules are checked after D AC rules. SELinux policy rules are not used if D AC rules
deny access first.
Linux and SELinux Users
On Linux operating systems that run SELinux, there are Linux users as well as SELinux users.
SELinux users are part of SELinux policy. Linux users are mapped to SELinux users. To avoid
confusion, this guide uses “ Linux user” and “ SELinux user” to differentiate between the two.
2.1. Benefit s of running SELinux
All processes and files are labeled with a type. A type defines a domain for processes, and a type
for files. Processes are separated from each other by running in their own domains, and SELinux
policy rules define how processes interact with files, as well as how processes interact with each
other. Access is only allowed if an SELinux policy rule exists that specifically allows it.
Fine-grained access control. Stepping beyond traditional UNIX permissions that are controlled at
user discretion and based on Linux user and group ID s, SELinux access decisions are based on
all available information, such as an SELinux user, role, type, and, optionally, a level.
SELinux policy is administratively-defined, enforced system-wide, and is not set at user discretion.
Reduced vulnerability to privilege escalation attacks. One example: since processes run in
domains, and are therefore separated from each other, and because SELinux policy rules define
how processes access files and other processes, if a process is compromised, the attacker only
has access to the normal functions of that process, and to files the process has been configured
to have access to. For example, if the Apache HTTP Server is compromised, an attacker cannot
use that process to read files in user home directories, unless a specific SELinux policy rule was
added or configured to allow such access.
SELinux can be used to enforce data confidentiality and integrity, as well as protecting processes
from untrusted inputs.
However, SELinux is not:
antivirus software,
a replacement for passwords, firewalls, or other security systems,
an all-in-one security solution.
SELinux is designed to enhance existing security solutions, not replace them. Even when running
SELinux, it is important to continue to follow good security practices, such as keeping software up-todate, using hard-to-guess passwords, firewalls, and so on.
2.2. Examples
10
Chapt er 2 . Int roduct ion
The following examples demonstrate how SELinux increases security:
The default action is deny. If an SELinux policy rule does not exist to allow access, such as for a
process opening a file, access is denied.
SELinux can confine Linux users. A number of confined SELinux users exist in SELinux policy.
Linux users can be mapped to confined SELinux users to take advantage of the security rules and
mechanisms applied to them. For example, mapping a Linux user to the SELinux user_u user,
results in a Linux user that is not able to run (unless configured otherwise) set user ID (setuid)
applications, such as sud o and su, as well as preventing them from executing files and
applications in their home directory. If configured, this prevents users from executing malicious
files from their home directories.
Process separation is used. Processes run in their own domains, preventing processes from
accessing files used by other processes, as well as preventing processes from accessing other
processes. For example, when running SELinux, unless otherwise configured, an attacker cannot
compromise a Samba server, and then use that Samba server as an attack vector to read and
write to files used by other processes, such as databases used by MySQL.
SELinux helps limit the damage made by configuration mistakes. D omain Name System (D NS)
servers often replicate information between each other in what is known as a zone transfer.
Attackers can use zone transfers to update D NS servers with false information. When running the
Berkeley Internet Name D omain (BIND ) as a D NS server in Red Hat Enterprise Linux, even if an
administrator forgets to limit which servers can perform a zone transfer, the default SELinux policy
prevents zone files [3] from being updated via zone transfers, by the BIND named daemon itself,
and by other processes.
Refer to the Red Hat Magazine article, Risk report: Three years of Red Hat Enterprise Linux 4 [4] ,
for exploits that were restricted due to the default SELinux targeted policy in Red Hat Enterprise
Linux 4.
Refer to the NetworkWorld.com article, A seatbelt for server software: SELinux blocks real-world
exploits [5] , for background information about SELinux, and information about various exploits
that SELinux has prevented.
Refer to James Morris's SELinux mitigates remote root vulnerability in OpenPegasus blog post for
information about an exploit in OpenPegasus that was mitigated by SELinux as shipped with Red
Hat Enterprise Linux 4 and 5.
2.3. SELinux Archit ect ure
SELinux is a Linux security module that is built into the Linux kernel. SELinux is driven by loadable
policy rules. When security-relevant access is taking place, such as when a process attempts to open
a file, the operation is intercepted in the kernel by SELinux. If an SELinux policy rule allows the
operation, it continues, otherwise, the operation is blocked and the process receives an error.
SELinux decisions, such as allowing or disallowing access, are cached. This cache is known as the
Access Vector Cache (AVC). When using these cached decisions, SELinux policy rules need to be
checked less, which increases performance. Remember that SELinux policy rules have no effect if
D AC rules deny access first.
2.4 . SELinux Modes
SELinux has three modes:
11
Red Hat Ent erprise Linux 6 Securit y- Enhanced Linux
Enforcing: SELinux policy is enforced. SELinux denies access based on SELinux policy rules.
Permissive: SELinux policy is not enforced. SELinux does not deny access, but denials are
logged for actions that would have been denied if running in enforcing mode.
D isabled: SELinux is disabled. Only D AC rules are used.
Use the setenfo rce command to change between enforcing and permissive mode. Changes made
with setenfo rce do not persist across reboots. To change to enforcing mode, as the Linux root
user, run the setenfo rce 1 command. To change to permissive mode, run the setenfo rce 0
command. Use the g etenfo rce command to view the current SELinux mode.
Persistent mode changes are covered in Section 5.4, “ Enabling and D isabling SELinux” .
[1] " Integ rating Flexib le Sup p o rt fo r Sec urity Po lic ies into the Linux O p erating Sys tem" , b y Peter
Lo s c o c c o and Step hen Smalley. This p ap er was o rig inally p rep ared fo r the Natio nal Sec urity Ag enc y
and is , c o ns eq uently, in the p ub lic d o main. Refer to the o rig inal p ap er fo r d etails and the d o c ument as
it was firs t releas ed . Any ed its and c hang es were d o ne b y Murray Mc Allis ter.
[2] " Meeting Critic al Sec urity O b jec tives with Sec urity-Enhanc ed Linux" , b y Peter Lo s c o c c o and Step hen
Smalley. This p ap er was o rig inally p rep ared fo r the Natio nal Sec urity Ag enc y and is , c o ns eq uently, in
the p ub lic d o main. Refer to the o rig inal p ap er fo r d etails and the d o c ument as it was firs t releas ed . Any
ed its and c hang es were d o ne b y Murray Mc Allis ter.
[3] Text files that inc lud e info rmatio n, s uc h as ho s t name to IP ad d res s map p ing s , that are us ed b y DNS
s ervers .
[4] Co x, Mark. " Ris k rep o rt: Three years o f Red Hat Enterp ris e Linux 4" . Pub lis hed 26 Feb ruary 20 0 8 .
Ac c es s ed 27 Aug us t 20 0 9 : http ://mag az ine.red hat.c o m/20 0 8 /0 2/26 /ris k-rep o rt-three-years -o f-red -hatenterp ris e-linux-4/.
[5] Marti, Do n. " A s eatb elt fo r s erver s o ftware: SELinux b lo c ks real-wo rld exp lo its " . Pub lis hed 24
Feb ruary 20 0 8 . Ac c es s ed 27 Aug us t 20 0 9 : http ://www.netwo rkwo rld .c o m/news /20 0 8 /0 2240 8 s elinux.html.
12
Chapt er 3. SELinux Cont ext s
Chapter 3. SELinux Contexts
Processes and files are labeled with an SELinux context that contains additional information, such
as an SELinux user, role, type, and, optionally, a level. When running SELinux, all of this information
is used to make access control decisions. In Red Hat Enterprise Linux, SELinux provides a
combination of Role-Based Access Control (RBAC), Type Enforcement (TE), and, optionally, MultiLevel Security (MLS).
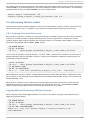
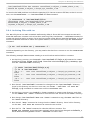
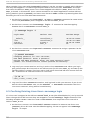
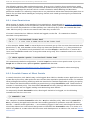
The following is an example showing SELinux context. SELinux contexts are used on processes,
Linux users, and files, on Linux operating systems that run SELinux. Use the l s -Z command to
view the SELinux context of files and directories:
~]$ l s -Z fi l e1
-rwxrw-r-- user1 group1 unconfined_u:object_r:user_home_t:s0
file1
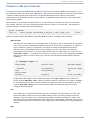
SELinux contexts follow the SELinux user:role:type:level syntax. The fields are as follows:
SELinux user
The SELinux user identity is an identity known to the policy that is authorized for a specific
set of roles, and for a specific MLS/MCS range. Each Linux user is mapped to an SELinux
user via SELinux policy. This allows Linux users to inherit the restrictions placed on
SELinux users. The mapped SELinux user identity is used in the SELinux context for
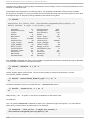
processes in that session, in order to define what roles and levels they can enter. Run the
semanag e l o g i n -l command as the Linux root user to view a list of mappings between
SELinux and Linux user accounts (you need to have the policycoreutils-python package
installed):
~]# semanag e l o g i n -l
Login Name
SELinux User
MLS/MCS Range
__default__
root
s0:c0.c1023
system_u
unconfined_u
unconfined_u
s0-s0:c0.c1023
s0-
system_u
s0-s0:c0.c1023
Output may differ slightly from system to system. The Lo g i n Name column lists Linux
users, and the SELi nux User column lists which SELinux user the Linux user is mapped
to. For processes, the SELinux user limits which roles and levels are accessible. The last
column, MLS/MC S R ang e, is the level used by Multi-Level Security (MLS) and MultiCategory Security (MCS).
role
Part of SELinux is the Role-Based Access Control (RBAC) security model. The role is an
attribute of RBAC. SELinux users are authorized for roles, and roles are authorized for
domains. The role serves as an intermediary between domains and SELinux users. The
roles that can be entered determine which domains can be entered; ultimately, this controls
which object types can be accessed. This helps reduce vulnerability to privilege escalation
attacks.
type
13
Red Hat Ent erprise Linux 6 Securit y- Enhanced Linux
The type is an attribute of Type Enforcement. The type defines a domain for processes, and
a type for files. SELinux policy rules define how types can access each other, whether it be
a domain accessing a type, or a domain accessing another domain. Access is only allowed
if a specific SELinux policy rule exists that allows it.
level
The level is an attribute of MLS and MCS. An MLS range is a pair of levels, written as
lowlevel-highlevel if the levels differ, or lowlevel if the levels are identical (s0 -s0 is the same
as s0 ). Each level is a sensitivity-category pair, with categories being optional. If there are
categories, the level is written as sensitivity:category-set. If there are no categories, it is
written as sensitivity.
If the category set is a contiguous series, it can be abbreviated. For example, c0 . c3 is the
same as c0 ,c1,c2,c3. The /etc/sel i nux/targ eted /setrans. co nf file maps levels
(s0 : c0 ) to human-readable form (that is C o mpanyC o nfi d enti al ). D o not edit
setrans. co nf with a text editor: use the semanag e command to make changes. Refer to
the semanage(8) manual page for further information. In Red Hat Enterprise Linux, targeted
policy enforces MCS, and in MCS, there is just one sensitivity, s0 . MCS in Red Hat
Enterprise Linux supports 1024 different categories: c0 through to c10 23. s0 s0 : c0 . c10 23 is sensitivity s0 and authorized for all categories.
MLS enforces the Bell-La Padula Mandatory Access Model, and is used in Labeled Security
Protection Profile (LSPP) environments. To use MLS restrictions, install the selinux-policymls package, and configure MLS to be the default SELinux policy. The MLS policy shipped
with Red Hat Enterprise Linux omits many program domains that were not part of the
evaluated configuration, and therefore, MLS on a desktop workstation is unusable (no
support for the X Window System); however, an MLS policy from the upstream SELinux
Reference Policy can be built that includes all program domains. For more information on
MLS configuration, refer to Section 5.11, “ Multi-Level Security (MLS)” .
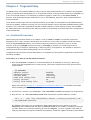
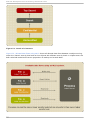
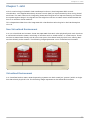
3.1. Domain T ransit ions
A process in one domain transitions to another domain by executing an application that has the
entrypo i nt type for the new domain. The entrypo i nt permission is used in SELinux policy, and
controls which applications can be used to enter a domain. The following example demonstrates a
domain transition:
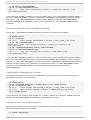
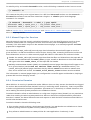
1. A user wants to change their password. To do this, they run the passwd application. The
/usr/bi n/passwd executable is labeled with the passwd _exec_t type:
~]$ l s -Z /usr/bi n/passwd
-rwsr-xr-x root root system_u:object_r:passwd_exec_t:s0
/usr/bin/passwd
The passwd application accesses /etc/shad o w, which is labeled with the shad o w_t type:
~]$ l s -Z /etc/shad o w
-r--------. root root system_u:object_r:shadow_t:s0
/etc/shadow
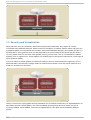
2. An SELinux policy rule states that processes running in the passwd _t domain are allowed to
read and write to files labeled with the shad o w_t type. The shad o w_t type is only applied to
files that are required for a password change. This includes /etc/g shad o w, /etc/shad o w,
and their backup files.
14
Chapt er 3. SELinux Cont ext s
3. An SELinux policy rule states that the passwd _t domain has entrypo i nt permission to the
passwd _exec_t type.
4. When a user runs the passwd application, the user's shell process transitions to the
passwd _t domain. With SELinux, since the default action is to deny, and a rule exists that
allows (among other things) applications running in the passwd _t domain to access files
labeled with the shad o w_t type, the passwd application is allowed to access /etc/shad o w,
and update the user's password.
This example is not exhaustive, and is used as a basic example to explain domain transition.
Although there is an actual rule that allows subjects running in the passwd _t domain to access
objects labeled with the shad o w_t file type, other SELinux policy rules must be met before the subject
can transition to a new domain. In this example, Type Enforcement ensures:
The passwd _t domain can only be entered by executing an application labeled with the
passwd _exec_t type; can only execute from authorized shared libraries, such as the l i b_t
type; and cannot execute any other applications.
Only authorized domains, such as passwd _t, can write to files labeled with the shad o w_t type.
Even if other processes are running with superuser privileges, those processes cannot write to
files labeled with the shad o w_t type, as they are not running in the passwd _t domain.
Only authorized domains can transition to the passwd _t domain. For example, the send mai l
process running in the send mai l _t domain does not have a legitimate reason to execute
passwd ; therefore, it can never transition to the passwd _t domain.
Processes running in the passwd _t domain can only read and write to authorized types, such as
files labeled with the etc_t or shad o w_t types. This prevents the passwd application from being
tricked into reading or writing arbitrary files.
3.2. SELinux Cont ext s for Processes
Use the ps -eZ command to view the SELinux context for processes. For example:
1. Open a terminal, such as Ap p licat io n s → Syst em T o o ls → T ermin al.
2. Run the passwd command. D o not enter a new password.
3. Open a new tab, or another terminal, and run the ps -eZ | g rep passwd command. The
output is similar to the following:
unconfined_u:unconfined_r:passwd_t:s0-s0:c0.c1023 13212 pts/1
00:00:00 passwd
4. In the first tab/terminal, press C trl + C to cancel the passwd application.
In this example, when the passwd application (labeled with the passwd _exec_t type) is executed,
the user's shell process transitions to the passwd _t domain. Remember that the type defines a
domain for processes, and a type for files.
Use the ps -eZ command to view the SELinux contexts for running processes. The following is a
truncated example of the output, and may differ on your system:
system_u:system_r:dhcpc_t:s0
system_u:system_r:sshd_t:s0-s0:c0.c1023
system_u:system_r:gpm_t:s0
system_u:system_r:crond_t:s0-s0:c0.c1023
1869
1882
1964
1973
? 00:00:00 dhclient
? 00:00:00 sshd
? 00:00:00 gpm
? 00:00:00 crond
15
Red Hat Ent erprise Linux 6 Securit y- Enhanced Linux
system_u:system_r:kerneloops_t:s0
1983 ?
system_u:system_r:crond_t:s0-s0:c0.c1023 1991 ?
00:00:05 kerneloops
00:00:00 atd
The system_r role is used for system processes, such as daemons. Type Enforcement then
separates each domain.
3.3. SELinux Cont ext s for Users
Use the i d -Z command to view the SELinux context associated with your Linux user:
unconfined_u:unconfined_r:unconfined_t:s0-s0:c0.c1023
In Red Hat Enterprise Linux, Linux users run unconfined by default. This SELinux context shows that
the Linux user is mapped to the SELinux unco nfi ned _u user, running as the unco nfi ned _r role,
and is running in the unco nfi ned _t domain. s0 -s0 is an MLS range, which in this case, is the
same as just s0 . The categories the user has access to is defined by c0 . c10 23, which is all
categories (c0 through to c10 23).
16
Chapt er 4 . T arget ed Policy
Chapter 4. Targeted Policy
Targeted policy is the default SELinux policy used in Red Hat Enterprise Linux. When using targeted
policy, processes that are targeted run in a confined domain, and processes that are not targeted run
in an unconfined domain. For example, by default, logged-in users run in the unco nfi ned _t
domain, and system processes started by init run in the i ni trc_t domain; both of these domains
are unconfined.
Unconfined domains (as well as confined domains) are subject to executable and writeable memory
checks. By default, subjects running in an unconfined domain cannot allocate writeable memory and
execute it. This reduces vulnerability to buffer overflow attacks. These memory checks are disabled
by setting Booleans, which allow the SELinux policy to be modified at runtime. Boolean configuration
is discussed later.
4 .1. Confined Processes
Almost every service that listens on a network, such as sshd or httpd , is confined in Red Hat
Enterprise Linux. Also, most processes that run as the Linux root user and perform tasks for users,
such as the passwd application, are confined. When a process is confined, it runs in its own
domain, such as the httpd process running in the httpd _t domain. If a confined process is
compromised by an attacker, depending on SELinux policy configuration, an attacker's access to
resources and the possible damage they can do is limited.
Complete this procedure to ensure that SELinux is enabled and the system is prepared to perform the
following example:
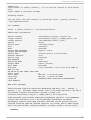
Pro ced u re 4 .1. H o w t o Verif y SELin u x St at u s
1. Run the sestatus command to confirm that SELinux is enabled, is running in enforcing
mode, and that targeted policy is being used. The correct output should look similar to the
output bellow.
~]$ sestatus
SELinux status:
SELinuxfs mount:
Current mode:
Mode from config file:
Policy version:
Policy from config file:
enabled
/selinux
enforcing
enforcing
24
targeted
Refer to the section Section 5.4, “ Enabling and D isabling SELinux” for detailed information
about enabling and disabling SELinux.
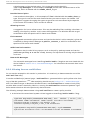
2. As the Linux root user, run the to uch /var/www/html /testfi l e command to create a file.
3. Run the l s -Z /var/www/html /testfi l e command to view the SELinux context:
-rw-r--r-- root root unconfined_u:object_r:httpd_sys_content_t:s0
/var/www/html/testfile
By default, Linux users run unconfined in Red Hat Enterprise Linux, which is why the
testfi l e file is labeled with the SELinux unco nfi ned _u user. RBAC is used for processes,
not files. Roles do not have a meaning for files; the o bject_r role is a generic role used for
files (on persistent storage and network file systems). Under the /pro c/ directory, files related
17
Red Hat Ent erprise Linux 6 Securit y- Enhanced Linux
to processes may use the system_r role. [6 ] The httpd _sys_co ntent_t type allows the
httpd process to access this file.
The following example demonstrates how SELinux prevents the Apache HTTP Server (httpd ) from
reading files that are not correctly labeled, such as files intended for use by Samba. This is an
example, and should not be used in production. It assumes that the httpd and wget packages are
installed, the SELinux targeted policy is used, and that SELinux is running in enforcing mode.
Pro ced u re 4 .2. An Examp le o f C o n f in ed Pro cess
1. As the Linux root user, run the servi ce httpd start command to start the httpd process.
The output is as follows if httpd starts successfully:
~]# servi ce httpd start
Starting httpd:
[
OK
]
2. Change into a directory where your Linux user has write access to, and run the wg et
http: //l o cal ho st/testfi l e command. Unless there are changes to the default
configuration, this command succeeds:
~]$ wg et http: //l o cal ho st/testfi l e
--2009-11-06 17:43:01-- http://localhost/testfile
Resolving localhost... 127.0.0.1
Connecting to localhost|127.0.0.1|:80... connected.
HTTP request sent, awaiting response... 200 OK
Length: 0 [text/plain]
Saving to: `testfile'
[ <=>
] 0
--.-K/s
in 0s
2009-11-06 17:43:01 (0.00 B/s) - `testfile' saved [0/0]
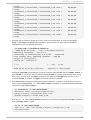
3. The chco n command relabels files; however, such label changes do not survive when the file
system is relabeled. For permanent changes that survive a file system relabel, use the
semanag e command, which is discussed later. As the Linux root user, run the following
command to change the type to a type used by Samba:
~]# chco n -t samba_share_t /var/www/html /testfi l e
Run the l s -Z /var/www/html /testfi l e command to view the changes:
-rw-r--r-- root root unconfined_u:object_r:samba_share_t:s0
/var/www/html/testfile
4. Note: the current D AC permissions allow the httpd process access to testfi l e. Change
into a directory where your Linux user has write access to, and run the wg et
http: //l o cal ho st/testfi l e command. Unless there are changes to the default
configuration, this command fails:
~]$ wg et http: //l o cal ho st/testfi l e
--2009-11-06 14:11:23-- http://localhost/testfile
Resolving localhost... 127.0.0.1
Connecting to localhost|127.0.0.1|:80... connected.
18
Chapt er 4 . T arget ed Policy
HTTP request sent, awaiting response... 403 Forbidden
2009-11-06 14:11:23 ERROR 403: Forbidden.
5. As the Linux root user, run the rm -i /var/www/html /testfi l e command to remove
testfi l e.
6. If you do not require httpd to be running, as the Linux root user, run the servi ce httpd
sto p command to stop httpd :
~]# servi ce httpd sto p
Stopping httpd:
[
OK
]
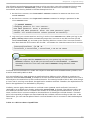
This example demonstrates the additional security added by SELinux. Although D AC rules allowed
the httpd process access to testfi l e in step 2, because the file was labeled with a type that the
httpd process does not have access to, SELinux denied access.
If the aud i td daemon is running, an error similar to the following is logged to
/var/l o g /aud i t/aud i t. l o g :
type=AVC msg=audit(1220706212.937:70): avc: denied { getattr } for
pid=1904 comm="httpd" path="/var/www/html/testfile" dev=sda5 ino=247576
scontext=unconfined_u:system_r:httpd_t:s0
tcontext=unconfined_u:object_r:samba_share_t:s0 tclass=file
type=SYSCALL msg=audit(1220706212.937:70): arch=40000003 syscall=196
success=no exit=-13 a0=b9e21da0 a1=bf9581dc a2=555ff4 a3=2008171 items=0
ppid=1902 pid=1904 auid=500 uid=48 gid=48 euid=48 suid=48 fsuid=48
egid=48 sgid=48 fsgid=48 tty=(none) ses=1 comm="httpd"
exe="/usr/sbin/httpd" subj=unconfined_u:system_r:httpd_t:s0 key=(null)
Also, an error similar to the following is logged to /var/l o g /httpd /erro r_l o g :
[Wed May 06 23:00:54 2009] [error] [client 127.0.0.1] (13)Permission
denied: access to /testfile denied
4 .2. Unconfined Processes
Unconfined processes run in unconfined domains, for example, init programs run in the unconfined
i ni trc_t domain, unconfined kernel processes run in the kernel _t domain, and unconfined
Linux users run in the unco nfi ned _t domain. For unconfined processes, SELinux policy rules are
applied, but policy rules exist that allow processes running in unconfined domains almost all
access. Processes running in unconfined domains fall back to using D AC rules exclusively. If an
unconfined process is compromised, SELinux does not prevent an attacker from gaining access to
system resources and data, but of course, D AC rules are still used. SELinux is a security
enhancement on top of D AC rules – it does not replace them.
To ensure that SELinux is enabled and the system is prepared to perform the following example,
complete the Procedure 4.1, “ How to Verify SELinux Status” described in Section 4.1, “ Confined
Processes” .
The following example demonstrates how the Apache HTTP Server (httpd ) can access data
intended for use by Samba, when running unconfined. Note that in Red Hat Enterprise Linux, the
httpd process runs in the confined httpd _t domain by default. This is an example, and should not
be used in production. It assumes that the httpd, wget, dbus and audit packages are installed, that the
19
Red Hat Ent erprise Linux 6 Securit y- Enhanced Linux
SELinux targeted policy is used, and that SELinux is running in enforcing mode.
Pro ced u re 4 .3. An Examp le o f U n co n f in ed Pro cess
1. The chco n command relabels files; however, such label changes do not survive when the file
system is relabeled. For permanent changes that survive a file system relabel, use the
semanag e command, which is discussed later. As the Linux root user, run the following
command to change the type to a type used by Samba:
~]# chco n -t samba_share_t /var/www/html /testfi l e
Run the l s -Z /var/www/html /testfi l e command to view the changes:
~]$ l s -Z /var/www/html /testfi l e
-rw-r--r-- root root unconfined_u:object_r:samba_share_t:s0
/var/www/html/testfile
2. Run the servi ce httpd status command to confirm that the httpd process is not
running:
~]$ servi ce httpd status
httpd is stopped
If the output differs, run the servi ce httpd sto p command as the Linux root user to stop
the httpd process:
~]# servi ce httpd sto p
Stopping httpd:
[
OK
]
3. To make the httpd process run unconfined, run the following command as the Linux root
user to change the type of /usr/sbi n/httpd , to a type that does not transition to a confined
domain:
~]# chco n -t unco nfi ned _exec_t /usr/sbi n/httpd
4. Run the l s -Z /usr/sbi n/httpd command to confirm that /usr/sbi n/httpd is labeled
with the unco nfi ned _exec_t type:
~]$ l s -Z /usr/sbi n/httpd
-rwxr-xr-x root root system_u:object_r:unconfined_exec_t:s0
/usr/sbin/httpd
5. As the Linux root user, run the servi ce httpd start command to start the httpd process.
The output is as follows if httpd starts successfully:
~]# servi ce httpd start
Starting httpd:
[
6. Run the ps -eZ | g rep httpd command to view the httpd running in the
unco nfi ned _t domain:
~]$ ps -eZ | g rep httpd
unconfined_u:unconfined_r:unconfined_t:s0 7721 ?
20
00:00:00
OK
]
Chapt er 4 . T arget ed Policy
httpd
unconfined_u:unconfined_r:unconfined_t:s0
httpd
unconfined_u:unconfined_r:unconfined_t:s0
httpd
unconfined_u:unconfined_r:unconfined_t:s0
httpd
unconfined_u:unconfined_r:unconfined_t:s0
httpd
unconfined_u:unconfined_r:unconfined_t:s0
httpd
unconfined_u:unconfined_r:unconfined_t:s0
httpd
unconfined_u:unconfined_r:unconfined_t:s0
httpd
unconfined_u:unconfined_r:unconfined_t:s0
httpd
7723 ?
00:00:00
7724 ?
00:00:00
7725 ?
00:00:00
7726 ?
00:00:00
7727 ?
00:00:00
7728 ?
00:00:00
7729 ?
00:00:00
7730 ?
00:00:00
7. Change into a directory where your Linux user has write access to, and run the wg et
http: //l o cal ho st/testfi l e command. Unless there are changes to the default
configuration, this command succeeds:
~]$ wg et http: //l o cal ho st/testfi l e
--2009-05-07 01:41:10-- http://localhost/testfile
Resolving localhost... 127.0.0.1
Connecting to localhost|127.0.0.1|:80... connected.
HTTP request sent, awaiting response... 200 OK
Length: 0 [text/plain]
Saving to: `testfile.1'
[ <=>
]--.-K/s
in 0s
2009-05-07 01:41:10 (0.00 B/s) - `testfile.1' saved [0/0]
Although the httpd process does not have access to files labeled with the samba_share_t
type, httpd is running in the unconfined unco nfi ned _t domain, and falls back to using
D AC rules, and as such, the wg et command succeeds. Had httpd been running in the
confined httpd _t domain, the wg et command would have failed.
8. The resto reco n command restores the default SELinux context for files. As the Linux root
user, run the resto reco n -v /usr/sbi n/httpd command to restore the default SELinux
context for /usr/sbi n/httpd :
~]# resto reco n -v /usr/sbi n/httpd
restorecon reset /usr/sbin/httpd context
system_u:object_r:unconfined_exec_t:s0>system_u:object_r:httpd_exec_t:s0
Run the l s -Z /usr/sbi n/httpd command to confirm that /usr/sbi n/httpd is labeled
with the httpd _exec_t type:
~]$ l s -Z /usr/sbi n/httpd
-rwxr-xr-x root root system_u:object_r:httpd_exec_t:s0
/usr/sbin/httpd
21
Red Hat Ent erprise Linux 6 Securit y- Enhanced Linux
9. As the Linux root user, run the servi ce httpd restart command to restart httpd . After
restarting, run the ps -eZ | g rep httpd command to confirm that httpd is running in the
confined httpd _t domain:
~]# servi ce httpd restart
Stopping httpd:
Starting httpd:
~]# ps -eZ | g rep httpd
unconfined_u:system_r:httpd_t:s0
unconfined_u:system_r:httpd_t:s0
unconfined_u:system_r:httpd_t:s0
unconfined_u:system_r:httpd_t:s0
unconfined_u:system_r:httpd_t:s0
unconfined_u:system_r:httpd_t:s0
unconfined_u:system_r:httpd_t:s0
[
[
8883
8884
8885
8886
8887
8888
8889
?
?
?
?
?
?
?
00:00:00
00:00:00
00:00:00
00:00:00
00:00:00
00:00:00
00:00:00
OK
OK
]
]
httpd
httpd
httpd
httpd
httpd
httpd
httpd
10. As the Linux root user, run the rm -i /var/www/html /testfi l e command to remove
testfi l e:
~]# rm -i /var/www/html /testfi l e
rm: remove regular empty file `/var/www/html/testfile'? y
11. If you do not require httpd to be running, as the Linux root user, run the servi ce httpd
sto p command to stop httpd :
~]# servi ce httpd sto p
Stopping httpd:
[
OK
]
The examples in these sections demonstrate how data can be protected from a compromised
confined-process (protected by SELinux), as well as how data is more accessible to an attacker from
a compromised unconfined-process (not protected by SELinux).
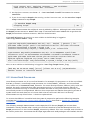
4 .3. Confined and Unconfined Users
Each Linux user is mapped to an SELinux user via SELinux policy. This allows Linux users to inherit
the restrictions on SELinux users. This Linux user mapping is seen by running the semanag e
l o g i n -l command as the Linux root user:
~]# semanag e l o g i n -l
Login Name
SELinux User
MLS/MCS Range
__default__
root
system_u
unconfined_u
unconfined_u
system_u
s0-s0:c0.c1023
s0-s0:c0.c1023
s0-s0:c0.c1023
In Red Hat Enterprise Linux 6, Linux users are mapped to the SELinux __d efaul t__ login by
default, which is mapped to the SELinux unco nfi ned _u user. The following line defines the default
mapping:
__default__
22
unconfined_u
s0-s0:c0.c1023
Chapt er 4 . T arget ed Policy
The following procedure demonstrates how to add a new Linux user to the system and how to map
that user to the SELinux unco nfi ned _u user. It assumes that the Linux root user is running
unconfined, as it does by default in Red Hat Enterprise Linux 6:
1. As the Linux root user, run the userad d newuser command to create a new Linux user
named newuser.
2. As the Linux root user, run the passwd newuser command to assign a password to the
Linux newuser user:
~]# passwd newuser
Changing password for user newuser.
New UNIX password: Enter a password
Retype new UNIX password: Enter the same password again
passwd: all authentication tokens updated successfully.
3. Log out of your current session, and log in as the Linux newuser user. When you log in, the
p am_selin u x PAM module automatically maps the Linux user to an SELinux user (in this
case, unco nfi ned _u), and sets up the resulting SELinux context. The Linux user's shell is
then launched with this context. Run the i d -Z command to view the context of a Linux user:
[newuser@ localhost ~]$ i d -Z
unconfined_u:unconfined_r:unconfined_t:s0-s0:c0.c1023
Note
If you no longer need the newuser user on your system, log out of the Linux
newuser's session, log in with your account, and run the userd el -r newuser
command as the Linux root user. It will remove newuser along with their home
directory.
Confined and unconfined Linux users are subject to executable and writeable memory checks, and
are also restricted by MCS or MLS.
If an unconfined Linux user executes an application that SELinux policy defines as one that can
transition from the unco nfi ned _t domain to its own confined domain, the unconfined Linux user is
still subject to the restrictions of that confined domain. The security benefit of this is that, even though
a Linux user is running unconfined, the application remains confined. Therefore, the exploitation of a
flaw in the application can be limited by the policy.
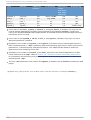
Similarly, we can apply these checks to confined users. However, each confined Linux user is
restricted by a confined user domain against the unco nfi ned _t domain. The SELinux policy can
also define a transition from a confined user domain to its own target confined domain. In such a
case, confined Linux users are subject to the restrictions of that target confined domain. The main
point is that special privileges are associated with the confined users according to their role. In the
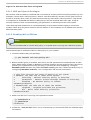
table below, you can see examples of basic confined domains for Linux users in Red Hat Enterprise
Linux 6:
T ab le 4 .1. SELin u x U ser C ap ab ilit ies
23
Red Hat Ent erprise Linux 6 Securit y- Enhanced Linux
U ser
D o main
sysadm_u
staff_u
user_u
guest_u
xguest_u
sysadm_t
staff_t
user_t
guest_t
xguest_t
X Win d o w
Syst em
yes
yes
yes
no
yes
su o r su d o
su and su d o
only su d o
no
no
no
Execu t e in
h o me
d irect o ry
an d /t mp /
( d ef au lt )
yes
yes
yes
no
no
N et wo rkin g
yes
yes
yes
yes
Firefox only
Linux users in the user_t, g uest_t, xg uest_t, and g i t_shel l _t domains can only run set
user ID (setuid) applications if SELinux policy permits it (for example, passwd ). These users
cannot run the su and sud o setuid applications, and therefore cannot use these applications to
become the Linux root user.
Linux users in the sysad m_t, staff_t, user_t, and xg uest_t domains can log in via the X
Window System and a terminal.
By default, Linux users in the g uest_t and xg uest_t domains cannot execute applications in
their home directories or /tmp/, preventing them from executing applications, which inherit users'
permissions, in directories they have write access to. This helps prevent flawed or malicious
applications from modifying users' files.
By default, Linux users in the staff_t and user_t domains can execute applications in their
home directories and /tmp/. Refer to Section 6.6, “ Booleans for Users Executing Applications”
for information about allowing and preventing users from executing applications in their home
directories and /tmp/.
The only network access Linux users in the xg uest_t domain have is Firef o x connecting to web
pages.
[6 ] When us ing o ther p o lic ies , s uc h as MLS, o ther ro les may b e us ed , fo r examp le, secad m_r.
24
Chapt er 5. Working wit h SELinux
Chapter 5. Working with SELinux
The following sections give a brief overview of the main SELinux packages in Red Hat Enterprise
Linux; installing and updating packages; which log files are used; the main SELinux configuration
file; enabling and disabling SELinux; SELinux modes; configuring Booleans; temporarily and
persistently changing file and directory labels; overriding file system labels with the mo unt command;
mounting NFS volumes; and how to preserve SELinux contexts when copying and archiving files
and directories.
5.1. SELinux Packages
In Red Hat Enterprise Linux, the SELinux packages are installed by default, in a full installation,
unless they are manually excluded during installation. If performing a minimal installation in text
mode, the policycoreutils-python and the policycoreutils-gui package are not installed by default. Also,
by default, SELinux targeted policy is used, and SELinux runs in enforcing mode. The following is a
brief description of the SELinux packages that are installed on your system by default:
policycoreutils provides utilities such as resto reco n, seco n, setfi l es, semo d ul e,
l o ad _po l i cy, and setsebo o l , for operating and managing SELinux.
selinux-policy provides the SELinux Reference Policy. The SELinux Reference Policy is a complete
SELinux policy, and is used as a basis for other policies, such as the SELinux targeted policy;
refer to the Tresys Technology SELinux Reference Policy page for further information. This
package also provides the /usr/share/sel i nux/d evel /po l i cyg ento o l development
utility, as well as example policy files.
selinux-policy-targeted provides the SELinux targeted policy.
libselinux – provides an API for SELinux applications.
libselinux-utils provides the avcstat, g etenfo rce, g etsebo o l , matchpathco n,
sel i nuxco nl i st, sel i nuxd efco n, sel i nuxenabl ed , setenfo rce, and to g g l esebo o l
utilities.
libselinux-python provides Python bindings for developing SELinux applications.
The following is a brief description of the main optional packages, which have to be installed via the
yum i nstal l <package-name> command:
selinux-policy-mls provides the MLS SELinux policy.
setroubleshoot-server translates denial messages, produced when access is denied by SELinux,
into detailed descriptions that are viewed with the seal ert utility, also provided by this package.
setools-console – this package provides the Tresys Technology SETools distribution, a number of
tools and libraries for analyzing and querying policy, audit log monitoring and reporting, and file
context management [7] . The setools package is a meta-package for SETools. The setools-gui
package provides the apo l , seaud i t, and sed i ffx tools. The setools-console package
provides the seaud i t-repo rt, sechecker, sed i ff, sei nfo , sesearch, fi nd co n, repl co n,
and i nd exco n command-line tools. Refer to the Tresys Technology SETools page for
information about these tools.
mcstrans translates levels, such as s0 -s0 : c0 . c10 23, to an easier to read form, such as
SystemLo w-SystemHi g h. This package is not installed by default.
policycoreutils-python provides utilities such as semanag e, aud i t2al l o w, aud i t2why, and
chcat, for operating and managing SELinux.
25
Red Hat Ent erprise Linux 6 Securit y- Enhanced Linux
policycoreutils-gui provides system-co nfi g -sel i nux, a graphical tool for managing SELinux.
5.2. Which Log File is Used
In Red Hat Enterprise Linux 6, the dbus and audit packages are installed by default, unless they are
removed from the default package selection. The setroubleshoot-server must be installed via Yum (the
yum i nstal l setro ubl esho o t command).
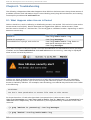
If the aud i td daemon is running, SELinux denial messages, such as the following, are written to
/var/l o g /aud i t/aud i t. l o g by default:
type=AVC msg=audit(1223024155.684:49): avc: denied { getattr } for
pid=2000 comm="httpd" path="/var/www/html/file1" dev=dm-0 ino=399185
scontext=unconfined_u:system_r:httpd_t:s0
tcontext=system_u:object_r:samba_share_t:s0 tclass=file
May 7 18:55:56 localhost setroubleshoot: SELinux is preventing httpd
(httpd_t) "getattr" to /var/www/html/file1 (samba_share_t). For complete
SELinux messages. run sealert -l de7e30d6-5488-466d-a606-92c9f40d316d
In Red Hat Enterprise Linux 6, setro ubl esho o td no longer constantly runs as a service. However,
it is still used to analyze the AVC messages. Two new programs act as a method to start
setro ubl esho o t when needed: sed i spatch and seappl et. The sed i spatch utility runs as part
of the audit subsystem, and via d bus, sends a message when an AVC denial message is returned.
These messages go straight to setro ubl esho o td if it is already running. If setro ubl esho o td is
not running, sed i spatch starts it automatically. The seappl et utility runs in the system toolbar,
waiting for dbus messages in setro ubl esho o td . It launches the notification bubble, allowing the
user to review AVC messages.
Pro ced u re 5.1. St art in g D aemo n s Au t o mat ically
To configure the aud i td and rsysl o g d daemons to automatically start at boot, run the following
commands as the Linux root user:
1.
~]# chkco nfi g --l evel s 234 5 aud i td o n
~]# chkco nfi g --l evel s 234 5 rsysl o g o n
2. Use the servi ce service-name status command to check if these services are running,
for example:
~]# servi ce aud i td status
auditd (pid 1318) is running...
3. If the above services are not running (service-name i s sto pped ), use the servi ce
service-name start command as the Linux root user to start them. For example:
~]# servi ce aud i td start
Starting auditd:
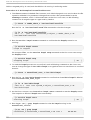
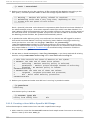
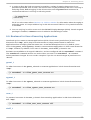
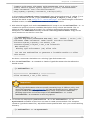
5.3. Main Configurat ion File
26
[
OK
]
Chapt er 5. Working wit h SELinux
The /etc/sel i nux/co nfi g file is the main SELinux configuration file. It controls the SELinux
mode and the SELinux policy to use:
# This file controls the state of SELinux on the system.
# SELINUX= can take one of these three values:
#
enforcing - SELinux security policy is enforced.
#
permissive - SELinux prints warnings instead of enforcing.
#
disabled - No SELinux policy is loaded.
SELINUX=enforcing
# SELINUXTYPE= can take one of these two values:
#
targeted - Targeted processes are protected,
#
mls - Multi Level Security protection.
SELINUXTYPE=targeted
SELINUX= enfo rci ng
The SELINUX option sets the mode SELinux runs in. SELinux has three modes: enforcing,
permissive, and disabled. When using enforcing mode, SELinux policy is enforced, and
SELinux denies access based on SELinux policy rules. D enial messages are logged. When
using permissive mode, SELinux policy is not enforced. SELinux does not deny access, but
denials are logged for actions that would have been denied if running SELinux in enforcing
mode. When using disabled mode, SELinux is disabled (the SELinux module is not
registered with the Linux kernel), and only D AC rules are used.
SELINUXT Y P E= targ eted
The SELINUXT Y P E option sets the SELinux policy to use. Targeted policy is the default
policy. Only change this option if you want to use the MLS policy. For information on how
to enable the MLS policy, refer to Section 5.11.2, “ Enabling MLS in SELinux” .
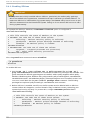
Important
When systems run with SELinux in permissive or disabled mode, users have permission to
label files incorrectly. Also, files created while SELinux is disabled are not labeled. This causes
problems when changing to enforcing mode. To prevent incorrectly labeled and unlabeled
files from causing problems, file systems are automatically relabeled when changing from
disabled mode to permissive or enforcing mode.
5.4 . Enabling and Disabling SELinux
Use the g etenfo rce or sestatus commands to check the status of SELinux. The g etenfo rce
command returns Enfo rci ng , P ermi ssi ve, or D i sabl ed .
The sestatus command returns the SELinux status and the SELinux policy being used:
~]$ sestatus
SELinux status:
SELinuxfs mount:
Current mode:
Mode from config file:
Policy version:
Policy from config file:
enabled
/selinux
enforcing
enforcing
24
targeted
27
Red Hat Ent erprise Linux 6 Securit y- Enhanced Linux
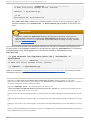
5.4 .1. Enabling SELinux
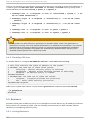
Important
If the system was initially installed without SELinux, particularly the selinux-policy package,
which was added to the system later, one additional step is necessary to enable SELinux. To
make sure SELinux is initialized during system startup, the d racut utility has to be run to put
SELinux awareness into the initramfs file system. Failing to do so causes SELinux not to start
during system startup.
On systems with SELinux disabled, the SELINUX= d i sabl ed option is configured in
/etc/sel i nux/co nfi g :
# This file controls the state of SELinux on the system.
# SELINUX= can take one of these three values:
#
enforcing - SELinux security policy is enforced.
#
permissive - SELinux prints warnings instead of enforcing.
#
disabled - No SELinux policy is loaded.
SELINUX=disabled
# SELINUXTYPE= can take one of these two values:
#
targeted - Targeted processes are protected,
#
mls - Multi Level Security protection.
SELINUXTYPE=targeted
Also, the g etenfo rce command returns D i sabl ed :
~]$ g etenfo rce
Disabled
To enable SELinux:
1. Use the rpm -q a | g rep sel i nux, rpm -q po l i cyco reuti l s, and rpm -q a |
g rep setro ubl esho o t commands to confirm that the SELinux packages are installed. This
guide assumes the following packages are installed: selinux-policy-targeted, selinux-policy,
libselinux, libselinux-python, libselinux-utils, policycoreutils, policycoreutils-python, setroubleshoot,
setroubleshoot-server, setroubleshoot-plugins. If these packages are not installed, as the Linux
root user, install them via the yum i nstal l package-name command. The following
packages are optional: policycoreutils-gui, setroubleshoot, and mcstrans.
2. Before SELinux is enabled, each file on the file system must be labeled with an SELinux
context. Before this happens, confined domains may be denied access, preventing your
system from booting correctly. To prevent this, configure SELINUX= permi ssi ve in
/etc/sel i nux/co nfi g :
# This file controls the state of SELinux on the system.
# SELINUX= can take one of these three values:
#
enforcing - SELinux security policy is enforced.
#
permissive - SELinux prints warnings instead of enforcing.
#
disabled - No SELinux policy is loaded.
SELINUX=permissive
28
Chapt er 5. Working wit h SELinux
# SELINUXTYPE= can take one of these two values:
#
targeted - Targeted processes are protected,
#
mls - Multi Level Security protection.
SELINUXTYPE=targeted
3. As the Linux root user, run the rebo o t command to restart the system. D uring the next boot,
file systems are labeled. The label process labels all files with an SELinux context:
*** Warning -- SELinux targeted policy relabel is required.
*** Relabeling could take a very long time, depending on file
*** system size and speed of hard drives.
****
Each * (asterisk) character on the bottom line represents 1000 files that have been labeled. In
the above example, four * characters represent 4000 files have been labeled. The time it takes
to label all files depends upon the number of files on the system, and the speed of the hard
disk drives. On modern systems, this process can take as little as 10 minutes.
4. In permissive mode, SELinux policy is not enforced, but denials are still logged for actions
that would have been denied if running in enforcing mode. Before changing to enforcing
mode, as the Linux root user, run the g rep "SELi nux i s preventi ng "
/var/l o g /messag es command to confirm that SELinux did not deny actions during the
last boot. If SELinux did not deny actions during the last boot, this command does not return
any output. Refer to Chapter 8, Troubleshooting for troubleshooting information if SELinux
denied access during boot.
5. If there were no denial messages in /var/l o g /messag es, configure SELINUX= enfo rci ng
in /etc/sel i nux/co nfi g :
# This file controls the state of SELinux on the system.
# SELINUX= can take one of these three values:
#
enforcing - SELinux security policy is enforced.
#
permissive - SELinux prints warnings instead of enforcing.
#
disabled - No SELinux policy is loaded.
SELINUX=enforcing
# SELINUXTYPE= can take one of these two values:
#
targeted - Targeted processes are protected,
#
mls - Multi Level Security protection.
SELINUXTYPE=targeted
6. Reboot your system. After reboot, confirm that g etenfo rce returns Enfo rci ng :
~]$ g etenfo rce
Enforcing
7. As the Linux root user, run the semanag e l o g i n -l command to view the mapping
between SELinux and Linux users. The output should be as follows:
Login Name
SELinux User
MLS/MCS Range
__default__
root
system_u
unconfined_u
unconfined_u
system_u
s0-s0:c0.c1023
s0-s0:c0.c1023
s0-s0:c0.c1023
29
Red Hat Ent erprise Linux 6 Securit y- Enhanced Linux
If this is not the case, run the following commands as the Linux root user to fix the user mappings. It
is safe to ignore the SELi nux-user username i s al read y d efi ned warnings if they occur,
where username can be unco nfi ned _u, g uest_u, or xg uest_u:
1. semanag e user -a -S targ eted -P user -R "unco nfi ned _r system_r" -r s0 s0 : c0 . c10 23 unco nfi ned _u
2. semanag e l o g i n -m -S targ eted -s "unco nfi ned _u" -r s0 -s0 : c0 . c10 23
__d efaul t__
3. semanag e l o g i n -m -S targ eted -s "unco nfi ned _u" -r s0 -s0 : c0 . c10 23
ro o t
4. semanag e user -a -S targ eted -P user -R g uest_r g uest_u
5. semanag e user -a -S targ eted -P user -R xg uest_r xg uest_u
Important
When systems run with SELinux in permissive or disabled mode, users have permission to
label files incorrectly. Also, files created while SELinux is disabled are not labeled. This causes
problems when changing to enforcing mode. To prevent incorrectly labeled and unlabeled
files from causing problems, file systems are automatically relabeled when changing from
disabled mode to permissive or enforcing mode.
5.4 .2. Disabling SELinux
To disable SELinux, configure SELINUX= d i sabl ed in /etc/sel i nux/co nfi g :
# This file controls the state of SELinux on the system.
# SELINUX= can take one of these three values:
#
enforcing - SELinux security policy is enforced.
#
permissive - SELinux prints warnings instead of enforcing.
#
disabled - No SELinux policy is loaded.
SELINUX=disabled
# SELINUXTYPE= can take one of these two values:
#
targeted - Targeted processes are protected,
#
mls - Multi Level Security protection.
SELINUXTYPE=targeted
Reboot your system. After reboot, confirm that the g etenfo rce command returns D i sabl ed :
~]$ g etenfo rce
Disabled
5.5. Booleans
Booleans allow parts of SELinux policy to be changed at runtime, without any knowledge of SELinux
policy writing. This allows changes, such as allowing services access to NFS volumes, without
reloading or recompiling SELinux policy.
5.5.1. List ing Booleans
30
Chapt er 5. Working wit h SELinux
For a list of Booleans, an explanation of what each one is, and whether they are on or off, run the
semanag e bo o l ean -l command as the Linux root user. The following example does not list all
Booleans:
~]# semanag e bo o l ean -l
SELinux boolean
ftp_home_dir
in the user home directories
xen_use_nfs
xguest_connect_network
Manager
Description
-> off
Allow ftp to read and write files
-> off
-> on
Allow xen to manage nfs files
Allow xguest to configure Network
The SELi nux bo o l ean column lists Boolean names. The D escri pti o n column lists whether the
Booleans are on or off, and what they do.
In the following example, the ftp_ho me_d i r Boolean is off, preventing the FTP daemon (vsftpd )
from reading and writing to files in user home directories:
ftp_home_dir
in the user home directories
-> off
Allow ftp to read and write files
The g etsebo o l -a command lists Booleans, whether they are on or off, but does not give a
description of each one. The following example does not list all Booleans:
~]$ g etsebo o l -a
allow_console_login --> off
allow_cvs_read_shadow --> off
allow_daemons_dump_core --> on
Run the g etsebo o l boolean-name command to only list the status of the boolean-name Boolean:
~]$ g etsebo o l al l o w_co nso l e_l o g i n
allow_console_login --> off
Use a space-separated list to list multiple Booleans:
~]$ g etsebo o l al l o w_co nso l e_l o g i n al l o w_cvs_read _shad o w
al l o w_d aemo ns_d ump_co re
allow_console_login --> off
allow_cvs_read_shadow --> off
allow_daemons_dump_core --> on
5.5.2. Configuring Booleans
Run the setsebo o l utility in the setsebo o l boolean_name o n/o ff form to enable or disable
Booleans.
The following example demonstrates configuring the httpd _can_netwo rk_co nnect_d b Boolean:
1. By default, the httpd _can_netwo rk_co nnect_d b Boolean is off, preventing Apache HTTP
Server scripts and modules from connecting to database servers:
31
Red Hat Ent erprise Linux 6 Securit y- Enhanced Linux
~]$ g etsebo o l httpd _can_netwo rk_co nnect_d b
httpd_can_network_connect_db --> off
2. To temporarily enable Apache HTTP Server scripts and modules to connect to database
servers, run the setsebo o l httpd _can_netwo rk_co nnect_d b o n command as the
Linux root user.
3. Use the g etsebo o l httpd _can_netwo rk_co nnect_d b command to verify the Boolean is
enabled:
~]$ g etsebo o l httpd _can_netwo rk_co nnect_d b
httpd_can_network_connect_db --> on
This allows Apache HTTP Server scripts and modules to connect to database servers.
4. This change is not persistent across reboots. To make changes persistent across reboots,
run the setsebo o l -P boolean-name o n command as the Linux root user: [8 ]
~]# setsebo o l -P httpd _can_netwo rk_co nnect_d b o n
5.6. SELinux Cont ext s – Labeling Files
On systems running SELinux, all processes and files are labeled in a way that represents securityrelevant information. This information is called the SELinux context. For files, this is viewed using the
l s -Z command:
~]$ l s -Z fi l e1
-rw-rw-r-- user1 group1 unconfined_u:object_r:user_home_t:s0 file1
In this example, SELinux provides a user (unco nfi ned _u), a role (o bject_r), a type
(user_ho me_t), and a level (s0 ). This information is used to make access control decisions. On
D AC systems, access is controlled based on Linux user and group ID s. SELinux policy rules are
checked after D AC rules. SELinux policy rules are not used if D AC rules deny access first.
There are multiple commands for managing the SELinux context for files, such as chco n, semanag e
fco ntext, and resto reco n.
5.6.1. T emporary Changes: chcon
The chco n command changes the SELinux context for files. However, changes made with the chco n
command do not survive a file system relabel, or the execution of the resto reco n command.
SELinux policy controls whether users are able to modify the SELinux context for any given file. When
using chco n, users provide all or part of the SELinux context to change. An incorrect file type is a
common cause of SELinux denying access.
Quick Reference
Run the chco n -t type file-name command to change the file type, where type is a type,
such as httpd _sys_co ntent_t, and file-name is a file or directory name.
Run the chco n -R -t type directory-name command to change the type of the directory
and its contents, where type is a type, such as httpd _sys_co ntent_t, and directory-name is a
directory name.
32
Chapt er 5. Working wit h SELinux
Pro ced u re 5.2. C h an g in g a File' s o r D irect o ry' s T yp e
The following procedure demonstrates changing the type, and no other attributes of the SELinux
context. The example in this section works the same for directories, for example, if fi l e1 was a
directory.
1. Run the cd command without arguments to change into your home directory.
2. Run the to uch fi l e1 command to create a new file. Use the l s -Z fi l e1 command to
view the SELinux context for fi l e1:
~]$ l s -Z fi l e1
-rw-rw-r-- user1 group1 unconfined_u:object_r:user_home_t:s0 file1
In this example, the SELinux context for fi l e1 includes the SELinux unco nfi ned _u user,
o bject_r role, user_ho me_t type, and the s0 level. For a description of each part of the
SELinux context, refer to Chapter 3, SELinux Contexts.
3. Run the chco n -t samba_share_t fi l e1 command to change the type to
samba_share_t. The -t option only changes the type. View the change with l s -Z fi l e1:
~]$ l s -Z fi l e1
-rw-rw-r-- user1 group1 unconfined_u:object_r:samba_share_t:s0
file1
4. Use the resto reco n -v fi l e1 command to restore the SELinux context for the fi l e1 file.
Use the -v option to view what changes:
~]$ resto reco n -v fi l e1
restorecon reset file1 context
unconfined_u:object_r:samba_share_t:s0>system_u:object_r:user_home_t:s0
In this example, the previous type, samba_share_t, is restored to the correct, user_ho me_t
type. When using targeted policy (the default SELinux policy in Red Hat Enterprise Linux 6),
the resto reco n command reads the files in the
/etc/sel i nux/targ eted /co ntexts/fi l es/ directory, to see which SELinux context
files should have.
Pro ced u re 5.3. C h an g in g a D irect o ry an d it s C o n t en t s T yp es
The following example demonstrates creating a new directory, and changing the directory's file type
(along with its contents) to a type used by the Apache HTTP Server. The configuration in this
example is used if you want Apache HTTP Server to use a different document root (instead of
/var/www/html /):
1. As the Linux root user, run the mkd i r /web command to create a new directory, and then the
to uch /web/fi l e{1,2,3} command to create 3 empty files (fi l e1, fi l e2, and fi l e3).
The /web/ directory and files in it are labeled with the d efaul t_t type:
~]# l s -d Z /web
drwxr-xr-x root
~]# l s -l Z /web
-rw-r--r-- root
-rw-r--r-- root
-rw-r--r-- root
root unconfined_u:object_r:default_t:s0 /web
root unconfined_u:object_r:default_t:s0 file1
root unconfined_u:object_r:default_t:s0 file2
root unconfined_u:object_r:default_t:s0 file3
33
Red Hat Ent erprise Linux 6 Securit y- Enhanced Linux
2. As the Linux root user, run the chco n -R -t httpd _sys_co ntent_t /web/ command to
change the type of the /web/ directory (and its contents) to httpd _sys_co ntent_t:
~]# chco n -R -t httpd _sys_co ntent_t /web/
~]# l s -d Z /web/
drwxr-xr-x root root unconfined_u:object_r:httpd_sys_content_t:s0
/web/
~]# l s -l Z /web/
-rw-r--r-- root root unconfined_u:object_r:httpd_sys_content_t:s0
file1
-rw-r--r-- root root unconfined_u:object_r:httpd_sys_content_t:s0
file2
-rw-r--r-- root root unconfined_u:object_r:httpd_sys_content_t:s0
file3
3. As the Linux root user, run the resto reco n -R -v /web/ command to restore the default
SELinux contexts:
~]# resto reco n -R -v /web/
restorecon reset /web context
unconfined_u:object_r:httpd_sys_content_t:s0>system_u:object_r:default_t:s0
restorecon reset /web/file2 context
unconfined_u:object_r:httpd_sys_content_t:s0>system_u:object_r:default_t:s0
restorecon reset /web/file3 context
unconfined_u:object_r:httpd_sys_content_t:s0>system_u:object_r:default_t:s0
restorecon reset /web/file1 context
unconfined_u:object_r:httpd_sys_content_t:s0>system_u:object_r:default_t:s0
Refer to the chcon(1) manual page for further information about chco n.
Note
Type Enforcement is the main permission control used in SELinux targeted policy. For the most
part, SELinux users and roles can be ignored.
5.6.2. Persist ent Changes: semanage fcont ext
The semanag e fco ntext command is used to change the SELinux context of files. When using
targeted policy, changes are written to files located in the
/etc/sel i nux/targ eted /co ntexts/fi l es/ directory:
The fi l e_co ntexts file specifies default contexts for many files, as well as contexts updated via
semanag e fco ntext.
The fi l e_co ntexts. l o cal file stores contexts to newly created files and directories not found
in fi l e_co ntexts.
34
Chapt er 5. Working wit h SELinux
Two utilities read these files. The setfi l es utility is used when a file system is relabeled and the
resto reco n utility restores the default SELinux contexts. This means that changes made by
semanag e fco ntext are persistent, even if the file system is relabeled. SELinux policy controls
whether users are able to modify the SELinux context for any given file.
Quick Reference
To make SELinux context changes that survive a file system relabel:
1. Run the semanag e fco ntext -a options file-name| directory-name command,
remembering to use the full path to the file or directory.
2. Run the resto reco n -v file-name| directory-name command to apply the context
changes.
Pro ced u re 5.4 . C h an g in g a File' s o r D irect o ry ' s T yp e
The following example demonstrates changing a file's type, and no other attributes of the SELinux
context. This example works the same for directories, for instance if fi l e1 was a directory.
1. As the Linux root user, run the to uch /etc/fi l e1 command to create a new file. By default,
newly-created files in the /etc/ directory are labeled with the etc_t type:
~]# l s -Z /etc/fi l e1
-rw-r--r-- root root unconfined_u:object_r:etc_t:s0
/etc/file1
Use the l s -d Z directory_name command to list information about a directory.
2. As the Linux root user, run the semanag e fco ntext -a -t samba_share_t
/etc/fi l e1 command to change the fi l e1 type to samba_share_t. The -a option adds a
new record, and the -t option defines a type (samba_share_t). Note that running this
command does not directly change the type; fi l e1 is still labeled with the etc_t type:
~]# semanag e fco ntext -a -t samba_share_t /etc/fi l e1
~]# l s -Z /etc/fi l e1
-rw-r--r-- root root unconfined_u:object_r:etc_t:s0
/etc/file1
The semanag e fco ntext -a -t samba_share_t /etc/fi l e1 command adds the
following entry to
/etc/sel i nux/targ eted /co ntexts/fi l es/fi l e_co ntexts. l o cal :
/etc/file1
unconfined_u:object_r:samba_share_t:s0
3. As the Linux root user, run the resto reco n -v /etc/fi l e1 command to change the type.
Because the semanag e command added an entry to fi l e. co ntexts. l o cal for
/etc/fi l e1, the resto reco n command changes the type to samba_share_t:
~]# resto reco n -v /etc/fi l e1
restorecon reset /etc/file1 context unconfined_u:object_r:etc_t:s0>system_u:object_r:samba_share_t:s0
Pro ced u re 5.5. C h an g in g a D irect o ry an d it s C o n t en t s T yp es
35
Red Hat Ent erprise Linux 6 Securit y- Enhanced Linux
The following example demonstrates creating a new directory, and changing the directory's file type
(along with its contents) to a type used by Apache HTTP Server. The configuration in this example is
used if you want Apache HTTP Server to use a different document root (instead of
/var/www/html /):
1. As the Linux root user, run the mkd i r /web command to create a new directory, and then the
to uch /web/fi l e{1,2,3} command to create 3 empty files (fi l e1, fi l e2, and fi l e3).
The /web/ directory and files in it are labeled with the d efaul t_t type:
~]# l s -d Z /web
drwxr-xr-x root
~]# l s -l Z /web
-rw-r--r-- root
-rw-r--r-- root
-rw-r--r-- root
root unconfined_u:object_r:default_t:s0 /web
root unconfined_u:object_r:default_t:s0 file1
root unconfined_u:object_r:default_t:s0 file2
root unconfined_u:object_r:default_t:s0 file3
2. As the Linux root user, run the semanag e fco ntext -a -t httpd _sys_co ntent_t
"/web(/. *)?" command to change the type of the /web/ directory and the files in it, to
httpd _sys_co ntent_t. The -a option adds a new record, and the -t option defines a type
(httpd_sys_content_t). The "/web(/. *)?" regular expression causes the semanag e
command to apply changes to the /web/ directory, as well as the files in it. Note that running
this command does not directly change the type; /web/ and files in it are still labeled with the
d efaul t_t type:
~]# l s -d Z /web
drwxr-xr-x root
~]# l s -l Z /web
-rw-r--r-- root
-rw-r--r-- root
-rw-r--r-- root
root unconfined_u:object_r:default_t:s0 /web
root unconfined_u:object_r:default_t:s0 file1
root unconfined_u:object_r:default_t:s0 file2
root unconfined_u:object_r:default_t:s0 file3
The semanag e fco ntext -a -t httpd _sys_co ntent_t "/web(/. *)?" command
adds the following entry to
/etc/sel i nux/targ eted /co ntexts/fi l es/fi l e_co ntexts. l o cal :
/web(/.*)?
system_u:object_r:httpd_sys_content_t:s0
3. As the Linux root user, run the resto reco n -R -v /web command to change the type of
the /web/ directory, as well as all files in it. The -R is for recursive, which means all files and
directories under the /web/ directory are labeled with the httpd _sys_co ntent_t type.
Since the semanag e command added an entry to fi l e. co ntexts. l o cal for
/web(/. *)?, the resto reco n command changes the types to httpd _sys_co ntent_t:
~]# resto reco n -R -v /web
restorecon reset /web context unconfined_u:object_r:default_t:s0>system_u:object_r:httpd_sys_content_t:s0
restorecon reset /web/file2 context
unconfined_u:object_r:default_t:s0>system_u:object_r:httpd_sys_content_t:s0
restorecon reset /web/file3 context
unconfined_u:object_r:default_t:s0>system_u:object_r:httpd_sys_content_t:s0
restorecon reset /web/file1 context
unconfined_u:object_r:default_t:s0>system_u:object_r:httpd_sys_content_t:s0
36
Chapt er 5. Working wit h SELinux
Note
By default, newly-created files and directories inherit the SELinux type of their parent
directories. For example, when creating a new file in the /etc/ directory that is labeled
with the etc_t type, the new file inherits the same type:
~]$ l s -d Z - /etc/
drwxr-xr-x. root root system_u:object_r:etc_t:s0
/etc
~]# to uch /etc/fi l e1
~]# l s -l Z /etc/fi l e1
-rw-r--r--. root root unconfined_u:object_r:etc_t:s0
/etc/file1
Pro ced u re 5.6 . D elet in g an ad d ed C o n t ext
The following example demonstrates adding and removing an SELinux context. If the context is part
of a regular expression, for example, /web(/. *)?, use quotation marks around the regular
expression:
~]# semanag e fco ntext -d "/web(/. *)?"
1. To remove the context, as the Linux root user, run the semanag e fco ntext -d filename| directory-name command, where file-name|directory-name is the first part in
fi l e_co ntexts. l o cal . The following is an example of a context in
fi l e_co ntexts. l o cal :
/test
system_u:object_r:httpd_sys_content_t:s0
With the first part being /test. To prevent the /test/ directory from being labeled with the
httpd _sys_co ntent_t after running resto reco n, or after a file system relabel, run the
following command as the Linux root user to delete the context from
fi l e_co ntexts. l o cal :
~]# semanag e fco ntext -d /test
2. As the Linux root user, use the resto reco n utility to restore the default SELinux context.
Refer to the semanage(8) manual page for further information about semanag e.
Important
When changing the SELinux context with semanag e fco ntext -a, use the full path to the
file or directory to avoid files being mislabeled after a file system relabel, or after the
resto reco n command is run.
5.7. T he
fi l e_t
and d efaul t_t T ypes
37
Red Hat Ent erprise Linux 6 Securit y- Enhanced Linux
5.7. T he
fi l e_t
and d efaul t_t T ypes
When using a file system that supports extended attributes (EA), the fi l e_t type is the default type
for files that have not been assigned an EA value. This type is only used for this purpose and does
not exist on correctly labeled file systems, because all files on a system running SELinux should
have a proper SELinux context, and the fi l e_t type is never used in file-context configuration [9 ] .
The d efaul t_t type is used on files that do not match any pattern in file-context configuration, so
that such files can be distinguished from files that do not have a context on disk, and generally are
kept inaccessible to confined domains. For example, if you create a new top-level directory, such as
/myd i recto ry/, this directory may be labeled with the d efaul t_t type. If services need access to
this directory, you need to update the file-context configuration for this location. See Section 5.6.2,
“ Persistent Changes: semanage fcontext” for details on adding a context to the file-context
configuration.
5.8. Mount ing File Syst ems
By default, when a file system that supports extended attributes is mounted, the security context for
each file is obtained from the security.selinux extended attribute of the file. Files in file systems that do
not support extended attributes are assigned a single, default security context from the policy
configuration, based on file system type.
Use the mo unt -o co ntext command to override existing extended attributes, or to specify a
different, default context for file systems that do not support extended attributes. This is useful if you
do not trust a file system to supply the correct attributes, for example, removable media used in
multiple systems. The mo unt -o co ntext command can also be used to support labeling for file
systems that do not support extended attributes, such as File Allocation Table (FAT) or NFS volumes.
The context specified with the co ntext is not written to disk: the original contexts are preserved, and
are seen when mounting without a co ntext option (if the file system had extended attributes in the
first place).
For further information about file system labeling, refer to James Morris's " Filesystem Labeling in
SELinux" article: http://www.linuxjournal.com/article/7426.
5.8.1. Cont ext Mount s
To mount a file system with the specified context, overriding existing contexts if they exist, or to
specify a different, default context for a file system that does not support extended attributes, as the
Linux root user, use the mo unt -o co ntext= SELinux_user:role:type:level command when
mounting the desired file system. Context changes are not written to disk. By default, NFS mounts on
the client side are labeled with a default context defined by policy for NFS volumes. In common
policies, this default context uses the nfs_t type. Without additional mount options, this may prevent
sharing NFS volumes via other services, such as the Apache HTTP Server. The following example
mounts an NFS volume so that it can be shared via the Apache HTTP Server:
~]# mo unt server: /expo rt /l o cal /mo unt/po i nt -o \
co ntext= "system_u: o bject_r: httpd _sys_co ntent_t: s0 "
Newly-created files and directories on this file system appear to have the SELinux context specified
with -o co ntext. However, since these changes are not written to disk, the context specified with
this option does not persist between mounts. Therefore, this option must be used with the same
context specified during every mount to retain the desired context. For information about making
context mount persistent, refer to the Section 5.8.5, “ Making Context Mounts Persistent” .
38
Chapt er 5. Working wit h SELinux
Type Enforcement is the main permission control used in SELinux targeted policy. For the most part,
SELinux users and roles can be ignored, so, when overriding the SELinux context with -o co ntext,
use the SELinux system_u user and o bject_r role, and concentrate on the type. If you are not
using the MLS policy or multi-category security, use the s0 level.
Note
When a file system is mounted with a co ntext option, context changes (by users and
processes) are prohibited. For example, running the chco n command on a file system
mounted with a co ntext option results in a O perati o n no t suppo rted error.
5.8.2. Changing t he Default Cont ext
As mentioned in Section 5.7, “ The fi l e_t and d efaul t_t Types” , on file systems that support
extended attributes, when a file that lacks an SELinux context on disk is accessed, it is treated as if it
had a default context as defined by SELinux policy. In common policies, this default context uses the
fi l e_t type. If it is desirable to use a different default context, mount the file system with the
d efco ntext option.
The following example mounts a newly-created file system (on /d ev/sd a2) to the newly-created
/test/ directory. It assumes that there are no rules in
/etc/sel i nux/targ eted /co ntexts/fi l es/ that define a context for the /test/ directory:
~]# mo unt /d ev/sd a2 /test/ -o
d efco ntext= "system_u: o bject_r: samba_share_t: s0 "
In this example:
the d efco ntext option defines that system_u: o bject_r: samba_share_t: s0 is " the default
security context for unlabeled files" [10 ] .
when mounted, the root directory (/test/) of the file system is treated as if it is labeled with the
context specified by d efco ntext (this label is not stored on disk). This affects the labeling for
files created under /test/: new files inherit the samba_share_t type, and these labels are stored
on disk.
files created under /test/ while the file system was mounted with a d efco ntext option retain
their labels.
5.8.3. Mount ing an NFS Volume
By default, NFS mounts on the client side are labeled with a default context defined by policy for NFS
volumes. In common policies, this default context uses the nfs_t type. D epending on policy
configuration, services, such as Apache HTTP Server and MySQL, may not be able to read files
labeled with the nfs_t type. This may prevent file systems labeled with this type from being mounted
and then read or exported by other services.
If you would like to mount an NFS volume and read or export that file system with another service,
use the co ntext option when mounting to override the nfs_t type. Use the following context option
to mount NFS volumes so that they can be shared via the Apache HTTP Server:
~]# mo unt server: /expo rt /l o cal /mo unt/po i nt -o
co ntext= "system_u: o bject_r: httpd _sys_co ntent_t: s0 "
39
Red Hat Ent erprise Linux 6 Securit y- Enhanced Linux
Since these changes are not written to disk, the context specified with this option does not persist
between mounts. Therefore, this option must be used with the same context specified during every
mount to retain the desired context. For information about making context mount persistent, refer to
the Section 5.8.5, “ Making Context Mounts Persistent” .
As an alternative to mounting file systems with co ntext options, Booleans can be enabled to allow
services access to file systems labeled with the nfs_t type. Refer to Managing Confined Services for
instructions on configuring Booleans to allow services access to the nfs_t type.
5.8.4 . Mult iple NFS Mount s
When mounting multiple mounts from the same NFS export, attempting to override the SELinux
context of each mount with a different context, results in subsequent mount commands failing. In the
following example, the NFS server has a single export, /expo rt, which has two subdirectories, web/
and d atabase/. The following commands attempt two mounts from a single NFS export, and try to
override the context for each one:
~]# mo unt server: /expo rt/web /l o cal /web -o
co ntext= "system_u: o bject_r: httpd _sys_co ntent_t: s0 "
~]# mo unt server: /expo rt/d atabase /l o cal /d atabase -o
co ntext= "system_u: o bject_r: mysq l d _d b_t: s0 "
The second mount command fails, and the following is logged to /var/l o g /messag es:
kernel: SELinux: mount invalid. Same superblock, different security
settings for (dev 0:15, type nfs)
To mount multiple mounts from a single NFS export, with each mount having a different context, use
the -o no sharecache,co ntext options. The following example mounts multiple mounts from a
single NFS export, with a different context for each mount (allowing a single service access to each
one):
~]# mo unt server: /expo rt/web /l o cal /web -o
no sharecache,co ntext= "system_u: o bject_r: httpd _sys_co ntent_t: s0 "
~]# mo unt server: /expo rt/d atabase /l o cal /d atabase -o \
no sharecache,co ntext= "system_u: o bject_r: mysq l d _d b_t: s0 "
In this example, server: /expo rt/web is mounted locally to /l o cal /web/, with all files being
labeled with the httpd _sys_co ntent_t type, allowing Apache HTTP Server access.
server: /expo rt/d atabase is mounted locally to /l o cal /d atabase, with all files being labeled
with the mysq l d _d b_t type, allowing MySQL access. These type changes are not written to disk.
Important
The no sharecache options allows you to mount the same subdirectory of an export multiple
times with different contexts (for example, mounting /expo rt/web multiple times). D o not
mount the same subdirectory from an export multiple times with different contexts, as this
creates an overlapping mount, where files are accessible under two different contexts.
5.8.5. Making Cont ext Mount s Persist ent
40
Chapt er 5. Working wit h SELinux
To make context mounts persistent across remounting and reboots, add entries for the file systems in
/etc/fstab or an automounter map, and use the desired context as a mount option. The following
example adds an entry to /etc/fstab for an NFS context mount:
server:/export /local/mount/ nfs
context="system_u:object_r:httpd_sys_content_t:s0" 0 0
5.9. Maint aining SELinux Labels
These sections describe what happens to SELinux contexts when copying, moving, and archiving
files and directories. Also, it explains how to preserve contexts when copying and archiving.
5.9.1. Copying Files and Direct ories
When a file or directory is copied, a new file or directory is created if it does not exist. That new file or
directory's context is based on default-labeling rules, not the original file or directory's context
(unless options were used to preserve the original context). For example, files created in user home
directories are labeled with the user_ho me_t type:
~]$ to uch fi l e1
~]$ l s -Z fi l e1
-rw-rw-r-- user1 group1 unconfined_u:object_r:user_home_t:s0 file1
If such a file is copied to another directory, such as /etc/, the new file is created in accordance to
default-labeling rules for the /etc/ directory. Copying a file (without additional options) may not
preserve the original context:
~]$ l s -Z fi l e1
-rw-rw-r-- user1 group1 unconfined_u:object_r:user_home_t:s0 file1
~]# cp fi l e1 /etc/
~]$ l s -Z /etc/fi l e1
-rw-r--r-- root root unconfined_u:object_r:etc_t:s0
/etc/file1
When fi l e1 is copied to /etc/, if /etc/fi l e1 does not exist, /etc/fi l e1 is created as a new
file. As shown in the example above, /etc/fi l e1 is labeled with the etc_t type, in accordance to
default-labeling rules.
When a file is copied over an existing file, the existing file's context is preserved, unless the user
specified cp options to preserve the context of the original file, such as --preserve= co ntext.
SELinux policy may prevent contexts from being preserved during copies.
Copying Wit hout Preserving SELinux Cont ext s
When copying a file with the cp command, if no options are given, the type is inherited from the
targeted, parent directory:
~]$ to uch fi l e1
~]$ l s -Z fi l e1
-rw-rw-r-- user1 group1 unconfined_u:object_r:user_home_t:s0 file1
~]$ l s -d Z /var/www/html /
drwxr-xr-x root root system_u:object_r:httpd_sys_content_t:s0
/var/www/html/
41
Red Hat Ent erprise Linux 6 Securit y- Enhanced Linux
~]# cp fi l e1 /var/www/html /
~]$ l s -Z /var/www/html /fi l e1
-rw-r--r-- root root unconfined_u:object_r:httpd_sys_content_t:s0
/var/www/html/file1
In this example, fi l e1 is created in a user's home directory, and is labeled with the user_ho me_t
type. The /var/www/html / directory is labeled with the httpd _sys_co ntent_t type, as shown
with the l s -d Z /var/www/html / command. When fi l e1 is copied to /var/www/html /, it
inherits the httpd _sys_co ntent_t type, as shown with the l s -Z /var/www/html /fi l e1
command.
Preserving SELinux Cont ext s When Copying
Use the cp --preserve= co ntext command to preserve contexts when copying:
~]$ to uch fi l e1
~]$ l s -Z fi l e1
-rw-rw-r-- user1 group1 unconfined_u:object_r:user_home_t:s0 file1
~]$ l s -d Z /var/www/html /
drwxr-xr-x root root system_u:object_r:httpd_sys_content_t:s0
/var/www/html/
~]# cp --preserve= co ntext fi l e1 /var/www/html /
~]$ l s -Z /var/www/html /fi l e1
-rw-r--r-- root root unconfined_u:object_r:user_home_t:s0
/var/www/html/file1
In this example, fi l e1 is created in a user's home directory, and is labeled with the user_ho me_t
type. The /var/www/html / directory is labeled with the httpd _sys_co ntent_t type, as shown
with the l s -d Z /var/www/html / command. Using the --preserve= co ntext option preserves
SELinux contexts during copy operations. As shown with the l s -Z /var/www/html /fi l e1
command, the fi l e1 user_ho me_t type was preserved when the file was copied to
/var/www/html /.
Copying and Changing t he Cont ext
Use the cp -Z command to change the destination copy's context. The following example was
performed in the user's home directory:
~]$ to uch fi l e1
~]$ cp -Z system_u: o bject_r: samba_share_t: s0 fi l e1 fi l e2
~]$ l s -Z fi l e1 fi l e2
-rw-rw-r-- user1 group1 unconfined_u:object_r:user_home_t:s0 file1
-rw-rw-r-- user1 group1 system_u:object_r:samba_share_t:s0 file2
~]$ rm fi l e1 fi l e2
In this example, the context is defined with the -Z option. Without the -Z option, fi l e2 would be
labeled with the unco nfi ned _u: o bject_r: user_ho me_t context.
Copying a File Over an Exist ing File
When a file is copied over an existing file, the existing file's context is preserved (unless an option is
used to preserve contexts). For example:
~]# to uch /etc/fi l e1
42
Chapt er 5. Working wit h SELinux
~]# l s -Z /etc/fi l e1
-rw-r--r-- root root unconfined_u:object_r:etc_t:s0
/etc/file1
~]# to uch /tmp/fi l e2
~]# l s -Z /tmp/fi l e2
-rw-r--r-- root root unconfined_u:object_r:user_tmp_t:s0 /tmp/file2
~]# cp /tmp/fi l e2 /etc/fi l e1
~]# l s -Z /etc/fi l e1
-rw-r--r-- root root unconfined_u:object_r:etc_t:s0
/etc/file1
In this example, two files are created: /etc/fi l e1, labeled with the etc_t type, and /tmp/fi l e2,
labeled with the user_tmp_t type. The cp /tmp/fi l e2 /etc/fi l e1 command overwrites fi l e1
with fi l e2. After copying, the l s -Z /etc/fi l e1 command shows fi l e1 labeled with the etc_t
type, not the user_tmp_t type from /tmp/fi l e2 that replaced /etc/fi l e1.
Important
Copy files and directories, rather than moving them. This helps ensure they are labeled with
the correct SELinux contexts. Incorrect SELinux contexts can prevent processes from
accessing such files and directories.
5.9.2. Moving Files and Direct ories
Files and directories keep their current SELinux context when they are moved. In many cases, this is
incorrect for the location they are being moved to. The following example demonstrates moving a file
from a user's home directory to /var/www/html /, which is used by the Apache HTTP Server. Since
the file is moved, it does not inherit the correct SELinux context:
1. Run the cd command without any arguments to change into your home directory. Once in
your home directory, run the to uch fi l e1 command to create a file. This file is labeled with
the user_ho me_t type:
~]$ l s -Z fi l e1
-rw-rw-r-- user1 group1 unconfined_u:object_r:user_home_t:s0 file1
2. Run the l s -d Z /var/www/html / command to view the SELinux context of the
/var/www/html / directory:
~]$ l s -d Z /var/www/html /
drwxr-xr-x root root system_u:object_r:httpd_sys_content_t:s0
/var/www/html/
By default, the /var/www/html / directory is labeled with the httpd _sys_co ntent_t type.
Files and directories created under the /var/www/html / directory inherit this type, and as
such, they are labeled with this type.
3. As the Linux root user, run the mv fi l e1 /var/www/html / command to move fi l e1 to
the /var/www/html / directory. Since this file is moved, it keeps its current user_ho me_t
type:
~]# mv fi l e1 /var/www/html /
~]# l s -Z /var/www/html /fi l e1
-rw-rw-r-- user1 group1 unconfined_u:object_r:user_home_t:s0
/var/www/html/file1
43
Red Hat Ent erprise Linux 6 Securit y- Enhanced Linux
By default, the Apache HTTP Server cannot read files that are labeled with the user_ho me_t type. If
all files comprising a web page are labeled with the user_ho me_t type, or another type that the
Apache HTTP Server cannot read, permission is denied when attempting to access them via web
browsers, such as Firefox.
Important
Moving files and directories with the mv command may result in the incorrect SELinux context,
preventing processes, such as the Apache HTTP Server and Samba, from accessing such
files and directories.
5.9.3. Checking t he Default SELinux Cont ext
Use the matchpathco n command to check if files and directories have the correct SELinux context.
From the matchpathcon(8) manual page: " matchpathco n queries the system policy and outputs the
default security context associated with the file path." [11] . The following example demonstrates
using the matchpathco n command to verify that files in /var/www/html / directory are labeled
correctly:
1. As the Linux root user, run the to uch /var/www/html /fi l e{1,2,3} command to create
three files (fi l e1, fi l e2, and fi l e3). These files inherit the httpd _sys_co ntent_t type
from the /var/www/html / directory:
~]# to uch /var/www/html /fi l e{1,2,3}
~]# l s -Z /var/www/html /
-rw-r--r-- root root unconfined_u:object_r:httpd_sys_content_t:s0
file1
-rw-r--r-- root root unconfined_u:object_r:httpd_sys_content_t:s0
file2
-rw-r--r-- root root unconfined_u:object_r:httpd_sys_content_t:s0
file3
2. As the Linux root user, run the chco n -t samba_share_t /var/www/html /fi l e1
command to change the fi l e1 type to samba_share_t. Note that the Apache HTTP Server
cannot read files or directories labeled with the samba_share_t type.
3. The matchpathco n -V option compares the current SELinux context to the correct, default
context in SELinux policy. Run the matchpathco n -V /var/www/html /* command to
check all files in the /var/www/html / directory:
~]$ matchpathco n -V /var/www/html /*
/var/www/html/file1 has context
unconfined_u:object_r:samba_share_t:s0, should be
system_u:object_r:httpd_sys_content_t:s0
/var/www/html/file2 verified.
/var/www/html/file3 verified.
The following output from the matchpathco n command explains that fi l e1 is labeled with the
samba_share_t type, but should be labeled with the httpd _sys_co ntent_t type:
44
Chapt er 5. Working wit h SELinux
/var/www/html/file1 has context unconfined_u:object_r:samba_share_t:s0,
should be system_u:object_r:httpd_sys_content_t:s0
To resolve the label problem and allow the Apache HTTP Server access to fi l e1, as the Linux root
user, run the resto reco n -v /var/www/html /fi l e1 command:
~]# resto reco n -v /var/www/html /fi l e1
restorecon reset /var/www/html/file1 context
unconfined_u:object_r:samba_share_t:s0>system_u:object_r:httpd_sys_content_t:s0
5.9.4 . Archiving Files wit h t ar
The tar utility does not retain extended attributes by default. Since SELinux contexts are stored in
extended attributes, contexts can be lost when archiving files. Use the tar --sel i nux command to
create archives that retain contexts. If a tar archive contains files without extended attributes, or if you
want the extended attributes to match the system defaults, run the archive through the resto reco n
command:
~]$ tar -xvf archive.tar | resto reco n -f Note that depending on the directory, you may need to be the Linux root user to run the resto reco n
command.
The following example demonstrates creating a tar archive that retains SELinux contexts:
1. As the Linux root user, run the to uch /var/www/html /fi l e{1,2,3} command to create
three files (fi l e1, fi l e2, and fi l e3). These files inherit the httpd _sys_co ntent_t type
from the /var/www/html / directory:
~]# to uch /var/www/html /fi l e{1,2,3}
~]# l s -Z /var/www/html /
-rw-r--r-- root root unconfined_u:object_r:httpd_sys_content_t:s0
file1
-rw-r--r-- root root unconfined_u:object_r:httpd_sys_content_t:s0
file2
-rw-r--r-- root root unconfined_u:object_r:httpd_sys_content_t:s0
file3
2. Run the cd /var/www/html / command to change into the /var/www/html / directory.
Once in this directory, as the Linux root user, run the tar --sel i nux -cf test. tar
fi l e{1,2,3} command to create a tar archive named test. tar.
3. As the Linux root user, run the mkd i r /test command to create a new directory, and then,
run the chmo d 777 /test/ command to allow all users full-access to the /test/ directory.
4. Run the cp /var/www/html /test. tar /test/ command to copy the test. tar file in to
the /test/ directory.
5. Run the cd /test/ command to change into the /test/ directory. Once in this directory,
run the tar -xvf test. tar command to extract the tar archive.
6. Run the l s -l Z /test/ command to view the SELinux contexts. The
httpd _sys_co ntent_t type has been retained, rather than being changed to d efaul t_t,
which would have happened had the --sel i nux not been used:
45
Red Hat Ent erprise Linux 6 Securit y- Enhanced Linux
~]$ l s -l Z /test/
-rw-r--r-- user1 group1
unconfined_u:object_r:httpd_sys_content_t:s0 file1
-rw-r--r-- user1 group1
unconfined_u:object_r:httpd_sys_content_t:s0 file2
-rw-r--r-- user1 group1
unconfined_u:object_r:httpd_sys_content_t:s0 file3
-rw-r--r-- user1 group1 unconfined_u:object_r:default_t:s0
test.tar
7. If the /test/ directory is no longer required, as the Linux root user, run the rm -ri /test/
command to remove it, as well as all files in it.
Refer to the tar(1) manual page for further information about tar, such as the --xattrs option that
retains all extended attributes.
5.9.5. Archiving Files wit h st ar
The star utility does not retain extended attributes by default. Since SELinux contexts are stored in
extended attributes, contexts can be lost when archiving files. Use the star -xattr -H= exustar
command to create archives that retain contexts. The star package is not installed by default. To
install star, run the yum i nstal l star command as the Linux root user.
The following example demonstrates creating a Star archive that retains SELinux contexts:
1. As the Linux root user, run the to uch /var/www/html /fi l e{1,2,3} command to create
three files (fi l e1, fi l e2, and fi l e3). These files inherit the httpd _sys_co ntent_t type
from the /var/www/html / directory:
~]# to uch /var/www/html /fi l e{1,2,3}
~]# l s -Z /var/www/html /
-rw-r--r-- root root unconfined_u:object_r:httpd_sys_content_t:s0
file1
-rw-r--r-- root root unconfined_u:object_r:httpd_sys_content_t:s0
file2
-rw-r--r-- root root unconfined_u:object_r:httpd_sys_content_t:s0
file3
2. Run the cd /var/www/html / command to change into the /var/www/html / directory.
Once in this directory, as the Linux root user, run the star -xattr -H= exustar -c f= test. star fi l e{1,2,3} command to create a Star archive named test. star:
~]# star -xattr -H= exustar -c -f= test. star fi l e{1,2,3}
star: 1 blocks + 0 bytes (total of 10240 bytes = 10.00k).
3. As the Linux root user, run the mkd i r /test command to create a new directory, and then,
run the chmo d 777 /test/ command to allow all users full-access to the /test/ directory.
4. Run the cp /var/www/html /test. star /test/ command to copy the test. star file in
to the /test/ directory.
5. Run the cd /test/ command to change into the /test/ directory. Once in this directory,
run the star -x -f= test. star command to extract the Star archive:
46
Chapt er 5. Working wit h SELinux
~]$ star -x -f= test. star
star: 1 blocks + 0 bytes (total of 10240 bytes = 10.00k).
6. Run the l s -l Z /test/ command to view the SELinux contexts. The
httpd _sys_co ntent_t type has been retained, rather than being changed to d efaul t_t,
which would have happened had the -xattr -H= exustar option not been used:
~]$ l s -l Z /test/
-rw-r--r-- user1 group1
unconfined_u:object_r:httpd_sys_content_t:s0 file1
-rw-r--r-- user1 group1
unconfined_u:object_r:httpd_sys_content_t:s0 file2
-rw-r--r-- user1 group1
unconfined_u:object_r:httpd_sys_content_t:s0 file3
-rw-r--r-- user1 group1 unconfined_u:object_r:default_t:s0
test.star
7. If the /test/ directory is no longer required, as the Linux root user, run the rm -ri /test/
command to remove it, as well as all files in it.
8. If star is no longer required, as the Linux root user, run the yum remo ve star command to
remove the package.
Refer to the star(1) manual page for further information about star.
5.10. Informat ion Gat hering T ools
The utilities listed bellow are command-line tools that provide well-formatted information, such as
access vector cache statistics or the number of classes, types, or Booleans.
avcst at
This command provides a short output of the access vector cache statistics since boot. You can
watch the statistics in real time by specifying a time interval in seconds. This provides updated
statistics since the initial output. The statistics file used is /sel i nux/avc/cache_stats, and you
can specify a different cache file with the -f /path/to /fi l e option.
~]# avcstat
lookups
47517410
hits
47504630
misses
12780
allocs
12780
reclaims
12176
frees
12275
seinfo
This utility is useful in describing the break-down of a policy, such as the number of classes, types,
Booleans, allow rules, and others. sei nfo is a command-line utility that uses a policy.conf file (a
single text file containing policy source for versions 12 through 21), a binary policy file, a modular
list of policy packages, or a policy list file as input. You must have the setools-console package
installed to use the sein f o utility.
The output of sei nfo will vary between binary and source files. For example, the policy source file
uses the { } brackets to group multiple rule elements onto a single line. A similar effect happens with
attributes, where a single attribute expands into one or many types. Because these are expanded
and no longer relevant in the binary policy file, they have a return value of zero in the search results.
47
Red Hat Ent erprise Linux 6 Securit y- Enhanced Linux
However, the number of rules greatly increases as each formerly one line rule using brackets is now a
number of individual lines.
Some items are not present in the binary policy. For example, neverallow rules are only checked
during policy compile, not during runtime, and initial SID s are not part of the binary policy since they
are required prior to the policy being loaded by the kernel during boot.
~]# sei nfo
Statistics for policy file: /etc/selinux/targeted/policy/policy.24
Policy Version & Type: v.24 (binary, mls)
Classes:
Sensitivities:
Types:
Users:
Booleans:
Allow:
Auditallow:
Type_trans:
Type_member:
Role_trans:
Constraints:
Initial SIDs:
Genfscon:
Netifcon:
Permissives:
77
1
3001
9
158
262796
44
10760
44
237
62
27
82
0
22
Permissions:
Categories:
Attributes:
Roles:
Cond. Expr.:
Neverallow:
Dontaudit:
Type_change:
Role allow:
Range_trans:
Validatetrans:
Fs_use:
Portcon:
Nodecon:
Polcap:
229
1024
244
13
193
0
156710
38
20
2546
0
22
373
0
2
The sei nfo command can also list the number of types with the domain attribute, giving an estimate
of the number of different confined processes:
~]# sei nfo -ad o mai n -x | wc -l
550
Not all domain types are confined. To look at the number of unconfined domains, use the
unconfined_domain attribute:
~]# sei nfo -aunco nfi ned _d o mai n_type -x | wc -l
52
Permissive domains can be counted with the --permi ssi ve option.
~]# sei nfo --permi ssi ve -x | wc -l
31
Remove the | wc -l option in the above commands to see the full lists.
sesearch
You can use the sesearch command to search for a particular type in the policy. You can search
either policy source files or the binary file. For example:
~]$ sesearch --ro l e_al l o w -t httpd _sys_co ntent_t
/etc/sel i nux/targ eted /po l i cy/po l i cy. 24
48
Chapt er 5. Working wit h SELinux
Found 20
allow
allow
allow
allow
allow
allow
allow
allow
allow
allow
allow
allow
allow
allow
allow
allow
allow
allow
allow
allow
role allow rules:
system_r sysadm_r;
sysadm_r system_r;
sysadm_r staff_r;
sysadm_r user_r;
system_r git_shell_r;
system_r guest_r;
logadm_r system_r;
system_r logadm_r;
system_r nx_server_r;
system_r staff_r;
staff_r logadm_r;
staff_r sysadm_r;
staff_r unconfined_r;
staff_r webadm_r;
unconfined_r system_r;
system_r unconfined_r;
system_r user_r;
webadm_r system_r;
system_r webadm_r;
system_r xguest_r;
The sesearch command can provide the number of allow rules:
~]# sesearch --al l o w | wc -l
262798
And the number of dontaudit rules:
~]# sesearch --d o ntaud i t | wc -l
156712
5.11. Mult i-Level Securit y (MLS)
The Multi-Level Security technology refers to a security scheme that enforces the Bell-La Padula
Mandatory Access Model. Under MLS, users and processes are called subjects, and files, devices,
and other passive components of the system are called objects. Both subjects and objects are
labeled with a security level, which entails a subject's clearance or an object's classification. Each
security level is composed of a sensitivity and a category, for example, an internal release schedule is
filed under the internal documents category with a confidential sensitivity.
Figure 5.1, “ Levels of clearance” shows levels of clearance as originally designed by the US defense
community. Relating to our internal schedule example above, only users that have gained the
confidential clearance are allowed to view documents in the confidential category. However, users
who only have the confidential clearance are not allowed to view documents that require higher
levels or clearance; they are allowed read access only to documents with lower levels of clearance,
and write access to documents with higher levels of clearance.
49
Red Hat Ent erprise Linux 6 Securit y- Enhanced Linux
Fig u re 5.1. Levels o f clearan ce
Figure 5.2, “ Allowed data flows using MLS” shows all allowed data flows between a subject running
under the " Secret" security level and various objects with different security levels. In simple terms, the
Bell-LaPadula model enforces two properties: no read up and no write down.
50
Chapt er 5. Working wit h SELinux
Fig u re 5.2. Allo wed d at a f lo ws u sin g MLS
5.11.1. MLS and Syst em Privileges
MLS access rules are always combined with conventional access permissions (file permissions). For
example, if a user with a security level of " Secret" uses D iscretionary Access Control (D AC) to block
access to a file by other users, this also blocks access by users with a security level of " Top Secret" .
It is important to remember that SELinux MLS policy rules are checked after D AC rules. A higher
security clearance does not automatically give permission to arbitrarily browse a file system.
Users with top-level clearances do not automatically acquire administrative rights on multi-level
systems. While they may have access to all information on the computer, this is different from having
administrative rights.
5.11.2. Enabling MLS in SELinux
Note
It is not recommended to use the MLS policy on a system that is running the X Window System.
Follow these steps to enable the SELinux MLS policy on your system.
1. Install the selinux-policy-mls package:
~]# yum i nstal l sel i nux-po l i cy-ml s
2. Before the MLS policy is enabled, each file on the file system must be relabeled with an MLS
label. When the file system is relabeled, confined domains may be denied access, which may
prevent your system from booting correctly. To prevent this from happening, configure
SELINUX= permi ssi ve in the /etc/sel i nux/co nfi g file. Also, enable the MLS policy by
configuring SELINUXT Y P E= ml s. Your configuration file should look like this:
# This file controls the state of SELinux on the system.
# SELINUX= can take one of these three values:
#
enforcing - SELinux security policy is enforced.
#
permissive - SELinux prints warnings instead of enforcing.
#
disabled - No SELinux policy is loaded.
SELINUX=permissive
# SELINUXTYPE= can take one of these two values:
#
targeted - Targeted processes are protected,
#
mls - Multi Level Security protection.
SELINUXTYPE=mls
3. Make sure SELinux is running in the permissive mode:
~]# setenfo rce 0
~]# g etenfo rce
Permissive
4. Create the . auto rel abel file in root's home directory to ensure that files are relabeled upon
next reboot:
51
Red Hat Ent erprise Linux 6 Securit y- Enhanced Linux
~]# to uch /. auto rel abel
5. Reboot your system. D uring the next boot, all file systems will be relabeled according to the
MLS policy. The label process labels all files with an appropriate SELinux context:
*** Warning -- SELinux mls policy relabel is required.
*** Relabeling could take a very long time, depending on file
*** system size and speed of hard drives.
***********
Each * (asterisk) character on the bottom line represents 1000 files that have been labeled. In
the above example, eleven * characters represent 11000 files which have been labeled. The
time it takes to label all files depends upon the number of files on the system, and the speed of
the hard disk drives. On modern systems, this process can take as little as 10 minutes. Once
the labeling process finishes, the system will automatically reboot.
6. In permissive mode, SELinux policy is not enforced, but denials are still logged for actions
that would have been denied if running in enforcing mode. Before changing to enforcing
mode, as the Linux root user, run the g rep "SELi nux i s preventi ng "
/var/l o g /messag es command to confirm that SELinux did not deny actions during the
last boot. If SELinux did not deny actions during the last boot, this command does not return
any output. Refer to Chapter 8, Troubleshooting for troubleshooting information if SELinux
denied access during boot.
7. If there were no denial messages in /var/l o g /messag es, or you have resolved all existing
denials, configure SELINUX= enfo rci ng in the /etc/sel i nux/co nfi g file:
# This file controls the state of SELinux on the system.
# SELINUX= can take one of these three values:
#
enforcing - SELinux security policy is enforced.
#
permissive - SELinux prints warnings instead of enforcing.
#
disabled - No SELinux policy is loaded.
SELINUX=enforcing
# SELINUXTYPE= can take one of these two values:
#
targeted - Targeted processes are protected,
#
mls - Multi Level Security protection.
SELINUXTYPE=mls
8. Reboot your system and make sure SELinux is running in permissive mode:
~]$ g etenfo rce
Enforcing
and the MLS policy is enabled:
~]# sestatus | g rep ml s
Policy from config file:
mls
5.11.3. Creat ing a User Wit h a Specific MLS Range
Follow these steps to create a new Linux user with a specific MLS range:
1. Add a new Linux user via the userad d command and map the new Linux user to an existing
SELinux user (in this case, user_u):
52
Chapt er 5. Working wit h SELinux
~]# userad d -Z user_u jo hn
2. Assign the newly-created Linux user a password:
~]# passwd jo hn
3. Run the semanag e l o g i n -l command to view the mapping between SELinux and Linux
users. The output should be as follows:
Login Name
SELinux User
MLS/MCS Range
__default__
john
root
system_u
user_u
user_u
root
system_u
s0
s0
s0-s15:c0.c1023
s0-s15:c0.c1023
4. D efine a specific range for user jo hn:
~]# semanag e l o g i n --mo d i fy --seuser user_u --rang e s2: c10 0 jo hn
5. Run the semanag e l o g i n -l command to view the mapping between SELinux and Linux
users. Note that the user jo hn now has a specific MLS range defined:
Login Name
SELinux User
MLS/MCS Range
__default__
john
root
system_u
user_u
user_u
root
system_u
s0
s2:c100
s0-s15:c0.c1023
s0-s15:c0.c1023
6. To correct the label on john's home directory (if needed), run the following command:
~]# chco n -R -l s2: c10 0 /ho me/jo hn
5.11.4 . Set t ing Up Polyinst ant iat ed Direct ories
The /tmp/ and /var/tmp/ directories are normally used for temporary storage by all programs,
services, and users. Such setup, however, makes these directories vulnerable to race condition
attacks, or an information leak based on file names. SELinux offers a solution in the form of
polyinstantiated directories. This effectively means that both /tmp/ and /var/tmp/ are instantiated,
making them appear private for each user. When instantiation of directories is enabled, each user's
/tmp/ and /var/tmp/ directory is automatically mounted under /tmp-i nst and /var/tmp/tmpi nst.
Follow these steps to enable polyinstantiation of directories:
1. Uncomment the last three lines in the /etc/securi ty/namespace. co nf file to enable
instantiation of the /tmp/, /var/tmp/, and users' home directories:
~]$ tai l
/tmp
/var/tmp
$HOME
-n 3 /etc/securi ty/namespace. co nf
/tmp-inst/
level
root,adm
/var/tmp/tmp-inst/
level
root,adm
$HOME/$USER.inst/
level
53
Red Hat Ent erprise Linux 6 Securit y- Enhanced Linux
2. Ensure that in the /etc/pam. d /l o g i n file, the pam_namespace. so module is configured
for session:
~]$ g rep namespace /etc/pam. d /l o g i n
session
required
pam_namespace.so
3. Reboot your system.
[7] Brind le, Jo s hua. " Re: b lurb fo r fed o ra s eto o ls p ac kag es " Email to Murray Mc Allis ter. 1 No vemb er
20 0 8 . Any ed its o r c hang es in this vers io n were d o ne b y Murray Mc Allis ter.
[8 ] To temp o rarily revert to the d efault b ehavio r, as the Linux ro o t us er, run the setsebo o l
httpd _can_netwo rk_co nnect_d b o ff c o mmand . Fo r c hang es that p ers is t ac ro s s reb o o ts , run
the setsebo o l -P httpd _can_netwo rk_co nnect_d b o ff c o mmand .
[9 ] Files in the /etc/sel i nux/targ eted /co ntexts/fi l es/ d irec to ry d efine c o ntexts fo r files
and d irec to ries . Files in this d irec to ry are read b y the resto reco n and setfi l es utilities to res to re
files and d irec to ries to their d efault c o ntexts .
[10 ] Mo rris , James . " Files ys tem Lab eling in SELinux" . Pub lis hed 1 O c to b er 20 0 4. Ac c es s ed 14 O c to b er
20 0 8 : http ://www.linuxjo urnal.c o m/artic le/7426 .
[11] The matc hp athc o n(8 ) manual p ag e, as s hip p ed with the libselinux-utils p ac kag e in Red Hat Enterp ris e
Linux, is written b y Daniel Wals h. Any ed its o r c hang es in this vers io n were d o ne b y Murray Mc Allis ter.
54
Chapt er 6 . Confining Users
Chapter 6. Confining Users
A number of confined SELinux users are available in Red Hat Enterprise Linux 6. Each Linux user is
mapped to an SELinux user via SELinux policy, allowing Linux users to inherit the restrictions placed
on SELinux users, for example (depending on the user), not being able to: run the X Window System;
use networking; run setuid applications (unless SELinux policy permits it); or run the su and sud o
commands. This helps protect the system from the user. Refer to Section 4.3, “ Confined and
Unconfined Users” for further information about confined users.
6.1. Linux and SELinux User Mappings
As the Linux root user, run the semanag e l o g i n -l command to view the mapping between Linux
users and SELinux users:
~]# semanag e l o g i n -l
Login Name
SELinux User
MLS/MCS Range
__default__
root
system_u
unconfined_u
unconfined_u
system_u
s0-s0:c0.c1023
s0-s0:c0.c1023
s0-s0:c0.c1023
In Red Hat Enterprise Linux 6, Linux users are mapped to the SELinux __d efaul t__ login by default
(which is in turn mapped to the SELinux unco nfi ned _u user). When a Linux user is created with the
userad d command, if no options are specified, they are mapped to the SELinux unco nfi ned _u
user. The following defines the default-mapping:
__default__
unconfined_u
s0-s0:c0.c1023
6.2. Confining New Linux Users: useradd
Linux users mapped to the SELinux unco nfi ned _u user run in the unco nfi ned _t domain. This is
seen by running the i d -Z command while logged-in as a Linux user mapped to unco nfi ned _u:
~]$ i d -Z
unconfined_u:unconfined_r:unconfined_t:s0-s0:c0.c1023
When Linux users run in the unco nfi ned _t domain, SELinux policy rules are applied, but policy
rules exist that allow Linux users running in the unco nfi ned _t domain almost all access. If
unconfined Linux users execute an application that SELinux policy defines can transition from the
unco nfi ned _t domain to its own confined domain, unconfined Linux users are still subject to the
restrictions of that confined domain. The security benefit of this is that, even though a Linux user is
running unconfined, the application remains confined, and therefore, the exploitation of a flaw in the
application can be limited by policy.
Note
This does not protect the system from the user. Instead, the user and the system are being
protected from possible damage caused by a flaw in the application.
55
Red Hat Ent erprise Linux 6 Securit y- Enhanced Linux
When creating Linux users with the userad d command, use the -Z option to specify which SELinux
user they are mapped to. The following example creates a new Linux user, useruuser, and maps
that user to the SELinux user_u user. Linux users mapped to the SELinux user_u user run in the
user_t domain. In this domain, Linux users are unable to run setuid applications unless SELinux
policy permits it (such as passwd ), and cannot run the su or sud o command, preventing them from
becoming the Linux root user with these commands.
1. As the Linux root user, run the userad d -Z user_u useruuser command to create a new
Linux user (useruuser) that is mapped to the SELinux user_u user.
2. As the Linux root user, run the semanag e l o g i n -l command to view the mapping
between the Linux useruuser user and user_u:
~]# semanag e l o g i n -l
Login Name
SELinux User
MLS/MCS Range
__default__
root
system_u
useruuser
unconfined_u
unconfined_u
system_u
user_u
s0-s0:c0.c1023
s0-s0:c0.c1023
s0-s0:c0.c1023
s0
3. As the Linux root user, run the passwd useruuser command to assign a password to the
Linux useruuser user:
~]# passwd useruuser
Changing password for user useruuser.
New UNIX password: Enter a password
Retype new UNIX password: Enter the same password again
passwd: all authentication tokens updated successfully.
4. Log out of your current session, and log in as the Linux useruuser user. When you log in,
pam_selinux maps the Linux user to an SELinux user (in this case, user_u), and sets up the
resulting SELinux context. The Linux user's shell is then launched with this context. Run the
i d -Z command to view the context of a Linux user:
~]$ i d -Z
user_u:user_r:user_t:s0
5. Log out of the Linux useruuser's session, and log back in with your account. If you do not
want the Linux useruuser user, run the userd el -r useruuser command as the Linux
root user to remove it, along with its home directory.
6.3. Confining Exist ing Linux Users: semanage login
If a Linux user is mapped to the SELinux unco nfi ned _u user (the default behavior), and you would
like to change which SELinux user they are mapped to, use the semanag e l o g i n command. The
following example creates a new Linux user named newuser, then maps that Linux user to the
SELinux user_u user:
1. As the Linux root user, run the userad d newuser command to create a new Linux user
(newuser). Since this user uses the default mapping, it does not appear in the semanag e
l o g i n -l output:
56
Chapt er 6 . Confining Users
~]# userad d newuser
~]# semanag e l o g i n -l
Login Name
SELinux User
MLS/MCS Range
__default__
root
system_u
unconfined_u
unconfined_u
system_u
s0-s0:c0.c1023
s0-s0:c0.c1023
s0-s0:c0.c1023
2. To map the Linux newuser user to the SELinux user_u user, run the following command as
the Linux root user:
~]# semanag e l o g i n -a -s user_u newuser
The -a option adds a new record, and the -s option specifies the SELinux user to map a
Linux user to. The last argument, newuser, is the Linux user you want mapped to the
specified SELinux user.
3. To view the mapping between the Linux newuser user and user_u, run the semanag e
l o g i n -l command as the Linux root user:
~]# semanag e l o g i n -l
Login Name
SELinux User
MLS/MCS Range
__default__
newuser
root
system_u
unconfined_u
user_u
unconfined_u
system_u
s0-s0:c0.c1023
s0
s0-s0:c0.c1023
s0-s0:c0.c1023
4. As the Linux root user, run the passwd newuser command to assign a password to the
Linux newuser user:
~]# passwd newuser
Changing password for user newuser.
New password: Enter a password
Retype new password: Enter the same password again
passwd: all authentication tokens updated successfully.
5. Log out of your current session, and log in as the Linux newuser user. Run the i d -Z
command to view the newuser's SELinux context:
~]$ i d -Z
user_u:user_r:user_t:s0
6. Log out of the Linux newuser's session, and log back in with your account. If you do not
want the Linux newuser user, run the userd el -r newuser command as the Linux root
user to remove it, along with its home directory. Run the semanag e l o g i n -d newuser
command to remove the mapping between the Linux newuser user and user_u:
~]# userd el -r newuser
~]# semanag e l o g i n -d newuser
~]# semanag e l o g i n -l
57
Red Hat Ent erprise Linux 6 Securit y- Enhanced Linux
Login Name
SELinux User
MLS/MCS Range
__default__
root
system_u
unconfined_u
unconfined_u
system_u
s0-s0:c0.c1023
s0-s0:c0.c1023
s0-s0:c0.c1023
6.4 . Changing t he Default Mapping
In Red Hat Enterprise Linux 6, Linux users are mapped to the SELinux __d efaul t__ login by default
(which is in turn mapped to the SELinux unco nfi ned _u user). If you would like new Linux users,
and Linux users not specifically mapped to an SELinux user to be confined by default, change the
default mapping with the semanag e l o g i n command.
For example, run the following command as the Linux root user to change the default mapping from
unco nfi ned _u to user_u:
~]# semanag e l o g i n -m -S targ eted -s "user_u" -r s0 __d efaul t__
Run the semanag e l o g i n -l command as the Linux root user to verify the __d efaul t__ login is
mapped to user_u:
~]# semanag e l o g i n -l
Login Name
SELinux User
MLS/MCS Range
__default__
root
system_u
user_u
unconfined_u
system_u
s0
s0-s0:c0.c1023
s0-s0:c0.c1023
If a new Linux user is created and an SELinux user is not specified, or if an existing Linux user logs
in and does not match a specific entry from the semanag e l o g i n -l output, they are mapped to
user_u, as per the __d efaul t__ login.
To change back to the default behavior, run the following command as the Linux root user to map the
__d efaul t__ login to the SELinux unco nfi ned _u user:
~]# semanag e l o g i n -m -S targ eted -s "unco nfi ned _u" -r s0 -s0 : c0 . c10 23
__d efaul t__
6.5. xguest : Kiosk Mode
The xguest package provides a kiosk user account. This account is used to secure machines that
people walk up to and use, such as those at libraries, banks, airports, information kiosks, and coffee
shops. The kiosk user account is very limited: essentially, it only allows users to log in and use
Firef o x to browse Internet websites. Any changes made while logged in with this account, such as
creating files or changing settings, are lost when you log out.
To set up the kiosk account:
1. As the Linux root user, run the yum i nstal l xg uest command to install the xguest
package. Install dependencies as required.
58
Chapt er 6 . Confining Users
2. In order to allow the kiosk account to be used by a variety of people, the account is not
password-protected, and as such, the account can only be protected if SELinux is running in
enforcing mode. Before logging in with this account, use the g etenfo rce command to
confirm that SELinux is running in enforcing mode:
~]$ g etenfo rce
Enforcing
If this is not the case, refer to Section 2.4, “ SELinux Modes” for information about changing to
enforcing mode. It is not possible to log in with this account if SELinux is in permissive mode
or disabled.
3. You can only log in to this account via the GNOME D isplay Manager (GD M). Once the xguest
package is installed, a G uest account is added to the GD M login screen.
6.6. Booleans for Users Execut ing Applicat ions
Not allowing Linux users to execute applications (which inherit users' permissions) in their home
directories and /tmp/, which they have write access to, helps prevent flawed or malicious
applications from modifying files that users own. In Red Hat Enterprise Linux 6, by default, Linux
users in the g uest_t and xg uest_t domains cannot execute applications in their home directories
or /tmp/; however, by default, Linux users in the user_t and staff_t domains can.
Booleans are available to change this behavior, and are configured with the setsebo o l command.
The setsebo o l command must be run as the Linux root user. The setsebo o l -P command
makes persistent changes. D o not use the -P option if you do not want changes to persist across
reboots:
guest _t
To allow Linux users in the g uest_t domain to execute applications in their home directories and
/tmp/:
~]# setsebo o l -P al l o w_g uest_exec_co ntent o n
xguest _t
To allow Linux users in the xg uest_t domain to execute applications in their home directories and
/tmp/:
~]# setsebo o l -P al l o w_xg uest_exec_co ntent o n
user_t
To prevent Linux users in the user_t domain from executing applications in their home directories
and /tmp/:
~]# setsebo o l -P al l o w_user_exec_co ntent o ff
st aff_t
59
Red Hat Ent erprise Linux 6 Securit y- Enhanced Linux
To prevent Linux users in the staff_t domain from executing applications in their home directories
and /tmp/:
~]# setsebo o l -P al l o w_staff_exec_co ntent o ff
60
Chapt er 7 . sVirt
Chapter 7. sVirt
sVirt is a technology included in Red Hat Enterprise Linux 6 that integrates SELinux and
virtualization. sVirt applies Mandatory Access Control (MAC) to improve security when using virtual
machines. The main reasons for integrating these technologies are to improve security and harden
the system against bugs in the hypervisor that might be used as an attack vector aimed toward the
host or to another virtual machine.
This chapter describes how sVirt integrates with virtualization technologies in Red Hat Enterprise
Linux 6.
Non-Virt ualiz ed Environment
In a non-virtualized environment, hosts are separated from each other physically and each host has
a self-contained environment, consisting of services such as a Web server, or a D NS server. These
services communicate directly to their own user space, host kernel and physical host, offering their
services directly to the network. The following image represents a non-virtualized environment:
Virt ualiz ed Environment
In a virtualized environment, several operating systems can be housed (as " guests" ) within a single
host kernel and physical host. The following image represents a virtualized environment:
61
Red Hat Ent erprise Linux 6 Securit y- Enhanced Linux
7.1. Securit y and Virt ualiz at ion
When services are not virtualized, machines are physically separated. Any exploit is usually
contained to the affected machine, with the obvious exception of network attacks. When services are
grouped together in a virtualized environment, extra vulnerabilities emerge in the system. If there is a
security flaw in the hypervisor that can be exploited by a guest instance, this guest may be able to
not only attack the host, but also other guests running on that host. This is not theoretical; attacks
already exist on hypervisors. These attacks can extend beyond the guest instance and could expose
other guests to attack.
sVirt is an effort to isolate guests and limit their ability to launch further attacks if exploited. This is
demonstrated in the following image, where an attack cannot break out of the virtual machine and
extend to another host instance:
SELinux introduces a pluggable security framework for virtualized instances in its implementation of
Mandatory Access Control (MAC). The sVirt framework allows guests and their resources to be
uniquely labeled. Once labeled, rules can be applied which can reject access between different
guests.
62
Chapt er 7 . sVirt
7.2. sVirt Labeling
Like other services under the protection of SELinux, sVirt uses process-based mechanisms and
restrictions to provide an extra layer of security over guest instances. Under typical use, you should
not even notice that sVirt is working in the background. This section describes the labeling features
of sVirt.
As shown in the following output, when using sVirt, each Virtual Machine (VM) process is labeled and
runs with a dynamically generated level. Each process is isolated from other VMs with different levels:
~]# ps -eZ | g rep q emu
system_u:system_r:svirt_t:s0:c87,c520 27950 ? 00:00:17 qemu-kvm
system_u:system_r:svirt_t:s0:c639,c757 27989 ? 00:00:06 qemu-system-x86
The actual disk images are automatically labeled to match the processes, as shown in the following
output:
~]# l s -l Z /var/l i b/l i bvi rt/i mag es/*
system_u:object_r:svirt_image_t:s0:c87,c520
image1
The following table outlines the different labels that can be assigned when using sVirt:
T ab le 7.1. sVirt Lab els
T yp e
SELin u x C o n t ext
Virtual Machine Processes
system_u:system_r:svirt_t:MCS1 MCS1 is a randomly selected
MCS field. Currently
approximately 500,000 labels
are supported.
system_u:object_r:svirt_image_t Only processes labeled svirt_t
:MCS1
with the same MCS fields are
able to read/write these image
files and devices.
system_u:object_r:svirt_image_t All processes labeled svirt_t are
:s0
allowed to write to the
svirt_image_t:s0 files and
devices.
system_u:object_r:virt_content_t System default label used when
:s0
an image exits. No svirt_t virtual
processes are allowed to read
files/devices with this label.
Virtual Machine Image
Virtual Machine Shared
Read/Write Content
Virtual Machine Image
D escrip t io n
It is also possible to perform static labeling when using sVirt. Static labels allow the administrator to
select a specific label, including the MCS/MLS field, for a virtual machine. Administrators who run
statically-labeled virtual machines are responsible for setting the correct label on the image files. The
virtual machine will always be started with that label, and the sVirt system will never modify the label
of a statically-labeled virtual machine's content. This allows the sVirt component to run in an MLS
environment. You can also run multiple virtual machines with different sensitivity levels on a system,
depending on your requirements.
63
Red Hat Ent erprise Linux 6 Securit y- Enhanced Linux
Chapter 8. Troubleshooting
The following chapter describes what happens when SELinux denies access; the top three causes of
problems; where to find information about correct labeling; analyzing SELinux denials; and creating
custom policy modules with aud i t2al l o w.
8.1. What Happens when Access is Denied
SELinux decisions, such as allowing or disallowing access, are cached. This cache is known as the
Access Vector Cache (AVC). D enial messages are logged when SELinux denies access. These
denials are also known as " AVC denials" , and are logged to a different location, depending on which
daemons are running:
D aemo n
Lo g Lo cat io n
auditd on
auditd off; rsyslogd on
setroubleshootd, rsyslogd, and auditd on
/var/l o g /aud i t/aud i t. l o g
/var/l o g /messag es
/var/l o g /aud i t/aud i t. l o g . Easier-toread denial messages also sent to
/var/l o g /messag es
If you are running the X Window System, have the setroubleshoot and setroubleshoot-server packages
installed, and the setro ubl esho o td and aud i td daemons are running, a warning is displayed
when access is denied by SELinux:
Clicking on 'Show' presents a detailed analysis of why SELinux denied access, and a possible
solution for allowing access. If you are not running the X Window System, it is less obvious when
access is denied by SELinux. For example, users browsing your website may receive an error similar
to the following:
Forbidden
You don't have permission to access file name on this server
For these situations, if D AC rules (standard Linux permissions) allow access, check
/var/l o g /messag es and /var/l o g /aud i t/aud i t. l o g for "SELi nux i s preventi ng " and
"d eni ed " errors respectively. This can be done by running the following commands as the Linux
root user:
~]# g rep "SELi nux i s preventi ng " /var/l o g /messag es
~]# g rep "d eni ed " /var/l o g /aud i t/aud i t. l o g
64
Chapt er 8 . T roubleshoot ing
8.2. T op T hree Causes of Problems
The following sections describe the top three causes of problems: labeling problems, configuring
Booleans and ports for services, and evolving SELinux rules.
8.2.1. Labeling Problems
On systems running SELinux, all processes and files are labeled with a label that contains securityrelevant information. This information is called the SELinux context. If these labels are wrong, access
may be denied. If an application is labeled incorrectly, the process it transitions to may not have the
correct label, possibly causing SELinux to deny access, and the process being able to create
mislabeled files.
A common cause of labeling problems is when a non-standard directory is used for a service. For
example, instead of using /var/www/html / for a website, an administrator wants to use
/srv/myweb/. On Red Hat Enterprise Linux 6, the /srv/ directory is labeled with the var_t type.
Files and directories created and /srv/ inherit this type. Also, newly-created top-level directories
(such as /myserver/) may be labeled with the d efaul t_t type. SELinux prevents the Apache HTTP
Server (httpd ) from accessing both of these types. To allow access, SELinux must know that the files
in /srv/myweb/ are to be accessible to httpd :
~]# semanag e fco ntext -a -t httpd _sys_co ntent_t "/srv/myweb(/. *)?"
This semanag e command adds the context for the /srv/myweb/ directory (and all files and
directories under it) to the SELinux file-context configuration [12] . The semanag e command does not
change the context. As the Linux root user, run the resto reco n command to apply the changes:
~]# resto reco n -R -v /srv/myweb
Refer to Section 5.6.2, “ Persistent Changes: semanage fcontext” for further information about adding
contexts to the file-context configuration.
8 .2 .1 .1 . What is t he Co rre ct Co nt e xt ?
The matchpathco n command checks the context of a file path and compares it to the default label
for that path. The following example demonstrates using matchpathco n on a directory that contains
incorrectly labeled files:
~]$ matchpathco n -V /var/www/html /*
/var/www/html/index.html has context
unconfined_u:object_r:user_home_t:s0, should be
system_u:object_r:httpd_sys_content_t:s0
/var/www/html/page1.html has context
unconfined_u:object_r:user_home_t:s0, should be
system_u:object_r:httpd_sys_content_t:s0
In this example, the i nd ex. html and pag e1. html files are labeled with the user_ho me_t type.
This type is used for files in user home directories. Using the mv command to move files from your
home directory may result in files being labeled with the user_ho me_t type. This type should not
exist outside of home directories. Use the resto reco n command to restore such files to their correct
type:
65
Red Hat Ent erprise Linux 6 Securit y- Enhanced Linux
~]# resto reco n -v /var/www/html /i nd ex. html
restorecon reset /var/www/html/index.html context
unconfined_u:object_r:user_home_t:s0>system_u:object_r:httpd_sys_content_t:s0
To restore the context for all files under a directory, use the -R option:
~]# resto reco n -R -v /var/www/html /
restorecon reset /var/www/html/page1.html context
unconfined_u:object_r:samba_share_t:s0>system_u:object_r:httpd_sys_content_t:s0
restorecon reset /var/www/html/index.html context
unconfined_u:object_r:samba_share_t:s0>system_u:object_r:httpd_sys_content_t:s0
Refer to Section 5.9.3, “ Checking the D efault SELinux Context” for a more detailed example of
matchpathco n.
8.2.2. How are Confined Services Running?
Services can be run in a variety of ways. To cater for this, you must tell SELinux how you are running
services. This can be achieved via Booleans that allow parts of SELinux policy to be changed at
runtime, without any knowledge of SELinux policy writing. This allows changes, such as allowing
services access to NFS volumes, without reloading or recompiling SELinux policy. Also, running
services on non-default port numbers requires policy configuration to be updated via the semanag e
command.
For example, to allow the Apache HTTP Server to communicate with MySQL, enable the
httpd _can_netwo rk_co nnect_d b Boolean:
~]# setsebo o l -P httpd _can_netwo rk_co nnect_d b o n
If access is denied for a particular service, use the g etsebo o l and g rep commands to see if any
Booleans are available to allow access. For example, use the g etsebo o l -a | g rep ftp
command to search for FTP related Booleans:
~]$ g etsebo o l -a | g rep ftp
allow_ftpd_anon_write --> off
allow_ftpd_full_access --> off
allow_ftpd_use_cifs --> off
allow_ftpd_use_nfs --> off
ftp_home_dir --> off
ftpd_connect_db --> off
httpd_enable_ftp_server --> off
tftp_anon_write --> off
For a list of Booleans and whether they are on or off, run the g etsebo o l -a command. For a list of
Booleans, an explanation of what each one is, and whether they are on or off, run the semanag e
bo o l ean -l command as the Linux root user. Refer to Section 5.5, “ Booleans” for information
about listing and configuring Booleans.
Port Numbers
66
Chapt er 8 . T roubleshoot ing
D epending on policy configuration, services may only be allowed to run on certain port numbers.
Attempting to change the port a service runs on without changing policy may result in the service
failing to start. For example, run the semanag e po rt -l | g rep http command as the Linux root
user to list http related ports:
~]# semanag e po rt -l | g rep http
http_cache_port_t
tcp
http_cache_port_t
udp
http_port_t
tcp
pegasus_http_port_t
tcp
pegasus_https_port_t
tcp
3128, 8080, 8118
3130
80, 443, 488, 8008, 8009, 8443
5988
5989
The http_po rt_t port type defines the ports Apache HTTP Server can listen on, which in this case,
are TCP ports 80, 443, 488, 8008, 8009, and 8443. If an administrator configures httpd . co nf so
that httpd listens on port 9876 (Li sten 9 876 ), but policy is not updated to reflect this, the
servi ce httpd start command fails:
~]# servi ce httpd start
Starting httpd: (13)Permission denied: make_sock: could not bind to
address [::]:9876
(13)Permission denied: make_sock: could not bind to address 0.0.0.0:9876
no listening sockets available, shutting down
Unable to open logs
[FAILED]
An SELinux denial similar to the following is logged to /var/l o g /aud i t/aud i t. l o g :
type=AVC msg=audit(1225948455.061:294): avc: denied { name_bind } for
pid=4997 comm="httpd" src=9876 scontext=unconfined_u:system_r:httpd_t:s0
tcontext=system_u:object_r:port_t:s0 tclass=tcp_socket
To allow httpd to listen on a port that is not listed for the http_po rt_t port type, run the semanag e
po rt command to add a port to policy configuration [13] :
~]# semanag e po rt -a -t http_po rt_t -p tcp 9 876
The -a option adds a new record; the -t option defines a type; and the -p option defines a protocol.
The last argument is the port number to add.
8.2.3. Evolving Rules and Broken Applicat ions
Applications may be broken, causing SELinux to deny access. Also, SELinux rules are evolving –
SELinux may not have seen an application running in a certain way, possibly causing it to deny
access, even though the application is working as expected. For example, if a new version of
PostgreSQL is released, it may perform actions the current policy has not seen before, causing
access to be denied, even though access should be allowed.
For these situations, after access is denied, use aud i t2al l o w to create a custom policy module to
allow access. Refer to Section 8.3.8, “ Allowing Access: audit2allow” for information about using
aud i t2al l o w.
8.3. Fixing Problems
67
Red Hat Ent erprise Linux 6 Securit y- Enhanced Linux
The following sections help troubleshoot issues. They go over: checking Linux permissions, which
are checked before SELinux rules; possible causes of SELinux denying access, but no denials being
logged; manual pages for services, which contain information about labeling and Booleans;
permissive domains, for allowing one process to run permissive, rather than the whole system; how to
search for and view denial messages; analyzing denials; and creating custom policy modules with
aud i t2al l o w.
8.3.1. Linux Permissions
When access is denied, check standard Linux permissions. As mentioned in Chapter 2, Introduction,
most operating systems use a D iscretionary Access Control (D AC) system to control access, allowing
users to control the permissions of files that they own. SELinux policy rules are checked after D AC
rules. SELinux policy rules are not used if D AC rules deny access first.
If access is denied and no SELinux denials are logged, use the l s -l command to view the
standard Linux permissions:
~]$ l s -l /var/www/html /i nd ex. html
-rw-r----- 1 root root 0 2009-05-07 11:06 index.html
In this example, i nd ex. html is owned by the root user and group. The root user has read and write
permissions (-rw), and members of the root group have read permissions (-r-). Everyone else has
no access (---). By default, such permissions do not allow httpd to read this file. To resolve this
issue, use the cho wn command to change the owner and group. This command must be run as the
Linux root user:
~]# cho wn apache: apache /var/www/html /i nd ex. html
This assumes the default configuration, in which httpd runs as the Linux apache user. If you run
httpd with a different user, replace apache: apache with that user.
Refer to the Fedora D ocumentation Project " Permissions" draft for information about managing
Linux permissions.
8.3.2. Possible Causes of Silent Denials
In certain situations, AVC denials may not be logged when SELinux denies access. Applications and
system library functions often probe for more access than required to perform their tasks. To maintain
least privilege without filling audit logs with AVC denials for harmless application probing, the policy
can silence AVC denials without allowing a permission by using d o ntaud i t rules. These rules are
common in standard policy. The downside of d o ntaud i t is that, although SELinux denies access,
denial messages are not logged, making troubleshooting more difficult.
To temporarily disable d o ntaud i t rules, allowing all denials to be logged, run the following
command as the Linux root user:
~]# semo d ul e -D B
The -D option disables d o ntaud i t rules; the -B option rebuilds policy. After running semo d ul e D B, try exercising the application that was encountering permission problems, and see if SELinux
denials — relevant to the application — are now being logged. Take care in deciding which denials
should be allowed, as some should be ignored and handled via d o ntaud i t rules. If in doubt, or in
search of guidance, contact other SELinux users and developers on an SELinux list, such as fedoraselinux-list.
68
Chapt er 8 . T roubleshoot ing
To rebuild policy and enable d o ntaud i t rules, run the following command as the Linux root user:
~]# semo d ul e -B
This restores the policy to its original state. For a full list of d o ntaud i t rules, run the sesearch -d o ntaud i t command. Narrow down searches using the -s domain option and the g rep
command. For example:
~]$ sesearch --d o ntaud i t -s smbd _t | g rep sq ui d
dontaudit smbd_t squid_port_t : tcp_socket name_bind ;
dontaudit smbd_t squid_port_t : udp_socket name_bind ;
Refer to Section 8.3.6, “ Raw Audit Messages” and Section 8.3.7, “ sealert Messages” for information
about analyzing denials.
8.3.3. Manual Pages for Services
Manual pages for services contain valuable information, such as what file type to use for a given
situation, and Booleans to change the access a service has (such as httpd accessing NFS
volumes). This information may be in the standard manual page, or a manual page with sel i nux
prepended or appended.
For example, the httpd_selinux(8) manual page has information about what file type to use for a
given situation, as well as Booleans to allow scripts, sharing files, accessing directories inside user
home directories, and so on. Other manual pages with SELinux information for services include:
Samba: the samba_selinux(8) manual page describes that files and directories to be exported via
Samba must be labeled with the samba_share_t type, as well as Booleans to allow files labeled
with types other than samba_share_t to be exported via Samba.
Berkeley Internet Name D omain (BIND ): the named(8) manual page describes what file type to use
for a given situation (see the R ed Hat SELi nux BIND Securi ty P ro fi l e section). The
named_selinux(8) manual page describes that, by default, named cannot write to master zone
files, and to allow such access, the named _wri te_master_zo nes Boolean must be enabled.
The information in manual pages helps you configure the correct file types and Booleans, helping to
prevent SELinux from denying access.
8.3.4 . Permissive Domains
When SELinux is running in permissive mode, SELinux does not deny access, but denials are logged
for actions that would have been denied if running in enforcing mode. Previously, it was not possible
to make a single domain permissive (remember: processes run in domains). In certain situations, this
led to making the whole system permissive to troubleshoot issues.
Permissive domains allow an administrator to configure a single process (domain) to run permissive,
rather than making the whole system permissive. SELinux checks are still performed for permissive
domains; however, the kernel allows access and reports an AVC denial for situations where SELinux
would have denied access.
Permissive domains have the following uses:
They can be used for making a single process (domain) run permissive to troubleshoot an issue
without putting the entire system at risk by making it permissive.
They allow an administrator to create policies for new applications. Previously, it was
69
Red Hat Ent erprise Linux 6 Securit y- Enhanced Linux
recommended that a minimal policy be created, and then the entire machine put into permissive
mode, so that the application could run, but SELinux denials still logged. aud i t2al l o w could
then be used to help write the policy. This put the whole system at risk. With permissive domains,
only the domain in the new policy can be marked permissive, without putting the whole system at
risk.
8 .3.4 .1 . Making a Do m ain Pe rm issive
To make a domain permissive, run the semanag e permi ssi ve -a domain command, where
domain is the domain you want to make permissive. For example, run the following command as the
Linux root user to make the httpd _t domain (the domain the Apache HTTP Server runs in)
permissive:
~]# semanag e permi ssi ve -a httpd _t
To view a list of domains you have made permissive, run the semo d ul e -l | g rep permi ssi ve
command as the Linux root user. For example:
~]# semo d ul e -l | g rep permi ssi ve
permissive_httpd_t 1.0
permissivedomains 1.0.0
If you no longer want a domain to be permissive, run the semanag e permi ssi ve -d domain
command as the Linux root user. For example:
~]# semanag e permi ssi ve -d httpd _t
8 .3.4 .2 . De nials fo r Pe rm issive Do m ains
The SY SC ALL message is different for permissive domains. The following is an example AVC denial
(and the associated system call) from the Apache HTTP Server:
type=AVC msg=audit(1226882736.442:86): avc: denied { getattr } for
pid=2427 comm="httpd" path="/var/www/html/file1" dev=dm-0 ino=284133
scontext=unconfined_u:system_r:httpd_t:s0
tcontext=unconfined_u:object_r:samba_share_t:s0 tclass=file
type=SYSCALL msg=audit(1226882736.442:86): arch=40000003 syscall=196
success=no exit=-13 a0=b9a1e198 a1=bfc2921c a2=54dff4 a3=2008171 items=0
ppid=2425 pid=2427 auid=502 uid=48 gid=48 euid=48 suid=48 fsuid=48
egid=48 sgid=48 fsgid=48 tty=(none) ses=4 comm="httpd"
exe="/usr/sbin/httpd" subj=unconfined_u:system_r:httpd_t:s0 key=(null)
By default, the httpd _t domain is not permissive, and as such, the action is denied, and the
SY SC ALL message contains success= no . The following is an example AVC denial for the same
situation, except the semanag e permi ssi ve -a httpd _t command has been run to make the
httpd _t domain permissive:
type=AVC msg=audit(1226882925.714:136): avc: denied { read } for
pid=2512 comm="httpd" name="file1" dev=dm-0 ino=284133
scontext=unconfined_u:system_r:httpd_t:s0
tcontext=unconfined_u:object_r:samba_share_t:s0 tclass=file
type=SYSCALL msg=audit(1226882925.714:136): arch=40000003 syscall=5
70
Chapt er 8 . T roubleshoot ing
success=yes exit=11 a0=b962a1e8 a1=8000 a2=0 a3=8000 items=0 ppid=2511
pid=2512 auid=502 uid=48 gid=48 euid=48 suid=48 fsuid=48 egid=48 sgid=48
fsgid=48 tty=(none) ses=4 comm="httpd" exe="/usr/sbin/httpd"
subj=unconfined_u:system_r:httpd_t:s0 key=(null)
In this case, although an AVC denial was logged, access was not denied, as shown by
success= yes in the SY SC ALL message.
Refer to D an Walsh's " Permissive D omains" blog entry for further information about permissive
domains.
8.3.5. Searching For and Viewing Denials
This section assumes the setroubleshoot, setroubleshoot-server, dbus and audit packages are installed,
and that the aud i td , rsysl o g d , and setro ubl esho o td daemons are running. Refer to
Section 5.2, “ Which Log File is Used” for information about starting these daemons. A number of
tools are available for searching for and viewing SELinux denials, such as ausearch, aurepo rt,
and seal ert.
ausearch
The audit package provides the ausearch utility. From the ausearch(8) manual page: " ausearch is
a tool that can query the audit daemon logs based for events based on different search criteria" [14] .
The ausearch utility accesses /var/l o g /aud i t/aud i t. l o g , and as such, must be run as the
Linux root user:
Search in g Fo r
C o mman d
all denials
denials for that today
denials from the last 10 minutes
ausearch -m avc
ausearch -m avc -ts to d ay
ausearch -m avc -ts recent
To search for SELinux denials for a particular service, use the -c comm-name option, where commname " is the executable’s name" [15] , for example, httpd for the Apache HTTP Server, and smbd for
Samba:
~]# ausearch -m avc -c httpd
~]# ausearch -m avc -c smbd
With each ausearch command, it is advised to use either the --i nterpret (-i ) option for easier
readability, or the --raw (-r) option for script processing. Refer to the ausearch(8) manual page for
further ausearch options.
aureport
The audit package provides the aurepo rt utility. From the aureport(8) manual page: " aurepo rt is a
tool that produces summary reports of the audit system logs" [16 ] . The aurepo rt utility accesses
/var/l o g /aud i t/aud i t. l o g , and as such, must be run as the Linux root user. To view a list of
SELinux denials and how often each one occurred, run the aurepo rt -a command. The following is
example output that includes two denials:
~]# aurepo rt -a
71
Red Hat Ent erprise Linux 6 Securit y- Enhanced Linux
AVC Report
========================================================
# date time comm subj syscall class permission obj event
========================================================
1. 05/01/2009 21:41:39 httpd unconfined_u:system_r:httpd_t:s0 195 file
getattr system_u:object_r:samba_share_t:s0 denied 2
2. 05/03/2009 22:00:25 vsftpd unconfined_u:system_r:ftpd_t:s0 5 file read
unconfined_u:object_r:cifs_t:s0 denied 4
Refer to the aureport(8) manual page for further aurepo rt options.
sealert
The setroubleshoot-server package provides the seal ert utility, which reads denial messages
translated by setroubleshoot-server. D enials are assigned ID s, as seen in /var/l o g /messag es. The
following is an example denial from messag es:
setroubleshoot: SELinux is preventing /usr/sbin/httpd from name_bind
access on the tcp_socket. For complete SELinux messages. run sealert -l
8c123656-5dda-4e5d-8791-9e3bd03786b7
In this example, the denial ID is 8c1236 56 -5d d a-4 e5d -879 1-9 e3bd 0 3786 b7. The -l option
takes an ID as an argument. Running the seal ert -l 8c1236 56 -5d d a-4 e5d -879 19 e3bd 0 3786 b7 command presents a detailed analysis of why SELinux denied access, and a
possible solution for allowing access.
If you are running the X Window System, have the setroubleshoot and setroubleshoot-server packages
installed, and the setro ubl esho o td , d bus and aud i td daemons are running, a warning is
displayed when access is denied by SELinux:
Clicking on Sho w launches the seal ert GUI, which allows you to troubleshoot the problem:
72
Chapt er 8 . T roubleshoot ing
Alternatively, run the seal ert -b command to launch the seal ert GUI. To view a detailed analysis
of all denial messages, run the seal ert -l \* command.
See the sealert(8) manual page for further seal ert options.
8.3.6. Raw Audit Messages
Raw audit messages are logged to /var/l o g /aud i t/aud i t. l o g . The following is an example
AVC denial (and the associated system call) that occurred when the Apache HTTP Server (running in
the httpd _t domain) attempted to access the /var/www/html /fi l e1 file (labeled with the
samba_share_t type):
type=AVC msg=audit(1226874073.147:96): avc: denied { getattr } for
pid=2465 comm="httpd" path="/var/www/html/file1" dev=dm-0 ino=284133
scontext=unconfined_u:system_r:httpd_t:s0
tcontext=unconfined_u:object_r:samba_share_t:s0 tclass=file
type=SYSCALL msg=audit(1226874073.147:96): arch=40000003 syscall=196
success=no exit=-13 a0=b98df198 a1=bfec85dc a2=54dff4 a3=2008171 items=0
ppid=2463 pid=2465 auid=502 uid=48 gid=48 euid=48 suid=48 fsuid=48
egid=48 sgid=48 fsgid=48 tty=(none) ses=6 comm="httpd"
exe="/usr/sbin/httpd" subj=unconfined_u:system_r:httpd_t:s0 key=(null)
{ getattr }
The item in the curly brackets indicates the permission that was denied. The g etattr entry
indicates the source process was trying to read the target file's status information. This
occurs before reading files. This action is denied due to the file being accessed having a
wrong label. Commonly seen permissions include g etattr, read , and wri te.
co mm= "httpd"
The executable that launched the process. The full path of the executable is found in the
exe= section of the system call (SY SC ALL) message, which in this case, is
exe= "/usr/sbi n/httpd ".
p at h = "/var/www/html/file1"
The path to the object (target) the process attempted to access.
sco n t ext = "unconfined_u:system_r:httpd_t:s0"
The SELinux context of the process that attempted the denied action. In this case, it is the
SELinux context of the Apache HTTP Server, which is running in the httpd _t domain.
73
Red Hat Ent erprise Linux 6 Securit y- Enhanced Linux
t co n t ext = "unconfined_u:object_r:samba_share_t:s0"
The SELinux context of the object (target) the process attempted to access. In this case, it is
the SELinux context of fi l e1. Note that the samba_share_t type is not accessible to
processes running in the httpd _t domain.
In certain situations, the tco ntext may match the sco ntext, for example, when a process
attempts to execute a system service that will change characteristics of that running
process, such as the user ID . Also, the tco ntext may match the sco ntext when a process
tries to use more resources (such as memory) than normal limits allow, resulting in a
security check to see if that process is allowed to break those limits.
From the system call (SY SC ALL) message, two items are of interest:
success= no: indicates whether the denial (AVC) was enforced or not. success= no indicates the
system call was not successful (SELinux denied access). success= yes indicates the system call
was successful. This can be seen for permissive domains or unconfined domains, such as
i ni trc_t and kernel _t.
exe= "/usr/sbin/httpd": the full path to the executable that launched the process, which in
this case, is exe= "/usr/sbi n/httpd ".
An incorrect file type is a common cause for SELinux denying access. To start troubleshooting,
compare the source context (sco ntext) with the target context (tco ntext). Should the process
(sco ntext) be accessing such an object (tco ntext)? For example, the Apache HTTP Server
(httpd _t) should only be accessing types specified in the httpd_selinux(8) manual page, such as
httpd _sys_co ntent_t, publ i c_co ntent_t, and so on, unless configured otherwise.
8.3.7. sealert Messages
D enials are assigned ID s, as seen in /var/l o g /messag es. The following is an example AVC
denial (logged to messag es) that occurred when the Apache HTTP Server (running in the httpd _t
domain) attempted to access the /var/www/html /fi l e1 file (labeled with the samba_share_t
type):
hostname setroubleshoot: SELinux is preventing httpd (httpd_t) "getattr"
to /var/www/html/file1 (samba_share_t). For complete SELinux messages.
run sealert -l 84e0b04d-d0ad-4347-8317-22e74f6cd020
As suggested, run the seal ert -l 84 e0 b0 4 d -d 0 ad -4 34 7-8317-22e74 f6 cd 0 20 command to
view the complete message. This command only works on the local machine, and presents the same
information as the seal ert GUI:
~]$ seal ert -l 84 e0 b0 4 d -d 0 ad -4 34 7-8317-22e74 f6 cd 0 20
Summary:
SELinux is preventing httpd (httpd_t) "getattr" to /var/www/html/file1
(samba_share_t).
Detailed Description:
SELinux denied access to /var/www/html/file1 requested by httpd.
/var/www/html/file1 has a context used for sharing by different program.
If you
would like to share /var/www/html/file1 from httpd also, you need to
74
Chapt er 8 . T roubleshoot ing
change its
file context to public_content_t. If you did not intend to this access,
this
could signal a intrusion attempt.
Allowing Access:
You can alter the file context by executing chcon -t public_content_t
'/var/www/html/file1'
Fix Command:
chcon -t public_content_t '/var/www/html/file1'
Additional Information:
Source Context
unconfined_u:system_r:httpd_t:s0
Target Context
unconfined_u:object_r:samba_share_t:s0
Target Objects
/var/www/html/file1 [ file ]
Source
httpd
Source Path
/usr/sbin/httpd
Port
<Unknown>
Host
hostname
Source RPM Packages
httpd-2.2.10-2
Target RPM Packages
Policy RPM
selinux-policy-3.5.13-11.fc12
Selinux Enabled
True
Policy Type
targeted
MLS Enabled
True
Enforcing Mode
Enforcing
Plugin Name
public_content
Host Name
hostname
Platform
Linux hostname 2.6.27.4-68.fc12.i686 #1
SMP Thu Oct
30 00:49:42 EDT 2008 i686 i686
Alert Count
4
First Seen
Wed Nov 5 18:53:05 2008
Last Seen
Wed Nov 5 01:22:58 2008
Local ID
84e0b04d-d0ad-4347-8317-22e74f6cd020
Line Numbers
Raw Audit Messages
node=hostname type=AVC msg=audit(1225812178.788:101): avc: denied {
getattr } for pid=2441 comm="httpd" path="/var/www/html/file1" dev=dm-0
ino=284916 scontext=unconfined_u:system_r:httpd_t:s0
tcontext=unconfined_u:object_r:samba_share_t:s0 tclass=file
node=hostname type=SYSCALL msg=audit(1225812178.788:101): arch=40000003
syscall=196 success=no exit=-13 a0=b8e97188 a1=bf87aaac a2=54dff4
a3=2008171 items=0 ppid=2439 pid=2441 auid=502 uid=48 gid=48 euid=48
suid=48 fsuid=48 egid=48 sgid=48 fsgid=48 tty=(none) ses=3 comm="httpd"
exe="/usr/sbin/httpd" subj=unconfined_u:system_r:httpd_t:s0 key=(null)
Su mmary
75
Red Hat Ent erprise Linux 6 Securit y- Enhanced Linux
A brief summary of the denied action. This is the same as the denial in
/var/l o g /messag es. In this example, the httpd process was denied access to a file
(fi l e1), which is labeled with the samba_share_t type.
D et ailed D escrip t io n
A more verbose description. In this example, fi l e1 is labeled with the samba_share_t
type. This type is used for files and directories that you want to export via Samba. The
description suggests changing the type to a type that can be accessed by the Apache
HTTP Server and Samba, if such access is desired.
Allo win g Access
A suggestion for how to allow access. This may be relabeling files, enabling a Boolean, or
making a local policy module. In this case, the suggestion is to label the file with a type
accessible to both the Apache HTTP Server and Samba.
Fix C o mman d
A suggested command to allow access and resolve the denial. In this example, it gives the
command to change the fi l e1 type to publ i c_co ntent_t, which is accessible to the
Apache HTTP Server and Samba.
Ad d it io n al In f o rmat io n
Information that is useful in bug reports, such as the policy package name and version
(sel i nux-po l i cy-3. 5. 13-11. fc12), but may not help towards solving why the denial
occurred.
R aw Au d it Messag es
The raw audit messages from /var/l o g /aud i t/aud i t. l o g that are associated with the
denial. Refer to Section 8.3.6, “ Raw Audit Messages” for information about each item in the
AVC denial.
8.3.8. Allowing Access: audit 2allow
D o not use the example in this section in production. It is used only to demonstrate the use of the
aud i t2al l o w utility.
From the audit2allow(1) manual page: " aud i t2al l o w – generate SELinux policy allow rules from
logs of denied operations" [17] . After analyzing denials as per Section 8.3.7, “ sealert Messages” ,
and if no label changes or Booleans allowed access, use aud i t2al l o w to create a local policy
module. After access is denied by SELinux, running the aud i t2al l o w command presents Type
Enforcement rules that allow the previously denied access.
The following example demonstrates using aud i t2al l o w to create a policy module:
1. A denial and the associated system call are logged to /var/l o g /aud i t/aud i t. l o g :
type=AVC msg=audit(1226270358.848:238): avc: denied { write } for
pid=13349 comm="certwatch" name="cache" dev=dm-0 ino=218171
scontext=system_u:system_r:certwatch_t:s0
tcontext=system_u:object_r:var_t:s0 tclass=dir
type=SYSCALL msg=audit(1226270358.848:238): arch=40000003
syscall=39 success=no exit=-13 a0=39a2bf a1=3ff a2=3a0354 a3=94703c8
76
Chapt er 8 . T roubleshoot ing
items=0 ppid=13344 pid=13349 auid=4294967295 uid=0 gid=0 euid=0
suid=0 fsuid=0 egid=0 sgid=0 fsgid=0 tty=(none) ses=4294967295
comm="certwatch" exe="/usr/bin/certwatch"
subj=system_u:system_r:certwatch_t:s0 key=(null)
In this example, cert wat ch (co mm= "certwatch") was denied write access ({ wri te }) to a
directory labeled with the var_t type (tco ntext= system_u: o bject_r: var_t: s0 ).
Analyze the denial as per Section 8.3.7, “ sealert Messages” . If no label changes or Booleans
allowed access, use aud i t2al l o w to create a local policy module.
2. With a denial logged, such as the certwatch denial in step 1, run the aud i t2al l o w -w -a
command to produce a human-readable description of why access was denied. The -a
option causes all audit logs to be read. The -w option produces the human-readable
description. The aud i t2al l o w utility accesses /var/l o g /aud i t/aud i t. l o g , and as
such, must be run as the Linux root user:
~]# aud i t2al l o w -w -a
type=AVC msg=audit(1226270358.848:238): avc: denied { write } for
pid=13349 comm="certwatch" name="cache" dev=dm-0 ino=218171
scontext=system_u:system_r:certwatch_t:s0
tcontext=system_u:object_r:var_t:s0 tclass=dir
Was caused by:
Missing type enforcement (TE) allow rule.
You can use audit2allow to generate a loadable module to allow
this access.
As shown, access was denied due to a missing Type Enforcement rule.
3. Run the aud i t2al l o w -a command to view the Type Enforcement rule that allows the
denied access:
~]# aud i t2al l o w -a
#============= certwatch_t ==============
allow certwatch_t var_t:dir write;
Important
Missing Type Enforcement rules are usually caused by bugs in SELinux policy, and
should be reported in Red Hat Bugzilla. For Red Hat Enterprise Linux, create bugs
against the R ed Hat Enterpri se Li nux product, and select the sel i nuxpo l i cy component. Include the output of the aud i t2al l o w -w -a and
aud i t2al l o w -a commands in such bug reports.
4. To use the rule displayed by aud i t2al l o w -a, run the aud i t2al l o w -a -M
mycertwatch command as the Linux root user to create custom module. The -M option
creates a Type Enforcement file (. te) with the name specified with -M, in your current working
directory:
~]# aud i t2al l o w -a -M mycertwatch
77
Red Hat Ent erprise Linux 6 Securit y- Enhanced Linux
******************** IMPORTANT ***********************
To make this policy package active, execute:
semodule -i mycertwatch.pp
~]# l s
mycertwatch.pp
mycertwatch.te
Also, aud i t2al l o w compiles the Type Enforcement rule into a policy package (. pp). To
install the module, run the semo d ul e -i mycertwatch.pp command as the Linux root
user.
Important
Modules created with aud i t2al l o w may allow more access than required. It is
recommended that policy created with aud i t2al l o w be posted to an SELinux list,
such as fedora-selinux-list, for review. If you believe their is a bug in policy, create a
bug in Red Hat Bugzilla.
If you have multiple denials from multiple processes, but only want to create a custom policy for a
single process, use the g rep command to narrow down the input for aud i t2al l o w. The following
example demonstrates using g rep to only send denials related to certwatch through
aud i t2al l o w:
~]# g rep certwatch /var/l o g /aud i t/aud i t. l o g | aud i t2al l o w -M
mycertwatch2
******************** IMPORTANT ***********************
To make this policy package active, execute:
~]# semo d ul e -i mycertwatch2. pp
Refer to D an Walsh's " Using audit2allow to build policy modules. Revisited." blog entry for further
information about using aud i t2al l o w to build policy modules.
[12] Files in /etc/sel i nux/targ eted /co ntexts/fi l es/ d efine c o ntexts fo r files and
d irec to ries . Files in this d irec to ry are read b y the resto reco n and setfi l es c o mmand s to res to re
files and d irec to ries to their d efault c o ntexts .
[13] The semanag e po rt -a c o mmand ad d s an entry to the
/etc/sel i nux/targ eted /mo d ul es/acti ve/po rts. l o cal file. No te that b y d efault, this file
c an o nly b e viewed b y the Linux ro o t us er.
[14] Fro m the aus earc h(8 ) manual p ag e, as s hip p ed with the audit p ac kag e in Red Hat Enterp ris e Linux
6.
[15] Fro m the aus earc h(8 ) manual p ag e, as s hip p ed with the audit p ac kag e in Red Hat Enterp ris e Linux
6.
[16 ] Fro m the aurep o rt(8 ) manual p ag e, as s hip p ed with the audit p ac kag e in Red Hat Enterp ris e Linux
6.
[17] Fro m the aud it2allo w(1) manual p ag e, whic h is availab le when the policycoreutils-sandbox p ac kag e in
Red Hat Enterp ris e Linux 6 is ins talled .
78
Chapt er 9 . Furt her Informat ion
Chapter 9. Further Information
9.1. Cont ribut ors
D omingo Becker – Translation – Spanish
D ominick Grift – Technical Editor
D aniel Cabrera – Translation – Spanish
Murray McAllister – Red Hat Engineering Content Services
James Morris – Technical Editor
Eric Paris – Technical Editor
Scott Radvan – Red Hat Engineering Content Services
D aniel Walsh – Red Hat Security Engineering
Geert Warrink – Translation – D utch
9.2. Ot her Resources
T he Nat ional Securit y Agency (NSA)
From the NSA Contributors to SELinux page:
Researchers in NSA's National Information Assurance Research Laboratory (NIARL) designed and
implemented flexible mandatory access controls in the major subsystems of the Linux kernel and
implemented the new operating system components provided by the Flask architecture, namely the security
server and the access vector cache. The NSA researchers reworked the LSM-based SELinux for inclusion in
Linux 2.6. NSA has also led the development of similar controls for the X Window System (XACE/XSELinux)
and for Xen (XSM/Flask).
Main SELinux website: http://www.nsa.gov/research/selinux/index.shtml.
SELinux documentation: http://www.nsa.gov/research/selinux/docs.shtml.
SELinux background: http://www.nsa.gov/research/selinux/background.shtml.
T resys T echnology
Tresys Technology are the upstream for:
SELinux userland libraries and tools.
SELinux Reference Policy.
SELinux News
News: http://selinuxnews.org/wp/.
Planet SELinux (blogs): http://selinuxnews.org/planet/.
79
Red Hat Ent erprise Linux 6 Securit y- Enhanced Linux
SELinux Project Wiki
Main page: http://selinuxproject.org/page/Main_Page.
User resources, including links to documentation, mailing lists, websites, and tools:
http://selinuxproject.org/page/User_Resources.
Fedora
Main page: http://fedoraproject.org/wiki/SELinux.
Troubleshooting: http://fedoraproject.org/wiki/SELinux/Troubleshooting.
Fedora SELinux FAQ: http://docs.fedoraproject.org/.
SELinux Managing Confined Services Guide: http://docs.fedoraproject.org/
T he UnOfficial SELinux FAQ
http://www.crypt.gen.nz/selinux/faq.html
IRC
On Freenode:
#selinux
#fedora-selinux
#security
80
Revision Hist ory
Revision History
R evisio n 6 - 0
Fri O ct 10 2014
Red Hat Enterprise Linux 6.6 GA release of the book
B arb o ra An čin co vá
R evisio n 4 - 0
Feb Fri 22 2013
Release of the SELinux Guide for Red Hat Enterprise Linux 6.4
T o máš Č ap ek
R evisio n 3- 0
Wed Ju n 20 2012
Release of the SELinux Guide for Red Hat Enterprise Linux 6.3
Mart in Prp ič
R evisio n 2- 0
T u e D ec 6 2011
Release of the SELinux Guide for Red Hat Enterprise Linux 6.2
Mart in Prp ič
R evisio n 1.9 - 0
Wed Mar 3 2010
Revision for Red Hat Enterprise Linux 6
Sco t t R ad van
81