1
'HOO3RZHU9DXOW11DQG1
86(5·6*8,'(
333%%%%35(/,0,
35
ZZZGHOOFRP
____________________
Information in this document is subject to change without notice.
© 1999 Network Appliance, Inc. Licensed to Dell Computer Corporation. All rights reserved.
Reproduction in any manner whatsoever without the written permission of Dell Computer Corporation is strictly forbidden.
No part of this book covered by copyright may be reproduced in any form or by any meansgraphic, electronic, or mechanical,
including photocopying, recording, taping, or storage in an electronic retrieval systemwithout prior written permission of the
copyright owner.
Portions of this product are derived from the Berkeley Net2 release and the 4.4-Lite-2 release, which are copyrighted and publicly
distributed by The Regents of the University of California.
Copyright © 19801995 The Regents of the University of California. All rights reserved.
Portions of this product are derived from NetBSD, which is copyrighted and publicly distributed by Carnegie Mellon University.
Copyright © 1994, 1995 Carnegie Mellon University. All rights reserved. Author Chris G. Demetriou.
Permission to use, copy, modify, and distribute this software and its documentation is hereby granted, provided that both the
copyright notice and its permission notice appear in all copies of the software, derivative works or modified versions, and any
portions thereof, and that both notices appear in supporting documentation.
CARNEGIE MELLON ALLOWS FREE USE OF THIS SOFTWARE IN ITS AS IS CONDITION. CARNEGIE MELLON DISCLAIMS
ANY LIABILITY OF ANY KIND FOR ANY DAMAGES WHATSOEVER RESULTING FROM THE USE OF THIS SOFTWARE.
Software derived from copyrighted material of The Regents of the University of California, Carnegie Mellon University, and
Network Appliance are subject to the following license and disclaimer:
Redistribution and use in source and binary forms, with or without modification, are permitted provided that the following
conditions are met:
1. Redistributions of source code must retain the above copyright notices, this list of conditions, and the following
disclaimer.
2. Redistributions in binary form must reproduce the above copyright notices, this list of conditions, and the following
disclaimer in the documentation and/or other materials provided with the distribution.
3. All advertising materials mentioning features or use of this software must display the following acknowledgment:
This product includes software developed by the University of California, Berkeley and its contributors.
4. Neither the name of the University nor the names of its contributors may be used to endorse or promote products derived
from this software without specific prior written permission.
THIS SOFTWARE IS PROVIDED BY THE REGENTS AND CONTRIBUTORS AS IS AND ANY EXPRESS OR IMPLIED
WARRANTIES, INCLUDING, BUT NOT LIMITED TO, THE IMPLIED WARRANTIES OF MERCHANTABILITY AND FITNESS FOR A
PARTICULAR PURPOSE ARE DISCLAIMED. IN NO EVENT SHALL THE REGENTS OR CONTRIBUTORS BE LIABLE FOR ANY
DIRECT, INDIRECT, INCIDENTAL, SPECIAL, EXEMPLARY, OR CONSEQUENTIAL DAMAGES (INCLUDING, BUT NOT LIMITED
TO, PROCUREMENT OF SUBSTITUTE GOODS OR SERVICES; LOSS OF USE, DATA, OR PROFITS; OR BUSINESS
INTERRUPTION) HOWEVER CAUSED AND ON ANY THEORY OF LIABILITY, WHETHER IN CONTRACT, STRICT LIABILITY, OR
TORT (INCLUDING NEGLIGENCE OR OTHERWISE) ARISING IN ANY WAY OUT OF THE USE OF THIS SOFTWARE, EVEN IF
ADVISED OF THE POSSIBILITY OF SUCH DAMAGE.
Network Appliance reserves the right to change any products described herein at any time, and without notice. Network
Appliance assumes no responsibility or liability arising from the use of products described herein, except as expressly agreed to
in writing by Network Appliance. The use and purchase of this product do not convey a license under any patent rights,
trademark rights, or any other intellectual property rights of Network Appliance.
The product described in this manual may be protected by one or more U.S. patents, foreign patents, or pending applications.
RESTRICTED RIGHTS LEGEND: Use, duplication, or disclosure by the government is subject to restrictions as set forth in
subparagraph (c)(1)(ii) of the Rights in Technical Data and Computer Software clause at DFARS 252.277-7103 (October 1988) and
FAR 52-227-19 (June 1987).
Trademarks used in this text: Dell, the DELL logo, PowerVault, Dell OpenManage, and PowerEdge are trademarks, and DellWare
is a service mark of Dell Computer Corporation; Novell and NetWare are registered trademarks of Novell, Inc.; Data ONTAP, WAFL,
FilerView, and SecureShare are trademarks of Network Appliance, Inc; MS-DOS, Microsoft, Windows, and Windows NT are
registered trademarks, and Windows for Workgroups is a trademark of Microsoft Corporation; Intel, Pentium, and LANDesk are
registered trademarks, and Intel386 is a trademark of Intel Corporation; UNIX is a registered trademark of The Open Group in the
United States and other countries; VESA is a registered trademark and VL-Bus is a trademark of Video Electronics Standards
Association.
Other trademarks and trade names may be used in this document to refer to either the entities claiming the marks and names or
their products. Dell Computer Corporation disclaims any proprietary interest in trademarks and trade names other than its own.
April 1999 P/N 2385P Rev. A00
6DIHW\,QVWUXFWLRQV
Use the following safety guidelines to ensure your own personal safety and to help
protect your computer or storage system from potential damage.
Throughout this guide, blocks of text may be accompanied by an icon and printed in
bold type or in italic type. These blocks of text are notes, cautions, and warnings, and
they are used as follows:
NOTE: A NOTE contains important information that helps you install or operate the
system efficiently.
&$87,21$&$87,21FRQWDLQVLQVWUXFWLRQVWKDW\RXPXVWIROORZWRDYRLG
GDPDJHWRWKHHTXLSPHQWDV\VWHPFUDVKRUORVVRIGDWD
:$51,1*$:$51,1*FRQWDLQVLQVWUXFWLRQVWKDW\RXPXVWIROORZWRDYRLG
SHUVRQDOLQMXU\
6DIHW\:DUQLQJV
Observe the following warnings while servicing this system:
:$51,1*7KHUHLVDGDQJHURIDQHZEDWWHU\H[SORGLQJLILWLVLQFRUUHFWO\
LQVWDOOHG5HSODFHWKHEDWWHU\RQO\ZLWKWKHVDPHRUHTXLYDOHQWW\SHUHFRP
PHQGHGE\WKHPDQXIDFWXUHU'LVFDUGXVHGEDWWHULHVDFFRUGLQJWRWKH
PDQXIDFWXUHU·VLQVWUXFWLRQV
:$51,1*7KHSRZHUVXSSOLHVLQ\RXUFRPSXWHURUVWRUDJHV\VWHPPD\
SURGXFHKLJKYROWDJHVDQGHQHUJ\KD]DUGVZKLFKFDQFDXVHERGLO\KDUP
2QO\WUDLQHGVHUYLFHWHFKQLFLDQVDUHDXWKRUL]HGWRUHPRYHWKHFRPSXWHU
FRYHUVDQGDFFHVVDQ\RIWKHFRPSRQHQWVLQVLGHWKHFRPSXWHU
:$51,1*7KLVV\VWHPPD\KDYHPRUHWKDQRQHSRZHUVXSSO\FDEOH7R
UHGXFHWKHULVNRIHOHFWULFDOVKRFNDWUDLQHGVHUYLFHWHFKQLFLDQPXVWGLVFRQ
QHFWDOOSRZHUVXSSO\FDEOHVEHIRUHVHUYLFLQJWKHV\VWHP
'µ/(l,7¥832=251¨1©7HQWRV\VWÅPPÕzHPÉWYÉFHQDS½MHFÉFKNDEHOÕ.H
VQÉzHQÉUL]LNDÖUD]XHOHNWULFNÙPSURXGHPMHQXWQÅDE\vNROHQÙVHUYLVQÉWHFKQLN
SÔHGSURY½GÈQÉPVHUYLVXV\VWÅPXRGSRMLOYvHFKQ\QDS½MHFÉNDEHO\
v
$'9$56(/'HWWHV\VWHPNDQKDYHPHUHHQGHWVWU¡PIRUV\QLQJVNDEHO)RU
DWUHGXFHUHULVLNRHQIRUHOHNWULVNVW¡GE¡UHQSURIHVVLRQHOVHUYLFHWHNQLNHU
IUDNREOHDOOHVWU¡PIRUV\QLQJVNDEOHUI¡UV\VWHPHWVHUYLFHUHV
9$52,7867lVVlMlUMHVWHOPlVVlYRLROODXVHDPSLNXLQ\NVLYLUWDMRKWR6lK
N|LVNXYDDUDQSLHQHQWlPLVHNVLDPPDWWLWDLWRLVHQKXROWRKHQNLO|QRQ
LUURWHWWDYDNDLNNLYLUWDMRKGRWHQQHQMlUMHVWHOPlQKXROWDPLVWD
²³¨§¶²³¨©§¨°«¨§ÃÐÐÃâÔËÔÕÈÏÃÏÑÉÈÕËÏÈÕßÐÈÔÍÑÎßÍÑÍÃÄÈÎÈÌ
àÎÈÍÕÓÑÒËÕÃÐËâ¥ÑËÊÄÈÉÃÐËÈàÎÈÍÕÓËÚÈÔÍÑÆÑÖÇÃÓÃÍÅÃÎË×ËÙËÓÑÅÃÐÐÞÌ
ÕÈØÐËÍÇÑÎÉÈÐÑÕÍÎáÚËÕßÅÔÈÍÃÄÈÎËàÎÈÍÕÓÑÒËÕÃÐËâÒÓÈÉÇÈÚÈÏÒÓËÔÕÖÒËÕß
ÍÑÄÔÎÖÉËÅÃÐËáÔËÔÕÈÏÞ
2675=((1,(6\VWHPWHQPRHPLHÂZLÆFHMQLMHGHQNDEHO]DVLODQLD$E\
]PQLHMV]\ÂU\]\NRSRUDHQLDSUGHPSU]HGQDSUDZOXENRQVHUZDFMV\VWHPX
ZV]\VWNLHNDEOH]DVLODQLDSRZLQQ\E\ÂRGF]RQHSU]H]SU]HV]NRORQHJRWHFKQLND
REVXJL
$'9$56(/'HWHUPXOLJDWGHWWHV\VWHPHWKDUPHUHQQpQVWU¡POHGQLQJ
8QQJnIDUHIRUVW¡W(QHUIDUHQVHUYLFHWHNQLNHUPnNREOHIUDDOOHVWU¡POHG
QLQJHUI¡UGHWXWI¡UHVVHUYLFHSnV\VWHPHW
9$51,1*'HWWDV\VWHPNDQKDIOHUDQlWNDEODU(QEHK|ULJVHUYLFHWHNQLNHU
PnVWHNRSSODORVVDOODQlWNDEODULQQDQVHUYLFHXWI|UVI|UDWWPLQVNDULVNHQ
I|UHOHNWULVNDVW|WDU
$GGLWLRQDO6DIHW\3UHFDXWLRQV
To reduce the risk of bodily injury, electrical shock, fire, and damage to the equipment,
observe the following precautions.
*HQHUDO3UHFDXWLRQV
Observe the following general precautions for using and working with your system:
vi
Observe and follow service markings. Do not service any Dell product except as
explained in your Dell system documentation. Opening or removing covers that
are marked with the triangular symbol with a lightning bolt may expose you to
electrical shock. Components inside these compartments should be serviced
only by a Dell authorized service technician.
If any of the following conditions occur, unplug the product from the electrical
outlet and replace the part or contact your Dell authorized service provider:
The power cable, extension cord, or plug is damaged.
An object has fallen into the product.
The product has been exposed to water.
The product has been dropped or damaged.
The product does not operate correctly when you follow the operating
instructions.
Keep your system components away from radiators and heat sources. Also, do
not block cooling vents.
Do not spill food or liquids on your system components, and never operate the
product in a wet environment. If the computer gets wet, see the appropriate
chapter in your troubleshooting guide or contact a Dell-authorized service
provider.
Do not push any objects into the openings of your system components. Doing so
can cause fire or electric shock by shorting out interior components.
Use the product only with Dell products or other Dell-approved equipment.
Use the correct external power source. Operate the product only from the type
of power source indicated on the electrical ratings label. If you are not sure of the
type of power source required, consult your Dell service provider or local power
company.
To help avoid damaging your system components, be sure the voltage selection
switch (if provided) on the power supply is set to match the power available at
your location:
Allow the product to cool before removing covers or touching internal
components.
115 volts (V)/60 hertz (Hz) in most of North and South America and some Far
Eastern countries such as South Korea and Taiwan
100 V/50 Hz in eastern Japan and 100 V/60 Hz in western Japan
230 V/50 Hz in most of Europe, the Middle East, and the Far East
Also be sure that your monitor and attached peripherals are electrically rated to
operate with the power available in your location.
Use only approved power cable(s). If you have not been provided with a power
cable for your computer or storage system or for any AC-powered option
intended for your system, purchase a power cable that is approved for use in your
country. The power cable must be rated for the product and for the voltage and
current marked on the products electrical ratings label. The voltage and current
rating of the cable should be greater than the ratings marked on the product.
To help prevent electric shock, plug the system components and peripheral
power cables into properly grounded electrical outlets. These cables are
equipped with three-prong plugs to help ensure proper grounding. Do not use
adapter plugs or remove the grounding prong from a cable. If you must use an
extension cord, use a three-wire cord with properly grounded plugs.
Observe extension cord and power strip ratings. Make sure that the total ampere
rating of all products plugged into the extension cord or power strip does not
exceed 80 percent of the extension cord or power strip ampere ratings limit.
vii
Do not use appliance/voltage converters or kits sold for appliances with your Dell
product.
To help protect your system components from sudden, transient increases and
decreases in electrical power, use a surge suppressor, line conditioner, or uninterruptible power supply (UPS).
Position cables and power cords carefully; route cables and the power cord and
plug so that they cannot be stepped on or tripped over. Be sure that nothing rests
on your system components cables or power cord.
Do not modify power cables or plugs. Consult a licensed electrician or your
power company for site modifications. Always follow your local/national wiring
rules.
To help avoid possible damage to the system board, wait 5 seconds after turning
off the system before removing a component from the system board or disconnecting a peripheral device from the computer.
Handle batteries carefully. Do not disassemble, crush, puncture, short external
contacts, dispose of in fire or water, or expose batteries to temperatures higher
than 60 degrees Celsius (140 degrees Fahrenheit). Do not attempt to open or service batteries; replace batteries only with batteries designated for the product.
Turn down the volume before using headphones or other audio devices.
3UHFDXWLRQVIRU6HUYHUDQG6WRUDJH6\VWHPV
Observe the following additional safety guidelines for your system:
Unless your installation and/or troubleshooting documentation specifically allows
it, do not remove enclosure covers, attempt to override the safety interlocks, or
access any components inside the system. Depending on your system, installation and repairs may be done only by individuals who are qualified to service your
computer or storage system equipment and trained to deal with products capable of producing hazardous energy levels.
When connecting or disconnecting power to hot-pluggable power supplies, if
offered with your Dell product, observe the following guidelines:
viii
Install the power supply before connecting the power cable to the power
supply.
Unplug the power cable before removing the power supply.
If the system has multiple sources of power, disconnect power from the system by unplugging all power cables from the power supplies.
Move products with care; ensure that all casters and/or stabilizers are firmly connected to the computer or storage system. Avoid sudden stops and uneven
surfaces.
3UHFDXWLRQVIRU5DFN0RXQWDEOH3URGXFWV
Observe the following precautions for rack stability and safety. Also refer to the rack
installation documentation accompanying the system and the rack for specific warning and/or caution statements and procedures.
:$51,1*,QVWDOOLQJ'HOOV\VWHPFRPSRQHQWVLQD'HOOUDFNZLWKRXWWKH
IURQWDQGVLGHVWDELOL]HUVLQVWDOOHGFRXOGFDXVHWKHUDFNWRWLSRYHUSRWHQ
WLDOO\UHVXOWLQJLQERGLO\LQMXU\XQGHUFHUWDLQFLUFXPVWDQFHV7KHUHIRUH
DOZD\VLQVWDOOWKHVWDELOL]HUVEHIRUHLQVWDOOLQJFRPSRQHQWVLQWKHUDFN
:$51,1*$IWHULQVWDOOLQJV\VWHPFRPSRQHQWVLQDUDFNQHYHUSXOOPRUH
WKDQRQHFRPSRQHQWRXWRIWKHUDFNRQLWVVOLGHDVVHPEOLHVDWRQHWLPH7KH
ZHLJKWRIPRUHWKDQRQHH[WHQGHGFRPSRQHQWFRXOGFDXVHWKHUDFNWRWLS
RYHUDQGLQMXUHVRPHRQH
NOTE: Dells server and storage systems are certified as components for use in Dells
rack cabinet using the Dell customer rack kit. The final installation of Dell systems and
rack kits in any other brand of rack cabinet has not been approved by any safety agencies. It is the customers responsibility to have the final combination of Dell systems
and rack kits for use in other brands of rack cabinets evaluated for suitability by a certified safety agency.
System rack kits are intended to be installed in a Dell rack by trained service technicians. If you install the kit in any other rack, be sure that the rack meets the
specifications of a Dell rack.
Do not move large racks by yourself. Due to the height and weight of the rack,
Dell recommends a minimum of two people to accomplish this task.
Before working on the rack, make sure that the stabilizers are secure to the rack,
extend to the floor, and that the full weight of the rack rests on the floor. Install
front and side stabilizers on a single rack or front stabilizers for joined multiple
racks before working on the rack.
Always load the rack from the bottom up, and load the heaviest item in the rack
first.
Make sure that the rack is level and stable before extending a component from
the rack.
Extend only one component at a time from the rack.
After a component is inserted into the rack, carefully extend the rail into a locking
position, and then slide the component into the rack.
Do not overload the AC supply branch circuit that provides power to the rack. The
total rack load should not exceed 80 percent of the branch circuit rating.
Ensure that proper airflow is provided to components in the rack.
Use caution when pressing the component rail release latches and sliding a component into or out of a rack; the slide rails can pinch your fingers.
Do not step on or stand on any system/component when servicing other
systems/components in a rack.
ix
3UHFDXWLRQVIRU3URGXFWV:LWK0RGHPV
7HOHFRPPXQLFDWLRQVRU/RFDO$UHD1HWZRUN2SWLRQV
Observe the following guidelines when working with options:
Do not connect or use a modem or telephone during a lightning storm. There
may be a risk of electrical shock from lightning.
Never connect or use a modem or telephone in a wet environment.
Disconnect the modem cable before opening a product enclosure, touching or
installing internal components, or touching an uninsulated modem cable or jack.
Do not use a telephone line to report a gas leak while you are in the vicinity of the
leak.
Do not plug a modem or telephone cable into the network interface controller
(NIC) receptacle.
3UHFDXWLRQVIRU3URGXFWV:LWK/DVHU'HYLFHV
Observe the following precautions for laser devices:
Do not open any panels, operate controls, make adjustments, or perform procedures on a laser device other than those specified in the products
documentation.
Only authorized service technicians should repair laser devices.
:KHQ:RUNLQJ,QVLGH<RXU&RPSXWHU
Before you remove the computer covers, perform the following steps in the sequence
indicated.
:$51,1*6RPH'HOOV\VWHPVFDQEHVHUYLFHGRQO\E\WUDLQHGVHUYLFHWHFK
QLFLDQVEHFDXVHRIKLJKYROWDJHVDQGHQHUJ\KD]DUGV'RQRWDWWHPSWWR
VHUYLFHWKHFRPSXWHUV\VWHP\RXUVHOIH[FHSWDVH[SODLQHGLQWKLVJXLGHDQG
HOVHZKHUHLQ'HOOGRFXPHQWDWLRQ$OZD\VIROORZLQVWDOODWLRQDQGVHUYLFH
LQVWUXFWLRQVFORVHO\
&$87,217RKHOSDYRLGSRVVLEOHGDPDJHWRWKHV\VWHPERDUGZDLWVHF
RQGVDIWHUWXUQLQJRIIWKHV\VWHPEHIRUHUHPRYLQJDFRPSRQHQWIURPWKH
V\VWHPERDUGRUGLVFRQQHFWLQJDSHULSKHUDOGHYLFHIURPWKHFRPSXWHU
1.
Turn off your computer and any peripherals.
2.
Ground yourself by touching an unpainted metal surface on the chassis, such as
the metal around the card-slot openings at the back of the computer, before
touching anything inside your computer.
While you work, periodically touch an unpainted metal surface on the computer
chassis to dissipate any static electricity that might harm internal components.
x
3.
Disconnect your computer and peripherals from their power sources. Also, disconnect any telephone or telecommunication lines from the computer.
Doing so reduces the potential for personal injury or shock.
In addition, take note of these safety guidelines when appropriate:
When you disconnect a cable, pull on its connector or on its strain-relief loop, not
on the cable itself. Some cables have a connector with locking tabs; if you are disconnecting this type of cable, press in on the locking tabs before disconnecting
the cable. As you pull connectors apart, keep them evenly aligned to avoid bending any connector pins. Also, before you connect a cable, make sure that both
connectors are correctly oriented and aligned.
Handle components and cards with care. Dont touch the components or contacts on a card. Hold a card by its edges or by its metal mounting bracket. Hold a
component such as a microprocessor chip by its edges, not by its pins.
:$51,1*7KHUHLVDGDQJHURIDQHZEDWWHU\H[SORGLQJLILWLVLQFRUUHFWO\
LQVWDOOHG5HSODFHWKHEDWWHU\RQO\ZLWKWKHVDPHRUHTXLYDOHQWW\SHUHFRP
PHQGHGE\WKHPDQXIDFWXUHU'LVFDUGXVHGEDWWHULHVDFFRUGLQJWRWKH
PDQXIDFWXUHU·VLQVWUXFWLRQV
3URWHFWLQJ$JDLQVW(OHFWURVWDWLF'LVFKDUJH
Static electricity can harm delicate components inside your computer. To prevent
static damage, discharge static electricity from your body before you touch any of
your computers electronic components, such as the microprocessor. You can do so
by touching an unpainted metal surface on the computer chassis.
As you continue to work inside the computer, periodically touch an unpainted metal
surface to remove any static charge your body may have accumulated.
You can also take the following steps to prevent damage from electrostatic discharge
(ESD):
When unpacking a static-sensitive component from its shipping carton, do not
remove the component from the antistatic packing material until you are ready to
install the component in your computer. Just before unwrapping the antistatic
packaging, be sure to discharge static electricity from your body.
When transporting a sensitive component, first place it in an antistatic container
or packaging.
Handle all sensitive components in a static-safe area. If possible, use antistatic
floor pads and workbench pads.
The following notice may appear throughout this document to remind you of these
precautions:
:$51,1*6HH´3URWHFWLQJ$JDLQVW(OHFWURVWDWLF'LVFKDUJHµLQWKHVDIHW\
LQVWUXFWLRQVDWWKHIURQWRIWKLVJXLGH
xi
(UJRQRPLF&RPSXWLQJ+DELWV
:$51,1*,PSURSHURUSURORQJHGNH\ERDUGXVHPD\UHVXOWLQLQMXU\
:$51,1*9LHZLQJWKHPRQLWRUVFUHHQIRUH[WHQGHGSHULRGVRIWLPHPD\
UHVXOWLQH\HVWUDLQ
For comfort and efficiency, observe the following ergonomic guidelines when you set
up and use your computer system:
xii
Position your system so that the monitor and keyboard are directly in front of you
as you work. Special shelves are available (from Dell and other sources) to help
you correctly position your keyboard.
Set the monitor at a comfortable viewing distance (usually 510 to 610 millimeters
[20 to 24 inches] from your eyes).
Make sure that the monitor screen is at eye level or slightly lower when you sit in
front of the monitor.
Adjust the tilt of the monitor, its contrast and brightness settings, and the lighting
around you (such as overhead lights, desk lamps, and the curtains or blinds on
nearby windows) to minimize reflections and glare on the monitor screen.
Use a chair that provides good lower back support.
Always leave space to rest your hands while you use the keyboard or mouse.
Vary your work activities. Try to organize your work so that you do not have to
type for extended periods of time. When you stop typing, try to do things that
use both hands.
Keep your forearms horizontal with your wrists in a neutral, comfortable position
while you use the keyboard or mouse.
Let your upper arms hang naturally at your sides.
Sit erect, with your feet resting on the floor and your thighs level.
When sitting, make sure the weight of your legs is on your feet and not on the
front of your chair seat. Adjust your chairs height or use a footrest, if necessary,
to maintain proper posture.
monitor screen at or below eye level
wrists relaxed and flat
monitor and
keyboard
positioned
directly
in front of user
arms at desk level
feet flat on
the floor
xiii
xiv
3UHIDFH
$ERXW7KLV*XLGH
This guide is intended for anyone who configures and operates a new Dell
PowerVault 720N, 740N, or 760N filer that runs Data ONTAP 5.3 software.
It can be used by system administrators who are familiar with operating systems that
run on the filers clients, such as UNIX, Windows 9x, and Windows NT and with how
the Network File System (NFS), Common Internet File System (CIFS), and Hypertext
Transfer Protocol (HTTP) protocols are used for file sharing or transfers. This guide
doesnt cover basic system or network administration topics, such as Internet Protocol (IP) addressing, routing, and network topology.
The guide provides information about configuring the filer using both the Setup
Wizard and the setup command. It is organized in the following sections:
Chapter 1 introduces the standard features of the filer and provides a
description of the software media for the filer.
Chapters 2 and 3 describe how to configure the software using the Setup
Wizard.
Chapter 4 describes how to configure the software using the setup
command.
Chapters 5 through 9 provide additional information for configuration for both
Setup Wizard and setup command users.
Chapter 10 provides information about installing SecureShare if you used the
setup command; if you used the Setup Wizard, SecureShare was automatically installed.
Appendix A, "Technical Specifications," summarizes the technical specifications of the PowerVault 720N, 740N, and 760N storage systems.
Appendix B, "Installing PowerVault Filer Software," provides instructions for
installing the Data ONTAP 5.3 software.
Appendix C, "Preparing for CIFS Configuration," provides information about
deciding on a domain or workgroup configuration, choosing between
PC-style or UNIX-style permissions, and adding the filer to a Windows NT
domain.
Appendix D, "Time Zones," provides the time zones needed for the setup
prompt.
xv
Appendix E, "Regulatory Notices," is for users who are interested in which
regulatory agencies have tested and approved the Dell PowerVault 720N,
740N, and 760N filers.
Appendix F, "Warranty, Return Policy, and Year 2000 Statement of
Compliance," describes the warranty for your Dell system and the "Total Satisfaction" Return Policy.
The glossary provides definitions of terms, acronyms, and abbreviations
used in this guide.
:DUUDQW\DQG5HWXUQ3ROLF\,QIRUPDWLRQ
Dell Computer Corporation ("Dell") manufactures its hardware products from parts and
components that are new or equivalent to new in accordance with industry-standard
practices. For information about the Dell warranty for your system, see Appendix F,
"Warranty, Return Policy, and Year 2000 Statement of Compliance."
2WKHU'RFXPHQWV<RX0D\1HHG
Besides this Users Guide, the following documentation is included with your system:
The Getting Started document provides step-by-step instructions for setting up
your computer system.
The Quick Reference card provides the filer commands and command options.
The System Administrator and Command Reference Guide provides information
about how to configure, operate, and manage Dell PowerVault 720N, 740N, and
760N filers that run Data ONTAP 5.3 software. It also contains the user
commands.
The Installation and Troubleshooting Guide provides instructions for installing system hardware and includes troubleshooting and diagnostic procedures for testing
your computer system.
You may also have one or more of the following documents.
NOTE: Documentation updates are sometimes included with your system to describe
changes to your system or software. Always read these updates before consulting
any other documentation because the updates often contain the latest information.
xvi
Documentation is included with any options you purchase separately from your
system. This documentation includes information that you need to configure and
install these options. Installation instructions for the options are included in the
Installation and Troubleshooting Guide.
Technical information filessometimes called "readme" filesmay be installed
on your root volume to provide last-minute updates about technical changes to
your system or advanced technical reference material intended for experienced
users or technicians.
7HUPLQRORJ\&RQYHQWLRQV
This guide uses the following terms:
Filer refers to a PowerVault 720N, 740N, or 760N storage system.
System refers, at a minimum, to a filer and a connected PowerVault 700N Disk
Array Enclosure (DAE) storage system. A tape backup device can also be a component of the system, but is not required.
1RWDWLRQDO&RQYHQWLRQV
You can enter filer commands on either the console or from any client computer that
can access the filer through telnet.
In examples that illustrate commands executed on a UNIX workstation, this guide
uses the command syntax of SunOS 4.1.x. The command syntax and output might
differ, depending on your version of UNIX.
This guide uses the term "type" to mean pressing one or more keys on the keyboard.
It uses the term "enter" to mean pressing one or more keys and then pressing the
Enter key.
.H\&RPELQDWLRQV
When describing key combinations, this guide uses the hyphen (-) to separate individual keys. For example, "Ctrl-D" means pressing the "Control" and "D" keys
simultaneously. Also, this guide uses the term "Enter" to refer to the key that generates a carriage return, although the key is named "Return" on some keyboards.
7\SRJUDSKLFDO&RQYHQWLRQV
Typographical conventions used in this guide are shown in the following table:
&RQYHQWLRQ
7\SHRI,QIRUPDWLRQ
Italic type
Words or characters that require special attention.
File names.
Placeholders for information you must supply. For
example, if the guide says to enter the arp -d
hostname command, you enter the characters
"arp -d" followed by the actual name of the host.
Man page names.
Book titles in cross-references.
xvii
&RQYHQWLRQ
7\SHRI,QIRUPDWLRQ
Monospaced font
Command and daemon names.
Information displayed on the system console or
other computer monitors.
The contents of files.
Bold monospaced
font
Words or characters you type. What you type is
always shown in lowercase letters, unless you
must type it in uppercase letters.
6SHFLDO0HVVDJHV
This guide contains special messages that are described as follows:
NOTE: A NOTE contains important information that helps you install or operate the
system efficiently.
&$87,21$&$87,21FRQWDLQVLQVWUXFWLRQVWKDW\RXPXVWIROORZWRDYRLG
GDPDJHWRWKHHTXLSPHQWDV\VWHPFUDVKRUORVVRIGDWD
:$51,1*$:$51,1*FRQWDLQVLQVWUXFWLRQVWKDW\RXPXVWIROORZWRDYRLG
SHUVRQDOLQMXU\
xviii
&RQWHQWV
&KDSWHU
)LOHU)HDWXUHVDQG6RIWZDUH Standard Features of the Filer . . . . . . . . . . . . . . . . . . . . . . . . . . . . . . . . . . . . . . . . . 1-1
Filer Software Description. . . . . . . . . . . . . . . . . . . . . . . . . . . . . . . . . . . . . . . . . . . . 1-1
About the Software . . . . . . . . . . . . . . . . . . . . . . . . . . . . . . . . . . . . . . . . . . . . . 1-1
CD and Diskette Contents . . . . . . . . . . . . . . . . . . . . . . . . . . . . . . . . . . . . . . . . 1-2
Software Updates . . . . . . . . . . . . . . . . . . . . . . . . . . . . . . . . . . . . . . . . . . . . . . 1-2
&KDSWHU
6HWXS:L]DUG³,QWURGXFWLRQ Overview . . . . . . . . . . . . . . . . . . . . . . . . . . . . . . . . . . . . . . . . . . . . . . . . . . . . . . . . . 2-1
Prerequisites to Using the Setup Wizard. . . . . . . . . . . . . . . . . . . . . . . . . . . . . . . . . 2-1
Restriction on Using Setup Wizard . . . . . . . . . . . . . . . . . . . . . . . . . . . . . . . . . . . . . 2-2
About Basic Configuration Using Setup Wizard . . . . . . . . . . . . . . . . . . . . . . . . . . . 2-2
&KDSWHU
6HWXS:L]DUG³%DVLF&RQILJXUDWLRQRIWKH)LOHU Beginning the Configuration . . . . . . . . . . . . . . . . . . . . . . . . . . . . . . . . . . . . . . . . . . 3-1
Steps to Configuration . . . . . . . . . . . . . . . . . . . . . . . . . . . . . . . . . . . . . . . . . . . 3-1
How to Provide an IP Address . . . . . . . . . . . . . . . . . . . . . . . . . . . . . . . . . . . . . 3-1
Using DHCP to Obtain the IP Address for the New Filer . . . . . . . . . . . . . 3-1
Entering a Static IP Address for the New Filer . . . . . . . . . . . . . . . . . . . . . 3-2
How to Use the Setup Wizard . . . . . . . . . . . . . . . . . . . . . . . . . . . . . . . . . . . . . 3-2
How to Verify the Configuration. . . . . . . . . . . . . . . . . . . . . . . . . . . . . . . . . . . . 3-2
Using Setup Wizard on a Filer With a DHCP Server . . . . . . . . . . . . . . . . . . . . . . . . 3-2
Description . . . . . . . . . . . . . . . . . . . . . . . . . . . . . . . . . . . . . . . . . . . . . . . . . . . . 3-2
Prerequisites . . . . . . . . . . . . . . . . . . . . . . . . . . . . . . . . . . . . . . . . . . . . . . . . . . 3-2
Restrictions . . . . . . . . . . . . . . . . . . . . . . . . . . . . . . . . . . . . . . . . . . . . . . . . . . . 3-2
Steps . . . . . . . . . . . . . . . . . . . . . . . . . . . . . . . . . . . . . . . . . . . . . . . . . . . . . . . . 3-3
Results . . . . . . . . . . . . . . . . . . . . . . . . . . . . . . . . . . . . . . . . . . . . . . . . . . . . . . . 3-3
Where to Go From Here. . . . . . . . . . . . . . . . . . . . . . . . . . . . . . . . . . . . . . . . . . 3-3
xix
Using Setup Wizard on a New Filer Without a DHCP Server . . . . . . . . . . . . . . . . .
Description. . . . . . . . . . . . . . . . . . . . . . . . . . . . . . . . . . . . . . . . . . . . . . . . . . . .
Prerequisites . . . . . . . . . . . . . . . . . . . . . . . . . . . . . . . . . . . . . . . . . . . . . . . . . .
Steps . . . . . . . . . . . . . . . . . . . . . . . . . . . . . . . . . . . . . . . . . . . . . . . . . . . . . . . .
Where to Go From Here . . . . . . . . . . . . . . . . . . . . . . . . . . . . . . . . . . . . . . . . .
Verifying Network Connections . . . . . . . . . . . . . . . . . . . . . . . . . . . . . . . . . . . . . . .
Description. . . . . . . . . . . . . . . . . . . . . . . . . . . . . . . . . . . . . . . . . . . . . . . . . . . .
Steps . . . . . . . . . . . . . . . . . . . . . . . . . . . . . . . . . . . . . . . . . . . . . . . . . . . . . . . .
Examples . . . . . . . . . . . . . . . . . . . . . . . . . . . . . . . . . . . . . . . . . . . . . . . . . . . . .
Troubleshooting . . . . . . . . . . . . . . . . . . . . . . . . . . . . . . . . . . . . . . . . . . . . . . . .
Where to Go From Here . . . . . . . . . . . . . . . . . . . . . . . . . . . . . . . . . . . . . . . . . . . . .
&KDSWHU
VHWXS&RPPDQG³,QWURGXFWLRQ Overview. . . . . . . . . . . . . . . . . . . . . . . . . . . . . . . . . . . . . . . . . . . . . . . . . . . . . . . . .
Configuration Process . . . . . . . . . . . . . . . . . . . . . . . . . . . . . . . . . . . . . . . . . . .
Using DHCP With the Filer . . . . . . . . . . . . . . . . . . . . . . . . . . . . . . . . . . . . . . . . . . .
Description. . . . . . . . . . . . . . . . . . . . . . . . . . . . . . . . . . . . . . . . . . . . . . . . . . . .
Prerequisites . . . . . . . . . . . . . . . . . . . . . . . . . . . . . . . . . . . . . . . . . . . . . . . . . .
Steps . . . . . . . . . . . . . . . . . . . . . . . . . . . . . . . . . . . . . . . . . . . . . . . . . . . . . . . .
Configuring the Filer . . . . . . . . . . . . . . . . . . . . . . . . . . . . . . . . . . . . . . . . . . . . . . . .
Description. . . . . . . . . . . . . . . . . . . . . . . . . . . . . . . . . . . . . . . . . . . . . . . . . . . .
Prerequisites . . . . . . . . . . . . . . . . . . . . . . . . . . . . . . . . . . . . . . . . . . . . . . . . . .
Steps . . . . . . . . . . . . . . . . . . . . . . . . . . . . . . . . . . . . . . . . . . . . . . . . . . . . . . . .
Results . . . . . . . . . . . . . . . . . . . . . . . . . . . . . . . . . . . . . . . . . . . . . . . . . . . . . . .
Verifying Network Connections . . . . . . . . . . . . . . . . . . . . . . . . . . . . . . . . . . . . . . .
Using the ping Command . . . . . . . . . . . . . . . . . . . . . . . . . . . . . . . . . . . . . . . .
Procedure. . . . . . . . . . . . . . . . . . . . . . . . . . . . . . . . . . . . . . . . . . . . . . . . . . . . .
Examples . . . . . . . . . . . . . . . . . . . . . . . . . . . . . . . . . . . . . . . . . . . . . . . . . . . . .
How to Troubleshoot Problems. . . . . . . . . . . . . . . . . . . . . . . . . . . . . . . . . . . .
&KDSWHU
4-1
4-1
4-2
4-2
4-2
4-3
4-3
4-3
4-3
4-3
4-4
4-4
4-4
4-4
4-4
4-5
8VLQJ)LOHU9LHZ Administering Your Filer From FilerView. . . . . . . . . . . . . . . . . . . . . . . . . . . . . . . . .
Using FilerView . . . . . . . . . . . . . . . . . . . . . . . . . . . . . . . . . . . . . . . . . . . . . . . .
Prerequisites . . . . . . . . . . . . . . . . . . . . . . . . . . . . . . . . . . . . . . . . . . . . . . . . . .
Accessing FilerView. . . . . . . . . . . . . . . . . . . . . . . . . . . . . . . . . . . . . . . . . . . . .
Example . . . . . . . . . . . . . . . . . . . . . . . . . . . . . . . . . . . . . . . . . . . . . . . . . .
Using the FilerView Interface. . . . . . . . . . . . . . . . . . . . . . . . . . . . . . . . . . . . . .
Left Frame . . . . . . . . . . . . . . . . . . . . . . . . . . . . . . . . . . . . . . . . . . . . . . . .
Right Frame . . . . . . . . . . . . . . . . . . . . . . . . . . . . . . . . . . . . . . . . . . . . . . .
Help Button. . . . . . . . . . . . . . . . . . . . . . . . . . . . . . . . . . . . . . . . . . . . . . . .
xx
3-4
3-4
3-4
3-4
3-5
3-5
3-5
3-5
3-5
3-5
3-6
5-1
5-1
5-1
5-1
5-1
5-2
5-2
5-2
5-2
&KDSWHU
&RQILJXULQJ+773RQWKH)LOHU HTTP Configuration Information . . . . . . . . . . . . . . . . . . . . . . . . . . . . . . . . . . . . . . . 6-1
About This Chapter. . . . . . . . . . . . . . . . . . . . . . . . . . . . . . . . . . . . . . . . . . . . . . 6-1
Prerequisites . . . . . . . . . . . . . . . . . . . . . . . . . . . . . . . . . . . . . . . . . . . . . . . . . . 6-1
Procedure . . . . . . . . . . . . . . . . . . . . . . . . . . . . . . . . . . . . . . . . . . . . . . . . . . . . . 6-1
Results . . . . . . . . . . . . . . . . . . . . . . . . . . . . . . . . . . . . . . . . . . . . . . . . . . . . . . . 6-2
&KDSWHU
6HWWLQJ8SSDVVZGDQGJURXS)LOHV passwd and group Information . . . . . . . . . . . . . . . . . . . . . . . . . . . . . . . . . . . . . . . . 7-1
About This Chapter. . . . . . . . . . . . . . . . . . . . . . . . . . . . . . . . . . . . . . . . . . . . . . 7-1
Who Should Use This Chapter . . . . . . . . . . . . . . . . . . . . . . . . . . . . . . . . . . . . . 7-1
Location of the passwd and group Files. . . . . . . . . . . . . . . . . . . . . . . . . . . . . . 7-1
How the Filer Uses the passwd and group Files . . . . . . . . . . . . . . . . . . . . . . . 7-1
Default passwd File . . . . . . . . . . . . . . . . . . . . . . . . . . . . . . . . . . . . . . . . . . . . . 7-2
Default group File. . . . . . . . . . . . . . . . . . . . . . . . . . . . . . . . . . . . . . . . . . . . . . . 7-3
Accessing passwd and group Files From Windows NT and
Windows 9x Workstations . . . . . . . . . . . . . . . . . . . . . . . . . . . . . . . . . . . . . . . . . . . 7-3
Description . . . . . . . . . . . . . . . . . . . . . . . . . . . . . . . . . . . . . . . . . . . . . . . . . . . . 7-3
Steps . . . . . . . . . . . . . . . . . . . . . . . . . . . . . . . . . . . . . . . . . . . . . . . . . . . . . . . . 7-4
Accessing passwd and group Files From UNIX/NFS Clients. . . . . . . . . . . . . . . . . . 7-4
Description . . . . . . . . . . . . . . . . . . . . . . . . . . . . . . . . . . . . . . . . . . . . . . . . . . . . 7-4
Steps . . . . . . . . . . . . . . . . . . . . . . . . . . . . . . . . . . . . . . . . . . . . . . . . . . . . . . . . 7-4
Adding Entries to the passwd File. . . . . . . . . . . . . . . . . . . . . . . . . . . . . . . . . . . . . . 7-4
Adding Entries to the passwd File From a UNIX Client. . . . . . . . . . . . . . . . . . . . . . 7-5
Description . . . . . . . . . . . . . . . . . . . . . . . . . . . . . . . . . . . . . . . . . . . . . . . . . . . . 7-5
Steps . . . . . . . . . . . . . . . . . . . . . . . . . . . . . . . . . . . . . . . . . . . . . . . . . . . . . . . . 7-5
Adding Entries to the passwd File From a Windows/NFS Client . . . . . . . . . . . . . . 7-6
Description . . . . . . . . . . . . . . . . . . . . . . . . . . . . . . . . . . . . . . . . . . . . . . . . . . . . 7-6
Steps . . . . . . . . . . . . . . . . . . . . . . . . . . . . . . . . . . . . . . . . . . . . . . . . . . . . . . . . 7-6
Adding Entries to the group File . . . . . . . . . . . . . . . . . . . . . . . . . . . . . . . . . . . . . . . 7-6
Description . . . . . . . . . . . . . . . . . . . . . . . . . . . . . . . . . . . . . . . . . . . . . . . . . . . . 7-6
Prerequisites . . . . . . . . . . . . . . . . . . . . . . . . . . . . . . . . . . . . . . . . . . . . . . . . . . 7-6
Steps . . . . . . . . . . . . . . . . . . . . . . . . . . . . . . . . . . . . . . . . . . . . . . . . . . . . . . . . 7-7
Results . . . . . . . . . . . . . . . . . . . . . . . . . . . . . . . . . . . . . . . . . . . . . . . . . . . . . . . 7-7
&KDSWHU
&RQILJXULQJ$FFHVVWR&,)66KDUHV Assigning Access Rights . . . . . . . . . . . . . . . . . . . . . . . . . . . . . . . . . . . . . . . . . . . . . 8-1
About This Chapter. . . . . . . . . . . . . . . . . . . . . . . . . . . . . . . . . . . . . . . . . . . . . . 8-1
Scope of Shares Access. . . . . . . . . . . . . . . . . . . . . . . . . . . . . . . . . . . . . . . . . . 8-1
cifs Command Parameters. . . . . . . . . . . . . . . . . . . . . . . . . . . . . . . . . . . . . . . . 8-1
Establishing Access to Shares. . . . . . . . . . . . . . . . . . . . . . . . . . . . . . . . . . . . . . . . . 8-2
Description . . . . . . . . . . . . . . . . . . . . . . . . . . . . . . . . . . . . . . . . . . . . . . . . . . . . 8-2
Steps . . . . . . . . . . . . . . . . . . . . . . . . . . . . . . . . . . . . . . . . . . . . . . . . . . . . . . . . 8-2
xxi
&KDSWHU
&RQILJXULQJ&OLHQWVWR$FFHVVWKH)LOHU CIFS and NFS Client Configuration . . . . . . . . . . . . . . . . . . . . . . . . . . . . . . . . . . . . .
Configuring CIFS Clients . . . . . . . . . . . . . . . . . . . . . . . . . . . . . . . . . . . . . . . . . . . . .
About This Section. . . . . . . . . . . . . . . . . . . . . . . . . . . . . . . . . . . . . . . . . . . . . .
Filer Is Visible to CIFS Clients After Setup. . . . . . . . . . . . . . . . . . . . . . . . . . . .
CIFS Client Connection Methods. . . . . . . . . . . . . . . . . . . . . . . . . . . . . . . . . . .
Steps . . . . . . . . . . . . . . . . . . . . . . . . . . . . . . . . . . . . . . . . . . . . . . . . . . . . . . . .
Results . . . . . . . . . . . . . . . . . . . . . . . . . . . . . . . . . . . . . . . . . . . . . . . . . . . . . . .
Configuring NFS Clients . . . . . . . . . . . . . . . . . . . . . . . . . . . . . . . . . . . . . . . . . . . . .
About This Section. . . . . . . . . . . . . . . . . . . . . . . . . . . . . . . . . . . . . . . . . . . . . .
Host and Interface Names. . . . . . . . . . . . . . . . . . . . . . . . . . . . . . . . . . . . . . . .
Configuring NFS Clients Using Two Types of Name Resolution. . . . . . . . . . .
Configuring NFS Clients Using DNS or NIS for Name Resolution . . . . . . . . . . . . .
Configuring NFS Clients Using /etc/hosts File for Name Resolution . . . . . . . . . . .
Exporting Filer Directories for NFS Clients . . . . . . . . . . . . . . . . . . . . . . . . . . . . . . .
Mounting File Systems on NFS Clients . . . . . . . . . . . . . . . . . . . . . . . . . . . . . . . . .
Description. . . . . . . . . . . . . . . . . . . . . . . . . . . . . . . . . . . . . . . . . . . . . . . . . . . .
Steps . . . . . . . . . . . . . . . . . . . . . . . . . . . . . . . . . . . . . . . . . . . . . . . . . . . . . . . .
Result. . . . . . . . . . . . . . . . . . . . . . . . . . . . . . . . . . . . . . . . . . . . . . . . . . . . . . . .
Where to Go From Here . . . . . . . . . . . . . . . . . . . . . . . . . . . . . . . . . . . . . . . . . . . . .
&KDSWHU
9-1
9-1
9-1
9-1
9-1
9-2
9-2
9-3
9-3
9-3
9-3
9-3
9-3
9-4
9-4
9-4
9-4
9-5
9-5
VHWXS&RPPDQG³,QVWDOOLQJ6HFXUH6KDUH About SecureShare . . . . . . . . . . . . . . . . . . . . . . . . . . . . . . . . . . . . . . . . . . . . . . . .
Features in SecureShare . . . . . . . . . . . . . . . . . . . . . . . . . . . . . . . . . . . . . . . .
Installing SecureShare Access . . . . . . . . . . . . . . . . . . . . . . . . . . . . . . . . . . . . . . .
Description. . . . . . . . . . . . . . . . . . . . . . . . . . . . . . . . . . . . . . . . . . . . . . . . . . .
Steps . . . . . . . . . . . . . . . . . . . . . . . . . . . . . . . . . . . . . . . . . . . . . . . . . . . . . . .
Installing SecureShare Account Migrator . . . . . . . . . . . . . . . . . . . . . . . . . . . . . . .
Description. . . . . . . . . . . . . . . . . . . . . . . . . . . . . . . . . . . . . . . . . . . . . . . . . . .
Steps . . . . . . . . . . . . . . . . . . . . . . . . . . . . . . . . . . . . . . . . . . . . . . . . . . . . . . .
10-1
10-1
10-1
10-1
10-2
10-2
10-2
10-2
$SSHQGL[$
7HFKQLFDO6SHFLILFDWLRQV $
$SSHQGL[%
,QVWDOOLQJ3RZHU9DXOW)LOHU6RIWZDUH %
PowerVault Filer Software Installation . . . . . . . . . . . . . . . . . . . . . . . . . . . . . . . . . . B-1
What This Appendix Contains . . . . . . . . . . . . . . . . . . . . . . . . . . . . . . . . . . . . . B-1
Installing the Operating System. . . . . . . . . . . . . . . . . . . . . . . . . . . . . . . . . . . . B-1
Booting From Bootable System Diskettes . . . . . . . . . . . . . . . . . . . . . . . . . . . . . . . B-1
Booting From Diskette. . . . . . . . . . . . . . . . . . . . . . . . . . . . . . . . . . . . . . . . . . . B-1
Installing Data ONTAP 5.3 Software. . . . . . . . . . . . . . . . . . . . . . . . . . . . . . . . . . . . B-3
Installation From a Windows Client . . . . . . . . . . . . . . . . . . . . . . . . . . . . . . . . . B-3
Installation From a UNIX Client . . . . . . . . . . . . . . . . . . . . . . . . . . . . . . . . . . . . B-4
xxii
Changing to CIFS-Compatible Security Styles. . . . . . . . . . . . . . . . . . . . . . . . . . . . . B-5
Security Styles . . . . . . . . . . . . . . . . . . . . . . . . . . . . . . . . . . . . . . . . . . . . . . . . . B-5
Changing the Root Volume Security Style . . . . . . . . . . . . . . . . . . . . . . . . . . . . B-5
Creating Bootable System Diskettes. . . . . . . . . . . . . . . . . . . . . . . . . . . . . . . . . . . . B-5
Overview of Creating Bootable System Diskettes. . . . . . . . . . . . . . . . . . . . . . B-5
Creating Bootable System Diskettes on a Windows Client. . . . . . . . . . . . . . . B-6
Creating Bootable System Diskettes on a UNIX Client . . . . . . . . . . . . . . . . . . B-6
Creating a Diagnostics Diskette . . . . . . . . . . . . . . . . . . . . . . . . . . . . . . . . . . . . . . . B-7
Creating Diskettes From Diskette Image Files. . . . . . . . . . . . . . . . . . . . . . . . . B-7
Creating a Diagnostics Diskette on a Windows Client System . . . . . . . . . . . . B-7
Creating a Diagnostics Diskette on a UNIX Client . . . . . . . . . . . . . . . . . . . . . . B-7
$SSHQGL[&
3UHSDULQJIRU&,)6&RQILJXUDWLRQ &
CIFS Information Needed . . . . . . . . . . . . . . . . . . . . . . . . . . . . . . . . . . . . . . . . . . . . C-1
About This Appendix . . . . . . . . . . . . . . . . . . . . . . . . . . . . . . . . . . . . . . . . . . . . C-1
Deciding on a Domain or Workgroup Configuration . . . . . . . . . . . . . . . . . . . . . . . . C-1
About This Section . . . . . . . . . . . . . . . . . . . . . . . . . . . . . . . . . . . . . . . . . . . . . . C-1
Definition of a Domain . . . . . . . . . . . . . . . . . . . . . . . . . . . . . . . . . . . . . . . . . . . C-1
Definition of a Workgroup . . . . . . . . . . . . . . . . . . . . . . . . . . . . . . . . . . . . . . . . C-2
When to Install Into a Windows NT Domain . . . . . . . . . . . . . . . . . . . . . . . . . . C-2
When to Install Into a Windows Workgroup . . . . . . . . . . . . . . . . . . . . . . . . . . C-2
Summary of Domain and Workgroup Features . . . . . . . . . . . . . . . . . . . . . . . . C-2
Choosing Between PC-Style or UNIX-Style Permissions . . . . . . . . . . . . . . . . . . . . C-3
About This Section . . . . . . . . . . . . . . . . . . . . . . . . . . . . . . . . . . . . . . . . . . . . . . C-3
How PC-Style Permissions Work. . . . . . . . . . . . . . . . . . . . . . . . . . . . . . . . . . . C-4
When to Choose PC-Style Permissions . . . . . . . . . . . . . . . . . . . . . . . . . . . . . . C-4
How UNIX-Style Permissions Work . . . . . . . . . . . . . . . . . . . . . . . . . . . . . . . . . C-4
When to Choose UNIX-Style Permissions . . . . . . . . . . . . . . . . . . . . . . . . . . . . C-4
Adding the Filer to a Windows NT Domain . . . . . . . . . . . . . . . . . . . . . . . . . . . . . . . C-4
About This Section . . . . . . . . . . . . . . . . . . . . . . . . . . . . . . . . . . . . . . . . . . . . . . C-4
Prerequisites . . . . . . . . . . . . . . . . . . . . . . . . . . . . . . . . . . . . . . . . . . . . . . . . . . C-5
Procedure . . . . . . . . . . . . . . . . . . . . . . . . . . . . . . . . . . . . . . . . . . . . . . . . . . . . . C-5
Results . . . . . . . . . . . . . . . . . . . . . . . . . . . . . . . . . . . . . . . . . . . . . . . . . . . . . . . C-5
$SSHQGL['
7LPH=RQHV '
Time Zone Selection . . . . . . . . . . . . . . . . . . . . . . . . . . . . . . . . . . . . . . . . . . . . . . . . D-1
About This Section . . . . . . . . . . . . . . . . . . . . . . . . . . . . . . . . . . . . . . . . . . . . . . D-1
Africa . . . . . . . . . . . . . . . . . . . . . . . . . . . . . . . . . . . . . . . . . . . . . . . . . . . . . . . . D-1
America . . . . . . . . . . . . . . . . . . . . . . . . . . . . . . . . . . . . . . . . . . . . . . . . . . . . . . D-1
Antarctica . . . . . . . . . . . . . . . . . . . . . . . . . . . . . . . . . . . . . . . . . . . . . . . . . . . . . D-2
Asia. . . . . . . . . . . . . . . . . . . . . . . . . . . . . . . . . . . . . . . . . . . . . . . . . . . . . . . . . . D-2
Atlantic . . . . . . . . . . . . . . . . . . . . . . . . . . . . . . . . . . . . . . . . . . . . . . . . . . . . . . . D-3
xxiii
Australia . . . . . . . . . . . . . . . . . . . . . . . . . . . . . . . . . . . . . . . . . . . . . . . . . . . . . D-3
Brazil . . . . . . . . . . . . . . . . . . . . . . . . . . . . . . . . . . . . . . . . . . . . . . . . . . . . . . . . D-3
Canada . . . . . . . . . . . . . . . . . . . . . . . . . . . . . . . . . . . . . . . . . . . . . . . . . . . . . . . D-3
Chile . . . . . . . . . . . . . . . . . . . . . . . . . . . . . . . . . . . . . . . . . . . . . . . . . . . . . . . . . D-3
Etc . . . . . . . . . . . . . . . . . . . . . . . . . . . . . . . . . . . . . . . . . . . . . . . . . . . . . . . . . . D-4
Europe . . . . . . . . . . . . . . . . . . . . . . . . . . . . . . . . . . . . . . . . . . . . . . . . . . . . . . . D-4
GMT . . . . . . . . . . . . . . . . . . . . . . . . . . . . . . . . . . . . . . . . . . . . . . . . . . . . . . . . . D-4
Indian (Indian Ocean) . . . . . . . . . . . . . . . . . . . . . . . . . . . . . . . . . . . . . . . . . . . . D-5
Mexico . . . . . . . . . . . . . . . . . . . . . . . . . . . . . . . . . . . . . . . . . . . . . . . . . . . . . . . D-5
Miscellaneous . . . . . . . . . . . . . . . . . . . . . . . . . . . . . . . . . . . . . . . . . . . . . . . . . D-5
Pacific. . . . . . . . . . . . . . . . . . . . . . . . . . . . . . . . . . . . . . . . . . . . . . . . . . . . . . . . D-5
System V . . . . . . . . . . . . . . . . . . . . . . . . . . . . . . . . . . . . . . . . . . . . . . . . . . . . . D-6
US (United States) . . . . . . . . . . . . . . . . . . . . . . . . . . . . . . . . . . . . . . . . . . . . . . D-6
Aliases . . . . . . . . . . . . . . . . . . . . . . . . . . . . . . . . . . . . . . . . . . . . . . . . . . . . . . . D-6
$SSHQGL[(
5HJXODWRU\1RWLFHV (
FCC Notices (U.S. Only) . . . . . . . . . . . . . . . . . . . . . . . . . . . . . . . . . . . . . . . . . . . . . E-2
Class A . . . . . . . . . . . . . . . . . . . . . . . . . . . . . . . . . . . . . . . . . . . . . . . . . . . . . . . E-3
Class B . . . . . . . . . . . . . . . . . . . . . . . . . . . . . . . . . . . . . . . . . . . . . . . . . . . . . . . E-3
IC Notice (Canada Only) . . . . . . . . . . . . . . . . . . . . . . . . . . . . . . . . . . . . . . . . . . . . . E-3
CE Notice (European Union) . . . . . . . . . . . . . . . . . . . . . . . . . . . . . . . . . . . . . . . . . . E-4
Battery Disposal . . . . . . . . . . . . . . . . . . . . . . . . . . . . . . . . . . . . . . . . . . . . . . . . . . . E-4
EN 55022 Compliance (Czech Republic Only). . . . . . . . . . . . . . . . . . . . . . . . . . . . . E-5
VCCI Notice (Japan Only) . . . . . . . . . . . . . . . . . . . . . . . . . . . . . . . . . . . . . . . . . . . . E-5
Class A ITE. . . . . . . . . . . . . . . . . . . . . . . . . . . . . . . . . . . . . . . . . . . . . . . . . . . . E-5
Class B ITE. . . . . . . . . . . . . . . . . . . . . . . . . . . . . . . . . . . . . . . . . . . . . . . . . . . . E-6
MOC Notice (South Korea Only) . . . . . . . . . . . . . . . . . . . . . . . . . . . . . . . . . . . . . . . E-6
Class A Device. . . . . . . . . . . . . . . . . . . . . . . . . . . . . . . . . . . . . . . . . . . . . . . . . E-7
Class B Device. . . . . . . . . . . . . . . . . . . . . . . . . . . . . . . . . . . . . . . . . . . . . . . . . E-7
Polish Center for Testing and Certification Notice . . . . . . . . . . . . . . . . . . . . . . . . . E-7
Wymagania Polskiego Centrum BadaÒ i Certyfikacji . . . . . . . . . . . . . . . . . . . . . . . E-8
Pozostae instrukcje bezpieczeÒstwa . . . . . . . . . . . . . . . . . . . . . . . . . . . . . . . . . . E-8
NOM Information (Mexico Only). . . . . . . . . . . . . . . . . . . . . . . . . . . . . . . . . . . . . . . E-9
Información para NOM (únicamente para México) . . . . . . . . . . . . . . . . . . . . . . . . . E-9
BSMI Notice (Taiwan Only). . . . . . . . . . . . . . . . . . . . . . . . . . . . . . . . . . . . . . . . . . E-10
$SSHQGL[)
:DUUDQW\5HWXUQ3ROLF\DQG<HDU
6WDWHPHQWRI&RPSOLDQFH )
Limited Three-Year Warranty (U.S. Only) . . . . . . . . . . . . . . . . . . . . . . . . . . . . . . . .
Coverage During Year One . . . . . . . . . . . . . . . . . . . . . . . . . . . . . . . . . . . . . . .
Coverage During Years Two and Three . . . . . . . . . . . . . . . . . . . . . . . . . . . . . .
General Provisions . . . . . . . . . . . . . . . . . . . . . . . . . . . . . . . . . . . . . . . . . . . . . .
xxiv
F-1
F-1
F-2
F-2
Limited Three-Year Warranty (Canada Only) . . . . . . . . . . . . . . . . . . . . . . . . . . . . . . F-3
Coverage During Year One. . . . . . . . . . . . . . . . . . . . . . . . . . . . . . . . . . . . . . . . F-4
Coverage During Years Two and Three . . . . . . . . . . . . . . . . . . . . . . . . . . . . . . F-4
General Provisions . . . . . . . . . . . . . . . . . . . . . . . . . . . . . . . . . . . . . . . . . . . . . . F-5
Total Satisfaction Return Policy (U.S. and Canada Only). . . . . . . . . . . . . . . . . . . F-5
Year 2000 Statement of Compliance for Dell-Branded Hardware Products . . . . . . F-6
Previous Products . . . . . . . . . . . . . . . . . . . . . . . . . . . . . . . . . . . . . . . . . . . . . . F-7
Software. . . . . . . . . . . . . . . . . . . . . . . . . . . . . . . . . . . . . . . . . . . . . . . . . . . . . . F-7
Additional Information . . . . . . . . . . . . . . . . . . . . . . . . . . . . . . . . . . . . . . . . . . . F-7
*ORVVDU\
,QGH[
)LJXUHV
Figure 1-1.
Figure 7-1.
Figure 7-2.
Figure E-1.
Figure E-2.
Figure E-3.
Figure E-4.
Filer Features . . . . . . . . . . . . . . . . . . . . . . . . . . . . . . . . . . . . . . . . . . . 1-1
passwrd File Default Entry. . . . . . . . . . . . . . . . . . . . . . . . . . . . . . . . . 7-2
group File Default Entry . . . . . . . . . . . . . . . . . . . . . . . . . . . . . . . . . . . 7-3
VCCI Class A ITE Regulatory Mark . . . . . . . . . . . . . . . . . . . . . . . . . . E-6
VCCI Class B ITE Regulatory Mark . . . . . . . . . . . . . . . . . . . . . . . . . . E-6
MOC Class A Regulatory Mark . . . . . . . . . . . . . . . . . . . . . . . . . . . . . E-7
MOC Class B Regulatory Mark . . . . . . . . . . . . . . . . . . . . . . . . . . . . . E-7
7DEOHV
Table 1-1.
Table 5-1.
Table 7-1.
Table 7-2.
Table 8-1.
Table 9-1.
Table A-1.
Table C-1.
Filer CD and Diskettes . . . . . . . . . . . . . . . . . . . . . . . . . . . . . . . . . . . . 1-2
FilerView Home Page Choices. . . . . . . . . . . . . . . . . . . . . . . . . . . . . . 5-2
passwrd File Field Entries . . . . . . . . . . . . . . . . . . . . . . . . . . . . . . . . . 7-2
group File Field Entries . . . . . . . . . . . . . . . . . . . . . . . . . . . . . . . . . . . 7-3
cifs Command Parameters . . . . . . . . . . . . . . . . . . . . . . . . . . . . . . . . 8-1
CIFS Client Connection Methods. . . . . . . . . . . . . . . . . . . . . . . . . . . . 9-2
Technical Specifications. . . . . . . . . . . . . . . . . . . . . . . . . . . . . . . . . . . A-1
Domain and Workgroup Features . . . . . . . . . . . . . . . . . . . . . . . . . . . C-3
xxv
xxvi
&+$37(5
)LOHU)HDWXUHVDQG6RIWZDUH
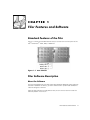
6WDQGDUG)HDWXUHVRIWKH)LOHU
Figure 1-1 shows the standard features that you can see from the front panel of the
Dell PowerVault 720N, 740N, or 760N filer.
)LJXUH)LOHU)HDWXUHV
)LOHU6RIWZDUH'HVFULSWLRQ
$ERXWWKH6RIWZDUH
The filer was shipped with a CD and system boot diskettes. Because system software
has been installed at the factory, you dont need the CD or system boot diskettes to
install or configure a new filer.
Store the filer software in a safe place so that you can use it to recover in case of a
software problem in the future.
Filer Features and Software 1-1
&'DQG'LVNHWWH&RQWHQWV
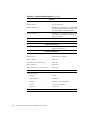
Table 1-1 describes the CD and system boot diskettes:
7DEOH)LOHU&'DQG'LVNHWWHV
3DFNDJH,WHP
&RQWHQWV
Data ONTAP 5.3
CD
This CD contains the system software and documentation.
If you need to reinstall the system software for any reason,
you need this CD; call Dell technical support for instructions before reinstalling system software on the filer.
The Data ONTAP 5.3 CD contains the system files and system boot software in two formats so that it can be read by
both UNIX ® and PC workstations. For full information
about the contents of the CD, read the file named contents.txt on the CD.
System boot
diskettes
If the filer fails to boot from hard disk, or if you forget your
password, you must boot the filer from the system boot
diskettes.
Custom MIB
Use this Management Information Base (MIB) with SNMP
to get detailed information about filer operation. For further
information, see your System Administrator and Command
Reference Guide.
6RIWZDUH8SGDWHV
Dell regularly makes software updates available to customers who purchase software
support agreements.
You can find information about the latest software updates at Dells World Wide Web
site at http://www.dell.com.
1-2
Dell PowerVault 720N, 740N, and 760N Users Guide
&+$37(5
6HWXS:L]DUG³,QWURGXFWLRQ
2YHUYLHZ
The Setup Wizard provides an easy to use Web-based method of configuring the
basic settings for a new filer.
The configuration method using the setup command is different from the Setup
Wizard configuration method in these ways:
Uses command-line installation and configuration commands to install and configure the new filer
Provides limited on-line help
The Setup Wizard uses the network and a Web browser to perform the initial basic
setup for filers, eliminating the need for the command-line setup. The Setup Wizard
contains context-sensitive help for each field on each page.
After you finish the basic configuration, you can use the Web-based FilerView tool
to complete other types of configurations you might need on this filer. FilerView also
uses the network and a Web browser to perform general management tasks.
3UHUHTXLVLWHVWR8VLQJWKH6HWXS:L]DUG
The Setup Wizard needs an IP address to begin the configuration process, which you
can obtain using either of the following methods:
An existing Dynamic Host Configuration Protocol (DHCP) server on your network
during initial boot of the new filer.
If the filer cant find or obtain an IP address from the DHCP server, the normal
setup script, using a console connected to the filer, prompts you for several
pieces of information, including an IP address, and then asks whether you want
to use the Setup Wizard. This method works with any filer; however, you must
have a console connected to the filer for the initial few pieces of setup
information.
Setup Wizard Introduction 2-1
5HVWULFWLRQRQ8VLQJ6HWXS:L]DUG
If you dont want to switch from the console to the Web-based wizard to do the configuration (when you are not using a DHCP server), you should use the setup
command configuration that is discussed in Chapter 4, setup Command
Introduction.
$ERXW%DVLF&RQILJXUDWLRQ8VLQJ6HWXS
:L]DUG
The Setup Wizard uses multiple Web pages with a limited number of questions per
page to set up the filer. On-line context-sensitive help is available for each field that
you need to respond to. The Setup Wizard covers protocol licensing, based on what
you purchased; administration setup; DNS, NIS, and Windows NT setup; and routing
and email gateway setup.
2-2
Dell PowerVault 720N, 740N, and 760N Users Guide
&+$37(5
6HWXS:L]DUG³%DVLF
&RQILJXUDWLRQRIWKH)LOHU
%HJLQQLQJWKH&RQILJXUDWLRQ
6WHSVWR&RQILJXUDWLRQ
There are several steps to performing the basic configuration of a new filer:
Providing the filer with an IP address
Using the Setup Wizard to do the configuration
Verifying the configuration of the filer
+RZWR3URYLGHDQ,3$GGUHVV
There are two methods to providing the filer with an IP address:
8VLQJ'+&3WR2EWDLQWKH,3$GGUHVVIRUWKH1HZ)LOHU
To use the DHCP server to obtain an IP address for the filer, you need to ensure that
the following DHCP configuration exists:
You need the MAC address from the filers e0 interface before you turn on and
configure your filer. You need to manually allocate a static IP address on the
DHCP server.
The e0 MAC address is printed on a label on the back of the filers PCB carrier, in
the upper left-hand corner.
Use the e0 MAC address to manually allocate a static IP address on the DHCP
server for your filer; or provide your DHCP administrator with the information to
perform this task. The DHCP server uses the e0 MAC address to identify the filer
when it boots.
To avoid IP address conflicts, use a static IP address on your DHCP server. If you
use a dynamic IP address, the filer does not release that address when its lease
expires. The lease is a predetermined expiration time set on the DHCP server.
If you are using DHCP to obtain the IP address for the filer, see "Using Setup
Wizard on a Filer With a DHCP Server."
Setup Wizard Basic Configuration of the Filer 3-1
(QWHULQJD6WDWLF,3$GGUHVVIRUWKH1HZ)LOHU
If you are not using DHCP to obtain the IP address for the filer, see "Using Setup
Wizard on a New Filer Without a DHCP Server."
+RZWR8VHWKH6HWXS:L]DUG
After you have the IP address for the new filer, you can point your browser to the URL
address on the filer to start the Setup Wizard. You follow the pages of prompts to
complete the configuration. Each prompt field has its own context-sensitive help
screen if you need more information than the prompt gives.
The last page of the wizard displays all the configuration settings you provided and
enables you to make any changes you might want to make. You can click the field you
want to change; the wizard takes you to that specific page.
After you finish making any changes necessary, you click Finish and the Setup Wizard
configures the filer. After the Setup Wizard finishes, the filer is ready for use.
+RZWR9HULI\WKH&RQILJXUDWLRQ
You can verify that the configuration is successful by using ping to see that all network interfaces are up and working.
8VLQJ6HWXS:L]DUGRQD)LOHU:LWKD
'+&36HUYHU
'HVFULSWLRQ
This procedure configures a PowerVault 720N, 740N, or a 760N filer using the Setup
Wizard. After you complete this procedure, the filer is running the protocols for which
you purchased licenses, and is configured and ready for use.
3UHUHTXLVLWHV
You need the following requirements completed before you begin the procedure:
A static IP address on your DHCP server set up before you begin the filer
configuration
The new filer attached to the network
A client browser on the same network as the filers e0 network
5HVWULFWLRQV
If your new filer will be using virtual interfaces, use the procedure documented in
"Using Setup Wizard on a New Filer Without a DHCP Server."
3-2
Dell PowerVault 720N, 740N, and 760N Users Guide
6WHSV
To begin the configuration, perform the following steps:
1.
Turn on the filers power switch to begin the configuration process.
The first time the filer boots, it contacts the DHCP server and requests an IP
address. The DHCP server supplies the static IP address you configured it with.
2.
From a client on the same network, point a web browser to
http://filer-name/api
or
http://filer-ip-address/api
Replace filer-name or filer-ip-address with either the name of the filer or the filers
IP address that you set up in the DHCP server.
The Setup Wizard loads.
3.
Enter the information as requested.
5HVXOWV
After you finish configuring the filer, it is on-line. The following directories exist on
the filer:
/vol/vol0
/vol/vol0/home
NOTE: /vol is not a directoryit is a special virtual root path under which the filer
mounts its volumes. You cannot mount /vol to view all the volumes on the filer; you
must mount each filer volume separately.
If you purchased a license for the NFS protocol, /vol/vol0 is exported to the administration host for root access; /vol0/home is exported to the administration host for root
access and to all clients for general access. Paths such as /etc/passwd are referenced
as /vol/vol0/etc/passwd.
If you purchased a license for the CIFS protocol, /vol/vol0 is shared as C$; only the
system administrator with the root password has read and write access to the C$
share. The /vol/vol0/home directory is shared as HOME without access granted
to anyone.
:KHUHWR*R)URP+HUH
Verify the network connections of your new filer using the procedure in "Verifying
Network Connections."
Setup Wizard Basic Configuration of the Filer 3-3
8VLQJ6HWXS:L]DUGRQD1HZ)LOHU
:LWKRXWD'+&36HUYHU
'HVFULSWLRQ
This procedure enables you to use the Setup Wizard on a new filer without using a
DHCP server to obtain the new filers IP address. This procedure also enables you to
set up virtual interfaces in your new filer.
After you complete this procedure, the filer is running the protocols for which you purchased licenses, and is configured and ready for use.
3UHUHTXLVLWHV
You need the following requirements completed before you begin the procedure:
Installed filer hardware and the serial console attached to the filer according to
the instructions in your hardware guide
The new filer attached to the network
A client browser on the same network as the filers e0 network
6WHSV
To give the filer an IP address and to use the Setup Wizard to configure the filer, perform the following steps:
1.
Turn on the filers power switch to begin the configuration process.
The first time the filer boots up, it runs setup.
If setup does not run automatically, enter setup and press Enter.
2.
Enter the information as requested.
The following prompt is displayed:
:RXOG\RXOLNHWRFRQWLQXHVHWXSWKURXJKWKHZHE
LQWHUIDFH">Q@
3.
Enter yes to continue the setup using the Setup Wizard.
The wizard displays the following message:
3RLQWDZHEEURZVHUWR
KWWSILOHUQDPHDSL
RU
KWWSILOHULSDGGUHVVDSL
WRFRPSOHWHVHWXS
3-4
Dell PowerVault 720N, 740N, and 760N Users Guide
4.
From a client attached to the network, point your browser to the filer address
given; the Setup Wizard loads.
5.
Enter the information as requested.
:KHUHWR*R)URP+HUH
Verify the network connections of your new filer using the procedure in "Verifying Network Connections."
9HULI\LQJ1HWZRUN&RQQHFWLRQV
'HVFULSWLRQ
After you configure the filer, you use the ping command from a client attached to the
network to verify that the filer is set up correctly and can communicate with other
computers on the network.
6WHSV
To verify filer communication, perform the following steps:
1.
At a client attached to the network, enter the following command:
SLQJILOHULSDGGUHVV!
2.
Replace <filer ipaddress> with the Internet protocol (IP) address that you
assigned the filer.
3.
Repeat the test for each interface that is installed in the filer.
([DPSOHV
The following examples test the network connections for a filer that has the host
name filer with two interfaces named e0 and f0 installed:
SLQJILOHUH
SLQJILOHUI
7URXEOHVKRRWLQJ
If an interface does not respond to a ping command, make sure that:
The interface is securely attached to the network.
The routers function properly with correct routing information if the ping command is issued from a network not directly attached to the interface.
The media type is set up correctly if the interface is on an Ethernet card containing different media connectors.
Setup Wizard Basic Configuration of the Filer 3-5
:KHUHWR*R)URP+HUH
You have completed the configuration using the Setup Wizard. Go to Chapter 5,
"Using FilerView."
3-6
Dell PowerVault 720N, 740N, and 760N Users Guide
&+$37(5
VHWXS&RPPDQG³,QWURGXFWLRQ
2YHUYLHZ
&RQILJXUDWLRQ3URFHVV
To configure a new filer for the first time, perform the following steps. Some of the
procedures are optional, depending on the filer options that you purchased.
1.
Set up DHCP.
If you want to use the Dynamic Host Configuration Protocol (DHCP) to configure
the filers onboard interface (e0), follow the instructions in "Using DHCP With the
Filer."
Using DHCP to assign an IP address to a filer enables you to use a Telnet client to
complete the first-time configuration, rather than having to attach a serial console
to the filer to complete the configuration.
2.
Add the filer to a Windows NT domain.
If you purchased a license for the CIFS protocol for your filer and you plan to add
the filer to a Windows NT domain, see "Adding the Filer to a Windows NT
Domain" in Appendix C.
3.
Configure the filer.
Configure your filer according to the instructions in "Configuring the Filer."
4.
Verify the filers network connections.
Verify that the filer is communicating on the network by following the instructions
in "Verifying Network Connections."
5.
Configure HTTP service.
If you purchased a license for the HTTP protocol for your filer, configure the HTTP
options as described in Chapter 6, "Configuring HTTP on the Filer."
6.
Set up passwd and group files.
setup Command Introduction 4-1
If you purchased a license for the CIFS protocol for your filer and you are not
using a Windows NT domain controller to authenticate users, configure passwd
and group files according to the instructions in Chapter 7, "Setting Up passwd
and group Files."
7.
Configure CIFS shares.
If you purchased a license for the CIFS protocol for your filer, configure CIFS
shares so that users can access directories on the filer.
8.
Configure clients to access the filer.
You must configure clients according to the instructions in Chapter 9, "Configuring Clients to Access the Filer," so that they can access information on the filer.
9.
Install the SecureShare program on CIFS clients.
If you purchased a license for the CIFS protocol for your filer, you can install the
SecureShare program on Windows clients according to the instructions in Chapter 10, "setup Command Installing SecureShare," This enables users to view
and modify the UNIX permissions and attributes on files stored on the filer.
10. Learn about the Data ONTAP 5.3 software.
Read Chapter 1, "Filer Features and Software."
11. Learn about FilerView.
Read Chapter 5, "Configuring the Filer Using FilerView," to learn how to administer your filer using the FilerView Web-based administration tool.
8VLQJ'+&3:LWKWKH )LOHU
'HVFULSWLRQ
Follow this procedure to use DHCP to assign a static IP address to the onboard interface (e0) on a filer during first-time configuration. This procedure enables you to use a
Telnet client to access the filer and complete the first-time configuration, rather than
having to attach a hard-wired console to the filer. When you use DHCP to assign an IP
address to the onboard interface, the filer:
Obtains the address from the DHCP server when the filer is turned on
Configures the onboard interface with the IP address
Becomes accessible to a Telnet client or the Setup Wizard
3UHUHTXLVLWHV
To use this procedure, you must have a DHCP server and the filer on the same network segment.
4-2
Dell PowerVault 720N, 740N, and 760N Users Guide
6WHSV
To use DHCP to assign an IP address to the onboard interface, perform the following
steps:
1.
Locate the MAC address for the onboard interface by looking for a label on the
back of the left side of the filers PCB carrier, if necessary.
2.
Configure the DHCP server to return a static IP address for the interface based
on the MAC address for the onboard interface.
&$87,217KH'+&3VHUYHUPXVWUHWXUQDVWDWLF,3DGGUHVVIRUWKH
LQWHUIDFH,IWKHVHUYHUUHWXUQVDG\QDPLF,3DGGUHVVWKHILOHUGLVSOD\V
DQHUURUPHVVDJHDQGFRQWLQXHVWRXVHWKH,3DGGUHVVSHUPDQHQWO\³
ZKLFKFDQUHVXOWLQDQ,3DGGUHVVFRQIOLFWLIWKH'+&3VHUYHUDVVLJQVWKH
,3DGGUHVVG\QDPLFDOO\WRRWKHUFOLHQWVIURPWLPHWRWLPH
&RQILJXULQJWKH)LOHU
'HVFULSWLRQ
This procedure describes how to configure your filer whether or not you use DHCP.
Complete this procedure after you install your new filer. After you configure your filer,
it is visible on your network and available for access by users from their client
computers.
3UHUHTXLVLWHV
Before you start this procedure, you must:
Install the filer hardware and the serial console according to the instructions in
your hardware guide if you are not using DHCP.
Complete steps 1 through 3 of "Configuration Process."
6WHSV
To configure a filer, perform the following steps:
1.
Turn on the filers power switch to begin the configuration process.
The first time the filer boots:
2.
If you followed the steps in "Using DHCP With the Filer," the filer obtains an
IP address for the e0 interface.
The filer runs the setup command.
Enter the configuration information as prompted by the setup program.
setup Command Introduction 4-3
5HVXOWV
After you finish configuring the filer, it is on-line. The following directories exist on the
filer:
/vol/vol0
/vol/vol0/home
NOTE: /volis not a directoryit is a special virtual root path under which the filer
mounts its volumes. You cannot mount /volto view all the volumes on the filer; you
must mount each filer volume separately.
If you purchased a license for the NFS protocol, /vol/vol0 is exported to the administration host for root access; /vol0/home is exported to the administration host for root
access and to all clients for general access.
If you purchased a license for the CIFS protocol, /vol/vol0 is shared as C$; only the
system administrator with the root password has read and write access to the C$
share. The /vol/vol0/home directory is shared as HOME without access granted to
anyone.
9HULI\LQJ1HWZRUN&RQQHFWLRQV
8VLQJWKHSLQJ&RPPDQG
After you configure the filer, you use the ping command from a client attached to the
network to verify that the filer can communicate with other computers on the
network.
3URFHGXUH
To verify filer communication, perform the following steps:
1.
At a client attached to the network, enter the following command:
ping hostname-interface
Replace the variable hostname with the host name that you assigned to the filer
when you ran setup; replace the variable interface with one of the interface
names that the filer assigned when you ran setup.
2.
Repeat the test once for each interface that is installed in the filer.
([DPSOHV
The following examples test the network connections for a filer that has the host
name filer with two interfaces named e0 and f0 installed:
ping filer-e0
ping filer-f0
4-4
Dell PowerVault 720N, 740N, and 760N Users Guide
+RZWR7URXEOHVKRRW3UREOHPV
If an interface does not respond to a ping command, make sure that:
The interface is securely attached to the network.
The routers function properly with correct routing information if the ping command is issued from a network not directly attached to the interface.
The media type is set up correctly if the interface is using a multi-port Ethernet
card with different port speeds.
setup Command Introduction 4-5
4-6
Dell PowerVault 720N, 740N, and 760N Users Guide
&+$37(5
8VLQJ)LOHU9LHZ
$GPLQLVWHULQJ<RXU)LOHU)URP)LOHU9LHZ
8VLQJ)LOHU9LHZ
This chapter introduces FilerView, the Web-based administration tool for Data
ONTAP 5.3.
FilerView enables you to perform most administration tasks from any client on your
network that has a compatible Web browser. FilerView is a GUI-based administration
tool, using Java applets, that performs tasks that would otherwise require you to
enter commands at the filer console or edit configuration files.
You can use FilerView even if you did not purchase a license for the HTTP protocol.
If you prefer to manage the filer by using a command-line interface and editing configuration files, see your System Administrator and Command Reference Guide.
3UHUHTXLVLWHV
You need Netscape Navigator 4 or later or Microsoft Internet Explorer 4 or later to
access FilerView. FilerView has not been tested with other Web browsers.
$FFHVVLQJ)LOHU9LHZ
If you used the Setup Wizard, you can access FilerView by clicking the system
management tools link on the Setup Wizards Finished page.
If you used the setup command, you can access FilerView by pointing your browser
to the filer home page (http://hostname/na_admin), substituting the filers name for
hostname.
([DPSOH
If your hosts name is filer, enter the following URL:
KWWSILOHUQDBDGPLQ
Using FilerView
5-1
When your browser connects to the filer, the filer home page is loaded. The initial
page contains the choices shown in Table 5-1.
7DEOH)LOHU9LHZ+RPH3DJH&KRLFHV
&KRLFH
'HVFULSWLRQ
Manual Pages
Links to UNIX-style man pages for
the Data ONTAP 5.3 console commands.
FilerView
Links to the FilerView opening screen
with management options.
Filer-At-A-Glance
Displays a tool that monitors the performance of the filer.
8VLQJWKH)LOHU9LHZ,QWHUIDFH
The FilerView interface consists of two frames: a left frame and a right frame.
/HIW)UDPH
The left frame contains an expandable list of categories:
The Real-time Displays category contains choices that launch separate tools that
monitor filer performance.
The other categories represent management functions.
To view the Real-time Displays or the functions in a category, double-click the
Real-time Displays or a category name. To select a Real-time Display or a function,
double-click the display or function name.
NOTE: The first time you select a function, FilerView prompts you to enter the filers
administration password. After you enter the correct password, FilerView does not
prompt you for the password again.
5LJKW)UDPH
The right frame contains a logo initially.
As you select functions from the left frame, the right frame changes to display forms
that provide information about the filer configuration and enable you to change the
filers configuration.
To alter the filer configuration, you change information that is displayed in forms and
then save the information.
+HOS%XWWRQ
The top of the window contains a Help button that you can click to view Help for the
form that is currently displayed in the right frame.
5-2
Dell PowerVault 720N, 740N, and 760N Users Guide
&+$37(5
&RQILJXULQJ+773RQWKH)LOHU
+773&RQILJXUDWLRQ,QIRUPDWLRQ
$ERXW7KLV&KDSWHU
This chapter contains instructions for configuring the filer to provide HTTP service. If
you purchased a license for the HTTP protocol, follow the instructions in this chapter
to configure the HTTP service; otherwise, continue with Chapter 7, "Setting Up
passwd and group Files."
3UHUHTXLVLWHV
Before configuring the filer to provide HTTP service, you must decide which directory
path that the filer uses as the home directory for files to be accessed by HTTP clients.
The path name for the directory uses the following format:
/vol/volume_name/directory_name
For example, to use the /home/html_files directory path on the vol0 volume, you use
the following path:
/vol/vol0/home/html_files
3URFHGXUH
NOTE: All lines within filer configuration files must end with a carriage return.
To configure HTTP service, perform the following steps:
1.
At the filer console, enter the following command to enable the HTTP daemon:
options httpd.enable on
2.
Use the following command syntax to specify the root of the path that HTTP
requests can use:
options httpd.rootdir pathname
Configuring HTTP on the Filer 6-1
For example, if you want HTTP clients to gain access to files or subdirectories
under /vol0/home/html_files, enter
options httpd.rootdir /vol/vol0/home/html_files
When Web browsers request files using HTTP, the filer delivers the files using the
root directory. For example, if a browser requests the URL http://filer/demo/
index.htm, the filer sends the file /vol0/home/html_files/demo/index.htm.
3.
If you want the HTTP service started whenever the filer is booted, use an editor
from an NFS or Microsoft® Windows® operating system client to enter the following lines to the filers /etc/rc file:
options httpd.enable on
options httpd.rootdir pathname
5HVXOWV
The filer is configured to respond to requests from Web browsers.
6-2
Dell PowerVault 720N, 740N, and 760N Users Guide
&+$37(5
6HWWLQJ8SSDVVZGDQGJURXS
)LOHV
SDVVZGDQGJURXS,QIRUPDWLRQ
$ERXW7KLV&KDSWHU
This chapter describes how to set up the passwd and group files on the filer so that
the filer can authenticate users.
:KR6KRXOG8VH7KLV&KDSWHU
You should use the information in this chapter if your filer is licensed for the CIFS protocol and does not use a Windows NT domain controller to authenticate users.
If your filer does use a Windows NT domain controller, skip this chapter and continue
with Chapter 8, "Configuring Access to CIFS Shares."
/RFDWLRQRIWKHSDVVZGDQGJURXS)LOHV
The setup program created default passwd and group files in the /etc directory of the
filer default volume.
+RZWKH)LOHU8VHVWKHSDVVZGDQGJURXS)LOHV
The filer uses passwd and group files for the following reasons:
To authenticate users for CIFS access and to translate user and group names in
the /etc/quotas file to UIDs and GIDs
If the filer uses a Windows NT domain controller to authenticate CIFS users, the
domain controller verifies the users login name and password, and the filer verifies that the user has an entry in the passwd file.
If the filer uses the passwd file to authenticate NFS or CIFS users, the filer uses
the encrypted password in the passwd file to verify the users login name and
password.
Setting Up passwd and group Files 7-1
To determine CIFS guest access
For additional information about guest access, see your System Administrator
and Command Reference Guide.
To determine users rights to access files
For information about how the filer uses the files to determine access rights in an
environment with both NFS and CIFS users, see your System Administrator and
Command Reference Guide.
'HIDXOWSDVVZG)LOH
Figure 7-1 shows the default entry in the passwd file.
)LJXUHSDVVZUG)LOH'HIDXOW(QWU\
Table 7-1 describes the fields in an entry.
7DEOHSDVVZUG)LOH)LHOG(QWULHV
7-2
)LHOG
'HVFULSWLRQ
User name
Contains a user name for the user.
Encrypted
password
Contains a password for the user. The filer disregards this
field if NIS or a Microsoft Windows NT® operating system
domain controller is used to authenticate user names and
passwords.
UID
Contains a unique integer that is the UID (user ID).
GID
Contains a unique integer that is the users primary GID
(group ID).
Users full name
Contains the users full name. The filer ignores this field.
UNIX home
directory
Contains the path of the users home directory. The filer
ignores this field.
Default shell
Contains the path of the users default shell. The filer
ignores this field.
Dell PowerVault 720N, 740N, and 760N Users Guide
'HIDXOWJURXS)LOH
Figure 7-2 shows the default entry in the group file.
)LJXUHJURXS)LOH'HIDXOW(QWU\
Table 7-2 describes the fields in an entry.
7DEOHJURXS)LOH)LHOG(QWULHV
)LHOG
'HVFULSWLRQ
Group name
Contains a unique group name.
Encrypted
password
Contains a password. This field is never used and is blank.
GID
Contains a unique integer that is the GID.
User names
Contains a comma-separated list of user names that belong
to the group.
$FFHVVLQJSDVVZGDQGJURXS)LOHV)URP
:LQGRZV17DQG:LQGRZV[
:RUNVWDWLRQV
'HVFULSWLRQ
This procedure enables you to access the passwd and group files from a Windows NT
or Windows 9x workstation.
Setting Up passwd and group Files 7-3
6WHSV
To access the files from a Windows NT or Windows 9x workstation, perform the following steps:
1.
Map a drive to the root of the default filer volume using the following Universal
Naming Convention (UNC) path; replace filername with the name of your filer:
??ILOHUQDPH?&
When prompted, enter a password based on one of the following scenarios:
2.
If Windows displays a dialog box asking for a user name and a password,
use Administrator as the user name.
If you set up the filer to use a Windows NT domain controller to authenticate
users, use the domains administrator password.
If you set up the filer to use the passwd file to authenticate users, use the
administrator password that you entered during setup.
Change to the /etc directory.
$FFHVVLQJSDVVZGDQGJURXS)LOHV)URP
81,;1)6&OLHQWV
'HVFULSWLRQ
This procedure enables you to access the passwd and group files from a UNIX/NFS
client.
6WHSV
To access the files from a UNIX/NFS client, perform the following steps:
1.
Mount the root of the default filer volume to the clients file system using the following path; replace filername with the name of your filer:
filername:/vol/vol0
2.
Change to the /etc directory.
$GGLQJ(QWULHVWRWKHSDVVZG)LOH
The procedure you use to add entries to the /etc/passwd file depends on whether you
are using the /etc/passwd file or either a Windows NT domain controller or NIS to
authenticate users.
If you are using the /etc/passwd file to authenticate users, see "Adding Entries to the
passwd File From a UNIX Client."
If you are using either a Windows NT domain controller or NIS to authenticate users,
see "Adding Entries to the passwd File From a Windows/NFS Client."
7-4
Dell PowerVault 720N, 740N, and 760N Users Guide
$GGLQJ(QWULHVWRWKHSDVVZG)LOH)URPD
81,;&OLHQW
'HVFULSWLRQ
In this procedure, you add entries to a passwd file on a UNIX client using a text editor,
then transfer the file to the filer. You add entries to the passwd file on a UNIX client
because each entry in the file requires an encrypted password and the filer does not
have a command for creating passwords. The format for entries in the passwd file is
as follows:
XVHUQDPHSDVVZRUGXLGJLGIXOOQDPHGHIDXOWVKHOO
6WHSV
To add entries to a passwd file, perform the following steps:
1.
Log in to a UNIX client as the root user.
2.
Change to the /etc directory.
3.
Make a copy of the existing passwd file under a new name, such as passwd.old.
4.
Open the existing passwd file in a text editor.
5.
Add an entry for each user who needs access to files.
Leave the password and default shell fields empty. You set passwords in step 8.
The filer does not use the default shell field.
6.
If you did not purchase a license for the NFS protocol, delete any entries from the
passwd file that are for non-CIFS users.
7.
Save the file and exit the editor.
8.
Set a password for each user by entering the following command:
SDVVZGXVHUQDPH
The passwd program prompts you to enter the new password twice.
9.
Copy the passwd file from the UNIX client to the /etc directory on the filer.
10. Delete the passwd file from the UNIX client and rename the saved file to
passwd.
11. Continue with "Adding Entries to the group File."
Setting Up passwd and group Files 7-5
$GGLQJ(QWULHVWRWKHSDVVZG)LOH)URPD
:LQGRZV1)6&OLHQW
'HVFULSWLRQ
In this procedure, you edit the passwd file from a Windows NT or Windows 9x workstation or a UNIX/NFS client using a text editor. The format for entries in the passwd
file is as follows:
XVHUQDPHSDVVZRUGJLGXLGIXOOQDPHGHIDXOWVKHOO
6WHSV
To add entries to the passwd file, perform the following steps:
1.
In a text editor, open the passwd file from the /etc directory of the default filer
volume.
2.
Add an entry for each user who needs to access files.
Leave the password and default shell fields empty. The filer does not use them
when users are authenticated by a Windows NT domain controller or NIS.
3.
Save the file and exit the text editor.
4.
Continue with "Adding Entries to the group File."
$GGLQJ(QWULHVWRWKHJURXS)LOH
'HVFULSWLRQ
In this procedure, you edit the group file from either a Windows NT or Windows 9x
workstation or a UNIX/NFS client using a text editor. This enables you to add users to
a specific group that has rights to access the filer.
The format for entries in the group file is as follows:
JURXSQDPHJLGXVHUQDPHXVHUQDPH
3UHUHTXLVLWHV
This procedure assumes that you already connected to the root filer volume using the
instructions in one of the following sections:
7-6
"Accessing passwd and group Files From Windows NT and Windows 9x
Workstations"
"Accessing passwd and group Files From UNIX/NFS Clients"
Dell PowerVault 720N, 740N, and 760N Users Guide
6WHSV
To add entries to the group file, perform the following steps:
1.
Use a text editor to open the /etc/group file.
2.
Add entries to the file for each group.
3.
Save the file and exit the text editor.
5HVXOWV
The passwd and group files on the filer now contain entries for users and groups. The
filer can verify users rights to access the filer.
Setting Up passwd and group Files 7-7
7-8
Dell PowerVault 720N, 740N, and 760N Users Guide
&+$37(5
&RQILJXULQJ$FFHVVWR&,)66KDUHV
$VVLJQLQJ$FFHVV5LJKWV
$ERXW7KLV&KDSWHU
This chapter describes how to assign users and groups access rights to CIFS shares
(directories) using FilerView; see your System Administrator and Command Reference
Guide for instructions about using Windows NT Server Manager to assign access
rights.
If you did not purchase a license for the CIFS protocol, continue on to Chapter 9, "Configuring Clients to Access the Filer."
6FRSHRI6KDUHV$FFHVV
The rights you assign to a share apply to the entire share; for example, if you assign a
user rights to a share named HOME, the user gains rights to the directory specified
by the HOME share and to all subdirectories under the directory. When you assign
rights, they are recorded in the share ACL.
FLIV&RPPDQG3DUDPHWHUV
FilerView enables you to grant users and groups access to CIFS shares, using the following form of the cifs command:
FLIVDFFHVVVKDUH>J@^XVHU_JURXS`ULJKWV
The cifs command parameters are described in Table 8-1.
7DEOHFLIV&RPPDQG3DUDPHWHUV
3DUDPHWHU
'HVFULSWLRQ
access
Specifies that an access entry is to be created.
share
Specifies the name of the share.
user | group
Specifies the name of the user or group for which access
to the share is granted. When prefixed with the -g option,
this field specifies a UNIX group.
Configuring Access to CIFS Shares 8-1
7DEOHFLIV&RPPDQG3DUDPHWHUVFRQWLQXHG
3DUDPHWHU
'HVFULSWLRQ
rights
Specifies which rights the user or group have to the share.
In UNIX-style permissions, rights are specified by three
characters, rwx, which stand for read, write, and execute. A
dash (-) in any position denies the user the right specified by
the character it replaces.
Examples:
rwx grants read, write, and execute rights.
r-- grants only the right to read files.
rw- grants only the rights to read and write files.
r-x grants only the rights to read and execute files.
In Windows NT-style permissions, rights are specified as:
No Access, Read, Change, and Full Control.
(VWDEOLVKLQJ$FFHVVWR6KDUHV
'HVFULSWLRQ
The following procedure creates the access rights to the current CIFS shares.
6WHSV
To establish access to shares, perform the following steps:
8-2
1.
From FilerView, select the CIFS option.
2.
From the CIFS option, select Share/Access Editor.
3.
Select the specific share you want to provide access to and click New Access.
4.
Choose either Access by Group or Access by User.
5.
Enter the name of the user or group for whom you want to specify access rights
to the share.
6.
In the Rights field, select the type of permissions you want to set for this share.
7.
Click OK to create the new access.
Dell PowerVault 720N, 740N, and 760N Users Guide
&+$37(5
&RQILJXULQJ&OLHQWVWR$FFHVVWKH
)LOHU
&,)6DQG1)6&OLHQW&RQILJXUDWLRQ
This chapter describes how to configure CIFS and NFS clients to access directories
and files on the filer.
&RQILJXULQJ&,)6&OLHQWV
$ERXW7KLV6HFWLRQ
Follow the instructions in this section to configure CIFS clients to access information
on the filer.
)LOHU,V9LVLEOHWR&,)6&OLHQWV$IWHU6HWXS
After setup finishes, the filer becomes visible to CIFS clients by automatically registering with the master browser on its local network.
If cross-subnet browsing is configured correctly, the filer is now visible to all CIFS clients. For more information about cross-subnet browsing, refer to the Microsoft
networking documentation.
&,)6&OLHQW&RQQHFWLRQ0HWKRGV
Table 9-1 describes the various methods by which CIFS clients can connect to the
filer. For more information about the following commands and windows, refer to the
System Administrator and Command Reference Guide.
Configuring Clients to Access the Filer 9-1
7DEOH&,)6&OLHQW&RQQHFWLRQ0HWKRGV
0HWKRG
&OLHQWRSHUDWLQJ
V\VWHP
&RPPDQGRUZLQGRZ
'HVFULSWLRQ
1
Windows 9x,
Windows NT 4.0
Map Network Drive
window (from
Windows Explorer)
Connect to the filer as a
network drive.
2
Windows 9x,
Windows NT 4.0
Network Neighborhood
Click the filer icon in the
Network Neighborhood
window.
3
Windows NT
3.51, Windows
for Workgroups
Connect Network
Drive window (from
the File Manager)
Connect to the filer as a
network drive.
4
Any operating
system that supports the
MS-DOS® command-line interface and
supports the
net use command
Map a share to a drive
letter on the command
line. For example:
net use
f:\\filer\home
net use
command
6WHSV
To inform users about how to access the filer, perform the following steps:
1.
Determine the connection methods that are correct for your CIFS clients.
2.
If your CIFS clients can use methods 1, 3, and 4 to connect to the filer, inform
your users of the filers UNC path.
The UNC path consists of a computer name and a share name in the following
format:
??FRPSXWHUBQDPH?VKDUHBQDPH
If the filer is named filer and the directory that contains users directories is
shared with the name "home," the UNC path is \\filer\home.
3.
If your CIFS clients can use method 2 to connect to the filer, inform your users of
the filer name so that they can locate the filer in Network Neighborhood.
5HVXOWV
After you provide users with information about how to access the filer, they can connect to the filer, view directories, and read and write files.
9-2
Dell PowerVault 720N, 740N, and 760N Users Guide
&RQILJXULQJ1)6&OLHQWV
$ERXW7KLV6HFWLRQ
If you purchased a license for the NFS protocol, follow the instructions in this section
to prepare NFS clients to mount file systems from the filer.
+RVWDQG,QWHUIDFH1DPHV
When you ran the Setup Wizard or the setup command, the filer generated a host
name for each interface by appending the number of the interface to the filer host
name.
For example, the interface name for the first interface on a filer named filer might be
filer-e0; the second interface might be filer-e1.
&RQILJXULQJ1)6&OLHQWV8VLQJ7ZR7\SHVRI1DPH
5HVROXWLRQ
To configure NFS clients, choose one of the following methods for name resolution:
DNS or NIS
/etc/hosts file
&RQILJXULQJ1)6&OLHQWV8VLQJ'16RU1,6
IRU1DPH5HVROXWLRQ
If you use DNS or NIS for name resolution, add an entry in your DNS or NIS databases
for each of the filer interfaces.
The following example shows how the entries might look for a filer with these
interfaces:
255.255.255.145
255.255.255.155
filer-e0 filer
filer-e1
In the first line of the preceding example, the filer host name itself is used as an alias
for the first network interface.
&RQILJXULQJ1)6&OLHQWV8VLQJ
HWFKRVWV)LOHIRU1DPH5HVROXWLRQ
If you use /etc/hosts file for name resolution, add an entry in each hosts /etc/hosts file
for each of the filer interfaces.
Configuring Clients to Access the Filer 9-3
The following example shows how the entries might look for a filer with these
interfaces:
255.255.255.145
255.255.255.155
filer-e0 filer
filer-e1
In the first line of the preceding example, the filer host name itself is used as an alias
for the first network interface.
([SRUWLQJ)LOHU'LUHFWRULHVIRU1)6&OLHQWV
You must export the filers file systems before clients can mount them.
Use an editor from an NFS or CIFS client to edit the /etc/exports file to export filer
directories.
0RXQWLQJ)LOH6\VWHPVRQ1)6&OLHQWV
'HVFULSWLRQ
For clients to mount file systems from the filer, you must create entries for the directories exported from the filer in each clients /etc/fstab or /etc/vfstab file.
After you edit the clients /etc/fstab or /etc/vfstab file, the clients mount the file systems automatically when they boot.
6WHSV
To prepare clients to mount the filers file systems, perform the following steps:
NOTE: The /vol/vol0/home directory is used as a sample filer directory in this procedure. You should use a path that exists on the filer.
1.
Create a directory on the client to act as a mount point. For example, /n/filer/
home.
2.
To mount the filers /vol/vol0/home directory to /n/filer/home, add the following
line to the clients /etc/fstab or /etc/vfstab file:
filername:/vol/vol0/home /n/filer/home nfs rw 0 0
Replace filername with the name of your file.
The file system is mounted when the client reboots.
3.
To mount the /vol/vol0/home directory without a client reboot, enter the following
command at the client:
mount filername:/vol/vol0/home /n/filer/home
9-4
Dell PowerVault 720N, 740N, and 760N Users Guide
5HVXOW
After the /vol/vol0/home directory on the filer is mounted, the user on the client system can create, modify, or remove files in /n/filer/home.
:KHUHWR*R)URP+HUH
If you configured the filer using the setup command, continue on to Chapter 10,
"setup Command Installing SecureShare.
If you configured the filer using the Setup Wizard, your configuration is complete.
SecureShare was automatically installed by the Setup Wizard.
Configuring Clients to Access the Filer 9-5
9-6
Dell PowerVault 720N, 740N, and 760N Users Guide
&+$37(5
VHWXS&RPPDQG³,QVWDOOLQJ
6HFXUH6KDUH
$ERXW6HFXUH6KDUH
)HDWXUHVLQ6HFXUH6KDUH
For multiprotocol environments, Data ONTAP 5.3 provides two SecureShare features:
SecureShare Access, which makes it easy for Windows users to change UNIX
file permissions on the filer.
SecureShare Access appears as a tab in the Properties dialog box of a set of files
you select if at least one of the files is a UNIX file. To use SecureShare Access,
see your System Administrator and Command Reference Guide.
SecureShare Account Migrator, which makes it easy to convert users and groups
from a Windows NT domain into the format necessary to populate the /etc/
passwd and /etc/group files on your filer. It enables you to perform the following
tasks:
Create the commands necessary to build CIFS shares for each user and
apply appropriate rights to these shares.
Synchronize a Windows NT domain with /etc files, so you can keep your /etc
files current by running the program daily.
You can run SecureShare Account Migrator only from Windows NT, and only if
you have administrative access to the filer.
,QVWDOOLQJ6HFXUH6KDUH$FFHVV
'HVFULSWLRQ
This procedure installs SecureShare Access from the CD onto the filer.
setup Command Installing SecureShare10-1
6WHSV
To install SecureShare Access from the CD, perform the following steps:
1.
Make sure that the Data ONTAP 5.3 CD is in the CD-ROM drive.
2.
Click the CD-ROM drive icon.
3.
Click UTILS.
4.
Click SSACCESS.
5.
Click SSACCESS.EXE.
6.
Follow the prompts in the SecureShare Access installer program.
,QVWDOOLQJ6HFXUH6KDUH$FFRXQW0LJUDWRU
'HVFULSWLRQ
The following procedure installs the SecureShare Account Migrator from the
CD onto the filer.
6WHSV
To install SecureShare Account Migrator from the CD, perform the following steps:
1.
Make sure that the Data ONTAP 5.3 CD is in the CD-ROM drive.
2.
Click the CD-ROM drive icon.
3.
Click UTILS.
4.
Click SSAM.
5.
Open the README file.
6.
Click SSACMIGR.EXE.
7.
Follow the prompts in the SecureShare Account Migrator installer program.
10-2 Dell PowerVault 720N, 740N, and 760N Users Guide
$33(1',;$
7HFKQLFDO6SHFLILFDWLRQV
7DEOH$7HFKQLFDO6SHFLILFDWLRQV
0LFURSURFHVVRU
Microprocessor type . . . . . . . . . . . . . . . . 21164A Alpha 400MHz on the PowerVault
720N and 740N filers; Alpha 600MHz on
the PowerVault 760N filer
Internal cache . . . . . . . . . . . . . . . . . . . . . No cache on the PowerVault 720N filer;
1-MB onboard cache on the PowerVault
740N filer; 2-MB onboard cache on the
PowerVault 760N filer
Math coprocessor . . . . . . . . . . . . . . . . . . internal to microprocessor
([SDQVLRQ%XV
Bus types . . . . . . . . . . . . . . . . . . . . . . . . PCI
Bus speed: PCI . . . . . . . . . . . . . . . . . . . . 33 MHz
PCI expansion-card connectors . . . . . . . . Four in PowerVault 720N filer; two 32-bit
and two 64-bit
Seven in PowerVault 740N filer; two 32-bit
and five 64-bit
Nine in the PowerVault 760N filer; three
32-bit and six 64-bit
PCI expansion-card connector data
width (maximum). . . . . . . . . . . . . . . . . . . 64 bits
NOTE: For the full name of an abbreviation or acronym used in this table, see the Glossary.
Technical Specifications A-1
7DEOH$7HFKQLFDO6SHFLILFDWLRQVFRQWLQXHG
0HPRU\
Architecture. . . . . . . . . . . . . . . . . . . . . . . . 3.3-V DIMM, unbuffered SDRAM (ECC)
DIMM sockets. . . . . . . . . . . . . . . . . . . . . . four; gold contacts
DIMM capacities . . . . . . . . . . . . . . . . . . . . 256 MB on the PowerVault 720N; 512 MB
on the PowerVault 740N; and 1 GB on the
PowerVault 760N, unbuffered SDRAM
Maximum RAM. . . . . . . . . . . . . . . . . . . . . 256 MB on the PowerVault 720N; 512 MB
on the PowerVault 740N; and 1 GB on the
PowerVault 760N
'ULYHV
Externally accessible bays. . . . . . . . . . . . . one 3.5-inch bay for a diskette drive
3RUWVDQG&RQQHFWRUV
Externally accessible: Serial . . . . . . . . . . . one 9-pin console connector; one 9-pin
diagnostics connector
&RQWUROVDQG,QGLFDWRUV
Reset control. . . . . . . . . . . . . . . . . . . . . . . push button
Power control . . . . . . . . . . . . . . . . . . . . . . power switch on the back
Status indicator . . . . . . . . . . . . . . . . . . . . . green LED
Hard-disk drive activity indicator . . . . . . . . green LED
Power indicator . . . . . . . . . . . . . . . . . . . . . green LED
Activity indicator (on NIC connector). . . . . yellow LED
3RZHU
DC power supply:
Wattage . . . . . . . . . . . . . . . . . . . . . . . 240 W
Heat dissipation . . . . . . . . . . . . . . . . . 1025 BTUs
Voltage . . . . . . . . . . . . . . . . . . . . . . . . 90 to 250 V AC single phase
Current . . . . . . . . . . . . . . . . . . . . . . . . 4 A at 90 V AC (rated)
Frequency . . . . . . . . . . . . . . . . . . . . . 47 to 63 Hz
NOTE: For the full name of an abbreviation or acronym used in this table, see the Glossary.
A-2
Dell PowerVault 720N, 740N, and 760N Users Guide
7DEOH$7HFKQLFDO6SHFLILFDWLRQVFRQWLQXHG
3K\VLFDO
Height . . . . . . . . . . . . . . . . . . . . . . . . . . . 22.23 cm (8.75 inches)
Width . . . . . . . . . . . . . . . . . . . . . . . . . . . . 43.18 cm (17.0 inches)
Depth. . . . . . . . . . . . . . . . . . . . . . . . . . . . 64.14 cm (25.25 inches)
Weight . . . . . . . . . . . . . . . . . . . . . . . . . . 28.8 kg (64.0 lb)
(QYLURQPHQWDO
Temperature:
Operating . . . . . . . . . . . . . . . . . . . . . 10° to 40°C (50° to 95°F)
Storage . . . . . . . . . . . . . . . . . . . . . . . -20° to 65°C (4° to 149°F)
Relative humidity:
Operating . . . . . . . . . . . . . . . . . . . . . 10% to 90% (noncondensing)
Storage . . . . . . . . . . . . . . . . . . . . . . . 10% to 90% (noncondensing) in original
shipping container; 50% otherwise
Altitude:
Operating . . . . . . . . . . . . . . . . . . . . . 16 to 3077 m (50 to 10,000 ft) at 37° C
Storage . . . . . . . . . . . . . . . . . . . . . . . 16 to 7625 m (50 to 25,000 ft)
NOTE: For the full name of an abbreviation or acronym used in this table, see the Glossary.
Technical Specifications A-3
A-4
Dell PowerVault 720N, 740N, and 760N Users Guide
$33(1',;%
,QVWDOOLQJ3RZHU9DXOW)LOHU
6RIWZDUH
3RZHU9DXOW)LOHU6RIWZDUH,QVWDOODWLRQ
:KDW7KLV$SSHQGL[&RQWDLQV
This appendix contains information for:
Booting from bootable system diskettes
Installing Data ONTAP 5.3 software
Changing to CIFS-compatible security styles
Creating bootable system diskettes
Creating a Diagnostics diskette
,QVWDOOLQJWKH2SHUDWLQJ6\VWHP
To perform the installation, you must have access to either of the following clients,
which must have write permission to the filers root directory:
a system running a Microsoft Windows 9x or Windows NT 4.0, and a CD-ROM
drive
a UNIX workstation running NFS Client version 2 or 3, and a CD-ROM drive
You must be able to log into the filer as Administrator and have access to the filers
system console.
%RRWLQJ)URP%RRWDEOH6\VWHP'LVNHWWHV
%RRWLQJ)URP'LVNHWWH
To boot the filer, complete the following steps:
1.
Insert the diskette labeled System Boot Diskette 1 into the filers diskette drive.
Installing PowerVault Filer Software B-1
2.
Ensure the filer is running.
3.
At the system console, enter:
reboot
The filer displays the following boot menu:
1RUPDO%RRW
%RRWZLWKRXWHWFUF
&KDQJH3DVVZRUG
,QLWLDOL]HDOOGLVNV
0DLQWHQDQFHPRGHERRW
6HOHFWLRQ"
4.
Choose one of the boot types shown below by entering the corresponding
number:
Normal Boot (1) Use Normal Boot to run the filer normally, but
from a diskette.
Boot without /etc/rc (2) Use Boot without /etc/rc to troubleshoot
and repair configuration problems.
NOTE: Booting without /etc/rc causes the filer to use only default options
settings, disregarding all the options settings you put in /etc/rc, and disabling
some services, such as syslog.
Change Password (3) Use Change Password to reset your filers administrative password.
Initialize all disks (4) Use Initialize all disks to zero all disks attached to the
filer.
NOTE: This action will result in a loss of all data on the disks.
Maintenance mode boot (5) Use Maintenance mode boot to go into
Maintenance mode and perform some volume and disk operations and get
detailed volume and disk information. Maintenance mode is special for the
following reasons:
Most normal functions, including file/system operations, are disabled.
A limited set of commands is available for diagnosing and repairing disk
and volume problems.
You exit Maintenance mode with the halt command.
5.
B-2
Remove the system boot diskette and store it.
Dell PowerVault 720N, 740N, and 760N Users Guide
,QVWDOOLQJ'DWD217$36RIWZDUH
,QVWDOODWLRQ)URPD:LQGRZV&OLHQW
From a Windows NT or Windows 9x client, you must install the files from the CD to
the filer by performing the following steps.
NOTE: CIFS must be licensed and configured on the filer. To register the CIFS license,
enter the following commands from the filer console:
filer>license cifs=<license number>
where <license number> is the provided CIFS license.
filer>cifs setup
To access the system files from the CD and install them on the filer, perform the following steps:
1.
As the Domain Administrator from a Windows client, right-click My Computer
and click Map Network Drive.
2.
In the Map Drive dialog box that appears, select an unused drive letter.
3.
In the Path field of the dialog box, enter a path similar to the following example:
//filer/c$
where filer is the name of the filer, and c$ is the name assigned to the hidden
share of its root directory.
Do not change the Connect As field.
4.
Insert the CD in the CD-ROM drive, and from the root directory of the CD, run the
setup.bat file to begin the installation process.
5.
After viewing the Welcome screen and the software license agreement screen,
specify a destination folder (this folder is the mapped, root-level directory of the
filer).
You must accept the license agreement to continue with this procedure.
The Browse option allows this mapping to be specified.
6.
Select the appropriate setup installation method.
Typical installs Data ONTAP 5.3 operating system and local help files.
Compact installs Data ONTAP 5.3.
Custom allows you to select from the available components and install.
7.
Once the files have been copied to the filer, enter download at the filers console
to complete the installation.
The filer can now be rebooted; no boot diskettes are needed.
Installing PowerVault Filer Software B-3
,QVWDOODWLRQ)URPD81,;&OLHQW
From a UNIX client running NFS Client version 2 or 3, you must install the files from
the CD to the filer by performing the following steps.
NOTE: An NFS license must be purchased and registered on the filer to proceed. To
register the NFS license, enter the following command from the filer console:
filer>license nfs=<license number>
where <license number> is the provided NFS license.
To access the system files from the CD and install them on the filer, perform the following steps:
1.
Mount the filers root file system to a directory on the client. For example, enter:
mount filer:/ /mnt
where /mnt is the directory on the client where you want to mount the filers root
file system.
2.
Change the directory to a local temporary directory on the client system. For
example, enter:
FG/tmp
where /tmp is a local temporary directory on the client.
3.
Insert the CD into the CD-ROM drive and extract the files, specifying the input
file, output file, and block size. For example, enter:
tar xvf /CD-ROM_MNT_PT/ontap/5_3/alpha/sysfiles.tar
where CD-ROM_MNT_PT is the name of your CD mount point.
Result: The tar command reports the names of the files that are copied
(tar_image.Z and dell_filer_install).
4.
Run the dell_filer_install script with an argument that tells the script where to
install the files; this is the mount point for the filers root directory. You can keep
or delete the tar files.
To delete the tar files, enter:
./dell_filer_install /mnt
To keep the tar files, enter:
./dell_filer_install -k /mnt
where /mnt is the directory on the client where you mounted the filers root file
system.
Result: The install script decompresses and extracts files.
5.
B-4
From the client system, unmount the filers root file system (/) by entering the following commands:
Dell PowerVault 720N, 740N, and 760N Users Guide
cd /
umount /mnt
where /mnt is the directory on the client where you mounted the filers root file
system.
6.
At the filer console, enter download to complete the installation.
&KDQJLQJWR&,)6&RPSDWLEOH6HFXULW\
6W\OHV
Every volume and qtree has a default security style of UNIX, which permits only
UNIX-style permissions.
6HFXULW\6W\OHV
To enable NTFS-style file security on one or more volumes, you can change the
security style of the volumes you want to one of the following styles:
Mixed allows both UNIX-style and Windows NT-style permissions.
NTFS allows only Windows NT-style permissions.
NOTE: If you have only one volume, that volume is also the root volume.
&KDQJLQJWKH5RRW9ROXPH6HFXULW\6W\OH
To change the security style of the root volume to mixed, use the following command:
qtree security /vol/vol0/ mixed
The default name of the root volume is /vol/vol0, and you must put a slash after the
name of the root volume.
For additional information about security styles, volumes, and qtrees, refer to your
System Administrator and Command Reference Guide.
&UHDWLQJ%RRWDEOH6\VWHP'LVNHWWHV
2YHUYLHZRI&UHDWLQJ%RRWDEOH6\VWHP'LVNHWWHV
You can create the bootable system diskettes from the CD. Refer to the appropriate
procedure that follows depending on whether you are working from a Windows client
or a UNIX client to administer your filer.
Installing PowerVault Filer Software B-5
&UHDWLQJ%RRWDEOH6\VWHP'LVNHWWHVRQD:LQGRZV&OLHQW
To create the boot diskette from a Windows client system, perform the following
steps:
1.
Use the RaWrite utility to extract the system boot diskette software and copy it
to the diskette.
If you do not already have this utility on your system, it is on the CD in the
<drive>:\utils\Rawrite directory where drive is the CD-ROM drive.
2.
Insert a blank, write-enabled diskette into the diskette drive. Label the diskette
"System Boot Diskette 1, Data ONTAP 5.3."
3.
Open the RaWrite folder and double-click the Rawrite.exe file.
4.
Enter the name used for the image file (for example, boot1 for boot diskette 1 or
boot2 for boot diskette 2).
The RaWrite utility starts and prompts you for an image source file.
The utility prompts you for a target diskette drive.
5.
Enter the drive letter for the formatted diskette that will be the system boot
diskette.
The status of the operation is displayed in messages. When the operation is
done, continue to the next step.
6.
Remove the diskette from the drive and write-protect the diskette.
7.
Repeat this procedure for the second system boot diskette and label it "System
Boot Diskette 2, Data ONTAP 5.3."
&UHDWLQJ%RRWDEOH6\VWHP'LVNHWWHVRQD81,;&OLHQW
To create the boot diskette from a UNIX client, perform the following steps:
Replace the variable filename with the name of the image to be /mnt/ontap/5_3/alpha/
boot1 and /mnt/ontap/5_3/alpha/boot2 in the CD, where /mnt is the directory on the
client where you mounted the CD-ROM drive.
If the diskette drive in your administration client is not named /dev/fd0, replace
/dev/fd0 with the name of your diskette drive by performing the following steps:
1.
Insert a blank, write-enabled diskette into the diskette drive on the administration
client system. Label the diskette "System Boot Diskette 1, Data ONTAP 5.3."
2.
Copy the boot diskette 1 image to the diskette using the dd command. For
example,
3.
Remove the diskette from the drive and write-protect the diskette.
4.
Repeat this procedure for the second system boot diskette and label it "System
Boot Diskette 2, Data ONTAP 5.3."
dd if=filename of=/dev/fd0 bs=512
B-6
Dell PowerVault 720N, 740N, and 760N Users Guide
&UHDWLQJD'LDJQRVWLFV'LVNHWWH
&UHDWLQJ'LVNHWWHV)URP'LVNHWWH,PDJH)LOHV
This section describes how to make a Diagnostics boot diskette from a diskette image
file supplied on the CD for a Windows client system or a DOS shell window or a UNIX
client.
&UHDWLQJD'LDJQRVWLFV'LVNHWWHRQD:LQGRZV&OLHQW
6\VWHP
To create the diagnostics diskette from a Windows client system or a DOS shell window, perform the following steps:
1.
Use the RaWrite utility to extract the diagnostics boot diskette software and copy
it to the diskette.
If you do not already have this utility on your system, it is on the CD in the
<drive>:\utils\Rawrite directory where drive is the CD-ROM drive.
2.
Insert the CD in the Windows client system CD-ROM drive.
3.
Insert a blank, write-enabled diskette into the Windows client diskette drive.
Label the diskette "System Diagnostics Diskette".
4.
Open the RaWrite folder and double-click the Rawrite.exe file.
The RaWrite utility starts and prompts you for an image source file.
5.
Enter the name used for the image file (for example, boot1 for boot diskette 1 or
boot2 for boot diskette 2).
The utility prompts you for a target diskette drive.
6.
Enter the drive letter for the formatted diskette that will be the system diagnostics diskette.
The status of the operation is displayed. When the operation is done, continue to
the next step.
7.
Remove the diskette from the drive and write-protect the diskette.
&UHDWLQJD'LDJQRVWLFV'LVNHWWHRQD81,;&OLHQW
To create the diagnostics diskette from a UNIX client, perform the following steps:
1.
Insert the CD in the UNIX client CD-ROM drive.
2.
Mount the CD (some UNIX clients do this automatically when the CD is inserted
into the drive; others require that you use the mount command).
3.
Insert a blank, write-enabled diskette into the UNIX client diskette drive (in this
procedure, it is assumed that the CD is mounted at /cdrom). Label the diskette
"System Diagnostics Diskette" and include the filer name and model on this label.
4.
Copy the boot diskette 1 image to the diskette using the GG command. For
example,
Installing PowerVault Filer Software B-7
dd if=cdrom/ontap/5_3/alpha/diag_1_6 of=/dev/fd0 bs=512
Replace /dev/fd0 with the device name of your diskette drive if it is not /dev/fd0.
5.
B-8
Remove the diskette from the drive and write-protect the diskette.
Dell PowerVault 720N, 740N, and 760N Users Guide
$33(1',;&
3UHSDULQJIRU&,)6&RQILJXUDWLRQ
&,)6,QIRUPDWLRQ1HHGHG
$ERXW7KLV$SSHQGL[
This appendix contains information to help you understand the following CIFS configuration issues:
Deciding on a domain or workgroup configuration
Choosing between PC-style or UNIX-style permissions
Adding the filer to a Windows NT domain
'HFLGLQJRQD'RPDLQRU:RUNJURXS
&RQILJXUDWLRQ
$ERXW7KLV6HFWLRQ
You can install the filer into a Windows NT domain or Windows workgroup. Use the
information in this section to help you decide which to choose.
&$87,21,WLVGLIILFXOWWRFKDQJHWKLVGHFLVLRQDIWHU\RXUXQsetup
'HILQLWLRQRID'RPDLQ
A domain:
Is a collection of Windows NT computers that share a common directory database defined by a Windows NT server administrator
Has a unique domain name
Provides access to centralized user and group accounts
Enables centralized administration of user and group accounts
Preparing for CIFS Configuration C-1
'HILQLWLRQRID:RUNJURXS
A workgroup:
Is a collection of Windows NT computers
Has a unique workgroup name
Is grouped for viewing purposes
Does not provide access to centralized user and group accounts
Does not enable centralized administration of user and group accounts
:KHQWR,QVWDOO,QWRD:LQGRZV17'RPDLQ
Install the filer into a Windows NT domain:
If you want centralized administration using a Windows NT domain
If you want to integrate the filer into the Windows NT domain topology
If you want user authentication to be handled by Windows NT domain controllers
&$87,21<RXUQHWZRUNPXVWKDYHDWOHDVWRQH:LQGRZV17GRPDLQFRQ
WUROOHUWRLQVWDOOWKHILOHULQWRD:LQGRZV17GRPDLQ
:KHQWR,QVWDOO,QWRD:LQGRZV:RUNJURXS
Install the filer into a Windows workgroup:
If you do not want centralized administration through a Windows NT domain
If you want UNIX-style authentication using an /etc/passwd file or NIS
&$87,21,I\RXLQVWDOOWKHILOHULQWRD:LQGRZVZRUNJURXSLWLVQRWFRP
SDWLEOHZLWKFOLHQWVWKDWKDYH:LQGRZV176HUYLFH3DFNRUKLJKHURU
:LQGRZV [FOLHQWVZLWK0LFURVRIW'LVWULEXWHG)LOH6\VWHP')6
LQVWDOOHG&OLHQWVFDQEHPDGHFRPSDWLEOHE\DGGLQJDUHJLVWU\HQWU\WR
UHHQDEOHSODLQWH[WSDVVZRUGV
7RUHHQDEOHSODLQWH[WSDVVZRUGVRQD:LQGRZV17FOLHQWFRQVXOWWKH
0LFURVRIW.QRZOHGJH%DVHRQWKH:HEDWKWWSZZZPLFURVRIWFRPNE
GHIDXOWDVSUHIHUWRDUWLFOH4:LWK8QHQFU\SWHG3DVVZRUG63
)DLOVWR&RQQHFWWR60%6HUYHU
7RUHHQDEOHSODLQWH[WSDVVZRUGVRQD:LQGRZV[FOLHQWFRQVXOWWKHIRO
ORZLQJILOHLQWKH0LFURVRIW.QRZOHGJH%DVHRQWKH:HE
KWWSZZZPLFURVRIWFRPQWVHUYHUGIVUHDGPHDVS
6XPPDU\RI'RPDLQDQG:RUNJURXS)HDWXUHV
Table C-1 shows which authentication features are available to domains and which are
available to workgroups.
C-2
Dell PowerVault 720N, 740N, and 760N Users Guide
7DEOH&'RPDLQDQG:RUNJURXS)HDWXUHV
)HDWXUH
'RPDLQ
:RUNJURXS
Compatible with Windows NT 4.0 Service
Pack 3 or higher (encryption).
Y
N
Compatible with Windows NT 4.0 Service
Pack 3 or higher (message signing).
N
N
Support for Windows NT-only users.
Y
N
Encrypted password sent to filer.
Y
N
/etc/passwd and /etc/group files on the filer
determine User Identification numbers
(UIDs) and Group Identification numbers
(GIDs) for multiprotocol.
Y
Y
/etc/passwd file on the filer contains users
passwords.
N
Y
Single login.
Y
N
Change password remotely.
Y
Y (only with
NIS)
Multiple net segments.
Y
N
&KRRVLQJ%HWZHHQ3&6W\OHRU81,;6W\OH
3HUPLVVLRQV
$ERXW7KLV6HFWLRQ
When you configure the CIFS protocol, you must choose whether the filer uses PCstyle or UNIX-style permissions.
NOTE: If you are setting up a filer in a Windows NT-only environment, you can skip
this section.
This section provides a brief overview of PC-style and UNIX-style permissions and
provides guidelines for choosing which style to use. PC-style permissions are similar
to FAT (File Allocation Table); they maintain security with share level ACLs (Access
Control Lists).
In addition, PC-style permissions also allow you to further restrict file security using
file permissions. UNIX-style permissions do not use share level ACLs. Therefore,
using PC-style permissions only affects PC access to files with UNIX security.
Preparing for CIFS Configuration C-3
+RZ3&6W\OH3HUPLVVLRQV:RUN
PC-style permissions are determined by the rights assigned in a shares ACL and are
limited by the UNIX permissions assigned to a file. To write to a file when PC-style
permissions are in effect, a user must meet the following criteria:
The user must have write permission for the file in the ACL.
The user must have write permission for the file according to the UNIX-style permissions associated with the file.
If the user is the owner of the file, the filer uses the UNIX-style permissions set
for the owner of the file. If the user is not the owner of the file, the filer uses the
UNIX-style permissions set for the UNIX group associated with the file. Note that
the UNIX "other" permissions are not used.
:KHQWR&KRRVH3&6W\OH3HUPLVVLRQV
Choose PC-style permissions if you need file access to be controlled by ACLs.
+RZ81,;6W\OH3HUPLVVLRQV:RUN
UNIX-style permissions are determined by the rights associated with the UNIX UID
and GID and are limited by the ACL permissions assigned to a file. To write to a file
when UNIX-style permissions are in effect, a user must meet the following criteria:
If the user is the owner of the file, the write permission for the users UID must
be set.
If the user is not the owner of the file, he or she must be a member of the group
(GID) associated with the file and the write permission for the groups GID must
be set.
The user must have write permission for the file in the ACL.
:KHQWR&KRRVH81,;6W\OH3HUPLVVLRQV
Choose UNIX-style permissions if you want to implement simple security and need
access to be controlled using exact UNIX rules.
NOTE: If you choose UNIX-style permissions, set the share ACL permission to rwx
for everyone. With this setting, the UNIX rights work just as they do on a UNIX
system.
$GGLQJWKH)LOHUWRD:LQGRZV17'RPDLQ
$ERXW7KLV6HFWLRQ
Use the information in this section to add the filer to a Windows NT domain before
you configure the filer.
C-4
Dell PowerVault 720N, 740N, and 760N Users Guide
NOTE: This section presents one method of adding the filer to a Windows NT domain.
For alternative ways of adding the filer to a Windows NT domain, consult the
Microsoft Knowledge Base on the Web at http://www.microsoft.com/kb/
default.asp and refer to article Q140387, "Batch File Adds/Removes Machine
Accounts in Server Manager."
3UHUHTXLVLWHV
&$87,21,WLVGLIILFXOWWRFKDQJHWKHGHFLVLRQWRDGGWKHILOHUWRD:LQGRZV
17GRPDLQDIWHU\RXKDYHUXQsetup
To add the filer to a Windows NT domain, you must meet the following prerequisites:
You must have a permanent Windows NT domain.
You must have the "add workstation to domain" privilege.
You must be able to connect to the Primary Domain Controller (PDC).
3URFHGXUH
To add the filer to a Windows NT domain, perform the following steps:
1.
Log in as Administrator at a Windows NT server that is a member of the Windows NT domain into which you are adding the filer.
2.
Run Server Manager.
3.
From the Computer menu, select Add to Domain.
The Add Computer To Domain window appears.
4.
Click the Windows NT Workstation or Server option button.
5.
Enter the name of the filer.
The filer name can have up to 15 of the following characters:
letters (AZ), numerals (09), !, #, $, @, %, , (, ), -, ^, _, {, }, and ~
6.
Click Add.
5HVXOWV
The filer was added to the Windows NT domain.
&$87,21'RQRWXVHWKLVDFFRXQWXQWLO\RXILQLVKFRQILJXULQJWKHILOHU
Preparing for CIFS Configuration C-5
C-6
Dell PowerVault 720N, 740N, and 760N Users Guide
$33(1',;'
7LPH=RQHV
7LPH=RQH6HOHFWLRQ
$ERXW7KLV6HFWLRQ
You must enter one of the following time zones when setup prompts for a time
zone.
$IULFD
Africa/Abidjan
Africa/Algiers
Africa/Bangui
Africa/Blantyre
Africa/Cairo
Africa/Dakar
Africa/Douala
Africa/Harare
Africa/Khartoum
Africa/Lagos
Africa/Luanda
Africa/Malabo
Africa/Mbabane
Africa/Nairobi
Africa/Nouakchott
Africa/Sao_Tome
Africa/Tunis
Africa/Accra
Africa/Asmera
Africa/Banjul
Africa/Brazzaville
Africa/Casablanca
Africa/Dar_es_Salaam
Africa/Freetown
Africa/Johannesburg
Africa/Kigali
Africa/Libreville
Africa/Lumumbashi
Africa/Maputo
Africa/Mogadishu
Africa/Ndjamena
Africa/Ouagadougou
Africa/Timbuktu
Africa/Windhoek
Africa/Addis_Ababa
Africa/Bamako
Africa/Bissau
Africa/Bujumbura
Africa/Conakry
Africa/Djibouti
Africa/Gaborone
Africa/Kampala
Africa/Kinshasa
Africa/Lome
Africa/Lusaka
Africa/Maseru
Africa/Monrovia
Africa/Niamey
Africa/Porto-Novo
Africa/Tripoli
America/Anchorage
America/Aruba
America/Barbados
America/Boise
America/Catamarca
America/Chicago
America/Cuiaba
America/Anguilla
America/Asuncion
America/Belize
America/Buenos_Aires
America/Cayenne
America/Cordoba
America/Curacao
$PHULFD
America/Adak
America/Antigua
America/Atka
America/Bogota
America/Caracas
America/Cayman
America/Costa_Rica
Time Zones D-1
America/Dawson
America/Detroit
America/El_Salvador
America/Fortaleza
America/Goose_Bay
America/Guadeloupe
America/Guyana
America/Indiana
America/Iqaluit
America/Juneau
America/Lima
America/Maceio
America/Martinique
America/Menominee
America/Montevideo
America/Nassau
America/Nome
America/Pangnirtung
America/Port_of_Spain
America/Puerto_Rico
America/Regina
America/Santo_Domingo
America/Shiprock
America/St_Lucia
America/Swift_Current
America/Thunder_Bay
America/Vancouver
America/Winnipeg
America/Dawson_Creek
America/Dominica
America/Ensenada
America/Glace_Bay
America/Grand_Turk
America/Guatemala
America/Halifax
America/Indianapolis
America/Jamaica
America/Knox_IN
America/Los_Angeles
America/Managua
America/Mazatlan
America/Mexico_City
America/Montreal
America/New_York
America/Noronha
America/Paramaribo
America/Port-au-Prince
America/Rainy_River
America/Rosario
America/Sao_Paulo
America/St_Johns
America/St_Thomas
America/Tegucigalpa
America/Tijuana
America/Virgin
America/Yakutat
America/Denver
America/Edmonton
America/Fort_Wayne
America/Godthab
America/Grenada
America/Guayaquil
America/Havana
America/Inuvik
America/Jujuy
America/La_Paz
America/Louisville
America/Manaus
America/Mendoza
America/Miquelon
America/Montserrat
America/Nipigon
America/Panama
America/Phoenix
America/Porto_Acre
America/Rankin_Inlet
America/Santiago
America/Scoresbysund
America/St_Kitts
America/St_Vincent
America/Thule
America/Tortola
America/Whitehorse
America/Yellowknife
$QWDUFWLFD
Antarctica/Casey
Antarctica/McMurdo
Antarctica/DumontDUrville
Antarctica/Palmer
Antarctica/Mawson
Antarctica/South_Pole
$VLD
Asia/Aden
Asia/Anadyr
Asia/Ashkhabad
Asia/Baku
Asia/Bishkek
Asia/Chungking
Asia/Damascus
Asia/Gaza
Asia/Irkutsk
Asia/Jakarta
Asia/Kabul
Asia/Kashgar
Asia/Kuala_Lumpur
Asia/Macao
D-2
Asia/Alma-Ata
Asia/Aqtau
Asia/Baghdad
Asia/Bangkok
Asia/Brunei
Asia/Colombo
Asia/Dubai
Asia/Harbin
Asia/Ishigaki
Asia/Jayapura
Asia/Kamchatka
Asia/Katmandu
Asia/Kuching
Asia/Magadan
Dell PowerVault 720N, 740N, and 760N Users Guide
Asia/Amman
Asia/Aqtobe
Asia/Bahrain
Asia/Beirut
Asia/Calcutta
Asia/Dacca
Asia/Dushanbe
Asia/Hong_Kong
Asia/Istanbul
Asia/Jerusalem
Asia/Karachi
Asia/Krasnoyarsk
Asia/Kuwait
Asia/Manila
Asia/Muscat
Asia/Omsk
Asia/Qatar
Asia/Saigon
Asia/Singapore
Asia/Tbilisi
Asia/Thimbu
Asia/Ulan_Bator
Asia/Vladivostok
Asia/Yerevan
Asia/Nicosia
Asia/Phnom_Penh
Asia/Rangoon
Asia/Seoul
Asia/Taipei
Asia/Tehran
Asia/Tokyo
Asia/Urumqi
Asia/Yakutsk
Asia/Novosibirsk
Asia/Pyongyang
Asia/Riyadh
Asia/Shanghai
Asia/Tashkent
Asia/Tel_Aviv
Asia/Ujung_Pandang
Asia/Vientiane
Asia/Yekaterinburg
Atlantic/Bermuda
Atlantic/Faeroe
Atlantic/Reykjavik
Atlantic/Stanley
Atlantic/Canary
Atlantic/Jan_Mayen
Atlantic/South_Georgia
Australia/Adelaide
Australia/Canberra
Australia/LHI
Australia/Melbourne
Australia/Perth
Australia/Sydney
Australia/West
Australia/Brisbane
Australia/Darwin
Australia/Lindeman
Australia/NSW
Australia/Queensland
Australia/Tasmania
Australia/Yancowinna
Brazil/DeNoronha
Brazil/East
Canada/Atlantic
Canada/Central
Canada/Eastern
Canada/Pacific
Canada/Mountain
Canada/Saskatchewan
Canada/EastSaskatchewan
Canada/Newfoundland
Canada/Yukon
$WODQWLF
Atlantic/Azores
Atlantic/Cape_Verde
Atlantic/Madeira
Atlantic/St_Helena
$XVWUDOLD
Australia/ACT
Australia/Broken_Hill
Australia/Hobart
Australia/Lord Howe
Australia/North
Australia/South
Australia/Victoria
%UD]LO
Brazil/Acre
Brazil/West
&DQDGD
&KLOH
Chile/Continental
Chile/EasterIsland
Time Zones D-3
(WF
Etc/GMT
Etc/GMT+2
Etc/GMT+5
Etc/GMT+8
Etc/GMT+11
Etc/GMT-0
Etc/GMT-3
Etc/GMT-6
Etc/GMT-9
Etc/GMT-12
Etc/Greenwich
Etc/UTC
Etc/GMT+0
Etc/GMT+3
Etc/GMT+6
Etc/GMT+9
Etc/GMT+12
Etc/GMT-1
Etc/GMT-4
Etc/GMT-7
Etc/GMT-10
Etc/GMT-13
Etc/UCT
Etc/Zulu
Etc/GMT+1
Etc/GMT+4
Etc/GMT+7
Etc/GMT+10
Etc/GMT0
Etc/GMT-2
Etc/GMT-5
Etc/GMT-8
Etc/GMT-11
Etc/GMT-14
Etc/Universal
Europe/Andorra
Europe/Belgrade
Europe/Brussels
Europe/Chisinau
Europe/Gibraltar
Europe/Kiev
Europe/Ljubljana
Europe/Madrid
Europe/Monaco
Europe/Paris
Europe/Rome
Europe/Simferopol
Europe/Stockholm
Europe/Vaduz
Europe/Vilnius
Europe/Zurich
Europe/Athens
Europe/Berlin
Europe/Bucharest
Europe/Copenhagen
Europe/Helsinki
Europe/Kuybyshev
Europe/London
Europe/Malta
Europe/Moscow
Europe/Prague
Europe/San_Marino
Europe/Skopje
Europe/Tallinn
Europe/Vatican
Europe/Warsaw
GMT+1
GMT+4
GMT+7
GMT+10
GMT+13
GMT-3
GMT-6
GMT-9
GMT-12
GMT+2
GMT+5
GMT+8
GMT+11
GMT-1
GMT-4
GMT-7
GMT-10
(XURSH
Europe/Amsterdam
Europe/Belfast
Europe/Bratislava
Europe/Budapest
Europe/Dublin
Europe/Istanbul
Europe/Lisbon
Europe/Luxembourg
Europe/Minsk
Europe/Oslo
Europe/Riga
Europe/Sarajevo
Europe/Sofia
Europe/Tirane
Europe/Vienna
Europe/Zagreb
*07
GMT
GMT+3
GMT+6
GMT+9
GMT+12
GMT-2
GMT-5
GMT-8
GMT-11
D-4
Dell PowerVault 720N, 740N, and 760N Users Guide
,QGLDQ,QGLDQ2FHDQ
Indian/Antananarivo
Indian/Cocos
Indian/Mahe
Indian/Mayotte
Indian/Chagos
Indian/Comoro
Indian/Maldives
Indian/Reunion
Indian/Christmas
Indian/Kerguelen
Indian/Mauritius
Mexico/BajaSur
Mexico/General
CET
EET
EST
GB
Hongkong
Iran
Japan
MET
Navajo
Poland
PST8PDT
Singapore
Universal
W-SU
CST6CDT
Egypt
EST5EDT
GB-Eire
HST
Israel
Kwajalein
MST
NZ
Portugal
ROC
Turkey
UTC
Zulu
Pacific/Auckland
Pacific/Efate
Pacific/Fiji
Pacific/Gambier
Pacific/Honolulu
Pacific/Kosrae
Pacific/Marquesas
Pacific/Niue
Pacific/Pago_Pago
Pacific/Ponape
Pacific/Saipan
Pacific/Tarawa
Pacific/Wake
Pacific/Chatham
Pacific/Enderbury
Pacific/Funafuti
Pacific/Guadalcanal
Pacific/Johnston
Pacific/Kwajalein
Pacific/Midway
Pacific/Norfolk
Pacific/Palau
Pacific/Port_Moresby
Pacific/Samoa
Pacific/Tongatapu
Pacific/Wallis
0H[LFR
Mexico/BajaNorte
0LVFHOODQHRXV
Arctic/Longyearbyen
Cuba
Eire
Factory
Greenwich
Iceland
Jamaica
Libya
MST7MDT
NZ-CHAT
PRC
ROK
UCT
WET
3DFLILF
Pacific/Apia
Pacific/Easter
Pacific/Fakaofo
Pacific/Galapagos
Pacific/Guam
Pacific/Kiritimati
Pacific/Majuro
Pacific/Nauru
Pacific/Noumea
Pacific/Pitcairn
Pacific/Rarotonga
Pacific/Tahiti
Pacific/Truk
Pacific/Yap
Time Zones D-5
6\VWHP9
SystemV/AST4
SystemV/CST6CDT
SystemV/HST10
SystemV/PST8
SystemV/YST9YDT
SystemV/AST4ADT
SystemV/EST5
SystemV/MST7
SystemV/PST8PDT
SystemV/CST6
SystemV/EST5EDT
SystemV/MST7MDT
SystemV/YST9
US/Aleutian
US/East-Indiana
US/Indiana-Starke
US/Pacific
US/Arizona
US/Eastern
US/Michigan
US/Pacific-New
868QLWHG6WDWHV
US/Alaska
US/Central
US/Hawaii
US/Mountain
US/Samoa
$OLDVHV
GMT=Greenwich, UCT, UTC, Universal, Zulu
CET=MET (Middle European Time)
US/Eastern=Jamaica
US/Mountain=Navajo
D-6
Dell PowerVault 720N, 740N, and 760N Users Guide
$33(1',;(
5HJXODWRU\1RWLFHV
Electromagnetic Interference (EMI) is any signal or emission, radiated in free space or
conducted along power or signal leads, that endangers the functioning of a radio navigation or other safety service or seriously degrades, obstructs, or repeatedly
interrupts a licensed radio communications service. Radio communications services
include but are not limited to AM/FM commercial broadcast, television, cellular services, radar, air-traffic control, pager, and Personal Communication Services (PCS).
These licensed services, along with unintentional radiators such as digital devices,
including computer systems, contribute to the electromagnetic environment.
Electromagnetic Compatibility (EMC) is the ability of items of electronic equipment to
function properly together in the electronic environment. While this computer system
has been designed and determined to be compliant with regulatory agency limits for
EMI, there is no guarantee that interference will not occur in a particular installation. If
this equipment does cause interference with radio communications services, which
can be determined by turning the equipment off and on, you are encouraged to try to
correct the interference by one or more of the following measures:
Reorient the receiving antenna.
Relocate the computer with respect to the receiver.
Move the computer away from the receiver.
Plug the computer into a different outlet so that the computer and the receiver
are on different branch circuits.
If necessary, consult a Technical Support representative of Dell Computer Corporation
or an experienced radio/television technician for additional suggestions. You may find
the FCC Interference Handbook, 1986, to be helpful. It is available from the U.S. Government Printing Office, Washington, DC 20402, Stock No. 004-000-00450-7 or on
the World Wide Web at http://www.fcc.gov/Bureaus/Compliance/WWW/
tvibook.html.
Dell computer systems are designed, tested, and classified for their intended electromagnetic environment. These electromagnetic environment classifications generally
refer to the following harmonized definitions:
Class A is typically for business or industrial environments.
Class B is typically for residential environments.
Regulatory Notices E-1
Information Technology Equipment (ITE), including peripherals, expansion cards, printers, input/output (I/O) devices, monitors, and so on, that are integrated into or
connected to the system should match the electromagnetic environment classification of the computer system.
$1RWLFH$ERXW6KLHOGHG6LJQDO&DEOHV8VHRQO\VKLHOGHGFDEOHVIRUFRQ
QHFWLQJSHULSKHUDOVWRDQ\'HOOGHYLFHWRUHGXFHWKHSRVVLELOLW\RI
LQWHUIHUHQFHZLWKUDGLRFRPPXQLFDWLRQVVHUYLFHV8VLQJVKLHOGHGFDEOHV
HQVXUHVWKDW\RXPDLQWDLQWKHDSSURSULDWH(0&FODVVLILFDWLRQIRUWKH
LQWHQGHGHQYLURQPHQW)RUSDUDOOHOSULQWHUVDFDEOHLVDYDLODEOHIURP'HOO
&RPSXWHU&RUSRUDWLRQ,I\RXSUHIHU\RXFDQRUGHUDFDEOHIURP'HOO&RP
SXWHU&RUSRUDWLRQRQWKH:RUOG:LGH:HEDWKWWSZZZGHOOFRP
SURGXFWVGHOOZDUHLQGH[KWP
$1RWLFH$ERXW1HWZRUNHG&RPSXWHU6\VWHPV6RPH'HOOFRPSXWHUV\VWHPV
WKDWDUHFODVVLILHGIRU&ODVV%HQYLURQPHQWVPD\LQFOXGHDQRQERDUGQHW
ZRUNLQWHUIDFHFRQWUROOHU1,&,I\RXU&ODVV%V\VWHPFRQWDLQVD1,&LWPD\
EHFRQVLGHUHGWREHD&ODVV$V\VWHPDWWKHWLPHWKDWWKH1,&LVFRQQHFWHG
WRDQHWZRUN:KHQWKH1,&LVQRWFRQQHFWHGWRDQHWZRUN\RXUV\VWHPLV
FRQVLGHUHGWREHD&ODVV%GLJLWDOGHYLFH
Most Dell computer systems are classified for Class B environments. To determine
the electromagnetic classification for your system or device, refer to the following
sections specific for each regulatory agency. Each section provides country-specific
EMC/EMI or product safety information.
)&&1RWLFHV862QO\
Most Dell computer systems are classified by the Federal Communications Commission (FCC) as Class B digital devices. However, the inclusion of certain options can
change the rating of some configurations to Class A. To determine which classification
applies to your computer system, examine all FCC registration labels located on the
bottom or back panel of your computer, on card-mounting brackets, and on the cards
themselves. If any one of the labels carries a Class A rating, your entire system is considered to be a Class A digital device. If all labels carry an FCC Class B rating as
distinguished by either an FCC ID number or the FCC logo, (
), your system is considered to be a Class B digital device.
Once you have determined your systems FCC classification, read the appropriate
FCC notice. Note that FCC regulations provide that changes or modifications not
expressly approved by Dell Computer Corporation could void your authority to operate
this equipment.
This device complies with Part 15 of the FCC Rules. Operation is subject to the following two conditions:
E-2
This device may not cause harmful interference.
This device must accept any interference received, including interference that
may cause undesired operation.
Dell PowerVault 720N, 740N, and 760N Users Guide
&ODVV$
This equipment has been tested and found to comply with the limits for a Class A digital device pursuant to Part 15 of the FCC Rules. These limits are designed to provide
reasonable protection against harmful interference when the equipment is operated
in a commercial environment. This equipment generates, uses, and can radiate radio
frequency energy and, if not installed and used in accordance with the manufacturers
instruction manual, may cause harmful interference with radio communications. Operation of this equipment in a residential area is likely to cause harmful interference, in
which case you will be required to correct the interference at your own expense.
&ODVV%
This equipment has been tested and found to comply with the limits for a Class B digital device pursuant to Part 15 of the FCC Rules. These limits are designed to provide
reasonable protection against harmful interference in a residential installation. This
equipment generates, uses, and can radiate radio frequency energy and, if not
installed and used in accordance with the manufacturers instruction manual, may
cause interference with radio communications. However, there is no guarantee that
interference will not occur in a particular installation. If this equipment does cause
harmful interference to radio or television reception, which can be determined by turning the equipment off and on, you are encouraged to try to correct the interference by
one or more of the following measures:
Reorient or relocate the receiving antenna.
Consult the dealer or an experienced radio/television technician for help.
Increase the separation between the equipment and the receiver.
Connect the equipment into an outlet on a circuit different from that to which the
receiver is connected.
The following information is provided on the device or devices covered in this document in compliance with FCC regulations:
Product name: Dell PowerVault 720N, 740N, and 760N
Model number: LMM
Company name: Dell Computer Corporation
EMC Engineering Department
One Dell Way
Round Rock, Texas 78682 USA
512-338-4400
,&1RWLFH&DQDGD2QO\
Most Dell computer systems (and other Dell digital apparatus) are classified by the
Industry Canada (IC) Interference-Causing Equipment Standard #3 (ICES-003) as
Class B digital devices. To determine which classification (Class A or B) applies to your
computer system (or other Dell digital apparatus), examine all registration labels
located on the bottom or the back panel of your computer (or other digital apparatus).
Regulatory Notices E-3
A statement in the form of IC Class A ICES-3 or IC Class B ICES-3 will be located
on one of these labels. Note that Industry Canada regulations provide that changes or
modifications not expressly approved by Dell Computer Corporation could void your
authority to operate this equipment.
This Class B (or Class A, if so indicated on the registration label) digital apparatus
meets the requirements of the Canadian Interference-Causing Equipment
Regulations.
Cet appareil numérique de la Classe B (ou Classe A, si ainsi indiqué sur létiquette
denregistration) respecte toutes les exigences du Reglement sur le Materiel
Brouilleur du Canada.
&(1RWLFH(XURSHDQ8QLRQ
Marking by the symbol
indicates compliance of this Dell system to the EMC
Directive and the Low Voltage Directive of the European Union. Such marking is indicative that this Dell system meets the following technical standards:
EN 55022 Limits and Methods of Measurement of Radio Interference Characteristics of Information Technology Equipment.
EN 50082-1: 1992 Electromagnetic compatibilityGeneric immunity standard Part 1: Residential, commercial, and light industry.
EN 60950 Safety of Information Technology Equipment.
NOTE: EN 55022 emissions requirements provide for two classifications:
Class A is for typical commercial areas.
Class B is for typical domestic areas.
5),17(5)(5(1&(:$51,1*7KLVLVD&ODVV$SURGXFW,QDGRPHVWLFHQYL
URQPHQWWKLVSURGXFWPD\FDXVHUDGLRIUHTXHQF\5)LQWHUIHUHQFHLQZKLFK
FDVHWKHXVHUPD\EHUHTXLUHGWRWDNHDGHTXDWHPHDVXUHV
A Declaration of Conformity in accordance with the preceding directives and standards has been made and is on file at Dell Products Europe BV, Limerick, Ireland.
%DWWHU\'LVSRVDO
Your computer system uses a lithium-ion battery. The lithium-ion battery is a long-life
battery, and it is very possible that you will never need to replace it. However, should
you need to replace it, refer to your service manual for instructions.
Do not dispose of the battery along with household waste. Contact your local waste
disposal agency for the address of the nearest battery deposit site.
NOTE: Your system may also include circuit cards or other components that contain
batteries. These batteries must also be disposed of in a battery deposit site. For information about such batteries, refer to the documentation for the specific card or
component.
E-4
Dell PowerVault 720N, 740N, and 760N Users Guide
(1&RPSOLDQFH&]HFK5HSXEOLF
2QO\
This device belongs to Class B devices as described in EN 55022, unless it is specifically stated that it is a Class A device on the specification label. The following
applies to devices in Class A of EN 55022 (radius of protection up to 30 meters).
The user of the device is obliged to take all steps necessary to remove sources of
interference to telecommunication or other devices.
1PLVE OFOÇ OB UZQPWÃN tUJULV QPÂÇUBÂF VWFEFOP xF TQBE» EP UÒÇEZ " QPEMF
&/ TQBE»BVUPNBUJDLZEPUÒÇEZ#QPEMF&/1SP[BÒÇ[FOÇ[BÒB[FO»
EP UÒÇEZ " PDISBOOÃ Q»TNP N
QPEMF &/ QMBUÇ O»TMFEVKÇDÇ %PKEFMJ L
SVtFOÇUFMFLPNVOJLBÂOÇDIOFCPKJOZDI[BÒÇ[FOÇKFVxJWBUFMQPWJOFOQSPWÃTUUBLPW»
PQBUÒFOÇBCZSVtFOÇPETUSBOJM
9&&,1RWLFH-DSDQ2QO\
Most Dell computer systems are classified by the Voluntary Control Council for Interference (VCCI) as Class B information technology equipment (ITE). However, the
inclusion of certain options can change the rating of some configurations to Class A.
ITE, including peripherals, expansion cards, printers, input/output (I/O) devices, monitors, and so on, integrated into or connected to the system, should match the
electromagnetic environment classification (Class A or B) of the computer system.
To determine which classification applies to your computer system, examine the regulatory labels/markings (see Figures E-1 and E-2) located on the bottom or back panel
of your computer. Once you have determined your systems VCCI classification, read
the appropriate VCCI notice.
&ODVV$,7(
This is a Class A product based on the standard of the Voluntary Control Council for
Interference (VCCI) for information technology equipment. If this equipment is used in
a domestic environment, radio disturbance may arise. When such trouble occurs, the
user may be required to take corrective actions.
Regulatory Notices E-5
9&&,$
)LJXUH(9&&,&ODVV$,7(5HJXODWRU\0DUN
&ODVV%,7(
This is a Class B product based on the standard of the Voluntary Control Council for
Interference (VCCI) for information technology equipment. If this equipment is used
near a radio or television receiver in a domestic environment, it may cause radio interference. Install and use the equipment according to the instruction manual.
)LJXUH(9&&,&ODVV%,7(5HJXODWRU\0DUN
02&1RWLFH6RXWK.RUHD2QO\
To determine which classification (Class A or B) applies to your computer system (or
other Dell digital device), examine the South Korean Ministry of Communications
(MOC) registration labels located on your computer (or other Dell digital device). The
MOC label may be located separately from the other regulatory marking applied to
your product. The English text, EMI (A), for Class A products, or EMI (B) for Class
B products, appears in the center of the MOC label (see Figures E-3 and E-4).
NOTE: MOC emissions requirements provide for two classifications:
E-6
Class A devices are for business purposes.
Class B devices are for nonbusiness purposes.
Dell PowerVault 720N, 740N, and 760N Users Guide
&ODVV$'HYLFH
Note that this device has been approved for business purposes with regard to electromagnetic interference. If you find that this device is not suitable for your use, you may
exchange it for a nonbusiness device.
(0,$
)LJXUH(02&&ODVV$5HJXODWRU\0DUN
&ODVV%'HYLFH
Note that this device has been approved for nonbusiness purposes and may be used
in any environment, including residential areas.
(0,%
)LJXUH(02&&ODVV%5HJXODWRU\0DUN
3ROLVK&HQWHUIRU7HVWLQJDQG&HUWLILFDWLRQ
1RWLFH
The equipment should draw power from a socket with an attached protection circuit (a
three-prong socket). All equipment that works together (computer, monitor, printer,
and so on) should have the same power supply source.
Regulatory Notices E-7
The phasing conductor of the rooms electrical installation should have a reserve
short-circuit protection device in the form of a fuse with a nominal value no larger than
16 amperes (A).
To completely switch off the equipment, the power supply cable must be removed
from the power supply socket, which should be located near the equipment and easily
accessible.
A protection mark B confirms that the equipment is in compliance with the protection usage requirements of standards PN-93/T-42107 and PN-89/E-06251.
8ZNBHBOJB1PMTLJFHP$FOUSVN#BEBËJ
$FSUZGJLBDKJ
6S[E[FOJFQPXJOOPCZÀ[BTJMBOF[HOJB[EB[QS[ZD[POZNPCXPEFNPDISPOOZN
HOJB[EP[LPLJFN
8TQÍQSBDVKDF[FTPCVS[E[FOJBLPNQVUFSNPOJUPS
ESVLBSLB
QPXJOOZCZÀ[BTJMBOF[UFHPTBNFHPySÍEB
*OTUBMBDKBFMFLUSZD[OBQPNJFT[D[FOJBQPXJOOB[BXJFSBÀXQS[FXPE[JFGB[PXZN
SF[FSXPXPDISPOÄQS[FE[XBSDJBNJXQPTUBDJCF[QJFD[OJLBPXBSUPvDJ[OBNJPOPXFK
OJFXJÄLT[FKOJ"BNQFSÍX
8DFMVDBLPXJUFHPXZD[FOJBVS[E[FOJB[TJFDJ[BTJMBOJBOBMFZXZKÀXUZD[LÄ
LBCMB[BTJMBKDFHP[HOJB[ELBLUÍSFQPXJOOP[OBKEPXBÀTJÄXQPCMJVVS[E[FOJBJ
CZÀBUXPEPTUÄQOF
;OBLCF[QJFD[FËTUXB#QPUXJFSE[B[HPEOPvÀVS[E[FOJB[XZNBHBOJBNJ
CF[QJFD[FËTUXBVZULPXBOJB[BXBSUZNJX1/5J1/&
1P[PTUBFJOTUSVLDKFCF[QJFD[FËTUXB
E-8
/JFOBMFZVZXBÀXUZD[FLBEBQUFSPXZDIMVCVTVXBÀLPLBPCXPEVPDISPOOFHP
[XUZD[LJ+FFMJLPOJFD[OFKFTUVZDJFQS[FEVBD[BUPOBMFZVZÀQS[FEVBD[B
ZPXFHP[QSBXJEPXPQPD[POZNQS[FXPEFNPDISPOOZN
4ZTUFNLPNQVUFSPXZOBMFZ[BCF[QJFD[ZÀQS[FEOBHZNJDIXJMPXZNJ
X[SPTUBNJMVCTQBELBNJOBQJÄDJBVZXBKDFMJNJOBUPSBQS[FQJÄÀVS[E[FOJB
EPQBTPXVKDFHPMVCCF[[BLÍDFOJPXFHPySÍEB[BTJMBOJB
/BMFZVQFXOJÀTJÄBCZOJDOJFMFBPOBLBCMBDITZTUFNVLPNQVUFSPXFHP
PSB[BCZLBCMFOJFCZZVNJFT[D[POFXNJFKTDVHE[JFNPOBCZPCZOBOJF
OBEFQUZXBÀMVCQPUZLBÀTJÄPOJF
/JFOBMFZSP[MFXBÀOBQPKÍXBOJJOOZDIQZOÍXOBTZTUFNLPNQVUFSPXZ
/JFOBMFZXQZDIBÀBEOZDIQS[FENJPUÍXEPPUXPSÍXTZTUFNVLPNQVUFSPXFHP
HEZNPFUPTQPXPEPXBÀQPBSMVCQPSBFOJFQSEFNQPQS[F[[XBSDJF
FMFNFOUÍXXFXOÄUS[OZDI
4ZTUFNLPNQVUFSPXZQPXJOJFO[OBKEPXBÀTJÄ[EBMBPEHS[FKOJLÍXJySÍEF
DJFQB1POBEUPOJFOBMFZCMPLPXBÀPUXPSÍXXFOUZMBDZKOZDI/BMFZVOJLBÀ
LBE[FOJBMVyOZDIQBQJFSÍXQPELPNQVUFSPSB[VNJFT[D[BOJBLPNQVUFSBX
DJBTOZNNJFKTDVCF[NPMJXPvDJDZSLVMBDKJQPXJFUS[BXPLÍOJFHP
Dell PowerVault 720N, 740N, and 760N Users Guide
120,QIRUPDWLRQ0H[LFR2QO\
The following information is provided on the device(s) described in this document in
compliance with the requirements of the official Mexican standards (NOM):
Exporter:
Dell Computer Corporation
One Dell Way
Round Rock, TX 78682
Importer:
Dell Computer de México,
S.A. de C.V.
Rio Lerma No. 302 - 4° Piso
Col. Cuauhtemoc
16500 México, D.F.
Ship to:
Dell Computer de México,
S.A. de C.V. al Cuidado
de Kuehne & Nagel de
México S. de R.I.
Avenida Soles No. 55
Col. Peñon de los Baños
15520 México, D.F.
Supply voltage:
100-240 VAC
Frequency:
60/50 Hz
Input current
rating:
Input current rating: 5.0 A
,QIRUPDFLyQSDUD120~QLFDPHQWHSDUD
0p[LFR
La información siguiente se proporciona en el dispositivo o en los dispositivos descritos en este documento, en cumplimiento con los requisitos de la Norma Oficial
Mexicana (NOM):
Exportador:
Dell Computer Corporation
One Dell Way
Round Rock, TX 78682
Importador:
Dell Computer de México,
S.A. de C.V.
Rio Lerma No. 302 - 4° Piso
Col. Cuauhtemoc
16500 México, D.F.
Regulatory Notices E-9
Exportador:
Dell Computer Corporation
One Dell Way
Round Rock, TX 78682
Embarcar a:
Dell Computer de México,
S.A. de C.V. al Cuidado
de Kuehne & Nagel de
México S. de R.I.
Avenida Soles No. 55
Col. Peñon de los Baños
15520 México, D.F.
Tensión
alimentación:
100-240 VAC
Frecuencia:
60/50 Hz
Consumo de
corriente:
5.0 A
%60,1RWLFH7DLZDQ2QO\
E-10 Dell PowerVault 720N, 740N, and 760N Users Guide
$33(1',;)
:DUUDQW\5HWXUQ3ROLF\DQG<HDU
6WDWHPHQWRI&RPSOLDQFH
/LPLWHG7KUHH<HDU:DUUDQW\862QO\
Dell Computer Corporation (Dell) manufactures its hardware products from parts
and components that are new or equivalent to new in accordance with industrystandard practices. Dell warrants that the hardware products it manufactures will be
free from defects in materials and workmanship. The warranty term is three years
beginning on the date of invoice, as described in the following text.
Damage due to shipping the products to you is covered under this warranty. Otherwise, this warranty does not cover damage due to external causes, including
accident, abuse, misuse, problems with electrical power, servicing not authorized by
Dell, usage not in accordance with product instructions, failure to perform required
preventive maintenance, and problems caused by use of parts and components not
supplied by Dell.
This warranty does not cover any items that are in one or more of the following categories: software; external devices (except as specifically noted); accessories or parts
added to a Dell system after the system is shipped from Dell; accessories or parts
added to a Dell system through Dells system integration department; accessories or
parts that are not installed in the Dell factory; or DellWareSM products. Monitors, keyboards, and mice that are Dell-branded or that are included on Dells standard price list
are covered under this warranty; all other monitors, keyboards, and mice (including
those sold through the DellWare program) are not covered. Batteries for portable
computers are covered only during the initial one-year period of this warranty.
&RYHUDJH'XULQJ<HDU2QH
During the one-year period beginning on the invoice date, Dell will repair or replace
products covered under this limited warranty that are returned to Dells facility. To
request warranty service, you must call Dells Customer Technical Support within the
warranty period. Refer to the chapter titled Getting Help in your systems troubleshooting documentation to find the appropriate telephone number for obtaining
customer assistance. If warranty service is required, Dell will issue a Return Material
Authorization Number. You must ship the products back to Dell in their original or
equivalent packaging, prepay shipping charges, and insure the shipment or accept the
risk of loss or damage during shipment. Dell will ship the repaired or replacement
Warranty, Return Policy, and Year 2000 Statement of Compliance F-1
products to you freight prepaid if you use an address in the continental U.S., where
applicable. Shipments to other locations will be made freight collect.
NOTE: Before you ship the product(s) to Dell, back up the data on the hard-disk
drive(s) and any other storage device(s) in the product(s). Remove any removable
media, such as diskettes, CDs, or PC Cards. Dell does not accept liability for lost data
or software.
Dell owns all parts removed from repaired products. Dell uses new and reconditioned
parts made by various manufacturers in performing warranty repairs and building
replacement products. If Dell repairs or replaces a product, its warranty term is not
extended.
&RYHUDJH'XULQJ<HDUV7ZRDQG7KUHH
During the second and third years of this limited warranty, Dell will provide, on an
exchange basis and subject to Dells Exchange Policy in effect on the date of the
exchange, replacement parts for the Dell hardware product(s) covered under this limited warranty when a part requires replacement. You must report each instance of
hardware failure to Dells Customer Technical Support in advance to obtain Dells concurrence that a part should be replaced and to have Dell ship the replacement part.
Dell will ship parts (freight prepaid) if you use an address in the continental U.S. or
Canada, where applicable. Shipments to other locations will be made freight collect.
Dell will include a prepaid shipping container with each replacement part for your use
in returning the replaced part to Dell. Replacement parts are new or reconditioned.
Dell may provide replacement parts made by various manufacturers when supplying
parts to you. The warranty term for a replacement part is the remainder of the limited
warranty term.
You will pay Dell for replacement parts if the replaced part is not returned to Dell. The
process for returning replaced parts, and your obligation to pay for replacement parts
if you do not return the replaced parts to Dell, will be in accordance with Dells
Exchange Policy in effect on the date of the exchange.
You accept full responsibility for your software and data. Dell is not required to advise
or remind you of appropriate backup and other procedures.
*HQHUDO3URYLVLRQV
THIS WARRANTY GIVES YOU SPECIFIC LEGAL RIGHTS WHICH VARY FROM STATE
TO STATE (OR JURISDICTION TO JURISDICTION). DELL'S RESPONSIBILITY FOR
MALFUNCTIONS AND DEFECTS IN HARDWARE IS LIMITED TO REPAIR AND
REPLACEMENT AS SET FORTH IN THIS WARRANTY STATEMENT. ALL EXPRESS
AND IMPLIED WARRANTIES FOR THE PRODUCT, INCLUDING BUT NOT LIMITED
TO ANY IMPLIED WARRANTIES OF AND CONDITIONS OF MERCHANTIBILITY AND
FITNESS FOR A PARTICULAR PURPOSE, ARE LIMITED IN DURATION TO THE WARRANTY PERIOD SET FORTH ABOVE AND NO WARRANTIES, WHETHER EXPRESS
OR IMPLIED, WILL APPLY AFTER SUCH PERIOD.
SOME STATES (OR JURISDICTIONS) DO NOT ALLOW LIMITATIONS ON HOW
LONG AN IMPLIED WARRANTY LASTS, SO THE PRECEDING LIMITATION MAY NOT
APPLY TO YOU.
F-2
Dell PowerVault 720N, 740N, and 760N Users Guide
DELL DOES NOT ACCEPT LIABILITY BEYOND THE REMEDIES SET FORTH IN THIS
WARRANTY STATEMENT OR LIABILITY FOR INCIDENTAL OR CONSEQUENTIAL
DAMAGES, INCLUDING WITHOUT LIMITATION ANY LIABILITY FOR PRODUCTS
NOT BEING AVAILABLE FOR USE OR FOR LOST DATA OR SOFTWARE.
SOME STATES (OR JURISDICTIONS) DO NOT ALLOW THE EXCLUSION OR LIMITATION OF INCIDENTAL OR CONSEQUENTIAL DAMAGES, SO THE PRECEDING
EXCLUSION OR LIMITATION MAY NOT APPLY TO YOU.
These provisions apply to Dells limited three-year warranty only. For provisions of any
service contract covering your system, refer to your invoice or the separate service
contract that you will receive.
If Dell elects to exchange a system or component, the exchange will be made in
accordance with Dells Exchange Policy in effect on the date of the exchange. In any
instance in which Dell issues a Return Material Authorization Number, Dell must
receive the product(s) for repair prior to the expiration of the warranty period in order
for the repair(s) to be covered by the warranty.
NOTE: If you chose one of the available warranty and service options in place of the
standard limited three-year warranty described in the preceding text, the option you
chose will be listed on your invoice.
/LPLWHG7KUHH<HDU:DUUDQW\&DQDGD
2QO\
Dell Computer Corporation (Dell) manufactures its hardware products from parts
and components that are new or equivalent to new in accordance with industrystandard practices. Dell warrants that the hardware products it manufactures will be
free from defects in materials and workmanship. The warranty term is three years
beginning on the date of invoice, as described in the following text.
Damage due to shipping the products to you is covered under this warranty. Otherwise, this warranty does not cover damage due to external causes, including
accident, abuse, misuse, problems with electrical power, servicing not authorized by
Dell, usage not in accordance with product instructions, failure to perform required
preventive maintenance, and problems caused by use of parts and components not
supplied by Dell.
This warranty does not cover any items that are in one or more of the following categories: software; external devices (except as specifically noted); accessories or parts
added to a Dell system after the system is shipped from Dell; accessories or parts
added to a Dell system through Dells system integration department; accessories or
parts that are not installed in the Dell factory; or DellWareSM products. Monitors, keyboards, and mice that are Dell-branded or that are included on Dells standard price list
are covered under this warranty; all other monitors, keyboards, and mice (including
those sold through the DellWare program) are not covered. Batteries for portable
computers are covered only during the initial one-year period of this warranty.
Warranty, Return Policy, and Year 2000 Statement of Compliance F-3
&RYHUDJH'XULQJ<HDU2QH
During the one-year period beginning on the invoice date, Dell will repair or replace
products covered under this limited warranty that are returned to Dells facility. To
request warranty service, you must call Dells Customer Technical Support within the
warranty period. Refer to the chapter titled Getting Help in your systems troubleshooting documentation to find the appropriate telephone number for obtaining
customer assistance. If warranty service is required, Dell will issue a Return Material
Authorization Number. You must ship the products back to Dell in their original or
equivalent packaging, prepay shipping charges, and insure the shipment or accept the
risk of loss or damage during shipment. Dell will ship the repaired or replacement
products to you freight prepaid if you use an address in Canada, where applicable.
Shipments to other locations will be made freight collect.
NOTE: Before you ship the product(s) to Dell, back up the data on the hard-disk
drive(s) and any other storage device(s) in the product(s). Remove any removable
media, such as diskettes, CDs, or PC Cards. Dell does not accept liability for lost data
or software.
Dell owns all parts removed from repaired products. Dell uses new and reconditioned
parts made by various manufacturers in performing warranty repairs and building
replacement products. If Dell repairs or replaces a product, its warranty term is not
extended.
&RYHUDJH'XULQJ<HDUV7ZRDQG7KUHH
During the second and third years of this limited warranty, Dell will provide, on an
exchange basis and subject to Dells Exchange Policy in effect on the date of the
exchange, replacement parts for the Dell hardware product(s) covered under this limited warranty when a part requires replacement. You must report each instance of
hardware failure to Dells Customer Technical Support in advance to obtain Dells concurrence that a part should be replaced and to have Dell ship the replacement part.
Dell will ship parts (freight prepaid) if you use an address in the continental U.S. or
Canada, where applicable. Shipments to other locations will be made freight collect.
Dell will include a prepaid shipping container with each replacement part for your use
in returning the replaced part to Dell. Replacement parts are new or reconditioned.
Dell may provide replacement parts made by various manufacturers when supplying
parts to you. The warranty term for a replacement part is the remainder of the limited
warranty term.
You will pay Dell for replacement parts if the replaced part is not returned to Dell. The
process for returning replaced parts, and your obligation to pay for replacement parts
if you do not return the replaced parts to Dell, will be in accordance with Dells
Exchange Policy in effect on the date of the exchange.
You accept full responsibility for your software and data. Dell is not required to advise
or remind you of appropriate backup and other procedures.
F-4
Dell PowerVault 720N, 740N, and 760N Users Guide
*HQHUDO3URYLVLRQV
DELL MAKES NO EXPRESS WARRANTIES OR CONDITIONS BEYOND THOSE
STATED IN THIS WARRANTY STATEMENT. DELL DISCLAIMS ALL OTHER WARRANTIES AND CONDITIONS, EXPRESS OR IMPLIED, INCLUDING WITHOUT
LIMITATION IMPLIED WARRANTIES AND CONDITIONS OF MERCHANTABILITY
AND FITNESS FOR A PARTICULAR PURPOSE. SOME STATES (OR JURISDICTIONS)
DO NOT ALLOW LIMITATIONS ON IMPLIED WARRANTIES OR CONDITIONS, SO
THIS LIMITATION MAY NOT APPLY TO YOU.
DELLS RESPONSIBILITY FOR MALFUNCTIONS AND DEFECTS IN HARDWARE IS
LIMITED TO REPAIR AND REPLACEMENT AS SET FORTH IN THIS WARRANTY
STATEMENT. THESE WARRANTIES GIVE YOU SPECIFIC LEGAL RIGHTS, AND YOU
MAY ALSO HAVE OTHER RIGHTS, WHICH VARY FROM STATE TO STATE (OR JURISDICTION TO JURISDICTION).
DELL DOES NOT ACCEPT LIABILITY BEYOND THE REMEDIES SET FORTH IN THIS
WARRANTY STATEMENT OR LIABILITY FOR INCIDENTAL OR CONSEQUENTIAL
DAMAGES, INCLUDING WITHOUT LIMITATION ANY LIABILITY FOR PRODUCTS
NOT BEING AVAILABLE FOR USE OR FOR LOST DATA OR SOFTWARE.
SOME STATES (OR JURISDICTIONS) DO NOT ALLOW THE EXCLUSION OR LIMITATION OF INCIDENTAL OR CONSEQUENTIAL DAMAGES, SO THE PRECEDING
EXCLUSION OR LIMITATION MAY NOT APPLY TO YOU.
These provisions apply to Dells limited three-year warranty only. For provisions of any
service contract covering your system, refer to your invoice or the separate service
contract that you will receive.
If Dell elects to exchange a system or component, the exchange will be made in
accordance with Dells Exchange Policy in effect on the date of the exchange. In any
instance in which Dell issues a Return Material Authorization Number, Dell must
receive the product(s) for repair prior to the expiration of the warranty period in order
for the repair(s) to be covered by the warranty.
NOTE: If you chose one of the available warranty and service options in place of the
standard limited three-year warranty described in the preceding text, the option you
chose will be listed on your invoice.
´7RWDO6DWLVIDFWLRQµ5HWXUQ3ROLF\86DQG
&DQDGD2QO\
If you are an end-user customer who bought new products directly from a Dell company, you may return them to Dell within 30 days of the date of invoice for a refund or
credit of the product purchase price. If you are an end-user customer who bought
reconditioned or refurbished products from a Dell company, you may return them to
Dell within 14 days of the date of invoice for a refund or credit of the product purchase
price. In either case, the refund or credit will not include any shipping and handling
charges shown on your invoice. If you are an organization that bought the products
under a written agreement with Dell, the agreement may contain different terms for
the return of products than specified by this policy.
Warranty, Return Policy, and Year 2000 Statement of Compliance F-5
To return products, you must call Dell Customer Service to receive a Credit Return
Authorization Number. Refer to the chapter titled Getting Help in your system's
troubleshooting documentation or, for some systems, the section titled Contacting
Dell in your system's online guide to find the appropriate telephone number for
obtaining customer assistance. To expedite the processing of your refund or credit,
Dell expects you to return the products to Dell in their original packaging within five
days of the date that Dell issues the Credit Return Authorization Number. You must
also prepay shipping charges and insure the shipment or accept the risk of loss or
damage during shipment. You may return software for refund or credit only if the
sealed package containing the diskette(s) or CD(s) is unopened. Returned products
must be in as-new condition, and all of the manuals, diskette(s), CD(s), power cables,
and other items included with a product must be returned with it. For customers who
want to return, for refund or credit only, either applications software or an operating
system that has been installed by Dell, the whole system must be returned, along
with any media and documentation that may have been included in the original
shipment.
This Total Satisfaction Return Policy does not apply to DellWare products, which
may be returned under DellWare's then-current return policy. In addition, reconditioned parts purchased through Dell Spare Parts Sales in Canada are nonreturnable.
<HDU6WDWHPHQWRI&RPSOLDQFHIRU
'HOO%UDQGHG+DUGZDUH3URGXFWV
Dell-branded hardware products shipped on or after January 1, 1997, are eligible to
carry the NSTL Hardware Tested Year 2000 Compliant logo by virtue of formal testing with, and successful completion of, the National Software Testing Laboratories
(NSTL) YMARK2000 test.* Dell will treat a failure to pass the YMARK2000 test as a
covered event under Dell's warranty for the product, subject to the normal warranty
limitations.** For a complete copy of Dell's warranty, see the product's documentation. Dell-branded hardware products will also recognize the year 2000 as a leap year.
*The YMARK2000 standard tests the ability of system hardware and firmware to support the
transition to the year 2000 (and to recognize leap years, when appropriate, for years 2000
through 2009 inclusive) and not that of options, operating systems, or applications software.
Dell-branded hardware products that pass the YMARK2000 test conform to BSI-DISC
PD 2000-1.
** Except for this clarification of Dell's warranty for NSTL logo hardware, all other warranties,
conditions and remedies, express or implied, relating to year 2000 readiness or compliance are
disclaimed. To make a claim under this warranty for NSTL logo hardware, customers must contact Dell prior to January 1, 2001.
To make a claim, write to:
Dell Computer Corporation
P.O. Box 149258
Austin, Texas 78714-9258
Attention: Year 2000
F-6
Dell PowerVault 720N, 740N, and 760N Users Guide
Despite a system's ability to pass the YMARK2000 test, actual rollover results in specific operating environments may vary depending on other factors including, but not limited to, other
hardware, operating systems, and applications software.
3UHYLRXV3URGXFWV
For Dell-branded hardware products shipped prior to January 1, 1997, that have an
upgradable basic input/output system (BIOS), Dell makes available a BIOS upgrade.
Although these products may not have been tested under the YMARK2000 test, Dell
believes that the hardware would pass the YMARK2000 test, provided the appropriate BIOS upgrade is properly loaded.
For Dell-branded hardware products that do not have an upgradable BIOS, Dell has
made available, as a convenience to customers, the Dell Program Patch, a software
utility designed to assist customers in managing the year 2000 rollover.
6RIWZDUH
Dell specifically excludes all non-Dell-developed software from this compliance statement. All software run on Dell-branded hardware products should be independently
verified by customers to be year 2000-compliant.
$GGLWLRQDO,QIRUPDWLRQ
For additional information on year 2000 compliance of Dell-branded hardware products, refer to Dell's Year 2000 Web site at http://www.dell.com/year2000 or
contact a Dell customer service representative in your area.
Warranty, Return Policy, and Year 2000 Statement of Compliance F-7
F-8
Dell PowerVault 720N, 740N, and 760N Users Guide
*ORVVDU\
The following list defines or identifies
technical terms, abbreviations, and acronyms used in Dell user documents.
$
Abbreviation for ampere(s).
$&
Abbreviation for alternating current.
$&/
Access control list. A list that contains the
users or groups access rights to each
share.
DGDSWHUFDUG
An expansion card that plugs into an
expansion-card connector on the computers system board. An adapter card adds
some specialized function to the computer by providing an interface between the
expansion bus and a peripheral device. Examples of adapter cards include network
cards, sound boards, and SCSI adapters.
$'&
Abbreviation for analog-to-digital
converter.
$',
Abbreviation for Autodesk Device
Interface.
DGPLQLVWUDWLRQKRVW
The client you specify during filer setup
for managing the filer. The setup program automatically configures the filer to
accept telnet and rsh connections
from this client, to give permission to
this client for mounting the / and /home
directories, and to use this client as the
mailhost for sending autosupport email
messages. At any time after you run the
setup program, you can configure the
filer to work with other clients in the
same way as it does with the administration host.
$,
Abbreviation for artificial intelligence.
$16,
Acronym for American National Standards
Institute.
$3&
Abbreviation for American Power
Conversion.
DSSOLFDWLRQSURJUDP
Software designed to help you perform a
specific task, such as a spreadsheet or
word processor. Application programs are
distinct from operating system and utility
software.
$6&,,
Acronym for American Standard Code for
Information Interchange. A text file containing only characters from the ASCII
character set (usually created with a text
editor, such as MS-DOS® Editor or Notepad in Windows), is called an ASCII file.
$6,&
Acronym for application-specific integrated circuit.
$63,
Advanced SCSI programming interface.
Glossary
1
DXWKHQWLFDWLRQ
A security step performed by a domain
controller for the filers domain, or by the
filer itself, using its /etc/passwd file.
DXWRH[HFEDWILOH
When you boot your computer, MS-DOS
runs any commands contained in the text
file, autoexec.bat (after running any commands in the config.sys file). An
autoexec.bat file is not required to boot
MS-DOS, but provides a convenient place
to run commands that are essential for
setting up a consistent computing environmentsuch as loading mouse or
network software.
EDFNXS
A copy of a program or data file. As a
precaution, you should back up your
computers hard-disk drive on a regular
basis. Before making a change to the configuration of your computer, you should
back up important start-up files, such as
autoexec.bat and config.sys for
MS-DOS or win.ini and system.ini for
Windows.
EHHSFRGH
A diagnostic system message in the form
of a series of beeps from your computers
speaker. Refer to your Diagnostics and
Troubleshooting Guide for a complete discussion of system beep codes.
%,26
Acronym for basic input/output system.
Your computers BIOS contains programs
stored on a ROM chip. The BIOS controls
the following:
Communications between the
microprocessor and peripheral
devices, such as the keyboard and
the video adapter
Miscellaneous functions, such as
system messages
EDVHPHPRU\
Synonym for conventional memory. See
also conventional memory.
ELW
The smallest unit of information interpreted by your computer.
%$6,&
Acronym for Beginners All-Purpose Symbolic Instruction Code, a programming
language. MS-DOS includes a version of
BASIC.
EORFNVL]H
The size of a block. See also block and
striping.
EDWFKILOH
An ASCII text file containing a list of commands that run in sequence. Batch files
must have a filename extension of bat.
EDXGUDWH
Data transmission speed. For example,
modems are designed to transmit data at
one or more specified baud rate(s)
through the COM (serial) port of a
computer.
%%6
Abbreviation for bulletin board service. A
computer system that serves as a central
location for accessing data or relaying
messages by modem. For example, Dells
2
TechConnect BBS contains the latest version of software such as video drivers and
the Dell Directory. If your system has a
modem, you can access the BBS and
download the most recent version of this
software.
Dell PowerVault 720N, 740N, and 760N Users Guide
ERRWURXWLQH
When you start your computer, it clears
all memory, initializes devices, and loads
the operating system. Unless the operating system fails to respond, you can
reboot (also called warm boot) your computer by pressing <Ctrl><Alt><Del>;
otherwise, you must perform a cold boot
by pressing the reset button (if your computer has one) or by turning the computer
off, then back on.
ERRWDEOHGLVNHWWH
You can start your computer from a diskette in drive A. To make a bootable
diskette, insert a diskette in drive A, type
sys a: at the command line prompt, then
press <Enter>. Use this bootable diskette
if your computer will not boot from the harddisk drive.
&%7
Abbreviation for computer-based training.
ESL
Abbreviation for bits per inch.
&&)7
Abbreviation for cold cathode fluorescent
tube.
ESV
Abbreviation for bits per second.
%78
Abbreviation for British thermal unit.
EXV
A bus forms an information pathway between the components of a computer.
Your computer contains an expansion bus
that allows the microprocessor to communicate with controllers for all the
various peripheral devices connected to
the computer. Your computer also contains an address bus and a data bus for
communications between the microprocessor and RAM.
E\WH
Eight contiguous bits of information, the
basic data unit used by your computer.
%=7
Abbreviation for Bundesamt fur Zulassungen in der Telekommunikation.
&
Abbreviation for Celsius.
FDFKH
To facilitate quicker data retrieval, a storage area for keeping a copy of data or
instructions. For example, your computers BIOS may cache ROM code in faster
RAM. Or, a disk-cache utility may reserve
RAM in which to store frequently accessed information from your computers disk
drives; when a program makes a request
to a disk drive for data that is in the cache,
the disk-cache utility can retrieve the data
from RAM faster than from the disk drive.
FDUGHGJHFRQQHFWRU
On the bottom of an expansion card, the
metal-contact section that plugs into an
expansion-card connector.
&'520
Abbreviation for compact disc read-only
memory. CD-ROM drives use optical
technology to read data from compact
discs. Compact discs are read-only storage devices; you cannot write new data
to a compact disc with standard CD-ROM
drives.
&*$
Abbreviation for color graphics adapter.
&,)6
Common Internet File System. A protocol
for networking PCs.
FOLHQW
A computer that shares files on a filer.
&,2
Abbreviation for comprehensive input/
output.
FP
Abbreviation for centimeter(s).
&026
Acronym for complementary metal-oxide
semiconductor. In computers, CMOS
memory chips are often used for NVRAM
storage.
&20Q
The MS-DOS device names for the first
through fourth serial ports on your computer are COM1, COM2, COM3, and
COM4. MS-DOS supports up to four serial
ports. However, the default interrupt for
COM1 and COM3 is IRQ4, and the default
interrupt for COM2 and COM4 is IRQ3.
Therefore, you must be careful when configuring software that runs a serial device
so that you dont create an interrupt
conflict.
Glossary
3
&21
The MS-DOS device name for the console, which includes your computers
keyboard and text displayed on the
screen.
FRQILJV\VILOH
When you boot your computer, MS-DOS
runs any commands contained in the text
file, config.sys (before running any commands in the autoexec.bat file). A
config.sys file is not required to boot
MS-DOS, but provides a convenient place
to run commands that are essential for
setting up a consistent computing environmentsuch as loading device drivers with
a device= statement.
FRQVROH
A terminal that is attached to a filers serial
port and is used to monitor and manage
filer operation.
FRQWUROOHU
A chip or expansion card that controls the
transfer of data between the microprocessor and a peripheral, such as a disk
drive or the keyboard.
FRQYHQWLRQDOPHPRU\
The first 640 KB of RAM. Unless they are
specially designed, MS-DOS programs
are limited to running in conventional
memory. See also EMM, expanded memory, extended memory, HMA, memory
manager, upper memory area, and XMM.
FRSURFHVVRU
A coprocessor relieves the computers
microprocessor of specific processing
tasks. A math coprocessor, for example,
handles numeric processing. A graphics
coprocessor handles video rendering. The
Intel® Pentium® microprocessor includes a
built-in math coprocessor.
FSL
Abbreviation for characters per inch.
&38
Abbreviation for central processing unit.
See also microprocessor.
4
Dell PowerVault 720N, 740N, and 760N Users Guide
FXUVRU
In character-based MS-DOS programs,
the cursor is usually a block or an underscore (possibly blinking) that represents
the position at which the next character
typed will appear. Windows programs can
design their own cursorscommon cursor symbols include the pointer arrow and
the text-insertion I-beam.
'$&
Acronym for digital-to-analog converter.
'$7
Acronym for digital audio tape.
G%
Abbreviation for decibel(s).
G%$
Abbreviation for adjusted decibel(s).
'&
Abbreviation for direct current.
''&
Acronym for display data channel. A
VESA® standard mechanism that allows
the system to communicate with the
monitor and retrieve information about its
capabilities.
'HOO2SHQ0DQDJH&OLHQWDQG
&OLHQW$GPLQLVWUDWRU
The Dell OpenManage program is a DMI
browser that allows you to view information about various components of your
system.
GHYLFHGULYHU
A device driver allows the operating system or a program to interface correctly
with a peripheral, such as a printer or network card. Some device driverssuch as
network driversmust be loaded from
the config.sys file (with a device= statement) or as memory-resident programs
(usually, from the autoexec.bat file). Otherssuch as video driversmust load
when you start the program for which they
were designed.
'HVNWRS0DQDJHU
Desktop Manager, a component of the
Intel LANDesk® Configuration Manager
system management software, is used to
manage clients after installing an operating system, management agents, and
applications.
'+&3
Acronym for Dynamic Host Configuration
Protocol.
GLDJQRVWLFV
See diskette-based diagnostics.
',00
Acronym for dual in-line memory
module.
',1
Acronym for Deutsche Industrie Norm.
',3
Acronym for dual in-line package. A circuit
board, such as a system board or expansion card, may contain DIP switches for
configuring the circuit board. DIP switches are always toggle switches, with an
ON position and an OFF position.
DIP switches
GLUHFWRU\
Directories help keep related files organized on a disk in a hierarchical, inverted
tree structure. Each disk has a root
directory; for example, a C:\> prompt normally indicates that you are at the root
directory of hard-disk drive C. Additional directories that branch off of the root directory
are called subdirectories. Subdirectories
may contain additional directories branching
off of them.
F\
root directory
F?ZLQGRZV
F?GRV
F?GHOO
subdirectorie
F?ZLQGRZV?V\VWHP
GLVNHWWHEDVHGGLDJQRVWLFV
A comprehensive set of diagnostic tests
for your Dell computer. To use the
diskette-based diagnostics, you must
boot your computer from the Dell Diagnostics diskette. Refer to your Installation and
Troubleshooting Guide for a complete
discussion about how to use the diskettebased diagnostics.
GLVSOD\DGDSWHU
See video adapter.
'0$
Abbreviation for direct memory access. A
DMA channel allows certain types of data
transfer between RAM and a device to
bypass the microprocessor.
'0,
Abbreviation for Desktop Management
Interface. DMI enables the management
of your computer systems software and
hardware. DMI defines the software, interfaces, and data files that enable your
system to determine and report information about its components.
If DMI is installed on your system, you can
enable DMI support as you complete the
setup of your system by double-clicking
the DMI icon in the Windows Control Panel. For further instructions on enabling
DMI support or for more information
about DMI, refer to the DMI online help.
'07)
Acronym for Desktop Management Task
Force, a consortium of companies representing hardware and software providers,
of which Dell Computer Corporation is a
steering committee member.
Glossary
5
'2&
Abbreviation for Department of Communications (in Canada).
GSL
Abbreviation for dots per inch.
'306
Abbreviation for Display Power Management Signaling. A standard developed by
the Video Electronics Standards Association that defines the hardware signals
sent by a video controller to activate power management states in a video display
or monitor. A monitor is said to be DPMScompliant when it is designed to enter a
power management state after receiving
the appropriate signal from a computers
video controller.
'5$&
Acronym for Dell Remote Assistant Card.
'5$0
Abbreviation for dynamic random-access
memory. A computers RAM is usually
made up entirely of DRAM chips. Because DRAM chips cannot store an
electrical charge indefinitely, your computer continually refreshes each DRAM
chip in the computer.
GULYHW\SHQXPEHU
Your computer can recognize a number of
specific hard-disk drives. Each is assigned
a drive-type number that is stored in
NVRAM. The hard-disk drive(s) specified
in your computers System Setup program must match the actual drive(s)
installed in the computer. The System
Setup program also allows you to specify
physical parameters (cylinders, heads,
write precomp, landing zone, and capacity) for drives not included in the table of
drive types stored in NVRAM.
6
'7(
Abbreviation for data terminal equipment.
Any device (such as a computer system)
that can send data in digital form by
means of a cable or communications line.
The DTE is connected to the cable or
communications line through a data communications equipment (DCE) device,
such as a modem.
(&&
Abbreviation for error checking and
correction.
(&3
Abbreviation for Extended Capabilities
Port.
('2
Abbreviation for extended-data output. A
type of RAM chip that holds data on the
chips output data lines for a longer period
of time than fast-page mode RAM chips.
The EDO RAM chips are also faster than
fast-page mode RAM chips.
((3520
Acronym for electrically erasable programmable read-only memory.
(*$
Abbreviation for enhanced graphics
adapter.
(,6$
Acronym for Extended Industry-Standard
Architecture, a 32-bit expansion-bus design. The expansion-card connectors in an
EISA computer are also compatible with
8- or 16-bit ISA expansion cards.
'6''
Abbreviation for double-sided/doubledensity.
To avoid a configuration conflict when installing an EISA expansion card, you must
use the EISA Configuration Utility. This
utility allows you to specify which expansion slot contains the card and obtains
information about the cards required system resources from a corresponding EISA
configuration file.
'6+'
Abbreviation for double-sided/highdensity.
(0&
Abbreviation for Electromagnetic
Compatibility.
Dell PowerVault 720N, 740N, and 760N Users Guide
(0,
Abbreviation for electromagnetic
interference.
(00
Abbreviation for expanded memory
manager. A software utility that uses extended memory to emulate expanded
memory on computers with an Intel386
or higher microprocessor. See also conventional memory, expanded memory,
extended memory, memory manager,
and XMM.
(06
Abbreviation for Expanded Memory Specification. See also expanded memory,
memory manager, and XMS.
HQWHUSULVH
A systems-management software product
that is either a source or a receiver of SNMP
traps.
(3520
Acronym for erasable programmable
read-only memory.
(6'
Abbreviation for electrostatic discharge.
Refer to Safety Instructions at the front
of your Users Guide for a complete discussion of ESD.
(60
Abbreviation for embedded server
management.
(6',
Acronym for enhanced small-device
interface.
H[SDQGHGPHPRU\
A technique for accessing RAM above
1 MB. To enable expanded memory on
your computer, you must use an EMM.
You should configure your system to support expanded memory only if you run
application programs that can use (or
require) expanded memory. See also
conventional memory, EMM, extended
memory, and memory manager.
H[SDQVLRQEXV
Your computer contains an expansion bus
that allows the microprocessor to communicate with controllers for peripheral
devices, such as a network card or an internal modem.
H[SDQVLRQFDUG
A SCSI card, NVRAM card, network card,
hot swap card, or console card that plugs
into a filer expansion slot.
H[SDQVLRQFDUGFRQQHFWRU
A connector on the computers system
board for plugging in an expansion card.
H[WHQGHGPHPRU\
RAM above 1 MB. Most software that can
use it, such as Windows, requires that extended memory be under the control of
an XMM. See also conventional memory,
expanded memory, memory manager,
and XMM.
H[WHUQDOFDFKHPHPRU\
A RAM cache using SRAM chips. Because SRAM chips operate at several
times the speed of DRAM chips, the
microprocessor can retrieve data and instructions faster from external cache
memory than from RAM.
)
Abbreviation for Fahrenheit.
)$7
Acronym for file allocation table. The file
system structure used by MS-DOS to organize and keep track of file storage. The
Microsoft® Windows NT ® operating system can optionally use a FAT file system
structure.
)&&
Abbreviation for Federal Communications
Commission.
ILOHU
A filer is a dedicated, special-purpose
network data server that provides fast and
reliable file service to network clients
connected to Ethernet networks.
Glossary
7
IODVKPHPRU\
A type of EEPROM chip that can be reprogrammed from a utility on diskette
while still installed in a computer; most
EEPROM chips can only be rewritten with
special programming equipment.
IRUPDW
To prepare a hard-disk drive or diskette for
storing files. An unconditional format deletes all data stored on the disk. The
format command in MS-DOS 5.0 or higher
includes an option that allows you to unformat a disk, if you have not yet used the disk
for file storage.
IW
Abbreviation for feet.
)73
Abbreviation for file transport protocol.
J
Abbreviation for gram(s).
*
Abbreviation for gravities.
*%
Abbreviation for gigabyte(s). A gigabyte
equals 1,024 megabytes or
1,073,741,824 bytes.
*,'
Group identification number.
JURXS
A group of users defined in the filers
/etc/group file.
JUDSKLFVFRSURFHVVRU
See coprocessor.
JUDSKLFVPRGH
See video mode.
JXDUGLQJ
A type of data redundancy that uses a set
of physical drives to store data and a single, additional drive to store parity data.
Using guarding, the users data is protected from the loss of a single drive.
Guarding is sometimes preferred over
mirroring because it is more cost effective
8
Dell PowerVault 720N, 740N, and 760N Users Guide
in systems with a very high storage capacity. However, guarded configurations are
significantly slower for applications that
frequently write to the array, because
each attempt to write to the array requires
multiple read and write commands to
maintain the parity information. If this is a
problem, mirroring or duplexing is a better
choice. See also mirroring, RAID 4, and
RAID 5.
*8,
Acronym for graphical user interface.
K
Abbreviation for hexadecimal. A base-16
numbering system, often used in programming to identify addresses in the
computers RAM and I/O memory addresses for devices. The sequence of
decimal numbers from 0 through 16, for
example, is expressed in hexadecimal notation as: 0, 1, 2, 3, 4, 5, 6, 7, 8, 9, A, B,
C, D, E, F, 10. In text, hexadecimal numbers are often followed by h or preceded
by 0x. MS-DOS conventional memorythe
first 640 KB of memory addressesis from
00000h to 9FFFFh; the MS-DOS upper
memory areamemory addresses between 640 KB and 1 MBis from A0000h
to FFFFFh.
KHDWVLQN
A metal plate with metal pegs or ribs
that help dissipate heat. Some microprocessors include a heat sink.
+0$
Abbreviation for high memory area. The
first 64 KB of extended memory above
1 MB. A memory manager that conforms
to the XMS can make the HMA a direct
extension of conventional memory. See
also conventional memory, memory
manager, upper memory area, and XMM.
+,3
Acronym for the Dell OpenManage Hardware Instrumentation Package. HIP
provides seamless integration with the Intel LANDesk Server Manager. Together,
HIP and LANDesk Server Manager allow
you to monitor your Dell servers and track
status information about Dell server
components.
KRVWDGDSWHU
A host adapter implements communication between the computers bus and the
controller for a peripheral. (Hard-disk drive
controller subsystems include integrated
host adapter circuitry.) To add a SCSI expansion bus to your system, you must
install the appropriate host adapter.
+3)6
Abbreviation for the High Performance
File System option in the Windows NT
operating system.
+773
Hypertext Transfer Protocol. An object-oriented protocol that can be used for many
tasks, such as name servers and distributed object management systems,
through extension of its request methods
(commands).
+]
Abbreviation for hertz.
,2
Abbreviation for input/output. The keyboard and a printer, for example, are I/O
devices. In general, I/O activity can be differentiated from computational activity.
For example, when a program sends a
document to the printer, it is engaging in
I/O activity; when the program sorts a list
of terms, it is engaging in computational
activity.
,'
Abbreviation for identification.
,+9
Abbreviation for independent hardware
vendor.
LQEDQG
Communication across the network between the console and server.
LQWHUODFLQJ
A technique for increasing video resolution by only updating alternate horizontal
lines on the screen. Because interlacing
can result in noticeable screen flicker,
most users prefer noninterlaced video
adapter resolutions.
LQWHUQDOPLFURSURFHVVRUFDFKH
An instruction and data cache built in to
the microprocessor. The Pentium microprocessor, for example, includes a 16-KB
internal cache, which is set up as an 8-KB
read-only instruction cache and an 8-KB
read/write data cache.
,3
Acronym for Internet Protocol.
,3;
Acronym for internetwork packet
exchange.
,54
Abbreviation for interrupt request. A signal that data is about to be sent to or
received by a peripheral travels by an IRQ
line to the microprocessor. Each peripheral connection must be assigned an IRQ
number. For example, the first serial port
in your computer (COM1) is assigned to
IRQ4 by default. Two devices can share
the same IRQ assignment, but you cannot
operate both devices simultaneously.
,6$
Acronym for Industry-Standard Architecture. A 16-bit expansion bus design. The
expansion-card connectors in an ISA computer are also compatible with 8-bit ISA
expansion cards.
,60
Abbreviation for Internet Service
Manager.
,7(
Abbreviation for information technology
equipment.
-(,'$
Acronym for Japanese Electronic Industry
Development Association.
.
Abbreviation for kilo-, indicating 1,000.
.%
Abbreviation for kilobyte(s), 1,024 bytes.
.%VHF
Abbreviation for kilobyte(s) per second.
Glossary
9
.ELWV
Abbreviation for kilobit(s), 1,024 bits.
microprocessor chip to be installed or removed with minimal stress to the device.
.ELWVVHF
Abbreviation for kilobit(s) per second.
/,0
Acronym for Lotus/Intel/Microsoft. LIM
usually refers to version 4.0 of the EMS.
NH\FRPELQDWLRQ
A command requiring that you press multiple keys at the same time. For example,
you can reboot your computer by pressing
the <Ctrl><Alt><Del> key combination.
NJ
Abbreviation for kilogram(s), 1,000 grams.
N+]
Abbreviation for kilohertz, 1,000 hertz.
/$1
Acronym for local area network. A LAN
system is usually confined to the same
building or a few nearby buildings, with all
equipment linked by wiring dedicated
specifically to the LAN.
OE
Abbreviation for pound(s).
/&'
Abbreviation for liquid crystal display. A
low-power display often used for notebook computers. An LCD consists of a
liquid crystal solution between two
sheets of polarizing material. An electric
current causes each crystal to act like a
shutter that can open to allow light past
or close to block the light.
/'60
Abbreviation for LANDesk Server
Manager.
/('
Abbreviation for light-emitting diode. An
electronic device that lights up when a
current is passed through it.
/,)
Acronym for low insertion force. Some
computers use LIF sockets and connectors to allow devices such as the
10
Dell PowerVault 720N, 740N, and 760N Users Guide
/1
Abbreviation for load number.
ORFDOEXV
On a computer with local-bus expansion
capability, certain peripheral devices
(such as the video adapter circuitry) can
be designed to run much faster than they
would with a traditional expansion bus.
Some local-bus designs allow peripherals
to run at the same speed and with the
same width data path as the computers
microprocessor.
/37Q
The MS-DOS device names for the first
through third parallel printer ports on your
computer are LPT1, LPT2, and LPT3.
/81
Acronym for logical unit number.
P
Abbreviation for meter(s).
P$
Abbreviation for milliampere(s).
P$K
Abbreviation for milliampere-hour(s).
PDWKFRSURFHVVRU
See coprocessor.
0%
Abbreviation for megabyte(s). The term
megabyte means 1,048,576 bytes; however, when referring to hard-disk drive
storage, the term is often rounded to mean
1,000,000 bytes.
0%5
Abbreviation for master boot record.
0'$
Abbreviation for monochrome display
adapter.
PHPRU\
A computer can contain several different
forms of memory, such as RAM, ROM,
and video memory. Frequently, the word
memory is used as a synonym for RAM; for
example, an unqualified statement such as
…a computer with 8 MB of memory refers to a computer with 8 MB of RAM.
PHPRU\DGGUHVV
A specific location, usually expressed as
a hexadecimal number, in the computers
RAM.
PHPRU\PDQDJHU
A utility that controls the implementation
of memory in addition to conventional
memory, such as extended or expanded
memory. See also conventional memory,
EMM, expanded memory, extended
memory, HMA, upper memory area, and
XMM.
0*$
Abbreviation for monochrome graphics
adapter.
0+]
Abbreviation for megahertz.
0,%
Acronym for management information
base.
0,)
Abbreviation for management information format.
PLFURSURFHVVRU
Because it is the primary computational
chip inside the computer, it is customary
to refer to the microprocessor as the
computers brain. The microprocessor
contains an arithmetic processing unit and
a control unit. Software written for one
microprocessor must usually be revised
to run on another microprocessor. CPU is
a synonym for microprocessor.
PLQ
Abbreviation for minute(s).
PLUURULQJ
A type of data redundancy that uses a set
of physical drives to store data and one or
more sets of additional drives to store duplicate copies of the data. Mirroring is the
preferred data redundancy technique in
lower-capacity systems and in systems
where performance is extremely important. See also guarding, RAID 1, and RAID
10.
PP
Abbreviation for millimeter(s).
PRXVH
A pointing device that controls the
movement of the cursor on a screen.
Mouse-aware software allows you to activate commands by clicking a mouse
button while pointing at objects displayed
on the screen.
PV
Abbreviation for millisecond(s).
06'26
Abbreviation for Microsoft Disk Operating
System.
07%)
Abbreviation for mean time between
failures.
PXOWLIUHTXHQF\PRQLWRU
A monitor that supports several video
standards. A multifrequency monitor can
adjust to the frequency range of the signal
from a variety of video adapters.
P9
Abbreviation for millivolt(s).
1)6
Network File System. A protocol for
networking PCs.
1,&
Acronym for network interface card.
1L&DG
Acronym for nickel cadmium.
1L0+
Abbreviation for nickel-metal hydride.
Glossary
11
1/0
Acronym for Novell® NetWare® Loadable
Module.
10,
Abbreviation for nonmaskable interrupt. A
device sends an NMI to signal the microprocessor about hardware errors, such as
a parity error.
QRQLQWHUODFHG
A technique for decreasing screen flicker
by sequentially refreshing each horizontal
line on the screen.
QV
Abbreviation for nanosecond(s), one billionth of a second.
17)6
Abbreviation for the NT File System option in the Windows NT operating system.
195$0
Abbreviation for nonvolatile randomaccess memory. Memory that does not
lose its contents when you turn off your
computer. NVRAM is used for maintaining the date, time, and system setup
options.
26
Abbreviation for Operating System/2.
RXWRIEDQG
Communications that do not use the network but are passed via modem. The outof-band path is used for remote management of a server or for accessing server
information when the server or network
is down.
273
Abbreviation for one-time programmable.
SDUDOOHOSRUW
An I/O port used most often to connect a
parallel printer to your computer. You can
usually identify a parallel port on your computer by its 25-hole connector.
12
Dell PowerVault 720N, 740N, and 760N Users Guide
SDUDPHWHU
A value or option that you specify to a program. A parameter is sometimes called a
switch or an argument.
SDUWLWLRQ
You can divide a hard-disk drive into multiple physical sections called partitions
with the fdisk command. Each partition can
contain multiple logical drives. For example,
you could partition a 200-MB hard-disk drive
into two physically separate partitions with
three logical drive assignments, as shown in
the following table.
3DUWLWLRQLQJWKH+DUG'LVN'ULYH
3K\VLFDO3DUWLWLRQVDQG6L]HV
Partition 1 120 MB
Partition 2 80 MB
/RJLFDO'ULYH$VVLJQPHQWVDQG6L]HV
Drive C 120 MB
Drive D 50 MB
Drive E 30 MB
After partitioning the hard-disk drive, you
must format each logical drive with the
format command.
3&&DUG
Slightly larger than a credit card, a PC Card
is a removable I/O cardsuch as a modem, LAN, SRAM, or flash memory
cardthat adheres to the PCMCIA standards. See also PCMCIA.
3&,
Abbreviation for Peripheral Component
Interconnect. A standard for local-bus
implementation developed by Intel
Corporation.
3&0&,$
Abbreviation for Personal Computer
Memory Card International Association.
See also PC Card.
3'&
Primary Domain Controller. The domain
controller that has negotiated to be, or has
been assigned as, the primary authentication server for the domain.
SHULSKHUDOGHYLFH
An internal or external devicesuch as a
printer, a disk drive, or a keyboardconnected to a computer.
3*$
Abbreviation for pin grid array, a type of
microprocessor socket that allows you to
remove the microprocessor chip.
SL[HO
Arranged in rows and columns, a pixel is
a single point on a video display. Video
resolution640 x 480, for exampleis
expressed as the number of pixels across
by the number of pixels up and down.
3267
Acronym for power-on self-test. Before
the operating system loads when you turn
on your computer, the POST tests various
system components such as RAM, the
disk drives, and the keyboard.
SSP
Abbreviation for pages per minute.
34)3
Abbreviation for plastic quad flat pack, a
type of microprocessor socket in which
the microprocessor chip is permanently
mounted.
351
A synonym for the MS-DOS device name
LPT1.
SURJUDPGLVNHWWHVHW
The set of diskettes from which you can
perform a complete installation of an application program. When you reconfigure
a program, you often need its program diskette set.
SURWHFWHGPRGH
An operating mode supported by 80286
or higher microprocessors, protected
mode allows operating systems to
implement:
A memory address space of 16 MB
(80286 microprocessor) to 4 GB
(Intel386 or higher microprocessor)
Multitasking
Virtual memory, a method for
increasing addressable memory by
using the hard-disk drive
The Windows NT 32-bit operating system
runs in protected mode. MS-DOS cannot
run in protected mode; however, some
programs that you can start from
MS-DOSsuch as Windowsare able to
put the computer into protected mode.
36
Abbreviation for Personal System/2.
363%
Abbreviation for power-supply paralleling
board.
39&
Abbreviation for polyvinyl chloride.
4,&
Abbreviation for quarter-inch cartridge.
5$,'
Acronym for redundant arrays of independent disks. This phrase was introduced by
David Patterson, Garth Gibson, and Randy
Katz at the University of California at Berkeley in 1987. The goal of RAID is to use
multiple small, inexpensive disk drives to
provide high storage capacity and performance while maintaining or improving the
reliability of the disk subsystem.
Patterson, Gibson, and Katz described
five different methods, which are known
as RAID levels 1 through 5. Each level
uses one or more extra drives to provide
a means of recovering data lost when a
disk fails, so that the effective failure rate
of the whole disk subsystem becomes
very low.
Recently, Katz has defined a sixth method, RAID 6, which improves reliability
even further, and a configuration that provides no data recovery has popularly
become known as RAID 0.
5$,'
RAID 0 is commonly called striping. This
was not originally defined as a RAID level
but has since come into popular use. In
this array configuration, data is written
Glossary
13
sequentially across the available disks and
no redundancy is provided. RAID 0 configurations provide very high performance
but relatively low reliability. RAID 0 is the
best choice when DSA controller cards
are duplexed. See also striping.
5$,'
RAID 1 is commonly called mirroring.
RAID 1 also uses striping, so RAID 1 may
be regarded as the mirroring of RAID 0
configurations. RAID 1 is the best choice
in high-availability applications that require
high performance or relatively low data capacity. See also mirroring, RAID 10,
striping.
5$,'
RAID 4 is commonly called guarding. It
uses data striping, like RAID 0, but adds a
single, dedicated parity drive. The parity
data stored on this drive can be used to
recover data lost from a single failed drive.
RAID 4 configurations write data slowly
because parity data has to be generated
and written to the parity drive, and the
generation of the parity data frequently requires reading data from multiple physical
drives. See also guarding and striping.
5$,'
RAID 5, like RAID 4, is commonly called
guarding. RAID 5 is identical to RAID 4,
except that the parity data is distributed
evenly across all physical drives instead
of a parity drive. In configurations using a
large number of physical drives in which
a large number of simultaneous small
write operations are being performed,
RAID 5 offers potentially higher performance than RAID 4. RAID 4 and RAID 5
configurations are appropriate in highavailability applications where performance is less critical or where high data
capacity is required. See also guarding.
5$,'
RAID 10 is a mirroring technique in which
data is duplicated across two identical
RAID 0 arrays or hard-disk drives. All data
on a physical drive in one array is duplicated, or mirrored, on a drive in the second
array. Mirroring offers complete redundancy of data for greater data security.
See also mirroring, RAID 1, and striping.
14
Dell PowerVault 720N, 740N, and 760N Users Guide
5$0
Acronym for random-access memory.
The computers primary temporary storage area for program instructions and
data. Each location in RAM is identified by
a number called a memory address. Any
information stored in RAM is lost when you
turn off your computer.
5$0'$&
Acronym for random-access memory
digital-to-analog converter.
UHDGRQO\ILOH
A read-only file is one that you are prohibited from editing or deleting. A file can
have read-only status if:
Its read-only attribute is enabled.
It is located on a network in a
directory to which the system
administrator has assigned readonly rights to you.
It resides on a physically writeprotected diskette.
UHDOPRGH
An operating mode supported by 80286
or higher microprocessors, real mode
imitates the architecture of an 8086
microprocessor. Designed to run in real
mode, MS-DOS (unassisted by additional
software techniques) can address only
640 KB of conventional memory.
UHIUHVKUDWH
The frequency, measured in Hz, at which
the screens horizontal lines are recharged. A monitors refresh rate is also
referred to as its vertical frequency.
5(1
Abbreviation for ringer equivalence
number.
5),
Abbreviation for radio frequency
interference.
5*%
Abbreviation for red/green/blue.
520
Acronym for read-only memory. Your
computer contains some programs essential to its operation in ROM code.
Unlike RAM, a ROM chip retains its
contents even after you turn off your computer. Examples of code in ROM include
the program that initiates your computers
boot routine and the POST.
USP
Abbreviation for revolutions per minute.
57&
Abbreviation for real-time clock. Batterypowered clock circuitry inside the computer that keeps the date and time after
you turn off the computer.
6&6,
Acronym for small computer system interface. An I/O bus interface with faster
data transmission rates than standard
ports. You can connect up to seven devices to one SCSI interface.
6'06
Abbreviation for SCSI device management
system.
6'5$0
Abbreviation for Synchronous Dynamic
Random Access Memory.
6'6
Abbreviation for scalable disk system.
6(&
Abbreviation for single-edge connector
cartridge.
VHULDOSRUW
An I/O port used most often to connect a
modem or a mouse to your computer. You
can usually identify a serial port on your
computer by its 9-pin connector.
VKDGRZLQJ
A computers system and video BIOS
code is usually stored on ROM chips.
Shadowing refers to the performanceenhancement technique that copies BIOS
code to faster RAM chips in the upper
memory area (above 640 KB) during the
boot routine.
VKDUH
A directory or directory structure on the
filer that has been made available to network users and can be mapped to a drive
letter on a CIFS client.
60$57
Acronym for Self-Monitoring Analysis Reporting Technology. A technology that
allows hard-disk drives to report errors
and failures to the system BIOS, which
then displays an error message on the
screen. To take advantage of this technology, you must have a SMART-compliant
hard-disk drive and the proper support in
the system BIOS.
60%
Acronym for system management bus.
600
Abbreviation for server monitor module.
An ISA expansion card that provides a modem interface for out-of-band monitoring
and control of a server.
VHF
Abbreviation for second(s).
603
Abbreviation for symmetric
mutiprocessing.
VHFWRU
The fundamental unit of data access for a
hard-disk drive. For PC-compatible systems, a sector is usually 512 bytes. See
also block and block size.
606
Abbreviation for Systems Management
Server.
VHULDOFRQVROH
An ASCII or ANSI terminal attached to a
filers serial port. Used to monitor and
manage filer operations.
6103
Abbreviation for Simple Network Management Protocol.
Glossary
15
64/
Abbreviation for Structured Query
Language.
V\VWHPGLVNHWWH
System diskette is a synonym for bootable
diskette.
VWULSLQJ
In composite drivers with two or more
physical drives, the drive array subsystem
uses a method of data storage called striping. With this method, data is divided into
a series of pieces called blocks and each
data block is stored on a different physical
drive. When each drive contains a block
of data, the process starts over with the
first physical drive. By carefully selecting
the size of the data block, the chance that
the information needed can be read from
or written to multiple physical drives at
once is increased, greatly increasing the
performance of the composite drive. See
also block, block size, and RAID.
V\VWHPPHPRU\
System memory is a synonym for RAM.
65$0
Abbreviation for static random-access
memory. Because SRAM chips do not
require continual refreshing, they are substantially faster than DRAM chips. SRAM
is used mostly for external cache
memory.
69*$
Abbreviation for super video graphics
array. See also VGA.
VZLWFK
See parameter.
V\QFQHJRWLDWLRQ
Sync negotiation is a SCSI feature that
allows the host adapter and its attached
SCSI devices to transfer data in synchronous mode. Synchronous data transfer is
faster than asynchronous data transfer.
V\QWD[
The rules that dictate how you must type
a command or instruction so that the computer will understand it.
V\VWHPERDUG
As the main circuit board, the system
board usually contains most of your filers
integral components, such as the microprocessor, RAM, and expansion-card
connectors.
16
Dell PowerVault 720N, 740N, and 760N Users Guide
6\VWHP6HWXSSURJUDP
System Setup program options allow you
to configure your computers hardware.
Some options in the System Setup
program require that you reboot the
computer in order to make a hardwareconfiguration change. Because the System Setup program is stored in NVRAM,
any options that you set remain in effect
until you change them again.
V\VWHPLQLILOH
When you start Windows, it consults the
system.ini file to determine a variety of
options for the Windows operating
environment. Among other things, the
system.ini file records which video, mouse,
and keyboard drivers are installed for
Windows.
Running the Control Panel or Windows
Setup program may change options in the
system.ini file. On other occasions, you
may need to change or add options to the
system.ini file manually with a text editor,
such as Notepad.
7&3,3
Abbreviation for Transmission Control
Protocol/Internet Protocol.
7,5&3
Abbreviation for Transport Independent
Remote Procedure Call.
WHUPLQDWRU
Some devices, especially disk drives, contain a terminator to absorb and dissipate
excess current. When more than one
such device is connected in a series, you
may need to remove the terminatoror
change a jumper setting to disable itunless it is the last device in the series.
However, some devices have terminators
that should never be removed or disabled.
WH[WHGLWRU
An application program for editing text
files consisting exclusively of ASCII
characters. MS-DOS Editor and Notepad
(in Windows) are text editors, for example. Most word processors use
proprietary file formats containing binary
characters, although some can read and
write text files.
WH[WPRGH
See video mode.
7)7
Abbreviation for thin film transistor. A flatpanel display for notebook computers
where each pixel is controlled by one to
four transistors.
WSL
Abbreviation for tracks per inch.
WUDS
An alert, error, or system message from
a server reporting an exception (for example, a device failure or a threshold
violation) in a server.
765
Abbreviation for terminate-and-stayresident. A TSR program runs in the
background. Most TSR programs implement a predefined key combination
(sometimes referred to as a hot key)
that allows you to activate the TSR programs interface while running another
MS-DOS program. When you finish using
the TSR program, you can return to the
other application program and leave the
TSR program resident in memory for later
use.
Because MS-DOS is not designed to
support multiple programs running simultaneously, TSR programs can sometimes
cause memory conflicts. When troubleshooting, rule out the possibility of such a
conflict by rebooting your computer without starting any TSR programs.
8'$
Acronym for user-defined attribute.
8,'
User identification number.
8/
Abbreviation for Underwriters
Laboratories.
80%
Abbreviation for upper memory blocks.
See also conventional memory, HMA,
memory manager, and upper memory
area.
XSSHUPHPRU\DUHD
The 384 KB of RAM located between
640 KB and 1 MB. If the computer has an
Intel386 or higher microprocessor, a software utility called a memory manager can
create UMBs in the upper memory area, in
which you can load device drivers and
memory-resident programs. See also
conventional memory, HMA, and memory manager.
836
Abbreviation for uninterruptible power
supply. A battery-powered unit that
automatically supplies power to your
computer in the event of an electrical
failure.
862&
Abbreviation for Universal Service Ordering Code.
XWLOLW\
A program used to manage system resources memory, disk drives, or
printers, for example. The diskcopy command for duplicating diskettes and the
himem.sys device driver for managing extended memory are utilities included in
MS-DOS.
9
Abbreviation for volt(s).
9$&
Abbreviation for volt(s) alternating
current.
8'3
Abbreviation for User Datagram Protocol.
Glossary
17
9&&,
Abbreviation for Voluntary Control Council
for Interference.
9'&
Abbreviation for volt(s) direct current.
9'(
Abbreviation for Verband Deutscher
Elektrotechniker.
9'6
Abbreviation for Virtual Direct Memory
Access Services.
9(6$
Acronym for Video Electronics Standards
Association.
9*$
Abbreviation for video graphics array. VGA
and SVGA are video standards for video
adapters with greater resolution and color
display capabilities than EGA and CGA,
the previous standards.
To display a program at a specific resolution, you must install the appropriate
video drivers and your monitor must support the resolution. Similarly, the number
of colors that a program can display depends on the capabilities of the monitor,
the video driver, and the amount of memory installed for the video adapter.
9*$IHDWXUHFRQQHFWRU
On some systems with a built-in VGA
video adapter, a VGA feature connector
allows you to add an enhancement adapter, such as a video accelerator, to your
computer. A VGA feature connector can
also be called a VGA pass-through
connector.
YLGHRDGDSWHU
The logical circuitry that providesin
combination with the monitor or display
your computers video capabilities. A
video adapter may support more or fewer
features than a specific monitor offers.
Typically, a video adapter comes with
video drivers for displaying popular
18
Dell PowerVault 720N, 740N, and 760N Users Guide
application programs and operating environments in a variety of video modes.
On most current Dell computers, a video
adapter is integrated into the system
board. Also available are many video
adapter cards that plug into an expansioncard connector.
Video adapters can include memory separate from RAM on the system board. The
amount of video memory, along with the
adapters video drivers, may affect the
number of colors that can be simultaneously displayed. Video adapters can
also include their own coprocessor chip
for faster graphics rendering.
YLGHRGULYHU
Graphics-mode application programs and
operating environments, such as Windows, often require video drivers in order
to display at a chosen resolution with the
desired number of colors. A program may
include some generic video drivers.
Any additional video drivers may need to
match the video adapter; you can find
these drivers on a separate diskette with
your computer or video adapter.
YLGHRPHPRU\
Most VGA and SVGA video adapters include VRAM or DRAM memory chips in
addition to your computers RAM. The
amount of video memory installed primarily influences the number of colors that a
program can display (with the appropriate
video drivers and monitor capability).
YLGHRPRGH
Video adapters normally support multiple
text and graphics display modes. Character-based software (such as MS-DOS)
displays in text modes that can be defined
as x columns by y rows of characters. Graphics-based software (such as Windows)
displays in graphics modes that can be defined as x horizontal by y vertical pixels by z
colors.
YLGHRUHVROXWLRQ
Video resolution640 x 480, for exampleis expressed as the number of pixels
across by the number of pixels up and
down. To display a program at a specific
graphics resolution, you must install the
appropriate video drivers and your monitor must support the resolution.
YLHZHU
A system running the remote control
viewer window, usually the console.
YLUWXDOPRGH
An operating mode supported by Intel386
or higher microprocessors, virtual 8086
mode allows operating environments
such as Windowsto run multiple programs in separate 1-MB sections of
memory. Each 1-MB section is called a
virtual machine.
YLUWXDOPHPRU\
A method for increasing addressable
RAM by using the hard-disk drive.
(MS-DOS does not support true virtual
memory, which must be implemented at
the operating system level.) For example,
in a computer with 8 MB of RAM and
16 MB of virtual memory set up on the
hard-disk drive, the operating system
would manage the system as though it
had 24 MB of physical RAM.
YLUXV
A self-starting program designed to inconvenience you. Virus programs have been
known to corrupt the files stored on a
hard-disk drive or to replicate themselves
until a system or network runs out of
memory.
The most common way that virus programs move from one system to another
is via infected diskettes, from which
they copy themselves to the hard-disk
drive. To guard against virus programs,
you should do the following:
Periodically run a virus-checking utility on your computers hard-disk
drive
Always run a virus-checking utility on
any diskettes (including commercially sold software) before using
them
9/%XV
An abbreviation for VESA local bus. A
standard for local bus implementation developed by the Video Electronics
Standards Association.
9/6,
Abbreviation for very-large-scale
integration.
9SS
Abbreviation for peak-point voltage.
95$0
Abbreviation for video random-access
memory. Some video adapters use VRAM
chips (or a combination of VRAM and
DRAM) to improve video performance.
VRAM is dual-ported, allowing the video
adapter to update the screen and receive
new image data at the same time.
:
Abbreviation for watt(s).
ZLQLQLILOH
When you start Windows, it consults the
win.ini file to determine a variety of options
for the Windows operating environment.
Among other things, the win.ini file records
what printer(s) and fonts are installed for
Windows. The win.ini file also usually
includes sections that contain optional settings for Windows application programs that
are installed on the hard-disk drive.
Running the Control Panel or Windows
Setup program may change options in the
win.ini file. On other occasions, you may
need to change or add options to the win.ini
file manually with a text editor, such as
Notepad.
ZRUNJURXS
A collection of computers running Microsoft Windows NT or Windows for
Workgroups operating systems that is
grouped for browsing and sharing.
ZULWHSURWHFWHG
Read-only files are said to be writeprotected. You can write-protect a 3.5-inch
diskette by sliding its write-protect tab to the
open position and a 5.25-inch diskette by
Glossary
19
placing an adhesive label over its writeprotect notch.
:::
Abbreviation for World Wide Web.
;00
Abbreviation for extended memory manager, a utility that allows application
programs and operating environments to
use extended memory in accordance with
the XMS. See also conventional memory,
EMM, expanded memory, extended
memory, and memory manager.
20
Dell PowerVault 720N, 740N, and 760N Users Guide
;06
Abbreviation for eXtended Memory Specification. See also EMS, extended
memory, and memory manager.
=,)
Acronym for zero insertion force. Some
computers use ZIF sockets and connectors to allow devices such as the
microprocessor chip to be installed or
removed with no stress applied to
the device.
,QGH[
$
&
Africa, time zone names for, D-1
Canada, time zone names for, D-3
Aliases, time zone names for, D-6
caution message, xviii
America, time zone names for, D-1
CE notice for European Union, E-4
Antartica, time zone names for, D-2
Chile, time zones for, D-3
Asia, time zone names for, D-2
CIFS client configuration
connection methods, 9-1
steps, 9-2
Atlantic, time zone names for, D-3
Australia, time zone names for, D-3
authenticating users
using passwd and group files, 7-1
with Windows NT domain controller,
7-1
without Windows NT domain
controller, 7-1
%
battery disposal, E-4
bootable system diskettes
booting from, B-1
creating on a UNIX client, B-6
creating on a Windows client, B-6
cifs command
CIFS shares, 8-1
CIFS shares
access
assigning rights, 8-1
configuring, 8-1
scope, 8-1
cifs command, 8-1
CIFS-compatible security styles, B-5
configuration methods
setup command, 4-1
Setup Wizard, 2-1
configuring clients to access filer
CIFS, 9-1
NFS, 9-1
Brazil, time zones for, D-3
BSMI notice for Taiwan, E-10
Index
1
'
Data ONTAP
installing from a UNIX client, B-4
installing from a Windows client, B-3
installing, overview, B-1
FilerView
accessing, 5-1
administering the filer, 5-1
overview, 5-1
prerequisites, 5-1
using the interface, 5-2
Dells Web site, 1-2
DHCP server
setup command, 4-2
Setup Wizard, 3-2
domain
definition, C-1
features, C-2
Windows NT or Windows Workgroup,
C-1
drives
types supported, A-2
(
*
GMT, time zone names for, D-4
group file
accessing from
UNIX/NFS clients, 7-4
Windows NT and Windows 9x
Workstations, 7-3
adding entries
from UNIX/NFS, 7-6
from Windows NT or
Windows 9x, 7-6
default, 7-3
location, 7-1
electrostatic discharge. See ESD
EN 55022 compliance for Czech
Republic, E-5
environmental specifications, A-3
ESD, xi
+
HTTP
configuring, 6-1
Etc, time zone names for, D-4
Europe, time zone names for, D-4
expansion bus specifications, A-1
,
IC notice for Canada, E-3
)
FCC notices for U.S., E-2
filer
technical specifications, A-1
filer software
CD and diskettes, 1-2
installing Data ONTAP, B-1
updates, 1-2
filer, features, 1-1
2
Dell PowerVault 720N, 740N, and 760N Users Guide
Indian Ocean, time zone names for, D-5
indicators
list of, A-2
IP address
DHCP, 3-1
static, 3-2
.
key combinations, xvii
0
passwd files
setting up, 7-1
memory specifications, A-2
MIB, Dell custom, 1-2
permissions
PC-style, C-3
UNIX-style, C-3
microprocessor specifications, A-1
physical specifications, A-3
MOC notice for South Korea, E-6
ping command, 4-4
Mexico, time zone names for, D-5
Polish notice, E-7
1
network connections
ping command, 4-4
verifying with setup command, 4-4
verifying with Setup Wizard, 3-5
New Zealand, time zone names for, D-3
NFS client configuration
filer directories, 9-4
host and interface names, 9-3
mounting file systems, 9-4
name resolution, /etc/hosts file, 9-3
name resolution, DNS or NIS, 9-3
overview, 9-3
NOM information for Mexico, E-9
notational conventions, xvii
Note message, xviii
3
ports and connectors specifications, A-2
power specifications, A-2
5
regulatory notices, E-1
return policy
U.S. and Canada, F-5
6
safety instructions
for preventing ESD, xi
health considerations, xii
SecureShare
features, 10-1
installing, 10-1
SecureShare Access, 10-1
SecureShare Account Migrator, 10-2
SecureShare Access, 10-1
Pacific, time zone names for, D-5
SecureShare Account Migrator, 10-2
passwd file
accessing from
UNIX/NFS clients, 7-4
Windows NT and Windows 9x
Workstations, 7-3
adding entries from a UNIX client, 7-5
adding entries from a Windows/NFS
client, 7-6
adding entries, overview, 7-4
default, 7-2
location, 7-1
setup command, 4-4
overview, 4-1
procedure, 4-3
SecureShare, installing, 10-1
using DCHP, 4-2
verifying network connections, 4-4
Setup Wizard
basic configuration, 3-1
DHCP server
filer with, 3-2
filer without, 3-4
Index
3
different from setup command, 2-1
how to use, 3-2
IP address, 3-1
DHCP, 3-1
static, 3-2
overview, 2-1
prerequisites to using, 2-1
restrictions, 2-2
verifying configuration, 3-2
verifying network connections, 3-5, 4-4
software
configuring clients to access, 9-1
specifications, of the filer, A-1
System V, time zone names for, D-6
7
9
VCCI notice for Japan, E-5
:
warning message, xviii
warranty information
Canada, F-3
U.S., F-1
Windows NT domain
adding a filer, C-4
CIFS configuration, C-1
Windows Workgroup
CIFS configuration, C-1
definition, C-2
features, C-2
technical specifications, A-1
terminology conventions, xvii
typographical conventions, xvii
<
year 2000 compliance, F-6
8
United States, time zone names for, D-6
4
Dell PowerVault 720N, 740N, and 760N Users Guide