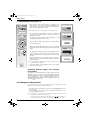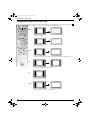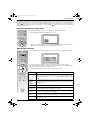
1
32nxcover.fm Page 1 Wednesday, September 5, 2001 9:06 AM
4-206-381-62
R
420638162
Trinitron Digital TV
Operating Instructions
KD-32NX100U
© 2001 by Sony Corporation Printed in UK
GB
32nxcover.fm Page 2 Wednesday, September 5, 2001 9:06 AM
NOTICE FOR CUSTOMERS IN THE UNITED KINGDOM
A moulded plug complying with BS1363 is fitted to this equipment for your
safety and convenience. Should the fuse in the plug supplied need to be
replaced, a 5 AMP fuse approved by ASTA or BSI to BS 1362 (i.e. marked
with T or
) must be used. When an alternative type of plug is used it
should be fitted with a 5 AMP FUSE, otherwise the circuit should be protected
by a 5 AMP FUSE at the distribution board. If the plug supplied with this
equipment has a detachable fuse cover, be sure to attach the fuse cover after
you change the fuse. Never use the plug without the fuse cover. If you should
lose the fuse cover, please contact your nearest Sony service centre.
ASA
FUSE
How to replace the Fuse
Open the fuse compartment with a flat blade screwdriver, and replace the
fuse.
IMPORTANT
If the plug supplied is not suitable for the socket outlet in your home, it
should be cut off and an appropriate plug fitted in accordance with the
following instructions:
The wires in this mains lead are coloured in accordance with the following
code:
Blue
Neutral
Brown
Live
As the colours of the wires in the mains lead of this apparatus may not
correspond with the coloured markings identifying the terminals in your
plug, proceed as follows:
The wire which is coloured blue must be connected to the terminal which
is marked with the letter N or coloured black. The wire which is coloured
brown must be connected to the terminal which is marked with the letter
L or coloured red. Do not connect either wire to the earth terminal in the
plug which is marked by the letter E or by the safety earth
symbol
or coloured green or green and yellow.
•
•
•
WARNING
To prevent shock hazard, do not insert the plug cut off from the
mains lead into a socket outlet. This plug cannot be used and
should be destroyed.
To prevent fire or shock hazard, do not expose the unit to rain or
moisture.
Dangerously high voltages are present inside the set. Do not
open the cabinet. Refer servicing to qualified personnel only.
NX1-12.fm Page 1 Wednesday, September 5, 2001 9:16 AM
Safety information
Moving the TV
If you wish to move the TV after it has been connected to the stand, please observe the
following precautions:
•
Never attempt to lift the TV and the stand together.
•
Before lifting the TV from the stand, you must disconnect the securing strap on the rear of
the TV (see illustration below). To gain access to the strap, remove the door that conceals
the rear sockets of the TV (if you have already added it), then remove the cover from the
rear column of the stand.
•
Take care not to trap your fingers under the TV when placing the TV onto a flat surface.
Securing
strap
1
NX1-12.fm Page 2 Wednesday, September 5, 2001 9:16 AM
Safety information
2
This set is to operate on a 220-240V AC
supply only. Take care not to connect too
many appliances to the same power socket
as this could result in fire or electric shock.
For environmental and safety reasons, it is
recommended that the TV set is not left in
standby mode when not in use. Disconnect
from the mains.
Never push objects of any kind into the set
as this could result in a fire or electric shock.
Never spill liquid of any kind on the set. If
any liquid or solid object does fall through,
do not operate the TV. Have it checked
immediately by qualified personnel.
Do not open the cabinet and the rear cover
of the TV. Refer to qualified service
personnel only.
For your own safety, do not touch any part
of the TV, power lead or aerial lead during
lightning storms.
To prevent fire or shock hazard, do not
expose the TV to rain or moisture.
Do not cover the ventilation openings of the
TV. For ventilation, leave a space of at least
10cm all around the set.
Never place the TV in hot, humid or
excessively dusty places. Do not install the
TV where it may be exposed to mechanical
vibrations.
Do not place any objects on the TV. To
prevent fire, keep inflammable objects or
naked flames (e.g. candles) away from the
TV.
Clean the TV with a soft, lightly dampened
cloth. Do not use benzine, thinner or any
other chemicals to clean the TV. Do not
scratch the TV screen. As a safety
precaution, unplug the TV before cleaning it.
Pull out the power lead by the plug. Do not
pull on the power lead itself.
Take care not to place heavy objects on the
power lead as this could result in damage.
We recommend you wind any excess lead
around the holders provided on the rear of
the TV.
Do not allow children to climb on the TV.
Place the TV on a secure stable stand. Do
not place the TV on its side or face up.
Unplug the power lead before moving the
TV. Avoid uneven surfaces, quick steps or
excessive force. If the set has been
dropped or damaged, have it checked
immediately by qualified service personnel.
Do not cover the ventilation openings of the
TV with items such as curtains or
newspapers etc.
NX1-12.fm Page 3 Friday, September 7, 2001 9:43 AM
Table of contents
Thank you for choosing this Sony television.
Please take time to read this instruction manual as it will help you to understand all the features available to you.
Getting started
Checking the accessories supplied ................................................................................................ 4
Inserting batteries into the remote control handset ........................................................................ 4
Connecting an aerial and a VCR .................................................................................................... 5
Switching on the TV........................................................................................................................ 5
Automatically tuning the TV ............................................................................................................ 6
Switching between digital and analogue programmes.................................................................... 6
Finding your video channel ............................................................................................................ 6
Overview of the TV buttons............................................................................................................. 7
Overview of the remote control buttons .......................................................................................... 8
Using the text services
Using a Digital text service ............................................................................................................. 9
Using a conventional text service ................................................................................................... 10
Using the text menu ........................................................................................................................ 11
Changing the screen format manually ...................................................................................... 12
Digital features
The Channel Index menu................................................................................................................ 13
The EPG menu ............................................................................................................................... 15
The Digital Info display.................................................................................................................... 17
The Main menu............................................................................................................................... 18
TV menu system
Using the programme index table ................................................................................................... 23
Adjusting the picture ....................................................................................................................... 23
Adjusting the sound ........................................................................................................................ 24
Using the Features menu................................................................................................................ 25
Naming a programme ..................................................................................................................... 26
Skipping a programme.................................................................................................................... 26
Using the Further Programme Preset menu................................................................................... 27
Re-arranging your channels............................................................................................................ 27
Adjusting the picture rotation .......................................................................................................... 28
Setting your personal ID ................................................................................................................. 28
Adjusting the picture geometry for an RGB source ........................................................................ 29
Presetting and naming inputs from external equipment ................................................................. 29
Manually tuning analogue signals................................................................................................... 30
Additional information
Connecting additional equipment ................................................................................................... 31
Remote control configuration for VCR/DVD.................................................................................... 33
Specifications.................................................................................................................................. 34
Troubleshooting............................................................................................................................... 35
Removing and cleaning the glass panel ......................................................................................... 36
TALL
GITA
DI
DIGI
1
Using the menu system of this TV
All the menus of this TV are activated by the remote control. The
V, v, B, b and OK buttons of the remote control are used to
navigate the menus and to store any settings you make.
0
RE
DE
MO
C
V button
OK
OK button
Throughout the pages of this manual you will notice drawings of
the remote control with certain buttons shaded white. This
shading indicates the buttons you will need to press whilst
following the instructions. In the example shown the V, v and OK
buttons are the buttons to be pressed.
v button
3
NX1-12.fm Page 4 Wednesday, September 5, 2001 9:16 AM
Getting started
Follow steps 1 - 6 to install your TV and view the TV
programmes
1. Checking the accessories supplied
DIGITA
L
5
0
DE
MO
RE
C
RF Loopthrough cable
Batteries
Remote control handset
2. Inserting batteries into the remote control handset
1
Place a coin in the slot at the bottom
of the remote control. Turn anti
clockwise to release the battery
compartment.
2
Insert the batteries as indicated in
battery compartment.
3
Replace the battery compartment and
lock in place by twisting coin clockwise
in slot.
Always remember to dispose of batteries in an environmentally friendly way
4
NX1-12.fm Page 5 Wednesday, September 5, 2001 9:16 AM
Getting started
3. Connecting an aerial and a VCR
Connecting an aerial only
RF loopthrough
cable (supplied)
1.
Connect your existing aerial lead to the
Digital socket marked
on the rear of the
TV as shown.
2.
Connect the supplied RF loopthrough cable
from the socket marked
to the analogue
socket marked
.
Existing
aerial
Connecting an aerial and a VCR
1.
2.
3.
4.
5.
6.
RF lead (not
supplied)
Scart lead
(not supplied)
Connect your existing aerial to the Digital
socket marked
on the rear of the TV as
shown.
Connect the supplied RF loopthrough cable
from the lower socket marked
on the TV
to the RF IN socket on your VCR.
Connect a lead from the RF output of your
VCR to the Analogue socket marked
on
the TV.
Connect a scart lead from the socket marked
3 s 3 on the rear of the TV to the scart
socket of your VCR (refer to VCR instructions).
Connect the VCR to the mains socket and
switch on.
Insert a pre-recorded tape into the VCR and
press the ‘PLAY’ button. This enables the TV
to locate and store the video channel during
the ‘Automatically tuning the TV’ procedure.
RF loopthrough
cable (supplied)
4. Switching on the TV
1.
Connect the TV plug to your mains socket
(220 - 240 V AC, 50 Hz).
2.
Press the on/off switch in a forward direction to
switch on the TV.
Note: If the red indicator on the front of the TV is lit the TV
is in standby mode. Press the TV
button on
the remote control to switch on the TV. Please be
patient as the picture may take a few moments to
appear on screen.
/
5
NX1-12.fm Page 6 Wednesday, September 5, 2001 9:16 AM
Getting started
5. Automatically tuning the TV
1.
AL
AL
DI
DIGGITIT
1
2
4
5
7
8
Note: The digital features of this set are designed for use in Great Britian only.
3
6
2.
9
0
MO
RE
DE
When you switch on this TV for the first time, the Language/Country
menu appears on screen with the word ‘English’ highlighted. Press
the V or v buttons on the remote control to choose the language you
require then press the OK button to confirm.
The word Country is now highlighted. Press the V or v buttons to
choose the country in which you wish to operate the TV, then press
the OK button to confirm.
The autotune prompt screen appears. Press the OK button to select
Yes and begin the digital autotune procedure.
C
As this may take some time, a menu appears on screen and informs
you of the tuning progress.
OK
When all the available digital programmes are found, the analogue
tuning display appears and all the analogue signals are captured and
stored.
If no digital and no analogue signals are found, a display appears on
screen asking you to confirm your aerial is connected. Check your
aerial is connected then press the OK button to repeat the tuning
procedure.
Once all signals have been captured and stored, the TV returns to
normal operation and displays the digital programme captured on
programme number 1.
Note: If no digital signals are captured, then the analogue programme stored on
programme number 1 is displayed.
3.
To view programmes, press the PROG+/- button or the numbered
buttons on the remote control.
Switching between digital and analogue
programmes
To check if you are watching a digital or analogue programme press the
button on the remote control. If you are watching a digital programme
an Info display appears on screen providing brief details for the current
and next programme. To change to analogue programmes press the
DIGITAL/
button. When you wish to return to digital programmes press
the DIGITAL/
button once more.
6. Finding your video channel
If you connected a VCR to your TV when following the ‘Connecting your aerial
instructions’, you now need to find your video channel.
1.
2.
First ensure the TV is in analogue mode. If not press the DIGITAL/
button on the
remote control.
Press the PROG+/- button on the remote control until the picture from the prerecorded tape appears on screen.
Notes: If you wish to move your video channel to a different programme number, refer to the
‘Rearranging your channels’ section of this manual.
/
button repeatedly on
If you have connected your VCR using a scart lead, press the
the remote control until the picture from the pre-recorded tape appears on the TV screen.
6
NX1-12.fm Page 7 Wednesday, September 5, 2001 9:16 AM
Getting started
Overview of the TV buttons
The TV buttons can be found on the right side of the TV. An expanded
view is shown below.
Programme Up or Down buttons
Press to move to the next or preceding
channel.
Volume control buttons
Press to increase or decrease the volume.
Video input button
Press to select input signals from a VCR etc.
Reset button
Press to return picture and sound levels to
their factory settings.
7
NX1-12.fm Page 8 Wednesday, September 5, 2001 9:16 AM
Getting started
Overview of the remote control buttons
/
VIDEO
button
Press to switch off your VCR or DVD
temporarily. Press again to resume normal
operation.
Mute button
Press to mute the sound. Press again to
restore.
DIGITAL/
button
Press to switch between digital or analogue
mode.
/
TV
button
Press to switch off your TV temporarily. The
Red indicator on the front of the TV will
illuminate. Press again to resume normal
operation
AL
DIGIT
5
Screen format button
Press repeatedly to change the screen
format.
0
Buttons 0 - 9
Press to input the required channel number.
For numbers 10 and above, enter the second
digit within 2 seconds.
GUIDE button
Has no function on this model.
MODE button
This remote can operate not only Sony DVDs
and VCRs, but also those made by other
manufacturers . Press this button to select the
type of equipment you want to control. A green
light appears momentarily to indicate the mode
selected. Note: before operating your VCR or
DVD, you must enter the correct configuration
code. Please refer to the section ‘Remote
Control Configuration for VCR/DVD’.
Text button
Press to enter the text mode.
EPG button
Press to display the Electronic Programme
Guide when in Digital mode.
Control pad
Use these buttons to navigate through the
menu system of the TV.
Note: When MODE button has been set to
VCR or DVD, the control pad operates the
main functions of your VCR or DVD.
Coloured buttons
These buttons are used for the text and Digital
menus. Refer to the relevant sections in this
instruction manual.
8
DE
MO
RE
C
Input button
/Hold button
Press to select signals from equipment
connected to the TV sockets (refer to
‘Connecting optional equipment to the TV’).
In text mode press to keep a page on display.
Press again to cancel.
Previous channel button
Press to return to the previous channel you
were watching (providing you watched it for at
least 5 seconds)
In digital text mode, press to remove the digital
text display from the TV screen.
Note: If the MODE button is set to VCR, use this
button to select double digit numbers on your VCR,
e.g. press this button, then press 2 and 3 for 23.
REC button
When the MODE button is set to VCR, press
this button to place your VCR into record mode.
Info button
Press to display the INFO menu in Digital
mode. When watching analogue programmes
press to reveal information such as programme
number etc.
INDEX button
When in digital mode, press to display the
Channel Index menu.
PROG +/- button
Press to select the next or previous
programme.
In text mode, press to select the next page or
the previous page.
Volume + and - button
Press to adjust the volume to the desired level.
MENU button
Press to enter the menu system of this TV.
NX1-12.fm Page 9 Monday, September 17, 2001 10:58 AM
Using the text services
Using a Digital text service
Most digital TV channels broadcast information via their text service. This digital service includes high
quality text and graphics along with advanced navigation options. Additionally, this TV has access to
dedicated text channels transmitted by the broadcasting authorities.
The appearance, content and navigation methods of all Digital text services are decided by the
broadcaster. For example, the BBC’s Digital text service may look different to ITV’s Digital text. Most of the
Digital text services currently available use simple navigation methods based on the following buttons:
The text button
to load up the Digital text,
The V, v, B and b buttons (to move around the screen),
The OK button or the numbered buttons (to select items on screen),
The four coloured buttons (to access shortcuts).
Selecting a dedicated Digital text channel
AL
AL
DI
DIGGITIT
1
2
4
5
7
8
1.
Press the
button on the remote control to check if you are in digital mode. If you are watching a
digital programme an Info display appears on screen providing brief details for the current and next
programme. If the display does not appear, press the DIGITAL/
button to switch to digital mode.
2.
Press the
button to remove the Info display from the TV screen then select the programme
number that is broadcasting the dedicated Digital text channel by using the numbered buttons on the
remote control. If you do not know the channel number of a dedicated Digital text channel, you can use
the ‘Channel Index menu’ to find one. (Please refer to the ‘Channel index menu’ section of this
manual.)
3.
Once the text page is displayed, follow the on-screen instructions to obtain your required selection.
3
6
9
0
RE
DE
MO
C
OK
Note: On some pages the TV programme may also be displayed on the text screen. On-screen instructions will
inform you how to change the displayed programme.
4.
If you are instructed to press ‘OK’ or ‘Select’ when viewing the text pages, press the OK button.
5.
When you have finished viewing the text service, press the
button to exit.
Selecting a text service from other Digital channels
Normal text services may also be available on other digital channels. This is sometimes indicated by a
small symbol on your TV screen, superimposed on the programme you are watching.
1.
Press the V, v, B, or b buttons to select the symbol, then press the OK button to display the chosen
information.
2.
Alternatively, you may be instructed to use the numbered or coloured buttons on your remote control
to display the various pages of text information. If you are instructed to press ‘OK’ or ‘Select’ when
viewing the text pages, press the OK button.
3.
Once the text information is displayed, you can access required information by using the V, v, B, or b
buttons, the coloured buttons and/or the numbered buttons of the remote control.
4.
When you have finished viewing the text service, press the
button to exit.
9
NX1-12.fm Page 10 Wednesday, September 5, 2001 9:16 AM
Using the text services
Using a conventional text service
Most analogue TV channels broadcast a text service. The index page (usually page 100) provides
information on how to use the service. Please ensure you are receiving a strong signal or some text errors
may occur.
Switching on the text service
AL
AL
DI
DIGGITIT
1
2
4
5
7
8
1.
Press the
button on the remote control to check if you are in analogue mode. If you are watching
a digital programme an Info display appears on screen providing brief details for the current and next
programme. To change to analogue programmes press the DIGITAL/
button.
2.
Select the TV programme which carries the text service you wish to view.
3.
Press the
4.
Press the numbered buttons to enter a three digit number for the text page you wish to view. Your
selected page appears on screen.
5.
Enter more 3 digit page numbers as required.
6.
When you have finished viewing the text service, press the DIGITAL/
display from the screen.
3
6
9
0
MO
RE
DE
button on the remote control to enter the text mode.
C
OK
button to remove the text
How to use the text features
10
Text Features
How to select
To select the next or
preceding page
Press the
To select a sub page
A text page can consist of several sub pages. In this case an information box
is displayed at the bottom of the screen showing the number of sub pages
available. Select the sub pages by pressing the V or v button.
To keep a page on
display
Press the
To use mix mode
When in text mode press the
button. The text page is superimposed onto
the picture. Press the
button again to return to TV mode.
To use Fastext
Fastext allows you to access pages with one button push. When Fastext is
available, four coloured items appear at the bottom of the screen. Press the
corresponding coloured button on the remote control to display the page.
To use the Page
Catching feature
Select a page that contains several page numbers (e.g. the index page), then
press the OK button. Press the V or v button to highlight the page number
required, then press the OK button again. Your selected page appears on
screen.
or
button.
button. Press again to cancel.
NX1-12.fm Page 11 Wednesday, September 5, 2001 9:16 AM
Using the text services
Using a conventional text service
Using the text menu
You can access more features by using the text menu:
1.
Press the
button on your remote control to enter the conventional text mode.
2.
With the text display on screen, press the MENU button to display the ‘text’ menu.
3.
Press the V or v button to highlight your desired feature, then press the b button to select.
4.
Press the MENU button to remove the text menu from the screen.
AL
DIGIT
1
2
4
5
7
8
3
6
9
0
RE
DE
MO
C
OK
The following table explains each feature and its function.
Feature
Function
Top/Bottom/Full
This feature allows you to enlarge sections of the displayed page. Press the V
button to enlarge upper half of the page or v to enlarge the bottom half. Press the
OK button to return page to normal size. Press B button to return to the text
menu.
Text Clear
Use this feature to view the TV programme whilst the text service is searching for
a page. Once the page has been found, a blue
symbol appears in the top left
corner of the screen. Press the
button to view the page.
Reveal
Select this to reveal hidden information on the page (such as answers to a quiz).
Time Page
This feature allows a time-coded text page (such as an alarm page), to be
displayed at a set time. When selected, the ‘Time Page’ sub menu is displayed.
Enter the desired page number and the time you want the page to appear using
the remote control buttons 0 - 9, then press OK button to confirm the settings.
The TV then exits the text mode and the time is displayed in the top left corner of
the screen. At your requested time the text page is displayed.
Page Overview
(Only for TOPText
broadcasts)
TOP-Text pages are divided into two columns. The first column shows ‘blocks’ of
pages and the second shows ‘groups’ of pages. Press b or B button to select the
desired column, then press V or v button to select the relevant ‘group’ or ‘block’ of
pages. Press the OK button to display the chosen pages.
11
NX1-12.fm Page 12 Wednesday, September 5, 2001 9:16 AM
Changing the screen format
Changing the screen format manually
You can change the screen format manually to suit the broadcast you are watching. By pressing the
button on the remote control you can choose from the 5 formats listed below.
AL
AL
DIGGITIT
DI
Wide-
For 16:9 broadcasts.
DE
MO
RE
C
For 4:3 broadcasts.
Zoom-
Imitation of wide screen effect for movies broadcast in cinemascopic (letter box) format.
14:9-
Compromise between the 4:3 and 16:9 format.
4:3-
Conventional screen format.
Smart-
Imitation of wide screen effect for 4:3 broadcasts.
12
NX 13-22.fm Page 13 Wednesday, September 5, 2001 9:30 AM
Digital features
The Channel Index menu
The Channel Index menu provides you with a quick and easy way to:a)
b)
c)
d)
View a complete list of the programmes available for selection,
Obtain a preview of the programmes contained in the list,
Search for a programme quickly by selecting from different categories of programmes,
Store programmes into a list of favourites.
1. The Channel Index menu is only available in Digital mode. To check if you are in Digital mode, press
the
button on the remote control. An Info display appears on screen providing brief details for the
current and next programme. If the display does not appear, press the DIGITAL/
button.
AL
AL
DI
DIGGITIT
MO
2. Press the
button to remove the Info display from the screen then press the INDEX button to
display the Channel Index menu. This menu contains a list of all the available channels. The name
and duration of each programme contained in the list is also made available. The current channel is
previewed in the top right corner of the screen with its programme number and channel name
displayed below it.
RE
DE
C
OK
3. Press the V or v buttons to move the cursor up or down the list to select the desired programme. If
you do not want to select a programme from the 6 channels listed, press the GREEN button to display
the next 6 programmes or the RED button to display the preceding 6 channels.
4. Press the OK button to display the highlighted programme in the preview window*.
5. Press the OK button to exit the Channel Index menu. The programme that was being previewed is
now displayed at full screen size.
*Note: If an age limit for viewing has been set and the programme selected exceeds that age limit, you will need to
enter your PIN code before the preview is displayed. Refer to ‘The Main menu’ for more information on the ‘PIN
Code’ feature. Programmes that exceed the age limit you have set are identified by a
symbol.
13
NX 13-22.fm Page 14 Wednesday, September 5, 2001 9:30 AM
Digital features
Channel Index menu
The Category pop-up list
The Category pop-up list allows you to search for programmes quickly by dividing the channels into different
categories. For example, if you select ‘News’ from the Category pop-up list, then only programmes related
to News will be shown in the Channel Index menu.
1. Whilst the Channel Index menu is on screen, press the YELLOW button to display the Category popup list.
AL
DIGIT
RE
DE
MO
C
2. Press the V or v buttons to highlight the required category.
3. Press the OK button. The Channel Index list will now only contain programmes of the type selected.
The category you choose will be displayed in a title bar at the top of the programme list along with the
date and time. The following categories are available:
OK
Favourite
Choice
Recent Prog.
All Categories
Sports
News
Film
Entertainment
Lifestyle
Education
Kids
Contains the programmes you have stored as a favourite (see below).
The TV will create this list based on the type of programmes you watch the most.
Contains the last 5 programmes watched.
Contains all available channels.
Contains all sport channels.
Contains all news channels.
Contains all film channels.
Contains all entertainment channels.
Contains all lifestyle channels.
Contains all education channels.
Contains all kids channels.
Favourite Programmes
This feature allows you to create a list of your favourite programmes.
To add a programme to the Favourite list
1. Whilst the Channel Index menu is on screen, press the V or v buttons to highlight the programme you
want as a favourite.
2. Press the BLUE button to store the programme in the favourite list.
To remove a programme from the Favourite list
1. Whilst the Channel Index menu is on screen, press the YELLOW button to access the Category popup menu.
2. Press the V or v buttons to highlight the ‘Favourite’ category. Press the OK button to display the
Favourite category list.
3. Press the V or v buttons to highlight the programme you wish to remove from the Favourite list.
4. Press the BLUE button to remove the programme.
5. Press the YELLOW button and select the category you wish to return to, then press the OK button.
14
NX 13-22.fm Page 15 Wednesday, September 5, 2001 9:30 AM
Digital features
The EPG menu
The EPG menu (Electronic Programme Guide) provides you with a quick and easy way to:a) View a complete list of the programmes available.
b) Obtain a preview of the programmes currently being broadcast.
c) Create a list relating to a category of programme, e.g. Sports or Movies.
d) Record programmes.
1. The EPG menu is only available when watching Digital channels. To check if you are in Digital mode,
press the
button on the remote control. An Info display appears on screen providing brief details
for the current and next programme. If the display does not appear, press the DIGITAL/
button.
AL
AL
DI
DIGGITIT
MO
2.
RE
DE
Press the
button to remove the Info display from the screen then press the
button to display
the EPG menu screen. This screen consists of an information window, a preview window, a 2 hour
timer bar (divided into 30 minute intervals) and a 5 channel programme list covering the 2 hour
period.
C
OK
3. Press the V or v buttons to move the cursor bar up or down the programme list and the b or B
buttons to move left and right. If you press the b button once more after highlighting the last
programme on the right, the programmes scheduled for the next 2 hour period are displayed. As
each programme is highlighted, a brief description of the programme appears in the event information
box at the top left of the screen. If you do not wish to select a programme from the 5 channels listed,
press the GREEN button to display the next 5 channels or RED button to display the previous 5
channels.
4. If a programme you highlight is currently being broadcast, you will be prompted to press the OK
button to obtain a preview.
*Note:
If an age limit for viewing has been set and the programme selected exceeds that age limit, you will need to enter your PIN
code before the preview is displayed. Refer to ‘The Main menu’ for more information on the ‘PIN Code’ feature. Programmes
that exceed the age limit you have set will be identified by a
symbol.
5. When the programme in the preview screen is the one you want, press the OK button to exit the EPG
The Category pop-up list
The Category pop-up list allows you to search for programmes quickly by dividing the channels into
different categories. For example, if you select ‘News’ from the Category pop-up list, then only
programmes related to News will be shown in the EPG menu.
1. Whilst the EPG menu is on screen, press the YELLOW button to display the Category pop-up list.
2. Press the V or v buttons to highlight the category you want, then press the OK button. The EPG
programme list will now only contain programmes of the type selected.
For information on the category types as well as instructions on how to add and remove programmes from
the Favourite list, please refer to ‘The Channel Index menu’ section on the previous page.
15
NX 13-22.fm Page 16 Wednesday, September 5, 2001 9:30 AM
Digital features
The EPG menu
To select a programme for recording or timed display
1. Whilst the EPG menu is on screen, press the V, v, B or b buttons to highlight a future programme in the
EPG menu that you wish to record, then press the OK button. The Timer screen appears.
AL
DIGIT
RE
DE
MO
C
2. Press the RED button and your VCR will automatically record the selected programme when it starts
(only if your VCR has Smartlink facility), or press the GREEN button if you wish the programme to
appear on your TV screen when transmission begins.
OK
Notes: If you do not have a Smartlink VCR, a message appears on screen informing you to set the timer on your VCR.
Press the RED button to continue, then set the timer recording function on your VCR to correspond with the
programme you have selected for recording. Press the BLUE button to remove the Timer display.
When a programme has been stored for recording, a solid bar appears in the EPG display directly under the
timer bar. This solid bar shows you the amount of time allocated to a recording, and reminds you that you are
unable to record any other programmes during that period of time.
To set the Manual Timer
1. Whilst the EPG menu is on screen, press the BLUE button to display the Timer List menu, then press
the RED button to select ‘Manual Rec’. If your VCR does not have Smartlink, a message will be
displayed reminding you to set your VCR timer. Press the RED button to display the ‘Manual Timer
Setup’ menu.
Press the V or v buttons to select the correct date. Press the b button to highlight the start time.
Press the V or v buttons to select the start time. Press the b button to highlight the stop time.
Press the V or v buttons to select the stop time. Press the b button to highlight the programme.
Press the V or v buttons to select the channel. Press the OK button to store. The Timer List menu is
displayed. The event is now stored in the Timer List. Press the BLUE button to return to the main EPG
screen.
6. Press the RED button and repeat steps 2-5 if you wish to store further programmes for recording.
7. Press the
button to return to normal TV operation.
8. Set the timer recording function on your VCR to switch on and off to correspond with the programmes
you have stored for recording.
2.
3.
4.
5.
Notes on Recording and Manual Timer modes:
After setting the recording you can put the TV into its standby mode, but do not switch off completely or the
recording will be cancelled. If you put the TV into standby mode, the standby indicator on the front of the TV
flashes green periodically to remind you that a recording has been programmed. Once recording has started,
do not change channels or switch to analogue mode or the recording will be cancelled.
To cancel a previously set event
1. Whilst the EPG menu is on screen, press the BLUE button to display the Timer List.
2. Press the V, v, B or b buttons to highlight the programme/event you wish to cancel.
3. Press the YELLOW button to cancel.
16
NX 13-22.fm Page 17 Wednesday, September 5, 2001 9:30 AM
Digital features
The Digital Info display
This display gives you information both on the current programme being shown and on the next scheduled
programme. When first selected, the Info display gives a brief description of the current programme being
transmitted, its channel number and the start and end time. The title of the next programme and its start and
end time is also shown in a programme box on the right of the current programmes information.
1. Press the
button on the remote control to obtain the Digital Info display. If the banner does not
appear, press the DIGITAL/
button on the remote control.
AL
AL
DI
DIGGITIT
RE
DE
MO
C
2. Press the b button to obtain a brief description of the next programme in the schedule. If the
programme box is blank, there is no information currently available. To return to the starting point,
press the B button repeatedly until the description for the current programme reappears.
OK
3. Press the
button on the remote control at any time to exit the Info display.
Note: To change channels while the Info menu is displayed, press the relevant numbered buttons on the remote control.
Using other Info features
Subtitles
This feature places Digital subtitles on the screen. With the Digital Info display on screen, press the RED
button to access the ‘Subtitles’ pop-up menu. Press the V or v button to highlight the language you wish
the subtitles to appear in, then press OK to select.
Audio
When a multi language broadcast is available, this feature allows you listen to the broadcast in your selected
language. With the Digital Info display on screen, press the GREEN button to access the ‘Audio’ pop-up
menu. Press the V or v button to highlight the language required then press OK to select.
REC/Timer
When you highlight a current programme, the ‘REC’ feature allows you to automatically set your VCR to
record the selected programme (only if you have a Smartlink VCR), or you can select ‘Wake up’ to have the
TV switch to the correct channel automatically when the programme starts. With the Digital Info display on
screen, press the YELLOW button to access the ‘REC’ pop-up menu. You can now press the RED button
to record the event or the GREEN button to activate the Wake up facility. If your VCR does not have
Smartlink a message will be displayed reminding you to manually set your VCR. Press the RED button to
continue or press the BLUE button to return to the Info display.
When you highlight a future programme, the ‘Timer’ facility allows you to set your VCR to automatically
record the selected programme, or set the TV to automatically switch to the correct channel when the
selected programme starts. Press the RED button if you wish your VCR to automatically record the selected
programme when it starts (only if your VCR has Smartlink facility), or press the GREEN button if you wish
the programme to appear on your TV screen when transmission begins.
Set-up
Press the BLUE button to access the ‘Main menu’. The Main menu is explained on the following pages.
17
NX 13-22.fm Page 18 Wednesday, September 5, 2001 9:30 AM
Digital features
The Main menu
The Main menu contains several features that allow you to customise the Digital side of the TV. The Main
menu is only available when watching Digital channels. To check if you are in Digital mode, press the
button on the remote control. An Info display appears on screen providing brief details of the current and
next programme. If the display does not appear, press the DIGITAL/
button.
Favourite programme
This feature allows you to store your favourite channels in a list for quick access.
1. Press the
button on the remote control to obtain the Digital Info display. Press the BLUE button to
display the Main menu.
2. Press the V or v button to highlight ‘Favourite Programme’, then press the OK button to display the
Favourite Programme menu.
AL
AL
DI
DIGGITIT
RE
DE
MO
OK
C
3. Press the V or v button to scroll through the list until the programme you wish to store as a favourite is
highlighted. If you do not wish to select any of the displayed programmes as a favourite, press the RED
or GREEN button to display the previous or next 5 programmes in the list.
4. When you have found and highlighted a programme you want to store as a favourite, press the OK
button. A tick appears alongside that programme in the display. If you wish to cancel your selection,
press the OK button again.
5. Repeat steps 3 and 4 to store other programmes as favourites, then press the BLUE button repeatedly
until all menus are removed from the screen.
Wallpaper
This feature allows you to customise the background pattern for all the Digital menus.
1. Press the
button on the remote control to obtain the Digital Info display. Press the BLUE button to
display the Main menu.
2. Press the V or v button to highlight ‘Wallpaper’ then press the OK button to display the Wallpaper
menu.
3. Press the V or v button to select your choice of wall paper then press the OK button to store.
4. Press the BLUE button repeatedly until all menus are removed from the screen.
18
NX 13-22.fm Page 19 Wednesday, September 5, 2001 9:30 AM
Digital features
The Main menu
Parental Control
This feature allows you to set an age limit for viewing programmes. If any films or programmes classed
above the age limit you have set are broadcast, you will be requested to enter a PIN code before viewing
is allowed.
If you have not already set a PIN code:
1. Press the
button on the remote control to obtain the Digital Info display. Press the BLUE button to
display the Main menu.
2. Press the V or v button to highlight ‘Parental Control’ then press the OK button to display the Parental
Control menu.
ITALL
DI
DIGGITA
1
2
4
5
7
3
6
8
9
0
RE
DE
MO
C
3. Press the RED button to display the PIN entry box on screen.
4. Use the numbered buttons on the remote control to enter a 4-digit number of your choice. As you enter
each digit it will be represented by a * in the PIN entry box. Enter the code again to confirm.
OK
Note:This will be your PIN number for the future - please use a number you can remember easily.
5. Press the OK button to confirm your PIN code.
6. Press the BLUE button to return to the Detail Set-up menu.
7. Press the BLUE button to return to the Digital Set-up menu.
Follow Steps 2-5 of the instructions below:
If you have already set a PIN code:
1. Press the
button on the remote control to obtain the Digital Info display. Press the BLUE button to
display the Main menu.
2. Press the V or v button to highlight ‘Parental Control’ then press the OK button to display the Parental
Control menu.
3. Using the numbered buttons on the remote control, enter your 4-digit PIN code. As you enter each digit
it will be represented by a * in the PIN entry box. Press the OK button to confirm your PIN code.
4. With the ‘Age’ box highlighted, press the V or v button to set the age limit you desire then press the OK
button to confirm your setting.
5. Press the BLUE button repeatedly until all menus are removed from the screen.
Auto Tuning
This feature allows you to automatically re-tune all available Digital channels.
0
MO
RE
C
DE
1. Press the
button on the remote control to obtain the Digital Info display. Press the BLUE button to
display the Main menu.
2. Press the V or v button to highlight ‘Auto Tuning’ then press the OK button to display the Auto Tuning
menu.
OK
3. Press the RED button to begin tuning in all available Digital channels.
Note:
If you wish to cancel the ‘Auto Tuning’ process, press the BLUE button.
19
NX 13-22.fm Page 20 Wednesday, September 5, 2001 9:30 AM
Digital features
The Main menu
Manual Tuning
This feature allows you to select a programme number from the displayed list and change the digital services
of that programme.
1. Press the
button on the remote control to obtain the ‘Digital Info’ display. Press the BLUE button to
display the Main menu.
2. Press the V or v button to highlight ‘Detail Set-up’ then press the OK button to display the Detail Set-up
menu.
3. Press the V or v button to highlight ‘Manual Tuning’ then press the OK button to display the Manual
Tuning menu.
AL
DIGIT
RE
DE
MO
C
4. Press the V or v button to highlight the chosen programme number for your new channel. If you do not
wish to select any of the programme numbers listed, press the RED or GREEN button to display the
previous or next 5 programme numbers on the list.
5. With your programme number highlighted, press the OK button to display the ‘Manual Programme
Search’ screen.
6. Press the V or v button if you wish to change the channel number, then press the b button to make the
select search box active.
7. Press the V or v button to begin the search process. The words ‘Searching up’ or ‘Searching down’
appear in the select search box indicating that the TV is searching. If no Digital services are found on
the channel you have chosen, the channel number changes up or down automatically and the search
continues. When all services allocated to the selected channel have been found, the service selection
screen is displayed.
8. Press the V or v button to find and highlight the service you wish to allocate to the programme number
selected in Step 4, then press the OK button to store.
9. Repeat Steps 4 to 8 if you wish to manually add more channels to your TV. Press the BLUE button
repeatedly to remove all menus from the screen.
OK
PIN Code
This feature allows you to set a new 4-digit PIN code.
1. Press the
button on the remote control to obtain the ‘Digital Info’ display. Press the BLUE button to
display the Main menu.
2. Press the V or v button to highlight ‘Detail Set-up’ then press the OK button to display the Detail Set-up
menu.
3. Press the V or v button to highlight ‘PIN Code’ then press the OK button to display the PIN Code menu.
AL
DIGIT
RE
DE
MO
OK
C
4. Enter your existing PIN code using the numbered buttons on the remote control. If you enter a wrong
number, press the RED button to clear and start again.
5. Once you have entered your PIN code, a new PIN screen appears. Enter your new PIN code, then enter
once again as instructed for confirmation.
6. When both PIN codes match, a message appears to inform you that your new PIN code has been
accepted. This is the PIN code you must use in future.
7. Press the BLUE button repeatedly until all menus are removed from the screen.
Note:
20
If you have forgotten your PIN code, please use 9999. This PIN code will always be accepted.
NX 13-22.fm Page 21 Wednesday, September 5, 2001 9:30 AM
Digital features
The Main menu
Software Download
Periodically Sony will issue updates for the software that controls your TV. This feature will allow you to
automatically receive updates through your existing aerial.
1. Press the
button on the remote control to obtain the Digital Info menu. Press the BLUE button to
display the Main menu.
2. Press the V or v button to highlight ‘Detail Set-up’ then press the OK button to display the Detail Set-up
menu.
3. Press the V or v button to highlight ‘Software Download’ then press the OK button to display the
Software Download menu.
AL
DIGIT
RE
DE
MO
C
4. Press the V or v button to change the ‘Current Setting’. If you wish to receive downloads, set the
‘Current Setting’ to ‘On’. If you do not wish to receive downloads, set the ‘Current Setting’ to ‘Off’.
5. Press the OK button to confirm.
6. Press the BLUE button repeatedly until all menus are removed from the screen.
OK
System Information
This is an information screen only. It tells you the current version of the software in your TV together with
the signal quality, as indicated by the coloured bar in the display.
1. Press the
button on the remote control to obtain the ‘Digital Info’ menu. Press the BLUE button to
display the Main menu.
2. Press the V or v button to highlight ‘Detail Set-up’ then press the OK button to display the Detail Set-up
menu.
3. Press the V or v button to highlight ‘System Information’ then press the OK button to display the
System Information display.
AL
DIGIT
RE
DE
MO
OK
C
4. Press the BLUE button repeatedly until all menus are removed from the screen.
21
NX 13-22.fm Page 22 Wednesday, September 5, 2001 9:30 AM
Digital features
The Main menu
CAM Setup
This feature allows you to access a pay per view service once you have obtained a Conditional Access
Module (CAM) and a viewing card. Please contact your nearest pay-per-view supplier for details.
1. Switch off the TV and unplug from the mains.
2. Insert the CAM into the
socket on the rear of the TV as shown. Take care not to damage the CAM
when inserting.
AL
DIGIT
Note: If you have already attached the door that covers the rear sockets you will have to unscrew and remove this to
gain access to the CAM socket.
RE
DE
MO
Viewing card
and CAM
C
OK
3.
4.
5.
6.
7.
Insert your viewing card into the CAM.
Connect the TV to the mains and switch on.
Press the
button on the remote control to obtain the Digital Info display.
Press the BLUE button to display the Main menu.
Press the V or v button to highlight ‘CAM Setup’, then press the OK button to display the set up menu
of the service provider.
For further information regarding the services available, please contact your pay-per-view supplier.
22
NX 23-30.fm Page 23 Wednesday, September 5, 2001 9:34 AM
TV menu system
The following pages explain the TV set up menus and their operation. Although most of these menus can be accessed whilst
watching digital programmes, we recommend you switch to analogue mode to view all the menus. To check which mode you are in,
press the
button on the remote control. If you are watching a digital programme, an Info display appears on screen providing brief
details for the current and next programme. If this happens, press the DIGITAL/
button on the remote control to switch to the
traditional analogue channels.
Using the programme index table
The programme index table is an easy way to search for a programme you wish to view.
1. Press the OK button to display the programme list on screen.
RE
DE
MO
C
OK
2. Press the V or v button to scroll through the list until the programme number you wish to view is
highlighted, then press the OK button to display that programme on screen.
Adjusting the picture
1. Press the MENU button to display the main menu, then press the b button to highlight ‘Picture Mode’.
ITA
TALL
GITA
DI
DIGGI
RE
DE
MO
C
2. Press the V or v button to highlight the option you require then press the b button to confirm.
The table below explains the function of each option and which buttons to press for adjustment. Once
adjustment has been finalised, press the OK button to store.
3. Press the MENU button when you wish to remove the menu from the screen.
OK
Option
Adjustment/Effect
Picture Mode
Press V or v button to select Live, Personal, Movie or Game mode. Live, Movie and
Game have had their picture levels preset to suit their intended functions, whilst
Personal mode allows you to set your own levels of brightness, sharpness and
colour.
Contrast
Brightness
Colour
Sharpness
Press B or b button to increase or decrease the levels to suit personal taste. You can
only adjust the Colour, Brightness and Sharpness if you have selected ‘Personal’ in
‘Picture Mode’ option.
Reset
Resets picture to factory preset levels.
AI
(artificial
intelligence)
Press V or v button to turn On or Off. When set to On, the TV will monitor the picture
and limit any sudden increases in brightness and contrast.
Noise
Detection
Press V or v button to switch On or Off. When set to On, this option can sometimes
reduce the noise level apparent on a weak signal.
DRC
Mode
Press V or v button to set the desired picture resolution. Set to ‘Off’ for basic picture
quality, ‘DRC50’ for improved resolution or ‘DRC100’ for optimum picture resolution.
Colour Tone
Press V or v button to alter the tint of the colour to suit your taste. Choose from
Warm, Normal or Cool.
MENU
23
NX 23-30.fm Page 24 Wednesday, September 5, 2001 9:34 AM
TV menu system
Adjusting the sound
1. Press the MENU button to display the main menu.
2. Press the v button to highlight the
icon, then press the b button to highlight ’Sound Effect’.
AL
AL
DI
DIGGITIT
RE
DE
MO
C
3. Press the V or v button to select the option you wish to adjust, then press the b button to confirm.
The table below explains the function of each option and which buttons to press for adjustment. Once
adjustment has been finalised, press the OK button to store.
OK
4. Press the MENU button when you wish to remove the menu from the screen.
Option
Adjustment/Effect
Sound Effect
Press V or v button to select from Personal, Dolby V*, Natural**, or Dynamic**.
When Dolby V. is selected, the TV simulates the full effects of Dolby Surround
sound when receiving a Dolby broadcast.
Equaliser
Adjustment
(only available if
Sound Effect is set
to ‘Personal’).
This option allows you to alter the sound by adjusting the 5 frequency bands
which control the overall sound effect. Press the B or b buttons to select each
band, then press V or v button to adjust the frequency level. Once the desired
adjustment is made press the OK button to store.
Virtual Effect
Changes the level of surround sound effect when listening to a Dolby surround
sound broadcast. (only when Dolby V has been selected in Sound Effect option)
Balance
Press B or b button to set the balance to desired level.
Auto Vol. Control
Press V or v button to set to On or Off. When set to On, the volume remains
constant even if the broadcast level changes (during adverts for example).
Dual Sound
When receiving bilingual broadcasts: Press V or v button to choose A to listen to
the first language or B to listen to the second language.
When receiving Stereo broadcasts: Press V or v button to choose Mono or
Stereo.
Note: When NICAM is broadcast the word ‘NICAM’ appears in the menu.
MENU
Audio-out Vol.
Press B or b button to increase or decrease the volume level to the headphone
socket and/or the audio out sockets on the rear of the TV.
Dual Sound
When receiving bilingual broadcasts press V or v button to select which
language is output to the headphone socket. Select A to listen to the first
language or B to listen to the second language.
Notes:
This TV has been designed to create a Virtual Dolby Surround sound effect from a ‘Dolby Surround’ broadcast
without the need for additional surround speakers. However, if you wish to connect an external amplifier to this
TV, please refer to the ‘Connecting external equipment’ section of this manual.
* When ‘Dolby V’ is selected, the TV simulates the full effects of Dolby Pro Logic Surround sound without the
need for additional speakers. Manufactured under licence from Dolby Laboratories. ‘Dolby’, ‘Pro Logic’ and
the double-D symbol are trademarks of Dolby Laboratories.
** Natural and Dynamic are functions of the ‘BBE High definition Sound System’. This system enhances
clarity, detail, presence of sound, and increases musical realism. The ‘BBE High definition Sound System’ is
manufactured by Sony Corporation under licence from BBE Sound, inc. It is covered by U.S. Patent No.
4,638,258 and No. 4,482,866. The word ‘BBE’ and the BBE symbol are trademarks of BBE Sound, Inc.
24
NX 23-30.fm Page 25 Wednesday, September 5, 2001 9:34 AM
TV menu system
Using the Features menu
1. Press the MENU button to display the main menu.
2. Press the v button to highlight the
icon, then press the b button to highlight ‘Auto Format’.
AL
AL
DI
DIGGITIT
RE
C
DE
MO
3. Press the V or v button to select the option you wish to adjust, then press the b button to confirm.
The table below explains the function of each option and which buttons to press for adjustment. Once
adjustment has been finalised, press the OK button to store.
OK
4. Press the MENU button when you wish to remove the menu from the screen.
MENU
Option
Adjustment/Effect
Auto Format
Press V or v button to select between Off or On.
Off: Picture size remains constant irrespective of broadcasting format.
On: Picture size changes to match the broadcasting format. For example, if a
conventional 14:9 broadcast changes to a Wide screen format, the TV switches
formats automatically.
Format Correction
Press V or v button to select Off or On.
Off: When 4:3 and 14:9 broadcasts are received, there will be dark areas visible
at each side of the screen.
On: Smart mode is automatically selected when 4:3 and 14:9 broadcasts are
received, thus eliminating the dark areas on each side of the screen.
(Only available when On
has been selected in
‘Auto Format’ option)
Sleep Timer
Press V or v button to select a period of time before the TV switches itself into
standby mode. This can be up to 90 minutes in 10 minute intervals.
When you wish to return to normal TV operation press the TV
button.
/
AV3 Output
Press V or v button to select which input source you wish to output from the AV3
socket. This option allows you to connect a VCR to AV3 and then record whatever
signals are being applied to the other sockets etc. Choose from Ana.TV, Digi.TV,
AV1, AV2, AV3 or AV4.
Ana.TV: Always outputs the tuned analogue TV signal.
Digi.TV: Always outputs the tuned digital TV signal.
AV1: Outputs signals from equipment connected to the
1 rear socket.
AV2: Outputs signals from equipment connected to the
2 rear socket.
AV3: Outputs signals from equipment connected to the
3 / s 3 rear socket.
AV4: Outputs signals from equipment connected to the side sockets of the TV.
25
NX 23-30.fm Page 26 Wednesday, September 5, 2001 9:34 AM
TV menu system
Naming a programme
With this feature you can name a programme using up to 5 characters (letters or numbers).
1. Press the MENU button to display the main menu.
2.
Press the v button to highlight the
icon, then press the b button to highlight ‘Auto Tuning’.
3. Press the v button to highlight ‘Manual Set Up’ then press the b button to display the Manual Set Up
menu.
RE
DE
MO
C
4. Press the v button to highlight ‘Manual Programme Preset’ then press the b button to display the
Manual Programme Preset menu.
OK
5. Press the V or v button to highlight the programme number that you wish to name, then press the b
button until the first dash in the LABEL column is highlighted. Now press the V or v button until the
first character you desire appears in the display (you can also insert a blank space), then press the b
button to confirm.
MENU
6. Select other characters using the v, v and b buttons, then press the OK button to store.
7. Repeat steps 5 - 6 to name other channels if desired, then press the MENU button to remove the
menu from the screen.
Skipping a programme
This feature lets you to skip unwanted programmes when they are selected using the PROG+/- button.
However, the programme can still be selected using the numbered buttons on the remote control handset.
1. Press the MENU button to display the main menu.
2. Press the v button to highlight the
icon, then press the b button to highlight ‘Auto Tuning’.
3. Press the v button to highlight ‘Manual Set Up’ then press the b button to display the Manual Set Up
menu.
RE
DE
MO
C
4. Press the v button to highlight ‘Manual Programme Preset’ then press the b button to display the
Manual Programme Preset menu.
OK
MENU
5. Press the V or v button to highlight the programme number that you wish to skip, then press the b
button to highlight the SKIP column.
6. Press the V or v button to select ‘On’, then press the OK button to store.
7. Repeat steps 5 - 6 to skip other channels if desired, then press the MENU button to remove the menu
from the screen.
To release the Skip function, follow the above procedure and change On to Off in step 6.
26
NX 23-30.fm Page 27 Wednesday, September 5, 2001 9:34 AM
TV menu system
Using the Further Programme Preset menu
The Further Programme Preset menu allows you to: a) set the volume level of an individual programme to
be different from the rest, b) fine tune a programme to improve its reception or c) preset a scrambled signal
applied to one of the AV sockets on the rear of the TV (e.g. from a pay decoder) so it is displayed on a
programme number of your choice.
1. Press the MENU button to display the main menu.
2. Press the v button to highlight the
icon, then press the b button to highlight ‘Auto Tuning’.
3. Press the v button to highlight ‘Manual Set Up’ then press the b button to display the Manual Set Up
menu.
4. Press the v button to highlight ‘Further Programme Preset’ then press the b button to display the
Further Programme Preset menu.
AL
DIGIT
RE
DE
MO
C
5. Press the V or v button to highlight the programme number you require then press the b button to
select: a) VOL b) AFT or c) DECODER.
6. a) VOL (Volume level offset)
Press the V or v button to adjust the volume level of the programme (between -7 to +7), then press OK
to store.
Repeat steps 5 and 6a for other programmes.
b) AFT (Automatic Fine Tuning)
Press the V or v button to adjust the tuning frequency over a range of -15 to +15, then press OK to
store.
Repeat steps 5 and 6b for other programmes.
c) DECODER
Press the V or v button to select Off, AV1 or AV2 for the programme number you have chosen, then
press OK button. You can now attach a decoder to the selected socket and the unscrambled signal will
appear on the chosen programme number.
Repeat steps 5 and 6c to select the AV inputs for other programme numbers.
7. Press the MENU button to return to normal operation.
OK
MENU
Re-arranging your channels
You can use this feature to change the order in which the channels are stored on your TV.
1. Press the MENU button to display the main menu.
2. Press the v button to highlight the
icon, then press the b button to highlight ‘Auto Tuning’.
3. Press the v button to highlight ‘Programme Sorting’, then press the b button to display the Programme
Sorting menu.
RE
DE
MO
C
OK
4. Press the v or V button to highlight the channel you want to move then press the b button to confirm.
5. Press the v or V button to select a new programme position for your chosen channel, then press the
OK button to confirm. Your chosen channel has now moved to its new position.
6. Repeat steps 4 and 5 to move other channels as required.
7. Press the MENU button to remove the menu from the screen.
MENU
27
NX 23-30.fm Page 28 Wednesday, September 5, 2001 9:34 AM
TV menu system
Adjusting the picture rotation
Due to the Earth’s magnetic field the picture can sometimes slant. This feature enables you to cancel out
any such effect.
1. Press the MENU button to display the main menu.
2.
Press the v button to highlight the
icon, then press the b button to highlight ‘Auto Tuning’.
3. Press the v button to highlight ‘Manual Set Up’ then press the b button to display the Manual Set Up
menu.
RE
DE
MO
C
4. Press the v button to highlight ‘Picture Rotation’ then press the b button to select.
OK
5. Press the V or v button to rotate the picture over a range of -5 to +5 then press the OK button to store.
MENU
6. Press the MENU button to remove the menu from the screen.
Setting your personal ID
This feature allows you to enter a safety code to the TV, which would help you to be traced if the TV is
stolen and recovered. This code can only be entered once, so please make a note of it and keep it safe.
1. Press the MENU button to display the main menu.
L
DIGITA
2.
Press the v button to highlight the
icon, then press the b button to highlight ‘Auto Tuning’.
3. Press the v button to highlight ‘Manual Set Up’, then press the b button to display the Manual Set Up
menu.
4. Press the v button to highlight ‘Personal ID’ then press the b button to select.
RE
DE
MO
C
OK
5. Press the V or v button to display the first character you require (letter or number), then press the b
button to select.
MENU
6. Repeat the procedure to complete your ID code, then press the OK button. A box appears requesting
your confirmation. Press OK to confirm and save.
7. Press the MENU button to remove the menu from the screen.
28
NX 23-30.fm Page 29 Wednesday, September 5, 2001 9:34 AM
TV menu system
Adjusting the picture geometry for an RGB source
When viewing signals from an RGB source such as a Sony Playstation, it may be necessary to adjust the
picture geometry.
1. Press the
the
1 or
button on the remote control until the RGB input from equipment you have connected to
2 socket of the TV is displayed.
2. Press the MENU button to display the main menu.
AL
DIGIT
3.
Press the v button to highlight the
icon, then press the b button to highlight ‘Auto Tuning’.
4. Press the v button to highlight ‘Manual Set Up’ then press the b button to display the Manual Set Up
menu.
5. Press the v button to highlight ‘RGB Set Up’ then press the b button to display the RGB Set Up menu.
RE
DE
MO
C
OK
6. Press the b button to select H Centre, then press the V or v button to centralise the picture over a range
of -10 to +10. Press OK button to store new setting.
7. Press the b button to select H Size then press the V or v button to adjust the picture size over a range
of -10 to +10. Press OK button to store, then press the MENU button to remove menu from the screen.
MENU
Presetting and naming inputs from external equipment
Use this feature to give a name to each piece of equipment connected to the Audio/Video (AV) sockets on
your TV. These names will be displayed on screen briefly when the equipment is selected.
1. Press the MENU button to display the main menu.
2.
Press the v button to highlight the
icon, then press the b button to highlight ‘Auto Tuning’.
3. Press the V or v button to highlight ‘AV Preset’ then press the b button to display the AV Preset menu.
RE
DE
MO
C
OK
4. Press the V or v button to select the AV socket your equipment is connected to (AV1, AV2, AV3 or
AV4).
5. Press the b button to select AUTO FORMAT column, then press the v or v button to select Off or On.
(see ‘Using the Features menu’ for a description of the Auto Format function).
MENU
6. Press the b button to select LABEL column.
7. Press the V or v button to display the first character of the name you wish to use, then press the b
button to select.
8. Repeat the procedure until you complete the name, then press the OK button to store.
9. Repeat steps 4 to 8 if you wish to name other equipment connected to the AV sockets, then press the
MENU button to remove the menu from the screen.
29
NX 23-30.fm Page 30 Wednesday, September 5, 2001 9:34 AM
TV menu system
Manually tuning analogue signals
With this feature you can manually add analogue programmes to your TV. Manual tuning also allows you
to select inputs from the scart sockets (VCRs etc) so that they can be viewed on the programme number
of your choice.
To check which mode you are in, press the
button on the remote control. If you are watching a digital
programme, an Info display appears on screen providing brief details for the current and next programme.
If this happens, press the DIGITAL/
button on the remote control to switch to the traditional analogue
channels.
1. Press the MENU button to display the main menu.
2.
AL
AL
IT
DI
DIGGIT
1
2
4
5
7
8
Press the v button to highlight the
icon, then press the b button to highlight ‘Auto Tuning’.
3. Press the v button to highlight ‘Manual Set Up’ then press the b button to display the Manual Set Up
menu.
3
6
4. Press the v button to highlight ‘Manual Programme Preset’ then press the b button to display the
Manual Programme Preset menu.
9
0
MO
RE
DE
C
OK
5. Press the V or v button to highlight the programme number you require, then press the b button to
highlight the SKIP column.
6. Press the V or v button to set to OFF, then press the b button to highlight SYS column.
MENU
7. Press the V or v button to select your system requirement. For example, choose I for theTV
broadcasts or ‘EXT’ if you wish to view signals from your VCR or other equipment you have connected
to the scart sockets (AV1, AV2 etc.). Press b button to confirm your choice.
If you selected a TV broadcast system:
Press the V or v button to select ‘C’ for terrestrial channels, ‘S’ for cable channels or ‘F’ for direct
frequency input, then press b button to confirm your choice.
If you know the channel number or frequency number you require, use buttons 0 - 9 on the remote
control to enter the number, otherwise press the V or v button to search for the next available
broadcast. If the broadcast found is not the one you desire, press the V or v button to repeat the
search.
If you have selected EXT:
Press the V or v button to select the AV socket whose input you wish to view on the programme
number chosen in step 5.
8. Press the OK button to store.
9. Repeat steps 5 - 8 if you wish to tune in broadcasts to other programme numbers, then press the
MENU button to remove the menu from the screen .
30
NX31-36.fm Page 31 Wednesday, September 5, 2001 9:39 AM
Additional information
Connecting additional equipment
The following illustration shows how to connect a wide range of equipment to the rear of your TV. Please note that the connecting
cables are not supplied.
C
B
E
A
D
F
Modem
MD/DAT
VCR
PlayStation
DVD
Hi-Fi
1. After you have connected your equipment, press the
/
button on the remote control until the
correct symbol for your equipment appears on the TV screen (see table below).
On screen symbol
AL
DIGIT
1
2
3
MO
DE
RE
Usage
For equipment connected to socket A
For equipment connected to socket B
For equipment connected to socket C
C
Note: to record digital programmes you must connect your VCR to the Scart socket C using a scart lead.
2. Switch on your equipment to view the signal.
3. Press the DIGITAL/
button when you wish to return to normal TV operation.
Connecting a VCR that supports Smartlink
The Smartlink system offers a direct link between the TV and VCR. If you have a Smartlink VCR, please
refer to those instructions for further information.
Note: To operate correctly your VCR must be connected to the C socket of the TV using a fully wired 21 pin scart lead.
Connecting to external audio equipment
Plug in your Hi-Fi system to socket D if you wish to amplify the sound from the TV. The volume level can
still be adjusted using the volume button
on the remote control.
Connecting your MD/ DAT player
Plug in your MD/DAT player to socket E.
Connecting a modem
Connect your modem to the F socket and your telephone socket.
31
NX31-36.fm Page 32 Wednesday, September 5, 2001 9:39 AM
Additional information
Connecting additional equipment
You can also connect equipment such as camcorders to the side panel of this TV as shown in the following illustration.
S-VHS/Hi8/DVC
camcorder
8mm/Hi8/ DVC
camcorder
G
H
I
1. After you have connected your equipment, press the
/
button on the remote control until the
correct symbol for your equipment appears on the TV screen (see table below).
On screen symbol
AL
DIGIT
s
Usage
4
For equipment connected to sockets G and I
4
For equipment connected to sockets H and I
2. Switch on your equipment to view the signal.
MO
DE
RE
C
3. Press the DIGITAL/
button when you wish to return to normal TV operation.
Note: To avoid picture distortion, do not connect equipment to the G and H sockets at the same time.
Connecting headphones
Plug in your headphones to the headphone socket. This can be found on the left side of the TV.
32
NX31-36.fm Page 33 Wednesday, September 5, 2001 9:39 AM
Additional information
Remote control configuration for VCR/DVD
This remote control has been configured to operate not only Sony DVDs and VCRs but also those made by
other manufacturers. To operate other makes of DVD and VCR using this remote control, complete the
following procedure:
AL
AL
DI
DIGGITIT
1
2
4
5
7
8
3
6
9
0
MO
DE
RE
C
1. Find the 3 digit code for your brand from the list below. If your brand has more than one code allocated
to it, make a note of the first code only at this stage.
2. Press the MODE button on the remote control until either the VCR green light or the DVD green light is
illuminated.
3. Whilst the required green light is illuminated, press and hold down the YELLOW button for
approximately 6 seconds, until the light starts to flash.
4. Enter the 3 digit code for your DVD or VCR. Once a correct number has been entered, all three green
lights will illuminate momentarily.
5. Turn on your DVD or VCR and check that the remote control operates the main functions. If not, repeat
steps 2 - 4 and enter the next 3 digit code allocated to your brand of VCR or DVD.
6. When you wish to use the remote control to operate the TV again, press the MODE button until the TV
green light illuminates. Don’t forget to select VCR or DVD using the MODE button every time you wish
to operate that equipment with this remote control.
Note: The brand codes you set may be lost if weak batteries are not replaced immediately. Should this
happen, use the above procedure to reset the code. A small label has been attached to the inside of the
battery cover for you to make a note of your brand codes.
Not all brands and models of DVDs or VCRs are covered in this list. However, Sony will endeavour to
update the software periodically, so please refer to the code table provided with your remote control.
VCR Brand List
DVD Brand List
Brand
Code
Brand
Code
SONY (VHS)
301, 302, 303, 309
SONY
001
SONY (BETA)
301, 302, 303, 309
AIWA
021
SONY (DVD)
304, 305, 306
DENON
018, 027, 020, 002
AIWA
325, 331, 351
GRUNDIG
009, 028, 023, 024, 016. 003
AKAI
326, 329, 330
HITACHI
025, 026, 015, 004
DAEWOO
342, 343
JVC
006, 017
GRUNDIG
358, 355, 360, 361, 320, 351
KENWOOD
008
HITACHI
327, 333, 334
LG
015, 014
JVC
314, 315, 322, 344, 352, 353,
354, 348, 349
LOEWE
009, 028, 023, 024, 016. 003
LG
332, 338
MATSUI
013, 016
LOEWE
358, 355, 360, 361, 320, 351
ONKYO
022
MATSUI
356, 357
PANASONIC
018, 027, 020, 002
ORION
328
PHILIPS
009, 028, 023, 024, 016. 003
PANASONIC
321, 323
PIONEER
004
PHILIPS
311, 312, 313, 316, 317, 318,
358, 359
SAMSUNG
011, 014
SAMSUNG
339, 340, 341, 345
SANYO
007
SANYO
335, 336
SHARP
019, 027
SHARP
324
THOMSON
012
THOMSON
319, 350
TOSHIBA
003
TOSHIBA
337
YAMAHA
018, 027, 020, 002
33
NX31-36.fm Page 34 Wednesday, September 5, 2001 9:39 AM
Additional information
Specifications
TV system
I/ DVB-T
Colour system
PAL, SECAM
NTSC 3.58/4.43 (only Video in)
MPEG-2 MP@ML
UHF: B21-B69
Picture tube
82cm (32inches) FD Trinitron WIDE 102° deflection
Dimensions
982mm x 564mm x 586mm (W x H x D)
Weight
Approx. 74Kg
Sound output
Left/Right 2 x 20W (music power) Sub Woofer 30W (music power)
Power consumption
160W
Rear terminals
AV1 socket
AV2 socket
AV3 socket
socket :
socket :
Side terminals
s
4 socket:
4 socket:
4 socket:
socket:
Accessories
supplied
1:
21-pin Euro connector (CENELEC standard) including audio/
video input, RGB input, TV audio/video output.
21-pin Euro connector (CENELEC standard) including audio/
2:
video input, RGB input, TV audio/video output.
3 s 3 : 21-pin Euro connector (CENELEC standard) including audio/
video input, S-video input, selectable audio/video output.
RCA connectors (variable output for audio signals)
Conditional Access Module
Video input - phono jack
S-Video input (4pin DIN)
Audio inputs - phono jacks
Headphone output - stereo minijack
RM-935 remote control (1)
RF Loopthrough Cable (1)
IEC designated size AAA battery (2)
Design and specification are subject to change without notice
34
NX31-36.fm Page 35 Wednesday, September 5, 2001 9:39 AM
Additional information
Troubleshooting
Here are some simple solutions to problems which may affect the picture and sound.
Problem
Cause
No picture, no sound.
Good picture, no sound.
•
•
•
•
•
•
•
•
•
•
•
•
•
•
Power off.
TV in standby.
Aerial disconnected.
Picture preset level adjustment.
No digital transmissions in your area.
No digital transmissions from the transmitter you are currently using.
Weak signal.
Unsuitable aerial.
Scrambled/subscription-only channel.
Programme used only for data (no picture or sound).
Programme not being transmitted.
Digital mode Timer Record active (regular flash).
Fault (irregular flash).
Volume control.
Poor picture quality.
•
Wrong external mode selected on an RGB video source.
No colour on colour programmes.
•
Colour level setting.
Remote control does not function.
•
Batteries low.
Distorted picture when changing programmes or
selecting Teletext.
•
Inputs from external equipment not switched off.
Cause
Solution
Power off.
TV in standby.
•
Plug in the TV.
•
Press the
•
•
•
•
•
•
•
•
•
If the
indicator is on press the
button or a numbered button on the
remote control.
Check the aerial connection.
Select ‘Picture Adjustment’ menu then adjust the brightness, picture and
colour levels.
Tune in the analogue channels available using the ‘Manually tuning
analogue signals’ instruction in this manual, then contact a local installer to
find out when digital transmissions begin in your area.
Contact a local installer to find out which transmitter you should be pointing
your aerial at.
Change your aerial to cover the channels used by digital programmes.
(Contact a local installer)
Ensure aerial is correctly aligned to transmitter.
Ensure aerial is plugged directly into the TV (not through other equipment).
Upgrade to a higher gain aerial.
Subscribe to pay-per-view broadcaster.
See ‘Skipping a programme’ section.
See ‘Re-arranging your channels’ section.
Do not open the cabinet, refer to qualified personnel.
Contact your nearest Sony Service Centre.
•
Press the
•
If
is displayed on the screen, press the
control.
Wrong external mode selected.
•
Colour level setting.
•
Press the
button repeatedly until the RGB symbol
is displayed on
screen.
Select ‘Picture Adjustment’ menu on the TV menu system then adjust the
colour setting.
Poor or no picture (screen is dark), but good sound.
No picture on any channel after digital tuning.
Some channels are blank.
Standby indicator flashing.
Aerial disconnected.
Picture level adjustment.
•
•
No digital transmissions in your area.
•
No digital transmissions from the transmitter you
are currently using.
Unsuitable aerial.
•
Weak signal.
Scrambled/subscription-only channel.
Programme information without picture or sound.
Fault.
Volume control.
•
•
•
button on the front of the TV.
/
+ button on the remote control.
button on the remote
If you continue to have these problems, have your TV serviced by qualified personnel or you can contact
the Sony UK Digital HelpLine on 0870 600 1717.
NEVER open the casing yourself.
35
NX31-36.fm Page 36 Wednesday, September 5, 2001 9:39 AM
Additional information
From time to time dust particles or condensation may get trapped between the glass panel and the TV screen. These instructions will
guide you through the steps required to both remove and re-fit the glass panel safely.
Removing the glass panel
NEVER attempt to remove the glass panel on your own - for safety reasons Sony recommends that two people carry out the
following procedure at all times.
1
Support the bottom of the glass
panel as shown AT ALL TIMES.
2
Push the clips located on the
underside of the TV, as shown, to
release the glass panel.
3
Whilst pushing the release clip,
slide the glass panel up.
5
Carefully remove the glass panel
and place it safely in an upright
position. To avoid injury or damage,
do not leave it on the floor.
6
Clean both sides of the glass and the
TV screen. Use a soft, damp, lint free
cloth. Do not use any chemical
solutions or abrasive cleaners.
Trinitron
4
Supporting the glass panel, tilt it
away from the TV.
Re-fitting the glass panel
NEVER attempt to re-fit the glass panel on your own - for safety reasons Sony recommends that two people carry out the following
procedure at all times.
1
Lift the glass, and move toward
the TV.
2
Insert the bottom locating pins of
the glass panel into the keyhole
slots on the TV.
3
Tilt the glass panel forwards at the
top to engage all the locating pins,
then push forward firmly to secure.
Locating pin
4
While still maintaining forward
pressure to the bottom of the glass,
carefully slide the glass down until it
locks.
CAUTION
Before removing your hands check that you are unable to move the glass.
When correctly fitted, the plastic rib shown in the drawing below should not be
visible.
Plastic rib
Safety Note
The glass panel supplied complies with all relevant safety regulations. However, should the glass become damaged at
any time, it is strongly recommended that a replacement is obtained from an authorised Sony dealer.
36
32nxcover.fm Page 3 Wednesday, September 5, 2001 9:06 AM
32nxcover.fm Page 4 Friday, September 7, 2001 10:29 AM
4-206-381-62
420638162
How to carry this TV
• Sony strongly recommends that this TV should not
be lifted by less than two people.
• Always assume the correct posture when lifting.
• Standing at the side of the TV, place one hand under
the glass panel on the front of the TV as shown.
• Lift and carry the TV to its required position. Do not
place the TV on an unstable surface.
Sony Corporation Printed in UK
Recyclable