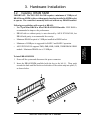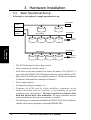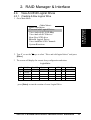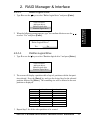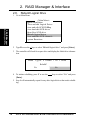
1
R
PCI-DA2100
PCI to SCSI Disk Array Controller
USER'S MANUAL
Hardware Installation
USER'S NOTICE
No part of this product, including the product and software may be reproduced,
transmitted, transcribed, stored in a retrieval system, or translated into any language
in any form by any means without the express written permission of ASUSTeK
COMPUTER INC. (hereinafter referred to as ASUS) except documentation kept by
the purchaser for backup purposes.
ASUS provides this manual "as is" without warranty of any kind, either express or
implied, including but not limited to the implied warranties or conditions of merchantability or fitness for a particular purpose. In no event shall ASUS be liable for
any loss or profits, loss of business, loss of use or data, interruption of business, or
for indirect, special, incidental, or consequential damages of any kind, even if ASUS
has been advised of the possibility of such damages arising from any defect or error
in this manual or product. ASUS may revise this manual from time to time without
notice.
Products mentioned in this manual are mentioned for identification purposes only.
Product names appearing in this manual may or may not be registered trademarks or
copyrights of their respective companies.
The product name and revision number are both printed on the board itself. Manual
revisions are released for each board design represented by the digit before and after
the period of the manual revision number. Manual updates are represented by the
third digit in the manual revision number. For updated BIOS, drivers, or product
release information you may visit ASUS' home page at: http://www.asus.com.tw/
© Copyright 1996 ASUSTeK COMPUTER INC. All rights reserved.
Product Name:
Manual Revision:
Release Date:
II
ASUS PCI-DA2100
1.22
November 1996
ASUS PCI-DA2100 User’s Manual
ASUS CONTACT INFORMATION
ASUSTeK COMPUTER INC.
Marketing Info:
Address: 150 Li-Te Road, Peitou, Taipei, Taiwan, ROC
Telephone: 886-2-894-3447
Fax:
886-2-894-3449
Email:
[email protected]
Technical Support:
Fax:
BBS:
Email:
WWW:
Gopher:
FTP:
886-2-895-9254
886-2-896-4667
[email protected]
http://www.asus.com.tw/
gopher.asus.com.tw
ftp.asus.com.tw/pub/ASUS
ASUS COMPUTER INTERNATIONAL
Marketing Info:
Address: 721 Charcot Avenue, San Jose, CA 95131, USA
Telephone: 1-408-474-0567
Fax:
1-408-474-0568
Email:
[email protected]
Technical Support:
BBS:
Email:
1-408-474-0555
[email protected]
ASUS COMPUTER GmbH
Marketing Info:
Address: Harkort Str. 25, 40880 Ratingen, BRD, Germany
Telephone: 49-2102-445011
Fax:
49-2102-442066
Email:
[email protected]
Technical Support:
BBS:
Email:
49-2102-448690
[email protected]
ASUS PCI-DA2100 User’s Manual
III
CONTENTS
I. INTRODUCTION ......................................................... 1
How this manual is organized .......................................................... 1
Item Checklist .................................................................................. 1
II. FEATURES .................................................................. 2
Features of the ASUS Motherboard ................................................. 2
Parts of the ASUS Motherboard ...................................................... 3
III. INSTALLATION ........................................................ 4
Map of the ASUS Motherboard .......................................................
Installation Steps ..............................................................................
1. Jumpers ........................................................................................
Jumper Settings ....................................................................
TAG SRAM Upgrade .................................................................
Cyrix CPU Identification ......................................................
2. System Memory (DRAM & SRAM) ..........................................
DRAM Memory Installation Procedures: ............................
3. Central Processing Unit (CPU) ...................................................
4. Expansion Cards .........................................................................
Expansion Card Installation Procedure: ...............................
Assigning IRQs for Expansion Cards ...................................
Assigning DMA Channels for ISA Cards .............................
5. External Connectors ....................................................................
Power Connection Procedures ...................................................
4
6
6
7
7
11
12
13
15
16
16
16
17
18
25
IV. BIOS SOFTWARE ..................................................... 26
Support Software .............................................................................
Flash Memory Writer Utility ...........................................................
Main Menu ...........................................................................
Advanced Features Menu .....................................................
Updating your Motherboard's BIOS ..........................................
6. BIOS Setup .................................................................................
Load Defaults .......................................................................
Standard CMOS Setup ...............................................................
Details of Standard CMOS Setup: ........................................
IV
ASUS PCI-DA2100 User’s Manual
26
26
26
27
28
29
30
30
31
CONTENTS
BIOS Features Setup ..................................................................
Details of BIOS Features Setup: ...........................................
Chipset Features Setup ...............................................................
Power Management Setup ..........................................................
Details of Power Management Setup: ..................................
PNP and PCI Setup ....................................................................
Load BIOS Defaults ...................................................................
Load Setup Defaults ...................................................................
Supervisor Password and User Password ..................................
IDE HDD Auto Detection ..........................................................
Save and Exit Setup ...................................................................
Exit Without Saving ...................................................................
34
34
37
40
40
42
44
44
45
46
47
47
V. DESKTOP MANAGEMENT ...................................... 49
Desktop Management Interface (DMI) ............................................
Introducing the ASUS DMI Configuration Utility ...............
System Requirements ...........................................................
Using the ASUS DMI Configuration Utility ........................
Notes: ....................................................................................
49
49
49
50
50
VI. ADAPTEC EZ-SCSI UTILITY ................................. 53
Quick Start Instructions ...................................................................
Windows95 or WindowsNT .......................................................
Windows/Windows for Workgroups 3.1x ..................................
DOS ............................................................................................
Troubleshooting Tips .......................................................................
SCSI Device Troubleshooting ....................................................
Windows95/WindowsNT Troubleshooting ................................
Information for DOS/Windows 3.1x Users .....................................
DOS and Windows3.1x Device Drivers .....................................
DOS and Windows3.1x ASPI Managers ....................................
DOS Formatting Utilities ...........................................................
Low-level Formatter (scsifmt) ..............................................
Formatter and Partitioner (afdisk) ........................................
Removable Media Manager (rmvtool) .................................
53
53
53
53
54
54
54
57
57
57
58
58
59
61
VII. ADAPTEC 7800 DRIVERS (88 Pages)
(for onboard Adaptec 7880 SCSI Chipset)
ASUS PCI-DA2100 User’s Manual
V
FCC & DOC COMPLIANCE
Federal Communications Commission Statement
This device complies with FCC Rules Part 15. Operation is subject to the following
two conditions:
•
•
This device may not cause harmful interference, and
This device must accept any interference received, including interference that
may cause undesired operation.
This equipment has been tested and found to comply with the limits for a Class B
digital device, pursuant to Part 15 of the FCC Rules. These limits are designed to
provide reasonable protection against harmful interference in a residential installation. This equipment generates, uses and can radiate radio frequency energy and, if
not installed and used in accordance with manufacturer's instructions, may cause
harmful interference to radio communications. However, there is no guarantee that
interference will not occur in a particular installation. If this equipment does cause
harmful interference to radio or television reception, which can be determined by
turning the equipment off and on, the user is encouraged to try to correct the interference by one or more of the following measures:
•
•
•
•
Re-orient or relocate the receiving antenna.
Increase the separation between the equipment and receiver.
Connect the equipment to an outlet on a circuit different from that to which the
receiver is connected.
Consult the dealer or an experienced radio/TV technician for help.
WARNING: The use of shielded cables for connection of the monitor to the graphics card is required to assure compliance with FCC regulations. Changes or modifications to this unit not expressly approved by the party responsible for compliance
could void the user's authority to operate this equipment.
Canadian Department of Communications Statement
This digital apparatus does not exceed the Class B limits for radio noise emissions
from digital apparatus set out in the Radio Interference Regulations of the Canadian
Department of Communications.
VI
ASUS PCI-DA2100 User’s Manual
1. Introduction
1. Introduction
1. Introduction
The ASUS PCI-DA2100 is a PCI to SCSI RAID controller specifically designed to
provide RAID 0, 1, 3 or 5 capability to any host system equipped with Little Endian
PCI Local Bus interface. All the RAID functions of ASUS PCI-DA2100 are performed by a 486 CPU coupled with high-speed DRAMs and firmware in Flash
Memory. In effect, it endows the host system with the high performance and faulttolerant disk storage operation of RAID technology. It is also an ideal solution for
weaving several hard disks into one contiguous volume.
The ASUS PCI-DA2100 has a comprehensive drive failure management that allows
automatic bad block reassignment when a bad sector is encountered during a write.
Hot-swapping is supported through automatic detection of failed drives, followed
by either automatic background rebuilding onto a spare if a spare is assigned or
manual replacement of failed drive and manually initiated background rebuilding.
And all these failure recovery operations are performed in a way transparent to the
host.
The controller has been designed with the ease of integration and maintenance in
mind. The major features are described in the following section. The ASUS PCIDA2100 already includes all the major operational requirements for a RAID subsystem. The final features of a fully-built RAID subsystem will, however, depend
on the actual components used and the creativity of the integrator.
ASUS PCI-DA2100 User’s Manual
1
2. Features
2. Features
•
Five operating modes:
Non-RAID
RAID-0
RAID-1
RAID-3
RAID-5
2. Features
2
Disk Spanning (including single-drive operation)
Striping
Mirroring and Striping
Block Striping w/ Dedicated Parity
Multiple Block Striping w/ Distributed Parity
•
Comprehensive failure management including:
Automatic bad sector reassignment
Hot-swapping
Spare drive operation
Background rebuilding
•
PCI Standard length form factor: 6.87"(L) X 4.2"(W).
•
Up to 8 logical drives, each with independent RAID mode.
•
Up to 8 partitions per logical drive.
•
Dynamic mapping of LUNs to logical drives.
•
All channels are Ultra Wide SCSI-2 (downward compatible to SCSI-1, SCSI-2).
•
Compatibility and automatic matching of any SCSI hard disks complying with
SCSI-1, SCSI-2, Fast Wide, and Ultra Wide SCSI (1 or 2) specifications.
•
Full-Wide SCSI-2 implementation including Tagged Command Queuing and
Multi-Threaded I/O.
•
Uses 486 CPU with all executable firmware downloaded into high-speed DRAM.
•
BIOS INT 13 support.
•
Flash EEPROM for easy firmware and BIOS upgrading.
•
Up to 32 MBytes of intelligent Read-Ahead/Write-Back cache.
•
EDO RAM support for enhanced performance.
ASUS PCI-DA2100 User’s Manual
2. Features
Layout of the ASUS DA-2100
SIMM Socket for
Cache upgrade
Fast & Wide SCSI Ch.1
Non Volatile SRAM
2. Features
Fast & Wide SCSI Ch.0
486 Processor
ASUS PCI-DA2100 User’s Manual
3
3. Hardware Installation
3.1.
Layout of the ASUS DA-2100
JP1
Channel 0
JP2
Channel 1
JP6
Memory Expansion (72-Pin DRAM)
Non Volatile
SRAM
FLASH ROM
486DX2-66
Central Processing
Unit
3. Hardware
Main Board Parts
JP1, JP2: Factory use. Open for normal operation.
JP6: LED Connector for Hard Disk Drive Activity light.
4
ASUS PCI-DA2100 User’s Manual
3. Hardware Installation
3.2.
Installing DRAM SIMM
IMPORTANT: The ASUS PCI-DA2100 requires a minimum of 2 MBytes of
DRAM in one SIMM (with or without parity function) installed in SIMM socket
to operate. The controller is normally delivered without any DRAM installed.
•
DRAM with or without parity is auto-detected by ASUS PCI-DA2100, but
DRAM with parity is recommended for security.
•
Minimum DRAM required is 2 MBytes installed in SIMM socket.
•
Minimum of 4 MBytes is suggested for RAID-3 and RAID-5 operation.
•
ASUS PCI-DA2100 supports 2MB, 4MB, 8MB, 16MB, 32MB DRAM SIMM
module. Maximum DRAM size is 32 MBytes.
3. Hardware
Installing DRAM
Following are guidelines with regards to DRAM:
• Use 72-pin 60 ns DRAM or 60 ns EDO RAM SIMM module. EDO RAM is
recommended to improve the performance.
To install DRAM SIMM:
1 Power off the system and disconnect the power connector.
2 Insert the DRAM SIMM paralleled with the key to the left (1). Then, push
towards the back until the hooks on both sides of the socket snap into place (2)
as shown below.
ASUS PCI-DA2100 User’s Manual
5
3. Hardware Installation
3.3.
Basic Operational Set-Up
Following is a description of a sample operational set-up:
Terminator
External
Channel 0
Internal
Channel 0
Internal
Channel 1
SCSI Cable
Terminator
Up to 7
Drives
3. Hardware
Basic Setup
SCSI Cable
Terminator
Up to 7
Drives
•
•
•
•
•
•
•
•
6
The SCSI cable must be shorter than 2 meters
Drives connected to channel 0 and/or 1.
SCSI nodes on the same channel have unique ID number. The SCSI ID 7 is
reserved for the ASUS PCI-DA2100 adapter and thus no drives should use ID7.
Both ends of all SCSI cables are properly terminated. Disable the termination
of channel-0 and enable the termination of channel-1
Power supply attached.
All operation parameters properly set.
Terminate the SCSI cable by either installing a terminator on the
farthest hard disk from the controller or by installing an external
terminator on the end connector. The latter, is preferred as removal of the
hard disk will not affect cable termination. All other terminators must be
removed making sure that only one terminator is installed.
The default state of terminators embedded on ASUS PCI-DA2100 controller are
enabled, which can be changed by running RAIDMAN.EXE.
ASUS PCI-DA2100 User’s Manual
4. Disk Failure Management
4. Disk Failure Management
One of the most important aspects of a RAID system is in providing fault-tolerant
non-stop disk storage operation. In the event of a disk failure, disk access will
continue normally with the failure transparent to the host system. The ASUS PCIDA2100 will announce a disk failure with a repeated two-beep sequence over the
speaker on the ASUS PCI-DA2100.
IMPORTANT: Although the RAID subsystem will continue to
provide uninterrupted disk access after a drive failure, do not leave a failed
drive unattended! Without a spare drive, a RAID system can not survive the
failure of a second drive on the same logical drive. A defective drive has to be
replaced and the data rebuild as soon as possible. For the same reason, if you
are doing hot-swapping, remove only the defective drive. Removing the wrong
drive will result in unrecoverable data loss.
In all cases, data will have to be rebuilt onto the replacement drive. Data rebuilding
is done in the background, meaning the host system can access the storage subsystem as usual while the rebuilding is taking place.
Operation With Spare Drive
4. Disk Failure
Management
4.1.
Following are guidelines with regards to disk failure recovery when a spare drive is
available:
•
If a spare drive exists in the same logical drive, the controller will
automatically mount the spare drive and start data rebuilding in the background.
•
Depending on the design of the subsystem external to the ASUS PCI-DA2100,
it may be possible to remove defective drive and replace it with a new drive
without shutting down the system (hot-swapping). Alternatively, the system
can be shut down at a convenient time and the failed drive replaced.
•
The replacement drive must then be assigned as the new spare drive.
ASUS PCI-DA2100 User’s Manual
7
4. Disk Failure Management
4.2.
Operation Without Spare Drive
• Depending on the design of the subsystem, the defective drive can be replaced
without shutting down the system (hot-swapping). Alternatively, the system
can be shut down at a convenient time and the failed drive replaced.
•
If the replacement drive is installed on the same channel and ID number, you
can then proceed to data rebuilding.
•
If the replacement drive is installed on a different channel or ID number, it has
to be “Scan” in as a new drive and then assigned as a spare drive of the logical
drive. Data rebuilding will have to be manually initiated as instructed in the
following section.
4.3.
Data Rebuilding Via Text RAID Manager
Data rebuilding can be done through running RAIDMAN.EXE under DOS.
4. Disk Failure
Without Spare Drive
8
ASUS PCI-DA2100 User’s Manual
5. BIOS Configuration Utility
5. BIOS Configuration Utility
At system bootup, the ASUS PCI-DA2100 BIOS displays the following message:
ASUS PCI-DA2000 Series (PCI-TO-SCSI RAID) BIOS v1.11
PCI Bus # = 00 Device # = 0B Port = E800 IRQ = 12 EDORAM=4 MB FW=1.11
!! Press <Ctrl><I> for Configuration Utility, <Q> to Skip !!
NOTES :
PCI Bus #, Device #:
Show the PCI bus and PCI device number been assigned to ASUS PCI-DA2100.
The numbers are in hexadecimal.
Port:
Show the I/O port base address been assigned to ASUS PCI-DA2100.
IRQ:
Show the Interrupt level been assigned to ASUS PCI-DA2100. The level is in decimal.
EDO RAM DRAM:
Displays the cache RAM type and size been installed on ASUS PCI-DA2100.
F/W:
Show the firmware version of ASUS PCI-DA2100.
ASUS PCI-DA2100 BIOS waits 3 seconds for a keystroke. You can press [Ctrl-I]
to enter the configuration utility, or press Q to skip waiting for a keystroke.
5.1.
5. BIOS Utility
Configuration
If [Ctrl-I] is pressed to enter configuration utility, the main menu will appear. There
are two functions in the main menu: Configuration and Color/Monochrome.
Configuration
There are four functions in the Configuration Option: Configure BIOS, Configure
Card, Configure SCSI and Reset to Defaults.
ASUS PCI-DA2100 User’s Manual
9
5. BIOS Configuration Utility
5.1.1. Configure BIOS
1. Enable BIOS INT 13H Function.
2. BIOS Translation Mode : Auto or Fixed.
Use fixed mode together with “Support for Disks > 1GB” is disabled for UNIX/
DOS or UNIX/OS2 dual boot system, use Auto mode for other system.
Auto mode :
• BIOS detects the existing CHS mapping from the disk.
• If any valid CHS mapping is found, BIOS uses it.
• If no valid CHS mapping is found, BIOS uses Fixed mode.
Fixed mode :
• If option “Support for Disks > 1 GB” is disabled,
BIOS uses SectorsPerTrack = 32, TotalHeads = 64.
• If option “Support for Disks > 1 GB” is enabled,
For disk size <= 1GB,BIOS uses SectorsPerTrack = 32, TotalHeads = 64.
For disk size > 1GB, BIOS uses SectorsPerTrack = 63, TotalHeads = 255.
3. Support for Disk > 1 GB.
4. Support Removable Disks as Fixed Disks: to be supported in the future.
5. Support for 3 Disks or More (MS-DOS v5.0 or Above) :
For MS-DOS version below 5.0, only supports up to 2 disks, don’t set this option
to “Yes” on those version DOS system.
6. Support for NOT-ZERO SCSI LUN : Set this option to “Yes”, if you want the
BIOS to support all SCSI Target LUNs, 0 to 7.
7. Configure BIOS Devices : Select this option, the screen appears a
status list of SCSI device scanned by BIOS at BIOS initialization. If SCSI device is not scanned by BIOS, then it is never installed by BIOS.
5. BIOS Utility
Configure BIOS
5.1.2. Configure Card
Select this option, the following message appears :
ISA Mailbox Emulation Mode :
IO Port Address 330
Press [Enter] to select the desired IO port address.
NOTE: If you want to use the diskette-provided device driver, you MUST set
the I/O port address to Disabled, otherwise the card will ignore this driver.
10
ASUS PCI-DA2100 User’s Manual
5. BIOS Configuration Utility
5.1.3. Configure SCSI
If this option is selected, a list of physical SCSI channels will appear.
Select a SCSI channel that you want to configure, then a new dialog box of SCSI
Channel Configuration will appear. The major options are listed as follows.
1. SCSI ID:
Use this option to change SCSI ID of SCSI Channel.
2. Enable SCSI Termination :
Use this option to enable/disable SCSI termination.
3. Configure SCSI Devices:
Use this option to change the low-level SCSI features of SCSI devices.
The supported options are listed as follows.
* Synchronous Transfer Period.
* Maximum Tagged Command Queue.
* SCSI Disconnect.
* SCSI Parity.
5.1.4. Reset to Defaults
If this option is selected, all the configurations are reset to the manufacture’s defaults.
5.2.
Color/Monochrome
5. BIOS Utility
Configure SCSI
Switches display mode between color and monochrome.
ASUS PCI-DA2100 User’s Manual
11
(This page was intentionally left blank)
12
ASUS PCI-DA2100 User’s Manual
6. Troubleshooting
6. Troubleshooting
Problem - Check
6. Troubleshooting
NOTE: Following is a check list for problems commonly encountered during
installation. For failures that occur during operation, refer to the failure recovery procedure.
PROBLEM
CHECK
7-segment is off or not flashing
1 PCI slot contact quality.
2 Minimum of 2MB DRAM SIMM
installed.
SCSI channel failure detected
upon start-up with SCSI cables
connected.
Buzzer with continuous beeps
1 ID numbers (must be unique for each
device on the same SCSI channel).
Initialization failure
1 ID numbers (must be unique for each
device on the same SCSI channel).
2 Terminators are properly installed.
Cannot detect SCSI drive
1 Drive power connections.
2 Drive SCSI cable connections.
3 ID numbers (must be unique for each
device on the same SCSI channel).
2 Terminators are properly installed.
BIOS show no drive connection 1 SCSI port to LUN assignment.
2 Logical drive mapping to LUN.
Logical drive failure detected
during boot-up
1 Proper installation or connection of one or
more of the drives (use the “View SCSI
drives” function to help locate the problem).
System is not stable after
running a period of time
1 SCSI cable is no more than 2 meters.
2 Terminators are properly installed.
3 Power supply voltage is within the specification.
ASUS PCI-DA2100 User’s Manual
13
7. Specifications
7. Specifications
RAID level
Operation
Failure management
7. Specifications
Failure indicator
Cache size
Host interface
Hard disk interface
Hard disk channels
Channel Terminator
SCSI protocol
SCSI transfer rate
Max. SCSI drives
No. of logical drives
Partitions
No. of LUNs
Control
SCSI connectors
SCSI cabling
Voltage
Current
Operating Temperature
Relative Humidity
Operating Altitude
Dimensions
14
0, 1, 3, 5 (or non-RAID disk spanning)
Firmware on Flash Memory and DRAM
running on 486 CPU
Bad sector reassignment, hot-swapping,
hot spare drive operation, background
rebuilding
Via Text RAID Manager , GUI RAID
Manager and on-board buzzer
Up to 32 MBytes
PCI Rev. 2.0
Ultra Wide SCSI 2
Up to 2
Active, software programmable
SCSI-1/2, Fast Wide SCSI-1/2 (auto-match)
40 MBytes/sec synchronous
14
8 with different RAID levels
8 per logical drive, total of 64
8 per channel, total of 64 (dynamic mapping
to logical drives or partitions)
Via Text RAID Manager or GUI RAID
Manager
68-pin header for internal channels,
68- pin High-Density female connector for
external channel
Single-ended
+5 Volts
2 Amp
0˚ to 45˚ C
10-96%, non-condensing
Sea level to 10,000 ft.
6.87"(L) x 4.2(W)
ASUS PCI-DA2100 User’s Manual
A. Updating
Appendix A: Updating BIOS, Firmware, and
Boot Record
The BIOS, firmware and boot-record (the section of code that boots the controller
and allows for temporary download of firmware) of the ASUS PCI-DA2100 stored
in Flash Memory can be updated via Text RAID Manager under DOS. New releases of the BIOS/firmware/boot-record are available on the ASUS BBS, FTP server.
To perform the download, the following must be available:
• ASUS PCI-DA2100 plugged into a host PCI slot and properly functioning.
• RAIDMAN.EXE running under DOS.
A. Updating
BIOS, Firmware, Boot
To perform the download, follow the following procedure:
1 Select “Controller Maintenance” menu option under “System Functions” via
the Text RAID Manager.
2 Select the desired download option. If upgrading of both firmware and bootrecord is desired, first select “Advanced Maintenance Functions” menu item
then select “Download Boot Record with Firmware”.
3 When prompt for operation confirmation appears, select” Yes” to confirm.
4 When prompted for a file name, enter the name of the file containing the code
to be downloaded. If both firmware and boot-record are being downloaded,
enter the name of the boot-record file.
5 If both firmware and boot-record are being downloaded, when downloading of
boot-record is complete, repeat step 4, then, when prompted for a file name,
enter the name of firmware file.
6 When file transfer is complete, please wait a moment while the ASUS PCIDA2100 burns the code into its EEPROM-Flash.
IMPORTANT: Be sure to allow the EEPROM-Flash programming (burning)
stage to go to completion. Do not reset or turn off the computer or the controller while EEPROM-Flash programming is in process. Doing so may result in
an unrecoverable error that requires the service of the manufacture.
ASUS PCI-DA2100 User’s Manual
15
B. SCSI Cable Specifications
Appendix B: SCSI Cable Specifications
The Fast Wide SCSI-2 recommendation for a SCSI cable operating at a transfer rate
of 20 MBytes/sec is as follows:
•
Maximum length
2 meters
•
Impedance
Between 90 Ω to 132 Ω
•
Signal Attenuation
0.095 dB/meter @ 5 MHz (max.)
•
Pair-Pair Propagation Delay Delta 0.2 ns/meter (max.)
•
DC Resistance
0.23 Ω/meter @ 20˚ C (max.)
B. SCSI Cable
SCSI Cable Spec.
16
ASUS PCI-DA2100 User’s Manual
C. RAID Concept
Appendix C: RAID Concept
RAID stands for Redundant Array of Inexpensive Drive. Some of the advantages of
using a RAID storage subsystem are:
* Provides disk spanning by weaving all connected drives into one single volume.
* Increases disk access speed by breaking data into several blocks for reading/
writing it to several drives in parallel. With RAID, storage speed increases as
more drives are added. Without RAID, the speed slows down as more drives are
installed.
* Provides fault-tolerance by mirroring or parity operation.
RAID 0
Block Striping - Data is broken into logical blocks, the size of a SCSI disk block,
and striped across several drives.
Drive 0
A0
B0
C0
D0
Drive 1
A1
B1
C1
D1
Drive 2
A2
B2
C2
D2
Drive 3
A3
B3
C3
D3
Drive 4
A4
B4
C4
D4
RAID 1
Mirroring and Striping - Copy of the same data is recorded into two set of striping
drives. In the event of failure, the duplicate set continues operation.
Drive 0
A0
A2
A4
B1
Set 2
Drive 1
A1
A3
B0
B2
Drive 0
A0
A2
A4
B1
C. RAID Concept
RAID Concept
Set 1
Drive 1
A1
A3
B0
B2
ASUS PCI-DA2100 User’s Manual
17
C. RAID Concept
RAID 3
Block Striping with Dedicated Parity - Data is broken into logical blocks, the size of
a SCSI disk block, and striped across several drives. One drive is dedicated to
parity. In the event of failure, original data is re-generated from the parity information.
Drive 0
A0
A4
B3
C2
Drive 1
A1
B0
B4
C3
Drive 2
A2
B1
C0
C4
Drive 3
A3
B2
C1
D0
Drive 4
P
P
P
P
RAID 5
Multiple Block Striping with Dedicated Parity - Sets a given number logical blocks
as a unit for striping across several drives. For small read/write, as few as one drive
may be activated for improved small record access speed. Parity information is
interleaved across the drive array. In the event of failure, original data is regenerated from the parity information.
Drive 0
A0-A1
B3-B4
D1-D2
E4-F0
Drive 1
A2-A3
P
D3-D4
F1-F2
Drive 2
A4-B0
C0-C1
P
F3-F4
Drive 3
B1-B2
C2-C3
E0-E1
P
Drive 4
P
C4-D0
E2-E3
G0-G1
Required Number of Drives and Net Capacity
Following is a summary of the minimum number of drives required and the capacity
available for the different types of RAID operation:
C. RAID Concept
RAID Concept
OPERATION
RAID 0
RAID 1
RAID 0 + 1
RAID 3
RAID 5
MIN. DRIVES
2
2
4
3
3
CAP. AVAILABLE
T
T/2
T/2
T x (n - 1) / n
T x (n - 1) / n
T = Sum of the capacity of all connected drives
n = Number of connected drives
18
ASUS PCI-DA2100 User’s Manual
R
PCI-DA2000 Series
PCI to SCSI Disk Array Controller
Driver Installation
(This page was intentionally left blank)
20
ASUS PCI-DA2000 Series RAID Controllers Driver Installation
1. Introduction
1. Introduction
1. Introduction
The ASUS PCI-DA2000 Series Controller is the product model name for ASUS
PCI-to-SCSI RAID controllers specifically designed to provide RAID 0, 1, 3 or 5
capability to any host system equipped with Little Endian PCI Local Bus interface.
All the RAID functions of an ASUS PCI-DA2000 Series Controller are performed
by a 486 CPU coupled with high-speed DRAMs and firmware in Flash Memory. In
effect, it endows the host system with the high-performance and fault-tolerant disk
storage operation of RAID technology. It is also an ideal solution for weaving several hard disks into one contiguous volume.
The ASUS PCI-DA2000 Series Controller has a comprehensive drive failure management that allows automatic bad block reassignment when a bad sector is encountered during a write. Hot-swapping is supported through automatic detection of
failed drives, followed by either automatic background rebuilding onto a spare if a
spare is assigned or manual replacement of failed drive and manually initiated background rebuilding. And all these failure recovery operations are performed in a way
transparent to the host.
The controllers has been designed with the ease of integration and maintenance in
mind. The major features are described in their corresponding Hardware Manaul.
The ASUS PCI-DA2000 Series Controller already includes all the major operational requirements for a RAID subsystem. The final features of a fully-built RAID
subsystem will, however, depend on the actual components used and the creativity
of the integrator.
This manual describes both the software drivers and utilities for All of ASUS PCI to
SCSI RAID controllers. The ASUS PCI-DA2000 Series Controller will represent
following products:
•
•
ASUS PCI-DA2000
ASUS PCI-DA2100
ASUS PCI-DA2000 Series RAID Controllers Driver Installation
21
2. RAID Manager & Interface
2. Text RAID Manager and RS-232 Terminal
Interface Operation
For ASUS PCI-DA2100, there are no RS-232 Port on the board. So, the RS-232
Terminal Interface Operation doesn’t support on the product.
2. RAID Manager
RAID Manager utility
The Text RAID Manager utility “RAIDMAN.EXE” and RS-232 Terminal Interface
Operation provides a user-friendly menu-driven system for configuring and managing the ASUS PCI-DA2000 Series Controller. The RAIDMAN.EXE can be run
under DOS, NetWare, Windows 95, and Windows NT environment.
2.1.
Text RAID Manager
On execution of RAIDMAN.EXE under DOS, screen will display a list of target
controllers. Use the keys to position the cursor over the desired controller and
press [Enter] to select it.
ASUSTeK RAID Manager v1.12A
Copyright (C) 1995 ASUSTeK COMPUTER. All rights reserved.
Select Controller
PCI Bus # = 0
Device # = D
: move cursor, <ENTER>: select, <ESC>: exit, <F2>: toggle display
22
ASUS PCI-DA2000 Series RAID Controllers Driver Installation
2. RAID Manager & Interface
ASUS PCI-DA2000 Series RAID Controllers Driver Installation
2. RAID Manager
<Main Menu>
Quick installation
View and edit logical drives
view And edit SCSI ID Map
view And edit SCSI drives
Scan new SCSI drive
Rebuild logical drives
view and Edit SCSI channels
system Functions
23
RAID Manager utility
Now the Main Menu will be displayed.
2. RAID Manager & Interface
2.2.
RS-232 Terminal Interface Operation
Under normal operation the screen displays the average throughput (256 KBytes/
sec per division).
After powering up the ASUS PCI-DA2000 Series Controller, the terminal screen
will show:
2. RAID Manager
RAID Manager utility
ASUS PCI-DA2000 Series Disk Array is installed with 8 MBytes DRAM
Total SCSI Channels: 2
SCSI channel: 0 is a drive channel, id=7
SCSI channel: 1 is a drive channel, id=7
Scanning SCSI drives. Please wait a few moments!
0
2MB/S
Please press <Enter> to enter main menu
Pressing [Enter] will call up the Main Menu.
<Main Menu>
Quick installation
View and edit logical drives
view and edit SCSI ID Map
view And edit SCSI drives
Scan new SCSI drive
Rebuild logical drives
view and Edit SCSI channels
system Functions
24
ASUS PCI-DA2000 Series RAID Controllers Driver Installation
2. RAID Manager & Interface
The keys used in the Text RAID Manager and RS-232 Terminal Interface Operation
are as follows:
Left, right, up and down arrow to select options.
[Enter] To go into a submenu or to execute an option.
To escape and go back to the preceding menu.
2. RAID Manager
[Ctrl-l] To refresh terminal screen.
NOTE:
If the password feature is enabled, you will be prompted to enter the password
before executing commands that affect configuration or operation.
ASUS PCI-DA2000 Series RAID Controllers Driver Installation
25
RAID Manager utility
[Esc]
2. RAID Manager & Interface
2.3.
Quick Installation
2.3.1. New RAID System Initialization
Quick Installation
2. RAID Manager
NOTE: A “Logical Drive” is a set of drives grouped together to operate under
a given RAID level and appears as a single contiguous drive. The ASUS PCIDA2000 Series is capable of grouping connected drives into as many as 8 logical drives, each configured to the same or different RAID levels. A logical drive
can be further divided into a maximum of 8 “Partitions”. During operation,
the host sees an unpartitioned logical drive or a partition of a partitioned logical drive as one single contiguous drive.
1 Go to Main Menu.
<Main Menu>
Quick installation
View and edit logical drives
view and edit SCSI ID Map
view And edit SCSI drives
Scan new SCSI drive
Rebuild logical drives
view and Edit SCSI channels
system Functions
26
ASUS PCI-DA2000 Series RAID Controllers Driver Installation
2. RAID Manager & Interface
2 Type Q or use the
keys to select a RAID level and press [Enter].
2. RAID Manager
< RAID Level >
RAID 5
RAID 5 + Spare
RAID 3
RAID 3 + Spare
RAID 1
RAID 1 + Spare
RAID 0
NRAID
4 If a fault-tolerant RAID level has been selected, drive parity initialization will
be performed at this point. A progress indicator similar to the one shown below
will be displayed. When initialization is complete, the controller will automatically map the entire capacity of the logical drive to SCSI ID 0 LUN 0.
Creating RAID
87 % Complete
ASUS PCI-DA2000 Series RAID Controllers Driver Installation
27
Quick Installation
3 Use the
keys to select “Quick installation” and press [Enter].
2. RAID Manager & Interface
2.3.2. Existing RAID System Reinitialization
1 Type Q or use the
keys to select “Quick installation” and press [Enter].
2 A prompt “Delete all defined Logical Drives?” will appear.
to select “Yes” and press [Enter].
3 To confirm deletion, type Y or use the
Existing RAID
2. RAID Manager
Delete all defined Logical Drives ?
Yes
No
4 Choose a RAID level by typing 5, 3, 1, 0 or N or use the keys to select a RAID
level and press [Enter].
5 The controller will start initialization and automatically map the logical drive to
SCSI ID 0 LUN 0 of first host channel.
28
ASUS PCI-DA2000 Series RAID Controllers Driver Installation
2. RAID Manager & Interface
2.4.
View And Edit Logical Drives
2.4.1. Creating A New Logical Drive
2 Type V or use the
[Enter].
2. RAID Manager
<Main Menu>
Quick installation
View and edit Logical Drives
View And edit SCSI ID Map
View And edit SCSI drives
Scan New SCSI drive
Rebuild Logical Drives
View And Edit SCSI Channels
System Functions
keys to select “View and edit logical drives” and press
3 The screen will display the current Array configuration and status.
Logical Drive
LG
0
1
2
3
4
RAID
RAID5
NONE
NONE
NONE
NONE
Size(MB)
4032 MB
Status
GOOD
#OnLine #STB #Fail
5
1
0
NAME
press [Enter] to start the creation of a new Logical Drive.
ASUS PCI-DA2000 Series RAID Controllers Driver Installation
29
Creating New Drives
1 Go to Main Menu.
2. RAID Manager & Interface
4 Select a logical drive number which has not yet been defined by typing the
logical drive number or using the keys to select the choice and press [Enter].
A prompt “Create Logical Drive?” will appear.
Create Logical Drive ?
Yes
No
Creating New Drives
2. RAID Manager
5 To confirm creation of a new logical drive, type Y or use the
“Yes” and press [Enter].
to select
6 A list of supported RAID level will appear. Chose a level by typing 5, 3, 1, 0 or
N or use the keys to select a level and press [Enter].
< RAID Level >
RAID 5
RAID 3
RAID 1
RAID 0
NRAID
7 A list of available drive will appear. Mark (*) the drives to be included in the
current logical drive by using the to select the drive and pressing [Enter].
Slot
*0
*1
*2
*3
*4
30
Chl
1
1
1
2
2
ID
0
1
2
0
1
Size(MB)
2048
2048
2048
2048
2048
Speed
LG_DRV
Status
Vendor and Product ID
Seagate ST12400N
Seagate ST12400N
Seagate ST12400N
Seagate ST12400N
Seagate ST12400N
ASUS PCI-DA2000 Series RAID Controllers Driver Installation
2. RAID Manager & Interface
8 Press [Esc] after selecting the drives and if a fault-tolerant RAID level (1,3 or 5)
has been selected, the controller will start parity initialization. A progress indicator similar to the one shown below will be displayed. When initialization has
finished, logical drive creation is complete.
87 % Complete
9 At this point, the logical drive has been partitioned into a single
partition covering the entire drive capacity and is inaccessible to the host.
10 If different partitioning is desired, go to “Partition Logical Drive”
(section 2.4.2.4.) menu to do the partitioning.
11 When the Logical Drive is properly partitioned, go to “View and Edit scsi id
Map” (section 2.5.) menu to map the Logical Drive Partitions to LUNs.
ASUS PCI-DA2000 Series RAID Controllers Driver Installation
31
Creating New Drives
2. RAID Manager
Creating RAID
2. RAID Manager & Interface
2.4.2. Maintaining an Existing Logical Drive
In step 4 of the section entitled “Creating a New Logical Drive”, if you select a
existing logical drive, then the following menu will appear on the screen:
2. RAID Manager
Existing Logical Drive
View scsi drives
Add stand-by drives
Delete logical drive
Partition logical drive
2.4.2.1.
View SCSI Drives
1 Type V or use the
keys to select “View scsi drives” and press [Enter].
2 The screen will display all the drives currently assigned to the logical drive as
follows:
Slot
0
1
2
3
4
Chl
1
1
1
2
2
2.4.2.2.
ID
0
1
2
0
1
Size(MB)
2048
2048
2048
2048
2048
Speed
LG_DRV
Status
Vendor and Product ID
Seagate ST12400N
Seagate ST12400N
Seagate ST12400N
Seagate ST12400N
Seagate ST12400N
Add Stand-By Drives
1 Type A or use the
keys to select “Add stand-by drives” and press [Enter].
View scsi drives
Add stand-by drives
Delete logical drive
Partition logical drive
2 A list of available drives will appear. Use the
[Enter].
to select the drive and press
3 The screen will redisplay the logical drive information indicating a spare drive
has been assigned.
32
ASUS PCI-DA2000 Series RAID Controllers Driver Installation
2. RAID Manager & Interface
Delete Logical Drive
1 Type D or use the
keys to select “Delete logical drive” and press [Enter].
2. RAID Manager
View scsi drives
Add spare drives
Delete logical drive
Partition logical drive
2 When the following prompt appears, type Y to confirm deletion or use the
to select “Yes” and press [Enter].
Delete Logical Drive ?
Yes
2.4.2.4.
No
Partition Logical Drive
1 Type P or use the
keys to select “Partition logical drive” and press [Enter].
View scsi drives
Add spare drives
Delete logical drive
Partition logical drive
2 The screen will display a partition table of up to 8 partitions with the last partition selected. Press the [Enter] key and type the desired size for the selected
partition followed by [Enter]. The remaining size will be allotted to the next
partition as displayed.
Partition
0
1
2
3
4
5
6
7
Offset(MB)
0
Size(MB)
2048
3 Repeat Step 2 for all the other partitions to be created.
ASUS PCI-DA2000 Series RAID Controllers Driver Installation
33
Delete Logical Drives
2.4.2.3.
2. RAID Manager & Interface
2.5.
View And Edit SCSI ID Mapping
1 Go to Main Menu.
2. RAID Manager
View & Edit SCSI ID
<Main Menu>
Quick installation
View and edit Logical Drives
view and edit SCSI ID Map
view And edit SCSI drives
Scan New SCSI drive
Rebuild logical drives
view and Edit SCSI channels
system Functions
2 Type M or use the
keys to select “view and edit scsi id Map”
3 A list of host SCSI-ID’s will be displayed similar to the following:
SCSI ID
0
1
2
3
4
5
6
Type the SCSI ID to be mapped/unmapped or use
press [Enter]
keys to select a SCSI ID and
4 A list of LUNs and their respective mapping will be displayed similar to the
following:
LUN
0
1
2
3
4
5
6
7
34
LG_DRV Partition Size (MB)
0
0
8192
0
1
8192
1
0
2048
1
1
2048
RAID
RAID5
RAID5
RAID3
RAID3
ASUS PCI-DA2000 Series RAID Controllers Driver Installation
2. RAID Manager & Interface
5 To map a LUN to a Logical Drive partition, select an available LUN (one not
already mapped) and type the number of the selected LUN or use the keys to
select the desired LUN and type [Enter]
0
RAID
RAID5
Size(MB)
Status
#OnLine #STB #Fail
4032 MB GOOD
5
1
NAME
0
5.2 If the Logical Drive has been partitioned into multiple partitions, a list of partitions will be displayed similar to the following:
Partition
0
1
2
Use the
Offset
0
2048
4096
Size
2048
2048
2048
keys to select a partition number and press [Enter]
5.3 At the following prompt, type Y to confirm the mapping operation or use the
to select “Yes” and press [Enter].
Map Logical Drive 0 Partition 0 to ID 0 LUN 0 ?
Yes
No
6 To delete a host LUN mapping, use the
type [Enter].
keys to select the desired LUN and
6.1 At a prompt for confirmation similar to the following, type Y or use
select “Yes” and press [Enter].
keys to
Delete Host LUN?
Yes
No
ASUS PCI-DA2000 Series RAID Controllers Driver Installation
35
View & Edit SCSI ID
LG
2. RAID Manager
5.1 A list of available logical drives will be displayed similar to the following. Select a Logical Drive by typing the Logical Drive number or using the keys to
select the choice and press [Enter]
2. RAID Manager & Interface
2.6.
View And Edit SCSI Drives
1 Go to Main Menu.
2. RAID Manager
View & Edit SCSI
Drives
<Main Menu>
Quick installation
View and edit Logical Drives
view and edit SCSI ID Map
view And edit SCSI drives
Scan New SCSI drive
Rebuild logical drives
view and Edit SCSI channels
system Functions
2 Type A or use the keys to select “view And edit scsi drives” and press [Enter].
The screen will display all drives assigned to the logical drive.
Slot
0
1
2
3
4
36
Chl
1
1
1
2
2
ID Size(MB)
0
2048
1
2048
2
2048
0
2048
1
2048
Speed
LG_DRV
0
0
0
0
0
Status
Vendor and Product ID
SEAGATE ST12400N
SEAGATE ST12400N
SEAGATE ST12400N
SEAGATE ST12400N
SEAGATE ST12400N
ASUS PCI-DA2000 Series RAID Controllers Driver Installation
2. RAID Manager & Interface
2.7.
Scan New SCSI Drives
2 Type S or use the
2. RAID Manager
<Main Menu>
Quick installation
View and edit Logical Drives
view and edit SCSI ID Map
view And edit SCSI drives
Scan New SCSI drive
Rebuild logical drives
view and Edit SCSI channels
system Functions
keys to select “Scan new scsi drive” and press [Enter].
3 Use the keys to select the SCSI channel where the new drive is installed and
press [Enter].
SCSI Channel
0
1
4 Use the keys to select the SCSI ID number (only available IDs will be displayed) of the new drive and press [Enter].
SCSI ID
4
5
6
7
ASUS PCI-DA2000 Series RAID Controllers Driver Installation
37
Scan New SCSI Drives
1 Go to Main Menu.
2. RAID Manager & Interface
2.8.
Rebuild Logical Drive
1 Go to Main Menu.
2. RAID Manager
Rebuild Logical Drive
<Main Menu>
Quick installation
View and edit Logical Drives
view and edit SCSI ID Map
view And edit SCSI drives
Scan New SCSI drive
Rebuild logical drives
view and Edit SCSI channels
system Functions
2 Type R or use the
keys to select “Rebuild logical drive” and press [Enter].
3 The controller will check for a spare drive and display the failed drive information.
Found
Lg_Drv 0 Channel 1 ID 2 Failed
Rebuild?
Yes
4 To initiate rebuilding, press Y or use the
[Enter].
No
keys to select “Yes” and press
5 Step 4 will automatically repeat for any other logical drives that needs rebuilding.
38
ASUS PCI-DA2000 Series RAID Controllers Driver Installation
2. RAID Manager & Interface
2.9.
Go to Main Menu.
2 Type E or use the
[Enter].
2. RAID Manager
<Main Menu>
Quick installation
View and edit Logical Drives
view and edit SCSI ID Map
view And edit SCSI drives
Scan New SCSI drive
Rebuild logical drives
view and Edit SCSI channels
system Functions
keys to select “view and Edit scsi channels” and press
3 The screen will display a channel table. Type the channel number or use the
keys to select a channel and press [Enter].
Now the screen will show the following table:
SCSI ID
SCSI Termination
Sync transfer clock
Wide transfer
2.9.1. SCSI ID
1 To change the SCSI ID, type I or use the
[Enter].
keys to select “scsi ID” and press
SCSI ID
SCSI Termination
Sync transfer clock
Wide transfer
ASUS PCI-DA2000 Series RAID Controllers Driver Installation
39
SCSI Channels
1
View And Edit SCSI Channels
2. RAID Manager & Interface
2 Use the
keys to select the SCSI ID number and press [Enter].
SCSI Channels
2. RAID Manager
0
1
2
3
4
5
6
7
3 When the following prompt appears, type “Y” to confirm or use the
select “Yes” and press [Enter].
to
Change ID ?
Yes
No
2.9.2. SCSI Termination
This function serves to enable or disable a SCSI channel’s active termination.
1 Type T or use the
keys to select “scsi Termination” and press [Enter].
SCSI ID
SCSI Termination
Sync transfer clock
Wide transfer
2 Type Y or use the
to select “Yes” and press [Enter] to toggle the channel
termination function.
Disable Channel Terminator ?
Yes
40
No
ASUS PCI-DA2000 Series RAID Controllers Driver Installation
2. RAID Manager & Interface
2.9.3. Synchronous Transfer Clock
2 Use the
2. RAID Manager
SCSI ID
SCSI Termination
Sync transfer clock
Wide transfer
keys to select “Sync transfer clock” and press [Enter]
2.9.4. Wide Transfer
This function serves to enable or disable wide transfer for the SCSI bus.
Note: This feature is not available on the ASUS PCI DA-2000.
1 Type W or use the
keys to select “Wide transfer” and press [Enter].
SCSI ID
SCSI Termination
Sync transfer clock
Wide transfer
2 Type Y or use the
transfer.
to select “Yes” and press [Enter] to disable the Wide
Disable Wide transfer?
Yes
No
ASUS PCI-DA2000 Series RAID Controllers Driver Installation
41
Sync Transfer Clock
1. To change the default synchronous transfer clock rate that is negotiated by the
ASUS PCI-DA2000 Series, type S or use the keys to select “Sync transfer
clock” and press [Enter]
2. RAID Manager & Interface
2.10. System Functions
1 Go to Main Menu.
System Functions
2. RAID Manager
<Main Menu>
Quick installation
View and edit Logical Drives
view and edit SCSI ID Map
view And edit SCSI drives
Scan New SCSI drive
Rebuild logical drives
view and Edit SCSI channels
system Functions
2 Type F or use the
keys to select “system Functions” and press [Enter].
3 The screen will display the following menu:
Mute Beeper
Write Back Cache enabled
Scsi Motor spin up disabled
Scsi Reset at Power up disabled
Monitor Port Baud-Rate 9600
Total Cache Size 4 MB
Firmware Version 1.11
Serial number 300026
CPU Type 80486SX-33
Change Password
Modem setup
Reset controller
Controller Maintenance
2.10.1. Mute Beeper
1 To disable the beeper setting Use the
[Enter].
keys to select “Mute Beeper” and press
2 When the following prompt is displayed, type Y to confirm the change or use
to select “Yes” and press [Enter] to disable beeper.
the
Mute Beeper ?
Yes
42
No
ASUS PCI-DA2000 Series RAID Controllers Driver Installation
2. RAID Manager & Interface
2.10.2. Enabling/Disabling Write Back Cache
1 To toggle the Write Back Cache setting use the
cache” and press [Enter].
keys to select “Write back
Yes
2. RAID Manager
Disable write back cache ?
No
2.10.3. SCSI Motor Spin Up
This option determines whether or not the ASUS PCI-DA2000 Series sequences the
drives to start spinning in succession at five second intervals. Enabling such sequencing can help to prevent overloading the power supply when several drives spin
up at the same time.
1 To toggle the current setting Use the
press [Enter].
keys to select “Scsi Motor spin up” and
2 When the following prompt is displayed, type Y to confirm the change in setting
to select “Yes” and press [Enter] to enable sequential motor
or use the
spin-up.
Disable scsi motor spin up ?
Yes
No
2.10.4. SCSI Reset At Power Up
This option determines whether or not the ASUS PCI-DA2000 Series asserts SCSI
bus reset during power-up initialization.
1 To toggle the setting use the keys to select “Scsi Reset at power up” and press
[Enter].
2 When the following prompt is displayed, type Y to confirm the change in setting
to select “Yes” and press [Enter] to enable power-up reset.
or use the
Disable scsi reset at power up ?
Yes
No
ASUS PCI-DA2000 Series RAID Controllers Driver Installation
43
System Functions
2 When the following prompt is displayed, type Y to confirm the change in setting
to select “Yes” and press [Enter] to enable data write-back cachor use the
ing or vice versa.
2. RAID Manager & Interface
2.10.5. Monitor Port Baud Rate
This menu item can be selected to modify the baud rate used for the RS-232 Terminal Interface Operation.
1 To toggle the setting use the
press [Enter].
2. Use the
keys to select “Monitor Port Baud-Rate” and
keys to select the desired baud rate and press [Enter].
SCSI Reset
2. RAIID Manager
9600
19200
38400
4800
2400
3 When the following prompt is displayed, type Y to confirm the change in setting
to select “Yes” and press [Enter].
or use the
Change baud rate ?
Yes
No
2.10.6. Total Cache Size
The screen will show the total cache size. This cannot be modified.
2.10.7. Firmware Version
The screen will show the firmware version. This cannot be modified.
2.10.8. Bootrecord Version
The screen will show the boot record version.
modified.
This cannot be
2.10.9. Serial Number
The screen will show the controller serial number. This cannot be modified.
2.10.10. CPU Type
The screen will show the CPU type. This cannot be modified.
44
ASUS PCI-DA2000 Series RAID Controllers Driver Installation
2. RAID Manager & Interface
2.10.11. Change Password
A security feature is supported that allows the setting of a password. Select this
menu item to set or change the password.
1 Use the
keys to select “Change Passwordasswo” and press [Enter].
Old password:
3 A prompt to enter a new password will appear. Type the new password followed
by [Enter]. You will be prompted to enter the new password twice.
4 When the prompt to enter the new password a second time appears, type the new
password followed by [Enter] again.
2.10.12. Modem Setup
This function can be used to set up parameters used for modem operation.
2.10.13. Reset Controller
This function can be used to reset the entire ASUS PCI-DA2000 Series.
1 Use the
keys to select “Reset controller” and press [Enter].
2 When the following prompt appears, type Y To confirm reset or use the
select “Yes” and press [Enter].
to
Reset controller ?
Yes
No
ASUS PCI-DA2000 Series RAID Controllers Driver Installation
45
Change Password
2. RAIID Manager
2 If a password was set previously, you will be prompted to enter the old password. Type the old password followed by [Enter].
2. RAID Manager & Interface
2.10.14. Controller Maintenance
This menu item includes maintenance functions such as new firmware on BIOS
downloading
1 Use the keys to select “Controller Maintenance” and press [Enter]. The following submenu will be displayed:
2. RAIID Manager
Controller Maintenance
Download Firmware
Download BIOS
Advanced Maintenance Functions
2 Use the
keys to select the desired function and press [Enter].
3 A prompt for confirmation similar to the following will be displayed. Type Y to
keys to select “Yes” and press [Enter].
confirm or use
Download Firmware ?
Yes
No
4 For running Text RAID Manager “RAIDMAN.EXE”, a message similar to the
following will appear, select Yes for downloading.
Download Firmware ?
Yes
No
For RS-232 Terminal Interface Operation, a message similar to the following
will appear indicating the controller is awaiting a response from the host:
Download code only. leaving boot record intact.
Waiting for Download of Firmware Binary.
Please use ZMODEM protocol to send Firmware binary file
5 For running RAID manger “RAIDMAN.EXE”, typing the file name to be downloaded with drivers path where the downloaded file can be found and press [Enter] when following screen appears:
Firmware
Enter File Name:
For RS-232 Terminal Interface Operation, download operation has been selected,
have the host communication program “send” the file containing the data to be
downloaded using ZMODEM protocol.
46
ASUS PCI-DA2000 Series RAID Controllers Driver Installation
3. DOS ASPI Drivers Installation
3. DOS ASPI Drivers Installation
The ASUS PCI-DA2000 Series can be used as a host adapter for SCSI tape drives
and CD-ROM drives. To access such devices under DOS, it is necessary to install
the ASUS PCI-DA2000 Series DOS ASPI Manager device driver.
In CONFIG.SYS file
DEVICE=[path1]I2DOSASP.SYS
DEVICE = [path1]ASPICDRM.SYS /d:[driver signature]
LASTDRIVE = [logical drive]
In AUTOEXEC.BAT file
[path2]MSCDEX /d:[driver signature]
where:
[path1] - A complete DOS path string including logical drive identifier and
subdirectories indicating where the file I2DOSASP.SYS can be found.
[path2] - A complete DOS path string including logical drive identifier and
subdirectories indicating where the Microsoft CD-ROM extension program
MSCDEX.EXE can be found.
[driver signature] - The signature for CD-ROM driver, the driver signature specified in CONFIG.SYS must match the driver signature specified in AUTOEXEC.BAT
mscdex command.
[logical drive] - The next alphabet of the last logical drive been assigned to hard disk
drives.
ASUS PCI-DA2000 Series RAID Controllers Driver Installation
47
Installation
3. ASPI Drivers
The ASUS PCI-DA2000 Series DOS ASPI Manager allows DOS/Windows applications and OS Installation Programs to access CD-ROM drives or SCSI tape
drives that are connected to and properly configured under the ASUS PCI-DA2000
Series. The ASUS PCI-DA2000 Series ASPI Manager and CD-ROM Driver are
installed as a device driver under DOS by adding the following command lines to
the CONFIG.SYS and AUTOEXEC.BAT files in the root directory of the boot
drive as follows:
3. DOS ASPI Drivers Installation
Example:
If there is a subdirectory on the C:\DA2000 containing the ASUS PCI-DA2000
Series ASPI Manager Manager file I2DOSASP.SYS and CD-ROM Driver file
ASPICDRM.SYS, a subdirectory on the C:\DOS containing the Microsoft CDROM extension program MSCDEX.EXE, and logical drives been assigned to Hard
disk are C: and D:, then the following lines should be added to the CONFIG.SYS
and AUTOEXEC.BAT files respectively:
In CONFIG.SYS file
DEVICE=C:\DA2000\I2DOSASP.SYS
DEVICE = C:\DA2000\ASPICDRM.SYS /D:mscd001
LASRDRIVE = E
Installation
3. ASPI Drivers
In AUTOEXEC.BAT file
C:\DOS\MSCDEX /D:mscd001
Note that there are no restrictions with regard to where these lines are added in the
CONFIG.SYS. Also note that the ASUS PCI-DA2000 Series ASPI Manager will
automatically select an optimal configuration so no load line options are needed.
The ASUS PCI-DA2000 Series ASPI Manager and CD-ROM Driver can be “loaded
high” should it be desirable to conserve system memory space below 640K. Consult the manual for the particular memory manager installed on your system for
details on how to install a device driver “high”.
48
ASUS PCI-DA2000 Series RAID Controllers Driver Installation
4. NetWare Driver Installation
4. NetWare Driver Installation
The ASUS PCI-DA2000 Series drivers diskette contains the following driver files
for NetWare v3.1x, v4.0x and v4.1 respectively:
In sub-directory netware\v3_1x:
-ASUSASP.DSK:ASPI manager for NetWare v3.1x
-DA2000.DDI:
Installation Information File.
-DA2000.DSK: Disk Driver for NetWare v3.1x
In sub-directory netware\v4_x:
-ASUSASP.DSK:ASPI manager for Netware v4.0x and v4.1
-DA2000.DDI:
Installation Information File.
-DA2000.DSK: Disk Driver for NetWare v4.0x and v4.1.
4.1.
Installing NetWare v3.1x
4. NetWare Driver
1 Use ASUS PCI-DA2000 Series BIOS Configuration Utility to disable ISA Mailbox Emulation mode (default is disabled). To do this, at system bootup, press
[Ctrl-I], select Configure Card option, then change IO Port Address to DISABLED.
2 Use ASUS Text RAID Manager or RS-232 Terminal Interface Operation to configure Logical Drives and SCSI Devices and map them to valid SCSI-IDs/LUNs.
Note that SCSI ID 7 is reserved for the ASUS PCI-DA2000 Series adapter
and thus no logical drives or devices should be mapped to this SCSI ID.
3 Plug one or up to four ASUS PCI-DA2000’s Series into host PCI slots then
power on. ASUS PCI-DA2000 Series BIOS will show the following messages
on the screen for each installed ASUS PCI-DA2000 Series:
ASUS PCI-DA2000 Series (PCI-TO-SCSI RAID) BIOS v1.11
PCI Bus # = 00 Device # = 0A Port = E800 IRQ = 11 EDORAM = 4MB FW=v1.12
!! Press <Ctrl><I> for Configuration Utility, <Q> to Skip !!
4 Make sure the RAID configuration is properly set. (Refer to section 4 Text
RAID Manager and RS-232 Terminal Interface Operation).
ASUS PCI-DA2000 Series RAID Controllers Driver Installation
49
Installation
Follow these procedures to install ASUS PCI-DA2000 drivers for Netware v3.11 or
v3.12.
4. NetWare Driver Installation
5 Follow the instructions in the Netware User’s Manual to install the server.
6 Run the NetWare v3.11 or v3.12 SERVER.EXE program to star the server.
7 At the system console prompt, use load command to load the ASUS PCI-DA2000
Series driver by typing load DA2000.DSK[Enter]
8 System console will display the following messages on the screen:
Loading module DA2000.DSK
ASUS PCI-DA2000 Disk Driver for NetWare v3.1x
Version 1.11c November 3, 1995
Auto-loading module ASUSASPI.DSK
ASUS ASPI Manager for NetWare v3.1x, v4.0x and v4.1
Version 1.11b October 27, 1995
Supported Slot values are 11
Slot: 11
The slot number (value) is auto-detected by ASUS PCI-DA2000 Series driver
according to which PCI slot the ASUS PCI-DA2000 Series been plugged into.
Write down the slot number for later using in STARTUP.NCF.
Install NetWare v3.1x
4. NetWare Driver
9 At this point, press [Enter]. If ASUS PCI-DA2000 Series driver installs successfully, the system console will display the following messages on the screen:
PCI Bus # = 0, Device # = 9, Port = E400, IRQ = 10
ASUS Disk Driver Installed Successfully
10 Load the driver “DA2000.DSK” once for each installed ASUS PCI-DA2000.
This driver supports up to four ASUS PCI-DA2000 Series Controller.
11 After each instance of the ASUS PCI-DA2000 Series driver has been loaded
successfully, continue with the operations of Novell NetWare server described
in NetWare User’s Manual.
Notes:
The correct syntax in STARTUP.NCF file to load the ASUS PCI-DA2000 Series
drivers is similar to the following:
# load DA2000 slot = x
x is the slot number of slot into which the ASUS PCI-DA2000 Series been plugged.
The slot number is auto-detected by ASUS PCI-DA2000 Series driver and shown
on the system console screen during ASUS PCI-DA2000 Series driver loading.
50
ASUS PCI-DA2000 Series RAID Controllers Driver Installation
4. NetWare Driver Installation
4.2.
Installing NetWare V4.0x/v4.1
1 Use ASUS PCI-DA2000 Series BIOS Configuration Utility to disable ISA Mailbox Emulation mode(default is disabled). To do this, at system bootup, press
[Ctrl-I], select Configure Card option, then change IO Port Address to DISABLED.
2 Use ASUS RAID Manager or RS-232 Terminal Interface Operation to configure Logical Drives and SCSI Devices and map them to valid SCSI-IDs/LUNs.
Note that SCSI ID 7 is reserved for the ASUS PCI-DA2000 Series adapter
and thus no logical drives or devices should be mapped to this SCSI ID.
3 For installation of a new server, follow these procedures:
4 If your Netware installation package is a CD-ROM version and the CD-ROM
Drive used to perform the installation is connected to an ASUS PCI-DA2000
Series, make sure the ASUS PCI-DA2000 Series ASPI manager
“I2DOSASP.SYS”, CD-ROM driver “ASPICDRM.SYS”, and Microsoft CDROM extension program “MSCDEX.EXE” are specified in DOS files
CONFIG.SYS and AUTOEXEC.BAT.
ASUS PCI-DA2000 Series (PCI-TO-SCSI RAID) BIOS v1.11
PCI Bus # = 00 Device # = 0A Port = E800 IRQ = 11 EDORAM = 4MB FW=v1.12
!! Press <Ctrl><I> for Configuration Utility, <Q> to Skip !!
6 Make sure the RAID configuration is properly set. (Refer to section 4 Text
RAID Manager and RS-232 Terminal Interface Operation).
7 Change to sub-directory where the Netware install program locate, then typing
install and press Enter.
Example:
Assume the CD-ROM is mapped to DOS logical drive D, type the following at
the DOS prompt:
CD D:\NETWARE.40\ENGLISH
install
ASUS PCI-DA2000 Series RAID Controllers Driver Installation
51
NetWare v4.0x/v4.1
4. NetWare Driver
5 Plug up to four ASUS PCI-DA2000 Series into host PCI slots then power on.
ASUS PCI-DA2000 Series BIOS will show the following messages on the screen
for each installed ASUS PCI-DA2000 Series:
4. NetWare Driver Installation
8 Follow the instructions in the Netware User’s Manual until following screen appears:
NetWare Server Installation v4.x
NetWare loadable Module
Load Disk Driver
Choose a disk driver that corresponding to the disk controller
hardware in this server. Repeat this step for additional drivers.
ISADISK.DSK
Novell ISADISK (AT Compatible) Driver
MNS16S.DSK
Mountain Network Solutions, Inc - SCSI Controller Driver
MNS8MM.DSK
Mountain Network Solutions, Inc - SCSI 8MM Device Driver
MNSDAT.DSK
Mountain Network Solutions, Inc - SCSI DDS DAT Device Driver
PM11NW40.DSK DPT ISA SCSI HBA Driver
Loaded Drivers
Use this driver with ESDI, MFM, and ST-506 drives
that have adapter boards using the standard AT disk
interface. The ISADISK driver can use controllers at
both the primary and the secondary addresses. This
allows two adapter cards to be installed in the host
NetWare V4.0x/v4.1
4. NetWare Driver
Load a disk driver listed
Load a disk driver not listed
Unload a disk driver
Scroll help windows
Help<F1>
Continue
<Enter>
<Ins>
<Del>
<F5>(up) <F6>(dn)
<F10> Abort INSTALL
Change lists <F2>
<Alt><F10>
9 Press [Ins] then wait for the following screen to appears:
NetWare Server Installation v4.x
NetWare loadable Module
Path A:\ will be scanned for drivers to install. Verify that this
directory path corresponds to where the driver file (*.DSK, *.CMD, *.HAM,
or *.VDM) is located. Drives for a large number of disk controllers are
included with NetWare. You may insert the appropriate NetWare diskette
(or specify a NetWare CD-ROM directory), or insert a third-party diskette.
Disk drivers are in the directory \NETWARE.40\________\DISKDRV and LAN
drivers are in \NETWARE.40\________\LANDRV on the CD-ROM.
Press <F3> to specify a different path;
Press <Enter> to continue.
Continue
Specify a different source drive/directory
Help <F1>
Previous screen
52
<Enter>
<F3>
<Esc> Abort INSTALL <ALT><F10>
ASUS PCI-DA2000 Series RAID Controllers Driver Installation
4. NetWare Driver Installation
10 Press [F3] then wait for the following screen to appears:
NetWare Server Installation v4.x
NetWare loadable Module
Specify a directory path:
<Enter>
<F3>
<Esc> Abort INSTALL <ALT><F10>
11 Insert the ASUS PCI-DA2000 Series Driver Diskette into floppy A: and type
netware\v4.x and press [Enter] then wait for the following screen to appears:
NetWare Server Installation v4.x
NetWare loadable Module
Select a new disk driver to install:
DA2000.DSK
ASUS PCI-DA2000 Series PCI-TO-SCSI Disk Driver for NetWare v4.0x, v4.1
ASUSASPI.DSK ASUS ASPI Manager for Netware v3.1X, v4.0x and v4.1
This driver supports up to four ASUS PCI-DA2000 Series and multiple
SCSI LUN.
When you load DA2000.DSK you have to specify which ASUS PCI-DA2000
Series you are loading the driver for by using the command line option
‘SLOT=N’.
Select multiple disk drivers
Load a driver listed
Unload a driver
Scroll help windows
Help <F1> Previous screen
<F5>
<Enter>
<Del>
<F7>(up) <F8>(dn)
<Esc> Abort INSTALL
Loaded Drivers
Change lists <F2>
<Alt><F10>
ASUS PCI-DA2000 Series RAID Controllers Driver Installation
53
NetWare V4.0x/v4.1
Continue
Specify a different source drive/directory
Help <F1>
Previous screen
4. NetWare Driver
>A:\
4. NetWare Driver Installation
12 Select DA2100.DSK as a new disk driver to install by pressing ≠ key and pressing [Enter] then wait for the following screen to appears:
NetWare Server Installation v4.x
NetWare loadable Module
loading driver DA2000.DSK ...
Please wait
13 Press [ALT] [ESC] keys at the same time to switch to system console screen or
wait for the NetWare installation program to time out. When it times out, the
following screen will appear:
NetWare V4.0x/v4.1
4. NetWare Driver
NetWare Server Installation v4.x
NetWare loadable Module
DA2000.DSK did not finish loading in the time allowed (15 seconds).
Controller will be switched to the system console screen, where you may either see it
finish or enter information to finish loading it. (INSTALL-4.0-247)
Press <Enter> to continue.
54
ASUS PCI-DA2000 Series RAID Controllers Driver Installation
4. NetWare Driver Installation
14 Press [Enter] to switch to system console screen.
LOAD C:\SERVER.40\DA2000.DSK
ASUS PCI-DA2000 Series Disk Driver for NetWare v4.0x, v4.1
Version 1.11b October 27, 1995
Auto-loading module ASUSASPI.DSK
ASUS ASPI Manager for NetWare v3.1x, v4.0x and v4.1
Version 1.11b October 27, 1995
Supported Slot values are 11
Slot: 11
The slot number (value) is auto-detected by ASUS PCI-DA2000 Series driver according to which PCI slot the ASUS PCI-DA2000 Series been plugged into. Write
down the slot number for later using in STARTUP.NCF.
15 Press [Enter] on system console screen
Driver DA2000 was successfully loaded.
Press <Enter> to continue
ASUS PCI-DA2000 Series RAID Controllers Driver Installation
55
NetWare V4.0x/v4.1
NetWare loadable Module
4. NetWare Driver
NetWare Server Installation v4.x
4. NetWare Driver Installation
16 Press [Enter] to continue the installation
NetWare Server Installation v4.x
NetWare loadable Module
Select an action:
Load driver DA2000 again
Load another (different) driver
Continue with installation
17 Select “Continue with installation” and press [Enter] to continue the installation.
Note:
The correct syntax in STARTUP.NCF file to load the ASUS PCI-DA2000 Series
drivers is similar to the following:
# load DA2000 slot = x
NetWare V4.0x/v4.1
4. NetWare Driver
x is the slot number of slot into which where the ASUS PCI-DA2000 Series been
plugged. The slot number is auto-detected by ASUS PCI-DA2000 Series driver
and shown on the system console screen during ASUS PCI-DA2000 Series driver
loading.
56
ASUS PCI-DA2000 Series RAID Controllers Driver Installation
5. Windows NT Driver Installation
5. Windows NT Driver Installation
Up to 4 ASUS PCI-DA2000 Series adapters can be installed in one computer. The
following files are supplied for driver installation, to be found in the subdirectory
\WINNT\V3_1 for Windows NT 3.1.
-DA2000.SYS:
-PCIDA:
-OEMSETUP.INF:
-TXTSETUP.OEM:
PCI-DA2000 Series Miniport Driver for Windows NT 3.1
PCI Disk Array Tag File
Information file for driver installation
Information file for driver installation
The following files are supplied for driver installation, they are put in the
\WINNT\V3_5X subdirectory for Windows NT 3.5X.
-DA2000.SYS:
-PCIDA:
-OEMSETUP.INF:
-TXTSETUP.OEM:
5.1.
PCI-DA2000 Series Miniport Driver for Windows NT 3.5x
PCI Disk Array Tag File
Information file for driver installation
Information file for driver installation
Installing Windows NT
Follow these steps only if Windows NT is not installed on your computer or if you
are upgrading to new version of Windows NT.
5. Windows NT
2 Use ASUS Text RAID Manager or RS-232 Terminal Interface Operation to configure Logical Drives and SCSI Devices and map them to valid SCSI-IDs/LUNs.
Note that SCSI ID 7 is reserved for the ASUS PCI-DA2000 Series adapter
and thus no logical drives or devices should be mapped to this SCSI ID.
3 Prepare for the installation by using DISKCOPY (or any other disk-copy utility)
to make backup copy of ASUS PCI-DA2000 Series distribution diskette. If you
are installing Windows NT 3.1, copy all files from \WINNT\V3_1 to root directory of the backup diskette. If you are installing Windows NT 3.5x, copy all
files from \WINNT\V3_5X to root directory of the backup diskette. Use the
backup copy as your working diskette.
ASUS PCI-DA2000 Series RAID Controllers Driver Installation
57
Installation
1 Use ASUS PCI-DA2000 Series BIOS Configuration Utility to disable ISA Mailbox Emulation mode (default is disabled). To do this, at system bootup, press
[Ctrl-I], select Configure Card option, then change IO Port Address to DISABLED.
5. Windows NT Driver Installation
4 If you are installing Windows NT from a floppy drive, insert the “Windows NT
Disk #1” into floppy drive A. If you are installing Windows NT from a CDROM drive, insert the “Windows NT Setup Boot Disk” into floppy drive A.
5 Power on your computer.
6 When Prompted, select Custom Setup. If you are installing Windows NT 3.1 go
to step 8.
7 Press S to skip mass storage devices detection.
8 Windows NT setup cannot find any adapter and displays NONE. Press S to
specify additional SCSI adapters. From the list of SCSI adapters, select “Other
(Requires disk provided by a hardware manufacturer)”.
9 Insert ASUS PCI-DA2000 Series Distribution Diskette into floppy drive A and
press [Enter]. The screen displays “ASUS PCI-DA2000 Series PCI-TO-SCSI
RAID Miniport”. Then, press [Enter] to select this driver.
10 Press [Enter] to continue Windows NT setup and follow the steps given in Windows NT Installation documentation.
5.2.
Installing in an Existing NT System
If you are adding an ASUS PCI-DA2000 Series adapter to a computer that already
has an ASUS PCI-DA2000 Series adapter installed for Windows NT, then follow
step 1 through step 2 only.
If you are adding an ASUS PCI-DA2000 Series adapter to a computer that has no
ASUS PCI-DA2000 Series adapter installed for Windows NT, then follow all steps.
Installation
5. Windows NT
1 Use ASUS PCI-DA2000 Series BIOS Configuration Utility to disable ISA Mailbox Emulation mode (default is disabled). To do this, at system bootup, press
[Ctrl-I], select Configure Card option, then change IO Port Address to DISABLED.
2 Use ASUS Text RAID Manager or RS-232 Terminal Interface Operation to configure Logical Drives and SCSI Devices and map them to valid host SCSI-IDs/
LUNs. Note that SCSI ID 7 is reserved for the ASUS PCI-DA2000 Series
adapter and thus no logical drives or devices should be mapped to this SCSI
ID.
58
ASUS PCI-DA2000 Series RAID Controllers Driver Installation
5. Windows NT Driver Installation
3 Prepare for the installation by using DISKCOPY (or any other disk-copy utility)
to make backup copy of ASUS PCI-DA2000 Series distribution diskette. If you
are installing Windows NT 3.1, copy all files from \WINNT\V3_1 to root directory of the backup diskette. If you are installing Windows NT 3.5x, copy all
files from \WINNT\V3_5X to root directory of the backup diskette. Use the
backup copy as your working diskette.
4 Boot Windows NT. Select the “Windows NT Setup” program from the “Main”
program group.
5 Select the “Options” pull-down menu and then select “Add/Remove SCSI Adapters”. The “SCSI Adapter Setup” displays a list of installed SCSI Adapters. Then
select “Add” to add an ASUS PCI-DA2000 Series adapter to the list.
6 Select “OK” to make sure you want to add a SCSI adapter, “Windows NT Setup”
displays “Select SCSI Adapter Option” and a list of SCSI adapters. Expand the
list of SCSI adapters, select “Other (Requires disk provided by a hardware manufacturer)” .
7 Insert ASUS PCI-DA2000 Series Distribution Diskette into floppy drive A and
press [Enter]. The screen displays “ASUS PCI-DA2000 Series PCI-TO-SCSI
RAID Miniport”. Then, select “OK” to select this driver, then select “Install” .
8 Enter the path, normally it is A:\, to the directory with the device driver, then
select “Continue”. “Windows NT Setup” copies device driver to your disk and
updates configuration to make new configuration take effect after system reboots.
5. Windows NT
10 Select “Control Panel” program from “Main” program group. Select “Devices”
program. A device list appears, select the ASUS PCI-DA2000 Series device,
then click on the “Startup” button. Change Startup type to “System”, then select
“OK”. Select “Close” to exit “Devices” program, then close the “Control Panel”
program.
11 Shutdown Windows NT, then restart your computer. It is possible that some
drive letter assignments may be different from previous configuration.
ASUS PCI-DA2000 Series RAID Controllers Driver Installation
59
Installation
9 Make sure the new added device driver is in the installed SCSI adapter list, then
press “Close” to exit the “SCSI Adapter Setup”, and then close the “Windows
NT Setup” program. If you are not running Windows NT 3.1, go to step 11, or
do step 10.
5. Windows NT Driver Installation
5.3.
Updating Windows NT Device Driver
1 Copy the new device driver from the distribution diskette to the directory
[SystemRoot]\system32\drivers, where [SystemRoot] is the system root directory of Windows NT.
For example, if the system root directory is C:\WINNT, then type the following:
copy a:\winnt\v3_1\DA2000.SYS c:\winnt\system32\drivers
Skip step 2 if the version of your Windows NT is not v3.1.
2 If one of the ASUS PCI-DA2000 Series adapters control the system boot disk,
use ATTRIB.EXE to disable the hidden, system and read only attributes of
c:\ntbootdd.sys, then copy the same driver to c:\ntbootdd.sys and restore the
attributes of c:\ntbootdd.sys.
For example,
attrib -h -r -s c:\ntbootdd.sys
copy a:\winnt\v3_1\DA2000.SYS c:\ntbootdd.sys
attrib +h +r +s c:\ntbootdd.sys
3 Shutdown Windows NT, then restart your computer.
5. Windows NT
Updating PCI-DA2100
60
ASUS PCI-DA2000 Series RAID Controllers Driver Installation
6. Windows 95
6. Windows 95 Driver Installation
The following files are supplied for driver installation, they are put in the \WIN95
subdirectory for Windows 95.
-DA2000.MPD:
ASUS PCI-DA2000 Series family Miniport Driver for Windows
95.
-DAW95.INF :
Information file for driver installation.
6.1.
Installing Windows 95 and the driver
1 Use ASUS PCI-DA2000 Series BIOS Configuration Utility to disable ISA Mailbox Emulation Mode (default is disabled). To do this, at system bootup, press
[Ctrl-I], select Configure Card option, then change IO Port Address to DISABLED.
2 Use ASUS Text RAID Manager or RS-232 Terminal Interface to configure Logical Drives and SCSI Devices and map them to valid SCSI-IDs/LUNs.
Note that SCSI ID 7 is reserved for the ASUS PCI-DA2000 Series controller
and thus no logical drives or devices should be mapped to this SCSI ID.
3 Follow the instructions in Windows 95 installation documentation to install
Windows 95.
4 When Windows 95 installation is complete, restart Windows 95.
5 Click on the “Start” button on the task bar of Windows 95.
6 Select “Settings”, and then click on “Control Panel”.
7 Double-click on the “System” icon, then click on “Device Manager” tab.
8 Click on the plus sign next to the “Other devices” icon, then Double-click on the
yellow question mark labelled “PCI SCSI Bus Controller” icon, then click on
the “Driver” tab.
9 In the Driver tab, click on “Change Driver”. When asked to select hardware
type, select “SCSI Controllers”.
ASUS PCI-DA2000 Series RAID Controllers Driver Installation
61
Installation
6. Windows 95 Driver Installation
6. Windows 95 Driver Installation
Installation
6. Windows 95
10 Click on the “Have Disk” button and enter a:\win95 as the subdirectory to copy
the manufacturer’s file from. Insert ASUS PCI-DA2000 Series distribution diskette into drive A: and click on “OK”.
11 Select “ASUS DA-2000 Series PCI-to-SCSI RAID Adapter”, and click on “OK”.
12 Click on “OK”. The driver is copied.
13 When asked to remove ROM BIOS of ASUS PCI-DA2000 Series Controller,
you MUST click on “Cancel” to keep ROM BIOS.
14 You must restart your system for the changes to take effect. Click on “Yes” to
shutdown the system and restart your computer.
15 When the system is booting up, an “Unknown Device” warning window will be
displayed, this is a normal behavior because a virtual target is registered by
ASUS PCI-DA2000 Series family Miniport Driver to support ASUS GUI RAID
Manager. Please select “Do not install a driver” , and click on “OK”.
16 Make sure that the ASUS PCI-DA2000 Series family Miniport Driver is working properly by using Device Manager tab of System icon in Control Panel.
Click on the plus sign next to the SCSI controllers icon, and double-click on the
Infortrend ASUS PCI-DA2000 Series PCI-to-SCSI RAID Adapter icon. Check
the Device status. If the device is working properly, the driver is installed successfully. If not, the driver is not installed. Check your CONFIG.SYS to see if
I2DOSASP.SYS is installed. If it is installed, remove it, and restart your computer.
62
ASUS PCI-DA2000 Series RAID Controllers Driver Installation
6. Windows 95
6.2. Updating ASUS PCI-DA2000 Series Driver for
Windows 95
1 Click on the “Start” button in the task bar of Windows 95.
2 Select “Settings”, and then click on “Control Panel”.
3 Double-click on the “System” icon, then click on “Device Manager” tab.
4 Click on the plus sign next to the “SCSI controller” icon, then Double-click on
the “ASUS PCI-DA2000 Series PCI-to-SCSI RAID Adapter” icon. Click on
the “Driver” tab.
5 On the “Driver” tab, click on “Change Driver”.
6 Click on the “Have Disk” button and enter a:\win95 as the subdirectory to copy
the manufacturer’s file from. Click “OK”.
7 Select ASUS PCI-DA2000 Series PCI-to-SCSI RAID Adapter, and click on
“OK”.
8 Click on “OK”. The driver is copied.
9 You must restart your system for the changes to take effect. Click on “Yes” to
shutdown the system and restart your computer.
ASUS PCI-DA2000 Series RAID Controllers Driver Installation
63
Updating PCI-DA2000
6. Windows 95 Driver Installation
7. OS/2 Driver Installation
7. OS/2 Driver Installation
Up to 4 ASUS PCI-DA2000 Series controllers can be installed in one computer.
The following files are supplied for driver installation, they are put in the \OS2
subdirectory.
Installation
7. OS/2 Driver
DA2000.ADD:
ASUS PCI-DA2000 Series OS/2 2.x and 3.0 (Warp) Device Driver.
DA2000.DDP:
Device Driver Profile for driver installation.
README.OS2:
An text file describing the ASUS PCI-DA2000 Series OS/2 driver.
7.1. Installing OS/2 2.x or 3.0
Follow these steps only if OS/2 2.x, 3.0 is not installed on your computer or if you
are upgrading to OS/2 2.x or 3.0.
1 Use ASUS PCI-DA2000 Series BIOS Configuration Utility to disable ISA Mailbox Emulation mode (default is disabled). To do this, at system bootup, press
[Ctrl-I], select Configure Card option, then change IO Port Address to DISABLED.
2 Use ASUS Text RAID Manager or RS-232 Terminal Interface Operation to
configure Logical Drives and SCSI Devices and map them to valid SCSI-IDs/
LUNs. Note that SCSI ID 7 is reserved for the ASUS PCI-DA2000 Series
adapter and thus no logical drives or devices should be mapped to this
SCSI ID.
3 Prepare for the installation by using DISKCOPY (or any other disk-copy utility) to make backup copy of IBM OS/2 installation diskette #1. Use this copy
as your working diskette #1.
4 Copy DA2000.ADD from ASUS PCI-DA2000 Series Distribution Diskette to
OS/2 installation diskette #1. Modify the CONFIG.SYS file on OS/2 installation diskette #1 to add the following line to the end of CONFIG.SYS:
BASEDEV=DA2000.ADD /V
5 Follow the steps from IBM for installing OS/2.
64
ASUS PCI-DA2000 Series RAID Controllers Driver Installation
7. OS/2 Driver Installation
7.2. Installing in an Existing OS/2 2.x/3.0
7. OS/2 Driver
1 Use ASUS PCI-DA2000 Series BIOS Configuration Utility to disable ISA Mailbox Emulation mode (default is disabled). To do this, at system bootup, press
[Ctrl-I], select Configure Card option, then change IO Port Address to DISABLED.
2 Use ASUS Text RAID Manager or RS-232 Terminal Interface Operation to configure Logical Drives and SCSI Devices and map them to valid SCSI-IDs/LUNs.
Note that SCSI ID 7 is reserved for the ASUS PCI-DA2000 Series controller
and thus no logical drives or devices should be mapped to this SCSI ID.
3 Execute the program DDINSTAL by selecting the Device Driver Install icon
within the System Setup folder of OS/2 System folder or by typing DDINSTAL
at OS/2 prompt.
4 Insert the ASUS PCI-DA2000 Series Distribution Diskette in the appropriate
floppy drive and follow the instructions from DDINSTALL. Set the source
directory to a:\os2 and the destination path to the root directory of system drive
while running DDINSTALL.
5 Reboot your system.
7.3. Updating ASUS PCI-DA2000 Series OS/2
Device Driver
1 Copy the new device driver from the distribution diskette to the root directory of
system drive where that OS/2 is installed.
For example,
copy a:\os2\DA2000.ADDc:\
2 Shutdown OS/2, then restart your computer.
ASUS PCI-DA2000 Series RAID Controllers Driver Installation
65
Installing PCI-DA2000
If you are adding an ASUS PCI-DA2000 Series controller to a computer that already has an ASUS PCI-DA2000 Series controller installed for OS/2 2.x/3.0, then
follow step 1 through step 2 only. If you are adding an ASUS PCI-DA2000 Series
controller to a computer that has no ASUS PCI-DA2000 Series controller installed
for OS/2 2.x/3.0, then follow all steps.
7. OS/2 Driver Installation
7.4. OS/2 Driver Command-Line Options
1 Driver Command Syntax :
BASEDEV=DA2000.ADD [Driver-Options][Adapter-Options][Unit-Options]
The command and options must be put in the CONFIG.SYS file. The changes of
command-line option will not take effect until the system is restarted.
Command-Line
7. OS/2 Driver
2 Command-Line Options :
1) Command-line options are case-insensitive.
2) All command-line options begin with the slash character (/).
3) The exclamation character (!) is a negation operator; that is, it negates the
option that follows it.
3 Driver-Options :
/V
Verbose. Either Display the driver name, version number, date, adapter Information
and device information if the driver loads successfully, or display error messages if
the driver fails to initialize.
/(!)ET
(Disable) Enable Embedded Target Support. Makes the driver (disable) enable notzero SCSI LUN support. Default setting is /ET.
/PCI:n
Maximum PCI Bus Number in the computer. Where n is a decimal value between 0
to 255. Default value is 255.
66
ASUS PCI-DA2000 Series RAID Controllers Driver Installation
7. OS/2 Driver Installation
7. OS/2 Driver
/BUS:n
PCI Bus Number which ASUS PCI-DA2000 Series is plugged in. You can get the
PCI bus number from the information that ASUS PCI-DA2000 Series BIOS displays at system bootup.
Note: ASUS PCI-DA2000 Series BIOS displays bus number in hex value, you
must translate that into decimal value.
/DEV:n
PCI Device Number which ASUS PCI-DA2000 Series is plugged in. You can get
the PCI device number from the information that ASUS PCI-DA2000 Series BIOS
displays at system bootup.
Note: ASUS PCI-DA2000 Series BIOS displays device number in hex value,
you must translate that into decimal value.
/(!)ET
(Disable) Enable Embedded Target Support. Makes the driver (disable) enable notzero SCSI LUN support to the specified adapter by /A:n . Default setting is /ET.
/(!)DM
(Disable) Enable Direct Access Storage Device (DASD) Manager Support. (Disable) Enable all the units, connect to the adapter specified by /A:n, to be supported
by the IBM-supplied DASD manager (OS2DASD.DMD). The default setting is /
DM.
/(!)SM
(Disable) Enable SCSI Manager Support. (Disable) Enable all the units, connect to
the adapter specified by /A:n, to be supported by the IBM-supplied SCSI manager
(OS2SCSI.DMD). The default setting is /SM.
5 Unit-Options :
/(!)ET:i1,i2,i3....
(Disable) Enable Embedded Target Support. Where i1,i2,i3 is the specified SCSI
Target ID. Makes the driver (disable) enable not-zero SCSI LUN support to the
specified SCSI ID of the specified adapter by /A:n. Default setting is /ET.
ASUS PCI-DA2000 Series RAID Controllers Driver Installation
67
Command-Line
4 Adapter-Options :
/A:n
Adapter Identification. Where n is a decimal value. This option specifies the ordering of adapters. Normally, adapters are numbered consecutively, starting at 0.
7. OS/2 Driver Installation
/(!)DM:i1,i2,i3... OR /(!)DM:(i1,l1),(i2,l2)....
(Disable) Enable Direct Access Storage Device (DASD) Manager Support. Where
i1,i2,i3 is the specified SCSI Target ID. (i1,l1),(i2,l2) is the specified SCSI Target
ID-LUN. (Disable) Enable the specified SCSI Target ID(LUN) of the adapter specified by /A:n, to be supported by the IBM-supplied DASD manager
(OS2DASD.DMD). The default setting is /DM. The boot device MUST be supported by DASD Manager, or the computer can not be able to boot OS/2.
Command-Line
7. OS/2 Driver
/(!)SM:i1,i2,i3... OR /(!)SM:(i1,l1),(i2,l2)....
(Disable) Enable SCSI Manager Support. Where i1,i2,i3 is the specified SCSI Target ID. (i1,l1),(i2,l2) is the specified SCSI Target ID-LUN. (Disable) Enable the
specified SCSI Target ID(LUN) of the adapter specified by /A:n, to be supported by
the IBM-supplied SCSI manager (OS2SCSI.DMD). The default setting is /SM.
Note : The driver will find all the ASUS PCI-DA2000 Series controller in your
computer automatically, if no /BUS and /DEV options specified.
68
ASUS PCI-DA2000 Series RAID Controllers Driver Installation
8. SCO Unix Driver Installation
8. SCO Unix Driver Installation
The chapter describes how to install SCO UNIX BTLD (Boot Time Loadable Driver)
for ASUS PCI-DA2000 Series Controller.
8.1. Installing SCO UNIX
1 Use ASUS PCI-DA2000 Series BIOS Configuration Utility to disable ISA Mailbox Emulation mode (default is disabled). To do this, at system bootup, press
[Ctrl-I], select Configure Card option, then change IO Port Address to DISABLED.
3 Check IO devices, CD-ROM or TAPE drive is properly installed.
4 Insert the N1 boot diskette into the floppy drive and turn on the PC. When the
“boot” message appears, type link as follows:
SCO UNIX System V/386
Boot: link <Enter>
5 Type PCIDA at the following prompt:
What packages do you need linked in the system,
or ‘q’ to quit?: pcida
ASUS PCI-DA2000 Series RAID Controllers Driver Installation
69
Installation
8. SCO Unix
2 Use ASUS Text RAID Manager or RS-232 Terminal Interface Operation to configure Logical Drives and SCSI Devices and map them to valid SCSI-IDs/LUNs.
Note that SCSI ID 7 is reserved for the ASUS PCI-DA2000 Series controller
and thus no logical drives or devices should be mapped to this SCSI ID.
8. SCO Unix Driver Installation
6 You will be prompted to insert the DA2000 Series BTLD diskette after a series
of messages as follows:
Please insert the fd(x)pcida volume and press <RETURN>
or ‘q’ to quit:
7 After Insert the diskette, press [Enter].
Follow the appropriate SCSI manual to install the SCO UNIX from the installation media (floppy, tape, or CD-ROM).
8 A message similar to the following will be displayed:
Installation
8. SCO Unix
Please insert the pcida volume and press <ENTER>:
Insert the ASUS BTLD diskette again and press [ENTER]
9 At the following prompt, type “y”:
The BTLD packages will now be added to the Link Kit.
The Link Kit is not installed.
Do you wish to install it now?(y/n)
70
ASUS PCI-DA2000 Series RAID Controllers Driver Installation
8. SCO Unix Driver Installation
10 At the following prompt, press [ENTER]:
The following packages are on this diskette:
NAME
DESCRIPTION
pcida
ASUS PCI-DA2000 Series SCSI Disk Array Driver for
SCO UNIX system
Please enter the names of the packages you
wish to install or q to quit:_
11 The ASUS PCI-DA2000 Series driver will now be linked into the SCO UNIX
kernel.
ASUS PCI-DA2000 Series RAID Controllers Driver Installation
71
Installation
8. SCO Unix
[default:pcida]
A. Text RAID Manager / RS-232
Terminal Operation Command Reference
Quick Installation
View and edit logical drives
View scsi drives
Add stand-by drives
Delete logical drive
Partition logical drive
view and edit scsi id Map
view and edit scsi drives
Scan new scsi drive
Rebuild logical drive
view and Edit scsi channels
scsi Id
scsi Terminator
Terminal Interface
A. RAID Manager
Sync transfer clock
Wide transfer
system Functions
Mute Beeper
Write Back Cache
Scsi Motor Spin-Up
Scsi Reset at Power-Up
Monitor Port Baud-Rate
Total Cache Size
Firmware Version
Bootrecord Version
Serial Number
CPU Type 80486SX-33
Change Password
Modem Control
Reset Controller
Controller Maintenance
Quick Set-Up Function
View drives assigned to a logical drive.
Assign a spare drive to a logical drive.
Delete a logical drive.
Divide a logical drive into up to 8
partitions.
View and edit scsi id Map
View and edit available drives
Include a newly installed drive into an
existing list.
Initiate data rebuilding.
View and edit available SCSI channels
Set SCSI channel ID number.
Enable or disable SCSI channel active
termination.
Change Sync transfer clock
Enable or disable wide transfer
Turn beeper off.
Enable or disable write back caching.
Enable or disable the staggered spin-up
of connected drives.
Enable or disable reset of SCSI channels
during power-up.
Set serial port baud rate.
Display the total cache size
Display the firmware version
Display the bootrecord version
Display the controller serial number
Display the CPU type
Set or change password.
Set up modem parameters.
Reset the controller
Download/Upload controller Firmware
through the Text RAID Manager.
NOTE: RS-232 Terminal Operation is not available on the ASUS PCI DA-2100.
72
ASUS PCI-DA2000 Series RAID Controllers Driver Installation