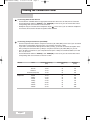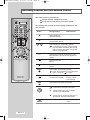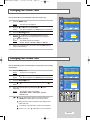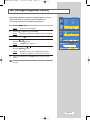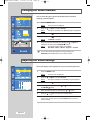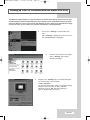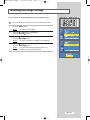
1
653Fcover.qxd
4/13/04 4:02 PM
Page 1
LCD TV
LW32A33W
- AFTER SALES SERVICE
LCD TV
- Do not hesitate to contact your retailer or service agent if a
change in the performance of your product indicates that a
faulty condition may be present.
Owner’s Instructions
Before operating the unit,
please read this manual thoroughly,
and retain it for future reference.
ELECTRONICS
LW32A33W
ON-SCREEN MENUS
PC DISPLAY
PICTURE IN PICTURE (PIP)
TELETEXT
BN68-00653F-00
This device is a class B digital apparatus.
BN68-00653C-00Eng
4/13/04 4:42 PM
Page 1
LCD TV
LW32A33W
Owner’s Instructions
Before operating the unit,
please read this manual thoroughly,
and retain it for future reference.
ON-SCREEN MENUS
PC DISPLAY
PICTURE IN PICTURE (PIP)
TELETEXT
This device is a class B digital apparatus.
BN68-00653C-00Eng
4/13/04 4:42 PM
Page 2
Do not display a still image (such as on a video game or when hooking up a DVD to
this LCD TV) on the Color TFT-LCD (Thin Film Transister Liquid Crystal Display)
panel for a long time as it can cause screen image retention. This image retention is
also known as “screen burn”. To avoid such image retention, reduce the degree of
brightness and contrast of this screen when displaying a still image.
Contents
CONNECTING AND PREPARING YOUR TV
Viewing the Control Panel .........................................................................................
Viewing the Connection Panel...................................................................................
- Connecting an Aerial or Cable Television Network ...............................................
- Connecting Set-Top Box, VCR or DVD .................................................................
- Connecting External A/V Devices ..........................................................................
- Connecting Component Devices (DTV/DVD) .......................................................
- Connecting Computer ............................................................................................
- Connecting DVI.......................................................................................................
- Connecting Sub Woofer .........................................................................................
- Connecting HDMI (High-Definition Multimedia Interface) .....................................
Viewing the Remote Control (All Functions Except Teletext) ...................................
Viewing the Remote Control (Teletext Functions).....................................................
Installing Batteries in the Remote Control.................................................................
Switching On and Off .................................................................................................
Placing Your Television in Standby Mode .................................................................
Becoming Familiar with the Remote Control ............................................................
Plug and Play .............................................................................................................
Choosing Your Language ..........................................................................................
SETTING
THE
CHANNELS
Storing Channels Automatically.................................................................................
Storing Channels Manually........................................................................................
Editing the Channels..................................................................................................
Sorting the Stored Channels .....................................................................................
Assigning Channels Names ......................................................................................
Fine Tuning Channel Reception ................................................................................
LNA (Low Noise Amplifier) .........................................................................................
SETTING
THE
THE
23
24
25
25
26
26
27
28
29
30
SOUND
Adjusting the Volume .................................................................................................
Switching the Sound Off Temporarily ........................................................................
Changing the Sound Standard ..................................................................................
Adjusting the Sound Settings ....................................................................................
Setting the TruSurround XT(SRS TSXT) ..................................................................
English-2
15
16
18
19
20
21
22
PICTURE
Changing the Picture Standard .................................................................................
Adjusting the Custom Picture ....................................................................................
Changing the Colour Tone .........................................................................................
Changing the Picture Size .........................................................................................
Freezing the Current Picture......................................................................................
DNIe(Digital Natural Image engine) ..........................................................................
MCC (My Colour Control) ..........................................................................................
I2C (Intelligent Image Control)...................................................................................
IBC (Intelligent Brightness Control) ...........................................................................
Viewing the Picture In Picture (PIP) ..........................................................................
SETTING
4
5
5
5
6
6
7
7
7
7
8
9
10
11
11
12
13
14
32
33
34
34
35
BN68-00653C-00Eng
4/13/04 4:43 PM
Page 3
Contents
SETTING
THE
SOUND
Adjusting the Volume Automatically ..........................................................................
Connecting Headphones ...........................................................................................
Adjusting Your Headphone Preferences ...................................................................
Listening to the Sound of the Sub Picture ................................................................
Sub Woofer.................................................................................................................
SETTING
THE
35
36
36
37
37
TIME
Setting and Displaying the Current Time .................................................................. 38
Setting the Sleep Timer.............................................................................................. 39
Switching the Television On and Off Automatically................................................... 40
SETTING
THE
OTHERS
Setting the Blue Screen Mode...................................................................................
Colour Weakness.......................................................................................................
Selecting the Melody .................................................................................................
Selecting a Device from External Sources................................................................
Viewing Pictures from External Sources ...................................................................
SETTING
THE
PC
Setting up Your PC Software (Based on Windows 2000 or XP) ........................
Adjusting the PC Screen Automatically ..............................................................
Coarse and Fine Tuning of the Image ................................................................
Changing the Image Position..............................................................................
Initializing the Image Settings .............................................................................
USING
THE
41
42
43
44
44
45
46
47
48
49
TELETEXT FEATURE
Teletext Decoder ........................................................................................................
Displaying the Teletext Information............................................................................
Selecting a Specific Teletext Page ............................................................................
Using FLOF to Select a Teletext Page......................................................................
50
50
51
52
RECOMMENDATIONS FOR USE
Troubleshooting: Before Contacting Service Personnel...........................................
Installing Stand...........................................................................................................
Using the Anti-Theft Kensington Lock .......................................................................
How to install the wall Bracket...................................................................................
Technical and Environmental Specifications.............................................................
Display Mode (PC).....................................................................................................
Pin Configurations......................................................................................................
Wiring the Mains Power Supply Plug (UK Only) ......................................................
Setting Up Your Remote Control ...............................................................................
53
54
55
56
58
59
60
61
62
Symbols
Press
Important
Note
English-3
BN68-00653C-00Eng
4/13/04 4:43 PM
Page 4
Viewing the Control Panel
SOURCE
Displays a menu of all of the available
input sources (TV, Ext.1, Ext.2, AV3,
S-Video, Component, HDMI, DVI, PC).
You can also use the SOURCE
buttons
on the TV’s control panel to make selection.
MENU
Press to see an on-screen menu of
your TV’s features.
+
Press to decrease or increasethe volume.
Also used to select items on the
on-screen menu.
C/P.
Press to change channels.
Also press to highlight various items
on the on-screen menu.
(Without the Remote Control, You can
turn on TV by using the Channel buttons.)
English-4
(Power)
Press to turn the TV on and off.
Light Detecting Sensor
Adjusts brightness of screen automatically by
detecting brightness of surrounding environment.
This sensor works when IBC is on.
Remote Control Sensor
Aims the remote control towards this spot
on the TV.
Power Indicator
Lights up when you turn the power off.
When you turn the power off after selecting On/Off
Timer, green light will appear.
BN68-00653C-00Eng
4/13/04 4:43 PM
Page 5
Viewing the Connection Panel
Power Input
Whenever you connect an audio or video system to your set, ensure that all elements are
switched off.
1 Connecting an Aerial or Cable Television Network
To view television channels correctly, a signal must be received by the set from one of the following sources:
- An outdoor aerial
- A cable television network
- A satellite network
2 Connecting Set-Top Box, VCR or DVD
- Connect the VCR or DVD SCART cable to the SCART connector of the VCR or DVD.
- If you wish to connect both the Set-Top Box and VCR (or DVD), you should connect the Set-Top Box
to the VCR (or DVD) and connect the VCR (or DVD) to your set.
Input/Output Specification
Input
Connector
Video
Audio (L/R)
SCART 1
✔
✔
SCART 2
✔
✔
S-Video
Output
RGB
Video+Audio (L/R)
✔
Only TV Out
Monitor Out
(TV/Ext.1/Ext.2/AV3/S-VHS)
English-5
BN68-00653C-00Eng
4/13/04 4:43 PM
Page 6
Viewing the Connection Panel
3
Connecting External A/V Devices
- Connect RCA or S-VIDEO cable to an appropriate external A/V device such as VCR, DVD or Camcorder.
- Connect RCA audio cables to “AUDIO(L)” and “AUDIO(R)” on the rear of your set and the other ends to
corresponding audio out connectors on the A/V device.
- Headphone may be connected to the headphone output ( 4 ) on the rear of your set. While the headphone
is connected, the sound from the built-in speakers will be disabled.
5
Connecting Component Devices (DTV/DVD)
- Connect component video cables to component connector (“Y”,“PB”,“PR”) on the rear of your set and the
other ends to corresponding component video out connectors on the DTV or DVD.
- If you wish to connect both the Set-Top Box and DTV (or DVD), you should connect the Set-Top Box to the
DTV (or DVD) and connect the DTV (or DVD) to component connector (“Y”,“PB”,“PR”) on your set.
- The Y, Pb and Pr connectors on your component devices (DTV or DVD) are sometimes labeled Y, B-Y and
R-Y or Y, Cb and Cr.
- Connect RCA audio cables to “AUDIO(L)” and “AUDIO(R)” on the rear of your set and the other ends to
corresponding audio out connectors on the DTV or DVD.
Source
Video
Horizontal Frequency
(kHz)
Vertical Frequency
(Hz)
Resolution
(Lines)
Source
PAL
SECAM
NTSC4.43
NTSC3.58 (Except RF)
15.625
15.625
15.734
15.704
50
50
60
60
575
575
483
483
480/60i
480/60p
576/50i
576/50p
720/60p
1080/50i
1080/60i
15.734
31.469
15.625
31.250
45.000
28.125
33.750
60
60
50
50
60
50
60
483
483
576
576
720
1080
1080
Component
English-6
BN68-00653C-00Eng
4/13/04 4:43 PM
Page 7
Viewing the Connection Panel
6 Connecting Computer
- Connect the D- Sub cable to “PC (PC IN)” on the rear of your set.
- Connect the stereo audio cable to “AUDIO (PC IN)” on the rear of your set and the other end to
“Audio Out” of the sound card on your computer.
7 Connecting DVI
- Connect the DVI connector to the DVD connector.
- Connect the stereo audio cable to “L - Audio - R” on the rear of your set and the other end to
“Audio Out” of the sound card on your DVD.
- DVI dose not support PC function.
8 Connecting Sub Woofer
9 Connecting HDMI (High-Definition Multimedia Interface)
Supports connections between HDMI-connection-enabled AV devices (set top boxes, DVD players, AV
receivers and digital TVs).
What is HDMI?
-
HDMI, or high-definition multimedia interface, is a next-generation interface that enables the
transmission of digital audio and video signals using a single cable without compression.
- “Multimedia interface” is a more accurate name for it especially because it allows multiple channels of
digital audio (5.1 channels).The difference between HDMI and DVI is that the HDMI device is smaller
in size, has the HDCP coding feature installed, and supports multi - channel digital audio.
English-7
BN68-00653C-00Eng
4/13/04 4:43 PM
Page 8
Viewing the Remote Control (All Functions Except Teletext)
TELEVISION STANDBY BUTTON
(Refer to page 11)
DISPLAY SELECTED INPUT SOURCE
AND BATTERY STATUS
PICTURE STANDARD SELECTION
(Refer to page 23)
TV MODE INFORMATION DISPLAY
MAKE THE REMOTE CONTROL
WORKS FOR TV, VCR, CABLE,
DVD, STB
(Refer to page 62~65)
NUMERIC BUTTONS
PREVIOUS CHANNEL
ONE/TWO-DIGIT CHANNEL SELECTION
VOLUME INCREASE
(Refer to page 32)
TEMPORARY SOUND SWITCH OFF
(Refer to page 33)
VOLUME DECREASE
(Refer to page 32)
ON-SCREEN DISPLAY
(Refer to page 12)
NEXT CHANNEL
(Refer to page 11)
VIDEO INPUT SOURCE SELECTION
(Refer to page 44)
PREVIOUS CHANNEL
(Refer to page 11)
INFORMATION DISPLAY (CURRENT
CHANNEL AND AUDIO/VIDEO
SETTINGS)
(Refer to page 38)
EXIT FROM THE OSD
CHANGE CONFIRMATION
CONTROL THE CURSOR IN THE MENU
(Refer to page 12)
STILL THE MAIN PICTURE
(Refer to page 26)
SRS TSXT SELECTION
(Refer to page 35)
PIP FUNCTIONS; (Refer to page 30~31)
PIP ON : PIP ON/OFF
P / : PIP CHANNEL SELECTION
SWAP : INTERCHANGE THE MAIN
AND SUB PICTURE
>
AUTOMATIC SWITCH-OFF
(Refer to page 39)
PC MODE SELECTION
(Refer to page 46)
SOUND MODE SELECTION
<
SOUND STANDARD SELECTION
(Refer to page 34)
PICTURE SIZE SELECTION
(Refer to page 25)
DNIe SELECTION
(Refer to page 26)
SET
(Refer to page 62~64)
Reset :
When your remote does not work,
change the batter ies and press the
“Reset” button for 2-3 seconds before use.
VCR/DVD FUNCTIONS;
: REWIND
: STOP
: PLAY/PAUSE
: FAST FORWARD
The performance of the remote control may be affected by bright light.
English-8
BN68-00653C-00Eng
4/13/04 4:43 PM
Page 9
Viewing the Remote Control (Teletext Functions)
TELETEXT NEXT PAGE
TELETEXT PREVIOUS PAGE
TELETEXT DISPLAY/MIX
TELETEXT REVEAL
TELETEXT INDEX
TELETEXT HOLD
TELETEXT SIZE SELECTION
TELETEXT CANCEL
TELETEXT SUB-PAGE
Teletext Function : Refer to page 50 - 52 for details
English-9
BN68-00653C-00Eng
4/13/04 4:43 PM
Page 10
Installing Batteries in the Remote Control
1
Slide the cover out completely.
2
Install two AAA size batteries.
Make sure to match the “+” and “–” ends of the batteries with
the diagram inside the compartment.
3
Replace the cover.
Remove the batteries and store them in a cool, dry place
if you won’t be using the remote control for a long time.
The remote control can be used up to about 23 feet from the TV.
(Assuming typical TV usage, the batteries last for about one year.)
The remote control doesn’t work!
Check the following:
1. Is the TV power switch on?
2. Are the plus end and the minus end of the battery reversed?
3. Did the battery run out?
4. Is there a power outage?
5. Is the power cord unplugged?
6. Is there a special fluorescent light or a neon sign nearby?
English-10
BN68-00653C-00Eng
4/13/04 4:43 PM
Page 11
Switching On and Off
The mains lead is attached to the rear of your set.
If you have purchased this set in the United Kingdom,
refer to page 61 for further instructions on plug wiring.
1
Plug the mains lead into an appropriate socket.
Result:
2
Press the POWER (
Result:
3
The main voltage is indicated on the rear of your set and
the frequency is 50 or 60Hz.
) button on the right-side of your set.
The standby indicator right on the front panel.
Press the numeric button (0~9) or channel up/down ( / ) button
on the remote control or
C/P.
button on
the right-side of your set.
Result:
The programme that you were watching last is reselected
automatically.
When you switch the set on for the very first time, you will be
asked to choose language in which the menus are to be
displayed (see page 14).
4
To switch your set off, press the POWER (
) button again.
Placing Your Television in Standby Mode
Your set can be placed in Standby mode, in order to reduce the power
consumption. The Standby mode can be useful when you wish to
interrupt viewing temporarily (during a meal, for example).
1
Press the POWER (
Result:
2
) button on the remote control.
The screen is turned off and a orange standby indicator
appears on the front of your set.
To switch your set back on, simply press the POWER (
buttons (0~9) or channel up/down ( / ) button again.
), numeric
Do not leave your set in Standby mode for long periods of time (when
you are away on holiday, for example).
Turn your set off by pressing the POWER ( ) button on the right-side
of the set.
It is best to unplug the set from the mains and aerial.
1. Use of the 'POWER( )' button on the remote is possible only when
the TV is in 'Power Saving' (standby) mode. If the TV is powered off,
the remote cannot be used to turn the TV on.
2. To retain the time and or automatic alarm settings, always put the TV
in stand-by mode with the remote control. Use of the the power switch
on the TV will clear all time related settings. [Benefit] This full 'power
off' function is as effective as unplugging the power cable.
TV switches to standby mode when powered off by the remote control.
To return power ( ) to the screen, press the remote control 'ON' or
channel button( ). Pressing the power button on the TV does not
return power to the screen because in this case, the TV restores the
last mode, which was 'Power Saving'.
English-11
BN68-00653C-00Eng
4/13/04 4:43 PM
Page 12
Becoming Familiar with the Remote Control
The remote control is used mainly to:
Change channels and adjust the volume
Set up your set using the on-screen menu system
The following table presents the most frequently used buttons and
their functions.
Button
Viewing Function
Menu Function
Used to display the
next stored channel.
-
Used to display the
previous stored channel.
-
~
Used to display the corresponding channels.
For double digit channels, the second digit
must be pushed immediately after the first.
Failure to do this will result in a single digit
channel being displayed.
_/_ _
Used to select a channel numbered ten or over.
Press this button, and enter the two digit channel
number.
Used to increase the
volume.
-
Used to decrease the
volume.
-
MUTE
Used to switch the sound off temporarily.
To turn the sound back on, press this button
+/- button.
again, or press the
MENU
Used to display the
on-screen menu system.
EXIT
Used to return to the
previous menu or
normal viewing.
Used to exit the On-Screen menu system.
Used to move among the menu items.
Used to select a menu item or increase
the value of the selected item.
Used to return to the previous menu item or
decrease the value of the selected item.
ENTER
English-12
Used to confirm your
choice.
BN68-00653C-00Eng
4/13/04 4:43 PM
Page 13
Plug and Play
When the set is initially powered ON, several basic customer settings
proceed automatically and subsequently.
The following settings are available.
1
If the set is in standby mode, press the POWER (
remote control.
Result:
2
) button on the
The message Plug & Play is displayed.
It appears for a little while, and then the Language
menu is automatically displayed.
Select the appropriate Language by pressing the
or
button.
The available languages are listed.
You can choose one of 18 languages.
3
Press the ENTER
Result:
4
The message Antenna Input Check is displayed
with the OK is selected.
Press the ENTER
Result:
button to confirm your choice.
button.
The following countries are available:
Belgium - Deutschland - Spain - France Italy - Netherlands - Switzerland - Sweden - UK E. Europe - Others
Plug & play
Area
5
Select your Area by pressing the
Press the ENTER
button.
Result:
6
7
button.
Switzerland
Sweden
UK
E. Europe
Others
The Auto Store menu is displayed.
Press the ENTER
Result:
or
button.
Move
Enter
The channel search will start and end automatically.
Select the Hour or min by pressing the
or
button.
Set the Hour/min by pressing the
or
button.
(Refer to “Setting and Displaying the Current Time”
on page 38)
Skip
Plug & play
Auto Store
554 MHz
P 1
C
Stop
Enter
8
Press the MENU
0
63 %
Skip
button to confirm your setting.
Clock
Result:
The message Enjoy your watching is displayed,
and then the channel which has been stored will be
activated.
Move
Hour
min
00
00
Adjust
Skip
Enjoy your watching
English-13
BN68-00653C-00Eng
4/13/04 4:43 PM
Page 14
Plug and Play
If you want to reset this feature...
1
Press the MENU button.
Result:
2
The main menu is displayed.
Press the
or
button to select Setup.
Press the ENTER
button.
Result:
The options available in the Setup group are displayed.
3
Press the
4
Press the ENTER
Result:
5
or
button to select Plug & Play.
button.
The message is Plug & Play displayed.
For further details on how to set, refer to the previous page.
Choosing Your Language
When you start using your set for the first time, you must select the
language which will be used for displaying menus and indications.
1
Press the MENU button.
Result:
2
The main menu is displayed.
Press the
Result:
or
button to select Setup.
The options available in the Setup group are displayed.
3
Press the ENTER
4
Press the
or
button to select Language.
Press the ENTER
button.
Result:
5
button.
The available languages are listed.
Select a particular language by pressing the
repeatedly.
Press the ENTER
button.
or
button
You can choose one of 18 languages.
6
English-14
When you are satisfied with your choice, press the EXIT button to
return to normal viewing.
BN68-00653C-00Eng
4/13/04 4:43 PM
Page 15
Storing Channels Automatically
You can scan for the frequency ranges available to you (and availability
depends on your country). Automatically allocated programme numbers
may not correspond to actual or desired programme numbers. However
you can sort numbers manually and clear any channels you do not wish
to watch.
TV
Channel
CountryL
Auto Store LLL
Manual Store
Add/DeleteLLL
SortLLL
NameLLL
Fine TuneLLL
LNAL
LLL
:L OffL
Move
1
Press the MENU button.
Result:
2
Press the
Result:
or
Enter
TV
button to select Channel.
The options available in the Channel group are
displayed.
:L Others
L
Belgium
Press the ENTER
Result:
4
button.
:LL
Press the ENTER
button again. Select your Country
by pressing the
or
button repeatedly.
Result:
The following countries are available:
Belgium - Deutschland - Spain - France Italy - Netherlands - Switzerland - Sweden - UK E. Europe - Others
5
Press the ENTER
6
Press the
or
button to select Auto Store.
Press the ENTER
button.
Result:
7
Enter
TV
The Country is selected.
Deutschland
Spain
France
Italy
Netherlands
Switzerland
LLL
Move
3
CountryL
Auto Store LLL
Manual Store
Add/DeleteLLL
SortLLL
NameLLL
Fine TuneLLL
LNAL
Move
:L Others L
Sweden
UK
E. Europe
Others
LLL
:LL
Enter
button.
The Start is selected.
The search will end automatically. Channels are sorted
and stored in an order which reflects their position in the
frequency range (with lowest first and highest last).
The programme originally selected is then displayed.
To return to the previous menu, press the MENU
button.
To stop the search before it has finished, press the
ENTER
button with stop selected.
8
Return
Channel
Press the ENTER
button to search the channels.
The sub menu is changed from Start to Stop with channel search
started.
Result:
Return
Channel
CountryL
Auto Store LLL
Manual Store
Add/DeleteLLL
SortLLL
NameLLL
Fine TuneLLL
LNAL
The main menu is displayed.
:L Others L
When the channels have been stored, you can:
Sort them in the order required (refer to page 19)
Assign a name to the stored channels (refer to page 20)
Add or delete the channels (refer to page 18)
Fine tune channel reception if necessary (refer to page 21)
Activate the LNA (Low Noise Amplifier) feature (refer to page 22)
English-15
Return
BN68-00653C-00Eng
4/13/04 4:43 PM
Page 16
Storing Channels Manually
You can store up to 100 channels, including those received via cable
networks. When storing channels manually, you can choose:
Whether or not to store each of the channels found
The programme number of each stored channel which you
wish to identify
TV
1
Manual Store
ProgrammeL
:
8
Colour SystemL
:L AUTO
Sound SystemL
:L BG
Result:
ChannelL
: C
SearchL
:L 182 MHz
StoreL
:L No
Move
TV
6
2
Return
Manual Store
ProgrsmmeL
:
Colour SystemL
:L AUTO
8
:L BG
ChannelL
:L C
SearchL
:L 182 MHz
StoreL
:L No
:L 8
Colour SystemL
Press the
or
button to select Manual Store.
Press the ENTER
button.
:L AUTOAUTO
:L C
SearchL
:L 182 MHz
StoreL
:L No
Enter
6
Press the
or
button to select Colour System and then
press the ENTER
button.
Select the Colour System required by pressing the
or
button repeatedly and then press the ENTER
button.
Return
Manual Store
ProgrammeL
:
Colour SystemL
:L AUTO
8
Sound SystemL
:L BG
C6
Result:
ChannelL
:L C
SearchL
:L 182 MHz
StoreL
:L No
Enter
7
Return
Manual Store
:
Colour SystemL
:L AUTO
Sound SystemL
:L BG
StoreL
Move
8
C6
8
:L No
Enter
Press the
or
button to select Sound System and then
press the ENTER
button.
Select the sound standard required by pressing the
or
button repeatedly and then press the ENTER
button.
Result:
BG
:L C
6DK
I
:L 182 MHz
L
English-16
The colour standards are displayed in the following order:
AUTO - PAL - SECAM - NT4.43
6
ProgrammeL
SearchL
The options available in the Manual Store menu are
displayed with Programme selected.
Press the ENTER
button again.
To assign a programme number to a channel, find the correct
number by pressing the
or
button and then press the
ENTER
button.
PAL
SECAM
6
NT 4.43
:L BG
ChannelL
ChannelL
button.
5
C6
Sound SystemL
T VT V
The options available in the Channel group are
displayed.
4
Return
ProgrammeL
Move
button to select Channel.
Press the ENTER
Result:
Enter
Move
or
3
6
Manual Store
T VT V
The main menu is displayed.
C6
Sound SystemL
TV
Press the
Result:
Enter
Move
Press the MENU button.
C6
Return
The sound standards are displayed in the following order:
BG - DK - I - L
For all the channels to move to the required channel numbers,
repeat steps 5 to 7 after selecting Programme by pressing
or
button.
BN68-00653C-00Eng
4/13/04 4:43 PM
Page 17
Storing Channels Manually
TV
9
If you know the number of the channel to be stored....
Press the
or
button to select Channel and then
press the ENTER
button.
Select C (Air channel) or S (Cable channel) by pressing the
or
button.
Press the
button to select Channel.
Select the required number by pressing the
then press the ENTER
button.
:L AUTO
button and
The tuner scans the frequency range until the first
channel or the channel that you selected is received
on your screen.
:L BG
:L C
SearchL
:L 182 MHz
StoreL
:L No
12
6
Adjust
Return
Manual Store
ProgrammeL
:
Colour SystemL
:L AUTO
8
C6
Sound SystemL
:L BG
ChannelL
:L C
SearchL
:L 182 MHz
StoreL
:L No
Adjust
TV
6
Enter
Return
Manual Store
ProgrammeL
:
Colour SystemL
:L AUTO
8
C6
Sound SystemL
:L BG
ChannelL
:L C
SearchL
:L 182 MHz
StoreL
: Yes
Enter
Press the
or
button to select Store and then press the
ENTER
button.
Select Yes by pressing the
or
button and then press the
ENTER
button.
Result:
C6
Sound SystemL
Adjust
11
8
ChannelL
TV
or
If you do not know the channel numbers, press the
or
button
to select Search and then press the ENTER
button.
Search by pressing
or
button and then press the ENTER
button.
Result:
:
Colour SystemL
Move
If there is abnormal sound or no sound, re-select the sound
system required.
10
Manual Store
ProgrammeL
The channel and associated programme number are
stored.
Repeat Steps 9 to11 for each channel to be stored.
Channel mode
P (Programme mode): When tuning is completed, the
broadcasting stations in your area will have been assigned to
position numbers from P00 to P99. You can select a channel by
entering the position number in this mode.
C (Real channel mode): You can select a channel by entering
the assigned number to each broadcast station in this mode.
S (Cable channel mode): You can select a channel by entering
the assigned number to each cable channel in this mode.
English-17
6
Return
BN68-00653C-00Eng
4/13/04 4:43 PM
Page 18
Editing the Channels
TV
Channel
CountryL
Auto Store LLL
Manual Store
Add/DeleteLLL
SortLLL
NameLLL
Fine TuneLLL
LNAL
:
Others L
LLL
:L OffL
Move
Enter
8
1
Prog. Change
2
Enter
Return
8
Prog. Change
The options available in the Channel group are
displayed.
In Memory
3
Delete
CH
The main menu is displayed.
Press the
or
button to select Channel.
Press the ENTER
button.
Result:
Add/Delete
Prog.No
Press the MENU button.
Result:
Not In Memory
Add
CH
All channels that you do not specifically choose to skip are displayed
during scanning.
Return
Add/Delete
Prog.No
You can exclude the channels you chosen from the channels you
scanned. When you scan through the stored channels, those you have
chosen to skip are not displayed.
Enter
Press the
or
button to select Add/Delete.
Press the ENTER button.
Return
Result:
4
Press the
/
button to select Channel that you wish to
Add or Delete.
Result:
English-18
The state of current channel is displayed.
If the channel that you wish to edit is not in memory, the
Add is selected and displayed.
Otherwise, if the channel that you wish to edit is in
memory, the Delete is selected and displayed.
5
Press the ENTER
6
To return to the previous menu, press the MENU
7
Repeat Step 4 and 6 for each channel to be added or deleted.
button to Add or Delete channel.
button.
BN68-00653C-00Eng
4/13/04 4:43 PM
Page 19
Sorting the Stored Channels
You can exchange the numbers of two channels, in order to:
TV
Channel
CountryL
Auto Store LLL
Manual Store
Add/DeleteLLL
SortLLL
NameLLL
Fine TuneLLL
LNAL
Modify the numeric order in which the channels have been
automatically stored.
Give easily remembered numbers to the channels that you
watch most often.
Move
1
Press the MENU button.
Result:
2
Press the
or
button to select Channel.
Press the ENTER
button.
Result:
3
Press the
or
button to select Sort.
Press the ENTER
button.
Result:
4
:L OffL
Return
Sort
Prog.
Channel
P
P
P
P
P
-
1
2
3
4
5
------
Move
Name
---------------------
Enter
TV
Return
Sort
Prog.
Channel
P
P
P
P
-
Name
- --
2
3
4
5
Move
-----
-----------------
Enter
The selected Channel number and Name is moved
to right side.
Press the
or
button to move to the position which you would
like to change and then press the ENTER
button.
Result:
6
The Prog., Channel and Name are displayed.
Select the Channel number that you wish to change by pressing the
or
button repeatedly.
Press the ENTER
button.
Result:
5
The options available in the Channel group are
displayed.
LLL
Enter
TV
The main menu is displayed.
:L Others L
The selected channel is exchanged with the one
previously stored to the chosen number.
Repeat step 4 to 5 for another channel to sort again.
English-19
Return
BN68-00653C-00Eng
4/13/04 4:43 PM
Page 20
Assigning Channels Names
TV
Channel
CountryL
Auto Store LLL
Manual Store
Add/DeleteLLL
SortLLL
NameLLL
Fine TuneLLL
LNAL
:L Others L
LLL
:L OffL
Move
Enter
TV
Channel names will be assigned automatically when channel
information is broadcast.
These names can be changed, allowing you to assign new names.
1
Press the MENU button.
Result:
Return
The main menu is displayed.
Name
Prog.
Channel
P
P
P
P
P
C
C
S
8
9
10
11
12
6
--12
14
Move
2
Name
C 6
--------C12
S14
Enter
TV
Result:
Return
3
Name
Prog.
Channel
P
P
P
P
P
C
C
S
8
9
10
11
12
Move
Adjust
C 6
--------C12
S14
4
5
The current Prog. Channel and Name are displayed.
If necessary, select the channel to be assigned to a new name by
pressing the
or
button.
Press the ENTER
button.
Result:
Return
The options available in the Channel group are
displayed.
Press the
or
button to select Name.
Press the ENTER
button.
Result:
Name
6
--12
14
Press the
or
button to select Channel.
Press the ENTER
button.
The selection bar is displayed around the name box.
To...
Then...
Select a letter, number or symbol
Press the
or
Move on the next letter
Press the
button
Move back the previous letter
Press the
Confirm the name
Press the ENTER
button
button
button
The characters available are :
Letters of the alphabet (A~Z)
Numbers (0~9)
Special characters ( * , _ , _ , space )
English-20
6
Repeat Steps 4 to 5 for each channel to be assigned to a new name.
7
When you are satisfied with the setting, press the MENU button to
return to the previous menu or press the EXIT button to return to
normal viewing.
BN68-00653C-00Eng
4/13/04 4:43 PM
Page 21
Fine Tuning Channel Reception
If the reception is clear, you do not have to fine-tune the channel,
as this is done automatically during the search and store operation.
If however the signal is weak or distorted, you may have to fine-tune
the channel manually.
1
Channel
CountryL
Auto Store LLL
Manual Store
Add/DeleteLLL
SortLLL
NameLLL
Fine TuneLLL
LNAL
Press the MENU button.
Result:
2
TV
The options available in the Channel group are
displayed.
3
Press the
or
button to select Fine Tune.
Press the ENTER
button.
4
Press the
or
button to reach the required setting.
Press the ENTER
button.
To reset the fine tuning, select Reset by pressing
or
button
and then press the ENTER
button.
To return to the previous menu, press the MENU
button.
:L OffL
Enter
Return
Fine Turn
Press the
or
button to select Channel.
Press the ENTER
button.
Result:
LLL
Move
The main menu is displayed.
:L Others L
P 8
0
Reset
Move
Adjust
Store
Fine Turn
This channel is fine tuned
P 8
0
Reset
Move
Adjust
Store
Fine Turn
This channel is fine tuned
P 8
00
Reset
Move
Enter
English-21
Return
BN68-00653C-00Eng
4/13/04 4:43 PM
Page 22
LNA (Low Noise Amplifier)
If the Set is operating in a weak-signal area, sometimes the LNA
function can improve the reception.
1
Press the MENU button.
Result:
2
Press the
or
button to select Channel.
Press the ENTER
button.
Result:
3
English-22
The LNA menu is displayed.
Select On by pressing
Result:
5
The options available in the Channel group are
displayed.
Press the
or
button to select LNA.
Press the ENTER
button.
Result:
4
The main menu is displayed.
or
button
Amplifies signals when antenna reception is poor.
However if incoming signals are interfering with each
others, tune off LNA as may malfunction
When it has finished, press the EXIT button to return to normal
viewing.
BN68-00653C-00Eng
4/13/04 4:43 PM
Page 23
Changing the Picture Standard
You can select the type of picture which best corresponds to your
viewing requirements.
1
ModeL
CustomLLL
Colour Tone L
SizeL
DNleL
PIPLLL
MCC LLL
More
Press the MENU button.
Result:
Picture
TV
The main menu is displayed.
:L Dynamic L
:L NormalL
:L Auto WideL
:L DNle OnL
2
Press the
Result:
3
button.
The Mode is selected.
Enter
Return
Picture
TV
ModeL
Custom LLL
Colour Tone L
SizeL
DNleL
PIPLLL
MCC LLL
More
:L Dynamic
L
Dynamic
Standard
Movie
:L NormalL
:L AutoCustom
WideL
:L DNle OnL
Press the ENTER
button again.
Select the required picture effect by pressing the
repeatedly.
Result:
Move
button to select Picture.
The options available in the Picture group are displayed.
Press the ENTER
Result:
4
or
or
button
Move
Enter
The following picture effects are available:
Dynamic - Standard - Movie - Custom
You can also display simply by pressing the P.MODE
(Picture Mode) button.
English-23
Return
BN68-00653C-00Eng
4/13/04 4:43 PM
Page 24
Adjusting the Custom Picture
Your set has several settings which allow you to control picture quality.
Picture
TV
:
Dynamic L
:
:
:
NormalL
Auto WideL
DNle OnL
ModeL
CustomLLL
Colour Tone L
SizeL
DNleL
PIPLLL
MCC LLL
More
Move
TV
Enter
1
Result:
2
Enter
100
45
75
55
English-24
or
button to select Picture.
The options available in the Picture group are displayed.
3
Press the ENTER
4
Press
button.
5
Select the option (Contrast, Brightness, Sharpness, Colour)
to be adjusted by pressing the
or
button. Press the
ENTER
button.
Return
100
Contrast
Press the
Result:
L
Move
The main menu is displayed.
Return
Custom
Contrast LLLL
BrightnessLLLL
SharpnessLLL
ColourLLLL
Press the MENU button.
Result:
or
button.
button to select Custom and press the ENTER
The horizontal bar is displayed.
6
Press the
7
When you are satisfied with the setting, press the MENU button to
return to the previous menu or press the EXIT button to return to
normal viewing.
or
button to reach the required setting.
BN68-00653C-00Eng
4/13/04 4:43 PM
Page 25
Changing the Colour Tone
You can select the most comfortable colour tone to your eye.
1
The main menu is displayed.
Press the
or
Result:
button to select Picture.
Move
The options available in the Picture group are displayed.
3
Press the ENTER
4
Press the
or
button to select Colour Tone and press
ENTER
button. Select the required option by pressing the
or
button repeatedly.
5
:L NormalL
:L Auto WideL
:L DNle OnL
ModeL
CustomLLL
Colour Tone L
SizeL
DNleL
PIP
MCC
button.
Enter
Return
Picture
TV
Move
Result:
:L Dynamic L
2
ModeL
CustomLLL
Colour Tone L
SizeL
DNleL
PIPLLL
MCC LLL
More
Press the MENU button.
Result:
Picture
TV
:L Dynamic
Cool 2
:L Normal
:L Auto Cool
Wide1
:L DNleNormal
On
Warm 1
Warm 2
Enter
Return
The following options are available:
Cool2 - Cool1 - Normal - Warm1 - Warm2
When you are satisfied with your choice, press the EXIT button to
return to normal viewing.
Changing the Picture Size
You can select the picture size which best corresponds to your viewing
requirements.
Press the MENU button.
The main menu is displayed.
Result:
2
Press the
or
button to select Picture.
The options available in the Picture group are displayed.
Result:
Move
Press the ENTER
4
Press
button.
or
button.
button to select Size and press the ENTER
Select the required option by pressing the
repeatedly.
Result:
or
button
:L Dynamic L
:L NormalL
: L Auto WideL
:L DNle OnL
Enter
ModeL
CustomLLL
Colour Tone L
SizeL
DNleL
PIP
MCC
Move
Auto Wide
:L Normal
Wide
:L Auto Wide
Pnorama
:L DNle On
Zoom1
Zoom2
4:3
Enter
You can select these options by simply pressing the
P.SIZE(Picture Size) button on the remote control.
When the picture size is selected to Auto Wide, the PIP
feature will work.
In PC Mode, only Wide and 4:3 mode can be adjusted.
or
Return
:L Dynamic
The following options are available:
Auto Wide - Wide - Panorama - Zoom1 Zoom2 - 4:3
In Zoom 1 or 2, use
Picture
TV
3
5
ModeL
CustomLLL
Colour Tone L
SizeL
DNleL
PIPLLL
MCC LLL
More
1
Picture
TV
button to move the picture.
English-25
Return
BN68-00653C-00Eng
4/13/04 4:43 PM
Page 26
Freezing the Current Picture
Press the "STILL" button to freeze a moving picture into a still one.
Press again to cancel.
DNIe(Digital Natural Image engine)
Samsung’s New Technology brings you more detailed images with
contrast and white enhancement. A new image compensation algorithm
gives viewers brighter and clearer image.
DNIe technology will match every signal to your eye.
1
Press the MENU button.
Result:
2
Press the
Result:
The main menu is displayed.
or
button to select Picture.
The options available in the Picture group are displayed.
3
Press the ENTER
4
Press the
or
button to select DNIe and then press the
ENTER
button.
Select the required option by pressing the
or
button.
Press the ENTER
button.
button.
The following options are available:
You can also select these options by simply pressing the
DNIe button.
DNIe On
Improved picture mode demonstrated by DNIe
Demo is activated.
DNIe Off
The mode is deactivated and the screen returns
to its original condition.
DNIe Demo The screen shows the improved image on the
left-hand side and the original image on the
right-hand side.
5
English-26
When you are satisfied with your choice, press the EXIT button to
return to normal viewing.
BN68-00653C-00Eng
4/13/04 4:43 PM
Page 27
MCC (My Colour Control)
MCC (My Colour Control)is to adust the most preferred colours such as
Skin Tone, Green Grass, Blue Sky without interfering with other colours
in order for each consumer to enjoy screen colour of their choice.
1
Picture
TV
Press the MENU button.
Result:
The main menu is displayed.
:
Dynamic L
:
:
:
NormalL
Auto WideL
DNle OnL
Easy ControlL
Detail Control LLL
:L Custom L
ModeL
Custom LLL
Colour Tone L
SizeL
DNleL
PIPLLL
MCC LLL
More
Move
2
Press the
Result:
or
button to select Picture.
The options available in the Picture group are displayed.
3
Press the ENTER
4
Press the
ENTER
Enter
TV
MCC
5
Press the
ENTER
the
or
or
button to select MCC and then press the
button.
Enter
6
Press the
ENTER
the
or
Result:
Return
The options available in the MCC menu are displayed.
Image Loading...
or
button to select Easy Control and press
button. Select a source of the sub picture by pressing
button and press the ENTER
button.
Emerald Green
Original
Result:
button.
Move
Result:
Return
The sources are displayed in the following order:
Turkish Blue - Emerald Green - Indian Pink
Standard - Custom
or
button to select Detail Control and press
button. Select a source of the sub picture by pressing
button and press the ENTER
button.
The sources are displayed in the following order:
Skin Tone - Green Grass - Blue Sky- Reset
7
Press the
8
When you are satisfied with the setting, press the MENU button to
return to the previous menu or press the EXIT button to return to
normal viewing.
or
Easy Control
Turkish Blue
Emerald Green
Move
Indian Pink
Enter
Return
TV
MCC
Easy ControlL
Detail Control LLL
:L Custom L
button to reach the required setting.
Move
Enter
Return
Image Loading...
This function doesn't work when Source is in PC mode, or DNIe is in
off mode.
TV
Detail Control
Skin ToneLLLL
Green GrassLLLL
Blue SkyLLL
Reset
Move
L
Enter
50
50
50
Return
Detail Control
Skin Tone
Move
50
Adjust
English-27
Return
BN68-00653C-00Eng
4/13/04 4:43 PM
Page 28
I2C (Intelligent Image Control)
Picture
TV
:
Dynamic L
:
:
:
NormalL
Auto WideL
DNle OnL
I2C (Intelligent Image Control)is to automatically detect distribution of
inputted visual signal and adjust to create optimum contrast.
1
Enter
Press the MENU button.
Result:
ModeL
Custom LLL
Colour Tone L
SizeL
DNleL
PIPLLL
MCC LLL
More
Move
The main menu is displayed.
Return
2
Press the
Result:
or
button to select Picture.
The options available in the Picture group are displayed.
3
Press the ENTER
4
Press the
or
button to select I2C.
Press the ENTER
button.
Result:
button.
The I2C menu is displayed.
5
Select On by pressing
or
Press the ENTER
button.
6
When it has finished, press the EXIT button to return to normal
viewing.
button.
This function doesn't work when Source is in PC mode, or DNIe is in
off mode.
English-28
BN68-00653C-00Eng
4/13/04 4:43 PM
Page 29
IBC (Intelligent Brightness Control)
IBC (Intelligent Brightness Control)is to adjust brightness of screen
either automatically or manually by detecting brightness of
surrounding environment using Light Detecting Sensor.
Press the MENU button.
Result:
2
Press the
Result:
The main menu is displayed.
or
4
Press the
or
button to select IBC.
Press the ENTER
button.
:
:
:
NormalL
Auto WideL
DNle OnL
Enter
button.
The IBC menu is displayed.
Select On by pressing
or button.
Press the ENTER
button.
Result:
6
Dynamic L
The options available in the Picture group are displayed.
Press the ENTER
5
:
button to select Picture.
3
Result:
ModeL
Custom LLL
Colour Tone L
SizeL
DNleL
PIPLLL
MCC LLL
More
Move
1
Picture
TV
Brightness on the screen is adjusted automatically
according to brightness of surrounding environment.
When it has finished, press the EXIT button to return to normal
viewing.
This function doesn't work when Source is in PC mode, or DNIe is in
off mode.
English-29
Return
BN68-00653C-00Eng
4/13/04 4:43 PM
Page 30
Viewing the Picture In Picture (PIP)
Picture
TV
:L Dynamic L
:L NormalL
:L Auto WideL
:L DNle OnL
ModeL
Custom LLL
Colour Tone L
SizeL
DNleL
PIPLLL
MCC LLL
More
Move
Enter
Return
You can display a sub picture within the main picture of set program or
video input. In this way you can watch or monitor set program or the
video input from any connected equipment while watching set or other
video input.
1
Press the MENU button.
Result:
2
Press the
Result:
The main menu is displayed.
or
button to select Picture.
The options available in the Picture group are displayed.
3
Press the ENTER
4
Press the
ENTER
Result:
button.
or
button to select PIP and then press the
button.
The options available in the PIP menu are displayed.
5
Press the ENTER
button again.
Select On by pressing the
or
button and then press the
ENTER
button.
6
Press the
or
button to select Source and press ENTER
button. Select a source of the sub picture by pressing the
or
button and press the ENTER
button.
Result:
The sources are displayed in the following order:
TV - Ext.1 - Ext.2 - AV3 - S-Video - Component
- HDMI - DVI - PC
Source selection is possible only when Component, HDMI,
DVI, and PC are connected.
7
Press the
or
button to select Swap.
To interchange the main picture and the sub picture, select Swap
option and press the ENTER
button.
Result:
8
The main picture and the sub picture are interchanged.
Press the
or
button to select Size of sub picture and then press
the ENTER
button.
Select a size of the sub picture by pressing the
or
button and
then press the ENTER
button.
Result:
The sizes are displayed in the following order
-
English-30
-
BN68-00653C-00Eng
4/13/04 4:47 PM
Page 31
Viewing the Picture In Picture (PIP)
Picture
TV
9
Press the
or
button to select Position and then press the
ENTER
button.
Select the position of sub picture by pressing the
or
button and
then press the ENTER
button.
Result:
Mode
Custom Colour Tone Size
DNle
PIP
MCC More
Move
When the size of sub picture is set to
or
, this feature does not work.
10
Enter
Mode
Custom Colour Tone Size
DNle
PIP
MCC More
: Normal
: Auto Wide
: DNle On
Move
The memorized Prog. is displayed.
To return to normal viewing, press the EXIT button.
Enter
Features
Description
PIP ON
Used to operate ON/OFF function of PIP
directly.
SWAP
Used to interchange the main picture and the
sub picture.
: Dynamic : Normal
: Auto Wide
: DNle On
When the main picture is in the Video
mode and the sub picture is in the set
mode, you might not hear the sound of
main picture when pressing the SWAP
button after changing the sub picture
channel. At this time, reselect the main
picture channel.
/
Used to select the channel of sub picture.
PIP Settings
Sub
Main
TV
Ext.1
Ext.2
AV3
S-Video
COMP
HDMI
DVI
PC
TV
O
O
O
O
O
O
O
O
O
Ext.1
O
O
O
O
O
O
O
O
O
Ext.2
O
O
O
O
O
O
O
O
O
AV3
O
O
O
O
O
O
O
O
O
S-Video
O
O
O
O
O
O
O
O
O
COMP
O
O
O
O
O
X
X
X
X
HDMI
O
O
O
O
O
X
X
X
X
DVI
O
O
O
O
O
X
X
X
X
PC
O
O
O
O
O
X
X
X
X
Return
Picture
Mode
Custom Colour Tone Size
DNle
Remote-control functions while "PIP" is "On":
: Dynamic TV
11
Return
Picture
TV
Press the
or
button to select Prog. and then press the
ENTER
button.
You can select the channel that you want to view through sub picture
by pressing the
or
button.
Result:
: Normal
: Auto Wide
: DNle On
You can move the sub picture counterclockwise.
: Dynamic English-31
BN68-00653C-00Eng
4/13/04 4:47 PM
Page 32
Adjusting the Volume
You can adjust the volume using your remote control.
Press the VOL(+) button to increase the volume.
Result: A horizontal bar is displayed and the volume increases until you
release the button. The cursor moves to the right to indicate the
volume.
Press the VOL(-) button to decrease the volume.
Result: A horizontal bar is displayed and the volume decreases until you
release the button. The cursor moves to the left to indicate the
volume.
Additional sound adjustments are available on your set.
For further details, refer to pages 33 to 37.
English-32
BN68-00653C-00Eng
4/13/04 4:47 PM
Page 33
Switching the Sound Off Temporarily
You can switch the sound off temporarily.
Example: You wish to answer the telephone.
1
Press the MUTE (
Result:
2
) button.
The sound is switched off and “Mute” is displayed.
When you wish to turn the sound back on, press the MUTE (
button again or either of the volume buttons.
Result:
)
The sound comes back on at the same volume as before
and the “Mute” indication disappears.
English-33
BN68-00653C-00Eng
4/13/04 4:47 PM
Page 34
Changing the Sound Standard
You can select the type of special sound effect to be used when
watching a given broadcast.
1
Press the MENU button.
Result:
2
Press the
Result:
The main menu is displayed.
or
button to select Sound.
The options available in the Sound group are displayed.
3
Press the ENTER
button.
4
Press the ENTER
button again.
Result:
5
The Mode is selected.
Select the required sound effect by pressing the
or
repeatedly and then press the ENTER
button.
Result:
button
The following sound effects are available:
Standard - Music - Movie - Speech - Custom
You can also select these options by simply pressing the
S.MODE (Sound Mode) button on the remote control.
Adjusting the Sound Settings
The sound settings can be adjusted to suit your personal preferences.
1
Press the MENU button.
Result:
2
Press the
Result:
English-34
The main menu is displayed.
or
button to select Sound.
The options available in the Sound group are displayed.
3
Press the ENTER
4
Select Egaliseur by pressing the
the ENTER
button.
5
Select the required option by pressing the
6
Press the
7
When you are satisfied with the setting, press the MENU button to
return to the previous menu or press the EXIT button to return to
normal viewing.
or
button.
or
button and then press
or
button.
button to reach the required setting.
BN68-00653C-00Eng
4/13/04 4:47 PM
Page 35
Setting the TruSurround XT(SRS TSXT)
TruSurround XT is a patented SRS technology that solves the problem
of playing 5.1 multichannel content over two speakers.
Trusurround delivers a compelling,virtual surround sound experience
through any two-speaker playback system, including internal television
speakers. It is fully compatible with all multichannel formats.
1
Press the MENU button.
Result:
2
Press the
Result:
The main menu is displayed.
or
button to select Sound.
The options available in the Sound group are displayed.
3
Press the ENTER
4
Press the
or
button to select SRS TSXT and then
press the ENTER
button.
5
Select the required option by pressing the
Press the ENTER
button.
Result:
6
button.
or
button.
The sources are displayed in the following order:
Off - 3D Mono - Stereo
Press the EXIT button to return to normal viewing.
Press the SRS button on remote control to change mode.
is a trademark of SRS Labs,Inc. TruSurround XT technology is
incorporated under license from SRS labs, Inc.
Adjusting the Volume Automatically
Each broadcasting station has its own signal conditions, and so
it is not easy for you to adjust the volume every time the channel
is changed.
This feature lets you automatically adjust the volume of the
desired channel by lowering the sound output when the
modulation signal is high or by raising the sound output when
the modulation signal is low.
1
Press the MENU button.
Result:
2
Press the
Result:
The main menu is displayed.
or
button to select Sound.
The options available in the Sound group are displayed.
3
Press the ENTER
4
Press the
or
button to select Auto Volume.
Press the ENTER
button.
5
Select the required option (Off or On) by pressing the
Press the ENTER
button.
6
Press the EXIT button to return to normal viewing.
button.
or
button.
English-35
BN68-00653C-00Eng
4/13/04 4:47 PM
Page 36
Connecting Headphones
You can connect a set of headphones to your set if you wish to watch a
TV programme without disturbing the other people in the room.
Plug a set of headphones into the 3.5mm mini-jack socket on the rear panel
of the set.
Result:
The sound is heard through the headphones.
For further details on how to set your headphone
preferences, refer to the section below.
Prolonged use of headphones at a high volume may damage
your hearing.
You will not receive sound from the speakers when you
connect headphones to the system.
Adjusting Your Headphone Preferences
You can adjust the headphone settings to suit your preferences.
The following headphones settings are available:
Volume, Balance, Bass, Treble.
1
Press the MENU button.
Result:
2
Press the
Result:
or
button to select Sound.
The options available in the Sound group are displayed.
3
Press the ENTER
4
Press the
or
button to select Headphone.
Press the ENTER
button.
Result:
English-36
The main menu is displayed.
button.
The Headphone sound menu (Volume, Balance,
Bass, Treble) is displayed.
To...
Then...
Change the option
Press the
or
button.
Change a setting
Press the
or
button.
Confirm the changes
Press the ENTER
button.
BN68-00653C-00Eng
4/13/04 4:47 PM
Page 37
Listening to the Sound of the Sub Picture
During the PIP feature is activating, you can listen to the sound of the
sub picture.
1
Press the MENU button.
The main menu is displayed.
Result:
2
Press the
or
button to select Sound.
The options available in the Sound group are displayed.
Result:
3
Press the ENTER
4
Press the
or
button to select Sound Select and then
press the ENTER
button.
Main and Sub are displayed.
Result:
When the PIP option only be "On", you can select these option.
5
Select the Sub by pressing the
or
button.
Press the ENTER
button.
You can listen to the sound of the sub picture.
Result:
To listen the sound of current main picture, set to Main.
button.
Sub Woofer
Sub Woofer is a speaker that complements front speaker’s reproduction
capability of low-pitched sound.
1
Press the MENU button.
Result:
2
Press the
Result:
The main menu is displayed.
or
button to select Sound.
The options available in the Sound group are displayed.
3
Press the ENTER
4
Press the
or
button to select Sub Woofer.
Press the ENTER
button.
5
After pressing the ENTER
"On" by pressing the
or
Result:
button.
button, select the required option
button.
The Sub Woofer menu (Volume, Cut off Freq.)
is displayed.
To...
Then...
Change the option
Press the
or
button.
Change a setting
Press the
or
button.
Confirm the changes
Press the ENTER
button.
English-37
BN68-00653C-00Eng
4/13/04 4:47 PM
Page 38
Setting and Displaying the Current Time
You can set the TV’S clock so that the current time is displayed when
you press the "INFO" button. You must also set the time if you wish to
use the automatic On/Off timers.
If you disconnect the power cord or switch off the power on the
right-side of panel, you have to set the clock again.
TV
Time
Clock
Sleep Time
On Timer Off Timer
00:00
Off
Off
Off
1
Result:
2
Move
Enter
TV
Return
min
00
00
3
Adjust
English-38
Return
The options available in the Setup group are displayed
with Time selected.
Press the ENTER
Result:
Move
The main menu is displayed.
Press the
or
button to select Setup.
Press the ENTER
button
Result:
Clock
Hour
Press the MENU button.
button.
The Time menu is displayed with Clock selected.
4
Press the ENTER
5
To...
button.
Press the...
Move to Hour or min
or
button
Set the hour or minute
or
button
6
When you have satisfied with the setting, press the MENU button
to return to the previous menu or press the EXIT button to return
to normal viewing.
7
To display the...
Press the...
Current time and selected audio/video
setting status
INFO button
BN68-00653C-00Eng
4/13/04 4:47 PM
Page 39
Setting the Sleep Timer
You can select a time period of between 30 and 180 minutes after which
the television automatically switches to standby mode.
1
Press the MENU button.
Result:
2
Press the
or
button to select Setup.
Press the ENTER
button.
Result:
3
The main menu is displayed.
The options available in the Setup group are displayed
with Time selected.
Press the ENTER
Result:
button.
The Time menu is displayed with Clock selected.
4
Press the
or
button to select Sleep Timer.
Press the ENTER
button.
5
Press the
or
button repeatedly and cycle through the preset
time intervals (Off, 30, 60, 90, 120, 150, 180).
Result:
The TV automatically switches to standby mode when
the timer reaches 0.
6
To cancel the sleep timer function, select "Off" by pressing the
or
button.
Press the ENTER
button.
7
Press the EXIT button to return to normal viewing.
You can set the sleep timer by simply pressing the "SLEEP" button on the
remote control.
1
Press the SLEEP button on the remote control.
Result:
2
If the sleep timer is not yet set, Off is displayed.
Otherwise, the remaining time before which the television
switches to Standby mode is displayed.
Select the preset time interval for staying on by pressing the SLEEP
button repeatedly.
English-39
BN68-00653C-00Eng
4/13/04 4:47 PM
Page 40
Switching the Television On and Off Automatically
You can set the On/Off timers so that the set will :
Switch on automatically and tune to the channel of your
choice at the time you select.
Switch off automatically at the time you select.
The first step is to set the television’s clock
(refer to “Setting and Displaying the Current Time” on page 38 ).
1
Press the MENU button.
Result:
2
Press the
or
button to select Setup.
Press the ENTER
button
Result:
3
4
Time
Clock
Sleep Time
On Timer Off Timer
00:00
Off
Off
Off
Move
TV
Enter
Return
button.
The Time menu is displayed with Clock selected.
Press the
or
button to select On Timer.
Press the ENTER
button.
Result:
5
The options available in the Setup group are displayed
with Time selected.
Press the ENTER
Result:
TV
The main menu is displayed.
The On Timer menu is displayed.
Set the time, channel and volume level at which you wish the set
to be switched on.
To...
Press the...
Off Timer
Move to Hour, min, Programme, and Volume
Hour
min
Set
00
00
Off
Move
Adjust
button
Set Hour, Minute, Programme, and
Volume level
or
button
Move to Set
or
button
Select On to enable above setting
or
button
Return
Press the ENTER
6
English-40
or
button.
Press the
or
button to select Off Timer.
In the same way, set the time at which you wish the set to be
switched off automatically.
BN68-00653C-00Eng
4/13/04 4:54 PM
Page 41
Setting the Blue Screen Mode
If no signal is being received or the signal is very weak, a blue screen
automatically replaces the noisy picture background.
If you wish to continue viewing the poor picture, you must set the
"Blue Screen" mode to "Off".
1
Press the MENU button.
Result:
2
The main menu is displayed.
Press the
or
button to select Setup.
Press the ENTER
button.
Result:
The options available in the Setup group are displayed.
3
Press the
or
button to select Blue Screen.
Press the ENTER
button.
4
Select the required option (On or Off) by pressing the
button.
Press the ENTER
button.
5
Press the EXIT button to return to normal viewing.
or
English-41
BN68-00653C-00Eng
4/13/04 4:54 PM
Page 42
Colour Weakness
TV
Setup
Time--Plug & Play --LanguageBlue ScreenPC--Colour WeaknessMelodyMove
TV
:- English:- Off:- Off:- Off
-
Enter
Colour Weakness is a feature that enables those with a
colour Weakness to view images as those with normal colour vision do.
The feature provides nine different colour adjustment layers each for
red, green and blue.
1
Return
Result:
Colour Weakness
Colour Weakness--
Press the MENU button.
RedGreenBlue---
0
0
0
-
2
Press the
or
button to select Setup.
Press the ENTER
button.
Result:
Move
TV
Enter
Return
Colour Weakness--
OnOff
On
RedGreenBlue---
TV
0
0
0
-
Enter
Press the
or
button to select Colour Weakness.
Press the ENTER
button.
4
Press the ENTER
button.
Select the required option (On or Off) by pressing the
button.
Press the ENTER
button.
Press the
or
button to select Red, Green and Blue.
Press the ENTER
button.
6
Press the
7
When you are satisfied with the setting, press the MENU button to
return to the previous menu or press the EXIT button to return to
normal viewing.
On-
RedGreenBlue---
Move
0
0
0
-
Enter
Return
Red
0
Adjust
English-42
or
button to adjust the Colour Weakness.
This function doesn't work when Source is in PC mode, or DNIe is in
off mode.
Colour Weakness
Move
or
5
Return
Colour Weakness
Colour Weakness--
The options available in the Setup group are displayed.
3
Colour Weakness
Move
The main menu is displayed.
Off-
Return
BN68-00653C-00Eng
4/13/04 4:54 PM
Page 43
Selecting the Melody
You can hear melody sound when the television is powered on
or off.
1
Press the MENU button.
Result:
2
The main menu is displayed.
Press the
or
button to select Setup.
Press the ENTER
button.
Result:
The options available in the Setup group are displayed.
3
Press the
or
button to select Melody.
Press the ENTER
button.
4
Select the required option (Off or On) by pressing the
button.
Press the ENTER
button.
5
Press the EXIT button to return to normal viewing.
or
English-43
BN68-00653C-00Eng
4/13/04 4:47 PM
Page 44
Selecting a Device from External Sources
Your set enables you to choose which audio/video signals are output
to the external connector.
1
Press the MENU button.
Press the ENTER
button to select Input.
Result:
The options available in the Input group are displayed.
2
Press the ENTER
button.
Result:
The options available in the Source List menu are
displayed.
3
Select the required device by pressing the
Press the ENTER
button.
4
Repeat Step 1.
Press the
or
button to select Edit Name.
Press the ENTER
button.
Result:
The options available in the Edit Name menu are
displayed.
5
Select the device that you wish to edit by pressing the
or
button.
Result:
The following options are available:
Ext.1 - Ext.2 - AV3 - S-Video - Component HDMI - DVI - PC
6
Press the ENTER
7
Select the required device by pressing the
or
button
repeatedly.
The following options are available:
Result:
---- - VCR - DVD - Cable STB - HD STB Satellite STB - AV Receiver - DVD Receiver Game - Camcorder - DVD Combo - DHR - PC
PC mode dose not support STB.
8
When you are satisfied with the setting, press the MENU button to
return to the previous menu or press the EXIT button to return to
normal viewing.
or
button.
button.
Viewing Pictures from External Sources
Once you have connected up your various audio and video systems,
you can view the different sources by selecting the appropriate input.
1
Check that all the necessary connections have been made.
2
Press the SOURCE button.
The edited device and audio status are displayed on
Result:
Top-left of the set.
3
Press the SOURCE button until the required input source is
selected.
If you change the external source while viewing, pictures might
take a short period of time to be switched.
English-44
BN68-00653C-00Eng
4/13/04 4:48 PM
Page 45
Setting up Your PC Software (Based on Widows 2000 or XP)
The Windows display-settings for a typical computer are shown below. But the actual screens on your
PC will probably be different, depending upon your particular version of Windows and your particular
video card. But even if your actual screens look different, the same, basic set-up information will apply
in almost all cases. (If not, contact your computer manufacturer or Samsung Dealer.)
1
First, click on “ Settings” on the Windows start
menu.
While “ Settings” is highlighted, move the cursor so
that “ Control Panel” is highlighted.
2
3
When the control panel screen appears,
click on “ Display” and a display
dialog-box will appear.
Navigate to the “ Settings” tab on the display dialog-box.
The correct setting of size (resolution)
- 1280 x 768 pixels
If a vertical-frequency option exists on your display settings
dialog box, the correct value is “ 60” or “ 60 Hz”.
Otherwise, just click “ OK” and exit the dialog box.
(Refer to 'Display Mode' on page 59)
English-45
BN68-00653C-00Eng
4/13/04 4:48 PM
Page 46
Adjusting the PC Screen Automatically
Auto adjustment allows the PC screen of set to self-adjust to the
incoming PC video signal.
The values of fine, coarse and position are adjusted automatically.
Press the PC button on the remote control to select the PC mode.
This function does not work in DVI-Digital mode.
1
Press the MENU button.
Result:
2
Press the
or
Press ENTER
Result:
3
English-46
button to select PC.
button.
The options available in the PC menu are displayed.
Press the
or
Press ENTER
Result:
button to select Setup.
button.
The options available in the Setup group are displayed.
Press the
or
Press ENTER
Result:
4
The main menu is displayed.
button to select Auto Adjustment.
button.
After the PC screen twists during the auto adjustment
procedure, the screen quality and position are
automatically adjusted.
BN68-00653C-00Eng
4/13/04 4:48 PM
Page 47
Coarse and Fine Tuning of the Image
The purpose of picture quality adjustment is to remove or reduce
picture noise.
If the noise is not removed by Fine tuning alone, then adjust the
frequency as best as possible (coarse) and Fine tune again.
After the noise has been reduced, re-adjust the picture so that it is
aligned on the center of screen.
Press the PC button on the remote control to select the PC mode.
1
Press the MENU button.
Result:
2
Press the
or
Press ENTER
Result:
3
5
button to select PC.
button.
The options available in the PC menu are displayed.
Press ENTER
Result:
button to select Setup.
button.
The options available in the Setup group are displayed.
Press the
or
Press ENTER
Result:
4
The main menu is displayed.
button again.
The Image Lock menu is selected.
Press the
or
button to select Coarse or Fine.
Press the ENTER
button.
Result:
The horizontal bar is displayed.
6
Press the
or
button to adjust the screen quality.
Vertical stripes may appear or the picture may become blurry.
7
When you are satisfied with the settings, press the MENU button to
return to the previous menu or press the EXIT button to return to
normal viewing.
English-47
BN68-00653C-00Eng
4/13/04 4:48 PM
Page 48
Changing the Image Position
Press the PC button on the remote control to select the PC mode.
1
Press the MENU button.
Result:
2
Press the
or
Press ENTER
3
Press the
or
button to select PC.
Press the ENTER
button.
Result:
4
button to select Setup.
button.
The options available in the PC menu are displayed.
Press the
or
button to select Position.
Press the ENTER
button.
Result:
English-48
The main menu is displayed.
You can adjust the image Position.
5
Press the
Press the
6
Press MENU button to return to the previous menu or press the
EXIT button to return to normal viewing.
or
or
button to adjust horizontal position.
button to adjust vertical position.
BN68-00653C-00Eng
4/13/04 4:48 PM
Page 49
Initializing the Image Settings
You can replace all image settings with the factory default values.
Press the PC button on the remote control to select the PC mode.
1
Press the MENU button.
Result:
The main menu is displayed.
2
Press the
or
button to select Setup.
Press the ENTER
button.
3
Press the
or
button to select PC.
Press the ENTER
button.
Result:
4
The options available in the PC menu are displayed.
Press the
or
button to select Image Reset.
Press the ENTER
button.
Result:
You can initialize all image settings (Image Lock,
Position) to the factory default values.
English-49
BN68-00653C-00Eng
4/13/04 4:48 PM
Page 50
Teletext Decoder
Most set channels carry “ teletext ”, pages of written information that
provide information such as:
Television programme times
News bulletins and Weather forecasts
Sports results
Subtitles for the hard of hearing
The teletext pages are organized according to six categories:
Part
Contents
A
Selected page number.
B
Broadcasting station identity.
C
Current page number or search status.
D
Date and time.
E
Text.
F
Status information.
Displaying the Teletext Information
You can display teletext information at any time, but signal reception
must be good. Otherwise:
Information may be missing
Some pages may not be displayed
To activate the teletext mode and display the contents page:
1
Using the P
( ) or P
the teletext service.
2
Press the TTX/MIX (
Result:
/
(
) button, select the channel providing
) button to activate the teletext mode.
The contents page is displayed. It can be redisplayed at
any time by pressing the INDEX ( ) button.
3
To display the actual broadcast simultaneously with the teletext page,
press the TTX/MIX( / ) button.
4
To return to normal viewing, press the CANCEL(
5
Press the TTX/MIX(
/
) button.
) button again to exit from the TTX display.
If any broken character appears while TTX is being viewed,
make sure that the TTX language is identical with the
language in the “Setup” menu mode. If both languages are
different, select the same language with the TTX language
on the “Setup” menu.
English-50
BN68-00653C-00Eng
4/13/04 4:48 PM
Page 51
Selecting a Specific Teletext Page
Press the number buttons on the remote control to enter the page
number directly:
1
Enter the three-digit page number listed in the contents by pressing the
corresponding numeric buttons.
Result:
The current page counter is incremented and the page is
then displayed.
2
If the selected page is linked with several secondary pages, the
secondary pages are displayed in sequence. To freeze the display on
a given page, press the HOLD ( ).
Press the HOLD ( ) button again to resume.
3
Using the various display options:
To display...
Press the...
Both teletext information and
the normal broadcast
TTX/MIX (
/
Hidden text
(answers to quiz games, for example)
REVEAL (
)
The normal screen
REVEAL (
) again
A secondary page,
by entering its 4-digit number
SUB-PAGE (
The next page
PAGE UP (
The previous page
PAGE DOWN (
Double-size letters in the:
• Upper half of the screen
• Lower half of the screen
SIZE ( )
• Once
• Twice
Normal screen
)
)
)
)
• Three times
English-51
BN68-00653C-00Eng
4/13/04 4:48 PM
Page 52
Using FLOF to Select a Teletext Page
The various topics included in the teletext pages are colour-coded, and
can be selected by pressing the coloured buttons on the remote control.
1
Display the teletext contents page by pressing the TTX/MIX (
button.
2
Press the coloured button corresponding to the topic that you wish to
select (The available topics are listed on the status information line).
Result:
3
4
English-52
/
The page is displayed with additional colour-coded
information that can be selected in the same way.
To display the...
Press the...
Previous page
Red button.
Next page
Green button.
When you have finished, press the CANCEL(
to the normal broadcast.
) button to return
)
BN68-00653C-00Eng
4/13/04 4:48 PM
Page 53
Troubleshooting: Before Contacting Service Personnel
Before contacting Samsung after-sales service, perform the following simple checks.
If you cannot solve the problem using the instructions below, note the model and serial number of your
set and contact your local dealer.
No sound or picture
Check that the mains lead has been connected to a wall socket.
Check that you have pressed the POWER ( ) button on the
right-side of the TV.
Check the picture contrast and brightness settings.
Check the volume.
Normal picture but no sound
Check the volume.
Check whether the MUTE (
remote control.
) button has been pressed on the
No picture or black and white picture
Adjust the colour settings.
Check that the broadcast system selected is correct.
Sound and picture interference
Try to identify the electrical appliance that is affecting the set and
move it further away.
Plug your set into a different mains socket.
Blurred or snowy picture,
distorted sound
Check the direction, location and connections of your aerial.
This interference is often due to the use of an indoor aerial.
Remote control malfunctions
Replace the remote control batteries.
Clean the upper edge of the remote control (transmission window).
Check the battery terminals.
“Check Signal Cable!” message is
displayed.
Check that the signal cable is firmly connected to the PC or video
sources.
Check that the PC or video sources are turned on.
On PC mode, “Not Supported Mode”
message is displayed.
Check the maximum resolution and the frequency of the video
adapter.
Compare these values with the data in the Display Modes Timing
Chart.
The image is too light or too dark.
Adjust the Brightness and Contrast.
On PC mode, horizontal bars appear to
flicker, jitter or shimmer on the image.
Adjust the Fine function.
On PC mode, vertical bars appear to
flicker, jitter or shimmer on the image.
Adjust the Coarse function and then adjust the Fine function.
On PC mode, screen is black and
power indicator light blinks every 1
seconds
The TV is using its power management system.
Move the computer’s mouse or press a key on the keyboard.
On PC mode, image is not stable and
may appear to vibrate.
Check that the display resolution and frequency from your
Computer or video board is an available mode for your set. On your
Computer check: Control Panel, Display, Settings.
If the setting is not correct, use your computer utility programme to
change the display settings.
Your set supports multiscan display functions within the
following frequency domain:
◆Horizontal frequency: 30 ~ 61 kHz
◆Vertical frequency: 56 ~ 75 Hz
◆Maximum refresh rate: 1920 X 1080i@60Hz
On PC mode, image is not centered
on the screen.
Adjust the horizontal and vertical position.
English-53
BN68-00653C-00Eng
4/13/04 4:48 PM
Page 54
Installing Stand
3
AV IN
IN
COMPONENT
HDMI
IN
EXT
DVI
1(AV)
IN
EXT
1(RGB)
- R
L - AUDIO
PORT
SERVIC
3
AV IN
IN
COMPONENT
HDMI
IN
EXT
DVI
1(AV)
IN
EXT
1(RGB)
- R
L - AUDIO
PORT
SERVIC
<1>
<2>
1. Lower the TV set in the direction of the arrow and fix the stand.
2. Use the four screws to tightly fix the stand.
Maintenance of Your LCD TV
WARNING: To avoid risk of electric shock, do not disassemble the TV cabinet.
Users cannot service the TV. User maintenance is restricted to cleaning as explained below:
Unplug the LCD TV from the power outlet before cleaning.
• To clean your flat panel display screen, lightly dampen a soft, clean cloth with water or mild detergent.
If possible, use a special screen cleaning tissue or solution suitable for the antistatic coating.
• To clean the LCD TV cabinet, use a cloth lightly dampened with a mild detergent.
• Never use flammable cleaning material to clean your LCD TV or any other electrical apparatus.
English-54
BN68-00653C-00Eng
4/13/04 4:48 PM
Page 55
Using the Anti-Theft Kensington Lock
The Kensington lock is a device used to physically fix the system when using it in a public place.
The locking device has to be purchased separately. The appearance and locking method may differ
from the illustration depending on the manufacturer. Please refer to the manual provided with the
Kensington lock for proper use.
Cable
Figure 2
HDMI IN
AV IN 3
DVI IN
SERVIC PORT
COMPONENT IN
L - AUDIO - R
EXT 1(RGB)
EXT 1(AV)
Figure 1
<Optional>
1. Insert the locking device into the Kensington slot on the LCD TV (Figure 1), and turn it in the locking direction
(Figure 2).
2. Connect the Kensington lock cable.
3. Fix the Kensington lock to a desk or a heavy stationary object.
English-55
BN68-00653C-00Eng
4/13/04 4:48 PM
Page 56
How to install the wall Bracket
Wall Mount Installation Guide
1. This Wall Mount is designed for Samsung’s 32” LCD TV models.
2. Have a Samsung dealer install the Wall Mount.
3. Two or more people are required for installation.
4. Samsung is not responsible for any product damage or any injury
caused by installation at the customer’s discretion.
Parts
For wall mount installation, only the components and parts provided should be used.
Wall Mount Bracket
Side Hinges
Side Brackets
Support Bars
Screws
Hangers : 4 EA
Screws1 : 4 EA
Screws2 : 12 EA
Screws3 : 4 EA
Left
Left
Right
Right
How to Assemble the Wall Mount
1.Wall Mount Set is provided in individual parts, assembly is required for further installation.
2. Assemble the Side Brackets and
Assemble the Wall Mount Bracket and Hinges as illustrated in the direction of arrows, and
Support Bars as illustrated, and
secure the Captive Screws.
secure the screws. (12 screws (2) are
Secure the Wall Mount Bracket on the wall after securing the screws.
provided. For the safety, be sure to
secure all 12 screws.)
Side Hinges
(Left)
Side Hinges
(Right)
4.Firmly secure the Hanger Holders
3.Assemble the screws (1) and the Hanger Holders
as illustrated.
English-56
(that is completed at step 3) onto the
rear of the Wall Mount Bracket.
BN68-00653C-00Eng
4/13/04 4:48 PM
Page 57
How to install the wall Bracket
How to Secure the LCD TV to the Wall Mount
1.Attach the assembled left/right Side Brackets onto the
rear side of the TV set and secure the screws(3).
2. Insert 4 Hangers into the grooves of the Wall Mount Bracket
and then push the Hangers downwards to mount the TV set
firmly. Be sure that the Hangers are firmly fixed onto the Wall
Mount Bracket after mounting the TV set.
How to Adjust the Angle of the Wall Mount
Before the installation of the Wall Mount Bracket onto the wall, adjust the angle to 0°.
1.Hold onto the topside of the TV set and pull it in
2.The angle can be adjusted by 0 ~ 20°.
direction of arrows to adjust the angle. Hold onto the
middle of the TV’s topside for the angle adjustment.
Installation Dimensions
English-57
BN68-00653C-00Eng
4/13/04 4:48 PM
Page 58
Technical and Environmental Specifications
Model Name
LW32A33W
Panel
Size
Display Size
Type
Pixel Pitch
Viewing Angle
32” Diagonal
687.36 (H) x 412.42 (V) mm
a-si TFT active matrix
0.537 (H) x 0.537 (V) mm
170/170 (H/V)
Frequency
Horizontal
Vertical
Display Colour
30 ~ 61 kHz
56 ~ 75 Hz
16,777,216 colours
Resolution
Optimum
Maximum
1280 x 768 @60Hz
1920 x 1080i@ 60 Hz
Input Signal
Sync.
Video Signal
H/V Separate, TTL, P. or N.
0.7 Vp-p @ 75 ohm
TV
Colour System
Sound System
PAL/SECAM/NTSC 4.43
BG, DK, I, L
Video
Colour System
Video System
PAL/NTSC/SECAM
CVBS, S-VHS, RGB
SCART 1
Video Input/Output
RGB Input
Audio Input/Output
1.0 Vp-p @ 75 ohm
0.7 Vp-p @ 75 ohm
500mVrms
SCART 2
Video Input/Output
Audio Input/Output
1.0 Vp-p @ 75 ohm
500mVrms
Component
Video In
Audio In
1.0 Vp-p @ 75 ohm
500mVrms
Power Supply
Input
AC 100 ~ 240 V, 60/50 Hz ±3Hz
Power Consumption
Maximum
Power Saving(Stand by)
170 W
< 5.0W
Dimension (W x D x H)
Body
With stand
33.93 x 4.95 x 23.01 inches (862.0 x 125.8 x 584.7 mm)
33.93 x 12.91 x 23.86 inches (862.0 x 328.0 x 606.2 mm)
Weight
With stand
English-58
23.0 kg (50.70 lbs)
BN68-00653C-00Eng
4/13/04 4:48 PM
Page 59
Technical and Environmental Specifications
Model
LW32A33W
Environmental Considerations
Operating Temperature
Operating Humidity
Storage Temperature
Storage Humidity
50 °F to 104 °F (10 °C to 40 °C)
10% to 80%, non-condensing
-4 °F to 113 °F (-20 °C to 45 °C)
5% to 95%, non-condensing
Audio Characteristics
Audio Input
Audio Input (PC)
Headphone Output
Frequency
Response
RCA Jack (L, R), 0.5Vrms (-9dB)
3.5Ø Stereo Jack, 0.5Vrms (-9dB)
Max. 10mW Output (3.5Ø Stereo Jack, 32Ω)
RF: 80Hz ~ 15kHz (at- 3dB)
A/V: 80Hz ~ 20kHz (at- 3dB)
Display Mode (PC)
Both screen position and size will vary depending on the type of PC monitor and its resolution.
The table below shows all of the display modes that are supported:
Mode
Resolution
Horizontal
Frequency (kHz)
Vertical
Frequency (Hz)
Pixel Clock
Frequency (MHz)
Sync Polarity
(H/V)
MAC
640 x 480
832 x 624
35.000
49.726
66.667
74.551
30.240
49.500
-/+ /+
IBM
640 x 480
720 x 400
31.469
31.469
59.940
70.087
25.175
28.322
-/-/+
VESA
640 x 480
640 x 480
800 x 600
800 x 600
800 x 600
1024 x 768
1024 x 768
1024 x 768
37.861
37.500
37.879
48.077
46.875
48.364
56.476
60.023
72.809
75.000
60.317
72.188
75.000
60.000
70.069
75.029
31.500
31.500
40.000
50.000
49.500
65.000
75.000
78.750
-/-/+ /+
+ /+
+ /+
-/-/+ /+
GTF
1280 x 768
47.700
60.000
80.136
-/+
The interlace mode is not supported.
The set might operate abnormally if a non-standard video format is selected.
DVI dose not support PC function.
English-59
BN68-00653C-00Eng
4/13/04 4:48 PM
Page 60
Pin Configurations
DVI - D connector
Pin
Separate H/V
Pin
Separate H/V
1
2
3
4
5
6
7
8
9
10
11
12
13
14
15
TMDS Data 2TMDS Data 2+
TMDS Data 2/ 4 Shield
TMDS Data 4TMDS Data 4+
DDC Clock
DDC Data
Analog Vertical Sync
TMDS Data 1TMDS Data 1+
TMDS Data 1/ 3 Shield
TMDS Data 3TMDS Data 3+
+5V Power
Ground ( +5 , Analog H/V Sync)
16
17
18
19
20
21
22
23
24
Hot Plug Detect
TMDS Data 0Rx 0+
TMDS Data 0/ 5 Shield
TMDS Data 5TMDS Data 5+
TMDS Clock Shield
TMDS Clock+
TMDS Clock-
D - Sub Connector
Pin
Separate H/V
1
2
3
4
5
6
7
8
9
10
11
12
13
14
15
Red (R)
Red (R)
Green (G)
Blue (B)
Grounding
(DDC return)
Grounding - Red (R)
Grounding - Green (G)
Grounding - Blue (B)
No connection
Grounding - Sync. / Self test
Grounding
DDC - SDA (Data)
Horizontal Sync.
Vertical Sync.
DDC - SCL (Clock)
Green (G)
Blue (B)
Grounding
Grounding (DDC return)
Grounding - Red (R)
Grounding - Green (G)
Grounding - Blue (B)
No connection
Grounding - Sync. / Self test
Grounding
DDC - SDA (Data)
Horizontal/Vertical Sync.
Not used
DDC - SCL (Clock)
English-60
Composite H/V
BN68-00653C-00Eng
4/13/04 4:48 PM
Page 61
Wiring the Mains Power Supply Plug (UK Only)
IMPORTANT NOTICE
The mains lead on this equipment is supplied with a moulded plug incorporating a fuse. The value of the fuse
is indicated on the pin face of the plug and, if it requires replacing, a fuse approved to BSI1362 of the same
rating must be used. Never use the plug with the fuse cover omitted if the cover is detachable.
If a replacement fuse cover is required, it must be of the same colour as the pin face of the plug. Replacement
covers are available from your dealer. If the fitted plug is not suitable for the power points in your house or the
cable is not long enough to reach a power point, you should obtain a suitable safety approved extension lead
or consult your dealer for assistance. However, if there is no alternative to cutting off the plug, remove the fuse
and then safely dispose of the plug. Do NOT connect the plug to a mains socket as there is a risk of shock
hazard from the bared flexible cord.
IMPORTANT
The wires in the mains lead are coloured in accordance with the following code:
BLUE - NEUTRAL
BROWN - LIVE
As these colours may not correspond to the coloured markings identifying the terminals in your plug,
proceed as follows:
The wire coloured BLUE must be connected to the terminal marked with the letter N or coloured BLUE or
BLACK. The wire coloured BROWN must be connected to the terminal marked with the letter L or coloured
BROWN or RED.
WARNING:
DO NOT CONNECT EITHER WIRE TO THE EARTH TERMINAL, WHICH IS MARKED
WITH THE LETTER E OR BY THE EARTH SYMBOL , OR COLOURED GREEN OR
GREEN AND YELLOW.
English-61
BN68-00653C-00Eng
4/13/04 4:48 PM
Page 62
Setting Up Your Remote Control
After it has been set up properly, your remote control can operate in
four different modes: TV, VCR, Cable, or DVD. Pressing the
corresponding button on the remote control allows you to switch
between these modes, and control whichever piece of equipment you
choose.
Note
The remote control might not be compatible with all DVD Players,
VCRs and Cable boxes.
Setting Up the Remote to Operate Your VCR
1
Turn off your VCR.
2
Press the SELECT button and make sure that the VCR LED is
illuminated.
3
Press the SET button on your TV’s remote control.
4
Using the number buttons on your remote control, enter three digits
of the VCR code listed on page 65 of this manual for your brand of
VCR. Make sure you enter three digits of the code, even if the first
digit is a “0”.
(If more than one code is listed, try the first one.)
5
Press the Power button on the remote control.
Your VCR should turn on if your remote is set up correctly.
If your VCR does not turn on after set up, repeat steps 2, 3, and 4,
but try one of the other codes listed for your brand of VCR.
If no other codes are listed, try each VCR code, 000 through 089.
Note on Using Remote Control Modes: VCR
When your remote control is in “VCR” mode, the volume buttons
still control your TV’s volume.
English-62
BN68-00653C-00Eng
4/13/04 4:48 PM
Page 63
Setting Up Your Remote Control
Setting Up the Remote to Operate Your Cable Box
1
Turn off your cable box.
2
Press the SELECT button and make sure that the Cable LED is
illuminated.
3
Press the SET button on your TV’s remote control.
4
Using the number buttons on your remote control, enter three digits
of the cable box code listed on page 65 of this manual for your
brand of cable box. Make sure you enter three digits of the code,
even if the first digit is a “0”.
If there is more than one code listed, try the first one.
5
Press the Power button on the remote control.
Your cable box should turn on if your remote is set up correctly.
If your cable box does not turn on after set up, repeat steps 2, 3, and
4, but try one of the other codes listed for your brand of cable box. If no
other codes are listed, try each code, 000 through 077.
Note on Using Remote Control Modes: Cable Box
When your remote control is in “Cable Box” mode, the volume
buttons still control your TV’s volume.
English-63
BN68-00653C-00Eng
4/13/04 4:48 PM
Page 64
Setting Up Your Remote Control
Setting Up the Remote to Operate Your DVD
1
Turn off your DVD.
2
Press the SELECT button and make sure that the DVD LED is
illuminated.
3
Press the SET button on your TV’s remote control.
4
Using the number buttons on your remote control, enter three digits
of the DVD code listed on page 65 of this manual for your brand of
DVD. Make sure you enter three digits of the code, even if the first
digit is a “0”.
If there is more than one code listed, try the first one.
5
Press the Power button on the remote control.
Your DVD should turn on if your remote is set up correctly.
If your DVD does not turn on after set up, repeat steps 2, 3, and 4,
but try one of the other codes listed for your brand of DVD.
If no other codes are list-ed, try each code, 000 through 008.
Note on Using Remote Control Modes: DVD
When your remote control is in “DVD” mode, the volume buttons
still control your TV’s volume.
English-64
BN68-00653C-00Eng
4/13/04 4:48 PM
Page 65
Setting Up Your Remote Control
Remote Control Codes
VCR Codes
Admiral
015,088
Aiwa
024
Audio Dynamics
022,025
Bell&Howell
011
Broksonic
019
Candle
016,018,022,054,055,061
017,062
Canon
Citizen
016,018,022,054,055,061
Colortyme
023
Craig
016,021
Curtis-Mathes 009,016,017,023,024,055,062,073,076
003,004,005,006,007,008,022,054,085
Daewoo
DBX
009
Dimensia
024
Dynatech
036
Electrohome
017,018,019,022,024,029,032,036,043,
Emerson
050,051,056,058,066,071,074,076,077,079
011,021,027,028,052,057,067
Fisher
024
Funai
GE
016
Go Video
023
Harman Kardon
014,024,044,045
Hitach
017
Instant Replay
JC Penny 011,014,016,017,023,025,039,044,060,062
JCL
011,017,023,025,039,055
JVC
kenwood
011,023,025,039,055
KLH
082
LG
001,002,007
Lloyd
024
Logik
040
024
LXI
017,038,062,065
Magnavox
011,017,023,025,038,039,055,070
Marantz
Marta
MEI
Memorex
MGA
Midland
Minota
Mitsubishi
Montgomery ward
016,024
MTC
016,024,040,041
Multitech
011,023,025,039,055,070,073
NEC
015
Optimus
017,062,084,086
Panasonic
014,044
Pentax
055
Pentex Reserch+
017,038,062,065
Philco
017,038
Philips
014,025,042,059
Pioneer
Portland
ProScan
Quartz
Quasar
Radio Shack/Realistics
053,054,061
009
011
017,053
011,015,017,018,021,
024,028,036,052,062
009,014,016,017,037,044,046,063,078
RCA
000,016,022,031,041,051
Samsung
025
Sansui
011,021
Sanyo
022,050,058,077
Scott
011,014,018,021,027,028,044,052,057
Sears
015,036,048,054
Sharp
026,035,040,064
Shintom
024
Signature
026,035,047
Sony
017,024,038,062,065
Sylvania
024
Symphonic
011,024
Tandy
Tashiko
Tatung
Teac
Technics
Temika
TMK
Toshiba
Totevision
Unitech
Vector Research
Victor
Video Concepts
Videosonic
Wards
Yamaha
Zenith
039
024,039,078
017
076
014,022,028,057,058
016,018
Cable Box Codes
015,016 NSC
017
015,016 Oak
024,046
015,016 Osk Sigma
024
Panasonic
011,035,047,069
054 Philips
015,016,027,029,034,036,037,040,041,048,049
012,013,023,031,032, Pioneer
026,028,052
033,038,044,075,076,077 Randtek
015,016
011,012,020,021,042,056 RCA
008,035,074
Hamlin
045,051,054 Regal
011,020,021
Hitachi
010,041
Jerrold 012,013,023,031,032,033,038,044,054,070,073 Regency
045,051 SA
Macom
000,011,030,052,071,072
Magnavox 015,016,027,029,034,036,037,040,041,048,049 Samsung
Anvision
Cable star
Eagle
Eastrm Int.
General Instrument
GI
Signature
054
Sprucer
035
Starcom
054
Stargate 2000
066
Sylvania
019,067
Texscan
019,067
Tocom
025,029,057,058,063
Unika
039,040,049
Universal
059,060
Viewstar 015,016,027,029,034,036,037,040,041,048,049
Warner Amex
052
Zenith
022,050,065,069
DVD Codes
Philips
Proscan
RCA
Toshiba
Panasonic
Sony
Samsung
007
008
008
002
006
004
000
English-65
BN68-00653C-00Eng
4/13/04 4:48 PM
Memo
Page 66
BN68-00653C-00Eng
4/13/04 4:48 PM
Page 67
- AFTER SALES SERVICE
- Do not hesitate to contact your retailer or service agent if a
change in the performance of your product indicates that a
faulty condition may be present.
ELECTRONICS