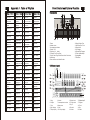
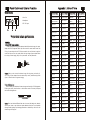
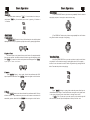
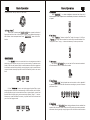
1
Disposal
Accumulators and Batteries
Operators Manual
The supplied rechargeable accumulators or batteries are recyclable.
Please dispose of them at special waste collection points or your local
dealer. Only dispose of exhausted batteries or rechargeable batteries to
ensure environmental protection.
WEEE-Declaration
Your product is designed and manufactured with materials and
components of high quality, which are recyclable and can be reused.
The symbol means that your product should be disposed of separately
from household waste when it reaches its end of life. Please dispose of
this equipment at your local collection point or recycling center. Please
help to protect the environment in which we all live.
CE
All specifications and appearances are subject to change without
notice. All information was correct at time of printing. Musikhaus Kirstein
GmbH does not guarantee for the accuracy or completeness of any
description, photograph or statement contained in this manual. Printed
colors and specifications may vary slightly from product. Products from
Musikhaus Kirstein GmbH are only sold through authorized dealer.
Distributors and dealers are not agents of Musikhaus Kirstein GmbH
and have no authority to bind Musikhaus Kirstein GmbH legally in any
way. This manual is protected by copyright. Any copying or reprint, even
in excerpts, is only allowed with written consent of Musikhaus Kirstein
GmbH. The same applies to reproduction or copying of images, even in
altered form.
Funkey 61 Plus
Electronic Keyboard
14
Appendix V . Technical Specifications
■Standard
·GB/ T12105- 1998 GB 8898- 2001 GB13837- 2003 GB17625. 1- 2003
■Display
Caution
The following requirements shall be observed to avoid hurting yourself Or
anybody else as well as damaging of peripheral devices. The intensions will
include(but not limited to) the followings:
Cautions
·LCD display
■Tone
AC/DC adapter:
·100 tones
·Please use specified AC/DC Adapter, otherwise fault adapter may cause damage of your
electr onic organ.
■Rhythm
·100 selected auto accompaniments
·Do not place AC adapter or power cord near heating source such as central heating or heat
■Effect control
radiator.
·Do not overbend wire and place heavy matters on wire or wind wire with other matters
to avoid damaging wire.
·Regularly check power plug and clean surface dirt. Do not pull out power plug with wet hand.
·Sustain、Vibrato、Transpose、Finetuning、Touch、Keyboard split、Pitch bend
Do not open the casing of electronic organ:
■Record
■Drums
·Do not open the casing of electronic organ and try to disassemble any part of it, nor make any change to
it. Should any abnormal function occur in use, please stop operating it immediately and send it for repair
by qualified servicemen.
·8 panel drums
Location of placing electronic organ:
■Accompaniment control
·Do not place the electronic organ in an envi ronment of dust y, vibrating, low or high temperature
(such as exposed to direct sunshine, near central heat or in the car exposed under sunshine)
to avoid damaging appearance or internal part.
·Do not put the electronic organ in an unstable place to avoid falling. Do not put any vessel
holding liquid on the electronic organ to avoid liquid flowing in it and impairing internal part.
■Demo song
·6 demo songs
·Record、Play、Rhythm program
·Start/ Stop、Sync、Fill- in, Tempo control
■Chord control
·Single chord、Finger chord、Bass Chord、Chord Clear
■Intelligent guide
·Demo song、Metronome、 A/ B/ C Guide
Maintenance:
■Other controls
·Power jack、Volume control、Accompaniment volume
·To clean the body of the electronic organ, wipe it with dry soft cloth. Do not use paint, dope,
organic solvent or chemically impregnated cloth.
■External port
Connection of peripheral device:
·DC 12V power jack、Head phone、Line out
·In order to prevent speaker from damaging, please adjust the volume of peripheral device
to the lowest and after music is gradually played, adjust to appropriate volume.
■Diapason
·C2~C7
■Accuracy in musical tuning
· ≤3cent
■Specifications
·980×390×130( mm)
■Weight
·5. 4Kg
■DC input
·DC12V
■Output power
·6W×2
■Quiescent
current
·150mA
■Parts provided with electronic organ
·AC/DC adapter、music stand and Operation Instructions
Caution in operation:
·Do not perform the organ with the loudest or uncomfortable volume to avoid decline in
hearing.
·Do not place heavy matters on the electronic organ, nor press keyboard, switch and socket
With heavy force.
·The package shall be opened by adult to avoid the danger of suffocating infant or children.
Please properly store or dispose the plastic package after unpacking.The matters contained
are not suitable for using by the children under 3 years old.
Notice
·Specifications are subject to change without notice.
·Should any description of product function be not specified in detail or some typing error occur,
Please forgive us.
·What is displayed in LCD in this instruction is only for the purpose of explanation and may be
different with actual display in your electronic organ.
·This company reta ins the right which needs to revise because of the duty and finally interp reta tion.
Appendix III . Table of Demo Song
Table of Contents
I.Panel Control and External Function
1.Panel control
LCD screen legend
2. External function
1
1
2
2
POWER
1. Use AC/DC power adapter
2.Use of batteries
Fitting Jack
1.Use of headphone
2.Connection with amplifier or Hi-Fi Equipment
2
2
Basic Operation
1. Turn on power switch
2. Adjustment of master Volume
TONE
Tone select
Effect & Control
1. Keyboard split
2. Keyboard touch
3. Sustain
4. Vibrato
5.Transpose
6. Fine tuning
7. Metronome
8. Panel drums
9. Pitch bend
Rhythm & Rhythm Function
1. Select rhythm
2. Start/ Stop
3. Sync
4. Fill- in
5. Accompaniment volume adjustment
6. Tempo adjustment
Chord Accompaniment
1. Bass chord
2. Chord clear
3. Single chord
4. Finger chord
Record Function
Demo songs
Demo song playing
Guide
Appendix
Appendix
Appendix
Appendix
Appendix
I . Table of Tone
II . Table of Rhythm
III . Table of Demo Song
IV . Trouble Shooting
V . Technical Specifications
.
Code of song
Code of song
NO
00
Turkish March
03
Symphony Of Carmen
01
Radetzky March
04
Green Sleeves
02
Fur Elise
05
Blue Danube
NO
2
II.Preparation before performance
III.Basic Operation
.
13
2
3
3
3
3
3
3
3
4
4
4
4
4
4
4
5
Appendix IV . Trouble Shooting
Trouble
Possible reason/eliminating method
Accompanying a little noise in turning
ON/ OFF power.
Normal phenomenon. Please do not worry.
After turning on power, press keyboard
but no sound can be emitted.
Check whether volume control key is at proper position
or headphone jack is held by other equipment to break
off built-in speaker system.
Using unqualified AC adapter or low batteries. Please
use the AC adapter provided with this electronic organ
or replace batteries.
5
5
Distort ed or disconti nued soun d, or even
system halt ed.
5
5
6
The note and its tone for a same voice
are a little different.
This is normal phenomenon caused by different voice
sampling diapason.
6
6
When using Sustain func tion,some tone s
have long sustain but some have short
sustain .
This is norm al phenomenon since the sustains of different
tones are set to optimu m lengths.
Abno rmal in volume or accompan iment
volume.
Check whether volume control and accompaniment
volume control are in proper setting.
In SYNC status, auto accompament
does not work.
Check whether Single chord or Finger chord is set, now
pres sing a note at left- hand keyboard area (19 keys in the
left of keyboard)
When using AC adapter,the electronic organ
does not emit sound after startup and indicating
LCD does not light up.
Check whether power socket is ener gized, AC adapt er is
well plugged, poor connection of power socket or
inadequate power voltage.
When using batteries,the electronic
organ does not emit sound after startup
and indicating LCD does not light up.
Check whether battery polarity is correct and batteries
have run down.
The pitch of note is not correct.
Check whether the parameter of Transpose is”00”.
When using mobile phone,the electronic
orga n will emit noise.
Mobi le phon e can disturb the electronic organ. To avoid
the noise, turn off the mobile phone or use it far away.
6
6
7
7
7
7
7
7
8
8
9
9
9 10
11
12
13
13
14
Appendix II . Table of Rhythm
12
No . Name of Voice No . Name of Voice No . Name of Voice
No . Name of Voice
00
Club Pop
25
Straight rock
50
Club Latin
75
Samba2
01
Rock Nroll
26
Techno2
51
Disco Chocolate
76
Schlager Rock
02
Waltz
27
Mambo2
52
Disco Fox
77
Schlager Alp
03
Bossa Nova
28
Country2
53
Disco Funk
78
Tarantella
04
Slow Rockl
29
8Beat Adria
54
Disco Hands
79
Tijuana Waltz
05
16beat pop
30
Big Band
Disco Latin
80
Electro Pop
06
8beat pop
31
Big Band Mid1
56
Disco Party
81
Fusion
07
8beat soul
32
Big Band Mid2
57
Disco Samba
82
Hip Waltz
08
8beat Rock
33
Big Band Fastl
58
Dixie Jazz
83
Limbo Rock
09
Rap pop
34
Big Band Fast2
59
Pop New Age
84
Acoustic Ballad
10
Pop Rock
35
Bolero
60
Uk Pop
85
Piano Ballad
11
60' s Soul
36
Cat Groove
61
Us March
86
R and B Ballad
12
Technol
37
Classic Piano Bld 62
Club Dance
87
Rock Ballad
13
Funk
38
Cumbia
63
Rhumba
88
Reggae
14
Mambol
39
Funky Disco
64
8Beat Modern
89
Slow and Easy
15
Countryl
40
Latin Waltz
65
Country Ballad
90
Swing Waltz
16
16Beat
41
Ober Polka
66
Hard Rock
91
Pub Piano
17
Pop Polka
42
Unplugged
67
Hullygully
92
Jazz BigBand
18
Twist
43
Bluegrassl
68
Jive
93
Jazz Club
19
Cha Cha
44
Bluegrass2
69
LoveSong
94
Jazz Waltzl
20
China Style
45
Bluegrass3
70
Medium Jazz
95
Jazz Waltz2
21
Slow Rock2
46
Saturday Night
71
Modem
22
Slow Rock3
47
Pop Ballad
72
Modern R and B
97
Salsa
23
Slow Waltz
48
Slow Soul
73
Pasodoble
98
Analog Ballad
Shuffle
Shuffle 55
Panel Control and External Function
Panel Control
1. Power
2. Master volume
3. Accompaniment Volume
4. GuideA、B、C
5. Digit Key0~9/+、- button
6.Transpose/ Fine Tunning/Tempo
7.Single Chord /Finger Chord /Bass Chord /Chord clear
8. Metronome
9. Demo all/ Demo one/ Vi brato/ Sustain
10. Songs/ Rhythm/ Tone
11. Start/ Stop/ Sync/ Fill in
12. Panel drums
13. LCD display
14 . Record/ Play / Program
15 . Touch / Keyboard split
16 . Lo udspeaker
17 . Pitch Bend
LCD Screen Legend
①②③
④
⑥
⑦
使用场合:
⑤
24
70' s Soul
49
Bright Pop
74
Samba1
Country
Pop 96
99
⑨
⑩
Jazz Rock
Show Tune
1 . Song
2 . Rhythm
6.Volume
7 . Accompaniment volume
3 . Tone
4 . Digit display
5 . Tempo display
8 . Metronome
9 . Staff
10 . B / W key display
11 . Single chord
12 . Finger chord
13 . Sync
14 . Sustain
15 . Vibrato
16 . Keyboard split
17 . Program
18 . Touch
19 . Rec
20 . Guide
Appendix I . table of Tone
Panel Control and External Function
External Function
No .Name of Voice
Line Out Headphone DC12V
Left
Right
C
1 . Line Out
2 . Headphone
No . Name of Voice No . Name of Voice
11
No . Name of Voice
00
Acoustic Grand Piano
25
Overdriven Guitar 50
Marimba 1
75
Koto2
01
Electron ic Piano 1
26
Muted Trumpet
51
Santur
76
Kalimba 1
02
Vibrap hone
27
French Horn
52
Reed Organ 1
77
Steel Bell 1
03
Percussive Organ
28
Jungle Bass 1
53
Puff Harmonica
78
Tenor Sax
04
Church Organ
29
Pi Pa 1
54
Ukulele
79
Woodblock
05
Accordion
30
Feedback Gt
55
12- str. Gt
80
Synt h Har ps i . 1
06
Harmonica
31
Uillean Harp
56
Guitar
81
Attack Clav . 1
07
Acoustic Giutar( Nylon)
32
Jazz Bass
57
Slow Violin
82
Crystal
08
Acoustic Giutar( Steel)
33
Flugel Hom
58
Bright String
83
Bag Pipe
09
Distorti on Guitar
34
Muted Hom
59
Jungle Bass 2
84
Barafon
10
Electric Bass Electric
35
Wood Barafon 1
60
Indian Flute
85
Organ Flute
11
Synth Bass
36
Electronic Piano 2
61
Clavi
86
Kalimba 2
12
Violi n
37
Multi Reed
62
Celesta 2
87
Reed Horn
13
Orchestral Harp
38
Guitar Pinch 1
63
Church Bells
88
Hard Vibe 2
14
String Ensemble 1
39 Multi Wind
64
Marimba 2
89
Twin Bones
15
Trumpet
40
Clavi 1
65
Dulcimer 1
90
Synth Harpsi. 2
16
Alto Sax
41
Celesta 1
66
Reed Organ 2
91
Attack Clav . 2
17
Oboe
42
Harpsichord
67
Electric Giutar( Clean) 1
92
Chorus Guitar
18
Clari net
43
Mellow Fm
68
Koto 1
93
Steel Bell 2
19
Flute
44
Pi Pa 2
69
Xylophone 2
94
Tsugaru
20
Pan Flute
45
UprightPiano
70
Shanai
95
Oct Harp
21
Lead 1( square )
46
Electronic Piano 3
71
Dulcimer 2
96
Bodhran
22
Banjo
47
Hard Vibe 1
72
English Horn
97
Tubular Bells 2
23
Xylop hone 1
48
Wood Barafo n 2
73
Electric Giuar( Clean) 2
98
Suona
24
Tubular Bells 1
49
Music Box
74
Shamisen
99
Castanets
3 . DC 12V input
Preparation before performance
POWER
1. Use AC/DC power adapter:
Please use the special AC/DC power adapter provided with this electronic organ or the power
adapter with DC 12V voltage and 500m A input curr ent and with centr al anode. Connect the
DC plug of power adapter into the DC12V power socket in the rear of electron ic organ.then
connect the other end into main socket (see that the input voltage of power adapter conform
to
. the voltage of electric supply), finally turn on power switch and start perform ance.
Caution: When you do not use this electronic organ for a long term, you should pull
out the plug of power adapter from main socket safely to avoid possible causing trouble
of part or other accident in long-term charging.
2.Use of Batteries:
Open the battery lid in the bottom of electronic organ and load eight 1.5V Size batteries,
Ensuring the polarity should conform to the direction marked on battery lid.Replace
the lid after loading batteries.
Cauti on:
on:Do not use batteries of different kinds and mix new and old batteries.Low batteries
will cause low volume or poor timbre and replace batteries at that time.To avoid possible
damage Caused by battery liquid leakage ,please take out batteries if you will not use the
electronic organ for a long term.
Pinch2
2
10
Basic Operation
2."Guide
Guide B
B" when you press any key,melody will be blocked.If you do not press Any
key in 3 seco nds,melody will be restored for your guide.
GUIDE
A
B
C
Preparation before performance
Fitting Jack
1.Use of headphone:
Connect headphone plug into" HEADPHONE" jack in the rear of electronic organ.
Now the internal speakers are automatically switched off. Use of headphone in performance
does not interfere with anybody else,suiting personal monitor and exercising at night.
3."Guide
Guide C
C" when you pres s this key,the domo song plays whil e melody does not
play.A begi nner can only press the key correspo nding to the note displayed on LCD before
playing next note,until the demo song comes to its end.
2.Connection with Amplifier or Hi-Fi Equipment
G U IDE
A
B
C
This electronic organ has built-in speaker system.Alternatively,it can also be
connected to any external amplifier or hi-fi equipment.First turn off the switch of electronic
organ and external equipment,then insert one end of stereo audio cable into LINE IN
or AUXIN jack of other hi-fi equipment and connect the other end into LINE OUT jack in
rear panel of electronic organ.
Amplifier
Line out
LINE OUT
Speaker box
Basic Operation
III、Basic Operation
1.Turn on power switch:
After AC adapter is connected or batteries installed correctly , press power button
to turn on " POWER SWITCH " and LCD will display the default information at startup . Press
POWER button once again to turn off power switch of electronic organ.
Power
2 . Adjustment of Volume :
This electronic organ has 16 levels of "VOLUME"
VOLUME from 1 to 16 for your choice .The
default level of volume is 12,Press Volume +/- key,volume will be increased or
decreased accordingly,Press Volume +/- keys simultaneously,the volume will be restored
to the default level automatically.
Basic Operation
TONE
Tone Select:
The default status at startup is "TONE"。If
TONE
current status is not tone,you
need to press "TONE"
TONE key.You can directly input a tone by pressing 0~9 buttons or
“+/-” buttons
Basic Operation
Demo Songs
1.Press"DEMO ONE"button to play a demo song repeatedly.Press the button to
stop playing and press it once again to enter next demo song.
。
Effect & Control
1.Keyboard Split:
2.Press"DEMO ALL"button to play all demo songs repeatedly from the first demo
song.Press the button once again to stop playing.
In"KEYBOARD
KEYBOARD SPLIT
SPLIT"mode,the 24 keys in left hand keep the voices before keyboard
spli tting while the rest keys in right hand may adjust other voices by pressi ng digi tal butt ons.
2 . Keyboard Touch :
This electronic organ is touch keyboard.At startup,touch function will be started automatically.
When you press keyboard with different touches,the electronic organ will emit different volume
Press"TOUCH"key
TOUCH
to cancel touch function and keyboard touch will disappear.Press "TOUCH"
TOUCH
key once again to restart touch function . .
Demo Song Playing
After pressing"DEMO SONG"button, press demo one button to enter the mode of demo
song selection.You can select demo songs by inputti ng digits such as 04,05 or pressing +/buttons.You can also enter the mode of demo song selection by pressing Demo all
button.Press start/stop button to stop playing.
3.Sustain:
Press " SUSTAIN" button to start sustain function. Now performance with B/ W
keys will produce Sustain effect. Press " SUSTAIN" button once again to exit the function.
Guide
4.Vibrato:
Press"VIBRATO"button
VIBRATO
to start vibrato function.Now performance with B/W keys
will Press Volume +/- keys simultaneously,the volume will be restored to the default level
autom atically. produce vibrat o effect . Press " VIBR ATO" butt on once again to exit the functi on .
Press "GUIDE"
GUIDE button to enter guide mode and press white keys to
select different demo songs. Press Guide button once again to exit guide mode.
In the course of playing,press volce button to change current voice.
1."GUIDE
GUIDE A
A" when you press any key,no matter correct or not,the electronic organ shall
emit correct melody note and repeat its accompaniment in One-key-One-Note mode.
GUIDE
A
B
C
Basic Operation
accompaným ents Press start / stop button to exit this funct ion .
Basic Operation
5.Transpose:
Press" TRANSPOSE",+or-button to heighten or lower one level of tone in ±6
levels altogether.Press Transpose+and-simultaneously will restore to the default value
of system.
4
. Finger
Chord
:
When rhythm is started,press"FINGER
FINGER CHORD
CHORD"button to enter the function of
finger auto bass chord.Now in chord area(1-19keys),apply different fingerings to
hear different chord accompaniments.Press "START/STOP"
START/STOP button to exit this
function.
6.Fine Tuning:
Press "TUNING
TUNING +/+/-" buttons to adjust Fine Tuning in the range of ±99.Press
"TUNING
TUNING +/+/-" button without release can continuously increase/decrease Fine
Tuning Value.Press Tuning +/- buttons simultaneously to restore preset value.
TUNING
Record Function
1.Press "RECORD"
RECORD button to enter record mode.You can hear metronome sound and the
pres et tempo is 120.Now pres s any key or drum key to start reco rding .The maximum reco rd
quantity is 350.When the maximum quantity is reached,metron ome sound will be stopped and
record cannot be continued.During recording, press any playing key to play the record.Whenever
you press this button,the memory in previous record will be cleared and you will re-enter record
mode.
7. Metronome:
After pressing"METRONOME"key,you
METRONOME
can hear tick.Four beats can be selected.
In Performance the effect of metronome is added.
8.Panel Drums:
2.Press "PROGRAM"
PROGRAM button to start rhythm program function.Edit a rhythm
through eight panel drums with the maximum range of 64 drums.When edit is finished,
press play button to play the drums edited to form a rhythm edited by yourself and
the best effect of rhythm playing can be reached by adjusting Tempo +/- buttons.
Whenever you press this button,the memory in previous record will be cleared and
you will re-enter program mode.
Press "PANEL
PANEL DRUM
DRUM"(total eight panel drums as shown below or refer to Appendix V)
to respond relevant drums and insert relevant drums according to your need to enhance
performance effect.
1
2
3
4
5
6
7
8
9.Pitch Bend:
When you push"PITCH
PITCH BEND
BEND"wheel during performance,the note emitted from
keyboard will produce an effect of pitch bend.By pushing the wheel upwards or
downwards,note will gradually change higher or lower.Loosen the wheel to restore
Basic Operation
Basic Operation
5.Accompaniment Volume Adjustment
original standard tone.
Pitch Be n d
The default "ACCOMPANIMENT
ACCOMPANIMENT VOLUME
VOLUME" is 16 and can be adjusted by pressing
volume +/- buttons.During adjustment,LCD gives correspondent display.Press
volume+/- Buttons simultaneously to restore default setting of accompaniment volume
automatically.
Rhythm & Rhythm Function
1.Select Rhythm:
This electronic organ has 100 rhythms for your choice.For detailed rhythm table,
refer to Appendix. Press "RHYTHM"
RHYTHM button to enter Rhythm Selection function.
LCD displays current rhythm number.To select rhythm throughout 00~99,input two
digits with digit buttons or select with +/-buttons.
6.Tempo Adjustment
Press"Tempo"+/Tempo
buttons to adjust the playing tempo of rhythm,metronome and
demo songs in the range of 30-240.
Chord Accompaniment
2. Start/Stop:
In default setting, press the button to play rhythm.Press"START/STOP"button
to exit other functions.
1.Bass Chord.
Under chord state,press"BASS
BASS CHORD
CHORD"button to shift chord timbre.
3. Sync:
Press"SYNC"button
SYNC
to start sync accompaniment function and press any key of
19 keys in left hand to start rhythm synchronously.If chord function is started,press
any key of 19 keys in chord area to start auto chord synchronously.If a rhythm is
being played.press "SYNC"
SYNC button to stop rhythm and start sync accompaniment function.
If sync function has been started,press "SYNC"
SYNC button to exit sync function.
2.Chord Clear:
Under chord state,press"CHORD
CHORD CLEAR
CLEAR"button to stop chord accompaniment
while rhythm plays continuously.
4.Fill-in:
You may press"FILL-IN"button to insert a fill-in during rhythm play to enhance
the performane of effect,then restore to original rhythm.
3.Single Chor d:
When rhythm is started , press " SINGLE CHORD" button to enter the function of single auto
bass chord, Now ýn chord area 1~19keys, apply dýfferent fýngerýngs to hear dýfferent chord